Backstrap Weaving – Encuentro de Tejedores de las Americas – Part Three…and more….

Before I get into Part 3 of my report on the Encuentro de Tejedores de las Americas (see Part 1 and Part 2 here and here), let me show you how I have been getting on with my latest experiment with supplementary-weft patterns.

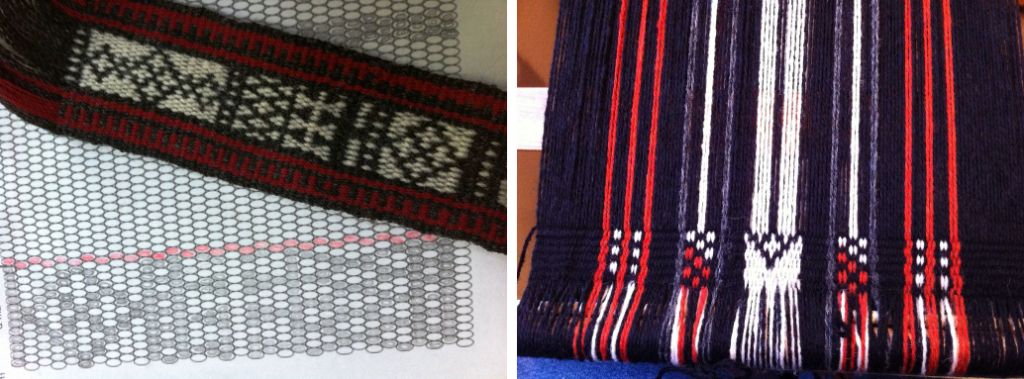
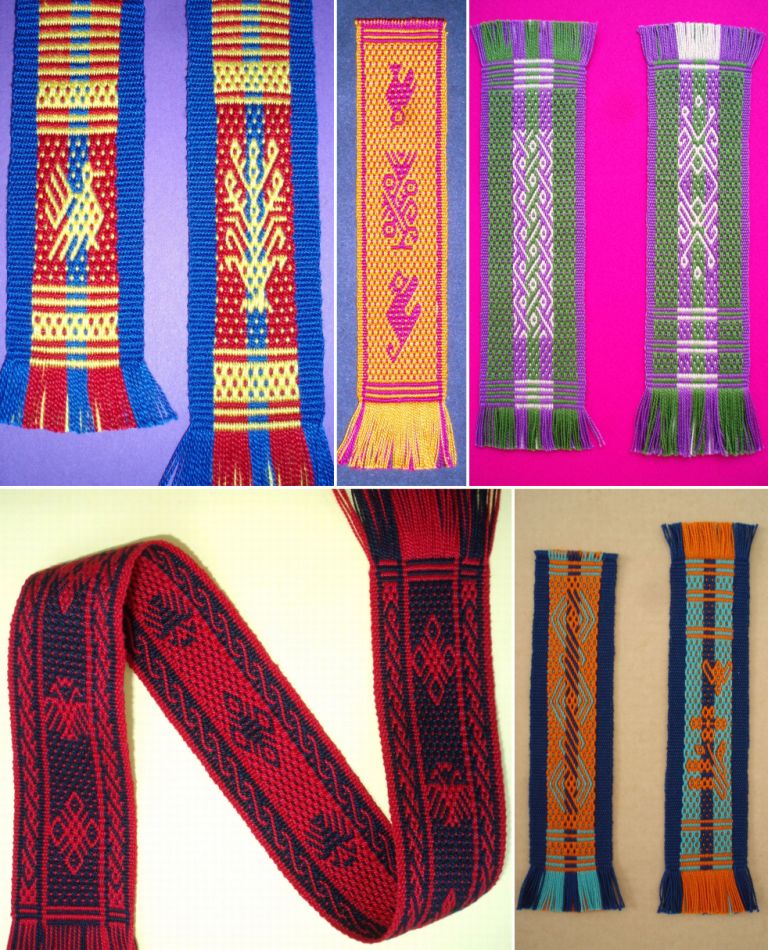
Bhutanese supplementary weft pattern samplerYou may remember from last week’s post that I was inspired by seeing textiles from Bhutan with their  gorgeous motifs created by using supplementary wefts.

I was happy to see that I could decorate my own woven cloth with similar patterns using techniques that I had learned in Guatemala.

At left is the sampler I made to practice the techniques and experiment with the spacing of the pattern warps. I had some fine cotton from Guatemala that my friend Betty had bought about 30 years ago. How nice that this cotton could finally find its purpose.

The black cotton disintegrated as soon as I pulled it out of the closet. I guess that there is something in the black dye that causes the yarn to rot quickly. The other colors…red, green and purple….were just fine and, fortunately, there was plenty of white to dye black. I had my heart set on a black scarf.

There were a lot of ends to wind to make 7 inches…672!!

OThe cotton is kind of sticky and I can see why Guatemalan weavers very often choose to size their yarn with a kind of corn starch wash.

I am using it as is and need to be very gentle. I broke one warp before even getting started and my heart sank but it turns out that it was due to my clumsy handling of the pick-up stick…phew! No more breaks so far but there is still a looooong way to go.

Of course I made a wee sample before diving in to see how many ends I would need to make an inch. I also needed to test the ideal number of strands of tencel to use for the weft patterns.

In the picture you can see my tiny warp with its string heddles and shed loop . The two sticks are the pattern sticks that I talked about in my last post. Of course, the yarn was already showing signs of stickiness even on this tiny project but I decided to go ahead undaunted 🙂

Sample done…width calculations made. Now, how long should a scarf be? Seems like a silly question, but I have never made a scarf before. Fortunately, I do own just ONE. After all those years spent skiing and then living in Patagonia you would think that I would be more scarf-wise.

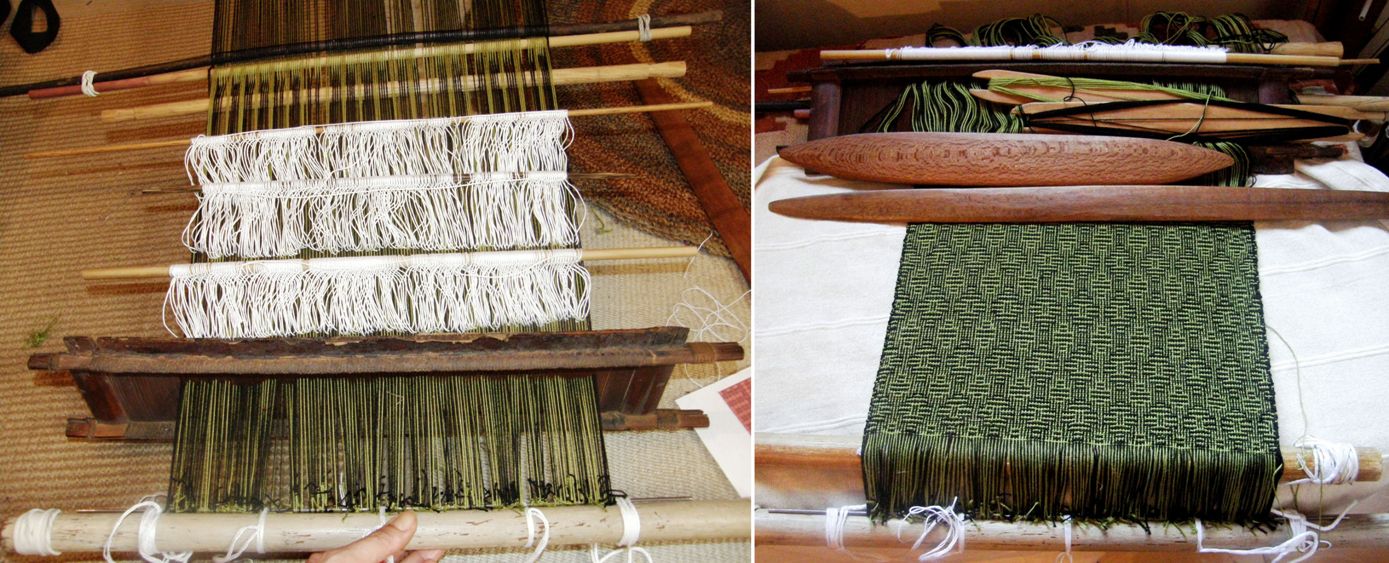
OThere is the warp and I am ready to make the 336 string heddles. I like making heddles…time to put on a cd and sing! and I didn’t cross or double up any warps…phew!

O

I have lots of pictures that I have taken of Bhutanese textiles in friends’ collections for inspiration and David K Barker’s books are wonderful too. (See my RESOURCES page for information on how to download his books for free.) However, I decided to play it safe to start with and weave one of the patterns that I had already tested on my sampler.

So, I sat down to weave and that is when it hit me…wow, this yarn is really FINE….and….it’s black! All the clues that I usually use to make the pick-up easier for supplementary-weft patterning are dependent on actually being able to see the threads!!

Boy, had I made things hard for myself but, believe it or not, I got used to it and came up with other ways to eyeball the placement of the patterns without having to become a slave to pattern charts and endless counting. It became a very cool learning experience and, as with all things new and experimental, much un-weaving was done and all with my heart in my mouth as I don’t think that this yarn will take much “backing and forthing”!

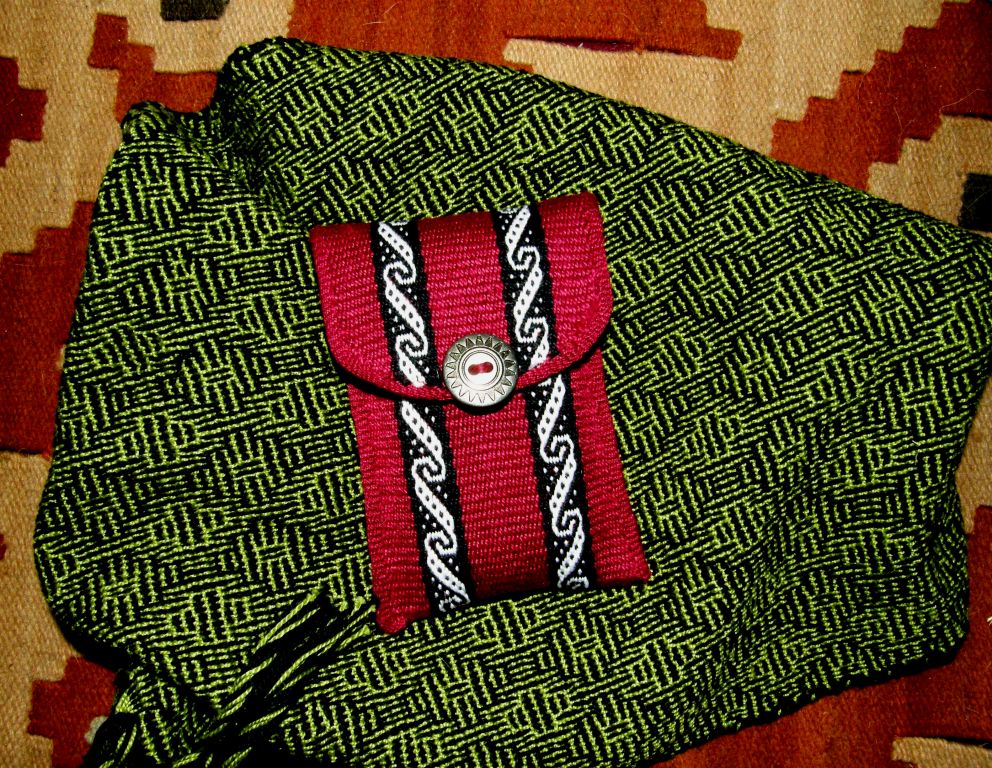
Bhutan pattern backstrap loom scarf

Here is the first pattern under way. I placed several thin pieces of cardboard in alternate sheds in the warp beyond the cross sticks. This gave me a place to make quick adjustments to loose warps within arm’s reach and with the warp under tension rather than having to get out of my backstrap and crawl up to the end of the loom.

cat on backstrap loom BhutanSometimes you don’t get to choose when to weave. I would come back in from a break to find Her Highness reclining in what was, apparently, the most comfortable spot in the house. Would you dare disturb someone with a look like that on their face? You can see the next set of patterns in progress here.

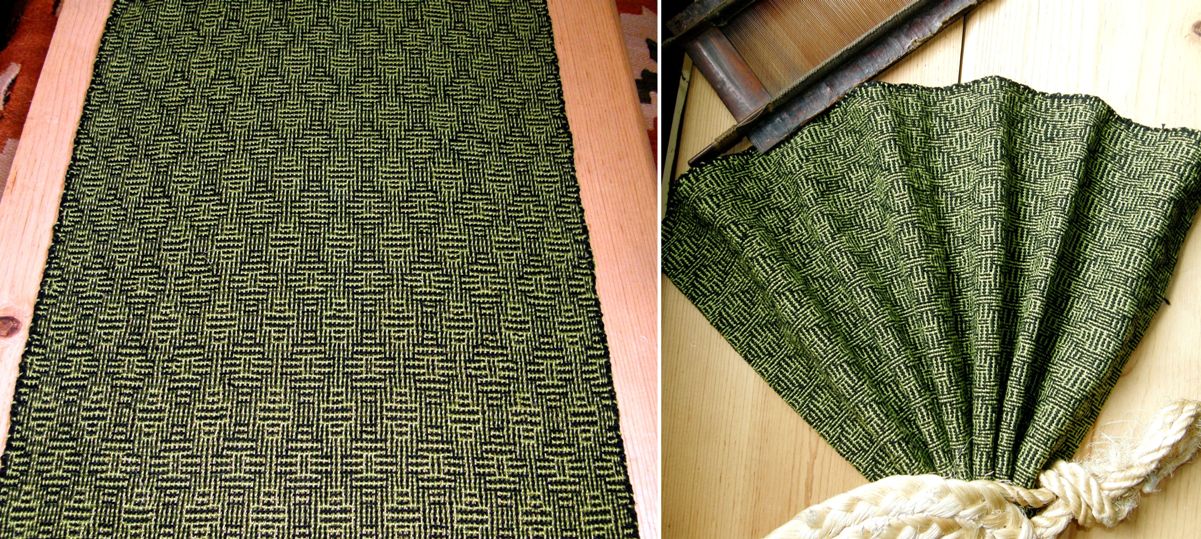
second Bhutanese design finishedOAnd this is where it stands for now. I am just getting past the first warp break and have my fingers crossed that there won’t be more. I watched a gentleman from Chahuaytire weaving on his backstrap loom when I was in Cusco. A warp broke and I loved the calm and cool way he went about fixing it like he had done it hundreds of times before (well, of course, he probably had). He didn’t need to have anyone tensioning the warp while he leaned forward to fix the break. That is the part I find hardest.

Be prepared to see a lot more of this project in the weeks to come. Unless, of course, those warps start a- snapping, and then you will most likely see it finished really soon as a zippered pouch or journal cover!

#########################################

ENCUENTRO DE TEJEDORES DE LAS AMERICAS  – PART THREE – SPINNERS AND WEAVERS IN ACTION

The Encuentro…it was over two months ago now and I am finding it hard to sum up here but I will try!

It was about yarn being created with the simplest tools…

Handspun cotton by the Matsigenka weavers of the Amazonian region of Bajo Urubamba, Peru
Fine and incredibly even handspun cotton by the Matsigenka weavers of the Amazonian region of Bajo Urubamba, Peru
The "malacate", spindle used in Mexico to spin silk with its horn whorl.
The spindle known as “malacate” used in Oaxaca, Mexico to spin silk. Its whorl is made of horn.
The traditional "sig sig" spindle of Salasaca, Ecuador made from pampas grass.
The traditional “sig sig” spindle of Salasaca, Ecuador made from pampas grass stems. A small piece of thin solid stem is inserted into the soft interior of the large stem section to suspend the wool yarn as it is spun.

OA spinner from Chiclayo, Peru showed me how she spins the natural brown cotton that is cultivated in the region. She told me that a heavy stone is usually placed on top of the cotton as she draws out the fiber to be spun. Not having one handy, she used the bottle of water that you see in the video. The spindle whorl is a piece of avocado seed.

It was about sticks…lots of sticks!

Sticks used by the weavers of Bajo Urubamba to create their warp-float patterns.
Twenty-four heddle sticks are used to weave the traditional pattern on the "faja sara" of San Ignacio de Loyola.
Multiple heddle sticks are used to weave the traditional pattern on the “faja sara” of San Ignacio de Loyola.

It was about threads being strung together in a stunning display of color and texture…

An ikat warp ready to be woven into the traditional shawl of Tacabamba, Peru
An ikat warp ready to be woven into the traditional shawl of Tacabamba, Peru. The ties on the sections of threads were the only means I could see to keep the threads aligned for the ikat patterns.
Threads are stretched on the typical leaning vertical loom of Tarabuco, Bolivia
Threads are stretched on the typical leaning vertical loom of Tarabuco, Bolivia. Multi-colored figures depicting ceremonies and scenes of daily life in the community will sit on a white mesh-like background. The colored threads are generally thicker than the white ones which gives the figures relief.
The backstrap loom with its cotton warp from Chiclayo, Peru.
The backstrap loom with its cotton warp from Chiclayo, Peru. A single-faced cloth decorated with warp-float patterns is created.
Bunches of string heddles control the colored layers of warps on the horizontal loom of Taquile Island, Peru
Small bunches of string heddles control the colored layers of warps on the horizontal loom of Taquile Island, Peru.
A floor loom holds the warp on which a weaver from Ayacucho, Peru will create a beautiful tapestry.
A floor loom holds the warp on which a weaver from Ayacucho, Peru is creating a beautiful tapestry.

And it was about the wonderful hands and spirits of the talented craftspeople and artists who use sticks and fiber to create beautiful cloth….such an amazing variety of people from across the Americas!

Weaver Natividad Machaca Quispe of Taquile Island, Peru creates a sash with bands of warp-faced double weave motifs and complementary-warp patterns.
Weaver, Natividad, of Taquile Island, Peru creates a sash with bands of warp-faced double weave motifs and complementary-warp patterns. This piece had six bands of pick-up patterns.
A weaver of panones of Tacabamba, Peru, puts the finshing touch on hher woven ikat shawl by knotting an intricate pattern into the the fringe.
A weaver of Tacabamba, Peru, puts the finshing touch on her woven ikat shawl by knotting an intricate pattern into the fringe.

knotwork on Tacabamba shawlHere is a short video of  Nila at work knotting the fringe of her woven ikat pañon…

And what about that belt loom with its twenty-four sets of string heddles? Araceli shows us how it is done…

A Matsigenka weaver from tropical lowland Peru creates warp-float patterns in cotton on her backstrap loom.
A woven tubular band in progress...putting the finishing touch on a woven piece from Pitumarca, Peru.
A woven tubular band in progress…putting the finishing touch on a woven piece from Pitumarca, Peru. The tubular band had been set up with three sets of string heddles and a shed loop and, therefore, did not require any pick-up.

And cloth comes off the loom and comes to life when draped around shoulders…

cloth comes to life

wearing the Tacabamba shawl

and wrapped around waists and heads…

taquile island peru and santiago atitlan guatemala

Diana from Guatemala, pictured above, wore this spectacular fine, ikat-patterned corte, or skirt…
O

There was time to watch and chat and share….

watching, chatting, sharing at ETAM 2012

Time to look and learn from Navajo weavers and spinners and an alpaca fiber weaver from Tanta, Peru…

looking and learning ETAM 2012

Time to sit or stand and ponder…

pondering ETAM 2012

Time to listen to weavers talk about their communities and textile traditions and meet new leaders in the field of textile research…

Bolivian Elvira Espejo shows the two most recent books she has written with British/ Bolivian Denise Arnold on weaving in the Andes. Representatives of the textile community on Taquile Island, Peru spoke about weaving and knitting traditions and the 547 families that are part of their textile co-operative which had begun in 1971 with only 7 families. Taquile Island has become an enormously popular tourist spot over the years. One point which created a bit of fun was their comment that "Taquile fashion" was being worn and loved around the world despite the fact that it was not appreciated in their own country of Peru. "Taquile fashion" then became one of the catch phrases of the conference and made us all smile.
Bolivian Elvira Espejo shows the two most recent books she has written with British/ Bolivian Denise Arnold on weaving in the Andes. Representatives of the textile community on Taquile Island, Peru spoke about weaving and knitting traditions and the 547 families that are part of their textile co-operative which had begun in 1971 with only 7 families. Taquile Island has become an enormously popular tourist spot over the years. One point which created a bit of fun was their response to a question about how they felt when a hat that was created to be worn by a high-ranking official was bought and worn by a tourist completely out of context. They said laughingly that they were proud that “Taquile fashion” was being worn and loved around the world despite the fact that it was not appreciated in their own country of Peru. “Taquile fashion” then became one of the catch phrases of the conference and made us all smile.

And time to just stand in complete awe…time and time again!

A weaving of the Jalq'a people of Potolo, Bolivia.
A weaving of the Jalq’a people of Potolo, Bolivia depicting Ukhu Pacha, the underworld, with its khuru figures.

Organizers ETAM 2012

Well, I hope that this gives you just a taste of what the week of ETAM was like. Thank you Maria Elena del Solar, Paula Trevisan and Luis Masa for organizing this event. And thank you Mara Elena for pushing me to go when I was dithering over the cost of getting there. It was the best birthday gift to myself ever!

Thank you Centro de Textiles Tradicionales de Cusco for the fabulous exhibit of textiles from your nine member communities that you organized in the Convention Center to coincide with this event and for providing outstanding teachers for the workshops.

As for Elvira Espejo and Denise Arnold’s books about which I know you will be curious, I have to find out if they are available in English and from where…stay tuned.

OOf course, you do know that the CTTC is having its second Tinkuy this coming year, don’t you?! 🙂 Are you coming?
Backstrap weaving – Staying on Track

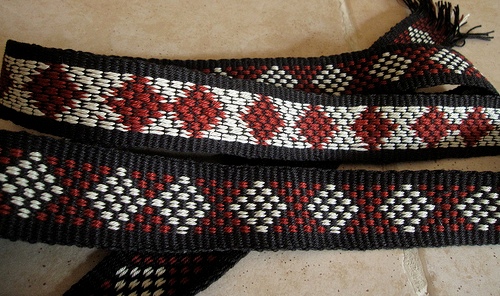
I have been trying to resist the urge to warp up for an al’ouerjan project and join in on the fun in the Ravelry group. You may remember that a couple of weeks ago, after having posted the warping tutorial for these traditional Bedouin patterns, Tracy suggested a weekend warp-along. Now we are seeing the increasingly large and impressive results of all that warping practice. Take a look at the bag strap that Tracy made at left.

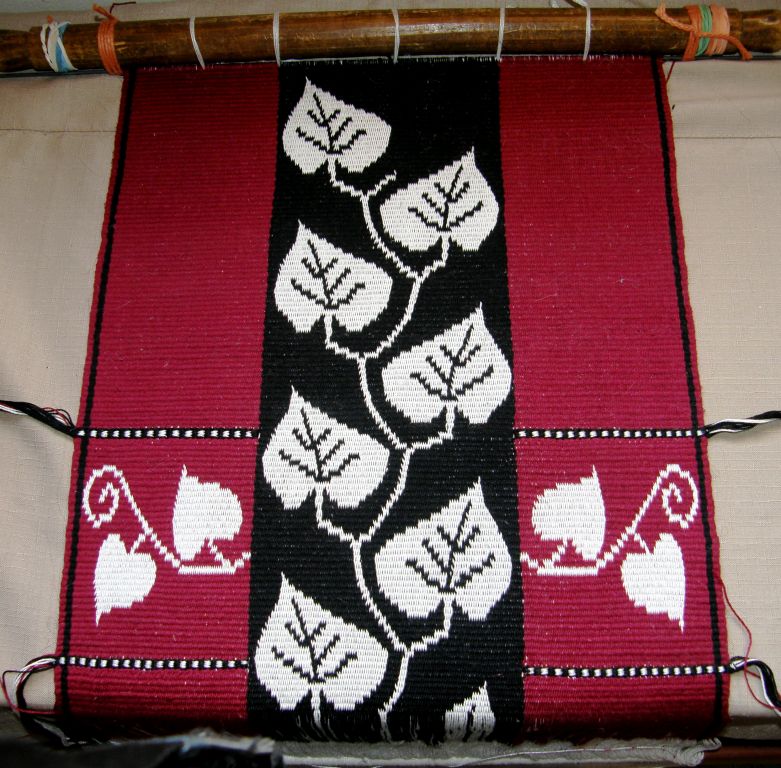
But…I am staying on track which means that I am sticking to my chamanto-style leaf-patterned wall hanging (although I couldn’t resist throwing in a bit of weft twining). I finished the first pebble weave hanging in this set with weft twining and so I decided that, apart from the common color scheme, the weft twining would be another theme that would tie all my planned wall hangings together.

While I sit and pass the shuttle, strum the warps, beat and coax the sheds open I think about what will be next in this series. I have no problem whatsoever in coming up with ideas…the problem is that I want to weave them all at once!

I stand back and look at this piece and I still can’t get used to it.

It’s not quite like anything I have done before but I have to say that I am having fun with it especially adding in that twined section with the motif within. I had to stop for a bit to chart those smaller leaves on their vine, sample them etc…It took a while to get them right.

I think that all my planned red, black and white pieces will look pretty nice when hung all together. The question is….where? Although I have been doing some major cleaning out, I still haven’t managed to uncover any significant amount of wall space.

Next on the clean up list is my dear old Ashford traditional wheel. Yes, I have a spinning wheel…who knew? It has been sitting there so long unnoticed, dusty and in desperate need of oil…poor thing. It was born in New Zealand and made its way all the way over to the Falkland Islands before finding its way into my home in southern Chile. I left a lot of stuff behind in Chile but the spinning wheel came up to Bolivia where it has sat in the corner for almost 14 years…shameful! I won’t take a picture of it now in its pitiful state. I will clean it up and get it back into shape. I have room to use it now!

I only had it for four months before leaving Chile and just got into using it and being able to turn out something consistent. I did, however, spin enough yarn to construct a vest, knitting the natural colored front and weaving the dyed brown back. The edging has been worked in cross knit looping.

This, too, sits neglected here in this hot steamy climate. It is a souvenir at least of the Patagonian sheep.

But, back to the al’ouerjan and let’s see what else the Ravelers have been up to…

So, there’s the strap that I showed you earlier on the gorgeous bag that Tracy made. She will line the bag  to protect the warp floats on the inside. She used an additional weft to secure the floats on the strap. You can see details about how that is done here. One of Tracy’s other warp-along products is the pillow cover which includes some tapestry-style twining in  the lower left hand corner and a striking and beautifully executed joining stitch.

Aunt Janet’s piece above left is in her own handspun wool. She has three sets of al’ouerjan patterning and that blue looks amazing.

Traudi so loved Tracy’s piece that she got into the act too using brown instead of black which looks fantastic. She twined along the bottom of the piece too. We are seeing more and more twining in this group…cool. Here is the tutorial for basic weft twining.

Jennifer did some charting and planning for the shajarah patterns before warping a wide piece that also includes an al’ouerjan design.

The charting paper with ovals which is useful for double weave, warp substitution and supplementary weft patterns can be found here. A tutorial for weaving these kinds of warp substitution patterns is here.

So, January has gotten off to a great start in the Ravelry group! Pantoffels has been wrangling with what she calles an ancient inkle loom and still managed to make this pretty needle pouch with plain pebble weave patterning.

And then she got a new inkle loom under the Christmas tree and will now try the pebble weave patterns in my book Andean Pebble Weave.

While I have been weaving my “leaf” piece based on the Chilean ponch known as a chamanto, I have been getting out other pictures of ponchos that I have to study the design layout that weavers use on these large pieces.

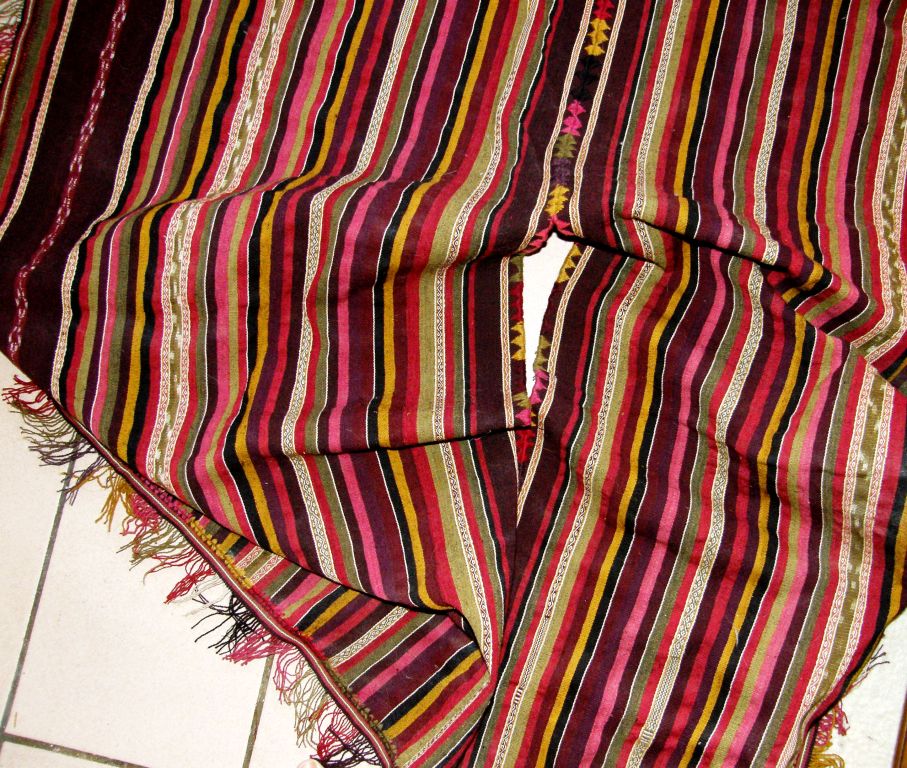
I own one poncho which I bought in Calcha, Bolivia many years ago. It is made from very fine handspun wool which has been colored with natural dyestuffs. It is patterned with simple stripes, some very narrow and simple ikat bands as well as several very narrow strips of pebble weave.

It has been woven as two panels with four selvedges each and a woven band has been sewn around the four edges with an added fringe. Don’t you love that decorative stitch that has been used to join the panels?

There is definitely an art to stripes. You can see the clever placement of fine white stripes to break up some of the richer colors.

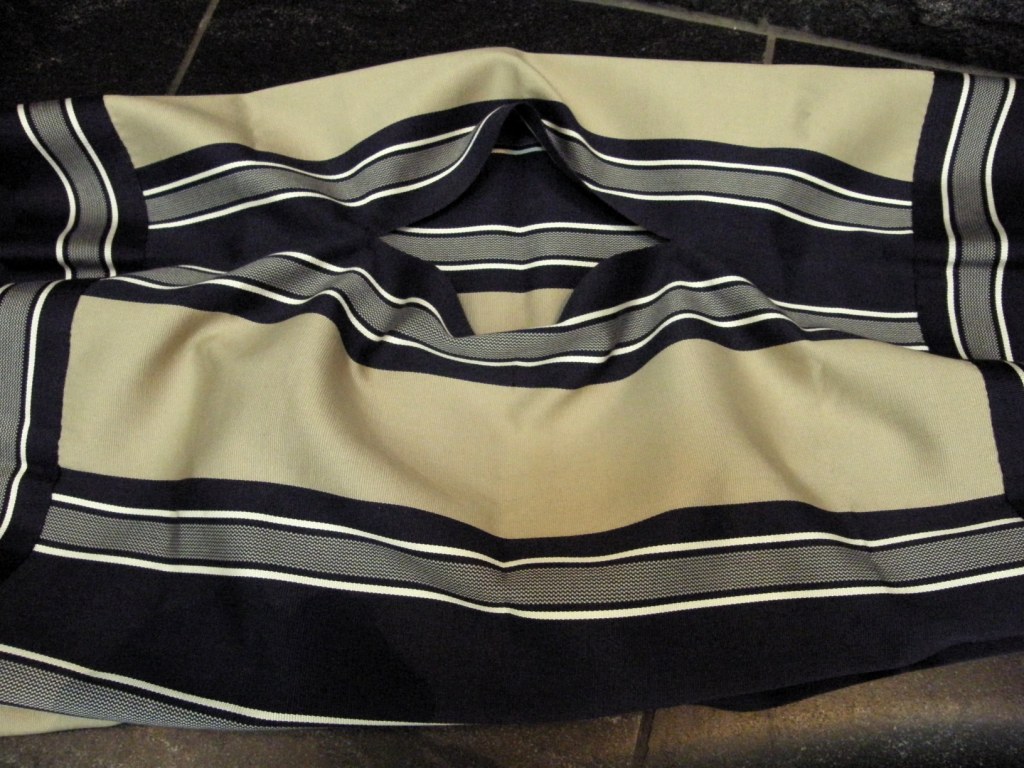
 An extremely fine and simply patterned manta from Chile. It is always interesting to see how the colors and stripes are distributed. As is typical, a broad band has been woven and sewn to the four edges of the piece and there is no fringe.

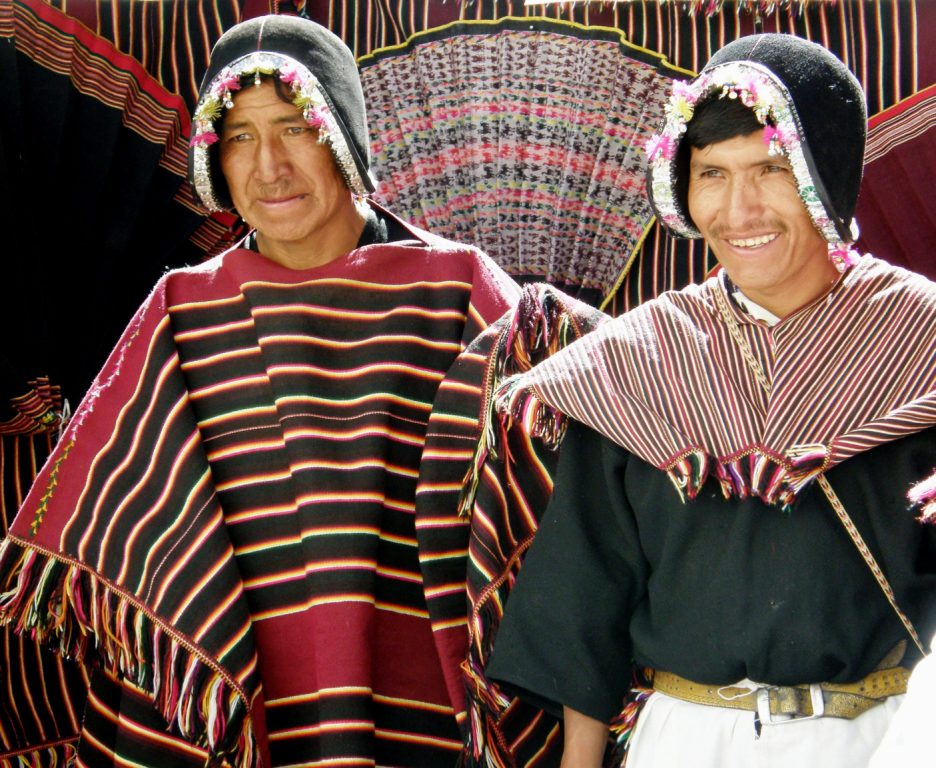
The typical poncho of Tarabuco and the smaller version known as unku can be seen above.

At a handcraft fair in Tarabuco I saw weavers making the long poncho panels. My friend, Anna, showed me the unku on the right that she had bought in Tarabuco when she came to visit me.

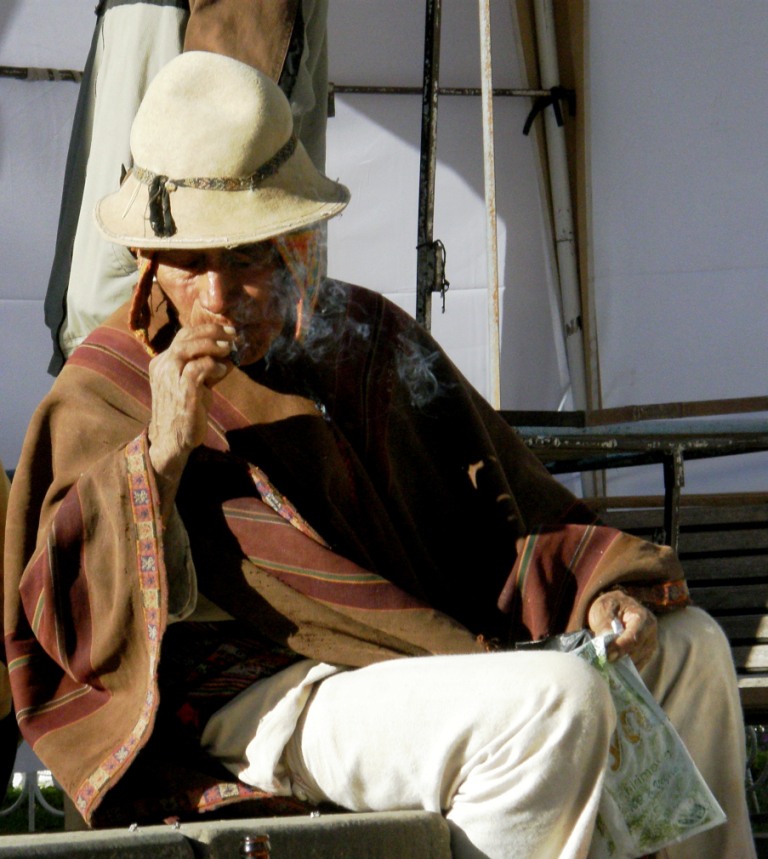
I spotted this gentleman in his much more subdued woolen poncho in a small plaza in Sucre. He was performing an offering to Pacha Mama in the early morning. How wonderfully simple and light the poncho looks although I am sure it is extremely warm and virtually waterproof.

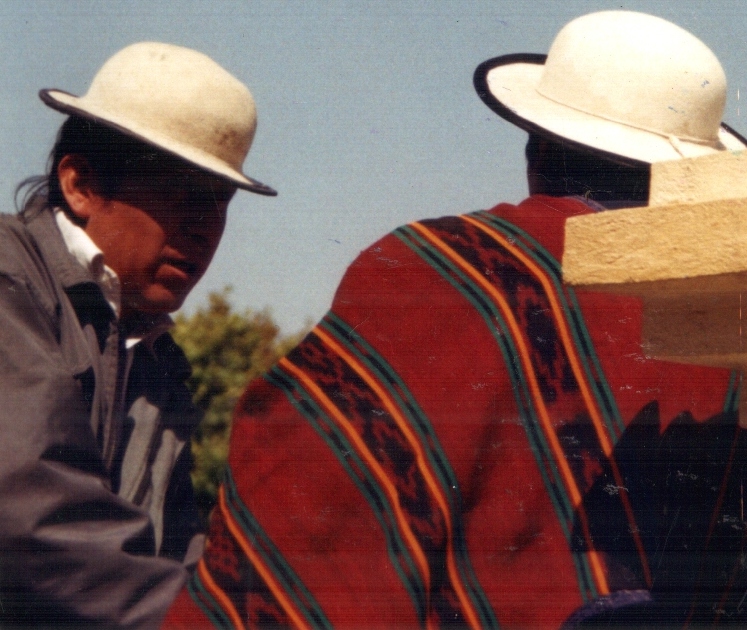
And then you have the incredibly intricately patterned calf-length ponchos woven and worn by the men of Chahuaytire in the Cusco area of Peru.

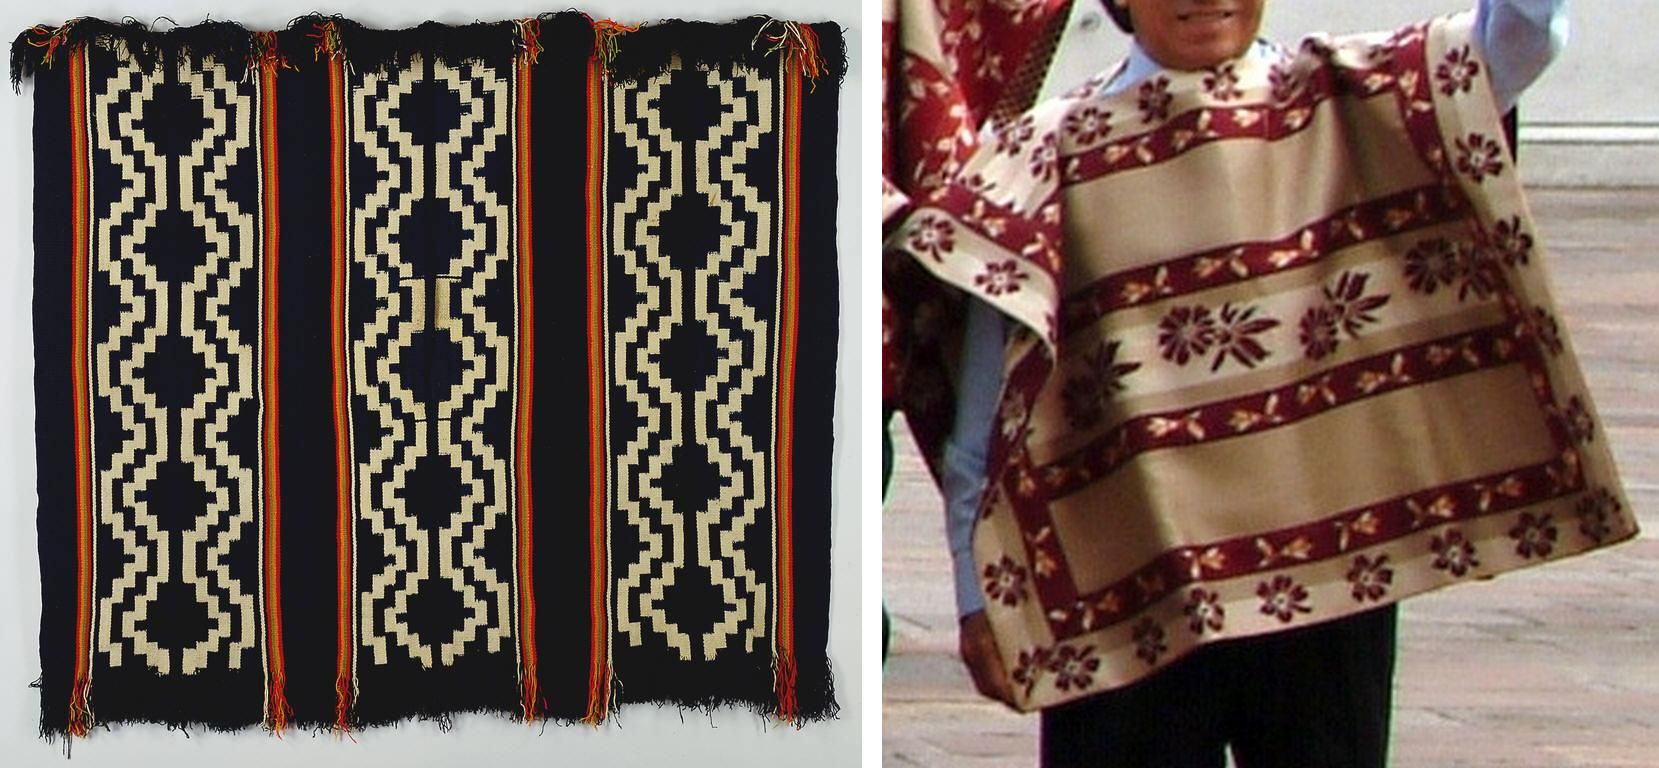
From Argentina and Chile we have the Mapuche makuñ with its ikat patterning technique executed in such a way that there is virtually no blurring of the design. The popularization of the poncho, from what I have read, is generally attributed to the Mapuche who wove them for their own use as well as for barter. On the right you see the chamanto of the Chilean huaso, with its leaf, fruit and floral motifs, which are said to have both indigenous and Spanish roots.

I have  a few pictures from Ecuador too…scans of old prints…

This is the “jijon” poncho which is factory-made in Quito and worn by those men who can afford one in Otavalo. You can see it being worn with its grey plaid face showing by the gentlemen on the left and with its darker face outward on the right. These men were wearing their ponchos to the market on a regular day. Apparently there is a much more costly blue double-faced poncho which is woven on the backstrap loom made-to-order. The ownership of one of these special ponchos indicates wealth and high social status.

On Sunday, which was both market day and church day in Cañar, a very social time around the main square and surrounding streets, I saw quite a few ikat-patterned ponchos being worn.

And finally there’s Juan below, (my pebble weave student!) with his mother and neighbor. Juan put on his  narrow, black fringe-less poncho and felt hat especially for this picture. On another visit during a festival all the men were wearing their ponchos for the occasion.

You can see the backstrap looms on which I was teaching Juan and Natalia pebble weave tied to the pole. In exchange Anita introduced me to her cousin on my next visit and he taught me to weave the typical supplementary warp patterned belts of Salasaca.

Okay, so I promised you some double weave edge samples this week, right? I am sorry, I didn’t get those done. I was busy trying to stay on track and not get “dis-track-ted” by all the goings-on in the Ravelry group. I want to finish my leafy hanging. but I must say that I have a bowl of tencel calling to me wanting to be made into a scarf…

That blue ball is indigo-dyed Japanese silk…a fabulously thoughtful gift brought to me from Japan by one of my old teaching colleagues here.

Hopefully I will get the leaf piece off the loom this week, plan and warp the next hanging, play a little with my tencel, get the Ashford Traddy up and running and do those double weave samples for the tutorial too….phew!

Oh, and I have started a new page for RESOURCES. You will see the tab for that on the header and I am slowly extracting all the links to interesting sites, articles and products that I have linked to in my 105 posts so far. This is quite a job but I hope to add two or three links to the page every week. I hope you find it useful.

.


Backstrap Weaving – Travel Tidbits from Massachusetts

Well, I am here in Massachusetts with my friend Pam in her peaceful home in a lovely rural area. It was a rough trip with burning smells in the aircraft cabin forcing the flight to land in Orlando where swarms of Brazilian children clutching Mickey Mouse dolls were also stranded due to thunderstorms. This meant arriving in Boston in the wee hours of the morning where I probably caught about 90 minutes of sleep on the airport floor before the early flight check-ins brought in the excited hordes.

But…I am here and I have a few tidbits to share…some interesting things that I have seen in the day and a half I have been here so far.

Firstly, the skies cleared today and I got to go out and see Pam’s indigo crop. Hopefully we will harvest some leaves and do some dyeing during my stay. Pam has done it before with her own plants and so I am looking forward to learning a lot.

We pulled off a leaf today and scrunched it about and left it to see if there were any signs of blue as this is apparently a way to see if the leaves are ready for picking and, yep, a few hours later when we remembered to go look at it, the signs were there.

And this is what we are going to dye….silk! all the way from Uzbekistan.

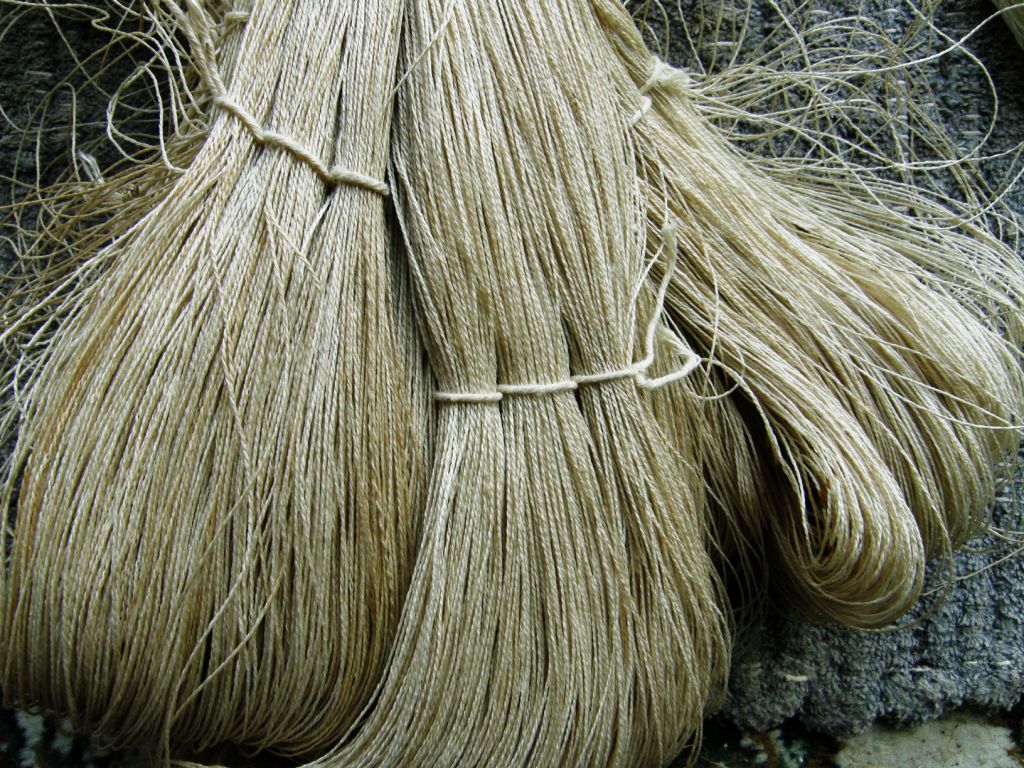
Here is the silk with its coating of sericin. I had no idea that this is how it looks and feels…stiffish…before being scoured with washing soda in simmering water.

Fortunately Pam also has a lot of beautiful soft scoured silk all ready to be skeined for dyeing.

I spent the afternoon revisiting Pam’s collection of textiles from Uzbekistan. I posted them in a previous blog post but getting to see them again with fresh eyes is always welcome. Even though these pieces were all bought on the three trips that Pam has made to Uzbekistan, some of the textiles actually originated in Turkmenistan.

The rug and rug piece which has been sewn into a bag caught my eye as both have been made with the warp substitution technique. Who cares about long floats on the back when you have weaving in this beautiful handspun yarn and gorgeous color combinations.

This is one of several rugs on the floor of the office in which I am sleeping. I love the fact that the long floats on the back of the piece give me a chance to feel and closely inspect the yarn.

This is a piece of rug that has been made into a bag. You can see both faces of the fabric. I just love those washed-out reds and blues. The rug was cut and then a woven band was folded lengthwise and sewn to the raw edges to cover and protect them.

The strap is interesting. Doesn’t that look like finger weaving?
I am pretty sure that this motif was done in three-color warp substitution. You can just make out two colors in the motif along with the red background. Only by looking on the other side where the colors were still bright you could clearly see the orange and green warp threads that alternate in this design.

This bag is my favorite…

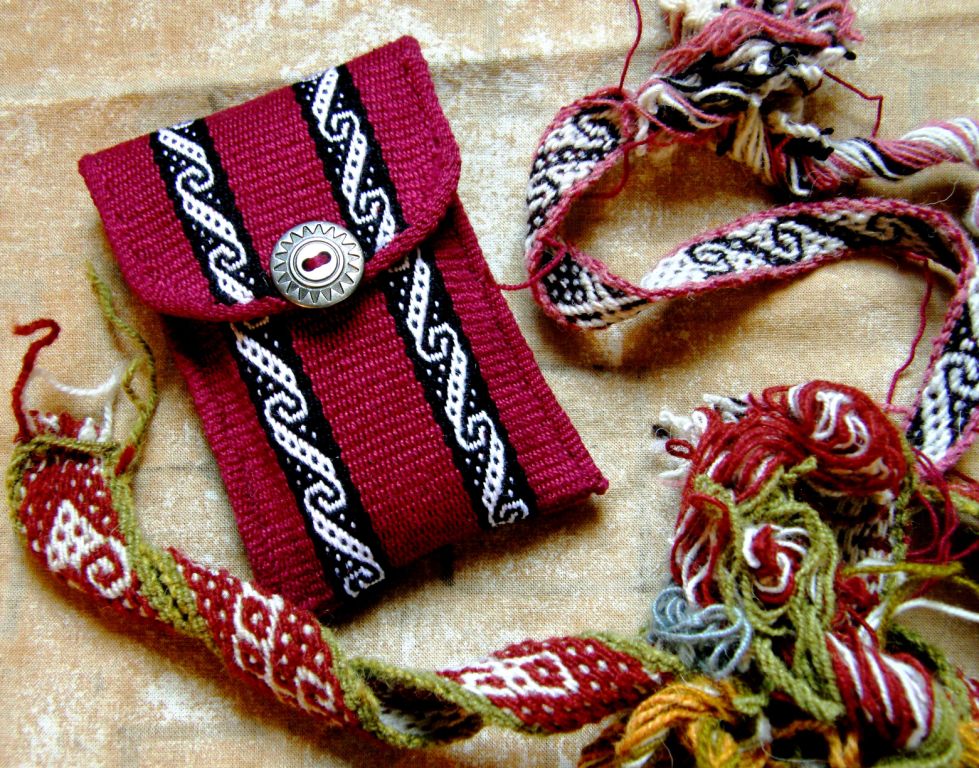
I am definitely going to cut a fancy flap and add some tassels to the next bag I make. I have just been getting confident with cutting and edging rounded flaps. Now look at this shape! This piece, which Pam says used to be part of a rug, is woven using the two-color alternating warp float method which I have been calling, for lack of a better name, “warp floats galore”. You may recognize the “S” motif from a belt, cell phone pouch and notebook cover that I made. The woven band has been sewn on beautifully and it all feels very secure.

Little “comb” patterns separate the warp float bands and a simple warp substitution design has been woven into the edging band.

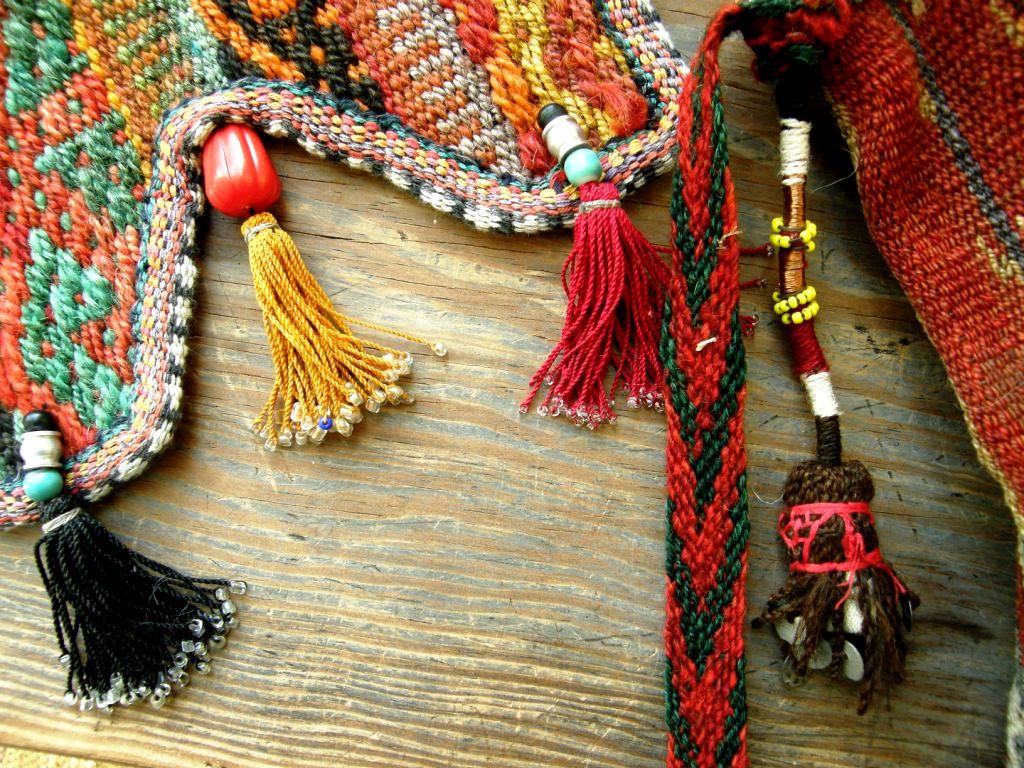
The fabulous tassels…one has embroidery on the outside and the one on the right includes copper wire in its wrapping.

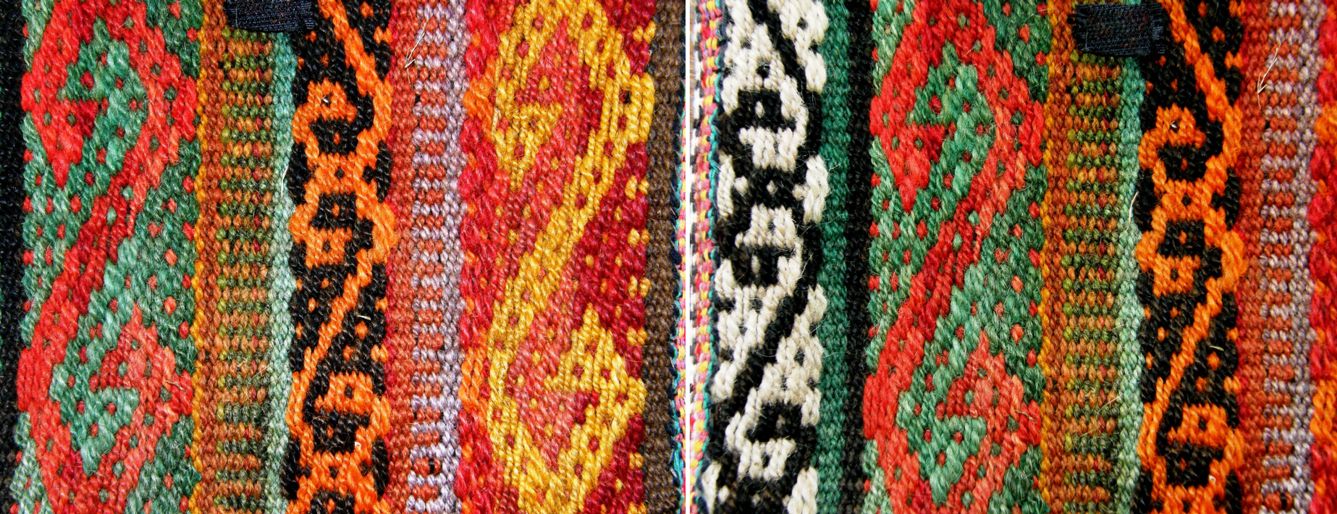
Here is a close-up of some of the warp float designs.

The bag strap has the same simple warp substitution design that appears on the edging. There is so much to be enjoyed in this one piece!

There is plenty more to show and tell from Pam’s lovely weaving space and home but I told you that this would just be about tidbits and so I will end with something that Pam’s friend Joan showed me on  a quick visit to her home in Worcester. I stayed with Joan and her husband Attila last spring. Joan introduced me to Saori weaving and took me to see Dar Ku, a Burmese weaver now settled in the US.

Joan is involved with new settlers in her area coming from all parts of the world. She has recently made friends with a basket weaver from Burundi as well as with textile weavers from Bhutan. An Ethiopian lady showed her how she spins cotton and gave her a spindle, some of her spun thread and a piece of Ethiopian woven cloth…all gorgeous!

 A close up of the end of the spindle and the woven cloth…I didn’t have the right conditions in which to photograph this well.

Unfortunately, lack of time won’t permit a return visit with Burmese weaver Dar Ku but I have posted a video I took last spring of Dar Ku at her backstrap loom weaving a supplementary weft design on warp-faced fabric.

I am so glad to be finally able to show this. It took forever to upload!

She weaves with the wrong side of the cloth facing her and carries her supplementary weft from place to place across the back to weave the parts of the pattern. She has a very soft beat and her tension seems to be quite relaxed.

I am told that these weavers usually weave with their legs braced against something and that this has been difficult to set up in their homes. For now they are just doing without the foot brace. I am sure it must feel weird for them weaving that way.

I wove once with Salasaca weavers in a shop rather than in their home where they have everything set up. They spent the whole time scrabbling about on the floor with their heels trying to get some purchase so that they could push and tension the warp more. Dar Ku on the other hand looks quite at home weaving with her feet crossed and not pushing against anything.

I love the way she opens the pattern heddles so delicately and smoothly. Everything just pops open so easily! It looks like the most relaxing effortless thing in the world. It is lovely to watch.

The Ravelry backstrap weavers and my other online weaving friends are hard at it turning out gorgeous projects…

How’s this for contrast…Jennifer is weaving a myriad of colored cotton stripes while Tracy just finished a pebble weave hanging with her handspun wool.

Verena has also been weaving pebble weave and hopes to sew this into a pouch.

Verena was my student here at Pam’s place last spring and has been getting on very well with her pebble weave since then.

And lastly, I have some charting paper to share.

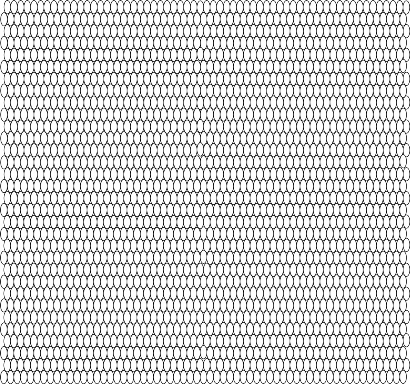
Lately, I have been charting my double weave, warp substitution and supplementary weft patterns on paper with elongated ovals rather than diamonds.

I made a sheet of ovals on a drawing program that I have and have posted it on this page for you all to use.

I am so used to the diamonds but I think that these ovals may be easier to use. I have had people tell me that they go cross-eyed with the diamonds!

I hope that this new charting paper helps.

Here is what it looks like. The page with the full version is is linked above.

Back with more travel tidbits next week.

Backstrap Weaving – Prototypes, Samples and Keepers


It’s been a week of bits and pieces…trying out new patterns, practicing new techniques, making width samples and prototypes and then putting everything together into something I can keep and use.

Cochabamba and my teacher Maxima seem far away now as I sit here in shorts with the temperature and humidity rising. Only two nights ago I had the down sleeping bag on the bed. It makes me yearn for the “eternal spring” weather of the Cochabamba valleys but, then again, today I walked outside to the street and bought big glorious golden dripping slices of pineapple, saw tiny green mangoes up high in the trees and realized that the markets will soon be brimming with the tangy achachairú. I read recently that this fruit is now being grown in tropical areas of Australia with its name changed to the more manageable achacha.

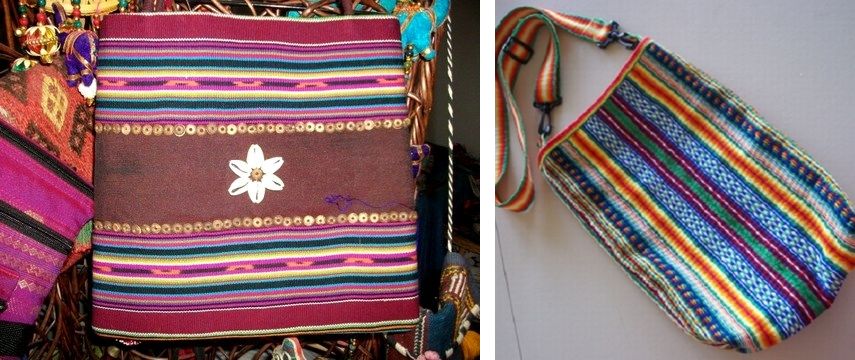
This week I tried out a supplementary warp design that was on a bag at the PAZA stand in Cochabamba. This piece had not been woven by Maxima who seems to specialize in pebble weave. I hadn’t even noticed the pattern when I was there. It was, as usual, a bit of a case of information overload…a very intense three days of weaving, sights, colors and sounds.

It is fun for me now to slowly review the videos I had taken of Maxima weaving and listen to the birdsong and the melodies made famous by the Cochabamba band Kjarkas playing in the background…details that were obscured by my concentration on all that Maxima was teaching me. For that reason I did not see the lovely supplementary warp design until I came home and went through my photos.

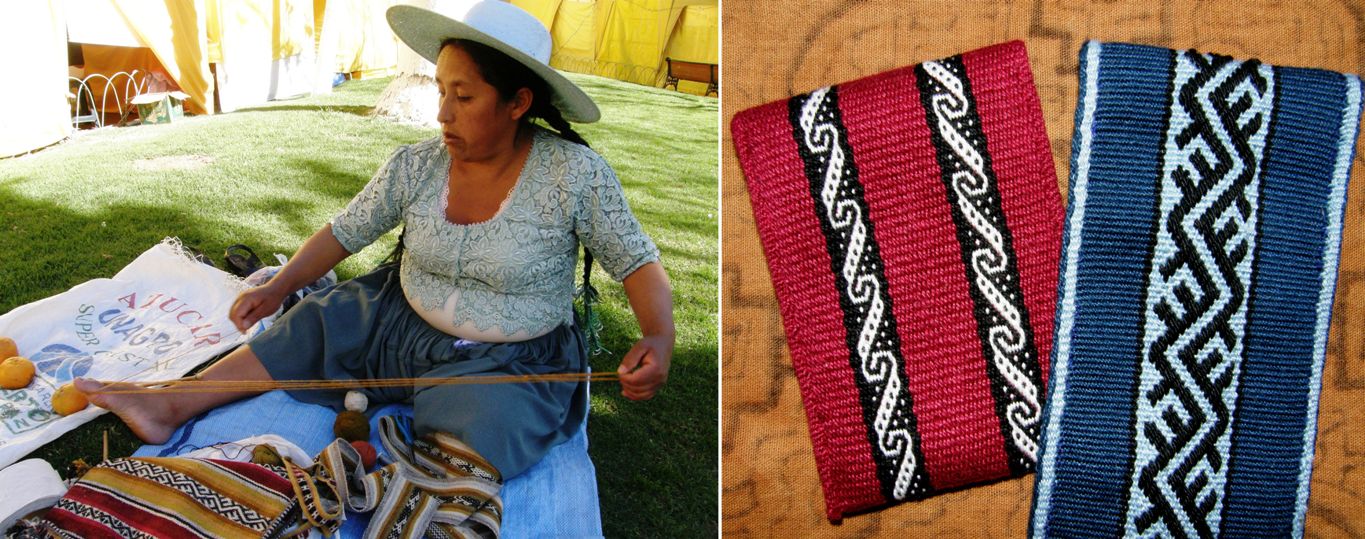
You can just see the design on the bag on the ground in the picture above left. Supplementary warp is not one of my favorite techniques and I guess that is why I had not paid much attention to it but I was quite struck by the pattern when I got home and had time to examine my pictures. If I had run across this design on the internet I would never have thought that it was Andean.

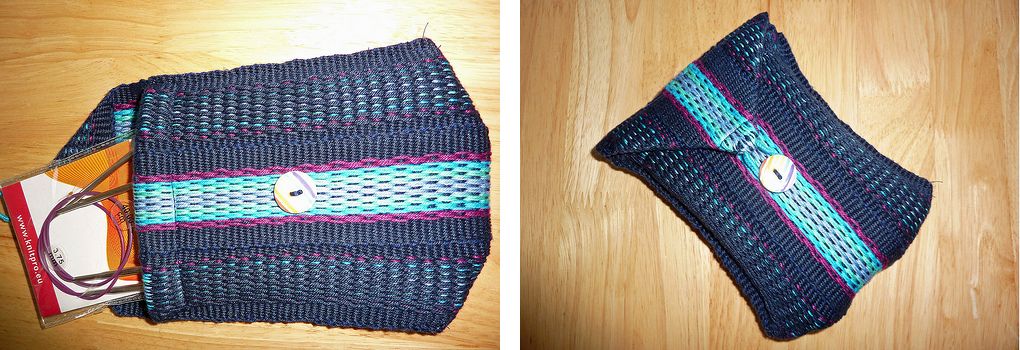
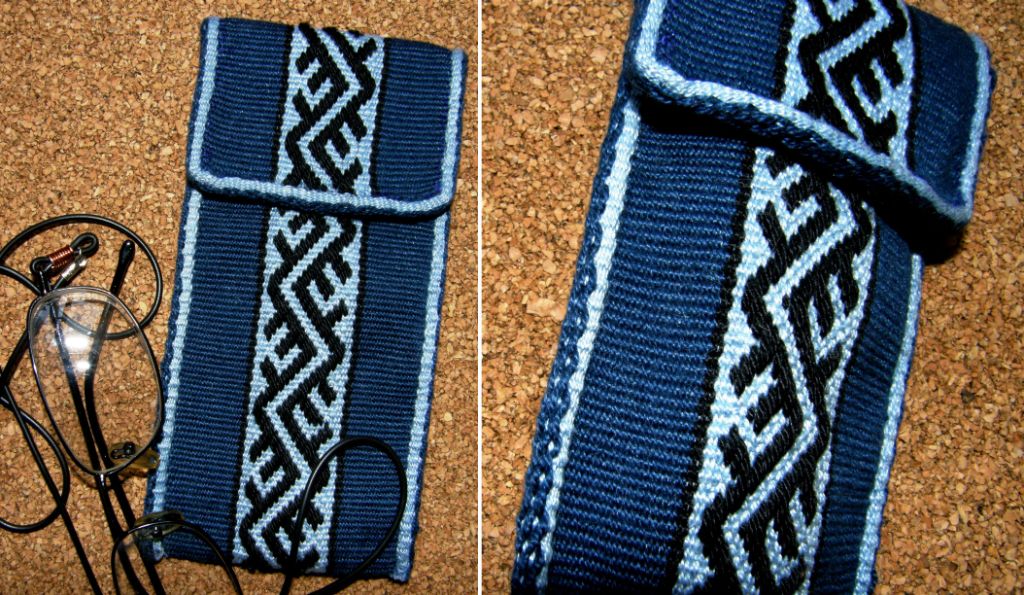
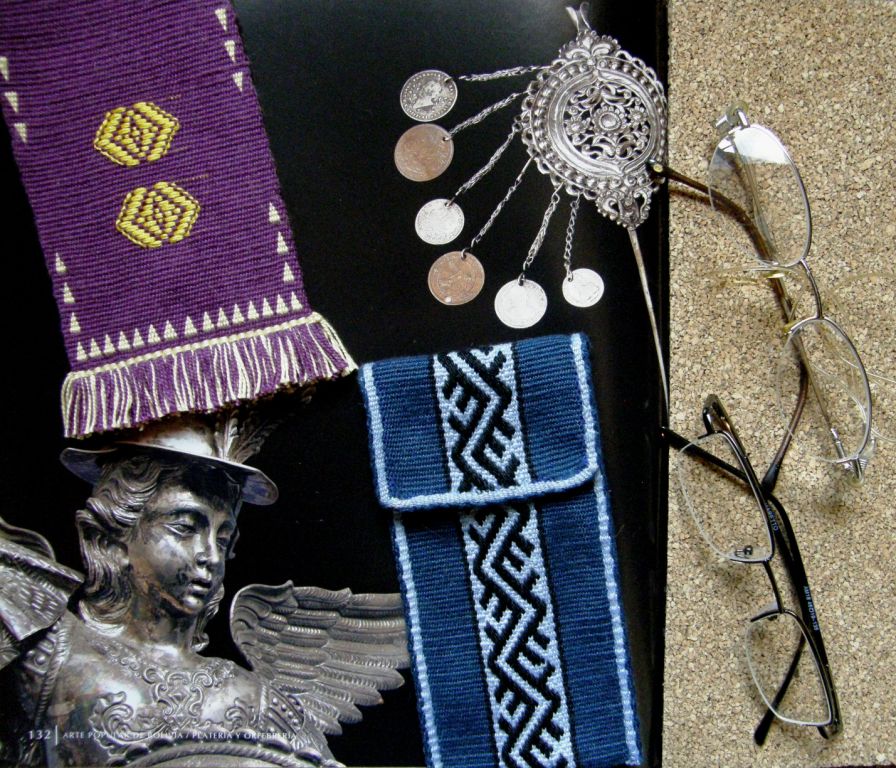
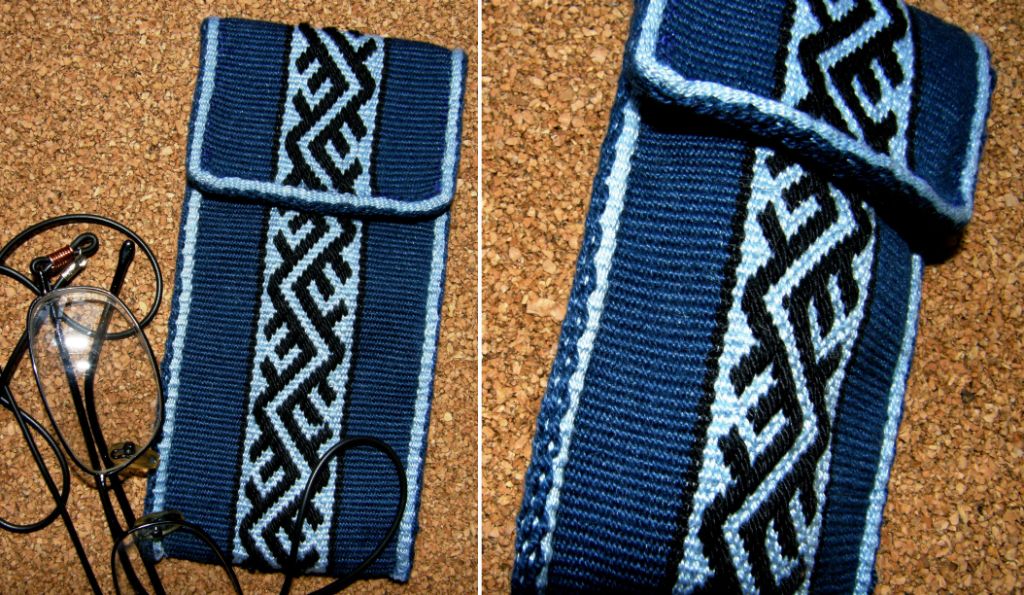
I wove it into a small piece which I sewed into an eye glass case and then used it as an opportunity to practice a tubular band in pebble weave. Not wanting to complicate things too much, I just did plain pebble weave (that is, a pebbled background with no motif) for this band setting up the warp as I was taught in Peru and thus avoiding having to do any pick-up.

Maxima’s way of doing pebble weave would have her picking up threads even for a plain pebble band. The advantage of her method is that it can be worked more easily using just finger tension rather than having the band attached to the body by way of a backstrap. No doubt I will discover other advantages as I delve further into her method.

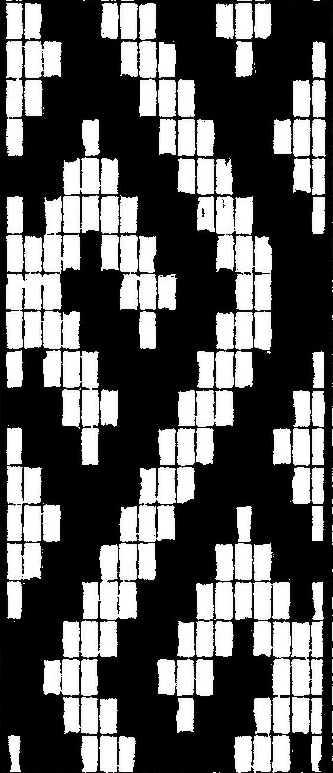
Here is the chart for the supplementary warp design if you would like to try it yourself. I have no idea if there is a standard way for charting these supplementary warp designs but this way works for me. I have also started a new page here where I will put charts for designs in this technique.

I have not done a tutorial on this pick-up method as there are plenty of good resources out there already. I believe that most inkle weaving books include it and Sue Foulkes recently did an online workshop in the Yahoo braids_and_bands group on Sami band weaving which uses the same technique.

If you would prefer to have a “real live” teacher with whom you can interact, Daryl Lancaster will be teaching an online class on this pick-up method for inkle loom weavers on Weavolution. Check out the details here.


You can just see the pebbles on the tubular band in the picture above.

So,  this particular sample found a use. I would like to weave this design again having the pattern extend right to the edge of the dark blue section. I think that would look even nicer.

This meant that two of my three pairs of glasses were nicely accommodated in woven pouches. I had made an eye glass case from a discontinuous warp experiment many months ago. I figured that I may as well make the third one which would give me a chance to try out another experiment.

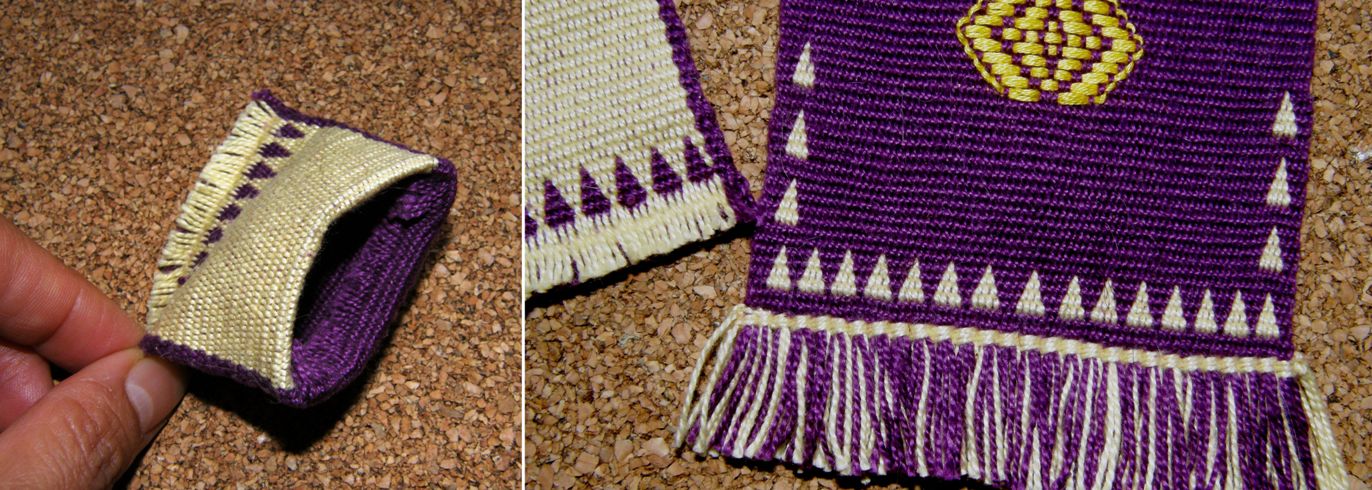
I wanted to make a pouch taking advantage of the fact that weaving a warp-faced double weave piece that doesn’t have motifs woven into it will create a tube. This meant that I could weave the front and back of the pouch simultaneously as two layers of cloth joined at the edges…..”instant pouch”!

It’s no big deal really! All this meant is that I would be saving a bit of seam sewing but I thought it would be fun to see what I could do with this. The tube, of course, is beautifully seamless! You can see, above left, a little sample I made a few weeks ago with some left over warp. There is no motif in that piece and so what I have created is two layers of cloth joined at the edges…a tube.

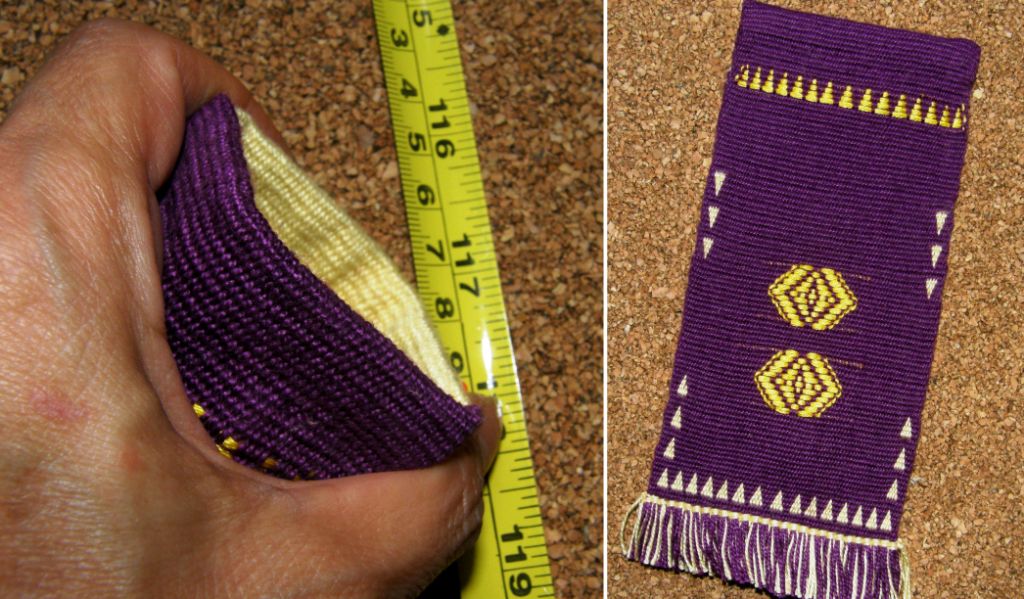
I sealed the bottom of the tube by weaving a pattern of triangles. Weaving motifs is what bonds the two layers in warp-faced double weave.

Although there was no need to do so, I decided to try to weave the triangles up the sides as well but soon discovered that the difference in take-up between the patterned and plain areas was considerable and that I would not be able to continue with that.

So I threw in a couple of supplementary weft figures woven in one of the ways I was taught in Guatemala with the turns of the weft outlining the motif. Then I just managed to get away with squeezing in three more triangles to balance things out. I was really just making it all up as I went…not like me at all!

I created another row of triangles at the top with a supplementary weft (next time I will put the weft turns on the inside of the tube so they won’t be seen). I couldn’t weave them in double weave as they would have sealed up my tube. Finally, I twined along the bottom to secure the weft and then I cut a fringe.

Probably the most fun part was creating the “flex” closure and I have my online weaving buddy Bobbie to thank for that.

When I met her in Portland last year, she showed me a bag made by a friend in which a closure had been created using pieces of an old tape measure. You probably know this kind of closure….you squeeze the sides of the bag and the top pops open. I am trying to show that in the picture above left.

My boyfriend patiently dismantled our tape measure, cut off a length from the inside end, wound the tape back up and put the case back together. No harm done. We didn’t need all ten feet!

I cut two pieces of the tape a little shorter than the width of my pouch. I then cut them down to about two thirds of their original width and rounded the ends. I turned down the top edges of the pouch and sewed them with the lengths of tape within and yes, it works! Above you can see a picture of a commercially available and far more sophisticated version and one of our Ravelry group members provided this link to various sources of these “flex frames”.

That was another experiment that can be used. Nevertheless I think I will make another taking into account lessons learned and with much more planning in the design.

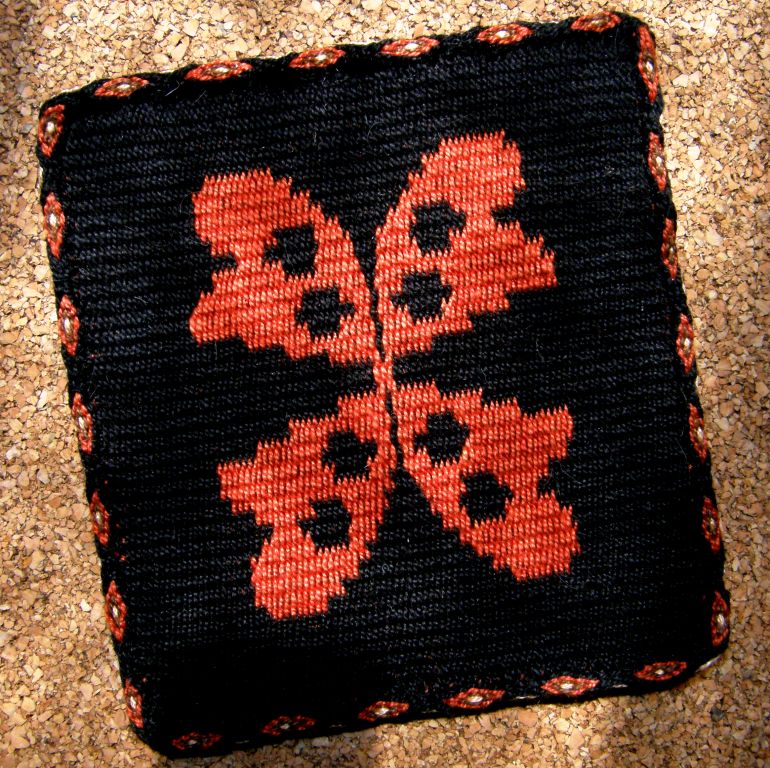
I resisted starting on that straight away as I had another idea bouncing around and so, this is a prototype for a new set of mug rugs that I would like to make…seen here dappled with sunlight…

Actually the prototype turned out pretty well and so it may be a keeper.

I edged my little 4 x 4 1/2″ piece with a tubular ñawi awapa. I am thinking of mounting the mug rugs on cork as the reverse color combination on the back doesn’t really work alongside the other colors in the tubular edging.

The cork will also serve to hide the raw end of the tubular band.

It was so nice being able to sit beside Maxima in Cochabamba last week and weave tubular bands. I had already learned how to weave and sew them but mostly through various brief observations of indigenous weavers over the years as well as through a large group class I took at the Tinkuy last year.

It was wonderful being able to have this one-on-one experience and watch how Maxima held her work, placed her sewing needle and tensioned the warp, smoothly coordinating all the moves. I was so absorbed that the sewing part was the one part of my instruction that I completely neglected to video or photograph! (although you can see a Bolivian and Peruvian weaver doing so in my videos here).

However, I did take video of many other things and have put some bits and pieces together for this post.

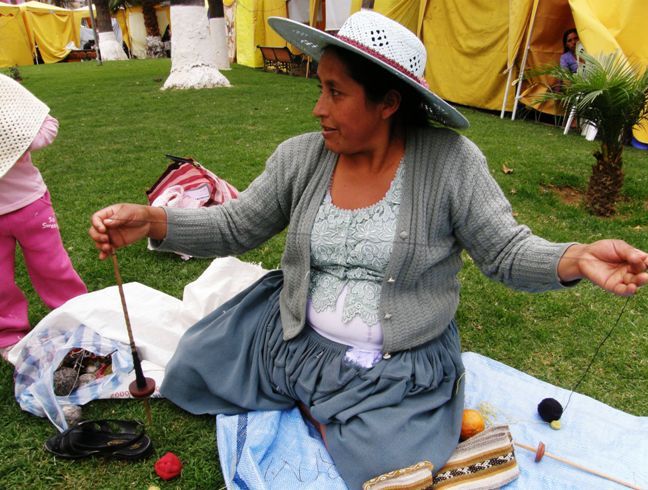
This first clip shows Maxima using her spindle to put extra twist into some plied yarn so that we would be able to weave with it.

I had been complaining during the Tour de Fleece of an aching thumb which developed from the way I was turning my spindle for plying. I really need to practice the Andean way of setting the spindle in motion for plying or respinning commercial yarn.

Maxima tied for first place with a Peruvian lady in the speed spinning contest which was held one night during the Tinkuy de Tejedores in Urubamba, Peru last year. The two ladies spun over six meters in two minutes.

The various segments in the next video show the stages of setting up a warp for weaving. Maxima winds a warp using her finger and big toe as warping stakes. You can see her winding two colors together with which she will pick her designs and then the final single edge warps. After tucking the end of the warp into her waist band she rearranges the warp cross separating the two colors into different sheds. Then she makes her heddles.

This final piece of video shows how Maxima opens her sheds and then forms a picking cross from which she selects the colored warps for her pattern. Not a stick in sight!!

If you would like to hear more of the music that can be faintly heard in the background of some of the video segments, check out this powerful live version of Wayayay by Kjarkas.

Before we leave Cochabamba, I would like to pass on Dorinda’s thanks to all those who visited the PAZA blog last week some of whom helped out with donations. Postscript: I see that Dorinda has just posted a thank you note on the PAZA site.

#########################################

The Ravelry Backstrap Group Weave-Along starts next week. We have a good bunch of people all ready to go. I am especially happy to see an old online weaving buddy Franco joining in.

Sharon aka Fiberaholic1 wove a bunch of 8-rev patterns from my Andean Pebble Weave book and did a beautiful job but this is a pre weave-along project as there will be no pick-up patterning in this latest weave-along. We are going to play with stripes and color.

And here are some more pieces to inspire our Weave-Alongers….my online weaving friend Caroline, in Australia, sent me this picture of a striped and ikat patterned textile from East Timor and JaQueline Keller on Weavolution allowed me to show her cheery bag made by sewing several plain-weave inkle bands, made with yarns of various weights, onto canvas. Such wonderful things can be made with plain warp-faced weaving!

And to finish I was just given this link from a Ravelry member to a book by Mirja Wark of The Netherlands about the weaving of a special belt called the si’ira  by the Wayuu people of Colombia and Venezuela. Colombia seems to be making its way bit by bit into my life…a little contact, a little information from here and there. I wonder where all this may lead?!

Backstrap Weaving – Cool Tools and Implements

“All those sticks! Where in the world do they go and what do they all do?”

I have written posts about all those mysterious sticks and wooden implements, from the basic loom bars to the heddle sticks, shed rods, coil rods, stabilizing rods, shuttles, beaters, swords, pick-up sticks, even “poking sticks” (my own name for an implement my Guatemalan teachers used to create inlaid brocade).

Last weekend I went to the highlands to the city of Cochabamba to experience the ultimate in “stickless” weaving – what I named “barefoot weaving” in a previous post and am now able to add yet another handy dandy tool to my backstrap weaving kit….my humble big toe!

I used to have rather fierce-looking, blister-proof ready-for-anything feet in my old trekking days. They carried me up and down mountains in many places across the globe but I am ashamed to say that they have now gone “soft” on me even though I rarely wear shoes in this climate that I find myself in. So, I didn’t last long with the hard-spun coarse wool chafing my toes and I shall have to put them into training for barefoot weaving.

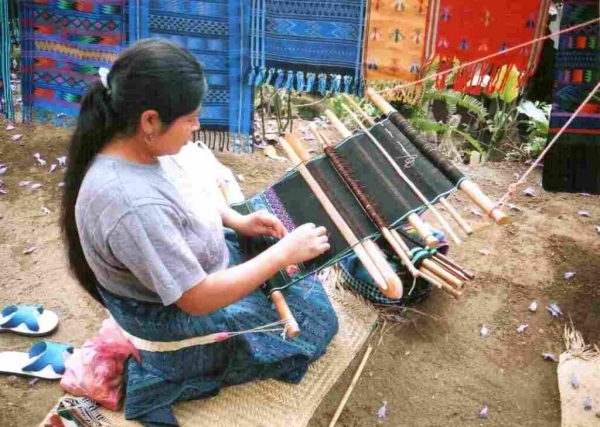
Maxima, daughter Zoraida and granddaughter Zuni were my weaving companions for my three-day stay in Cochabamba. Maxima was my teacher while little Zuni played at spinning on her "pushka". Zoraida was making a hat for daughter Zuni in tapestry crochet.

I met Maxima at the Tinkuy de Tejedores in Urubamba, Peru last year. She was my roommate along with American  ex-Peace Corps worker Dorinda Dutcher. Dorinda, who lives and works with the weavers in the town of Independencia here in Bolivia, had raised funds which had enabled her to take Maxima to the event. You can read about Dorinda’s work and her PAZA foundation here.

Dorinda, Maxima, Zoraida and Zuni were in the city last weekend selling weavings from their cooperative at a handcraft fair and this was a great opportunity for me to make a quick visit and have some classes.

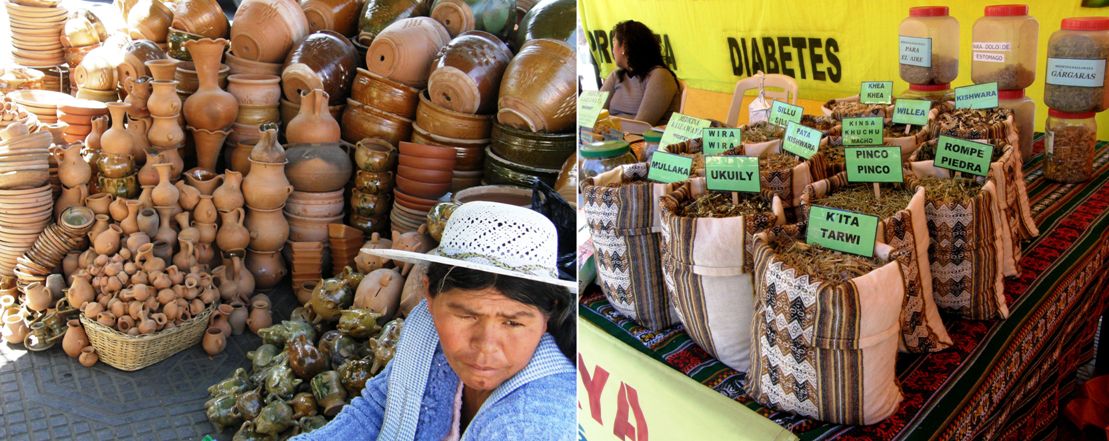
The fair included all manner of handcrafted items as well as grains, and medicinal plants of the famous Kallawaya healers of Charazani.
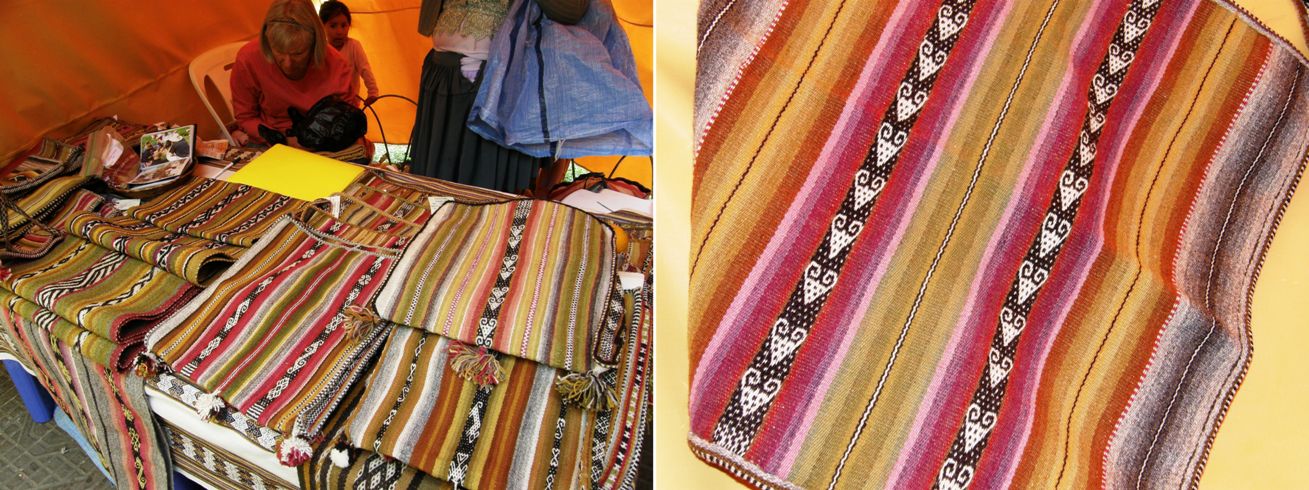
The weavers are recovering the art of dyeing their handspun wool with natural substances and creating large and small bags, pillow covers, hair bands, belts and other woven items which they sell at three such craft fairs that are held in Cochabamba each year.
I was excited to be able to buy almost a kilo of handspun and plied alpaca yarn from a neighboring booth at a very nice price . As it has been spun for knitting, I will need to respin it for warp-faced weaving on my backstrap loom. I hope to be able to dye a lot of it too.
I spent the mornings walking around the city on this my first ever visit to Cochabamba. I went up the hill to see the Christ the Redeemer statue which is just that little bit higher than the more famous one in Rio de Janeiro. Although the location is not quite as exotic as Rio, there was a nice view of the city in its pleasant valley surrounded by mountains.

That left the afternoons for weaving classes. Our only tools were our fingers and toes, scissors (am I the only one who uses her teeth when no one is looking?!) and a needle for sewing the tubular bands or bordes that we made.

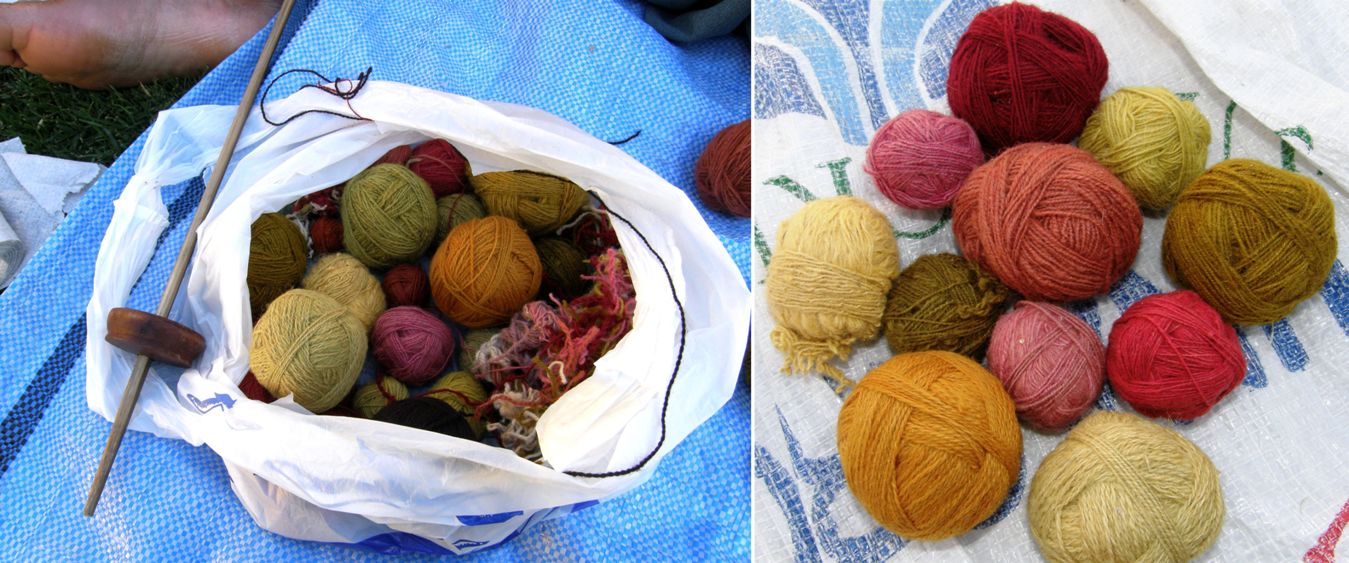
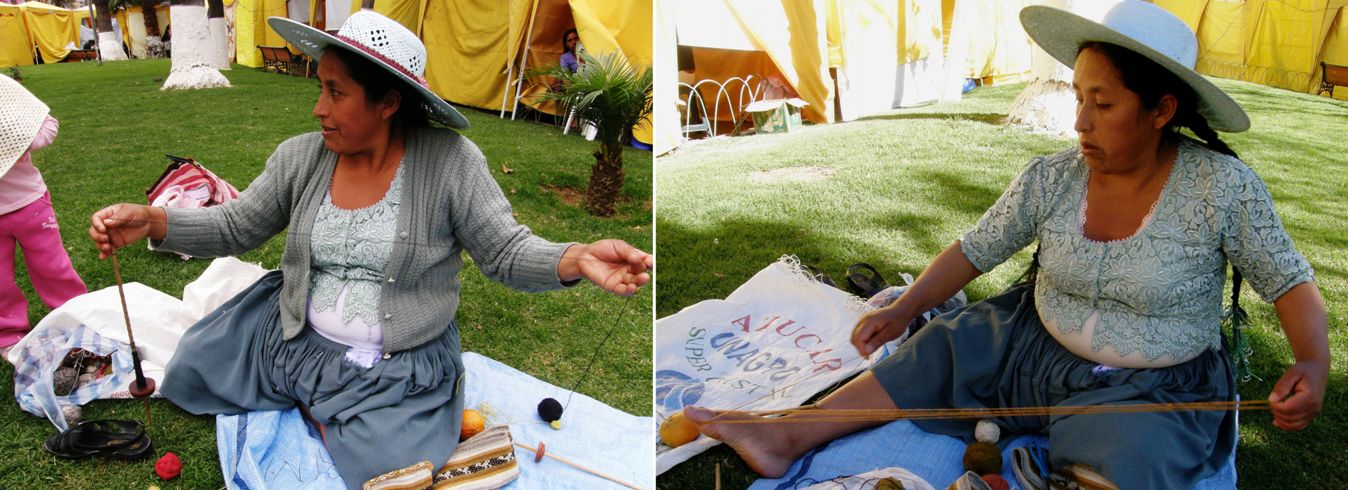
Here are the lovely yarns we got to play with…handspun and dyed with natural substances. A few of the colors were not ready to weave with yet as they had only been lightly plied and so Maxima picked up her large plying spindle and gave the yarn the extra twist needed for weaving. I have some nice video of Maxima doing this seated on the ground using that typical sweeping motion between her two hands to set the spindle in motion. I will show the videos in a future post once I have edited them.

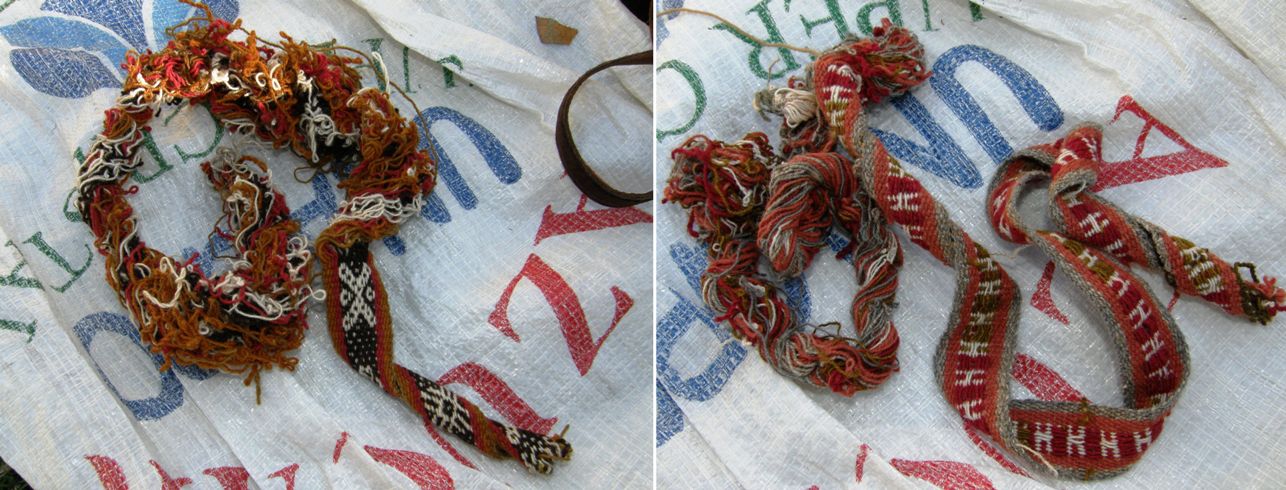
You can see the very high amount of twist in this yarn. The bands, when not under tension, will spiral and the unwoven yarn curls up on itself in an alarming mass.

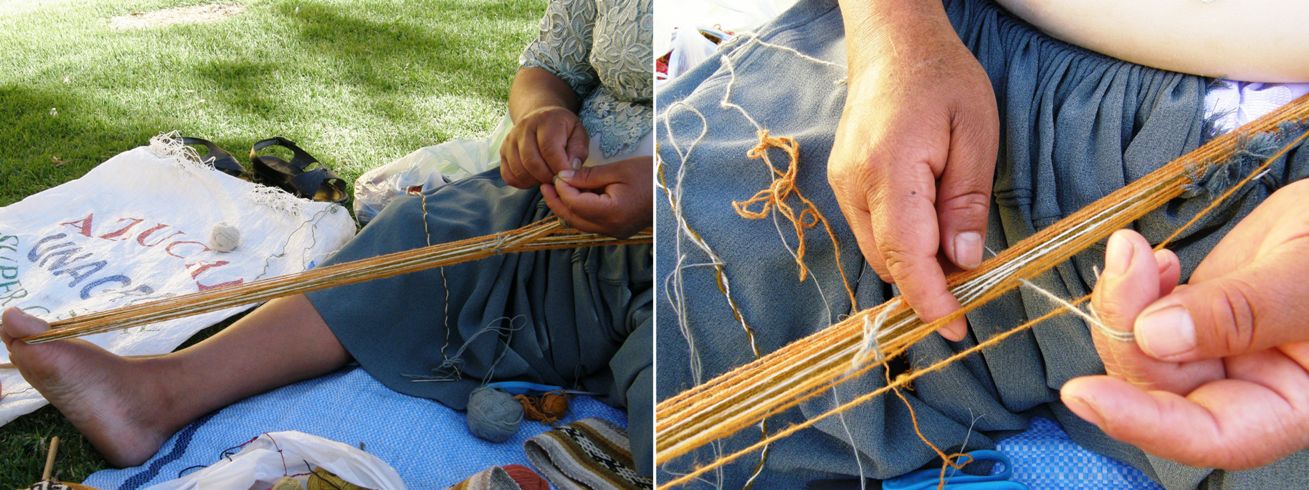
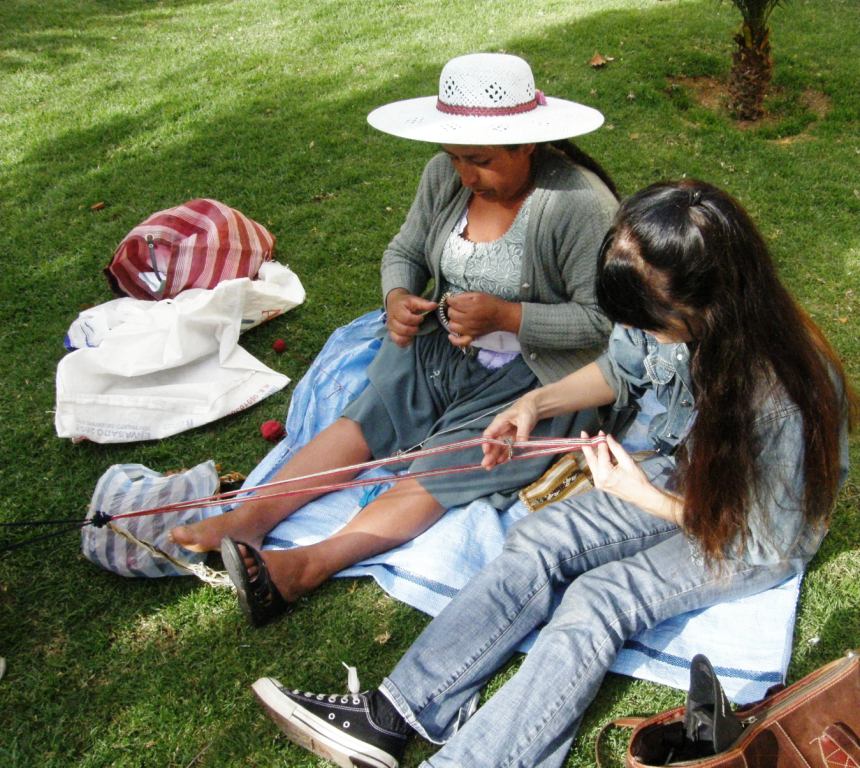
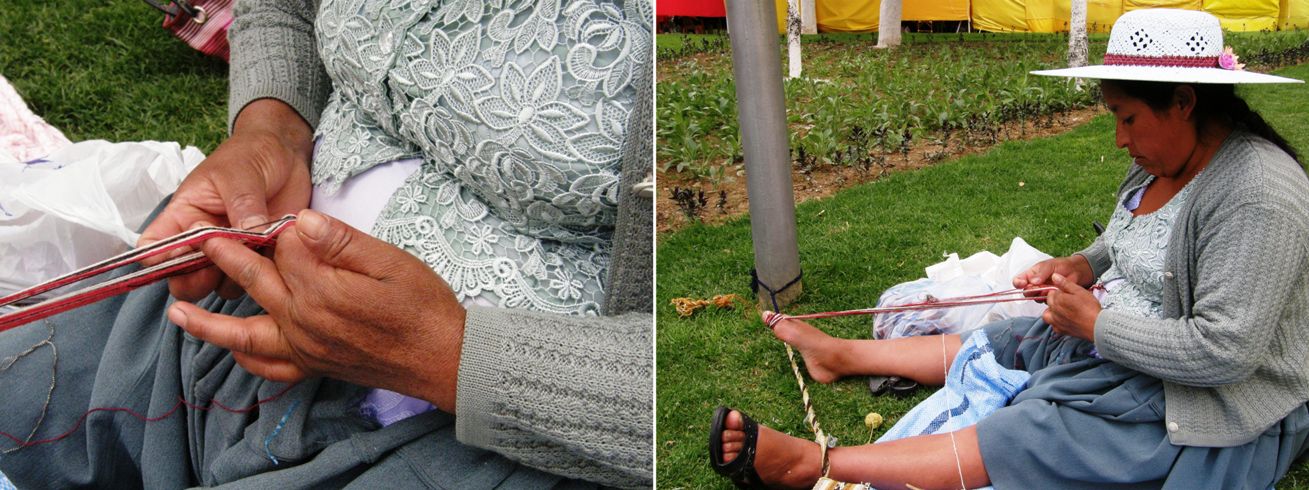
Above left, Maxima is twisting the yarn and on the right she has started warping for a tubular band using her forefinger and big toe as her warping stakes. As she does not have two central stakes around which to separate her colors, she winds her two colors together as doubled strands and then rearranges the cross once she is done. She tucks one end of the warp into the waist band of her skirt while the other ends stays wrapped around her toe. This leaves her two hands free to rearrange the warps into their two sheds.

Maxima then secured one side of the cross in a shed loop and made simple string heddles around the warps on the other side. Once the set up was complete, she removed the warp from her waistband and tensioned it between her forefinger and her toe…no backstrap or waist string was used.

On the first afternoon, I asked to learn tubular bands. I was so absorbed with filming, photographing and noting everything down that I didn't realize that the first band she taught me was actually pebble weave! Her set up and way of doing the pick-up is so completely different to the way I had been taught in the western part Peru. It threw me off at first and I got really confused! Fortunately we started with the design which is known in the Cusco area as "mayo k'enko" and which Maxima calls "linquito" and so it wasn't all totally foreign to me and I was then able to pick it up quite quickly. Maxima's method definitely has its advantages for weaving pebble weave as a finger-tensioned tubular band.

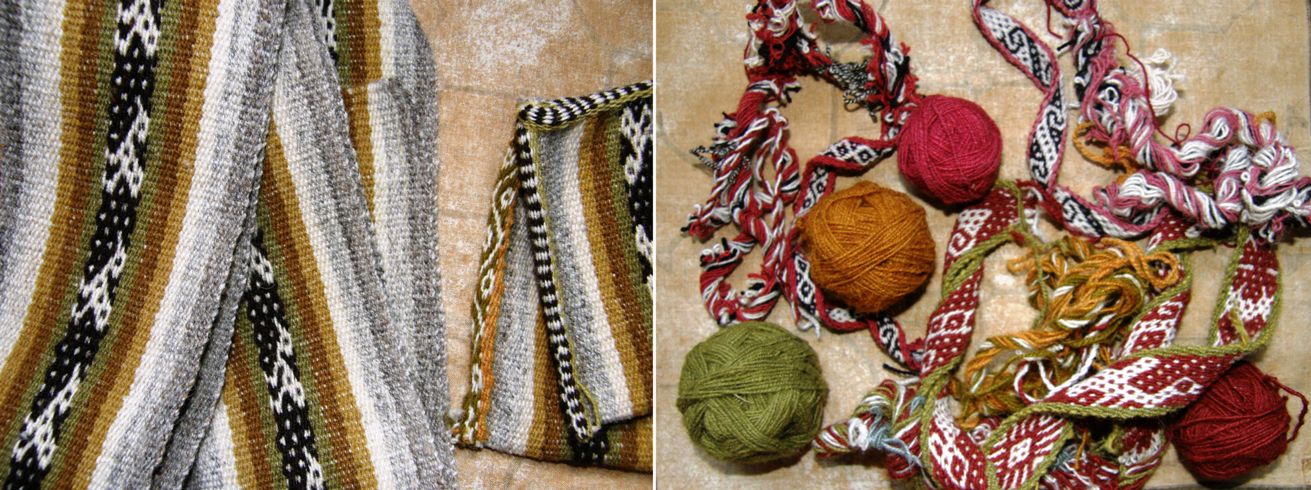
You can see the first pebble weave edging we made in the picture above left. The yarn was way too chunky for the little bag we were edging but it served as a learning exercise. Then we made a much simpler style for the second project. Above right you can see the three pebble weave bands, or huatos,  on which we worked on the second and third days of classes, starting narrow and gradually working up to wider designs.

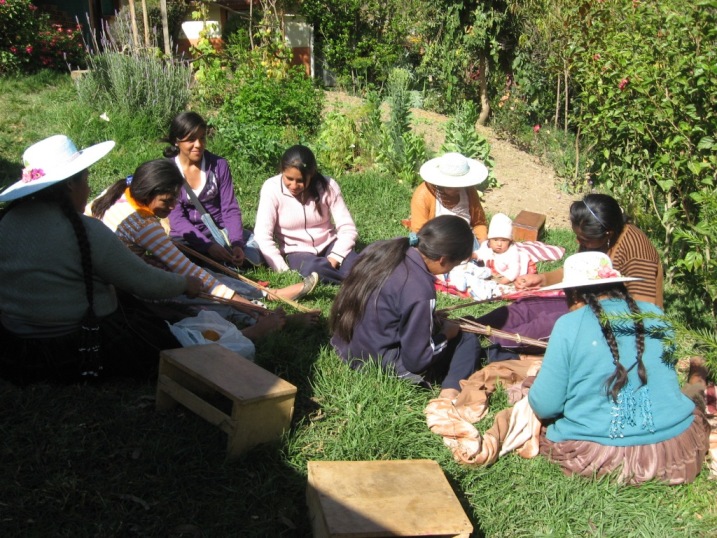
Weaving together on the grassy area behind the market stalls was cool and peaceful. Last Saturday was my birthday and this was a lovely way to spend it. There is a reason why these sensible ladies always wear hats. My poor lips are now a swollen mass of blisters from the dryness and high altitude sun.

While Maxima finishes off my edged pouch, I am weaving the first narrow pebble weave band. You can see how Maxima taught me to use my two fingers in the warp as my “picking cross” (I explained a little about the picking cross in last week’s post).

Maxima has made a picking cross and is selecting the warps from each side of the cross for her design. Her warp is attached to her toe and for a while so was mine. Then I also attached my warp to her toe when mine had had enough! Finally we moved to the post to tie my warp up and later Maxima did likewise.
On the left Maxima is using her fingers as cross sticks to rearrange the warp cross. I took my bands back to my hostel to do my homework...yes, there was homework! My bed had a convenient bar to which I could tie up and there would always be my toe if I hadn't been able to find anything that would do. On the third day we worked on wider motifs on the band pictured on the right. Some of the motifs were completely new to me and fun to learn with this "new" way of doing the pick-up.

In my Andean Pebble Weave book I show how I was taught to create a border for pebble weave of the same thickness as the design area. Maxima also creates a thick border but in a completely different manner. This is the fourth way that I have seen pebble weave being woven…all so VERY interesting!

Maxima with the Club de Chicas. This photo is from the PAZA Bolivia blog written by Dorinda Dutcher.


Maxima was a wonderful teacher. When I asked her if she enjoyed teaching she laughed and told me that when she had taught her daughters she would lose patience and want to slap them! Now she says that she is used to teaching and enjoys starting the young girls in the “Club de Chicas” in Independencia on their first weavings. I have made a tentative date to visit her in Independencia next March during the peach season.

I gave her a couple of key fobs, one of which was in double weave and I think she would like me to teach her that when I visit. I was surprised as there were double weave belts on sale in her stall but she told me that they had been made by other weavers. I have come across this before…weavers learn what their mothers and grandmothers can teach them but are unwilling to ask non-related weavers and their weaving peers to teach them other techniques.

Back at home I wanted to put things I learned into practice but I started off slowly by simply using one of the new designs I had learned in a cell phone pouch. I have made many cell phone pouches and realized that not one of them has been made with a pebble weave design which is, after all, my favorite technique.

Here is my latest cell phone pouch with the new design. You can see it on the pink bordered huato. I wove and sewed a red tubular edging and used a snap closure. I know that we like to apply nice names to these motifs but, of all the designs that Maxima taught me over the three days, only one had a name, the aforementioned linquito and she had no name for pebble weave either to distinguish it from the other weaving techniques practiced in the area.

Here is the cell phone pouch on my other finished project for this week - the shadow weave piece.

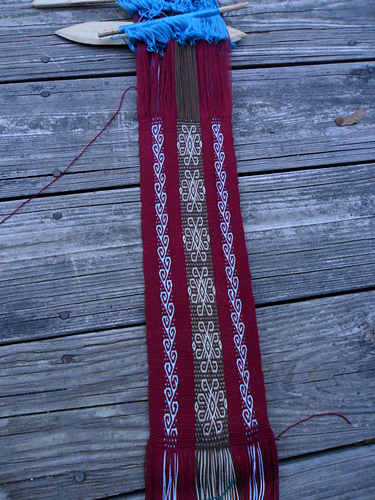
The shadow weave piece also came off the loom this week. You might remember that I had only wound a one-yard warp as it was an experiment. I am ridiculously pleased with it! However, no matter how I tried to photograph it I couldn’t get the shadowy three-dimensional effect to show up so, here it is looking rather flat.

Here is the warp on my backstrap loom with its bamboo reed, three sets of string heddles and shed rod and on the right you can see it in progress.
On the left you can see it as it came off the loom and on the right after having been wet finished.

The two doubled black edge ends I used looked a lot better after wet finishing but I am still not sure if doing that was such a good idea. Now, what do I use this piece of cloth for? I am actually thinking of using it as the lining for a bag…would that be nuts?
I LOVED making this! I have another four-shaft draft that I might tackle and then there is the eight-shaft one that has been calling to me for some time now…do I dare?

We are less than two weeks away from the start of our Ravelry group weave-along and I found some wonderfully inspiring pictures today from the Education and More site. Kareanni who works as a volunteer for this organization is in our backstrap group on Ravelry.

These bags are just a few of the latest fair trade products from Guatemalan weavers being offered by Education and More and are wonderful inspiration for our weave- along which will be all about using color and stripes in plain-weave.

I have had a wonderful array of completed backstrap projects coming into my inbox as well as posted in the Ravelry group this week. Where do I start?

Andreas in Greece emailed me telling me that he has been weaving from the tutorials on this blog and from my Andean Pebble Weave book. Not only has he picked up the pebble weave technique, but he has also gone on to make his own terrific designs.

And here are his simple warp float pieces…beautiful!!

You will recognize some of these designs from my tutorial while others were designed by Andreas. I do hope that we keep in touch as it would be great to learn about traditional weaving in Greece. Andreas told me that there is no warp-faced tradition. How in the world did he shape the bottom of that center band?? That is so cool!

Amber aka lavitaaj on Ravelry has been weaving outdoors making a renaissance design pouch for her sister using the “warp floats galore” technique.

And I am happy to see that she has just posted the finished pouch so I can share it this week…

All that is left to add is the toggle. She has edged it with a tubular band and I love the tassels she has added.

Here is what Jerome aka HeyZ has shown us in his first appearance in the group…a great combination of small pebble weave motifs and a simple and very effective warp float design of his own invention.

Anne and Kateri are working their way successfully through the first lessons in pebble weave while Yonat, who wove with me in Santa Cruz California last spring, has been doing a study in simple warp float patterns with beautiful results.

Speaking of simple warp floats, I received some pictures this week of the weaver who taught me this technique in coastal Ecuador. Kathleen Klumpp, who continues to work with Trinidad and her family to document the ancient spinning, dyeing and weaving techniques used in the coastal region and find markets for their products, sent me these pictures of Trini’s latest work.

In addition to the large satchel-like shoulder bags that Trini has been making she is now producing these cute purses using tagua nut buttons as closures. You can see her on the right weaving and sewing the edging band to the finished textile using her mother's handmade rigid heddle. I would so love to have Maxima see this way of making the "bordes"!

To finish,  I would like to make an appeal on behalf of Dorinda, Maxima, Zoraida and little Zuni and the weavers of the Independencia area in Bolivia. The PAZA project is currently experiencing a funding crisis. Sales at the fair last weekend were disappointingly low. I would love for you to visit the PAZA site and see for yourselves that this is a project worthy of support. Even the smallest donation will be very much appreciated. If you have used any of the tutorials here on my blog and enjoyed reading my posts, remember that all the information I am providing comes via weavers like Maxima and Trinidad and this is one small way that we can all give back a little.

Thank you! 🙂