Backstrap Weaving – Seasons

I wove this with handspun cotton singles that I’d bought in Guatemala back in 2008. I used my bamboo reed to achieve the sheer open look and used the same cotton as supplementary weft to weave in patterns. It’s a style that I had been wanting to try ever since I bought a sample from the Coban area of Guatemala.
While I love spinning with a drop spindle, I can’t say the same for plying. I find it downright tedious and I just wanted the task to finish. I’d ply at my craft group gatherings, on the train, at the Arts Society gatherings, at the spinning and weaving group….it just seemed to go on and on.
I managed to squeeze in some time at the loom between hiking trips. It took two attempts to wind a warp to my liking from all those fabulous natural dye colors but I had to face the fact that I just wouldn’t be able to get them all into the one piece.
Four seasons motifs in progress. The heddle arrangement may look awkward but it works well. I had seen weavers in Bolivia use similar arrangements for their double weave pieces.
The figures as well as the colors are meant to represent the four seasons. The yarn I had dyed with cochineal just didn’t belong here. It can wait along with the greens for another project.
I didn’t want to use the handspun wool as weft for either of these pieces and used instead some unidentified soft and very loosely spun ”stuff’ that a friend had given me. It worked well except for the fact that it was somewhat slippery and wanted every now and then to slip out of the shed at the edges rather than lie there snugly. I’d had that very same experience with luscious alpaca yarn that I’d spun once upon a time.
The two faces.
I somehow always find myself on the floor at the planning stage. I didn’t have a choice in Bolivia but I’m in a bigger place now with table space. I still end up on the floor.
I’m in a couple of hiking groups and get to go out at least twice a week.
The “real” project will be much wider than this.
I couldn’t believe that after having admired the Indonesian ikat textiles for so many years, particularly the ones from Sumba, that I should run across these in an op shop?!
This photo was taken after one week. It has developed even further since.

Backstrap Weaving – In the Bag

I love the two white cats under the table waiting patiently for tidbits.
Crunchy snacks anyone?
One of the many “healers” who will read your fortune and find solutions for your troubles.
It has the most wonderful smell that is characteristic of those home remedy stalls.
There are multiple vendors along this aisle and it’s amazing how much stuff they cram into their small allotted spaces. What’s more amazing is that they know exactly where everything is. I got my zip in the perfect color.
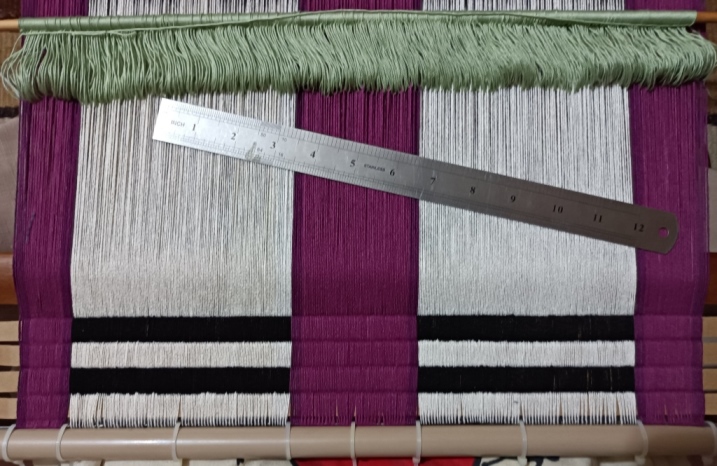
Each of the red sections is flanked by twelve ends of a slightly darker red. It doesn’t really show up in this photo. I goofed while warping and put more red ends on the right hand side than on the left but decided to just let it be.
I chose the pattern on the far left in these two images.
By doing this I can move the threads around until I get the ideal coverage of the cardboard strips within the sheds. I take measurements, carefully remove the strips, disturbing the threads as little as possible while doing so, and then start weaving. This enables me to start at just the right width and maintain it for the entire project.
There’s nothing delicate or subtle about this pattern!
I’m really happy with it! I ran out of black thick weft and switched to reddish brown which I think looked even better. In the end the color didn’t matter because I covered the bumpy selvedges in order to sew in the zip.
There’s no point to this photo. I just like the way my book looks on top of the rep weave piece. 🙂
I wove a band using the lightest of the three cochineal colours that I have in this cotton and used it to enclose the typical bumpy rep weave selvedges.
Here it is holding sticks, swords, shuttle and tool bag. I still have to sew to isolate the sleeves that hold the cords.

Backstrap Weaving – A Way with Words

With most of the messiness of the strikes and the disruptions of festive season holidays behind us, I finally managed to get an appointment with my Brazilian dentist which means that I can now offer you a toothy smile to welcome the New Year!

One of my favorite things about being at the dentist is reclining in front of her very large picture window watching the hummingbirds feed on the flowers in her garden. Hummingbirds have made their way back into my weaving as I decided on a garden theme for this fabric. I am hoping to be able to sew this into a cylindrical bag for my cotton spinning tools…hence the plant-like subject matter.

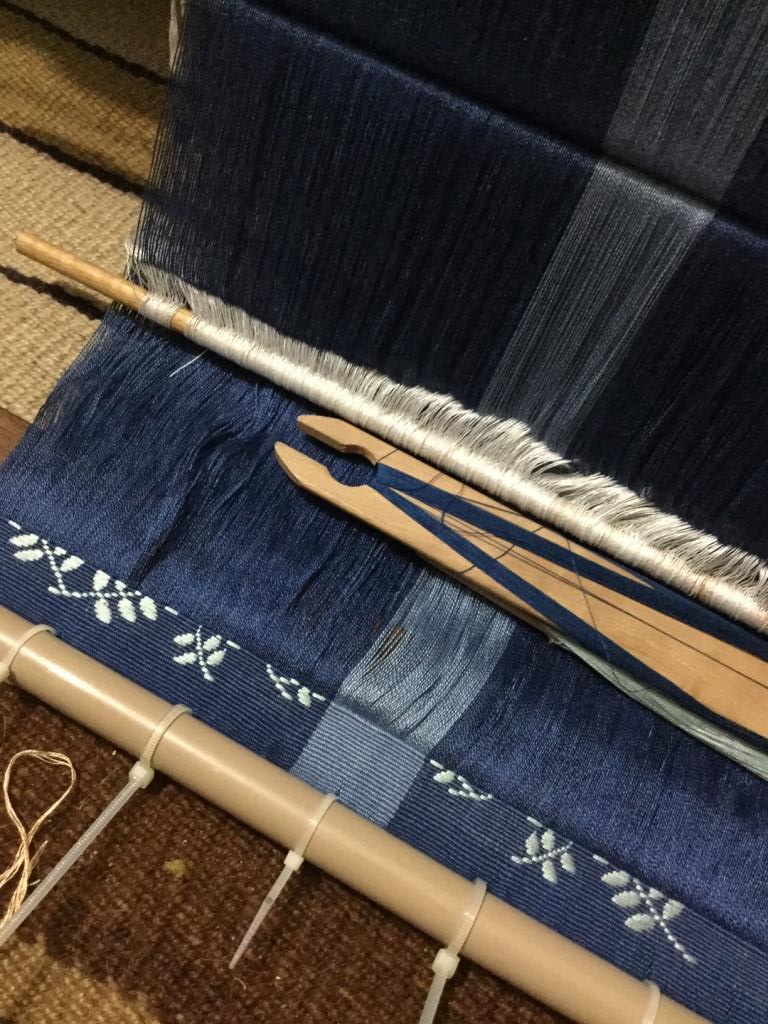
The warp is seventeen inches wide and quite short….just enough to make a draw-string cylindrical bag. I had a choice of making it long and narrow or wide and short. Long and narrow would have been much faster to weave….the horizontal strips of complementary-weft patterning that you see (the light blue and teal strips) are painfully slow to weave across seventeen inches! The complementary-warp sections (the darkest blue parts) zoom by in comparison.

Warp of 1192 ends of cotton with two sets of heddles for the structure that I call Andean Pebble Weave. I later added a third set of heddles to hold groups of warp threads for the weft-faced sections.

I was at first cursing my decision to go wide, but now that the project is underway, I am pleased with the way it looks, and have found that the small sample I had woven actually has given me enough information (I’d had my doubts), I have forgotten about the slowness and am thoroughly enjoying the process.

The warp is much longer than needed but it’s more comfortable to weave with this extra length and besides, I am hoping that I can squeeze in enough to perhaps produce an additional piece of fabric large enough to be the base of the bag.

I fiddled about for quite some time before getting this on the loom because I had to dye various shades of blue for the complementary-weft sections. I haven’t been very adventurous with that. I could use any color I want but am playing it safe in this project with shades of blue. Maybe I will get a little crazier in the next one.

My recent house and cat-sitting experience may have influenced my color choices. The band on the right is one that I was using as a sample during that time. I liked the colors in the bedding and then there’s kitty’s blue eyes. The gold would have been a nice “pop” color but I decided against it in the end. I can see something in that green, gold, and blue some day, though.

So, this is pretty much where it stands right now. I am weaving the figures upside down because the selvedge that I created at the start is going to be at the mouth of the bag.

This is my view while seated at the loom…

The colors are not showing up very well here. The last strip of complementary weft (mountains and forest!) actually has bands of three different shades of blue. You can see the third set of heddles that I installed for the weft-faced sections.

And now I have decided to weave some words into the last strip of complementary-weft….”spinning cotton” and “hilando algodon”. Lettering is not something that I have been interested in doing in the structure that I call Andean Pebble Weave. Warp-faced double weave gives me much more freedom to design interesting letters. The supplementary-warp structure that my Montagnard weaving teachers showed me (tutorial here) allows very bold lettering (with the disadvantage of sometimes resulting in quite long floats on the back of the piece). That style has its place but sometimes can be a little bit too “loud” for my liking. The intermesh structure allows me to use most of the tablet-weaving charts that Linda Hendrickson created.

Lettering in intermesh. Feathering on the edges of some of the diagonals can be distracting when heavier thread is used.

.

Lettering in weft twining (using two of Linda Hendrickson’s charts). The fact that there aren’t any floats gave me a lot of freedom when I moved on to designing my own letters in this structure.
The style of lettering using supplementary warp threads that my Montagnard weaving teachers use. Some of the white floats on the back can be long, for example, between the longer vertical of the G and the first vertical of the following N.
Warp-faced double weave gives me a lot of freedom for both simple and complex letter design….no floats!
I designed cursive lettering in supplementary weft. There are some very minor limitations because you have to consider the length of the weft floats.

But lettering can also be done in the structure that I call Andean Pebble Weave in what I consider a fun and quite quirky style. Many years ago, my friend Ruth in Melbourne showed me lettering that she had been designing in this structure. She had woven a really cool name tag for herself. Alison Irwin in Canada has also done so and published a project with Andean Pebble Weave lettering in one of the recent issues of Little Looms (Winter 2022). I will be using those letters to weave the words along the bottom of my bag. These letters have personality! They aren’t large and blocky and overpowering. They sort of dance their way along the warp. I had liked them but hadn’t been drawn to using them when Ruth had first showed me her creations. After all, I had so many other ways at my disposal for designing letters. But now they seem just right for this project. I like that weaving them in complementary weft rather than complementary warp means that the words run across the width of the warp rather than along the length.

You’ll have to wait for my next post to see these fun letters, that is, if I stay with this idea about adding words. The fact that this is not a repetitive or symmetric pattern will make progress very slow. I am, however, very curious to see how the letters look in complementary-weft and will most likely stick it out. (If you’d like a sneak preview of this style of lettering, go take a look at the Winter 2022 issue of Little Looms. You’ll see Alison’s project on the cover).

See you next time (maybe from Australia!…first time back in four years).

Backstrap Weaving – Proud!

I have woven a lot of things that have made me very happy but my latest piece is something of which I am particularly proud. That might sound a little obnoxious…but I can’t help it. The little cross-body purse that I just hand-sewed has me grinning from ear to ear. I guess it’s because I remember my school days when I was convinced that I was a total klutz when it came to any kind of craft project. In the end I even stopped handing in the work all together and my report cards would say “No work presented”, “Assignment incomplete”, or “Disappointing result”. I remember having a friend’s mother take pity and rescue and do

the sewing part of an assignment for me. My mother was also convinced that she had no craft-related skills or talents and I guess I just assumed I would be the same.

One of the 60/2 silk ikat pieces that I wove last year.

Not that this latest project is any great feat of sewing. It holds together and looks like what I had in mind and that is enough to please me. There aren’t any zips or fancy pockets. I took sewing skills that I had learned in my recent shoulder bag project and got to apply and improve on them. I took the ikat skills that I had learned in all the silk projects that I had woven during the worst of the pandemic and applied them to cotton.

In my last post, I showed you my ikat warp on the loom, heddled up and ready to go.

Almost all heddled. There are 880 ends in total of 20/2 cotton.
A coil rod in place on one of my older cotton scarf warps.

I had been deciding n whether it would be worth inserting a coil rod. I did go ahead and use one. Next time I will insert the rod right at the far end of the loom and leave it there. This time I inserted it, as is my habit, within reach just beyond my shed rod which meant that I had to roll it along the warp each time I advanced the warp. The rod will pick up the tiniest looseness in tension in any particular thread, take it up, and sort of push it along and away to the far end of the warp where it remains trapped. This is all very well unless you are trying to keep your ikat threads strictly aligned. In this case, it is preferable to have any tension differences gradually even themselves out as you inch your way along the warp in such a way as not to be noticeable at all. Each time the coil rod pulled a thread out of alignment, I had to take hold of the thread and ease it back into place. Lesson learned.

It’s amazing how fast the weaving goes after all the wrapping and dyeing that had taken place before I could even get the warp on the loom. Of course, it is only a meter of cloth which was the amount I had calculated as being necessary for my purse. I did not have a pattern for the purse and made up something very simple that is not all that different from my shoulder bag shape, except for the absence of pleats.

Rapid progress on the loom. The coil rod, unfortunately, is out of shot.

All my weaving friends will understand the reluctance to take scissors to a piece of your hand woven cloth and so it won’t surprise you that I had to let this cloth just sit about for a few days. In the meantime, I had to scale down the paper pattern I had made for my shoulder bag.

The finished one meter of ikat cloth.

I sewed a dummy purse, minus flap, to see if the shape I had drawn worked. I felt that it did and was able to use that dummy piece as the drop-in lining. It’s chocolate brown and I guess I was influenced by these naturally-dyed quilting pieces from Threads of Life in Ubud, Bali when I came up with my combination of colors. I have also seen ikat work in Guatemala that combines natural indigo blues with chocolate brown.

Hand-spun, backstrap loom-woven cotton pieces from Threads of Life…swoon.

Sadly, I neglected to take in-progress shots of the sewing part of this project. I wove three bands, one of which became the sides and base of the purse. The other is the strap and the third is the tubular edging on the flap. I was pleased that the pattern on the flap lined up quite nicely with that on the body of the purse and I used a magnetic clasp for the flap.

Feeling proud…can you tell?
Finished cross-body ikat purse.

These are sloooow projects but I find the slow hand-sewing so very relaxing. I posted my cloth in an online weaving group and one member responded with something like….”That looks like so much work!” I was kind of surprised. That’s the kind of thing that non-weavers say when I do a demonstration of backstrap weaving at an event. I have always felt that weavers, on the other hand, just get it!

A benefit of slow projects like this is the value you get from a relatively small amount of yarn! It has certainly kept me out of trouble for a good while. It never fails to tickle me that the bits that you see below can be transformed into a patterned purse.

20/2 mercerized cotton thread, dye for cotton, and ikat tape.

Next up…an attempt to make a small zippered coin purse in warp-faced fabric as a way to test my hand-spun Sea Island cotton. My teachers in coastal Ecuador used hand-spun cotton singles doubled rather than plied, and not sized, for their warp-faced weaving. My singles have stood up well to a balanced structure in an early test sample. Warp-faced will be a different story all together with all that added abrasion. Why am I using singles? I guess it’s only because I want the thread to be that fine. I may be completely misguided in this but we shall see what comes out of this next small experiment. I don’t think I will be wasting too much thread while learning these lessons. If my single thread stands up to the abrasion it just might be because I have put in too much twist and perhaps robbed it of its rustic hand-spun qualities. There are so many lessons to learn!

Mariana weaving warp-faced fabric for a double-pocket saddle bag using doubled hand-spun cotton singles, coastal Ecuador.

In my next post, I’ll have photos and information that my online weaving friend Christina has shared with me on her experience studying with ikat weavers in Mexico in 2019 as well as some images by another online friend who was in Ecuador interacting with ikat weavers in the 1970s. There might be a little something to report on my cotton coin purse project. I might even get to use my cochineal and alum.

And speaking of the red color of cochineal, here’s a teaser from next week’s post as the weavers in Mexico remove an ikat wrap to reveal one tiny part of the overall pattern…just in case you have seen enough blue for today! (Note that these weavers were using synthetic dye for their large production runs of 90-meter warps but use cochineal for their single unique backstrap-loom-woven pieces).

Photo courtesy of Christina Palafox.

Until next time…

Backstrap Weaving – The Story So Far

More books! Well, just one more for now. I still have a book that I had originally bought for my current book-cover obsession but which I had decided wasn’t quite the right size. I might just cover that one too. I already have a name in mind for it…Daily Mischief. I would like to do this one in Andean Pebble Weave. It’s not an ideal structure for lettering but my friend Ruth in Australia came up with some quirky fun lettering in it when she wove a name tag for herself. A quirky, fun style would suit the Daily Mischief title, I think.

My latest book cover is once again in 30/2 silk and, as I only have natural white, I had to measure out my needs for this project and dye it. I combined two blues that I have with a color called Quarry and I am delighted to say that this is one of those times when I can declare that I got exactly what I had wanted. I am wondering if maybe I am getting better at this!

Although I loved the color, this scraggily heap was rather dull and uninspiring. I had to keep reminding myself that this is soft, sleek silk. When wound back into balls for warping, it started showing once again its silky loveliness. It’s funny how when it is woven on the loom it somehow takes on a very matte cotton-like quality only to recover its sheen once again after having been wet-finished.

The sheen returns.

The color palette…

All the smaller balls are the 60/2 silk which might get used as supplementary weft to create the patterns. The skein on the left is more 30/2 silk for warp that I also dyed.

The warps for the last three book covers that I have woven in 30/2 silk have all had 904 ends and the warp is just short of 13 inches wide. I use Schacht warping stakes that are five inches inches long. I take a lot of care with tension when I am winding my warps for the backstrap loom. These ends aren’t going to cut and threaded through a rigid heddle or reed and then tied and re-tensioned. This means that I need to get it right as I am winding at the stakes. I always say that a beginner can be handed a well-wound and well-tensioned warp and then proceed to weave something decent. But even a very experienced weaver will have a very difficult time dealing with a poorly prepared warp. There are ways of dealing with a certain kinds of tension issues but it doesn’t make for fun weaving.

I love seeing a new wide, evenly-tensioned warp stretched out before me.

For that reason, I don’t like piling more then two inches worth of thread on my stakes in case they lean, even ever so slightly, and will always wind my wide warps in sections. The following pictures are some that I quickly snapped as I worked. First I chose and then laid out my sticks on the floor…cloth beam, warp beam and cross sticks.

Then I decided how many ends I would have in each section. In this case I had 80 in each in the dark blue areas. I wrote that out so that I could check it off as I went. I wound the first section on my stakes, replaced the stakes with safety strings, saved the cross and transfered it all to the sticks on the floor.

I leave the safety strings in place. Later when I am weaving, I only remove the ones at the cloth beam. The ones near the warp beam will make good counting strings when I need to lay in the first row of each of the pattern sections.

Adding more and more sections. If I lose track because I neglected to check off the numbers on my paper, I can always count the safety strings.

This is a very basic figure-eight warp in a single plane. Backstrap loom weavers in some regions add the heddles and often a coil rod as they wind the warp. It’s not my habit to do so even though I was taught this way on a circular warp by my Montagnard (Vietnamese hilltribe) teacher. (You can read more about that here).

Next comes the lashing. I have my own rather unconventional way of doing this. Most backstrap loom weavers will tightly lash a header cord to the cloth and warp beams all the way across the width of the warp. I prefer using a metal rod instead of a header cord.

Using a metal rod in place of a header cord and lashing it to the beam. On this narrow warp from many years ago I only needed two lashing points at the edges of the warp. I prefer using cable ties now.

I have collected rods in a multitude of girths and lengths over the years. My lashing is done with cable ties, usually five to seven depending on the width of the piece. I count the threads so that one is placed exactly in the center and further divide the warp into other sections with two or more…again counting so that the cable ties are placed in exactly the right spots. Two more cable ties are placed at the two edges. Being precise in the placement of the cable ties really helps me when it comes to measuring and setting the width before the first shot of weft is thrown. I can calculate how wide the warp should be in each section that the cable ties divide and distribute the warp threads within those sections as evenly as possible.

Starting on the 452 string heddles.

Next, I set up a second cross so that I can use what I call the “twisty sticks”. These are two sticks that I grasp and twist to help me open the heddle shed. I explain how I set up and use these in my video class Operating a Backstrap Loom which you can stream or buy as a dvd at Taproot Video. You can also see me using them in one of the video clips in this blog post.

You can see the two rods that are bound with rubber bands on my warp in this picture. Those are my “twist sticks”. In the various regions around the world in which the backstrap loom is used, weavers use a variety of techniques to help them raise the heddled threads smoothly and create a clear shed. Using the twisty sticks just happens to be my current favorite way of doing this.

You can also see me using the twisty sticks on a silk warp in this video:

And finally, because I will be weaving this piece in warp-faced plain weave and want to avoid the corrugated look that plain-weave cloth can sometimes develop especially when the warp material is one which has little to no stretch, I insert a coil rod. The coil rod locks the two layers of warp threads together so that they can’t see-saw back and forth as I operate the loom. Many weavers achieve the same thing by weaving an inch or so first at the far end of the loom before turning the loom around and starting at the cloth beam. That also locks the two layers of threads together. In fact, that was the way I was taught to do it by my several of my indigenous teachers but I have since become a big fan of the coil rod. For me, it has other benefits in addition to the one I mention here.

Dar Ku from Myanmar allowed me to spend some time with her as she wove at her backstrap loom You can see the coil rod in her warp, the rod that is furthest to the left.

After measuring and pushing threads around and measuring and repeating, I finally feel that the sett is just right and that I can start weaving. Of course, there was time spent drawing patterns onto charting paper. That was something that I was doing while waiting for the dyed thread to dry. I had decided that this would be a Traveler’s Diary (yes, I settled on the single ‘l’ spelling) and charted out lines of verse that I thought would suit the theme as well as picked the best hummingbird figure to go with them.

The first lines of writing appear.

I really like the way the light blue supplementary weft looks on the light blue spine color and am thinking about perhaps weaving an entire piece that way in which there is only a subtle difference in color between the warp and patterning weft…even more subtle than what you see here. It will depend on how clever I can be at the dye pot. My dyeing is still all a bit “mess or success” at the moment.

The second line of verse and the hummingbird leaving us for its long journey of migration. I have been seeing articles recently on hummingbirds in some parts of the U.S that have actually started to change their habits and winter over.

Bye-bye hummingbirds. You can see the two swords I use to prop open sheds and beat. My current favorite pick-up stick from Guatemala is also there. The little tool with the handle is from Ecuador and also used to beat. I use it when I feel that I need a little extra “oomph” and use it to press the weft into place while inching my way across the warp. I use it in much the same way as highland weavers here use the llama bone tool. My llama bone tools are too harsh for this silk.

It’s still on the loom as I write. It will be cut off, washed and placed on the book cover. I will most likely need to weave narrow strips as I have with the other covers to compensate for lost width during the wet-finishing process. I don’t feel that I can precisely account for shrinkage in the number of warp-ends to ensure a perfect fit. Adding the narrow strips to the other books has actually provided quite a lovely finishing touch. You can see three that were added to the Weaver’s Journal. A fourth was also added to the edge of the back cover.

So that’s the story of the books so far…to be continued. I actually remembered to take a picture of myself at the loom as I approached the end of this one so that I can wish you all a very happy, safe and peaceful transition into the new year.