Backstrap Weaving – Color Challenges

I have finished another ikat project/experiment. This one will be a wall hanging for, most likely, some future home as there isn’t a good space to hang it here. As with most of my weaving projects, I didn’t start out wanting to weave a wall hanging. I simply wanted to continue my experiments in ikat. The experiment was largely successful and so I now get to give the product a name….in this case, a wall hanging.

My goals for this one were to…

…try tying patterns into 60/2 silk. I hadn’t used 60/2 silk for ikat before.

…place one layer of warp threads on top of the other, so that the warp was half its original intended width, and tie the pattern onto both layers at once.

…dye with multiple colors.

…include patterns woven with supplementary weft.

…weave a band along the end of the piece using the fringe of the finished piece as the weft.

The dyeing itself was successful in that there weren’t any leaks or other mishaps. However, none of colors turned out the way I had expected! The first green was way brighter than expected. I thought that it would turn out a lot “dirtier” because I wasn’t dyeing over white. I had hoped that it would look like the typical “swampy” greens that one gets from using plants. Later, I remembered having received some good advice about these particular dyes when I was buying them. I was told that the colors were bright and that it was a good idea to add a tiny bit of slate-color dye to dull them a bit. I even bought a pot of the slate dye so I could do just that and then completely forgot to follow the advice. But, there were some things about the dyeing process that pleased me: as I was dyeing one color on top of another, then on top of yet another, I managed to create an unexpected reddish-brown that I loved. The thing is, I know I will never be able to replicate it!

I thought that I would end up with a black or almost-black background color after all the layering of colors. But, as you can see, it’s a very dark green with interesting shimmers of reddish-brown and teal that appear when light hits it a certain way.

This is a view looking down from my bed first thing in the morning. The warp in this picture has been set up for weaving on a backstrap loom with heddles in place and some weaving started. My bed base is the anchor point for the far end of my loom. I have to be careful if I get up in the darkness not to stumble and get myself entangled in warp!

As weaving progressed and the warp threads jiggled about with the movement of opening and closing sheds, they began to loosen their grip on each other and fan out. The ikat patterns slowly took on a more solid appearance. At this point, I paused to choose a color in my stash of 120/2 silk so that I could weave some motifs into the broad band of reddish-brown. I had a kind of wheat color that I thought would be a good match. Out came the charting paper and I drew a pattern with hooks and arrow-head shapes that would go well with the main ikat pattern. You can also see a thin horizontal stripe of teal lying on top of the one of the wooden rods which I had decided that I hated! So, I designed another fairly solid pattern for continuous supplementary weft to weave over and hopefully conceal it.

Discontinuous and continuous supplementary weft patterns.

This discontinuous pattern was fun to weave. I love this technique where two strands of patterning weft are passed at once. My little cardboard bobbins kept everything orderly. In the lower left part of  the picture with the bobbins, you can just make out the one and only warp thread that broke. I had nicked and weakened it with the tip of my scissors when I was cutting out the ikat tape. It didn’t take long for it to break once I started weaving. Replacing a section of broken thread that has been dyed multiple colors along its length can be a problem. I had some green 60/2 silk that wasn’t a bad match for the dark green but some of it had to creep into the brown section where the warp thread had torn.

The second continuous supplementary-weft pattern that I had designed to cover the teal stripe wasn’t so much fun to weave…at least not to get started. There were 882 warp ends to count in the shed to lay in the first shot of supplementary weft and I had to count it six times before I got it right! I kept ending up with one extra thread. Was I miscounting or had I actually wound 1766 ends of 60/2 silk instead of 1764? It was maddening! Conclusion…I was miscounting. Once the first row was in, it was pretty smooth sailing. I think the pattern does a pretty good job of hiding the stripe.

The threads in the main ikat section behaved pretty well. There wasn’t a great deal of shift except for the very center. I think that had something to do with the way I had lashed the warp to the frame for tying the ikat tape. It has the typical out-of-focus look of ikat.

After that, I had to go through laying in the pattern again for the strip of supplementary weft over the second teal stripe. It was slightly less painful the second time around. And how is this for crazy? I got about 20 rows in on the set of supplementary-weft motifs on the second brown section before I realized I was weaving the wrong pattern! I had designed two patterns. The first had been too fine for this weight of silk but worth keeping for perhaps another project in heavier thread. That was the chart I had grabbed. Grrr! Un-weaving this silk is no fun at all. There is a surprising amount of fluff build-up that binds the threads and means that the sheds don’t want to pop open cleanly to release the weft that you need to remove.. I literally had to tear the threads apart.And here it is finished and still on the loom. I tried to squeeze as much dark green out of it as I could at the end but warp tension was starting to get a bit wonky at that point and it was time to stop.

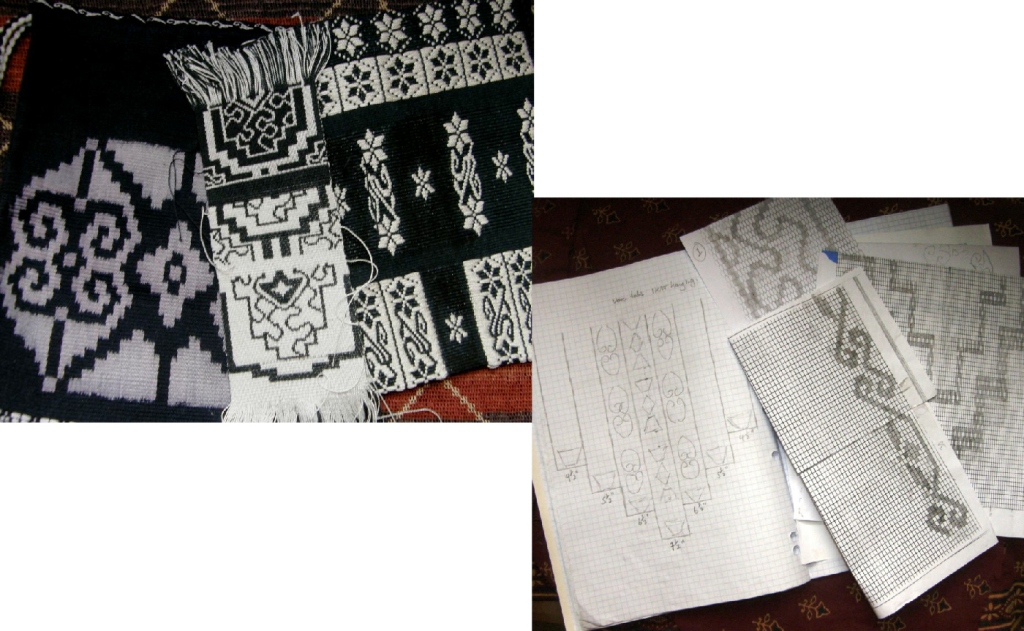
Once off the loom and after the usual finishing process, I wove a band along the bottom edge of the fabric using groups of warp threads from the fringe as the weft. I designed a double-faced pebble weave pattern that would suit the motifs on the cloth….hooks, diamonds, arrow heads. The piece certainly did not need any more added pattern but weaving a band like this is something I have been wanting to try and this was a good opportunity.

I suppose I shouldn’t have used this piece for my first attempt at this technique but I am quite pleased with the result nevertheless. It takes a while to figure out the number of threads to include in each warp bundle and how hard to beat. If either one of those two factors is not quite right, the fabric will pucker. And mine did a little. My first motif is more elongated than the other two. This is the result of having to adjust my beat as I went along.

I had been admiring ikat fabric from Sumba and had noticed that the weavers there join two panels of ikat cloth together side by side and then weave a band along the two ends of the joined panels using the threads in the fringe as the weft. The vast majority of examples that I have seen so far have been warp-faced plain-weave bands with some warp stripes. It makes me wonder if the weavers recognize that there is already enough pattern in the cloth itself and that the bands, therefore, should be quite plain. This is where I got the idea to weave such a band…but I wanted pattern in mine!

One of the many gifts that Kay Faulkner left to the weaving world was a set of video clips that she had taken while traveling in Indonesia. This will show you the process of weaving one of these bands in Sumba if you are curious….

My Montagnard (Vietnamese hilltribe) weaving teachers taught me to create a twined finish on unwoven warp ends. Like the Sumba weavers, they also join panels together to make their clothing.  A pattern is then twined around the unwoven warp threads on the edge of the combined panels. You can see this at the two ends of a piece I made after studying with these teachers. The Montagnard kteh edging is twined and highly patterned while the Sumba edging is woven and is normally quite plain, as far as I have seen so far. Sometimes a Montagnard weaver will hand over her cloth to a kteh expert who will finish off her woven work with the twined patterns.  Here is a video (unfortunately shot by me in quite low light conditions) of one of my Montagnard teachers twining part of a row with two colors. You can appreciate that it is quite a slow process compared to weaving a band along the edge. I find the movements very calming and graceful. I like the smooth, solid colors this technique produces. The twined band has only one “good” face.

Some day, my latest ikat experiment will find its place on a wall.  This experiment is over, notes have been taken, and it’s time to start thinking about the next project.  I am thinking about using cochineal to dye my next ikat attempt. I have only ever used it to dye llama fiber so far. It will be interesting to see how it goes on silk. Perhaps I’ll make some dye samples this time before I go and dive into the deep end. In the meantime, the unexpected colors that I created in this latest piece have grown on me…good and earthy….as the colors I had expected to get fade from my memory.

And, I continue the challenge of removing all color from my hair.  Let me sneak in an update here of my color-free challenge…18 months in and probably only two more trims to go to be rid of all the old dyed hair!

Backstrap Weaving – Free Time

How did you all do surviving Black Friday and Cyber Monday? I didn’t buy anything but I have been doing my share of advertising for the fact that I published a new book of patterns last month and also the fact that all my publications in English are now available as spiral-bound books rather than just as PDFs. …a girl’s gotta make a living after all.

But, in this blog post today, I think it might be nice to take a step back, have some “free” time and also think about some free resources that I have made available on this blog over the years. They have been around for a long time but perhaps we all need to be reminded of them now and then.

The first free thing I would like to tell you about is my tutorial on a weft-twining technique that I used to finish the following project…

I recently made some Christmas tree ornaments using the metal ribbon crimps that I normally use to turn my woven bands into wrist cuffs. I found that they also make cute little hangers for bands to swing from the Christmas tree. These are’t for me. I don’t do Christmas with a tree and all that stuff. These will be gifts.

The ribbon crimps I used, (or ribbon clamps as they are sometimes called), are one-and-a-half inches long. They come in various sizes and metal colors. I used weft twining at the ends of the little band pieces to stop them from unraveling. The weft twining is a pretty and practical finishing technique. I have used weft twining on other projects in the past when I have wanted to prevent unraveling. Using it means that I don’t need to twist or braid fringe or sew a hem. Below, you can see the multiple rows of twining just before the fringe starts on the place mats that I wove.

In one of the weave-alongs that we ran on Ravelry, Julia used the technique to finish the bands that she made into key fobs. The technique that I used to finish my tree ornaments uses four strands of thread to twine two rows simultaneously. It is quick and easy and fun. I do it while the piece is still on the loom as I find it much easier to apply while the warp is under tension.

So, this is one of the free things on my blog about which I can remind you…my tutorial on basic weft twining. The tutorial has video clips which show simple twining with two strands and then the four-strand twining that I used for my ornaments. It also shows photos of other projects where I have twined little patterns and even words. The videos show how you can use strands of two colors to twine motifs.

I have been weaving three ornaments per twenty-inch warp. My backstrap loom allows me to work on short warps. Twenty inches gave me three pieces for ornaments while also giving me plenty of room in which to work comfortably. I designed a set of Christmas-themed patterns for the Complementary-warp Pattern Book that I published back in 2018. I used a few of those for my ornaments but then I decided that any pretty motif would look nice hanging from a tree. So, I used a hummingbird and a flower pattern that I also designed. I will be weaving more and will probably give a set of four in different colors to friends. Maybe I can add a couple of new ones each year.

Here’s a tip I can give you if you are planning on making some of these: I prefer to make the band slightly narrower than the ribbon crimp. That way, when I enclose the raw edge in the crimp, I don’t have to be concerned about the warp ends flaring and peeking out from the sides of the crimp. They can, however, be tamed and made to behave with a little glue before you apply the crimp, if you prefer.

As you can see, the complementary-warp structure (in this case Andean Pebble Weave) that I used produces bands with two structurally identical faces with colors reversed.

Olyweaver has been playing with simple warp floats, a technique she learned via the free tutorials on my blog. Her Schacht inkle loom is allowing her to weave a surprisingly wide band. I love the calm, cool colors she is using.

What I call the simple-warp-float structure, gives you pattern on one face of the band and a lot of texture. You can see how the green floats stand out above the flat background of green and purple plain-weave horizontal stripes. My free tutorial on this structure is here.

It’s a nice technique for those who feel they would like to go beyond the basics of plain weave and take some first steps in pick-up weaving.

From there, you can advance to a technique in which both colors are used to form floats and pattern at the same time. Olyweaver is only using the green threads in her warp to form the pattern. In my examples above I am only using one of the two available colors to create floats.

My free video shows you how to create a warp for a backstrap loom so that you can weave these kinds of pick-up patterns.

In the following beautiful piece woven by Tracy Hudson, in which she used her own hand spun yarn, both colors are used to form floats. In the center section, red floats form the motif while blue floats fill in the background. This was woven on a backstrap loom.

You may remember that I showed pictures of Tracy just starting this piece when I got together with her on a visit to the USA. It is exciting to see how it has progressed since then.

Tracy’s piece has patterns from Central Asian yurt bands as does the band that I showed in my last post made by Olyweaver…

The traditional yurt bands only show pattern on one of the two faces of the band. They use a technique that produces warp-floats in two colors on only one face and I have a few free tutorials on that technique on my blog. This is the same structure that I used to weave the place mats that I showed earlier on in this post. This structure is used in many regions around the world. My place mat pattern comes from textiles of the tropical lowlands of Peru.

Here is the free tutorial for the S pattern band that Esther wove below. This is a traditional yurt-band pattern.

In my Complementary-warp Pick-up book, I show how these same patterns can be woven with two identical faces.

You can browse all the topics of my free tutorials here. And, may I remind you that many of the items that I gathered on my RESOURCES page are also free downloads.

Let’s see what else has I have seen online and in my inbox…

I LOVE this cotton piece made by Nettina on her backstrap loom! It’s plain weave and gorgeous!

My favorite part is the way she finished the raw edges of the cloth. I showed you earlier in this post how you can use weft twining as a pretty finish alongside fringe. Nettina didn’t want fringe on her piece and carefully covered the raw edges with coil stitches. This looks fabulous.

She has carefully spaced her coils so that colors can match up perfectly with the arrangement of colors in her woven cloth…beautiful!

If you would like to learn the coil stitch and other decorative finishes, I teach them in my book The Eye-pattern Tubular Band and Other Decorative Finishing Techniques which you can buy as a spiral-bound book or PDF at Taproot Video. I use step-by-step photos, drawings and video clips in my instructions. Both the PDF and print book  allow you access to the instructional video clips.

Here you can see the little “pocket bag” I wove and later decorated with the decorative coil stitch. You can make the coils as a colorful contrast to the piece as I have done or have them blend in perfectly as Nettina has done.

Wendy made a hat band using a cute viscacha motif as well as one that she designed herself in Andean Pebble Weave…

And, while not weaving Christmas tree ornaments, I have been working on my latest ikat piece. Here it is on the frame while I was tying in the pattern with pink plastic ikat tape…

I dyed it using Jacquard brand acid dye in a color they call teal. The dye behaved strangely. When I have used this dye in the past, the color has been almost completely exhausted by the end of the process. The water is almost clear and I have to do very little rinsing. This time the water was very blue and I had to rinse a lot before the silk thread would stop releasing blue color. It seems to me that the blue part of this dye mixture simply did not take anywhere near as well as the other components. I ended up with a green that I am guessing is missing much of the blue tone that one would normally expect from teal.

I decided I liked it. It’s funny that I had very recently downloaded a photo that my friend in India had shared of herself with a friend.  I had fallen in love with the green sari her friend was wearing and the rich colors of its pattern. My warp ended up being a green color that reminded me of the sari and gave me the idea to use earthy colors for patterning.

The aim for this ikat project is to include patterning with supplementary weft, not only bordering the ikat section but also within it. I have to stop looking at that sari because my piece is not going to be anywhere near as pretty! 

I started with a row of supplementary weft motifs in various colors. The warp is 30/2 silk and I am using several strands of 60/2 and 120/2 silk as the supplementary weft. My friend Betty has textiles from Bhutan hanging on the wall of her weaving studio and I used a motif from one of them that I had photographed while visiting. When I get to the ikat section I will use that same motif s and add another to fit the blank spaces that I left between the lines of ikat pattern.

In these pictures the cloth is showing much more of a blue tone than it does in reality. After the first row of pattern, I scattered a few more motifs to fill the space before the start of the ikat section. Then I had to start cutting off some of the ikat tape in order to be able to advance the warp. I leave the tape on for as long as I can manage as I believe that it leaving it in place helps to stop the warp threads from shifting too much. 

So, I have this on my backstrap loom on which to continue. Every now and then I take a break and work on Christmas ornaments. 

December is the month in which I decided I need to go back to working on my next book. Let’s see if I can stick to the plan! A balanced-weave ikat project is calling to me….I need to work out a schedule where I can do both. I could happily weave all day every day, but as I said earlier, a living needs to be made too!

In my next post I hope to show you what I have learned from attempting to tie and dye weft for ikat.


Backstrap Weaving – Two out of Three Ain’t Bad

Here’s enough inspiration for this year. In fact, it might be enough for the rest of my life! I fell in love with this picture that recently showed up on Facebook…

From Afrostyle magazine and designer Tarun Tahilian
From AfroStyle Magazine and designer Tarun Tahilian.

c0abc54341cdd9965f8eb5c2b37b26dfThis was shared from the page of AfroStyle Magazine.

Just when I am into weaving and wearing wrist cuffs, along comes this image of forearms covered with them. And, I have always thought that a turban would be the perfect solution to that awkward transition period from dark brown to grey hair. Not just your conventional turban, but multiple layered silks!

And imagine multiple silk ribbon necklaces around the model’s neck. Gorgeous!

Do a Google Image search for designer Tarun Tahilian and be prepared to melt. I can’t believe my clothes-challenged self is so taken with this.

I chose just one of this designer’s pieces to show as I have been working on a 60/2 silk piece that is in a similar teal-y tone.

Here it is on the loom and in a place in my bedroom that doesn’t really favor photography. It looks away too blue.I simply could not get the camera to capture the green tones of the thread…

silk on silk supplementary weft motifsOnce the weaving had advanced so far that it was uncomfortable to reach forward and operate the sheds, I needed to roll up the fabric around the front beam. That was when I really had to do something about the lack of long enough sticks for this project. I was already lacking a suitable back beam and now, a roll-up stick. I looked up on the terrace where people who move out of their apartments frequently dump unwanted brooms and mops. I have cut down many of them for loom pieces. The search didn’t turn up anything and so I headed to the market. It’s all of a block and a half from my place to one of the biggest and most chaotic street markets in this city with its interesting sights, sounds and aromas.

broom stall la ramadaI am showing this picture of the broom stall that I visited on New Year’s Eve with a table of underwear in the background so I can tell you about a New Year tradition.

It is traditional to sell red and yellow underwear at this time of year as wearing red underwear to bring in the new year will attract love to your life. Wearing yellow will bring you money. The markets are full of this in the days leading up to January 1st.

There’s wood under the spotted plastic coating on the broom stick. Unfortunately, the melted plastic seam was very rough and would have shredded my silk and so I had to spend quite a lot of time picking it off and then sanding the gnarly wood underneath. Of course, a couple of days later when I was out and about, I ran into a stall selling bare wooden broom sticks that were wonderfully smooth. I bought two of these perfect ones…two out of three ain’t bad. They cost 80 cents each!

Someone on Ravelry posed a question to the weaving group  about changes in our loom inventories at the end of 2015. With my new extra long sticks, I guess you could say that I added a new loom to mine. A front beam, back beam and roll-up stick for under $4.

My collection of sticks and swords and shuttles has out-grown my bedroom and now lives in the living room. It may not be obvious, but there is some kind of order there.

new backstrap sticksAnd so, I was able to spread out the threads at the far end along the nice new long beam and roll up the cloth as I progressed. Once off the loom, I was able to pose the fabric in places with better lighting and I think this picture shows more accurately the true colors…

silk bandanna backstrap weaving

wearing silk bandanna backstrap weavingI am really pleased with it!

I am pleased and relieved that my small sample of 200 ends gave me reliable information for the 2000 ends that I eventually used. I was able to set the width and maintain it rather effortlessly for the entire project. I spent an entire morning trying to ensure that the threads were all evenly spaced before throwing the first shot of weft.

It is supposed to be a bandanna/neckerchief sort of thing but you may see me wrapping it about my head turban-style one of these days, if it is big enough.

You can see the cloth being worn and looking very blue again. The larger picture, above, shows it fresh off the loom before wet finishing.

I don’t think any picture will show you the exciting change after washing and pressing. You would have to feel it, but here’s a picture of it after washing anyway…

 Now I need to hem it.

One of my weaving goals for perhaps the last couple of years has been to go longer, wider and finer. I achieved two out of three with this project and it has been a great way to start the new year.

Maybe I will get a three out of three with the next project. Length has never been an issue. I have woven long warps stretched all the way across my room. I have rolled up unwoven warp onto the back beam when there hasn’t been room to stretch out the warp and I have also wound circular warps that have allowed me to halve the amount of space required in which to work.

I hope to go a bit longer than my standard lengths in the next project but the biggest challenge will be the sticky fine wool. I want to weave two panels that I will later join into one.  I have no product in mind for this piece. The project will be about learning how this wool handles in warp-faced weaving on a backstrap loom. If it works well, I will have something nice to put on a table and perhaps all the information I need to go on and make a poncho.

I spent some time watching dvds and listening to music while I rolled the yarn into balls. I had bought lots of it! Then I was ready to wind a sample warp. Hopefully this will give me an idea of the width I will achieve with a certain number of ends in both plain weave and Andean Pebble Weave.

wool sample backstrap weavingI chose a pattern with which I am very familiar as I really wanted to focus my efforts on handling the wool and not on the pick-up. I do have concerns about this yarn breaking over the course of a long piece. It wasn’t taking too well to being constantly rubbed against itself. But, what the heck…I think I will just dive in and try the larger project that I have in mind. You might have to remind me of this ”what the heck” attitude in the next few weeks when I start whining about all the broken warp threads that I have had to fix!

Below, you can see the two faces of the band. The width wandered about a bit before settling. Now to figure out colors.

wool sample both faces

Let me now show you what some online friends have been weaving and sewing…

marieke kranenburgMarieke Kranenburg set herself a sewing goal for the holidays and put together various inkle bands and fabric to create this fabulous pillow.

julia toft backstrapJulia T made a backstrap using the intermesh structure and her own pattern. She is pretty pleased to have this lovely cushy s trap now and to be able to leave aside the improvised pillow case backstrap she has been using. I teach the intermesh structure in my second book.

Lori has started making her own backstrap too using the Andean Pebble Weave structure. I wonder if Lily has been weaving at her side.

lori backstrap

annamieke ruijper apw

Annamieke's inkle loom with Andean Pebble Weave.
Annamieke’s inkle loom with an Andean Pebble Weave in progress.

And, Annamieke Ruijper has been using her inkle loom as a frame for tensioning her Andean Pebble Weave warp. She has woven a series of four-revolution patterns from my book and also included a couple of her own designs. I love that she already has the confidence to do that.

I do not give specific instructions in my book for setting up Andean Pebble Weave on an inkle loom using the loom’s own heddle system. My book shows how to wind a warp and dress it and then you are free to tension it any way you wish…using the frames of inkle, rigid heddle or tapestry looms, for example, or your own body at one end –  backstrap-style.

There are many possible ways to set this up on an inkle loom and this is just one suggestion. I have done it at least three ways, sometimes using the inkle loom’s heddle system, and sometimes not.

sophie regnySophie Regny wove this Andean Pebble Weave piece using a pattern in my second book. When I was putting that book together, I started seeing potential Andean pebble Weave patterns everywhere. I created this design from the pattern on the inside cover of a journal that I had been given. It’s lovely to see someone using the pattern and Sophie’s work is crisp and neat.

Marianne Planting  tensions her  Andean Pebble Weave bands using a backstrap set-up and a band locking device. Below, you can see her work in progress where she is using one of the patterns I adapted from the tablet weaving of Louise Ström in my second book.

marianne planting 1Here’s a gorgeous colorful band with a classic pattern of Chichero also made by Marianne…

marianne planting

Facebook reminded me today that five years ago I was working on the strap for my backstrap loom bag. I had decided to create the word ”weave” in various languages and fonts. I used a weft twining technique to do so. The strap didn’t need to be that long and so I only managed to fit five or six words on it of the many that Facebook and blog friends had given me. Today, when I shared the Facebook Memory, I received some more. I think I need to come up with another project in which I can use all the words I have been given from weaving friends around the world.

twined words for weaveHere are the ones I was given five years ago. Maybe you have a word to add for me. And, with that, I will leave you until next week…

weave-translations


Backstrap Weaving – Plain Tales

There are many things to remind me that I am no longer in the US and am back in the tropics…that we are heading into summer while the northern hemisphere rolls into winter. There’s this picture that was taken by an online weaving friend in Vermont today….


Picture by Susan Anderson

I keep scrolling back to gaze at it as I write my post in the heat. I lived 6 years in ski resorts and can sense the strange way that sound gets muffled when snow has fallen as I look at this picture. I love its cool blueness.

I have been pulling my hair out all day because my internet connection has been particularly horrible…on and off every 30 seconds….while poor Susan in Vermont is without power in a snowstorm. I wonder how my Californian friends are doing with the massive rain storm that was predicted.

It’s been one of those weeks where I spent far more time online than at the loom. That is not such a bad thing. I got a lot done even if it was at a very slow speed. And, while emailing away and doing research, I ran across a very cool video.

embroidery of AyacuchoLast year, while visiting with my weaving friend, Dorothy, (the one who recently studied with Peruvian tapestry artist, Maximo Laura) I saw some of the textiles that she had collected on a previous visit to Peru.

One such piece was a pillow cover with some beautiful embroidery. Both Dorothy and I were curious about the embroidery stitch that was used to create the stems and filled-in areas. I posted pictures in a post following the visit and readers wrote to tell me of the origin of the piece…the province of Ayacucho.

I had been to the city of Ayacucho in 1996. That was shortly after the capture and imprisonment of the leader of the Shining Path movement which had used Ayacucho as the base for its terror activities. The city was a sad, depressed and desolate place at that time with few signs of activity and a mere handful of weavers still at their floor looms in the Santa Ana area. I hear that the city’s artisans have long been back at work producing all kinds of both traditional and contemporary handcrafts.

close up of Ayacucho embroideryMariana Venegas wrote to me immediately after I posted these pictures last year and sent me diagrams of  what she believed the stitch to be. She was right. But it was one of those things that I did not examine very closely, filed away and forgot about. Thank you so much, Mariana! Coming across the aformentioned video reminded me that I had wanted to learn how to do the stitch. In the video it has been named punto crespo.  In Bolivia, hair that is curly or frizzy is described as being crespo so, I guess I could safely say that it is the “curly stitch”.

Anyway, here is the video for anyone who is also curious. I would like to use this stitch in some way in my work.

Ayacucho is one of the places I would very much like to revisit as I see so much beautiful handwork coming from that area online. …not that I want to buy anything, photos will do…I am busy trying to find new homes for some of my things these days!

Here is a picture of some paintings done in Ayacucho from the Facebook page of Folt Bolt. I recommend going to Facebook and “liking” that page. The things that are posted there are a constant source of inspiration.

10801468_875090005865031_7243699615616830850_nHere is Folt Bolt’s description that accompanies the picture…

Sarhua is a village in Ayacucho, Peru. Tablas (boards made from the stock of the century plant) are painted using natural pigments extracted from the earth around the village and also from the leaves/flowers and roots of plants. Each member of the family must be reflected in the tablas, performing their every day work or enjoying a special day or festival. A tradition is gift-giving of a tabla to a friend or family member building a new home. These are usually 6 – 8 inches wide and up to 10 feet long and are attached along a ceiling beam on the second floor for good luck and protection.

???????????????????????????????I do remember these marvelous ceramic churches in Ayacucho. Not only were  miniature versions offered for sale in some of the stores in the city, but large ones sat on the rooftops of many of the houses in the surrounding suburbs. The examples, above, are part of Gay’s collection of textiles and folk art that I saw in her home in San Diego on my recent fall trip. Gay, by the way, is very keen to sell most of the items in the collection and would welcome any enquiries. Just leave me a message here on my blog.

As for the title of this post, Plain Tales,…that is what I have decided to call my second series of three red-black-and-white wall hangings. Why “plain”? Because they are all based on warp-faced plain weave….. a black warp-faced plain-weave panel patterned with white supplemental weft, two bonded layers of warp-faced plain weave, or double weave, and warp ikat, a tie-dyed warp woven in plain weave.

Each has a tale to tell but not only about what was involved in creating it.

??????????????????????Each has a story of the encounters and experiences I have had here in South America, and beyond, learning to weave on simple looms.

From the time spent at a raucous highland festival in the town of Calcha where I first spotted the women’s tiny floral hat bands amongst the dancing and celebration, to my first encounter with ikat in the form of my weaving teacher’s martital bedspread. The tied pattern included her name and her husband’s.

The Shipibo-inspired piece reminds me of the three weeks I spent on my knees doubled over at the horizontal ground loom learning double weave with my teacher laughingly telling me q’ella! (lazy!) and jokingly threatening to slap me when I didn’t beat hard enough!

As I sit twining, I am taken back to afternoons spent with my Montagnard teacher, listening to her stories about her overpowering desire as a child to learn to twine, abandoning her chores and risking her mother’s anger to run off secretly to another village to sit and study with her sister-in-law.

3 plain tales backstrap weavingAll three Plain Tales are off the loom now but not finished. There will be a great deal of tv time spent braiding and twisting fringe.

I re-did the red panels on the first of the three pieces to be completed and had, therefore, to re-do the weft twining that connects the them to the central black-and-white one. Each row of weft twining took 40 minutes! Now all the red panels match in structure and color.

weft twining on forst plain tales hangingIt has been so exciting to see this blank slate….

warp fr doube weave wall hanging

…turn into this…

shipibo inspired wall hanging plain talesAnd to see these experiments….

ikat experimentsbecome this….

ikat and brocade on backstrap loomI keep the woven samples, tests and trials and notes. Some of the samples can be fashioned into something useful, others not…

samples and notesAfter completing the relatively chaotic black-and-white center panels for each hanging it was always been soothing to then be able to sit at the loom and turn out plain red cloth with simple warp-float motifs. These quiet red panels flank the black-and white ones.

red on red panels on backstrap loomWhat’s next?…more ikat!  I am in the process of figuring out a new frame so that I can sit in a more comfortable positon while doing all the tying. I have a new idea for the ikat which will need sampling and I am pretty excited about it as I really don’t know what to expect. I brought back LOTS of black dye from the US this time so there will be lots of room for error and adjustment in the sampling.

I will leave you with a fun original design by David. He wove some star patterns using the Andean Pebble Weave structure based on Guaraní designs that I charted in my second book. Then he went on to use the tutorials on designing to create his own cat motifs. They are adorable!

dave


Backstrap Weaving – Simply Red (and Black and White)!

These are the best light conditions I could find for photographing the red-on-red pattern on the two side panels of my wall hanging.

The late, low, winter sun was drifting in through my bedroom window and I looked up from my weft twining to discover how well the light and shadow brought out the relief pattern. I have posed these pieces all over the place…on the floor, on the table, in this room and that…used natural light and flash, held the camera in my hand, and used a tripod, and was not happy with any of the results. All I got was a flat red mass.

And then, there I was, happily seated with my backstrap in place and the warp stretched out before me. The light came to me through the window and gave me the shot at last.

sunlight on red panels backstrap weavingIt was great after all this time to be able to see how the red panels looked beside the center one. The tricky part was lining the three panels up precisely and have them suspended under the same amount of tension so that I could twine across the top of all three at the same time.

I still can’t decide which face of the double weave looks better…

back of double weave panelI used the solid stepped lines and the arrow motif as part of the weft-twined pattern in much the same way as I had in the red panels…

finished weft twining on backstrap loomI need to do a bit more solid black twining to finish. That will be the part that gets clamped within the wooden hanger. Once off the loom, I will decide how to finish the ends of the twined wefts and how I will cut the fringe around those long woven tabs at the other end (see below).I need to contemplate that for a while. Once cut, that will be that, and I want to get it right!

finishing the shipibo backstrap pieceSo, it is time to move on to the next project….a clean slate and a bunch of sticks…exciting!

I bought a large cone of UKI 20/2 cotton for the next project with which I have never woven before. That means it is time to sample the yarn while I play with ideas for the ikat  in the next wall hanging. I’ve been at the sketch book creating hooky designs. Whether I am creating a design that is way beyond my limited wrapping skills, remains to be seen.

First, I need to get an idea of what kind of width I can get with X number of ends in the 20/2 cotton and so I wound a short-ish warp as a sample.

To make it more interesting, I decided that I could play a bit with the silk that I recently bought at CNCH and try a new-to-me supplementary-weft technique that is used for decorating hair sashes from Jacaltenango in Guatemala. Dr Carol Ventura has written a book about the Jacaltenango hair sashes. I have owned this book for years and once dabbled with the technique many, many years ago. As is always the case when using supplemental weft, the success of the project is very much dependent on finding the right kind of material for the supplemental weft for the weight of the ground cloth. While I understood the technique, my sample was downright ugly because my supplemental weft was too “light” for the ground cloth and there were large gaps between the rows of pattern. Then, I got distracted and wandered off in another direction.

I don’t even know where that sample is now. It was obviously not worth keeping. However, seeing a Jacaltenango hair sash that one of my students brought to class in Seattle last spring re-ignited my desire to try this technique….

jacaltenango hair sashI have made mistakes in my new sample and my count is off. I will un-weave this and start again now that I have a better feel for handling and counting these fine warp threads.  Hopefully the next attempt will be better. In the meantime,  this 20/2 white sample will give me a good idea of how many ends I will need to wind for my next wall hanging panel. I like two-fers.

backstrap sample with new cottonAnd, do I feel confident about this next ikat project? No, not at all! My experience with ikat has been quite limited but I figure that I may as well just jump in there. I do know from my own experience that the wrapping and dyeing part, although painfully slow, is relatively easy. For me, the hardest part has been keeping the warps well enough aligned while weaving so that my motif remains recognizable. Yet, I don’t want them to be so rigidly aligned that I lose the feathery outlines that make ikat so charming. This is one of my tiny attempts…

three ikat motifsHere are some narrow strips of ikat that I placed in a piece that includes supplementary-weft patterns…

strips of ikat backstrap weavingAnd finally, this experiment involved dyeing and then removing some of the wraps to dye again for a second color.

ikat book coverWay back in 1998, my weaving teacher in Candelaria, Bolivia showed me the first piece of ikat I had ever been able to handle. It was a  bedspread on which she had been working on and off for several years. This was something she was weaving for herself rather than the usual pieces that she weaves for the store in the museum in Sucre.  She was weaving with rather coarse handspun wool and her name and her husband’s had been worked in amongst the flower motifs..

stitched-ikatI’ve examined the wrapped warps, the finished cloth, and watched the weavers at work in many different places in my travels in South and Central America, trying to capture the secret of limiting the amount of  movement of the warp threads and the resulting image distortion. Below are examples from Chile, Ecuador and Peru.

mapuche-ikat-2

ikat weaver Bulcay Ecuador

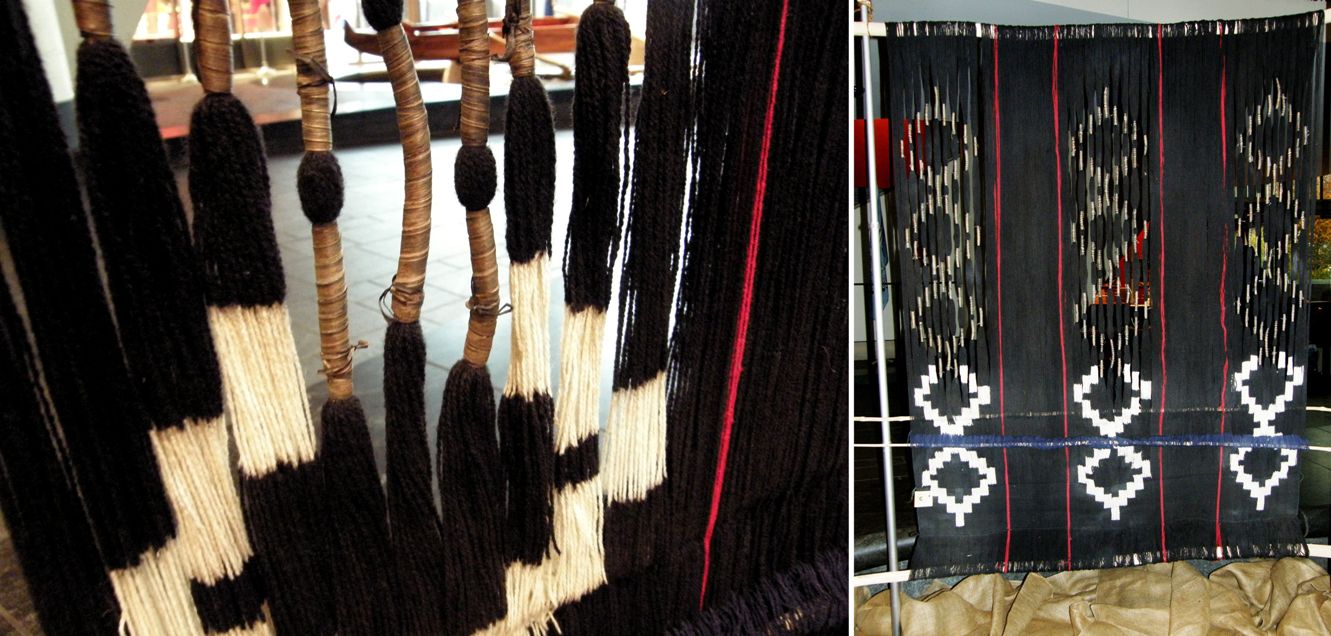
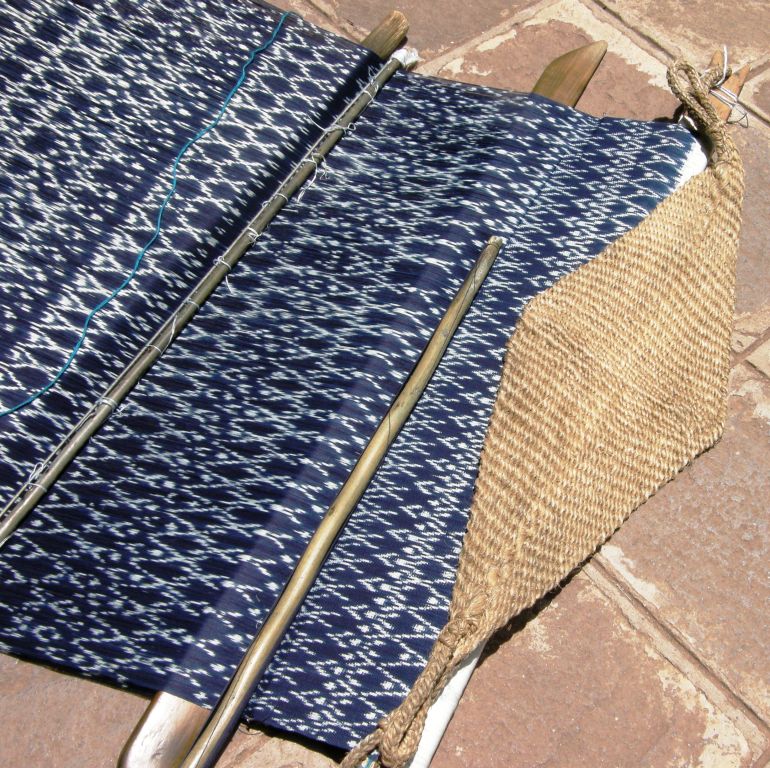
The simple backstrap loom of Tacabamba, Peru on which the indigo ikat-patterned "panones" are woven. They are up to one-meter wide, covered with tiny motifs and have patterns knotted into their fringes.
The simple backstrap loom of Tacabamba, Peru on which the indigo ikat-patterned “panones” are woven. They are up to one-meter wide, covered with tiny motifs and have patterns knotted into their fringes.

So, that is what I have been up to this last week….

Meanwhile, there has been a fair bit of red, black and white appearing online in the various places where band weavers hang out.

Cheryl wove with me last spring and now she is already designing her own motifs and weaving more than just samples.

cheryl (3)She designed the gecko figure and I love the arrow motifs at the bottom which remind me of little boomerangs. This will be a strap for her camera. I showed you some weeks ago the sample bands that she wove in preparation for this project. Here is the completed weaving…

cheryl finished camera strap pebble weave backsrapThe center motif is charted in my second book and is a pattern that I adapted from tablet-woven band by Louise Ström.

Ann Mester created this enticing warp for backstrap weaving which could be used for complementary-warp pick-up techniques like Andean Pebble Weave, or simple warp floats, or just to create attractive horizontal bars of black and white…

ann mester fb (2)Rufio, the kitten (who would look very stylish with a red collar) was rescued from Pet Rescue of Mercer.

Susan AndersonAnd, if you are wondering about what I call “simple warp floats, the technique that I used on the red-on-red panels, Susan Anderson’s example. above, very clearly shows the single-faced nature of this pick-up technique. Susan has floated the warp threads singly. For me, this gives a more delicate yet solid look to the motifs than that which is achieved by floating pairs. The pattern is from Anne Dixon’s The Weaver’s Inkle Pattern Directory. Susan wove this on an inkle loom and has done a beautiful job.

So, it will most likely be all about winding the warp and then finding a comfortable position and set-up for wrapping many many threads for ikat this coming week…

cropped-ikatThis was my first ever attempt, around eight years ago, I would guess. It’s wool warp…Navajo warp…wrapped with cassette tape. The wrapping and dyeing were successful…the weaving was not! This is another sample that has disappeared!…nothing to show for those hours of work except this picture and “experience”.  And I am sure that there will be much more experience to be gained and  many more lessons to be learned in this coming week.

See you next week…