Backstrap Weaving – Bonus Book News

Here’s some news for those of you who have bought either of my books on the eye-pattern tubular band or for those who might be considering buying it. What do we know so far? There are two versions of this book, a short version which is about weaving the eye-pattern tubular band as an independent band and the full version which also teaches how to weave the tube as a decorative edging. It’s a clever technique which allows you to weave and attach the band to the edge of cloth at the same time by using the weft as the sewing thread. The extended version also includes instructions for other decorative sewn finishes and is called The Eye-pattern Tubular Band and Other Decorative Finishing Techniques.

But you already know all that.

That isn’t the news.

Here’s the news…..While preparing material for a Zoom class on this topic, I decided to make a couple of additional video clips to enhance my Zoom teaching. I have now added them as Bonus Videos to the collection of clips that already accompany the books. You will be able to access these clips in the same way that you access the current collection. Instructions for doing so are in the books themselves in a section on Videos near the beginning. As you know, the video clips are accessible to those who have bought the PDF version as well as to those who bought the spiral-bound printed version. The original collection of videos were designed to supplement the dozens of step-by step photos and detailed explanations that are in the books. These two new videos will give you more supplemental material in that they give you a chance to see in action the steps that are laid out in the book, in step-by-step photos, for Sheds R1 and R2 .

I know that different people have different learning styles and I hope that I am able to cater to several of them in these books by providing step-by-step photos, detailed explanations, as well as video clips.. Some people like to see a process frozen into bite-sized steps in step-by-step photos. Others like to read detailed explanations and form visuals of their own. Many people like to have both kinds of instruction side-by side. And then there are others who like to hear the steps being described while watching them on video. Some people have told me that they hear my voice in their heads as they weave. Hopefully that’s a good thing! So, there are now two new opportunities to do just that.

Accessing the two bonus videos will be straightforward if you bought the books at Taproot Video. If you bought them some years ago from Patternfish which no longer exists, you will need to contact me via a comment on this blog post. I will see your comment behind the scenes and it won’t get published. EDITED TO ADD: The offer to share the videos for those who purchased from Patternfish ends on November 5, 2021.

I remember when I first learned to weave tubular bands as edgings….I wanted to edge everything I could get my hands on! I thought that the novelty might eventually wear off but it never has. It’s such a pretty finish to a project as well as being very practical. I doubt that my iPod pouch with the amount of use it gets would still be in such good shape if not for its protective edging. The tube actually encloses the edge of the fabric giving it strength and full protection. It could also be used to hide some questionable selvedges! I have edged bags and pouches in my woven cotton, silk and wool fabric. Here are just a few examples….

And, I was really happy to discover that some cotton fabric that I had bought, perhaps to one day use as lining, stood up really well to the tubular band. Until then, I had always thought that light commercial fabric, as opposed to the heavier warp-faced fabric that I am used to weaving, would not be able to support the spiraling energy of the tubular band. But I was wrong. By the time I had turned in the edges of the cloth to make a pouch, I was sewing onto four layers and they were more than able to support the pretty tubular edging. I love this little pouch with its cotton edging! The mouth of the pouch is decorated with the cross-knit looping stitch which I also teach in my book.

The eye-pattern tubular band was used to dress up a simple pouch made with commercial cotton fabric.

And, of course, there are a multitude of things to do with the tubes when woven as independent bands….cords to hold pendants, eye glasses and ID cards, fobs for keys, scissors and other tools, shoe laces, bracelets, draw strings…. They can be woven using a string in the warp ends which gets tied to your waste as my friend Marilyn is doing here. The other end of her warp is attached to a C clamp on a table.

Or the warp can be placed on a loom such as an inkle loom. Full instructions are given in the books to show how to set up and weave these on inkle looms. One of the many cool things about it is the fact that the warp does not require heddles. Once the warp threads are set-up and the cross is saved on two sticks, as you can see above and below, you are ready to weave. The book explains it all.

Weaving an eye-pattern tubular band on an inkle loom.
Independent tubular bands made into fobs.

I had a bit of fun recently using my own hand spun wool for the first time to create one of these lovely eye-pattern tubular bands. Many years ago, I wove some as edgings in my own hand spun llama and alpaca fiber but this is the first time that I have done so in wool.

A cuff I wove using my handspun llama fiber. It is edged with an eye-pattern tubular band in the same yarn.

I have set myself the task of fishing out every bit of random fleece from my closet and spinning it. It has been slow going as I only do it while I am on Zoom calls. At other times, I would really rather be weaving. But apart from this small indulgence, I have not allowed myself to use the spun and plied yarn. I want to first spin everything, decide which colors I will over-dye and only then plan a project. I did weave some of it right at the start of this project just to make sure that it was suitable for the kind of warp-faced fabric that I weave on my backstrap loom. A couple of wrist cuff projects told me that all was well except that I really wanted to go a bit finer. So that’s what I am doing now.

Of course, the cuff got an eye-pattern tubular edging.
Weaving and sewing a eye-pattern tubular band to a second cuff in my hand spun wool.

So, here is my eye-pattern tubular band in the finer hand spun wool that I have been recently preparing. I wanted to see how well these three colors played together….

I’ll finish this band and continue spinning while planning how I will use these and other colors in what will hopefully be a large-ish project on my backstrap loom. Then it will be time to get back into cotton spinning and another clean-out of the closet. I am still very much in the infancy stage of my cotton spinning.

Here’s an old photo that I recently unearthed from back in 2007 which was taken after I had returned from my second trip to Ecuador. I had had the opportunity to learn about the preparation and spinning of cotton for weaving from a family of weavers and spinners in coastal Ecuador. Here I am practicing the skills that they taught me. The distaff is a miniature version of the kind that they use. I built it while I was there with their help as the full-sized version would have been too difficult to bring back to Bolivia. Yes I know that you are probably distracted by my cat. It’s those eyes…she can burn holes in things with those eyes. She is now a grand old lady of 18 years of age. If I had only continued to practice, I would probably be a pretty decent cotton-spinner by now.

But I have wandered off topic now. This was really just meant to be a quick message about the two new BONUS videos. I hope those who own my books enjoy them and I hope that this post might encourage others to learn how to weave these patterned tubular bands.

Thank you so much for your support and see you next time (with more hummingbirds 🙂 )

A cotton pebble weave cuff with its tubular edging.

Backstrap Weaving – An Early Start on the Finish

I have two out of three panels for the wall hanging finished. That sounds like a lot but these two panels are just the “quiet companions” for the center black panel which will be heavy with supplementary-weft patterning. So, while it might sound like 66% of the work is done, it isn’t so. Still, it feels good to have this project well under way. I have even wound the warp for the center panel and now need to install 312 heddles and wind 624 ends around the coil rod….it’s worth it!

2 of 3 anels supplementary weft inlayThe black panel will have a lot of supplementary-weft inlay filling both positive and negative space. Then I would like to join the three panels across the top using weft twining and need to plan a design for that which will suit the woven patterns.

The Montagnard (Vietnamese hilltribe) backstrap weavers with whom I studied in the US use weft twining across the ends of the panels they sew together to make blankets. Two or three panels are sewn together once off the loom and then weft-twined patterns are added to one edge.

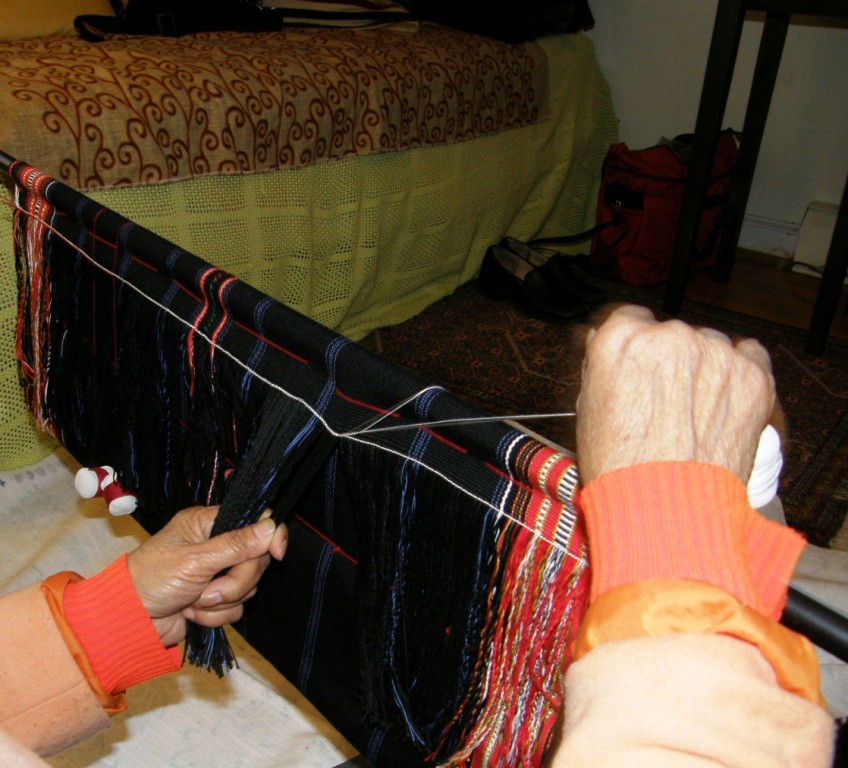
ngach twining set upAbove you can see my teacher Nagch working on a piece draped over a frame. The colored threads that she uses to encircle the hanging warp-ends are held on small cement bobbins that she made.

??????????????????????You can see how it is necessary to have the warps-ends under tension while the twining takes place. Nagch pulls the ends tight with one hand while twisting the bobbins with the other.

LEFT: Twining class with Nagch at Betsy's house. At right, Ju shows me how she gathers the warps in groups and sizes them before twining.
LEFT: Twining class with Nagch at Betsy’s house. At right, Ju shows me how she gathers the warps in groups and sizes them before twining.

Here are some the beautiful examples of twining on the edges of Montagnard skirts and blankets made by Nagch and Ju Nie…just the right colors for my project!

kteh designs

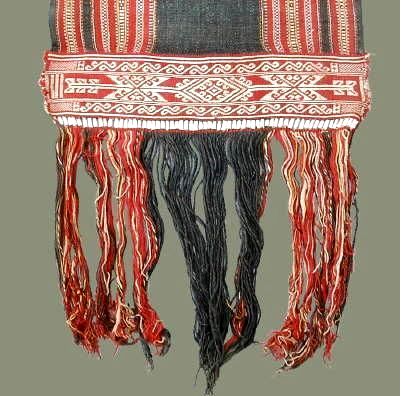
Twining on the bottom of a loin cloth. This image was shared with me by Susan Stem.

I have tried weft twining both on and off the loom and it is far easier for me to control while the pieces are still on the loom with the warp ends under tension. As my wall hanging is nowhere near as wide as the Montagnard blankets and skirts, I will be able to put the three panels on my backstrap loom side by side and twine all the way across them. That will be the only place that the three panels will be connected.

Then I will add some twining to the bottom of each individual panel. Again, it will be fun coming up with a design that works well with those on the panels.

I think they will need the weight of the twining at the bottom to help them hang well. I have always imagined that one of the possible reasons Montagnard weavers add twining and beads to the bottom of the loin cloths they weave is for the added weight. You wouldn’t want the flaps of those loin cloths blowing about in the breeze!

Anyway, that is what I envision for my wall hanging for the time being. Who knows how this plan will be modified along the way.

I have other ideas for perhaps edging the piece with a tubular band. So, I took some time off from the wall hanging project and brushed up on a tubular band structure that Marijke van Epen and I studied together when I visited her in the Netherlands last year. We had a picture from a book and were able after a couple of attempts  to figure it out.

As luck would have it, just ten days after I got home from that trip, I went to Peru and came across a weaver from Chahuaytire, in the Cusco region, weaving and sewing one of these very bands to the edges of a large piece of woven cloth. I saw how he had set up the warp and separated the threads into their various heddles and was able to buy a prepared warp from him.

tubular band of Chahuaytire

chahuaytire band three versionsIt was a long loooong warp!

It was designed to go all the way around one of the typical large carrying cloths.

Look at all that luscious handspun thread! The thread was colored with natural dyes and some of the shades of green were very similar. This means that the pattern is a little hard to discern.

The example that Marijke and I had been studying in Nilda Callañaupa’s first book had been done in very bright and distinct colors…six in all counting the border color.

I have made a few examples and have decided that I prefer a quieter version. The minimum number of colors could be as few as two.  That’s just as well as my wall hanging uses only three colors.

I have been sewing them along the edge of a wool band for practice. The one on the right is probably closest color-wise to the one in Nilda’s book. There is one fewer color in my wool version in the center.

Here is the three-color cotton version I made that I would prefer for my project:

three color version of chahuaytire bandHere is one from Chahuaytire that I photographed at the CTTC stall at the Santa Fe International Folk Art Market in July….those colors are so gorgeous!

???????????????????????????????Weft twined bottoms and tops and tubular edgings…it seems that I am more intent on thinking about the finishing touches for this project before I can even get started on the meaty part of it.

And, while on the same break…basically dithering around before getting into what I was really supposed to be doing, that is, winding the warp for the black panel….I decided to continue the three-color Andean Pebble weave sampler. It was coming out so well that I decided that I really needed to use it for something. I will probably sew it onto a woven piece of fabric. Too bad we won’t be able to appreciate the fact that it is reversible that way but it just so happens that all the mistakes are on the back! Never mind, there are some bigger and better projects yet to come using this structure!

???????????????????????????????The flower head motif is the center and I am now working my way backwards repeating the patterns. There you can see the hummingbird sipping from its flower.

Now, if only I were as talented with fabric and sewing needle as Julia….

julias sewing  with pebble weave(2)

julias sewing (1)Julia and Cindy, who are both in the Ravelry group and live on opposite sides of the US, got together at the Mannings to show and share their backstrap weaving work. Cindy lives in the northwest and has woven with me and Julia and I have gotten together a couple of times too. That’s Julia on the left and Cindy on the right.

Julia and Cindy at the ManningsThat’s an impressive display of their collective backstrap weaving work! I see some weft inlay work in there amongst the pebble weave and there must be a bunch of tubular bands there too.

Father Kyriakos in Australia sent me a picture of his Andean pebble weave work. He has both my books and is playing with color changes as well as working on using narrow patterns with reversals and reflections to create wider designs. I would say that he is a natural!

fr kyriakos pebble weaveWell, that’s enough thinking ahead about how my wall hanging will be finished.  It’s time to knuckle down and continue weaving it. I am off to dress up that black warp with its heddles and coil rod….see you next week.

Backstrap Weaving – Cutting Corners

CUTTING CORNERS

Guarani weaver, Angela's cell phone pouches.
Guarani weaver Angela’s cell phone pouches.

Amongst other things, I have decided to do a little tutorial this week on cutting backstrap woven fabric and covering the raw cut edge with a protective band.

This is my latest favorite way to create the flap on a bag and I was given the courage to try this when I saw some of the work of my GuaranÍ weaving teacher here in Santa Cruz.  She makes cell phone pouches with rounded flaps. I don’t know the steps that Angela takes to create these and so, have come up with my own. Possibly I am a bit over-cautious in my ways, but my system works for me and I am pleased with the results.

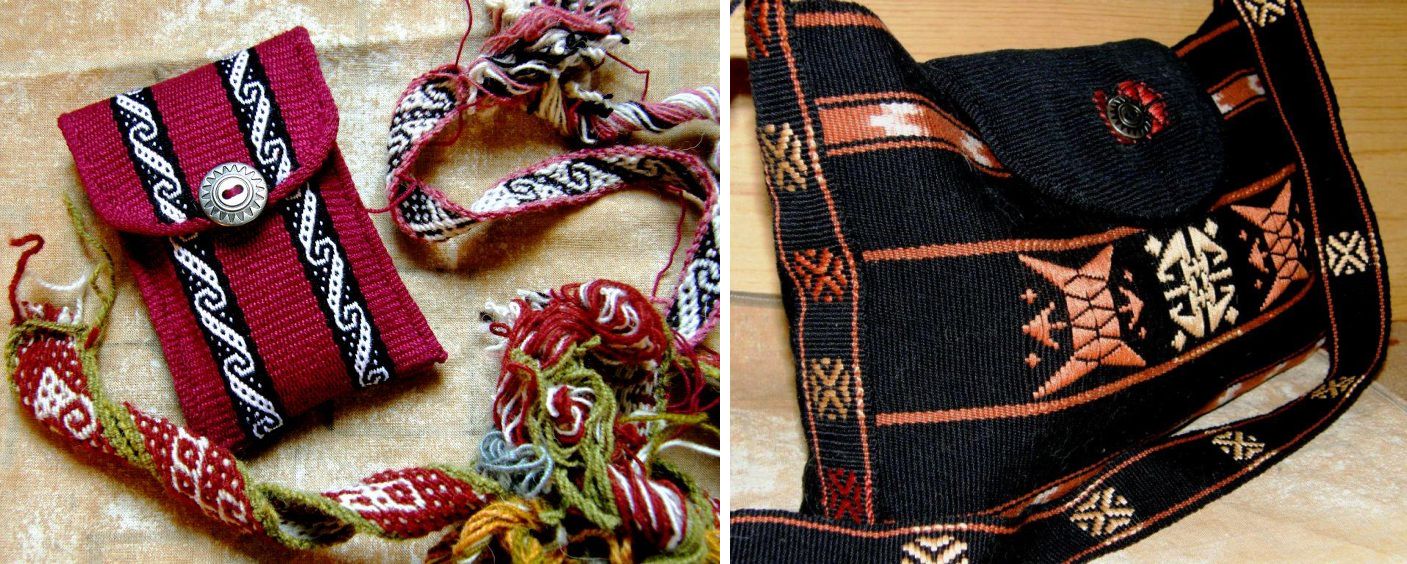
cell phone pouchesMaking cell phone pouches is one of my favorite ways to use a piece on which I have been sampling structures or patterns. You can see the different ways in which I have formed the flaps. This often depends on just how much fabric I have to use. The alpaca sample bottom left, for example, is closed with a drawsting as there was not enough cloth to make a flap. The example at top left has a  flap that was cut to shape and then covered with a tubular band.

rounded flapsHere are a couple more examples. The flap on the black bag was woven with quite a lightweight fabric compared to that used for the cell phone pouches. The tubular band, therefore was a bit heavy for it and caused the edges of the black flap to curl inward giving a convex shape. As it turned out that actually had its advantages! When the bag is filled with things and takes on a rounded shape, the flap curves nicely around it.

My latest bag project also has a rounded flap which is edged with a tubular band…

backstrap weaving bhutan bag

ikat robe at folk art marketI had been calling this latest project “Tales from the Subcontinent” as it comprises designs from Bhutan and Afghanistan.

However, now it carries an element which has been influenced by Central Asia. Its closure tab was inspired by tablet- woven trim on Uzbek ikat-patterned robes.

I showed you pictures last week of the Uzbek garments that I saw at the International Folk Art Market in Santa Fe NM with their tablet-woven edging bands.

I give many thanks to Ute for writing to me and sharing what she knows about the Uzbek bands as I was about to launch myself onto the wrong path trying to weave one using threads in 4 holes of the tablets. Ute told me that they are created using only two holes. With my limited tablet-weaving experience, I would have been lost without that valuable tip.

Uzbek two hole tablet band with my experimentsstThe little wristband that I bought at the market is in the center. I changed things a little in my experiments eliminating the dark outer color and altering the way the red stripe was set up. I made a sample in a medium weight cotton to start and then made the final piece for the closure tab on the left. Originally I had wanted to make the entire strap for the bag in this technique but decided that it was a bit too “busy” to play such a major role in this piece which was already highly decorated.

backstrap weaving Bhutan bag???????????????????????????????In this picture I just placed a silver button on the closure tab but I was not all together happy with the way that looked.

And then I remembered that I had coins from my trips to Nepal back in the 80s and 90s.

The smaller one would do perfectly and would be in keeping with the “subcontinent” theme.

I just had to polish it up and then get creative in finding a way to attach it.

You can see the more subdued strap pattern, above, that I used in the end. I used the same pattern as that on the edging band for the flap.

So, “Tales from the Subcontinent” is in search of a new name. I won’t say that it is finished yet as I am now thinking….Wouldn’t it be cool to have some black and white ikat patterned cloth with which to line it?….a sort of “inner bag” with a drawstring top…

bhutan bag front and back

So,  now we get to “cutting corners” and transforming a straight-edged flap into a rounded one…

I am using the lavender Andean Pebble Weave fabric that I was on my demo loom during my last trip. I really don’t like it much and decided that I could at least use it for a tutorial…

STEP ONE: Choose the curve…

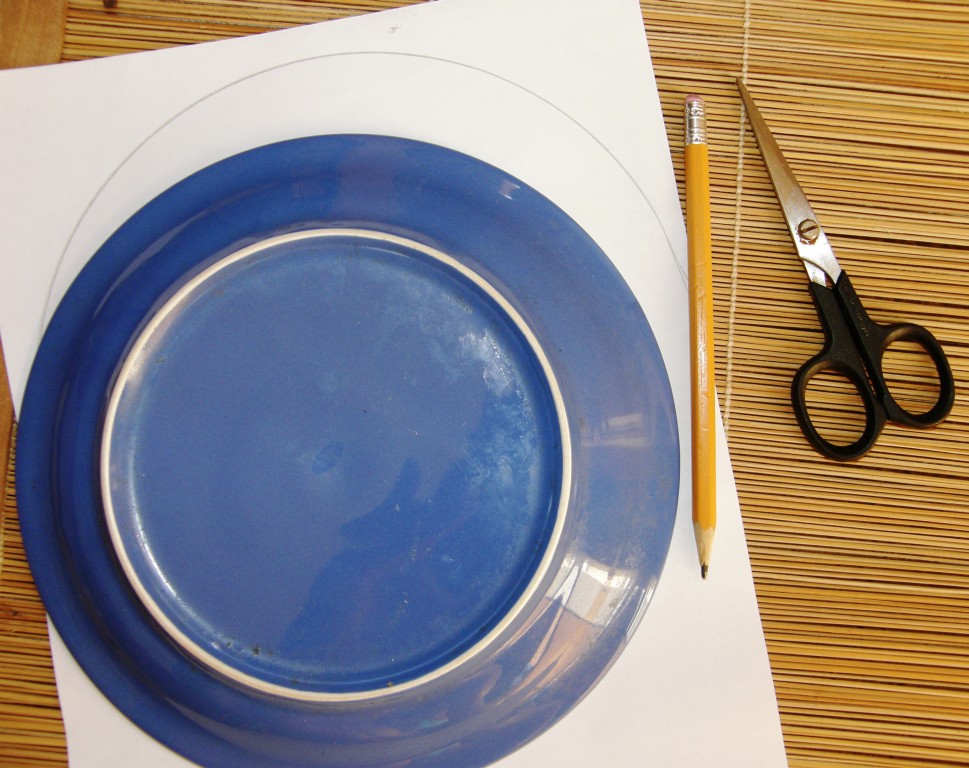
???????????????????????????????I have a small plate that has the right curve for the width of fabric that I am using. I used it for the black bag and saw that it would also work just fine for the lavender piece.

STEP TWO: Make a template.

???????????????????????????????I traced the curve on paper and cut it out.

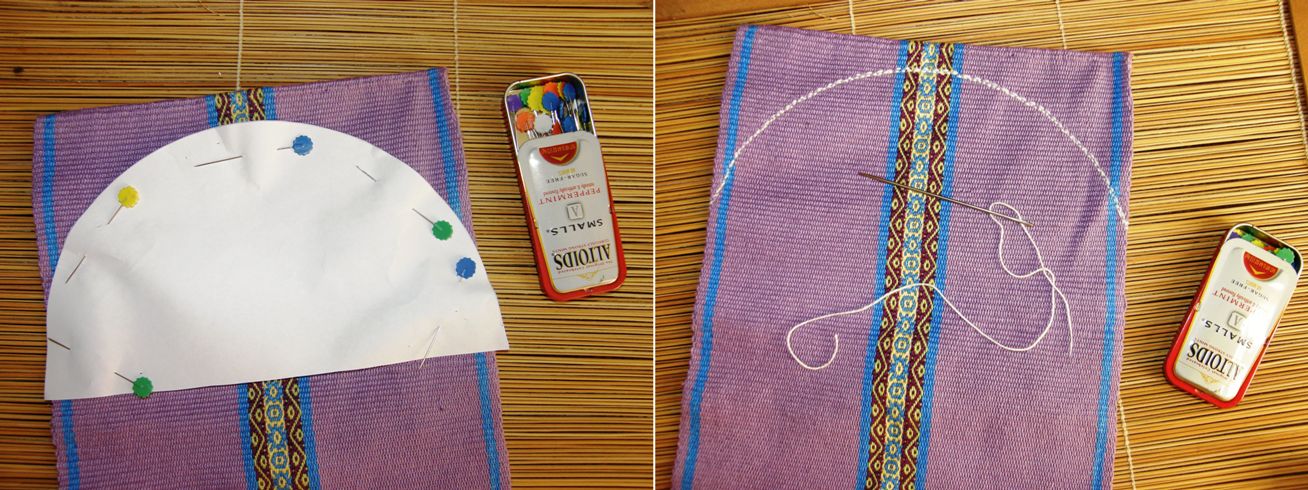
STEP THREE: Pin the template to the fabric and sew along the edge.

sewing around templateI sewed by hand and used crochet cotton for the thread. It’s a good thing that beauty does not count! I backstitched from one end to the other and then returned using a running stitch for extra security.

STEP FOUR: Paint diluted white glue onto the stitches.

???????????????????????????????

I used white glue, or carpenters’ glue, carpi cola , as it is known here. I diluted it with water, painted it onto the stitches on both sides of the cloth and waited until it dried before proceeding.

STEP FIVE: Cut the cloth and glue again.

???????????????????????????????I cut close to the stitches and then applied more diluted glue along the edge of the fabric. The glue goes on white but dries clear. The fabric I am using is dense and I needed to make sure that the glue got right into the weave. As the glue was drying I pinched the threads along the edge together to seal the edge. Once it was almost completely dry, I gave the edge a final trim (this is easier to do when the edge is still damp and supple). You may need to trim some loose weft ends or tidy up the edge a bit. Once it is dry and stiff, it will be harder to make fine cuts.

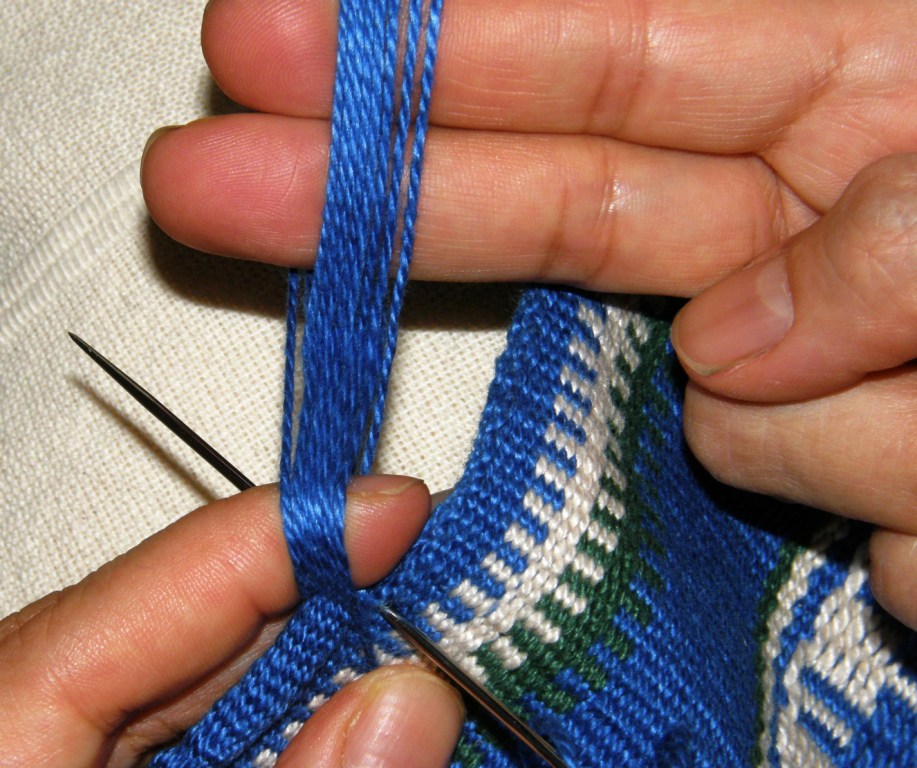
STEP SIX: Weave and sew your band to the edge.

???????????????????????????????

??????????????????????Now you have a nice stiff secure edge to which you can attach a band. See this tutorial for instructions on weaving and attaching tubular bands.

Judge the width of band needed to bend around the edge and cover the stitches and create a warp accordingly. Note that it is easier and often neater to weave these bands using a heavier yarn and few warp ends than fine yarn with many ends. I used a finer yarn here as I did not have a matching color in my heavier yarns. I used a heavier yarn on my recent black bag project and feel that that band is more attractive.

Make sure that your needle clears the glued stitches on both sides when it pierces the cloth. This way, the stitches will be completely covered by the band. Practice weaving and sewing bands many times on scrap fabric. It takes a while to have them turning out neatly and you don’t want to spoil your good fabric until you feel confident with the technique.

As for what to do with the warp ends when the band is done, I have suggestions for that on the tutorial page.

So, with the black bag finished to the point of being able to use it, I am now supposed to be getting on with the next in the wall hanging series. I had gotten as far as winding the yarn off skeins into balls for warping. And then came a distraction.

???????????????????????????????I don’t know what it is about arriving home after a trip. I have this urge to get rid of stuff that goes on for about a week. It’s great! It feels so liberating. So, stuff has been  given away and ejected. The above piece was the cover of a photo album that I was given.

I removed the album to toss and kept the cloth. It reminded me that it has been a long long time since I last played with three colors in complementary-warp pick-up.

I have done three and four-color pieces (see the header of this blog) which are not double faced.

??????????????????????

??????????????????????Here you can see what I mean by “not double faced”. I made this years ago and decided to hang it unfinished on the wall. It also reminds me that I used to get this beautiful fine wool/alpaca yarn when I lived in Chile. I used some leftovers of that yarn when I first came to Bolivia to weave this. How I wish I could get that yarn again.

The piece on the cover of the photo album is double faced. Only two colors show togther on each of the two faces at any one time…color A and B on the upper face and color B and C on the lower one. It is a bright and jolly piece and I love how the weaver flipped colors for just that one small section along the way…you can see how the yellow eyes on the green suddenly change to a red eye in just that one small part. Whether that is the center of the piece, I will never know as it was cut up to make the album cover.

Side A
Side A

Side B
Side B

So, this is what I am playing with and what kept me up past midnight last night. These are the two faces. I wish I could make a smoother transition from the red background to the beige but this defeated me at 12.30am. I suppose it would be easier if my design weren’t continuous. This is a sampler to get my head back around the technique.

#########################################

Some news… Deb McClintock has started setting up her blog again after losing most of her web page content some years ago in some sort of internet glitch…..heartbreaking. It’s all about simple looms in SE Asia and promises to be wonderful. Deb was invited to lecture last month at the Textile Museum in Washington DC about Laos textiles, looms and techniques. Her new blog is entitled Looms of South East Asia.

And, of course, don’t forget my Australian mate Wendy Garrity’s blog about Asian textiles and looms…Textile Trails. Wendy provided a link in last week’s comments to a picture she took of a notched stick on a loom in Nepal that looks very much like the one I was admiring on the backstrap loom from Myanmar at the Santa Fe Folk Art Market. She was also able to extract more information about the tablet woven bands from the Uzbek representatives at the Folk Art Market than I was!

##########################################

???????????????????????????????More news…..AUSTRALIA!

I will most likely be going back to Sydney for a visit in late November and would very much like to meet other weavers!

The decision to make this trip has been a very recent one which makes getting people together for this a little difficult as it is so close to Christmas.

I haven’t been back in 4 years and am very excited. I’m looking forward to hitching my loom to a eucalyptus tree and weaving while listening to the magpies and kookaburras.

The kookaburra picture at left was taken by my brother.