Backstrap Weaving – Sewing and Warping

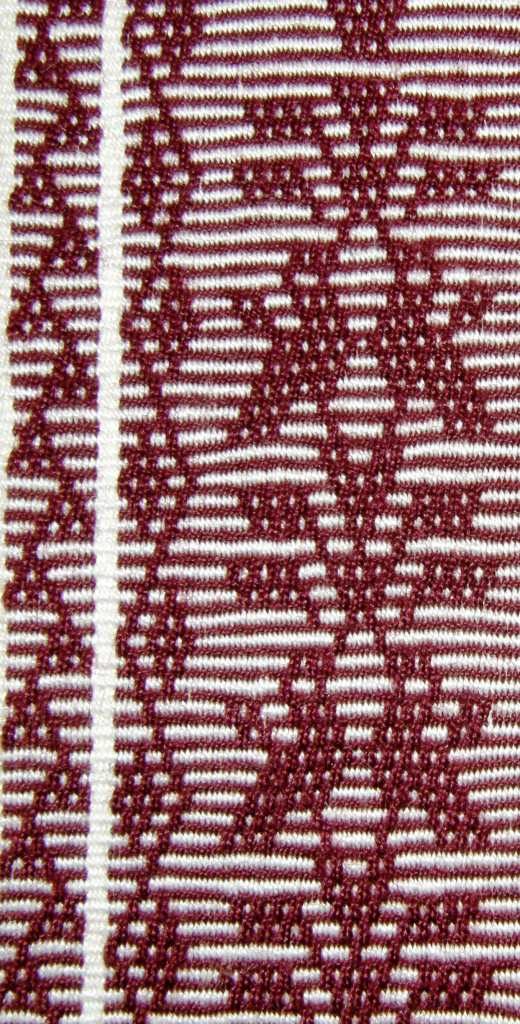
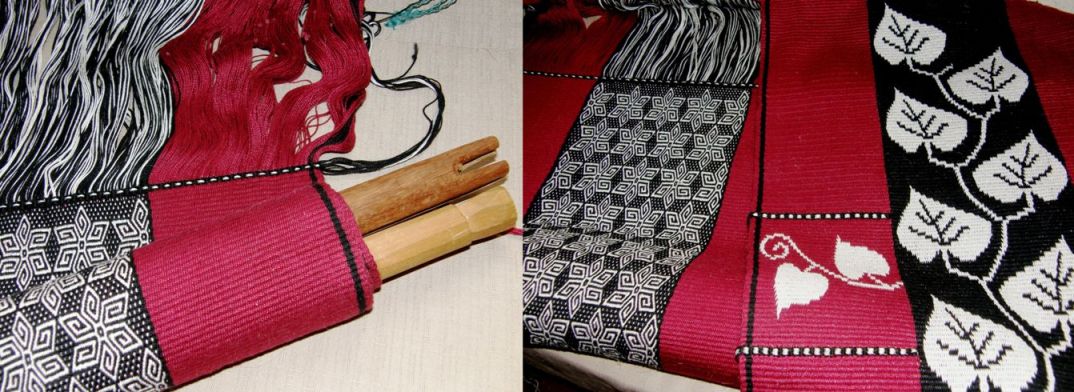
A bag in Intermesh structure with a shaped and edged flap. It includes some patterning in weft substitution.

I always get a bit nervous when my weaving friends who are skilled at sewing start picking up my weavings, many of which have been sewn into bags and small  pouches.  It’s when they start un-zipping, looking inside and inspecting seams that I get all wriggly. I am not great at sewing. My things hold together and look nice on the outside. However, I always fear that the inside might look a little unconventional to those who know something about sewing!

I sew by hand and I have to admit that I find sewing really relaxing. I love to put on a good movie and just sit and sew. Learning to make clothes is kind of a bucket-list thing. I always joke about one day being the best-dressed 79-year old you have ever seen.

Several of my weaving friends have kindly offered to help me make my first item of clothing. One of these days I will take advantage of those offers.

I dream of being able to find a pattern that works just right for me and then go to store knowing something about all that gorgeous fabric. I’ll be able to choose the right kind for the project I have in mind and a print that takes my fancy.

A yurt-shaped bag in reeled silk.

In the meantime, I’ll weave the fabric and sew my bags and pouches.

The fabric that was most recently on my loom was meant to be made into a bag. The black one you see above, which I named Tales from the Sub-continent and Beyond, has been traveling with me for a few years now and really isn’t quite big enough for the stuff I’d like to carry about when I am on the road.

To be honest, the final product is never of great importance to me. My main objective for this project was to weave something that included one of the little pockets that my Bolivian teachers weave into their coca-leaf bags. They are usually tiny pockets just big enough to to insert two or maybe three fingers. I wanted to have a large-ish bag with a pocket big enough to perhaps hold a folded boarding pass, baggage receipts and other bits and pieces that I need to have on hand when I travel.

Weaving that large pocket into this large project was really what this project was all about.

A bag I made for my sister-in-law in 8/2 cotton with Andean Pebble Weave patterns.

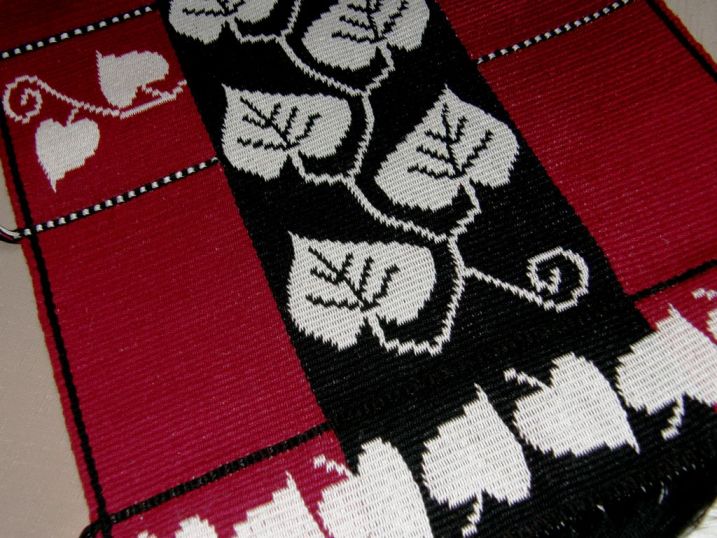
Once I had completed the pocket section of the bag, there was nothing new or challenging about the project and it was just a matter of weaving, weaving , weaving….until I decided right at the end that I needed to place the two weaving ladies under a tree.

Out came the charting paper and just I dove in and wove the tree without first sampling as I usually do. I am thinking that if I had wound a warp to first sample the pattern I would still be adjusting the charting and fiddling around with it today! I am quite happy with my tree. If I use it again in another project, I would make some small adjustments. In any case, designing and adding the tree to the project gave it just that extra bit of challenge that I enjoy.

I was determined to make it work because un-weaving wool is not fun. The hairy weft makes itself very much at home next to its hairy warp companions and does not want to be removed! I had already had enough experience un-weaving this wool at the start of this project when I decided that the green stripes  I had included in the warp had to go.

Almost at the end with the ladies waiting for their tree.

I had seen this tree picture shared on Facebook and tried to follow it back to its source. Unfortunately, it seems that the photographer’s name was never mentioned. I was quite taken with this grand tree shading all those people and wanted to include something like it in my project.

So, here are the ladies sitting and weaving and chatting under their tree. The bones for the weaver pattern were created by Maja, my online weaving friend in Germany. She allowed me to include her pattern in my Complementary-warp Pattern Book . She was also fine with my making adjustments to it so that I could have two versions in my book. This is my tweaked version. I doubled it and added the tree.

I was so happy with the tree pattern, that the pocket kind of took a back seat for a while.

Then I edged the pocket with the eye-pattern tubular band that I teach in one of my more recent books.

I doubled the thread so that the tubular band would stand out a bit more and added an extra edge thread to each side of the warp so there would be more solid blue in the tube right next to the pebbles. It looks nice enough in this picture but I have since unpicked it all! It just seemed too busy next to the pebbles. I realized that I usually sew these patterned tubular bands onto a solid-color edge. I’ll probably end up attaching a solid-color tubular band instead or some other variation that has more solid color than pattern. The addition of tube was lovely all around the edge. It really strengthened the pocket.

I wove a couple of bands to make the sides of the bag. This comes even after having asked for bag construction ideas in one of the online groups and being given the very wise advice to hand this off to someone who knows what they are doing! However, being someone who is always more interested in the process than the product, I decided that I would push ahead and see what I could come up with on my own. I think that in the end, I would rather have something, even though it may be quite clunky, that I have made myself. It’s a shame that I don’t have enough of the blue yarn left to make the straps.

Zipper and sides are in place.

The sides will be edged with a patterned tubular band which should look nice against all that solid blue. The`straps, once I get the yarn to weave them, will flank the central pattern and go all the way around the bottom of the bag.

In between periods of sewing, I have been in a warp-winding frenzy preparing for up-coming travels. My living room is a yarn jungle. And, with warping very much on my mind and with memories of my online encounter with Megan and Li backstrap weaving which I wrote about in a recent post, a wonderful video came to my attention. Created by Yan Zhang, this is the most beautiful film of backstrap weaving I have seen. It shows the backstrap weaving style used by the weavers of the Li minority group in China. Yan Zhang is the younger lady that you will see in this video winding a warp and then later sitting at the loom and weaving.

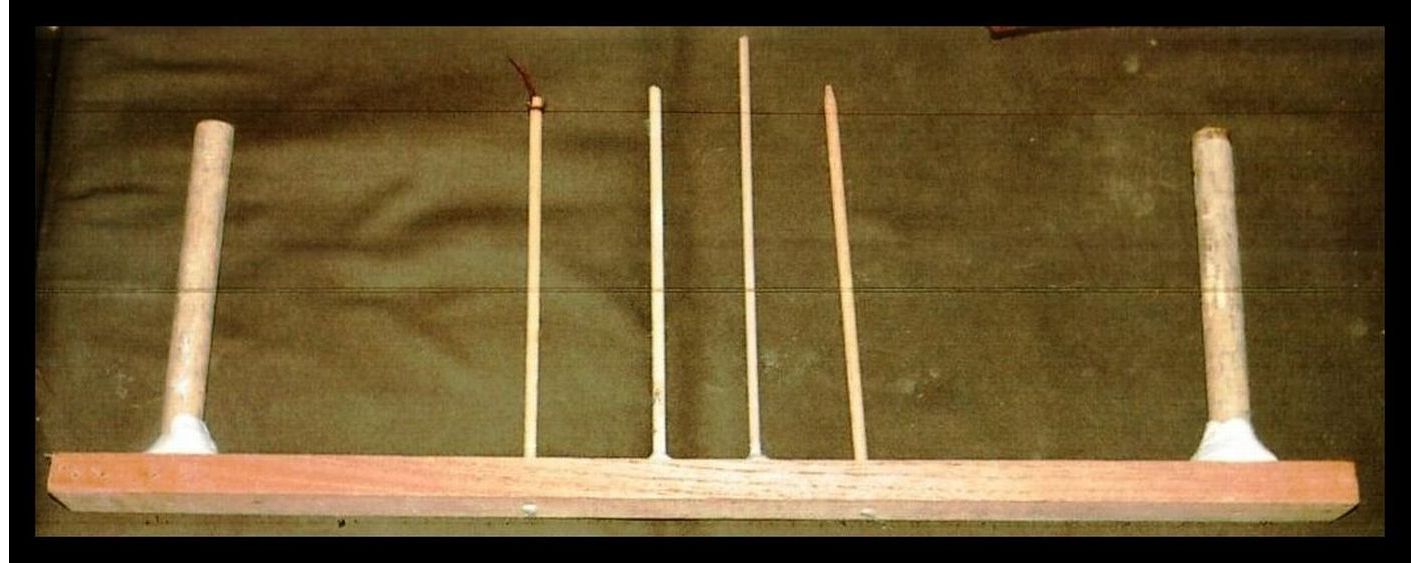
This is the first time that I have seen a warp for the backstrap loom wound this way. I contacted Yan Zhang so that I could be sure that I understood what she was doing. I will show a screen shot here of the warping frame to further entice you  to click on the video and watch it. In her reply Yan Zhang told me that “this frame is one of the most traditional tools of Li Brocade with 3000 years of history“. I have certainly never seen a warp wound this way before.

I like watching this video last thing at night so that I can close my eyes with the music still playing in my head. (ETA…unfortunately,it appears that the video has been removed from Youtube).

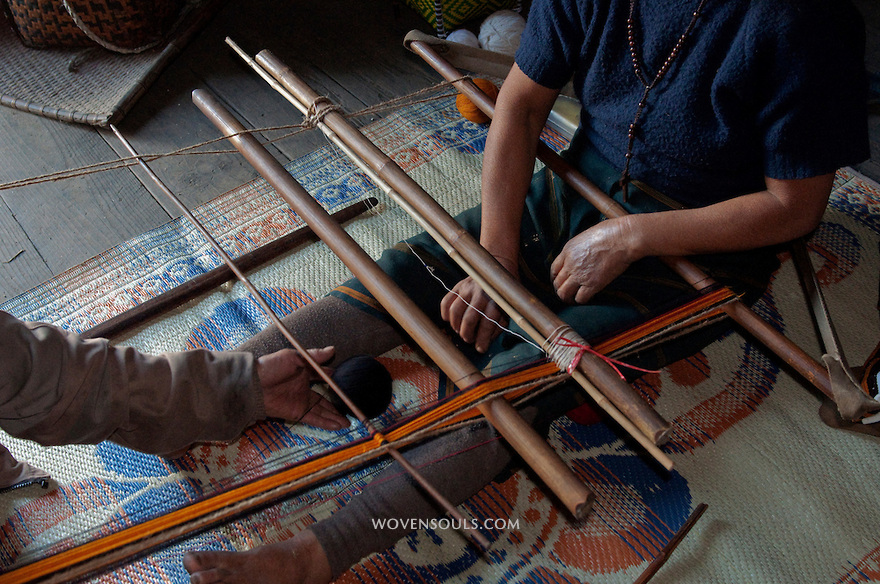
I haven’t been so excited about seeing a warp being prepared since I found this picture of two ladies preparing a backstrap loom from the website of Woven Souls. Jaina Mishra allowed me to share her image of the two ladies warping directly onto the loom.

Weavers in Arunachal Pradesh using the traditional back strap loom to weave skirts, shawls and loin cloths.

And then there was the thrill of winding a warp with Montagnard weaver Ju Nie. With Ju Nie I learned how to create the heddles as the warp is wound (as well as use the wonderful coil rod).

Ju was kind enough to let me try warping. I would never let anyone touch my warp!! She however, took control of the heddle string at each pass but I was slowly coming to understand what was going on.

Oh my gosh, there are so many exciting things still to learn and experience on this continent where I live. I am so grateful that while I am here I am still am able to enjoy these small amounts of contact with weavers from the other side of the world.

I hope that if nothing else grabs your attention in this post, that you will at least pause and watch Yan Zhang’s beautiful film. It is just over 5 minutes long.

I’ll leave you with a reminder, if I may, of my two latest publications….

The Eye-pattern Tubular Band.

Andean Pebble Weave on Inkle Looms.
 

Backstrap Weaving – What Money Can’t Buy

1513230_648143985229230_814686202_nOh, how true, how true! And this message could be a bit melancholic if not for the fact that I can happily say that those “priceless” items that can’t be bought, and which make me very happy, come into my life on a daily basis…not just on Christmas day. 

The priceless items are the opportunities to learn more and more from this hobby of mine about which I am passionate. The opportunities come from near and far…from my own experiments at the loom from which I constantly learn….from weavers here in Bolivia as well as from those on the other side of the world. Sometimes they seek me out and sometimes I just stumble across them via the internet.

While in Australia, I could hardly contain my excitement over a photo of  a backstrap weaver that I ran across online. I patiently waited for a reply from the photographer for permission to show her shot here while boring all the non-weavers around me with news of my find.

Courtesy Jaina Mishra/Wovensouls

Here is the image which photographer Jaina Mishra has allowed me to show. It shows a backstrap weaver from Arunachal Pradesh in northeast India warping with a partner directly onto her backstrap loom…something that I have never seen before (except for the simple narrow  toe-and-finger method of warping that I have been taught to do by my teachers here in Bolivia and which Maxima is executing below).

cochabamba-designs

ju-warpingIn the picture from Arunachal Pradesh, the heddles are being installed as the two ladies warp. The thicker of the two sticks at the heddles is being used, as far as I can tell, to ensure that each heddle is the same length.

Creating the heddles while warping is not unusual in Asia. You can see my Montagnard weaving teacher at left with the warp she created on vertical stakes with heddles in place. (Watch a video of my Montagnard weaving teacher doing it on vertical stakes in my blog post here and a video of my explanation here.)

However, I have never seen it being done directly onto the loom with the weaver seated in her backstrap as the ladies in Arunachal Pradesh are doing.

I showed you last week (and here it is again below) a picture of a textile from Arunachal Pradesh that a Facebook friend in India had sent me. I wonder if these ladies are going to be creating something similar.

adi tribe arunachal pradesh nth east indiaThe weaver’s partner is not attached to the warp but is simply sitting within the frame (created by the warp itself on one side and cord on the other to hold everthing square). You can see the position of the weaver’s partner in another picture from Jaina Mishra’s website here. (The website is fascinating and has galleries and galleries of her fabulous pictures.)

The two ladies sit and pass the ball of yarn back and forth and around the beams and shed rod, while creating the heddles. And they wrap the yarn aound a coil rod! (the farthest stick in the picture from the seated weaver). If you are wondering what in the world a coil rod is, I have written quite a bit about this piece of equipment in other blog posts starting here.

I am particularly excited about the presence of the coil rod as the warp that these ladies are creating is on a single plane. So far, I have only come across a coil rod being used by indigenous backstrap weavers in a circular warp. I used to say that those of us in the Ravelry group who have grown to love the good ol’ coil rod and use one in our single plane warps are being unconventional….maybe  we are not so unconventional after all!

???????????????????????????????Here is a coil rod installed on Montagnard weaver Ju Nie’s circular warp.

???????????????????????????????This is the first circular warp on which I used a coil rod. The lesson I learned from this exercise was that, when using lots of fine warp ends, the coil rod is tough to move once installed…use a thicker stick. It took two disastrous stick breaks for that to sink in! Since that first experience, I have been using a coil rod on most of my plain weave projects whether the warp be single plane or circular.

???????????????????????????????Here are two projects on which I am working. The black one is a single plane warp and the white piece is circular. The coil rod on each can be seen at the top of the warp.

I use the coil rod in single plane warps to help create even tension across the warps at the weaving line and therefore prevent “ridging” or “corrugation” of the woven fabric. Weaving an inch or so at the “wrong” end of the loom before beginning  project also prevents ridging but my current preferred method is to use the coil rod. In a circular warp, in my experience, the coil rod has the added benefit of helping to maintain a consistent width.

The black piece, by the way, is part of the latest in my red, black and white wall hanging series. The white piece is going to be a little remembrance banner for my mum who loved butterflies and African Violets. So far it has a violet butterfly and I hope to be able to chart and create supplemental weft motifs resembling African Violets.

One more thing I love about Jaina Mishra’s picture is the weaver’s backstrap. I like the little pockets at the ends of the straps into which the beam so neatly fits. So much to be enjoyed in one image!

Yes, these opportunities to learn are priceless and it is wonderful to see so many “encuentros” being organized in South America where weavers can gather and learn from each other. Major ones have been arranged in Peru, and there have been minor ones in Bolivia and Argentina.

Aymara and Guarani weavers learn from each otherAt this gathering in Santa Cruz, Bolivia, my Guaraní weaving teacher got to watch for the first time an Aymara backstrap weaver from Chile and learn the three-color version of the two-color intermesh technique that she weaves on her vertical loom.

learning dovetail warpingAnd then a Guaraní weaver shows dovetail warping on a vertical frame to weavers from Chile and Colombia.

???????????????????????????????Excited Peruvian backstrap weavers watch and photograph a lady from Tinkipaya, Bolivia weaving on her leaning vertical loom at a gathering of weavers in Peru.

1468797_573365889378997_122630664_nDouble weave expert Jennifer Moore, from the USA, no doubt learned a lot from the Peruvian weavers with whom she worked at the most recent Tinkuy in Cusco. However, the main purpose of her visit was to teach them balanced double weave pick-up. Here is the class in progress. The picture is from the CTTC’s Facebook page. Below is one of Jennifer’s pictures of her students at work. It was an experience that Jennifer described as the highlight of her weaving career. Try putting something like that on your Christmas wish list!

???????????????????????????????

learning single plane warping salasacaThese ladies from Salasaca, Ecuador were eager to learn pebble weave from me. Here we are creating a single plane warp. It was only eighteen months later, when their male cousin taught me the Salasaca style of weaving, that I realised how foreign my way of warping must have been to them. They are used to working with circular warps. Teaching them was an experience that I had never expected when I first went to Salasaca and something that money can’t buy.

Sometimes the learning is very hands-on. And sometimes just looking in wonder and quietly absorbing is enough….which is why I am so grateful for the images I find and am sent. There is still always so much one can learn and enjoy from a distance.

???????????????????????????????A weaver from Tinkipaya, Bolivia who uses a leaning vertical loom, ponders the 24 sets of string heddles on a Peruvian backstrap loom.

???????????????????????????????Sometimes the thrill can be about learning something as simple as a new way to make heddles. My Guaraní teacher asked me to show her how to make them on a stick. You can see the loose chained heddles higher up in the warp that are traditional in Guaraní weaving.

So, now I am home in Bolivia and have unfinished projects to pick up and new ones to contemplate, books to read and maybe even one to start writing.

I have brought home that yarn that I dyed with eucalyptus leaves and bark in Australia with Dace and have been thinking about a project for that…

??????????????????????The colors of the Australian landscape as depicted in Austrailan artist Pro Hart’s work give me some ideas on how to perhaps combine the rather pale tones that I have in the dyed yarn (and, yes, the thread still smells like eucalyptus!). 

??????????????????????I have a book of Pro Hart paintings that were created to accompany the poetry of Harry “Breaker” Morant, the “horse poet” . The wee bit of homesickness that I am currently experiencing makes me see the “you” in this poem as my home in Australia. You can read the words of the poem here if you are curious about this poet and his work.

More things that money can’t buy….the happiness at seeing what my students go on to create…

The brilliant rust red in Julia’s latest finished piece has my mouth watering…

Julias bagI showed the central pebble weave band on this blog before when Julia first wove it and now she has sewn it onto a piece of twill fabric that she wove on her floor loom in the fabulous rust red. The twill design is the perfect match for the pebble weave band, don’t you think? She has lined the bag and finished it with a tubular band. Teach me to sew like this!!!

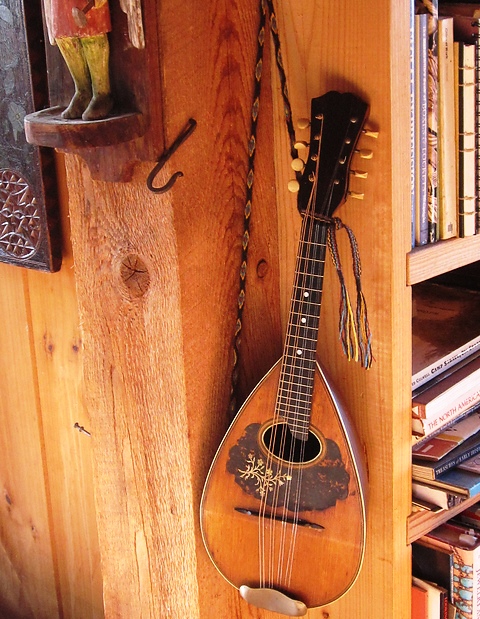
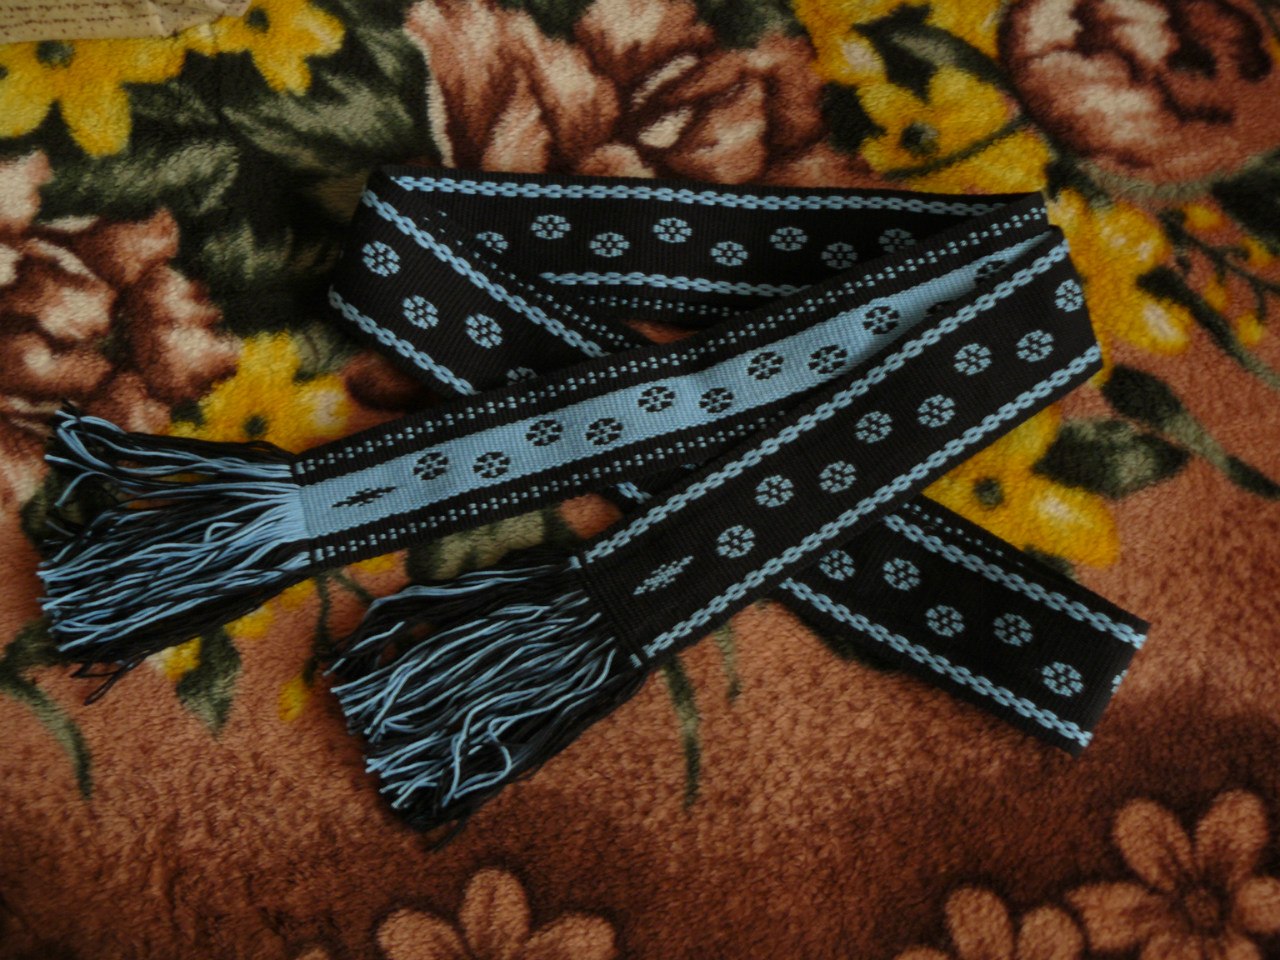
LLausanne's mandolin strapI taught Lausanne the ñawi awapa when I stayed with her in the fall and look how she has used it! It has made a wonderful strap for her mandolin. I am sure that your eyes are wandering to other intriguing treasures in that picture. Lausanne’s home is full of such things.

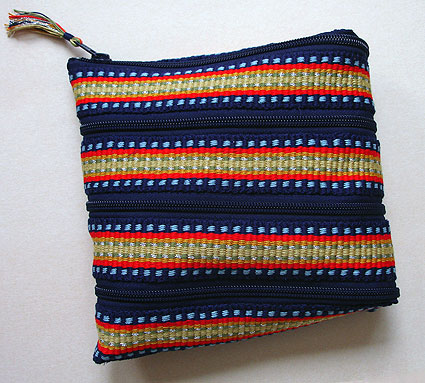
jennifers pouchesJennifer shows us that both threaded-in patterns and pick-up designs make for  beautiful pieces of fabric. She has made three lovely pouches with braided zipper pulls. The pick-up pattern she is used is one that I charted from textiles of Tinkipaya, Bolivia which appears in my second book.

Natalia and I have never met but she is a student of my blog all the way over in Russia. She followed my tutorial on double weave and has added her own touches to one of the small Bolivian motifs that I have used in examples…

natalia

k8black clasped weftAnd to remind us that backstrap weaving doesn’t have to only be about warp-faced fabric, k8black in the Ravelry group showed us her clasped weft scarf. I love the feathered effect in the pink weft.

Judy Kavanagh has also been creating balanced weave pieces on her backstrap loom with the aid of a rigid heddle…a few bits of wood and a rigid heddle is all she needs to create this gorgeous scarf.

Judy KavanaghThe next piece of work is not backstrap weaving but I want to show it to you as I have shown this project in progress before on this blog. This is what Yonat was working on during two of my visits to Santa Cruz California and is the result of a class in Ravenstail twining that she took with expert Cheryl Samuel. Here are the finished leggings!

1512483_10202898120120664_1879491657_nI would say that Yonat is the person who has woven more with me than anyone so far. Now I need to come up with something to challenge this talented lady on my next visit. 

Well, the jet lag is slowly subsiding after my 50-hour trip back to Bolivia (with about 10 hours of broken sleep along the way) and it is time to get back to the large backstrap projects that I had been missing…holiday over…back to work putting that niggling homesickness for Australia away!

See you next week at the usual time. I couldn’t blog yesterday as I was falling asleep at the computer! And a Happy New Year to you all.

Backstrap Weaving – New Challenges: Wider, Longer, Finer.

While doing some house keeping in my album of weavings on Facebook, I came across a picture I took of the first red, black and white wall hanging I made entitled “Starry Night”. My caption read that I was weaving this in order to push myself beyond my current width comfort zone. That was a nice reminder as I am now on the third piece of similar width in this series and I have to say that I feel very comfortable with this width now! Seems that I need to go wider.

The first two pieces in the wall hanging series
The first two pieces in the wall hanging series.

Here is where I stand with piece number three. That snake continues to slither its way up the cloth.

O

The pick-up is a piece of cake now…really! There’s nothing like repetition to firmly embed a design in your head and fingers. It began with lots of tedious chart reading which was made a lot easier with the use of removable highlighter tape. Then I played a favorite game…read the cloth and guess what comes next. Then, before passing the weft, sneak a peek at the chart to see if you are correct. Next comes reading the cloth, deciding what comes next and going for it. Beat, pass the weft and then look at the cloth, not at the chart, to see if you were correct. Eventually you reach that chart-free happy place.

But then….you finish the weaving, you start something entirely new with a totally different structure and the fun begins again!

As for going wider….there are still quite a few more pieces I want to make in this current series, but when I do get to the point when I am ready to break out of the old comfort zone, I will need some new equipment…longer loom bars for a start. I already have some pretty long swords.  I would also love to have the kind of backstrap that some of the weavers in Peru use.

Chiclayo and Santiago Atitlan

With its two sets of straps, it was designed to accommodate different widths of weaving.

And, I would like to weave longer pieces. The scarf that I recently made had me extended to the limits of my weaving space. I rolled up part of the warp at the far loom bar but I really prefer to have the warp unrolled at full stretch.

backstrap warp for scarf project

There was just enough space to put my cushion and sit with my back against the closet door. So, if I am to go longer, it is a simple matter of using a circular warp. I have woven on these kinds of warps on a few occasions. Anyone who does inkle weaving certainly knows about circular warps.

circular-and-single-plane-warps

The pictures above show a band on which I was working on my inkle loom. The warp is a complete circle. The black band next to it has been warped in a single plane in the same way as the long black scarf warp. Once weaving is finished, the circular warp is cut apart and the band can be extended to its full length.

The Montagnard weavers with whom I studied use circular warps for their long blanket and skirt panels.

montagnard weaver opening heddle shedYou can see Ju Nie above weaving the top part of her circular warp.

Probably the most time I spent weaving on a circular warp was when I learned to weave the typical belt of Salasaca, Ecuador. My teacher, Felipe, wove on his narrow front porch and his way of setting up a circular warp allowed him to sit and weave the very long belt even in that small space.

dovetail warp Salasaca Ecuador

Felipe’s belt will not have to be cut once the weaving is finished. He has warped in what is known as “dovetail”  fashion.

dovetail warp set-up

The following diagram will show you how he is using five of the six sticks you can see in the above picture to wind the warp for the white ground weave. The stick marked with the red arrow is the one around which the warps “dovetail”. When weaving is finished, the stick will be removed and the belt can be opened out. You can see the dovetail stick in the photo of Felipe weaving. It is in the section of  band that lies along the porch post.

dovetail warping path

And, if you are wondering about the sixth stick…that stick is used to hold the colored supplementary warps. Salasacan belts are woven in a supplementary-warp technique.

my salasaca belt

The diagram above shows the path of the white warps in the ground weave. The following diagram shows the path of the colored supplementary warps. In Salasaca, the supplementary warps all go together in a heddle of their own rather than being split between the two ground weave sheds.

dovetail warp path 2

angela-and-hammock-loomYou can see that when the dovetail stick or cord is removed, the end loops of the warp will stay intact. The loops can be very useful for finishing the woven item.

Guaraní hammock weavers here in Santa Cruz use the dovetail warping method and use the intact end loops for attaching the cords from which the hammock will be suspended.

So, longer warps are on the drawing board for me which will mean building a new warping board or modifying my existing ones.

I would really like to have a set-up like Felipe’s. Too bad I don’t have a porch on which to sit (and, yes, the view was lovely from there). I have seen pictures and videos of many Asian weavers with similar “triangular” set-ups. I will have to see into which wall I can drill holes in a place where I can still get good light! The idea of raising my bed way up high to give myself more space is gaining more and more merit.

The third challenge is to use finer yarn and I am already in training for that with my scarf projects made from Guatemalan cotton. I have a ball of fabulous indigo-dyed silk that an English teaching colleague brought back for me from Japan years ago. It is heavier than the 60/2 silk that I have been using as supplementary weft and I think that it is a good weight for a first large silk weaving experiment.

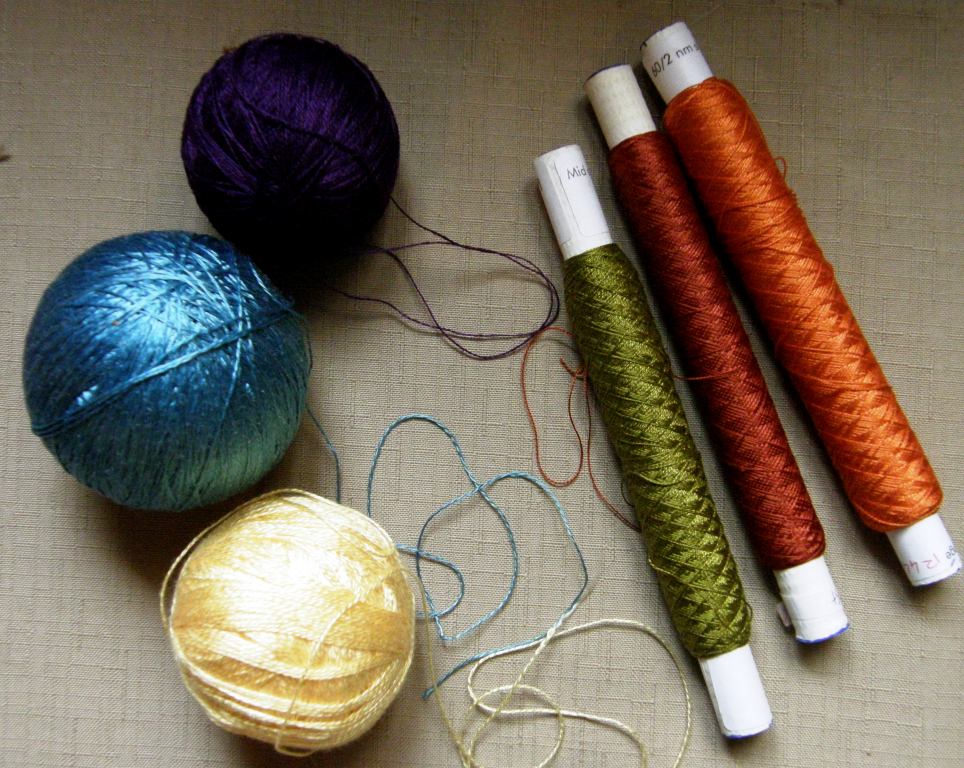
Light blue Japanese silk, spools of 60/2 silk, yellow 8/2 tencel and purple Guatemalan cotton.

pebble weave with silkHowever, this doesn’t mean an end to band weaving! I love weaving bands just for the pure fun of it and don’t care if I don’t have a particular use for them.

Narrow bands are a good way to test new yarn or check the proportions of a newly charted motif.

I love weaving miniatures too and have already used the 60/2 silk in a small pebble weave band (at left) to test the yarn, check how difficult it might be to see for doing pick-up as well as to try out a new pebble weave motif.

Band weaving for me is also a nice way to take a break from large pieces on which I might be working…only 16 threads to pick up rather than the 286 in my current project and I can attach to a toe and weave on the sofa.

Much of last year was spent finishing my second book which involved a lot of weaving of samples… mostly bands and a few larger pieces. I have buckets of bands here! They won’t be made into anything. Some of them are very useful in that they travel to my workshops and make good teaching tools.

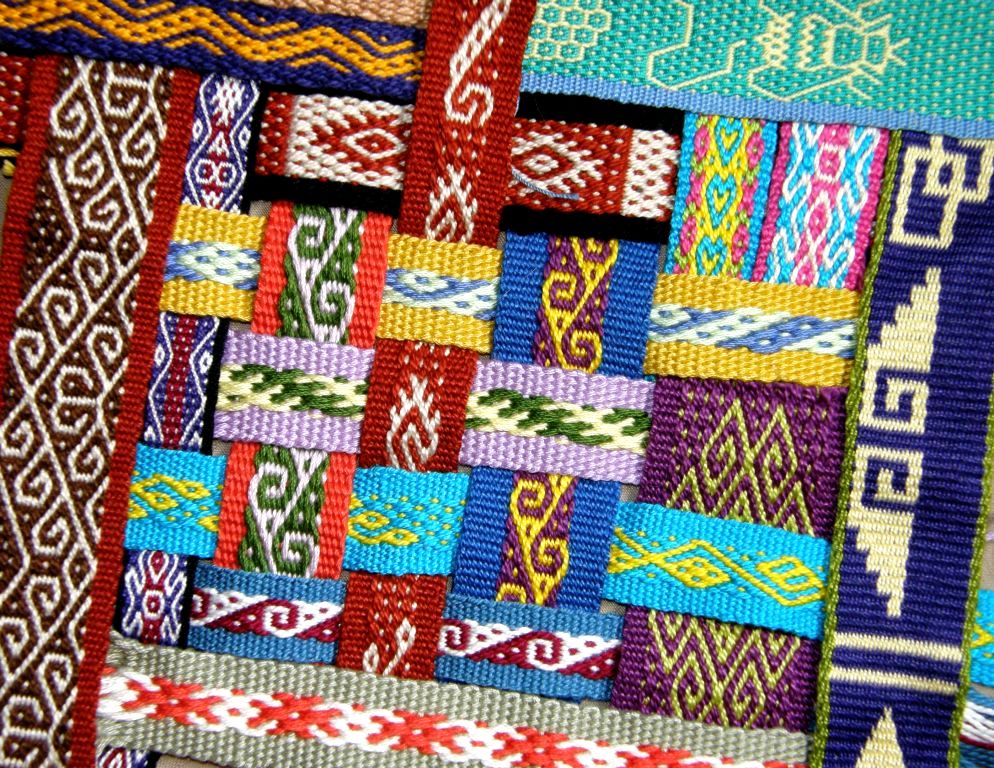
I took this next idea from my friend Yonat who put together a display of her inkle bands to photograph. I  put together a few of the bands that went into my book last year. They are of different widths and lengths…some barely two inches long… and so, my display is not as pretty and uniform and Yonat’s.

backsrap woven bands for book

The resulting book with yet more bands on the cover…

More adventures book cover dsz

You can download it from Patternfish.com.

ANWG 2013

The North West Weavers Conference, which will be held in Bellingham, Washington this June, recently opened its registrationI am going and hope to see you there!

To finish, here are some great projects from members of the Ravelry group…

carrie

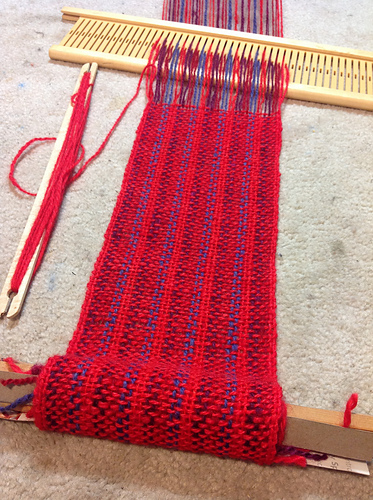
Carrie wove this warp-faced band using the frame of her rigid heddle loom on which to extend her warp. She used string heddles and a shed rod rather than the rigid heddle. The patterns were created with supplementary warps. Gorgeous! We all love the soft colors she chose.

amandaAmanda kindly shared part of her band with her first attempt at creating patterns with supplementary wefts. She shows the difference that applying less tension to her warp made to the amount of coverage she achieved with the supplementary weft. She is using #10 crochet cotton for warp and embroidery floss as her supplementary weft.

janet

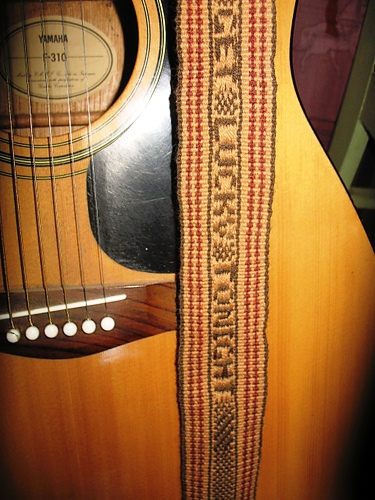
Janet wove this guitar strap for her husband with her own hand-spun and dyed wool. She used instructions for the pick-up patterns from Anne Dixon’s inkle weaving book.  She included words from a song which her husband wrote in the design and used guitar strap hardware made by our friend Annie MacHale to put it all together.

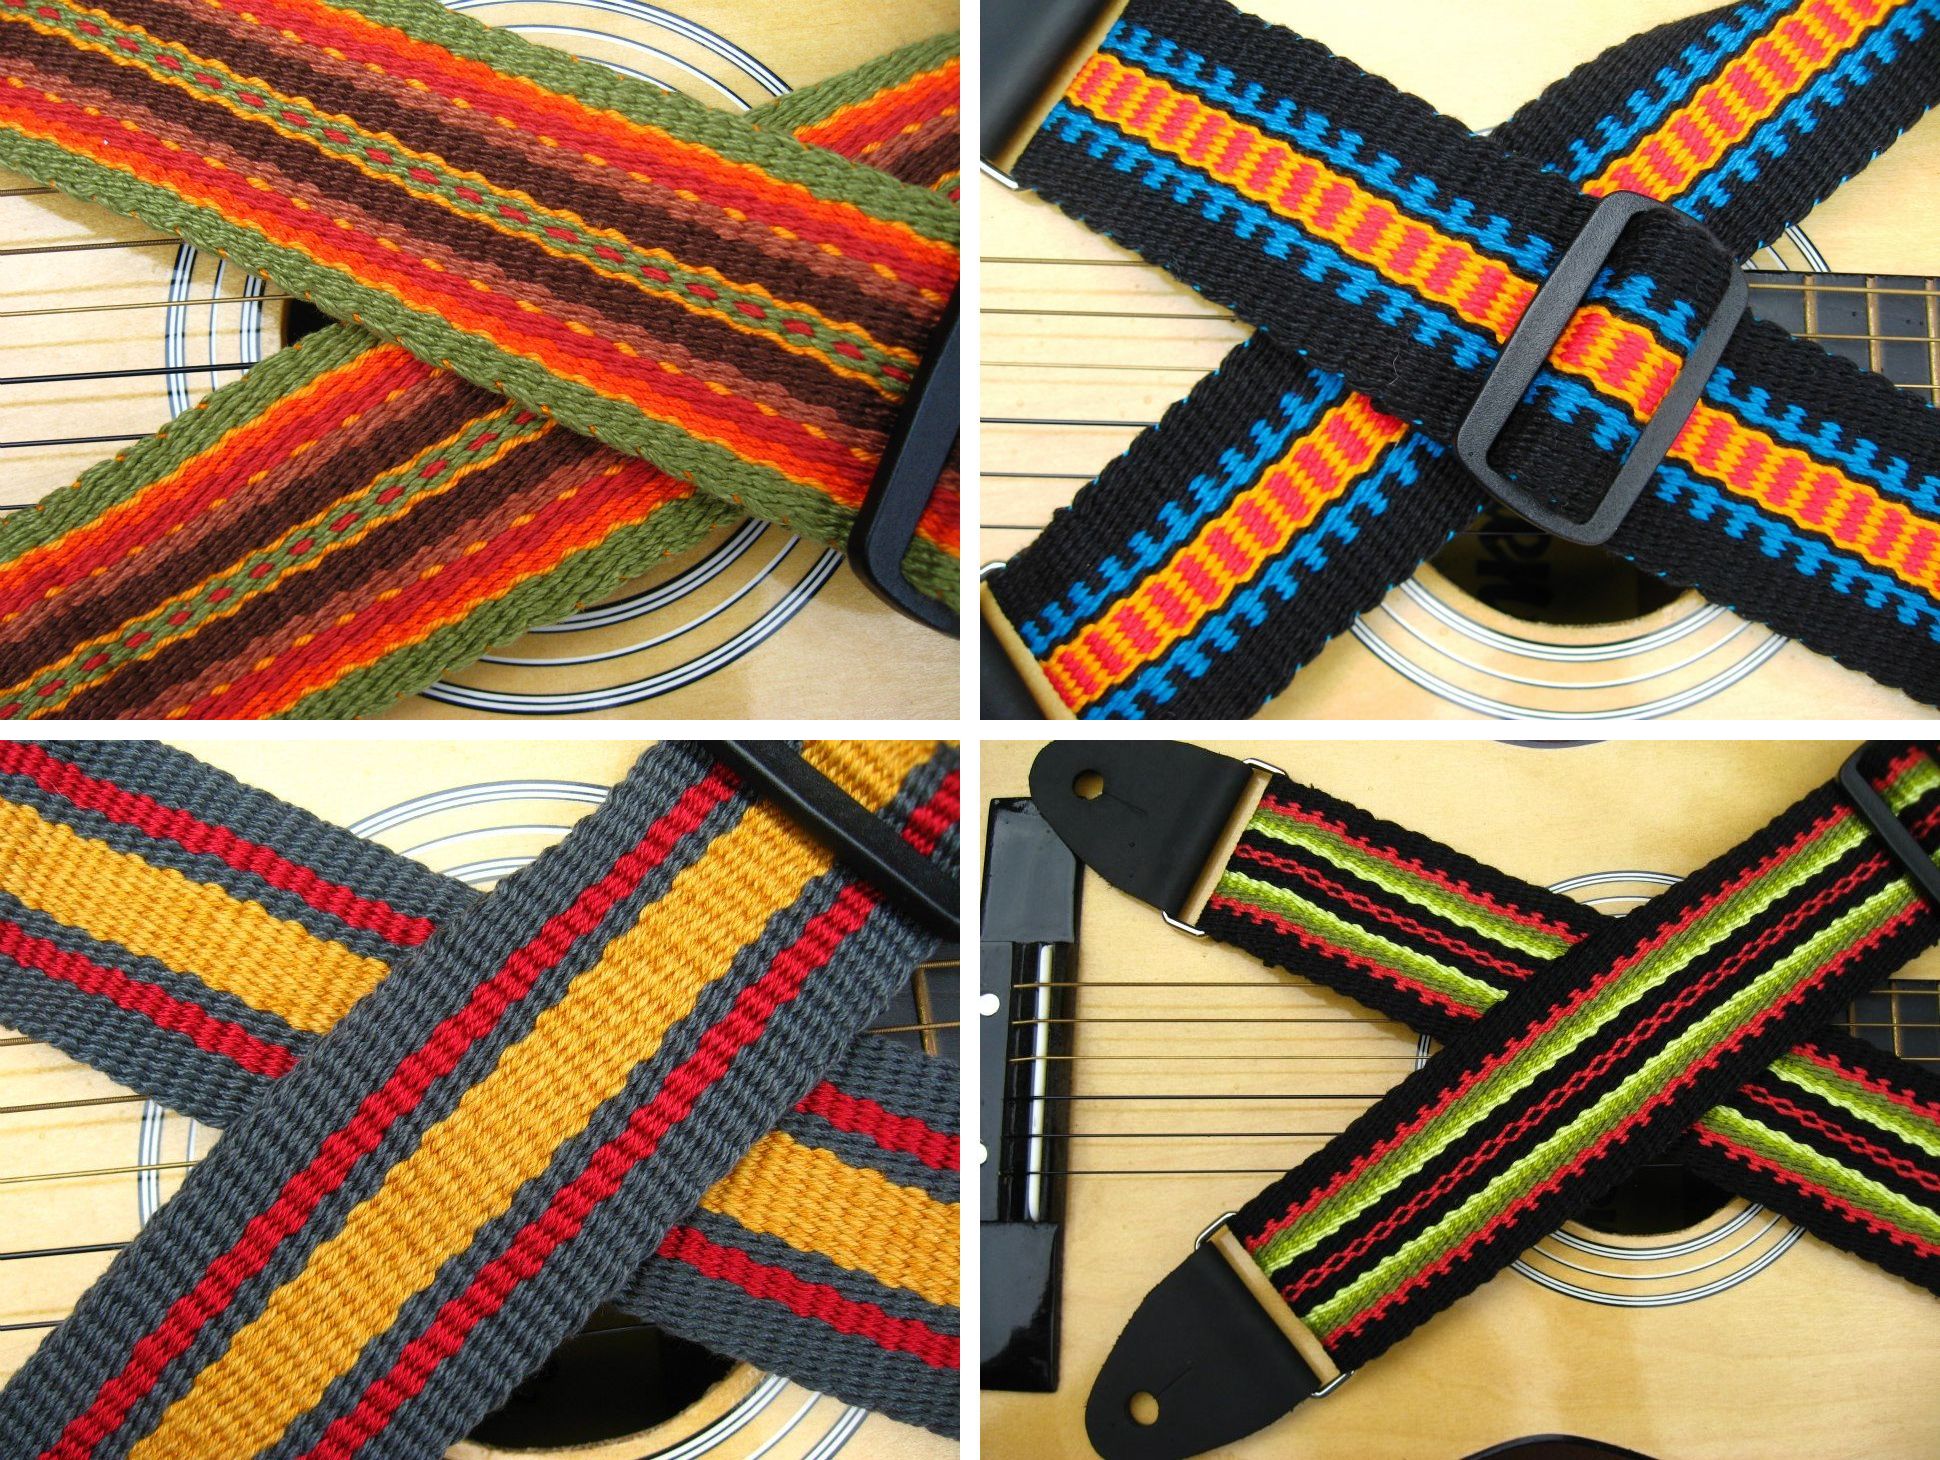
Speaking of Annie, she has been dazzling us on Facebook with the gorgeous straps she has been making on her inkle loom to sell at a big guitar show this weekend in California. Annie is all about color…I will leave you with just four examples of the more than forty guitar straps she will have for sale!

annies straps

So, my challenges are longer, wide, finer. What are yours?

Backstrap Weaving – Forgotten Resources

My new Resources page is up but bear in mind that it is a work in progress. You can click on the tab on the header of my blog or on the red image (the same as the one at left) that is on the sidebar.

The idea is to dig out all the links to articles, sites and other resources that I have used in my posts over the last two years and gather them in one convenient place. I know how easy it is to forget that all that good stuff is out there.

It’s even worse to remember that it is out there and not be able to find it! Ask me how I know.

Slowly I am going through old posts and finding those links and re posting themhere. I often wonder if people go back and re read my old posts. I surprise myself sometimes when I do a Google search and run across something from my blog about which I have completely forgotten.

So, you will find a handful of links that I have put there for now. One of them is completely new – a free book on Mapuche weaving.

Many years ago, when I was still living in Chile, I bought a book in Spanish on Mapuche textiles from the Museo Chileno de Arte Precolombino. My friend Caroline, in Australia, told me about the free download of this book that is available some time ago, possibly before I even started my blog.

Recently Luchita on Ravelry reminded me of it when she provided a link to the site where you can still download this book for free.

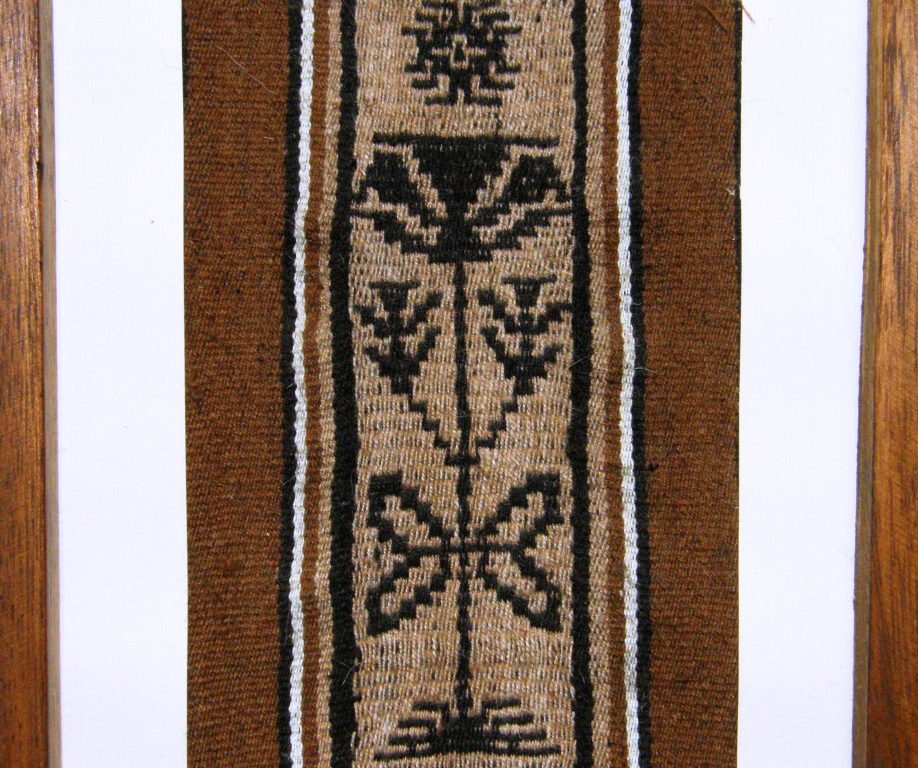
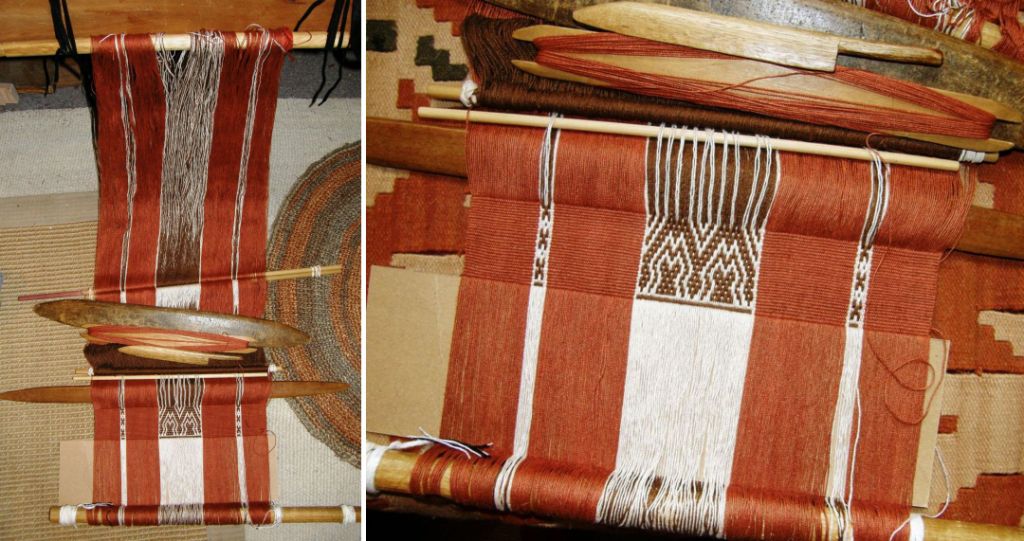
If you go to the RESOURCES page you will find the link. The woman on the cover is weaving a large piece, possibly a blanket or a poncho, which has a plant motif. Copying it from the cover image, I was able to make this the second Mapuche design that I ever wove many many years ago.

Here it is in my handspun llama fiber and it also happens to be the first time I ever wove with my handspun. I was so pleased with the result that I framed it even though it is rather wonky! I guess I didn’t think at that time I would ever weave with handspun again. It is a tiny piece as, if I remember correctly, many of the warp threads were breaking and it was a trial of patience.

Fortunately my handspun improved as a result of this initial experiment and I have no problem weaving with it now. It is interesting to see variations of this plant motif on old Mapuche textiles and notice how it has changed over time.
While skipping about on the net this week I ran into another almost forgotten resource…WeaveZine!

Of course it is not entirely forgotten for me as my article is there but you tend to forget that WeaveZine has been around since early 2008 and there is a lot of great stuff on there.

It was the article by Erica de Ruiter on this cute spiral zippered pouch made from a warp-faced band that took me there (go to the RESOURCES page if you want the link!).

As editor Syne Mitchell puts it, WeaveZine is no longer in production, but as weaving is timeless, so is the content within this archive.

I wish I had two months to just sit down with all my books and go through and refresh my memory of all the wonderful resources I have on hand. Many of them have little Post-It notes sticking out of them with inspiration for that next exciting project and the next and the next…

I was clearing up a bit more today and decided to put away the Textile Museum Journal that has been lying about here for ages under a pile of cat toys. Of course this provided a nice excuse to sit down, browse and stop tidying up and I was curious to know what had made me buy this issue of the Journal in the first place.

Oh yes, it was the article on the weavers of cotton saddlebags on the Santa Elena Peninsula in Ecuador. This article, among other things, gave me the little twin bird motif in the simple warp float technique that is shown on a cotton saddle bag from this region in the article. My version is at left.

Talk about forgotten resources.

I usually buy these journals for one particular article, sometimes two, and just glance through the others and it is funny how months later suddenly one of the other neglected articles jumps out at me.

This time it was the article in this 1983 issue by Maaike Knottenbelt on backstrap woven Mitla cloth of Mexico. According to the article the cloth was woven in skirt lengths for local use or for trade. Sadly, the article is in black and white and I was curious to see the traditional colors that are used in these skirt fabrics so I went online.

A Google search didn’t turn up anything that looked like the cloth pictured in the article. And then….Teyacapan to the rescue! Of course I should have known to go directly to Karen Elwell’s fabulous Flickr page on Mexican crafts. This is, as far as I can tell, a example of the Mitla cloth shown in the article.

The cloth has two faces, one which is warp-faced which we would normally consider the “right” side  and one which has exposed wefts. According to the article, the side with the weft floats is the one that develops as the upper face while the cloth is being woven and that is the face that can be seen in the picture.

In her article Knottenbelt quotes from Irmgard Weitlaner Johnson:

In 1957 only five weavers (men) knew how to weave this cloth, and only four Indians (men and women) knew how to warp the complete traditional pattern.

Knottenbelt published her article 26 years later and now almost 30 years after that I can’t find anything online about this kind of cloth being woven today and could only come up with Teyacapan’s photo of a museum piece. I wonder if it has completely disappeared.

The article goes into a lot of detail of the warping process where the warp threads are separated into their various sheds on the warping stakes themselves. The warp threads are not wound in a simple figure-eight and then rearranged later once on the loom. This is one of the aspects that the author found particualrly interesting.

Eight stakes are used to set up this warp for a skirt length. Six can be used for shorter lengths. Of course, I have seen this kind of thing done here in South America. Extra stakes are added to the basic warping set-up to conveniently separate warps into different sheds according to the structure being woven.

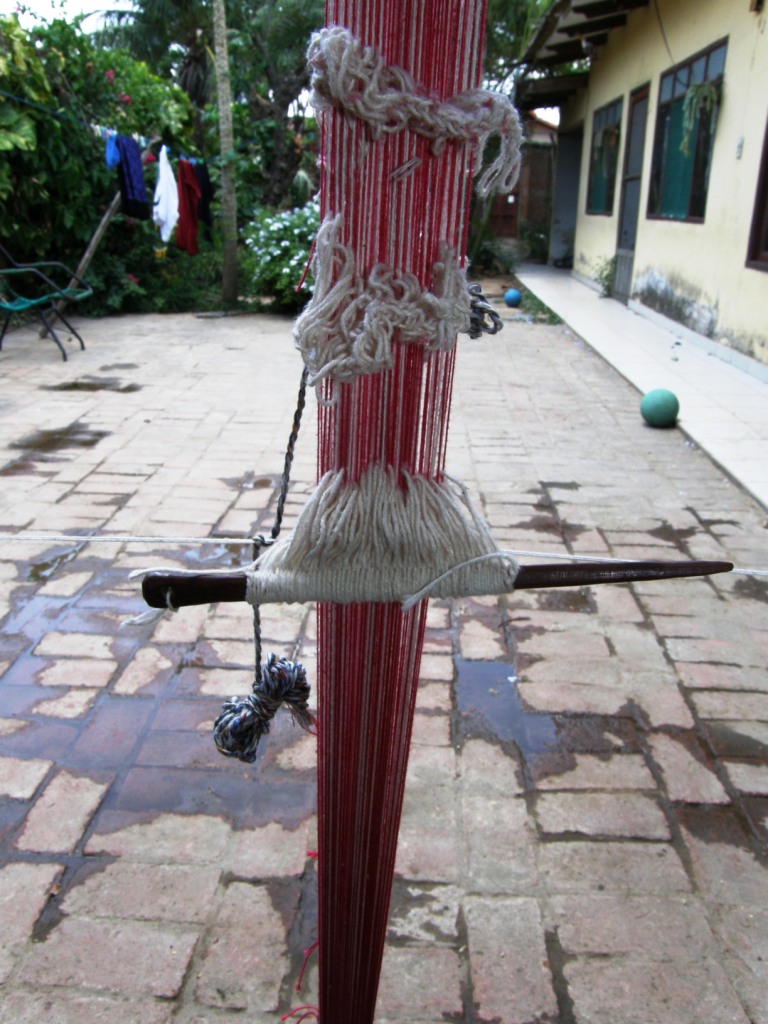
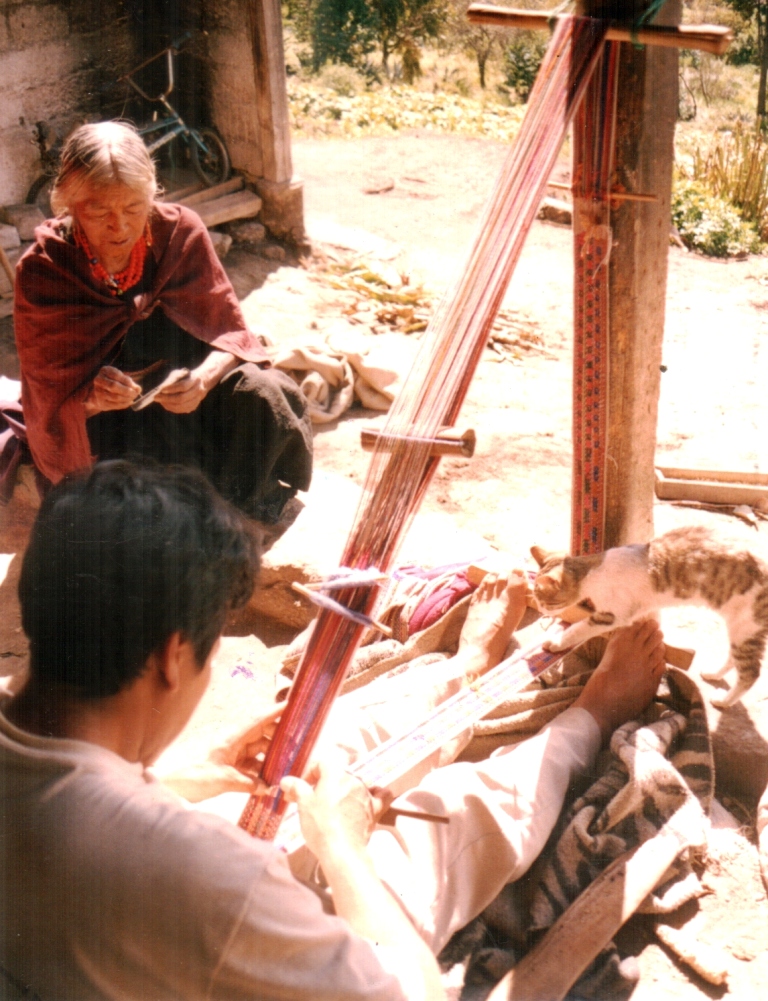
Felipe in Salasca, Ecuador is making a dovetailed warp for a supplementary warp belt using six stakes. The belt will be woven on his backstrap loom.

Above is the set-up I created at home to practice what Felipe had taught me except that my set-up is for a warp in a single plane and so doesn’t have the dovetail stake. I actually added an extra stake to further separate one of the colors. Hopefully I will be able to use this to try the Mitla cloth. I just wish there were more pictures out there. Even the simpler four-stake version is a variation of this idea…separate the colors into sheds on the warping stakes themselves….such a time saver!

I wonder what will leap out at me from the pages of that Journal if I pick it up again in a few months. There are three other articles in there and there is already a Turkmen tent band in there calling out for attention!

In the meantime, I have just about finished my chamanto inspired wall hanging.

The question is… how much pattern is too much pattern? I am not sure if I went overboard with the last row of leaves.

I am now re-twining the bottom of the Starry Night hanging so that it better matches the twining on this piece. That didn’t seem like a fun thing to do at first as the piece was already off the loom but it turned out not to be a problem as I had not yet cut the end loops.

I much prefer to twine on loom than off so that the warps are under tension.

I was able to slip the far loom bar back through the loops and then clamp and roll the weaving so I could twine with the warps once again under tension.

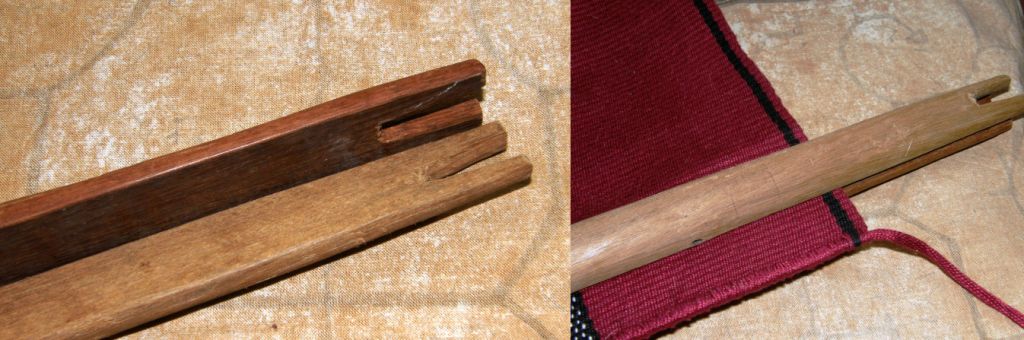
I have this nifty split loom bar that I bought from the Burmese backstrap weavers in Massachusetts. It is a typical round dowel-like bar which has been split in half and is used by the weavers to clamp and anchor their circular warps so that they don’t slip when beaten. The first thing that comes to mind is that surely it would be easier to just use two flat sticks but, they like the loom bar to be rounded, and I could see good reason for that once  I put it into use. Lucky for me I got to buy one ready made.

The third hanging in this series is on the drawing board. It will be influenced by South American weaving from a country a little further north this time. I hope to have made a start by next week’s blog post although there is a lot of sampling to be done first.

Now, about that double weave edge experiment that I mentioned two weeks ago… I made my samples and photographed them. Unfortunately the pictures don’t really tell you anything so you will have to take my word for it!

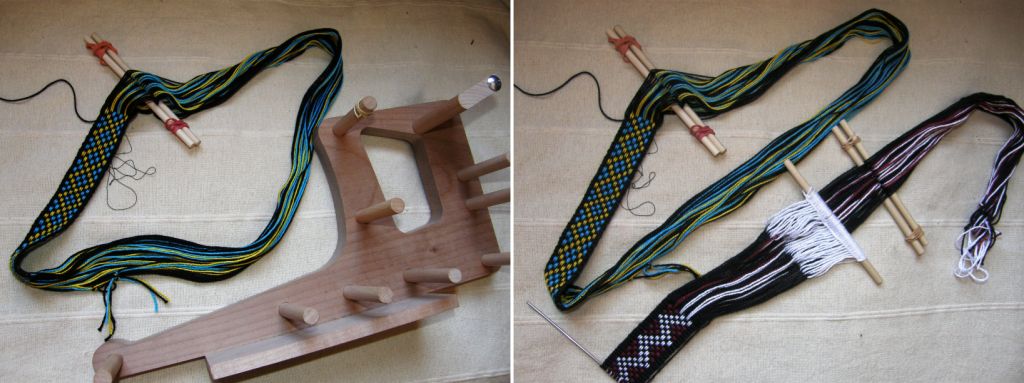
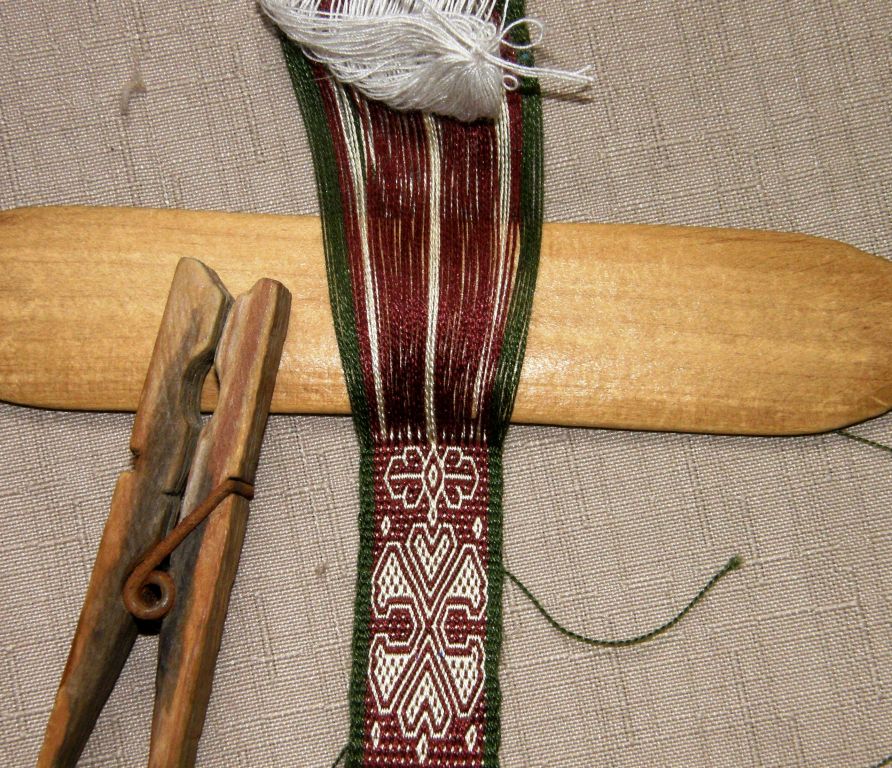
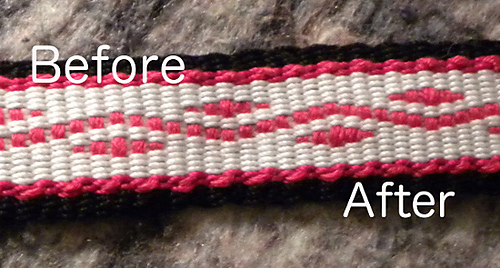
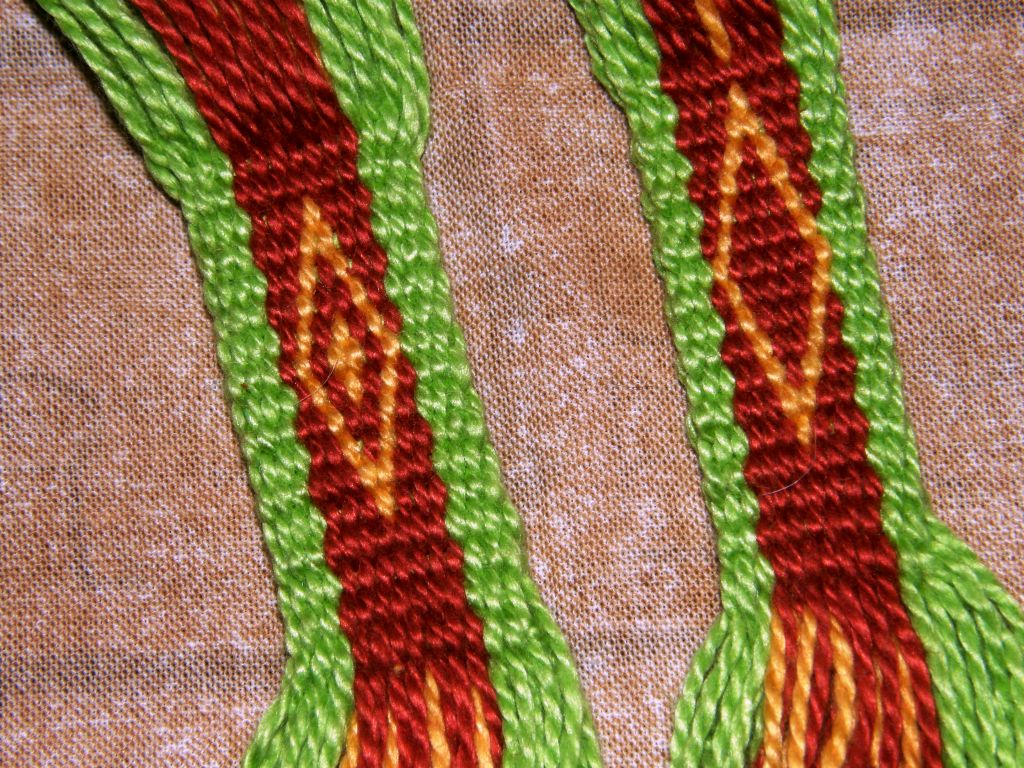
Both these bands have the same number of ends except that the one on the left has two revolutions of single thread on the very edges and the one on the right has only one revolution of single thread. Both methods improve the appearance of the edges for the reasons I gave in this blog post.  The band on the left has a flatter square-ish edge while the one on the left has a more rounded transition from upper to lower layer. I will post all this information on the tutorial page for double weave.

As for my earlier question… how much pattern is too much pattern?…I will leave you to ponder this with something truly spectacular….

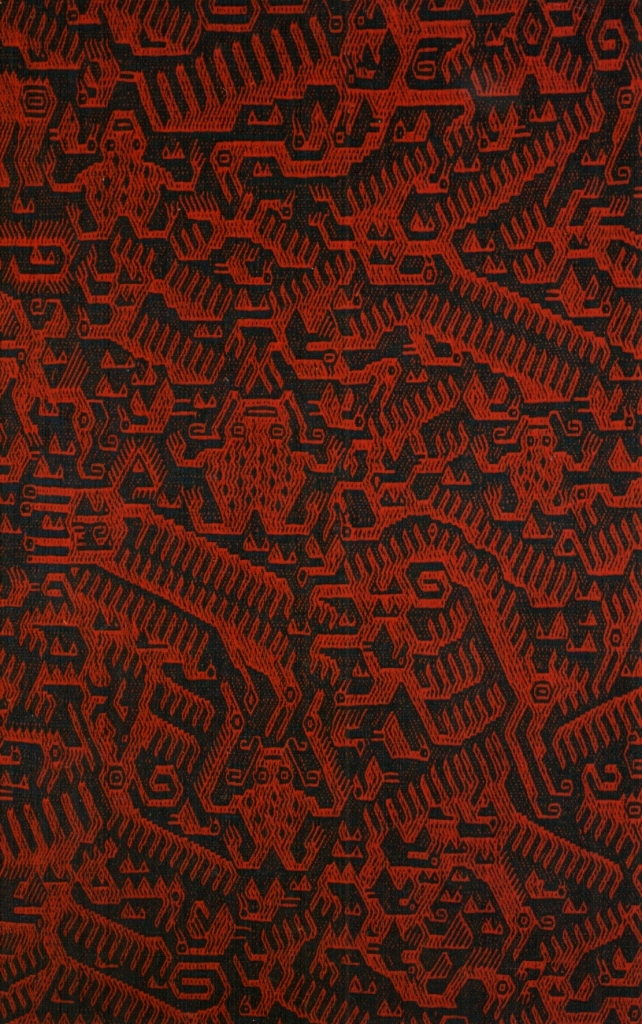
This kind of weaving is made by the Jalq’a people from Potolo in Bolivia on leaning vertical looms. There is barely any space that does not contain a motif. You even see motifs within motifs but, as the idea is to convey a sense of chaos, it all feels and looks just right, doesn’t it?

Backstrap Weaving – Great Lengths for Good Results


The more you weave on a backstrap loom, the more you come to realize the importance of good warping. I so wish I had photographed the great lengths I had gone to to warp for the four-color pebble weave piece above. It was a mad never-to-be-repeated combination of knitting machine tension rods planted in bottles, planks, toes and stakes! It was the time when I lived in southern Chile with little experience or materials on hand. All I knew was that good even tension was essential to a successful project and I was determined to achieve that. Well it worked and I was pleased with the results.

There are so many parts and tools for the backstrap loom that can be made from bits and pieces that one already has lying around the house. And even a warping set up can be easily constructed…just whack a few stakes into the ground in the backyard….and in one’s enthusiasm to get a warp onto the loom and start weaving one may be tempted to ignore the fact that the stakes leaned inward ever so slightly while the warp was being wound.
You learn after that first wonky warp that it is worth going to great lengths to make a suitable warping board if you want to have good results. I consider this the most important part of your backstrap weaving kit.

You can see at left my first warping attempt in Chile after returning from my first backstrap weaving lessons in Peru. Look at that crooked end! I had been warping successfully for Navajo weaving until then and tried to adapt that system to four-stake warping for pebble weave….didn’t work!

Even though that was fifteen years ago, I haven’t come up with any terribly sophisticated ways to warp. Sophistication isn’t necessary. I just make sure that my stakes are well grounded and cannot move or lean in.

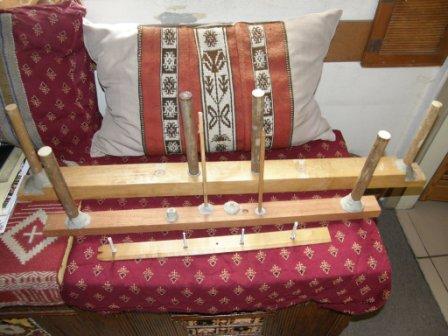
This family of simple warping boards has served me well over the years. Even when I need a longer warp for a belt or guitar strap I manage to combine the boards somehow to fit the bill. I made the middle board to accommodate the multiple sticks that are needed to warp for the supplementary warp technique that I studied in Salasaca Ecuador. The mini board in the foreround is the one that goes traveling with me. The ”stakes” are long screws which are bolted to the wood and can be removed for travel. I also use it at home for keyfobs and bookmarks.

It seemed that all my needs were met with these three simple boards. However, recently I have been weaving with my handspun alpaca yarn. All you spinners out there will understand my desire to not waste a single inch of this stuff!

Last week I showed you the passport pouch I made with my first lot of handspun. I warped it on the middle warping board and it was tough cutting the project off and “wasting” all that handspun. Normally I warp longer than the project requires…there is always that “just in case” factor and so what if a little cotton gets thrown away? But not my precious handspun!

So, I kept all the cut off alpaca yarn thinking I would use it as supplementary weft and that is just what I did this week. I had just enough handspun left to make a cell phone pouch. The dilemma was that I did not have a warping board that would allow me to warp just the right amount for this project. There wasn’t enough yarn to get the right width on the larger warping boards and the mini was too small for a cell phone pouch.

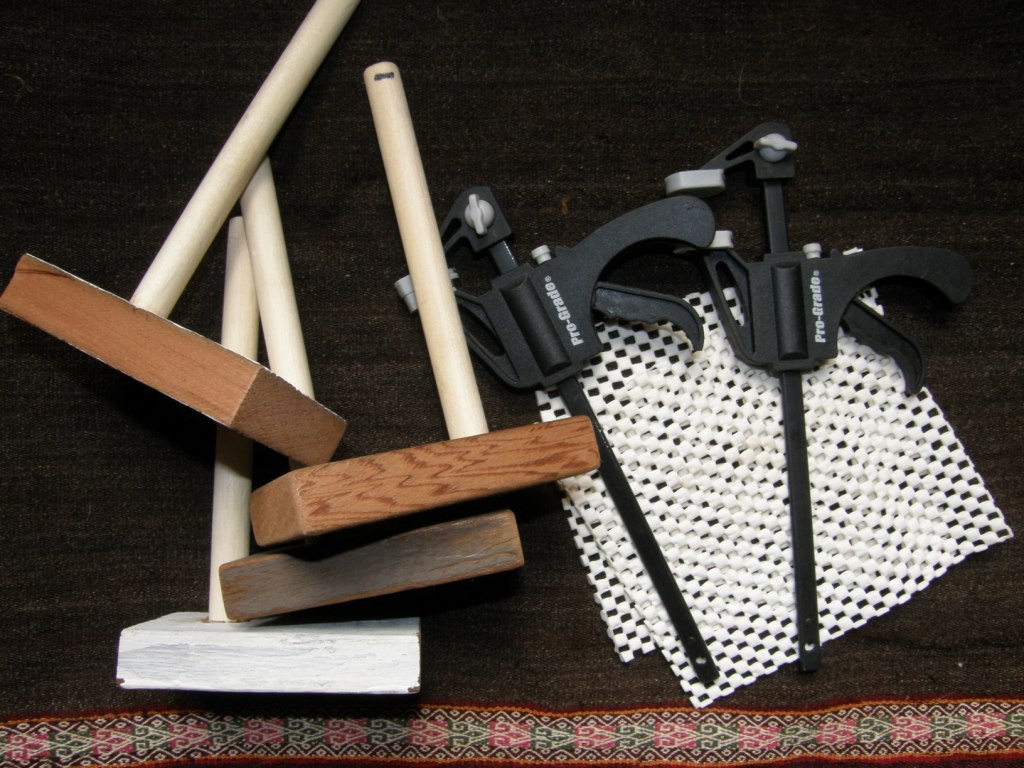
And then I remembered the nifty single warping pegs that my friend Janet and her husband Larry made for me. These can be clamped to a table to warp any length. My problem is that there isn’t a free table here to do that but I managed to use the tray table on which my computer sits and that was the perfect length.

This worked like a dream. I must warn you that clamps can slip while you are warping, quite often imperceptibly, and it won’t be until your warp is on the loom that you notice that one side is hanging slack while the other side is taut. I solved this problem by using that rubbery draw liner stuff that you see pictured above on both the top and bottom surfaces of the table…no slipping…beautiful warp.

I have a lot more about warping and the different ways my indigenous weaving teachers warp in this previous post and also here.

As I told you last week, I put only the slightest amount of overtwist in this yarn so you can see here that the warp can lie quite flat and not go curling up on itself. It is hairy, though, and I did have to work to clear my sheds. I had to put glue on the knots at the color changes after having the knots in this sleek fiber work their way undone multiple times and drive me nuts!

So, this was to be a cellphone pouch with supplementary weft patterning. I would never have thought of doing a piece in wool or fiber with this technique had it not been for Phil in our backstrap weaving Weave-Along on Ravelry who wove a band with his handspun which he decorated with a snake motif using his handspun as the supplementary weft. Then when I was staying with my friend Janet, who is an awesome spinner, I was further inspired when she wove a band with her handspun with silk supplementary wefts.

So, many thanks to Phil and Janet for giving me this idea.

And here is the finished cell phone pouch…

All the other pouches I have made have had flap closures. I decided on something different for this one and added a drawstring instead – an alpaca drawstring, of course!

The design is actually Indonesian. It was a scroll that repeated itself across the width of a piece that I saw at Convergence last year. I stacked the scroll and inverted it to make this new design.

The turns of the supplementary wefts are on the face of the weaving but are quite well camouflaged in the darker warp color. I dabbed glue on the supplementary weft ends as they exited on the back side of the piece. Again, the yarn is so sleek, I didn’t feel secure just cutting and leaving short ends as I would if I were working in cotton.

I am very happy with the way this turned out!

And that was the end of my alpaca yarn…now back to the spindle to make some more and just in time for the Tour de Fleece that starts this weekend.

I have quite a collection of cell phone pouch projects now influenced by Vietnamese hilltribe weavings, Central Asian yurt bands, Guarani designs and Indonesian textiles. Half of them have been given away. Hmmm…as I type I am getting ideas for a couple more!

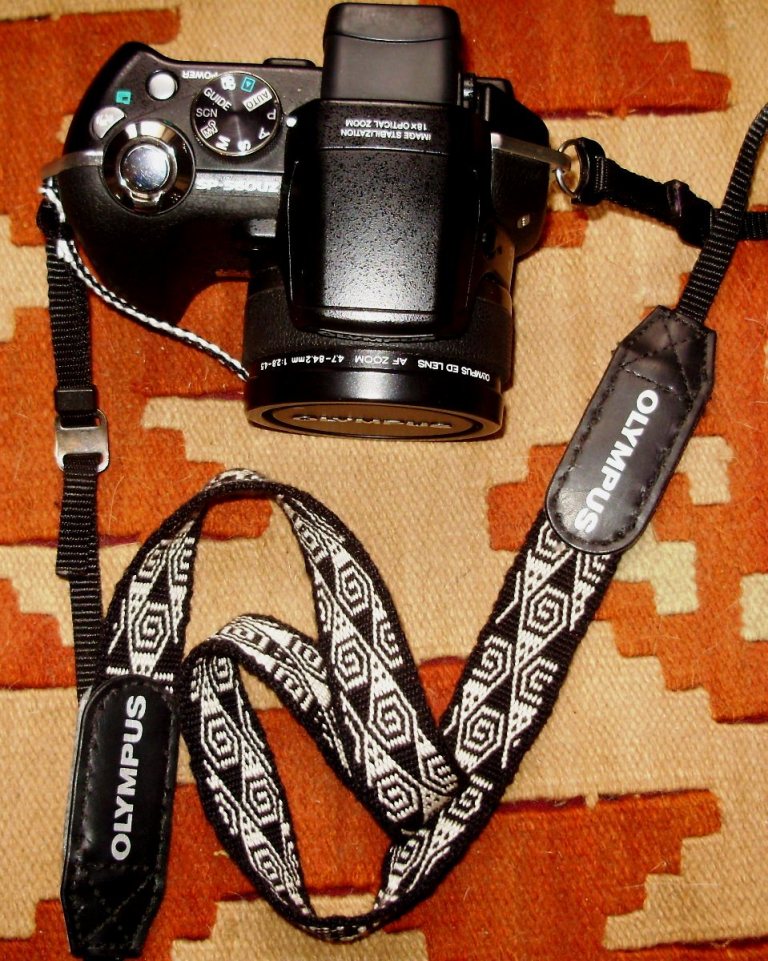
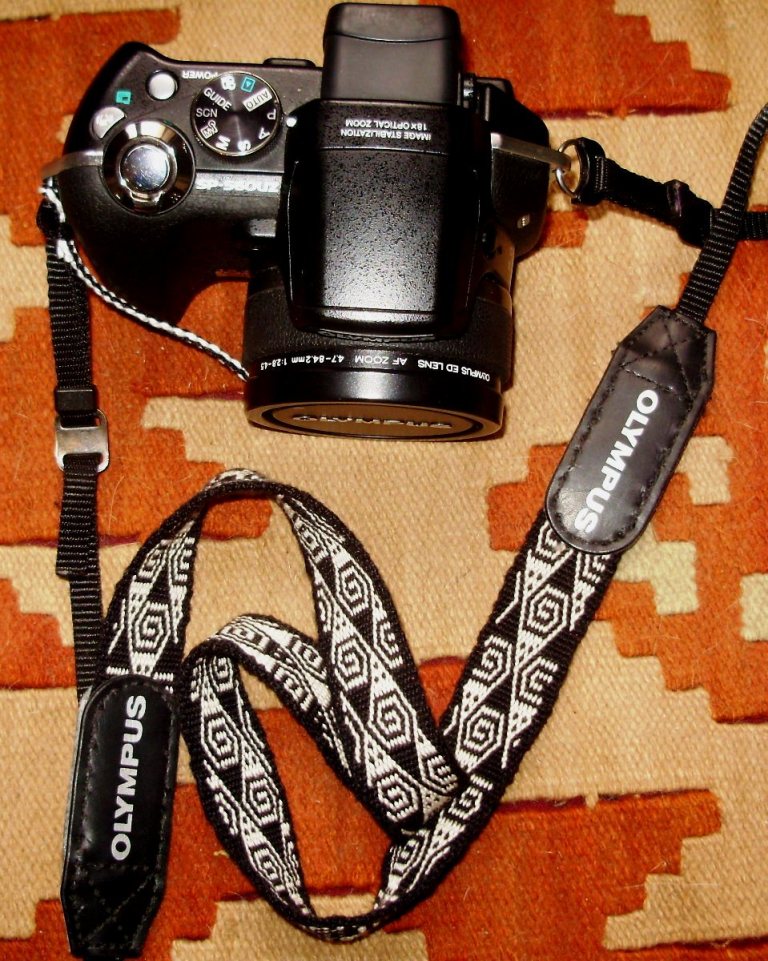
Last weekend I completely ignored my to-do list and launched myself into a new project. What brought this on? Some friends sent me pictures from my recent visit to the US and I realized that in almost every picture of me I was clutching my camera. I decided that my camera needs a bit of dressing up…well, to tell the truth, I probably do too but that ain’t gonna happen!

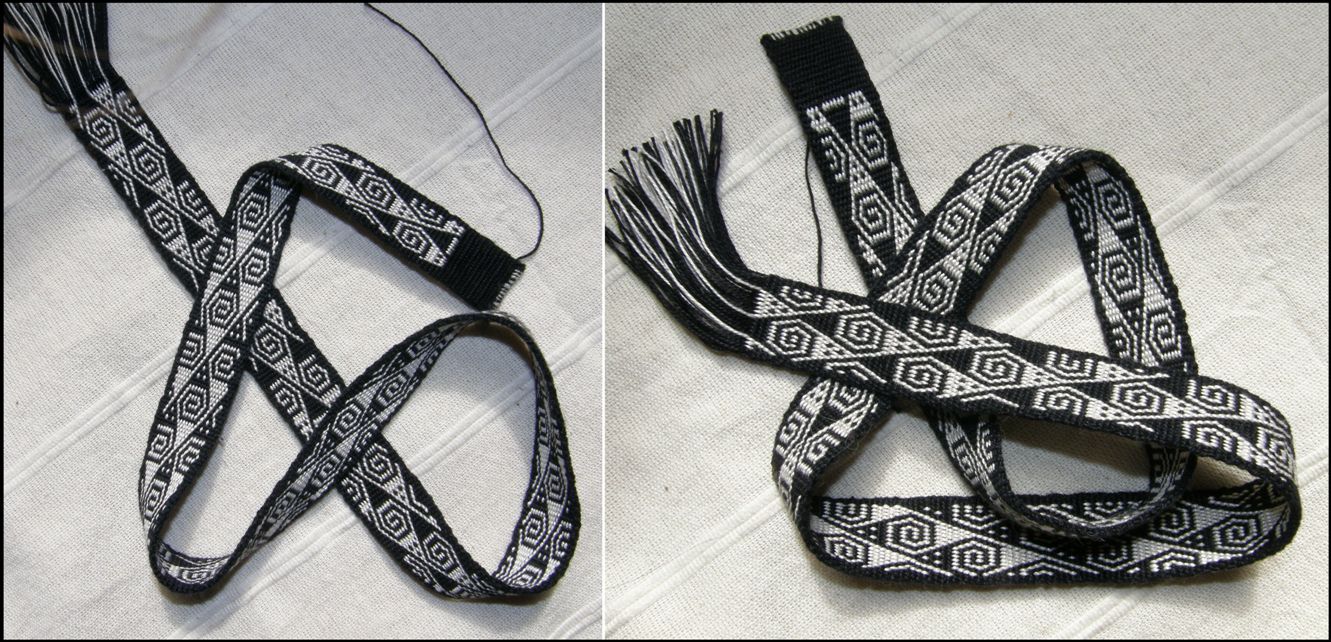
So, I wove a strap and braided a tie for the lense cap.

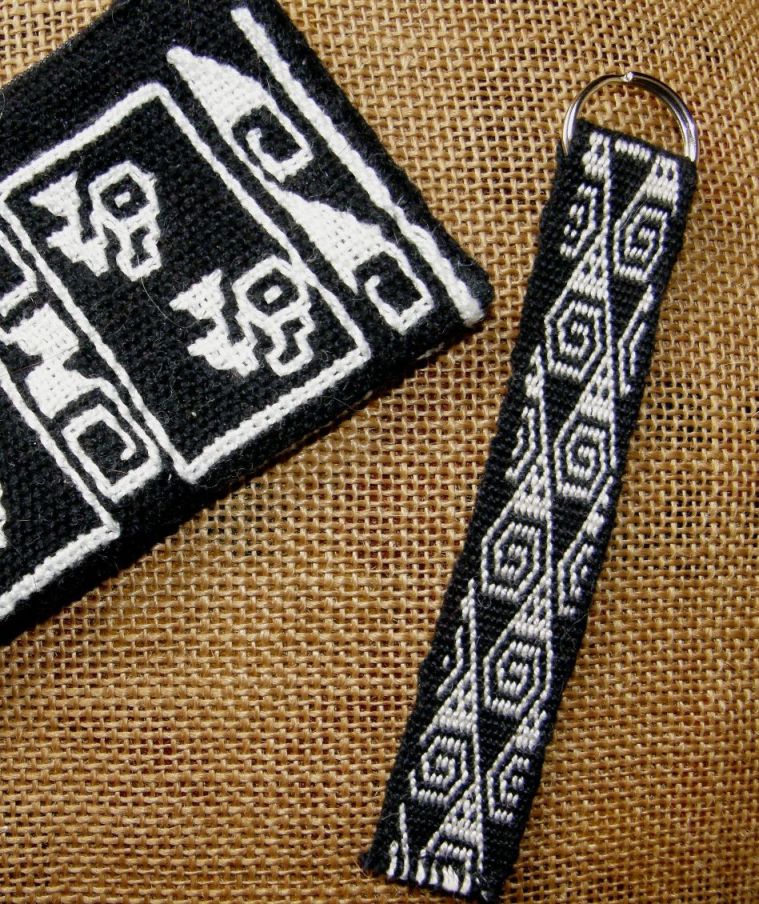
 I wove this in one-weft double weave and you can see that it is based on the float pattern that I used on the passport pouch I wove last week. I think that this design would also make a good project for warp substitution. Those of you  who have dabbled in warp substitution will know that one of the technique’s drawbacks is that you end up with long floats on the back but, if you are weaving an item where the back of the piece won’t be seen (unlike my camera strap project), the floats won’t matter.

Here is my dressed up camera…


I wove more length than I needed for this strap and so made a keyfob from the left overs and you can see above that not much warp was wasted.

Actually I could have woven more but I had had enough of these swirls by that time!

I have added this double weave pattern chart to this page. Take my advice and extend the chart if you plan on weaving it.

The design did not repeat at all for the entire length of the band and it is easy to go on weaving and forget when to start weaving the design as it enters from the right edge. You need to weave a fair bit before the design starts sinking in.

I just hand stitched across the bottom to seal the end.

Let’s go back now to the original topic to show you a couple of nifty warping ideas from some of my online weaving buddies.

Sometimes you have to get creative according to your budget, your lifestyle or living situation…lack of space and considerations like that. Above left is Marsha’s new warping set up using long screws and drilled holes and segments that can be joined together to accommodate a variety of warp lengths. It all comes apart for travel. Marsha is a terrific DIY-er and is also making lovely beaters and pick up sticks so, you know where to go if you would like to have some made.

And now you will see what I mean about going to great lengths…

Tracy and her husband lugged a bed frame onto the roof of their home in Qatar. That looks like a great sturdy set up and adding extra stakes to that for four-stake warping should be easy. The two extra stakes don’t need to be firmly grounded. In fact, I have seen a picture of a weaver warping seated on the ground with the two extra stakes lodged between his toes.

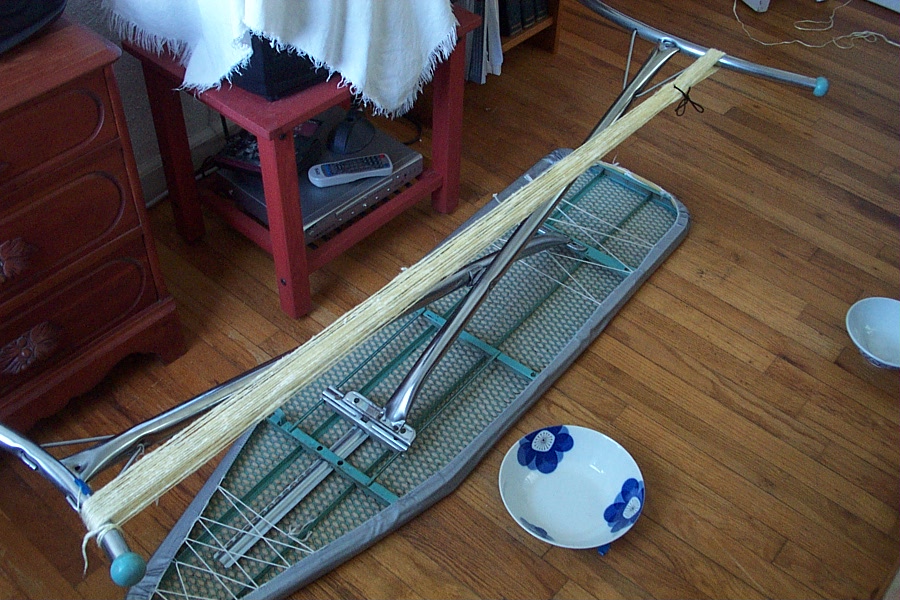
This set up was spotted today, by Dyggvi (from the Ravelry group) on this blog (it wasn’t wound for backstrap weaving)…Not sure about this being a good option as the legs look curved.

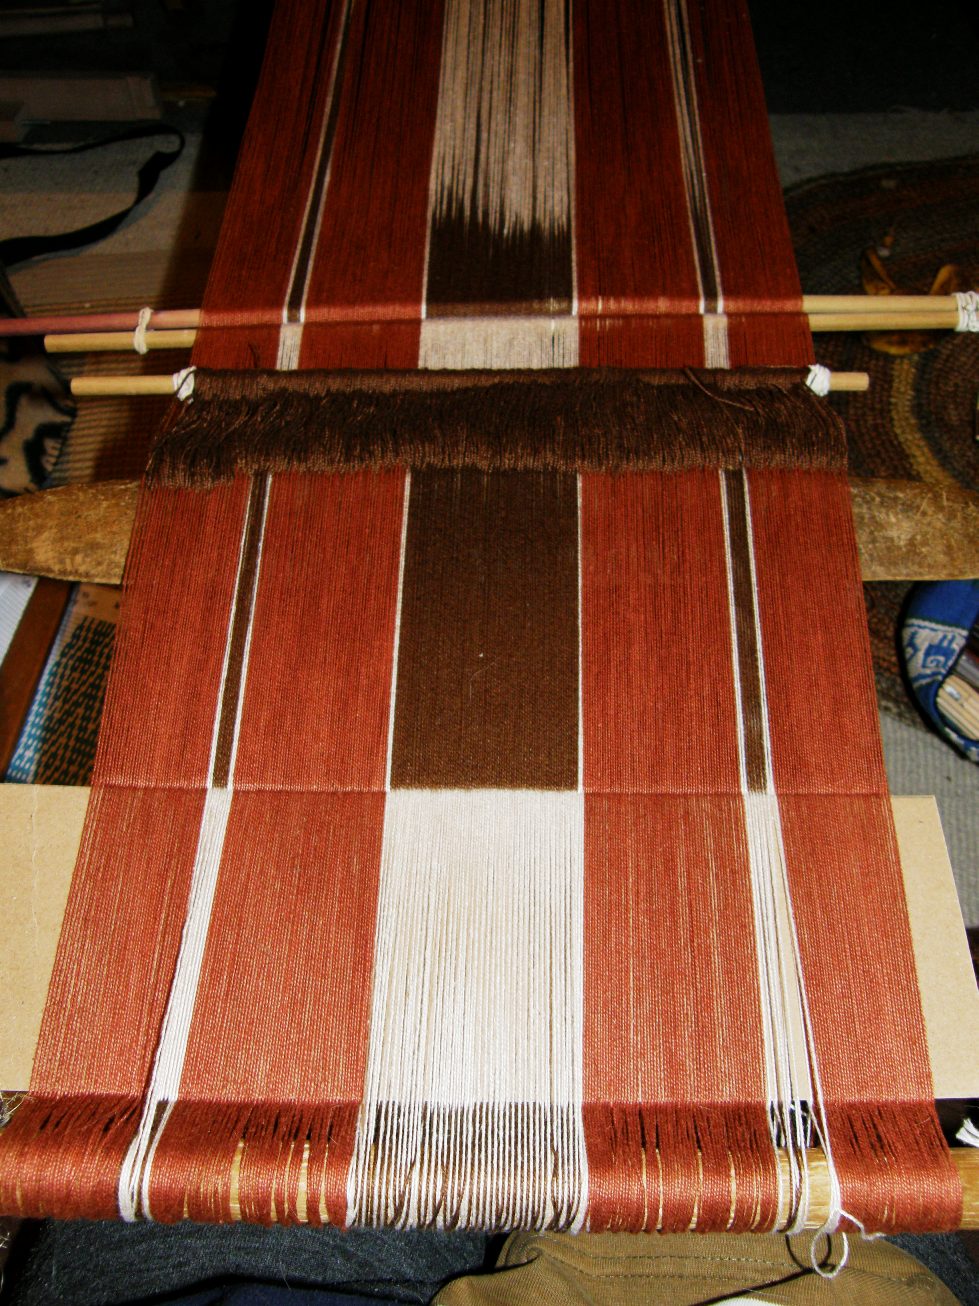
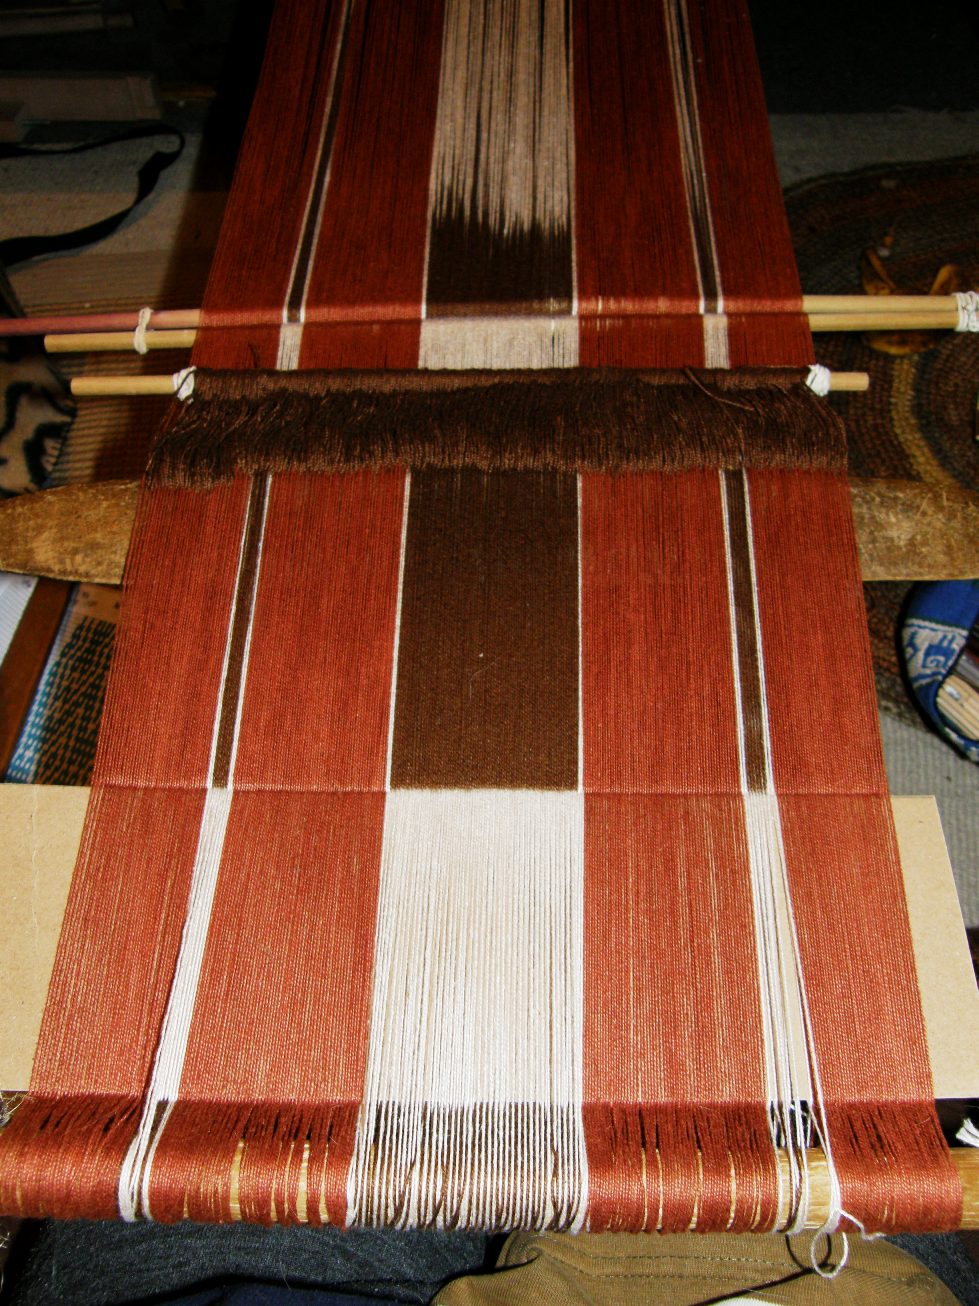
I warped up the widest piece I have done for a long time yesterday. It was warped in two sections and transferred to the loom bars. This will hopefully be the first of a set of four placemats all using the two-color warp float technique. Each one will be in a different color with a motif from a different culture.


I am leaving a pretty big fringe as I plan to twine a design on each end and will dye some of my Cebelia #20 thread brown for that (doesn’t seem to come in brown, does anyone know if that is a fact?)

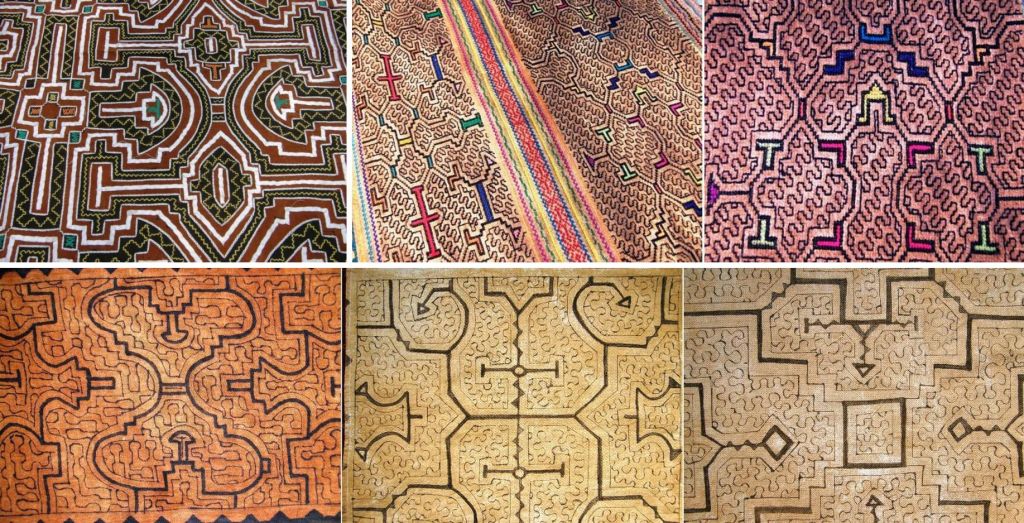
I am using that gorgeous terracotta brown color that I dyed last week which I wanted to have resemble the color of the Shipibo cloth pictured below left. The design is from what I am pretty sure is a Shipibo bag woven using the same technique. I have not seen many Shipibo textiles and have not traveled to the area of Peru where these people live but I have bought a few small pieces of their painted cloth and was shown some of their embroidered work by Yonat who has some of their textiles in her collection.

I would love to go and learn more about the Shipibo people and their work with textiles as these days I feel quite drawn to the weavings of the people of the lowland areas of this great continent which is very often neglected.

I would like to share a link with you which was sent to me by Yonat after the inclusion of some braids and Andean and Tibetan slings in my post last week. I definitely want to try some of those braids.

Also, Dyggvi, one of the group members on Ravelry, shared a couple of interesting links to images of backstrap weavers in Taiwan and their very unusual loom set up. The first picture in this link is of an Atayal weaver but there are backstrap weavers from other countries on that page too.

Tracy has written a blog post about the al’ouerjan weaving that is practiced by Bedouin weavers. It is a warp substutition technique and her post shows lots of lovely variations of the design.

I will leave you here with some outdoor backstrap weaving shots from both sides of the equator….

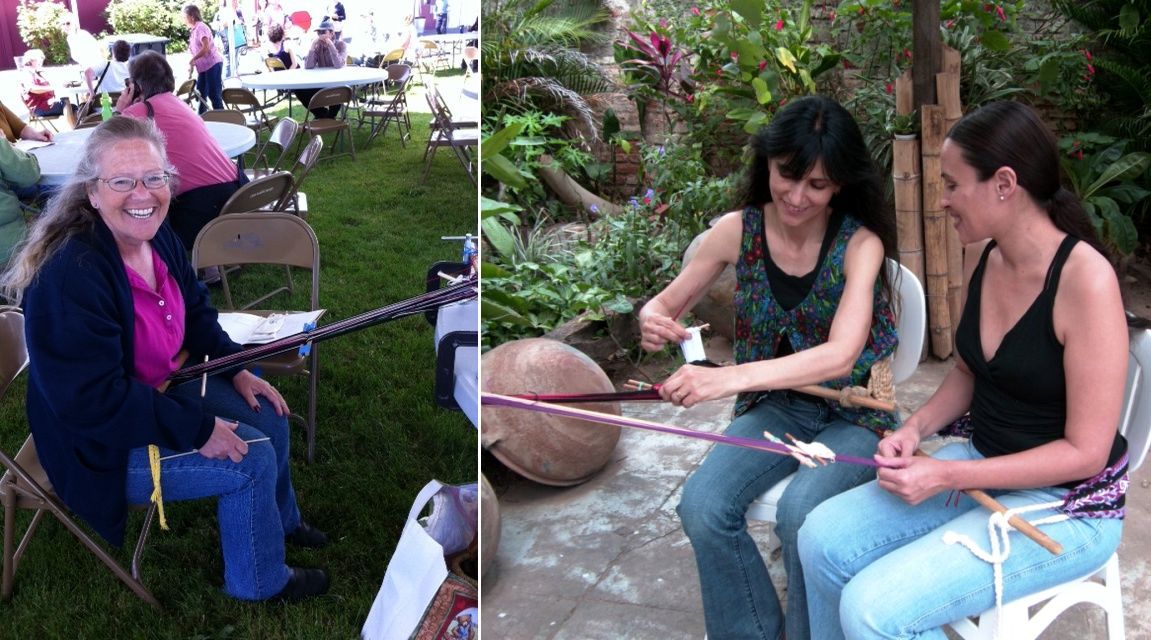
That’s Bobbie at the Black Sheep Gathering in Eugene Oregon last weekend. She met up with Jennifer and Janet, a couple of other Ravelry backstrap weavers and they were able to spend some time together weaving. That’s the early Oregon summer, still a little cool in the shade. Here in Santa Cruz Bolivia we are in the depths of winter as you can see on the right! I spent an afternoon weaving in the patio at my friend Lalenya’s house. There are only about ten cold days in winter here and that wasn’t one of them!

Thanks to everyone who visited my Andean Pebble Weave Facebook page. I am constantly posting photos and bits and pieces there. I hope you will continue to drop by and hit the “like” button.