Backstrap Weaving – From Experiment to Project

Just when I am at the point when I feel that I have learned enough about the behavior of the naturally-dyed silk that I was given to be able to move on to real projects rather than experiments and samples, I find that I don’t really have enough of this yarn left to be able to make anything decent!

These are the skeins of silk that had been used in natural dye experiments and given to me. I have used them to weave journal covers using a variety of warp-faced pick-up structures and, more recently, to experiment with ikat. If you have been following my most recent posts you will have seen and read a lot about my experiments in which I use multi-colored base warps for ikat. I wrap the warp in ikat tape to create a pattern. The taped areas resist the color in a dye bath and, when the tape is removed, a multi-colored pattern is revealed ready to weave.

Sadly, I am almost at the end of my supply of this naturally-dyed silk. There is just about enough to make one more small warp but I think that it is time to move on and try out the 30/2 silk that I got from my weaving friend Deanna in a swap.

The fourth in my recent ikat experiments with the multi-colored silk has happily changed its role from  experiment to project. I warped up a wider and slightly longer piece and decided not to create stripes of random color and width this time. All the stripes were twelve ends wide and I used symmetry in the arrangement of the colors.

I divided the groups of warp threads to be wrapped in tape into twelve-end sections. This was going to be a very orderly warp. I didn’t challenge myself to creating the impression of curves or to create nice even horizontal lines. I went with bold diagonals instead.

Here it is out of the black dye bath and almost dry enough to place on my backstrap loom beams.

As soon as the first few inches I had been woven, I knew that this one was going to be my favorite so far.

A little further along and feeling really pleased with it :-).

And, finally, off the loom…a close-up.

One more picture (can you tell I am loving this one?!)

How would it behave once wet finished? I had high hopes that this would work as a cowl. I had used 60/2 silk as weft. Would it have enough drape? I love the wet-finishing part of working with silk. The fabric relaxes and almost oozes under the iron as I give it a good hard press.

I am trying to show the sheen after wet finishing in this next picture. It was really hard to capture.

And, yes! It works as a cowl. I am so happy that I can wear this piece! (This is what fifteen months of cold turkey grey-hair grow-out looks like, by the way).


It is just draped around my neck in this picture. I have yet to finish it. I have three selvedges and need only deal with one raw edge. I’ll cover that edge with fabric and use three buttons and loops to close the cowl. I need to make the closure decorative as I am pretty sure that the cowl will swivel at will around my neck as I wear it. The buttons could end up in any position and they need to be pretty. Once again, I’ll have to put my meager sewing skills to the test.

Another project that got almost finished is the silk ribbon that I made for my Koru pendant:

I have washed some of the 30/2 silk so that it can be dyed. The first ikat project with this new material will be a narrow one while I get acquainted with the way it behaves. I want to focus on a much longer warp which will be folded in two on the ikat frame. In that way I can tie the ikat tape in multiple layers at the same time and achieve a repeat.

My weaving friend Pam shared pictures with me of her visit to Uzbekistan many years ago in which you can see a warp of many meters length folded and placed on the ikat frame where the young ladies sit ready to tie the pattern. The  beams that hold the warp under tension are tied to bolts in the floor.

I am absolutely in love with this piece below from Timor. Kinga Lauren who collected the piece, kindly allowed me to show it here in my blog post.

I love those curvy irregular patterns. You can see how the irregularities in the pattern in the lower half of the fabric are perfectly replicated in the upper half. The warp was obviously folded with ikat tape wrapped around both layers at once. 

A close-up of part of the ikat section and the fringe shows the number of beautiful subtle colors that were used in the stripes. This is naturally-dyed cotton.

Wrapping multiple layers will be one new challenge for me. The other will be attempting to dye with more than one color. I tried a very simple version of this many years ago on a rather carelessly tied pattern. I really liked the effect and was able to use the piece as a book cover. I had some mishaps with this cotton warp. This was back in the days when I was using cassette tape for wrapping cotton warp. I made one of the dye solutions too hot and the cassette tape simply did not deal well with the heat.

So, on the heels of my happy cowl project/ikat experiment, let’s see what kind of mess (or success) I can make with 30/2 silk!

To finish, I have some nice work to show you from my inbox from new and old online weaving friends…

Shilpa Nagarkar Rao is weaving Andean Pebble Weave patterns using my Complementary-warp Pattern Book (after having learned the technique in my Complementary-warp Pick-up book). She uses an inkle loom to weave bands and then combines them to make beautiful bags. (See her Facebook page).

Bag made from several bands woven on an inkle loom by Shilpa Nagarkar Rao

Cynthia has been working with supplementary weft creating motifs in several colors along the length of the band. This ability to change color at will is one of the many nice things about this technique and is why Guatemalan clothing can be so colorful.

I love how Vanessa De Columna made what I believe to be her very first Andean Pebble Weave band into a headband.

In book news, my latest pattern book, which ended up with 132 charted patterns, is in the hands of Taproot Video and I am just waiting for it to go live on the website. The Taproot folk are currently busy shooting a new spinning class with Joan Ruane…exciting news!


Backstrap Weaving – Life in the Yarn Forest

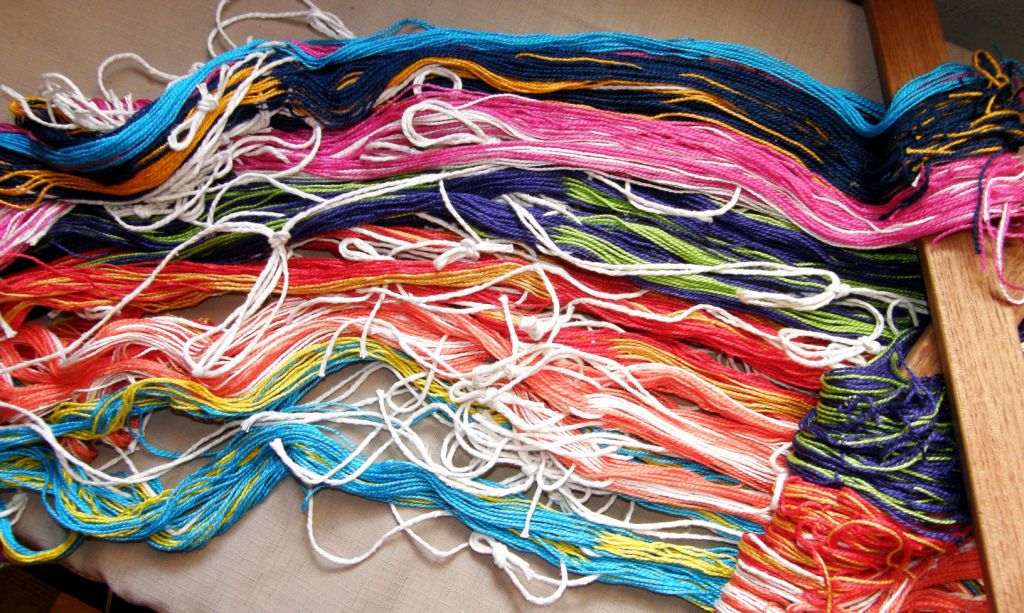
I was almost going to skip this week’s post. You see, I have been all tangled up in this stuff…This is about one-tenth of it!

warpsI am in the throes of warp preparation and, once I get the ball rolling, I don’t want to interrupt the flow in any way. The living room is a forest of colored thread. My cat is bored with it and just walks over the top as if it is all just some kind of new flooring. There is the risk, though, that she will bring down a lizard from the upstairs terrace and decide to play hide-and-seek with it in the yarn jungle.

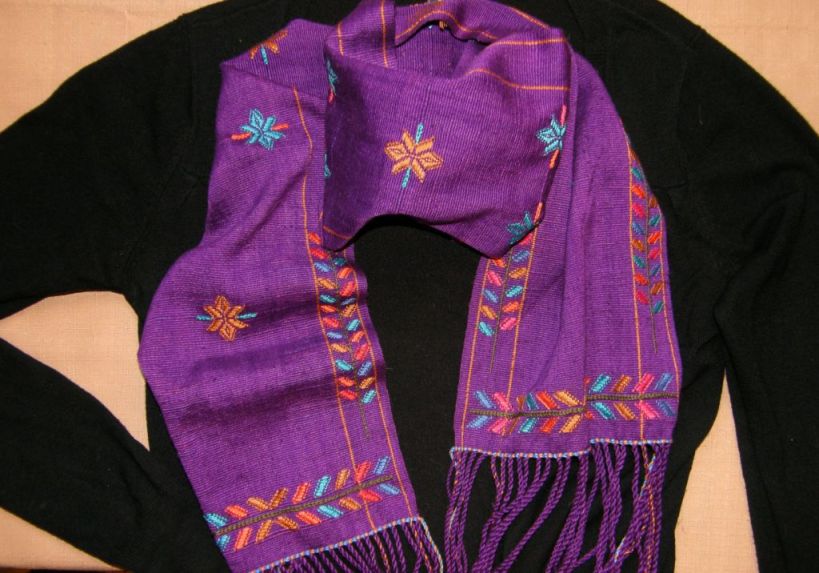
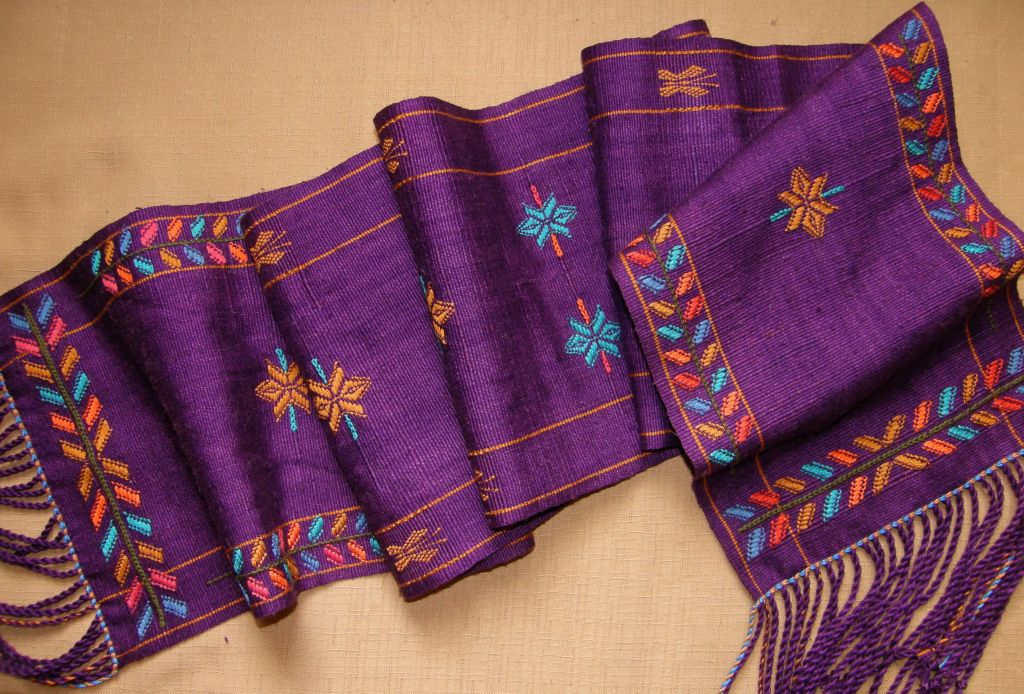
But, as I have been making good progress, I decided that I could part the branches and vines and step out for a bit so that I could post pictures of the finished purple scarf while I am still excited about it.

??????????????????????You will see that I decided not to add a few inches to start and finish. That is something that I had been pondering last week as I found myself with excess warp that I didn’t want to waste. The decision was made easier by the fact that I had just about run out of yarn for weft. That and the fact that the scarf really didn’t need any additional length, had me twining a two-color edging and cutting the circular warp apart earlier than expected. I am really happy with it.

And you can tell how excited I am as here I am playing fashion lady…(so NOT me!)

??????????????????????

I probably won’t have time to start another project before I get on the road but I have an idea developing for the next thing…a bandanna! which I will use as a kind of neckerchief.

The bandanna will be square, and wider than most things I weave, with supplementary-weft patterns scattered over it. I haven’t decided yet on the motifs…maybe something inspired by Mexican weaving or maybe something Indian for the Sanskrit origin of the word “bandanna”: बन्धन bandhana, “to tie”. I see many pictures on Facebook of the daughter of my Godmother, who still lives in India, dressed in luscious saris. Maybe something there can inspire this next project.

I have green and red left in the Guatemalan cotton with which I have been working and have chosen the red. I wish I had a really pale lilac in the silk for one of the supplementary wefts. Maybe I can pick up something on my trip.

??????????????????????So, I will have that idea percolating while I am traveling. If I do really well with my trip prep, maybe I will at least wind the warp so it will be good to go when I get back. Then it will be able to fight for first place among the many ideas which I usually bring home.

Along with my trip preparation, I have this project to finish….

finished baackstrap woven wall hangingsI won’t tell you how many warp ends there are in these three wall hanging panels that need to be twisted or braided or dealt with in some way. However, I kind of enjoy doing things like this. I like to find something that doesn’t really require my full attention on tv…like a movie or show I have seen and enjoyed before…and then sit with sweet snacks on hand and braid and twist away.

ANWG 2013I have lots of plans to add more panels to this wall hanging series. I can’t decide which project I will tackle next. I hope to have these three hung as part of an exhibit at ANWG in June.

It will be fun to see them up on a wall as there is certainly no room around here for them. The three pieces have structural and/or design influences from South American textiles I have seen. Some aspects were inspired by experiences I have had while on the road learning to weave.

Another reason I wanted to take a break and blog this week was to tell you about a weave-along in the Ravelry Backstrap Weaving group that Ghedrain is proposing starting March 1st.

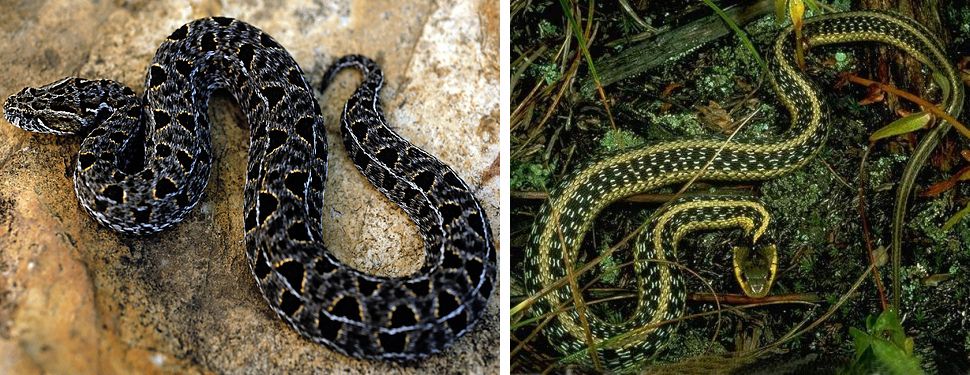
Considering that the Chinese Year of the Snake has just begun, Ghedrain has suggested creating projects that are inspired by snake-skin patterns or by the shape of the snake itself and has posted a number of pictures for ideas. Here are a couple: (the image on the right comes from this site.

snakes for WAL

Such amazing patterns!
The weave-along is open to all levels although it won’t be based on a tutorial of any kind. Any weave structure can be used…pebble weave, double weave, supplementary-weft inlay, to name a few….and we are particularly encouraging people to use plain weave with some creative colored warping to create snake-like warp-faced patterns. The inkle pattern generator is very helpful for experimenting with color arrangements.

Janet is planning to do a card-woven piece using a backstrap set-up. And it is not just limited to backstrap looms. We welcome the use of inkle looms or other looms on which warp-faced pieces can be woven.

Kateri, who wove with me in Massachusetts last year, showed the group what she has been up to lately using the pebble weave structure and patterns charted in my books

kateri pebble weave

It is nice to see Kateri venturing into wider pieces. The piece on the right became a study in how warp tension affects the elongation of the motifs…the more tension applied, the more elongated the motifs will be…something of which backstrap weavers need to be aware as they go rolling up and shortening the warp. The piece on the left has a favorite motif of mine which was taught to me by my dear teacher Maxima in Cochabamba. Kateri’s band is beautifully even and the motifs are nicely balanced the entire length of the band.

Ghedrain is set up to weave a scarf for her husband which is the project that lured her to backstrap weaving in the first place. After putting in some time to get acquainted with the loom and the warping process by weaving a few items, which I showed last week, the scarf project is now underway.

Ghedrain scarf


Backstrap Weaving – A Snaky Start to the New Year

A “snaky” start to the new year….”Snaky” isn’t one of those words I find myself writing very often and when I typed it into the title of this post, it was bugging the heck out of me…just didn’t look right. Spell-check wasn’t touching it, yet I wasn’t going to be happy until I had Googled it to make sure. It was then that I read that “snaky” in informal English in Australia and New Zealand  apparently means angry or bad-tempered.

So, I want to make it clear to the Aussies and Kiwis out there that I did not start this year angry or bad-tempered as the title of this post might imply. (This also reminds me that I am in my twentieth year here in South America…that’s a long time to have been away from Australia and any of the new expressions that may have been adopted into the local lingo.)

598638_479457965438891_897317545_n
supplementary weft samplerWhen I say “snaky” here, I am referring to the fact that the Chinese New Year, which will start on February 10, will herald the beginning of the Year of the Snake.

And why do I know this? Well, a Facebook friend shared the above image from a page called “The Journey to the Revelation of my Soul” and I saved it simply because….. I like the COLORS!
I am thinking that I must weave something with this color combination some time. Well, I kind of did in my sampler pictured above… but not quite. I want that rich burnt red background and that special shade of blue. Whoa…is this the structure and process person speaking?… now getting all excited about color?

OAnother reason the snake image appeals to me is that I happen to be starting the new year weaving a snake-like motif into my latest wall hanging project. I like to think of it as a boldly-patterned snake  winding its way back and forth across the cloth.

The pattern is based on one of the designs that Wayuu weavers work into their belts. Imagine my surprise when I got Mirja Wark’s book off the shelf, in which she describes and names the designs, to find that the particular pattern that I have been using as my inspiration is called pasatalo’ ouya which means “like the intestines of a cow”!

Okay…so, I am weaving a wall hanging with representations of cows’ noses and intestines. But, since I adapted the basic motif a lot so that it would be big and bold enough to fit the space in which I am working, I think I could allow myself to call it snaky instead. What do you think?

Sloooow going. I am not achieving the four finger widths which my teachers tell me is a good day’s work. Some days I am lucky if do three. It is, however, very exciting watching the pattern slither its way up the fabric.

It is giving me both a mental and physical workout, I can tell you! It is an extremely dense two-heddle complementary-warp structure and opening the heddles is hard work. While the tiny elements of pattern within the main shape are very repetitive and easy to read, there are just so many warps to handle! I feel that I deserve to get up and go eat mango after every pick!

O

I like to think of the figures on this sash that I wove a long time ago as snakes. I copied the design from a textile from pre- Colombian Peru. Who knows what the weavers of the original fabric were seeing when they created these motifs on their cloth.

books-2

The snake is an important figure in Guaraní weaving legends. My teacher tells me that it was a snake that appeared in the dreams of the first weaver and taught her the weaving designs. When Guaraní weavers of the Izoceña group weave the zig-zagging snake skin patterns in their cloth they are also representing the Isoso river along which they have settled. The snake and the river are one.

I wove Guarani inspired snake skin designs into this guitar strap.

The Mayan Goddess of Weaving, Ixchel, is most often depicted with a snake or snakes on her head or entwined in her hair…

ixchel 3 formsI was told that this is one of the reasons why many Guatemalan women weave richly colored sashes to wrap about their heads and around their hair. The sashes vary enormously, in width, length, color, design and weaving technique  from place to place. It is also interesting to see the different ways they are worn….

santiago atitlan hair sashby a lady from Santiago Atitlan above…

O

weaving a hair sash zunil guatemala…and by this sash weaver in Zunil.

##################################################

Wishing you all the very best for the new year surrounded by completely non-“snaky” (in the Australian sense of the word) folk!

##################################################


Backstrap Weaving – Hands Full of Threads

The black neck wrap is done and I am already thinking about the next one.

I thoroughly enjoyed working with this fine Guatemalan cotton thread (you see how I have forgotten about all the woes in the beginning!). It was fun picking up threads with the delicate Guatemalan pick-up sticks and feeling the silk supplementary wefts slide through my fingers.

This will be the color scheme for the next one…

colors for next backstrap woven scarf

Maybe I will use some Guatemalan-inspired designs this time or perhaps I will invent some of my own.

cotton-spinnersI got the black piece off the loom and then I was faced with fringe twisting. Would you believe I have never done this before? I have left fringes on placemats and braided the ends of other pieces. I had read the grumblings about fringe twisting from those who regularly weave scarves in the weaving forums and seen pictures of the gadgets and gizmos that have been designed to make this task less tedious.

I even watched a video I had taken of my Montagnard weaving and twining teacher, Ju Nie (seen at left spinning cotton), twisting the ends of a piece she had recently taken off her backstrap loom. Ju had come to visit at friend Betsy’s house and, rather than sit idle while chatting in the living room, she pulled out a wad of stuff wrapped in paper and a woven piece of cloth and started working. The “stuff” turned out to be mushy, sticky over-cooked rice through which she drew the warp ends before rolling them on her leg and setting them in the twist.

Here is the video. Ju explains that doing it on her pants is “no good” and that it works much better on her bare leg. I am guessing that her bare shin makes the best rolling surface.


So, I twisted my fringe and it wasn’t as slow as I had thought…much faster than braiding, I can tell you! I added weft twining to the ends of the fabric before taking it off the loom. I think that made a nice finish.  See the countered weft twining tutorial here.

And then I found that scarves are kind of hard to photograph…way too long and flat and lifeless to try and stretch out in one shot so I gathered it up and threw it down many times, fiddled about and I felt that this was the best “pose” in the end.

bhutan scarf with border

And another shot that shows my favorite central motif…

finished bhutan scarf backstrap loom

Although I was mad keen to get into the Guatemalan purple thread and warp up another scarf, (especially since I think that I  already experienced, hopefully, all possible mishaps when weaving the black one), I decided that there was another project sitting in the closet that needed my attention…(plus I really need to ponder and plan the patterns I want to use on the purple scarf before rushing in and weaving it)…

wayuu_motif_with_twining

Remember this guy? I had just started the large main motif when I decided that I would not touch this until I was sure I would have enough time to stick with it and finish it. When doing pick-up, I think it is best to do a pattern all in one go rather than leave it sitting while I travel. If I leave a piece for a long period of time,  I can almost see the place where I left off and picked up again. Perhaps I sit a little differently, apply a little bit more or less tension, beat differently…I don’t know…something changes. So, now is the time to get down and finish this piece.

Usig a forked stick in the warpI welcome the opportunity to have my hands in there and full of threads again. I am not a pick-up stick kind of gal,  unless a particular technique or yarn really demands it. I like to hold and pick and drop threads with my hands. Perhaps it’s because that is the way my first Peruvian teachers showed me. I have been shown and I have willingly tried other ways but I always come back to just using my hands.

Here is a weaver creating a belt patterned with supplementary warps. It is a narrow piece and so it is easy for her to simply insert her hand between the warp layers to do the pick-up.

I was finally successful in uploading the video of this weaver at work. You can see how she does her pick-up as well as see the two-stick method she uses for opening the heddle shed. She has a forked stick in the warp….one prong is her shed rod and the other prong holds a second cross. Grasping and twisting the fork, while leaning forward to relax tension, helps her to smoothly open the heddle shed. 

These are the kinds of textiles she produces…

O

I watched a gentleman from Chahuaytire also weaving supplementary-warp patterns into a much wider piece of cloth. He uses a pick-up stick to hold all the threads in both the pattern and plain-weave sections as he works his way across the cloth…


This is his weaving…

chahuaytire backstrap weaving

Both weavers work equally fast, don’t you think?

So, on I go with hands full of threads. This is the third piece in my red-white-and-black wall hanging series. This one has patterns which have been inspired by the si’ira belts woven by the Wayuu people of Colombia and Venezuela. Since starting this project, I got to go to Holland and meet Mirja Wark who spent years studying, collecting and cataloging these belts as well as writing a book describing the weaving, braiding and twining techniques used.

si'ira belts wayuu mirja wark

wayuu project in progressThese are belts that Mirja herself wove while studying. You can see the “cow’s nose” pattern at the bottom of the blue, pink and green belt that I used in my wall hanging. The large motif that I will use in the center has been very much adapted to fit my piece and uses just certain elements of the Wayuu patterns as inspiration. There are a lot of threads to pick and, until I things get rolling, I am very much clinging to my pattern chart. Thank you, Terri, for introducing me to removable highlighter tape which works like a dream!

So I will be parked in front of that piece for some time while taking breaks to re-spin the Malabrigo yarn, plan supplementary-weft patterns for the discontinuous-warp piece for which the Malabrigo is destined, ball up that large skein of Guatemalan purple cotton, sketch some patterns for the purple scarf project, plan piece number four in the wall hanging series…maybe ikat??…do I dare?

And I am folding this sampler piece this way and that to see if something useful can be made of it. It’s still on the loom and there is room for more pattern experiments.

O

Let me show you some things that Ravelry members and students and friends have made. It is a strange coincidence that three people decided to edge pieces of clothing with woven bands. Janet decorated a pair of felted slippers that she made, Laura edged gloves (and also made a camera strap and headbands) and Julia edged a couple of tiny shadow-weave kimonos with a pebble weave band. Three gorgeous projects! (I am in love with that shadow-weave cloth, by the way…it takes four shafts…I would like to try it).

christmas_projects__2012_006_medium

laura xmas projects

kimono_baby_black___white2_mediumI will leave you with the happy twin recipients of the wee kimonos…Julia’s grand nieces!

ZellaHattieinKimono_medium2

######################################

Right before I was about to publish this post,  a question was posted in the Ravelry group by a weaver who is trying supplementary-weft patterning for the first time and not getting the rich satin-like finish  that she would like in her patterns. Instead, there are spaces and gaps between the rows of her design. I posted a reply in the group but am copying it here as I think that it may be useful for others who feel like trying this lovely technique…

There is no formula that will suit all weavers…that is, “x” number of strands of such-and-such a supp weft material will give sufficient coverage with such-and-such warp thread. All weavers are different in the way they handle their warps.

For example, some weavers put a lot more tension on their warp than others. This means that they have fewer picks per inch than others because the warps are pulled so tight that they can’t bend over and under the wefts as easily as they do for weavers who use less tension. This means that a certain amount of supplementary weft material won’t give the same amount of coverage for those weavers as it does for others who use less tension.

Another case…some people simply don’t beat hard enough when using supplementary wefts. I beat hard and really mash the weft into place…not “wham wham” beating…more like placing the beater right at the weaving line and pushing against the weft hard with a rocking motion.

Other people pull too tightly on the supplementary weft. It has to be fairly relaxed in the shed to allow it to spread and cover the surface. As an experiment, pull your supplementary weft tight once you have changed sheds and see what happens. It will flatten and narrow and not give good coverage. You have to find the balance between thread that is relaxed enough in the shed and bumps at the sides, where the weft turns, that are not too big and loose.

These are all things that come with trial and error and experience. It might be that you need to use more supp weft material or it could be one of the other factors I have mentioned here.

I often use thread that is similar to #3 and #10 crochet cotton. It is Brazilian cotton that I get here in Bolivia. I have used two strands of embroidery floss with the “#3” and one and a half with the “#10”. This gives people an idea of where to start and what to try but, as I said, every weaver is different.

Hope this helps.

ETA My first Guatemalan teacher combed the strands of her supp wefts with the point of her pick-up stick so that they lay next to rather than on top of each other. They didn’t move with handling…the floats are not long enough to cause that to happen. I did the same with the six strands of 60/2 silk on my current project.

Backstrap Weaving – All that Weaving in a Nut Shell

I stopped buying textiles when I travel a long time ago. Firstly, I simply don’t have room to hang or display them and I hate having them stuffed in boxes in my closet.

Secondly, I don’t live in a climate that is friendly to textile preservation…the humidity!…and there is no escaping that now that I have decided I am never using an air conditioner again.

And thirdly, I would rather spend my money on getting places, taking classes and taking a lot of pictures which I can more easily store, enjoy, share and study. I think my digital camera was a far better purchase than any of the textiles I have brought home over the years. Too bad I left it until 2009 to go digital.

Oh, and one more reason…some of the things I have left out have been chewed by my cat. Above you can see some of the bits and pieces I took out for a profile picture I needed.

This means that I can’t take a case full of gorgeous handwoven textiles of Bolivia and other countries I have visited when I go to the US or elsewhere and want to tell people about the weaving I have seen. Even my own backstrap woven pieces are staying home now after seeing how they emerge in an ugly crumpled state from the bottom of my backpack. There  just isn’t a way to carefully pack these things. How do I capture all that weaving in a nut shell without packing and taking half the house with me?

As far as all the amazing indigenous textiles of South America are concerned, I am slowly building a nice digital collection of those and I carry it with me at all times to show on a space-efficient, crumple-proof, cat-resistant disc.

And, if I do take anything at all of mine, it has to have a dual purpose…something that is pretty to look at or which serves as an example of a structure that I am showing, as well as being useful while I am on the road.

Something like these backstraps… I can’t believe that it was this time last year that I was weaving these in preparation for my spring trip to the US. How time flies! They show some simple and complementary-warp structures as well as being useful to people who want to weave along with me. They are sturdy and  roll up nicely for packing.

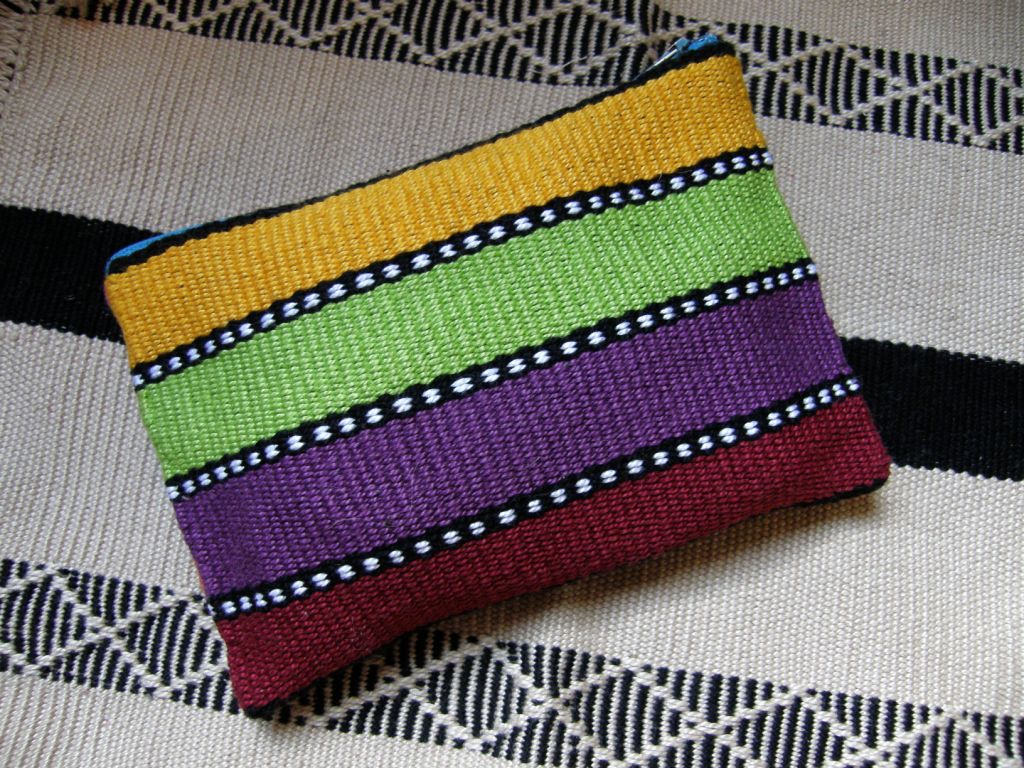
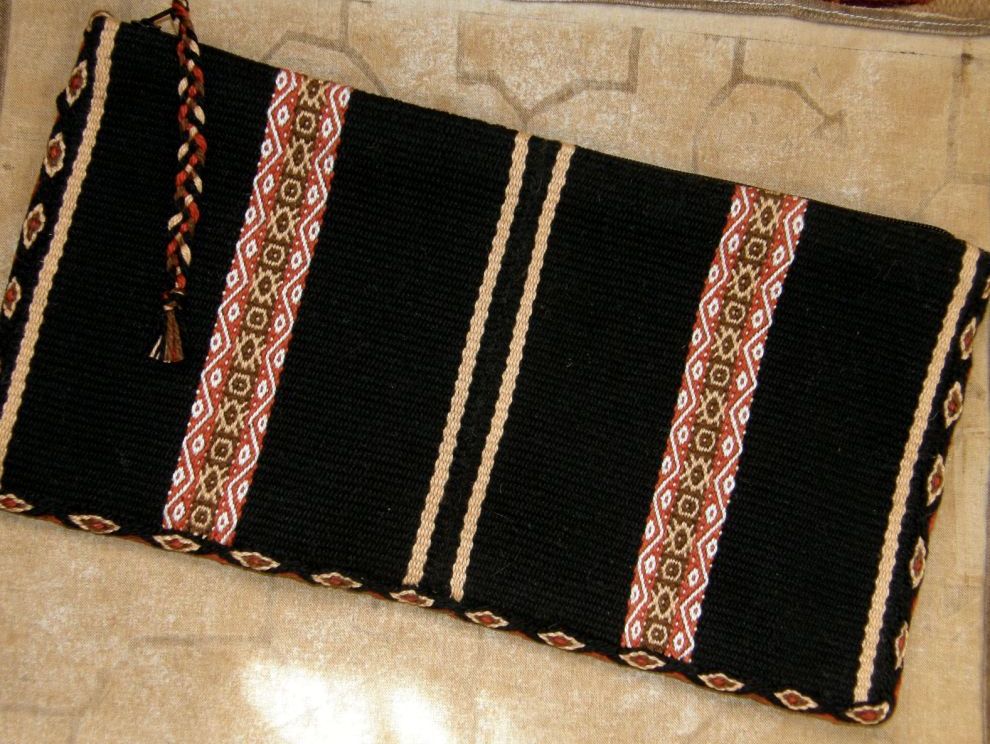
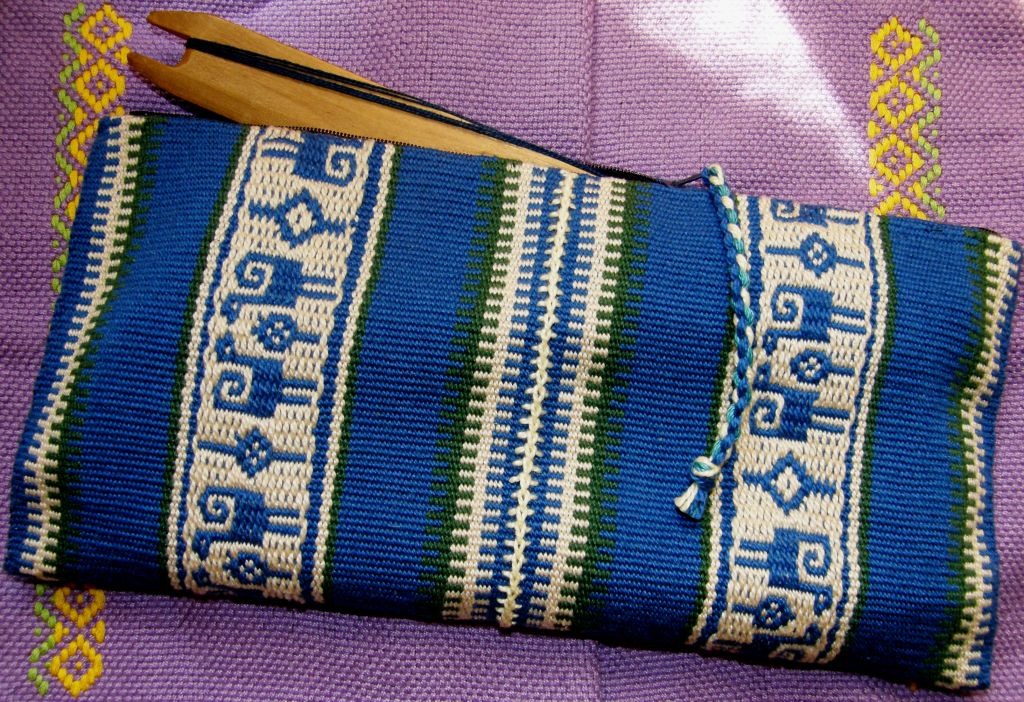
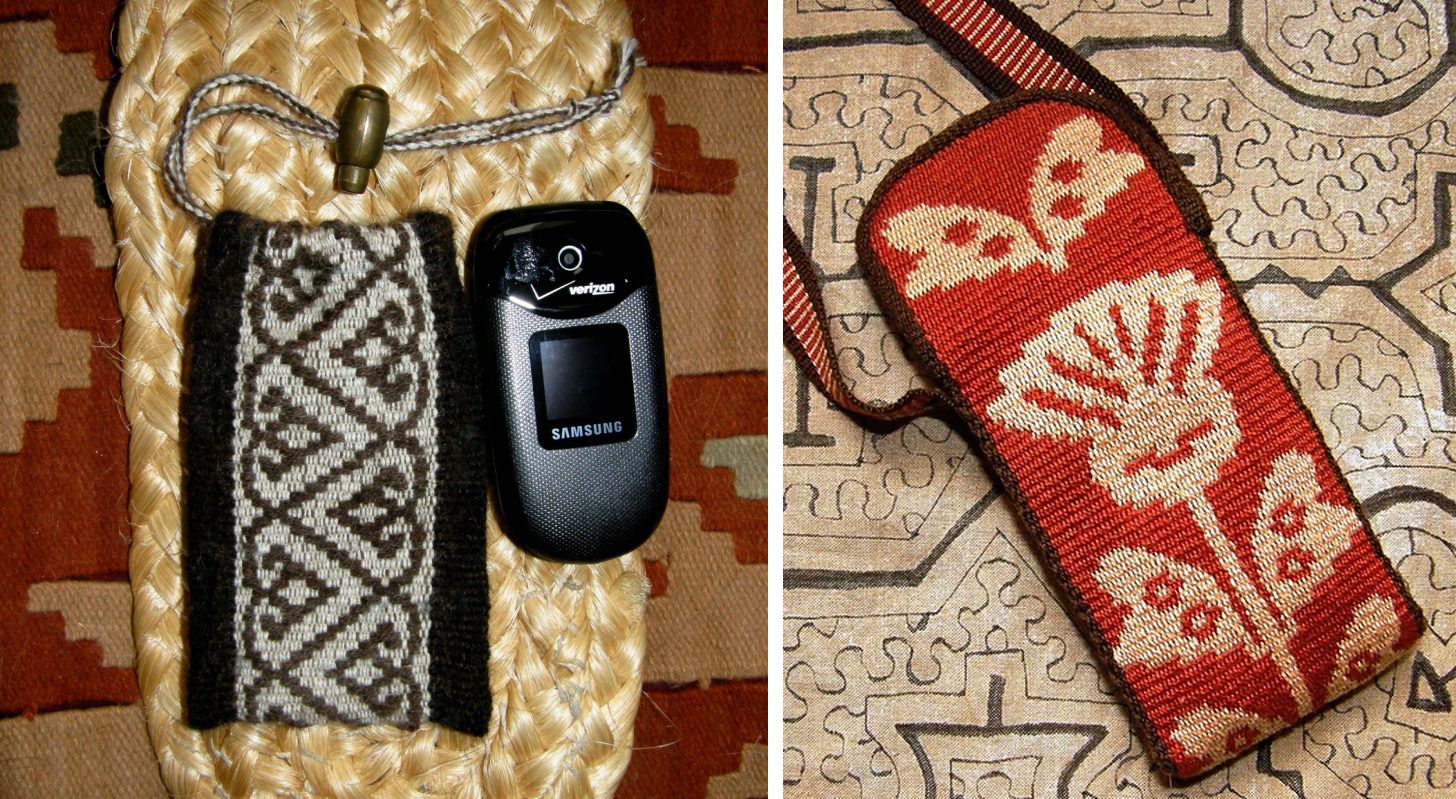
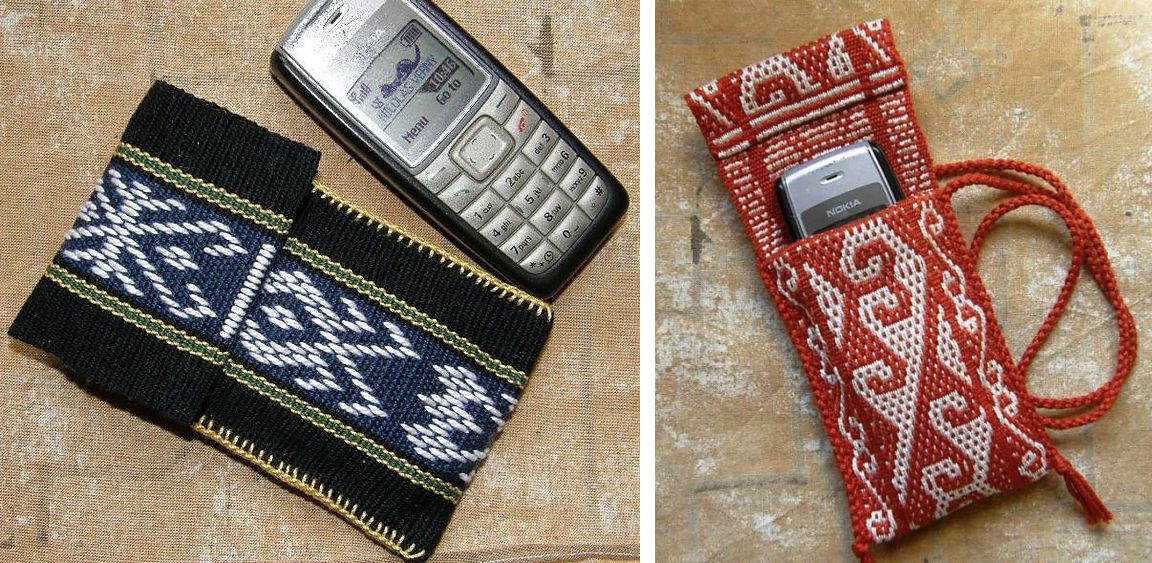
I don’t have a cell phone here in Bolivia but I find I really need to use one in the US for airport pick ups and that sort of thing. And it is just as well as I have quite a few cell phone pouches to choose from. I take one pouch for the phone and one for the charger.

Here are a few of them…

I should choose the ones that show structures that are not part of the backstraps. So, I could use the finnweave examples above or the supplementary weft patterned handspun alpaca one below or….

the one below left with the Van Dyke stitching that the Montagnard weavers use on the edges of their bags or….

…the one above that has a tubular woven band finish on the shaped flap. These little pouches are also handy as business card holders when I travel.

Then the glasses need to be accommodated. Ah, as the years go accumulating, so do the eyewear needs…reading, long distance, over contact lenses etc….What ever happened to the days of traveling light?

With the wool one above I can show people the theory behind the technique for making the discontinuous warp textiles that has being revived in Pitumarca, Peru.

At left I have a seamless tubular case made in double weave with a little supplementary weft patterning.

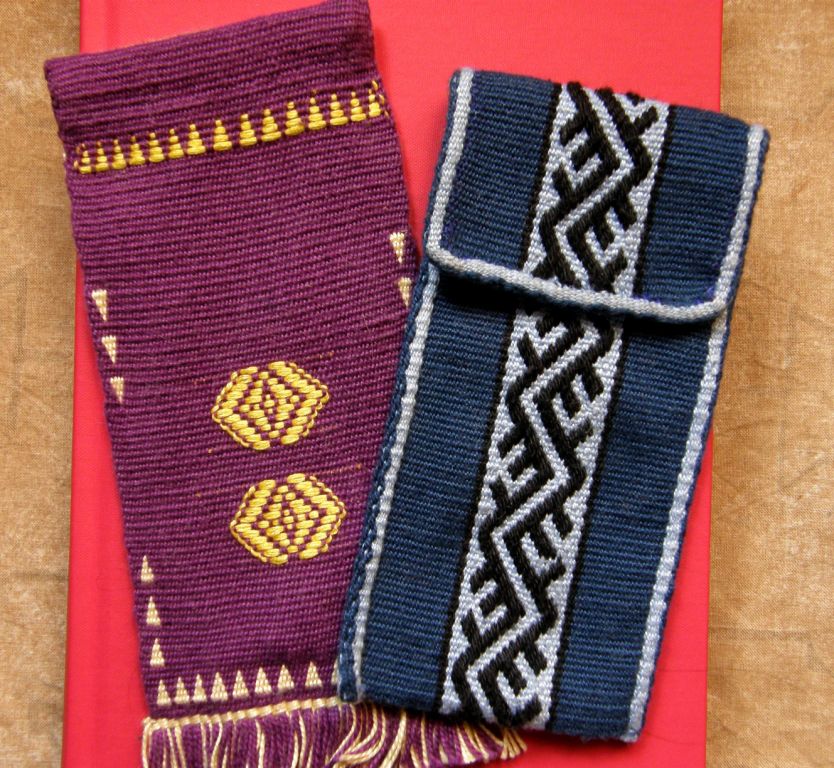
The blue case has a supplementary warp patterned strip and has been edged with a pebble weave tubular band.

These are all just samples that got made into things that now have the dual purpose of showing structures and techniques in a nice compact form as well as protecting my glasses while on the move.

If only I would use them here at home too, I might be able to locate my glasses more easily before I end up sitting on them!

Key fobs are useful for quickly locating all those keys to the TSA approved locks. Yes, I finally got some of those after getting tired of finding my broken locks inside my open luggage with an explanatory note. Would you believe that I don’t have a single woven fob right now? I always end up giving them away. I shall add that to the pre-trip “to-do” list. They are particularly good for showing lots of different structures in a very compact form.

I usually take a couple of projects on the loom so I can demonstrate backstrap weaving. I don’t warp with anything in particular in mind and the purpose is just to show how the loom works. Those projects usually suffer a lot as the loom gets tied up in different places at different angles and under different tension and the projects often are not looking quite their best by the end of the trip.

Fortunately, on the my last two trips the projects survived and I was able to make them into something on my return which are handy items to take on the road….

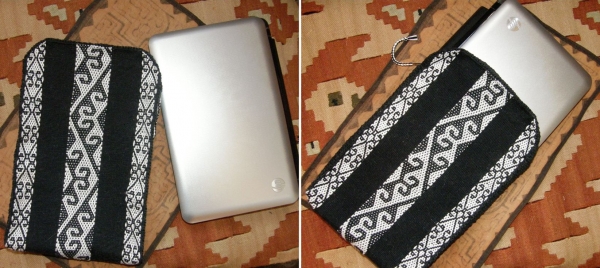
A dust cover for my notebook computer in two-color simple warp floats,

…a good sized pouch for my sewing materials in good ol’ plain weave,

…a nice large size tool bag to show a ñawi awapa band. It goes along with this next one (can’t have enough tool bags!)

…which shows the Van Dyke stitch used for joining pieces of cloth.

Oh, and there are a bunch of other pouches and purses that I use for coins, writing materials and documents, like this handspun alpaca passport pouch…

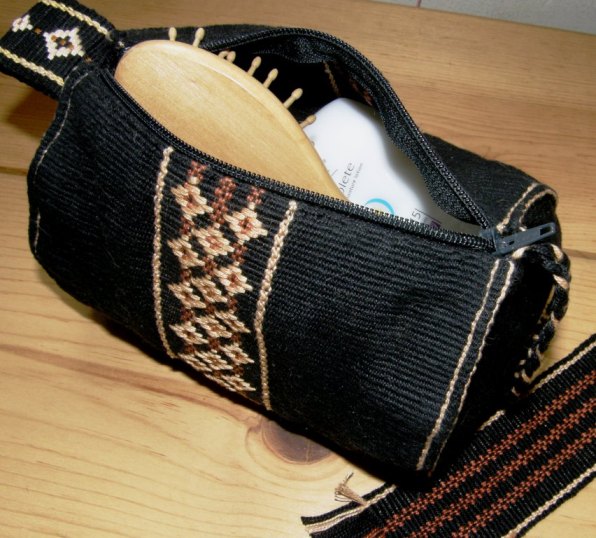
This little sausage pouch makes a great cosmetics bag and it shows how supplementary weft patterns can be used on top of warp patterns rather than just being woven into single-color cloth.

I love being able to take these things with me but, sadly, I have to admit that clear plastic bags are often much better. It is maddening sometimes trying to remember which pouch holds which items!

I almost forgot belts! You can’t get more efficient than that…I can wear the woven structure example that I want to show. Belts, however, are an added pain when going through airport security.

I finished my wee ikat sample and I am thinking of making it into a belt somehow.

It’s a bit on the short and flimsy side but maybe some added leather might work.

That’s all I managed to weave for myself this week. I did find the time to warp up for the next ikat project and on this one I am hoping to dye two colors.

Oh boy, this experiment is bound to give me a very much increased appreciation of and respect for the  Guatemalan, Indonesian and Central Asian ikat artisans and the textiles they create with multiple colors.

Here’s the warp on a frame ready to be tied. There are three panels but each panel will only have one motif. I am not going to get crazy with this! Let’s just see how this one turns out and I will take it from there.

In the Ravelry group Blomster joined in on our ikat weave-along using her rigid heddle loom. We decided that this WAL would be all about ikat on any kind of loom and I love what she made in a balanced weave. The ikat patterning is very subtle and she is pleased with the way it turned out.

Bobbie has been working on her simple warp float piece which has been inspired by a Guatemalan weaving she saw on the Education and More website. She bought naturally dyed cotton from Education and More for this project.

We don’t get a good look at the actual fabric in this shot but I will show you in the weeks to come. I just love looking at that gorgeous warp!!…the colors, the smoothness! I will tell you a little more about the process for this pattern too as Bobbie makes progress. I hope she will keep us supplied with pictures as it comes along. I am hoping to get together with Bobbie and other north-westerners from the Ravelry group when I am up that way next month.

Yonat, who weaves with me when I visit Santa Cruz California, has been practicing double weave..

She is using Bedouin shajarah motifs which are traditionally woven in a warp substitution technique. As that technique produces very long floats on the back of the fabric, weaving it in double weave as Yonat has done will produce a textile with identical faces in reversed colors and no long floats.

I am looking forward to going back to California and the ocean and some cooler temperatures…remember that it is summer down this way. 

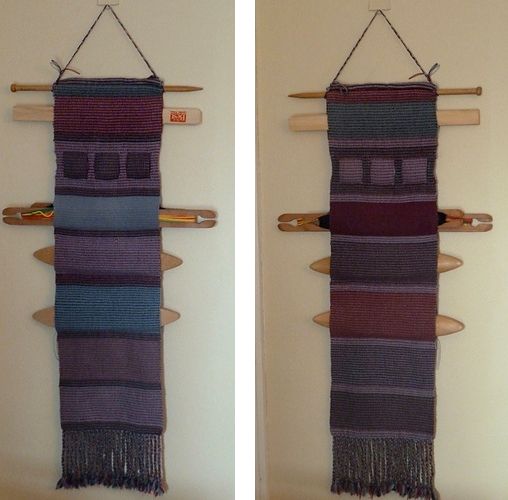
I loved seeing this project that Akknitter posted on Ravelry in the Warped Weavers group…nothing to do with backstrap weaving but I just really like this idea. It is from a project in the Nov/Dec 2008 Handwoven. It is being used for shuttle storage. I can see my loom bars nicely nested within something like that. It is double weave and so has two differently colored faces.

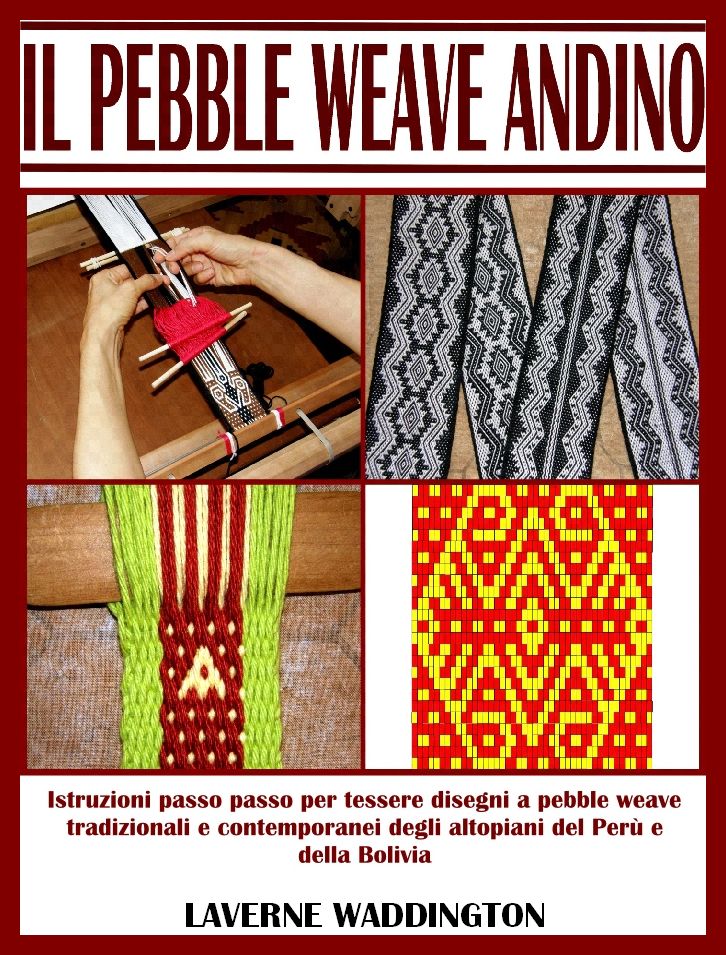
So….let’s see what I can accomplish weaving-wise in my last week of pre-trip madness. I am trying to put together the Italian version of Andean Pebble Weave and get some weaving done for myself. I can’t complain as all is going very well.

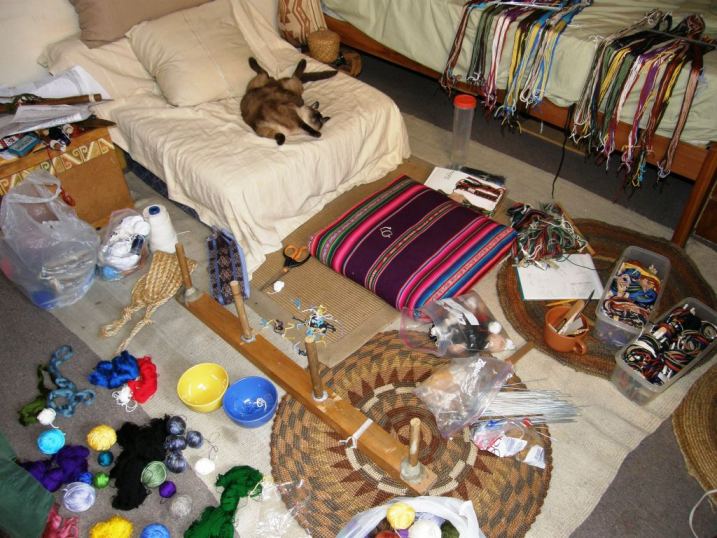
I will leave you with a picture of the organized chaos that is my bedroom these days. You can see that my cat doesn’t think much of it…

Coming soon courtesy of translator Lidia Guffanti…..