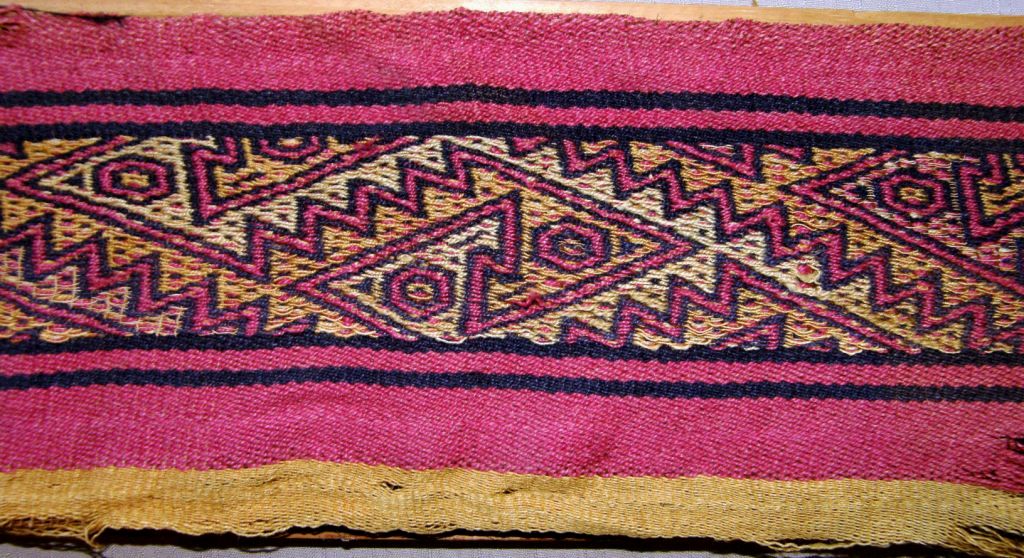
I traveled and now I’m back home trying to get my sleeping patterns back in order. I’ve found after all the trips away that I have done that one of the best ways to ease the effects of jet lag is to hit the ground running on my return. In the days when I was teaching English here at the Centro Boliviano Americano, I would arrive back from a trip to Australia and be back in the classroom the next day. I seemed to shake off the effects of jet lag so easily that way. If I come home and am just faced with cleaning, laundry, grocery shopping and a pile of yarn, it’s way too easy to give into the temptation to lay everything down and go take a nap. That doesn’t help at all with getting back to normal sleep patterns.
So, where did I go?
Arriving in Sydney in the early morning, I had hours to kill before my afternoon train up north. I put my luggage into storage at Central Station and went down to the harbor on what was an absolutely glorious day.
My gosh it was crowded down there. Was this the mass tourism that I had been hearing about? Not quite. I eventually realized that people were coming to witness the 50th birthday celebration day for the Sydney Opera House. Crowds were gathering for the day’s events.
Flying into Sydney at day break reminded me of the colors I had chosen for my woven piece named Sunrise, Sunset.
Now I’m back in Bolivia and have hit the ground running as far as my fiber-y pursuits go….not so much as far as cleaning and laundry go, though. Has it helped with the jet lag…..hmmmm, maybe just a little bit.
I had taken some cotton fabric away with me so that I could keep busy during any down time stitching for a shibori project. If you’ve read my most recent posts, you’ll know that I have plans to create another expandable folder just like this one that I just finished…
My expandable folder project has a woven wool cover with three-color patterning.It holds my various styles of blank pattern charts.
I used some fabric that I happened to have to line the cover and make the expandable sides.
I’m planning to use my stitched shibori fabric to line the cover and make the sides on this second folder project. I chose a simple leaf pattern to suit my beginner skill level. I’ve only made a few small stitched shibori experiments so far which I’ve used to line some of my woven bags.
At this stage, all the leaf shapes have been stitched and I am pulling and tying off the threads to prepare the cloth for dyeing. The folds of cloth in the tightly gathered areas will mostly resist the dye. I completed this task and took the piece home ready to go into the dye pot.
Sleep was denied me the first couple of nights. That along with the fact that day time temperatures have been outrageously and unseasonably high (and I don’t have air conditioning), had me dyeing the cloth in the wee hours and attempting to remove the stitches.That was the only time that I could bear to use the stove.It was lovely sitting and working on it in the quiet and relative coolness of 3am.
I’d used stronger thread than in my previous projects and removing it was quite a challenge. I was amazed at how different the two faces of the cloth looked. The photo above shows a soft image while the other face, below, has much bolder lines and higher contrast.
I’ll probably use one face for the lining and the other for the sides because I simply can’t decide which face I prefer.
I’d created a new pattern for the three-color weave I was planning to use for the cover of the new folder. I was once again going to use the wool singles that I’d got from the farmer in California. I dyed two blues to use alongside the natural grey. I think the pattern I drew for the structure that I call Andean Pebble Weave was born from having spent some time looking at textiles and basketry from Borneo and Sulawesi.
I made all the necessary calculations and wound the warp leaving it ready to be picked up when I returned from my trip.
This was what was waiting for my return so that I could hit the ground running. I’d separated the threads onto two sticks for the two sets of heddles and left the heddle making itself as the task that would get me straight back into the groove on my return.
Weaving with these wool singles is all about gently taming a hairy squiggly beast. I’d barely got into it when I broke a warp thread. This was a convenient reminder of just how careful I needed to be.
I got some smart and wonderfully thin black cable ties while in Australia for my unconventional way of lashing my warp to the beam.
Approaching halfway and rolling up the woven cloth around beams and paper.
Woo hoo!….past halfway and time to reverse the pattern. No more broken threads.I’m really pleased with the new pattern I created.
I’ll construct the folder in the same way I did the other. The cover will be three woven panels that I join with a decorative stitch. I had requests from a few people to explain how I put the folder together. Hopefully, I’ll remember to take pictures of the process this time so that I can write a blog post about it and show you.
Before I leave, I’d like to invite you to visit the PAZA Bolivia blog that my friend Dorinda Dutcher writes about the work of my weaving teacher Maxima and the other ladies in the co-op in the central Bolivian highlands. There are exciting plans to perhaps introduce the ladies to indigo-dyeing techniques and I can’t wait to see how the weavers combine it with their current gorgeous range of natural colors.
My favorite Bolivian weaving teacher, Maxima, stands here on the left with one of her daughters and a granddaughter…..three generations of weavers! Her granddaughter proudly shows her first ever weaving that has been accepted for sale by the co-op of weavers in her community. It was woven on the traditional leaning frame loom using handspun and naturally dyed wool. Dorinda, who works with these ladies to transport and help sell the products made from this beautiful cloth, has just written a blog post showing all that she has available to ship now from the USA (until Dec 6) if you are looking for Christmas gifts.
Another reason to direct you to the PAZA blog, is to make you aware of the woven products that the ladies offer via the co-op especially now that Christmas is approaching. I do hope that you will consider making a purchase to support them. Dorinda’s latest blog post shows what she has available in the US to ship until December 6 (after which she will be traveling and unable to process orders). Dorinda fills the blog with personal stories and photos of the weavers’ rural lives and is well worth a read even if you aren’t in the market for a beautiful piece of handweaving. Here’s the link again.
Until next time when I’ll hopefully have a finished folder to show you…..
Does one backstrap loom operating method fit all? Definitely not, especially when working with sticky, sticky, mill-spun singles wool. Give it a shot of hairspray some people will say, or coat it in sizing. My reaction is “yuck” (mind you, I’ve never tried it!). My hands are right in there in amongst the threads in the kind of pick-up patterning I do and I like to feel the natural fiber rather than a starchy stiffness or chemical coating.
The process is more meaningful to me than the finished product and I would rather slow down and adapt my method for operating the loom than coat the threads with stuff. (I’m quite sure I’ll try it one of these days, though, as I get further along with weaving with my own handspun cotton singles and will then take all this back).
I don’t want to limit myself to only the smoothest and friendliest of materials that are deemed suitable for warp-faced weaving on a backstrap loom. And so I will occasionally jump in and make the sticky stuff work. I guess in a way I enjoy the challenge as well as the feel of the finished product. Of course much depends on the intended use of the finished product.
This is the mill-spun wool singles yarn that I bought from a farmer while weaving with friends in Petaluma, California.
I have used this wool in three small projects in plain warp-faced weaving so far. It has stood up well in the weaving process and with use. I had yet to use it in any kind of denser warp-float structures, let alone in the three-color structure that I was planning. I figured that I could weave a sample to see how it behaved and then decide if I wanted to take it on for a larger project. I was confident that I could make it work. It just depended on how much work I had to put into making it work. Working with yarn like this usually involves slowing down and gently coaxing unwilling threads to release their sticky hairy grip on their neighbors so that you can get something that resembles a clear shed without damaging the yarn.
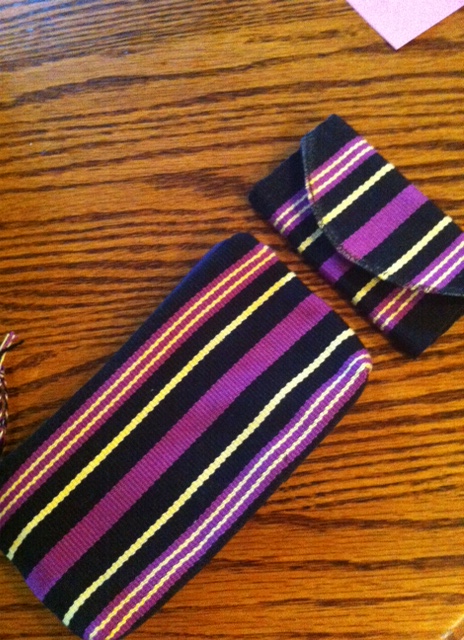
Two of the plain-weave projects that I’ve completed with this wool….a travel documents pouch on the left and mobile phone case on the right.
What made things a little trickier was the fact that I dyed some of the yarn. In the hot water the singles sort of poofed up (surely there’s a technical term for this) and didn’t recover when they dried. The un-dyed yarn looked thin and wiry next to it.
I wove a narrow sample in the three-color structure and decided that it would be doable in a wider project. Surprisingly, the threads in the tiny plain-weave borders were ones that complained most with that alarming rasping and tearing sound that they make as their entwined hairy fingers are torn apart. It all sounds very violent, doesn’t it?! But in reality it all has to be done very gently. In the warp-float section, there were far fewer complaints but I still had to work to clear sheds.
I sampled both the reversible and non-reversible versions of the three-color technique and also played with different weights of wool weft. Using the same yarn as weft gave me the best result.
There was a lot of pick-up to be done in my much larger planned pattern flanked by a lot more plain weave. Because operating the loom for the wide plain-weave borders required slower more gentle operation of the loom, I decided to just weave the pattern on its own and to add the sides as separate pieces. That way I could just place all my focus on the pick-up.
Taming the mill-spun singles into a three-color pattern in the structure that I call Andean Pebble Weave.
I’ve woven this three-color structure several times before using Tencel, tapestry wool and my own plied handspun wool and have achieved nice crisp images. The hairiness of the singles yarn gives a much more rustic look to the figures. It grows on you and I love the way it feels.
Using 8/2 Tencel in the same structure.
I had set up my warp with two sets of string heddles and once I had figured out my method for working them with this extra sticky stuff, I was on my way and enjoying seeing the pattern emerge. It’s always good to have multiple ways of adjusting basic methods to suit the kind of material with which you are working.
I didn’t do a whole lot of color flipping on this one, unlike the hummingbird camera strap that I wove in my own handspun. I just flipped to outline some leaves in red rather than white in one part. This wasn’t the kind of design in which I could regularly flip the background color.
The camera strap in which I could play with changing the background color, the hummingbird outline color and filler color. It was a bit brain bending but fun.
A little further along with some cloth already rolled up.
One thing that I always try to do when weaving with wool is advance the warp as often as possible so that the heddles and rods are not abrading one spot for too long.
And here it is finished….
Next came the grey side pieces….
Now to decide on whether to join the three pieces without overlapping them using one of the decorative stitches that I’ve learned from my teachers here, or join them with the tiniest of seams.
The heddles from the two warps remained pretty much fluff-free.The one on the left is from the pattern warp and is discolored. I’m guessing that a fine film of fluff has discolored it.
This little pouch for my pin loom is made up of three pieces joined together with a tiny seam. The center is a piece I wove from my own handspun llama yarn that I was rescuing from an old project. I added sides made from the mill-spun wool singles.
A subtle joining stitch in cotton connecting two panels that don’t overlap. I’d woven a very long band on a circular warp and Karen-style backstrap loom that had been given to me. I cut the band into five pieces and joined them to make a table square.
The completed table square.
The stitch can be decorative as well as functional when worked in a contrasting color. I used it to join the panels of this wool lap blanket that I wove.
Another kind of stitch that my Vietnamese backstrap weaving teachers use. I used it to connect two bands and make a tool bag.
Sometimes the joining stitch can be one of the main features. I used this stitch which was shown to me by one of my teachers in the Bolivian highlands to join two cotton panels that I had woven. Maxima stitches it in many bright and lively colors.
Picture courtesy of PAZA Bolivia shows Maxima’s carrying cloth with its colorful joining stitches.
So, what is this project supposed to be? It will hopefully be the cover for a folder that holds my pattern charts. I just have to figure out how to construct the folder. I want it to have multiple pockets for the various categories of structures and it may need to be expandable.
While I figure that out, I’ll start washing my handspun cotton singles as I have a project in mind for them and I might start preparing the handspun wool I recently got in the market for some cochineal dyeing. We have a run of really high temperatures coming up and I can’t say that I’m keen on having the stove on for these tasks. I don’t have air conditioning. But never mind, there’s always plenty of other fiber-y things to do.
Natural brown handspun cotton singles waiting to be washed. I use these metal mesh pencil cups to hold the thread under tension in the pot.
I’ll just pop in a photo here of the box purse that I was making in my last post. I didn’t show a photo of the open box with its contents. It’s so handy…I love it.
I’m going to leave you with a couple of short videos I took of weavers in Peru working with wide wool warps on their backstrap looms. You will see that some time and effort needs to put into opening the shed-rod shed with the particular kind of warp material they are using. Its not just a matter of drawing the shed rod forward to the heddles and then sliding the two together. The threads don’t smoothly rise and pop through to the other side as you often see happening in the hands of some backstrap loom weavers on Youtube who are using other kinds of friendlier warp material. Those of us who are privileged to be able to work with all kinds of warp materials soon find out that there isn’t just one single method that fits all.
The bag is done! Phew, I made it work. Actually, I lie…it isn’t quite done. I still have to apply the magnet snaps…one to close the mouth of the bag and one to pin down the flap. I put the word out that I was looking for the kind of round magnet snaps that you see here and, like magic, a friend who happened to be out and about this morning found them. While I do enjoy an excuse to poke around the street markets, it is also nice to have the goods just handed to you like this…almost like shopping online! I am so grateful. The street market that is three blocks from my place has one whole section dedicated to fabric. That’s where I eventually found the fusible interfacing. Just beyond the market is a street of leather and faux leather supply stores. In amongst them is a fabulous store called “Hebillandia” which would translate to Buckleland. That area would have been my first stop on the search for the magnets.
Looking back through my photos and notes, I see that this bag project sort of got started way back in January with this….
3-color reversible pebble weave in 8/2 tencel.
This was an exercise in getting my head back into three-color reversible pebble weave after a break of a few years. I guess I will always associate this particular band with Covid as it was during this project that I got infected. I had to put it on hold until the brain fog had cleared.
But going even further back, you could say that it started with this….
Yarn that I started spinning and plying while enjoying covid Zoom gatherings in 2020 and 2021.
The idea was to weave an item with my hand-spun wool using the 3-color pebble structure that would allow both faces to be seen. I decided to weave a strap. The bag idea grew from there.
Lining cloth in doubled 20/2 cotton.
I’ll say it again…I don’t need a bag. I just like to weave and this project has kept me weaving and out of trouble for some time. I also knew that it would teach me a lot. For example, I learned about fusible interfacing: what it’s called in Spanish, the difference between woven and unwoven, the various weights, how to apply it…most importantly, where exactly I can get it in the street market (although I think that I have bought a lifetime’s worth in three different weights!) Things can just inexplicably disappear from the stores here, like the alum that I had suddenly found so hard to find. I figured I should stock up on interfacing! I learned what makes a good DIY reed-threading hook and about doubling threads in dents. People do think that I am quite mad for weaving the lining fabric for the bag but I did learn a lot from that experience, used up some stash for which I had no other use, and I really like knowing that I wove absolutely every part of the bag (except for the interfacing).
I learned that with determination, or some might say stubbornness, I could make some things work. I might just happen to stumble upon the right way to do things. If not, I learn what not to do for next time. I did try to cut down on the “fails” and “do-overs” by asking for advice in online groups.
Some of the pieces coming together.
I had read about procedures for adding lining. One way is to sew it to the outer fabric before sewing the body of the bag together. Another way is to sew it on its own and then “drop” it in later. It seemed to me at first that the former would be easier and so I am glad that I asked in the Many Shuttles Handwoven Bags Group that Kathrin Weber started on Facebook as the majority of responders seemed to favor a dropped-in lining. I got the tips I needed. It would never have otherwise occurred to me that the lining should be sewn in exactly the same size as the outer fabric. I chose to ignore one tip that I had been generously given and regretted it. Hence the lining had to be dropped in twice. I learned that my “make-it-work” hand-stitching is hard to rip out!
Here is the flap fabric that I showed you last week and some of the other pieces…
Lining fabric, intermesh sides and base, strap and warp-faced plain weave body fabric.
I had so much fun weaving the flap fabric. I think that much of that came from the sheer relief that it was going to work. I had had some serious doubts about the 20/2 wool being able to stand up to this three-color structure. I only broke one thread. Strangely, I broke two when weaving the much simpler intermesh band that encircled the mouth of the bag. I needed that band to cover the top of the pleats that I had placed in the body of the bag. The pleats are supposed to make the whole thing slightly less box-like.
One of the scariest, and subsequently most fun, parts was finishing the flap. I had planned it to be twelve inches wide and that’s precisely what it ended up being. However, when I placed it on the bag with its strap sewn in place, it turned out to be too wide. I had to cut off the natural selvedges which, along with the curve that I wanted to cut into it, gave me way more raw edge with which to deal than I had anticipated.
I applied interfacing to the flap fabric and a hand-woven backing fabric. I sewed a line of stitches just to the inside of the proposed cutting line. Then I cut and applied the tubular band.
I love using woven tubular edgings! The raw edge is entirely enclosed within the tube and well protected. It goes on like magic! I hope that you can make it out on the curved part of the flap in the lower right image. It’s such a neat finish which also serves to strengthen the edge. The very top pattern on the flap fabric is the part that sits on the back of the bag. I have a tutorial on cutting a curved flap and applying tubular bands here.
So, after all this explanation, here is the finished bag. The first shot is the only one that shows that there was an attempt made to shape the bag with pleats. My pleats were probably too small. I’ll show the bag with open flap once I have the magnets in place. Lets see if I can make that work without having to gouge holes in the fabric.
All notes were recorded in my Weaver’s Journal, of course! I used my drop-spindle-spun yarn for the strap and the tubular band. The lining was in 20/2 cotton and a balanced plain weave. Everything else is in the 20/2 worsted-spun wool (that you can see in the skein) in tight warp-faced structures.
What’s next? I think that a couple of days of cotton-spinning on my takli are needed to clear my head. I am thinking about using it in a balanced plain weave (not yet in the open sheer cloth that I have mentioned here before) with some tiny bits of inlay in natural green and brown cotton. I might weave a fairly short piece to use as something very light that sits around the neck. I have decided that I am done with scarves…all that length and those ends flapping around to deal with…they annoy me! Maybe you have to have been raised wearing scarves to have learned to deal with that. In all the years that I lived in ski resorts and Patagonia, I never once wore a scarf. Nevertheless, I won’t be cutting down the ones that I have already woven. Tour de Fleece spinning teams are starting to form on Ravelry. I won’t join a team but I will follow along with my cotton spinning.
My slow-growing takli-spun cotton stash.
I would also like to use some of my hand-spun wool to weave a three-color camera strap. And then there’s a wool Finnweave project calling to me for which I am gathering ideas and a silk ikat with thread that I dye with cochineal…. and maybe a hand-spun cotton ikat?? if I can find cotton dye. That’s plenty to keep me out of trouble!
I will tell you which of these has won top position next time.
Lots of people ask me about how the pandemic is affecting me here in Bolivia and there is plenty to say about all the negative ways in which lives have been changed. But, there’s also a flip side…at least there is in my case…and there are some positive things going on as well as a direct result of not being able to travel and being obliged to stay in one place. I was thinking about it and this is the longest period of time I have stayed here in Bolivia since 2005! There was a period prior to that during which I hadn’t left South America for nine years but, after 2005, I seemed to be regularly picking up and flying away.
This long period at home has my Ideas Notebook crammed with planned projects and leaves me with plenty of time to play with those things that do require more sampling, planning, charting and trial-and-error which, for me, is best done over one long uninterrupted period of time. I have lots of uninterrupted time.
I showed my finished Finnweave sampler in my last post and am pleased to tell you that I found a use for it beyond just being a sample to which I can refer for future projects. It makes a wonderful cowl. Having worn my hair long for most of my adult life, I am very much aware of my bare neck and how cold it can get now that I have cut my hair short. I was very conscious of that on my winter visits to Australia and New Zealand last year.
Yes, I had a moment of frustration the other day and took it out on my hair in the form of yet another DIY haircut. At 10:30 pm with toothbrush in mouth this suddenly seemed like a good idea. While we are certainly not in cowl-wearing weather here south of the equator, the time will come when I can be back visiting the USA in the spring and fall, and hopefully Australia in the winter months, when the air can get a little nippy.
Quite a few people have been curious about the Finnweave I have been doing. I explain that I chose this structure simply because the pre-columbian textile fragments that I have were woven this way. There are of course other kinds of double weave pick-up structures that can be used to weave figures and the figures will have a certain appearance on the front and back of the cloth. Weavers can choose the look that they prefer. As always, I refer to the Doramay Keasbey article in Handwoven Jan/Feb 2011 in which she compares the front and back of bookmarks that she wove using five different doubleweave pick-up structures.
So, what about the flip side of my Finnweave? The Keasbey article includes Finnweave and I can show you the two sides of a motif on a piece that I wove some years ago using 8/2 cotton which I think is much clearer than trying to show you the example in the finer 20/2 cotton that I just wove.
You can see that smooth horizontal lines on one face look like toothy lines on the other . This particular motif does not have any fine vertical lines but a fine vertical line on the “good’ face looks like a column of small disconnected horizontal dashes on the back. Occasionally, I prefer the way a particular motif looks on the back in that from a distance it resembles blurry ikat with those toothy edges. It’s a softer look. The upper face has a much smoother and sharper appearance.
So, I will keep my Finnweave cowl on hand as I think about my next project using this structure. There’s not much chance of it being used as a cowl any time soon as we have temperatures in the high 90s with one day at 100 degrees forecast for the next eight days. The tropical “winter” is over!
What has been keeping me busy lately is refreshing my memory on three-color reversible pebble weave. It’s another one of those things that grabs my attention every few years. I showed you in my last post the sample I wove in tencel using this technique some years ago in which I used yellow and white on a blueberry background.
I can’t find that sample anywhere now but, thank goodness, I am better at keeping tabs on my notes. However, my notes could have been better and it was frustration with trying to interpret them that led to the late night hair-cutting incident! After a good night’s sleep, I got the notes all sorted and I chose primary colors in 8/2 tencel once again to test whether I had indeed understood the steps.
Examples from Peru shared with me by Mary Spanos with the red, green and yellow sections of three-color pebble..
I am using my backstrap loom with string heddles as you know. If you are a tablet-weaver, three-color double-faced pebble weave is apparently quite straightforward. I have read about people doing it by using triangular tablets but also square tablets that have holes in the sides. So, if you are in a great hurry to learn this, you might want to go with tablets. I’ll leave you to investigate that further.
I will be writing a tutorial on this eventually for those who use string heddles. “Why don’t you just use tablets?” you might ask… I am more interested in the string heddle process as that is the way the technique is woven here inSouth America.
I have examples of three-color pebble weave in pieces I bought in Peru on my very first visit in 1996. These particular pieces were relatively expensive and I had to think long and hard about investing in them back in my do-it-on-a-shoestring backpacking days. They blew my budget for the following ten days. I am so glad I bought them, though. My weaving friend Mary also sent me pictures of some similar pieces that she owns.
The three-color pebble weave figures in these particular pieces are not identical in appearance on the back of the cloth.
Here you can see the back of one that I wove myself many years ago in a non-reversible technique….
I haven’t yet had the chance to sit with a weaver who knows how to do the double-faced version and so my efforts have been guided by the writings of Adele Cahlander and Marjorie Cason in The Art of Bolivian Highland Weaving and a lot of trial-and-error of my own. Just by chance I was able to pick up a small piece of cloth that was woven using the double-faced three-color version. It was being used as the cover of a small photo album that I found in a souvenir store right here in Santa Cruz. I grabbed it! Thankfully, it had only been glued to the photo album along its edges and I could easily remove the cloth.
Bolivian cloth with pattern in double-faced three-color pebble.
The cloth is so very tightly woven as is the way here in Bolivia, that it is impossible to separate the warp threads to perhaps get some clues about how it was woven. In any case, I am using a series of steps for my own experiments and am getting the results I want. I feel that I could replicate the pattern on this cloth if I wanted to.
I would, however, love to be able to spend time with the Bolivian weaver of this piece of cloth and see if she has some other less laborious and more efficient way of achieving this which will no doubt have me slapping my forehead and exclaiming “Of course!” On the other hand, perhaps I am doing it just the way she does….I would love to know! Bolivian weavers think nothing of what may appear to us as extremely laborious weaving tasks….think of what they go through every time they finish a piece of warp-faced cloth with four selvedges, or the thread-by-thread pick-up that goes into weaving pieces like the red and black one you see here….
A weaving of the Jalq’a people of Potolo, Bolivia.
So, here is the piece in tencel that I wove to practice creating patterns using all three colors as outlines, background and fillers. My sample motifs got smaller and smaller as I gradually centered my focus on just some very specific aspects. These patterns are charted in my Complementary-warp Pattern Book.
The idea was to refresh my memory about this technique and, as it turned out, improve my notes for next time. But it was also about wanting to weave something using the wool I had started spinning during the Tour de Fleece. My spinning output is quite sad. I simply can’t manage to motivate make myself to devote that much time to it. I am more interested in charting and weaving. In any case, I have some yarn to use and after sampling in tencel, I was ready. I had originally planned to sample in some industrially spun wool but everything I found in the closet was either too heavy or too stretchy. I do have some Knit Picks Palette but I didn’t want to push my luck with that. The method I use has a lot of heddle action and I wasn’t sure how well the Palette would stand up to it.
A couple of wrist cuff projects seemed like a good way to start….
I used a little leaf motif that I had created for my Complementary-warp Pattern Book (slightly modified here) as well as part of a larger flower motif that I had created for the same book in the Garden-themed section.
One of the challenges for me when using this three-color technique is finding three colors that will work well together on bothfaces. I have a light color -white, a very dark color – black and a medium color- let’s call it tan. These three work well together. Other combinations may not. If, for example, I use two medium colors like purple and green, I can have them sit on either side of the lightest color on one face, but they will have to sit right next to each other on the other face. In that case there may not be enough contrast between the two for the pattern to be easily distinguishable.
You can see that tan and black sit right next to each other in the leaf motifs on the upper face and are separated by white on the lower face. I played with the outline color in the flower motif using both white and black as shape outlines and tan and white as the fillers.
My hand spun yarn stood up well. Admittedly, this is only a very short and narrow piece but I can tell thatf it will do well even in something much larger.
I added an eye-patterned tubular band in the same colors and then played around with different buttons for the button-and-loop closure. I love this cuff!
Next on the loom, was another cuff project using the green and purple that I mentioned above. I didn’t do any outline color-flipping in this one. Here it is getting its tubular edging. I love weaving and sewing that edging! (Check out my book if you would like to learn how to weave this patterned tubular band to use independently as jewelry, for example, as well as weave and sew it as an edging).
These are the buttons that I eventually chose…a flower one for the garden-theme and an interlocking shape to match the interlocked motifs which are charted in my pattern books.
The last thing is to braid and sew on the loops that go around the buttons to close the cuffs.
So, what’s next? While I am in wrist-cuff mode, I might make one in Finnweave. I do like to have examples of the various structures that I use in my wrist-cuff collection. I also feel motivated to spin some of the colors that I am least likely to use and then dye them so I that I can continue to play with three-color pebble. If you have suggestions for three colors that would work well together no matter how they sit in relation to each other, please let me know. I wove this wool three-color pebble some years ago in which the orange and green played well together when placed right next to each other….….and look just as good on the other face where they are separated by white.
Finally, I would like to promote my publications…in this case, the one I produced on the eye-pattern tubular band which you have seen along the edge of the cuffs I made. My ability to earn has been greatly reduced with my inability to travel to teach and book sales help to keep me afloat. Perhaps youwould like to try weaving an eye-pattern tubular band. I have two versions of the book. One, which is only available as a pdf, teaches how to weave the band as an independent tube which can be used in jewelry and other accessories. Ideas are given in the book.
In addition to this, the other extended version shows you how to weave and sew the band to the edge of cloth as I have done. It also goes on to teach two other decorative finishing techniques that are used by some of my Bolivian weaving teachers. This extended version is available as a pdf and as a spiral-bound book.
Both the short and extended versions, in either pdf or book form, give access to supplementary instructional video clips and are available atTaproot Video.
I’ll be donning my masks and venturing out a bit more in the next week or so as I need to re-stock the pantry before our national elections this month. I plan on staying in and well out of the way during and after that event.
If I needed an excuse to be a little less productive than usual this week, I had one. It was my birthday!
Another was the arrival of another wave of cold weather. It was perfect for lying on the sofa under a blanket with a hot beverage and a pile of textiles books. I was getting and consolidating more ideas for the next series of wall hangings.
The dilemma: My current wall hanging project has been woven in three colors: red, black and white. I have three pieces so far and have just started the fourth…
These are two of three panels that will form the whole piece pictured with the weft inlay sampler I made with this project in mind. I have a plan for a special way of uniting the three panels once they are done. There will be two identical red panels flanking a black. You can see that I have decided to weave both the red panels at once. Why? Because I am simply not confident about being able to weave one red patterned panel alone and then go on to produce a perfect replica.
And this is the thing about backstrap weaving and the fact that part of the loom itself is ME, a living, breathing thing with changing moods and attitudes which are so easily reflected in the cloth I am producing.
Just the way I am seated in any one weaving session and a change in the amount of tension I am applying can have an effect on the way the motifs look…more rounded, more elongated. Some days I weave in half hour bursts and barely settle into it. On others I can sit for three hours at a time and get into a wonderful flowing rhythm.
This means that if I write down the fomula for my first panel, for example, the number of picks of plain weave I need to do between motifs and follow that to the letter for the second panel, there is no guarantee that panel number 2 will be identical to number 1. However, I am happy to report that this is less and less of a problem for me as years go by and I become increasingly experienced. BUT I am not taking any risks with this wall hanging project and its two red panels!
Solution: weave them both together!
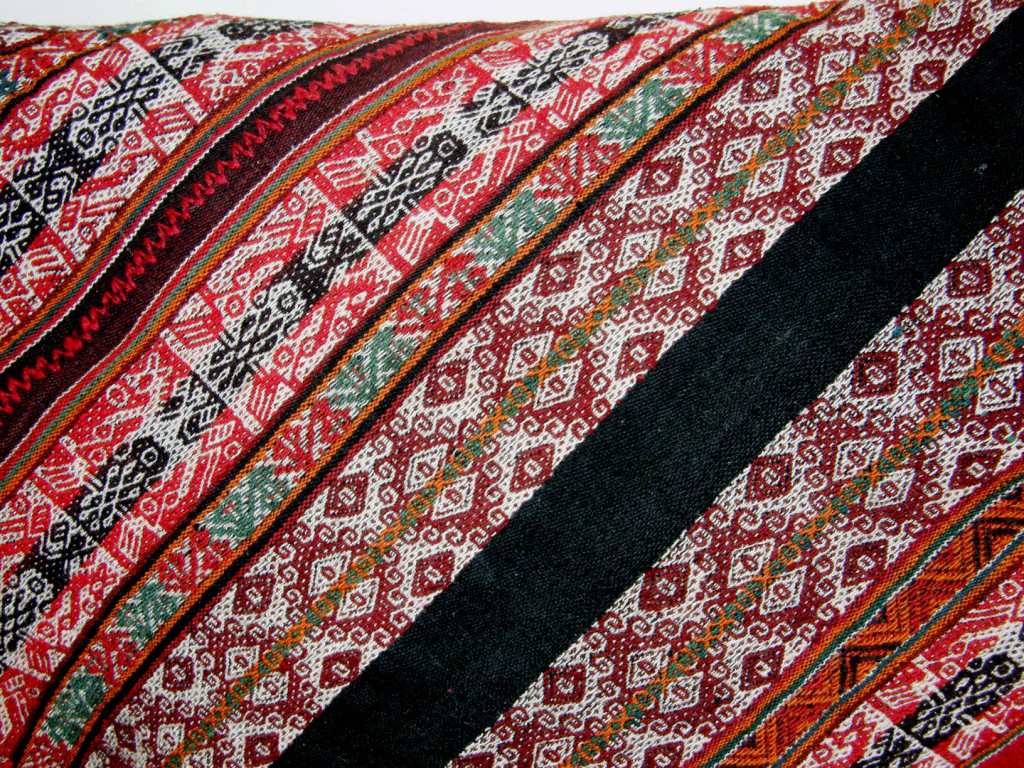
Of course, the weavers here in Bolivia and Peru don’t have that option when weaving the panels for their carrying cloths. Due to the width of the pieces, they can only manage one panel at a time on their backstrap loom. Look at the Peruvian piece above. You can see the zig zag red stitching that joins the two panels. All that patterning you can see on the right is perfectly duplicated on the left. They can weave for months and months with the myraid of interruptions and distractions that running a household entails and still produce two perfectly identical panels.
And then my mind is blown completely when I see the competition pieces that are made for the annual events held by the Center for Traditional Textiles in Cusco (CTTC). The 2010 event required weavers from each community to work as a team to produce pieces comprising many individual panels. Some communities challenged themselves to the max!
This is one of the winning pieces (I believe that it is from Sallac) from the 2010 competition and is being presented in this picture at the Tinkuy. I don’t know how many weavers were involved with this but I imagine that they must have had to work very closely together to achieve such consistency in those individual squares. Each weaver would have had to include the same amount of pattern with exactly the same dimensions as the others in his/her square. A weaver who applied more tension or who didn’t beat as hard would have created motifs that were slightly more elongated than the others and would have not been able to fit as much pattern into the square. Goodness knows if or how many squares had to be rejected. There were stories of tears, disappointments and frustration when weavers representing the various communities spoke on the podium.
I can see that the top ikat panels on the left and right don’t have the same orientation. I bet there is quite a story behind that!
The community of Pitumarca added yet another dimension by weaving panels of pattern within panels using the discontinuous-warp, or scaffolding, technique for which they are famous…
The CTTC has been posting pictures of some of the finalists in this year’s competition on their Facebook page (see below). I don’t know what the theme or requirements for this year’s event have been. The winners will be presented at the tinkuy in Cusco in November.
Some more detailed pictures posted by the CTTC….
Any guesses for the possible theme?….animals? twill?
And, are you going to the Tinkuy this year? It’s in November. There’s still time to register. Sadly, I am not. It was a tough decision but with my idea of going to Australia and possibly a trip to Mexico some time in the near future, I have to sacrifice some things. Even Australia is a bit iffy at this point.
Two of my backstrap weaving students, Dorothy and Karen will be going and I am already pestering them to send me daily reports. You can read my reports on the 2010 event here and here.
As for the dilemma that I mentioned way back in the beginning….before getting sidetracked by spectacular panels….I have taken up my studies of 3 and 4-color pebble weave again after having put it aside for several years and I now I want to include the 4-color version as part of my wall hanging series.
Four colors in a series of red, black and white….does not compute. So, a whole new series will be born. Those of you who have been following my blog and looking at my weavings for some time may already have a pretty good idea of what colors I will choose. If so, do tell, because I haven’t made that decision yet myself!
The red, black and white series will continue as I still have a bunch of ideas for that. However, while I have the 3 and 4-color pebble weave studies fresh in my mind, I would like to start a large piece with these techniques. I am still at the sampling stage, of course.
My first task will be to make a new strap for the four-color bag I wove years ago when I was still living in Chile.
It’s a wool bag with a cotton strap that is too short. It must come off. I have some wool that might work and I want to make a strap with a very small 3 or 4-color motif that won’t be overpowering.
I will have to dye the wool to suit and must look for wool dye in this land of cotton.
I continued with the three-color piece that I had started last week. This was more about creating some of my own patterns. I am sticking with flowery type things for the time being so that the band has some kind of theme. There’s a hummingbird which comes from a two-color pattern on a sash from Taquile Island. Carolyn’s bee pattern, that I included in my second book, would look good on this band. Sharon sent me embroidery designs for butterflies which were helpful.
There isn’t enough contrast between the light blue and yellow to be able to appreciate the figures on the reverse of the blue band. This band is made with tencel.
The four-color one in the next shot is cotton. There it is, mistakes and all.
Julia was taken with the multi-colored Bolivian hatband that I showed last week and wove a multi-colored band of her own…
Andean Pebble Weave…there’s a lifetime of study and creation for just this one structure.
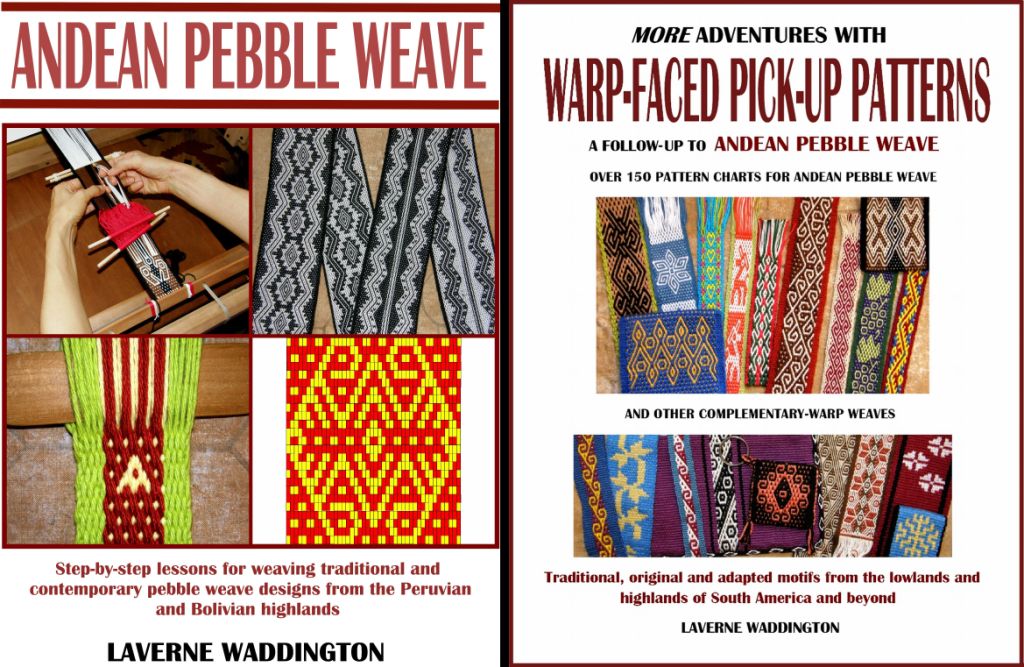
It is not a beginner technique. With some warp-faced band-weaving experience and a bit of pick-up under your belt, you can start with my first book to learn the basics of the Andean Pebble Weave structure. Then you can go on to the second volume to deepen your understanding of Andean Pebble Weave and other complementary-warp structures while learning how to design and chart your own two-color pebble weave patterns. If you are new to warp-faced band weaving there are plenty of free tutorials here on my blog to get you started. Don’t rush into pebble weave.
Jennifer is enjoying the simple pleasure of creating plain weave without ridges (there has been much written on this blog about the pesky ridging problem and the final logical solution!)
Here are her pieces ready for finishing touches. The small needle case will have a tubular band edging. Jennifer followed my Cutting Corners tutorial but notes that the wood glue she used does not dry clear (the glue I get here known as carpenters’ glue does). Look at that lovely smooth plain weave.
I have added a coil rod to my two red panels to eliminate the ridging that often occurs in warp-faced cotton pieces on the backstrap loom. Coil rods are often applied by backstrap weavers to circular warps. Mine is not circular but I am using one anyway. The most common way to eliminate ridging on cotton single-plane warps is to weave an inch or so at the “wrong” end of the loom to lock everything into place before starting to weave at the “right” end. However, I didn’t want to do that on this project because I believe that it will make my planned finishing and joining technique for the three panels more awkward. The coil rod is doing the trick…what a marvellous piece of equipment!
Until next week, let’s enjoy this beautiful old four-color piece that I found in an antique store right here in Santa Cruz about ten years ago…
And here is a last minute addition because I just went to Facebook and this leaped right off the page at me!
These are sashes woven by the Pueblo weavers and owners of Woven Dreams Textiles. This is part of their inventory for the Santa Fe Indian Market this week. One year I will get to that! Go to their Facebook page and take a look at the kilts they make.