Backstrap Weaving – A New Year and a New E-Book!

Happy New Year to all of you! I usually let December 31st slip on by but this time it was a little different because it marked the finish of my latest e-book on the eye-pattern tubular band and other decorative finishing techniques. It really did feel like a big finish and, as the fireworks boomed outside (we tend to only have the noisy ones here and not so many of the pretties), I almost felt as if they were cheering for me. I guess the end-of-year means something different for each and every one of us. This is what it meant to me at that very moment, and on and off until 2am! There are no official public displays of fireworks. People buy them in the market and let them off in their back yards. It can go on all night!

So….about the e-book. You may know this pretty eye-pattern tubular band by its Quechua name, ñawi awapa. I have seen it woven in various places across the highlands of Peru and Bolivia. Because I know of at least one other local name that is used for it, I decided to simply call it the eye-pattern band in my book.

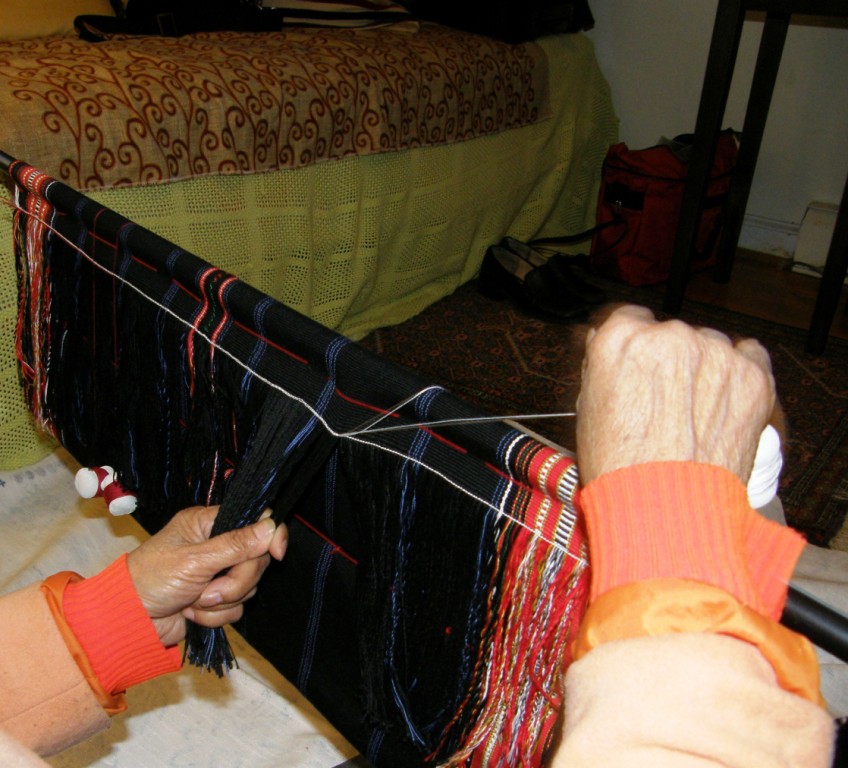
Weaving the eye-pattern tubular band in the central Bolivian highlands.

I have been happily applying it to my small woven pieces ever since I learned it. The novelty of seeing those little eyes appearing along the band never wears off! Used as an edging, it is the perfect finish to my woven pieces. In the highlands it is used for both decorative and practical reasons as it protects the edges of the fabric which are often the first parts to wear out.

Here’s my latest finished project using a simple two-color eye-pattern band as the edging on my Andean Pebble Weave wrist-cuff .

The tubular  band is woven and sewn simultaneously to the perimeter of the cuff using the weft as the sewing thread.

When I was learning to weave a coca-leaf bag with my teachers in Bolivia in 1997, I realized that removing the cloth from the loom did not mean the end of the project. It actually signaled the beginning of a whole new process that involved embellishing the piece with various decorative finishes. I saw that the eye pattern has different levels of complexity in different regions and that the methods used to create it can also vary. These kinds of similarities and differences have always fascinated me.

And, I have since learned that the eye-pattern tubular band is fun to weave on its own rather than purely as an edging. It makes lovely necklaces on which to hang pendants, sweet bracelets and bangles, and can be used in a variety of ways in accessories….fobs for keys and tools, lanyards, eye-glass holders, shoe laces, straps and drawstrings…. From my own experiments, I show you how to create straight, curved and spiraled versions of the tubular bands. They all have their particular charm!

One of the many fun things about this pattern is that you can make it as subdued or as lively as you like. I am generally limited to using only two colors at once in a pattern when I do most of my basic pick-up weaving techniques. The eye-pattern band allows you to use up to five or even more colors in the pattern. My favorite combination is usually with only three but you can make them as colorful as you like!


The traditional way to weave these tubular bands is by having the narrow warp attached to the weaver’s waist or belt with a piece of string. String heddles are not used at all and so the weaver’s body is simply suspending the warp. The weaver is not required to move the body back and forth to add or relax tension on the warp to help operate the heddles.

You should at least be familiar with weaving terminology…warp, weft, beat, shed etc…before you approach this.

Because heddles are not used at all to create the sheds, the warp can be easily set up and woven using an inkle loom or any other loom or frame that allows you to adjust tension for take-up. Full instructions on how to set up and weave the independent band on an inkle loom are included in both versions of the e-book.

Here I am weaving one on my tiny Ashford Inklette.

My e-book is available in two versions. One contains the instructions for weaving the eye-pattern band as an independent tube and then goes on to show how to weave and sew it simultaneously as an edging along the two sides of a project, or around corners, covering all edges.

I used a two-color eye-pattern tubular band to dress up a simple pouch that I made with commercial cotton fabric. The cross-knit-loop stitch decorates the mouth of the pouch.

Other decorative sewn finishing techniques such as the coil stitch, pictured below, are included with dozens of step-by-step photos as well as drawings.

The other version of the e-book is for those who only want to weave the band as an independent tube, perhaps for using it in jewelry and accessories, and aren’t interested in the sewing techniques. Both books provide ideas, instructions and suggestions for finishing the bands and for using them in such projects.

There are links to both versions in each one’s product description on the Taproot Video page.

And, let me tell you about something new for my e-books……

Both e-books include access to supplemental video clips. These are not stand-alone tutorials. They were designed to allow you to see “in action’’ some of the processes. The techniques are thoroughly explained in the books using over 140 photos, drawings and diagrams and so the videos really are optional supplemental material. With these additional materials I hope to be able to cater to a greater variety of learning styles. I had a lot of fun making those video clips and I am thrilled with them! Links to the videos are provided in the ebooks where they can be viewed and/or downloaded, if you like. They are better viewed after you have read each tutorial. Little video camera symbols in the book will let you know when there is a related video clip to be viewed.

For my left-handed weaving friends, I have included instructions in the Appendix on how to adapt the weaving technique to suit. You will notice that I said for my left-handed weaving friends. I am sorry, but for the sewing techniques in the book, I have left it up to you to adapt.  My left-handed students have always been so awesomely good at doing that in my classes!

I will leave you with this picture of me with one of my teachers, Maxima, spending a tranquil afternoon together. I weave as Maxima sews a decorative edging to a small pouch. The pouch on which she taught me to weave and sew a tubular band, lies on the ground between us. This was on my birthday back in 2011….a lovely way to spend it.

So, I hope that you will enjoy the e-book and I look forward to seeing what you create using it!

I wish you all the best for 2019!

(Hair update, for those who are interested…. I now have a blunt-edged chin-length hair cut with a good five months of grey growth!).


Backstrap Weaving – An Early Start on the Finish

I have two out of three panels for the wall hanging finished. That sounds like a lot but these two panels are just the “quiet companions” for the center black panel which will be heavy with supplementary-weft patterning. So, while it might sound like 66% of the work is done, it isn’t so. Still, it feels good to have this project well under way. I have even wound the warp for the center panel and now need to install 312 heddles and wind 624 ends around the coil rod….it’s worth it!

2 of 3 anels supplementary weft inlayThe black panel will have a lot of supplementary-weft inlay filling both positive and negative space. Then I would like to join the three panels across the top using weft twining and need to plan a design for that which will suit the woven patterns.

The Montagnard (Vietnamese hilltribe) backstrap weavers with whom I studied in the US use weft twining across the ends of the panels they sew together to make blankets. Two or three panels are sewn together once off the loom and then weft-twined patterns are added to one edge.

ngach twining set upAbove you can see my teacher Nagch working on a piece draped over a frame. The colored threads that she uses to encircle the hanging warp-ends are held on small cement bobbins that she made.

??????????????????????You can see how it is necessary to have the warps-ends under tension while the twining takes place. Nagch pulls the ends tight with one hand while twisting the bobbins with the other.

LEFT: Twining class with Nagch at Betsy's house. At right, Ju shows me how she gathers the warps in groups and sizes them before twining.
LEFT: Twining class with Nagch at Betsy’s house. At right, Ju shows me how she gathers the warps in groups and sizes them before twining.

Here are some the beautiful examples of twining on the edges of Montagnard skirts and blankets made by Nagch and Ju Nie…just the right colors for my project!

kteh designs

Twining on the bottom of a loin cloth. This image was shared with me by Susan Stem.

I have tried weft twining both on and off the loom and it is far easier for me to control while the pieces are still on the loom with the warp ends under tension. As my wall hanging is nowhere near as wide as the Montagnard blankets and skirts, I will be able to put the three panels on my backstrap loom side by side and twine all the way across them. That will be the only place that the three panels will be connected.

Then I will add some twining to the bottom of each individual panel. Again, it will be fun coming up with a design that works well with those on the panels.

I think they will need the weight of the twining at the bottom to help them hang well. I have always imagined that one of the possible reasons Montagnard weavers add twining and beads to the bottom of the loin cloths they weave is for the added weight. You wouldn’t want the flaps of those loin cloths blowing about in the breeze!

Anyway, that is what I envision for my wall hanging for the time being. Who knows how this plan will be modified along the way.

I have other ideas for perhaps edging the piece with a tubular band. So, I took some time off from the wall hanging project and brushed up on a tubular band structure that Marijke van Epen and I studied together when I visited her in the Netherlands last year. We had a picture from a book and were able after a couple of attempts  to figure it out.

As luck would have it, just ten days after I got home from that trip, I went to Peru and came across a weaver from Chahuaytire, in the Cusco region, weaving and sewing one of these very bands to the edges of a large piece of woven cloth. I saw how he had set up the warp and separated the threads into their various heddles and was able to buy a prepared warp from him.

tubular band of Chahuaytire

chahuaytire band three versionsIt was a long loooong warp!

It was designed to go all the way around one of the typical large carrying cloths.

Look at all that luscious handspun thread! The thread was colored with natural dyes and some of the shades of green were very similar. This means that the pattern is a little hard to discern.

The example that Marijke and I had been studying in Nilda Callañaupa’s first book had been done in very bright and distinct colors…six in all counting the border color.

I have made a few examples and have decided that I prefer a quieter version. The minimum number of colors could be as few as two.  That’s just as well as my wall hanging uses only three colors.

I have been sewing them along the edge of a wool band for practice. The one on the right is probably closest color-wise to the one in Nilda’s book. There is one fewer color in my wool version in the center.

Here is the three-color cotton version I made that I would prefer for my project:

three color version of chahuaytire bandHere is one from Chahuaytire that I photographed at the CTTC stall at the Santa Fe International Folk Art Market in July….those colors are so gorgeous!

???????????????????????????????Weft twined bottoms and tops and tubular edgings…it seems that I am more intent on thinking about the finishing touches for this project before I can even get started on the meaty part of it.

And, while on the same break…basically dithering around before getting into what I was really supposed to be doing, that is, winding the warp for the black panel….I decided to continue the three-color Andean Pebble weave sampler. It was coming out so well that I decided that I really needed to use it for something. I will probably sew it onto a woven piece of fabric. Too bad we won’t be able to appreciate the fact that it is reversible that way but it just so happens that all the mistakes are on the back! Never mind, there are some bigger and better projects yet to come using this structure!

???????????????????????????????The flower head motif is the center and I am now working my way backwards repeating the patterns. There you can see the hummingbird sipping from its flower.

Now, if only I were as talented with fabric and sewing needle as Julia….

julias sewing  with pebble weave(2)

julias sewing (1)Julia and Cindy, who are both in the Ravelry group and live on opposite sides of the US, got together at the Mannings to show and share their backstrap weaving work. Cindy lives in the northwest and has woven with me and Julia and I have gotten together a couple of times too. That’s Julia on the left and Cindy on the right.

Julia and Cindy at the ManningsThat’s an impressive display of their collective backstrap weaving work! I see some weft inlay work in there amongst the pebble weave and there must be a bunch of tubular bands there too.

Father Kyriakos in Australia sent me a picture of his Andean pebble weave work. He has both my books and is playing with color changes as well as working on using narrow patterns with reversals and reflections to create wider designs. I would say that he is a natural!

fr kyriakos pebble weaveWell, that’s enough thinking ahead about how my wall hanging will be finished.  It’s time to knuckle down and continue weaving it. I am off to dress up that black warp with its heddles and coil rod….see you next week.