The Inner Chaos…..I’m only talking about the chaos within my weaving tool bags and my weaving journal…nothing introspective….well maybe just a little bit. I am pretty jumbled up below the surface when it comes to my thoughts about my eventual move back to Australia. Now that I’ve let the cat out of the bag, I’m constantly being asked “when?”. I don’t know. There are so many complexities to be sorted out at this end!
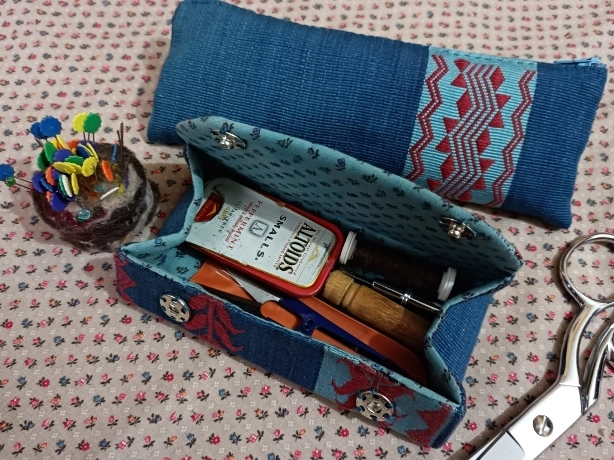
But enough of that. Let’s talk about weaving and tool bags. I showed you the little box bag that I made recently in which I can carry basic sewing supplies. I love how it opens up to give me a clear view of its contents. My large tool bag often has me digging around in the dark and getting stabbed by needles until I eventually give up and tip out the contents. I don’t help matters by tossing in all kinds of random odds and ends that I pick up from the floor when I sit down to weave….the used cable tie that I am determined to pick open and re-use, the rubber band that broke and that I’ve tied into a knot, the little chunk of eraser that really is too small to be of any more use.
I love this little box purse. The project also gave me a chance to practice my hand-sewing skills.
The long zippered tool bag was a bonus that I could make with left over fabric. It holds several of my small swords and the smaller of my pick-up sticks.
A variety of things that I use to pick up threads to create patterns…hair sticks, shawl pins, chopsticks, a dpn and a stick from my teacher in Guatemala. The shorter ones fit in the zippered bag.
Just a few of my smaller swords. These were all made for me from Australian woods found in the state of NSW (my home state).
But what about the longer tools that don’t fit in the zippered bag? Well, of course, they need another bag of their own, another box-like purse, except longer. And then what about the poor old large tool bag that has served me so well all these years?
The old faithful tool bag that has been everywhere with me, looking bright and sparkly, fresh off the loom in 2010, and the way it looks today.
It won’t be abandoned. I finally decided to invest in a good pair of fabric scissors and a pair of pinking shears. They now live in this bag all on their own. I’ve been told that I really should learn how to do French seams rather than rely on the pinking shears and I’ll get to that one day.
And so I got down to planning a larger box-like purse. I decided to use the champagne-colored cotton thread from Guatemala. I had epi information on it from past projects. I just needed to dye some of it brown and decide on a pattern for it in supplementary weft.
One of the journal covers that I wove using this thread.
Some years ago, I took paisley figures and arranged them in order to create a pattern of my own. It was a lot of drawing, sampling and modifying…a lot of work before I could start weaving. I used it once in a silk scarf project and that was the end of that for several years. I decided that it needed to be used again.
I fished the large paper pattern out of the folder. Luckily it was still legible. My pencil patterns often get really worn and smudged during the course of a project. Sometimes I even throw them away! I think, well, that was a lot of work…I’ll never weave that again! Now I always photograph them when they are freshly drawn.
All the sketching and ideas go into my weaving book. At that early stage its all fairly neat and orderly. It’s when the time comes for number crunching that it all goes to hell…the chaos within the pages begins. I would love to be one of those people who can consistently write neatly, sketch beautifully and create art within the pages of their journals. I do keep detailed notes but they are a mess! I often need to return to them and then I might have to spend quite a bit of time deciphering just how I got from A to B. If you want to see an absolutely amazing journals (dedicated to travel), take a look at jose_naranja on Instagram…unbelievably beautiful.
Weaving cloth covers for my notebooks has made note-making so pleasurable. I just wish the insides were as pretty as the outside.
These ones are still blank.
My current notebook.
I made a little video that takes you inside…..
I’m glad that many years ago when I was making books to document all that I had learned from my various indigenous teachers, I was patient enough to write out everything neatly, make precise drawings and diagrams, illustrate with photos, as well as glue in woven samples. Some even have miniature looms complete with heddles to illustrate the warping set-up. Each of the eight books I made had some kind of weaving on its cover.
The first one, bottom left, was started back in 1996 when I was still living in southern Chile.
Here’s a glimpse of the inside of a couple. These have already gone to live in Australia…
The last project in my little video is the start of the long version of the box-like purse. Here it is on the loom….
After weaving the main paisley motif which sits on the curved flap of the purse, I just wove a very simple version for what will be the base…
And here it is finished. Lessons learned when I made the first box-like purse served me well. I am really pleased with it.
I posed it next to another pouch that I wove with the same thread some years ago. The color has changed quite a lot over the years but it’s not really apparent in this photo. It has lost its golden hue on that old pouch.
It lacks the cuteness of the smaller one, though.
So now I need a bag in which to carry around all the individual tool purses…lol. Actually, my next project idea is to make a fabric case in which to store all my pattern charts. They’re currently stuffed inside a plastic box folder. The elastic straps that hold the cover in place have perished. I wonder if I could design some kind of concertina inner so that each technique has its own section. The fabric would be the outside cover. I’ve started planning the cover using the mill-spun singles wool. There’s some dyeing and sampling to do first as I’d like to use the three-color reversible pebble weave structure and need to see if the singles yarn will stand up to it.
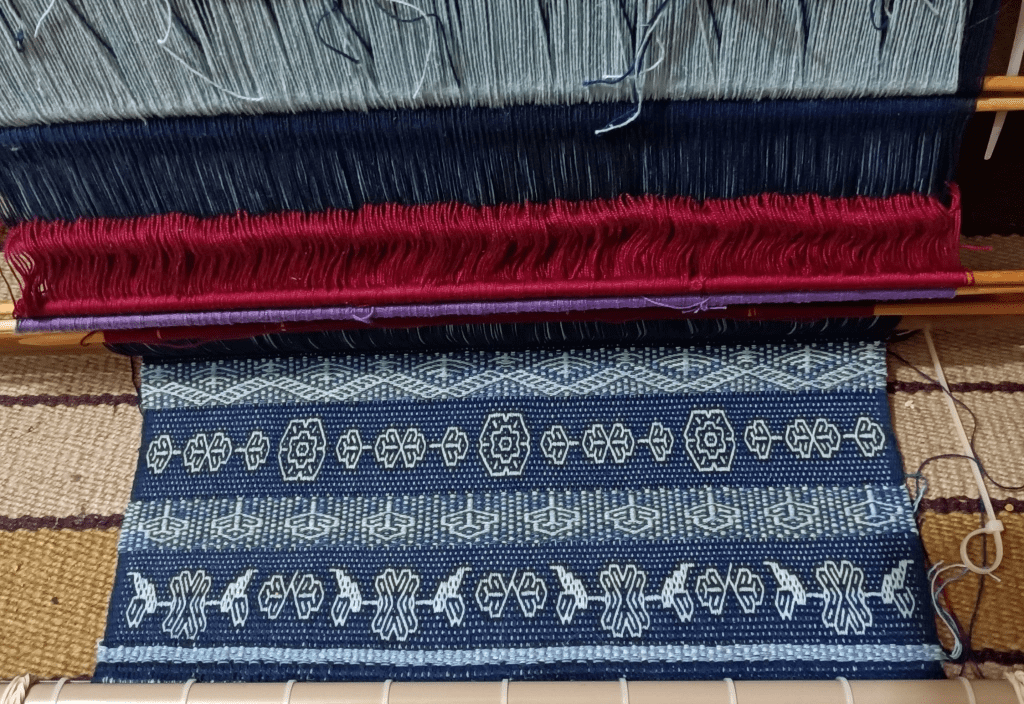
Three-color reversible pebble weave in my own handspun plied wool.
The mill-spun singles have worked well for me in plain weave. You can see that the heddles didn’t get clogged with fluff. I have yet to see how it behaves in a denser structure of warp floats.I want to dye some of it a darker grey and some black for the three-color project.
If the singles yarn isn’t up to the task, perhaps I’ll use the plied wool yarn and cochineal that I got in the market on my birthday.
So, in conclusion, the inner chaos of my large tool bag has been sorted. While I accept that the inner chaos of my weaving notebooks will never be, perhaps my chaotically-arranged pattern charts will get categorized according to structure inside a new case with handwoven cover.
Another birthday comes and goes. I was given some lovely mini cheesecakes by a friend and we went out for a stroll around the street market that starts a block and half from my place before having a birthday lunch. Every now and then I go to this market looking for cochineal. The ladies that sell the home remedies are the ones that have it but it seemed that the source had dried up as I hadn’t been able to find any this year.
The market is big and, being in good company, we chatted and ventured further into the market than I normally find it necessary to do on my own. It paid off. I actually found the cochineal mother lode. I just bought a little and then snapped photos all around to make sure that I’ll be able to find this particular vendor again.
I often forget how different these markets must seem to my weaving friends who live outside South America. I generally don’t feel secure taking my phone out when I am at the market. This comes from experience! In fact, I don’t usually take it with me at all. But, because I had an extra pair of eyes with me on this day, I brought it along and took a few photos along the way.
I love the two white cats under the table waiting patiently for tidbits.
Crunchy snacks anyone?
One of the many “healers” who will read your fortune and find solutions for your troubles.
And then I came across another surprise. It seemed that they were stacking up for my birthday. I have never seen anyone selling hand-spun wool down here in the tropical lowlands in all the years that I have been here. In fact, there isn’t any industrially-spun wool to be found either. On this day there were three balls of handspun wool hanging in amongst the home remedies in this little store owned by a lady from Potosi.
We talked spinning and weaving and she searched about to find her spindle to show me. It wasn’t particularly fine yarn but it was such a novelty to find it here and so nice to chat with this lady that I simply had to buy a ball of it. I’ll dye it with the cochineal that I just bought.
And with this I broke my vow to only work from stash but what the heck, it was my birthday.
It has the most wonderful smell that is characteristic of those home remedy stalls.
One more stop was made at the many aisles of the indoor part of the market where the sewing supplies are sold. I needed a long zip in a certain color for the loom carry bag that I was making.
There are multiple vendors along this aisle and it’s amazing how much stuff they cram into their small allotted spaces. What’s more amazing is that they know exactly where everything is. I got my zip in the perfect color.
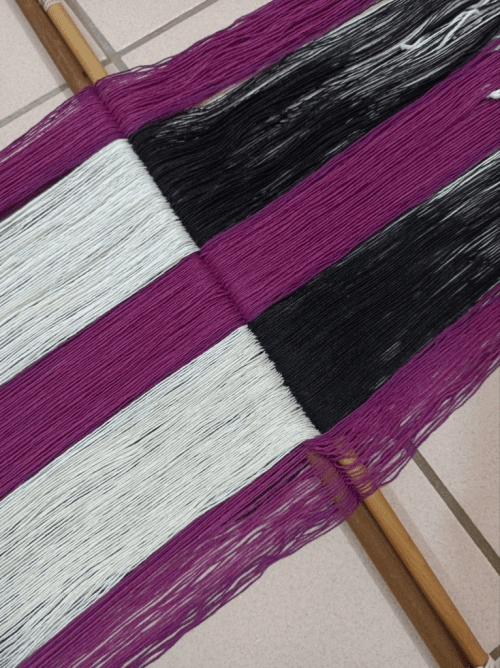
So, this is what has been on my loom. I showed you the warp of Mayan Hands cotton from Guatemala in my last post. I dyed the black and there are two shades of cochineal red that were dyed in Guatemala.
Each of the red sections is flanked by twelve ends of a slightly darker red. It doesn’t really show up in this photo. I goofed while warping and put more red ends on the right hand side than on the left but decided to just let it be.
The black and white section would enable me to weave several kinds of patterning styles and I decided to weave this in rep weave….alternating thick and thin weft. That would make a sturdy bag and a cushy backstrap. You might remember my plan to make a carry bag for my loom that could double as a backstrap.
I chose a pattern that I had used on a silk wrist cuff some years ago. I had woven it using the complementary-warp intermesh structure with a pattern from Joanne Hall’s book on Mexican Tapestry weaving.
I chose the pattern on the far left in these two images.
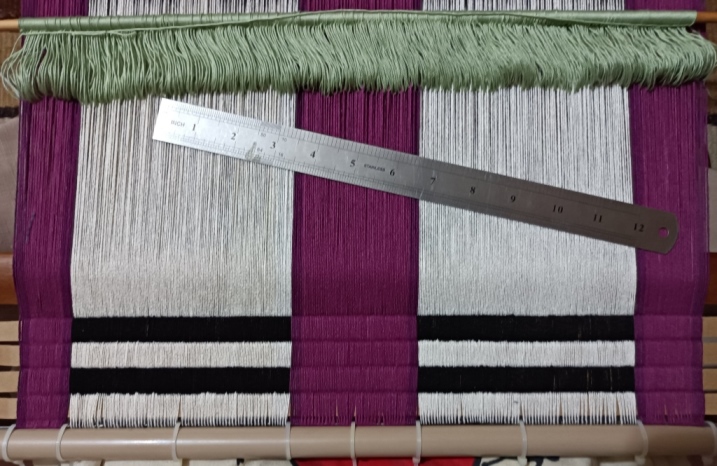
I first had to weave a sample to see how many strands I needed to make up the thick weft. Then I could get underway. Because I hadn’t used this Mayan Hands cotton in a large plain-weave project before and had only woven a tiny sample with it, I was a bit unsure about being able to set the width of the large project correctly right from the start. It’s quite common to start off too narrow. Threads that are sitting side by side along two cross sticks sit one above the other along the cloth beam and this can trick you into misjudging the width of the cloth. So, I did what I do if I am weaving with new-to-me yarn and placed four narrow strips of cardboard within the first four sheds so that I could see how the threads sit side by side.
By doing this I can move the threads around until I get the ideal coverage of the cardboard strips within the sheds. I take measurements, carefully remove the strips, disturbing the threads as little as possible while doing so, and then start weaving. This enables me to start at just the right width and maintain it for the entire project.
There’s nothing delicate or subtle about thispattern!
The motif is a complementary-warp pick-up pattern made up of two-span floats and very occasionally a three-span. Any section of white in a row that doesn’t have any white directly above or below it in the preceding or following row will be made up of three-span floats. Being complementary-warp, the piece is double-faced. It’s very straightforward. You just have to remember that vertical lines of white need to be broken up by picking up black threads in the thin-weft rows.
And here it is off the loom. I wove the start and finish only with thin weft so that they would be easier to hem. I also split them into two halves because they would become sleeves into which I would thread the cords for the backstrap. This will be clearer later when you see images of the cords in place.
I’m really happy with it! I ran out of black thick weft and switched to reddish brown which I think looked even better. In the end the color didn’t matter because I covered the bumpy selvedges in order to sew in the zip.
There’s no point to this photo. I just like the way my book looks on top of the rep weave piece. 🙂
I wove a band using the lightest of the three cochineal colours that I have in this cotton and used it to enclose the typical bumpy rep weave selvedges.
I still have to test the ideal length of the white cords so that I can cut and bind them off. I also need to decide on the best way to affix a carry strap. I’m going to let it sit for a bit while I think about that.
Here it is holding sticks, swords, shuttle and tool bag. I still have to sew to isolate the sleeves that hold the cords.
What’s next? Maybe some dyeing with cochineal and perhaps a longer version of the little box-like purse that I recently made. I have a lot of fine Guatemalan cotton for that in a color the vendor called champagne. I need to come up with a pattern for it in supplementary weft.
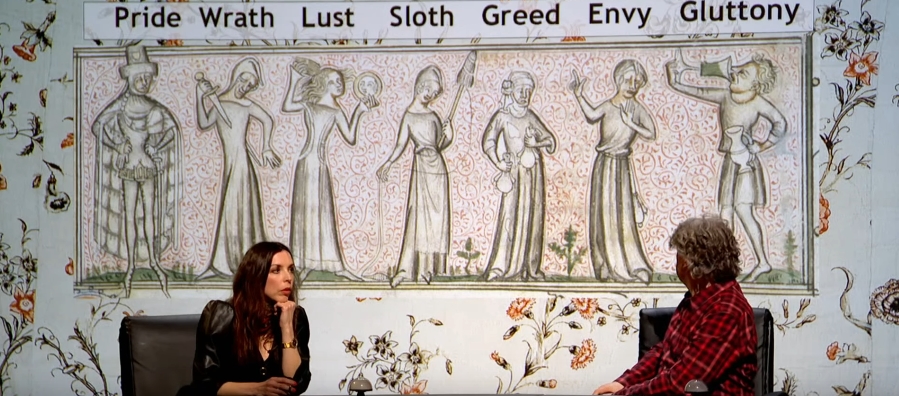
Keep busy lest you be accused of sloth! I was amused to see this depiction of the seven deadly/mortal sins in an episode of QI. A spinner was used to represent Sloth. How dare they! I couldn’t get a close enough view of the spinner during the program to be able to understand what that was all about. But I did find an image online and was able to see that her spindle, laden with yarn, was lying idle on the ground….the horror.
In my last post I left you with the fabric that I had woven for pockets for my new tote bag. It’s part of a stash-busting project using the small balls of Omega Sinfonia cotton that I’ve accumulated over the years.
Fabric for two pockets that I wove using the structure that I call Andean Pebble Weave. My backstrap loom enables me to create a nice neat third selvedge at the start of the fabric.
Then came the task of weaving the fabric for the body of the bag. Again, I wanted to be able to use up as much of that stash of Omega Sinfonia as possible. I knew that I could over-dye the lighter colors dark blue. But the dark colors would have to be dyed black. There weren’t enough lighter colors to allow me to create entirely blue fabric but I didn’t want the bag to be completely black either. I decided the cloth would be both blue and black. Oh my gosh, I had so many doubts about what this was going to look like!
The fact that each color that I overdyed would give me a different tone of blue and black was another thing to consider. This could be a mess. The differences in tone were not fully apparent until the warp had been wound and spread out before me. I suppose I could have taken the time to arrange the stripes in some sort of clever Fibonacci sequence of widths but once the warp was wound and on the loom beams, I wasn’t keen on fiddling around with it.
You might notice the absence of a coil rod on this warp. I’m in the habit of using one when I do warp-faced plain weave using material that has little to no stretch. Inserting one locks the two layers of threads together and stops them from see-sawing back and forth around the warp beam as I operate the loom. That see-sawing can cause the cloth to form a corrugated look. This time, I wove a inch or so at the far end of the warp to lock the two layers together instead before turning the loom around to start weaving at the knot-less “good” end.
I planned the cloth to be 19 inches wide. That’s a fair bit wider than what I usually have on my backstrap loom but certainly not as wide as the cloth I have seen on the backstrap looms of weavers in Indonesia and other parts of SE Asia. The widest cloth that I have seen on a backstrap loom in my travels in South America was 39 inches. It was light cotton cloth and the weaver had to stand to weave it.
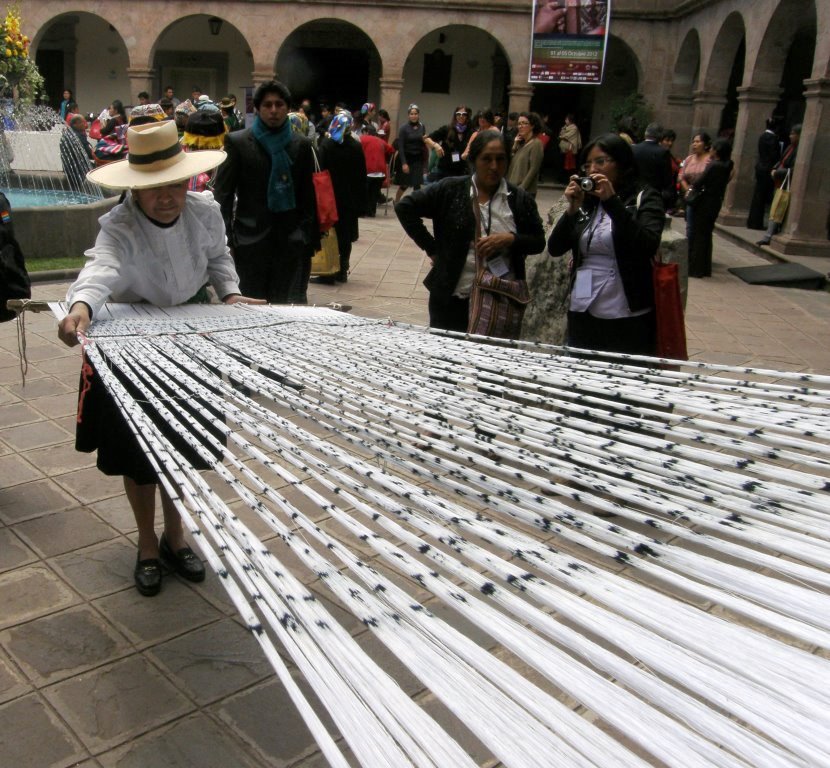
This weaver in Peru stands weaves a wide, light, cotton ikat warp.
I had to get out the long sticks and swords.
The sword on the right was just right for this project.
Laying the pocket fabric on top to see if I could imagine what the end product would look like.
Almost there.
Omega Sinfonia is quite hefty thread compared with what I have become used to using over recent years and so it was quite a work-out operating the loom and beating. My longest sword is not a particularly hefty one.
Before and after wet-finishing and pressing. The straps in the picture on the right don’t belong to this bag. I had just placed the cloth on top of another tote that I own to get an idea of strap placement.
The original idea had been to have two outer pockets, one on each side, showing the two faces of the Andean Pebble Weave pattern. In the end I went with one outside and one inside pocket instead. It was a fairly basic sewing project. I created box corners and then set about weaving the straps.
It has already been on its first grocery-shopping outing….
Its a winner. I’m really pleased with it. Well, that took care of about a third of the Omega Sinfonia scraps. What’s next? I have two kinds of reds and three kinds of browns left, none of which look good together, and a bunch of other odds and ends. I have in fact used red and brown together before but I guess that they just have to be the right kinds of red and brown in order to work…
Two wool panels that I wove and later sewed together to make a lap blanket.
People often ask me how I go about weaving wider pieces. For me, it’s all about the warping. Once a good evenly tensioned warp has been created and you are seated at the loom, there’s not a whole lot of difference in the process of dressing the warp and weaving. Additional sticks and other tools might be needed but operating the backstrap loom with a wide warp works on the same body-movement principles as with a narrow warp. It just requires more physical effort.
I have a few tips for creating and managing wider warps. I stress that this is just the way I do it. There are many different ways and of course, no one single correct way. This isn’t a step-by-step description…just some tips that I can share after perhaps having made every possible mistake over the years.
Tip 1: Make sure you have a stable warping set-up with stakes that aren’t going to shift or bend:
I always warp in sections and won’t pile up any more than two inches of threads on my warping stakes to avoid having them lean. I tie off and remove each section from the stakes and place them on beams and cross sticks that are waiting on the floor. Always use safety strings in case there’s an accident along the way!
First of several sections of a silk warp I created some time ago removed from the warping stakes and placed on beams and cross sticks on the floor.
This is the second warp that I created after returning from my first weaving lessons in Peru in 1996. I was in a big hurry to create a wide piece using both the Andean Pebble Weave and supplementary-warp structures that I had been taught but I didn’t yet have a good warping set-up. Take a look at the disaster on the warp beam!
Tip 2: Know your yarn, know your width, know your technique:
What I am saying is, don’t go wide with a yarn you have never used before. First weave a decent-sized sample.
I know that some people don’t bother with sampling but I like to know the width I am aiming for rather than just warping up and seeing what turns out. So, there is a lot of measuring and calculating that goes on based on samples that I have woven, preferably fairly recently, with the yarn I plan to use. I had a sample using the Omega Sinfonia thread for my bag project in both warp-faced plain weave and Andean Pebble Weave and used it to make my calculations. That way I knew exactly the number of ends I would need for each of the two structures to create my 9-inch-wide pocket fabric. The plain weave sections in the pocket actually came out slightly wider than expected (perhaps my sample had been too old and I have since then unconsciously changed the way I handle the weft). I was able to use that updated information to plan the warp-faced plain-weave cloth for the body of the bag.
One of my sampling warps. This one was more about sampling a motif that I was designing but it also gave me a chance to update the ends-per-inch information that I have for this 20/2 cotton warp as I plan to use this thread as part of my next project. It turned out that my epi info hasn’t changed since the last time I worked with this thread.
My brother still has the wedge-shaped wall hanging that I had gifted to my mum back in the early days. I had woven it with new-to-me yarn, so no sampling had been done, and I started off too narrow. It started to widen and didn’t stop widening all the way to the end. There’s an inch difference in width from start to finish. But because it never settled down into a consistent width, the gradual widening almost looks intentional.
Another thing worth mentioning that applies to wide warps more than narrow ones, is that I find it best to set up my loom in one place at one angle and then keep it there for the duration of the project. I had started my mum’s wall hanging in Bolivia and taken it unfinished to Australia. It got set up in a few different places at various angles while I struggled to finish it in time. I even had to work on the short warp with the warp beam awkwardly lodged behind my feet for a while (I didn’t have another rod or cord handy to extend its length). That awkwardness accounts for the fact that the cloth isn’t straight.
Many lessons were learned from this one project from back in the day.
I wouldn’t attempt a wide piece with a technique that I had just recently learned either. (Obviously I hadn’t added this to my advice list on that red warp back in 1996!)
Tip 3: Warp undisturbed and don’t disturb the warp:
Have everything you need for warping close at hand including the loom bars and cross sticks….scissors, rubber bands or tape, lashing string, string for tying off groups of warps for counting etc.
Try to warp in one uninterrupted session…turn off the kettle, put the cat out, ignore the phone, forget that cup of coffee! It’s amazing how things can change from one day to the next. I never leave a warp half-done until the next day.
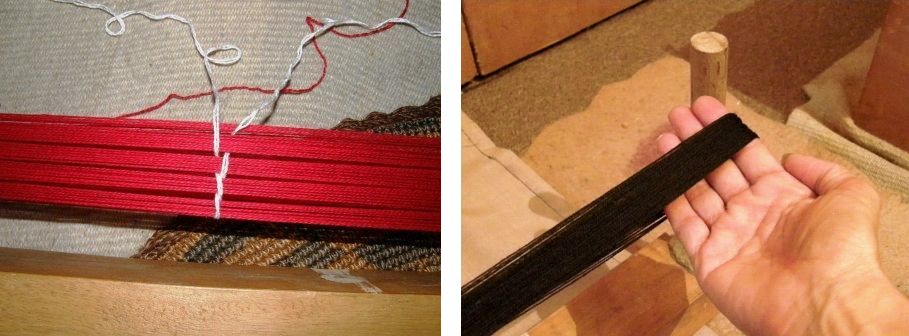
Once you have wound that beautifully-tensioned warp, do your very best not to disturb it. When I slide a section of warp off the warping board I try to keep my hand under the ends so that they are all lying flat across my fingers and not bunching up. Then I place them very carefully onto the beams. This saves a lot of tugging and rearranging later when I’m seated with the warp and tension and getting ready to weave. A lot of tugging can mess up your tension. Below right, you can see how I place my hand to lift the threads off the warping stake. Another thing you can do is chain thread around groups of threads as I’ve done on the red warp. It can help stop threads in a larger section of warp from shifting and climbing on top of each other, which all means less work and less time spent straightening things out later. One of my Guatemalan teachers did this.
Tip 4: Slow and steady…take the time to set-up and start well:
If necessary, settle the threads one by one along the cloth beam untwisting any that have overlapped. I learned to love doing this from my teacher in Guatemala. She so calmly and patiently lifted each thread on the tip of her pointed sick and placed it on the beam and I’ve learned to do the same. This is not entirely necessary if you are starting with a fringe and using waste yarn or cardboard strips as weft for your first few inches, but if you’re going for a third selvedge, this exercise will give you the neatest possible start.
Learning the patterning technique with supplementary weft with my weaving teacher in Guatemala. The cloth did not have a third selvedge. She carefully arranged the threads along her cloth beam which enabled her to press her first shots of weft hard against the beam for the least possible amount of loom waste.
Then I measure sections so that I know that my sett is consistent the whole way across the warp. There are varying degrees of “warp-facedness”. In some sections your threads might be crammed up tightly next to each other. In others they might be just a hair’s breadth apart. Mine tend to be the latter and I want that to be consistent. It’s especially hard to tell when you are working with dark colors or very fine threads. The overall width might be correct but the warp threads may still not be evenly distributed across that width.
I calculate the width that each of those sections that I removed from my warping stakes should be and make sure that the threads in each section are settled at that width. I can sometimes use up a whole morning fiddling around with this! However, with the right amount of prep, once I have thrown the first shots of weft and measured once again, I know that all will be smooth sailing from there on…just pure fun!
I’m going to finish with the The Big Bag again because after spending so much time doubting the success of this project, I now love it so much!
The good news is that I FOUND IT! If you read my last blog post, you’ll know what I’m talking about….the lost balls and skeins of silk that I had dyed with cochineal bugs. It had been a quite a task dyeing that silk as I slowly learned by trial-and-error about just some of the mysteries of dyeing with cochineal. It had got me through the tedium of being stuck indoors during the 36-day general strike that we had here last November. I had tucked all the thread away in a small zippered pouch and then misplaced it. The thing is that my apartment is tiny and its pretty hard to lose anything here. That made it all the more frustrating.
As expected, it turned up in a very unexpected place at a time when I wasn’t even looking for it. It was in a different zippered bag on a shelf in the bathroom of all places. It was safely tucked away in a very sweet zippered bag that I had got for a mere $3 at a used clothing store while visiting Washington State in the US. I had been thrilled with this find. It’s made of backstrap-loom-woven cotton cloth that was woven by the Women’s Skills Development Project in Pokhara, Nepal. I often use it as my toiletries bag when I travel. I can’t think of anything more perfect for me with its little label displaying a weaver at her backstrap loom. It’s beautifully put together and was in brand new condition when I bought it.
In this picture it sits on another piece of backstrap-loom-woven fabric that my aunt brought back from a trip to India. It’s an interesting combination of warp-float patterning, supplementary weft and weft twining. I’ve been twice to Nepal but never as a weaver. I would love to return and trek with a spindle and loom and see how I can connect with women along the way.
I look at my little bag from Nepal and wonder how long it took the weavers to construct it. I know, I know….I’m not a fan of the “how long did it take?” question but I can’t help wanting to compare their construction process to mine. The black bands around the mouth and base finish it so beautifully. You can barely make out the seam where they start and finish. Only the base is lined and covers the seam where the base meets the sides. I watch Handymum’s videos on Facebook and marvel at how she cuts and prepares all the parts for her bag projects. She then methodically sews everything in place and just leaves a small opening through which she eventually pushes all the fabric to reveal the finished bag right side out with everything in place ready to go. It’s like magic to me!
I tend to just make things up as I go and admit that I really don’t have much idea about what I am doing as I hand-stitch my bag projects. I look at pictures that I see online and take it from there. I am not looking for speed. I love sitting and slowly hand-stitching but I can never truly be sure about the success of a project at any point in the process. There’s almost as much time spent de-constructing as constructing and this project was no exception. But when its finally done, it’s very satisfying!
As you know, it started with uncovering the ply-split strap in my closet and deciding that it would look nice as the sides and base of a bag. How I was going to sew this rather thick and stiff strap to my backstrap-loom-woven fabric, I had no idea. That’s all part of my make-it-up-as-I-go style. I’ll just figure that out later. In the meantime, I’d go to all the trouble of weaving an ikat patterned piece to use as the outer pocket. There was wrapping and unwrapping of ikat tape and three dye baths. And then onward to the bag itself. After all that effort I’d just have to make it work.
Two hundred and sixty-eight heddles later came the black fabric for the body of the bag. I scraped together several colors of yarn and dyed them all black. Surprisingly they all came out with the same intensity of black color.
Construction underway….or should I say, construction, de-construction, re-construction. Still unsure at this point if I was going to be completely wasting my time.
Let me tell you that when you cut a ply-split band, it goes completely bonkers. I sewed back and forth across the band to secure it before cutting. All the twisted cords immediately unraveled and splayed out wildly in all directions. Help! I remembered that I had a leather backstrap that had been given to me by a guild. It had been part of one their deceased member’s estates. It was in just the right shade of brown. It would often be the first backstrap that I would put my hand on when I leaned over from my seat on the floor to open the bottom drawer and it got quite a lot of use. I hope that its former owner wouldn’t have minded my cutting it up in order to rescue this project by covering and protecting the end of the cut ply-split band.
With the leather in place and the bands for the zippered top woven and sewn into place, I was starting to think that maybe this project was going to be a success after all. I only then prepared the lining. It had to be lined. The wild ends of the ply-split band on the inside needed to be hidden! Where would the straps go? No idea at this point. I was still just making it up as I went.
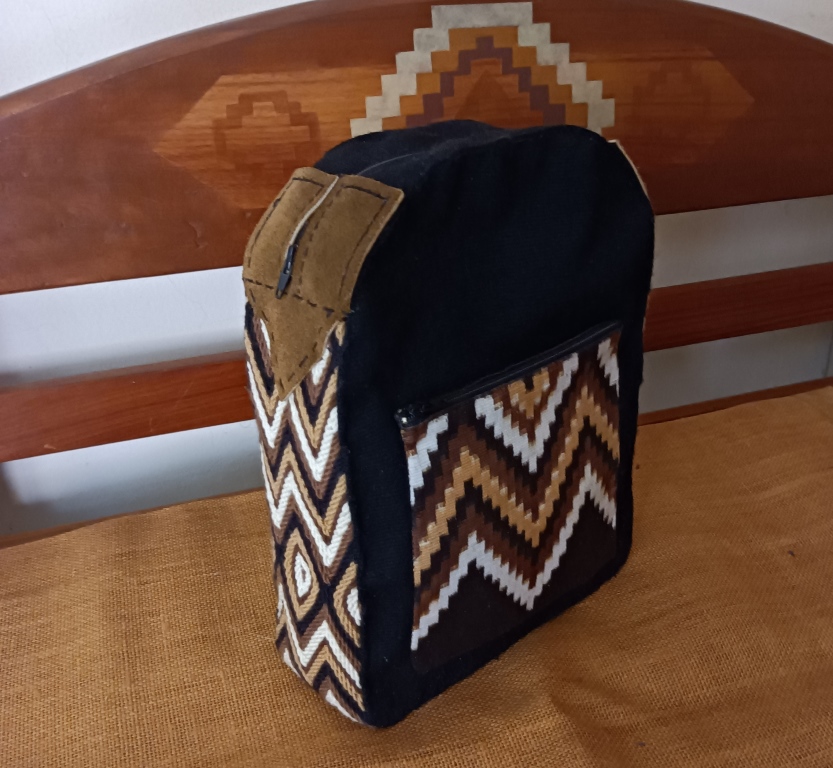
This is basically a mini backpack that is designed to be slung over one shoulder. I haven’t yet been able to find a one-inch length-adjustment buckle and so I had to improvise. The strap can be attached on the left or right depending on the shoulder I want to use. The leather backstrap yet again came to the rescue.
Done! It’s ready to use now but I’ll keep looking for that length-adjustment buckle so that I can change from double d-rings to a hook. I just had to get this finished because I know that if I left it until I found the buckle, it would never get done. If I were to do it over, I’d have the zipper go down another couple of inches. Making it up as you go is kind of fun but sometimes leads to poor decisions.
Another thing that I have been doing on the side is preparing some print fabric for another stitched shibori project. I brought back some soda ash with me from my last trip to Australia (I hadn’t been able to find a way here to buy it that didn’t involve industry-sized quantities). I dismantled a Vera Bradley toiletries bag that I no longer use…it’s too big! (this might give you a clue as to what led me to the bathroom shelf to eventually find those balls of cochineal silk) because the fabric is so pretty and I’ve been busy washing and scouring it. I’m only guessing that it’s 100% cotton as there isn’t a sewn-in label. A burn test seemed to indicate that it most likely is. I wonder how well I can expect dye to cover the print.
What’s next on the loom? Well, as you know, I am weaving only from stash and I still have a fair bit of this Mayan Hands cotton that my friend Kate gave me several years ago. This is the cotton that I used to weave the fabric for my cotton spinning bag that you see below. I also used it to weave the straps for the bag in this post. I wove them in the structure that I call Andean Pebble Weave in just one solid color and they are good and sturdy.
If I have enough yarn, I’d like to weave a very brightly colored tote bag for grocery shopping, mostly in plain weave and with a little bit of pick-up patterning. I take four cloth bags with me to the store, two slung over each shoulder and walk the seven blocks there and seven back. The bags and the straps in particular need to be good and strong and comfortable in order to support the weight of the groceries over that distance. The bags are not just riding from store to vehicle in a shopping cart. Some of my bags are weaving conference tote bags that are looking a bit shabby now. I still use the one from CNCH 2010! It has been the best of all the conference totes I have.
I’ll finish by telling you about the latest issue of Tiny Studio Creative Life magazine in which I have an article. The theme of the latest issue is Magic and I really enjoyed writing about the science of the craft and the magic of the art of creating cloth on a backstrap loom.
Editor Suzy Brown describes the magazine as being for spinners and yarn crafters and she does a beautiful job putting each issue together. Once again I have to thank her for laying out my article so nicely. The magazine is available in both digital and print formats and you can buy single issues or subscribe to receive them quarterly. It’s been wonderful watching Suzy build this business and create an international community of fans from her home in New Zealand.
The Jaunty Bag is finished and will be taking flight with me tomorrow night to Australia. It’s stuffed full of Upland white cotton sliver, my mortar spinning bowl, and takli spindle. I don’t plan to spin on the flight although I wish I could. I don’t think my fellow passengers would appreciate having my extended arm in their faces.
It’s one heck of a trip…60 hours from door to door. There’s a reason why some tickets are less expensive than others! At least I arrive at my brother’s place in the evening and can go straight to bed. A million thanks to my weaving friend Emerald who will help me out with my 150lbs of luggage (this is Phase 1 of my eventual move back to Australia) while waiting in Sydney for the train up north. The hardest thing about traveling alone with so much luggage is queuing to buy food and then somehow finding a hand free to carry it away, and going to the restroom.
As for the Jaunty Bag, here’s where I left it in my last post…
The bag had been constructed and I was weaving the strap. I used the structure that I call Andean Pebble Weave in only one color rather than two for the warp-faced part of the strap. I turned Andean Pebble Weave sideways and wove it using weft for the little figured squares. I had planned to weave the strap with four selvedges but overestimated the amount of take-up. With four selvedges the strap would be too long. But I am crazy and created the four selvedges anyway because it’s good experience! As I mentioned in a previous post, I find it much easier to fill the gap between the two ends of weaving with weft-faced weaving rather than warp-faced.
I cut off the excess length of band and sewed it onto the bag. It doesn’t have its lining yet but I did buy a book on stitched shibori which is the technique I would like to use for the lining. When I looked online again for that thirty-five-dollar Stitched Shibori book, it had magically become twenty-six dollars. I’ll have plenty of flight time in which to read it. Even without its lining the Jaunty Bag will go traveling with me.
I haven’t been back to Australia in three and a half years and I haven’t been there in the summer months since 2014. I’m not teaching on this trip because I have no room for any workshop equipment but I will meet up with a weaving friend or two just to have some fun weaving together. I wonder if I’ll be able to attend the guild meeting in Sydney.
I’ll be back in March. There’ll be lots of thinking time on flights to plan my next project. I’m not going to bring back any yarn (Ha! Lets see if I stick to that plan). Working with dwindling yarn stash throughout the pandemic and these last years has been a really good experience and I’d like to keep that going. I will however, bring back some acid dyes.
I guess I’ll see you when I get back to Bolivia. I’ll be posting Aussie things that catch my eye on my personal Facebook account.