Backstrap Weaving – Are Two Sides Better than One?

The teal supplementary weft travels from selvedge to selvedge of the band and you can just make out the little teal bumps along the edge where the weft exits one shed and turns to enter the next.
In this silk scarf project I used 60/2 silk as the structural weft in the sections that didn’t have pattern and changed to a 140/2 structural weft when I added the supplementary weft.
I carried the supplementary weft from selvedge to selvedge to create the patterns at the two ends of the scarf. The little flower motifs in the main body were woven using the “frame” technique.
All the samples here used the “selvedge-to-selvedge” technique except the white band with turquoise pattern second from the right. There you can see how the turquoise weft turns on the surface of the cloth to frame the pattern of triangles.
The dark brown base, stem and branches of these plant figures were created with this wrapping technique. All other parts of the patterns were created using the “frame” technique.
The upper pattern of horizontal and vertical lines was woven using the wrapping technique.
The scarf I wove using various Bhutanese motifs and two supplementary-weft patterning techniques.
You can see the front and back of this profusely patterned head sash from Aguacatan, Guatemala on the left. The back is plain red. The supplementary weft threads only travel within the shed or float on the upper face of the fabric. They never appear on the back.
This is the back of my learning piece that I wove with one of my Guatemalan teachers. You can see all the weft tails have been left hanging. They could be cut shorter and left there or snipped off flush with the fabric.
This fabric that I was told is from Chichcastenango, Guatemala is part of a huipil that has been worn and laundered over many years. You can see how the weft tails have become tangled in a merry mess on the back.
I like the back of my textiles in these techniques to be open and plain. This is the back of the paisley scarf I showed above. Creating a “clean” back is, of course, is easy to do when the supplementary weft runs from selvedge to selvedge. When there are various color changes happening across the width of the warp as there are in the Guatemalan textiles that I’ve shown here, there’ll be many more weft tails with which to deal and carefully snip at the back of the cloth.
You can see the two faces of the Guatemalan textile on the left showing the double-faced nature of this technique. On the right is my own attempt at the pair of Guatemalan quetzal birds.
This little bee pattern is the first double-faced one that I learned with my teacher. You can see that it almost looks like a cross-stitch pattern with it’s identical “stitches” stacked neatly in columns.

Backstrap Weaving – An Unexpected Match

Finished with the second figure and glad that I hadn’t cluttered the center space.
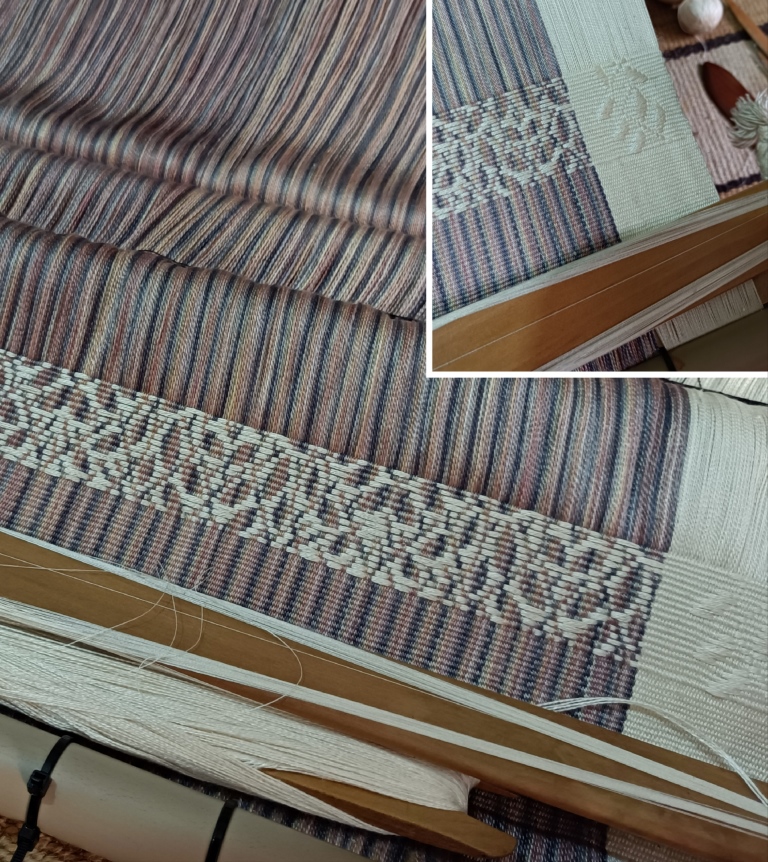
This photo gives a better view of the white-on-white pattern which is sometimes very hard to capture well. Note how the variegated thread mysteriously changes tone right at the middle of the warp.
When laid out flat like this, it’s a bit disappointing how “flat” it looks considering that it is, after all, made from silk.
Here’s another look at the white-on-white patterning on the sides that I love so much.
Here it is with one of the two flower/foliage bands placed alongside.
The two flower/foliage bands together. I was particularly pleased with these two bands as they had been a study in how to switch background colors smoothly back and forth along the length of a band without using a harsh and sudden horizontal transition.

I’ll leave you with images of two little slices of culture here in Santa Cruz…

Backstrap Weaving – What’s My Style?

One of the projects using the 140/2 silk as warp was the last two panels in my Within These Walls series.
So, here I am “backstrap weaving”. The cloth that I’m weaving is in a balanced doubleweave pick-up technique known as Finnweave which can be and is woven on other kinds of looms. I don’t think anyone is going to pick up my finished cloth and identify it as “backstrap weaving”.
A weaver from Pitumarca that I watched at Tinkuy 2010 creating weft-faced fabric on his backstrap loom.
A weaver from San Ignacio de Loyola in Peru has made the weaving of her warp-faced pattern totally loom controlled by using multiple sets of string heddles.
My weaving friend Sharon Kersten is currently sampling balanced cloth on a backstrap loom using a 15-dpi rigid heddle. Note her cool temple…push pins in a length of balsa wood.
This gorgeous sheer cotton cloth was woven on a backstrap loom by a weaver in Mexico. It’s yet another kind of fabric that I think is more accurately described as having been woven on a backstrap loom rather than with the blanket term “backstrap weaving”. The range of achievable structures and techniques is wide! (Image from the Flickr page of Teyacapan and used with her permission).
It’s always lovely when the threads have all been settled into place and I can get started on the pattern.
That’s the extent of the foliage pattern. I’ll weave this band of pattern again at the end. I am, however, continuing with the white-on-white along the sides.
And now a hummingbird and flowers start to make their appearance. This might be the only motif I weave between the upper and lower strips of foliage….keep it clean and simple, perhaps. We’ll see.
A backstrap-loom weaver from the Chamula municipality of Chiapas in Mexico.

Backstrap Weaving – Wonderfully Wide

The warp is made up of white and cochineal-dyed cotton from Guatemala. I dyed some of the white black.
The finished backstrap which doubles as a loom and tool tote bag.
An ikat shawl weaver from Tacabamba, Peru, standing to manage the wide cotton warp on her loom.
My Montagnard (Vietnamese hill tribe) teachers always use the beams and swords that are designed for the widest pieces of skirt and blanket fabric that they weave no matter how narrow the piece they happen to be weaving.
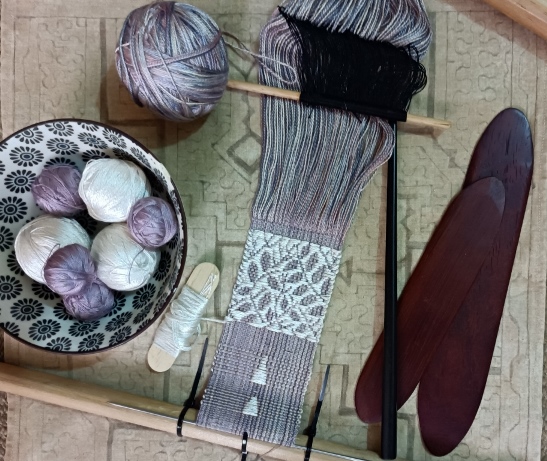
I wasn’t one hundred percent sure about the size of this silk thread but after fishing out silk examples from my stash drawer that range from 30/2 to 140/2, I came to the conclusion that the variegated is most likely 10/2 and the white 20/2.
I felt that I’d already explored the idea of a variegated ikat pattern in this piece (although the thread in this case isn’t actually variegated. It’s just a mix of lots of different colored ends of warp). I had to look back at this to be reminded that I hadn’t particularly liked the effect at the time (although it’s funny how things can grow on you!)
When I do ikat on a multi-colored warp, I prefer having wide stripes of color so that there’s only one color in each pattern segment, as you can see in this silk example I made some years ago.
This covered book that I created is already living in Australia. I dug up photos to see what the various colors of supplementary weft looked like in the upper and lower foliage patterns. Again, it isn’t variegated thread but rather a combination of four strands of three different colors. In this case the supplementary weft is used as the positive part of the pattern on the green background.
In this example, the gold supplementary weft has filled the negative space around the flower pattern which is revealed in the black ground cloth. The red patterning shows the use of supplementary weft in both positive and negative space.
The pattern needs to be busy so that there are never any excessively long floats of the white supplementary weft.
Off the warping stakes and onto the loom. As usual, when winding wide warps, I wind several small sections removing them one by one from the warping stakes and placing them on the loom beams that are waiting nearby on the floor. I don’t take any risks with having my warping stakes lean, even if ever so slightly, by having too much thread loaded onto them.
It’s normally my habit to start with a selvedge in which case I would remove those cardboard strips and start weaving right at the base of the warp. However, I decided to leave them in place this time. Although the two aren’t visible in this photo, I can tell you that the 10/2 silk and doubled 20/2 seem to working together well.
I’ll have a choice in the style of hummingbird figures….either using the supplementary weft to “draw” the swirls within their bodies as can be seen on the left, or use the weft to fill in the negative space within their bodies so that the swirls appear the underlying ground cloth, as on the right. I’m leaning towards the latter but maybe a combination of both?
The lake had alligators in it!

Backstrap Weaving – The Right Stuff

We’re standing still as we enter the sixteenth day of a city-wide strike but I have been pretty busy and entertained during this latest of the stay-at-home situations. It’s nowhere near as anxiety-ridden as the last time we did this for twenty-one days at the end of 2019.

This is what I have been up to:

SILK: soaking, scouring, squeezing, steeping, stirring

COCHINEAL: squashing, sifting, soaking, steeping, straining

DYEING: Sighing (over the dull colors), squealing (over the lovely ones), searching (for the right additives)

Dyeing experiments on silk with cochineal and alum mordant have kept me entertained during the strike.

But I don’t have the right stuff if I want to get the gorgeous reds normally associated with cochineal. Never mind, I’ll just pop out and get some. But of course everything is closed due to the strike. What I would like to have is cream of tartar and distilled water. The former is supposed to push the color towards a cherry red. Yum. My tap water is far too hard. I have read that dye molecules tend to adhere to the minerals in the water and not so much to the fiber. And that’s where the distilled water comes in.

Citric acid shifts the color to a strong orange.

The supermarkets have been allowed to open on two mornings a week from 6am to 11am. Imagine the whole city out trying to shop in those two time slots especially since the Day of the Dead fell right in the middle of it all. You would think that it would be a simple matter of getting some cream of tartar at the supermarket. I went to three and didn’t find it. I don’t have an oven and, therefore, don’t bake. I have never had a reason to look for it before. I found a place on Facebook that supplies commercial kitchens. Of course, it’s not open during the strike. I suppose I will have to buy a bagful! The distilled water will have to wait until the end of the strike too. In the meantime, I’ll just make do with what I’ve got and have fun.

This is the kind of red-ish purple that I got on my handspun llama with an alum mordant and tap water many years ago. I was really pleased with it. Many years ago, I used to have a softening attachment on my tap and I don’t remember if I still had it when I was dyeing this llama fiber. The company that supplied the cartridges for the attachment closed and that was the end of that. I know for sure that I hadn’t used cream of tartar.

In a way it’s a lot of fun making do with what you have on hand. Using coffee filters was suggested as a way to strain the bug particles out of the cochineal liquid. I don’t have any but I found that cutting two of the three layers out of one of the disposable surgical masks made a pretty good strainer. I could hang the elastic straps over two bottles to suspend the mask over a bowl. I had a little re-usable draw-string sack that can be used for tea leaves or yerba mate. That worked well for containing the crushed cochineal while the color was being extracted.

I got a few different purples…nothing terribly exciting….but adding lemon juice to the bath brought on a powerful zing of orange. Wow. Almost too powerful. I learned that I had to rinse the orange skeins in water that had a few drops of lemon juice. My first orange skein, rinsed under the tap, released a lot of orange liquid in the first rinse, a rosy quite attractive orange in the second, and then the skein magically turned purple before my eyes… and a very dark purple at that! Not a trace of orange left. How bizarre. I rinsed the others in lemon-y water after that and got some pretty colors.

Purple and orange and pink tones in silk from cochineal.

So, that’s what I have so far. I am looking forward to getting some reds when things are back to normal and I can get the right stuff. In the meantime I can start skeining and scouring and mordanting the next lot of silk. I have a new even greater appreciation for the person who prepared all these tiny sample silk skeins from natural dye experiments using all kinds of mordants and color-shifting agents.

Skeins of naturally dyed silk that were gifted to me.

I had so much fun combining those small skeins to weave book covers…

Hopefully I can get colors that work well enough together for a future ikat project.

As you can imagine, when doing this kind of thing there is a lot of time spent waiting for yarn to dry or soak or steep. I had to keep myself busy with other fiber pursuits so that I would stop impatiently poking at things in the pot. I am still spinning the brown cotton that is labeled as Cinnamon and am about to start experimenting with boiling small quantities of it for different lengths of time to see how that affects the resulting deepening of color. I first soaked one lot and allowed it to dry to see if the color changes at all from simply being thoroughly wetted. It doesn’t. Now it’s time to start boiling.

The color labeled Cinnamon is the uppermost one in this picture.

The other thing I did was weave a band in 60/2 silk to experiment with making jewelry…wrist-cuff bracelets and possibly pendants. I enjoy wearing these when I travel but am also thinking about possible income sources when I eventually return to live in Australia.

I added a hummingbird cuff bracelet to my collection of blue ones….

And then I unearthed a sample I had woven in indigo-dyed fine cotton from Guatemala. It will make a nice storage bag for the blue bracelets.

I finish my cuff bracelets in a number of ways. Sometimes I add a button to one end and a loop to the other. This involves finishing the raw edges of the band in some way. Usually the material is fine enough to turn under twice and hem. If not, I turn once and sew down after having sealed the edge with diluted PVA glue. This is not my favorite way as the dried glue can sometimes be scratchy against the skin. A more complicated but enjoyable way is to edge the perimeter with a woven tubular band. Using metal ribbon crimps and some sort of clasp takes care of the raw edges. However, cuffs with clasps like these are the hardest ones to do up. I have had lots of practice, though!

A tubular edging added to a wool band encloses and protects the edges.

Apart from enclosing and protecting the cut raw edges, ribbon crimps also allow you to wear the bracelet showing either of the two faces.

I wove my hummingbird design in warp-faced double weave. I love the smooth, solid color look of this structure. There are no floats and no spotted background. If you think that you would like to try double weave yourself, I have written a book which gives instructions via dozens of step-by-step photos, detailed explanations and video clips for those who like to weave bands on standard inkle looms. I think that it is a technique for those who have already tried and decided that they like the slower pace of weaving bands with pick-up patterns. It’s not the first-ever kind of pick-up patterning that I would recommend trying. I learned this structure in the highlands of Bolivia way back in 1997on a horizontal ground loom and have adapted the method to the inkle loom. Warp-faced Double Weave on Inkle Looms is available as a PDF or as a spiral-bound book at Taproot Video.

I made the most of every piece of this short band…

My friend Dorinda is back in the States now after visiting Maxima and all her other friends in the Bolivian highlands. Maxima runs a small grass roots weaving co-op made up of women from her town and neighboring rural communities far, far away from tourist trails. Pre pandemic, I was able to take and show examples of the ladies’ work that I own using their handspun wool and natural dyes and generate a lot of orders for them. The profits would go towards simple needs like buying supplies for their children at the start of the school year. If you were reading my blog during those years you will know that I got around a lot and there are now folks from Florida to Washington state who own some of the beautiful woven cloth. Although the ladies do sew the cloth into useful products, most of my weaving friends were interested in buying lengths of cloth that they could use in their own sewing projects.

Here are some of the youngest and newest members of the co-op who have recently graduated from the body-tensioned band loom to the leaning vertical frame loom on which they weave wider pieces. The youngest one has yet to graduate but will do so next year. Look at those lovely reds they get on the wool from cochineal. I need to get some of that good highland water!

Maxima’s sister, Narciza is one of my weaving buddies and is here showing the 4350 meters of yarn that she spun during the Spinning Week competition that Dorinda helped organize in October by seeking out funding for prizes.
Two groups of spinners competed for prizes. The first prize winners on the right are wearing their new skirts and the second prize winners received a knitted cardigan. Donated funds were used for the purchase of the skirt fabric and yarn and the skirts were sewn and cardigans machine-knitted by members of the co-op. 89, 887 meters of yarn were spun in the week! There’ll be plenty to go into the dye pots next season.

These ladies were the participants in the Spinning Week competition in the first week of October. It’s a very humble group of ladies living a simple rural existence deep within the highlands, growing vegetables for the Sunday market and raising livestock. There are no passing foreign tourists and no local interest in their woven goods in the nearest city nine hours away (it’s a spectacular bus journey!) Please do take a look at Dorinda’s blog, PAZA Bolivia, to read her fascinating stories about the lives of these women and their efforts to keep their spinning and weaving traditions alive. You might think about subscribing to automatically receive notification of her future posts. I hope that I can travel soon to promote their work and help out in my own small way as I used to. In the meantime, I’ll do my best via my blog.

I’ll leave you here with an idea for using ribbon crimps to make some tree ornaments. I show these every year! The bands don’t necessarily need to be holiday themed. I think any pattern looks good.

These are all woven using the structure that I call Andean Pebble Weave. If you would like to learn how to weave Andean Pebble Weave on an inkle loom. I have written a book that teaches just that: Andean Pebble Weave on Inkle Looms. If you use any other kind of loom to weave bands you can still learn the method that enables you to weave these kinds of double-faced bands in this book: Complementary-warp Pick-up. The advantage of the inkle loom book is that it includes instructional video clips in both its digital and physical versions.. Both these books teach the method that enables you weave all the patterns in my two follow-up pattern books.

Hopefully, the strike won’t last too much longer and there will be a peaceful end and a solution to satisfy all concerned. Until next time…..