Backstrap Weaving – The Long-awaited Book Update!

Rugged up for winter hiking with my Wednesday Walking Women’s Group at Wentworth Falls. Spinning wool for a lap blanket project at the Springwood Spinners and Weavers Group. We meet weekly! Attending a Jane Austen Tea Dance in Sydney…yes, I’m doing English Country Dancing and am quite obsessed! It’s good to add some non-hand activities. as my poor wrist and hand will probably never fully recover from my accident.

SO, HERE’S THE UPDATE….

Demonstrating weaving and spinning at Winterfest Medieval Fair while making new fiber friends.
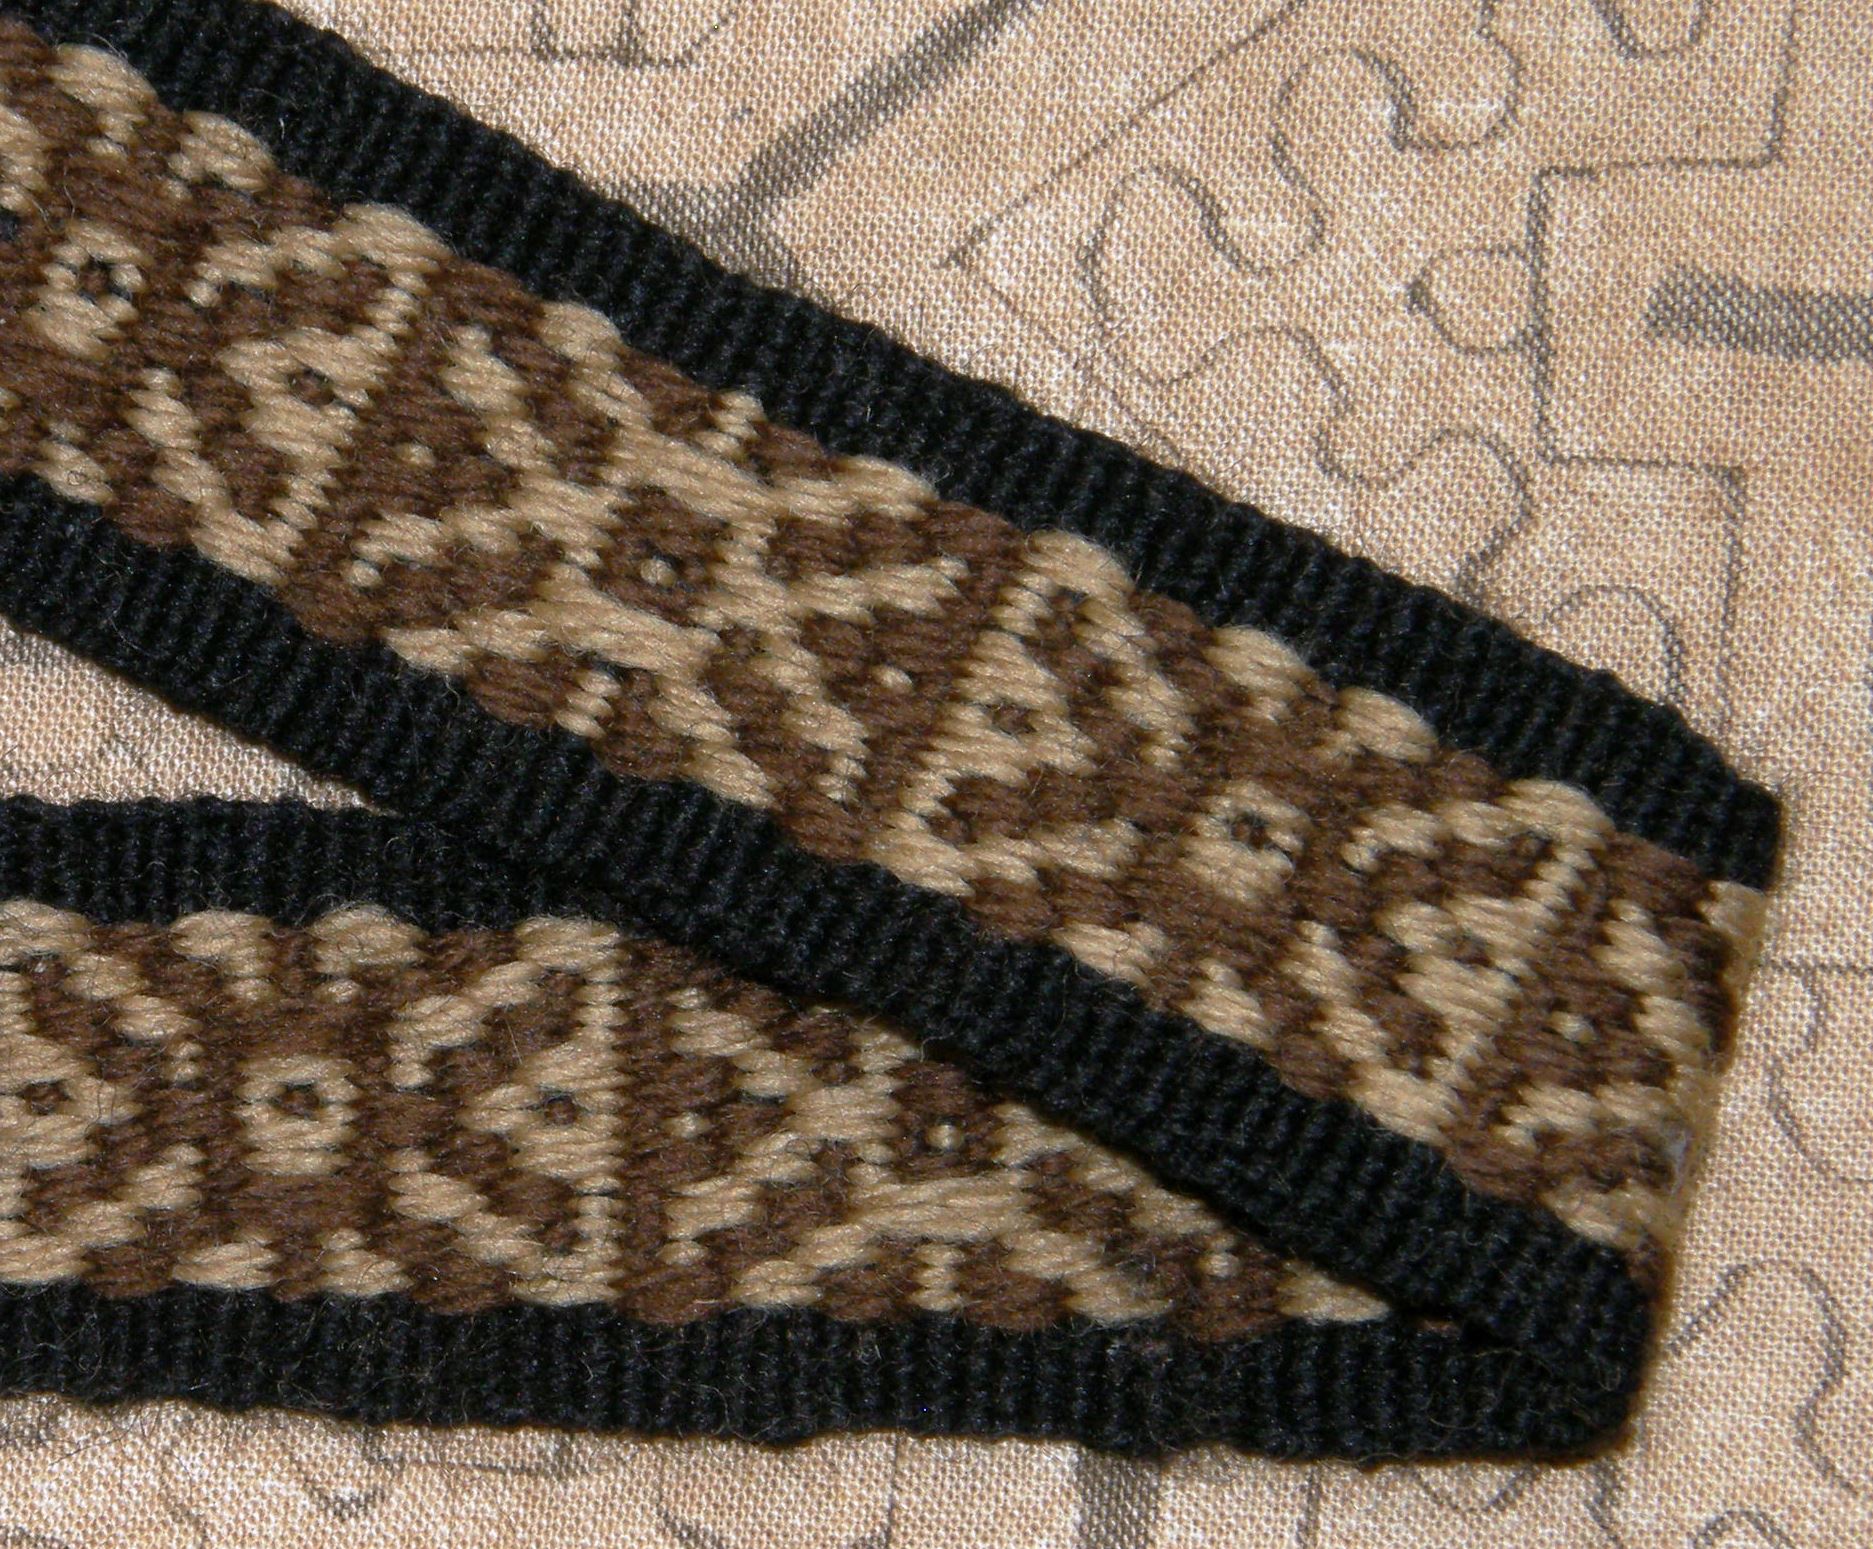
I chose to weave a pattern that I had transposed to the structure that I call Andean Pebble Weave from a historic tablet-woven band for the demo at the Medieval Fair. It has a little dragon-like figure which I thought appropriate. It is charted in the More Andean Pebble Weave Patterns book.

Some of these patterns are charted in this first book.

(More suitable starter books for those who use inkle or other band looms are Complementary-warp Pick-up for all kinds of looms that allow you to weave bands or Andean Pebble Weave on Inkle Looms specifically for inkle looms. See their descriptions below).

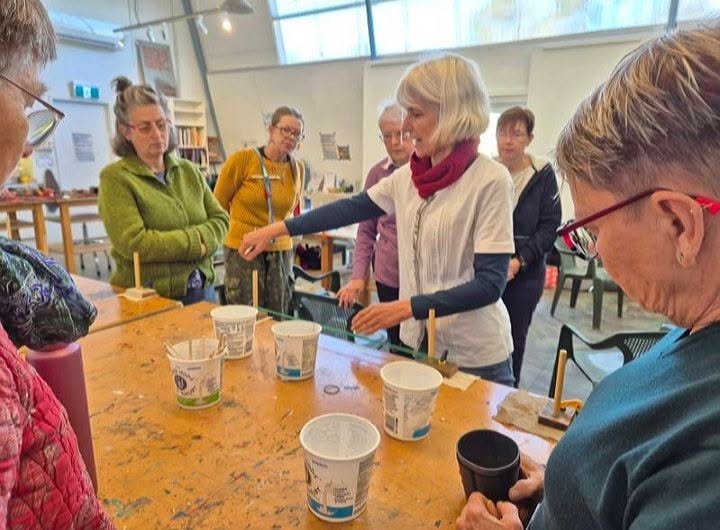
Teaching backstrap loom weaving at the Blackheath Arts Society here in the Blue Mountains. All those serious focused faces turned into smiling ones once they’d settled and started to feel comfortable with the techniques. Some had never ever wove before and can now call themselves weavers!


The colors I’ve been achieving lately in my natural dye experiments perfectly matched the Autumn colors here in my Blue Mountains home. The most recent color came from lichen which gave me the lovely lavender.


Being King of the World on Ruined Castle deep in the Jamison Valley, Blue Mountains NSW Australia. Day 3 of my three-day birthday celebration a couple of weeks ago…haha. No it wasn’t one of the milestone birthdays but the Beatles thought the age important enough to write a song about!

Backstrap Weaving – It isn’t all in the Wrist

The Garden Bands are finished and now the question is whether to use them in a project and, if the answer is yes, how?

In my last blog post, I showed you the first of the two bands sitting alongside my hummingbird band.

When I had finished the hummingbird band, I had been thinking about cutting it into two or three pieces, placing them side by side and making “something”. Friends in one of my Zoom groups were not enthusiastic and suggested I weave two bands to flank the hummers and use the whole thing as a wall hanging. I liked the idea of not having to cut (and possibly regret having done so). On top of that, weaving accompanying narrow bands meant that I could once again try out the little flower motifs and the subtle color transitions that I had been sampling in 20/2 cotton.

Now both bands are finished and here they are together…..

I am really pleased with them and may never use them for anything at all. I just really enjoyed creating them. I will play around with placing them next to the hummingbirds in various ways to create symmetry or even asymmetry as some of my weaving friends have suggested. I might keep the borders or perhaps fold them back so that they are hidden. I might hang them together so that they look like one complete piece or leave space between them.

Right now, I think I just need to leave them be and think about all that. Put it this way, there won’t be any cutting or sewing happening just yet.

What I would like to do next is sample these motifs in heavier thread. I have some 8/2 tencel that I would like to try. It will be interesting to see how wide the piece will be in this tencel. I have quite a few people asking me if I plan to publish these patterns and I am not really sure how they will look on a larger scale. They are fine and delicate in 60/2 silk. How will they look in 8/2 tencel?

At the same time I am not even sure if I would like to publish the hummingbirds. The hummingbirds have become part of my pandemic experience…they represent my yearning to be out of all this and zipping about freely. My friends in the States tell me that it is time to take in their feeders as the hummingbirds start their migration south. It must be so nice spotting the first ones arriving at the start of the season the following year. I have often thought about doing a similar seasonal change by spending the mild winters here in Bolivia and the summers in Australia but that was a pre-pandemic dream. I am not sure if I can pull that off any more. I, like many of you I am sure, have had to modify plans with the times.

This is the warp I created for the second band…

In this photo, I have finished creating the heddles for one half of the warp in this warp-faced double weave structure (one heddle set for all the light threads, and one for the darks), and have just started creating a third set for the light threads on the other side of the cross. A fourth will hold all the dark threads on that side of the cross. Those of you who have used my book Warp-faced Double Weave on Inkle Looms will have learned a two-shed set-up for this same structure that is perfect for the inkle loom. I only use four sets of heddles when I am weaving with a lot of ends and especially if the thread is fine. The inkle loom is perfect for the more basic two-shed set-up with heavier thread and fewer ends. Bolivian weavers who use this structure will use the method that is traditionally used in their community. Some of them use the two-shed method even when the threads are fine and numerous. This was the way that I was initially taught. Others use a four-shed set-up.

Working with multiple sets of heddles for a warp-faced structure on a fixed-tension loom, like the horizontal ground looms that are used in certain areas of Bolivia and Peru, is challenging.

Bunches of string heddles control the colored layers of warps on the horizontal loom of Taquile Island, Peru

In my experience, using a loom where the weaver can modify tension at will with his or her body makes the process of using multiple heddles much easier. Of course, I am talking about the backstrap loom. The weaver can control just how much the warp threads are able to rise and bend to form as large a shed as necessary without dragging up any sticky neighboring threads that don’t belong, and without causing abrasion.

A two-heddle set-up for Andean Pebble Weave for one of my Within These Walls panels.

When I was first taught Andean Pebble Weave way back in 1996 using narrow warps with quite fine thread, I was shown how to manage two sets of heddles. It took quite some time to figure out what was going on. I would just watch my teachers hands deftly manipulating the heddles, magically and effortlessly creating clean sheds, but at first was not able to replicate the moves. What I wasn’t noticing was how the rest of the body was also involved in the process. It wasn’t only about what their hands were doing. My teachers had to move to slightly relax tension on the warp while working with their hands. I broke a few warp threads in my rough handling before that key piece of information clicked. Those broken threads did not make me popular! You might understand what the title of this blog post is about now.

On narrow warps, I was able to wrap one set of heddles over one hand and roll it away while pulling up on the other heddle with the other hand. The wrapping and rolling tightens all the threads in those heddles. It holds them taut and in place so that they simply cannot grab on to neighboring threads and become part of a shed in which they don’t belong.

Here’s 7-year old Lily doing just that:

This and some of the following images are screen shots from videos that I took and will be blurry as a result. I think they still allow you to see what is going on. You can see how slack Lily’s warp is because she has relaxed tension (more than is really necessary as you can get away with very slight movements when the warp is this narrow). One hand is pulling up the second group of heddles while the other wraps and rolls the first set away.

Here’s my student Berna doing the same: (Hi Berna! I know you read this blog from time to time). She is raising the first heddle while rolling the other away. You can see how her left pinky rests on the warp and acts as the pivot point for the roll. Having placed her other pinky within the shed to save it, her body is on its way to returning to the “neutral” position in which the tension on the warp is no longer relaxed. She had relaxed tension just enough to enable her to save the shed on her finger. She can later replace her finger within the shed with a sword to beat.

Susan learned all this about operating a loom with two sets of heddles on narrow warps from me during my visits in the States. She needed to contact me recently after having set up the beautiful Andean Pebble Weave warp (below) with its two sets of pretty heddles as it’s her first time attempting something this wide. She works with wood and has had to prepare swords that will suit the width of this new project. I hope that she sends pictures of them.

The heddles on their rods fill a narrower space than the width of the warp as some of the heddles hold two threads. This difference in width is expected as the woven cloth will be a fair bit narrower than the width of the warp as you see it here. The fact that this structure uses warp floats on both faces of the fabric means that the fabric will be narrower and thicker than one with the same number of ends in plain weave.

Isn’t this warp gorgeous? I can’t wait to see what she does with this asymmetric layout.

This is Susan’s first attempt at this kind of width having woven several beautiful Andean Pebble Weave guitar straps for friends and family which have given her plenty of practice in winding nicely-tensioned warps and making string heddles. Of course, now her question is how to manage these two sets of much wider heddles. A hand is simply not large enough to wrap and roll these.

For wide warps, I was taught to substitute a sword for the hand….

Here I am demonstrating doing this for a group of friends and exaggerating somewhat to show the effect of moving my body forward to relax tension on the warp. The more I move forward, the larger the shed. The edge of the sword rests on the warp and is the pivot point. Once the shed is open, I can let go of the sword in the wrapped-and-rolled heddle, maintain the forward position, keep pulling up on the heddle rod, and save the open shed on a sword. You can see how my sword is completely wrapped within the heddles and rolled. So, an important tip is to take account of the width of your sword when you are making the heddles. If they are shorter than the width of the sword, this move will not work so well. If they are a lot longer, they will be clumsy.

This still-shot which I grabbed from one of my videos, shows a backstrap weaver in Peru positioning herself to wrap and roll her sword away while her other hand lifts the heddle nearest to her. She chooses to use a sword rather than her hand even on this relatively narrow warp. Her sword sits just below the heddle stick which shows that her heddles are the perfect length for this. That is what I always aim for. No doubt she has been doing this for most of her life and doesn’t even need to think about it.

Now you can see her raised heddle a lot more clearly and her forward position is evident.

So, this was precisely what I was doing on my double-weave Garden warp. I would roll Heddle One away with my hand while lifting Heddle Two. And I worked Heddles Three and Four in the same way. It enabled me to work with this fine 60/2 silk without breaking any threads from abrasion and achieve nice clean sheds every time.

When working with just one heddle together with a shed rod, I like to use what I call the “twisty stick” method. You can see this in action in this video clip. Twisting the two sticks tightens that layer of threads so that the threads remain taut and in place while I bend and raise the threads in the other layer. I go into this in more detail (how to set it up etc) in my video class Operating a Backstrap Loom.

You can see me using the twisty sticks a few times in this next video where I am nearing the end of a warp of 60/2 silk…

Of course, it is important to point out that there are many many different methods used by backstrap weavers to operate their looms. I share with you some of my current favorite methods that work well for me with a variety of warp materials. There is no single correct way to do any of this. Some materials, for example, are just friendlier in terms of stickiness and work well with simpler methods. Some materials are so sturdy that the weaver can get away with simply grabbing and pulling up on the heddle while sawing it back and forth along the warp to clear the shed and remove any stray threads that don’t belong.

How I would love to be there with all of you who are venturing into weaving on backstrap looms. Who knows when that will be possible? In the meantime, I hope that some of what you have seen here today is helpful and perhaps interesting even to those who don’t use a backstrap loom.

It’s time to wet finish the Garden and Hummingbird bands and give them a good hard press in order to better enjoy the loveliness of the silk. Right now they could easily be mistaken for cotton. I am looking forward to bringing out their sheen.

Until next time….

Backstrap Weaving – Chasing Away the Blues

I have been working with blues (and once or twice with the blues) these last two weeks as my latest ikat experiment develops. I still call these “experiments” as I aim to iron out kinks, try new things and learn something new from each attempt. I suppose the main focus of this one was to create the colors that I had in mind at the start of the project. If you have been reading along over this last year and following the progress of my ikat experiments, you will be used to my saying…”the color didn’t turn out at all as I had expected, but it grew on me.” This time, I decided that I would mix the dye powders I have and try to create certain tones of blue and have them match as closely as possible the colors that I have in mind, rather than just making do with what I get. Yes, Facebook reminded me that it’s has been a whole year since I started working on this latest round of ikat experiments. They began with my using short multi-colored base warps and black dye.

I showed you the start of my latest experiment in my last post where I had just begun applying the ikat tape. It’s a long narrow piece using what remains of my supply of 60/2 silk…a sash that will hang on the wall alongside other ikat pieces that I have created in this 60/2 silk. On the warping frame, it is folded to halve its length so that I can wrap the tape around two layers of threads at once.

Maybe a Christmas tree or a pine tree springs to mind…but, in my mind, these lines represent veins on a leaf.

I was able to mix three colors from my selection of dyes and get this faded-jeans blue as the first color layer. I was pleased with that. I wanted to get something that perhaps resembles the first dip in a vat of indigo.

The warp then went back onto the frame so that I could tie more patterns. That would allow me to reserve some of this color and then dye a second color over the top. Basically, all I wanted was a darker blue as the second color, preferably something that would look like multiple dips in an indigo vat. That took two attempts. On the first attempt, the color looked good and dark in the pot. I know to expect the color to lighten a lot as the thread dries, but it lightened way more than expected and I knew that there would not be enough contrast between the two shades of blue. 

On the second attempt, I got smarter and threw in some loose strands of silk that I had used as a test for the first faded-jeans color. I was able to remove them when I thought that the color was just about right and then rinse and quickly iron them dry to see the true color.

The warp then went back on the frame so that I could cut off the plastic wrappings. This time I didn’t leave any wrappings on. In my other experiments I left a row of wraps on the warp at the far end of the loom believing that they would help reduce the amount that the threads shifted as I wove. Time will tell if removing all the wrappings this time has been a mistake!

With all the wrappings removed, it was time for the grand opening. The warp could then go on my backstrap loom and be extended to its full length. I locate the pieces of thread that hold the cross and install the string heddles so that I can weave.

There are two kinds of shift that I have noticed from having done these ikat experiments as well as from having examined ikat work online, in exhibits and in my friends’ collections. When individual threads shift in varying degrees, you get that pleasant blurred effect that we all love. However, there’s another kind of shift that seems to be caused by the two layers of threads being misaligned. The result of that is an effect that I call “railroad tracks”. I am not fond of those railroad tracks!

In the picture below of an example of ikat work from Uzbekistan that my weaving friend Ute brought to show me , you can see the horizontal bars that I am calling railroad tracks. It’s something I would like to avoid. At the time of writing, I can tell you that the very first piece of pattern that I have reached in my current experiment, now that I have started weaving, is displaying railroad tracks….darn. I will be un-weaving and assessing and seeing what can be done about that. It may be the price for having removed all the wraps! If that is the case, I can say that this experiment truly had a purpose in showing me what not to do!

I am pleased with the tones of blue that I created. From now on, I will always toss a tiny bunch of loose silk into the dye bath with the ikat warp so that I can iron it dry, see the true color, and then adjust the dye mix accordingly. One other thing I did, which was maybe not a good idea, was leave the metal rod in place in the warp in the dye bath. I fold the warp around a metal rod when it is extended on the ikat frame. I removed it and replaced it with string in the first dye bath. As a result, all the threads at that end of the warp finished in a tangled mess. I left the rod in place in the second dye bath which kept everything in good order. However, either the metal stained the warp, or it reacted with the dye as there is a bit of a line across the center of the warp which may or may not come out in the wet-finish. More lessons learned!

At left, you can see a rough drawing I made of what I expect the finished piece to look like, complete with the line across the center. That line may refuse to budge in the wash and I so I may as well get used to it being there!

You may have noticed that the title of this post is “Chasing Away the Blues”. I have actually been actively welcoming blues in my latest project rather than chasing them away. What I am referring to in the title is the fact that I was involved in a very nice blues-chasing activity this morning. I received a very warm invitation to attend the Zoom meeting of a group of band weavers who call themselves the Banditos. What a way to lift my spirits! I am so grateful to Keith and the other Banditos for thinking of inviting me. This group is part of the Weavers Guild of Minnesota. Being able to join in gave me a chance to experience just a little piece what I have been missing from not being able to travel to meet and weave with weaving friends while chatting about all things weaverly. I have traveled to Australia in July and August every year for the last four years to do that. Last year I even got to go to New Zealand and spend time with weaving friends. These Zoom gatherings certainly help to chase away the blues that I sometimes feel as we all face such uncertain futures. 

Now it’s time for Show-and-Tell….(another thing that chases away the blues for me is seeing what online weaving friends are creating using my publications)…..

The idea in this photo is to show you the band that Allyne Holz wove to go with the bag that she crocheted. The pattern that she chose for her Andean Pebble Weave band is from my Complementary-warp Pattern Book. However, I know that you won’t be able to take your eyes off the bag! Leaf-lover, that I am, I have barely been able to get past the bag and its awesome draw-string closure either!

Diane Wardlow has chosen to weave a double weave band to add to the upper edge of her bag to cleverly increase its depth. She wove the  fabric for the bag using a really interesting sakiori/rag weaving technique.

Meg Kourmadas is also working her way through double weave using my book and has used the alpaca figure as part of her very first learning band.

Monique de Viscos is using a pretty variegated thread to weave patterns from my More Andean Pebble Weave Patterns book. It is interesting to see the effect of not using a third border color. I really need to include variegated thread in my bands from time to time. Monique’s band is very inspiring.

Orangie wove a striking sampler of eight-thread patterns from my Andean Pebble Weave on Inkle Looms book. 

I love the colors that Judy Andersen has combined for one of the 8-thread Andean Pebble Weave patterns in which S hooks are joined to form a sort of ram’s head motif.

And here’s Terry Martin’s first double weave learning band. I think she may have squeezed every one of the 11/12 learning patterns onto her band. I love the boldness and simplicity of lettering in this structure and how effective the very simplest stick letters can be.. There are also examples of more sophisticated alphabets in the book to inspire you.

Unfortunately, I was too late in asking permission from my online weaving friend, Josefin, to show her beautiful backstrap loom warps that she sets up attached to a tree in her garden in Sweden. She spins her own yarn and hand dyes it in lovely soft colors that look so natural. Hopefully I can include those very inspiring pictures next week.

I wonder if any of you are taking part in Ravelry’s annual Tour de Fleece event. I joined a team and have been spinning while waiting for my ikat warp to dry. I bought what were called Felters’ Packs when I was at the guild in Melbourne on one of my trips to Australia a few years ago. Here are the contents of one pack. I loved the colors and bought three packs. I think the quantity of yarn I get from this will be enough to weave a nice band perhaps in three-color pebble weave…something I haven’t done for a long time.

I hope you are all finding ways to stay positive and chase away the blues. Please stay safe and keep well.


Backstrap Weaving – My New Book: Warp-faced Double Weave on Inkle Looms

Some very kind people took some time and put some extra effort into helping me bring my new book to you in just a matter of days after I sent off the files. The place that prints my spiral-bound books worked extraordinarily quickly but I don’t think that was a personal favor!  I just hope that doesn’t mean that they are experiencing a serious slump in business. It was the folks at Taproot Video who were kind enough to re-arrange priorities for me so that my finished work could be brought to you as quickly as possible. Thank you Marilyn and Rainer at Taproot Video!

So, here it is...Warp-faced Double Weave on Inkle Looms…an advanced-level technique that is aimed at band-weavers who love to do pick-up. Yes, you do have to love it! because it is one of the slower techniques that I have encountered here in the highlands and lowlands of South America. The book is aimed at those who use the standard inkle loom. By that, I mean the kind of inkle loom that uses individual string heddles and where the weaver raises and lowers one layer of threads in order to create the two basic sheds. I used my Ashford Inklette for the tutorials in the book and I just use the loom’s two basic sheds.

Okay, it might be a slow technique that requires some extra work to set up and some extra care and attention while weaving (hence the advanced-level rating), but it is by far the easiest technique for designing. Some of the 45 patterns in the book were contributed by my students and weaving friends and many of them were created right there in the workshop as they were learning the technique. You could take a blank chart from the book and fill in cells in a completely random fashion, doodle away filling cells with your mind on something else, and still be able to weave the “pattern” you have created. It will be structurally sound!   

This double-weave technique does not use warp-floats. The surface of the band is not pebbled or spotted or speckled in appearance or texture. It is perfectly smooth in texture. Both faces carry the same motif with colors reversed. Bolivian weavers often flip the colors so that both possible faces can be seen at once.

A Bolivian belt in warp-faced double weave.

One of my students went home after Day One of a workshop and showed her beginner band to her 13-year old daughter. Thirteen-year old Emma then sat down with the charting paper and created a rabbit pattern and it was shared with all of us the next day. She has kindly contributed it to the book. I showed you Marilyn’s little llama in my last post which is made up of very few warp threads and weft picks. She used to keep llamas. Often the figures my students create have a personal meaning to them.  Jen keeps rabbits and created one of her own. Ruth drew the perfect figure for our narrow 12-thread learning band… an elegant long-legged, long-necked flamingo. But it’s not all about animals. All kinds of curved, angular, solid and delicately outlined figures can be created. Karen conjured up a grinning pumpkin during one gathering we had close to Halloween.

Some patterns were inspired by traditional patterns that I have seen in Mapuche and Bedouin textiles. While researching, I enjoyed learning more about the double-weave animal pack-bands that are woven by Qashqai nomads. Pictures of their bands are included as well as information on informative and inspiring magazine articles and websites.

And then there’s flora….my leaf pattern and Gerbelien’s Flower Love pattern, for example…

Forty-five pattern charts will keep you busy while your mind turns over ideas for designing one of your own. A section in the book is devoted to designing. Another shows you how easy it is to chart a figure from an image of a woven textile. There are charting challenges with an Answer Key in the Appendix.

One of the hardest things when I was putting this book together was how to come up with a limited set of patterns. I tried to provide examples of angular shapes, curve-like shapes, lines branching off at varying angles, thin lines, heavy lines, vertical and horizontal bars, curls and swirls so that you would have examples of the various elements that could be used to create your own patterns. The charts are there for you to enjoy straight from the book to your bands but also there to inspire you to create your own patterns.

The step-by-step pictures and detailed instructions and descriptions are supplemented by video clips. Both the PDF and printed formats allow you access to the clips.

As you can see in this picture, the tools you need to use are simple. I use two “tongue-depressor” craft sticks which do just fine as you learn. If you plan on doing a lot of double weave, you might think about investing in some heavier smoother swords which are more comfortable in the hands. 

There is a series of instructional clips that supplement various sections in the book as you set up the loom , start weaving, learn about color changes and how to pick up threads to form patterns. 

Two additional clips were filmed in silence so that you can watch the process in an uninterrupted flow.

One of my favorite sections is the one on how to finish a band. I was pleased about being able to teach one of my favorite braids as well as weft twining which you will find useful and decorative not only for double weave, but for all your bands. There is also instruction on a special way to finish double-weave bands which makes them easier to attach to buckles and clips for creating straps.


I hope that you enjoy my latest addition to my collection of technique and pattern books. Maybe I will follow it up with a pattern book but, in a way, I would be happy if that proves to be unnecessary because you are all busy creating your own beautiful patterns! That would mark the achievement of one of my goals in writing this book. 

Happy weaving! Here is the link once more so that you don’t have to scroll back up and look for it :-). Warp-faced Double Weave on Inkle Looms.  

As always, thank you for your support and thanks to everyone who has bought the book since I posted about it on Facebook. (and also to those who discovered the book on Taproot Video before I could even announce it!)


Backstrap Weaving – Stepping into Curves

I have been at my loom these past two weeks but also at my laptop keyboard as I move ahead with the new Andean Pebble Weave pattern book I am preparing. The new book has grown from 127 charts to 132…Help!…I can’t seem to stop! Give it one more week and I think I will be done. I am very excited about it. It has been fun weaving the new patterns into samples to be photographed for the book. Each block chart has its own photographed sample.

Between bouts of charting and weaving samples I wove the Silver Fern leaf pattern that I showed you in progress in my last post. Maori Koru motifs represent the curly yet-to-be fully unfurled fern leaves and I wanted to draw, chart and weave a representation of my own as a joyful reminder of my recent visit to New Zealand.

My first sample of the shape was a little too flat along its bottom edge and so I made a few adjustments in an attempt to create a bit more of an impression of “curviness’ and then set about weaving a narrow band for a book mark in 60/2 silk.

This is really just a test-run of my charted pattern but it is nice that it can be turned into something useful like a book mark.

The sample will help me see if the proportions are to my liking and if the figure looks too flat or is indeed quite curvy as I have hoped it to be. It will also help me to experiment with the ideal width.

My sample started out too narrow but the figure started to settle and look nicely rounded as I allowed the band to widen. I attempted to let the band go even wider hoping for even better proportions and curves but might have overdone it at the end as I could see a little  bit of red weft exposed in the black areas.

I am pleased with the result and may end up using this motif in a larger project at some point.

In Maori culture, the Koru is said to represent renewal and hope for the future. As there have been some quite significant changes going on in my life recently, these concepts are particularly meaningful to me right now. 

Next on the loom will be a silk neck ribbon for a brilliant little macrame seahorse that I bought from a talented artisan in Australia. I think I am going to use some of the patterns in the Rivers and Oceans set that I published in my Complementary-warp Pattern Book. That set is made up of some of my patterns as well those contributed by my weaving friends Julia and Kristin….a variety fish, sea creatures and watery swirls and eddies. Those watery patterns should make a very pretty band for the seahorse.

A few of the fish and water-themed motifs from my Complementary-warp Pattern Book.

Something else that is underway right now is another ikat piece using the tiny balls of naturally-dyed silk that I was given a few years ago. I combined a lot of the colors in two ikat warps earlier this year. They were very colorful base warps that I proceeded to wrap in ikat tape and then dye jet black. The areas wrapped with tape resisted the dye and gave me a warp of multi-color figures with stepped diagonals on a solid black background which I could then weave into cloth.

My latest warp is much more subdued as I am using a collection of paler more subtle colors…mostly the green, grey and blue-ish tones with a smattering of gold. I plan to dye this one blue with some powders that my friend Mog gave me when I was visiting in Australia. It involves mixing two lots of powder to get the blue I want. Mog gave me very clear instructions. I just hope I get it right!

As far as the pattern goes, I am still using figures with stepped sides but I am making the steps a lot smaller in the hope of creating something slightly more curvy….stepping my way slowly into curves, you might say. Even if I fail on the attempt at curves, I think the pattern will be quite nice…that is, IF I tie the ikat tape tight enough to avoid leaks and IF the threads don’t shift too much as I weave and IF I get the right tone of blue when I dye….so many things to consider when doing ikat!

And, I have this idea of adding some plain weave in a pale tone of blue to the sides when the time comes to weave the piece. I might weave some motifs into that part using supplementary weft. Yes, I can feel very confident about this plan at this point as the actual weaving part of this project is still a long way off!

Here’s the warp stretched on my ”ikat frame” with some ikat ties in place.  I have already decided that the first shape on the left is not quite right and so I will most likely be cutting those ties off, adjusting my pattern and re-tying. So, I see days and days of tying plastic strips on this warp… measuring, adjusting, cutting, starting again! Call me crazy but it is actually very satisfying. It provides a nice ”relax” time away from the keyboard and the book. In the same way, the book gives me nice breaks from tying ikat. It’s all good!

I will leave you with a reminder that all my e-books (PDFs) are now available at Taproot Video. It has been impossible to change every single old link on my blog over the last nine to ten years from Patternfish to the books’ new home at Taproot Video (I am, however, still trying to!) I see via my blog stats that a few people still click on the old Patternfish links now and then. I do hope that you somehow find your way to the Taproot Video website eventually.

If you are curious and/or excited about my up-coming new book of Andean Pebble Weave patterns but have not yet learned how to do complementary-warp pick-up or Andean Pebble Weave, my e-books(PDFs) on Complementary-warp Pick-up and Andean Pebble Weave on Inkle Looms will show you how. The Complementary-warp Pick-up book teaches you a method that can be used on any kind of loom. The only experience you need is the ability to warp your loom and weave a plain-weave warp-faced band. The method enables you to weave Andean Pebble Weave and any other kind of complementary-warp structure.

The Andean Pebble Weave on Inkle Looms book teaches methods that are particularly suitable for those who use a standard inkle loom. Those who are already weaving plain-weave bands on their loom will have all the skills necessary to continue with this book. Support in the form of video clips is also provided.

I hope to show you a lovely ikat warp on the loom and ready weave the next time I see you here. And maybe I will announce the release of the new pattern book and show you my seahorse pendant on its silk band. Thank you all for your continued support. Now it’s back to work!