Backstrap Weaving – Are Two Sides Better than One?

The teal supplementary weft travels from selvedge to selvedge of the band and you can just make out the little teal bumps along the edge where the weft exits one shed and turns to enter the next.
In this silk scarf project I used 60/2 silk as the structural weft in the sections that didn’t have pattern and changed to a 140/2 structural weft when I added the supplementary weft.
I carried the supplementary weft from selvedge to selvedge to create the patterns at the two ends of the scarf. The little flower motifs in the main body were woven using the “frame” technique.
All the samples here used the “selvedge-to-selvedge” technique except the white band with turquoise pattern second from the right. There you can see how the turquoise weft turns on the surface of the cloth to frame the pattern of triangles.
The dark brown base, stem and branches of these plant figures were created with this wrapping technique. All other parts of the patterns were created using the “frame” technique.
The upper pattern of horizontal and vertical lines was woven using the wrapping technique.
The scarf I wove using various Bhutanese motifs and two supplementary-weft patterning techniques.
You can see the front and back of this profusely patterned head sash from Aguacatan, Guatemala on the left. The back is plain red. The supplementary weft threads only travel within the shed or float on the upper face of the fabric. They never appear on the back.
This is the back of my learning piece that I wove with one of my Guatemalan teachers. You can see all the weft tails have been left hanging. They could be cut shorter and left there or snipped off flush with the fabric.
This fabric that I was told is from Chichcastenango, Guatemala is part of a huipil that has been worn and laundered over many years. You can see how the weft tails have become tangled in a merry mess on the back.
I like the back of my textiles in these techniques to be open and plain. This is the back of the paisley scarf I showed above. Creating a “clean” back is, of course, is easy to do when the supplementary weft runs from selvedge to selvedge. When there are various color changes happening across the width of the warp as there are in the Guatemalan textiles that I’ve shown here, there’ll be many more weft tails with which to deal and carefully snip at the back of the cloth.
You can see the two faces of the Guatemalan textile on the left showing the double-faced nature of this technique. On the right is my own attempt at the pair of Guatemalan quetzal birds.
This little bee pattern is the first double-faced one that I learned with my teacher. You can see that it almost looks like a cross-stitch pattern with it’s identical “stitches” stacked neatly in columns.

Backstrap Weaving – An Unexpected Match

Finished with the second figure and glad that I hadn’t cluttered the center space.
This photo gives a better view of the white-on-white pattern which is sometimes very hard to capture well. Note how the variegated thread mysteriously changes tone right at the middle of the warp.
When laid out flat like this, it’s a bit disappointing how “flat” it looks considering that it is, after all, made from silk.
Here’s another look at the white-on-white patterning on the sides that I love so much.
Here it is with one of the two flower/foliage bands placed alongside.
The two flower/foliage bands together. I was particularly pleased with these two bands as they had been a study in how to switch background colors smoothly back and forth along the length of a band without using a harsh and sudden horizontal transition.

I’ll leave you with images of two little slices of culture here in Santa Cruz…

Backstrap Weaving – What’s My Style?

One of the projects using the 140/2 silk as warp was the last two panels in my Within These Walls series.
So, here I am “backstrap weaving”. The cloth that I’m weaving is in a balanced doubleweave pick-up technique known as Finnweave which can be and is woven on other kinds of looms. I don’t think anyone is going to pick up my finished cloth and identify it as “backstrap weaving”.
A weaver from Pitumarca that I watched at Tinkuy 2010 creating weft-faced fabric on his backstrap loom.
A weaver from San Ignacio de Loyola in Peru has made the weaving of her warp-faced pattern totally loom controlled by using multiple sets of string heddles.
My weaving friend Sharon Kersten is currently sampling balanced cloth on a backstrap loom using a 15-dpi rigid heddle. Note her cool temple…push pins in a length of balsa wood.
This gorgeous sheer cotton cloth was woven on a backstrap loom by a weaver in Mexico. It’s yet another kind of fabric that I think is more accurately described as having been woven on a backstrap loom rather than with the blanket term “backstrap weaving”. The range of achievable structures and techniques is wide! (Image from the Flickr page of Teyacapan and used with her permission).
It’s always lovely when the threads have all been settled into place and I can get started on the pattern.
That’s the extent of the foliage pattern. I’ll weave this band of pattern again at the end. I am, however, continuing with the white-on-white along the sides.
And now a hummingbird and flowers start to make their appearance. This might be the only motif I weave between the upper and lower strips of foliage….keep it clean and simple, perhaps. We’ll see.
A backstrap-loom weaver from the Chamula municipality of Chiapas in Mexico.

Backstrap Weaving – Wonderfully Wide

The warp is made up of white and cochineal-dyed cotton from Guatemala. I dyed some of the white black.
The finished backstrap which doubles as a loom and tool tote bag.
An ikat shawl weaver from Tacabamba, Peru, standing to manage the wide cotton warp on her loom.
My Montagnard (Vietnamese hill tribe) teachers always use the beams and swords that are designed for the widest pieces of skirt and blanket fabric that they weave no matter how narrow the piece they happen to be weaving.
I wasn’t one hundred percent sure about the size of this silk thread but after fishing out silk examples from my stash drawer that range from 30/2 to 140/2, I came to the conclusion that the variegated is most likely 10/2 and the white 20/2.
I felt that I’d already explored the idea of a variegated ikat pattern in this piece (although the thread in this case isn’t actually variegated. It’s just a mix of lots of different colored ends of warp). I had to look back at this to be reminded that I hadn’t particularly liked the effect at the time (although it’s funny how things can grow on you!)
When I do ikat on a multi-colored warp, I prefer having wide stripes of color so that there’s only one color in each pattern segment, as you can see in this silk example I made some years ago.
This covered book that I created is already living in Australia. I dug up photos to see what the various colors of supplementary weft looked like in the upper and lower foliage patterns. Again, it isn’t variegated thread but rather a combination of four strands of three different colors. In this case the supplementary weft is used as the positive part of the pattern on the green background.
In this example, the gold supplementary weft has filled the negative space around the flower pattern which is revealed in the black ground cloth. The red patterning shows the use of supplementary weft in both positive and negative space.
The pattern needs to be busy so that there are never any excessively long floats of the white supplementary weft.
Off the warping stakes and onto the loom. As usual, when winding wide warps, I wind several small sections removing them one by one from the warping stakes and placing them on the loom beams that are waiting nearby on the floor. I don’t take any risks with having my warping stakes lean, even if ever so slightly, by having too much thread loaded onto them.
It’s normally my habit to start with a selvedge in which case I would remove those cardboard strips and start weaving right at the base of the warp. However, I decided to leave them in place this time. Although the two aren’t visible in this photo, I can tell you that the 10/2 silk and doubled 20/2 seem to working together well.
I’ll have a choice in the style of hummingbird figures….either using the supplementary weft to “draw” the swirls within their bodies as can be seen on the left, or use the weft to fill in the negative space within their bodies so that the swirls appear the underlying ground cloth, as on the right. I’m leaning towards the latter but maybe a combination of both?
The lake had alligators in it!

Backstrap Weaving- Back to Black…..and Red

I’m going to keep this post quite short as I am house and cat-sitting at the moment without my laptop and am attempting to write this post on my phone. I am a fast two-finger typist on my laptop but a very slow single-digit writer on my phone due to lack of practice. I don’t even try the dual thumb thing that everyone seems to do.

The cat in question. This blue-eyed 19-year-old lady lived with me until I sadly had to re-home her due to the amount of travel I was doing. Now I get to keep her company while her carer is away.

We are on Day 27 of the citywide general strike with no end in sight. At least now the authorities announce the plan for the week for permitted supermarket opening hours so that we can all be better organized. Before this, it was mass panic when the stores were allowed to open with the whole city out getting supplies….only to have another shopping morning announced just two days later.

I got out on one of the mornings and managed to pick up more cochineal from the ladies that sell home remedies in the street market. The bugs only come in tiny packets as they are sold here as remedies rather than for dyeing. The last time I bought some, they were sold by the teaspoonful out of a large jar.

I also managed to find a store that sells cream of tartar to use as a color-shifting agent for my cochineal dyeing but had to buy a minimum quarter kilo.

My projects have been rather blue lately. I wanted indigo blues for my ikat experiments and have had fun using synthetic dyes for silk and cotton to create different blues. I can’t get hold of natural indigo here. Now I would like to try my hand at using a natural dye for an ikat project and cochineal is a convenient thing with which to start.

I even used blues for my recent silk hummingbird cuff bracelet but that was more about just making do with what was available in my stash of 60/2 silk.

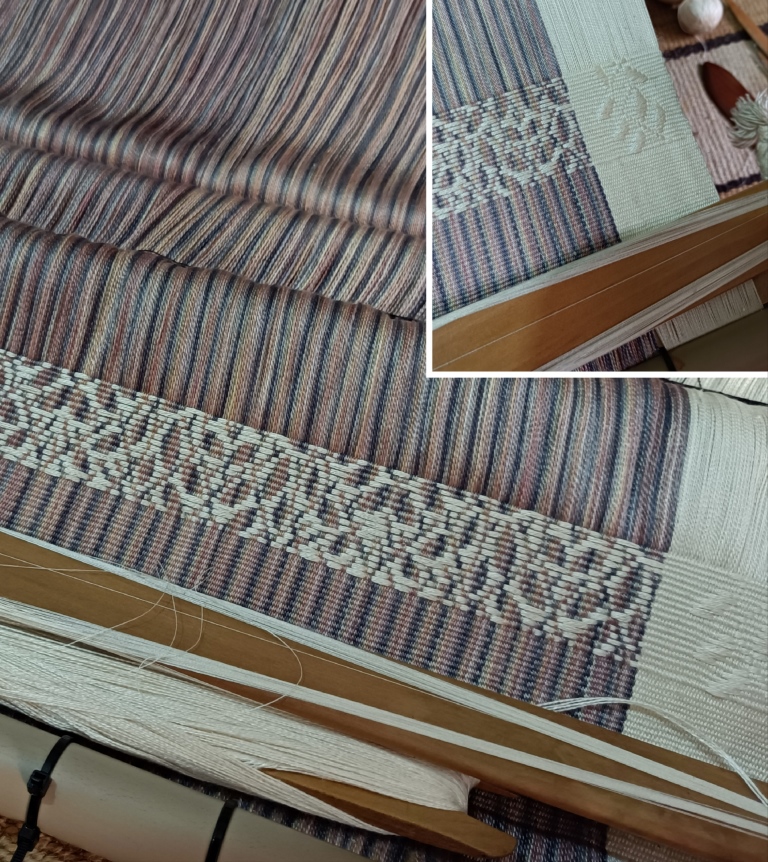
This is what’s on the loom now and I found this red and black kind of shocking after all those cool and calming blues.

But I do need to remind myself that red and black has always been a great favorite combination of mine and something that I have used time and time again over the years and as recently as 2020 when I wove my four-part Within These Walls series.

The first ever motif I wove with my backstrap loom teachers in Peru back in 1996 was in red and black.

My latest project is a request from a friend….a woven sleeve for his quena flute. I had to scratch around in my stash for suitable yarn and decided to go with chunky Omega Sinfonia cotton. This yarn is from my workshop stash for creating warps for my beginner students. I have a lot of this standing by for the day I can teach in-person classes again. I knew that I could create something big, bold and striking with this thread.

But, as always, I wove a width sample first. My eyes just seemed to naturally go for blues for the sample. I got the information that I needed from it and I hope to make something useful from it. It’s a good size for a case for sunglasses.

The pattern request for the quena case was for something snake-like. My Guaraní weaving teacher many years ago showed me one of the motifs that she weaves using the structure that the Guaraní people call karakarapepo. I call it Andean Pebble Weave. She explained the role of the snake in Guaraní legend and added that the zig-zag pattern also represents the life-giving Parapetí River along which her community lives.

This zig-zag motif is woven in many different ways. It doesn’t seem to have a single fixed form and it has been interesting to see the various forms it takes during the years I have been here. It’s hard to find any two that are exactly the same. My zig-zag pattern is a modified and embellished version of the one that my first teacher had shown me.
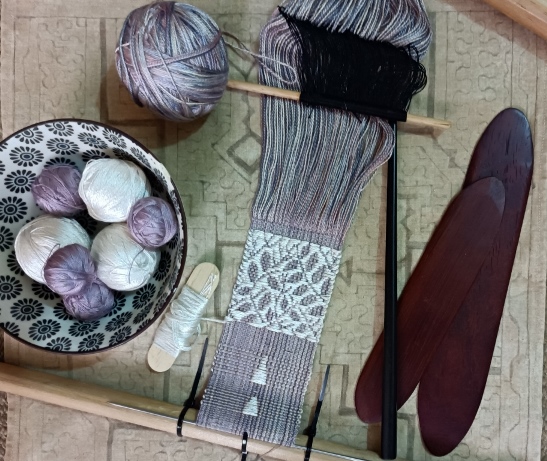
I never lose the thrill I feel when seated at a new warp all heddled up and ready to go. I am using the very efficient two-heddle method that my backstrap loom teachers from Ayacucho showed me.

In this chunky yarn, the inches quickly accumulate.

I got this far and then it was time to pack up some things for the two weeks of house sitting. My plan had been to go back and forth each day but the strike has made it less than pleasant to be walking around the deserted streets alone. It wasn’t something I was going to feel safe doing twice a day. And so I faced the fact that I would have to just stay put at my friend’s place which meant packing up my weaving . Hooray for the portability of the backstrap loom.

Sticks, yarn, swords, shuttle, string and cable ties to help attach the far beam to something all went into the tote bag. After completing the first pattern repeat, I didn’t need a chart any more. But darn…I forgot to bring the backstrap…and I have at least twelve of them at home!

But guess what…the tote bag makes a pretty good backstrap in an emergency. I love the idea of a loom carry bag that doubles as a backstrap. However, I would create a thicker cushier one if I were to make something like that in the future.

You make do with what you have and this tote bag has been working just fine as a backstrap.

This weaves up so quickly! I will have to sneak back home on one of the supermarket mornings (when there are more people out and about and it feels less creepy) and put together another warp. Once off the loom, I will figure out how to put this flute sleeve together. I am weaving the two sides of the sleeve as separate bands so that each can have its own third selvedge. That will save a bit of hemming.

I found table legs that I could attach the far beam to at just the right height, piled a bunch of heavy things on top of the table, threw a cushioned chair seat on the floor, and was good to go.

I am very much used to the red and black now. How did I ever feel that it was shocking?

There was some hope that the strike would end today but it hasn’t. Today was a permitted shopping morning and so I walked home to pick up my dyeing stuff.

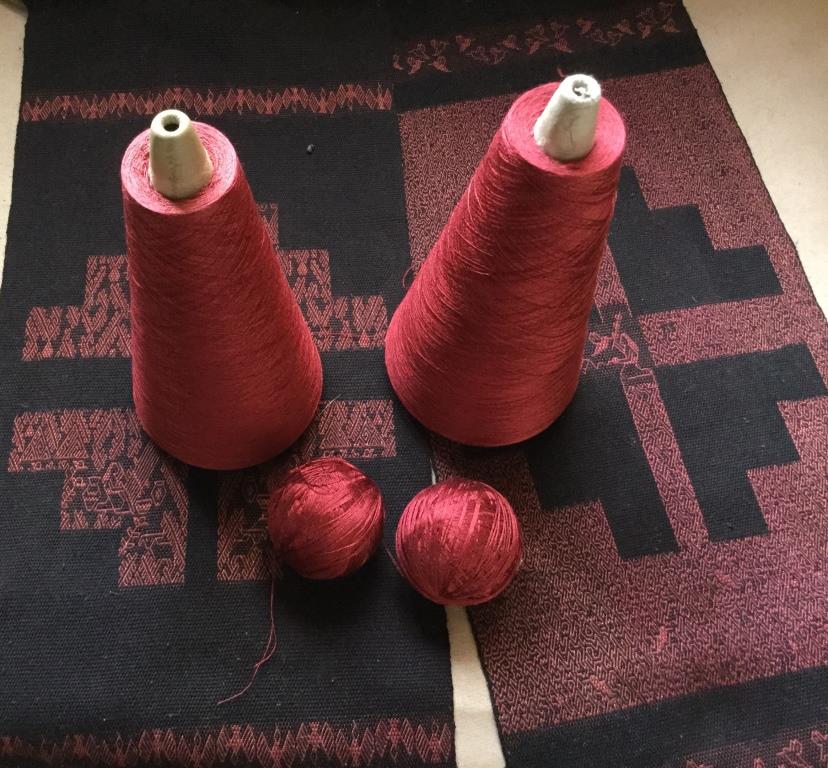
These are the colors I have so far on silk using cochineal, my hard tap water, and alum mordant. A bit of lemon juice produced the orange tones.

I am hoping that the cream of tartar will give me reds. This is what the pot looked like when I added the cream of tartar. Looks promising, right?

I have hung the skein to dry without having rinsed it. I am thinking that maybe the color needs time to “cure”. When I rinsed the first lemon-juice-induced orange skein in tap water (it was shockingly orange), all the orange color disappeared and I was left with purple! The only way that I found to save the color was by adding a bit of lemon juice to the rinse water. I am wondering, therefore, if I should rinse this latest skein in water that has a bit of cream of tartar in it. Well, it’s all about experimenting, isn’t it? I have yet to get hold of distilled water. That will have to wait until after the strike, I guess. It’s not a supermarket item here.

Well, I have managed to write this by pecking away at the phone keyboard while not making myself too crazy.

Hopefully the next time I write, I will be back home, we will be strike free, I’ll have beautiful red silk skeins to show, and a successfully completed quena sleeve.