
Backstrap Weaving – Thinking Outside the Walls

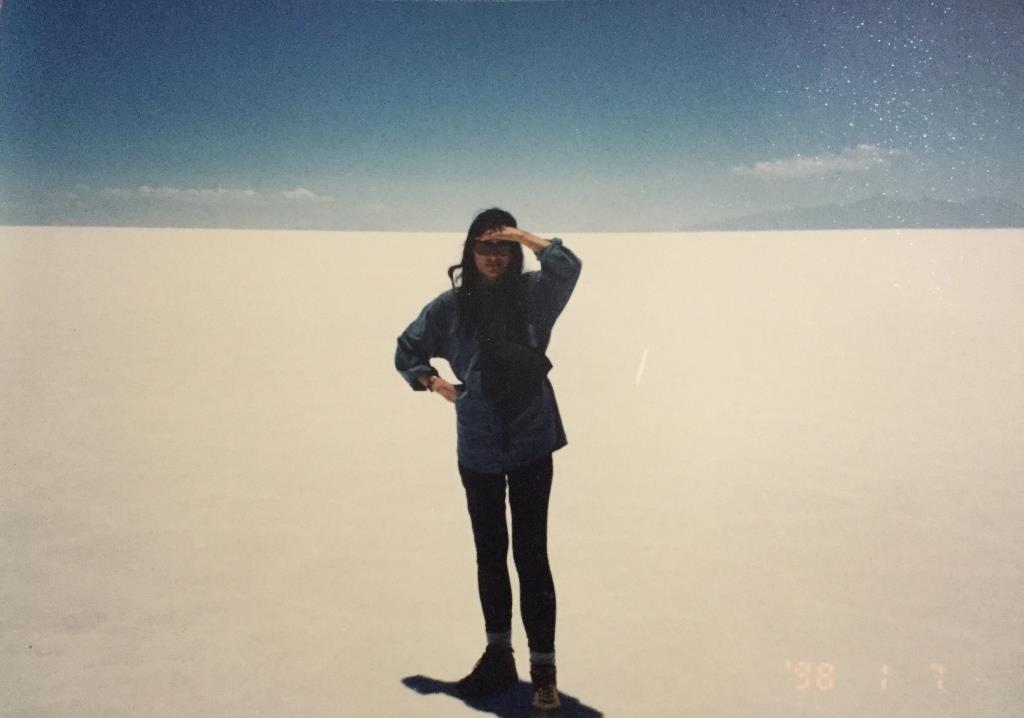
Is there anybody out there?! This was taken on a visit many years ago to the fabulous Salar de Uyuni here in Bolivia.

Fully vaccinated (albeit with the Sinopharm one in which I have little faith), I decided it was time to think outside the walls and venture out for my first outing, since the arrival of Covid-19 in Bolivia, that didn’t involve the supermarket or the dentist.

What would I find out there? Would I find that I have been behaving in an overly cautious way all this time and perhaps one of the few still hiding away within walls?

Would everything be completely normal? After all, we are not under any kind of restrictions now. Case, hospitalization and death numbers rise and fall from day to day as the third-wave curve wends its way downward. The fourth wave has already been predicted to arrive in October. Have we all just learned to live with this?

I have always been good at physical distancing! This was taken on a visit to a large expanse of sand dunes that inexplicably emerge from the surrounding jungle right here in Santa Cruz where I live.

This outing wasn’t about visiting spectacular salt lakes or mysterious sand dunes. It was simply about eating a burger with a friend in one of my old favorite hang-outs…the main Plaza here in the center of Santa Cruz. I used to live one and a half blocks away from it and would pass through it every day on my way to and from work. After finishing work at 10pm, I used to love stopping to sit there on balmy summer nights. The place would be full of activity as others gathered to enjoy the relative coolness of the evening before reluctantly heading home to face a restless night within heated walls.

My companion suggested the Plaza. The thought of being amongst all those people doing something that required the removal of masks made me nervous, even though it was an outdoor setting.

A typical sunny weekend afternoon would see the Plaza completely full…standing room only… as families gathered to eat ice cream and watch the world go by. There would be wandering coffee cart vendors in their crisp white uniforms, others selling cotton candy, balloon animals and toys and trinkets, people feeding the pigeons, kids chasing the pigeons, teenagers gathered in their little groups in every corner, the shoe shine guys poised ready for the next customer, elderly men playing chess surrounded by youngsters studying their moves, wanna-be models having their photos taken outside the cathedral. The Municipal Police would be strolling around although it is hard to imagine anything “bad” happening in that place of good clean fun. In a city in which it is often impossible to escape the blast of salsa and cumbia music, the Plaza is blissfully music-free.

And so it was with a mixture of relief and sadness that we found the Plaza almost deserted. There was no need to make circuits while looking for a place in the shade. Clearly people are being careful and largely staying home which is a big ask when home can often be a simple adobe or single brick dwelling, the interior of which resembles a pizza oven on hot days. It was sad to see this popular cooling refuge abandoned in this way.

Yes, I admit that it is strange to be writing several paragraphs about an outing to get a burger! So I’ll get back to the weaving now. In my last post I showed you the start of my hummingbird piece. This is another effort to think outside the walls and capture a feeling of uninhibited movement and joy.

I am weaving this in warp-faced double weave. It is certainly not the fastest patterning technique that I know. However, you might remember that I have just spent seven months picking up threads one by one to form intricate patterns on four panels. As a result, nothing feels slow any more and I just simply enjoy watching each and every one of the little figures I have created emerge. I loved designing the plants and piecing all the figures together. Weaving this lifts my spirits!

This is the final third of the band which I photographed so that you can see what the two faces look like. The plant at the very top is the one which is showering the scene with its parachuting seeds.

There was never meant to be an end product but I did find myself thinking about cutting this strip into three and sewing the pieces side by side to make something useful. But then a couple of people in a recent band-weaving Zoom gathering suggested weaving two more strips to flank this one. They could reveal more of the garden that surrounds this happy scene. I like that idea. It spares me the agony of having to do any cutting. All of you who produce hand woven cloth will know exactly what I mean. Plus it gives me a chance to do some more designing in this fun double- weave structure. It amazes me how far removed this is from the kind of pieces that I generally choose to weave.

And so I get to sprawl on the floor and do some more double-weave doodling. The chart for the hummingbird piece ended up being 130 inches long! I suppose I could photograph it in sections, erase the drawings and re-use the paper.

I was very pleased to see that Vicky Erker has been designing her own double-weave motifs after having learned the technique from my book Warp-faced Double Weave on Inkle Looms. My book includes a section on designing in which I use a leaf motif as the example. Some people take to designing more easily and quickly than others while some have no desire to design at all and are happy weaving from charts that have been provided in books.

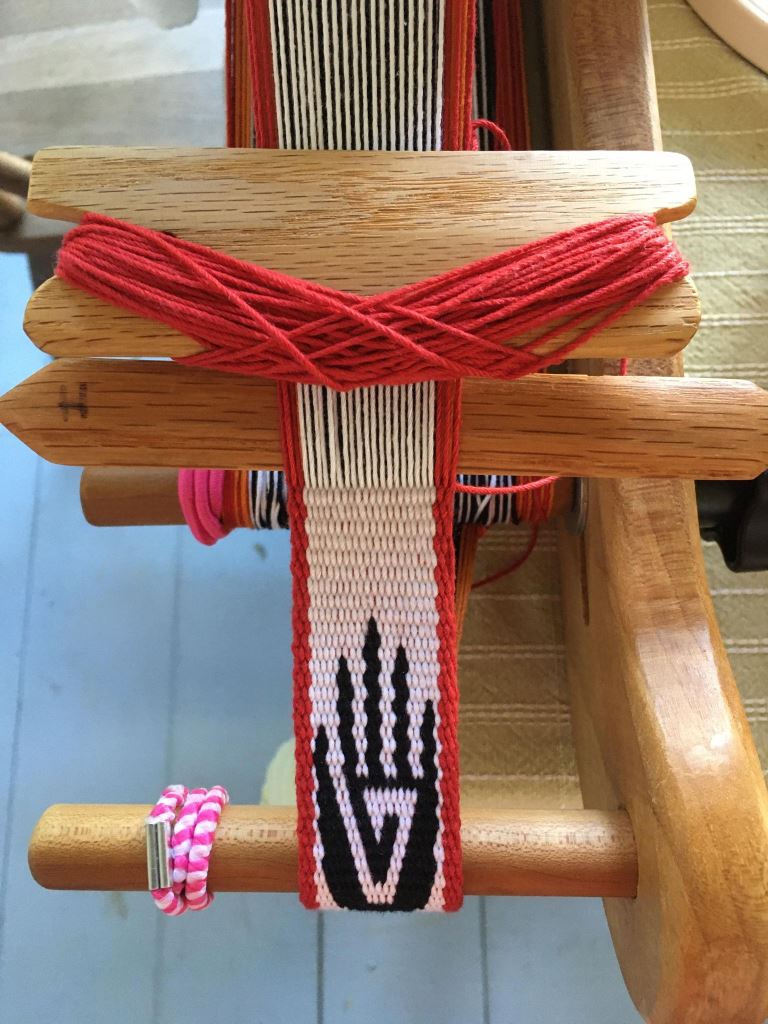
This striking hand petroglyph is the first pattern that Vicki showed me…..
And then she blew me away with this pattern that she based on a Quetzal motif that is often used in textiles of Guatemala. In Guatemala it is woven using completely different patterning structures.. Isn’t that awesome!
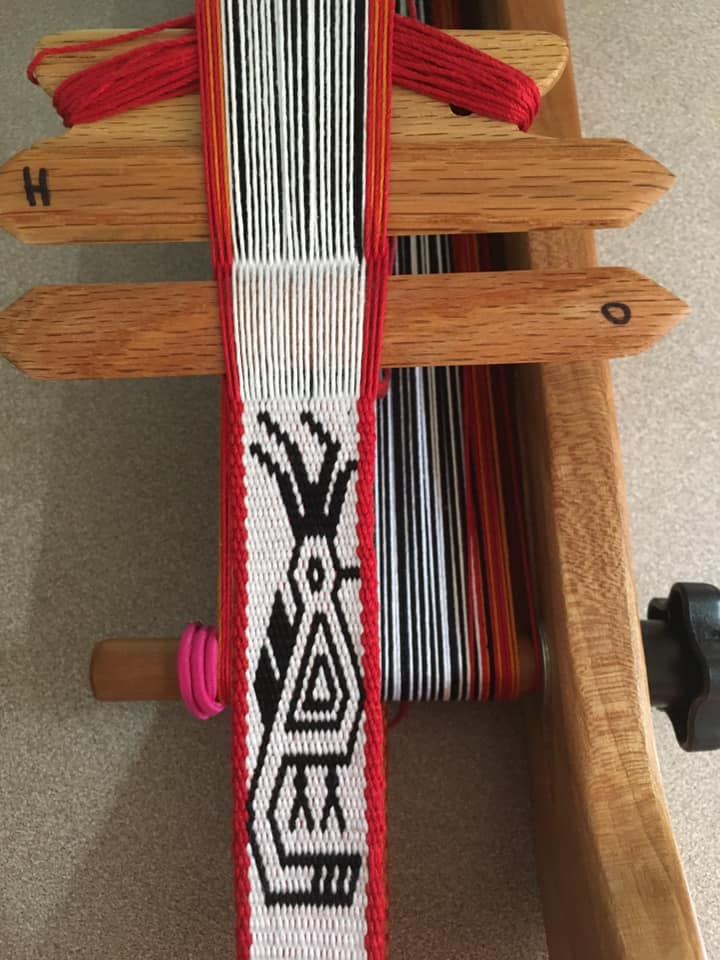
If you are wondering about the H and O lettering on Vicki’s swords. it is something I suggest doing to help you keep track of the shed in which you are working when weaving double weave. You can always mark tape and apply that to the sword if you don’t want to mark your sword. The H stands for Heddle Shed and the O for Open Shed. It is one of the tips I give weavers for working in double weave which of course will make much more sense when you are using the book. I hope you might consider trying warp-faced double weave. There are plenty of charts in the book and perhaps you will feel motivated to try creating some of your own designs.

When I was going through my old photos and finding the ones I posted earlier of the Uyuni Salt Lake and the sand dunes, one of my first thoughts on seeing those pictures, was…wow, not a single tree to which I could attach a backstrap loom! Of course, a tree would not be entirely necessary as backstrap weavers can turn themselves into completely self-contained looms using our feet or toes to hold the end of the warp.

Carolin shows here that if you happen to find yourself at the Uyuni salt lake while cycling from Alaska to Ushuaia, one’s bicycle can always provide a handy anchor point for the end of the warp….

Carolin with tiny loom tied to her bike and weaving on the salt lake.

Others have chosen to create something a little more comfortable that can be picked up, carried around and enjoyed both indoors and out. I don’t quite remember who started the frame-making thing in the Facebook group but several members have found these to be a really nice idea when they got fed up with looking for suitable places in their homes, both indoors and out, to which they can attach the ends of their warps. Here’s the one that Martina in Germany built….

Here’s Jenny’s with a clever pool-noodle hack to stop the beam from sliding….
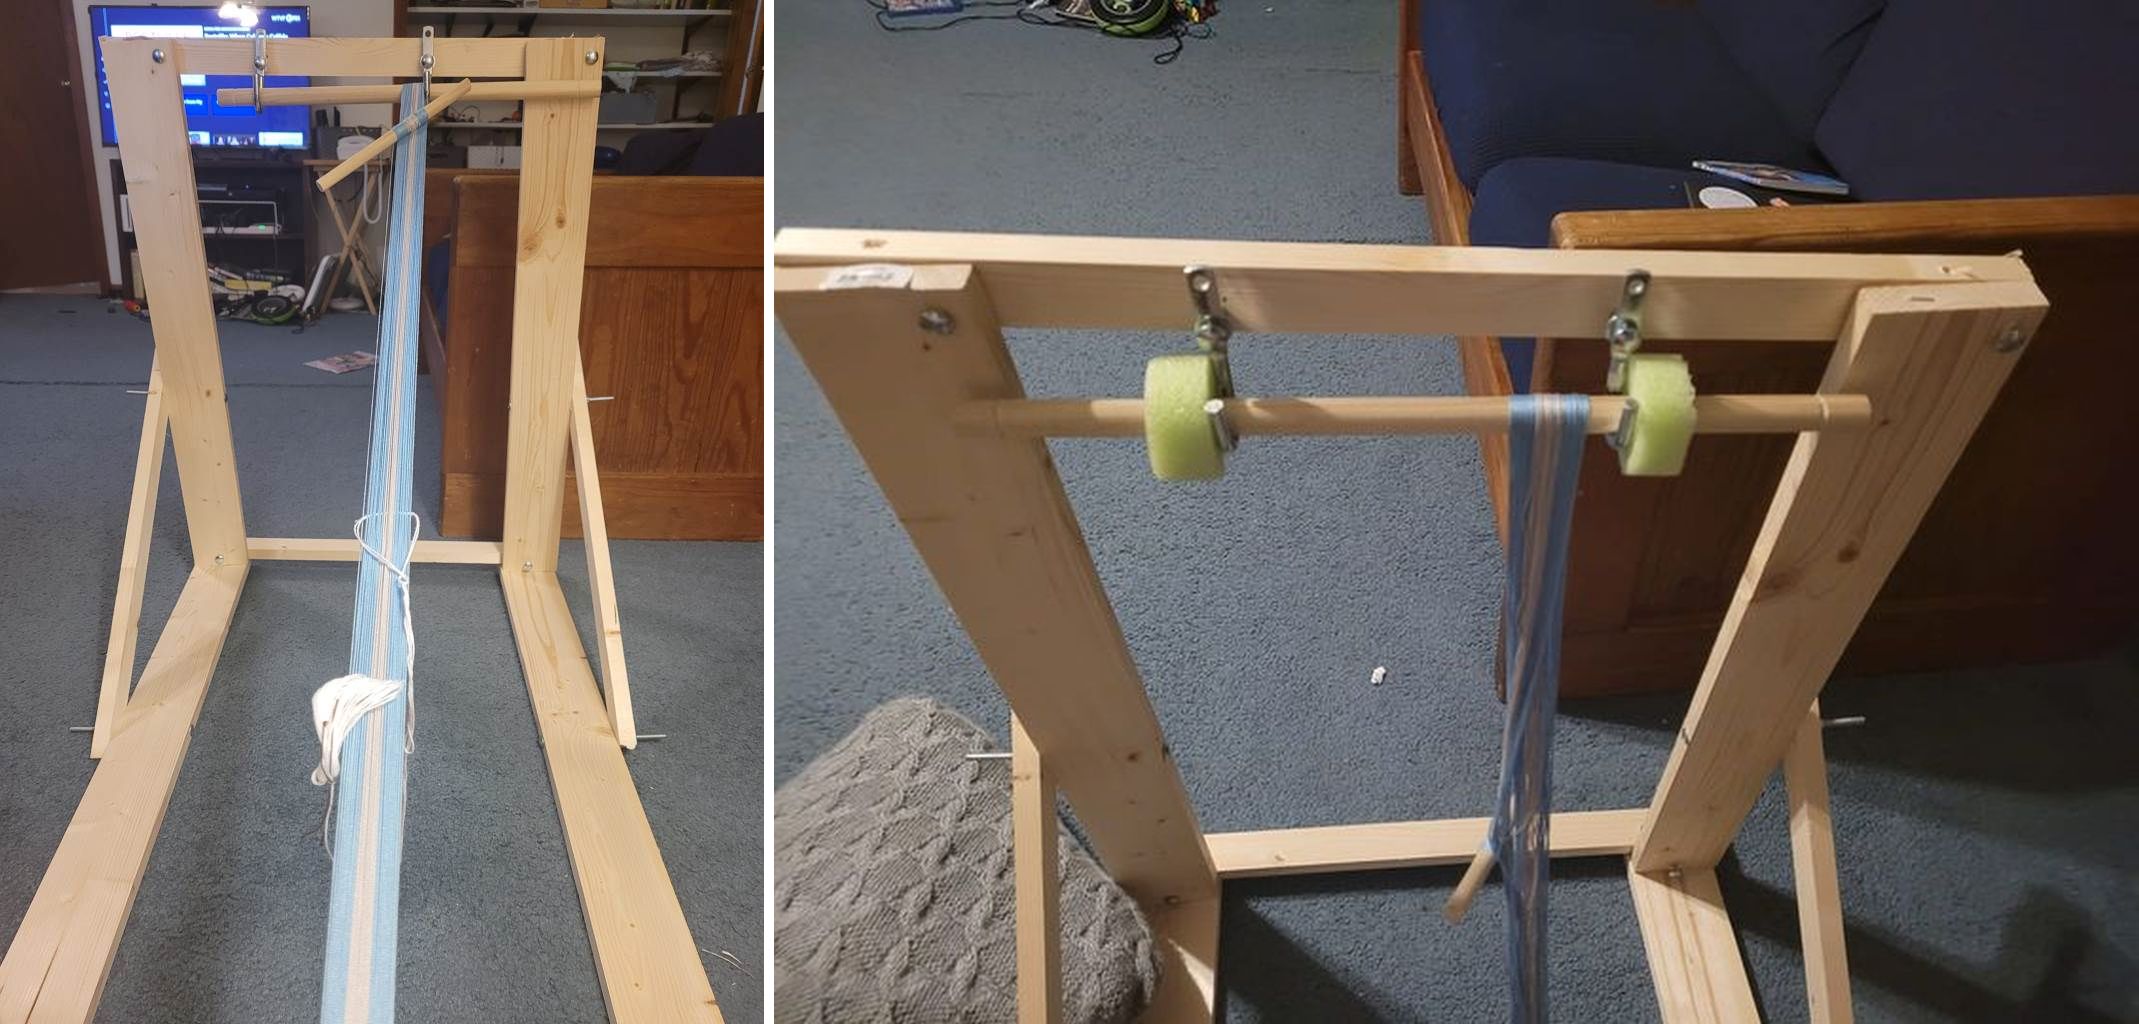
And here are models by Carlos on the left and Rosemary on the right…

Ritika Mittal allowed me to show this image of a weaver in Nagaland using a study frame to hold the end of her warp and provide a nice place for her to brace her feet.

Nancy’s anchor point isn’t exactly a portable one, but I always enjoy seeing a simple backstrap warp being attached to the more complex floor loom…this is Nancy’s first ever backstrap loom project and its a beauty.
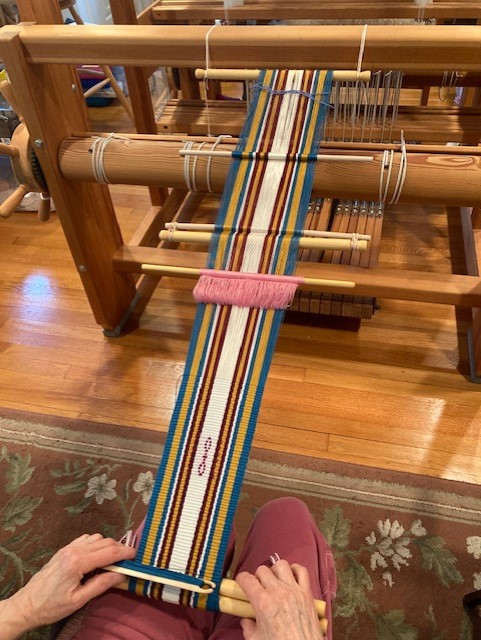
When I was having my Operating a Backstrap Loom class filmed, we had some trouble finding an anchor spot in the studio that was close enough to the set because I insisted on sitting on the floor. Eventually we managed to pile a lot of heavy stuff into a portable storage bin and use that.

While on the topic of that video class, Operating a Backstrap Loom, I’ll take this opportunity to let you know that the stock of DVDs is really low now and that I won’t be replacing them when Taproot Video runs out. The purchase of the Lifetime Streaming option caught up with, and now far outnumbers, the purchases of DVDs. So, if DVDs are your preference (they still are mine), you might want to make sure you get one while they are still around.

I showed Nancy’s first-ever weaving on a backstrap loom. I neglected to ask her if this piece is destined to become a backstrap. The dimensions are right. The backstrap itself is often a new backstrap-loom user’s first project and I am happy to see that the article I wrote about weaving your own backstrap way back in 2009 is still being used and enjoyed.

Here are a couple of backstraps that have been woven recently by Lieve on the left and Louise on the right….

My birthday is on Friday (lucky Friday the 13th) and I’ll hopefully be venturing outside the walls again for a little celebration.

Until next time.

Backstrap Weaving – Chasing Away the Blues

I have been working with blues (and once or twice with the blues) these last two weeks as my latest ikat experiment develops. I still call these “experiments” as I aim to iron out kinks, try new things and learn something new from each attempt. I suppose the main focus of this one was to create the colors that I had in mind at the start of the project. If you have been reading along over this last year and following the progress of my ikat experiments, you will be used to my saying…”the color didn’t turn out at all as I had expected, but it grew on me.” This time, I decided that I would mix the dye powders I have and try to create certain tones of blue and have them match as closely as possible the colors that I have in mind, rather than just making do with what I get. Yes, Facebook reminded me that it’s has been a whole year since I started working on this latest round of ikat experiments. They began with my using short multi-colored base warps and black dye.

I showed you the start of my latest experiment in my last post where I had just begun applying the ikat tape. It’s a long narrow piece using what remains of my supply of 60/2 silk…a sash that will hang on the wall alongside other ikat pieces that I have created in this 60/2 silk. On the warping frame, it is folded to halve its length so that I can wrap the tape around two layers of threads at once.

Maybe a Christmas tree or a pine tree springs to mind…but, in my mind, these lines represent veins on a leaf.

I was able to mix three colors from my selection of dyes and get this faded-jeans blue as the first color layer. I was pleased with that. I wanted to get something that perhaps resembles the first dip in a vat of indigo.

The warp then went back onto the frame so that I could tie more patterns. That would allow me to reserve some of this color and then dye a second color over the top. Basically, all I wanted was a darker blue as the second color, preferably something that would look like multiple dips in an indigo vat. That took two attempts. On the first attempt, the color looked good and dark in the pot. I know to expect the color to lighten a lot as the thread dries, but it lightened way more than expected and I knew that there would not be enough contrast between the two shades of blue. 

On the second attempt, I got smarter and threw in some loose strands of silk that I had used as a test for the first faded-jeans color. I was able to remove them when I thought that the color was just about right and then rinse and quickly iron them dry to see the true color.

The warp then went back on the frame so that I could cut off the plastic wrappings. This time I didn’t leave any wrappings on. In my other experiments I left a row of wraps on the warp at the far end of the loom believing that they would help reduce the amount that the threads shifted as I wove. Time will tell if removing all the wrappings this time has been a mistake!

With all the wrappings removed, it was time for the grand opening. The warp could then go on my backstrap loom and be extended to its full length. I locate the pieces of thread that hold the cross and install the string heddles so that I can weave.

There are two kinds of shift that I have noticed from having done these ikat experiments as well as from having examined ikat work online, in exhibits and in my friends’ collections. When individual threads shift in varying degrees, you get that pleasant blurred effect that we all love. However, there’s another kind of shift that seems to be caused by the two layers of threads being misaligned. The result of that is an effect that I call “railroad tracks”. I am not fond of those railroad tracks!

In the picture below of an example of ikat work from Uzbekistan that my weaving friend Ute brought to show me , you can see the horizontal bars that I am calling railroad tracks. It’s something I would like to avoid. At the time of writing, I can tell you that the very first piece of pattern that I have reached in my current experiment, now that I have started weaving, is displaying railroad tracks….darn. I will be un-weaving and assessing and seeing what can be done about that. It may be the price for having removed all the wraps! If that is the case, I can say that this experiment truly had a purpose in showing me what not to do!

I am pleased with the tones of blue that I created. From now on, I will always toss a tiny bunch of loose silk into the dye bath with the ikat warp so that I can iron it dry, see the true color, and then adjust the dye mix accordingly. One other thing I did, which was maybe not a good idea, was leave the metal rod in place in the warp in the dye bath. I fold the warp around a metal rod when it is extended on the ikat frame. I removed it and replaced it with string in the first dye bath. As a result, all the threads at that end of the warp finished in a tangled mess. I left the rod in place in the second dye bath which kept everything in good order. However, either the metal stained the warp, or it reacted with the dye as there is a bit of a line across the center of the warp which may or may not come out in the wet-finish. More lessons learned!

At left, you can see a rough drawing I made of what I expect the finished piece to look like, complete with the line across the center. That line may refuse to budge in the wash and I so I may as well get used to it being there!

You may have noticed that the title of this post is “Chasing Away the Blues”. I have actually been actively welcoming blues in my latest project rather than chasing them away. What I am referring to in the title is the fact that I was involved in a very nice blues-chasing activity this morning. I received a very warm invitation to attend the Zoom meeting of a group of band weavers who call themselves the Banditos. What a way to lift my spirits! I am so grateful to Keith and the other Banditos for thinking of inviting me. This group is part of the Weavers Guild of Minnesota. Being able to join in gave me a chance to experience just a little piece what I have been missing from not being able to travel to meet and weave with weaving friends while chatting about all things weaverly. I have traveled to Australia in July and August every year for the last four years to do that. Last year I even got to go to New Zealand and spend time with weaving friends. These Zoom gatherings certainly help to chase away the blues that I sometimes feel as we all face such uncertain futures. 

Now it’s time for Show-and-Tell….(another thing that chases away the blues for me is seeing what online weaving friends are creating using my publications)…..

The idea in this photo is to show you the band that Allyne Holz wove to go with the bag that she crocheted. The pattern that she chose for her Andean Pebble Weave band is from my Complementary-warp Pattern Book. However, I know that you won’t be able to take your eyes off the bag! Leaf-lover, that I am, I have barely been able to get past the bag and its awesome draw-string closure either!

Diane Wardlow has chosen to weave a double weave band to add to the upper edge of her bag to cleverly increase its depth. She wove the  fabric for the bag using a really interesting sakiori/rag weaving technique.

Meg Kourmadas is also working her way through double weave using my book and has used the alpaca figure as part of her very first learning band.

Monique de Viscos is using a pretty variegated thread to weave patterns from my More Andean Pebble Weave Patterns book. It is interesting to see the effect of not using a third border color. I really need to include variegated thread in my bands from time to time. Monique’s band is very inspiring.

Orangie wove a striking sampler of eight-thread patterns from my Andean Pebble Weave on Inkle Looms book. 

I love the colors that Judy Andersen has combined for one of the 8-thread Andean Pebble Weave patterns in which S hooks are joined to form a sort of ram’s head motif.

And here’s Terry Martin’s first double weave learning band. I think she may have squeezed every one of the 11/12 learning patterns onto her band. I love the boldness and simplicity of lettering in this structure and how effective the very simplest stick letters can be.. There are also examples of more sophisticated alphabets in the book to inspire you.

Unfortunately, I was too late in asking permission from my online weaving friend, Josefin, to show her beautiful backstrap loom warps that she sets up attached to a tree in her garden in Sweden. She spins her own yarn and hand dyes it in lovely soft colors that look so natural. Hopefully I can include those very inspiring pictures next week.

I wonder if any of you are taking part in Ravelry’s annual Tour de Fleece event. I joined a team and have been spinning while waiting for my ikat warp to dry. I bought what were called Felters’ Packs when I was at the guild in Melbourne on one of my trips to Australia a few years ago. Here are the contents of one pack. I loved the colors and bought three packs. I think the quantity of yarn I get from this will be enough to weave a nice band perhaps in three-color pebble weave…something I haven’t done for a long time.

I hope you are all finding ways to stay positive and chase away the blues. Please stay safe and keep well.


Backstrap Weaving – My New Book: Warp-faced Double Weave on Inkle Looms

Some very kind people took some time and put some extra effort into helping me bring my new book to you in just a matter of days after I sent off the files. The place that prints my spiral-bound books worked extraordinarily quickly but I don’t think that was a personal favor!  I just hope that doesn’t mean that they are experiencing a serious slump in business. It was the folks at Taproot Video who were kind enough to re-arrange priorities for me so that my finished work could be brought to you as quickly as possible. Thank you Marilyn and Rainer at Taproot Video!

So, here it is...Warp-faced Double Weave on Inkle Looms…an advanced-level technique that is aimed at band-weavers who love to do pick-up. Yes, you do have to love it! because it is one of the slower techniques that I have encountered here in the highlands and lowlands of South America. The book is aimed at those who use the standard inkle loom. By that, I mean the kind of inkle loom that uses individual string heddles and where the weaver raises and lowers one layer of threads in order to create the two basic sheds. I used my Ashford Inklette for the tutorials in the book and I just use the loom’s two basic sheds.

Okay, it might be a slow technique that requires some extra work to set up and some extra care and attention while weaving (hence the advanced-level rating), but it is by far the easiest technique for designing. Some of the 45 patterns in the book were contributed by my students and weaving friends and many of them were created right there in the workshop as they were learning the technique. You could take a blank chart from the book and fill in cells in a completely random fashion, doodle away filling cells with your mind on something else, and still be able to weave the “pattern” you have created. It will be structurally sound!   

This double-weave technique does not use warp-floats. The surface of the band is not pebbled or spotted or speckled in appearance or texture. It is perfectly smooth in texture. Both faces carry the same motif with colors reversed. Bolivian weavers often flip the colors so that both possible faces can be seen at once.

A Bolivian belt in warp-faced double weave.

One of my students went home after Day One of a workshop and showed her beginner band to her 13-year old daughter. Thirteen-year old Emma then sat down with the charting paper and created a rabbit pattern and it was shared with all of us the next day. She has kindly contributed it to the book. I showed you Marilyn’s little llama in my last post which is made up of very few warp threads and weft picks. She used to keep llamas. Often the figures my students create have a personal meaning to them.  Jen keeps rabbits and created one of her own. Ruth drew the perfect figure for our narrow 12-thread learning band… an elegant long-legged, long-necked flamingo. But it’s not all about animals. All kinds of curved, angular, solid and delicately outlined figures can be created. Karen conjured up a grinning pumpkin during one gathering we had close to Halloween.

Some patterns were inspired by traditional patterns that I have seen in Mapuche and Bedouin textiles. While researching, I enjoyed learning more about the double-weave animal pack-bands that are woven by Qashqai nomads. Pictures of their bands are included as well as information on informative and inspiring magazine articles and websites.

And then there’s flora….my leaf pattern and Gerbelien’s Flower Love pattern, for example…

Forty-five pattern charts will keep you busy while your mind turns over ideas for designing one of your own. A section in the book is devoted to designing. Another shows you how easy it is to chart a figure from an image of a woven textile. There are charting challenges with an Answer Key in the Appendix.

One of the hardest things when I was putting this book together was how to come up with a limited set of patterns. I tried to provide examples of angular shapes, curve-like shapes, lines branching off at varying angles, thin lines, heavy lines, vertical and horizontal bars, curls and swirls so that you would have examples of the various elements that could be used to create your own patterns. The charts are there for you to enjoy straight from the book to your bands but also there to inspire you to create your own patterns.

The step-by-step pictures and detailed instructions and descriptions are supplemented by video clips. Both the PDF and printed formats allow you access to the clips.

As you can see in this picture, the tools you need to use are simple. I use two “tongue-depressor” craft sticks which do just fine as you learn. If you plan on doing a lot of double weave, you might think about investing in some heavier smoother swords which are more comfortable in the hands. 

There is a series of instructional clips that supplement various sections in the book as you set up the loom , start weaving, learn about color changes and how to pick up threads to form patterns. 

Two additional clips were filmed in silence so that you can watch the process in an uninterrupted flow.

One of my favorite sections is the one on how to finish a band. I was pleased about being able to teach one of my favorite braids as well as weft twining which you will find useful and decorative not only for double weave, but for all your bands. There is also instruction on a special way to finish double-weave bands which makes them easier to attach to buckles and clips for creating straps.


I hope that you enjoy my latest addition to my collection of technique and pattern books. Maybe I will follow it up with a pattern book but, in a way, I would be happy if that proves to be unnecessary because you are all busy creating your own beautiful patterns! That would mark the achievement of one of my goals in writing this book. 

Happy weaving! Here is the link once more so that you don’t have to scroll back up and look for it :-). Warp-faced Double Weave on Inkle Looms.  

As always, thank you for your support and thanks to everyone who has bought the book since I posted about it on Facebook. (and also to those who discovered the book on Taproot Video before I could even announce it!)