Backstrap Weaving – Two-fers

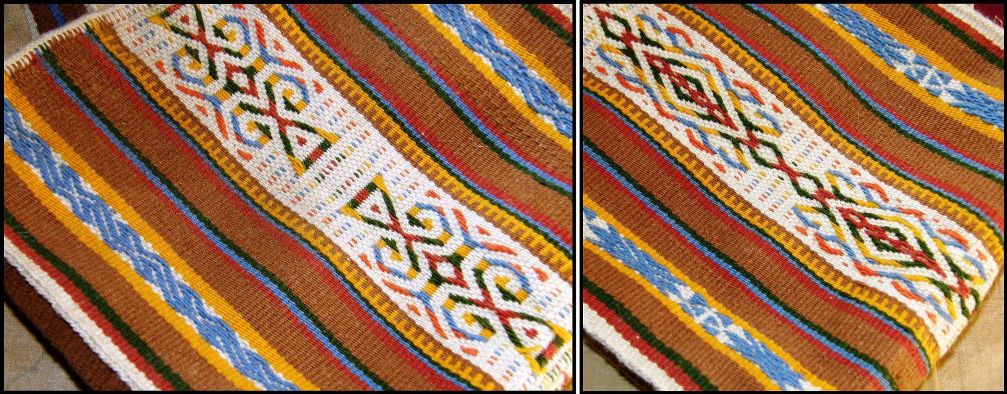
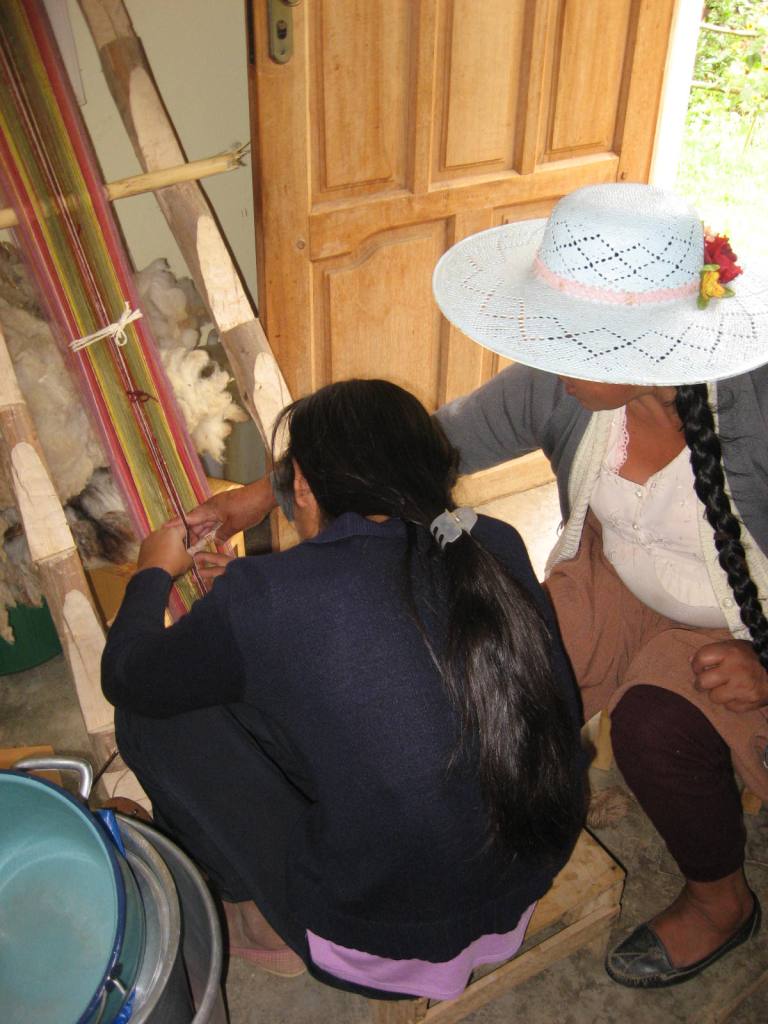
One of the things I like about the discontinuous-warp technique I have been playing with lately is that it gives me not one, but two opportunities to practice creating four selvedges….a two-fer. So, with the new piece that I warped this week I get two more chances, which makes five in total these last few weeks. I think my skills are improving. At the very least the process is becoming much less intimidating to me. I wonder if one day I will shrug it off and say that it is “normal” as my young teacher  from Pitumarca, Peru did.

Four-selvedge bands woven by Bolivian teenagers-in-training.
Four-selvedge bands woven by relatively new weavers…Bolivian teenagers-in-training.
The first piece on which I learned the four-selvedge technique in Potosi, Bolivia
The first piece on which I learned the four-selvedge technique in Potosi, Bolivia.

discontinuous warp ticlla closing the gapHere’s where I was at last week when I wrote my blog post. I still had the heddles in place and and had just removed the shed rod from the left hand side.

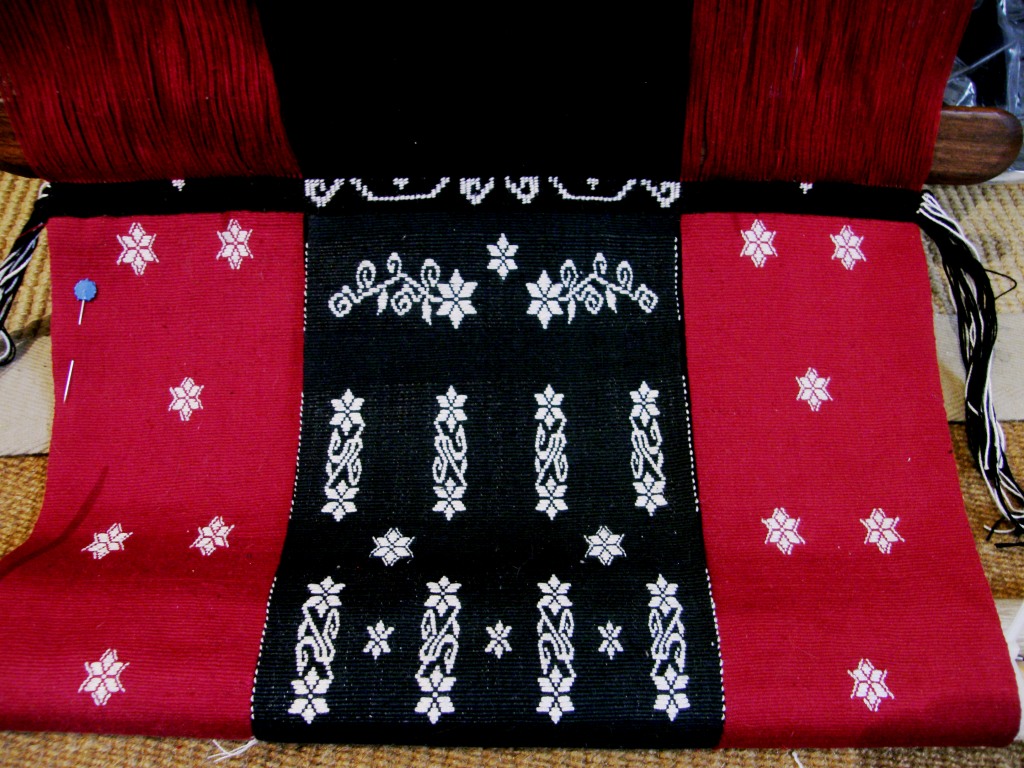
??????????????????????And here is the piece with the gaps closed. There are a few wobbles here and there but I am pretty pleased with it. Next came the tubular edging band and it took me five attempts to settle on the pattern and size. Part of the problem is that I don’t have much of a wool stash and the colors are very limited so, in the end I had to go with a heavier tubular band than I would have liked.

sewing tubular bandLate night weaving and sewing with poor lighting…not a good idea! I had to unpick a fair bit next day. You can just see near the upper left corner the end of the tubular band. I was left with the problem of what to do with all those warps ends. They are easier to deal with when you sew a tubular band to a bag. The band can be continued down into the bag, its end sewn over and hidden away inside. When you look at an Andean textile that has been finished this way, you have to look  hard to find the start and finish of the tubular edging. On all the pieces I have seen, the end has been sewn over and over and the unwoven warps cut. It has been done so neatly that you can barely tell that the resulting blunt end is there. This is something on which I need to work!

So, I wrapped the place where the start and finish of my band collided. It was obvious and ugly and I wanted to hide it. The small bit of  wrapping looked pretty awful. My solution was then to extend the wrapping to about an inch and wrap all four corners  the same way. This would  transform the wrapping into what we weavers like to call, with tongue in cheek, a ”design element”. You can see two of the wrapped parts below.

threaded in tubular band patternI created a threaded-in pattern for the tubular band rather than do something with pick-up. I warped the pattern off center so you can see the whole design sitting next to the upper face of the cloth rather than having to tip the edge to view it. The band on the back side of the cloth is in a solid color. Underneath all  that you can see this week’s new discontinuous-warp project…another two-fer.  It looks like I will be able to use that discarded tubular band warp from last week after all. I think the colors match this new project well.

What am I going to do with these pieces? Nothing! They are samples, practice pieces, notes and lessons in cloth. I would like to have one of the pieces in my wall hanging series represent the ticlla, or discontinuous warp technique, and so, the pieces I am currently weaving are part of my warm-up for that.

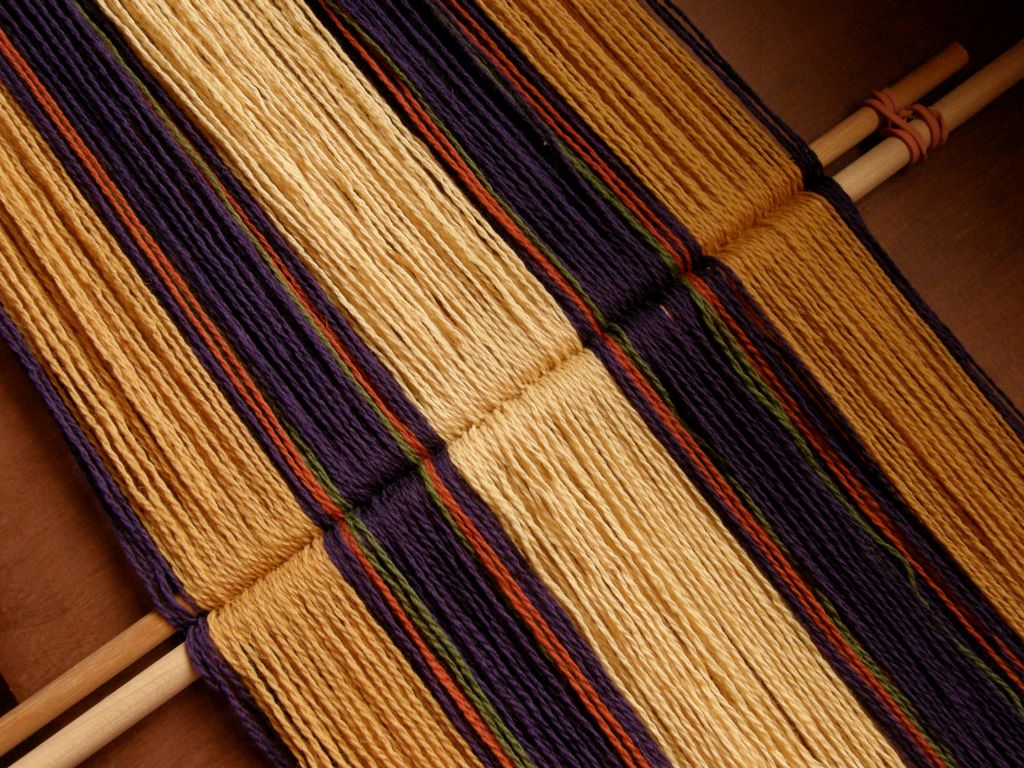
???????????????????????????????I so love sitting in front of a fresh warp like this!…terracotta and natural discontinuous warp in the same Navajo wool warp yarn that I used for the Four Seasons piece. This time I warped for a tiny strip of simple pick-up down the center and re-spun some brown wool to match the twist of the Navajo warp to use as the border color. I wanted to use a complementary-warp technique.

I wanted to decorate this one with supplementary-weft patterns again but I chose a “discontinuous” method this time in that the weft does not travel all the way across the warp to turn at the edge. The weft-turns shadow, or outlines, the motif.

discontinuous supplementary weft weft turnsThe terracotta supplementary-weft yarn that I used could have been thicker. I didn’t get as good  coverage with it as I did with the lighter color. The light bumps at the edge of the terracotta half of the cloth are the main weft turns. I had to go back and forth between white and terracotta weft as I didn’t have enough of either alone to complete the project. Those contrast color weft-turns will get covered by the tubular band later. The turns of the supplementary weft lie beside the motifs in a nice outline.

I wove the pick-up pattern wondering if there was a way I could close the gap between the two woven ends without interrupting the pattern. It was a four-shed pattern and I hoped that I would be able to fix things so that I would be in just the right shed for the last weft pass. I think a lot of it came down to luck in the end. The weaving fairies were with me :-).

gap closed on oe side of discontinuous warpIt worked! Now, let’s see if I can manage it on the other side. Hey, weaving fairies, don’t go away yet. I am disappointed with how noticeable the change from white to terracotta weft is in the white section…oh well.

I am very happy with my wee bit of pick-up on this piece but, before I get too carried away, here’s a reminder of what the Pitumarca weavers achieve as far as pick-up is concerned….

Pitumarca ticlla with supplementary warp pick upGranted it is a little easier to weave supplementary-warp pick-up in the small space at the finish of a four-selvedge piece but, oh my gosh, look at that! I would say, and this is just my guess, that the weaver closed the gap at the outer edges where you can see the tiniest fraction of an inch that is without pattern. The natural alpaca colors are so gorgeous. I don’t remember where the start and finish of the tubular band is located on this piece but your eye is certainly not drawn to any obvious spot where the weaver may have finished.

finishing-backstrap-weavingsAbove you can see a weaver from Pitumarca, Peru nearing the end of the warp. You can see how small the space in which she  picks up the patterns and operates the heddles is. One the right you can see how a four-selvedge piece with supplementary- warp patterns (part of a discontinuous-warp piece) has been finished.

While waiting for the brown yarn to dry and have its twist set, I thought about other possible ways to hide the join in tubular bands on these flat woven pieces. Maybe some cross knit looping? I practiced on one of the braided keyfobs that I have been making, the first one which was bit on the loose side. It could be sacrificed for this experiment.

OLYMPUS DIGITAL CAMERAI am not convinced but I will keep it up my sleeve just in case. I think it looks cute, as if I had knitted a wee wool sweater for the braid! I added another Margarita braid to the collection in red and black. 

Jennifer finished her stunning hemp piece with pick-up patterns of Chinchero, Peru. I have charted these in my second book. I like to think of complementary-warp structures as two-fers…one weft shot produces pattern on two beautiful faces.

jennifers chinchero pattern finishedNow she has to choose which face with be the outside of the bag she is planning. I am afraid that none of us in the Ravelry group were helpful when she asked us for opinions. We all liked both sides equally, of course! 

And speaking of bags, Julia once again wowed us with her weaving, piecing together and sewing skills….her creativity!

Julias bag with tubular band strapThe main fabric was woven on her floor loom and is stunning in itself. CindyQ, also in the Ravelry group, wove the blue supplementary-warp pick-up band and had given it to Julia as a gift. Julia’s idea for making a shoulder pad for the slim tubular band strap is so clever. She wove the band for the strap in tubular form and then wove it as a flat band for a while. She braided the flat band  to form the shoulder pad. How cool is that?

Kim varland rabbitbrushstudio dot blogspot dot com(2)Kim Varland, yet another Ravelry weaving buddy, has been playing with the yurt band border pattern that I have charted and explained in one of my tutorials. I love her color combination and she shows more examples on her blog.

Kim has used what I call a simple warp-float technique. While the pattern on the back side of the band is attractive and interesting, it is not truly double-faced. I have shown these patterns to weavers who all love the way it looks on the back.

The other day I was explaining to one of our new Ravelry group members what was meant by a “complementary-warp structure”. I was thinking that surely I had put a description of this somewhere on my blog with lots of pictures. I found it in a post back in 2011 which I had written just before going to Cochabamba to weave with my teacher Maxima. I had promised to start a tutorial page on my return which explained some of these terms which are used for some of the common structures woven by backstrap weavers here in South America.
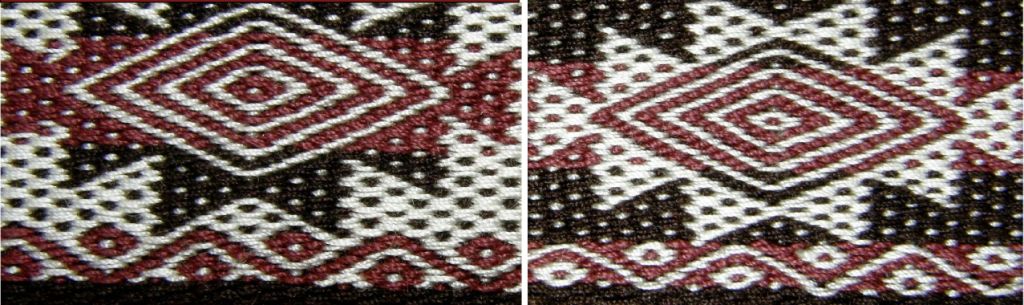
pebble a and bIt turns out that I never did and so , I will copy that portion of the blog post to a new page and will add some other structures to it this week….only two and a half years overdue! Above you can see the double-faced, or two-fer nature of complementary-warp structures.

Backstrap Weaving – Another Woolly Week

Another woolly week in the middle of summer! What’s going on? I have friends in Pennsylvania and Vermont writing and telling me about the extreme cold they have been suffering, shoveling endless amounts of snow, using crampons to get about in their yards and feeling almost like they can’t breathe. And then there’s all the talk about the Winter Olympics, although I have to admit that I am not feeling too festive about that right now with the way things have been going in the lead up.

Perhaps the chilly scenes in my head have had my hands reaching for wool. I am on a roll and can’t stop! I have to say that I actually felt more uncomfortable handling fine silk in the heat last summer. So far the wool has not been bothering me.

four selvedge wool warp backstrap weavingHere is where I was last week with a couple of inches left to go on this four-selvedge wool fabric. The next step was removing the shed rod. It is a little heart stopping removing that rod. I clung and clung to it. With one swift movement the cross was gone! It felt like the safety net had been pulled out from beneath me and I was left floundering in a mass of threads.

closing the gap discontinuous warpHowever, there are benefits to removing the shed rod. It means that when you raise the heddles to create a shed, you can actually insert two weft shots. One shot, if you look at the picture above, will weave the fabric on the left and the other will weave the fabric on the right….the two sides that I am attempting to join. And then you use a needle to pick up the threads that were formerly held on the shed rod. Again, two weft shots can be placed within that shed. Eventually the heddles are removed and it’s all needle weaving after that.

Finally, I got to the point where I could see that just two more shots would do the trick. The problem is that you can’t finish with two shots in the same shed. You have to squeeze one more between them. So, I could either put in one more shot or three more. One more was not going to be enough and three more would be too many. This happened when I finished the alpaca ticlla piece on which I had studied in Peru (see picture above). I squeezed in too many weft threads and it really looked too tight. I removed one and was left with two in the same shed, removed one more and was left with a noticeable gap and a weak spot in the fabric.

discontinuous warp piece off the loomHere is the finished piece. The gap is most noticeable in the white section (notice how the fabric curls due to the over twisted yarn that was used).

So, I decided to go with one fewer weft shot than I felt was necessary and had a slightly sleazy weak spot in the middle of the piece.

Two things marked the spot where the last weft shots lay…a darkish spot right in the center which was a dimple in the cloth, and  wobbly edges. The edge warps simply ended up being too long once I started closing the gap and there wasn’t a whole lot I could do about it at that stage. Loose edges would not support  the weft turns well.
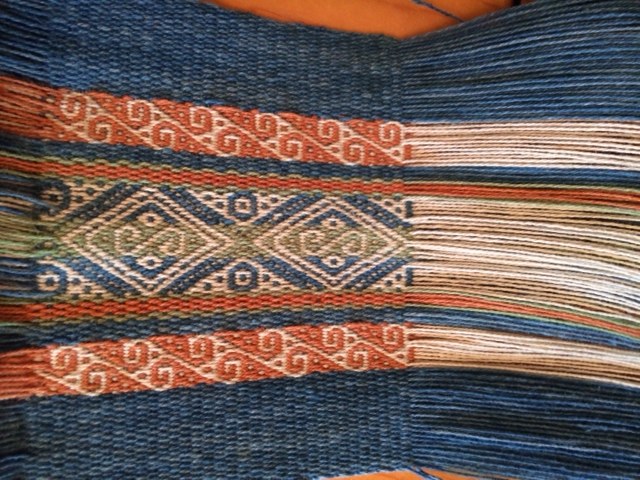
I didn’t like the dimple. I didn’t like the loose weak feel of the fabric in the middle. What to do?

??????????????????????And then it occurred to me…if I needed to stuff more weft into that space to firm up the fabric, why not make the weft a colored supplemental one? So, that is what I did. I needle-wove in a motif with supplemental weft. It turned out to be surprisingly easy to use the blunt end of a needle to get under the warps and weave in the motif. I can’t see myself ever getting away with that with cotton. But wool is friendly and stretchy!

The dimple disappeared but the wobbly edges didn’t. Everything  is a bit on the wobbly side in that area but at least the fabric is now stable. Believe me, it is really firm now! You can see the purple motif in the center flanked by green ones on the sides.

four selvedge piece second finishAnd I did have problems as anticipated with splitting the ply with the needle when needle-weaving. I thought that I had it under control only to find five skips on the back of the fabric where one of the strands in the 2-ply had not been caught on the needle. Oh well.
Lessons learned….when weaving a four-selvedge piece, keep an eye on the edge warps as you go so that you don’t end up with loose ones as the gap is closed. Avoid loosely plied thread. I split the ply so many times and had to back the needle out for a do-over and then there were several times that I didn’t even notice that it had happened.

This piece will be set aside until I can get more purple KnitPicks Palette for the tubular edging band and the sides. I have not one scrap left! I am still hoping to use this as a sleeve to protect a laptop computer.

??????????????????????As I said before, I was on a roll…a woolly roll. I found the wool warp yarn for Navajo-style weaving that I had bought at the Mannings last spring. During my stay there, Carol, Tom and Sara had let me dye it using their dye workshop supplies. I found it strangely heavy for Navajo warp but it had a good firm twist..no chance of splitting those strands apart…and any overtwist seemed to have settled.

I had bought it to use for a discontinuous warp project. In order to benefit from the lessons learned in my latest four-selvedge experience, I thought that I may as well  dive into a ticlla project, as the discontinuous warp technique is known in Pitumarca, Peru . The ticlla technique would give me the fun of weaving not one, but two, four-selvedge panels in the one piece.

Of course, my piece would be very, very simple! Nothing like these masterpieces!!…..

weaver from Pitumarca with discontinuous warpThis piece has multiple four-selvedge panels each incorporating complex continuous pick-up patterns.

bhutan-and-discontinuous-warp-from-peruThis ticlla piece, from the collection of my friend Betty, is stunning in the simplicity of its plain weave structure. However, the layout is anything but simple. Betty has adorned its center with a small brooch from Peru which matches so perfectly the colors of the yarn.

So, here is my warp…..

ticlla discontinuous warpI wish I had had a warping buddy to help with this. I finished it late at night and put the two sets of cross sticks, one for each panel, in place. You can see that I had used a metal rod around which to dovetail the threads in the center. I guess I was bleary eyed as, when I got up the next morning I could clearly see that despite my best efforts to keep everything straight and even, the metal rod had become distorted. I unwound the whole thing and started again using a wooden rod in place of the metal one. 

Below, there is a reminder of the warping path for one kind of ticlla warp so you can better understand what is going on above. You can see that the ladies from Pitumarca are  using a wooden rod for their center stick. I have seen pictures of weavers preparing these kinds of warps with metal rods but I think that two pairs of hands might be needed in those cases to help keep the tension on the rod balanced.

ticlla warp pitumarca peruI had four colored panels and, perhaps because I have had my mind on crazy weather patterns lately,…the extreme cold in the north and the extreme heat in Australia… I came up with a Four Seasons theme and designed some very simple motifs. There were relatively few warps to work with so I couldn’t include much detail and the weft floats could not span more than five warps without being awkwardly long.

??????????????????????There are the Spring and Summer motifs  in place…flowers and suns. The bulky turns of the wool supplementary weft on the edges will hopefully be covered later by a tubular edging band. In this picture I have already removed the dovetail stick and woven on both sides of center for stability. 

As for the edge threads, I did not secure them in any permanent way when I finished warping. I have them hitched to the loom bar so that I can easily get at them and pull to take up any slack as I go. Hopefully they will be as taut as all the other threads when it comes time to close the gap in the weaving. I want to avoid having wobbly edges on this piece.

Four seasons discontinuous warpFall and Winter…leaves with breeze lines between them and a snowflake. Now, all that there is left to do is keep an eye on those edge warps and close those gaps.

discontinuous warp ticlla closing the gapWith less than a quarter inch to go, I just removed the shed rod from the left hand side (I was using a fine metal rod as shed rod at this point). I might just be able to get one shed out of the heddles before removing them and needle weaving. Exciting!

More woolly pursuits….

wool work backstrap weavingI made another keyfob braid. The terracotta and white Navajo warp is standing by for another. I also wound a seven-foot warp with the KnitPicks Palette for a tubular edging band. I was impatient to edge that computer case piece. I went as far as weaving and sewing it to the top edge before I decided that the edging band really need to be based on purple. I will just have to be patient and wait until I can get the purple yarn. Maybe I can use this warp to edge something else.

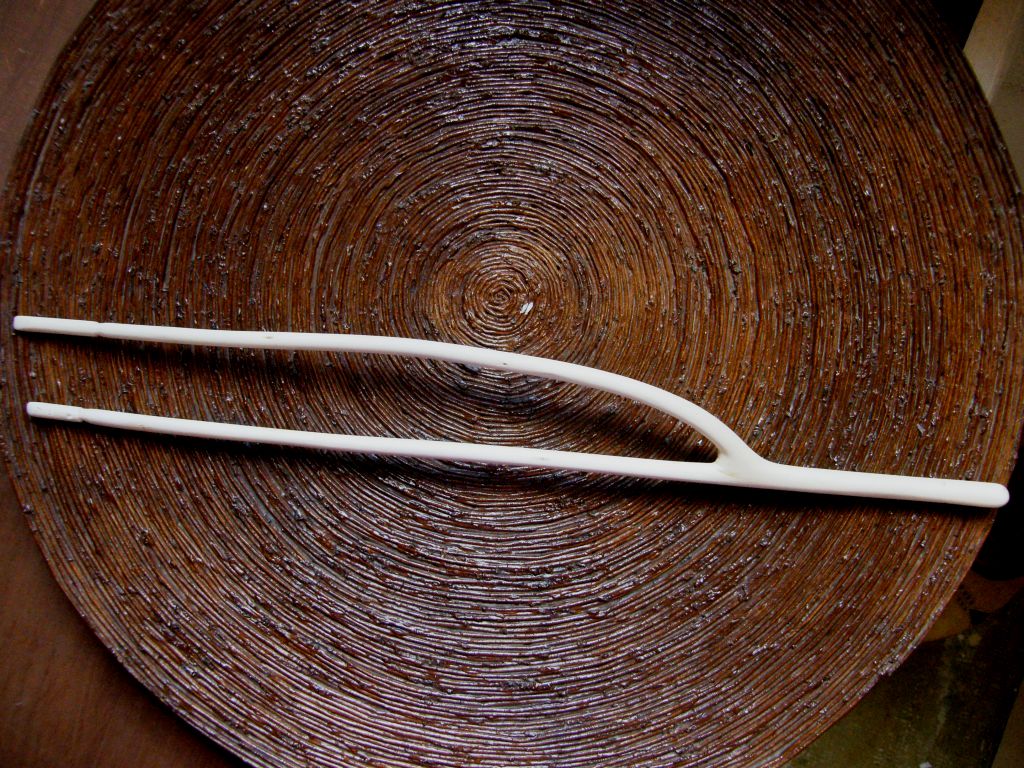
I uncovered the forked stick that Janet found for me in our garden ramblings when I was on her farm last spring. I had tied the prongs to train them to hold the right shape and it looks like it worked. Should I strip its bark or does this more rustic look contrast nicely with the smooth forked stick that fr. Kyriakos made for me?

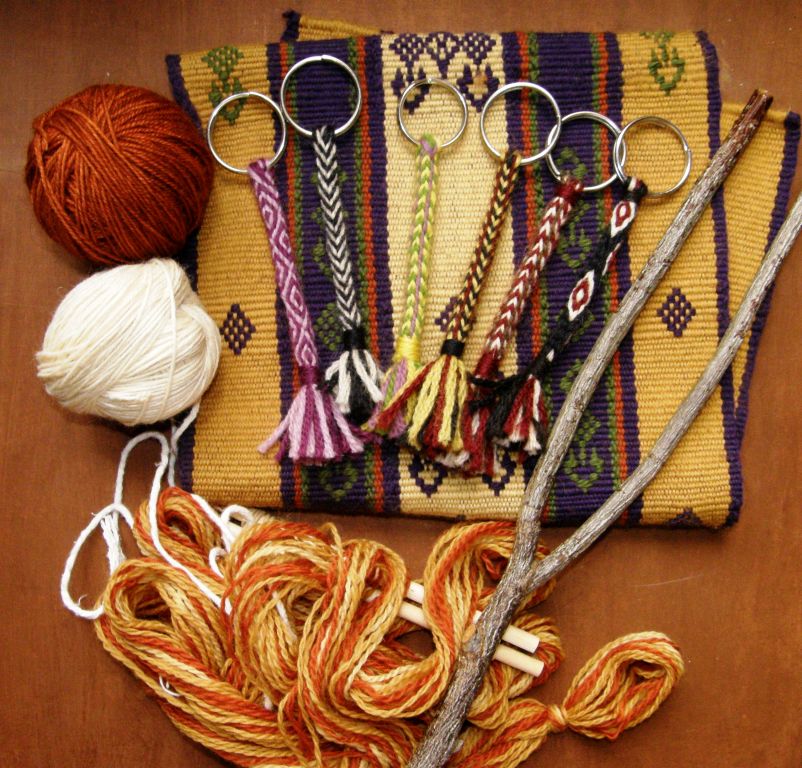
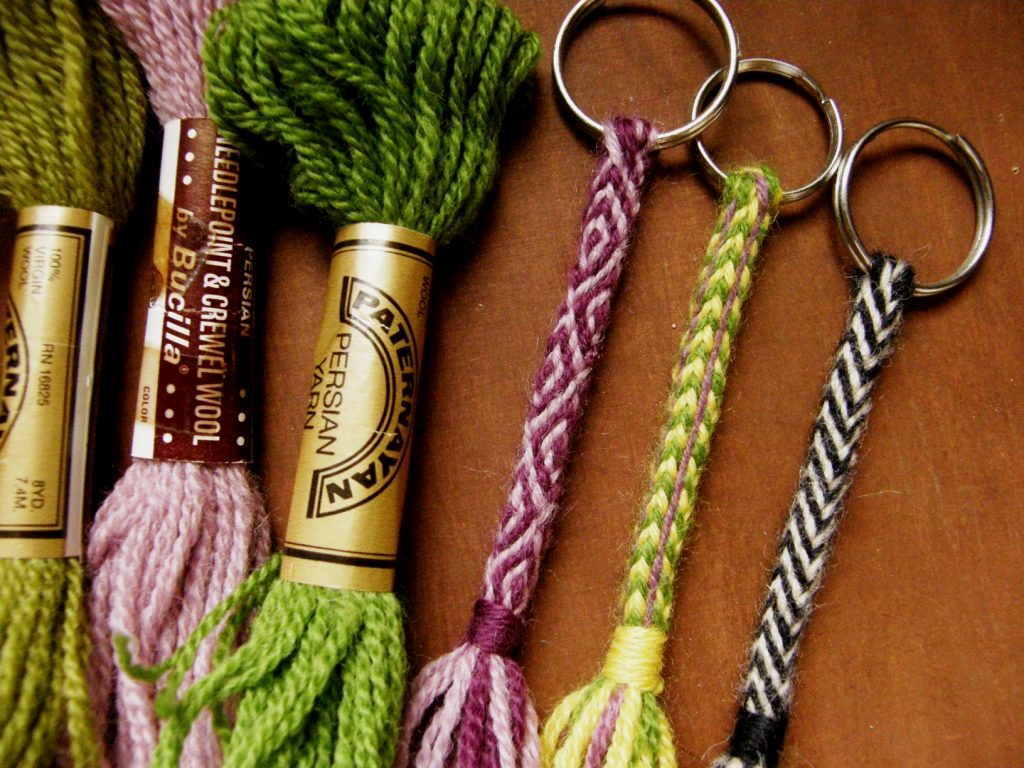
Margarita braid Peruuvian slingsOne of my weaving friends gave me a bag of Paternayan and other wool yarn from her stash and it works beautifully for my keyfob braids. The latest one on the left is the pattern that  my sling braiding teacher in Peru called “Margarita”. There is a tutorial for it here but I recommend starting with the Palma braid first.

I have not 3ven scratched the surface of the world of Peruvian sling braids. In fact, what I learned in Peru is not even a pin prick on the surface! That is why we are all eagerly awaiting the book on Peruvian sling braids on which Rodrick Owen is currently working. In the meantime I will practice the ones that I was taught by Zacarias. Dare I try the Margarita with color changes?  I haven’t tried it since my instruction in Peru in the nineties and am wondering just how good my notes are. We’ll see.

Using that Navajo warp yarn reminded me that when I was in Australia, I got to see a Navajo-style weaving that I had made in 1995 when I lived in Chile. I had given it to my brother when he visited me in Bolivia in 1998 and he has placed under glass on his dining table. How long ago all that seems and there’s my weaving looking like it has just come off the loom!

??????????????????????And there’s more wool in the closet! But, it is time to start planning wall hanging number five.

To finish, I have a rather strange story to tell about peering at my wool warp threads as I wove. As weaving progressed, the wool became hairier. Little fingers of fluff extended and accumulated on the threads creating a sort of shadowy effect. In the shadows I started to see wavy lines…not just random wavy lines, but lines that sort of made sense. They started to remind me of something and suddenly I realised what it was. And there was born the new inspiration for hanging number five! I have abandoned the idea on which I have been pondering all this time and am going with this new one. I’ll let you know more when it is all a bit more concrete.

Now….back to the needle weaving…..

Backstrap Weaving – Sunny Side Up


The only “problem” with double-faced structures, like Andean Pebble Weave, is that you sometimes don’t get to see and enjoy both faces of the fabric. I wove the above piece (using a non-Andean pattern) and then folded and sewed it into a bag. I had to decide which was the “sunny side” or, the side I would have on the outside of the bag while the other side, sadly, would be hidden forever on the inside. Actually, in this case, I guess I ended up choosing what you might call the “shady” side, the one on the right, the darker of the two options. The lighter, or sunny side, went on the inside.

Some of the structures I weave have two acceptable faces but there is one that is obviously the “right” one. What I call the simple warp float structure is one such structure.

central asian backstrap weavingThis is the piece I wove and sewed into a case for my little notebook computer.

central asian simple warp floats both sidesBoth sides are attractive in their own way. The “right” side on the left is patterned with warp floats. The other face shows exposed weft.  So, in the end, I didn’t have to hesitate over which side to use as the outside of the bag.

The same goes for the latest computer bag that I have been weaving.

wool warp backstrap weavingRemember the wool warp that I showed in last week’s post? It really was just supposed to be an experiment in weaving with loosely spun and plied wool. I was nervous about it but, as soon as I started weaving, I could tell that it was going to work out. I could open the sheds carefully and achieve nice clean openings without stressing the wool much at all. I used nylon heddles (yes, shock, horror…you know how much I hate nylon heddles!).

No fluff accumulated on the heddles but it did between the cross sticks and at the point where I pressed down on warps to help raise the heddles. I just gently removed the fluff each time I had to slide the cross sticks up the warp. This didn’t become a problem as I advanced the warp as often as I could so that the points of pressure and friction  and resulting fluffing were never in the same spot for too long.

???????????????????????????????So, I decided that this warp was going to be  a keeper and that I may as well add some patterns with wool supplementary weft. The technique I used is single faced so I won’t have to make a decision about which face is the sunny side.

As you can see below in this cotton example I wove some time ago, the back side of this single-faced technique is plain (which I suppose could be the side you chose to show if you went over the top with your supplementary-weft design and made something that you felt was garish).

???????????????????????????????The only problem with the wool project was that I had used up most of this little wool stash in the warping and only had a bit of terracotta yarn left with which to make patterns.

You can see that I used a coil rod to prevent corrugation. I wouldn’t really expect ridging with wool as it is so springy and forgiving but I wasn’t taking any chances. The wool was behaving nicely and I didn’t want to push it by having to unweave and start over if ridges appeared.

wool warp with pattern color changes backstrap weaving supplementary weftTwo warp ends broke while none of the others looked particularly worn at all.

Eventually I had to change to green supplementary weft. That was okay as I also had a green stripe in the warp into which I could hide the weft turns.This allowed me to save the little remaining terracotta to weave the same design at the other end.

And then just to make things more “interesting” I decided that, since I weave with wool so infrequently, I should use this piece as an opportunity to practice making something with four selvedges.  I turned the whole thing around and started weaving in from the other end.

four selvedge wool warp backstrap weavingBring out the little sticks, the skinny shuttles, the umbrella ribs, the needles and a large serving of patience!

In the above picture there are just under two inches left to weave and I am still, thankfully, able to use both the shed rod and string heddles. I think doing all that twining last week was a good warm-up to this. It was taking me forty minutes to twine a single row. Opening the sheds and weaving in this small space, so far, is a lot faster! I expect that to change pretty soon!

I thnk I might have trouble needle-weaving the last rows as the yarn is plied so loosely. I fear that I will be continually splitting the two strands with the needle.

creating the shed with a needleI suspect that the overspun and tightly plied yarn created by the weavers in Pitumarca, Peru would be easier to work with in this case. I needle wove the two ends of the discontinuous-warp piece shown above (my teacher Yaneth is demonstrating in the picture). Now I will be able to see how it compares with using store-bought yarn.

Will my wool project end up being the computer slip case that I had planned? I am not sure. I definitely want to decorate all four edges with a tubular band and am hoping that I can scrape together enough of this wool to do so. We will see what it wants to be when finished.

As for the twining that was giving me trouble…..

???????????????????????????????….it is done. I have yet to find a spot with good light to stretch this out to full length for photgraphing. Neither of the reds in the above picture are the true color.

After having problems with either the twining buckling or the fabric getting a pleated look, I twined and untwined and finally found the right formula. So, now the three panels are joined across the top and I shall set it all aside while I decide what to do at the bottom. Most likely I will make masses of tiny braids which is how I chose to finish the other three pieces in this series.

hatbands boliviaThis fourth hanging was inspired by hatbands used by the women in the Bolivian highland community of Calcha (the one bottom left in the picture at left).

I visited Calcha in August 1997.  It was a festival weekend and I hadn’t known. Because of the big party in progress, none of the women were weaving. A small boy ran home and brought back a hatband to show and later sell to me when I asked about weaving. I always wonder if he had taken it right off his mother’s hat and if he had gotten in trouble over it later. 

???????????????????????????????Now to dye some cotton red for  number five in the wall hanging series. Thank you, Bobbie, for giving me some of your Guatemalan cotton so that I can over-dye it for my projects.

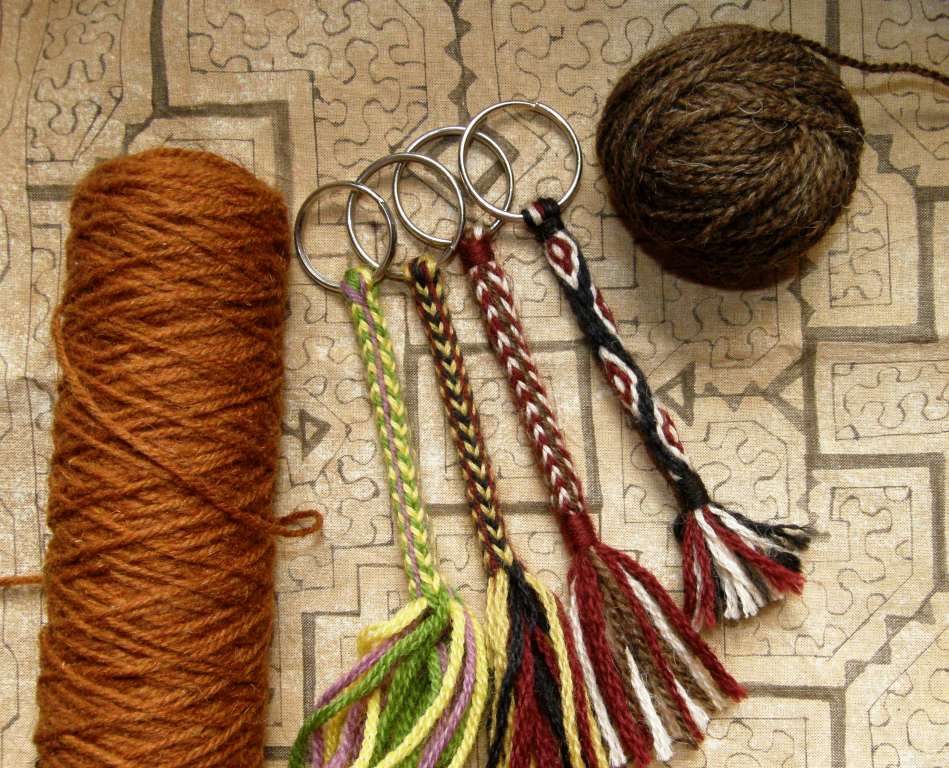
So, we will see the end of the woolly adventure next week. If it gets frustrating, I will get up and do some more keyfob braids. I added one more to the collection this week…the one on the left. It is simply the Palma braid done with only two colors instead of three.

And if the wool project all goes horribly wrong, I shall cut the piece in two and use the two pieces as front and back for a computer slip case anyway.

I think I will be looking more closely at wool when I am visiting the Mannings yarn store. I can usually quite safely breeze through the store without getting too tempted by anything.  I would like to see what other wool I can find that works so nicely on my backstrap loom (the wool for this current project is KnitPicks Palette, by the way. It comes in so many colors! I am almost scared to name it. Every time I fnd a wool designed for knitters that I like to use for weaving, it gets discontinued!).

Last time I was at the Mannings I was checking out the Harrisville Shetland as I had had success using it for warp-faced weaving straight off the cone on a floor loom. I made this band with it on my friend Pam’s floor loom. It felt so good!

warp-faced wool bandI have had success with Navajo warp on my backstrap loom too. I bought a ball in natural white and dyed it and made the bag with Mapuche designs below when I was still living in Chile. It was overtwisted and easy to use and made a good sturdy fabric for a bag but I am looking for fabric with a softer, kinder feel now.

mapuche-bag-front-and-backScreenHunter_003Why am I buying wool and not spinning it myself? One reason is that there simply isn’t any available here to spin in lowland Bolivia where I live.

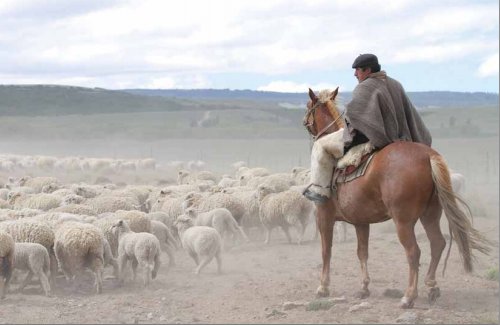
I think of all those years I lived in the Chilean Patagonia and all the sheep! Wool? It was everywhere! My boyfriend down there  worked as a shepherd for many years. I could have all the fleece I wanted. I did spin some of it and wove it as a plain balanced-weave piece that became the back of a vest. I used the rest of the handspun to knit the front. And then…. I moved to the tropics!

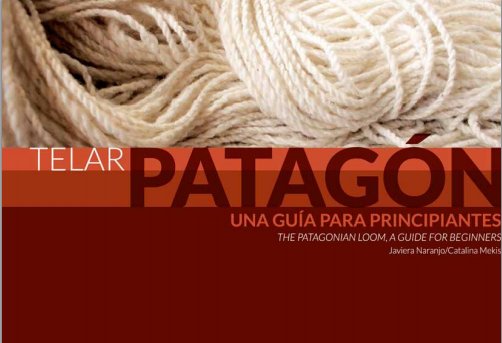
The picture above is from a free e-book entitled The Patagonian Loom, A guide for Beginners the link for which Weaving Southwest shared on Facebook today. It describes the continuing weaving tradition in the southern parts of Chile (not as far down south as where I was living where, unfortunately, I never came across anyone weaving). 

It’s a lovely book crammed with pictures with text in both Spanish and English. It gives a short history of the loom and then describes, the spinning, dyeing and weaving processes. It also provides instructions for warping and setting up the loom for projects that are typical of the region…saddle blankets, saddle bags, sashes, even a poncho. Thank you Weaving Southwest for sharing the link!

ScreenHunter_001Look at that gorgeous chunky handspun on the cover of the book which is used for warp-faced weaving on the vertical Patagonian loom. It reminds me of the fabulous yarn that Ace, one of my US friends, spun to weave into a backstrap. I had a lot of fun weaving with that yarn. It looked hairy and scary but wove up beautifully!

???????????????????????????????Now to get back to the loom and get my hands into that wool warp. Enjoy the e-book with its glimpse of life in the Chilean Patagonia.

Backstrap Weaving – Fingers and Toes

rav gamesIt’s a Ravelry.com thing. Paul suggested it and Joyful made it happen by designing a team badge. So, we have a team in the Ravelry Ravellenic Games which will run alongside the Winter Games at Sochi, Russia from February 7-23. The goal, as stated in the Ravelry rules, is to “Challenge yourself by starting and finishing one or more projects during the 2014 Winter Olympics” (and have fun). There is more to this…events, scores, finish line and medals. To be honest I have no clue as to what it all really entails but, as I weave everyday anyway, I thought, “Why not?” 

I did very little weaving this week. Instead I did lots of twining and, unfortunately, un-twining and twining again along with a little braiding. The twining became tricky and I only did the braiding to get myself away from the loom before I started throwing things! Twining attempt three is currently underway. I enjoy on-loom twining. It’s all about fingers and thread…no shedding devices, beaters, swords, shuttles or bobbins…it looks like pure simplicity on the surface but I am here to tell you that sometimes it can get complicated.

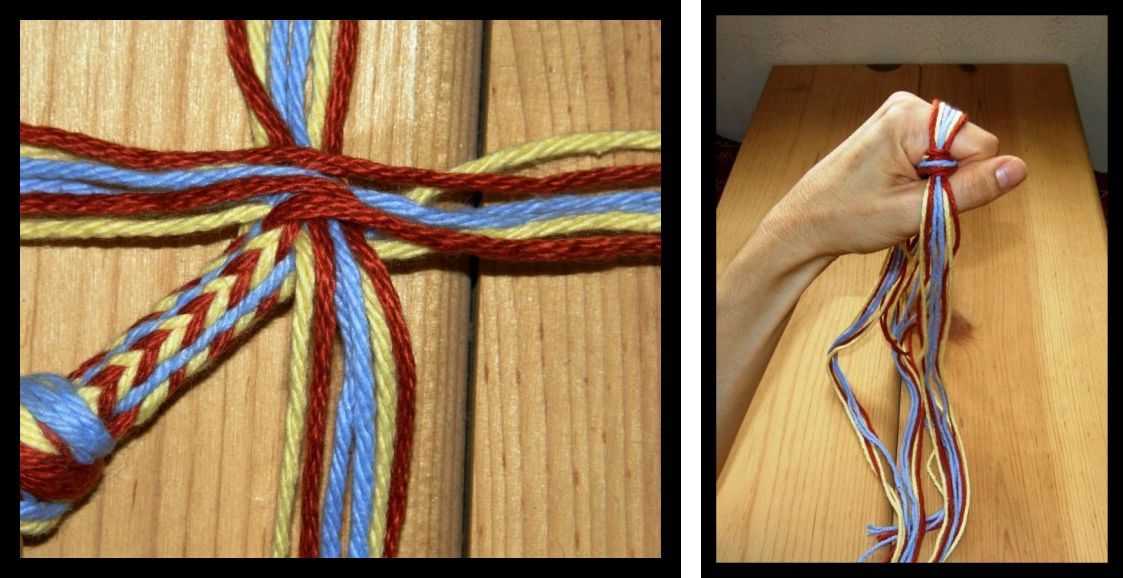
LEFT; The very start of the Palma braid with the 4 sets of 6 srands used to make it. RIGHT: My had in the braiding position. Two opposing stes of strands are interchanged. The braid is then rotated so the other two sets can be worked.
LEFT; The very start of the Palma braid with the 4 sets of 6 strands used to make it. RIGHT: My hand in the braiding position. Two opposing sets of strands are interchanged. The braid is then rotated so the other two sets can be worked.

So, I took a break from twining and braided to make some keyfobs. This was great. Short lengths of yarn for a small item, only three colors, no tools except for fingers and fist. I got out odds and ends of wool that I have in a tub in the closet and played.

???????????????????????????????It was fun making the Palma braid again after not having done so for a long, long time. The last time I recall having done so, I was teaching it to a Mapuche lady that I met in Cusco. The keyfob on the right is woven rather than braided. It’s a tubular weaving with the ñawi pattern which, for me,  is faster to execute than the braid. The weaving set up does not require string heddles, just a couple of sticks to hold the cross. You separate your feet and warp around your two big toes (only a very short warp is required for a keyfob!), secure the cross and you are ready to start weaving. Toes and thread. Fingers and thread. The weaving advances quickly compared to the braiding.  I was able to use my new forked stick in the cross.

???????????????????????????????Yes, the stick is way too big for that tiny band warp but I sat on the floor with knees up and the forked stick rested on my legs while I did the picking up of the warp threads to form the pattern. So, my forked stick, gift from fr. Kyriakos in Australia was used for the first time. There was a thread on Ravelry where we were asked to name our favorite new tool of 2013 and I had no hesitation in choosing this forked stick as mine. Cut from a pussy willow tree and  smoothed to perfection, carefully packed up and sent to me by mail, it’s a treasure!

Fr. Kyriakos with one of his projects. He has been learning to weave on a backstrap loom using my blog and books. Now he needs to make a forked stick for himself!

A forked stick or tanka is used by weavers of the ñawi awapa in the Cusco area of Peru. In other parts of Peru it is used to hold the cross and help with operating the string heddles. The weaver grasps the join of the fork and twists the sticks away. This serves to tighten the upper layer of threads. At the same time the weaver leans forward to relax tension on the lower layer of threads while pulling up on the heddle rod. This combination of moves makes the opening of the heddle shed smooth and efficient.

backstrap weaving Laverne WaddingtonInstructions for the Palma braid can be found here on my blog. You will also find the Margarita braid there which I might use this coming week for more keyfobs.

On another break from the twining torment I created a warp with the wool that I talked about last week. This could well be a disaster. I don’t think I have ever tried to weave anything so large with wool that has such loose twist. This project will be treated as an experiment to see how the wool behaves. As such, I haven’t planned any particular pattern for the piece and will play it by ear. If it is a success, it just might become a slip case for a computer. I do love the colors so here’s hoping that I can at least salvage a piece of woven cloth if it ends up a sticky, pilly, broken mess.

???????????????????????????????I will put in the heddles and then leave it until I am done with the twining.

Jennifer’s hemp project is coming along beautifully. I remember it was a long time ago that Jennifer first told me that she would like to weave the loraypu pattern of Chinchero (the one in the center). She waited patiently for my second book to come out in which I have charted these designs.  I can imagine how pleased she must be with the way this is turning out.

Jennifer progressI came across a gem of a video on Facebook last week. Unfortunately, it doesn’t have English subtitles but I am sure that you will enjoy watching this piece on a weaving cooperative in Suljaa, Mexico where young Amuzga girls can take a chair, sticks and thread and receive free weaving lessons from the weaving masters of the community. It is a beautiful video!! The shots of those little toes sticking up make me smile so much. The pride with which the little girls show and explain their work bring tears to my eyes. I love seeing them on their bellies on the floor coloring designs. That’s how I like to chart.

http://vimeo.com/81069844

Other videos by the same producer can been seen hereAll are worth seeing. I particularly like Serpiente de Colores which is an interesting film comprising a rapid succession of still shots accompanied by women speaking in the native language of the Amuzga (subtitled in Spanish).

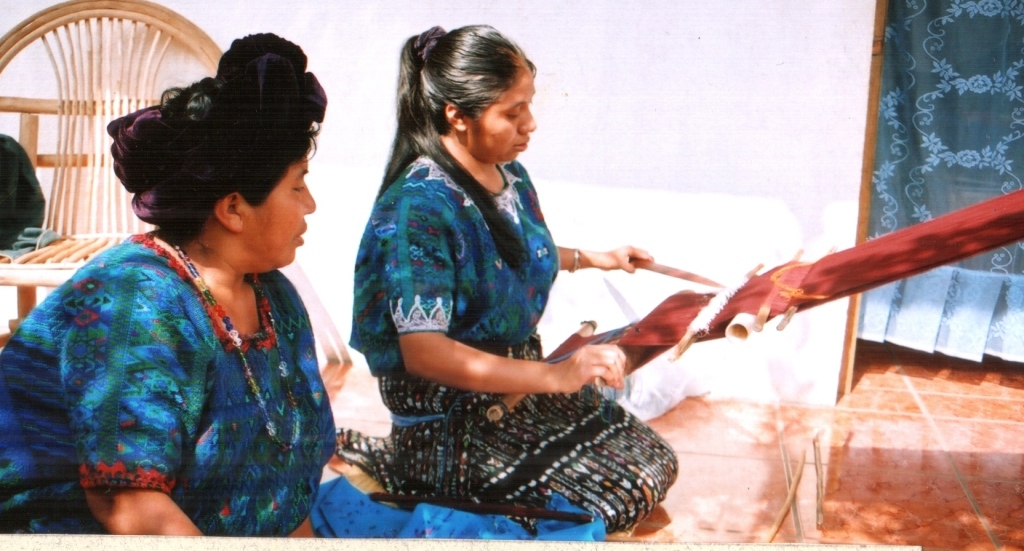
Juan Miguel tinkuyO (6)It is always delightful to see the youngsters learning to weave and interesting to see the ways that different cultures approach it. The little girls of Suljaa, for example, are taught using quite wide warps using fine cotton thread. In the video they were learning to count the threads and make simple patterns with supplemental wefts. You could see that their instructors often had to help them open the sheds. My 17-year old teacher in Guatemala, had become an accomplished weaver long before she was considered skilled enough to warp and set up the loom on her own. Her mother would do the warping and heddle making and then hand over the loom to her. 

In the Andes, children in the Cusco region, like the little boy above from Acopia, start out weaving many narrow woolen bands in order to perfect pick-up patterns which can later be combined on wider pieces. The bands are attached to their waists by string. I have seen pictures of small children in Nagaland weaving bands that look around 2″ wide with proper backstraps and with the loom bars lodged behind their tiny little toes. (see link at end of post)

A young girl from Pitumarca weaves a plain-weave tubular band while sewing it to the edge of a piece of woven cloth.
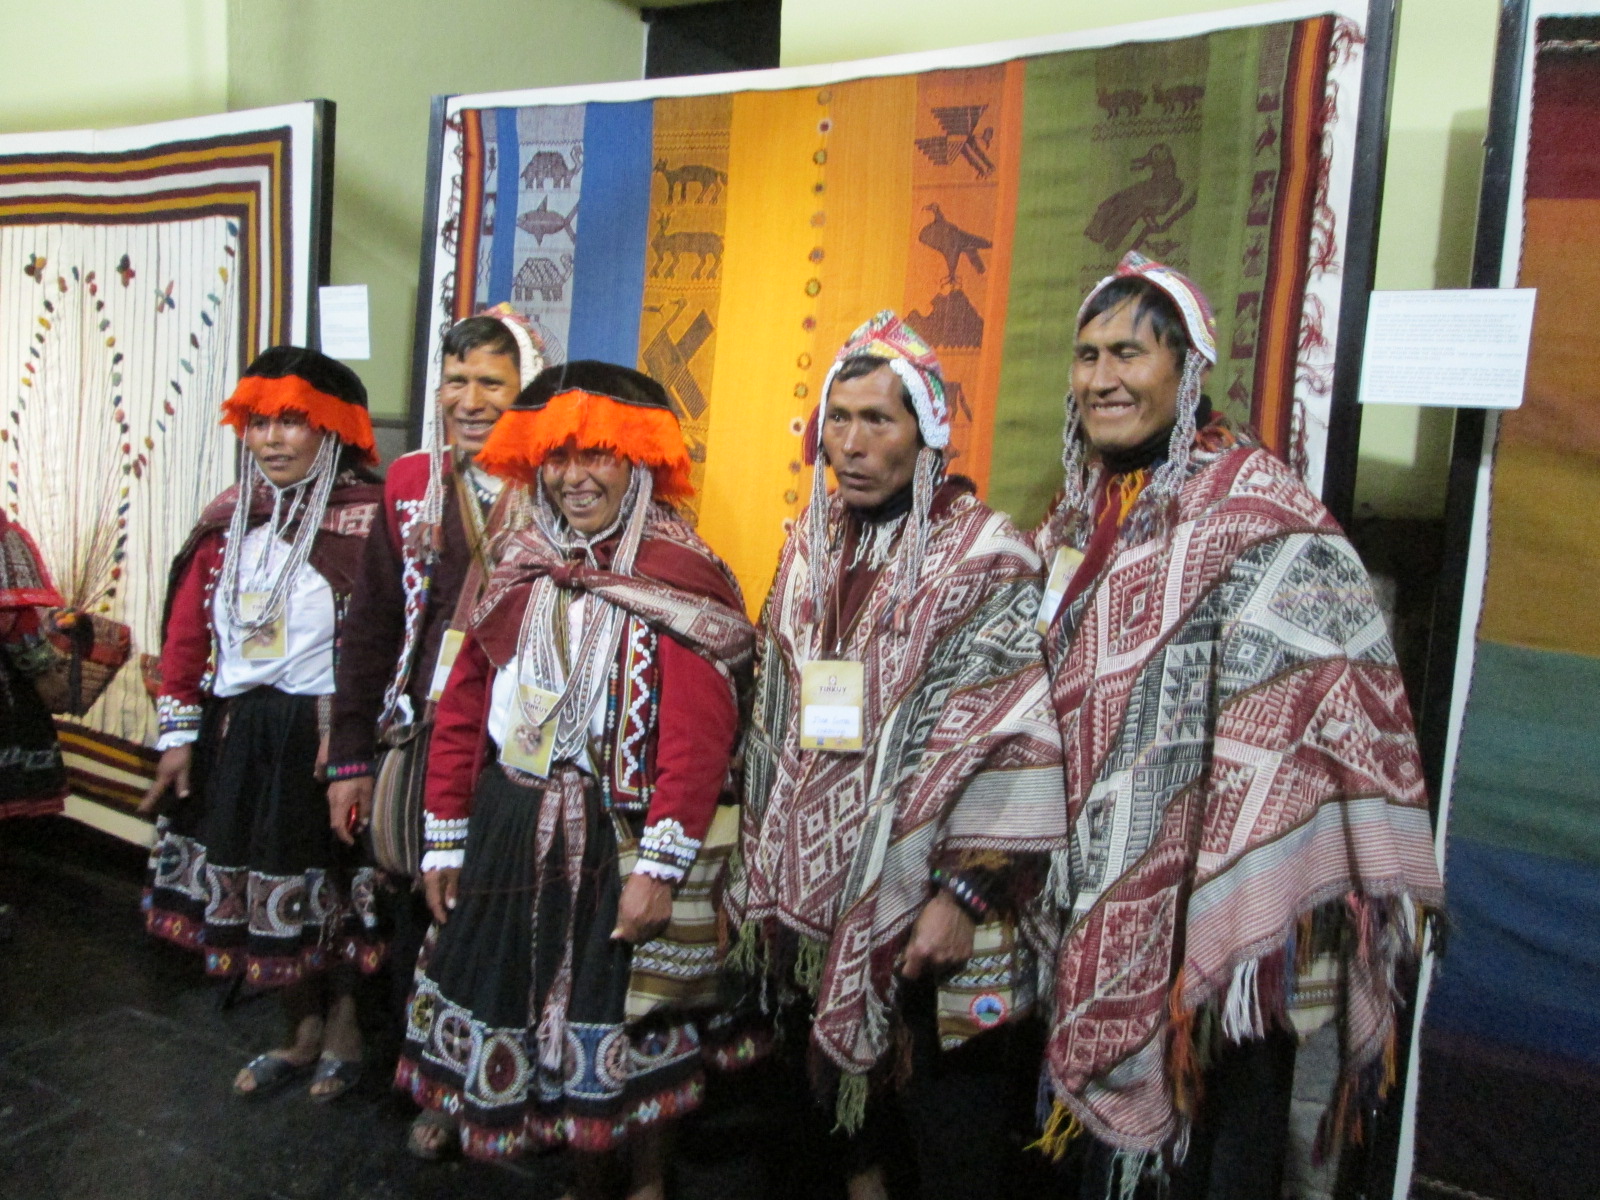
A community elder gives a set of tools toa young weaver at a ceremony at the Tinkuy de Tejedores in Urubamba 2010.
A young weaver proudly receives a set of tools from an elder of her community at a ceremony at the Tinkuy de Tejedores in Urubamba 2010.

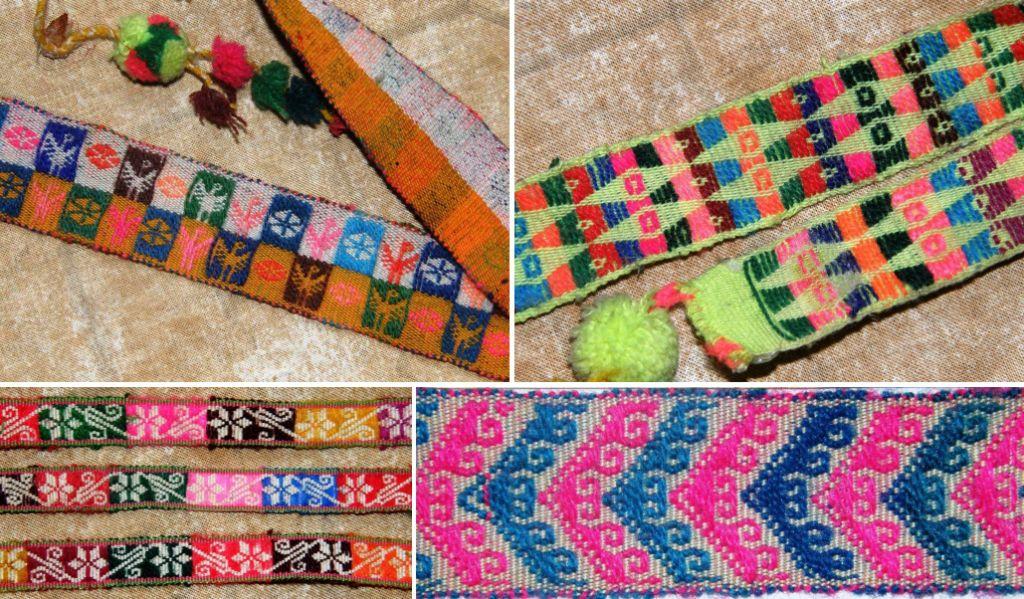
The Weaving Communities of Practice site explains and names (in both Aymara and Quechua) the various stages of the learning process in the Andes starting at 3-5 years with spinning and continuing from the age of 5 up to 25 with various stages of braiding, weaving and warping.

Nilda Callañaupa, in her book Weaving in the Peruvian Highlands Dreaming Patterns, Weaving Memories,  includes a chapter on Learning Designs and Techniques in the Peruvian highlands stating that learning to weave usually begins when children are 6 to 10 years old. Ed and Christine Franquemont write in greater detail about the learning process in Chinchero, Peru in the Textile Museum Journal Vol. 26, 1987.

Maxima Cortez guides teen-aged Gaby from the Club de Chicas as she weaves a traditional pick-up pattern.

Of course, this process of learning and passing on skills is interrupted in so many ways and in so many places as youngsters leave their homes in rural communities to live near cities which provide higher levels of  education and greater employment opportunities. In many places it has all together ceased to exist.

Dorinda Dutcher is one of several people who is working in rural communities to help, in Dorinda’s own words lead the local movement to rescue, preserve, and market their traditional weavings. PAZA has helped the weavers to revive natural dye techniques and provided technical support to improve the quality of the finished woven items for an external market. 

Youth have been involved to address the preservation objective. PAZA began the Club de Chicas in December 2010 during school vacation to help bridge the rupture in the passing of weaving tradition from mother to daughter when families migrate from their farms to town.

Many families migrate to provide education for their children beyond 5th grade. The Club de Chicas activities combine modern and traditional skills. The spinning and weaving classes are taught by Doña Màxima Cortez, the PAZA Coordinator. Dorinda Dutcher, former Peace Corps volunteer, teaches baking, computer, and basic business classes.

577740_517152818330767_401425517_nSince the Club de Chicas was established in 2010 I have been ordering bands from the group which I use as samples for decorative sewing techniques. I know that several of the bands in this collection that I bought in 2012 were made by the teen-aged girls under Maxima’s guidance.

Dorinda’s PAZA Bolivia site is now up and running again (after having suffered a malware infection) and Dorinda has written several posts about Tinkuy 2013 which she and Maxima attended. I have not found many reports online about Tinkuy 2013 and have been eagerly awaiting Dorinda’s detailed and entertaining posts.

Dorinda's photo shows proud weavers from Chahuaytire at Tinkuy 2013 standing on front of their entry in the 2013 community weaving competition.
Dorinda’s photo shows proud weavers from Chahuaytire at Tinkuy 2013 standing in front of their entry in the 2013 community weaving competition.

I contacted Indian photographer Ajay Jain to ask his permission  to include a set of wonderful pictures he took of children weaving in Nagaland. Unfortunately I haven’t heard back from him yet. In his images, the joy on the children’s little faces moves me and, once again, those wee toes holding onto loom bars make me smile and smile. Please do follow this link and take a look. It’s guaranteed to leave you with a smile too!

Until next week!

Backstrap Weaving – What’s on the Drawing Board?

4th wal hanging weft inlayAs I pressed the last creamy silk supplemental weft into place with my Guatemalan pointed stick I was thinking “Okay, that’s enough brocade work for the time being!” I was just finishing the inlay part of the third of my three-panel wall hanging. The black central panel was the last one to be tackled and, in fact, this was my second attempt, the first having been set aside as a “valuable learning experience”.

As is my custom as a new year rolls around, I looked back at my blog posts from the end of 2012 and early 2013 to see what I had been weaving a year ago. I saw that I was up to my eyeballs in supplemental wefts. All in all it was a very “supplemental wefty” year. Here are some of the results…

supplementary-weft-pattern-sampler (1)

8319396336_aca5cdd068_o

??????????????????????And, messing about with supplemental wefts brought with it lots of  plain weave of the warp-faced variety. With that came the great coil rod adventure and the conquest of the dreaded corrugation, the circular warp experiments and the enjoyment of using fine thread. One of my students during the year told me about a weaving instructor who had urged her students to embrace the challenge of perfecting plain weave. I guess I unconsciously took on that challenge last year…not that I am saying that I have perfected it!! But, I have to admit that I just love the feel of the fine red plain-weave panels in the three-panel wall hanging, the lack of ridging and the evenness of the edges…no fancy floats…just lovely plain cloth. 

I am pleased that I chose to weave the panels separately. I want to have those red panels hanging freely to float and sway as they please.

So, as one part of my mind is saying “enough with the weft inlay”, something else  inside is sayng “Okay, but what if….”

bedroom floor of a backstrap weaverthree color andean pebble weaveMy bedroom floor says it all! There are certainly advantages to living alone. It allows me to make my bedroom floor my permanent project, ideas and drawing board. I just need to step between stuff anf fall into bed. And, who cares if you wake up at 3am and have the urge to sit amongst the stuff feeling suddenly creative? So, what’s on the drawing board?

There are five projects there, three of which involve supplementary-weft patterning. Clearly I am not done with this and I am not done with seeking the perfect plain weave either. You can see the first “failed” brocade black panel in the lower right corner waiting to be made into something. Buttons and balls of thread stand by.

Then there’s the three-color pebble weave band stetched out that I wove last year (pictured above) which needs to adorn a bag. Meanwhile, two little piles of yarn have formed and are sitting there as the vague beginnings of two new projects. I want to make a scarf with my pale blue indigo-dyed Japanese silk. While I have used silk as a supplemental weft, I have not used it as warp (except for a tiny pebble weave experiment). I am hoping to start a silk-on-silk weft inlay project with that.

wool cell phone pouch backstrap weavingThe other project involves wool. I was really happy to find how easily I could weave my sister-in-law’s cell phone pouch using wool straight off the skein.

Re-spinning wool is generally recommended  for warp-faced weaving so that the “tighter” fiber can better withstand the abrasion of the string heddles and the rubbing of the warps against each other. I didn’t re-spin, yet the wool I used behaved so beautifully.

You do, however, need to have your shed opening technique down…smooth and gentle, no scraping or wrestling… to make his work.

There’s the wee wool drawstring pouch at left (picture kindly taken by my brother after my departure from Australia. He photographed it with some of the pretty colored plastic money that we use in Australia). We really need to find a nice wooden toggle for the bag.

alpaca_cell_phone_pouchThe wool I am planning to use for the next project is finer and more loosely plied. I think it will be more difficult to work with …a challenge.

Why don’t I just respin it? I don’t like the “hardness” of the resulting yarn or the curl that it gives to the finished pieces.

And guess what kind of patterning I want to do on this piece….weft inlay of course! Wool-on-wool.

I made a small pouch a long time ago with left over odds and ends of alpaca that I had spun and decorated it with supplemental weft of the same alpaca. I love the way the alpaca supplementary weft billows out of the sheds to lie fluffy and full on the surface of the cloth. I know that wool will behave the same way.

It seems there are endless possibilities for types of fiber to use for these inlay experiments. One thing I have not yet thought of using is hemp. Jennifer gave me some on one of my visits to Oregon and there it sits in the closet as yet untouched. Meanwhile Jennifer has been weaving with it and showed all of us in the Ravelry group her latest project….

photo_mediumThe colors, which Jennifer dyed herself, are gorgeous. They have that sun bleached look that I so love. The complementary-warp patterns are ones from Chinchero which I charted in my second book. Given the very hardy nature of hemp, I am thinking, as I sit here writing this, that I might use mine for the strap of a computer bag that I have been planning. Excuse me while I go fish the hemp out of the closet and toss it onto the bedroom floor! I won’t be using it for a weft inlay project, though.

The eucalyptus-dyed cotton thread awaits its purpose too…

???????????????????????????????And fr. Kyriakos wrote to me today and gave me a brilliant idea for it which has a suitably Australian theme….thank you!

Meanwhile, before I get too carried away with projects yet to come (well, it’s only natural with the coming of the new year, isn’t it?) there is still something on the loom which needs to be finished. I said that I had finished the weft inlay part of the wall hanging project. You could see in the first image at the top of this post that I have now set up the three finished panels on the one backstrap loom. Now I need to join the panels by twining across the top of all three at once.

twining on backstrap wall hangingSo, here you can see the twining underway. Oh my gosh, I had forgotten how SLOW weft twining can be! Thank goodness that muscle memory kicked in and I didn’t have to really refresh my skills. It’s been a while since I have done any major twining. The good thing about it is that this pattern doesn’t need any significant amount of concentration. As I said, muscle memory took over and, after the first row of pattern was in place, the counting was pretty much over and I could put on some music and sing and twine away.  

Tanka ch'oro and Andean hook patterns.
Tanka ch’oro and Andean hook patterns.

Muscle memory… such a handy thing. I never really believed that muscle memory would play a big part in pattern picking until I wove twenty-five tanka ch’oro bands in succession before the ANWG conference last June.

There would be times when my mind was reading the pattern and telling my fingers what to do yet I knew that something was wrong because it just didn’t feel right. I was actually picking the right colored threads in the right order but, because a distraction had caused me to form my picking cross backwards, my fingers were not picking in the way in which they had become accustomed after so much repetition.

I was amazed at how my fingers had memorized the moves and could immediately sense that something was wrong.

1521366_10152057744651530_1544583453_nAs I sit writing this post, a quick sidetrip to Facebook tells me that Radiant Orchid has been announced as the color of 2014. Who decides this and what does it all mean? Shock and horror…none of my planned projects included this color nor do I have any yarn  this color in my closet. Oh well, I guess I get to pass another year hopelessly out of fashion 🙂 It is a gorgeous color, though.

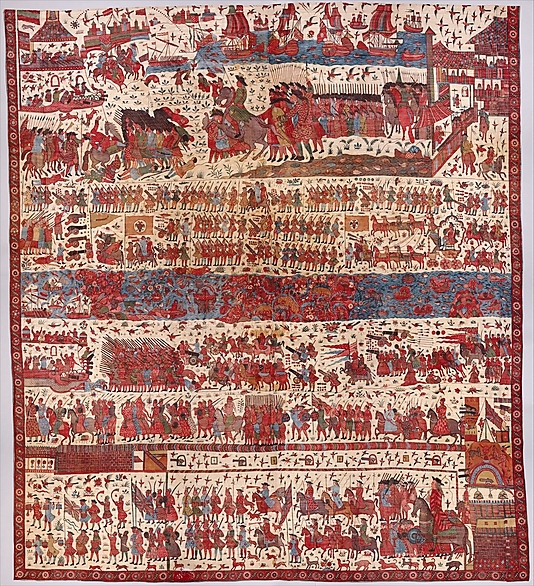
I will leave you here with an image of a textile from the website of the  Metropolitan Museum of Art in its current exhibit entitled Interwoven Globe- The World Textile Trade – 1500-1800. (Thanks to Jaina at Wovensouls for making me aware of this exhibit and the fact that it can be enjoyed online).

DP291194This cotton piece is labeled Hanging Depicting a European Conflict in South India and is dated before 1763. It is fascinating to me to see a textile depicting something of India in this time period. Some distant family members of mine in England have been tracing our family tree and have gone back as far as my great (x6) grandfather, Pierre Gallyot de la Vilette, who traveled from France to Pondicherry in south India to take up a post as a public notary around 1766. 

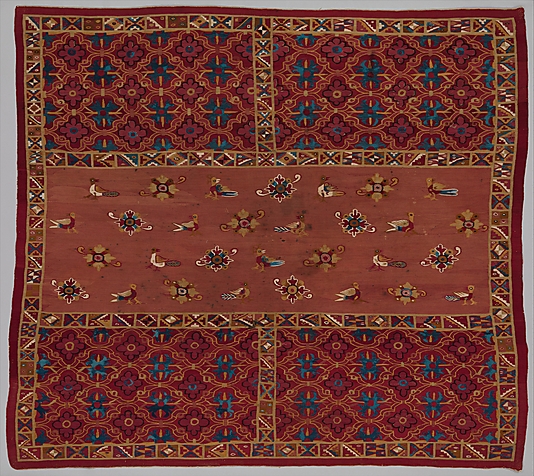
Another piece that I love from the exhibit is this tapestry mixture of Incan motifs (the tocapu design around the edges) and Spanish motifs in a wedding shawl made in Peru in the late 16th/early 17th centuries…

DP265667Take a look at the site and enjoy the exhibit!