Backstrap Weaving – Order and Disorder

It all started a few years ago when my weaving friend Bhakti gave me a loom with a circular warp that she had been using to study with a group of Karen backstrap weavers. Her teachers had created the warp and set it up for her. It seems that they used the sticks that they would normally use for their much wider projects. The coil rod, heddle sticks and shed rod were clumsily long for this narrow warp. Because I was traveling, the first thing I did was leave behind the large piece of long pvc pipe that they had been using as the shed rod. It was way too bulky to pack. I saved the space it had been occupying with a sturdy piece of cord.

I loved the simple backstrap made from a piece of plastic Thai rice sack. A halved stick of bamboo fills the seam at the two sides so that the strap doesn’t fold in on itself. The sword was also wonderful as was the forked dowel rod that had been neatly split in two. The unwoven warp, and later the cloth itself, get clamped between the two pieces of that split rod and then rolled with the help of another rod to hold the circular warp in place. This stops the warp from slipping around the two end beams as the weaver beats. It was too precious a piece to leave behind even though it was heavy and bulky. The simple temple, which consisted of a flat stick with pins taped to ends, was also a treasure.

In case you are not familiar with what I mean by a circular warp, compare the two warps in this next picture….

The warp with the blue and yellow pattern is circular. You start weaving at one point and continue around the circle until you arrive back at the place where you started. The entire warp slides and rotates around its two end beams every time you advance the warp. This means that the weaver always stays more or less seated at the same distance from the end of the warp throughout the project.

The other warp is the one that I more typically use…a single-plane warp. You start weaving at one end and finish at the other end. The cloth is rolled up as the weaving advances. The weaver, therefore, moves closer and closer to the end beam as the weaving advances.

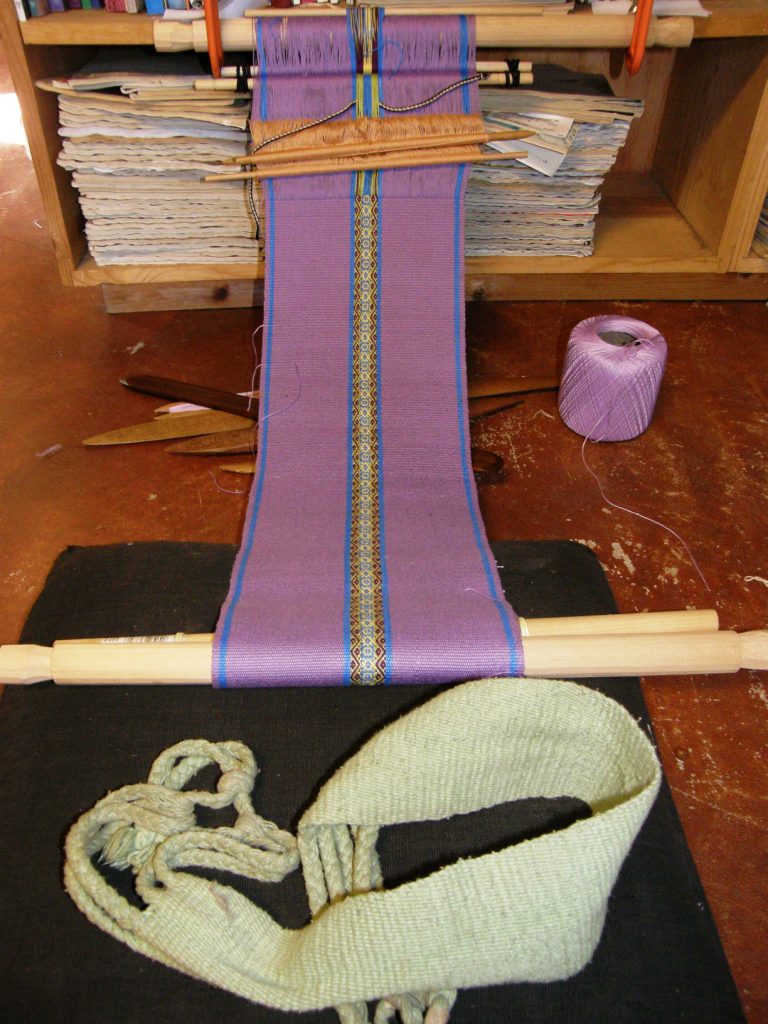
I learned about the use of circular warps on backstrap looms with the Montagnard (Vietnamese hilltribe) backstrap weavers with whom I studied some years ago and have used this kind of warp a few times in my own work. It is particularly handy when I want to weave a piece that is too long to fit in my weaving space on a single-plane set-up, like the purple scarf project below….

Here’s another long warp that I set up in circular fashion as a demonstration piece…

Above, you can clearly see the circular nature of the warp my Montagnard teacher, Ju Nie, is using.

One thing I have struggled with a little when using a circular warp is getting the warp well clamped and fixed in position in order to start the weaving. My aim has always been to clamp the warp so that I can start weaving as close to all the knots (where I changed colors in the warp) as possible. This creates the smallest amount of  loom waste. This has always involved a lot of fiddling and messing about, for me in my inexperience, with the threads slipping and sliding in their circle around the two end beams so that the knots eventually got very much misaligned. My warp that had come off the warping stakes in such good order would end up in complete disorder! Eventually I would get it clamped but there would be much more waste than I had anticipated because the knots had slipped so much out of alignment. Part of the problem is that I didn’t insert the coil rod while winding the warp. A coil rod in a circular warp has a very useful stabilizing effect even before you can actually start weaving.

I noticed that the Karen weavers set up their warp in a slightly different way which keeps the color changes in the warp perfectly aligned and in good order no matter how much messing about you do. They use two coil rods….one in the typical position beyond the shed rod and the other is positioned at the point in the warp where one would start weaving. This second one creates even more stability and locks everything at the color changes into position.

This is the way I would go about winding a warp if I wanted to replicate the set-up of the Karen warp I was given…

Of course, I can’t say that this is the way they did it themselves.

The two blackened circles are the two fixed stakes that hold the warp tension. Ca = the coil rod at the ”start” of the warp. Cb = the coil rod in its typical position beyond the shed rod. The stakes marked X hold the cross. I know that the Karen weavers use a hollow rod of large girth (H) to measure the length of the heddles that they create while they wind the warp. Later, a stick of much smaller girth is inserted in the tube. The tube is slid out from beneath the heddles and the thinner stick remains behind as the heddle rod.

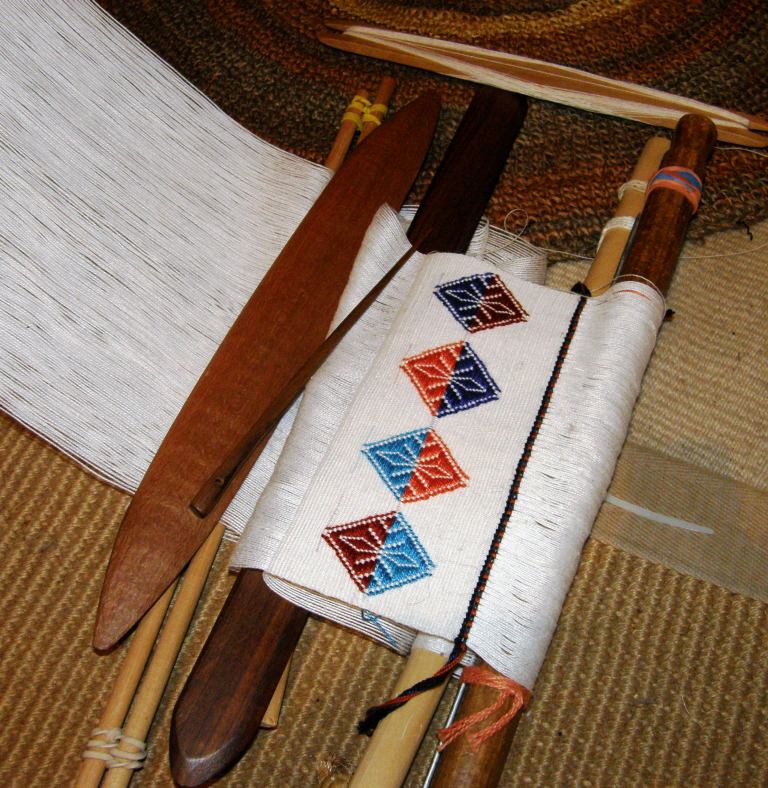
I could see from examining the Ca coil rod in my Karen warp that the first and last ends of warp were tied directly to the rod. At a color change, the tail of the old color would be left on standby until it was later called into use again. The new color would be tied to the rod. It all looks a bit disorderly there in the picture below but, wow, what a difference it makes to getting the warp nicely clamped and positioned so that the start of the weaving can be as orderly as possible!

I placed a stiff cardboard strip in one of the sheds at the coil rod which gave me a nice straight and even base against which to beat and started weaving from there.

In the very first picture I showed of the warp you may have noticed that there were two shuttles. The warp had been set up for some continuous patterning with supplementary-weft. The green weft was used for the ground weave and the white weft was the supplemental patterning thread. The warp included two patterning rods that raised certain warp threads in order to form the simple repeating pattern. These were placed in the same way that my Guatemalan weaving teachers had shown me.

I wasn’t really in love with the pattern and I also didn’t care for the fact that the ground weave was more warp-dominant than warp-faced so, once I had decided that I was going to actually sit and weave this piece (about three years after having received it!), I removed the patterning sticks and un-wove the six inches or so of cloth that had been started.

I used a thick piece of dowel to replace the pvc shed rod that I had removed. And then I put sticks in the original cross to get an idea of how wide this warp would be if I wove it as warp-faced rather than warp-dominant.

I am in the habit of first weaving a sample with new-to-me yarn before taking on a major project like this so that I know exactly what width to expect. That wasn’t an option this time. By putting in cross sticks and gently sliding them back and forth along the warp until everything settles, I can then push the threads around and get a pretty good idea of the where these threads will want to sit in my hands when I am in the driver’s seat. It’s worth noting that ten different weavers could work on this warp and all create different widths of good warp-faced cloth. The threads will behave in different ways with different weavers at the loom according to how how much tension each places on the wrap, how they beat and how they handle the weft. Something that was a little unusual for me was the fact that the warp was made up of doubled threads.

The first thing I had to come to terms with was the lack of order in the green strips. I am a bit nutty when it comes to symmetry. The green strips were all different widths. Well, the fact is that I didn’t come to terms with it and I cut and pulled out ends so that the two outer strips matched. I then made the two inner ones match too. They were slightly wider than the two outer ones. One white stripe was missing a couple of ends but I decided I would live with that!

ABOVE: In “jammies” on a wintry day trying to decide what to do about those uneven green bits!

From order to disorder….I then decided that the little supplementary-weft patterns that I planned to use, needed to be scattered randomly along the length of the piece. I don’t do random very well and every time I try, I find myself unconsciously slipping back into a pattern. I pushed ahead trying to be as little controlled by a need for symmetry and orderly patterning as I could.

There was plenty of warp to work with and so I decided the first part would just be about seeing if I had set the width correctly. Then I would decide on the motifs I would use, the material for the supplementary weft and the colors. The warp didn’t come with enough weft material to weave the complete project and so I used some white thread I have in my stash. You can see the turns of the white weft along the edges. A bit later I discovered that I did in fact have some green in my stash that almost perfectly matched the warp color.

Below you can see the fun moment when the ”starting coil rod” rounds the far beam and starts heading towards you rather than away from you. You finally get to catch just a glimpse of what you have woven so far….

The warp is in good order which is more than can be said about the contents of my cupboard!

And getting closer….and then closer….

In the picture above left you can see that I am using a shed rod attached with rubber bands to a second stick. These two form the system that I call the ”twisty sticks” and twisting them is what helps me to open a nice clean heddle shed without having the scrape the heddles along the warp. This way of operating the loom is one I learned from a backstrap weaver in Peru and is just one of many methods that I have seen backstrap weavers use.

In the picture on the right, you can see the flat stick (it’s actually a shuttle that I am re-purposing) that I kept permanently positioned in the ”back” shed at the shed rod. I would pull it down towards the heddle and then tilt it on its side to raise and clear that shed through the heddles. Then I would leave it lying flat once again within the shed when it wasn’t in use.

Getting veeeeery close….The two coil rods and the shed rod (I am using a two-stick shed rod aka ”twisty sticks”) are now so close together that if I wish to continue, I’ll need to change the large shed rod to a much slimmer one, which is what I did. With that, I was able to squeeze in another couple of inches.

And, this is where I called it quits….

All sticks have been removed and you can see the unwoven warp that connects the start of the woven cloth to the end. What a mess that is!

And here is the cloth straight off the loom….

One idea I have is to lay pieces of the cloth side by side, joining them with decorative stitching, and make a bag of some sort. I will let the cloth lie around for a while and see what other ideas come along.

Here are the simple sticks that went into this project from top to bottom…

far beam,

forked split rod (these are the ones that came with the warp but I ended up using the pair below them which I had bought from another backstrap weaver from Burma. They are much lighter in weight.),

shuttle (I didn’t use the stick shuttle that came with the warp as I am not fond of that kind of shuttle),

sword/beater (this is an old favorite of mine from back in 1995. It was originally a very long shuttle for my Navajo loom which was cut down and beveled to become a simple sword…love it!),

shed rod,

heddle rod and second heddle -”protection” rod,

starter coil rod (Ca)….interesting how it ended up a bit bowed!,

coil rod (Cb),

second shed stick which together with the shed rod formed the ”twisty sticks”.

Oh, and there was a second rod (not pictured) that was used together with the split rod to roll and secure the near end of the warp. I didn’t feel any need for a temple.

One other thing worth mentioning is that I have a new appreciation for the way my Guatemalan weaving teachers taught me to enclose the warp threads in heddles. This is the same method that the Karen weavers use and is also used by Yan, who brought her Li-style backstrap loom to show me, and Ju Nie my Montagnard teacher. I’ll expand on this in another post after I have done some experiments.

In the meantime, I must write to Bhakti and show her what became of her wonderful gift!


Backstrap Weaving – A new home for my ebooks: Taproot Video.

Patternfish.com has been the home for my e-publications since 2010 when Syne Mitchell first introduced me to its dynamic owner, Julia Grunau.

Sadly, after eleven successful years in business, the site closed its doors for sales on May 31, 2019. I would like to thank, Julia, Phil, Dale and all the team for the support they gave me over those nine years and particularly in the weeks and days leading up to the final closure. And, I would like to thank all of you who bought my e-books and gave me your vote of confidence right from the start when my first ebook, Andean Pebble Weave, was made available on WeaveZine.com back in 2009.

Now it’s time to move forward and I have found the perfect new home for new purchasers of my ebooks on the website of Taproot Video, which is also the home of my video class, Operating a Backstrap Loom. I couldn’t have asked for a smoother transition thanks to the hard work of the good folk at Taproot Video as well as those at Patternfish who were there to help out right to the very end.

As you can imagine, it will take me a while to update all the links to patternfish.com that I have placed in my blog posts over these nine years! The main links on the side-bar of my blog have been updated to Taproot Video and I have also included the links in the book titles below the next photo. Old links that continue to take you to patternfish.com will show you my old product page with a direct link to the new page at Taproot Video….at least until June 30, 2019, when the site may disappear all together. In that case, I hope that the message I have placed on the header of this blog will guide people to the right place.

Andean Pebble Weave

More Adventures in Warp-faced Pick-up Patterns

Complementary-warp Pick-up

Complementary-warp Pattern Book

The Eye-pattern Tubular Band and Other Decorative Finishing Techniques

Andean Pebble Weave on Inkle Looms

Foreign language editions:

Andean pebble Weave in GERMAN, FRENCH, ITALIAN and SPANISH

Complementary-warp Pick-up in GERMAN

Remember: if you have purchased one of my e-books from patternfish.com any time in the past but not yet downloaded it, please do so before June 30! Sales have ceased but the site will remain open for downloading purchased files until then. Please ask for help if you don’t know how to do that.

I hope you will visit Taproot Video after you read this blog post. While you are there, why not take a good look around at the other products that are offered, for example, video classes on tablet weaving by both John Mullarky and Kris Leet…cotton spinning by Joan Ruane….weaving on an inkle loom for beginners by Marilyn Romatka…sprang by Carol James…ply-split braiding with Linda Hendrickson… and  more.

As for me, I have more ebooks in the works which I will be offering at Taproot Video in the future.

In the meantime, I am pleased to say that I finished the straps for my big pocket bag and have sewn them on! This bag will go away with me on my next trip and we will see how my hand-sewing stands up to it! I am very happy with it and especially like the plain-weave tubular bands that edge the pocket and sides of the bag. The pocket is the perfect size for my iPod.

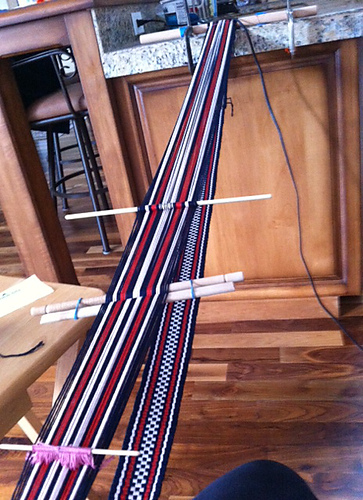
Right now I find myself sitting at an enormously long warp that was given to me by a weaver in the USA who had taken some classes from a Karen backstrap weaver. This was her student warp. It’s a circular warp and so it is actually twice the length of what you see here! It had about six inches of cloth woven and I have taken it back to the beginning to start afresh. I can only wonder what the weaver had planned for this long, long warp….perhaps a couple of scarves?

This warp has been sitting in my closet for a couple of years and now seems to be the perfect time to take it out and get it going again because I have received several questions from people about circular warps since I showed the picture of Yan Zhang’s loom in my last post. Following along with this project will help answer those questions better than words alone.

I have placed sticks in the original cross so that I can try to get a read on how wide this piece wants to be. It came with a simple temple ( a flat length of wood with pins taped to the ends) which would normally tell me the width but it was being woven as warp-dominant cloth rather then truly warp faced.

You can see the simple temple in the picture below. It’s the small stick at the bottom of the picture.

In the meantime, I need to get over the lack of symmetry in the stripes which is making my hair curl! This is me, below, pondering how difficult it might be to cut and pull out some of the green threads so that I can even up the stripes. And then there’s also the need to add a couple of white threads niggling at me. Pulling threads out is relatively easy but adding threads to such a long warp is not something I am willing to tackle!

There’ll be a full progress report next time….!


Backstrap Weaving – Worth the Wait

I had wanted to call this post simply “Waiting” but then had a funny feeling that I had used this title before. It didn’t surprise me. We tend to do a lot of waiting here in Bolivia. It’s a part of life and, after 15 years here (plus 5 more in Chile), I can hardly be annoyed or too put out by it. I Googled to check my use of this title and, yep, there it was in August 2012. I went back to see what all the waiting had been about back then. It was nothing to do with Bolivia at all…I had been waiting for some technical help with my second book and impatiently awaiting some exciting weaving events…all good stuff, as you can see below, and worth waiting for.

Some events from 2012

This week has been about a different kind of waiting. It involved getting up every day at 4am and trekking out to the SEGIP office to stand in line and…..wait. SEGIP issues visas and ID cards for foreigners. My ID card had expired and I have been trying since the end of December to move the paper work along. The office opens at 7am. You have to be there in a queue at 4.30am to get one of the 80 daily appointments. You wait in the street in the pouring rain or sun…we had both… and there’s no shelter.  I only wish I could entertain you with some nice shots of the sunrise or my fellow “waiters”. The sunrise was happening behind buildings and it was too dark most of the time for people shots. Today I succeeded! I was #46. I got to speak to someone.

OLYMPUS DIGITAL CAMERAAfter the Monday morning failure to gain admission, it was kind of fun greeting and seeing my fellow “rejects” the following days.

….the Brazilian medical students…always in large groups, always jolly, fun loving, even in the rain, and very, very loud.

…the Argentinians…recognizable by the thermoses that they carried and the little pots of yerba mate which they passed around and sipped and, of course, their gorgeous accent.

…the Mennonite gentlemen with their denim overalls and baseball caps, the ladies with their head scarves, print aprons and straw hats.

…the Russian Old Believer gentlemen with their long beards, piercing blue eyes and long, loose belted shirts. You have no idea how much I wanted to look more closely at those belts! They leaned on a fence with the Mennonites and talked about the recent rains on their land. There were some Mormon missionaries from the US looking so terribly young to be so far away from home.

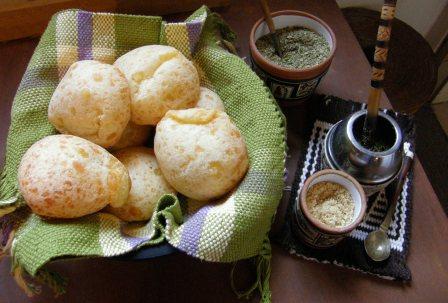
It was strange having so many foreigners gathered in one small place like that. Bolivian life is influenced in many ways by the cultures of its neighboring countries. Above, you can see the baked Brazilian snack called cuñape that is very much enjoyed here, and a pot of Argentinian yerba mate sitting on some of my backstrap woven pieces….a nice piece of Mennonite cheese or a pot of Mennonite honey would make it the perfect tea time picture.

The good thing is that, despite the wait and rejection on three days in a row, I managed to get home every day by 8.30am ready to face and enjoy a whole morning at the loom. That way, the pre-dawn expedition didn’t feel so much like wasted time.

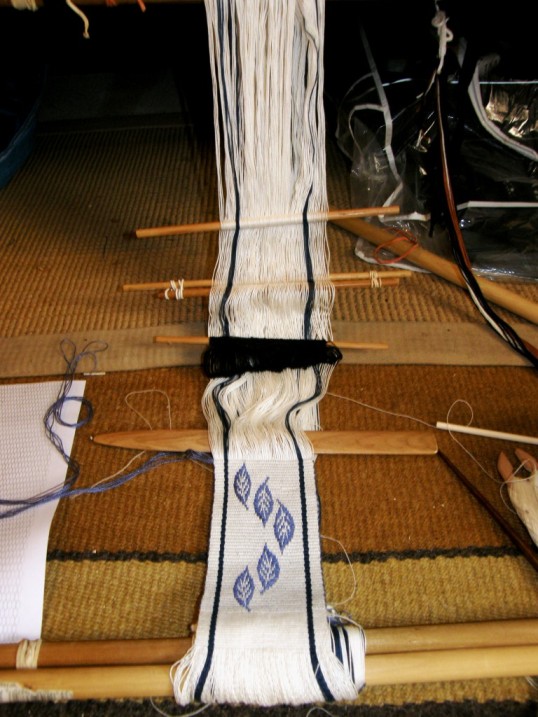
circular warp backstrapThis is one of the things on which I have been working this week. It’s the circular  warp that I took on my last US trip. I use it to show friends the different parts of a backstrap loom including the coil rod.  It’s been sitting here as just a white plain weave piece of cloth. I decided that it needed to have some pattern.

That is one of the things I love about patterning with supplementary weft . You can just add pattern to your plain white “canvas” at any time without a whole lot of planning. This warp had previously held a butterfly motif which I pulled out and replaced with this leafy design.

It’s interesting how different the same motif can look when woven with different materials. I created the leaf motif very recently for my discontinuous-warp experiment in heavy-ish wool. On that piece I had used wool as the supplementary weft.

My circular warp is fine cotton and I used tencel for the patterning weft. I also used a closer sett than I usually do so that the fine white cotton would cover the dark patterning weft well. The leaves that had looked so robust in wool  were thin and sickly looking in tencel on cotton so, I had to make adjustments to the original chart. The good thing about the finer warp thread is that you can use longer floats in the pattern and that allows more flexibility and options in the designing. I could use longer floats than the five-span maximum I used in the wool project. On the other hand, the single-span floats I used on the wool piece would  barely show up in the fine cotton. So, several adjustments had to be made to “fatten” the leaves and make the finer details more visible.

???????????????????????????????I don’t know exactly where this pattern is going from here,  but that is enough weaving for this warp for now. I placed the turns of the supplementary weft on the edge of the cloth rather than trying to conceal or camouflage the turns within the blue stripe as I usually do. I wanted to challenge myself to make consistently neat and attractive turns on the edge that would resemble little beads. I also turned the weft on the edge of the wool cloth. Those rather chunky turns are now hidden within the tubular edging.

circular warp backstrapAbove, you can get more of an idea of the circular nature of this warp and see the coil rod in position. The biggest difference I notice between weaving on a circular warp like this one and one in a single plane, is the ability to apply tension. There is a certain “springiness” to this circular warp which makes me feel like I can’t tension or beat as hard. This has me pushing with my feet (something I rarely do these days) in an attempt to apply more tension. Maybe that is why the majority of indigenous weavers I have seen using circular warps brace their feet against something as they weave. It is interesting to be able to compare the feel of the two kinds of warp set-ups this way.

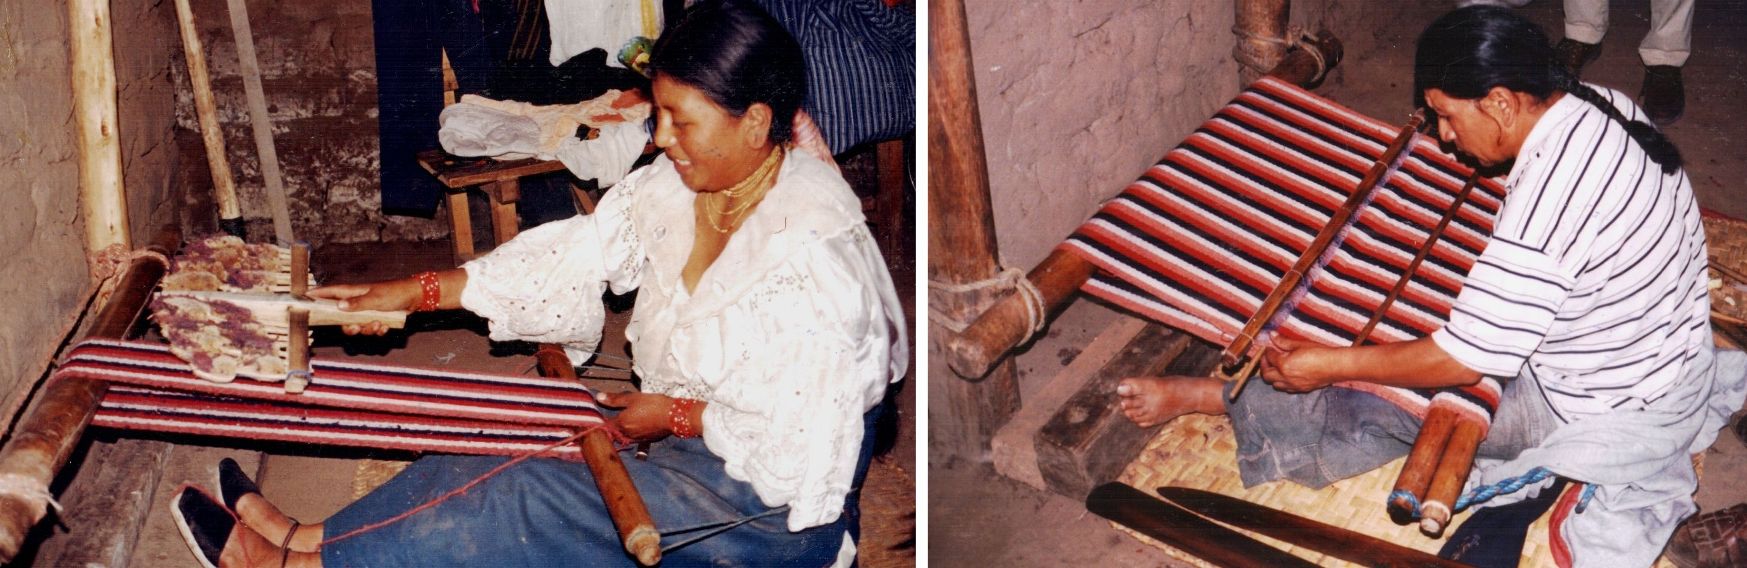
Weavers in Ecuador using circular warps brace their feet against piece of wood to help apply tension to the warp.
Weavers in Ecuador using circular warps brace their feet against blocks of wood to help apply tension to the warp.

At first, I decided that it would be an interesting challenge to just chart and weave one leaf and then see if, by reading from the one motif woven into the cloth, I could flip the design both horizontally and vertically. The challenge wasn’t met as it gave me a big headache! and so I decided to chart the four versions and go from there. I wrote a page some time ago which I added to my list of FAQs on my thoughts about the use or non-use of charts.

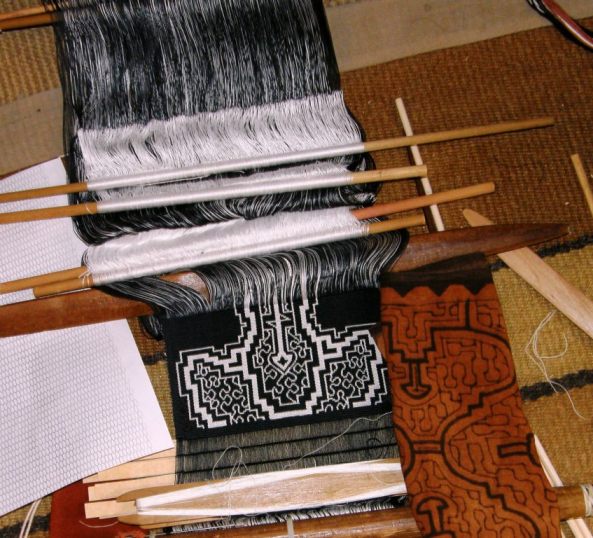
shipibo inspired wall hagnging panelMy latest wall hanging project uses a design I created and charted myself which is, for the most part, not symmetrical. It is a row- by-row slog working with an enormous pattern chart and was inspired by designs painted on cloth  by the Shipibo people of tropical lowland Peru.

Fortunately, for me, warp-faced double weave is one of the easier structures for reading the pattern  on the cloth because there are no warp-float lengths to be considered. Once a base line of pattern has been woven, it is easy and straightforward placing subsequent rows by referring to the preceding one without having to do a great deal of counting.  However, there are no small design elements within the large one that get repeated and which can, therefore, be eventually memorized.

The pattern is not one with which I am all together comfortable yet. What I mean to say, is that I am not sure that I like it yet! My eyes long for symmetry! I keep telling myself that I just need to WAIT (I have had plenty of practice with that this week!), weave a bit more, walk away, stand back, weave some more and allow it to develop. It is a design that has a lot of wiggly chaos within a rigid symmetrical outline. That’s the best I can do to decribe it for now. I just need to put a bit more of that heavy symmetrical outline into place to help me deal with the chaos!

I will wait. I won’t unweave. I feel confident that it will be just what I wanted in the end.

I was Googling some images this past week and came across some of my own things such as this…

Bhutanese motf supplementary weftI thought….wow, I remember that. I wove it at the start of my studies of Bhutanese patterns. Now, what in the world did I do with that? A quick search in the closet turned up nothing. And then I remembered…oh yeah, I unwove it because I didn’t much care for it at the time…too colorful or something like that. Maybe I should have WAITED. At least I took a picture of it before unweaving.

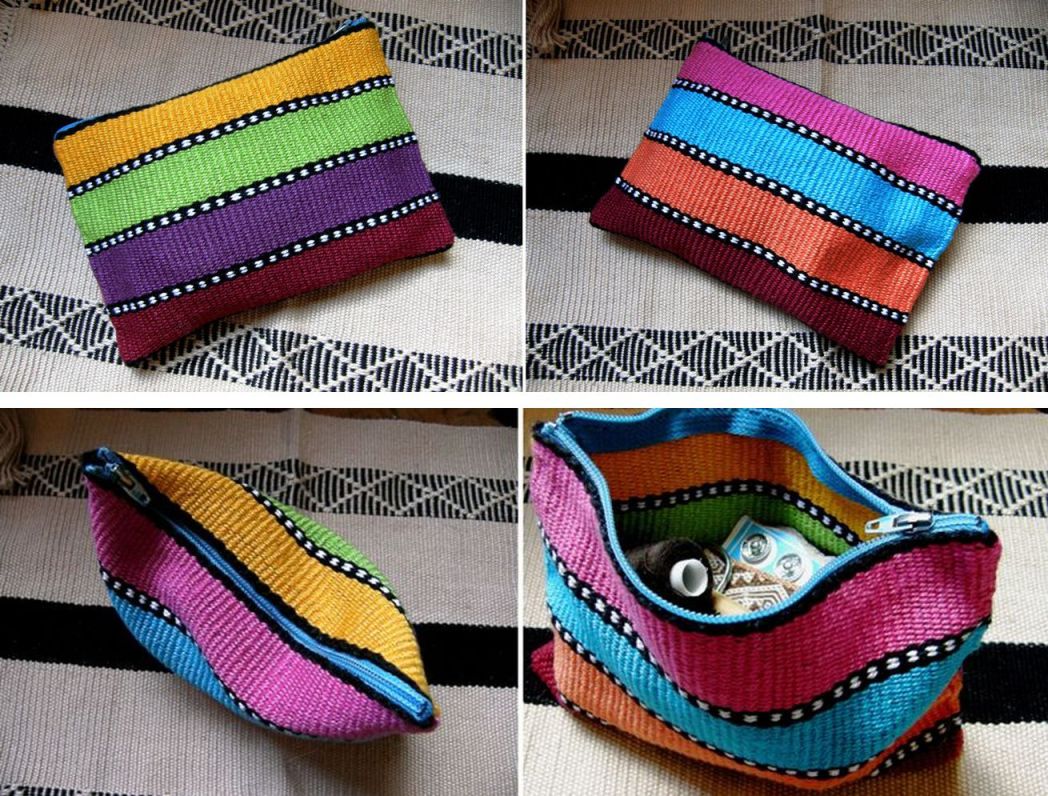
striped-pouch-x-4This had been a very hastily put together demo warp . I disliked the color combination so much that I didn’t even want to put it out to be seen. Nevertheless, I wove it off and sewed it into a pouch. Time has passed and now I just love my happy colorful sewing bag.

I am still waiting for this one to grow on me…

??????????????????????It was another travel warp into which I hadn’t put much thought. I was pleased to at least be able to use the finished fabric from the above warp for a tutorial on edgings.

Let’s see what online weaving friends have been up to…

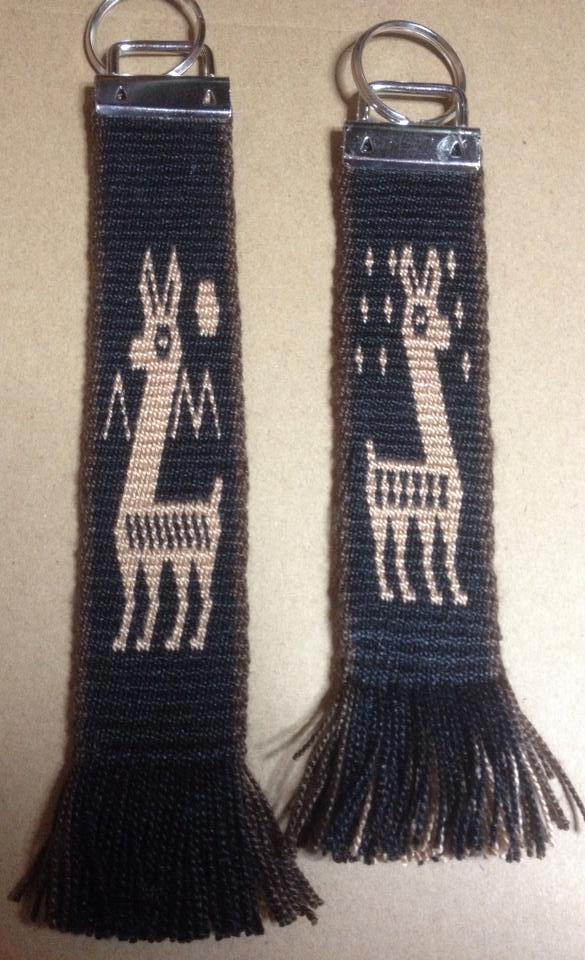
Scott is really getting into double weave and is now charting his own motifs. After working through my tutorial, he used the llama patterns to make keyfobs. I like those grippy keyfob ends…no sewing needed at that end. They are especially suitable for double weave which can be too bulky when folded and passed through a key ring.

scott (1) llamasNext he charted and wove the Norse Valknut motif…love it!

Scott's norse valknut motifI can’t wait to see what he comes up with next.

Jennifer finished her bag from our Ravelry Games weave-along…

Jennifer bag with chinchero patternsWhat a superb piece of work. She used denim which so perfectly matched the washed-out blue of her indigo-dyed hemp. Other pieces of colored fabric were used to frame the woven section. She finished it with a zip. 

lausanne pebble weave bandLausanne’s band is a lovely example of how simple 2 and 4-revolution Andean Pebble Weave motifs can be placed together to make new designs…something that I discuss and encourage in my second book. I love the way she has photographed it. It is so nice seeing lots and lots of band length like that.

Teresa in Chile sent me pictures of her first backstrap loom pieces using the tutorials on my blog for creating plain-weave bands with solid colors, comb patterns, and stripes. In this way she wisely develops and practices her skills in managing the backstrap loom with simple, fun, plain-weave projects. Now she is taking her first steps in creating patterns with warp floats.

teresa

I am glad that I didn’t have to keep you waiting for this blog post. Blog day is usually a strictly “at home” day for me consumed with taking photographs, editing and writing. I am just happy that I don’t have to get up at 4am again tomorrow!

See you next week.

Backstrap Weaving – Embroidery, Tatting, Quilting and, oh yes, the Backstrap Weaving :-)

Back home in Bolivia! My cat seems to have enjoyed her stay away in my absence in a home of Death Metal music fans… a noisy and action-packed home which also includes two kids and two parrots. She appears to need to sleep off all that excitement and has spent much of the last two days flat on her back with legs in the air, dead to the world.

Picture by Annie MacHale

Black Sheep backstrap weaving groupAs for me…I need a rest after all the excitement too! Was it really a whole seven weeks ago that I arrived in California and wove with my friends there? We had a very productive time weaving supplementary-weft patterns and the intermesh technique and spent one relaxing afternoon looking at my images and videos of South American backstrap weavers.

My trip ended in the same area. It was great to meet up with my Ravelry friend, Cookie, once again. She had woven with me at Janet’s place up north two years ago and brought along the pebble weave backstrap that she had woven for herself in the meantime.

Cookie's backstrap with pebble weave

This is a great example of taking one of the simple 4-revolution patterns from my first book and expanding it by weaving it side by side as a reflection of itself. Cookie also added some other small elements which made the pattern unique. It was almost impossible to recognize the orignal 4-revolution motif. I love it when people create their own pebble weave designs. This is a great way to approach it – with baby steps – first adapt and enhance an existing design and from there go on to create a motif that is entrely your own.

We used sticks to help pick up threads and pass the supplementary wefts. Cookie saw my Guatemalan pick-up stick and went on to create her own from chopsticks! See the original chopsticks on the right and then several versions of the pick-up stick that Cookie made.

Cookie's pick-up sticks from chop sticks

Days were spent weaving in Barbie’s home and I enjoyed my evenings staying with Kathleen. I got to stay in her cottage weaving studio in the garden and listen to the soothing sound of  the waterfall in the forest below. Kathleen’s home is decorated with textiles from Hungary, her husband’s homeland. Here are just a few of them.

hungarian embroidery and feltThe felt piece at top left comprises layers of wafer-thin pieces of felt using applique and reverse applique techniques. A Google search result tells me that this particular design falls into the category of Great Plain motifs, the Great Plain being the central plain of the Carpathian Basin. The motif dates back to the 18th century where it was first seen on the wool cloaks of the Hungarian shepherds.

I then uncovered a website which is a gold mine of information on embroidery techniques when I googled about Hungarian embroidery. This site is amazing! I will leave you to explore it. I will certainly be returning to it to learn more.

wood block for textile printsI can see myself doing embroidery one day should there come a time when I can’t weave with a backstrap loom anymore. As long as my eyesight is up to it!

I spent a fun afternoon with my weaving friend Dorothy. We went to an exhibit of Indian textiles at the San Jose Museum of Quilts and Textiles. It was a hands-on afternoon where we got to learn a little about Kantha embroidery. It was  an introductory session that any embroidery novice could handle just to get a taste as it is based on a simple running stitch. I attempted to embroider a classic paisley motif which is a mango shape. If I ever get it finished I shall show it to you.

We also got to play a little with hand-cut Indian wood blocks which are used to print designs on cloth. You can see the paisley pattern above. I think the wood blocks are a work of art in themselves. I also learned that you need to put some thought into the layout of the deisgn before stamping away like mad. I made a chaotic horrid mess!

I would love to know what embroidery stitch was used to create this piece that Dorothy bought from a Peruvian handcraft website.

dorothy's peruvian embroidery

The yarn was so fluffy that it was very difficult to isolate the path of the threads. The stitch had a braided look to it. I would love to know how to do it. Can anyone help?

dorothy's peruvian embroidery 1

palestinian cross stitch embroideryAt Gloria and Terese’s home, on my last night in the US, I saw this piece of Palestinian cross stitch embroidery that they had collected. I would love to know about the motif in the center. One pattern has been repeated from top to bottom while being rotated 90 degrees. Does anyone know about this motif and what it might represent? For more about these embroideries and the women who create them, take a look at this beautifully made site which has been put together with the support of the Red Cross of Iceland.

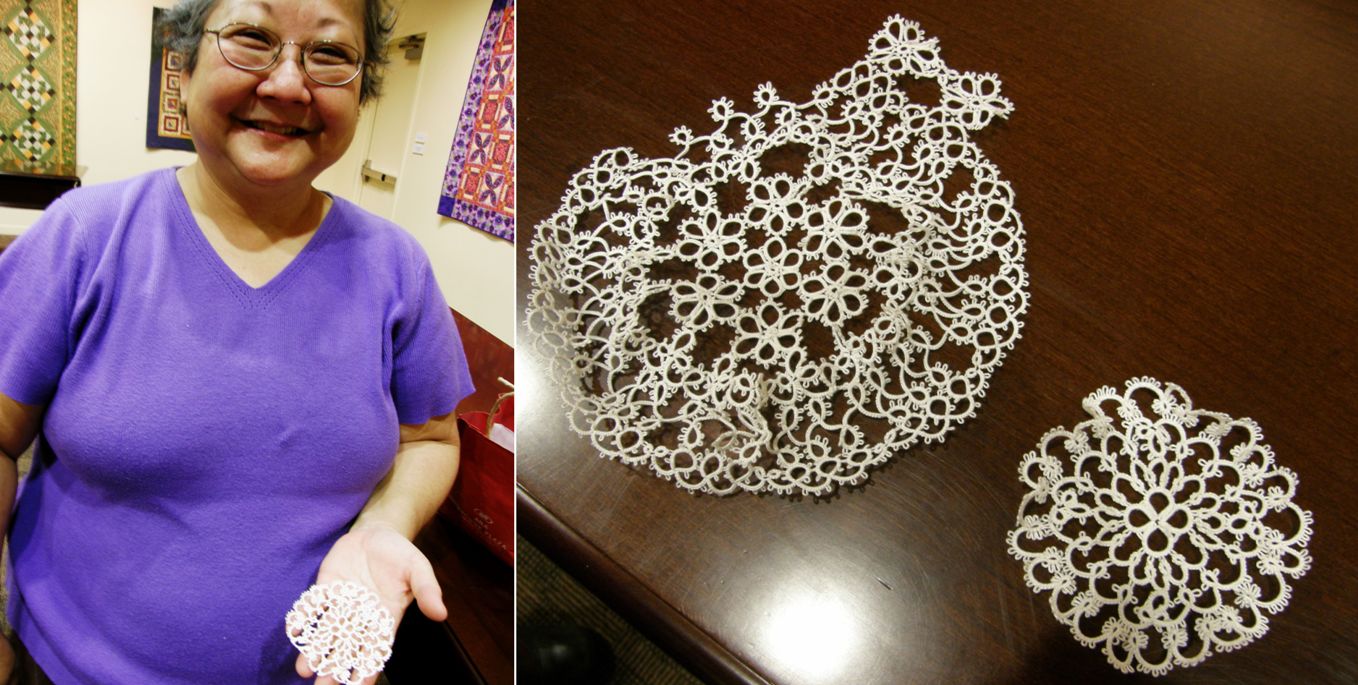
And, as always happens, when I learn a little about a new craft, examples of it seem to just fall out of the sky into my hands where ever I go! Not embroidery….tatting! One of the participants in the Indian texiles workshop was a tatter and showed me her work in progress. The larger of the two pieces will be a baby’s cap. I am in awe! Thank you, Vonnie, for teaching me to tatt.

tatting

And then I was chatting with Rachel, the barber, in an old barber shop in downtown Santa Cruz California while staying with my weaving friend Annie (I had created a bangs emergency when I got over enthusiastic while cutting my own). The result of that encounter is this…

tatting shuttlesRachel had recently got these as part of a big purchase of sewing supplies at an estate sale and was happy to pass them on to me. I think I had better get a-tatting! I like the metal one the best with the wee hook on its ponited end. Now the challenge is to see how simple tatting can be applied to my weaving. My online weaving friend Carol, who lives in Nicaragua, told me that this same idea also recently occurred to her. I would probably use wool instead of the super fine thread that is usually used for tatting.

dovetailing of two color warpsFrom embroidery to tatting and now back to a bit of backstrap weaving.

You may remember the discontinuous-warp piece that I got to play on. I wrote about it in my last post and have written several posts, like this one, about the technique.

I need to point out that this warp is not mine to keep. I was simply put in charge of transporting it from Yonat to Dorothy, its new owner, and my fee for the service was being allowed to play on it a bit! In any case, Dorothy needed a hand getting it going and I was happy to be of help.

This warp was used in a workshop on the ticlla technique that was given by Nilda Callañaupa in the US in 1997 and the project was never finished. Dorothy and I both had a lot of fun playing with it.

I wove from the end that had been started in the workshop and got the weaving on the other end established so that Dorothy could continue. Of course all the sticks are really too long for this project but this was the way it had been set up in the workshop and we didn’t see any reason to change things.

dorothy weaving the ticlla pieceYou can see that the warp has been turned around and there is Dorothy with the llama bone tool in hand beating in the weft.

dovetail section of discontinuous warp projectDorothy was kind enough to have me stay for a few days and there was precious little time to weave this together as Dorothy teaches art during the day. Coming home from a tiring day teaching art to children is not really a good way to face a tricky piece of weaving. So, while Dorothy was at work, I removed the dovetail stick in the center that holds everything together. A thick piece of thread remained behind in place of the stick. Then the join had to be stabilized by weaving on each side of it as you can see above. It is now up to Dorothy to finish the piece.

discontinuous warp piece stabilizedShe will continue to weave until it is impossible to open the sheds any more using the shed rod and heddles. Before she gets to that point she will be able to make things a little easier by using a thinner shed rod and passing the weft on a needle. The final stage will have her needle-weaving, picking up every other thread on the blunt end of the needle so that she can create a shed and pass the final wefts shots. She will have to do this on both sides of the center as each panel is a separate four-selvedge piece connected by the central dovetail join.

I enjoyed the chance to weave with the beautiful, beautiful handspun yarn that Nilda brought with her from Peru. It was so lovely to be able to bring this weaving back to life again sixteen years after it had been started. Yonat, who has been holding this warp since the workshop, wrote to me to tell me about its owner who has since passed away…

I thought I would tell you about the loom:

The name of the previous owner was Jean Davidson.  She was an amazing artist, curious to no end with an amazing sense of color and structure.

Her unique talent was her chenille-style quilts. She was an awesome lady, and I just feel like her energy is bubbling in that project that you guys are playing with.

Yonat also gave me a link to a site which shows the quilts that were part of an exhibit held in Santa Cruz in 2008 called Dreaming the Earth in which Jean participated.

The pieces in the show were inspired by creation stories from 
the indigenous peoples of Australia to honor the Arboretum’s Australian 
garden.  Most of the stories upon which they based their quilts were drawn
from a collection of Australian Aborigonal folklore by K. Langloh Parker 
(Australian Legentary Tales, 1997) available online (http://www.sacred-
texts/aus/alt/index.htm)  Abbreviated versions of these stories may be found next to the photographs of each of the quilts.


The quilts are beautiful and the stories delightful. It is really worth taking a look at the site. How nice to be able to weave on this piece that Jean started.


seat for backstrap weaving
If you are wondering about Dorothy’s set-up for weaving that I showed earlier, let me tell you more.


She had that built following instructions by my online friend Sharon on her blog. Sharon is really talented when it comes to DIY and improvisation and she told me about a cool seat, foot rest and warp hitching post that she made so that she could sit on the floor with her back against the sofa and weave. I posted the link here, Dorothy saw it and had it made. I got to try it and it is very cool. I like being able to brace my feet against something although I am wondering about the strength of the foot brace. There it is again above with one of my demo warps in place and a cushion on the seat for extra comfort.
synergo arts ergonomic benchMeanwhile, Bobbie from the Ravelry Backstrap Weaving Group reports that she has bought, for around $30, all the parts necessary for making the ergonomic bench  for backstrap weavers according to the plans put online by Synergo Arts.


We all looking forward to seeing how that turns out.
You can find plans for the bench with instructions on how to use which include a video here.


Other interesting textiles that I saw on this trip…
Mark showed me a woven cotton saddlebag. It is from the Piura region of Peru and I had never seen anything like it before…the jaw-dropping diversity of Peruvian weaving!


The red and black designs are warp patterns. The other colors that fill in parts of the main motifs are supplementary wefts. I love it when warp float patterns and supplementary wefts are combined this way and have only seen that once in an old Mexican belt. The tails of the supplementary wefts were left hanging out on the inside of the saddlebag pockets. There is a similar piece on this site which is dated at 1930-39.
saddle bag piura peru
 And, this is a four-selvedge piece!
four selvedge cotton weaving
If you look very closely a little way above the paper label you will see where the very last weft shot would have been needle woven into place. Thinking about doing a four-selvedge piece with cotton makes my hair stand on end! I tried it once….maybe one day I will try again!


I have more to show but will leave it here for this week. Let me end with Jennifer taking up the love of the curious coil rod. She placed one on a band which had started its life on her inkle loom. After transferring it to her backstrap loom she was disappointed to see that it had developed a serious ridging problem…that old corrugated cardboard thing that I have discussed here many times and have finally managed to conquer.

Coil rod to the rescue! More about that next week…

jennifer
This is going to be a beautiful guitar strap!


Well, it’s back to cleaning seven weeks of accumulated dust and getting things in order. Hopefully, I will be back at my loom soon.

Backstrap Weaving – The Curious Coil Rod

Are you ready for this week’s dose of red, black and white?

3 red black and white backstrap weaving hangingsI have quite a good selection of colors with which to work here in Santa Cruz. None of the colors go by fancy names. They are pretty much the basic tones. Therefore, when someone asked me to pass them the “chartreuse” yarn for their weft in one of my workshops, I had  no idea what they were talking about. Here, we get dark green and light green. But, I have to say that there are enough colors here to keep me happy.

Why then do I keep being drawn to black? I guess there is just something so clean and sharp about black and white.

Even the local Guaraní weavers can’t resist going back to this combination from time to time despite the fact that many of them use the same brand of colored cotton that I do…

guarani black and white weavingsThe third piece in my wall hanging series with the Wayuu-inspired design is an inch or so away from being finished. Naturally, as I have sat there these last few days picking up threads and heaving open the sheds, my thoughts have been turning to my next project. It will probably be a purple scarf decorated with supplementary wefts using cotton yarn from Guatemala and mostly silk supplementary wefts.

colors for next backstrap woven scarf
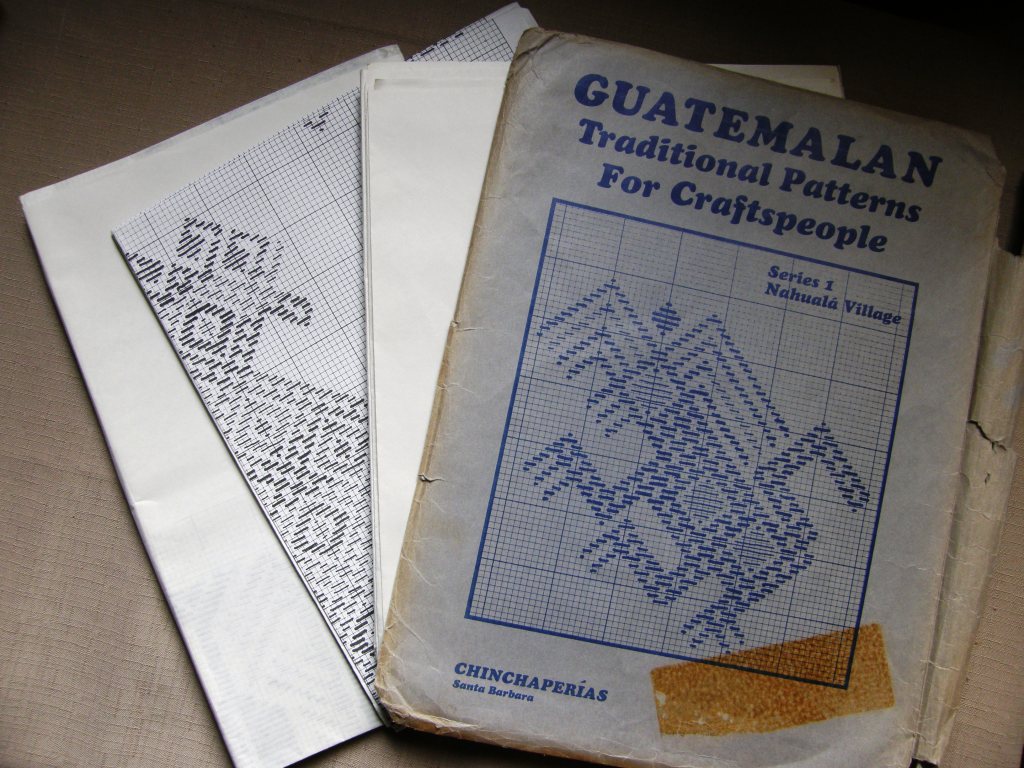
Guatemalan pattern chartsI am still planning the motifs and, while digging around at the book shelf, I unearthed a packet of patterns that was given to me by Sharon, a Weavolution weaving buddy, a year ago.

The packet contains three enormous sheets of detailed Guatemalan motifs. The front of the envelope states that this is Series 1 from Nahualá Village. Nothing on the packet or within indicates when these patterns were charted, by whom or how many packets comprise the entire set. Imagine if this person or people graphed patterns from dozens of villages!

Happily I tracked down another packet, series 3, on Ebay and it seems that there is a weaving guild that may have some others in their library.

However, I probably won’t use any of these motifs for my scarf. I have something quite specific in mind that I learned when I was studying in Guatemala but which also has a slight Bhutanese influence.

I told you about circular and dovetail warps last week and I have decided that I will make a circular one for my scarf. That will keep me in good foot-bracing distance from my bed. Winding a circular warp is straightforward enough. I was easily able to make some changes to my standard warping board to make this work well.

warping set up for circular warpThe two off-set stakes to hold the cross were all I needed. However, that picture is cropped and the following shows the complete set up…

circular warp set up with coil rod stakeThe extra unnecessary stake was incorporated so that I can try to learn more about the mysterious coil rod. So far, I have not seen a coil rod being used in Bolivia and Peru. The first place that I came across one being used was Ecuador. It was in the ikat- weaving town of Bulcay and I had no idea at the time what this piece of equipment was.

ikat weaving loom Bulcay Ecuador

There is a black arrow pointing to the coil rod in the above picture…the thin stick just below the upper beam.

ikat weaver Bulcay Ecuador

When I visited with this weaver, I was concentrating more on seeing how she prevented having the warps move out of alignment and excessively blur the ikat pattern. I suspected that the coil rod was her”secret weapon” but when I asked, she told me that it had nothing to do with it. Actually, I have to say that she was not very keen on answering my questions. Let’s face it…not everyone is fond of having strangers hang about pestering them with questions while they are trying to weave! She was nice enough to let me sit by and watch and take pictures.

coil rodDennis Penley, author of Paños de Gualaceo, writes that the coil rod, (he calls it a “rolling stick”) in Gualaceo, one of Bulcay’s neighboring communities, is added once the warp has been placed on the loom. He says that the warp threads are wound around the stick in bunches of ten. The stick serves to stop the warp threads from slipping.

You can see how the warps have been grouped in the above photo and the way they are coiled about the stick at left.

Of course, as time went by, I discovered that coil rods are used by many backstrap weavers who work with circular warps and I have since seen many examples of weavers in Asia using them.

When I met and got to spend a little time with Burmese weaver Dar Ku in Massachusetts, I noticed the coil rod in her loom.

O

It is the rod furthest from the weaver in the picture. I didn’t think at the time to ask her if she added it after or during warping. I was concentrating more on her use of supplementary wefts to make her patterns and the fact that she was weaving her designs while looking at the wrong side of the cloth! Her heddle system was also very interesting. You see, there are just so many wonderful things to see and take in when you watch a backstrap weaver at work!…what is the shape of her sword, how does she open the heddles, how hard does she beat, what does she use to pick up her threads and much much more!

As she wasn’t weaving ikat and her warps could move without causing any harm, I assume that the function of the coil rod in this case is to help maintain width and keep the warps spread and in order in the potentially messy area beyond the heddles and shed rod.

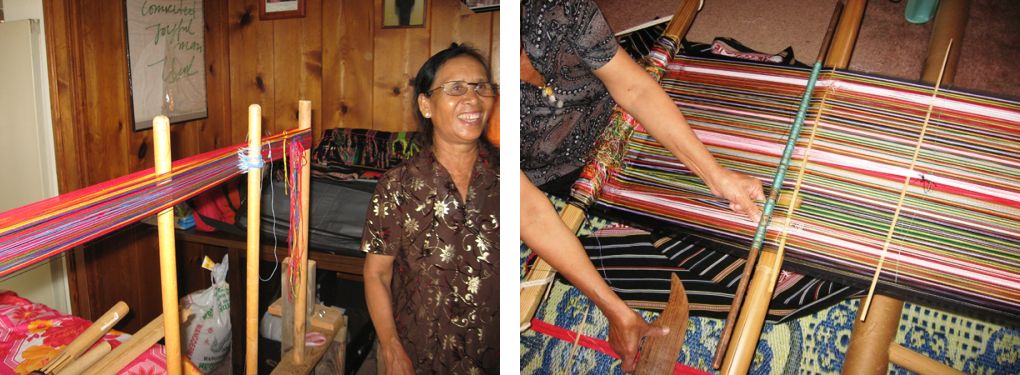
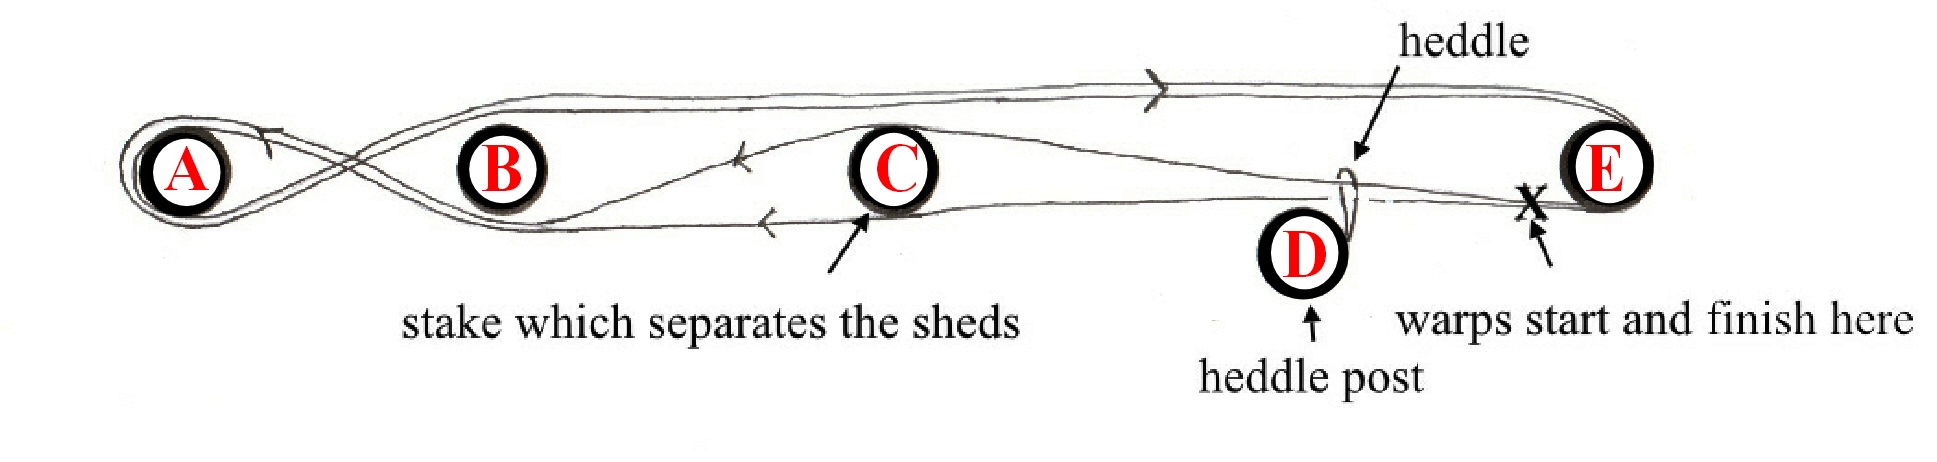
The one time that I have seen a warp being made which incorporated  a coil rod was when I studied with the Montagnard weavers in North Carolina. Again, there was so much to see especially since this was also the first time I had watched a weaver add heddles as she warped. Naturally, much of my attention was focused on that.ju-warpingThis is what Ju Nie’s warping path looked like…

Rhade warping pathIf you flip this upside down, you will see that my new warping set up was designed to resemble this. Stake C on Ju’s set-up separates the threads into two sheds. Stake D  holds the heddles that Ju makes as she winds the warp. Stakes B and E will be replaced with the backstrap loom bars. Stake A will be replaced by the “curious” coil rod.

As I am not going to make heddles as I go, stakes C and D on my set-up will hold the cross.

circular warp set up with coil rod stake

Here is a diagram showing the two-revolution warping path to complete the cross in my set up…

warping path with coil rod cross

From left to right…loom bar 1 will replace the first stake. The next two stakes will be replaced with cross sticks….I used pencils. Loom bar 2 will replace the next stake and the last stake on the right will be replaced with the coil rod. Below you can see how it looks when taken off the warping board. I have just wound a tiny warp and used some random sticks for the sake of this demonstration.

circular warp with coil rod on loom

Below you can see the loom almost ready for use. What remains to be done is make the heddles and select a suitable shed rod.

O

The yellow and green pencils are holding the cross. Heddles will be made to raise the threads that pass over the yellow pencil and a shed rod will replace the green pencil to raise the other half of the threads.

The coil rod has been rolled from its original position, in the picture below left, over the loom bar into its new position as seen below right.

coil rod put in position

This is what it looks like on Ju Nie’s narrow warp.

ju nie's coil rodSo, I know how to wind a circular warp and put the coil rod into position now…yay. The question remains…what exactly is the purpose of this wee stick? I guess I will find out as I weave my purple scarf. I suppose I will have to weave with a coil rod for a while and then without one in order to note the differences.

In Weaving and Dyeing in Highland Ecuador, Anne Rowe notes that the coil rod, as used by the ikat weavers in Azuay Province, helps secure the slippery cotton warp and maintain an even width for the fabric. However, it is not used by cotton ikat shawl weavers in Rumipamba. I imagine that the resulting shawls in both areas are equally well made.

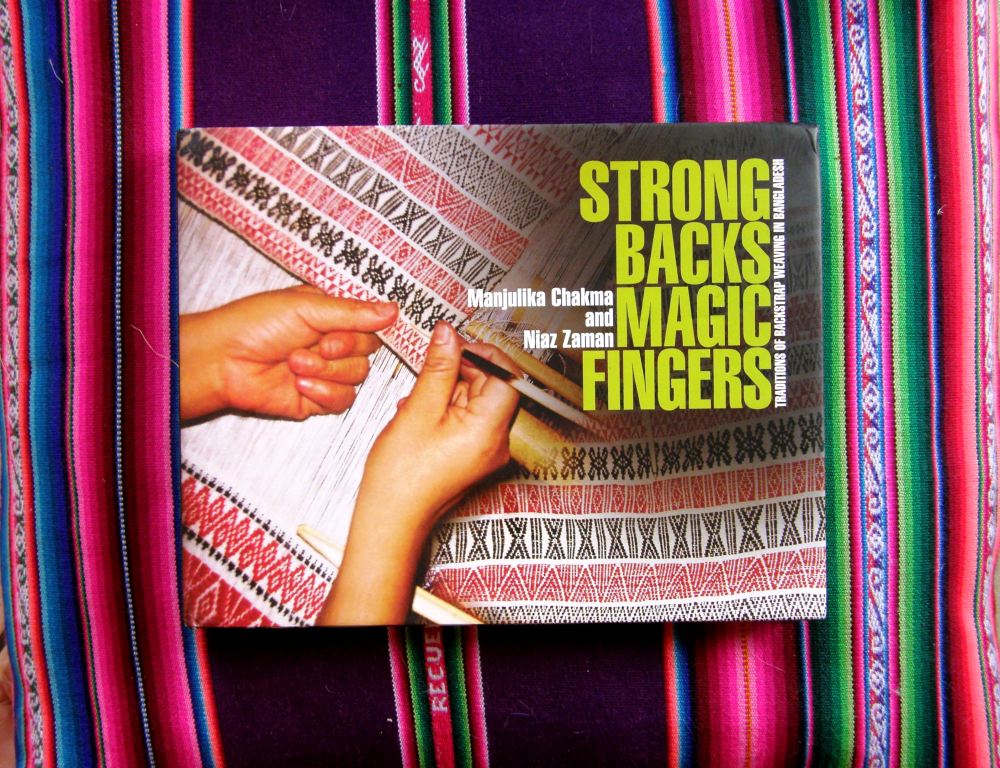
I have a book on backstrap weaving in Bangladesh, Strong Backs Magic Fingers, which describes the looms and textiles woven in twelve areas of that country. While the vast majority of the looms shown have coil rods,  some of them don’t. Certainly those that have the finest and silkiest looking thread always do. Yet, some weavers manage happily without them. It appears to be more of an aid than a necessity. Perhaps it is simply tradition that has some weavers using one.

Strong Backs Magic Fingers

I am kind of excited about having this new piece of equipment to experiment with!… a mere stick.

In Spiritual Fabric, Sadae Torimaru calls the coil rod that is placed in a body-tensioned loom used to weave narrow bands in China a ”temple stick” and says that it is used to keep yarns and width constant.

Some of you may like to read Maria Christou’s thesis An Ethnographic Study of the Loom and Weaving of the Sa’dan Toraja of To’barana’. Her research took place on the island of Sulawesi, Indonesia and on page 26 she ponders the coil rod and quotes the thoughts of other researchers on its purpose and use. It would seem that she found the answers to her questons in the course of her one year of study. I have to confess that I haven’t gotten that far in my reading of her paper to know for sure….printing out to read this weekend!

If you have made it this far in reading this post, thank you for bearing with me in my ramblings about a stick!

And so, let’s enjoy looking at some of the fruits of  these looms we have been talking about.

weavings Bangladesh Montagnard Burma

You can see a length of black skirt fabric with warp-float patterns woven by Ju Nie with a weft-twined edge added by her sister. The back cover of the book on weaving in Bangladesh shows the supplementary-weft patterned work of Chakma weavers and Dar Ku shows the white cotton fabric she wove for a dress as well as a richly patterned traditional blouse.

For those who may be curious about how Ju Nie adds heddles as she winds her warp, here is a video I made explaining it.   Ju Nie works way too fast in the video that I took of her doing it!

Wonderful, isn’t it? Maybe one day I will do this. For now, I find it very relaxing sitting at my loom and making my string heddles. There’s always something new to learn!

I will leave you with a video of Dar Ku weaving. She has such a beautiful peaceful way about her…