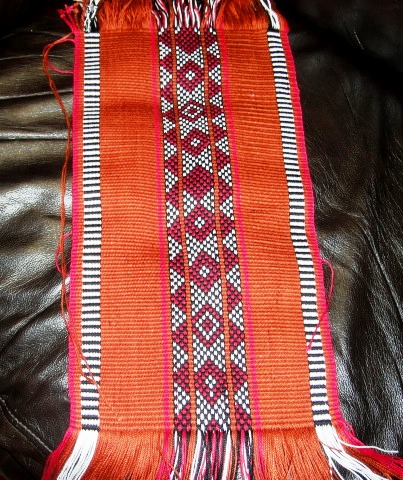
Backstrap Weaving – Cutting Corners

CUTTING CORNERS

Guarani weaver, Angela's cell phone pouches.
Guarani weaver Angela’s cell phone pouches.

Amongst other things, I have decided to do a little tutorial this week on cutting backstrap woven fabric and covering the raw cut edge with a protective band.

This is my latest favorite way to create the flap on a bag and I was given the courage to try this when I saw some of the work of my GuaranÍ weaving teacher here in Santa Cruz.  She makes cell phone pouches with rounded flaps. I don’t know the steps that Angela takes to create these and so, have come up with my own. Possibly I am a bit over-cautious in my ways, but my system works for me and I am pleased with the results.

cell phone pouchesMaking cell phone pouches is one of my favorite ways to use a piece on which I have been sampling structures or patterns. You can see the different ways in which I have formed the flaps. This often depends on just how much fabric I have to use. The alpaca sample bottom left, for example, is closed with a drawsting as there was not enough cloth to make a flap. The example at top left has a  flap that was cut to shape and then covered with a tubular band.
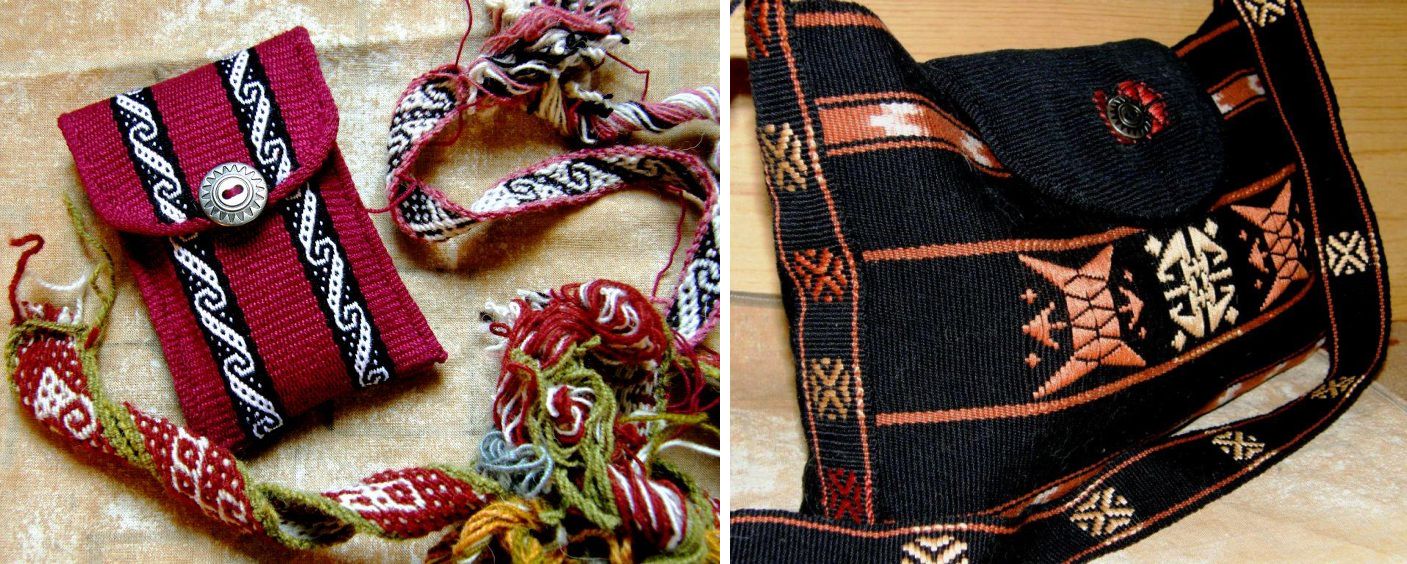
rounded flapsHere are a couple more examples. The flap on the black bag was woven with quite a lightweight fabric compared to that used for the cell phone pouches. The tubular band, therefore was a bit heavy for it and caused the edges of the black flap to curl inward giving a convex shape. As it turned out that actually had its advantages! When the bag is filled with things and takes on a rounded shape, the flap curves nicely around it.

My latest bag project also has a rounded flap which is edged with a tubular band…

backstrap weaving bhutan bag

ikat robe at folk art marketI had been calling this latest project “Tales from the Subcontinent” as it comprises designs from Bhutan and Afghanistan.

However, now it carries an element which has been influenced by Central Asia. Its closure tab was inspired by tablet- woven trim on Uzbek ikat-patterned robes.

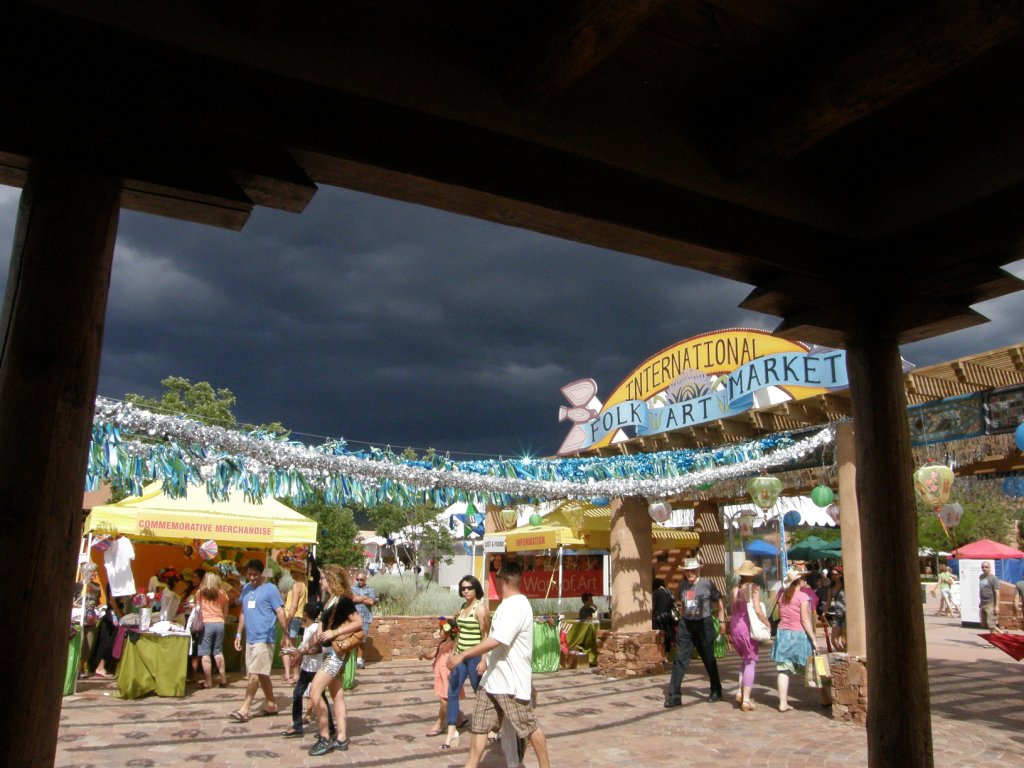
I showed you pictures last week of the Uzbek garments that I saw at the International Folk Art Market in Santa Fe NM with their tablet-woven edging bands.

I give many thanks to Ute for writing to me and sharing what she knows about the Uzbek bands as I was about to launch myself onto the wrong path trying to weave one using threads in 4 holes of the tablets. Ute told me that they are created using only two holes. With my limited tablet-weaving experience, I would have been lost without that valuable tip.

Uzbek two hole tablet band with my experimentsstThe little wristband that I bought at the market is in the center. I changed things a little in my experiments eliminating the dark outer color and altering the way the red stripe was set up. I made a sample in a medium weight cotton to start and then made the final piece for the closure tab on the left. Originally I had wanted to make the entire strap for the bag in this technique but decided that it was a bit too “busy” to play such a major role in this piece which was already highly decorated.

backstrap weaving Bhutan bag???????????????????????????????In this picture I just placed a silver button on the closure tab but I was not all together happy with the way that looked.

And then I remembered that I had coins from my trips to Nepal back in the 80s and 90s.

The smaller one would do perfectly and would be in keeping with the “subcontinent” theme.

I just had to polish it up and then get creative in finding a way to attach it.

You can see the more subdued strap pattern, above, that I used in the end. I used the same pattern as that on the edging band for the flap.

So, “Tales from the Subcontinent” is in search of a new name. I won’t say that it is finished yet as I am now thinking….Wouldn’t it be cool to have some black and white ikat patterned cloth with which to line it?….a sort of “inner bag” with a drawstring top…

bhutan bag front and back

So,  now we get to “cutting corners” and transforming a straight-edged flap into a rounded one…

I am using the lavender Andean Pebble Weave fabric that I was on my demo loom during my last trip. I really don’t like it much and decided that I could at least use it for a tutorial…

STEP ONE: Choose the curve…

???????????????????????????????I have a small plate that has the right curve for the width of fabric that I am using. I used it for the black bag and saw that it would also work just fine for the lavender piece.

STEP TWO: Make a template.
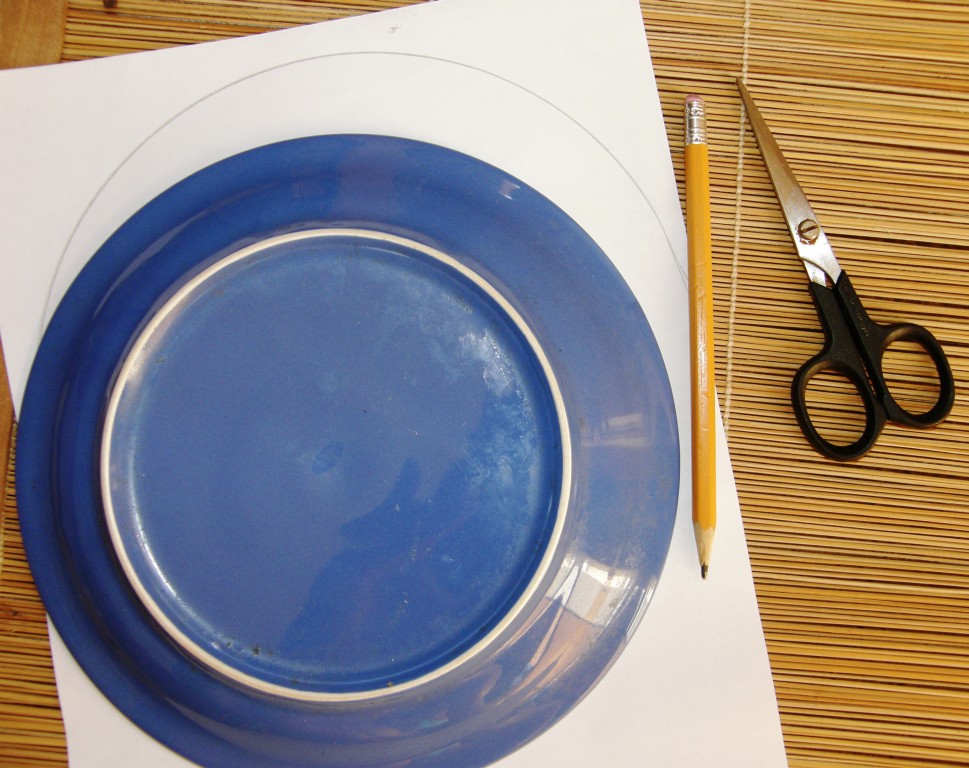
???????????????????????????????I traced the curve on paper and cut it out.

STEP THREE: Pin the template to the fabric and sew along the edge.
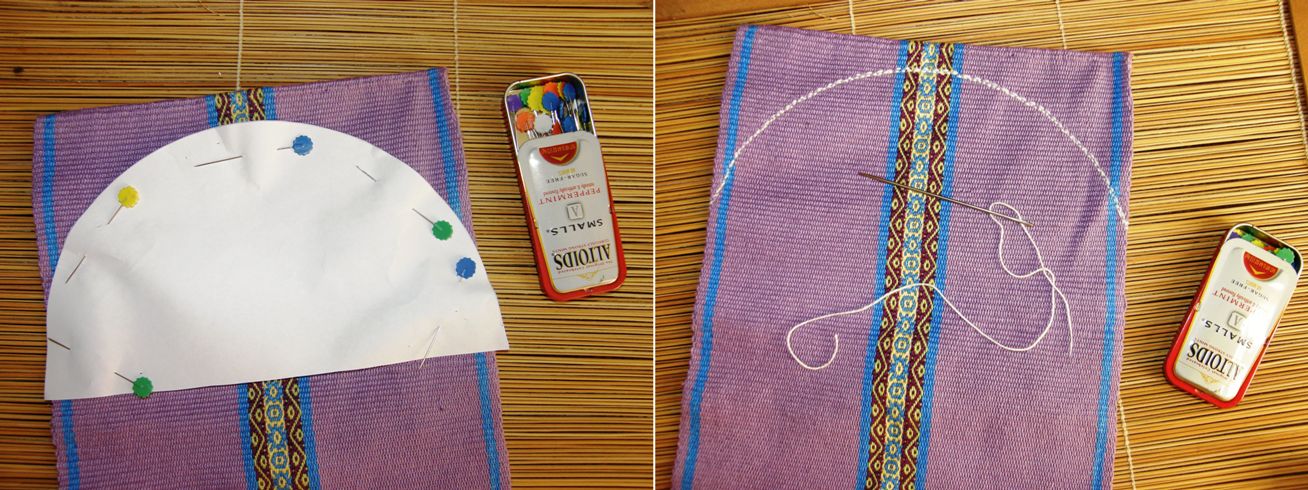
sewing around templateI sewed by hand and used crochet cotton for the thread. It’s a good thing that beauty does not count! I backstitched from one end to the other and then returned using a running stitch for extra security.

STEP FOUR: Paint diluted white glue onto the stitches.

???????????????????????????????

I used white glue, or carpenters’ glue, carpi cola , as it is known here. I diluted it with water, painted it onto the stitches on both sides of the cloth and waited until it dried before proceeding.

STEP FIVE: Cut the cloth and glue again.

???????????????????????????????I cut close to the stitches and then applied more diluted glue along the edge of the fabric. The glue goes on white but dries clear. The fabric I am using is dense and I needed to make sure that the glue got right into the weave. As the glue was drying I pinched the threads along the edge together to seal the edge. Once it was almost completely dry, I gave the edge a final trim (this is easier to do when the edge is still damp and supple). You may need to trim some loose weft ends or tidy up the edge a bit. Once it is dry and stiff, it will be harder to make fine cuts.

STEP SIX: Weave and sew your band to the edge.

???????????????????????????????

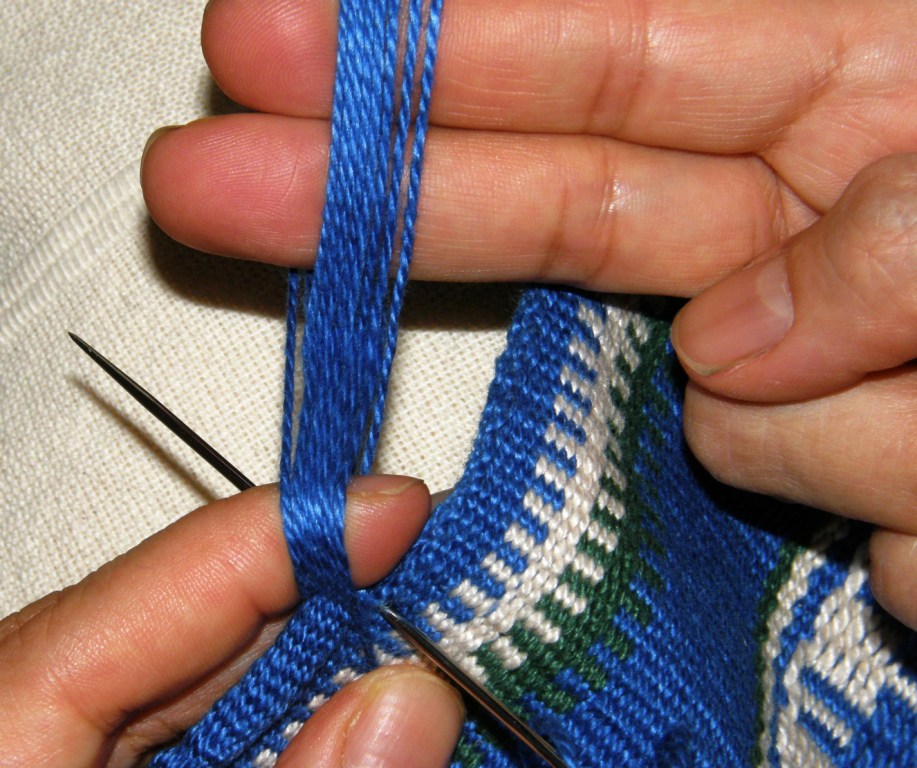
??????????????????????Now you have a nice stiff secure edge to which you can attach a band. See this tutorial for instructions on weaving and attaching tubular bands.

Judge the width of band needed to bend around the edge and cover the stitches and create a warp accordingly. Note that it is easier and often neater to weave these bands using a heavier yarn and few warp ends than fine yarn with many ends. I used a finer yarn here as I did not have a matching color in my heavier yarns. I used a heavier yarn on my recent black bag project and feel that that band is more attractive.

Make sure that your needle clears the glued stitches on both sides when it pierces the cloth. This way, the stitches will be completely covered by the band. Practice weaving and sewing bands many times on scrap fabric. It takes a while to have them turning out neatly and you don’t want to spoil your good fabric until you feel confident with the technique.

As for what to do with the warp ends when the band is done, I have suggestions for that on the tutorial page.

So, with the black bag finished to the point of being able to use it, I am now supposed to be getting on with the next in the wall hanging series. I had gotten as far as winding the yarn off skeins into balls for warping. And then came a distraction.
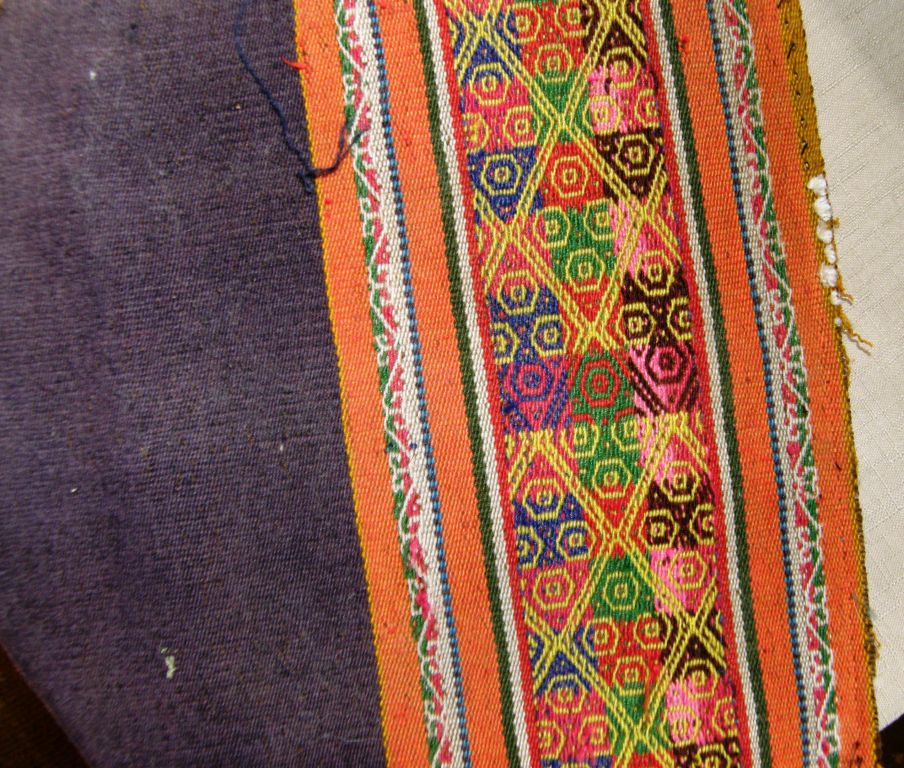
???????????????????????????????I don’t know what it is about arriving home after a trip. I have this urge to get rid of stuff that goes on for about a week. It’s great! It feels so liberating. So, stuff has been  given away and ejected. The above piece was the cover of a photo album that I was given.

I removed the album to toss and kept the cloth. It reminded me that it has been a long long time since I last played with three colors in complementary-warp pick-up.

I have done three and four-color pieces (see the header of this blog) which are not double faced.

??????????????????????

??????????????????????Here you can see what I mean by “not double faced”. I made this years ago and decided to hang it unfinished on the wall. It also reminds me that I used to get this beautiful fine wool/alpaca yarn when I lived in Chile. I used some leftovers of that yarn when I first came to Bolivia to weave this. How I wish I could get that yarn again.

The piece on the cover of the photo album is double faced. Only two colors show togther on each of the two faces at any one time…color A and B on the upper face and color B and C on the lower one. It is a bright and jolly piece and I love how the weaver flipped colors for just that one small section along the way…you can see how the yellow eyes on the green suddenly change to a red eye in just that one small part. Whether that is the center of the piece, I will never know as it was cut up to make the album cover.

Side A
Side A
Side B
Side B

So, this is what I am playing with and what kept me up past midnight last night. These are the two faces. I wish I could make a smoother transition from the red background to the beige but this defeated me at 12.30am. I suppose it would be easier if my design weren’t continuous. This is a sampler to get my head back around the technique.

#########################################

Some news… Deb McClintock has started setting up her blog again after losing most of her web page content some years ago in some sort of internet glitch…..heartbreaking. It’s all about simple looms in SE Asia and promises to be wonderful. Deb was invited to lecture last month at the Textile Museum in Washington DC about Laos textiles, looms and techniques. Her new blog is entitled Looms of South East Asia.

And, of course, don’t forget my Australian mate Wendy Garrity’s blog about Asian textiles and looms…Textile Trails. Wendy provided a link in last week’s comments to a picture she took of a notched stick on a loom in Nepal that looks very much like the one I was admiring on the backstrap loom from Myanmar at the Santa Fe Folk Art Market. She was also able to extract more information about the tablet woven bands from the Uzbek representatives at the Folk Art Market than I was!

##########################################

???????????????????????????????More news…..AUSTRALIA!

I will most likely be going back to Sydney for a visit in late November and would very much like to meet other weavers!

The decision to make this trip has been a very recent one which makes getting people together for this a little difficult as it is so close to Christmas.

I haven’t been back in 4 years and am very excited. I’m looking forward to hitching my loom to a eucalyptus tree and weaving while listening to the magpies and kookaburras.

The kookaburra picture at left was taken by my brother.

Backstrap Weaving – Hooray Santa Fe!

??????????????????????????????????????????????????????????????The last part of my US summer trip was spent in Santa Fe, New Mexico.

It had been a dream of mine for some time to visit the city’s annual International Folk Art Market and this year everything just fell beautifully into place.

My friend Annie and I had talked about the vague possibility of this visit months and months ago. Neither of us knew back then whether it really would happen. I couldn’t think of a better person with whom to visit the market.

Even when weaver friend Wendy visited me in Bolivia back in May and I found out that, by coincidence,  she was also planning on going, it was still pretty iffy.

And then, when Marilyn, whom I met at ANWG in June, said that she too was going, I knew that it just HAD to happen.

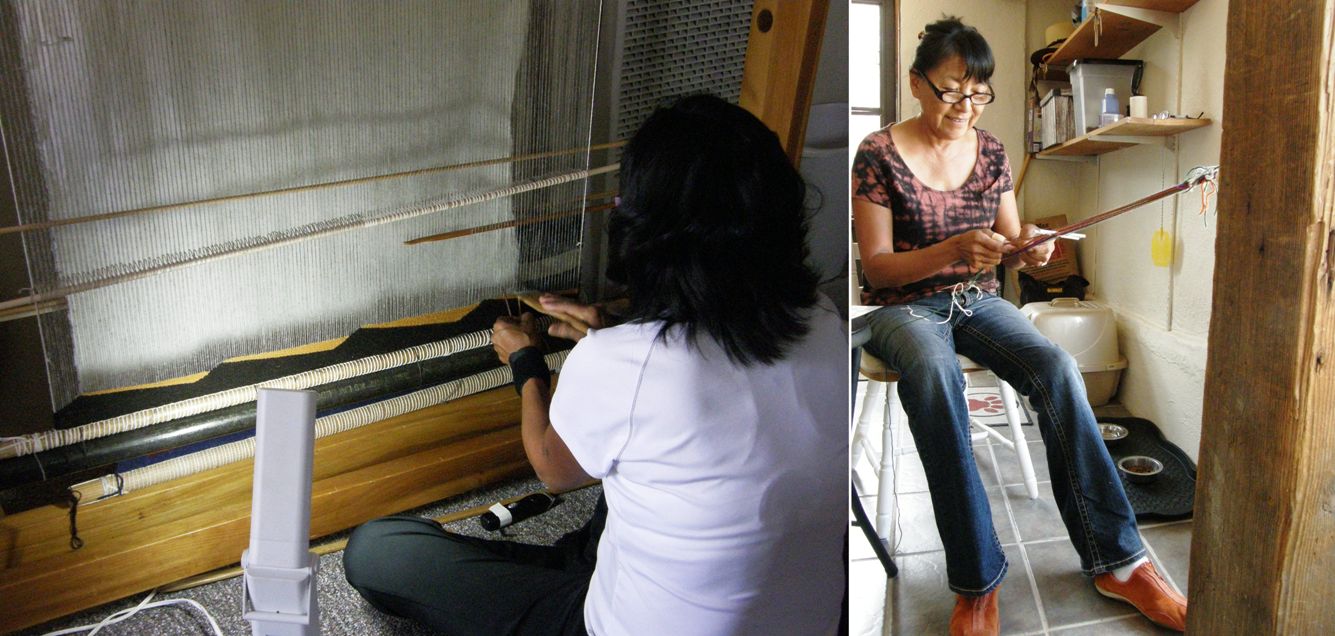
I had met textile artist DY Begay at the Tinkuy in Cusco in 2010 and again last year at the weaving Encuentro. She now lives in Santa Fe and extended an invitation to come visit. And that is how it all came to be.

santa fe downtown collageI arrived a few days before the market and had a chance to stroll around the downtown area. When I arrived at Santa Fe airport I was surprised to see the adobe airport building…hmmm, a little over the top, I thought at the time.

However, after taking a look around and seeing the downtown area, where even the parking stations are adobe and getting a feel for the place,  it all just felt so very right. I love the smooth curviness of the structures and how the colors change from pink to gold as the sun moves across the sky. And that sky! …the deep blue of dry desert air that would suddenly be covered by enormous black thunderheads that brought refreshing afternoon deluges.

???????????????????????????????And it was hot… but not Santa Cruz hot…the low humidity made the high temperatures quite tolerable. Yet, after a full day of strolling the market, it was a relief to sit down in a shady spot and wait for the rain to start. Below you can see Annie and Wendy at the end of day one.

There were thousands of people at the market yet I just knew that I would run into Wendy and Marilyn there. I had already bumped into Wendy by chance at the Travelers’ Market and Marilyn in the plaza downtown and at the pre market procession. It was like we were all magnets drawn to each other.

???????????????????????????????Another person I met by chance was double weave expert Jennifer Moore who was helping out Nilda Callañaupa at the CTTC booth. She and I then arranged to spend a day together while I showed her how to set up a backstrap loom for double weave pick-up. I got to see all her amazing double weave samples, the ingenious things she has made and the limits to which she has pushed this structure. It was impossible to pick favorites from the array of samples she showed me but here are just two of the many things that caught my eye…(these are Jennifer’s pictures).

I loved the completely seamless bag Jennifer created for the Checkers pieces.Even the bnarrw sleeve for the drawstring was created on the loom. The twill double weave pick-up is gorgeous.
I loved the completely seamless bag Jennifer created for the Checkers pieces. I believe that the checkerboard was woven as a double width piece….woven folded and then opened to its full width once off the loom. Even the narrow sleeve on the bag for the drawstring was created on the loom. The twill double weave pick-up is gorgeous.

??????????????????????Jennifer and I then went on to spend a magical final evening going to the opera, La Traviata, with DY and DY’s neighbor Alana, who had offered us the tickets.

I had no idea what to expect and it was amazing!

Santa Fe has an outdoor theater. It’s covered but has open sides. The sets are minimal and the backdrop is the beautiful Santa Fe sky which changes colors as evening fades into night. Desert nights get rather cold! The theater ushers certainly knew about that as they were all dressed in long handwoven ponchos.

And, speaking of cold, here I am back in Santa Cruz in the one cold wave that hits here per year. I just happened to arrive back the day before it hit…48 degrees…this is not normal. I managed to get in one day at the loom in shorts before the long pants and socks had to come out. Well, it IS winter after all.

back at my backstrap loomThis is where I was at with my weaving when I left Janet’s place in northern California. You can see that I had just started some warp wrapping having been inspired by the saddle bag, from Afghanistan, (we think) that Janet had bought. However, after going on with that for half the afternoon, (bags still unpacked in the living room!) I decided that I didn’t like it. I think that I need to practice the wrapping using wool, which fluffs out and fills space, before trying it with the unforgiving cotton.

So, the other half of the afternoon was spent unweaving and unwrapping (not so much fun) and then….unpacking  (even less fun).

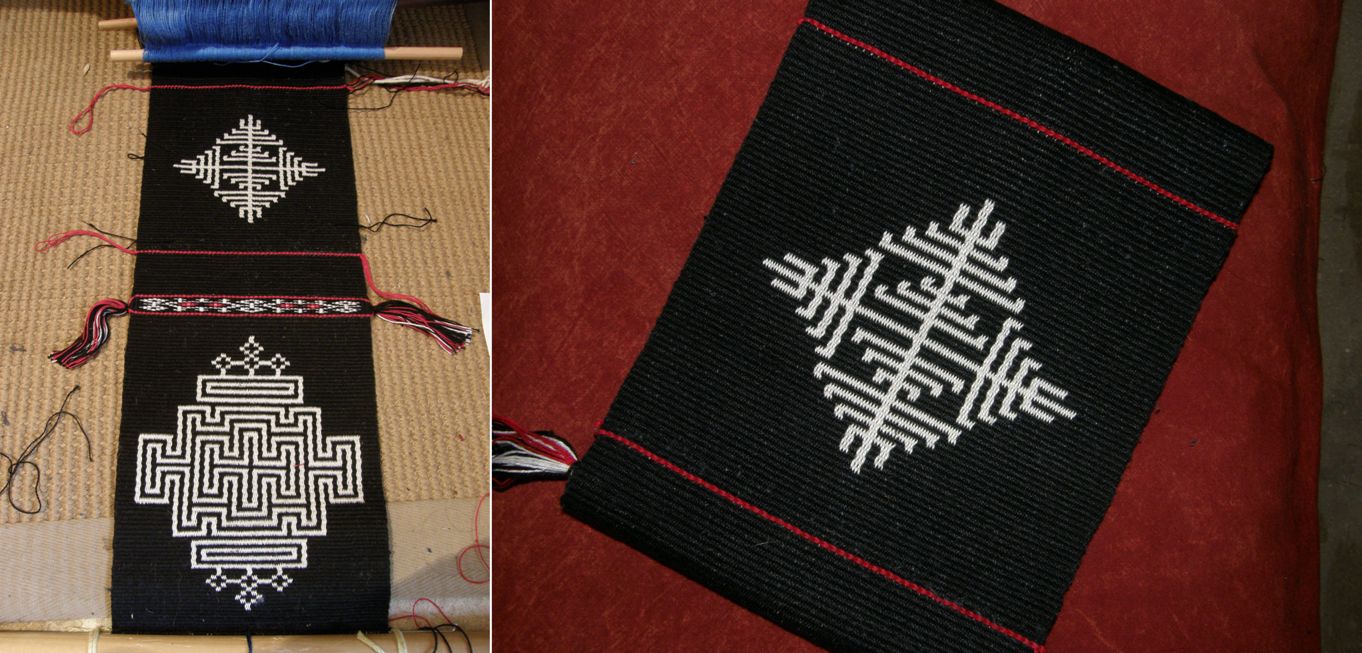
Then I got back on track. Janet’s saddle bag inspired the wrapped design above the main motif. Bhutanese motifs form the basis of the rest. This had me calling the project “Tales from the Sub-continent”.

sub continent bag projectHowever, now something from Central Asia is about to creep into the mix because of bands that I saw at the Folk Art Market. I am so happy to be able to add something from that event as that means that this project will comprise a few pieces of inspiration from my summer trip. That’s one of the best souvenirs I could have.

It’s off the loom and is going to be a bag. You can see how it will be folded on the right…that’s the back.

As for the Central Asian influence, you might remember that I went to the Central Asian ikat exhibit, Colors of the Oasis, at the Textile Museum in Washington DC in 2010. The ikat pieces were stunning. In fact, I had to go twice beacuse it was too much to take in.

I was interested at that time in the bands that edged some of the coats. As the exhibit was focused on the ikat patterning and process, no one at the museum could tell me anything about those bands. They looked like they had been card woven but someone also suggested that they had been braided using finger loops. You simply could not get close enough to see anything helpful.

uzbek ikat folk art market santa feHowever, at the Folk Art Market we got to touch all the gorgeous ikat patterned coats from Uzbekistan and look as closely as we pleased at the edging bands. Yes, there were wefts, they were woven, and one of the representatives did confirm that they were tablet woven.

So, here is where I am at….

tablet weaving a strap

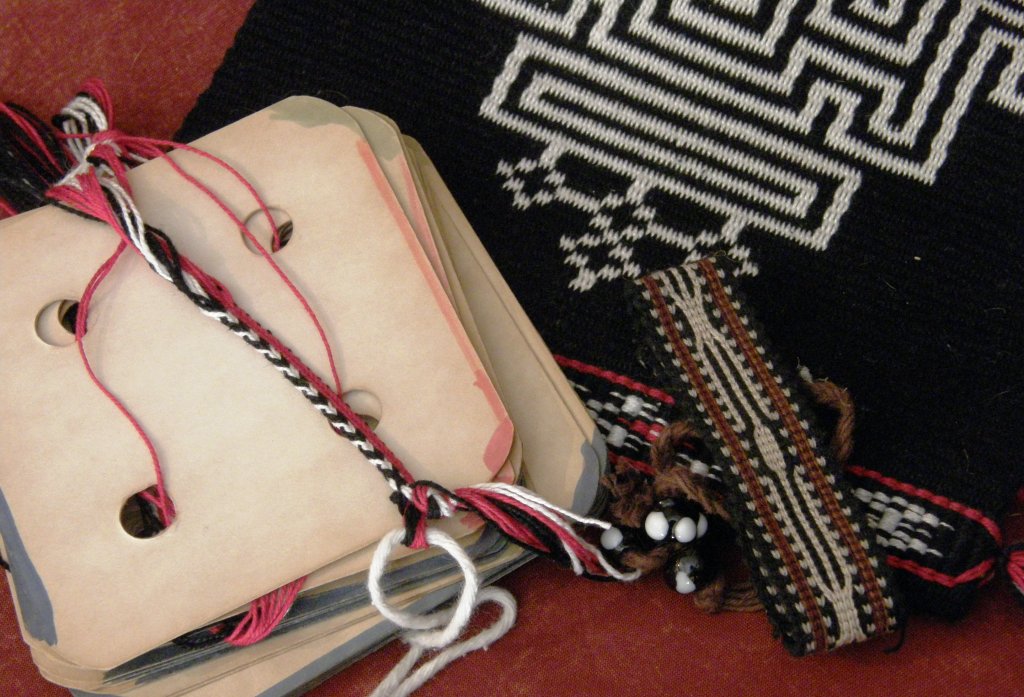
red and green card weaveI dug out my tablets. These are the ones that my dear friend Gladys Miller gave me way back in 1995.

They pre-date my Navajo-style weaving activity and my first backstrap learning trip to Peru.

Gladys sent me back to Chile with these tablets and Rachel Brown’s book. Later I got more books and made the piece at left. After that, I had my Navajo loom built and immersed myself in tapestry weaving.

Then came the first trip up north to Peru….and the rest is history!

So, I made a wee sample to see if I could remember the basics of threading. I want the strap of my bag to be the same design as the bands that edge the Central Asian ikat robes. Most of the bands are very similar in design and very simple.

It is interesting that on page 71 of  the Snows’ Step by Step Tablet Weaving, there is a picture of a Russian apron band that looks almost exactly the same. I was lucky to be able to buy a wristlet at the market (you can see it sitting on my weaving above) as an inexpensive example of the weave.

ikat robe at folk art marketI know that you will all be looking at the price tag on the above piece and sighing. Let’s all go to the market together next year! I only bought one other thing. It was another sample type thing to study…Guatemalan gauze, white on white on a miniature loom.

It was fun to see how the tablet woven bands are also being used as tubes for bag straps. I would say that they were sewn into tubes after being woven and stuffed with something. Mine, however, will be flat.

???????????????????????????????I did include a tubular band on my current bag project as an edging. I so enjoy weaving and sewing those tubular bands and they make such nice finishes. Using a tubular band to edge enabled me to cover and stabilize the cut raw edge that was created when I cut the flap into a rounded shape to make it more attractive.

???????????????????????????????Speaking of tubular bands, DY and I had some weaving time together at her place. DY had learned to make the ñawi awapa with me at the Tinkuy but had not put it into practice since then. Of course, all she needed was a little refresher and soon she was  on her way. It would be great to see her incorporate something like this in one of her tapestries.

DY weavingIt was nice waking up in the morning hearing DY’s fork beating the wefts into place as she creates her latest tapestry using her own handspun and natural dyed wool. Her home has lovely solid wooden posts which are convenient for backstrap weaving.

Now I shall proceed to bombard you with images from the International Folk Art Market to give you a wee taste of all that Annie and I got to see over those two days of market…

ayoreo bags and clans??????????????????????It was great to see the Ayoreo people of the lowland region in which I live in Bolivia represented. This the fifth time that they have been invited to attend the Market and sell their looped bags.

The fiber that is used for the bags is extracted from a wild bromeliad which in the Ayoreo language is called dajudie (elsewhere known as garabatá). The thread spun from this fiber is called dajua.

New Mexico Summer 2013 006One of the craftswomen was twisting three strands of thread into one on her thigh but, unfortunately, I was never present when they were making the actual bags.

I have quite often seen the women making these in the streets of Santa Cruz but they are very reserved and not comfortable with people examining what they are doing or asking questions.

I was, therefore, happy to be able to take the opportunity at the market to talk to the ladies (picture at left by Annie).

The traditional patterns belong to the seven clans of the Ayoreo society but some women have created their own new patterns inspired by their surroundings. Mostly natural dye substances are used but some artificial colors are being used in response to the demand for brighter colors by customers.

From Uzbekistan, which probably had more representatives than any other country…

uzbekistan crafts

selection of art and craft santa fe folk art market

Bright colors and simple black and white: pictures made from colored sequins from Haiti, beadwork from the Ukraine, paintings from Cuba and baskets from Panama.

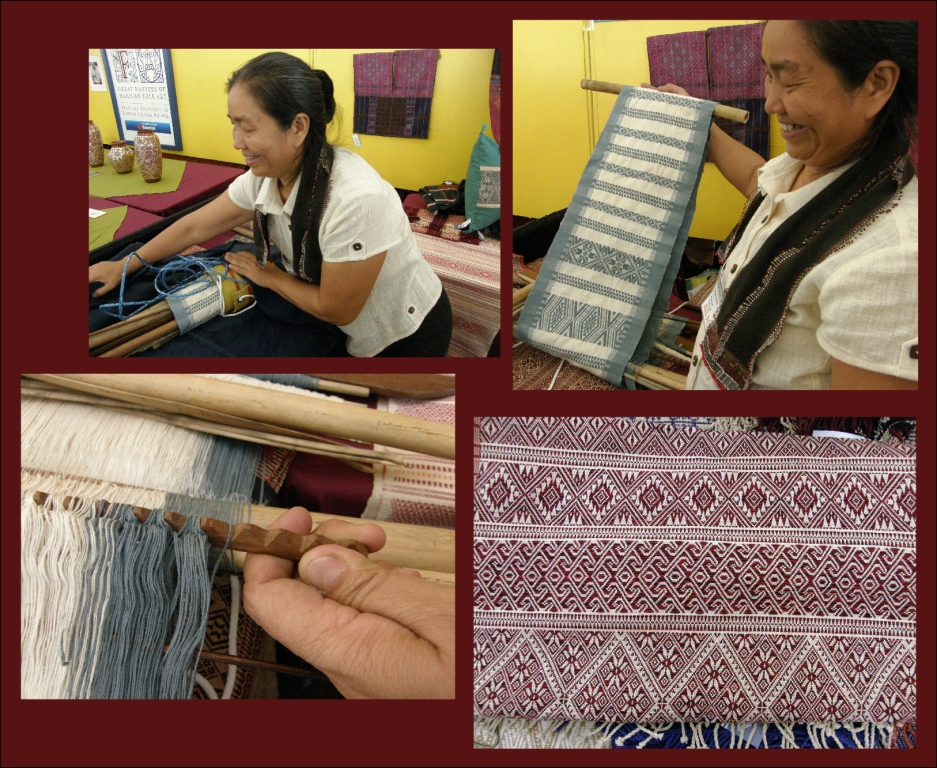
myanmar backstrap weavingKhun Shwe, a backstrap weaver from Myanmar, was happy to open up her rolled up backstrap loom and show me her work in progress. Her circular warp held a piece of equipment that I had not seen before. She told me that the notched stick was used to help spread the warps. Her work with supplementary wefts was fine and beautiful. She was so friendly and happy to meet someone so interested in her loom. I would love to study with her! I think she was doing well at the market. Quite a few people were trying on garments at her booth including Annie.

The variety…

variety of crafts santa fe folk art market...from Peru, Laos, India and Mongolia.

There was this on the Hungarian stand…

???????????????????????????????It was only $25 and no, I didn’t buy it. A lady was walking around with one and I decided to ask her about her band weaving interests. It turns out that she doesn’t weave and had no idea what the piece was. She simply found it interesting and bought it.

And the people came and came and looked and spent… When we were arriving at around 10am on Saturday, there were already early birds leaving with their purchases! I spent some time on Sunday afternoon with a very happy vendor from East Timor who had sold everything.

???????????????????????????????

???????????????????????????????Nilda was opening out this very large piece for an admiring couple when I was walking by and yes, they bought it! She couldn’t hide her pleasure at the sale. Of course, the ladies from Chinchero were seated at their looms and Nilda had a corner booth so they would have room to sit away from the crowded aisles in the shade and weave. That attracted a lot of people to the booth I am sure.

artisans at work santa fe folk art marketAn artisan from Pakistan creates a piece using applique and reverse applique techniques while another from Nepal works on a painting.

Everything about the Huichol artists from Mexico creating their yarn paintings was fascinatiing….all those woven bands and belts and straps to look at.

???????????????????????????????

huichol artsists at santa feThere is more….much more. Remember that there were over 150 artisans there! This is just a taste of the color, and excitement. I am saving the vast majority of pictures of textiles decorated with supplementary wefts for another post. When I have finished my bag project, I will start the next in the red, black and white wall hanging series and this piece will be all about supplementary weft patterning. I will show more market pieces as I progress on that as well as pieces from Nagaland that were on display at the Travelers’ Market in Santa Fe. They have all kinds of interesting ways to decorate using supplementary wefts.

Here are some finished projects from Ravelry group members and friends…

julia's supp weft projectJulia and I got to weave together and she has been captivated by supplementary- weft techniques.  She sewed a band onto fabric and made a bag and then cleverly made a square braid for a strap, fanned out the ends and wove a balanced weave shoulder pad and then finished the braid for the other half of the strap (much the same as one would do when making an Andean sling).

Cindy wove tubular band with me and is now making several slim bands to wear as a necklace, She is experimenting with making the bands in cotton. I find that it is harder to get an even finish with cotton than it is with wool. Her band looks great.

cindy

Gmp set me a picture of her latest band.. She simply added rings to the end so that it can be used as a belt. The pattern is charted in my second book.

???????????????????????????????I saw the handmade book made by Betty at ANWG. It was her contribution to the Portland Handweavers Guild study of  Japanese textile techniques. The paper is handmade and from Nepal. Betty used a traditional binding for the book and wove the cover. She wove a warp-faced double-weave band on a backstrap loom with Japanese characters to decorate the cover.

bettys book with warp faced double weave bandThat’s all for this week.

From hooray Santa Fe to hooray Santa Cruz….the weather is supposed to warm up any day now to a pleasant coolness…perfect weaving weather. I have come home with lots of ideas from this trip and am happy to be back at the loom for a few months.

My cat has gone to a new home. I spend too much time away and it is not good for her. It’s sad after ten years together but I know she is happy in her new place…she even caught her first mouse!

Here are DY and I and Drey, DY’s cat, one of my many kitty companions on this trip…

dy and drey

Backstrap Weaving – Ikat – Turning “Blips” into Beauty

IKAT! Ikat can be a little hard to deal with for someone like me who is into planning, charting and precision. I count my warps carefully…this one needs to be floated, this one doesn’t and, oh no, I made a mistake and must un-weave and…. darn!, the design is not looking as I thought it would…better un-weave and re-chart. I am not one for “winging” it or just throwing a warp on the loom and seeing where it takes me. I am even less crazy about letting a “blip” become a “design element” although my work often has such blips!

When I have tried ikat, the tie-dyed warps wandered off as they pleased once I started weaving, blurring the design to the extent that the original planned pattern became totally unrecognizable! You can wrench the warps about and try to get them to behave or just let them go and appreciate the beauty in the “blips”. You can probably guess which one I am more inclined to do.

Way back when I first tried ikat on the above warp I thought that it was all about the tying and dyeing and I was so nervous. Had I used the right wrapping material? It took me a while to settle on cassette tape after trying cabuya fiber (a kind of agave) and then strips cut from plastic supermarket bags. Had I tied tight enough? Was I using the right kind of dye (answer: NO…I used cotton dye on wool which gave me a wishy washy pink instead of  the Mexican red promised on the package). Would the wrapping allow the dye to seep?

Once I had dyed the warp and unwrapped part of it to see my lovely crisp and sharp pattern I was delighted. Now to get to the weaving…the easy part, right? Just plain weave, a piece of cake. And that is when everything went quite mad. The warps slipped around out of position with every move I made, the parts of the design wouldn’t line up and I was terribly disappointed.

Then came this….

On my trip to Guatemala in 2008 I bought this…a prepared ikat warp ready to go on the loom. “Ikat the easy way”! I exclaimed. This warp had been prepared by the experts and surely it would turn out nicely. I took just one section of it and put it on my loom….it was coming out even worse than my own experiment. At least on mine the first motif looked kind of okay. I put it aside very quickly. I just couldn’t bear the thought that someone had gone to all the trouble to tie and dye this warp only to have me come along and mess it up. It’s still there in the closet.

Once you have had an ikat disappointment, it is not really something that you feel like launching into again in a big hurry…all that time spent tying, dyeing, waiting for it to dry. In any case, I felt that I hadn’t really learned anything from the exercise to warrant another attempt. I needed to do some thinking about what needed to change about the way I was handling the warps.

But I did take something away from the experience – a growing awe and respect for the ikat weavers around the world! My gosh, the work they do creating those amazing images in their cloth. The motifs  have that wonderful fuzziness in their outlines which is what makes the technique so attractive.

This is a piece from Indonesia from a collection  of textiles owned by Phil Willett that he and the late  Dennis Penley collected. Of course the warps move out of alignment but not so much that the image is completely lost as mine was. Just the right amount of shifting is what makes this piece beautiful.

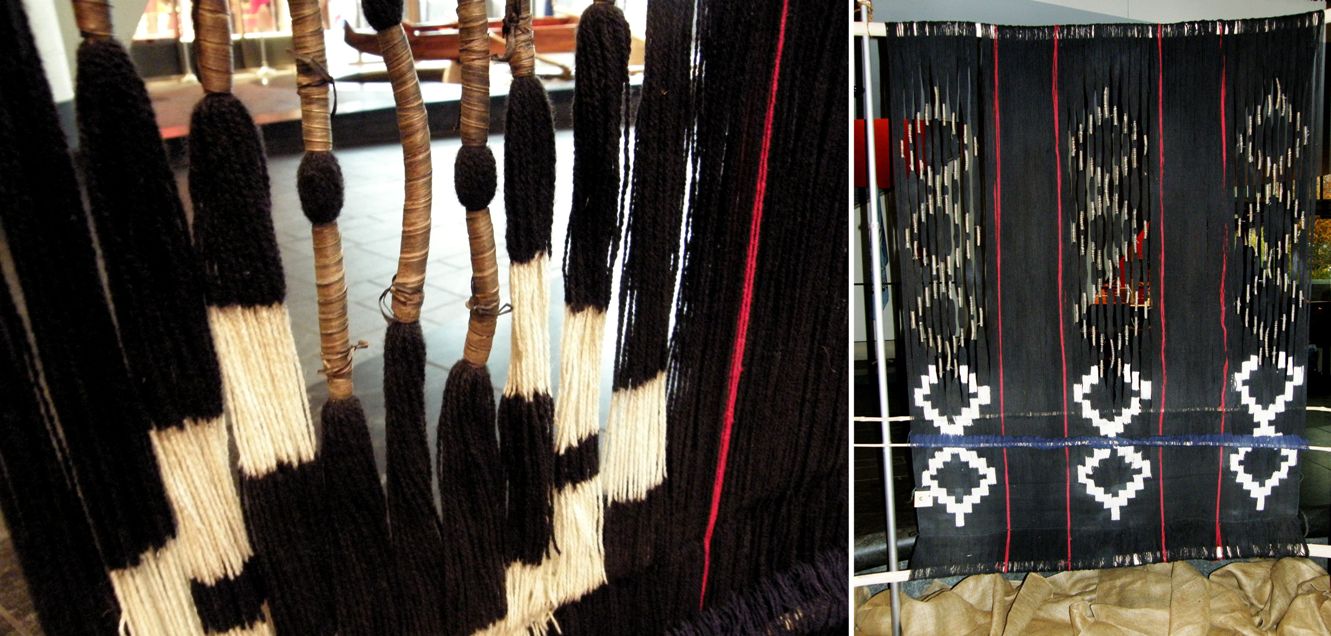
I saw an ikat bed cover that my weaving teacher in Candelaria was weaving with both hers and her husband’s names spelled out in the tie-dye technique, watched ikat weavers with their backstrap looms in the towns around Cuenca in Ecuador, saw ikat warps being prepared for floor looms in Salcaja in Guatemala, gazed at the amazing Central Asian ikat robes at the recent exhibit at the Textile Museum in DC and got to touch and examine a Mapuche ikat warp for a poncho on the loom at an exhibit at the National Museum of the American Indian in DC late last year.

The Mapuche ikats are known for the minimal shifting of the warps in the design and the relatively clean and crisp outlines the patterns have as a result.

Ikat! Sigh! I read an article here just today that describes it as “as trendy as anything ancient can ever claim to be”. I am not trendy by any stretch of the imagination and wasn’t aware that it was so. In any case, the “trend” does not appear to have reached Santa Cruz, Bolivia. The article says that “this kind of pattern now lends interiors a kind of dressed up Bohemian vibe”.

Let’s hope that this is good news for the artisans and that people are aware of the incredible amount of time and skill that goes into the pieces and will be prepared to pay fair prices accordingly.

This video, which was embedded on Ravelry recently, shows one group’s enterprising way of mimicking the appearance of ikat. They produce large lengths of cloth with large fuzzy-outlined ikat-like images without the long tying and dyeing process….

Schumacher – Darya Ikat Weaving Process from Schumacher on Vimeo.

And I have seen other interesting ways to imitate the look of ikat in the online weaving groups…the “faux ikat” using painted warps. Weaver Bonnie Tarses has a video here that shows how to set up for what she calls “almost ikat”.

In this WeaveZine article Syne Mitchell shows how to create an ikat effect with painted skeins on a rigid heddle loom.

The beauty of the piece is all about the very misalignment of the colored warps that I have been struggling to avoid.

See how the “blips” are turned into beauty!

I would love to weave something like that but I know that I would spend the whole time fussing with the warps and trying to get them to line up! I just wouldn’t be able to stop myself!

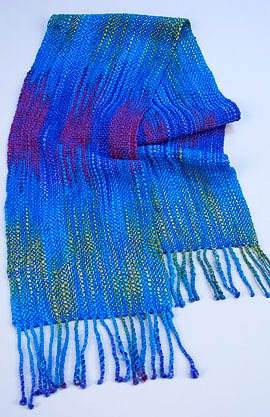
Ravelry member jtellier wove a faux ikat scarf on her rigid heddle loom, which you can see below, and shared it with us for inspiration when we were planning  our plain weave weave-along in the Backstrap Group.

Now we are doing an ikat weave-along and have four participants so far.

In this current weave-along we are trying to do true ikat by tying and dyeing the warps. We recognized that we needed to go into it with the right attitude. I didn’t want people to end up as disappointed and frustrated as I did after my first attempt and so we are all participating with the idea that we will definitely create something “interesting” if not exactly what we had in mind in the planning stage.

I have got some ideas and theories together about how to create my ikat pattern with a minimum of blurring in the design. My weaving friend Tracy and I discussed how the Mapuche weavers appear to leave all their ties in place on the warp and only unwrap enough of a bundle to give them the minimum of space in which to open the sheds and pass the weft. I have tried weaving without unwrapping everything beforehand (the warps still slipped) but not to the extent that the Mapuche weavers do.

I was also intrigued by this picture on the Education and More website, on their backstrap weaving page, of a warp in Guatemala which has been glued to the loom bar with corn masa. (Karen from Education and More tells us that it is used as a paste to secure the threads).

Hmmm… I thought. Maybe I can use diluted white glue to do the same.

Karen from Education and More shared this image with us in the Raverly Backstrap Weaving Group:

It shows how some ikat weavers, with whom she works in Guatemala, tie cotton around the sections of dyed warps to stop the warps from moving. I suspect that cotton against cotton holds well and does not slip. I have tried doing that with the cassette tape. The tape is far too slick to be effective. Doesn’t that warp look gorgeous!

And the final inspiration came from a Chilean lady on Facebook. A Facebook friend of mine “liked” her picture which is what allowed me to see her at work on an ikat piece on a wooden frame loom. I so wish I could have posted the picture here but I have not yet made contact with the weaver and, if I do, I will post the picture next week. I saw that she too was working in a very small space between the partly unwrapped ties and the weaving line.

She had a separate bar which appeared to part of the frame loom which was her shed rod. Unfortunately only a very small part of the loom can be seen. What interested me was that she had multiple sets of small heddles around  the groups of warps that she had wrapped. Each group had its own string heddle rather than having one large string heddle across the entire warp.

So I decided to use all these tactics in my project. As an experiment, it is not a very well conducted one as I will never be sure which of the new tactics will be responsible for the result…one or any combination of all of them.  Ah well.

First came the warping and wrapping. I set up the warp on a frame to wrap with cassette tape…still my favorite medium. I did not get carried away with the size of the warp. I guess that tells you something about my confidence, or lack thereof, in the success of the project! This is a cotton warp.

Here it is after dyeing with Dylon Olive Green cold water dye. I had dyed a skein of Plymouth Yarn with the green and this warp got tossed in at the end. The color is a little uneven and I kind of like the sort of washed-out look.

So here is the first motif. I was very pleased but still reserved in my excitement as I know from experience that the first motif generally works quite well. Things tend to go mad after the frst one.

My friend Annie will recognize the business card that she gave me back in 2010 which I am using to start the weaving and as a wee shuttle. I still have it, Annie and I hope you will give me a new one when I see you in March!

The warp at the loom bar is stiff with white glue which never entered the dye bath. The cassette tape ties down there are fairly ineffective. The warps just slide right through those but I like to think that they help a little. Cotton ties like the Guatemalan use would have been better. You can just see the bunches of white string heddles.

And I used a very fine weft. The warp is similar to a #10 crochet cotton. Of course I forgot to dye yarn for weft. I wove with this fine weft to start and finish the rep weave piece I showed last week and I really liked the feel of the fabric it produced.

Here are three finished motifs and all is well. The motifs are all a little different. I was not precise in my measuring and wrapping of the segments. The space in which I open the sheds is tiny and I am thankful for the fine sword that came with a Guatemalan backstrap loom that Linda in California gave me. I am using shed loops for the non-heddled shed. One shed loop for each section.

Three more motifs to go and I will be done…short and sweet! Very sweet! I am pretty happy with this. Now, which tactic or tactics produced these pleasing results? Good question!

What about the backstrap weavers who just go and unwrap all the ties, throw the warp on the loom and weave away producing beautiful results?…no “glue” or teeny tiny weaving spaces with teeny tiny bunches of heddles. I am completely in awe of these people.

And what about the ikat weavers in Uzbekistan?

My friend Pam took this picture in Uzbekistan and has allowed me to show it here. The ikat Master marks the mordanted warp and the ladies do the tying. Often the warp is mounted in layers on the frame so that multiple layers can be included in each wrap to repeat the patterns along the length of the entire warp. I got the idea of mounting my warp on a frame to wrap from seeing this picture.

The Education and More site which I linked to above and Flickr page have lots of beautiful pictures of Guatemalan weavers and textiles including many images of ikat weavings.

Did you know that Education and More is selling naturally dyed cotton from Guatemala on their website now?


Bobbie who is in the Ravelry group is not joining us for the ikat WAL.

She has just received her shipment of naturally dyed cotton yarn and has launched herself into a new project which has been inspired by this Guatemalan piece.

It is from the Education and More page and Jennifer discovered and shared it with us. It is the simple warp float technique and very effective.

I am sure Bobbie is going to do a beautiful job with it. Look at the Bedouin piece that she just finished:

As for ikat….will I go to all this trouble again? Yes! Now I am thinking multiple colors and trying to figure out how best to do the layering….it will be another sample. I will probably sew the current piece onto a piece of woven fabric. It is fine enough to do so, I think, and I would really like to use it.

In the meantime, I have started the next part of the si’ira inspired piece. All that counting had me procrastinating I am afraid…576 ends in the pattern area. The first row of pick-up is crucial. All other rows are picked up relative to that one and I can tell you that it is not fun to discover on row 20 that the lines in the motif are not meeting as they should because the first row was picked up incorrectly! So I really have to be in the right frame of mind to work on that first row…check and re-check.

And, it is done! and I am off and running.