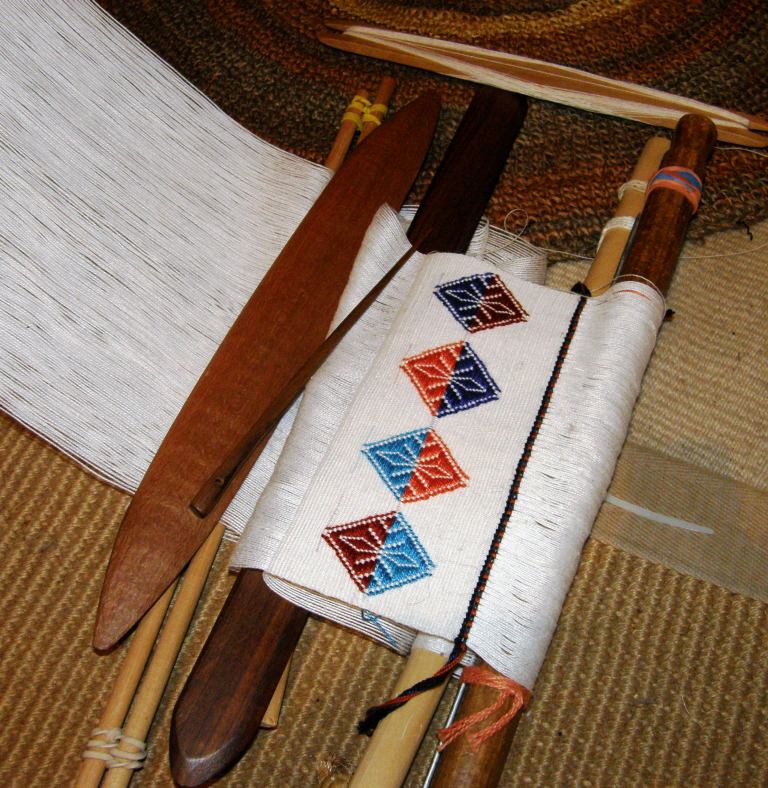
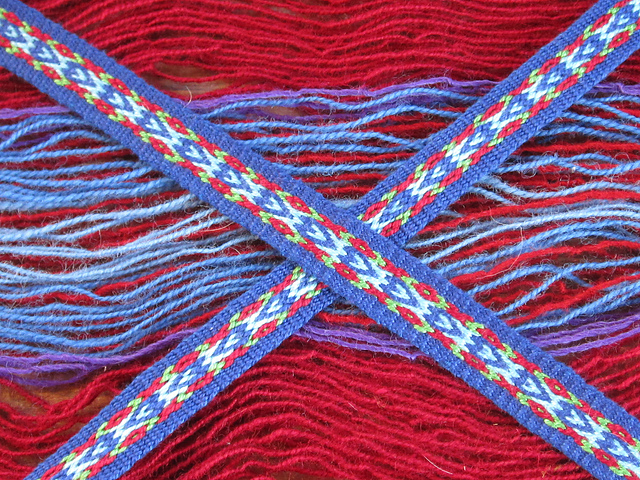
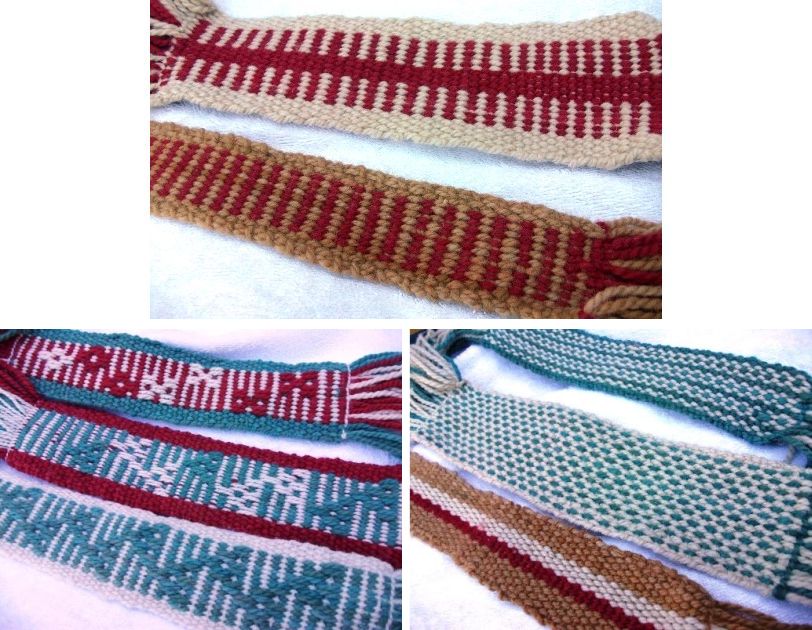
Backstrap Weaving – Time and Time Again

Panel 1: Within These Walls, a pandemic project.

My relationship with Time seems to be changing. I know that I am not the only one who got lost during these last two strange years, overcome by the feeling that time was speeding by… weeks and months merging into a hazy uneventful blob. Even now I struggle to separate 2020 from 2021. But I just recently realized that the passage of time is slowing down for me and starting to resemble something like normal, something recognizable from the pre-pandemic days. The calendar map that I have always carried in my mind’s eye is starting to reappear.

I resist the urge to go back and try to account, in terms of productivity, for the 24 months that have passed since we first went into lock-down here in Bolivia. Today marks the anniversary of the confirmation of the first known Covid case here. That any of us achieved anything meaningful at all is cause for celebration. And now I am talking as if it is all over. Of course, I know it isn’t, but there is definitely a change in my state of mind.

Three-panel wall hanging: Textile Trails

On the theme of Time, I am reminded of a question that I am very often asked when I show my woven work….. “How long did it take to weave that?”

I am trying very hard to think back to a time before I started weaving to see if perhaps I would have asked this question myself to a craftsperson and what might have motivated me to do so. Would it be because I was thinking of trying to make the object myself and needed to see if the time involved was worth my effort? Or perhaps I would want to know if the asking price for the object reflected the amount of time that had gone into creating it.

In any case, I find it a very difficult question to answer. How long does it take?…As long as it takes! I honestly don’t keep track. I don’t sell my work and so I need not consider time in order to fairly price an item. I am not weaving to a deadline. There is usually no exhibit for which the work has to be completed…the three pieces above were an exception as I had woven them for an exhibit at the ANWG conference in 2015. I would probably have to go back to my blog posts if I wanted to give an accurate answer in terms of the number of weeks on which I worked on a project. However, I would be at a complete loss when it came to the total number of hours.

I met a craftsperson some years ago and witnessed his response to the question…

“How long did it take to make that?”

His response:

A    l  i  f  e  t  i  m  e

I can only imagine that he very rightly considers that a lifetime of his accumulated knowledge, experience, skill and inspiration went into this and every piece that he has completed. I love his response.

So, I am willing to pour as much time and effort as is required into every piece I weave. There have been a couple of times, though, when I just wanted to get the thing done! One such time was when I had volunteered to weave six lanyards for a conference. The long piece of half-inch band with its small repeated motif did not excite me at all when the time came to weave it. I installed eleven sets of string heddles to move it along. I didn’t have to do any pick-up and that rather unique experience suddenly made the project very interesting as I came up with ways to remember which heddle came next in the sequence.

What I don’t like, is making silly mistakes and wasting time. Okay, I will admit that a mistake is always a learning experience and valuable for that reason but sometimes you just turn around and do the same old thing again!

A circular warp for a cotton scarf

Like the time I was using a coil rod for the first time on a circular warp many years ago. The coil rod (sometimes called rolling stick) is the uppermost stick in this cotton circular warp and I was using it because it seemed like an important part of a circular warp set-up. At the time, I didn’t fully understand its purpose. One of my aims for using it in this project was to figure that out.  While trying to move the rod as weaving progressed, I mishandled and broke the coil rod. I did it once…I learned something. I did it a second time…I cursed…but then I learned some more. The third time I broke it, it got flung to other side of the room and I continued without it. It was then that I started understanding its purpose because it was very much aware that it was a different experience weaving without it. And so I was happy to sit patiently and install it once again. 

(Note that I am talking about circular warps here. I do, however, continue to use the coil rod on both circular and single-plane warps if I am doing plain weave with cotton or silk (materials that have little to no stretch). I have written a lot about this tool in blog posts over the years. If you are interested in learning more, you could start here.) 

Maybe this is something that we don’t consider when we ask the craftsperson how long it took to complete the project. Do we want them to include the time used to fix “oopsies”? After all, the fixing of the oopsies adds to that lifetime of experience about which my craftsman friend was speaking.

The first six inches of this warp were woven and unwoven twice before I found just the right weight of material for the supplemental patterning weft.

While the amount of time needed to weave a piece is not important to me, I am always interested in learning about techniques that weavers have developed to help make the whole process more efficient, like the use of multiple string heddles and pattern storage sticks, for example. However, there is one thing that I have always been a bit stubborn about and that is the use of sizing.

In weaving, sizing is a substance that is used to coat warp threads that are hairy or “sticky”, or have other characteristics that make it difficult to achieve clean sheds. Basically, it smooths the threads. I resist using it purely because of the “ick” factor. That is, I hate to think of the mess of dunking my warp into a bath of starchy goo and I don’t think I would enjoy the feel of the stiffened coated threads as I weave. Keep in mind that my hands are usually in almost constant contact with the threads as I weave pick-up patterns. Of course, it all washes off in the end and you are left with the original softness of the yarn but yech, I just don’t like the sound of it. I prefer to stay away from the sizing and just adjust my loom-operating methods instead.

Adapting my methods to the materials in use: I was able to weave with Knit Picks Palette….a soft, loosely-plied wool and create a four-selvedged piece.

My approach when working with sticky materials is to adapt the way I operate the loom…take a lot of care when opening sheds by working the threads in sections, using my finger tips to help release the grip a thread may have on its neighbors. I advance the warp more often so that sticks and heddles are not sitting on and abrading any one section for too long, causing it to shed and pill. Yes, it does slow things down but, as I said, I am not in any hurry. I suspect that using a sized warp on a floor loom is a different experience in that the weaver isn’t necessarily handling the warp threads during the weaving part of the process.

Another way to avoid using sizing might be to add extra twist to commercial wool yarn to make it smoother. My weaving teachers here create relatively smooth hand-spun yarn by using a high amount of twist. They also add twist to the synthetic thread that they buy in the market. This kind of yarn creates a certain kind of cloth. The thing is that I don’t always want that kind of cloth.

Two wool lap-size blankets that I wove using Mora yarn. It’s worsted spun which helps somewhat with the stickiness issue. I didn’t add any extra twist.

My latest project has been with mill-spun wool singles….sticky stuff. I could get a tiny heddle shed which I would then proceed to open further with my fingers. I didn’t want to use sizing. I didn’t want to ply it or add extra twist. I love the way it feels. The supplementary weft is my own plied hand-spun wool.

From the 27-inch warp I got 21 1/2 inches of cloth and my string heddles came up remarkably clean.
I always love the way the back of these supplementary-weft patterned pieces look.
There was a small amount of curl in the cloth at its opposing corners. Folding it to make a pouch for my phone and edging it with a patterned tubular band took care of that.

The fresh warp in the above photo was for a small closure tab. I used my plied hand-spun for that. I used a dense structure of three-span floats (intermesh) to produce a sturdy band…hence the two sets of string heddles.

The finished pouch.

I wet-finished the small piece on the right under the sword. The warp threads shifted slightly closer together, I took measurements, but I didn’t notice any real difference in the feel of the cloth. I didn’t wet-finish the pouch piece as I was a little concerned about color run in the supplementary weft. I had bought that roving already colored. As the supplementary weft is tightly wedged between the two layers of warp in several places, I don’t think that even a color-catcher cloth would stop the color from bleeding onto the grey wool. If wet-finishing had made a significant difference to the way the cloth felt, I may have reconsidered.

I hope that I get a chance to show this, the first of many projects in the mill-spun wool singles, to the farming couple whose sheep provided the fleece. My original plan had been to use this yarn for a shoulder bag project. I would dye the yarn to match the three-color strap that I had already woven…

I used my plied hand-spun wool for this strap. I don’t feel that I was heavy-handed in the amount of twist I used. The strap lies perfectly flat and the yarn was beautiful to weave with.

However, now that I have seen the cloth that this yarn produces, I can’t bring myself to dye it. I love all the subtle color variations from this blend of natural white and black. I’ll be using it as is perhaps for a pillow cover and will add color with supplementary weft instead.

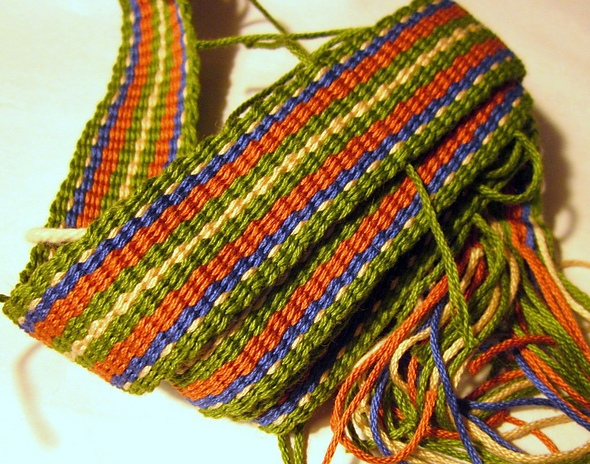
So, I will turn once again to my Mora yarn for the bag project. I over-dyed a pale green color that I didn’t particularly like to get a dark blue that is close to the strap color. It will be mostly plain blue and with a very narrow strip of three-color pattern in the center. I have used Mora for a bag project before and know that it performs well on the loom as well as with use.

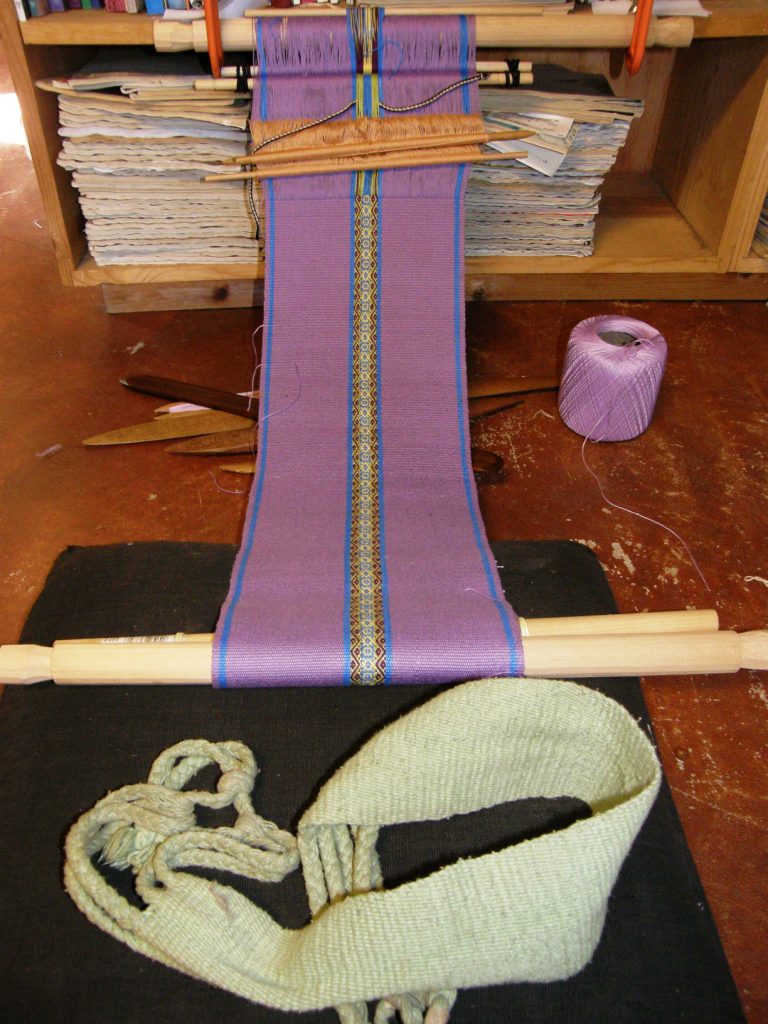
Fabric for a bag with built-in pocket woven with Mora wool.
If you are curious about the Mora yarn, here it is. It’s 20/2 worsted spun and I know that both Vavstuga and Eugene Textile Center carry it in the USA.

One skein of Mora goes a long way. It gives me material to work with for dyeing with cochineal for other projects. It’s taken two years but I finally got some alum. Just before the pandemic I had been out and about looking everywhere for the “precious” stuff…precious only because I suddenly could not find it anywhere. The usual pharmaceutical supply stores weren’t carrying it any more. The little hardware stalls in the market (there are dozens of them) didn’t have it. I tried the Mennonite market because I know that they can and pickle but they told me to go to the pharmaceutical places. The little McCormick jars of alum are not available here either. I am guessing that the Mennonite folk have a massive supply of it at home and are possibly not yet aware of it no longer being available. My friend Dorinda sent me some from Cochabamba a couple of weeks ago.

I have used cochineal in the past to dye my hand spun llama yarn. With an alum mordant I get the crimson color you see in this image.

The stones you see are a mineral that goes by the Quechua name millu. Dorinda sent it along as a bonus. It is not something that is required for dyeing with cochineal but she thought that I might enjoy experimenting with it. In the co-op, they use it to darken colors. It is also sold as a home remedy and it is in those stalls that it is found in the street markets. Now that I know what it is, I will most likely be able to find some here in Santa Cruz although I suspect that the amount Dorinda sent me will go a long way. Maybe I will also dye some silk with cochineal for an ikat project.

These are all time-consuming processes. I am not concerned about the amount of time it takes. If you have ever tried ikat, you will know what I mean by time-consuming. Slow processes are just perfect for someone who is working with dwindling stash!

When I told a friend of mine about having finally got hold of some alum via Cochabamba, he took on the challenge of hunting it down in Santa Cruz and came up with this in a very upmarket store of natural vegan-friendly cosmetics. One large chunk came contained in a cloth bag inside a fancy carry bag as if it were something terribly precious…and yes, the price was precious. The accompanying card shows someone applying it to their armpits. So I guess supplies, at least here in Santa Cruz, have been entirely diverted to the cosmetics industry.

Another “slow” project is my learning to spin cotton on a takli spindle. Version One didn’t have enough twist. Version Two had…you guessed it… what I suspected was too much twist. Version Three, which is in progress, is bound to have some other problem. And on it goes. I love the little takli spindle! And Joan Ruane’s video class on it has been so good. I’ll never forget the time I was with Joan at the Mannings. I had set up a backstrap loom and she had wanted to see what that was all about. I was doing pick-up and her reaction was “Oh my god, it’s slower than tapestry!” This from a woman who spins her own cotton for weaving! She made me laugh. I guess we all have our own feelings about Time.

As for Version Two with it’s crazy amount of twist, I decided to see if it was possible to set the twist on my singles (because that’s how I want to eventually use this thread…as singles) and did some reading about that. I have Stephanie Gaustad’s book on cotton, flax and hemp and there are also online resources about simmering and immersion. The trickiest part was having to immerse the thread under tension. My solution for that is a bit wacky. It worked for these small samples.

The thread went into the pot tightly wound around these metal mesh pencil caddies. I do want to use this thread as singles so that I can once again try to weave something approximating the sheer cotton cloth that is woven in the Alta Verapaz region of Guatemala. I want the thread to be finer than the hand-spun that I used last time in this piece…

Woven with hand-spun cotton singles that I had bought in Guatemala.

And this is where that icky topic of sizing comes back into it. I will probably give in and size the thread. I wove the above piece using a bamboo reed to maintain sett. The weavers in Alta Verapaz don’t use one and I am curious to know if the stiffening of the thread from the sizing is one of the factors that enables them to maintain the sett without the aid of the reed. I stress ONE of the factors because, of course, their supremely high level of skill gathered from years and years of work is going to be the main contributing factor. In videos, I have been able to hear the sound of their picking stick on the threads. The weavers are in the habit of slowly scraping the pick along the warp threads from selvedge to selvedge right at the weaving line as if, I am guessing, to encourage the threads to remain separated and not drift into warp dominant positions. That sound is not one that I would expect to hear from naked hand-spun cotton. The sizing that is used gives the threads a coating that produces that sound. Perhaps I will need to use sound as my guide when I try this myself.

All time-consuming stuff. But I am not here to just consume time. Hopefully, I will be using it to continue learning. When I recently explained to someone my plans for my own hand-spun cotton, they asked how long it would take before I would be ready to start the weaving. I sensibly replied….years.

Until next time…..

Backstrap Weaving -Twisting, Coiling and Rolling

There is no single correct way to do things when it comes to backstrap weaving. I love seeing the similarities and differences in the ways weavers wind warps, set up their looms and  operate them as well as the differences in the materials that they use…from pvc pipe to rebar to bone and worn wooden pieces that have been passed down from one generation to the next. Backstraps can be made from braided straw, plastic rice sacks, leather or woven wool and cotton. Warps can be angled upwards ever so slightly or steeply. Heddles can be applied during warping or after. I love the different shapes of tools and materials that I have in my collection. It is not really a ”collection” accumulated simply for the sake of collecting. I have used all these pieces at some time or other and continue to do so. You can see a leather backstrap from Guatemala, a bone sword and pick-up tool from Peru, loom beams from Burma, Guatemala and Peru and a sword from Ecuador…all sitting on a Bolivian weaving.

The thing I want to talk abut in this post is the corrugation or ridging that can occur when weaving a cotton piece in plain weave and the different ways I have found to deal with it. I have covered this in several posts as I struggled to figure out what was causing it and then found out how to prevent it from happening. I now use a coil rod if I am doing plain weave with a material that has little, if any, stretch or ”give”, like cotton or silk, for example. Probably the worst case of corrugation I have ever produced is out there for everyone to see in my tutorial on supplementary weft patterning…

You can see that the surface of the weaving is not flat and smooth . It looks a lot like corrugated cardboard…bump, flat, bump, flat, bump, flat. I finally figured out that when my warp passed around and was suspended by a large dowel at the far end, the entire warp was free to swivel back and forth around the dowel as I made the movements to operate the loom. This is what was causing that bump to form and it was just a matter of somehow stopping that swiveling from happening.

The corrugation only shows up when I do plain weave. Warp-float structures do not suffer from these annoying bumps.

You might be able to make out the difference in these two bands. The one on the left has a nice smooth surface while the one on the right is corrugated.


I had been given the know-how to combat the corrugation by my various indigenous weaving teachers without even being aware of it. One of the few places where I have studied plain weave in cotton with backstrap weavers was in Guatemala. There, my weaving teachers would weave an inch or so at one end of the loom and then turn the loom around and weave from the other end. The weaving at the far end of the loom locked the two layers of warp together so that the threads could not swivel back and forth as the weaver operated the loom…result: nice smooth cotton cloth..no corrugation.

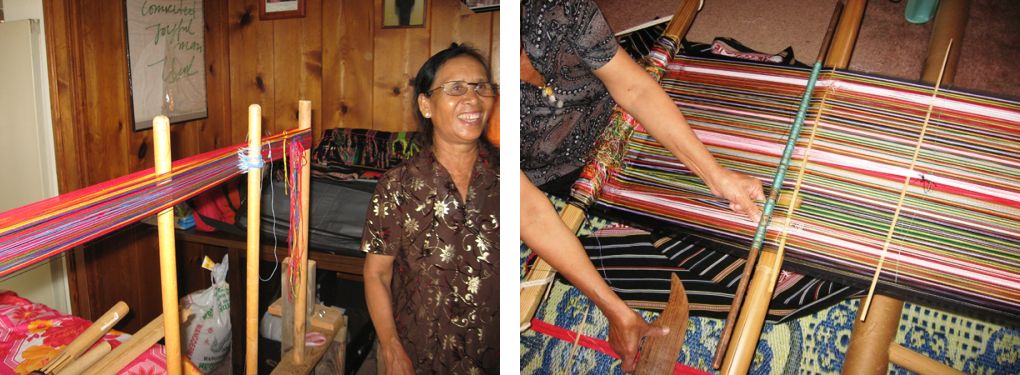
The picture below of my teacher is too small to show detail but you will notice that the warp layers at the far end of the loom are squeezed together right at the loom bar rather than being open as they pass around the beam. That is because an inch or so has already been woven at that far end.

So, anything that locks the layers of warp threads together rather than allowing them to be open and swiveling freely around the loom bars will work as a way to prevent corrugation.

Lashing the warp to the near and far beams is another way to lock the layers together…

This weaver in Peru is lashing her alpaca warp to the square loom beam. A header weft was placed within the open shed and then lashed to the beam. The primary reason for doing this is to allow her woven piece to have four selvedges. But, this technique would also stop a cotton piece from developing corrugation. You can see a very nice video of the lashing process here.

Here, my weaving teacher in Potosi, Bolivia is lashing one end of the warp we just wound to the beam…

My cotton warp in the following picture is lashed to the beam at both ends by way of a metal rod rather than a header weft. This is the way I choose to do it and it gives me nice smooth plain-weave cloth without ridges…

The red cotton cloth beneath the white sample was also woven on my backstrap loom. It’s plain-weave cotton and is smooth because I used a coil rod.

Some weavers turn their warp ends around a header weft as they wind the warp rather than inserting it later when the warp is off the warping stakes. It is always exciting to see the different ways backstrap weavers do things…

Of the three methods for locking the warp layers together that I have learned so far…1. weaving at both ends of the warp 2. lashing both ends of the warp to the beams and 3. inserting a coil rod…..the coil rod is my favorite. I am not quite sure why I favor this one. I think it might be because I like to take my warp off the warping stakes and then sit, set up and weave. I can sit and make my heddles, insert the coil rod and weave. I don’t need to be turning the loom around to lash both ends or turning the loom around and rearranging the sheds so I can weave at both ends. I want to just sit and stay put! I feel that the less I handle the loom in terms of moving it around and about, the better.

But, as always, it is nice to have a set of options from which to choose.

There’s nothing I like better than being seated in front of my warp with heddles, shed rod and coil rod in place, ready to throw that first weft! This is a warp of fine Guatemalan cotton that I wove in plain weave with supplementary weft patterns.

A coil rod has kept all my silk plain-weave projects just as they should be…”smooth as silk”!

Even though this next project was in wool, I inserted a coil rod. Sometimes, I just like to use one as I like the way it maintains the width of the warp beyond the shed rod.

My Montagnard (Vietnamese hilltribe) backstrap weaving teacher uses circular warps and inserts the coil rod as she winds her warp. This is the colorful fine cotton warp she created with coil rod in place when she was teaching me how to do this…

This next picture is probably one of my all-time favorite backstrap weaving images and I am showing it here courtesy of Jaina Mishra…

Weavers in Arunachal Pradesh use the traditional back strap loom to weave  skirts, shawls and loin cloths.

A backstrap weaver is warping directly onto her loom with the help of a friend. It looks to me like a single-plane rather than circular warp and the fun part is that they are installing the coil rod as they go. This would be ultimate for me who likes to sit at the loom and do everything in one go! They are making heddles installing the shed rod and coil rod all at once! I love the backstrap she is using for those very long beams…see the pockets that slip over the ends of the beams? There is so much to love about this picture! The weaver can start weaving straight away without ever having to move.

What I have finally done, for those of you who think that you might like to try using a coil rod yourselves, is make a couple of videos showing you how I go about inserting one. I am afraid that we are back to the bedroom-floor amateur videos of my past with these ones! but I am sure that you will see all you need to know.

What I usually do is sit in my loom and make my string heddles. Then I decide if I am going to use a loop or shed rod/s for the other shed and get that set up. I leave the cross sticks in place and then insert the coil rod. It’s something I enjoy doing…just like I enjoy making string heddles. I am a little crazy that way!  You can see Sara, above, inserting  the coil rod in her beautiful silk plain-weave warp. She has made her heddles and is using a shed rod with a second cross stick….the so-called ”twisty sticks” that I talk about in my dvd.

So here are the two videos. I had to make two segments for ease of uploading.


Now you will know why the coil rod is often also referred to in publications as the ”rolling stick”. I like the way it can sort of iron out small tension differences as it is being rolled to the back of the warp. I use wood rather than metal as I like the grip of the wood as opposed to smooth metal.

And, if you really would like to set up the coil rod as you wind your warp rather than after, I am sure that you will be able to see how to do that now that you know exactly how the threads turn around the rod. In past posts about the coil rod, I have shown how to install one while winding a circular warp.

I am going to finish by showing you a few projects by online weaving friends….

My new Operating a Backstrap Loom dvd traveled over the ocean to Maja in Germany. She was curious about learning new ways to set up a wide warp and has chosen the ”twisty-stick” method from the options I give in the dvd. She has already put it to use on her latest warp and I am thrilled about that. Look at her beautiful project!….

Collyer had woven tubular bands and learned about sewn embellishments with me. We decorate a piece of woven cloth made by my weaving friends in Bolivia. Collyer has applied the coil stitches to the flap of the pouch she put together with the cloth and has added a flat strap which she turned into a tubular edging along the sides….

Julia in Australia designed and wove a bee in the Andean Pebble Weave structure as the logo for her local beekeepers association…so striking!

Carmen sent this picture of the piece she has been working on using motifs from my second book...
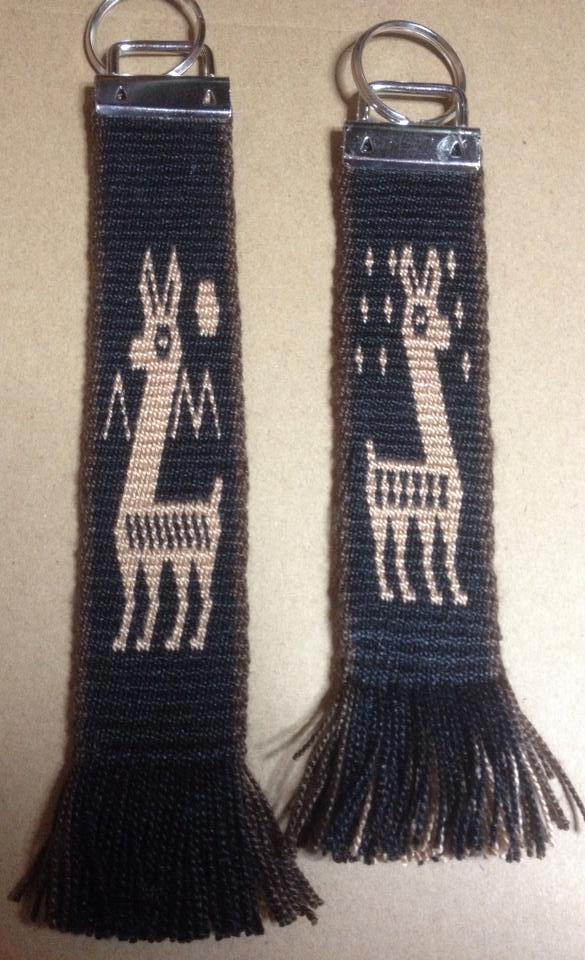
Also from my second book is this pattern that David in France used for his gorgeous Andean Pebble Weave band woven on an inkle loom…

For those of you who have my Andean Pebble Weave book and would like some suggestions for how to set it up on an inkle loom, I will be writing about this in a future post. Many weavers, Like David, have figured out a way to do it. I know of several ways it can be done so I can offer you some options.

I love Terri’s very relaxed and cozy backstrap set-up on her son’s bed…

Kathy showed me what she has been doing with the beautiful two-heddle intermesh technique I teach in my second book

Lieve in Belgium has been weaving pictures and words in warp-faced double weave on her inkle loom. Charts for the figures and letters are in my free tutorial here

Jennifer in the USA took a break from Andean Pebble Weave andhas now returned to wind a narrow warp so she can wisely start again at Lesson 1. She is showing the band that she wove with various figures before she took a break to pursue her other fiber activities…you should see her beautiful embroidery! She later said that she got back into pebble weave in no time.

Speaking of Andean Pebble Weave, I finally got the Spanish translation, Tejido Andino ”Pebble” laid out and up for sale on Patternfish.com. Many thanks to Isabelle Marmasse for the hard work she put into it.

As for my weaving, I guess I am about three-quarters of the way along my silk wrap piece. It is getting quite exciting. It really feels like a good length of cloth now and I can see it working as the shoulder wrap that I have planned. I really can’t wait to wash and iron it. However, the most intensive apart of the patterning is still to come…where I have to repeat the 3-color pebble pick-up that I wove at the start. So, while I might be three-quarters of the way in terms of length, that is probably not true in terms of time.

My dvd on Operating a Backstrap Loom continues to wing its way across the world!

Marilyn at Taproot Video has been keeping track and tells me that Norway and France have been added to the list of countries.

Many thanks to everyone for your support and I have been very happy to receive feedback from a lot of you about the wonderful ”aha” moments you have experienced.

I like to think that people are putting some of the techniques to immediate use just like Maja in Germany has done.

Here’s a sweet way to end this post…

I have another thank-you card that the young ladies in the highlands sent me after my visit. Maxima and I are winding a very colorful warp and there  I am in the corner weaving at the leaning vertical loom…such a lovely souvenir of my visit.


Backstrap Weaving – Worth the Wait

I had wanted to call this post simply “Waiting” but then had a funny feeling that I had used this title before. It didn’t surprise me. We tend to do a lot of waiting here in Bolivia. It’s a part of life and, after 15 years here (plus 5 more in Chile), I can hardly be annoyed or too put out by it. I Googled to check my use of this title and, yep, there it was in August 2012. I went back to see what all the waiting had been about back then. It was nothing to do with Bolivia at all…I had been waiting for some technical help with my second book and impatiently awaiting some exciting weaving events…all good stuff, as you can see below, and worth waiting for.

Some events from 2012

This week has been about a different kind of waiting. It involved getting up every day at 4am and trekking out to the SEGIP office to stand in line and…..wait. SEGIP issues visas and ID cards for foreigners. My ID card had expired and I have been trying since the end of December to move the paper work along. The office opens at 7am. You have to be there in a queue at 4.30am to get one of the 80 daily appointments. You wait in the street in the pouring rain or sun…we had both… and there’s no shelter.  I only wish I could entertain you with some nice shots of the sunrise or my fellow “waiters”. The sunrise was happening behind buildings and it was too dark most of the time for people shots. Today I succeeded! I was #46. I got to speak to someone.

OLYMPUS DIGITAL CAMERAAfter the Monday morning failure to gain admission, it was kind of fun greeting and seeing my fellow “rejects” the following days.

….the Brazilian medical students…always in large groups, always jolly, fun loving, even in the rain, and very, very loud.

…the Argentinians…recognizable by the thermoses that they carried and the little pots of yerba mate which they passed around and sipped and, of course, their gorgeous accent.

…the Mennonite gentlemen with their denim overalls and baseball caps, the ladies with their head scarves, print aprons and straw hats.

…the Russian Old Believer gentlemen with their long beards, piercing blue eyes and long, loose belted shirts. You have no idea how much I wanted to look more closely at those belts! They leaned on a fence with the Mennonites and talked about the recent rains on their land. There were some Mormon missionaries from the US looking so terribly young to be so far away from home.

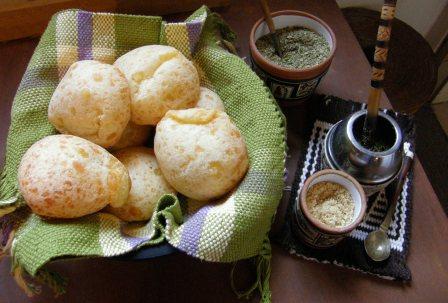
It was strange having so many foreigners gathered in one small place like that. Bolivian life is influenced in many ways by the cultures of its neighboring countries. Above, you can see the baked Brazilian snack called cuñape that is very much enjoyed here, and a pot of Argentinian yerba mate sitting on some of my backstrap woven pieces….a nice piece of Mennonite cheese or a pot of Mennonite honey would make it the perfect tea time picture.

The good thing is that, despite the wait and rejection on three days in a row, I managed to get home every day by 8.30am ready to face and enjoy a whole morning at the loom. That way, the pre-dawn expedition didn’t feel so much like wasted time.

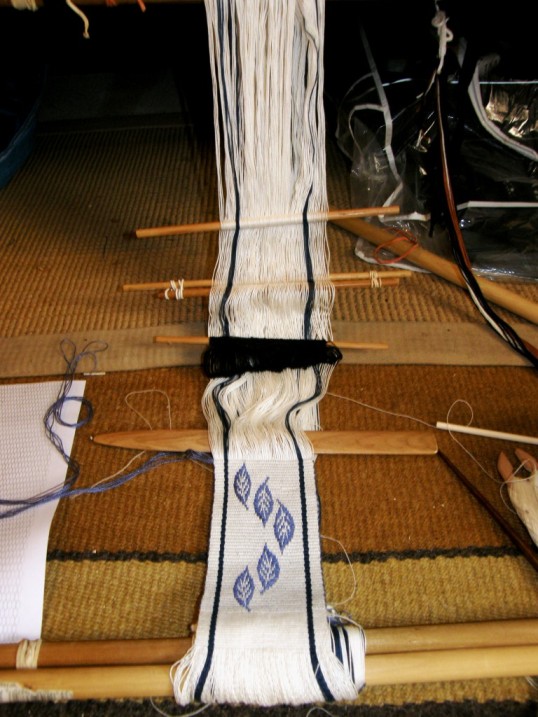
circular warp backstrapThis is one of the things on which I have been working this week. It’s the circular  warp that I took on my last US trip. I use it to show friends the different parts of a backstrap loom including the coil rod.  It’s been sitting here as just a white plain weave piece of cloth. I decided that it needed to have some pattern.

That is one of the things I love about patterning with supplementary weft . You can just add pattern to your plain white “canvas” at any time without a whole lot of planning. This warp had previously held a butterfly motif which I pulled out and replaced with this leafy design.

It’s interesting how different the same motif can look when woven with different materials. I created the leaf motif very recently for my discontinuous-warp experiment in heavy-ish wool. On that piece I had used wool as the supplementary weft.

My circular warp is fine cotton and I used tencel for the patterning weft. I also used a closer sett than I usually do so that the fine white cotton would cover the dark patterning weft well. The leaves that had looked so robust in wool  were thin and sickly looking in tencel on cotton so, I had to make adjustments to the original chart. The good thing about the finer warp thread is that you can use longer floats in the pattern and that allows more flexibility and options in the designing. I could use longer floats than the five-span maximum I used in the wool project. On the other hand, the single-span floats I used on the wool piece would  barely show up in the fine cotton. So, several adjustments had to be made to “fatten” the leaves and make the finer details more visible.

???????????????????????????????I don’t know exactly where this pattern is going from here,  but that is enough weaving for this warp for now. I placed the turns of the supplementary weft on the edge of the cloth rather than trying to conceal or camouflage the turns within the blue stripe as I usually do. I wanted to challenge myself to make consistently neat and attractive turns on the edge that would resemble little beads. I also turned the weft on the edge of the wool cloth. Those rather chunky turns are now hidden within the tubular edging.

circular warp backstrapAbove, you can get more of an idea of the circular nature of this warp and see the coil rod in position. The biggest difference I notice between weaving on a circular warp like this one and one in a single plane, is the ability to apply tension. There is a certain “springiness” to this circular warp which makes me feel like I can’t tension or beat as hard. This has me pushing with my feet (something I rarely do these days) in an attempt to apply more tension. Maybe that is why the majority of indigenous weavers I have seen using circular warps brace their feet against something as they weave. It is interesting to be able to compare the feel of the two kinds of warp set-ups this way.

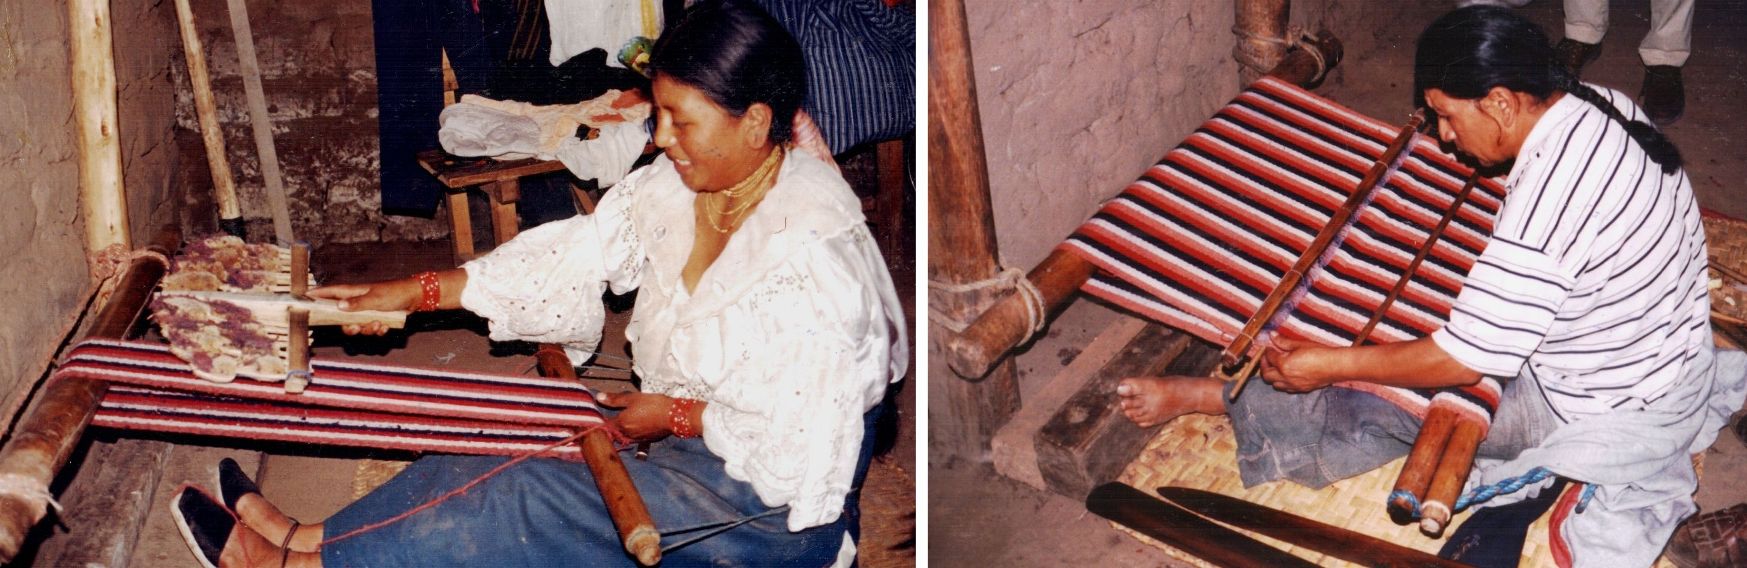
Weavers in Ecuador using circular warps brace their feet against piece of wood to help apply tension to the warp.
Weavers in Ecuador using circular warps brace their feet against blocks of wood to help apply tension to the warp.

At first, I decided that it would be an interesting challenge to just chart and weave one leaf and then see if, by reading from the one motif woven into the cloth, I could flip the design both horizontally and vertically. The challenge wasn’t met as it gave me a big headache! and so I decided to chart the four versions and go from there. I wrote a page some time ago which I added to my list of FAQs on my thoughts about the use or non-use of charts.

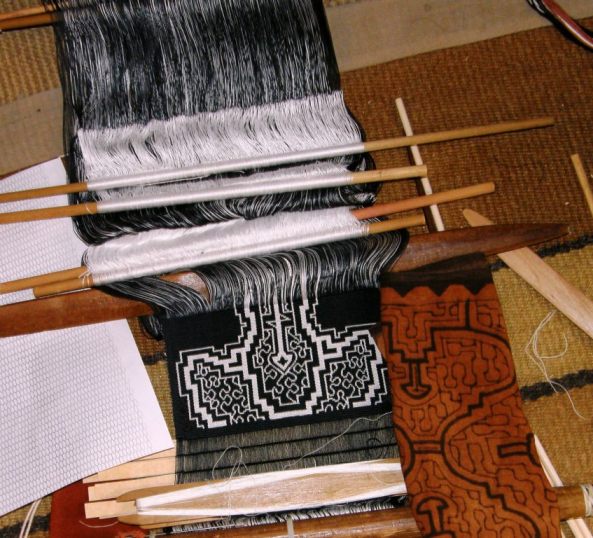
shipibo inspired wall hagnging panelMy latest wall hanging project uses a design I created and charted myself which is, for the most part, not symmetrical. It is a row- by-row slog working with an enormous pattern chart and was inspired by designs painted on cloth  by the Shipibo people of tropical lowland Peru.

Fortunately, for me, warp-faced double weave is one of the easier structures for reading the pattern  on the cloth because there are no warp-float lengths to be considered. Once a base line of pattern has been woven, it is easy and straightforward placing subsequent rows by referring to the preceding one without having to do a great deal of counting.  However, there are no small design elements within the large one that get repeated and which can, therefore, be eventually memorized.

The pattern is not one with which I am all together comfortable yet. What I mean to say, is that I am not sure that I like it yet! My eyes long for symmetry! I keep telling myself that I just need to WAIT (I have had plenty of practice with that this week!), weave a bit more, walk away, stand back, weave some more and allow it to develop. It is a design that has a lot of wiggly chaos within a rigid symmetrical outline. That’s the best I can do to decribe it for now. I just need to put a bit more of that heavy symmetrical outline into place to help me deal with the chaos!

I will wait. I won’t unweave. I feel confident that it will be just what I wanted in the end.

I was Googling some images this past week and came across some of my own things such as this…

Bhutanese motf supplementary weftI thought….wow, I remember that. I wove it at the start of my studies of Bhutanese patterns. Now, what in the world did I do with that? A quick search in the closet turned up nothing. And then I remembered…oh yeah, I unwove it because I didn’t much care for it at the time…too colorful or something like that. Maybe I should have WAITED. At least I took a picture of it before unweaving.

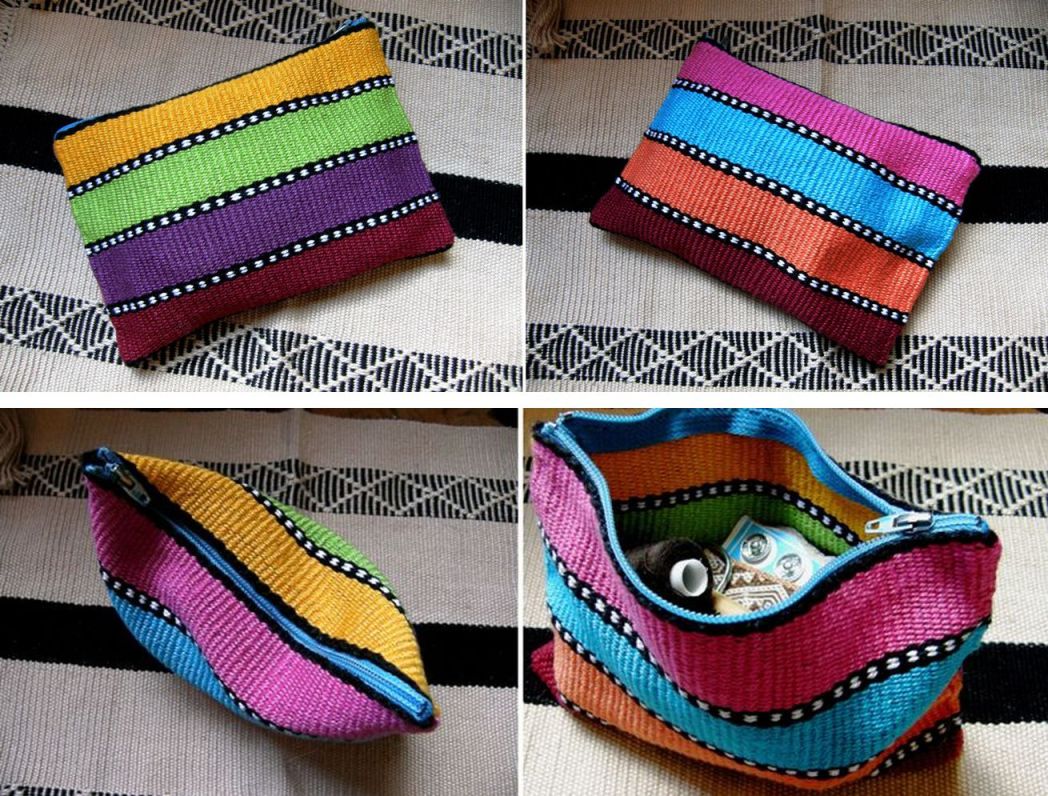
striped-pouch-x-4This had been a very hastily put together demo warp . I disliked the color combination so much that I didn’t even want to put it out to be seen. Nevertheless, I wove it off and sewed it into a pouch. Time has passed and now I just love my happy colorful sewing bag.

I am still waiting for this one to grow on me…

??????????????????????It was another travel warp into which I hadn’t put much thought. I was pleased to at least be able to use the finished fabric from the above warp for a tutorial on edgings.

Let’s see what online weaving friends have been up to…

Scott is really getting into double weave and is now charting his own motifs. After working through my tutorial, he used the llama patterns to make keyfobs. I like those grippy keyfob ends…no sewing needed at that end. They are especially suitable for double weave which can be too bulky when folded and passed through a key ring.

scott (1) llamasNext he charted and wove the Norse Valknut motif…love it!

Scott's norse valknut motifI can’t wait to see what he comes up with next.

Jennifer finished her bag from our Ravelry Games weave-along…

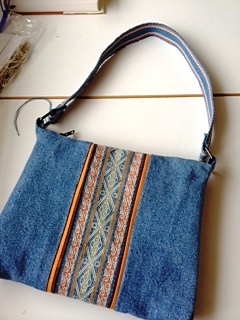
Jennifer bag with chinchero patternsWhat a superb piece of work. She used denim which so perfectly matched the washed-out blue of her indigo-dyed hemp. Other pieces of colored fabric were used to frame the woven section. She finished it with a zip. 

lausanne pebble weave bandLausanne’s band is a lovely example of how simple 2 and 4-revolution Andean Pebble Weave motifs can be placed together to make new designs…something that I discuss and encourage in my second book. I love the way she has photographed it. It is so nice seeing lots and lots of band length like that.

Teresa in Chile sent me pictures of her first backstrap loom pieces using the tutorials on my blog for creating plain-weave bands with solid colors, comb patterns, and stripes. In this way she wisely develops and practices her skills in managing the backstrap loom with simple, fun, plain-weave projects. Now she is taking her first steps in creating patterns with warp floats.

teresa

I am glad that I didn’t have to keep you waiting for this blog post. Blog day is usually a strictly “at home” day for me consumed with taking photographs, editing and writing. I am just happy that I don’t have to get up at 4am again tomorrow!

See you next week.

Backstrap Weaving – Tropical Themes and Tools

Santa Cruz,  Bolivia has almost all the lovely things that the tropics typically have to offer…swaying palm trees, avenues lined with mango trees dripping with fruit, exotic plant and birdlife and tremendous afternoon downpours of cooling rain (sadly few and far between these days). Too bad there aren’t any beaches in this country to complete the picture of tropical paradise. For those of you in the wintery whiteness of the northern hemisphere, here is a bit of tropical Bolivian color to brighten your day.

tropical color

And, on a similar colorful and cheery note, here is my newest scarf project still on the loom…

supplementary weft patterned scarf backstrap loom

Carmen at her loom

The main inspiration for the patterns has come from a particular Guatemalan plant motif woven using supplementary wefts. Carmen, pictured at left, taught me to weave this in her home of Santa Catarina Palopó on the shores of Lake Atitlan.

The small plant motif uses inlaid supplementary wefts for the leaves and various warp wrapping techniques to create the stem and plant base.

I took the leaf pattern, changed it a little to fit my working space, and used it in the side panels of the scarf. I also expanded it into an imaginary tropical flower. The tiny butterfly motif was adapted from one on a Mexican backstrap-woven textile that I saw online.

I love the way the turquoise and gold supplementary wefts look together in the flowers on this purple background….visions of tropical seas and golden mangoes! I have to admit that I have been dying to combine those two colors somehow ever since I saw the following shawl by Elisabeth Hill on her Flickr page…

Elisabeth Hill shawl

How is that for inspiration?! And I got to meet Lisa and see this piece in person at Maryland Sheep and Wool last year where the shawl took Best of Show. Lisa has done some backstrap weaving  with me so maybe that will somehow influence one of her projects. Take a look at her Flickr page to see more amazing creations in deflected double weave.

yarn from 2012 trips

I like how my purple scarf doesn’t really scream “me” at all…at least I don’t think it does.

I once had someone on Weavolution say that she could immediately spot a project of mine before clicking on the image to see who the weaver was. It’s nice in a way to know that you have developed a sort of weaving “character and style” that can be recognised.On the other hand, it’s nice to branch out and do something completely different and I have realised that, in order for me to do so, it is helpful to have access to yarn that I have never used before. So, I think that along with my “wider, longer, finer” weaving goal for this year, I will add “new fiber”. I intend to quieten the little voice that tells me to “keep it simple and just make do with what you can get locally” and take advantage of my trips to the US to gather up new-to-me fiber and a greater range of colors.

Above you can see alpaca, wool, hemp and bamboo (?…this was a gift and I am not sure what it is) yarn from a recent US trip….much of it gifts from weaver friends.
coil rod and other toolsNow, back to the current project. What about that coil rod…what has it been doing for me? I roll it along the warp as my weaving progresses and the fabric gets rolled around the loom bars. It is definitely a handy width guide. Beyond the coil rod the warp tends to spread and fan out as it stretches away toward the far loom bar.
The rod also ensures that there is always beautifully consistent tension between it and the weaving line. It locks the warps into place and gives me even tension with which to work no matter how many stretched and loosened warps may be gathering beyond it and on the lower layer of warp beyond the far loom bar. In short…I like it! It is a great little tool.

You can see the coil rod in place in the above picture. Other “tools” that I am using on this project are several ties of colored yarn along the shed rod and in the heddles.  Because my patterns are not wide enough to warrant the insertion of pattern sticks to raise the warps under which the supplementary wefts pass, I am using little ties to raise the appropriate warps instead. There are some that go around the warps themselves in the shed-rod shed and others which are tied around certain heddle strings. I simply pull on these to raise the pattern warps in the heddle shed. They save time and prevent eyesight strain!

As far as tools go, sometimes the simplest are the best…

Montagnard backstrap loom with suttes and double band

It always delights me to see that the use of simple sticks to carry the weft is common to many backstrap weavers around the globe….no fancy tool required! You have seen in my pictures that I use a specially shaped shuttle. Three of these were made for me when I lived in Chile and they have a kind of sentimental value. I enjoy using them and they double as beaters and swords sometimes so they are pretty nifty.

The Montagnard backstrap loom above has two bands in progress and you can see the two simple shuttles. The looms are so large that it quite cumbersome to balance them when only weaving one narrow band. They are designed for weaving large panels of cloth which are used for skirts, shirts and blankets.

I must admit that I have been often pulled towrad buying teeny tiny shuttles at fiber fairs purely for their cuteness factor. I have on occasion used them but had to turn my closet upside down just now to find them to photograph as they have been idle for a long time…

small band weaving shuttles

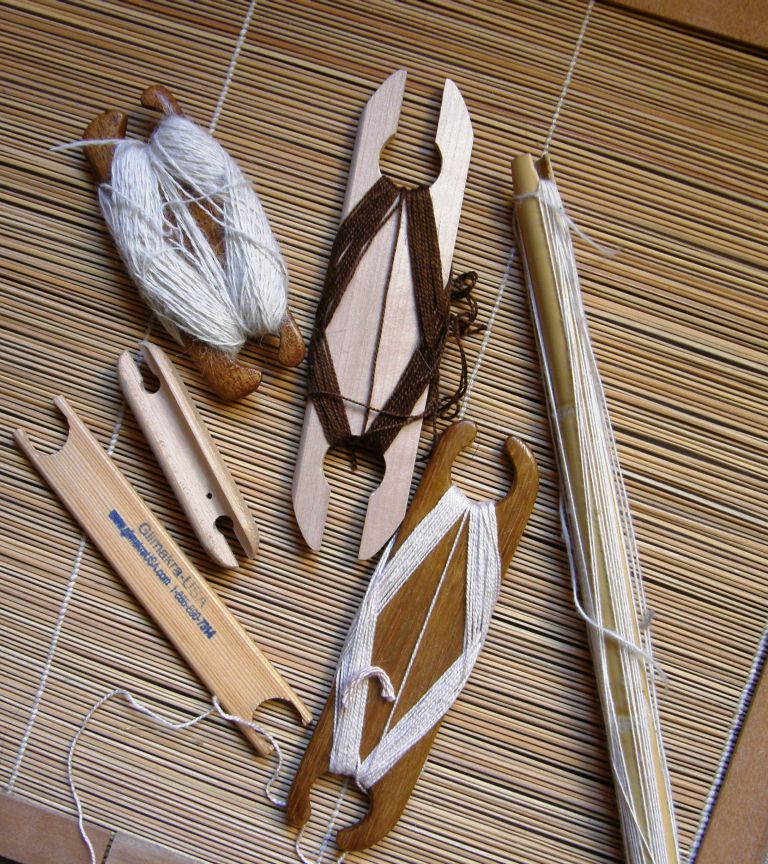
The long thin shuttle on the right is one that one of my Guatemalan weaving teachers used. All my other teachers have used simple sticks about which the yarn is wound or, for narrow pieces, simple “mummy”-like butterfly bundles. Below you can see two such weft bundles. The yarn feeds off the outside rather than from the center and a hitch is put in place to stop the bundle from unravelling when it hangs freely. These two examples are of handspun wool and alpaca fiber from the Cusco area.

yarn bitterflies used in backstrap weaving

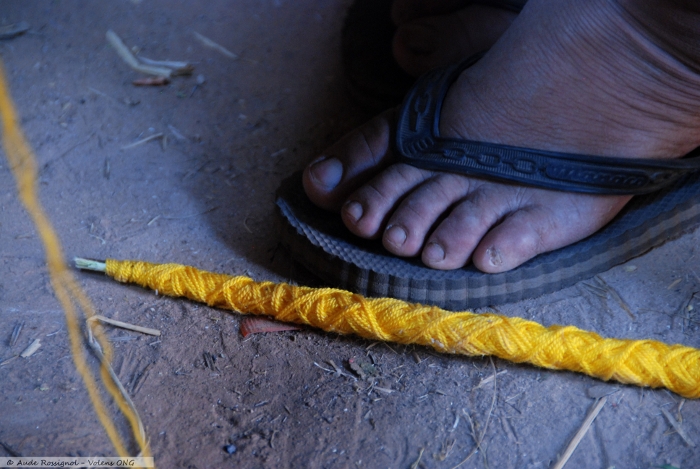
For narrow work my Guaraní teacher uses short lengths of scrap yarn for weft. This way she never wastes a thing! The weft lengths are so short that she does not even need to wind a butterfly. For wide pieces a simple stick shuttle is used as seen below.

Aude Rossignol

Permission to use this image was kindly given by Aude Rossignol.

Here is a video showing my Montagnard weaving teacher, Ju Nie, loading yarn onto her shuttle. You can see that her shin is a very useful piece of equipment as, in a previous post, I showed you how she also uses it to help twist the fringes of her woven projects. The video has two segments with a short pause between. Wait for the second part which shows a weaver from the Cusco area loading her large shuttle.


One of the most charming ways of passing the weft is one in which the weaver has her weft rolled into a ball. She places the ball within the shed and then tilts her body to angle the loom so that the ball rolls through to the other side!

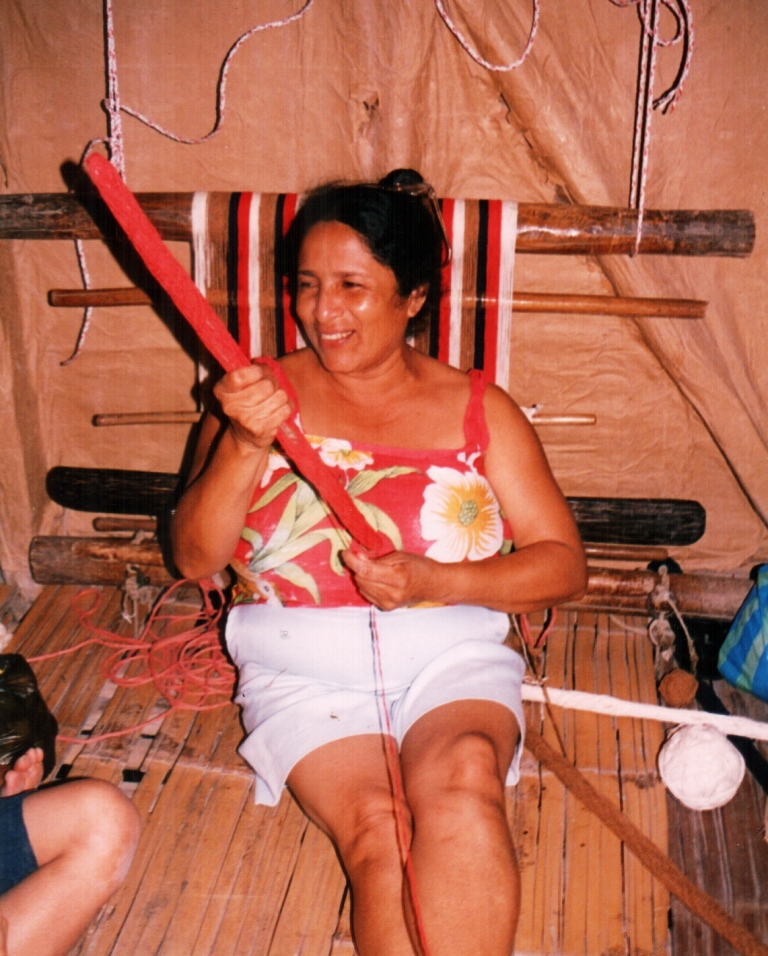
And finally, here is my teacher Trini in coastal Ecuador loading one of the three shuttles for the mini hammock she is preparing to teach me to weave. It was a balanced weave using three weft colors.

Trini with shuttle

In the Ravelry Backstrap Weaving Group, Marge and Julia showed what they have been working on lately. Marge has been trying out Tahki Cotton Classic Light. I have not tried the Light version but I did see it at WEBS when I visited and the color range is wonderful. Marge used an online inkle pattern generator to help her design the color arrangement. The result is gorgeous!

marge

Julia used two different color ways for the same pebble weave motif (charted in my second book) on two different looms…a four-harness and a Seidel Band Loom.

julia pebble weave on two loomsI will be visiting the Mannings this summer. If you want to come and weave, maybe we can spend a little time outside hitched to some shady trees down by the creek….on the ground or on chairs..that will be up to you.  How cool would that be?!

the-mannings-stream

Backstrap Weaving – The Curious Coil Rod

Are you ready for this week’s dose of red, black and white?

3 red black and white backstrap weaving hangingsI have quite a good selection of colors with which to work here in Santa Cruz. None of the colors go by fancy names. They are pretty much the basic tones. Therefore, when someone asked me to pass them the “chartreuse” yarn for their weft in one of my workshops, I had  no idea what they were talking about. Here, we get dark green and light green. But, I have to say that there are enough colors here to keep me happy.

Why then do I keep being drawn to black? I guess there is just something so clean and sharp about black and white.

Even the local Guaraní weavers can’t resist going back to this combination from time to time despite the fact that many of them use the same brand of colored cotton that I do…

guarani black and white weavingsThe third piece in my wall hanging series with the Wayuu-inspired design is an inch or so away from being finished. Naturally, as I have sat there these last few days picking up threads and heaving open the sheds, my thoughts have been turning to my next project. It will probably be a purple scarf decorated with supplementary wefts using cotton yarn from Guatemala and mostly silk supplementary wefts.

colors for next backstrap woven scarf
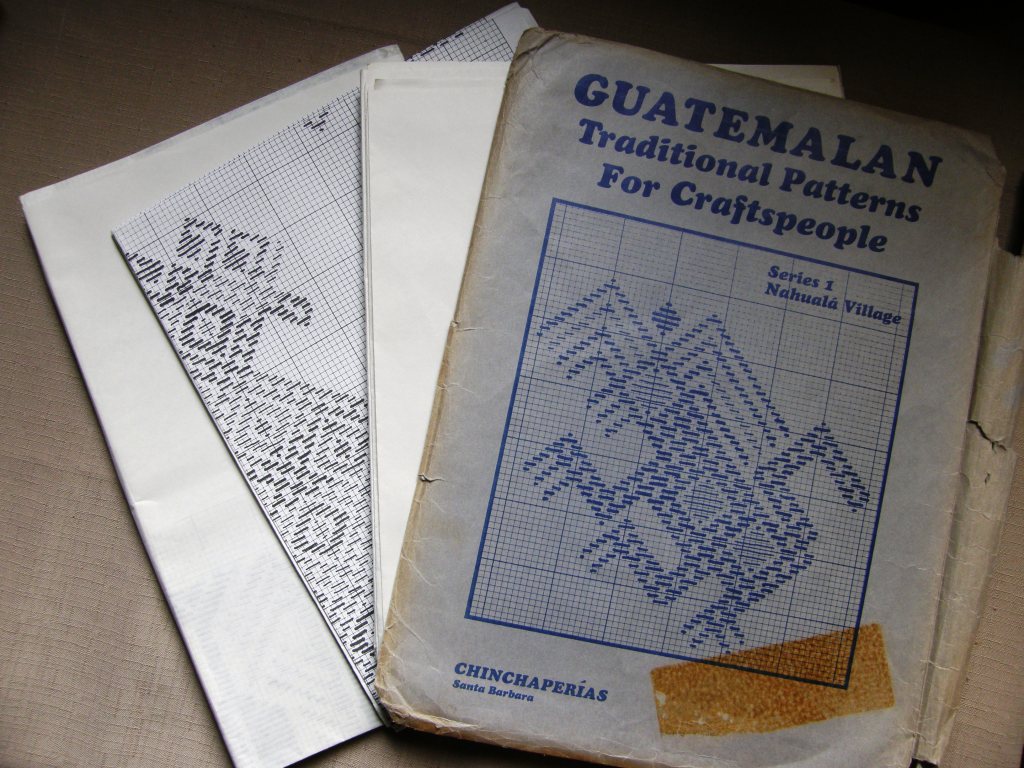
Guatemalan pattern chartsI am still planning the motifs and, while digging around at the book shelf, I unearthed a packet of patterns that was given to me by Sharon, a Weavolution weaving buddy, a year ago.

The packet contains three enormous sheets of detailed Guatemalan motifs. The front of the envelope states that this is Series 1 from Nahualá Village. Nothing on the packet or within indicates when these patterns were charted, by whom or how many packets comprise the entire set. Imagine if this person or people graphed patterns from dozens of villages!

Happily I tracked down another packet, series 3, on Ebay and it seems that there is a weaving guild that may have some others in their library.

However, I probably won’t use any of these motifs for my scarf. I have something quite specific in mind that I learned when I was studying in Guatemala but which also has a slight Bhutanese influence.

I told you about circular and dovetail warps last week and I have decided that I will make a circular one for my scarf. That will keep me in good foot-bracing distance from my bed. Winding a circular warp is straightforward enough. I was easily able to make some changes to my standard warping board to make this work well.

warping set up for circular warpThe two off-set stakes to hold the cross were all I needed. However, that picture is cropped and the following shows the complete set up…

circular warp set up with coil rod stakeThe extra unnecessary stake was incorporated so that I can try to learn more about the mysterious coil rod. So far, I have not seen a coil rod being used in Bolivia and Peru. The first place that I came across one being used was Ecuador. It was in the ikat- weaving town of Bulcay and I had no idea at the time what this piece of equipment was.

ikat weaving loom Bulcay Ecuador

There is a black arrow pointing to the coil rod in the above picture…the thin stick just below the upper beam.

ikat weaver Bulcay Ecuador

When I visited with this weaver, I was concentrating more on seeing how she prevented having the warps move out of alignment and excessively blur the ikat pattern. I suspected that the coil rod was her”secret weapon” but when I asked, she told me that it had nothing to do with it. Actually, I have to say that she was not very keen on answering my questions. Let’s face it…not everyone is fond of having strangers hang about pestering them with questions while they are trying to weave! She was nice enough to let me sit by and watch and take pictures.

coil rodDennis Penley, author of Paños de Gualaceo, writes that the coil rod, (he calls it a “rolling stick”) in Gualaceo, one of Bulcay’s neighboring communities, is added once the warp has been placed on the loom. He says that the warp threads are wound around the stick in bunches of ten. The stick serves to stop the warp threads from slipping.

You can see how the warps have been grouped in the above photo and the way they are coiled about the stick at left.

Of course, as time went by, I discovered that coil rods are used by many backstrap weavers who work with circular warps and I have since seen many examples of weavers in Asia using them.

When I met and got to spend a little time with Burmese weaver Dar Ku in Massachusetts, I noticed the coil rod in her loom.

O

It is the rod furthest from the weaver in the picture. I didn’t think at the time to ask her if she added it after or during warping. I was concentrating more on her use of supplementary wefts to make her patterns and the fact that she was weaving her designs while looking at the wrong side of the cloth! Her heddle system was also very interesting. You see, there are just so many wonderful things to see and take in when you watch a backstrap weaver at work!…what is the shape of her sword, how does she open the heddles, how hard does she beat, what does she use to pick up her threads and much much more!

As she wasn’t weaving ikat and her warps could move without causing any harm, I assume that the function of the coil rod in this case is to help maintain width and keep the warps spread and in order in the potentially messy area beyond the heddles and shed rod.

The one time that I have seen a warp being made which incorporated  a coil rod was when I studied with the Montagnard weavers in North Carolina. Again, there was so much to see especially since this was also the first time I had watched a weaver add heddles as she warped. Naturally, much of my attention was focused on that.ju-warpingThis is what Ju Nie’s warping path looked like…

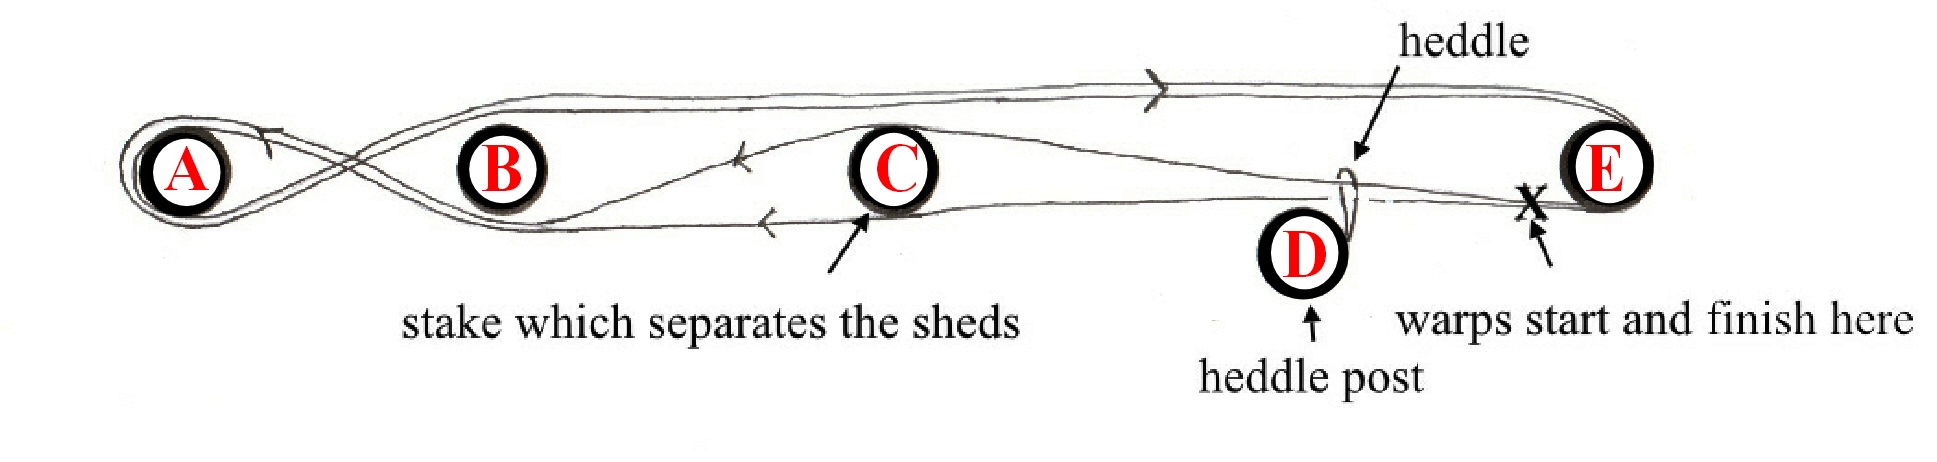
Rhade warping pathIf you flip this upside down, you will see that my new warping set up was designed to resemble this. Stake C on Ju’s set-up separates the threads into two sheds. Stake D  holds the heddles that Ju makes as she winds the warp. Stakes B and E will be replaced with the backstrap loom bars. Stake A will be replaced by the “curious” coil rod.

As I am not going to make heddles as I go, stakes C and D on my set-up will hold the cross.

circular warp set up with coil rod stake

Here is a diagram showing the two-revolution warping path to complete the cross in my set up…

warping path with coil rod cross

From left to right…loom bar 1 will replace the first stake. The next two stakes will be replaced with cross sticks….I used pencils. Loom bar 2 will replace the next stake and the last stake on the right will be replaced with the coil rod. Below you can see how it looks when taken off the warping board. I have just wound a tiny warp and used some random sticks for the sake of this demonstration.

circular warp with coil rod on loom

Below you can see the loom almost ready for use. What remains to be done is make the heddles and select a suitable shed rod.

O

The yellow and green pencils are holding the cross. Heddles will be made to raise the threads that pass over the yellow pencil and a shed rod will replace the green pencil to raise the other half of the threads.

The coil rod has been rolled from its original position, in the picture below left, over the loom bar into its new position as seen below right.

coil rod put in position

This is what it looks like on Ju Nie’s narrow warp.

ju nie's coil rodSo, I know how to wind a circular warp and put the coil rod into position now…yay. The question remains…what exactly is the purpose of this wee stick? I guess I will find out as I weave my purple scarf. I suppose I will have to weave with a coil rod for a while and then without one in order to note the differences.

In Weaving and Dyeing in Highland Ecuador, Anne Rowe notes that the coil rod, as used by the ikat weavers in Azuay Province, helps secure the slippery cotton warp and maintain an even width for the fabric. However, it is not used by cotton ikat shawl weavers in Rumipamba. I imagine that the resulting shawls in both areas are equally well made.

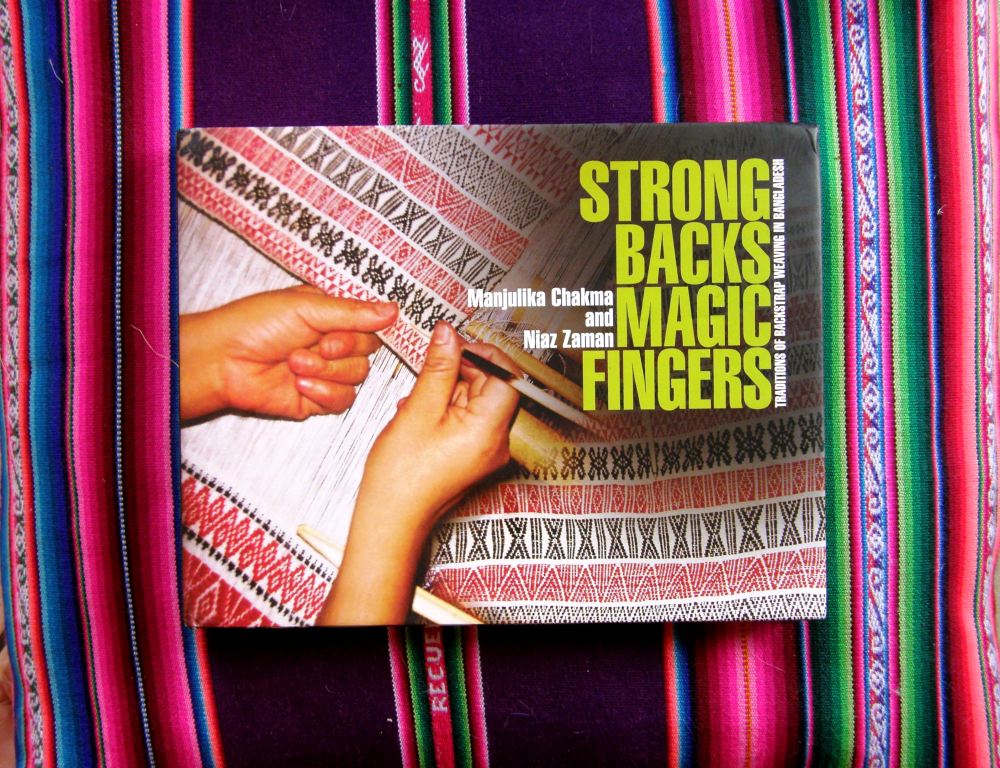
I have a book on backstrap weaving in Bangladesh, Strong Backs Magic Fingers, which describes the looms and textiles woven in twelve areas of that country. While the vast majority of the looms shown have coil rods,  some of them don’t. Certainly those that have the finest and silkiest looking thread always do. Yet, some weavers manage happily without them. It appears to be more of an aid than a necessity. Perhaps it is simply tradition that has some weavers using one.

Strong Backs Magic Fingers

I am kind of excited about having this new piece of equipment to experiment with!… a mere stick.

In Spiritual Fabric, Sadae Torimaru calls the coil rod that is placed in a body-tensioned loom used to weave narrow bands in China a ”temple stick” and says that it is used to keep yarns and width constant.

Some of you may like to read Maria Christou’s thesis An Ethnographic Study of the Loom and Weaving of the Sa’dan Toraja of To’barana’. Her research took place on the island of Sulawesi, Indonesia and on page 26 she ponders the coil rod and quotes the thoughts of other researchers on its purpose and use. It would seem that she found the answers to her questons in the course of her one year of study. I have to confess that I haven’t gotten that far in my reading of her paper to know for sure….printing out to read this weekend!

If you have made it this far in reading this post, thank you for bearing with me in my ramblings about a stick!

And so, let’s enjoy looking at some of the fruits of  these looms we have been talking about.

weavings Bangladesh Montagnard Burma

You can see a length of black skirt fabric with warp-float patterns woven by Ju Nie with a weft-twined edge added by her sister. The back cover of the book on weaving in Bangladesh shows the supplementary-weft patterned work of Chakma weavers and Dar Ku shows the white cotton fabric she wove for a dress as well as a richly patterned traditional blouse.

For those who may be curious about how Ju Nie adds heddles as she winds her warp, here is a video I made explaining it.   Ju Nie works way too fast in the video that I took of her doing it!

Wonderful, isn’t it? Maybe one day I will do this. For now, I find it very relaxing sitting at my loom and making my string heddles. There’s always something new to learn!

I will leave you with a video of Dar Ku weaving. She has such a beautiful peaceful way about her…