Backstrap Weaving – Color Challenges

I have finished another ikat project/experiment. This one will be a wall hanging for, most likely, some future home as there isn’t a good space to hang it here. As with most of my weaving projects, I didn’t start out wanting to weave a wall hanging. I simply wanted to continue my experiments in ikat. The experiment was largely successful and so I now get to give the product a name….in this case, a wall hanging.

My goals for this one were to…

…try tying patterns into 60/2 silk. I hadn’t used 60/2 silk for ikat before.

…place one layer of warp threads on top of the other, so that the warp was half its original intended width, and tie the pattern onto both layers at once.

…dye with multiple colors.

…include patterns woven with supplementary weft.

…weave a band along the end of the piece using the fringe of the finished piece as the weft.

The dyeing itself was successful in that there weren’t any leaks or other mishaps. However, none of colors turned out the way I had expected! The first green was way brighter than expected. I thought that it would turn out a lot “dirtier” because I wasn’t dyeing over white. I had hoped that it would look like the typical “swampy” greens that one gets from using plants. Later, I remembered having received some good advice about these particular dyes when I was buying them. I was told that the colors were bright and that it was a good idea to add a tiny bit of slate-color dye to dull them a bit. I even bought a pot of the slate dye so I could do just that and then completely forgot to follow the advice. But, there were some things about the dyeing process that pleased me: as I was dyeing one color on top of another, then on top of yet another, I managed to create an unexpected reddish-brown that I loved. The thing is, I know I will never be able to replicate it!

I thought that I would end up with a black or almost-black background color after all the layering of colors. But, as you can see, it’s a very dark green with interesting shimmers of reddish-brown and teal that appear when light hits it a certain way.

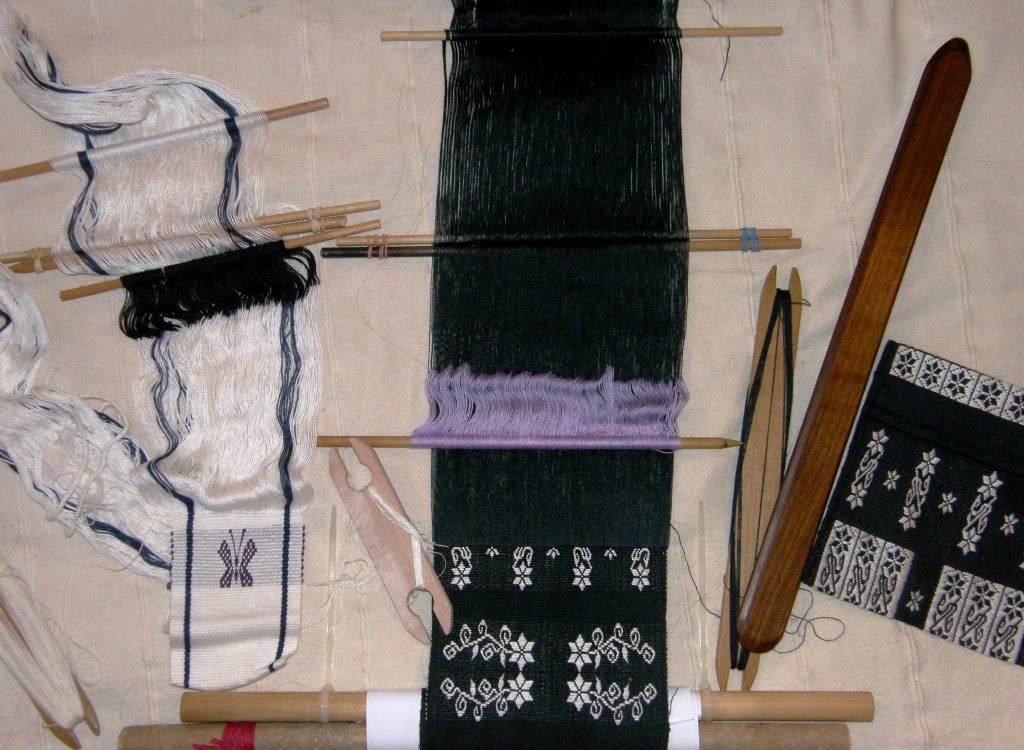
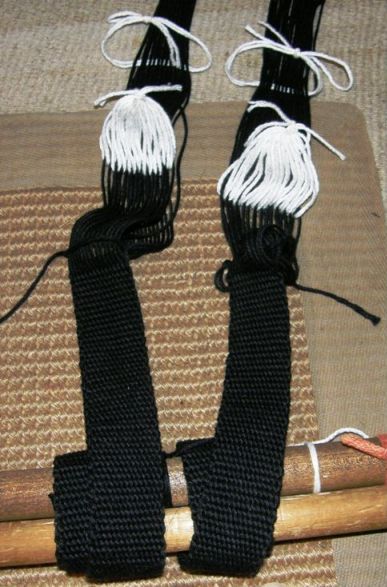
This is a view looking down from my bed first thing in the morning. The warp in this picture has been set up for weaving on a backstrap loom with heddles in place and some weaving started. My bed base is the anchor point for the far end of my loom. I have to be careful if I get up in the darkness not to stumble and get myself entangled in warp!

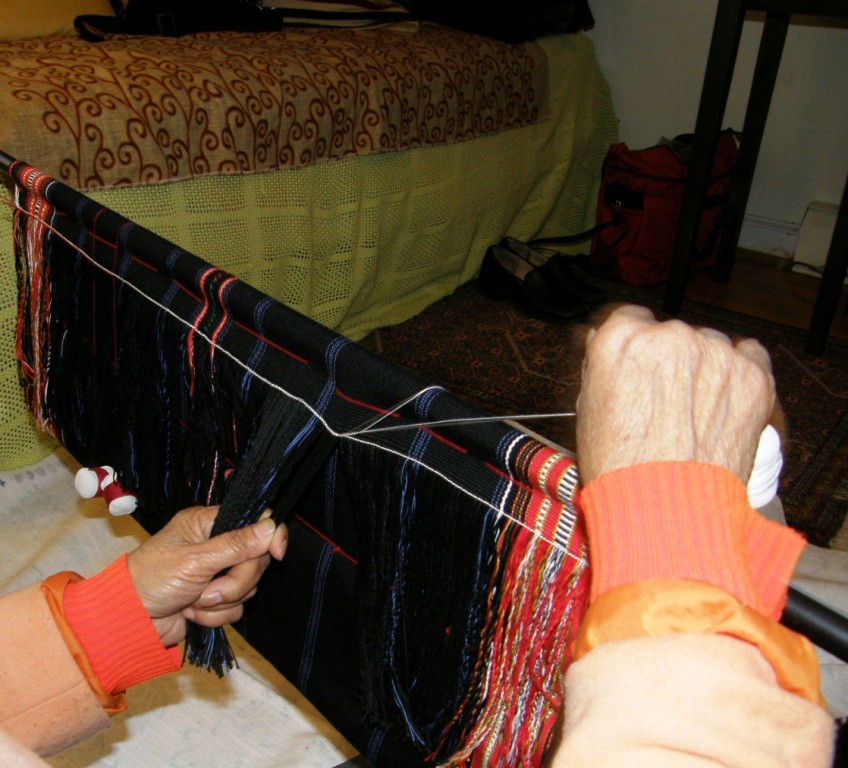
As weaving progressed and the warp threads jiggled about with the movement of opening and closing sheds, they began to loosen their grip on each other and fan out. The ikat patterns slowly took on a more solid appearance. At this point, I paused to choose a color in my stash of 120/2 silk so that I could weave some motifs into the broad band of reddish-brown. I had a kind of wheat color that I thought would be a good match. Out came the charting paper and I drew a pattern with hooks and arrow-head shapes that would go well with the main ikat pattern. You can also see a thin horizontal stripe of teal lying on top of the one of the wooden rods which I had decided that I hated! So, I designed another fairly solid pattern for continuous supplementary weft to weave over and hopefully conceal it.

Discontinuous and continuous supplementary weft patterns.

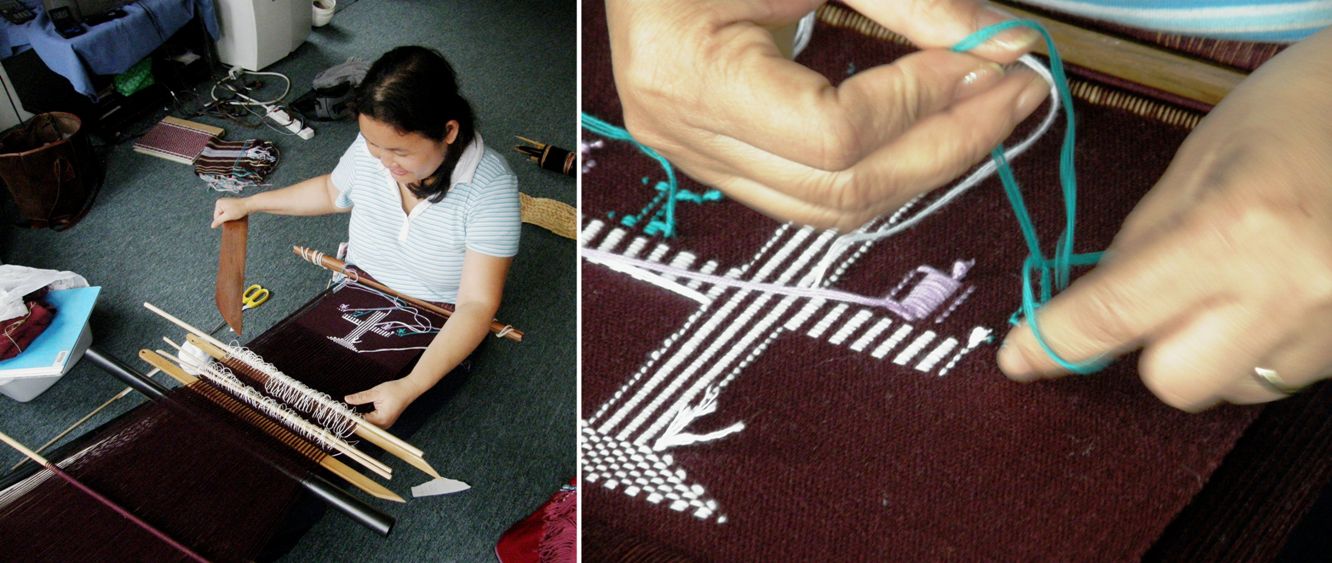
This discontinuous pattern was fun to weave. I love this technique where two strands of patterning weft are passed at once. My little cardboard bobbins kept everything orderly. In the lower left part of  the picture with the bobbins, you can just make out the one and only warp thread that broke. I had nicked and weakened it with the tip of my scissors when I was cutting out the ikat tape. It didn’t take long for it to break once I started weaving. Replacing a section of broken thread that has been dyed multiple colors along its length can be a problem. I had some green 60/2 silk that wasn’t a bad match for the dark green but some of it had to creep into the brown section where the warp thread had torn.

The second continuous supplementary-weft pattern that I had designed to cover the teal stripe wasn’t so much fun to weave…at least not to get started. There were 882 warp ends to count in the shed to lay in the first shot of supplementary weft and I had to count it six times before I got it right! I kept ending up with one extra thread. Was I miscounting or had I actually wound 1766 ends of 60/2 silk instead of 1764? It was maddening! Conclusion…I was miscounting. Once the first row was in, it was pretty smooth sailing. I think the pattern does a pretty good job of hiding the stripe.

The threads in the main ikat section behaved pretty well. There wasn’t a great deal of shift except for the very center. I think that had something to do with the way I had lashed the warp to the frame for tying the ikat tape. It has the typical out-of-focus look of ikat.

After that, I had to go through laying in the pattern again for the strip of supplementary weft over the second teal stripe. It was slightly less painful the second time around. And how is this for crazy? I got about 20 rows in on the set of supplementary-weft motifs on the second brown section before I realized I was weaving the wrong pattern! I had designed two patterns. The first had been too fine for this weight of silk but worth keeping for perhaps another project in heavier thread. That was the chart I had grabbed. Grrr! Un-weaving this silk is no fun at all. There is a surprising amount of fluff build-up that binds the threads and means that the sheds don’t want to pop open cleanly to release the weft that you need to remove.. I literally had to tear the threads apart.And here it is finished and still on the loom. I tried to squeeze as much dark green out of it as I could at the end but warp tension was starting to get a bit wonky at that point and it was time to stop.

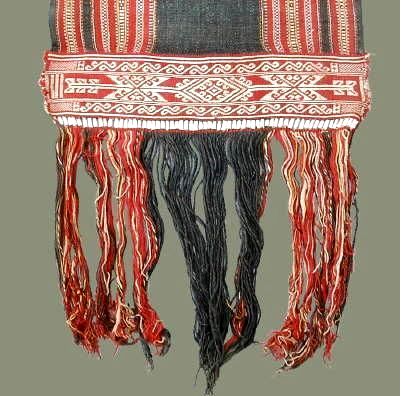
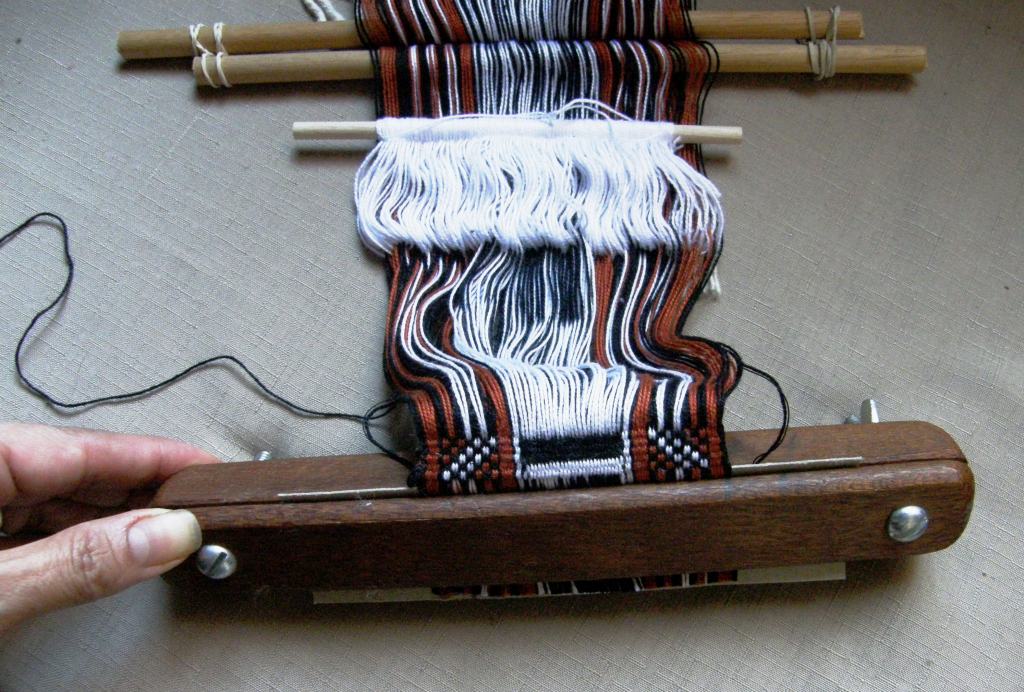
Once off the loom and after the usual finishing process, I wove a band along the bottom edge of the fabric using groups of warp threads from the fringe as the weft. I designed a double-faced pebble weave pattern that would suit the motifs on the cloth….hooks, diamonds, arrow heads. The piece certainly did not need any more added pattern but weaving a band like this is something I have been wanting to try and this was a good opportunity.

I suppose I shouldn’t have used this piece for my first attempt at this technique but I am quite pleased with the result nevertheless. It takes a while to figure out the number of threads to include in each warp bundle and how hard to beat. If either one of those two factors is not quite right, the fabric will pucker. And mine did a little. My first motif is more elongated than the other two. This is the result of having to adjust my beat as I went along.

I had been admiring ikat fabric from Sumba and had noticed that the weavers there join two panels of ikat cloth together side by side and then weave a band along the two ends of the joined panels using the threads in the fringe as the weft. The vast majority of examples that I have seen so far have been warp-faced plain-weave bands with some warp stripes. It makes me wonder if the weavers recognize that there is already enough pattern in the cloth itself and that the bands, therefore, should be quite plain. This is where I got the idea to weave such a band…but I wanted pattern in mine!

One of the many gifts that Kay Faulkner left to the weaving world was a set of video clips that she had taken while traveling in Indonesia. This will show you the process of weaving one of these bands in Sumba if you are curious….

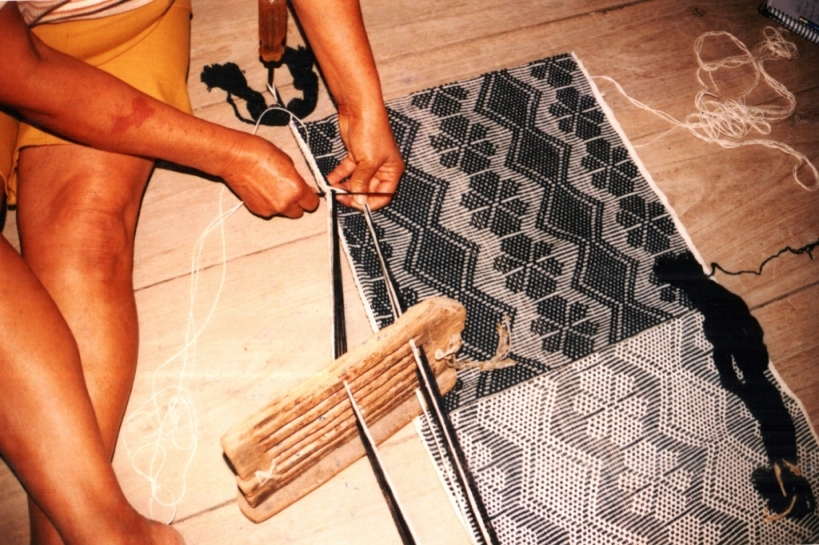
My Montagnard (Vietnamese hilltribe) weaving teachers taught me to create a twined finish on unwoven warp ends. Like the Sumba weavers, they also join panels together to make their clothing.  A pattern is then twined around the unwoven warp threads on the edge of the combined panels. You can see this at the two ends of a piece I made after studying with these teachers. The Montagnard kteh edging is twined and highly patterned while the Sumba edging is woven and is normally quite plain, as far as I have seen so far. Sometimes a Montagnard weaver will hand over her cloth to a kteh expert who will finish off her woven work with the twined patterns.  Here is a video (unfortunately shot by me in quite low light conditions) of one of my Montagnard teachers twining part of a row with two colors. You can appreciate that it is quite a slow process compared to weaving a band along the edge. I find the movements very calming and graceful. I like the smooth, solid colors this technique produces. The twined band has only one “good” face.

Some day, my latest ikat experiment will find its place on a wall.  This experiment is over, notes have been taken, and it’s time to start thinking about the next project.  I am thinking about using cochineal to dye my next ikat attempt. I have only ever used it to dye llama fiber so far. It will be interesting to see how it goes on silk. Perhaps I’ll make some dye samples this time before I go and dive into the deep end. In the meantime, the unexpected colors that I created in this latest piece have grown on me…good and earthy….as the colors I had expected to get fade from my memory.

And, I continue the challenge of removing all color from my hair.  Let me sneak in an update here of my color-free challenge…18 months in and probably only two more trims to go to be rid of all the old dyed hair!

Backstrap Weaving – What Money Can’t Buy

1513230_648143985229230_814686202_nOh, how true, how true! And this message could be a bit melancholic if not for the fact that I can happily say that those “priceless” items that can’t be bought, and which make me very happy, come into my life on a daily basis…not just on Christmas day. 

The priceless items are the opportunities to learn more and more from this hobby of mine about which I am passionate. The opportunities come from near and far…from my own experiments at the loom from which I constantly learn….from weavers here in Bolivia as well as from those on the other side of the world. Sometimes they seek me out and sometimes I just stumble across them via the internet.

While in Australia, I could hardly contain my excitement over a photo of  a backstrap weaver that I ran across online. I patiently waited for a reply from the photographer for permission to show her shot here while boring all the non-weavers around me with news of my find.

Courtesy Jaina Mishra/Wovensouls

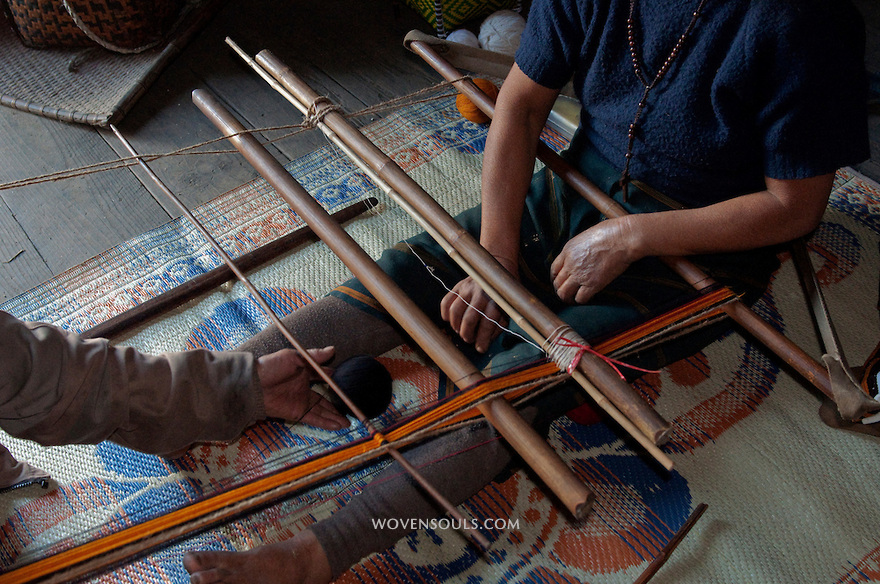
Here is the image which photographer Jaina Mishra has allowed me to show. It shows a backstrap weaver from Arunachal Pradesh in northeast India warping with a partner directly onto her backstrap loom…something that I have never seen before (except for the simple narrow  toe-and-finger method of warping that I have been taught to do by my teachers here in Bolivia and which Maxima is executing below).

cochabamba-designs

ju-warpingIn the picture from Arunachal Pradesh, the heddles are being installed as the two ladies warp. The thicker of the two sticks at the heddles is being used, as far as I can tell, to ensure that each heddle is the same length.

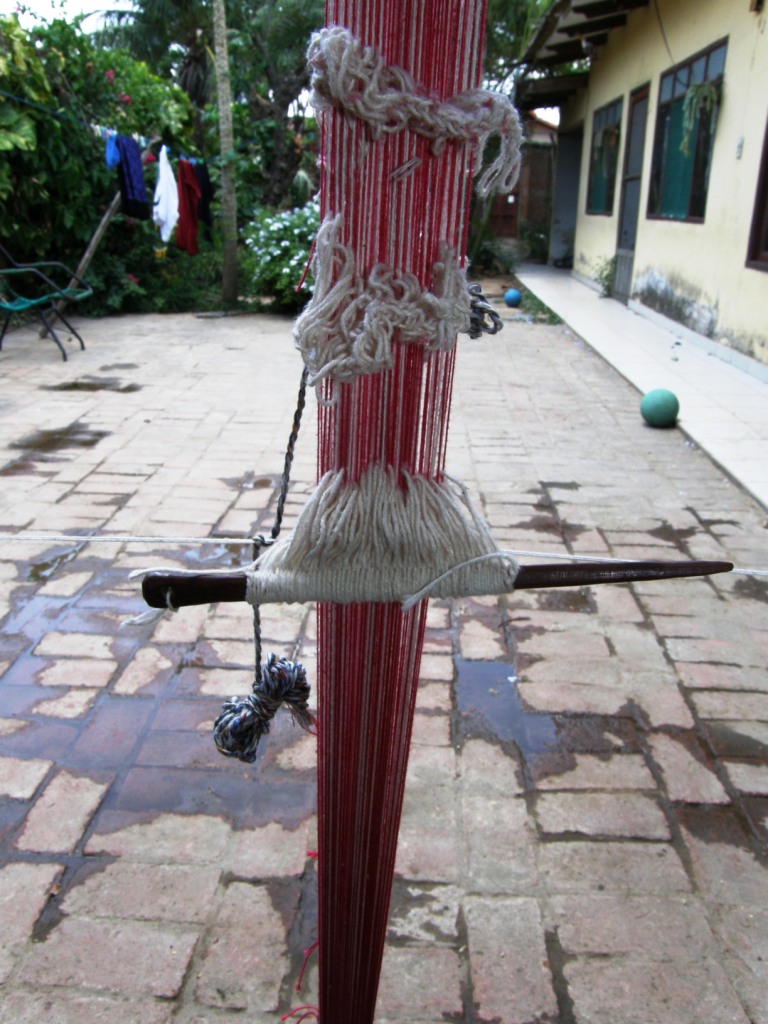
Creating the heddles while warping is not unusual in Asia. You can see my Montagnard weaving teacher at left with the warp she created on vertical stakes with heddles in place. (Watch a video of my Montagnard weaving teacher doing it on vertical stakes in my blog post here and a video of my explanation here.)

However, I have never seen it being done directly onto the loom with the weaver seated in her backstrap as the ladies in Arunachal Pradesh are doing.

I showed you last week (and here it is again below) a picture of a textile from Arunachal Pradesh that a Facebook friend in India had sent me. I wonder if these ladies are going to be creating something similar.

adi tribe arunachal pradesh nth east indiaThe weaver’s partner is not attached to the warp but is simply sitting within the frame (created by the warp itself on one side and cord on the other to hold everthing square). You can see the position of the weaver’s partner in another picture from Jaina Mishra’s website here. (The website is fascinating and has galleries and galleries of her fabulous pictures.)

The two ladies sit and pass the ball of yarn back and forth and around the beams and shed rod, while creating the heddles. And they wrap the yarn aound a coil rod! (the farthest stick in the picture from the seated weaver). If you are wondering what in the world a coil rod is, I have written quite a bit about this piece of equipment in other blog posts starting here.

I am particularly excited about the presence of the coil rod as the warp that these ladies are creating is on a single plane. So far, I have only come across a coil rod being used by indigenous backstrap weavers in a circular warp. I used to say that those of us in the Ravelry group who have grown to love the good ol’ coil rod and use one in our single plane warps are being unconventional….maybe  we are not so unconventional after all!

???????????????????????????????Here is a coil rod installed on Montagnard weaver Ju Nie’s circular warp.

???????????????????????????????This is the first circular warp on which I used a coil rod. The lesson I learned from this exercise was that, when using lots of fine warp ends, the coil rod is tough to move once installed…use a thicker stick. It took two disastrous stick breaks for that to sink in! Since that first experience, I have been using a coil rod on most of my plain weave projects whether the warp be single plane or circular.

???????????????????????????????Here are two projects on which I am working. The black one is a single plane warp and the white piece is circular. The coil rod on each can be seen at the top of the warp.

I use the coil rod in single plane warps to help create even tension across the warps at the weaving line and therefore prevent “ridging” or “corrugation” of the woven fabric. Weaving an inch or so at the “wrong” end of the loom before beginning  project also prevents ridging but my current preferred method is to use the coil rod. In a circular warp, in my experience, the coil rod has the added benefit of helping to maintain a consistent width.

The black piece, by the way, is part of the latest in my red, black and white wall hanging series. The white piece is going to be a little remembrance banner for my mum who loved butterflies and African Violets. So far it has a violet butterfly and I hope to be able to chart and create supplemental weft motifs resembling African Violets.

One more thing I love about Jaina Mishra’s picture is the weaver’s backstrap. I like the little pockets at the ends of the straps into which the beam so neatly fits. So much to be enjoyed in one image!

Yes, these opportunities to learn are priceless and it is wonderful to see so many “encuentros” being organized in South America where weavers can gather and learn from each other. Major ones have been arranged in Peru, and there have been minor ones in Bolivia and Argentina.

Aymara and Guarani weavers learn from each otherAt this gathering in Santa Cruz, Bolivia, my Guaraní weaving teacher got to watch for the first time an Aymara backstrap weaver from Chile and learn the three-color version of the two-color intermesh technique that she weaves on her vertical loom.

learning dovetail warpingAnd then a Guaraní weaver shows dovetail warping on a vertical frame to weavers from Chile and Colombia.

???????????????????????????????Excited Peruvian backstrap weavers watch and photograph a lady from Tinkipaya, Bolivia weaving on her leaning vertical loom at a gathering of weavers in Peru.

1468797_573365889378997_122630664_nDouble weave expert Jennifer Moore, from the USA, no doubt learned a lot from the Peruvian weavers with whom she worked at the most recent Tinkuy in Cusco. However, the main purpose of her visit was to teach them balanced double weave pick-up. Here is the class in progress. The picture is from the CTTC’s Facebook page. Below is one of Jennifer’s pictures of her students at work. It was an experience that Jennifer described as the highlight of her weaving career. Try putting something like that on your Christmas wish list!

???????????????????????????????

learning single plane warping salasacaThese ladies from Salasaca, Ecuador were eager to learn pebble weave from me. Here we are creating a single plane warp. It was only eighteen months later, when their male cousin taught me the Salasaca style of weaving, that I realised how foreign my way of warping must have been to them. They are used to working with circular warps. Teaching them was an experience that I had never expected when I first went to Salasaca and something that money can’t buy.

Sometimes the learning is very hands-on. And sometimes just looking in wonder and quietly absorbing is enough….which is why I am so grateful for the images I find and am sent. There is still always so much one can learn and enjoy from a distance.

???????????????????????????????A weaver from Tinkipaya, Bolivia who uses a leaning vertical loom, ponders the 24 sets of string heddles on a Peruvian backstrap loom.

???????????????????????????????Sometimes the thrill can be about learning something as simple as a new way to make heddles. My Guaraní teacher asked me to show her how to make them on a stick. You can see the loose chained heddles higher up in the warp that are traditional in Guaraní weaving.

So, now I am home in Bolivia and have unfinished projects to pick up and new ones to contemplate, books to read and maybe even one to start writing.

I have brought home that yarn that I dyed with eucalyptus leaves and bark in Australia with Dace and have been thinking about a project for that…

??????????????????????The colors of the Australian landscape as depicted in Austrailan artist Pro Hart’s work give me some ideas on how to perhaps combine the rather pale tones that I have in the dyed yarn (and, yes, the thread still smells like eucalyptus!). 

??????????????????????I have a book of Pro Hart paintings that were created to accompany the poetry of Harry “Breaker” Morant, the “horse poet” . The wee bit of homesickness that I am currently experiencing makes me see the “you” in this poem as my home in Australia. You can read the words of the poem here if you are curious about this poet and his work.

More things that money can’t buy….the happiness at seeing what my students go on to create…

The brilliant rust red in Julia’s latest finished piece has my mouth watering…

Julias bagI showed the central pebble weave band on this blog before when Julia first wove it and now she has sewn it onto a piece of twill fabric that she wove on her floor loom in the fabulous rust red. The twill design is the perfect match for the pebble weave band, don’t you think? She has lined the bag and finished it with a tubular band. Teach me to sew like this!!!

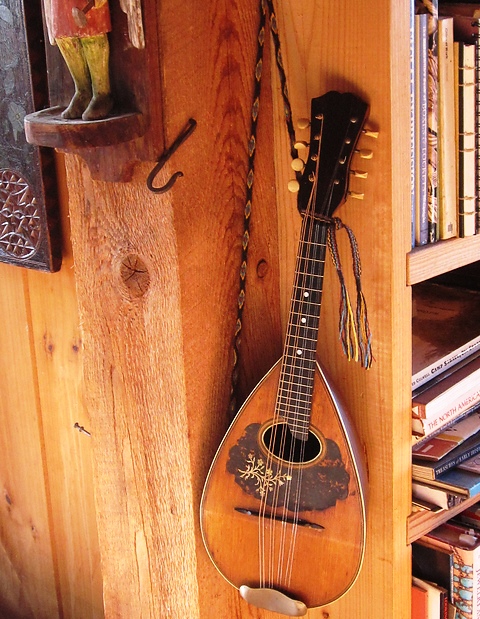
LLausanne's mandolin strapI taught Lausanne the ñawi awapa when I stayed with her in the fall and look how she has used it! It has made a wonderful strap for her mandolin. I am sure that your eyes are wandering to other intriguing treasures in that picture. Lausanne’s home is full of such things.

jennifers pouchesJennifer shows us that both threaded-in patterns and pick-up designs make for  beautiful pieces of fabric. She has made three lovely pouches with braided zipper pulls. The pick-up pattern she is used is one that I charted from textiles of Tinkipaya, Bolivia which appears in my second book.

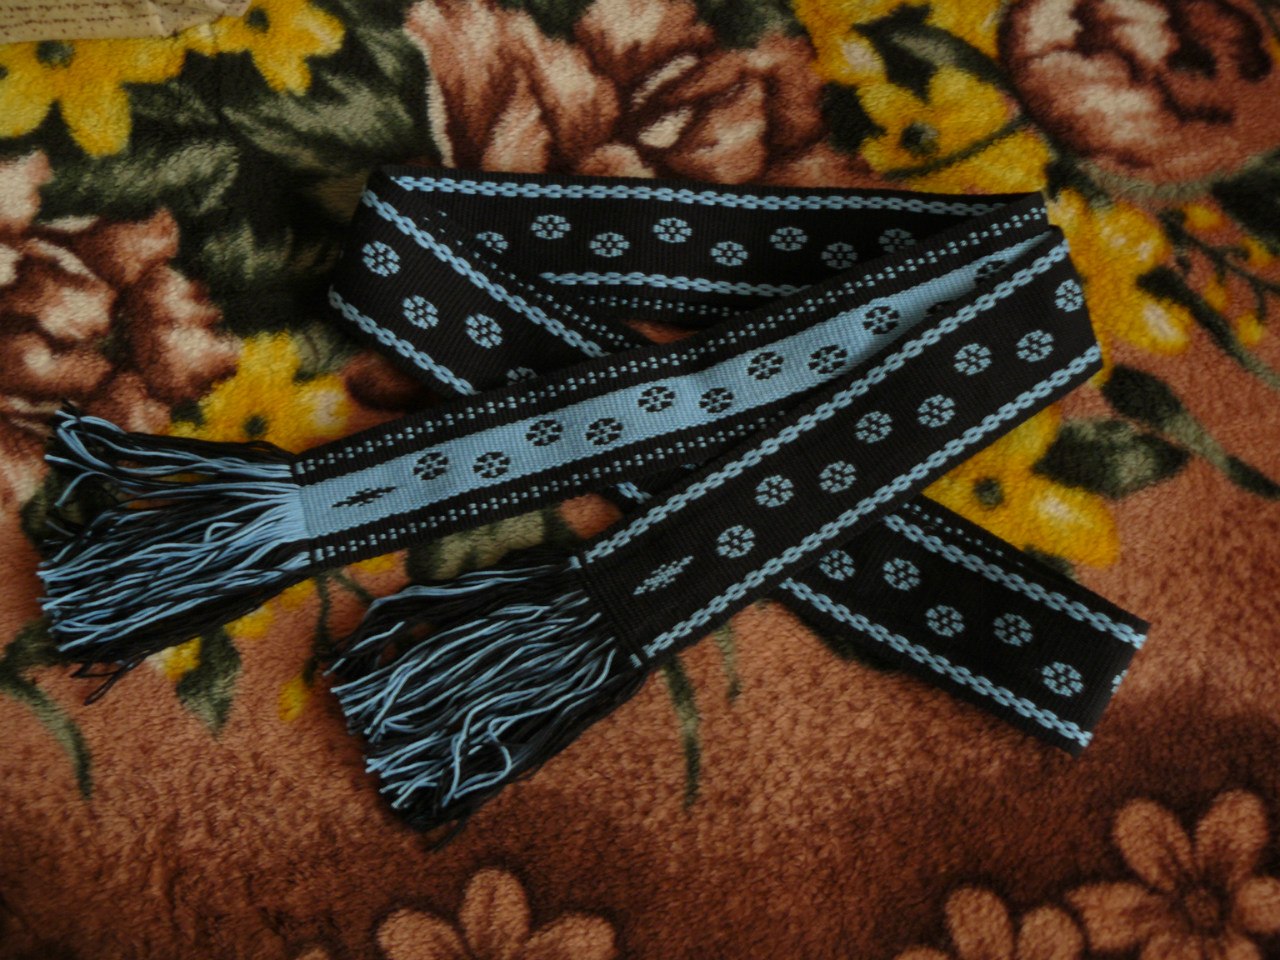
Natalia and I have never met but she is a student of my blog all the way over in Russia. She followed my tutorial on double weave and has added her own touches to one of the small Bolivian motifs that I have used in examples…

natalia

k8black clasped weftAnd to remind us that backstrap weaving doesn’t have to only be about warp-faced fabric, k8black in the Ravelry group showed us her clasped weft scarf. I love the feathered effect in the pink weft.

Judy Kavanagh has also been creating balanced weave pieces on her backstrap loom with the aid of a rigid heddle…a few bits of wood and a rigid heddle is all she needs to create this gorgeous scarf.

Judy KavanaghThe next piece of work is not backstrap weaving but I want to show it to you as I have shown this project in progress before on this blog. This is what Yonat was working on during two of my visits to Santa Cruz California and is the result of a class in Ravenstail twining that she took with expert Cheryl Samuel. Here are the finished leggings!

1512483_10202898120120664_1879491657_nI would say that Yonat is the person who has woven more with me than anyone so far. Now I need to come up with something to challenge this talented lady on my next visit. 

Well, the jet lag is slowly subsiding after my 50-hour trip back to Bolivia (with about 10 hours of broken sleep along the way) and it is time to get back to the large backstrap projects that I had been missing…holiday over…back to work putting that niggling homesickness for Australia away!

See you next week at the usual time. I couldn’t blog yesterday as I was falling asleep at the computer! And a Happy New Year to you all.

Backstrap Weaving – Seeing Double

4th in textile trail series backstrap weavingSeeing double….it was interesting weaving these two panels for my wall hanging at the same time on my backstrap loom. I am sure that doing so helped me achieve the identical spacing and dimensions of the supplementary-weft motifs that I was aiming for. I had those specific reasons for doing it that way. Did it save time? I am not really sure. I guess there was some efficiency in warping both panels in one session.

This is not the first time I have done this. A long time ago when I made a carry bag for my backstrap weaving stuff I needed two separate narrow bands for side panels. I wanted the neatness of the third selvedge on both and so wanted to weave them as two separate bands rather than weave one long band which would then be cut in half. Somehow I thought that it would be more efficient to weave them side by side like this. It was an interesting exercise but I couldn’t find anything about the process that was more efficient.

Well, okay, maybe it saved just a little time…the time that I would have spent dilly-dallying and messing around after finishing the first band and then finally heading to the warping board to set up the second one.

zip-panelsI know why the Montagnard weavers weave two bands together on their backstrap looms. It is simply a question of balance and a more comfortable way to weave.  The Montagnard looms are designed for very wide pieces…wide panels that will be joined to make blankets and skirts. Placing a single narrow band in the center of the loom bar that wide is awkward.

???????????????????????????????The bands shown in progress above will be bag straps for what the weavers have nicknamed their “Bible bags”.

montagnard bible bagsIn the next picture you can get a better idea of just how large those loom pieces are. Take a look at that mighty sword!
montagnard weavers with two bands on loomNow I can sit and wonder about the following piece that I saw recently on Teyacapan’s fabulous Flickr page of Mexican crafts and textiles…

teyacapan mexican weavingThe motifs are identical on both pieces but it is hard imagine that they are destined to be part of the same project because of the difference in border colors and, indeed, Karen says that they are fajas (belts). The loom bar is not extraordinarily wide so I don’t think that balance had anything to do with it. It is fun to see the different ways that weavers choose to set up their projects.

So, having finished the two red panels I am now working on the central black one…

??????????????????????

I am using a coil rod on this warp, as I did on the two red panels, to help lock the warp threads in place and stop them from slipping around the far loom bar. It is the  movement of the threads around the far bar as the sheds are opened that I believe is responsible for the corrugated look that warp- faced cotton pieces often develop. I am being  a little unconventional by using one on what is not a circular warp. I have written a series of posts about the coil rod starting with this one.

I was apparently very distracted as I placed the coil rod in this warp. I placed it upside down and only noticed, even though it was very obvious, after I was three-quarters of the way through. Thankfully, the fact that the rod sits on the underside of the warp rather than on its upper face does not have any affect on its performance.

While looking through the pictures I took when I studied with the Montagnard weavers I found this shot of Ju Nie’s coil rod sitting nicely in position on her circular warp.

coul rod on Montagnard loomAs I have said before, I want to play with creating the motifs by using the supplementary weft to form the motif itself as well as outline the motif in the black ground weave. You can see below, the first a row of ground weave motifs followed by the supplementary-weft ones and then a repeat of the ground-weave style.

Calcha flower motif in supplementary weft inlayThen I wove my adaptation of the Calcha hatband motif that I so love which inludes the flower head motif woven at the beginning of the black piece.

So far, I think that it is all working pretty well together.

three panels of fourth wall hangingAnd now I have decided that I need to challenge (or torture?) myself by weaving both styles side by side. That is causing me to see double all over again!

You can see what I mean by “both styles side by side” in the patterns on the Bolivian hatband in the center below

Bolivian hatbandsThe band has two ground-weave colors with one half of the band being white and the other yellow. The bird motif is formed in the supplementary weft on the white half of the band. On the yellow half the bird shape shows in the yellow ground weave and is outlined by the supplementary weft. The turns of the supplementary wefts are along the edges of the band which means that each shed holds the ground weft and two supplementary wefts. I have tried that myself but the result of stuffing all that weft into each shed with the weight of yarn that I use is too bulky for my liking.

For the moment, a whole two rows into the next set of motifs, I am bending my brain trying to see the motif in positive form and then negative  and back to positive again as I work my way picking and dropping threads across the warp. As with anything, I am sure that I will just get used to it.

I finished the three-color pebble weave band…one background color and two motif colors…another form of seeing double, I suppose, having had to think about two colors simultaneously forming patterns instead of one.

three color andean pebble weaveOnly now that the band is finished, I fully appreciate the feel and sheen of the tencel which simply weren’t apparent when the piece was at full stretch on the loom.

I found that there are lots of great sites online with free bag sewing patterns…no need to link to any particular one…there are LOADS of them. There is one for a cute backpack that I just might have to try. I will sew this band onto it. Now, should I weave the fabric for the backpack with a tiny bit of three-color pebble accent or should I go out and buy fabric? Seeing as I know nothing about fabric, that alone will be a challenge. Actually, I wouldn’t mind weaving a very wide piece of  plain-ish fabric on my backstrap loom.

Now to get that four-color band finished…something to relax with when all that positive and negative stuff on the black panel starts to flip me out! The other thing that is relaxing is thinking about and planning the weft-twined pattern that I hope to use to join the three panels along the top….down on the floor with charting paper and pencil and eraser…love that!

And again, while looking through my pictures of my Montagnard weaving teachers I found this one of a beautiful skirt woven by Ju Nie with its kteh work, the weft twined finish. Ju Nie often sends her skirt pieces back to Vietnam for her sister, who is more expert in kteh than she is, to add the twined and beaded finish.

ju nies skirtTo finish I would like to show you one of the most beautiful pictures of a collection of bands I have ever seen…

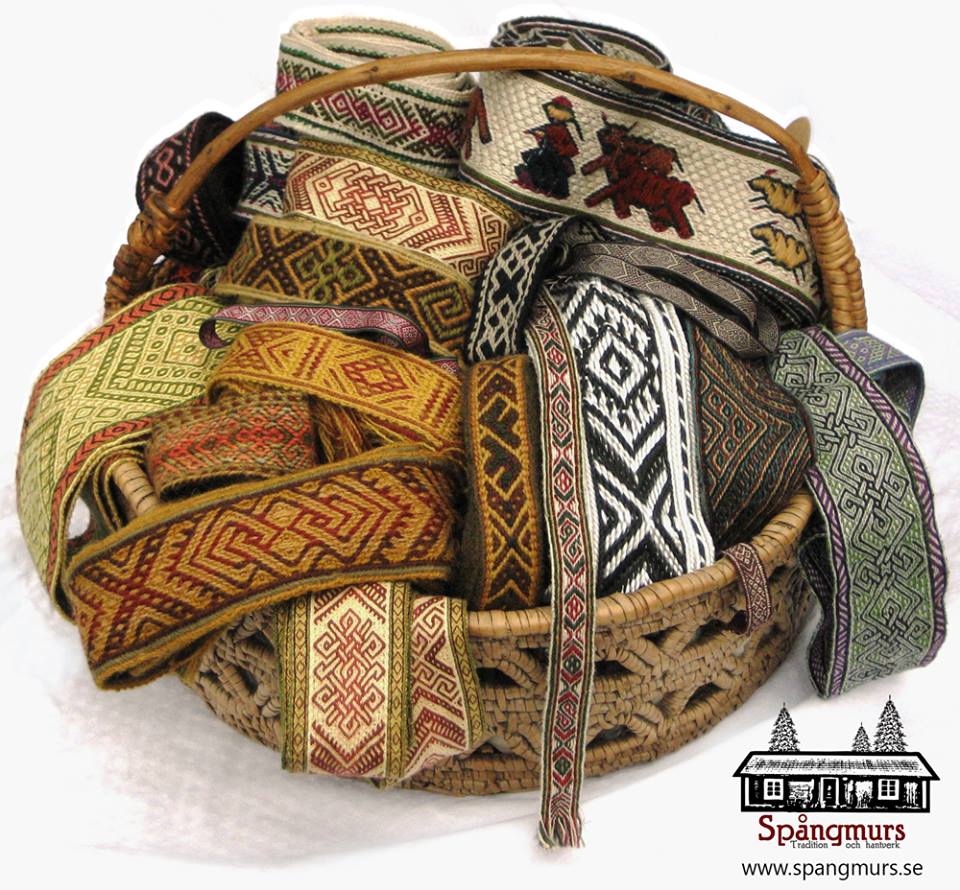
louise stromThese are some of the tablet-woven bands by Louise Ström in Sweden. Those of you who have my second book may recall Louise’s contribution of some of her tablet-weaving motifs. I show how these can be adapted to Andean Pebble Weave. In fact, I recognize one of the bands that she allowed me to use for patterns is in the basket above. Louise recently completed a booklet in English on tablet weaving entitled Krusband – Tablet Woven Poetry. A booklet about tablet weaving without using a chart. The appendix, which can be bought separately, has over 100 original patterns.

Back to my loom now. Let’s see if now, with a clear head, row three on the black panel is any less confusing!

Backstrap Weaving – An Early Start on the Finish

I have two out of three panels for the wall hanging finished. That sounds like a lot but these two panels are just the “quiet companions” for the center black panel which will be heavy with supplementary-weft patterning. So, while it might sound like 66% of the work is done, it isn’t so. Still, it feels good to have this project well under way. I have even wound the warp for the center panel and now need to install 312 heddles and wind 624 ends around the coil rod….it’s worth it!

2 of 3 anels supplementary weft inlayThe black panel will have a lot of supplementary-weft inlay filling both positive and negative space. Then I would like to join the three panels across the top using weft twining and need to plan a design for that which will suit the woven patterns.

The Montagnard (Vietnamese hilltribe) backstrap weavers with whom I studied in the US use weft twining across the ends of the panels they sew together to make blankets. Two or three panels are sewn together once off the loom and then weft-twined patterns are added to one edge.

ngach twining set upAbove you can see my teacher Nagch working on a piece draped over a frame. The colored threads that she uses to encircle the hanging warp-ends are held on small cement bobbins that she made.

??????????????????????You can see how it is necessary to have the warps-ends under tension while the twining takes place. Nagch pulls the ends tight with one hand while twisting the bobbins with the other.

LEFT: Twining class with Nagch at Betsy's house. At right, Ju shows me how she gathers the warps in groups and sizes them before twining.
LEFT: Twining class with Nagch at Betsy’s house. At right, Ju shows me how she gathers the warps in groups and sizes them before twining.

Here are some the beautiful examples of twining on the edges of Montagnard skirts and blankets made by Nagch and Ju Nie…just the right colors for my project!

kteh designs

Twining on the bottom of a loin cloth. This image was shared with me by Susan Stem.

I have tried weft twining both on and off the loom and it is far easier for me to control while the pieces are still on the loom with the warp ends under tension. As my wall hanging is nowhere near as wide as the Montagnard blankets and skirts, I will be able to put the three panels on my backstrap loom side by side and twine all the way across them. That will be the only place that the three panels will be connected.

Then I will add some twining to the bottom of each individual panel. Again, it will be fun coming up with a design that works well with those on the panels.

I think they will need the weight of the twining at the bottom to help them hang well. I have always imagined that one of the possible reasons Montagnard weavers add twining and beads to the bottom of the loin cloths they weave is for the added weight. You wouldn’t want the flaps of those loin cloths blowing about in the breeze!

Anyway, that is what I envision for my wall hanging for the time being. Who knows how this plan will be modified along the way.

I have other ideas for perhaps edging the piece with a tubular band. So, I took some time off from the wall hanging project and brushed up on a tubular band structure that Marijke van Epen and I studied together when I visited her in the Netherlands last year. We had a picture from a book and were able after a couple of attempts  to figure it out.

As luck would have it, just ten days after I got home from that trip, I went to Peru and came across a weaver from Chahuaytire, in the Cusco region, weaving and sewing one of these very bands to the edges of a large piece of woven cloth. I saw how he had set up the warp and separated the threads into their various heddles and was able to buy a prepared warp from him.

tubular band of Chahuaytire

chahuaytire band three versionsIt was a long loooong warp!

It was designed to go all the way around one of the typical large carrying cloths.

Look at all that luscious handspun thread! The thread was colored with natural dyes and some of the shades of green were very similar. This means that the pattern is a little hard to discern.

The example that Marijke and I had been studying in Nilda Callañaupa’s first book had been done in very bright and distinct colors…six in all counting the border color.

I have made a few examples and have decided that I prefer a quieter version. The minimum number of colors could be as few as two.  That’s just as well as my wall hanging uses only three colors.

I have been sewing them along the edge of a wool band for practice. The one on the right is probably closest color-wise to the one in Nilda’s book. There is one fewer color in my wool version in the center.

Here is the three-color cotton version I made that I would prefer for my project:

three color version of chahuaytire bandHere is one from Chahuaytire that I photographed at the CTTC stall at the Santa Fe International Folk Art Market in July….those colors are so gorgeous!

???????????????????????????????Weft twined bottoms and tops and tubular edgings…it seems that I am more intent on thinking about the finishing touches for this project before I can even get started on the meaty part of it.

And, while on the same break…basically dithering around before getting into what I was really supposed to be doing, that is, winding the warp for the black panel….I decided to continue the three-color Andean Pebble weave sampler. It was coming out so well that I decided that I really needed to use it for something. I will probably sew it onto a woven piece of fabric. Too bad we won’t be able to appreciate the fact that it is reversible that way but it just so happens that all the mistakes are on the back! Never mind, there are some bigger and better projects yet to come using this structure!

???????????????????????????????The flower head motif is the center and I am now working my way backwards repeating the patterns. There you can see the hummingbird sipping from its flower.

Now, if only I were as talented with fabric and sewing needle as Julia….

julias sewing  with pebble weave(2)

julias sewing (1)Julia and Cindy, who are both in the Ravelry group and live on opposite sides of the US, got together at the Mannings to show and share their backstrap weaving work. Cindy lives in the northwest and has woven with me and Julia and I have gotten together a couple of times too. That’s Julia on the left and Cindy on the right.

Julia and Cindy at the ManningsThat’s an impressive display of their collective backstrap weaving work! I see some weft inlay work in there amongst the pebble weave and there must be a bunch of tubular bands there too.

Father Kyriakos in Australia sent me a picture of his Andean pebble weave work. He has both my books and is playing with color changes as well as working on using narrow patterns with reversals and reflections to create wider designs. I would say that he is a natural!

fr kyriakos pebble weaveWell, that’s enough thinking ahead about how my wall hanging will be finished.  It’s time to knuckle down and continue weaving it. I am off to dress up that black warp with its heddles and coil rod….see you next week.

Backstrap Weaving – A Few Unconventional Moves

A Few Unconventional Moves…..If I am to talk about some unconventional things that I did at my backstrap loom this week, I think that I would have to first define what is meant by “conventional” in the world of backstrap weaving….an impossible task!

What is normal, or traditional, or conventional in one backstrap weaving community may not be so on the other side of the world or even within the same region or country.

ju-warpingAdding string heddles as one winds the warp, as Montagnard weaver Ju Nie does, would certainly be  looked upon with wonder as something strange and unusual by backstrap weavers here in Bolivia.

This one of Miguel Andrango's looms pictured here with his granddaughter. You can see the two shed rods above the heddle sticks. The space for the extra shed rod is programmed into the warp by using an extra stake during the warping process.

The way that many backstrap weavers in Ecuador spread the threads in the shed rod shed over two shed rods is something that I have not seen outside of Ecuador. This makes opening the shed rod shed, with its heavy load of wool warps, easier. You can see the two shed rods in Miguel Andrango’s warp above. Unconventional, you might say, but to weavers like Miguel Andrango, this is perfectly normal. And Mr Andrango is up for a bit “unconventionality” in his weaving  too by using motifs that are not traditional in Otavalan weaving.

montagnard_weavers-jpeg-scaled-1000The use of a tiny sweet wooden temple on even the narrowest of warps by the Montagnard backstrap weavers is something else that would seem less than normal to many backstrap weavers on this side of the world.

I have yet to see a circular warp being used by backstrap weavers in Bolivia but it is commonplace in Ecuador as is the use of a foot brace.

Burmese weaver Dar Ku weaves her patterns with supplementary weft while facing the wrong side of the cloth. She kept smiling and telling me how easy it is. I wonder what the Guatemalan weavers with whom I have worked, who also work with supplementary wefts, would think of that!

Dar Ku at work??????????????????????In Ecuador I never saw women weaving wide heavy wool pieces on backstrap looms. This was a task for men. The work is considered too heavy for women, I was told.

In Peru, men do weave at backstrap looms and there are communities where most of the backstrap weaving is in their hands. However, this is the exception rather than the rule.

I wonder what the male Ecuadorian weavers would think coming to Peru and seeing the wide and heavy warps being managed by the female weavers.

I wonder what the belt weavers in Salasaca, who use an enormous meat cleaver type of wooden implement to beat weft into place on their narrow belts with a couple of quick, heavy and powerful slams, would think seeing the way a Bolivian weaver pushes weft firmly into place bit by bit across the wdith of the warp with the tip of a llama bone tool.

3868486832_48e6a1c778All the implements were strange and unusual in my hands the first time. I can’t tell you how many times I forgot to let go of the weft before slamming that meat cleaver tool down….ouch. The llama bone was a bit more subtle but I still ended up with blisters from tightly clenching it and pushing that weft into place with all my strength. My weaving teachers considered tightness of weave to be a very important feature of well made cloth and I was determined to achieve their approval.

On the other hand, it was interesting to watch the gentle tappy-tapping of the beater in Dar Ku’s hands in contrast to the yell of “wham-wham” as Ju Nie showed us how firmly weft should be beaten! Clearly there is no general rule about how firm warp-faced cloth woven on a backstrap loom should feel.

I would love to see my teacher Maxima’s reaction to the set-up and way that weavers in coastal Ecuador add bands to the edges of their fabrics with their wooden rigid heddle that slides from side to sde along the floor to change sheds.

rh edgingSo…conventional? What is conventional in the world of backstrap weaving?

As for my aforementioned “unconventional” moves…let’s just say that I did some things that I haven’t seen backstrap weavers do. Of course, the day will probably come when I see this done somewhere. I have, after all, just scratched the surface of the backstrap weaving world here in Latin America and have had but the slightest glimpse into Montagnard, Burmese and Bhutanese weaving.

I have been finishing off the little supplementary-weft sampler that I have been working on these last couple of weeks. I wanted to get a piece off the loom and make it into a bag to take along on my next trip. I had experimented with positive and negative space. However, there was still a fair amount of warp left and the Guatemalan cotton is precious to me as I am not sure when or if I will be able to get more. I really didn’t want to waste any of it.

So here is what I did…I wove a dowel into the warp so that I could cut off my little bag piece and continue weaving the left over warp.

weaving a dowel into the warpI will probably fold that little flap of cloth over the dowel and tack it down and then lash the dowel to a bigger one. I think that should be sturdy enough to allow me to keep weaving. I have to admit that this wasn’t my idea. There was a discussion in one of the online groups where a floor loom weaver wanted to cut off her first towel on a long warp and then continue weaving. Someone said “weave in a dowel”. I am not sure if what I did is in fact what she meant when she said that but it was enough to have me wanting to try to “weave in a dowel”. I think it will work!

clamp toolI still have this Bedouin patterned embedded double weave piece that I cut and then clamped so that I could continue working on it. It is still there….I feel that that the woven-in dowel is a more secure system. We will see. Now I can compare!

Bedouin design amulet bagHere is the wee pouch that I made with the first part of that warp.

So, the piece of supplementary-weft patterned fabric was cut off the loom. Now to see how best to fold it.

back and front of supp weft pouchThere are the back and front views.  I decided to leave the flap on the front unpatterned as I wanted to edge the whole thing with a tubular band and I thought that things might look a bit too busy with pattern on the flap as well.

design on inside flap backstrap woven pouchHowever, I thought that it would be cute to have a design on the inside when the flap is open.

And that is another place where I got kind of unconventional.

The design on the inside of the flap had to be on the “wrong” face of the fabric to be in the right position once everything was folded. So, I turned the warp over and wove on the other side leaving the heddles on the back side of the fabric.

I wove the flower head pattern that I had been creating in the negative space at the beginning of the piece. I think it gives a nice touch to this little pouch…a nice little surprise when you open it up.

weaving on the back side of the cloth backstrap weavingFolding and then sewing done…it was time to start embellishing.

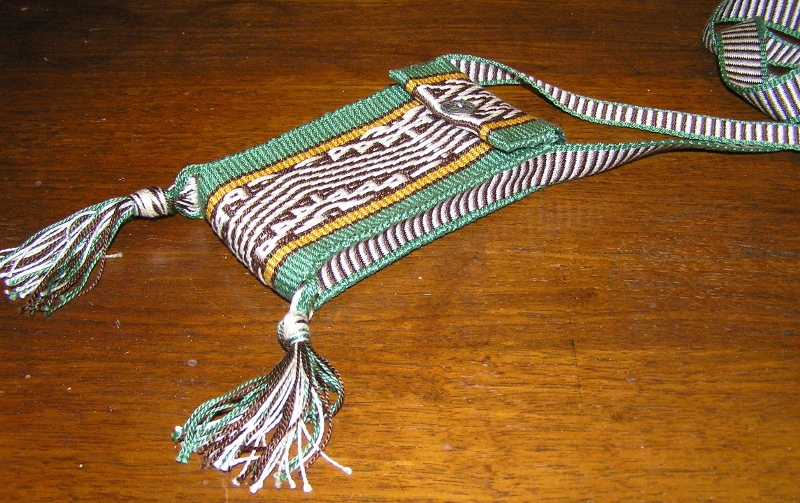
fron tof pouch with tubular bandThis is all I have done so far… a ñawi awapa tubular band around the outside. The eyes of the tubular band are red on the back side which matches the predominantly red patterning on that side. I will decide what to do with the tassels at the bottom and whether I should add some kind of finish to the bottom edge. Then there is a strap to be made and a button to be found for the front for some sort of closure.

pouch front and back backstrap weavingSo, after that experience with flipping the warp upside down and weaving on the other side so easily, I have a clear idea about what to do with the rest of the warp. I am excited to get started on that. I would like to continue with the supplementary-weft patterning but use both sides of the cloth, flipping back and forth, so that the finished piece has completely different patterns on both faces…or perhaps the same motifs but in completely different color schemes. It would need to become a finished product that would  allow both faces to be visible. This, of course, will be the sampler for a “real” project later.

In between sewing and embellishing, I got something else started on a loom. I am preparing some warps so I can weave at the Spin-In Day at the Mannings in June. Are you coming? I will be weaving away with my warp tied up to a tree. Come and say hello!

two heddle intermesh bhutan designHere is one of the warps I have prepared so far. This one is two-heddle intermesh which will have a large Bhutanese labyrinth design taken from David Barker’s first book (see the RESOURCES page for information on this free download).

pebble weave bandsAnd if you are tired of seeing red and black today, here is a bit of relief.

I have been recycling some of the many sample warps that I use which end up being a chaotic mix of odds and ends of sample motifs.

I unwove some of them and have several more to go. I am  re-weaving them using the same Andean pebble weave motifs along the length of each.

I can also finish this week’s post with some nice pieces in other color combinations too that were sent to me from online friends.

larisa pebble (2)

???????????????????????????????Larisa patterned her piece that is destined to become her backstrap with pebble weave patterns from my first book.

Gmpicket also sent me a picture of a great pouch that she made  using a design influenced by a belt of the Tarahumara people of Mexico that she saw on my blog. I have two Tarahumara patterns charted in my second book but this is not one of them. I love that brown, yellow and green combination.

So, I will be on the road again as from Wednesday next week. .hoping for nice weather and lots of people to chat to about backstrap weaving. If you have backstrap weavings to show me, please bring them along! I probably won’t blog next Thursday but will as soon as I can. I hope to meet lots of online friends at ANWG too and reunite with backstrap weaving friends in Humboldt County California. And then there’s a New Mexico adventure in mind… See you soon!