Backstrap Weaving – Time

finished baackstrap woven wall hangingsA question I am very often asked when I show my woven work is….. “How long did it take to weave that?”

I am trying very hard to think back to a time before I started weaving to see if perhaps I would have asked this question myself to a craftsperson and what might have motivated me to do so. Would it be because I was thinking of trying to make the object myself and needed to see if the time involved was worth my effort? Or perhaps I would want to know if the asking price for the object reflected the amount of time that had gone into creating it.

In any case, I find it a very difficult question to answer. How long does it take?…As long as it takes! I honestly don’t keep track. I don’t sell my work and so I need not consider time in order to fairly price an item. I am not weaving to a deadline. There is no exhibit for which the work has to be completed. I would probably have to go back to my blog posts if I wanted to give an accurate answer in terms of the number of weeks on which I worked on a project. However, I would be at a complete loss when it came to the total number of hours.

I met a craftsperson last year and witnessed his response to the question…

“How long did it take to make that?”

His response:

A    l  i  f  e  t  i  m  e

I can only imagine that he very rightly considers that a lifetime of his accumulated knowledge, experience, skill and inspiration went into this and every piece that he has completed. I love his response.

So, I am willing to pour as much time and effort as is required into every piece I weave. What I don’t like, is making silly mistakes and wasting time. Okay, I will admit that a mistake is always a learning experience and valuable for that reason but sometimes you just turn around and do the same old thing again!

Like… breaking my coil rod on my latest piece. I did it once…I learned. I did it a second time…I cursed…but then I learned some more.

purple sacrf project backstrap loom

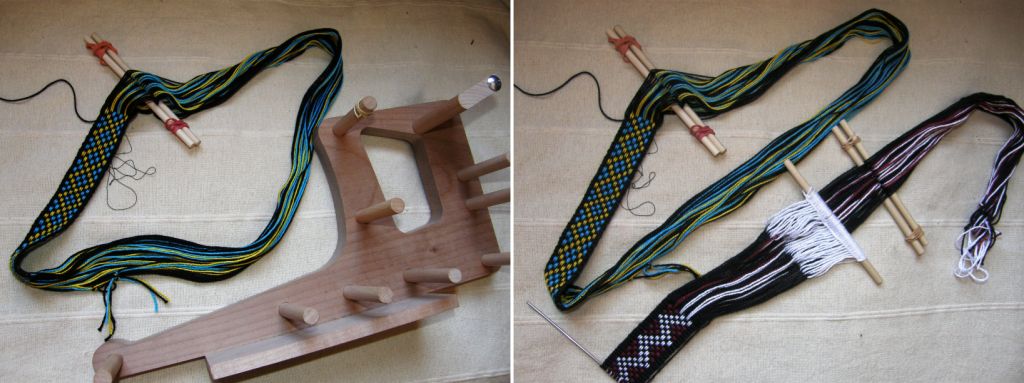
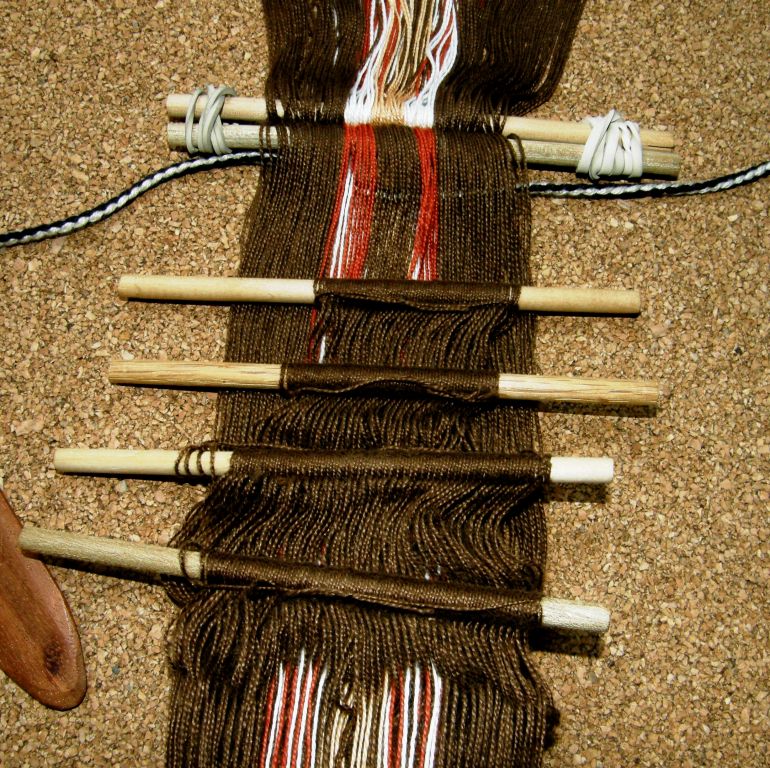
You can see the coil rod in the above picture. The stick is rather thin but it looks about the same size as coil rods that I have seen in use by weavers that I have observed.  In the above picture the coil rod is a fair distance from the shed rod and cross stick. As weaving progresses and the cloth gets rolled under the loom bar, the shed rod and cross sticks just naturally work their way up  the loom so that they are always at a comfortable distance from my body. The string heddles also follow along. Eventually, the shed rod and cross stick will have wriggled their way all the way up to the position of the coil rod and further progress will be blocked unless the coil rod is also moved.

coil rod and other tools

Above you can see how the distance between the cross and the coil rod is closing.
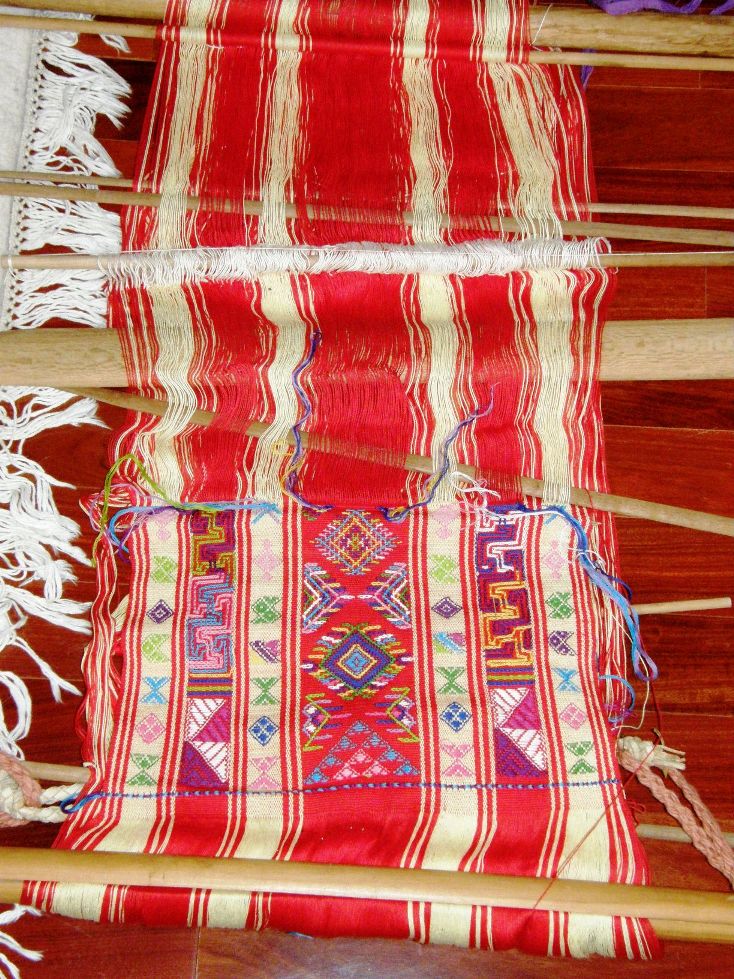
backstrap loom BhutanThe problem is that it is a heck of a job trying to move the coil rod! I moved it a couple of times sucessfully. Saying that it “inched” its way up the warp is being extremely generous.I could only move it the tiniest fraction of an inch at a time.

As far as I am concerned, the main purpose of the coil rod is to clamp the warps in place and maintain consistent warp tension between it and the weaver. This very characteristic of the coil rod is what makes it so insanely difficult to move! I wouldn’t want to be able to just smoothly and easily roll it up and down the warp. Its very purpose would be defeated if that were so.

It was the third time that I came to move the rod that I got over-confident and forced it too much. Then came a sound that you don’t want to hear when you are weaving…a sharp “snap!” The warps that were so tightly coiled and bunched on the rod leaped to freedom and went cascading into space. I didn’t stop to take pictures.

Fortunately, the stick broke about an inch from one end of the warps and, as the stick is much wider than the weaving, I was able to carefully pick up all the fallen loops and get them back on the now shorter stick. Hmmm….should I replace this with a heavier stick? No, it will be okay. I learned my lesson. I will just be more gentle from now on.

Yeah, right….A day after….”snap!” And this time right in the middle. You knew that was coming, didn’t you? The more I tried to retrieve the coils on one side, the more the coils on the other side would tumble off.

Out came the stick. I am still not quite sure where it landed when I flung it.

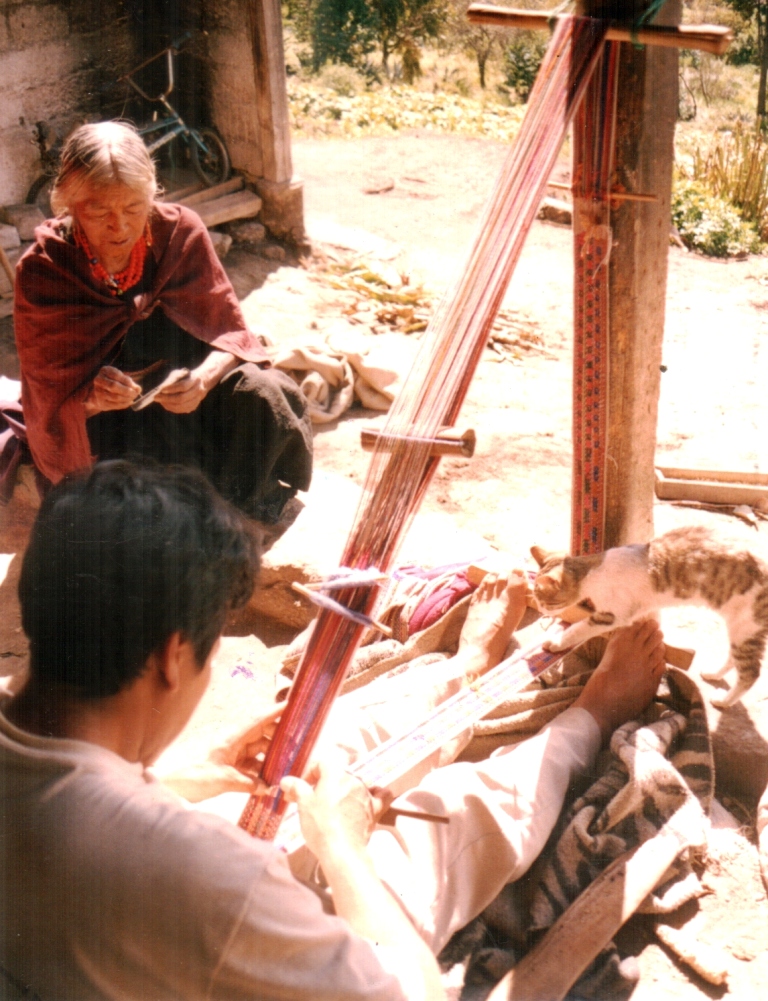
Ikat patterned shawl weaver of Ecudor setting up his backstrap loom. Picture courtesy of Agaath Theiken.
Ikat patterned shawl weaver of Ecuador setting up his backstrap loom. Picture courtesy of Agaath Theiken.

Actually, I did learn things as a result of the second accident. I wove on without the coil rod and found that I much preferred having one in the warps. After all, this was actually supposed to be part of the coil rod experiment.  Without the coil rod in place I found that I was having to hitch up certain loose warps with every single weft pass and I didn’t think that was good use of my time.

From there I went on to learn how to insert the coil rod when the warp is already off the warping stakes. Dennis Penley reports that this is how the weavers of the ikat paños in Ecuador put the rod in place.

So, I picked up each and every one of the 772 ends, twisted them one by one (rather than in groups of ten as the weavers in Ecuador do) and placed them on the new thicker rod. How long did that take? I don’t know! Don’t ask.

Maybe this is something that we don’t consider when we ask the craftsperson how long it took to complete the project. Do we want them to include the time used to fix “oopsies”? After all, the fixing of the oopsies adds to that lifetime of experience about which my craftsman friend was speaking.

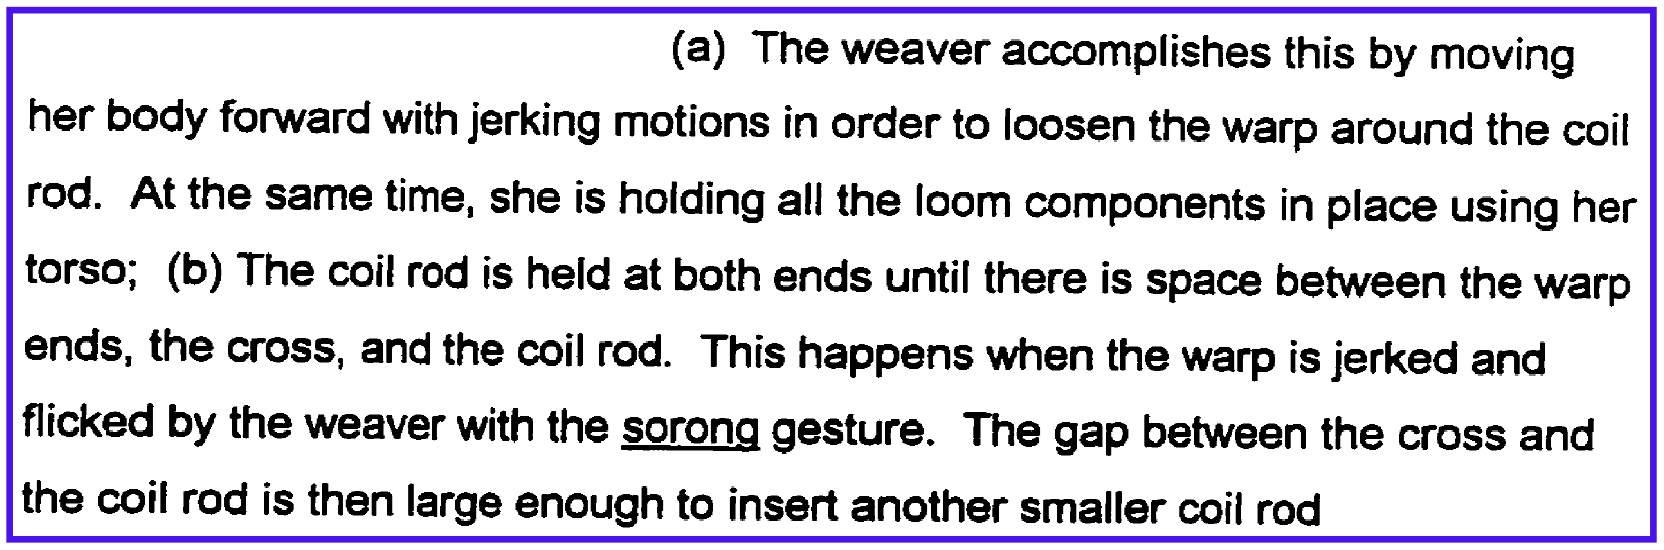
Obviously there is a technique for moving the coil rod that I have yet to learn. I turned to Maria Christou’s paper on the Sa’dan Toraja weavers of To’barana’. She describes how the coil rod is loosened so that it can be replaced with a thinner stick as weaving progresses and the space within which to open the sheds becomes increasingly smaller. I imagine that the movements she describes are the same as those that are used to move the rod along the warp.

She writes…
text

Christou explains earlier in the paper that the sorong gesture is the act of leaning forward to release tension on the warp and is used when the weaver wishes to open the heddle shed. I am wondering if the word sorong simply translates to “lean forward” or whether it is a word specific to backstrap weaving that describes the entire motion and how it relates to the operation of the loom.

There is still warp left to weave on my scarf project and so I will try what Christou describes the next time I need to move the rod. I am not sure I quite get it, but I will experiment.

While the amount of time needed to weave a piece is not important to me, I am always interested in learning about techniques that weavers have developed to help make the whole process more efficient.

For example, the use of backstrap weavers in San Ignacio de Loyola of multiple sets of string heddles so that patterned weaving can be carried out without having to do any pick-up. Of course the pattern threads need to be picked up once, but only once, before they can be placed within the heddles.

First Araceli has to make the twenty-four sets of heddles on this fresh warp. The pattern has alreday been picked up and saved on sticks.
Araceli is making the twenty-four sets of heddles on this fresh warp. The pattern has already been picked up and saved on sticks.

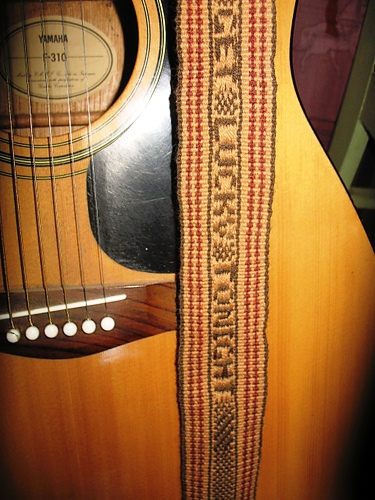
I did this myself once (with only four sets of heddles) when I was making a pebble weave guitar strap. I was on a deadline for that project as it was a birthday gift and so, speed was important.
four sets of string heddles

In Manabí province in coastal Ecuador, weavers on vertical looms also use multiple sets of string heddles to program the pattern so weaving can proceed without having to do pick-up. This means that that a weaving elder who knows the pattern can set up the loom while younger, more able-bodied weavers, who haven’t thoroughly learned the pattern, can carry out the more strenuous task of weaving the cloth.

coastal Ecuador use of multple string hedddles

???????????????????????????????

In Bajo Urubamba, Peru, backstrap weavers place multiple patterning sticks in the warp which hold the warps which will float and create the patterns.

ju-warping

Adding heddles while warping adds time to the warping process. However, it is almost impossible to cross warps and make mistakes while installing heddles this way. This saves the weaver from having to fix the heddle-making errors that can so easily occur when making heddles while seated at the loom.

The Montagnard way of installing the coil rod while warping seems to me to be a wonderful time-saving technique. Having had the experience of installing the coil rod both ways now….on the warping stakes and off…I can tell you which way I prefer!

coil rod cross on loom

Even little things like the pattern warp loops that I installed on my current weaving can make a big difference.
???????????????????????????????

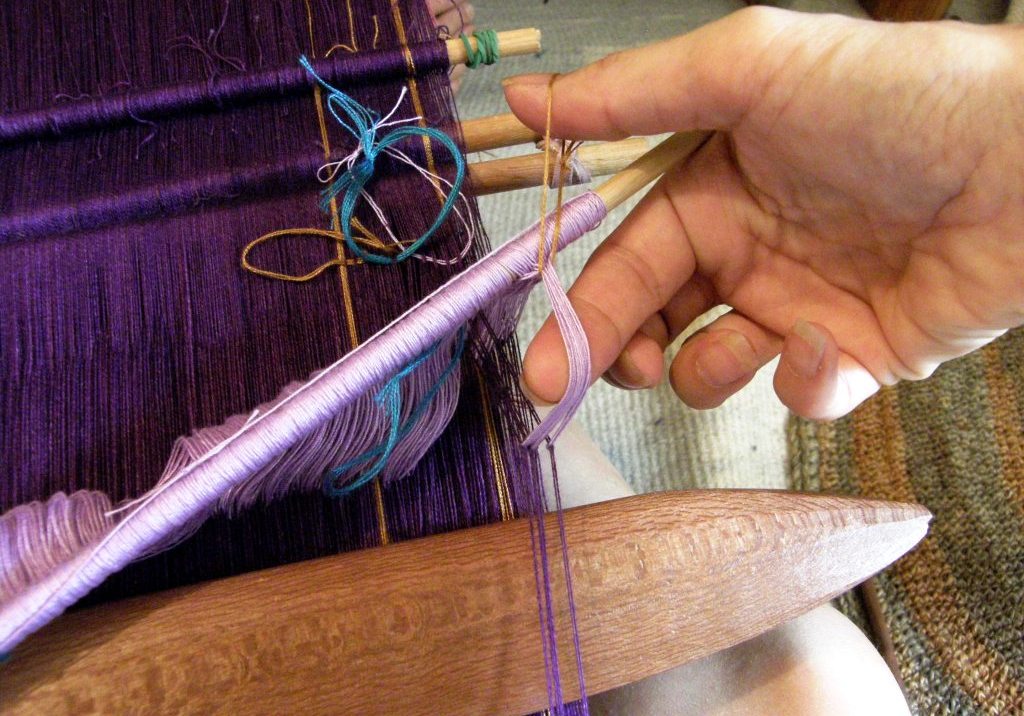
I can simply pull on a loop which draws forward a certain group of heddles which I can then raise to lift the warps needed for my pattern. My leaf pattern is very simple and requires only five sheds…three in the shed rod shed and two in the heddle shed. I have one loop in the heddles which raises warps from which I select the ones needed for that particular shed. It was more eye strain than time that I was trying to save in this case as the warps are so fine.

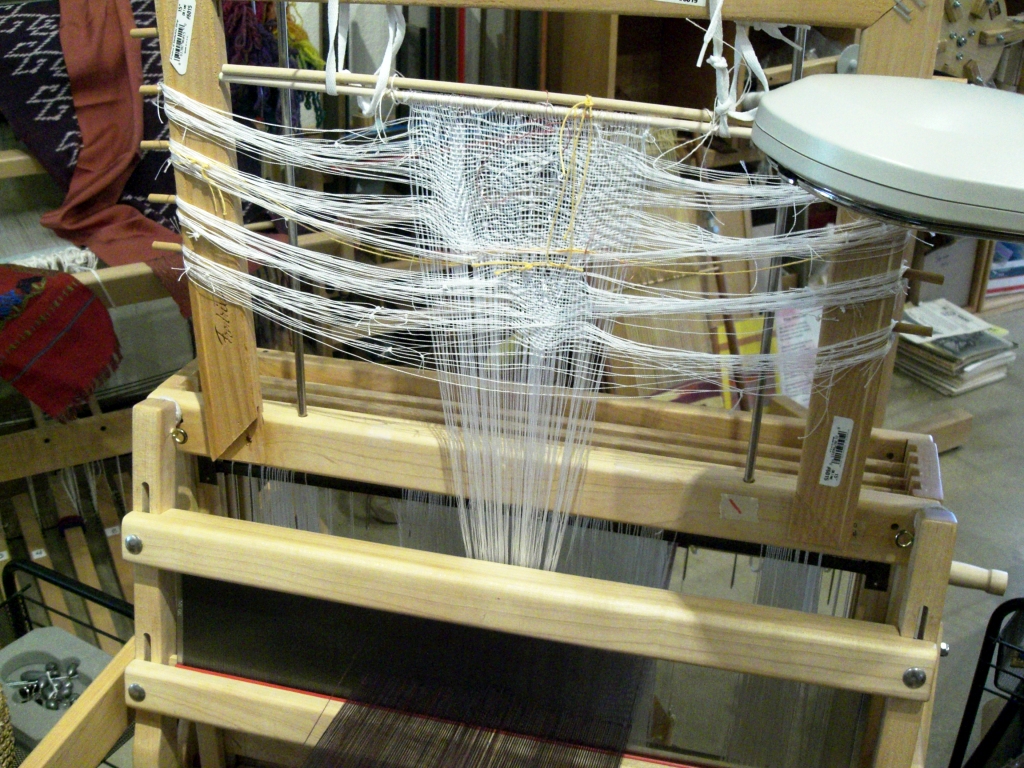
This little system is simple enough and I got the basic idea from a visit with weaver Deb McClintock in Texas last year. Deb has spent a lot of time studying with weavers of Laos and she showed me the pattern storage system that is used by Tay Dam weavers on floor looms. The weavers create complex patterns with supplementary wefts using this system. Deb has adapted the system to a floor loom in her studio. She is writitng an article for the Complex Weavers Journal on the method and how she uses it on her loom.
deb mcclintock adapted pattern storage system

Basically….Those vertical strings are really long heddles. The horizontal strings will be used to pull forward certain heddle strings which in turn will raise the warps needed for that pattern shed. The patterns are very complex as you can see by the large number of strings in place. This is a wonderful pattern storage system!

In this video, Deb shows her adaptation of the Laos system to her loom. She explains how each pattern string is stored below the warp until it is next called into use. This enables her to freely pull forward the next string in the sequence…

In future posts I hope to show you some of Deb’s work that has been influenced by her experiences learning about Lao weaving techniques.

#######################################

Here’s what some of my online weaving buddies have been up to….
cindyQ

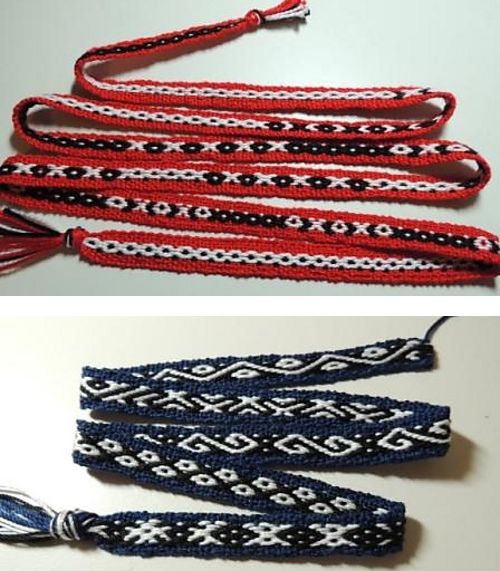
CindyQ has created some pretty bands while working her way through the lessons in my first book Andean Pebble Weave and it looks like she has it down.

cindyQ and helena

On the left is CindyQ’s current project in which she is using a pattern from the follow-up book More Adventures with Warp-faced Pick-up Patterns

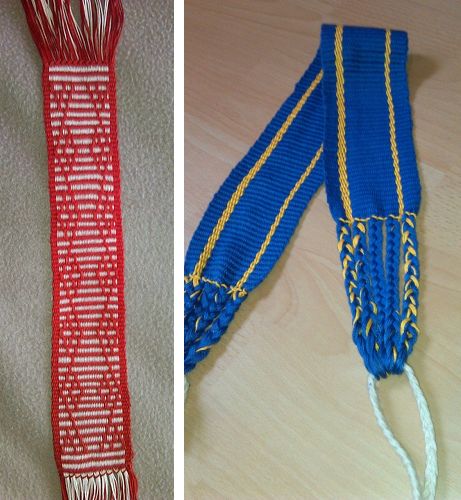
On the right Helena has made a band using two-color simple warp floats with a motif from Iran. My intermediate-level tutorial on this technique is here which includes the chart for the “s” motif along the edges of Helena’s band.
ghedrain

Ghedrain has been following tutorials here and made her own backstrap and is currently exploring simple warp floats. She has picked this up really fast.
betsy

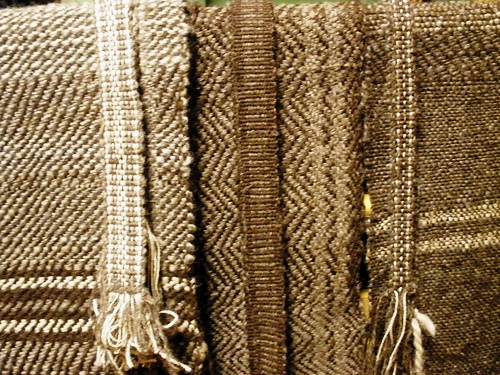
Betsy wove fabric on a floor loom using her own handpsun wool yarn which she will use to make bags. She just completed the straps for the bags on her backstrap loom.

supplemntary weft inlay cotton scarffAnd I am on the final stretch on my scarf project. I am just about to start weaving the last motif along the edge.

However, I am a bit disappointed because I could have made the scarf longer and made better use of the warp length. It was hard to figure out how long this would turn out as it is the first time I am using a circular warp for a full project and I didn’t know how far I would be able to weave before it got too difficult to open the sheds. I had to make a decision about when to start weaving the final design so that the overall pattern would be symmetric.

Now I see that I could easily add a couple of inches to this end as well as to the beginning and still have a nice long fringe. That, of course, would mean turning the loom around, swapping the position of the shed rod and heddle stick, planning a bit of extra pattern….sounds all very time consuming, doesn’t it. Worth it? Well, yes! I am not in any hurry and I have the TIME.

Backstrap Weaving – The Curious Coil Rod

Are you ready for this week’s dose of red, black and white?

3 red black and white backstrap weaving hangingsI have quite a good selection of colors with which to work here in Santa Cruz. None of the colors go by fancy names. They are pretty much the basic tones. Therefore, when someone asked me to pass them the “chartreuse” yarn for their weft in one of my workshops, I had  no idea what they were talking about. Here, we get dark green and light green. But, I have to say that there are enough colors here to keep me happy.
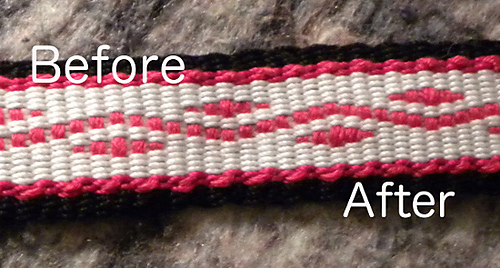
Why then do I keep being drawn to black? I guess there is just something so clean and sharp about black and white.

Even the local Guaraní weavers can’t resist going back to this combination from time to time despite the fact that many of them use the same brand of colored cotton that I do…

guarani black and white weavingsThe third piece in my wall hanging series with the Wayuu-inspired design is an inch or so away from being finished. Naturally, as I have sat there these last few days picking up threads and heaving open the sheds, my thoughts have been turning to my next project. It will probably be a purple scarf decorated with supplementary wefts using cotton yarn from Guatemala and mostly silk supplementary wefts.

colors for next backstrap woven scarf
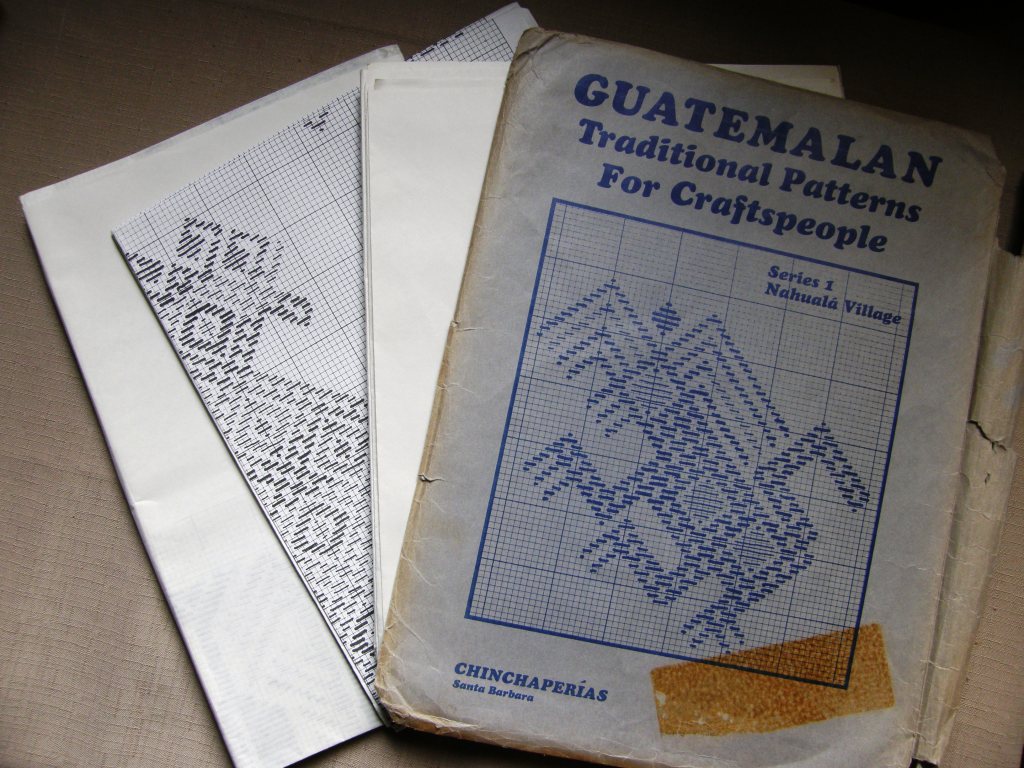
Guatemalan pattern chartsI am still planning the motifs and, while digging around at the book shelf, I unearthed a packet of patterns that was given to me by Sharon, a Weavolution weaving buddy, a year ago.

The packet contains three enormous sheets of detailed Guatemalan motifs. The front of the envelope states that this is Series 1 from Nahualá Village. Nothing on the packet or within indicates when these patterns were charted, by whom or how many packets comprise the entire set. Imagine if this person or people graphed patterns from dozens of villages!

Happily I tracked down another packet, series 3, on Ebay and it seems that there is a weaving guild that may have some others in their library.

However, I probably won’t use any of these motifs for my scarf. I have something quite specific in mind that I learned when I was studying in Guatemala but which also has a slight Bhutanese influence.

I told you about circular and dovetail warps last week and I have decided that I will make a circular one for my scarf. That will keep me in good foot-bracing distance from my bed. Winding a circular warp is straightforward enough. I was easily able to make some changes to my standard warping board to make this work well.

warping set up for circular warpThe two off-set stakes to hold the cross were all I needed. However, that picture is cropped and the following shows the complete set up…

circular warp set up with coil rod stakeThe extra unnecessary stake was incorporated so that I can try to learn more about the mysterious coil rod. So far, I have not seen a coil rod being used in Bolivia and Peru. The first place that I came across one being used was Ecuador. It was in the ikat- weaving town of Bulcay and I had no idea at the time what this piece of equipment was.

ikat weaving loom Bulcay Ecuador

There is a black arrow pointing to the coil rod in the above picture…the thin stick just below the upper beam.

ikat weaver Bulcay Ecuador

When I visited with this weaver, I was concentrating more on seeing how she prevented having the warps move out of alignment and excessively blur the ikat pattern. I suspected that the coil rod was her”secret weapon” but when I asked, she told me that it had nothing to do with it. Actually, I have to say that she was not very keen on answering my questions. Let’s face it…not everyone is fond of having strangers hang about pestering them with questions while they are trying to weave! She was nice enough to let me sit by and watch and take pictures.

coil rodDennis Penley, author of Paños de Gualaceo, writes that the coil rod, (he calls it a “rolling stick”) in Gualaceo, one of Bulcay’s neighboring communities, is added once the warp has been placed on the loom. He says that the warp threads are wound around the stick in bunches of ten. The stick serves to stop the warp threads from slipping.

You can see how the warps have been grouped in the above photo and the way they are coiled about the stick at left.

Of course, as time went by, I discovered that coil rods are used by many backstrap weavers who work with circular warps and I have since seen many examples of weavers in Asia using them.

When I met and got to spend a little time with Burmese weaver Dar Ku in Massachusetts, I noticed the coil rod in her loom.

O

It is the rod furthest from the weaver in the picture. I didn’t think at the time to ask her if she added it after or during warping. I was concentrating more on her use of supplementary wefts to make her patterns and the fact that she was weaving her designs while looking at the wrong side of the cloth! Her heddle system was also very interesting. You see, there are just so many wonderful things to see and take in when you watch a backstrap weaver at work!…what is the shape of her sword, how does she open the heddles, how hard does she beat, what does she use to pick up her threads and much much more!

As she wasn’t weaving ikat and her warps could move without causing any harm, I assume that the function of the coil rod in this case is to help maintain width and keep the warps spread and in order in the potentially messy area beyond the heddles and shed rod.

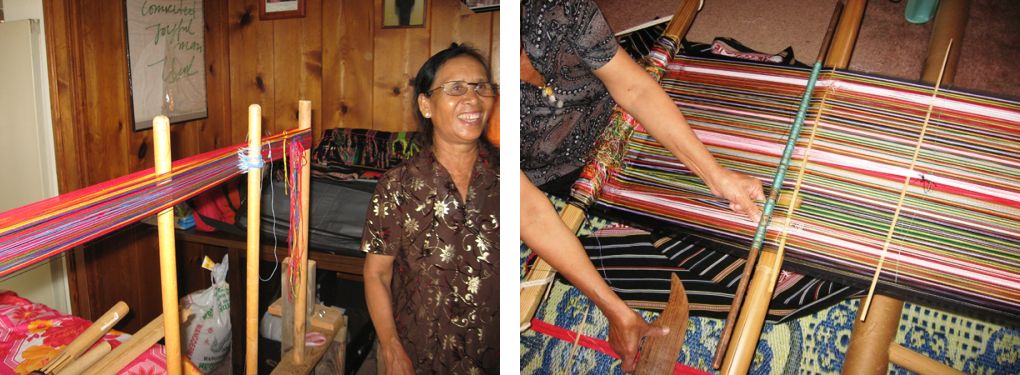
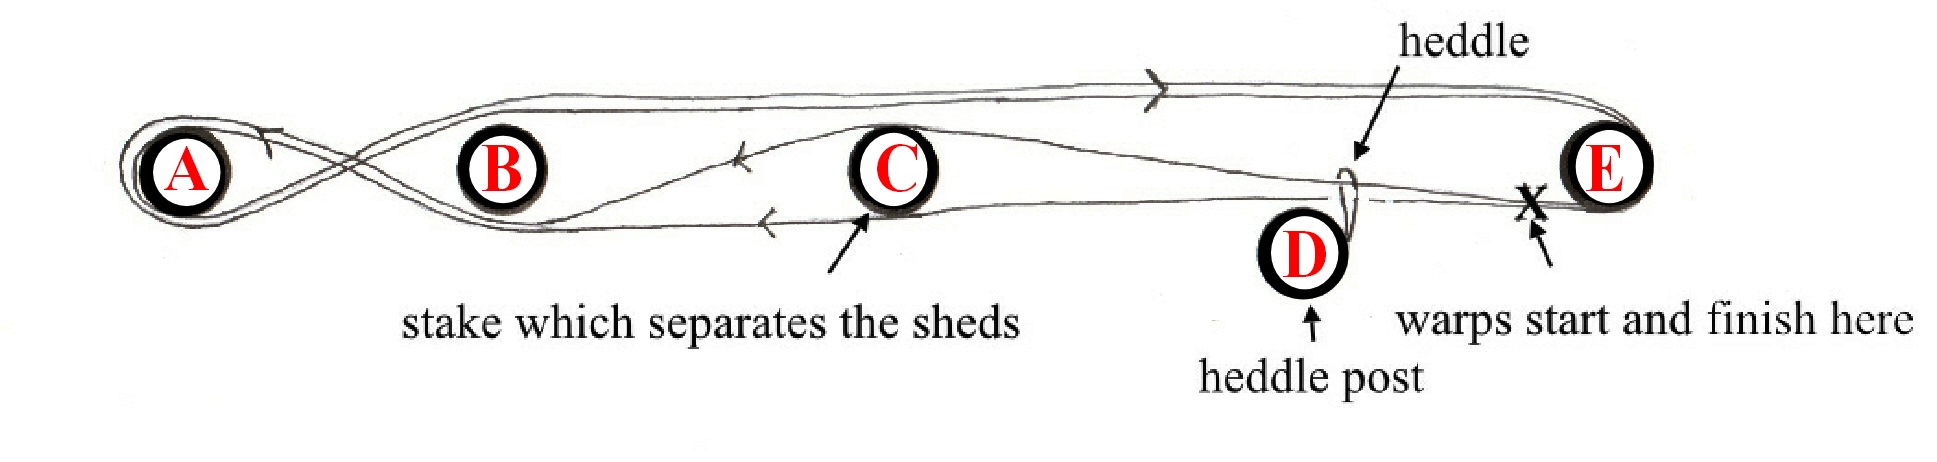
The one time that I have seen a warp being made which incorporated  a coil rod was when I studied with the Montagnard weavers in North Carolina. Again, there was so much to see especially since this was also the first time I had watched a weaver add heddles as she warped. Naturally, much of my attention was focused on that.ju-warpingThis is what Ju Nie’s warping path looked like…

Rhade warping pathIf you flip this upside down, you will see that my new warping set up was designed to resemble this. Stake C on Ju’s set-up separates the threads into two sheds. Stake D  holds the heddles that Ju makes as she winds the warp. Stakes B and E will be replaced with the backstrap loom bars. Stake A will be replaced by the “curious” coil rod.

As I am not going to make heddles as I go, stakes C and D on my set-up will hold the cross.

circular warp set up with coil rod stake

Here is a diagram showing the two-revolution warping path to complete the cross in my set up…

warping path with coil rod cross

From left to right…loom bar 1 will replace the first stake. The next two stakes will be replaced with cross sticks….I used pencils. Loom bar 2 will replace the next stake and the last stake on the right will be replaced with the coil rod. Below you can see how it looks when taken off the warping board. I have just wound a tiny warp and used some random sticks for the sake of this demonstration.

circular warp with coil rod on loom

Below you can see the loom almost ready for use. What remains to be done is make the heddles and select a suitable shed rod.

O

The yellow and green pencils are holding the cross. Heddles will be made to raise the threads that pass over the yellow pencil and a shed rod will replace the green pencil to raise the other half of the threads.

The coil rod has been rolled from its original position, in the picture below left, over the loom bar into its new position as seen below right.

coil rod put in position

This is what it looks like on Ju Nie’s narrow warp.

ju nie's coil rodSo, I know how to wind a circular warp and put the coil rod into position now…yay. The question remains…what exactly is the purpose of this wee stick? I guess I will find out as I weave my purple scarf. I suppose I will have to weave with a coil rod for a while and then without one in order to note the differences.

In Weaving and Dyeing in Highland Ecuador, Anne Rowe notes that the coil rod, as used by the ikat weavers in Azuay Province, helps secure the slippery cotton warp and maintain an even width for the fabric. However, it is not used by cotton ikat shawl weavers in Rumipamba. I imagine that the resulting shawls in both areas are equally well made.

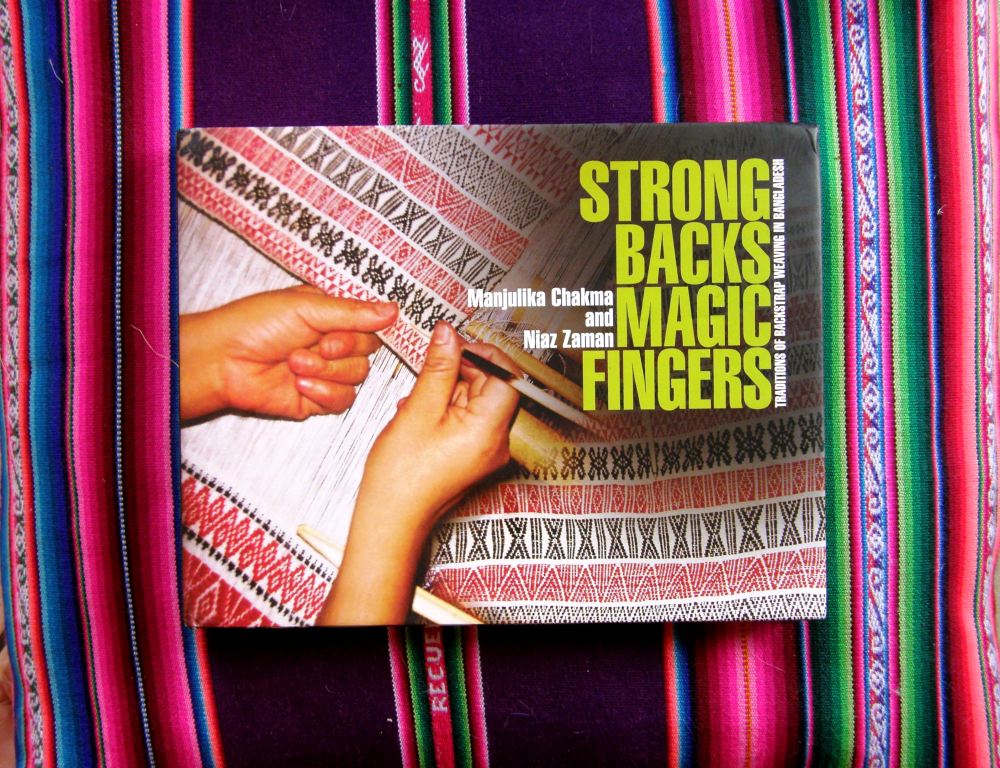
I have a book on backstrap weaving in Bangladesh, Strong Backs Magic Fingers, which describes the looms and textiles woven in twelve areas of that country. While the vast majority of the looms shown have coil rods,  some of them don’t. Certainly those that have the finest and silkiest looking thread always do. Yet, some weavers manage happily without them. It appears to be more of an aid than a necessity. Perhaps it is simply tradition that has some weavers using one.

Strong Backs Magic Fingers

I am kind of excited about having this new piece of equipment to experiment with!… a mere stick.

In Spiritual Fabric, Sadae Torimaru calls the coil rod that is placed in a body-tensioned loom used to weave narrow bands in China a ”temple stick” and says that it is used to keep yarns and width constant.

Some of you may like to read Maria Christou’s thesis An Ethnographic Study of the Loom and Weaving of the Sa’dan Toraja of To’barana’. Her research took place on the island of Sulawesi, Indonesia and on page 26 she ponders the coil rod and quotes the thoughts of other researchers on its purpose and use. It would seem that she found the answers to her questons in the course of her one year of study. I have to confess that I haven’t gotten that far in my reading of her paper to know for sure….printing out to read this weekend!

If you have made it this far in reading this post, thank you for bearing with me in my ramblings about a stick!

And so, let’s enjoy looking at some of the fruits of  these looms we have been talking about.

weavings Bangladesh Montagnard Burma

You can see a length of black skirt fabric with warp-float patterns woven by Ju Nie with a weft-twined edge added by her sister. The back cover of the book on weaving in Bangladesh shows the supplementary-weft patterned work of Chakma weavers and Dar Ku shows the white cotton fabric she wove for a dress as well as a richly patterned traditional blouse.

For those who may be curious about how Ju Nie adds heddles as she winds her warp, here is a video I made explaining it.   Ju Nie works way too fast in the video that I took of her doing it!

Wonderful, isn’t it? Maybe one day I will do this. For now, I find it very relaxing sitting at my loom and making my string heddles. There’s always something new to learn!

I will leave you with a video of Dar Ku weaving. She has such a beautiful peaceful way about her…


Backstrap Weaving – New Challenges: Wider, Longer, Finer.

While doing some house keeping in my album of weavings on Facebook, I came across a picture I took of the first red, black and white wall hanging I made entitled “Starry Night”. My caption read that I was weaving this in order to push myself beyond my current width comfort zone. That was a nice reminder as I am now on the third piece of similar width in this series and I have to say that I feel very comfortable with this width now! Seems that I need to go wider.

The first two pieces in the wall hanging series
The first two pieces in the wall hanging series.

Here is where I stand with piece number three. That snake continues to slither its way up the cloth.

O

The pick-up is a piece of cake now…really! There’s nothing like repetition to firmly embed a design in your head and fingers. It began with lots of tedious chart reading which was made a lot easier with the use of removable highlighter tape. Then I played a favorite game…read the cloth and guess what comes next. Then, before passing the weft, sneak a peek at the chart to see if you are correct. Next comes reading the cloth, deciding what comes next and going for it. Beat, pass the weft and then look at the cloth, not at the chart, to see if you were correct. Eventually you reach that chart-free happy place.

But then….you finish the weaving, you start something entirely new with a totally different structure and the fun begins again!

As for going wider….there are still quite a few more pieces I want to make in this current series, but when I do get to the point when I am ready to break out of the old comfort zone, I will need some new equipment…longer loom bars for a start. I already have some pretty long swords.  I would also love to have the kind of backstrap that some of the weavers in Peru use.

Chiclayo and Santiago Atitlan

With its two sets of straps, it was designed to accommodate different widths of weaving.

And, I would like to weave longer pieces. The scarf that I recently made had me extended to the limits of my weaving space. I rolled up part of the warp at the far loom bar but I really prefer to have the warp unrolled at full stretch.

backstrap warp for scarf project

There was just enough space to put my cushion and sit with my back against the closet door. So, if I am to go longer, it is a simple matter of using a circular warp. I have woven on these kinds of warps on a few occasions. Anyone who does inkle weaving certainly knows about circular warps.

circular-and-single-plane-warps

The pictures above show a band on which I was working on my inkle loom. The warp is a complete circle. The black band next to it has been warped in a single plane in the same way as the long black scarf warp. Once weaving is finished, the circular warp is cut apart and the band can be extended to its full length.

The Montagnard weavers with whom I studied use circular warps for their long blanket and skirt panels.

montagnard weaver opening heddle shedYou can see Ju Nie above weaving the top part of her circular warp.

Probably the most time I spent weaving on a circular warp was when I learned to weave the typical belt of Salasaca, Ecuador. My teacher, Felipe, wove on his narrow front porch and his way of setting up a circular warp allowed him to sit and weave the very long belt even in that small space.

dovetail warp Salasaca Ecuador

Felipe’s belt will not have to be cut once the weaving is finished. He has warped in what is known as “dovetail”  fashion.

dovetail warp set-up

The following diagram will show you how he is using five of the six sticks you can see in the above picture to wind the warp for the white ground weave. The stick marked with the red arrow is the one around which the warps “dovetail”. When weaving is finished, the stick will be removed and the belt can be opened out. You can see the dovetail stick in the photo of Felipe weaving. It is in the section of  band that lies along the porch post.

dovetail warping path

And, if you are wondering about the sixth stick…that stick is used to hold the colored supplementary warps. Salasacan belts are woven in a supplementary-warp technique.

my salasaca belt

The diagram above shows the path of the white warps in the ground weave. The following diagram shows the path of the colored supplementary warps. In Salasaca, the supplementary warps all go together in a heddle of their own rather than being split between the two ground weave sheds.

dovetail warp path 2

angela-and-hammock-loomYou can see that when the dovetail stick or cord is removed, the end loops of the warp will stay intact. The loops can be very useful for finishing the woven item.

Guaraní hammock weavers here in Santa Cruz use the dovetail warping method and use the intact end loops for attaching the cords from which the hammock will be suspended.

So, longer warps are on the drawing board for me which will mean building a new warping board or modifying my existing ones.

I would really like to have a set-up like Felipe’s. Too bad I don’t have a porch on which to sit (and, yes, the view was lovely from there). I have seen pictures and videos of many Asian weavers with similar “triangular” set-ups. I will have to see into which wall I can drill holes in a place where I can still get good light! The idea of raising my bed way up high to give myself more space is gaining more and more merit.

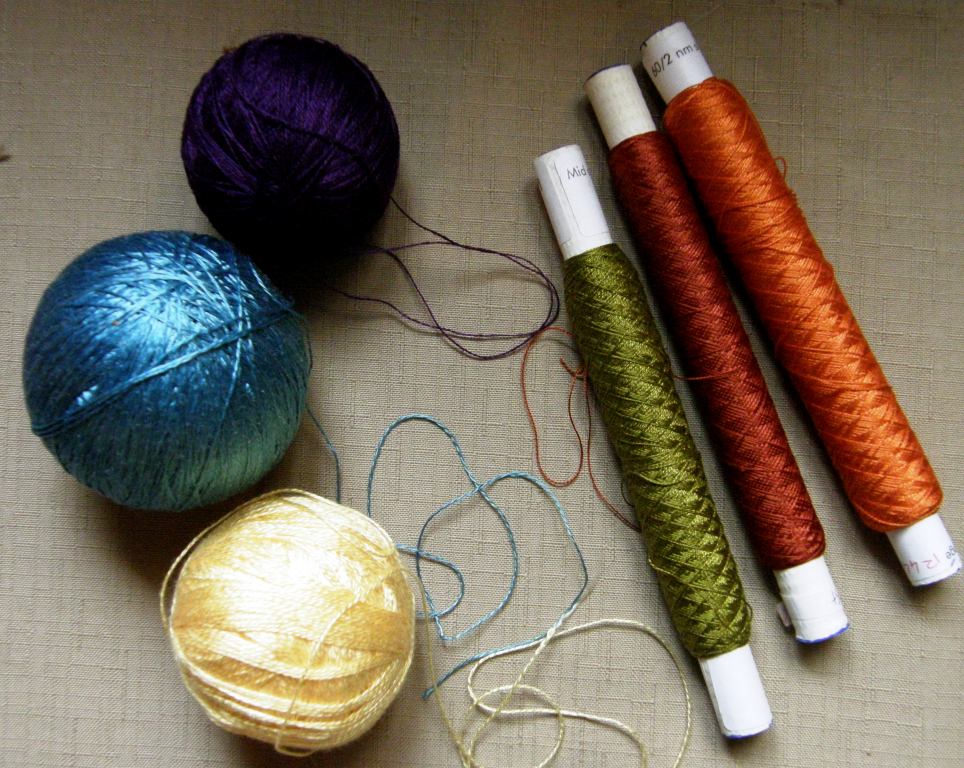
The third challenge is to use finer yarn and I am already in training for that with my scarf projects made from Guatemalan cotton. I have a ball of fabulous indigo-dyed silk that an English teaching colleague brought back for me from Japan years ago. It is heavier than the 60/2 silk that I have been using as supplementary weft and I think that it is a good weight for a first large silk weaving experiment.

Light blue Japanese silk, spools of 60/2 silk, yellow 8/2 tencel and purple Guatemalan cotton.

pebble weave with silkHowever, this doesn’t mean an end to band weaving! I love weaving bands just for the pure fun of it and don’t care if I don’t have a particular use for them.

Narrow bands are a good way to test new yarn or check the proportions of a newly charted motif.

I love weaving miniatures too and have already used the 60/2 silk in a small pebble weave band (at left) to test the yarn, check how difficult it might be to see for doing pick-up as well as to try out a new pebble weave motif.

Band weaving for me is also a nice way to take a break from large pieces on which I might be working…only 16 threads to pick up rather than the 286 in my current project and I can attach to a toe and weave on the sofa.

Much of last year was spent finishing my second book which involved a lot of weaving of samples… mostly bands and a few larger pieces. I have buckets of bands here! They won’t be made into anything. Some of them are very useful in that they travel to my workshops and make good teaching tools.

I took this next idea from my friend Yonat who put together a display of her inkle bands to photograph. I  put together a few of the bands that went into my book last year. They are of different widths and lengths…some barely two inches long… and so, my display is not as pretty and uniform and Yonat’s.

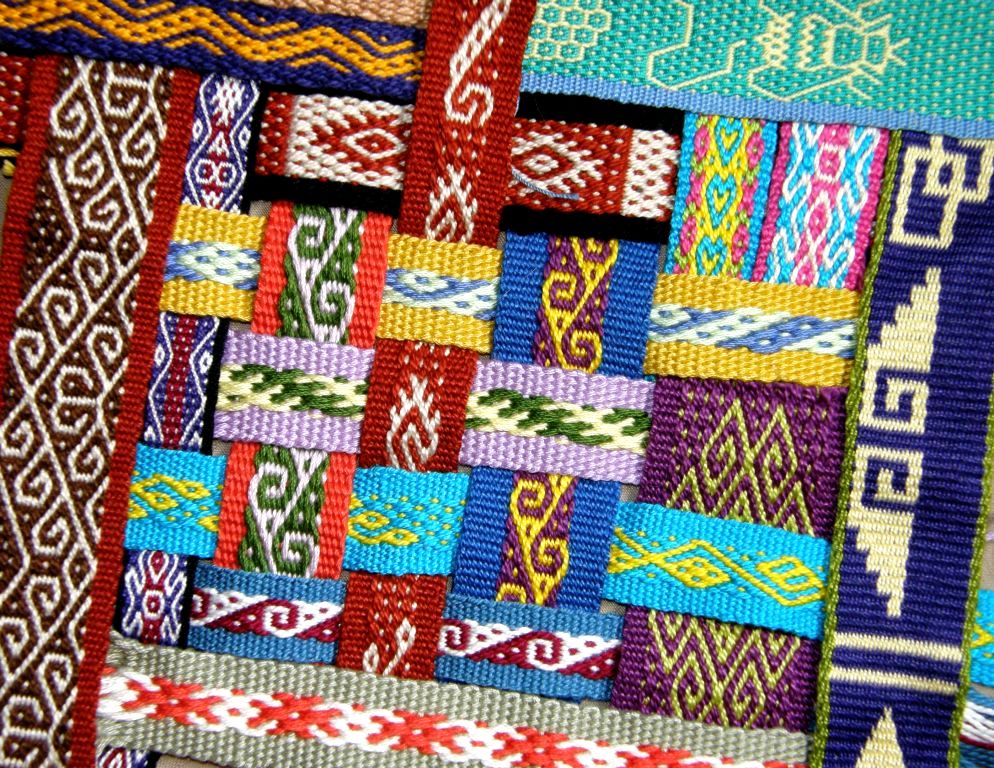
backsrap woven bands for book

The resulting book with yet more bands on the cover…

More adventures book cover dsz

You can download it from Patternfish.com.

ANWG 2013

The North West Weavers Conference, which will be held in Bellingham, Washington this June, recently opened its registrationI am going and hope to see you there!

To finish, here are some great projects from members of the Ravelry group…

carrie

Carrie wove this warp-faced band using the frame of her rigid heddle loom on which to extend her warp. She used string heddles and a shed rod rather than the rigid heddle. The patterns were created with supplementary warps. Gorgeous! We all love the soft colors she chose.

amandaAmanda kindly shared part of her band with her first attempt at creating patterns with supplementary wefts. She shows the difference that applying less tension to her warp made to the amount of coverage she achieved with the supplementary weft. She is using #10 crochet cotton for warp and embroidery floss as her supplementary weft.

janet

Janet wove this guitar strap for her husband with her own hand-spun and dyed wool. She used instructions for the pick-up patterns from Anne Dixon’s inkle weaving book.  She included words from a song which her husband wrote in the design and used guitar strap hardware made by our friend Annie MacHale to put it all together.

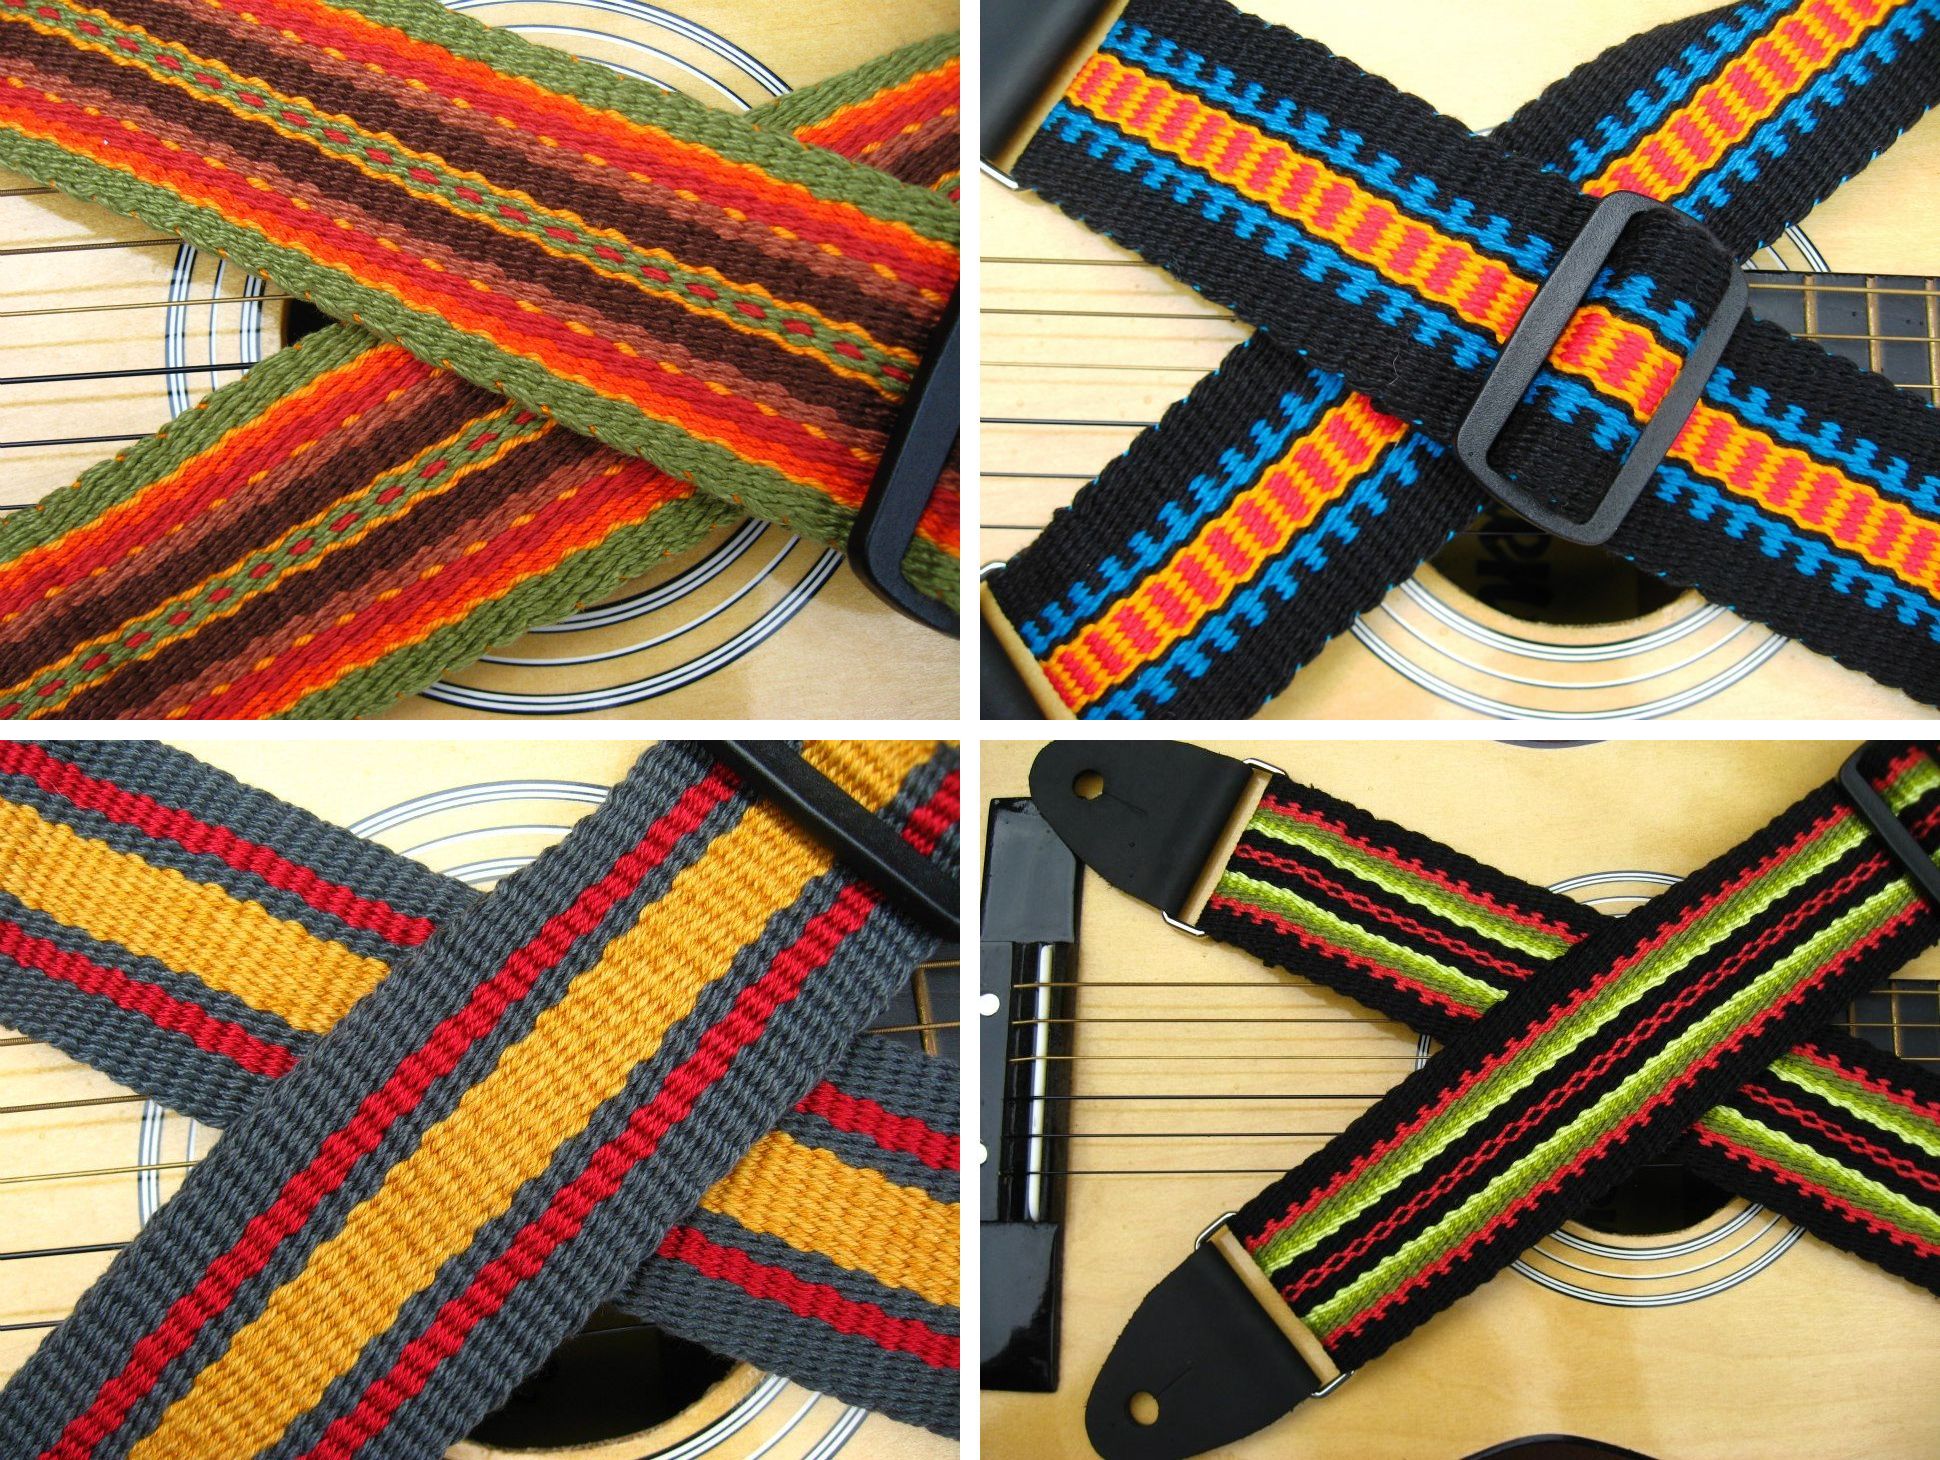
Speaking of Annie, she has been dazzling us on Facebook with the gorgeous straps she has been making on her inkle loom to sell at a big guitar show this weekend in California. Annie is all about color…I will leave you with just four examples of the more than forty guitar straps she will have for sale!

annies straps

So, my challenges are longer, wide, finer. What are yours?

Backstrap Weaving – Hands Full of Threads

The black neck wrap is done and I am already thinking about the next one.

I thoroughly enjoyed working with this fine Guatemalan cotton thread (you see how I have forgotten about all the woes in the beginning!). It was fun picking up threads with the delicate Guatemalan pick-up sticks and feeling the silk supplementary wefts slide through my fingers.

This will be the color scheme for the next one…

colors for next backstrap woven scarf

Maybe I will use some Guatemalan-inspired designs this time or perhaps I will invent some of my own.

cotton-spinnersI got the black piece off the loom and then I was faced with fringe twisting. Would you believe I have never done this before? I have left fringes on placemats and braided the ends of other pieces. I had read the grumblings about fringe twisting from those who regularly weave scarves in the weaving forums and seen pictures of the gadgets and gizmos that have been designed to make this task less tedious.

I even watched a video I had taken of my Montagnard weaving and twining teacher, Ju Nie (seen at left spinning cotton), twisting the ends of a piece she had recently taken off her backstrap loom. Ju had come to visit at friend Betsy’s house and, rather than sit idle while chatting in the living room, she pulled out a wad of stuff wrapped in paper and a woven piece of cloth and started working. The “stuff” turned out to be mushy, sticky over-cooked rice through which she drew the warp ends before rolling them on her leg and setting them in the twist.

Here is the video. Ju explains that doing it on her pants is “no good” and that it works much better on her bare leg. I am guessing that her bare shin makes the best rolling surface.


So, I twisted my fringe and it wasn’t as slow as I had thought…much faster than braiding, I can tell you! I added weft twining to the ends of the fabric before taking it off the loom. I think that made a nice finish.  See the countered weft twining tutorial here.

And then I found that scarves are kind of hard to photograph…way too long and flat and lifeless to try and stretch out in one shot so I gathered it up and threw it down many times, fiddled about and I felt that this was the best “pose” in the end.

bhutan scarf with border

And another shot that shows my favorite central motif…

finished bhutan scarf backstrap loom

Although I was mad keen to get into the Guatemalan purple thread and warp up another scarf, (especially since I think that I  already experienced, hopefully, all possible mishaps when weaving the black one), I decided that there was another project sitting in the closet that needed my attention…(plus I really need to ponder and plan the patterns I want to use on the purple scarf before rushing in and weaving it)…

wayuu_motif_with_twining

Remember this guy? I had just started the large main motif when I decided that I would not touch this until I was sure I would have enough time to stick with it and finish it. When doing pick-up, I think it is best to do a pattern all in one go rather than leave it sitting while I travel. If I leave a piece for a long period of time,  I can almost see the place where I left off and picked up again. Perhaps I sit a little differently, apply a little bit more or less tension, beat differently…I don’t know…something changes. So, now is the time to get down and finish this piece.

Usig a forked stick in the warpI welcome the opportunity to have my hands in there and full of threads again. I am not a pick-up stick kind of gal,  unless a particular technique or yarn really demands it. I like to hold and pick and drop threads with my hands. Perhaps it’s because that is the way my first Peruvian teachers showed me. I have been shown and I have willingly tried other ways but I always come back to just using my hands.

Here is a weaver creating a belt patterned with supplementary warps. It is a narrow piece and so it is easy for her to simply insert her hand between the warp layers to do the pick-up.

I was finally successful in uploading the video of this weaver at work. You can see how she does her pick-up as well as see the two-stick method she uses for opening the heddle shed. She has a forked stick in the warp….one prong is her shed rod and the other prong holds a second cross. Grasping and twisting the fork, while leaning forward to relax tension, helps her to smoothly open the heddle shed. 

These are the kinds of textiles she produces…

O

I watched a gentleman from Chahuaytire also weaving supplementary-warp patterns into a much wider piece of cloth. He uses a pick-up stick to hold all the threads in both the pattern and plain-weave sections as he works his way across the cloth…


This is his weaving…

chahuaytire backstrap weaving

Both weavers work equally fast, don’t you think?

So, on I go with hands full of threads. This is the third piece in my red-white-and-black wall hanging series. This one has patterns which have been inspired by the si’ira belts woven by the Wayuu people of Colombia and Venezuela. Since starting this project, I got to go to Holland and meet Mirja Wark who spent years studying, collecting and cataloging these belts as well as writing a book describing the weaving, braiding and twining techniques used.

si'ira belts wayuu mirja wark

wayuu project in progressThese are belts that Mirja herself wove while studying. You can see the “cow’s nose” pattern at the bottom of the blue, pink and green belt that I used in my wall hanging. The large motif that I will use in the center has been very much adapted to fit my piece and uses just certain elements of the Wayuu patterns as inspiration. There are a lot of threads to pick and, until I things get rolling, I am very much clinging to my pattern chart. Thank you, Terri, for introducing me to removable highlighter tape which works like a dream!

So I will be parked in front of that piece for some time while taking breaks to re-spin the Malabrigo yarn, plan supplementary-weft patterns for the discontinuous-warp piece for which the Malabrigo is destined, ball up that large skein of Guatemalan purple cotton, sketch some patterns for the purple scarf project, plan piece number four in the wall hanging series…maybe ikat??…do I dare?

And I am folding this sampler piece this way and that to see if something useful can be made of it. It’s still on the loom and there is room for more pattern experiments.

O

Let me show you some things that Ravelry members and students and friends have made. It is a strange coincidence that three people decided to edge pieces of clothing with woven bands. Janet decorated a pair of felted slippers that she made, Laura edged gloves (and also made a camera strap and headbands) and Julia edged a couple of tiny shadow-weave kimonos with a pebble weave band. Three gorgeous projects! (I am in love with that shadow-weave cloth, by the way…it takes four shafts…I would like to try it).

christmas_projects__2012_006_medium

laura xmas projects

kimono_baby_black___white2_mediumI will leave you with the happy twin recipients of the wee kimonos…Julia’s grand nieces!

ZellaHattieinKimono_medium2

######################################

Right before I was about to publish this post,  a question was posted in the Ravelry group by a weaver who is trying supplementary-weft patterning for the first time and not getting the rich satin-like finish  that she would like in her patterns. Instead, there are spaces and gaps between the rows of her design. I posted a reply in the group but am copying it here as I think that it may be useful for others who feel like trying this lovely technique…

There is no formula that will suit all weavers…that is, “x” number of strands of such-and-such a supp weft material will give sufficient coverage with such-and-such warp thread. All weavers are different in the way they handle their warps.

For example, some weavers put a lot more tension on their warp than others. This means that they have fewer picks per inch than others because the warps are pulled so tight that they can’t bend over and under the wefts as easily as they do for weavers who use less tension. This means that a certain amount of supplementary weft material won’t give the same amount of coverage for those weavers as it does for others who use less tension.

Another case…some people simply don’t beat hard enough when using supplementary wefts. I beat hard and really mash the weft into place…not “wham wham” beating…more like placing the beater right at the weaving line and pushing against the weft hard with a rocking motion.

Other people pull too tightly on the supplementary weft. It has to be fairly relaxed in the shed to allow it to spread and cover the surface. As an experiment, pull your supplementary weft tight once you have changed sheds and see what happens. It will flatten and narrow and not give good coverage. You have to find the balance between thread that is relaxed enough in the shed and bumps at the sides, where the weft turns, that are not too big and loose.

These are all things that come with trial and error and experience. It might be that you need to use more supp weft material or it could be one of the other factors I have mentioned here.

I often use thread that is similar to #3 and #10 crochet cotton. It is Brazilian cotton that I get here in Bolivia. I have used two strands of embroidery floss with the “#3” and one and a half with the “#10”. This gives people an idea of where to start and what to try but, as I said, every weaver is different.

Hope this helps.

ETA My first Guatemalan teacher combed the strands of her supp wefts with the point of her pick-up stick so that they lay next to rather than on top of each other. They didn’t move with handling…the floats are not long enough to cause that to happen. I did the same with the six strands of 60/2 silk on my current project.

Backstrap Weaving – The Weft-Patterned “Neck Wrap”

I suppose that it is normal to want to look back a bit as the end of the year approaches. This time I decided to jump back to the end of my blog years in 2011, 2010 and 2009 and take a look at what was going on. It is interesting to see that supplementary-weft patterning was a part in some way of all those December posts.

This time last year I was in a downsizing phase and rummaging through my closet to see what could be tossed. That was when I came across this wildly colorful supplementary-weft sampler that I made after having studied some of the patterning techniques in a few different communities in Guatemala. I included it in my blog post…(no, I didn’t toss it!)

supplementary-weft-pattern-detailYou can see that all the patterning elements that I am using in my current supplementary-weft project are present in this piece and this is barely the tip of the iceberg when it comes to all the different ways to create patterns with supplementary wefts that are used by Guatemalan weavers.

In December 2010, I was posting about the practice piece I made after studying with the Montagnard (Vietnamese hilltribe) weavers in North Carolina.  While the piece is mostly about the warp float patterning technique that they use, it also includes twined ends and a couple of their traditional motifs woven with supplementary wefts.

O

And finally, back in December 2009, when I had been blogging only a few weeks, I wrote a post on weaving wider projects which included this…

OLYMPUS DIGITAL CAMERAI included a tiny bit of supplementary-weft patterning  in the center of this placemat and mug rug set. I gave the pattern a thin striped look instead of a richer satin-like finish so that it would mimic the stripes in the two outer bands. The simplicity of the outer bands were inspired by a Guaraní textile.

So, this wonderfully fun patterning technique, which allows quite a lot of spontaneity, (the patterns on both the Montagnard and placemat projects were not planned and could have been just as easily cut out and removed if I had decided that I didn’t like them) has been in my weaving skills kit for quite some time.

hatbands of PotoloI remember the first time I saw a Bolivian highland weaver sitting in the street of Santa Cruz making a hatband only days after I had arrived here in 1998. The base weave was off-white sewing thread-weight cotton and she was creating patterns with bright acrylic threads. I crouched and chatted with her, watched what she was doing, and noted the name of the street so that I could return the next day and watch some more. I never found her again nor have I ever seen another weaver making a hatband since! I have seen plenty of beautiful hatbands but never one being woven again.

The hatbands above adorn the hat of a weaver from Potolo in the Bolivian highlands….bright colors on a black ground, much the same as the color scheme I have chosen for my scarf project. I have decided to call it a “neck wrap” as it is not going to be all drapey and flowing as one would normally expect a scarf to be. As long as I don’t have to actually bend and fold it around my neck, I will be happy!

start of Bhutan design scarf

Here it is, a little bit further along from the little I showed you last week, after all the messing around and lesson-learning. I am trying to think if I learned any more lessons from this wicked warp this week….I think I probably just convinced myself even more that I love putting in a second cross stick behind the shed rod and using those two sticks to help open the heddle shed. (Of course, this is just one of many ways that backtrap weavers operate their looms).

Second cross stick backstrap loom

Above you can see the second cross stick and shed rod in place. The third shorter stick sitting between them is the pattern stick.

If you watched the video of the Tacabamaba weaver in last week’s postyou will have seen how she places her sword on top of the warp and rolls that together with her shed rod to help open the heddle shed. Below, you can see Montagnard backstrap weaver, Ju Nie, doing the same using a bamboo slat instead of her sword.

montagnard weaver opening heddle shedI have a video on my page about sticky sheds showing this system in action.

I prefer to have the second stick permanently in the warp. One of the weavers that I met at the recent conference in Cusco used this system, with the second stick permanently in the warp, to open her heddle shed.

Her set-up is so cool. I wish I had a forked stick like that…must go out and look for one. The prong of the fork nearer the weaver holds the stick shed open while the other prong sits within a second cross.

Usig a forked stick in the warpShe would simply grip the place on the fork where both prongs join and twist the fork away from her while relaxing tension and pulling up on the heddles.

In the picture above, she is about to slide her sword under the warps raised by the shed rod. She will then turn the sword and clear those threads through the heddles and down to the weaving line. I have wonderful video of this weaver operating her loom and doing very fast supplementary-warp pick-up and I had every intention of showing it to you. Too bad my internet would not behave and allow me to upload it.

So, my warp has been behaving like a dream…sticky threads have been defeated and no more have broken. The odd loose ones here and there have been dealt with smoothly and calmly.

The center of Bhutan scarf project bacckstrap loomI decided to make the long motif the center of the scarf and work from there on repeating the designs from the first half of the project. However, I am not repeating the  motifs in the side bands as there are still plenty of those that I want to try!  I have no discipline sometimes!…I should just keep it simple and symmetrical…

starting the other half of the Bhutan scarf projectHere starts the other half….

I managed to almost squeeze in one more green motif before it was time to stop and write this blog post. It’s addictive and I don’t want to stop! The motifs are new and I am anxious to see how they turn out. Plus, I can’t weave it at night so, I really try to make the most of daylight hours. All that black thread is just too much at night and I am on an economy drive so, no super high powered lamps allowed!

one more green motif bhutan scarf

In the evenings, I have been spinning away tightening up the twist on the Malabrigo wool singles I bought while in the US. I am hoping to then ply them and weave a discontinuous-warp piece. As I am not confident about trying any warp float patterns on one of those yet, I will decorate the panels with some wool supplementary-weft designs.

respinning wool for discontinuous warp projectWhat has been happening in the Ravelry group?  ”It’s dead in here!” exclaimed Bobbie recently but she livened things up a little by posting her recently finished guitar strap made for her granddaughter…

bobbie guitar strap intermesh

This was made using the instructions for the two-heddle intermesh technique from my second book. Bobbie used Annie’s guitar strap kit to convert her beautifully woven band to a guitar strap.

Rob has been using my first book to weave some lovely bands with Andean patterns but we may have lost him to a four-shaft loom which recently appeared in his life. Now he is also turning out beautiful towels on that. Here are some of his latest backstrap, inkle and four-shaft loom projects….

rob's weaving projects

There have also been some mutterings in the group about using the 24 sets of string heddles to weave one of the fabulous fajas saras after I showed a picture of some of the belts of San Ignacio de Loyola Peru…

fajas saras san ignacio de loyola peruThat could be a fun weave-along but I don’t think I will join them on that one. While I do love making string heddles, I enjoy doing pick-up even more!

ikat textiles of the AndesOn another topic, a couple of interesting ikat resources came my way recently in my internet ramblings…

Quite by chance I discovered an e-book byMarguerite Gritli Pfyffer entilted “Ikat Textiles of the Andes”.

The book is the result of the author’s two years spent traveling in the Andes researching ikat patterned textiles. There is one section devoted to the pañones of Tacabamba that we saw last week.

From the other side of the world in China, Chris Buckley sent me the link to his recently finished paper entitled Investigating Cultural Evolution Using Phylogenetic Analysis: The Origins and Descent of the Southeast Asian Tradition of Warp Ikat Weaving.

The paper can be viewed online here.

Chris has always been very generous with his resources and, on several occasions, has allowed me to use images of textiles in his collections in these blog posts and for my charting.

Christmas will be done by the time I come to write my next blog post. I don’t do Christmas but I wish all of you the very best for whatever you get up to in the coming week. Now, back to that “neck wrap” thingy….