Backstrap Weaving – Roaming and Repping

There I sat with a mass of tiny blank squares in front of me. I was supposed to chart the next motif on my Si’ira inspired wall hanging.
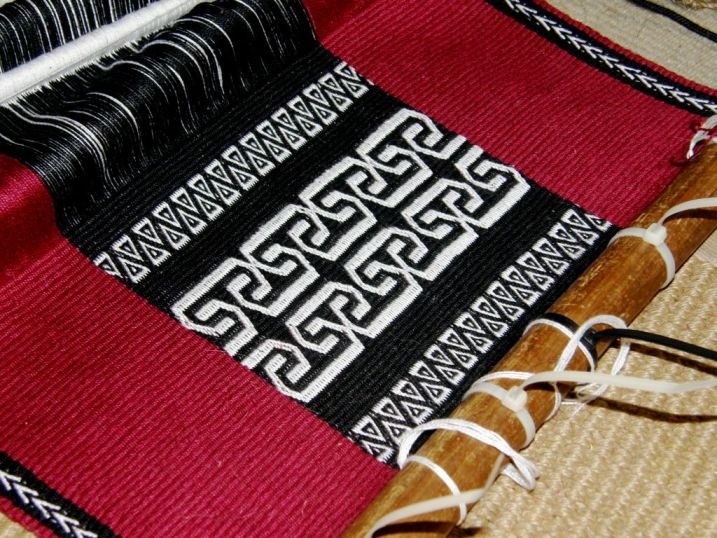
I want to use one of the motifs already charted in Mirja Wark’s book but make some adjustments and basically double its size so it will be bigger and bolder on my wall hanging.

I don’t know why, I just couldn’t get motivated to start it.

I knew very well that once the first few squares were filled I would be off and running and having fun but I put down the pencil and decided to roam a little online instead.
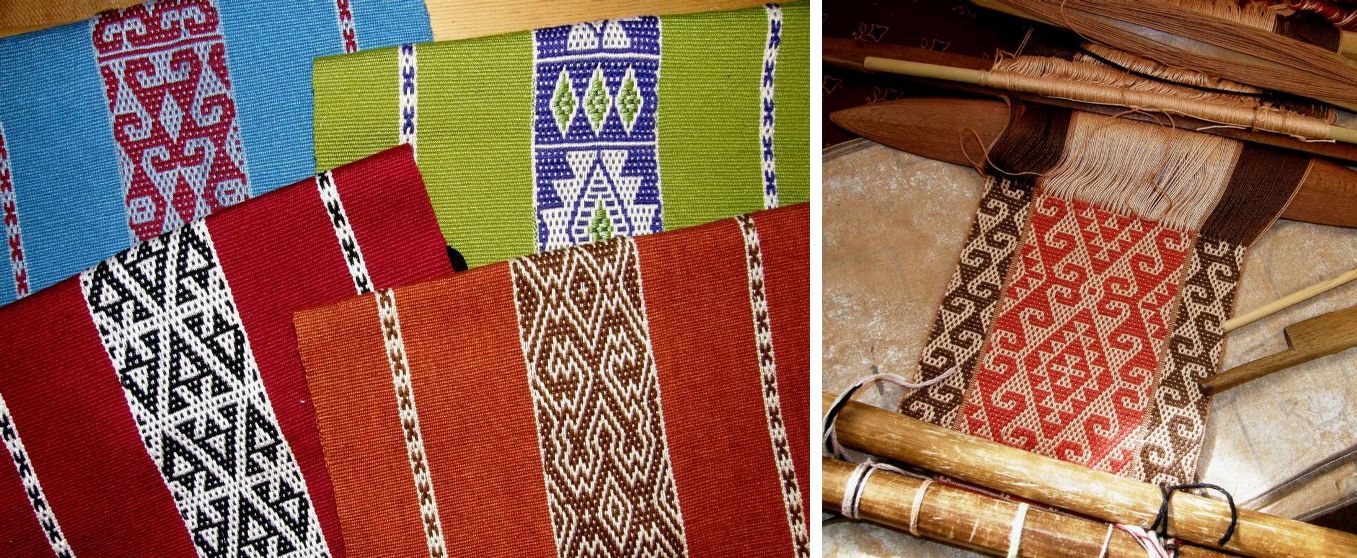
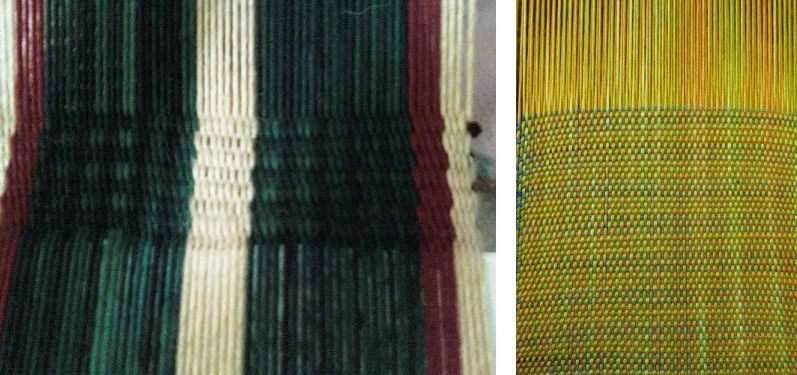
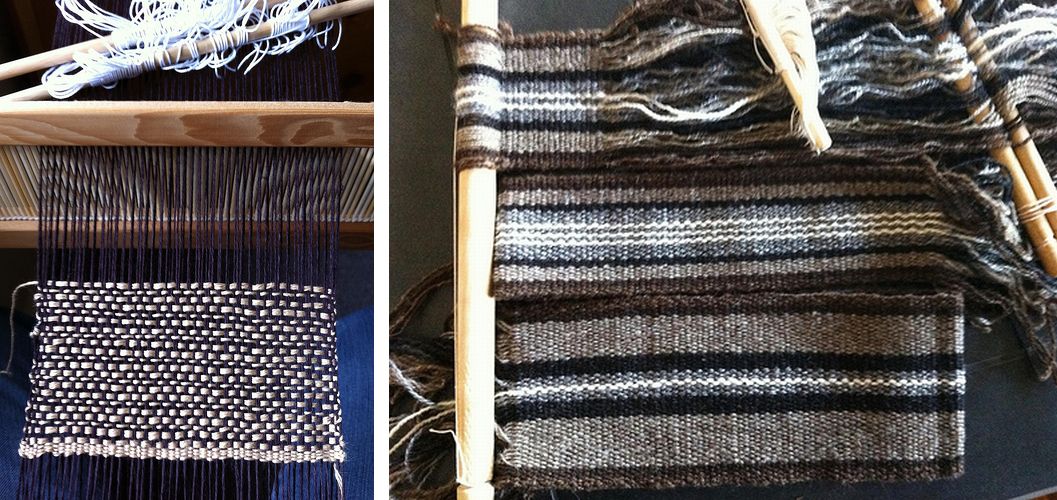
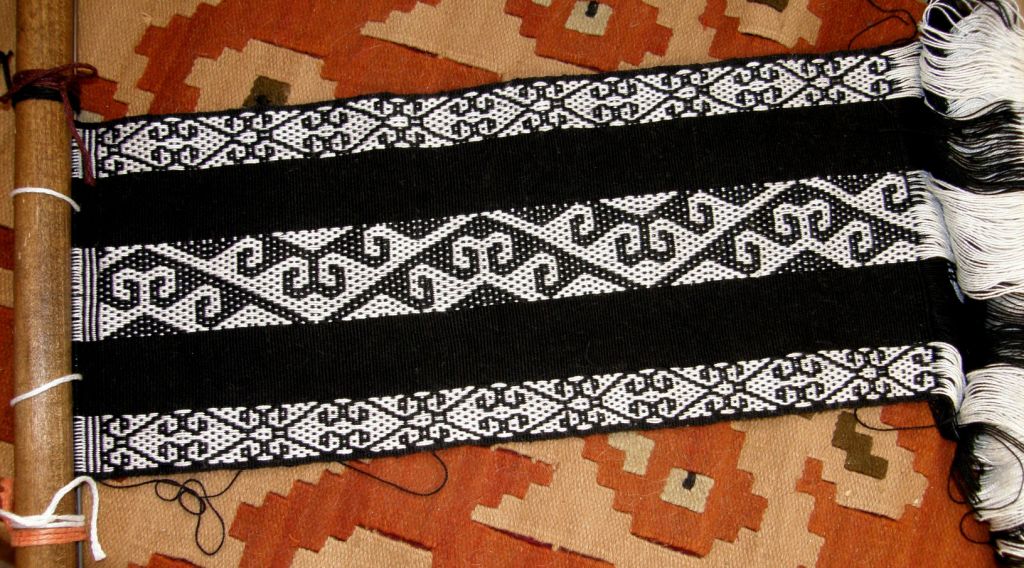
And there it was…one of those delightful distractions. Someone revived an old thread in the Warped Weavers Group on Ravelry – the rep weave weave-along thread – and it reminded me that I had returned from my fall trip to the US with ideas about trying this on my backstrap loom. After all, it’s warp-faced and seemed like quite a natural thing for me to do. All that is required is the use of alternating thick and thin wefts. There is a very nice article here about the basics of rep weave.

Some time ago, before I had ever heard of rep weave, I had played a little with this basic idea when doing simple warp floats.

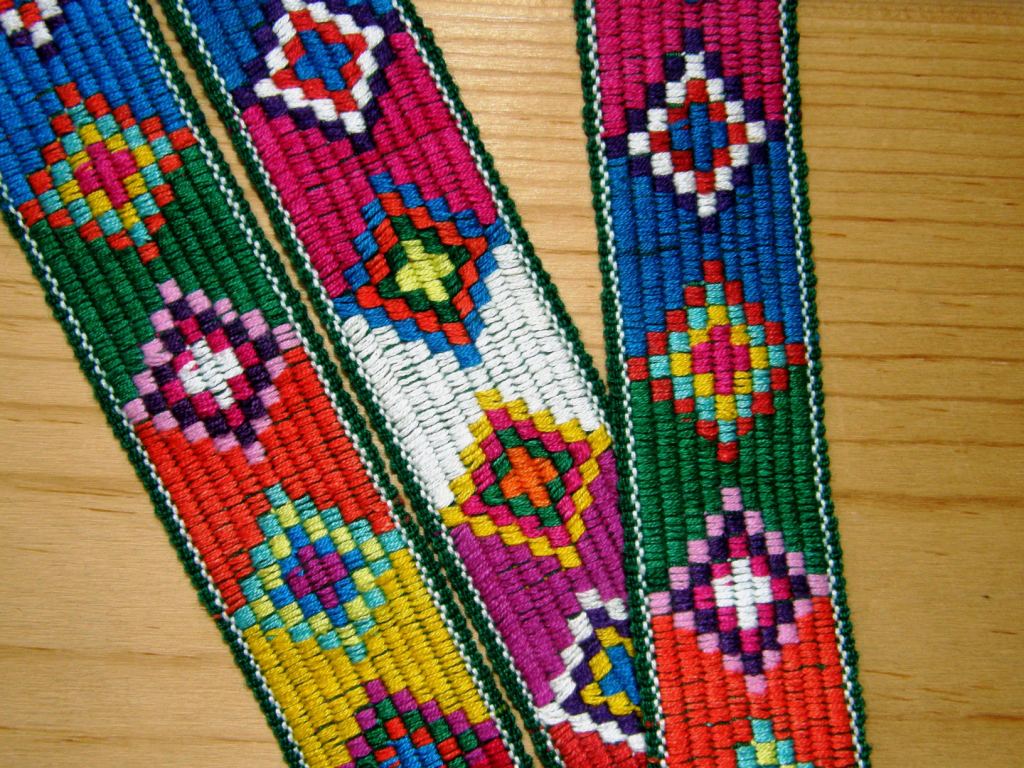
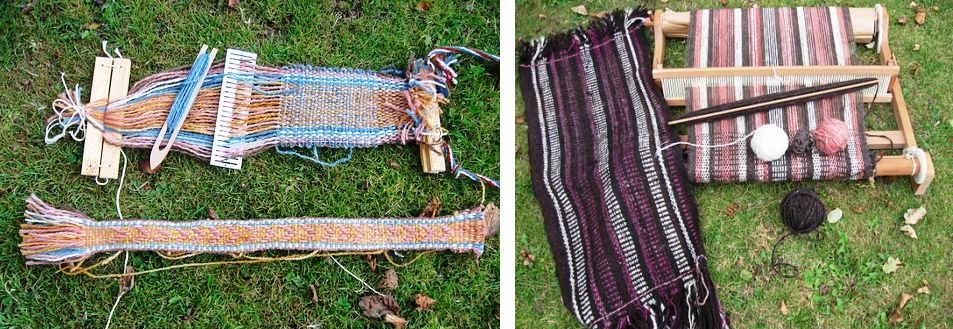
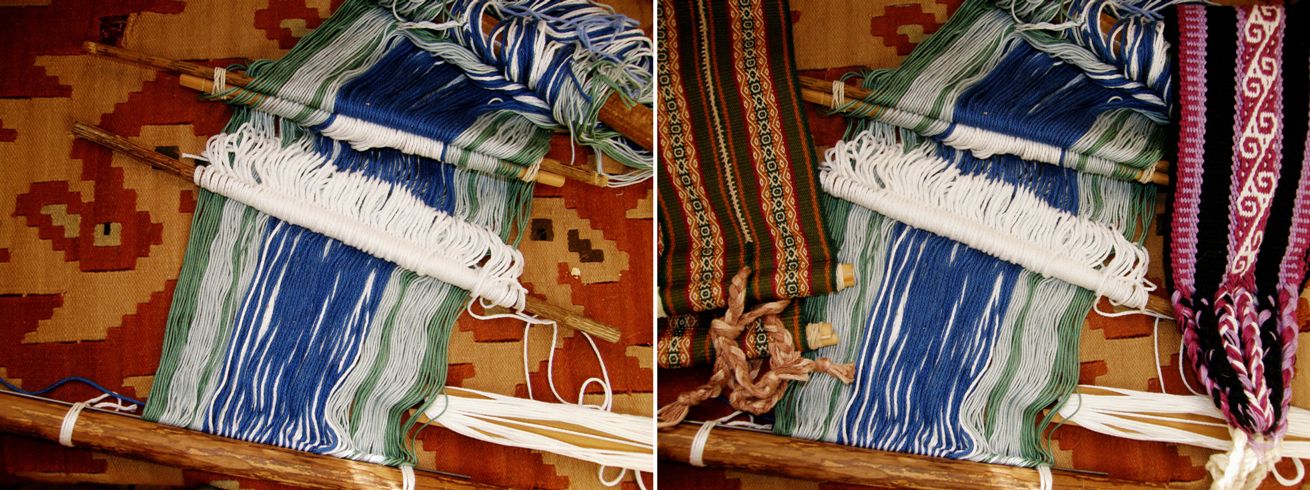
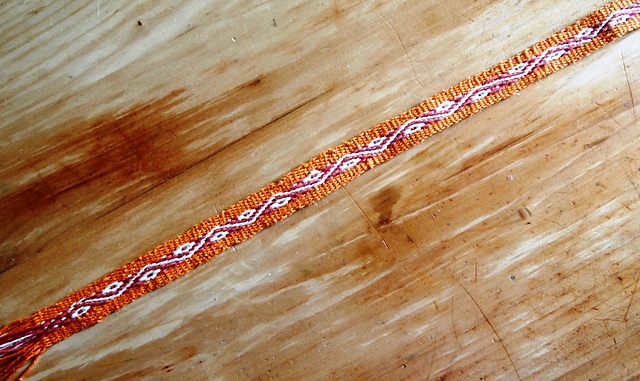
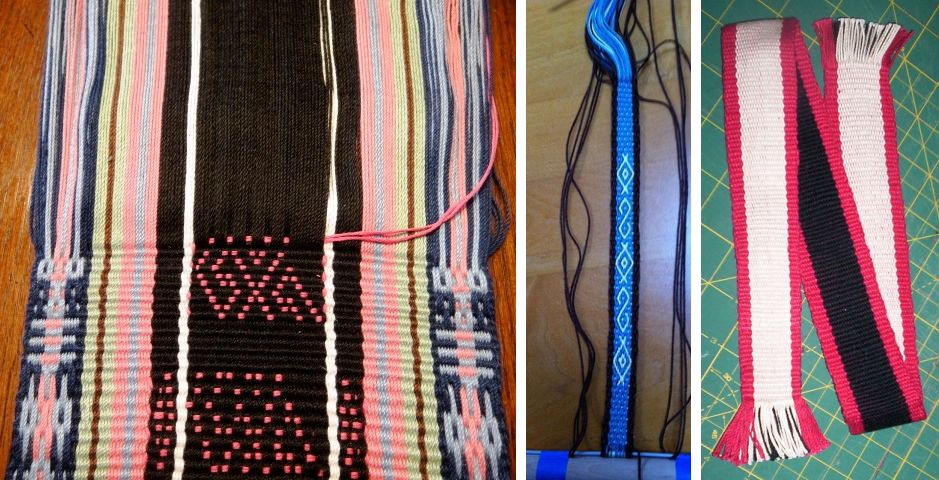
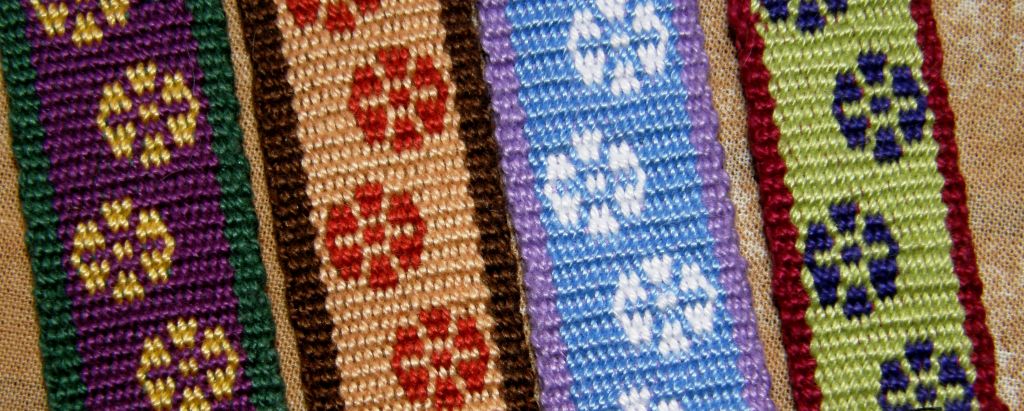
In an attempt to make the horizontal stripes less distracting on the band on the right I had used a #10 size weft under the white warps and a #3 under the colored ones. Obviously the difference in thickness wasn’t enough to be noticeable and I suppose if I had gone thicker, this piece would not have been practical for its intended use as a bookmark. And that is as far as I got with that.

And then rep weave came very much to life for me when I was staying at The Mannings last October during that big wet early season snow fall. Through the wintry wet, whiteness and darkness (we had three-day power outage) came this…
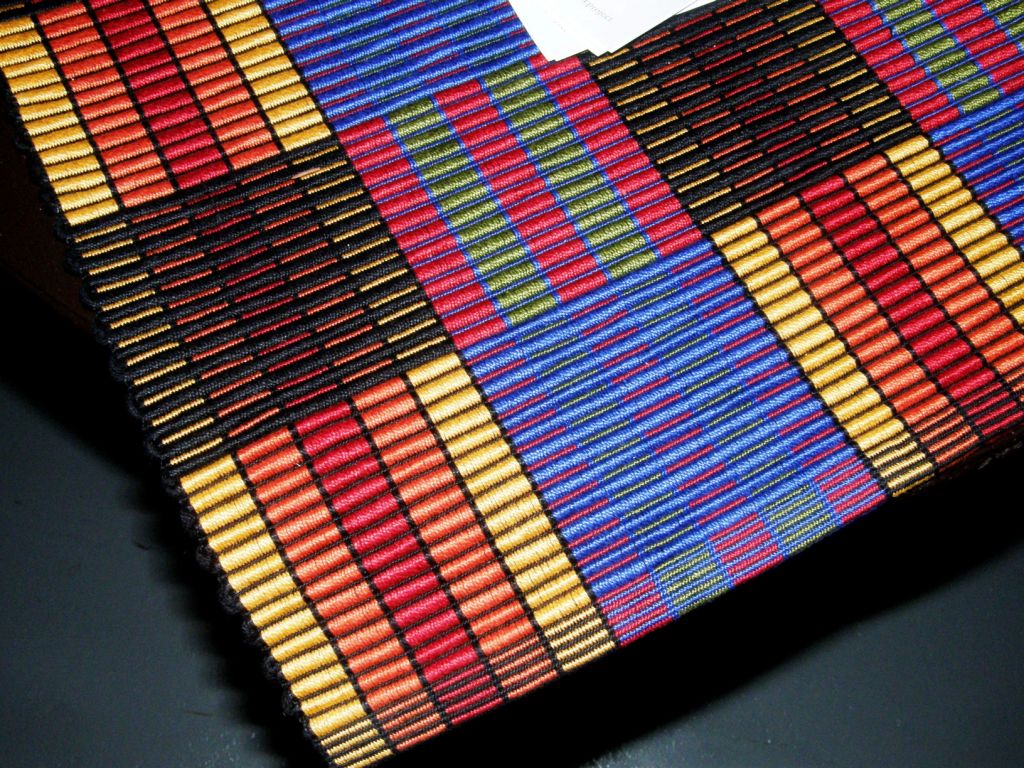
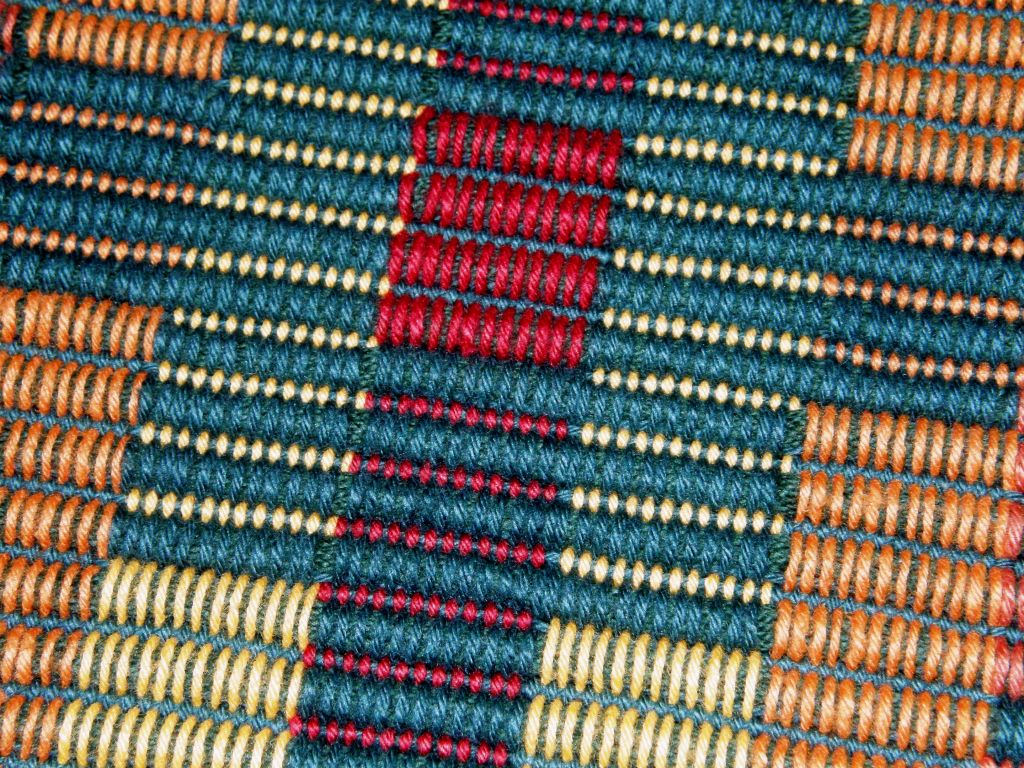
Color!! This was woven by The Mannings’ instructor Tom Knisely and made the front cover of Handwoven’s Jan /Feb 2011 issue, an issue that was near and dear to me because I had a little article in there myself. Little did I know that I would run into both the cover piece and its weaver in person.

So what are you to do when there is no power and you are the guest of owners of a weaving store?….sit down with piles of back issues of Handwoven and enjoy! It seemed that almost every issue I picked up had rep weave in it or maybe it was just that my mind was now tuned into it. There was this gorgeous rep weave rug in one issue….

And it turns out that it was hanging right there in one of the rooms in The Mannings store. I had been far too occupied weaving to notice. So, I got to take a look at this one as well. It was also woven by Tom. I learned that the warps don’t always have to be sett to completely cover the weft as they are in the first cover piece I showed above. In this piece the weft can be seen a little between the warps. Of course you can’t even notice that from a distance.

Perhaps this little bit of space helps you to achieve a clean shed more easily. Personally I like the more solid look.
So, between Tom’s pieces and the articles I read in the magazines I came home with ideas which went onto the “to-do” list. I decided that now was a good time to try something in rep weave. I wasn’t in the mood for charting and just wanted to weave! I already knew the design I wanted to try and hooray, it didn’t need charting.

First to sample…just how thick should that thick weft be? And what about the thin one?
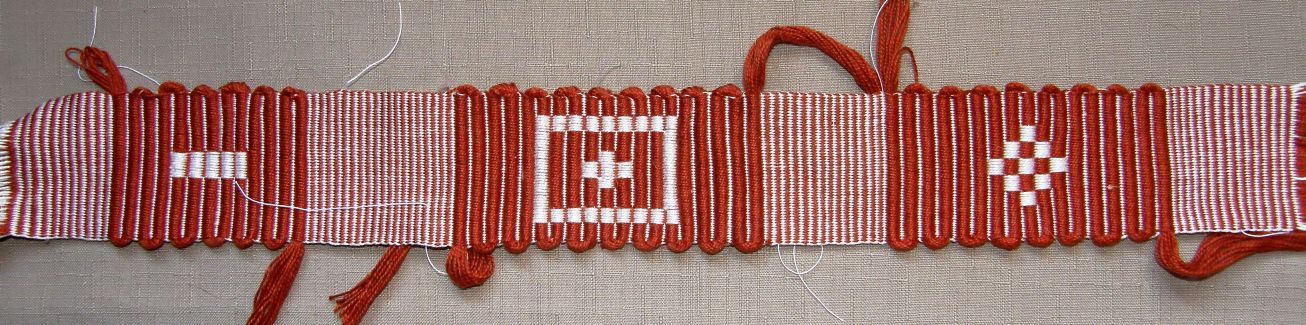
This is what worked with my Clea cotton (Clea is close to a #10 crochet cotton): I used sixteen strands of Clea for the thick and some tatting thread for the thin. The plain weave sections between the rep samples came up beautifully using the tatting thread as weft….no ridging and such pretty selvedges! A tip from one of the members in the Ravelry weave-along about finishing made me weave those plain weave sections. They can be folded under and hemmed and end up being pretty much the same thickness as the rep weave sections.
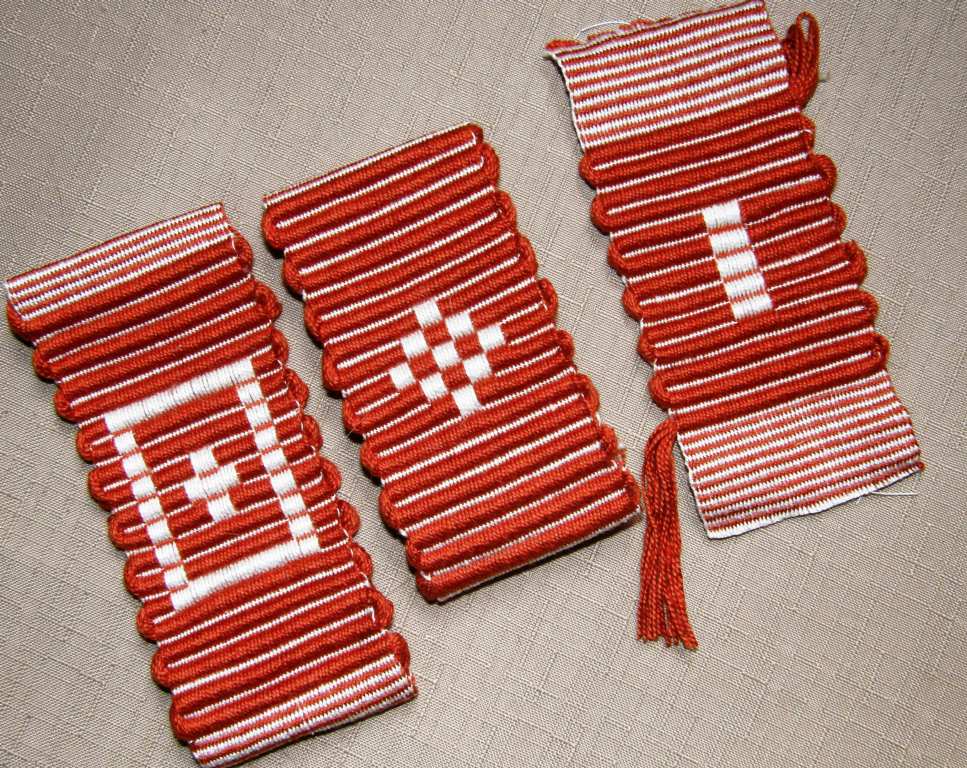
And that takes care of those thick weft tails too. They can be concealed within the folds. The hemmed plain weave pieces can be folded partly or all the way under. In the picture above I have just folded them but haven’t yet sewn them into place.

There were lots of nice tips on the weave-along thread. Some people finished their rep weave mug rugs with fringes. In that case I guess that the thick weft tails are somehow added to the fringe. Some people hem- stitched the ends.

Here are a couple of the results of the weave-along. A lot of the participants were using a four-harness mug rug kit from Yarn Barn and this four-shaft one for placemats.

Dawn MacFall hemmed her set of mug rugs while Donna finished hers with fringe.

Geri made this beautiful set of placemats…
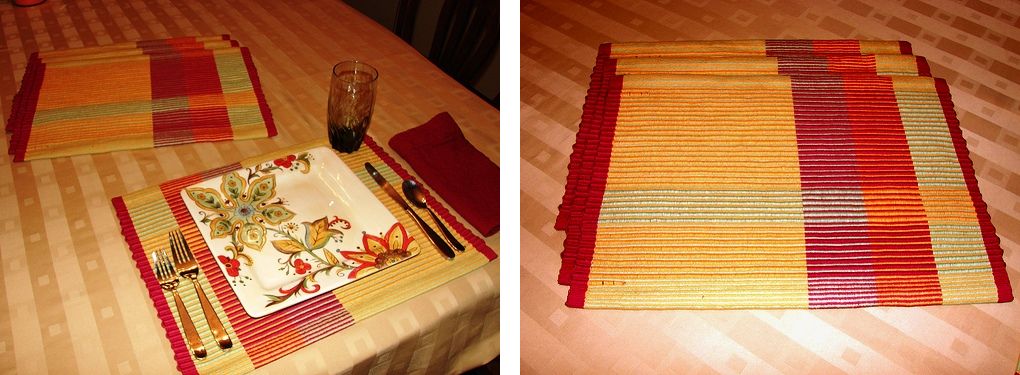
And it doesn’t have to always be about two alternating colors in the warp. This rug made by Ellen Turner uses the same colors in both sheds….clean and simple!
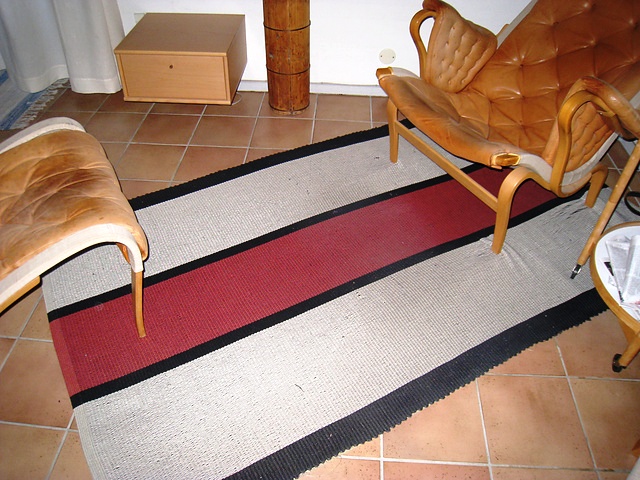
There were tips about handling the two shuttles of weft in the weave-along thread as well but, to be honest, the tip I liked the most was one by Tom Knisely in his Handwoven article (darn I didn’t write down the issue date). The article is called Getting Started with Warp Rep.

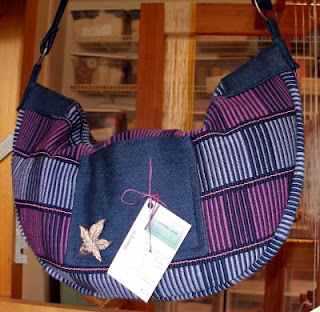
If you want to see some amazing bags made from rep weave fabric take a look here. I love these!! Lynnette, who created these gorgeous bags, has allowed me to post a picture here but please do go to her blog to see all the bags.
Eva Stossel has some terrific designs for four and sixteen shafts on her blog here.

Well you know me…clean and simple is elegant and beautiful but I have a thing for motifs and I wanted to adapt this design to rep weave…
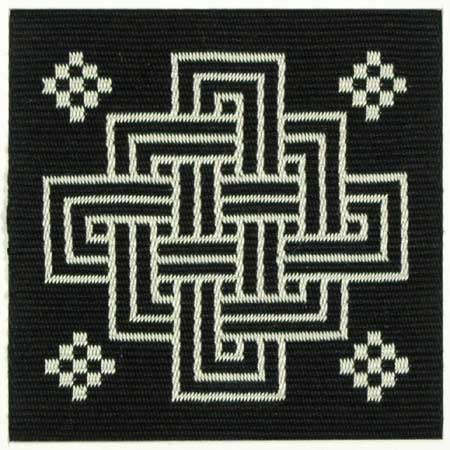
This image is from the web site of Dutch tablet weaver Marijke Van Epen and I have been admiring the knotwork designs she has there for a long long time. She has a page of all these beautiful black and white squares with knot designs and when I saw them for the first time, the idea of mug rugs immediately popped into my head. I wrote to Marijke and asked her permission to use her patterns which she kindly gave. But once I got into planning my mug rug project, I thought that I should come up with some patterns of my own…

So here I am once again admiring Marijke’s designs and wanting very much to do something with them. I could weave them in double weave like I did with the Abba Yohanni motif I wove below (which also happens to be on Marijke’s page) but I thought it might be fun and challenging to try one of them in rep.
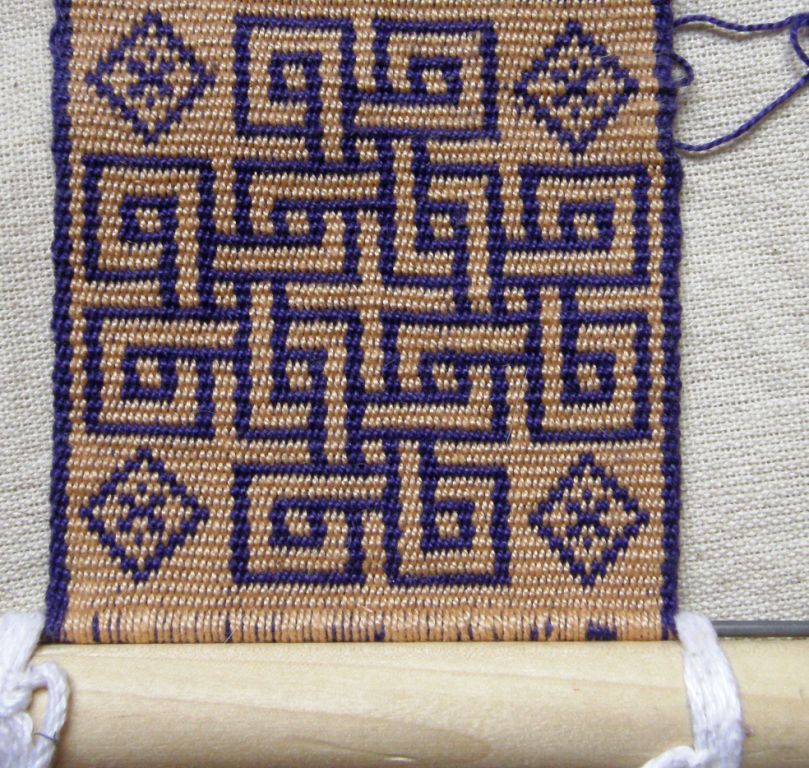
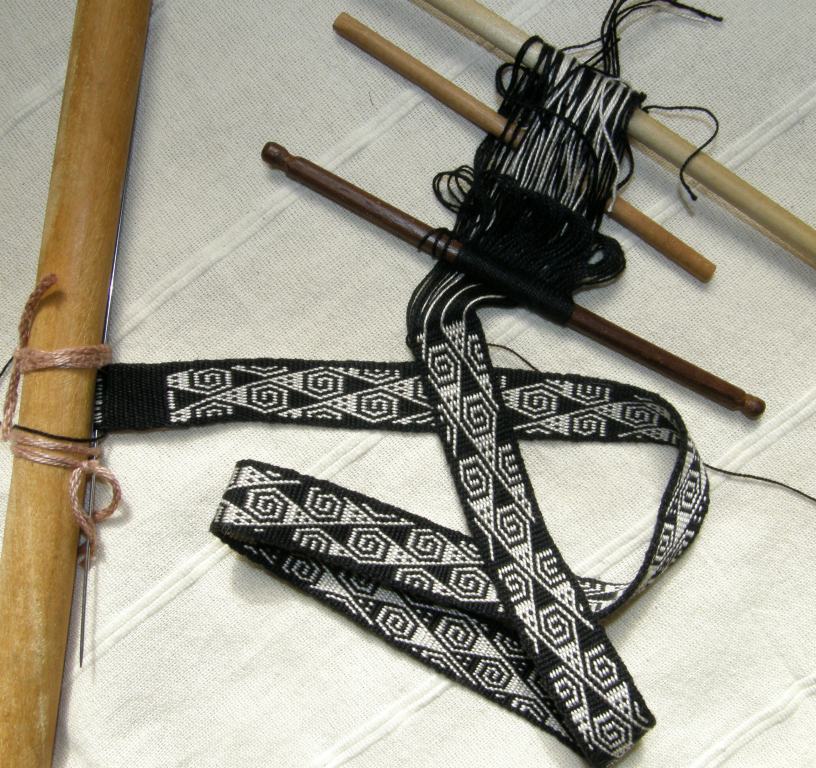
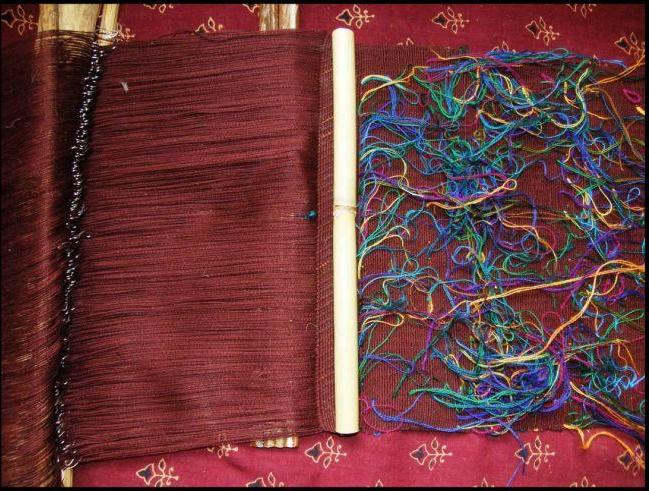
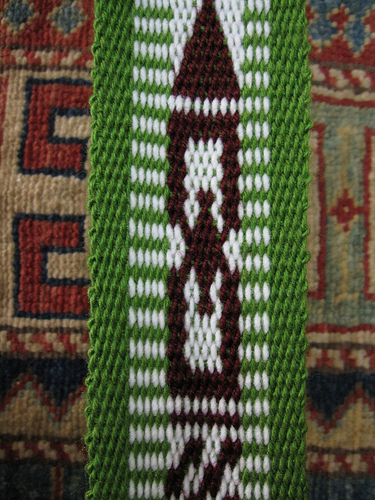
What I have on the loom now I am calling a sample for a table runner. The brown yarn was the only color of which I had enough to make both warp and weft. The sixteen strands required for the thick weft chews up a lot of yarn. I used two sheds…the usual shed rod and string heddles and hand manipulated the warps to create the pattern.
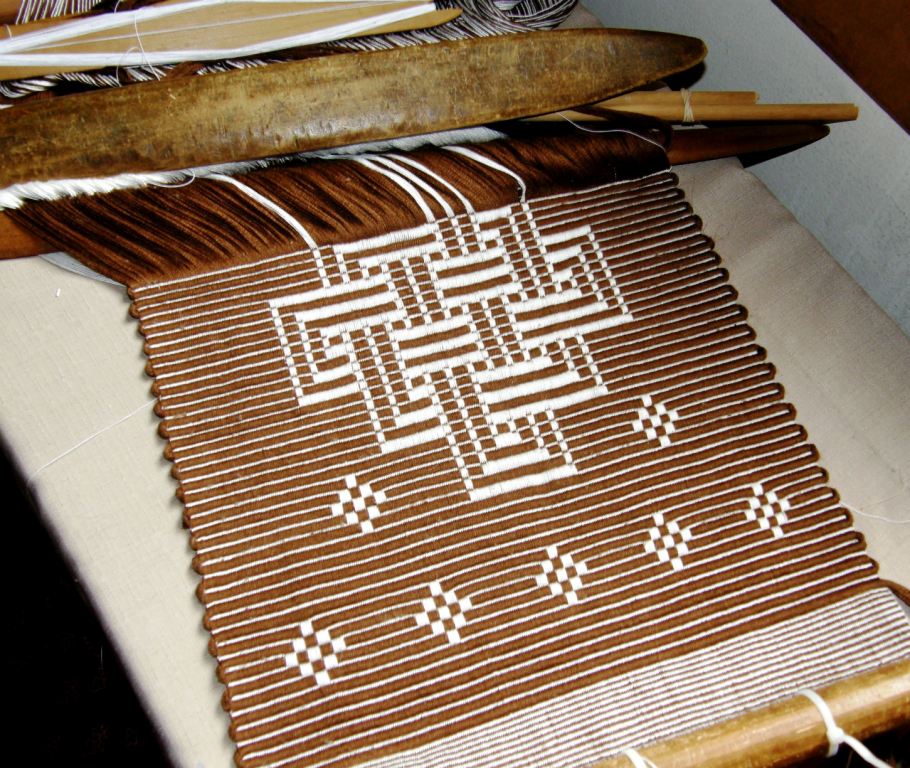
So, this is the sample. For the real piece I have an idea for a much more interesting border design and I will make those diamonds beside the main motif larger. I lost a tiny bit of width so I will make adjustments for that next time too.

Once the first row of the main motif has been placed, there really isn’t any major counting to do and that is nice for a change. Also, can you imagine how fast this weaves up with that chunky weft?!

My calculations of width to height worked out pretty well. If I had made the verticals in the motif wider to match the thickness of the horizontals the motif as a whole would not have turned out square.

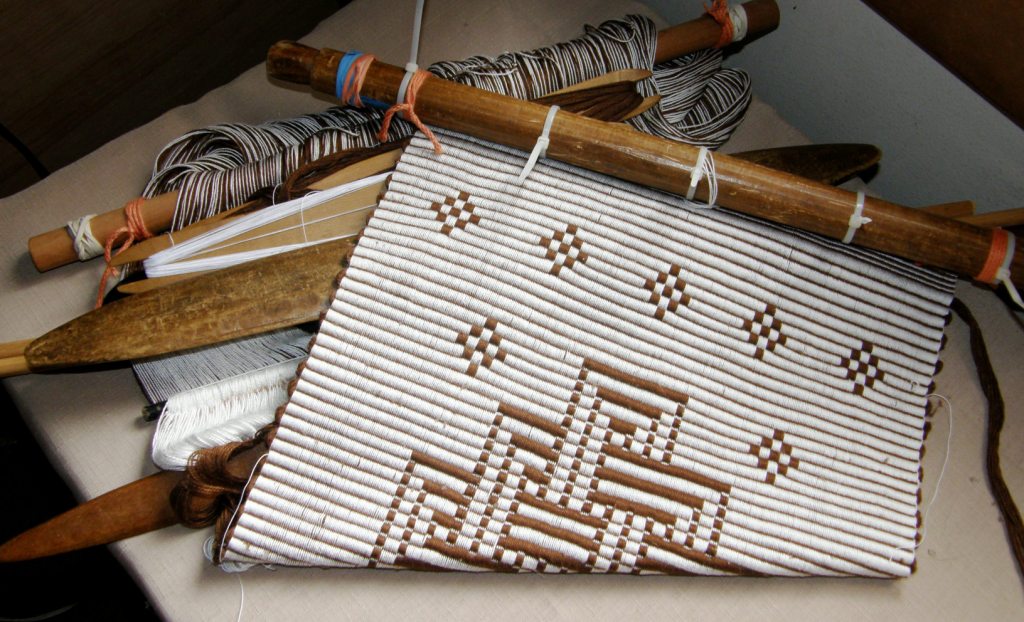
Here’s a peek at the back…
It was nice to return to Marijke’s site as she and I have been corresponding lately about a possible visit in September. I will be in the UK for the Braids 2012 conference in August and then plan to go over to The Netherlands. And I am secretly hoping to meet Mirja Wark somehow!

So, this has been fun! Normally when I weave I can’t listen to music that has lyrics as I automatically want to sing along and all my pick-up counting goes out the window. So, I have enjoyed being able to weave and sing at the same time with this project. The B52’s Cosmic Thing album was my choice…no love songs, no broken hearts, nothing deep or analytical…just pure fun. One of my favorites is “Roam”. We used to sing that back in my ski bumming days in the 80’s when we literally would “roam around the world” following the snow.

Now I roam around the world via the internet and the world comes to me too. This week Greece paid a visit when Andreas sent me pictures of his latest backstrap weaving. My oh my, he has been getting on with it and brought me a cheerful splash of color.
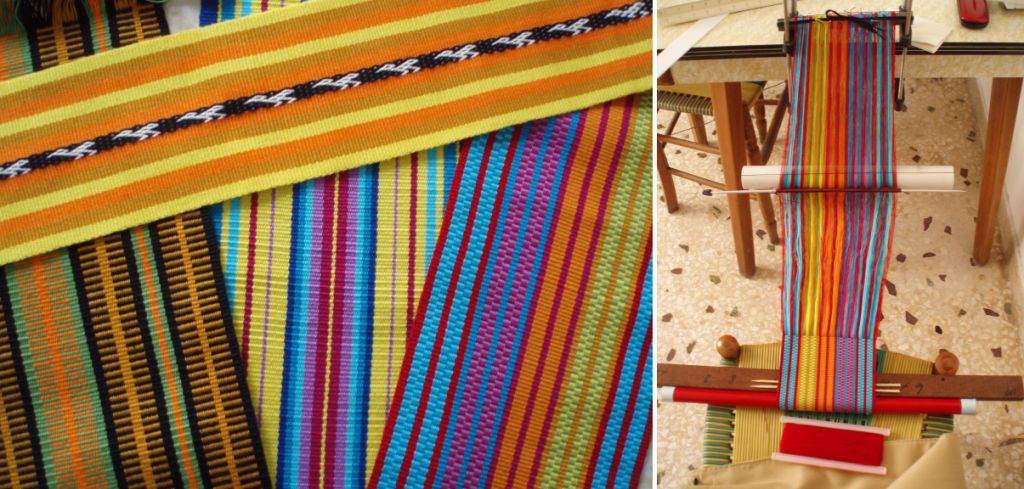
Color and all plain weave except for the one little pebble weave motif. I like the nice large shed rod he is using and the knitting needle heddle rod.
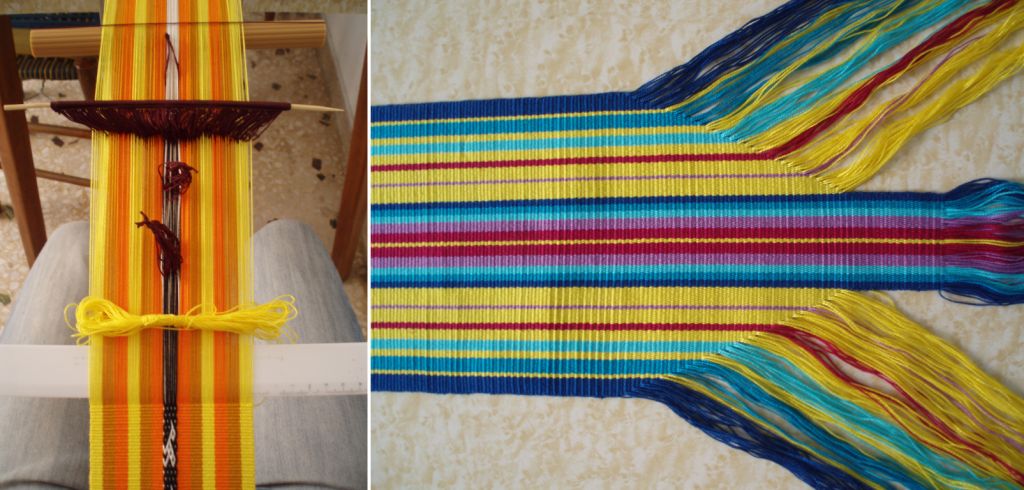
There he is teasing me with the special shaped finish that he does so well. I must try that again some time. Sweden also dropped by in the shape of two beautiful books on Leksandsband that were sent as a gift.

But it will be back to Colombia and Venezuela for me this coming week so I can get my design for the wall hanging ready. I will buy some yarn for the rep table runner and continue roaming the web for rep weave pattern ideas.

Check out my RESOURCES page…I added a couple of new goodies.

Backstrap Weaving – What’s on the Other Side?

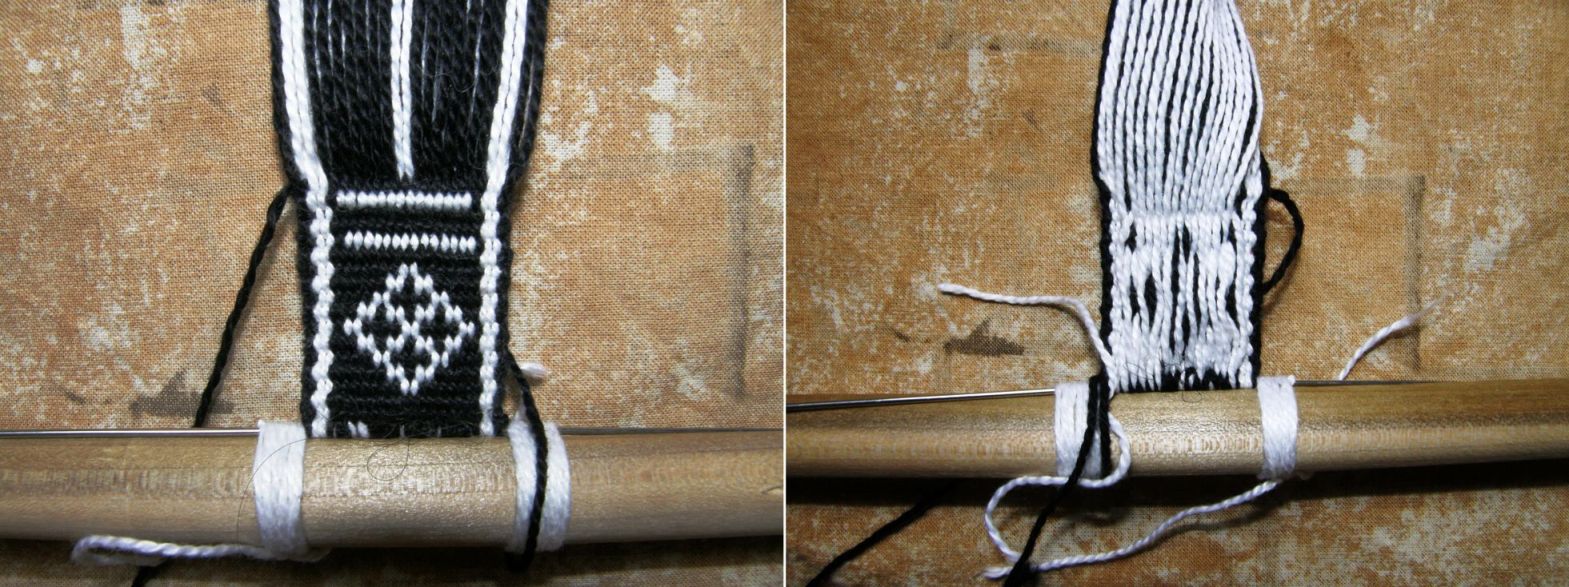
I have been looking at and thinking about what is on the “other side” of woven cloth and about the different attitudes of weavers from different cultures to what can be seen on the “wrong side” of the fabric. Some weaving structures are completely reversible as is the case of most complementary warp structures.
You can see both sides of my pebble weave piece at left and can probably appreciate that sometimes it is difficult to decide which side to make the “right” one as I had to in the case of this guitar strap when putting on the length adjustment buckle. As this is being sent to friend, I have actually left the decision up to her and only pinned the fabric in place around the buckle.
I always start with what I expect to be the right side facing me as I weave and find that sometimes I completely change my mind abut which side I like best once the piece is off the loom.

The wrong side of the weaving can also reveal just the information that is needed to be able to quickly identify the weaving structure.

For a while I was scratching my head over pictures of the yurt band that my friend Lisa had bought thinking it was pebble weave until she eventually sent me a picture of what was obviously its wrong side and I was then able to see that it had been woven using what I call simple warp floats.

At that time I didn’t much care for techniques that didn’t produce two “good” sides but who could resist trying to weave these gorgeous yurt band patterns?

Then it was a matter of getting the charting paper out, searching the net for more images of these bands and getting down to weave.
I must admit that lately I have gone a little crazy about this technique as I find more and more examples of its use in places like southern Iran, Mexico and tropical lowland Peru.

This weaving structure produces a definite right side. However, even though the wrong side with its exposed wefts looks nothing like the upper face, it can still be quite appealing depending on the color weft that you choose to use.
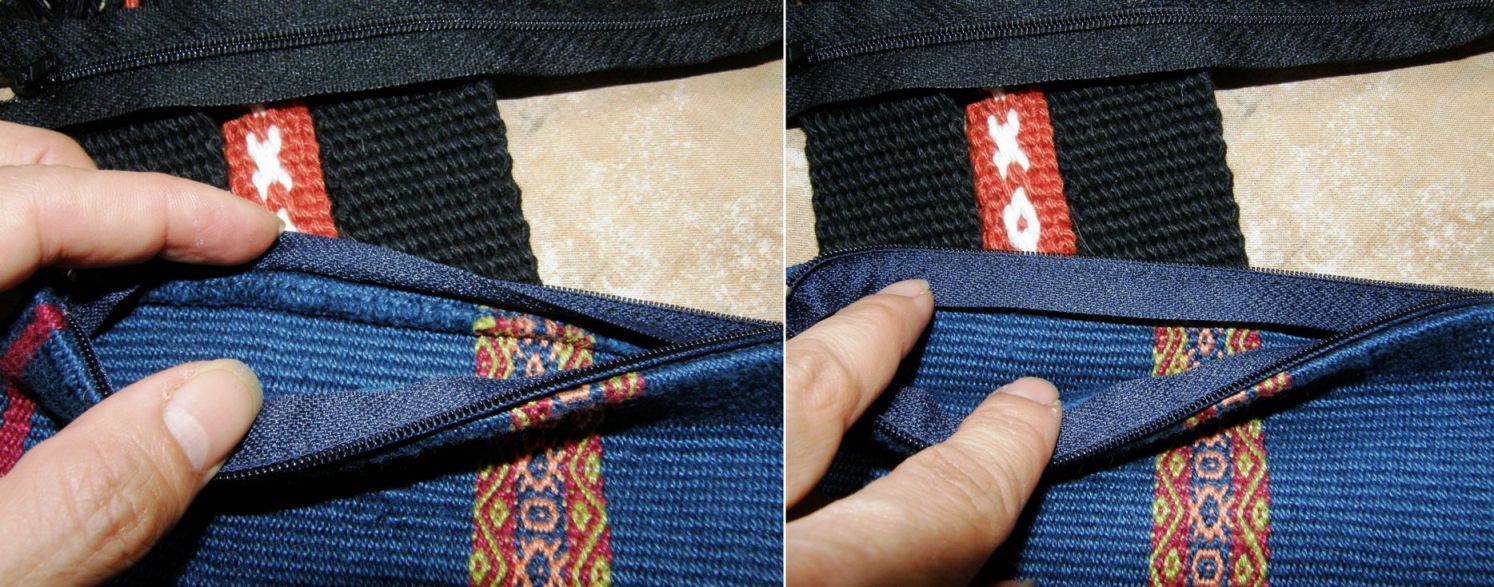
In the case of the yurt bands, only one side of the band is visible anyway when it is wrapped around a yurt. The piece I wove above right was made into a zippered purse and so no one needs to know what the inside of the purse looks like.

I am guessing that the day will come when there is a nasty spill on one of the place mats pictured above left and that I will be wishing that I could just flip it over and have the same design on the other side…oh well.

I might mention here that I just received my copy of The Journal for Weavers. Spinners and Dyers from the UK which has a beautiful article on  Kyrgyz textiles by Stephanie Bunn which includes yurt bands made in this kermé technique. She quotes a Kyrgzy person who says “Kyrgyz weavers are all mathematicians”. Bunn  then goes on to say “I found that trying to make the rhythmic pattern of kermé was the kind of experience that made me want to weep, although time improved matters.” You can read that article here.

I am infinitely grateful that I was taught the base of this technique by my wonderfully patient weaving teachers in coastal Ecuador and so taking the next step to  kermé was relatively easy.
The two pieces if weaving below have been woven in another technique with the same basic warp manipulations but their “back” sides are vastly different…


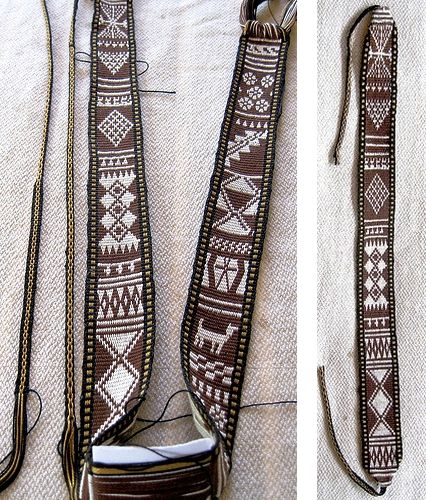
The motif above right is a smaller version of one of the Bedouin motifs on the belt above left.

The belt has been woven in warp-faced double weave and so the motifs are exactly the same on both faces with their colors reversed.

Unfortunately both sides will never be appreciated as only one face is ever seen! I wove this in double weave as this technique produces something sturdy enough to be used as a belt.

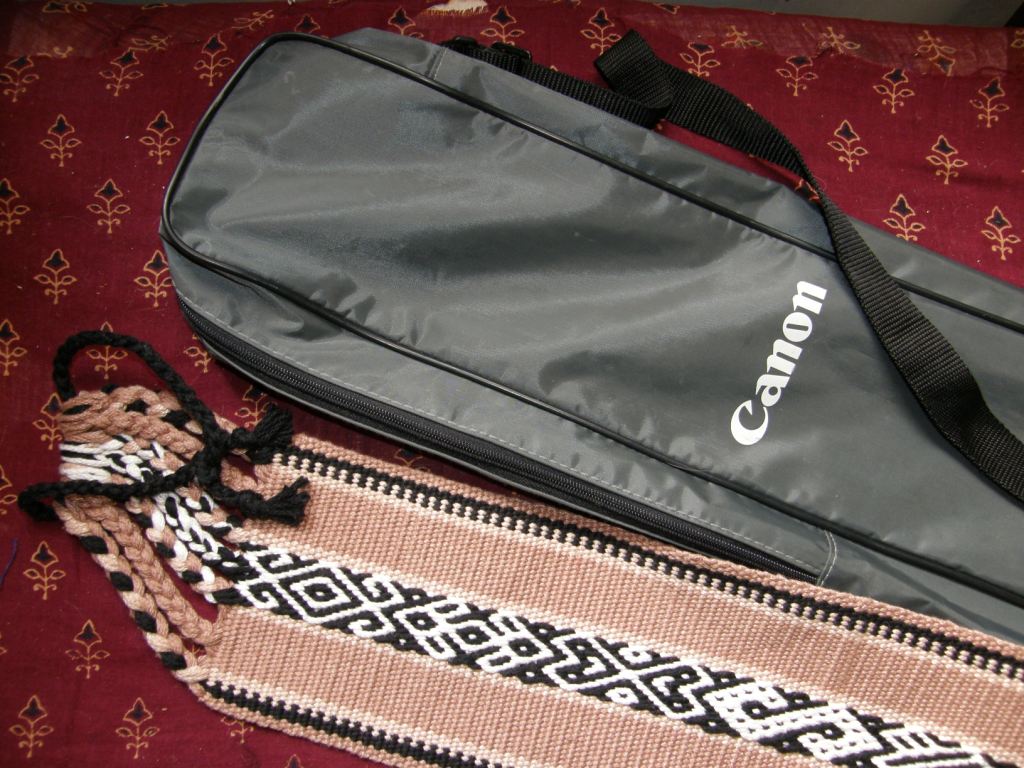
The camera strap I wove at left makes better use of this technique and I didn’t have to decide which face to make the “right” one.

Now look at the back of the piece above right which I show below…

This piece has been woven using the simple warp substitution technique which produces as you can see long floats. Most people do not have a good reaction to these long floats. I have to admit that I am not a big fan of them but it depends on your intended use for the piece. If this band were mounted on webbing, for example, it would make a good strap for a camera or a belt and it is a very simple weaving technique.

And this is where people in different cultures see things in different ways. While we may wrinkle our noses at the excessively long floats, the Bedouin people use this technique to weave motifs into very large pieces of fabric that are used as tent dividers. Both sides of the fabric are seen (although I have read that they are hung so that the  “right” side faces the men’s living area). They are not pieces of fabric that are being continually handled and so I guess that the long floats are not impractical.

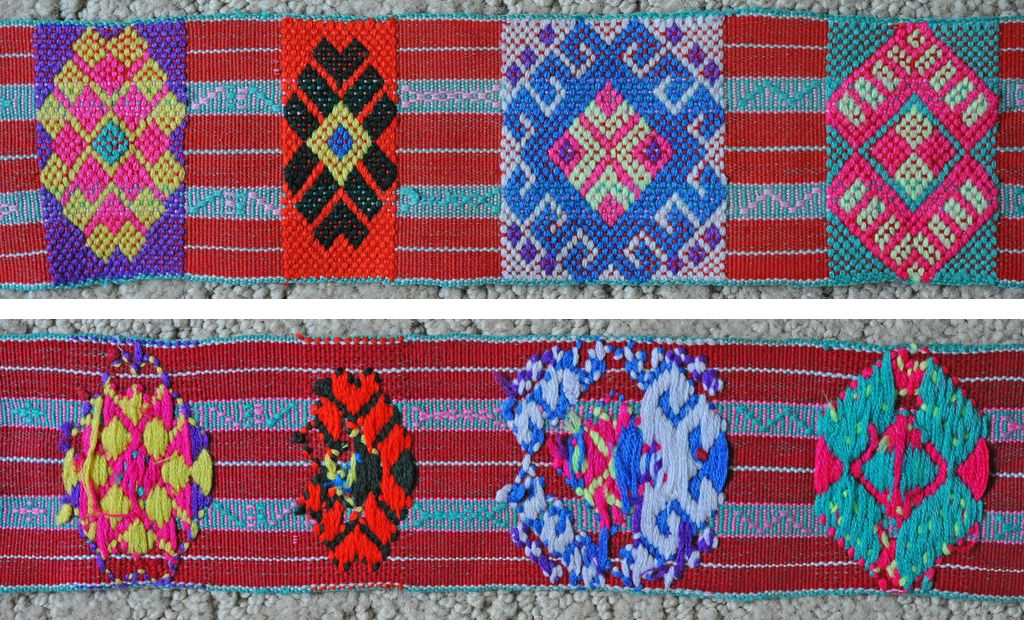
You can see the very long warp floats on the back of the Bedouin piece that Tracy in Qatar sent me. Some of the warps have even broken through age or use….hard to say which. What I do love about these particular long floats is that I get to really handle and examine the Bedouin handspun wool.

And then what about all the different kinds of supplementary weft techniques? I have only just scratched the very surface in this having learned the inlay technique on warp-faced fabrics which produces a single face of pattern and a double faced technique from Guatemala .

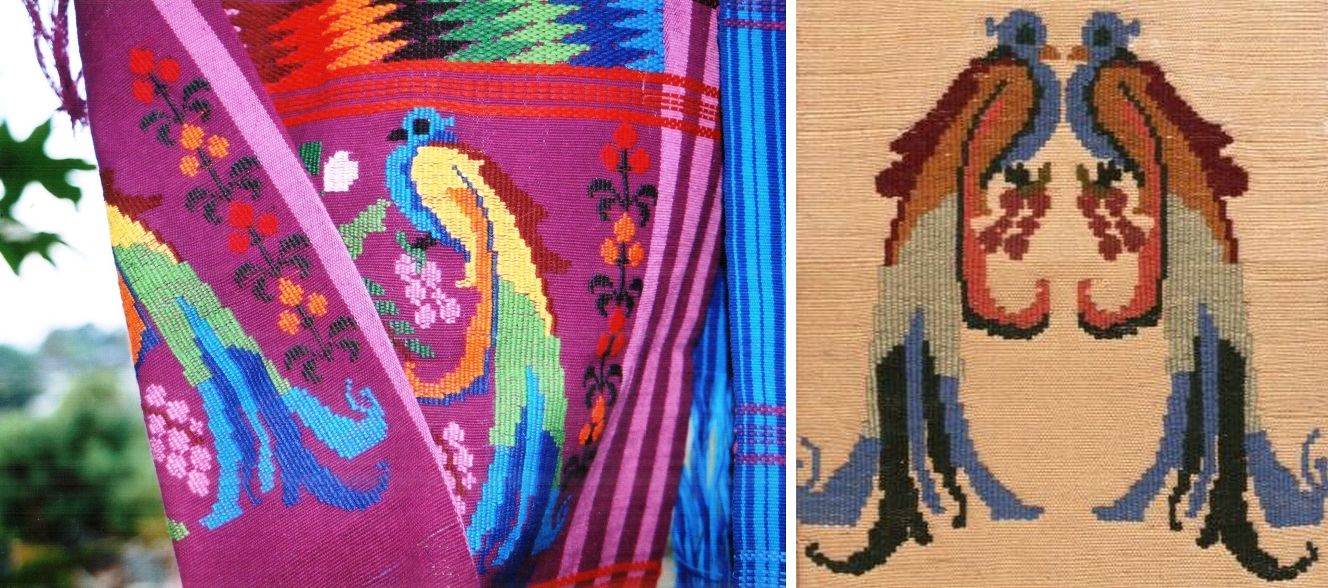
The double-faced technique can be seen above left on a Guatemalan weaving. This particular technique, as far as I know, is unique to San Antonio Aguas Calientes. My reproduction on the right was glued down onto the cover of my notebook in which I documented the technique so the other equally pretty face cannot be seen!
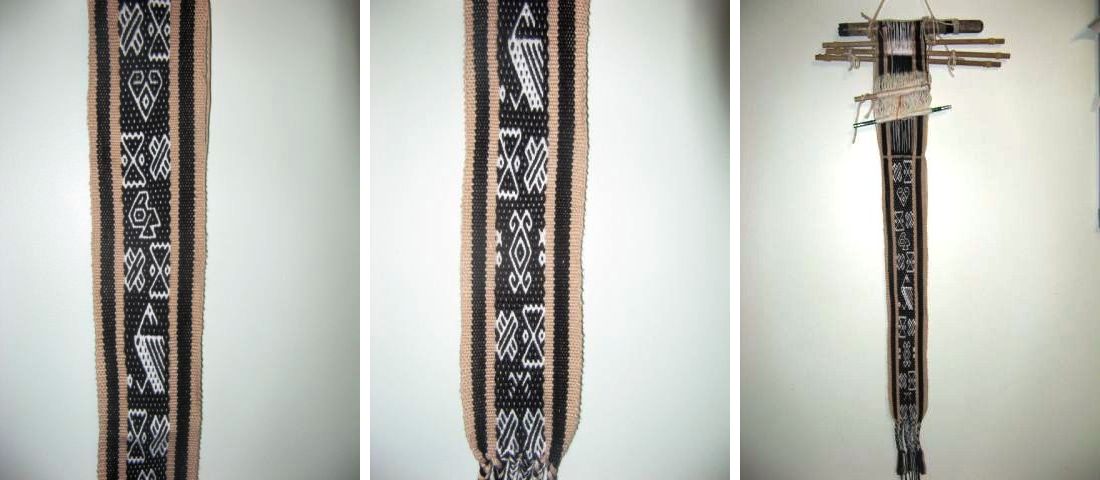
Even the weavers in Guatemala don’t get to show off the other face as they use this technique largely on their huipiles (blouses) alongside single-faced techniques.

Small babies’ caps are also made with fabric woven using only this double-faced method.

This hair sash from Jacaltenango was woven with a supplementary weft technique that produces two equally beautiful faces.

Sometimes the back of a piece patterned with supplementary wefts is left with small weft tails hanging…

They can be a merry mess while the piece is in progress…

Or they can be cut right off and hidden entirely within the sheds so one would never know by looking at the back of the cloth that the other side was a riot of supplementary weft pattern. Look at the plain red back and colorful front of this hair sash from Aguacatan…

Look how much pattern weft material is used in those tassels!

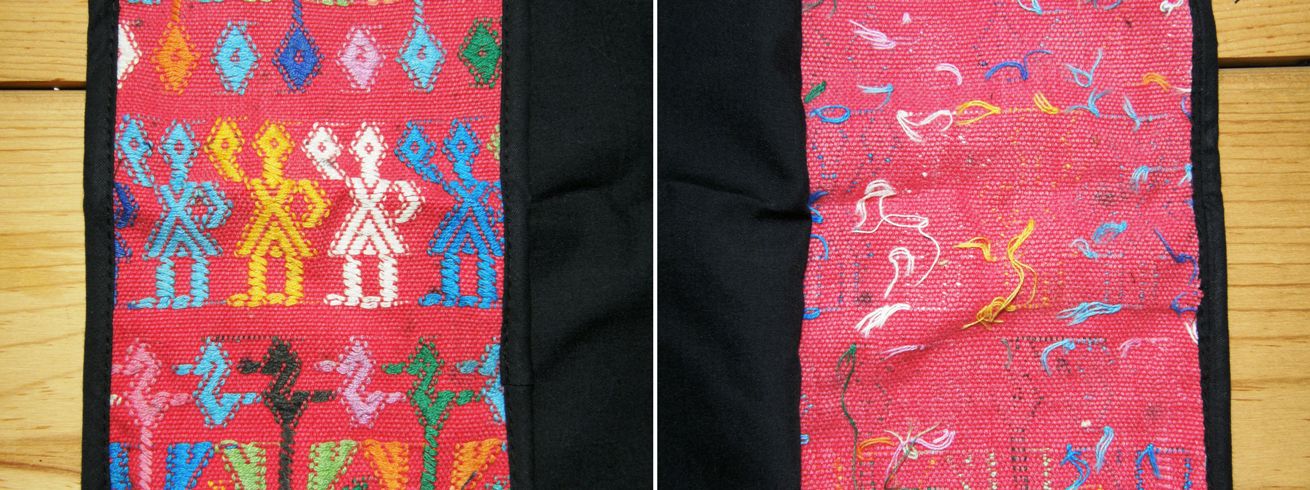
When the weft patterning is particularly profuse the resulting weft tails on the back can be quite a sight! This is an old piece of huipil from, I was told, Chichcastenango. Many years of laundering have created quite a tangle of weft ends on the back. This is all quite acceptable to the Guatemalan weavers.

I was very much taken with the following Guatemalan belt that Teyacapan has on her Flickr page and asked her to photograph the back so I could see how the pattern had been worked.

I love the blocks of pattern that the weaver has used! As I was saying in last week’s post, the supplementary weft pattern does not have to be worked on a blank canvas. It looks like this weaver has worked her weft pattern on tiny strips of fine warp float designs.

How is this for a canvas for supplementary weft patterns?

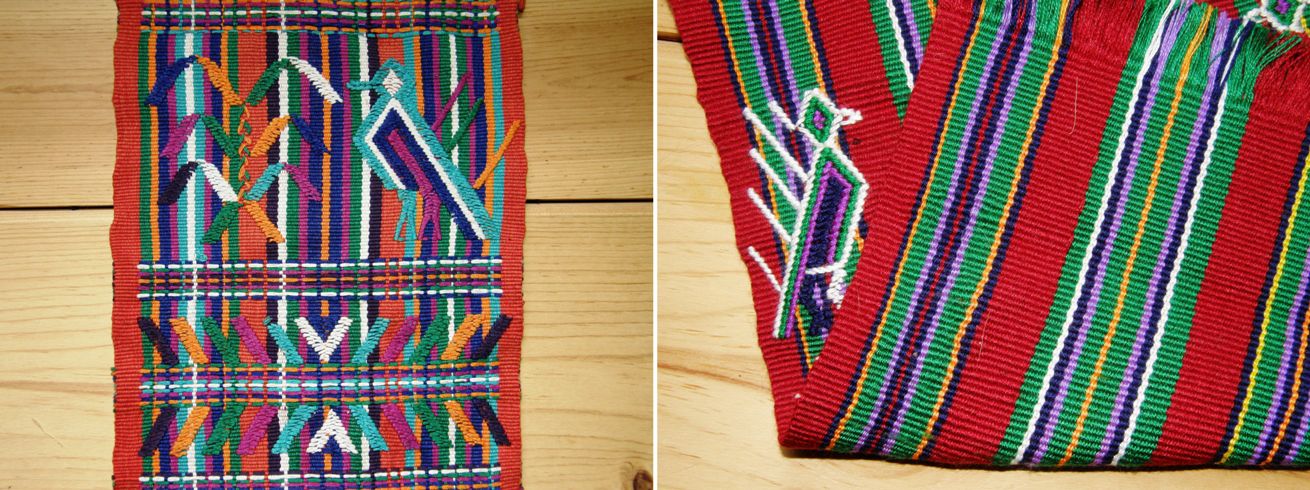
These pieces are from the areas of Nebaj and Cajul in Guatemala and again show how one face of the fabric can be completely different to the other. You can choose to show your bright stripes one day (free of any weft ends) or birds flitting about the corn plants another.

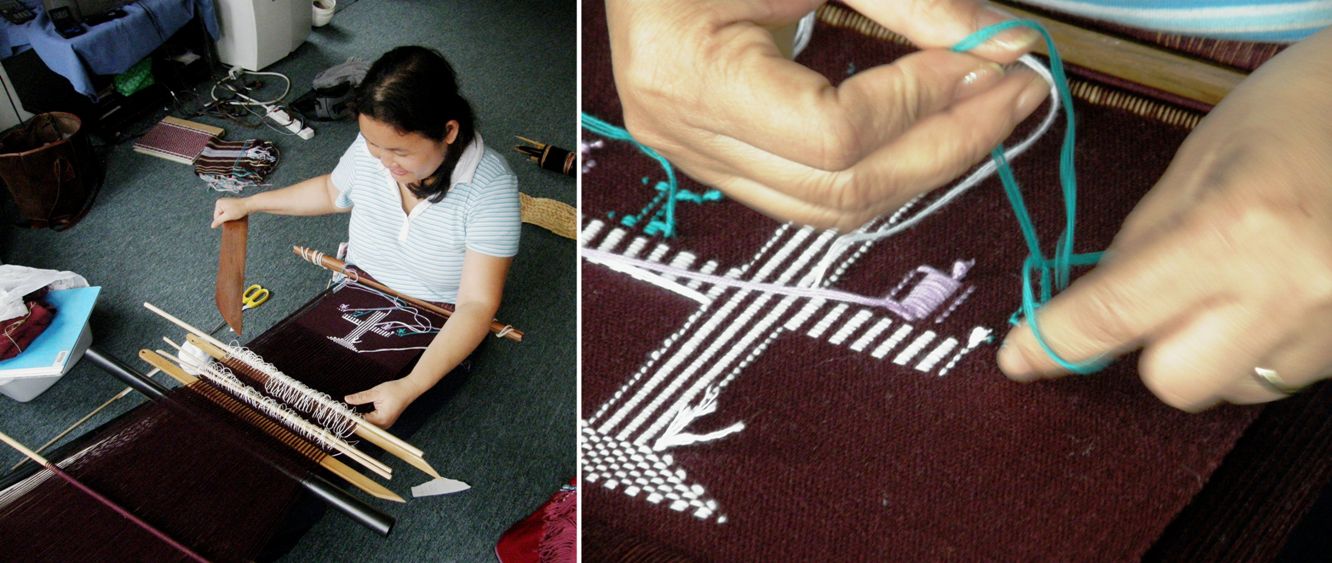
Some weavers actually work doing their supplementary weft patterns with the wrong side of the fabric facing up.

I got to visit Burmese weaver Dar Ku on my last visit to the US. She was happy to demonstrate for me while giggling and saying “It’s easy, it’s easy”. Her beat is surprisingly light and she does indeed make it look easy. Of course we all know not to fall into that trap! What fun to turn the piece over and see the right side with its neat patterns.

Franco shared a video of Lahu weavers from Thailand weaving supplementary weft patterns into tremendously long warp-faced pieces. The weaver is using a single-faced technique laying the supplementary wefts from edge to edge within the pattern sheds controlled by heddles and pattern sticks.

Here is another nice video of supplementary weft patterning from Acatenango Guatemala…one of the many videos that Red Corn Tours posts to its Facebook page every week. I watched this happily while asking myself “What’s on the other side?” and then the videographer, good chap, filmed from under the loom and I got to see the other side. What happy colors!

This is what has caught my attention most recently. I fished this out from the hundreds of photos I took on my US trip last spring when I got to photograph some gorgeous textiles from Bhutan in the collection of Betty Davenport.

I wove some motifs from one of the pieces into one of my more recent projects and now I have my eye on doing something like these zippered purses which Betty made from her samples using patterning techniques from Bhutan.

The supplementary weft pattern has been worked on a twill (on the left) and balanced plain weave (on the right) ground. Aren’t these pieces striking? There has been some talk of twills in our Ravelry backstrap weaving group which is what turned my mind to this project…that and my recent dabbling in supplementary weft patterns on interesting ‘canvases”. What’s on the other side? I don’t know…I didn’t think to look!

I wove a small twill sample a long time ago on my backstrap loom.

I don’t know a whole lot about non-warp-faced weaves (but I am slowly learning!) and so I just looked at a picture of a twill  in my copy of Irene Emery’s Primary Structure of Fabrics and set up my loom with three sets of string heddles and a shed rod holding the warps in the four sheds. I am not sure if I got the sett right…it was all guess work.

Not having any kind of reed to use at that time, I spaced the warps by lashing between them on the loom bar. It worked well for this small sample using #3 crochet cotton for both warp and weft. I had just read a discussion on Weavolution about the use of floating selvedges and so decided to try one of those too. And, as usual, I used the tiny sample  as a business card pouch. I learned a lot!

Another one of these non-warp-faced weaves that I find quite easy to handle on the backstrap loom without the use of a reed is finnweave. It behaves well enough for me. I have had the benefit now of seeing ”in person” the Huichol bags woven in this technique in the collections of two of my friends in the US so I know what I need to be striving for.

This is 10″ wide and is one of the storage bags I planned to make this month. Having used up pretty much all my black thread on some unexpected distractions, I chose blue and yellow for this project instead of the planned black and white. The designs are taken from Huichol and Otomi bags and belts. The flower design is actually taken from traditional Scandinavian finnweave pieces. The Otomi use a motif  that is so very similar but I prefer the Scandinavian version.

I am using three sets of string heddles and a shed rod to hold the fourth shed. And what’s on the other side, you ask? This technique I am doing is not truly reversible. You could get away with showing certain motifs on both sides. They wouldn’t be mirror images but they would look okay. However, the patterns I have chosen are not really amongst those.

Now here is the other project about which I am CHOCHA!! (chocha is used here in Bolivia and Argentina to mean “exceedingly pleased”!). I guess a lot of the pleasure comes from the fact that I am not skilled with a sewing needle, don’t own a machine and have never sewn anything from my handwovens larger than cell phone pouches and eye glass cases and a couple of very box-like shoulder bags.

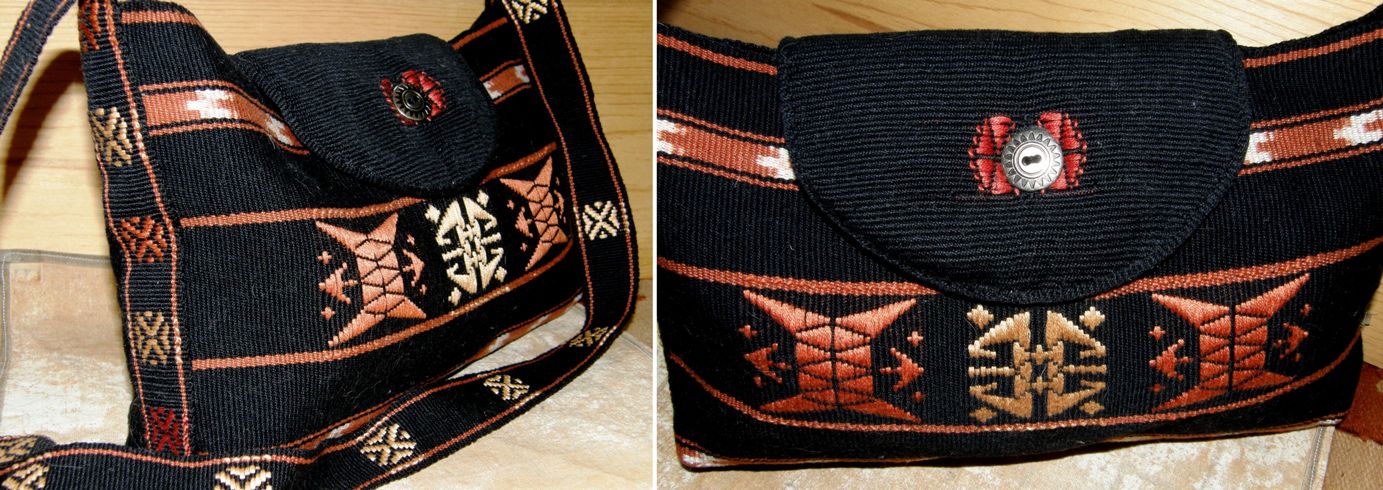
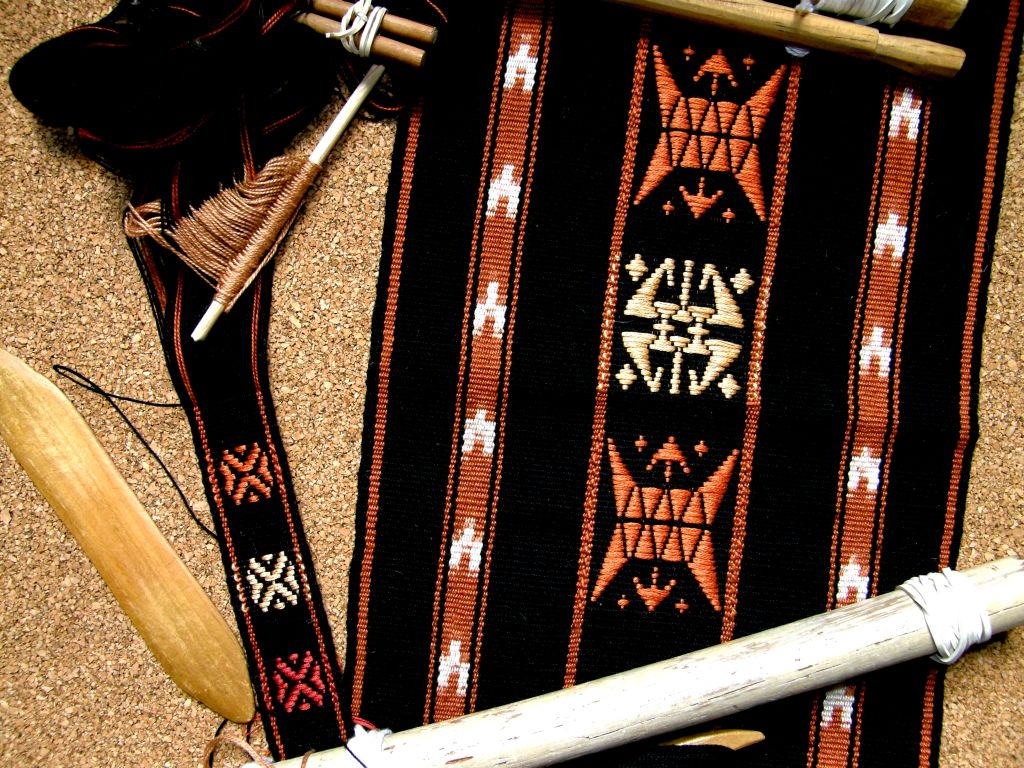
I just love how this all started as an experiment in ikat design with no intention whatsover to end up with a bag. I was bored with weaving the plain black piece of fabric with its two ikat strips and so added some supplementary weft patterns…motifs from a weaving from Bhutan in Betty Davenport’s collection. Then I decided I wanted to do something with it and the bag idea developed. I wove a strap and then another piece of plain black fabric for the back and finally a small piece of plain black for the flap.

How wonderful is the backstrap loom for enabling me to weave up the small pieces to put this bag together with very little waste.

Jentide from the Ravelry Backstrap Weaving Group showed us how she made a flat bottom for her tote bag and so I used that sewing technique and Amber had created a button hole in one of her bags so I did the same by separating the warp in the middle and weaving with two wefts. I wove a small supplementary weft motif on either side of the button hole.

I cut and shaped the flap edging it with a tubular band to cover the raw edge. The bag is still missing a zip. Zips are nice for the way they can hide raw edges.

However, I turned the fabric sideways to sew this latest bag and so have two nice clean selvedges at the top.

And if you haven’t seen enough black yet, here is the other thing that I am still working on…

Here is the supplementary weft pattern on its “spotty” canvas that I wrote about in detail last week. I added some weft twining in the middle and am still working on the weft twining at either end. I have no immediate plans for this piece but am bound to come up with something to further test and hopefully extend my meager sewing skills.

Now I am planning a tote bag in bright Guatemalan style stripes….enough black, right?!

Some progress from the third week of our backstrap plain-weave Weave-Along…

Marsha has chosen fall colors to make a piece which she says reminds her of Halloween, Thanksgiving and candy corn. Amber is making a tote bag by sewing two of her backstrap woven panels together. It is gorgeously simple and beautifully woven.

Misskineta, our newest active member, has started her first ever warp-faced piece while Tracy, fresh back from her summer vacation has jumped straight back into the loom with a lovely balanced piece which I believe is already off the loom. Janet is making progress on the panels for her indigo-dyed shawl. Her picture collages tell the story…

I dug out all my textile photos from my spring trip to get the shots of Dar Ku and Betty’s purses to post here and now have a whole lot more images and ideas swirling! Let’s see what materializes….

Backstrap Weaving – Ready, Set…Weave Along!

I fear the truth in the adage ”out of sight, out of mind”. You wouldn’t believe my computer desktop! It is a cluttered mass of folders and icons. I just know if I put anything away into a file, I will forget about it and I have new ideas coming up all the time.

The same goes for my bedroom/work space. We have had to come up with some interesting solutions to the lack of space in this little home which means we have two single beds side by side, one of which folds away during the day so I can have some floor space on which to work.

Everything has to be rolled up, picked up and put away at the end of the day so the bed can come back out. You would think that that would keep things fairly orderly…

I still seem to end up with piles of stuff on the floor everywhere…weaving sketches, books, tools, baskets of yarns, things I don’t dare put in a cupboard or closet because they serve to remind me of the latest new weaving idea I have had. They have to be covered so the cat won’t get at them. It is a merry mess, it lives and grows and never stagnates. But, it’s time for a change!

The fact is that there simply isn’t anywhere to put things anymore as my books have completely taken over…no more floor, shelf or closet space left but aha! there is wall space!

So, I am going to have lovely woven storage bags hung on the wall to hold my project bits and pieces and, on the whiteboard, a nice orderly list of what’s waiting to be explored. The bedroom will start to look like some kind of crazy textile bazaar! Actually it kind of does already.

Storage bag ideas: I love the woven sacks that are used up in the highlands for storage, transport and display in the markets and fairs. I have been searching for ideas for interesting bag shapes but I have to admit in the end that a rectangular piece of cloth folded in half and sewn together at the sides is probably the most economical if not the most elegant way to create a practical bag from a piece of handwoven fabric.

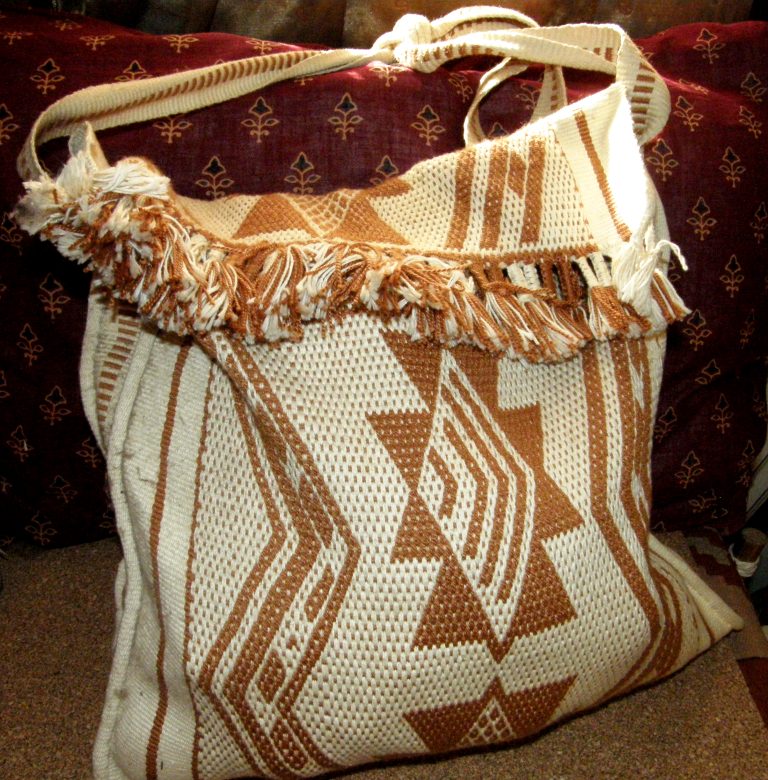
You can see one deep storage bag that I have at the top of this post that Tracy sent me from Qatar. The wool fabric is part of a Bedouin tent divider. That currently holds all my Tour de Fleece gear.

This wool bag that I made years ago with  Mapuche designs woven with supplementary warps hangs on a doorknob and holds all my camera stuff…battery recharger, cables, tripod attachments etc.

This gigantic cotton bag with Guarani pebble weave designs, which was bought here in Santa Cruz, hangs off one of the bed posts.

So there are more bags to be made so I can get everything off the floor and onto the walls! Well, you all know that I am just looking for an excuse to weave more things.

So, I am in the process of weaving a hanging strap, which I couldn’t resist decorating, for what will be a new storage bag made from a piece of fabric I wove some time ago as an ikat experiment. The strap has motifs from Bhutan as does the bag fabric.

It will also need a back and some sides in plain black…it will be very fast to weave those.

This will hang on the wall and hold what is currently being stored in a large basket on a shelf. The basket will go and yes! that way there will be more room for books or at least something that is currently on the floor. (I have a new book coming in the mail…thanks Anna!)

The motifs have been woven using supplementary wefts. I used one and a half strands of embroidery floss as the supplementary weft with my 35wpi cotton warp and weft. Veeeery slowly things may become a little better organized.

I have been admiring the designs made by the Huichol people of Mexico in balanced double weave for a long time ever since I first ran across their work in a museum in the US in 2007. They make bags on which they add large corner tassels and have an unusual way of braiding the warp ends.

These are a couple of samples I made in this technique some time ago.

 I prefer the patterns that they use in their belts and so I will probably try to make a storage bag in this double weave with motifs from their belts. I wonder if I can figure out how they work those warp ends.

The other project I worked on this week was the mug rug set.

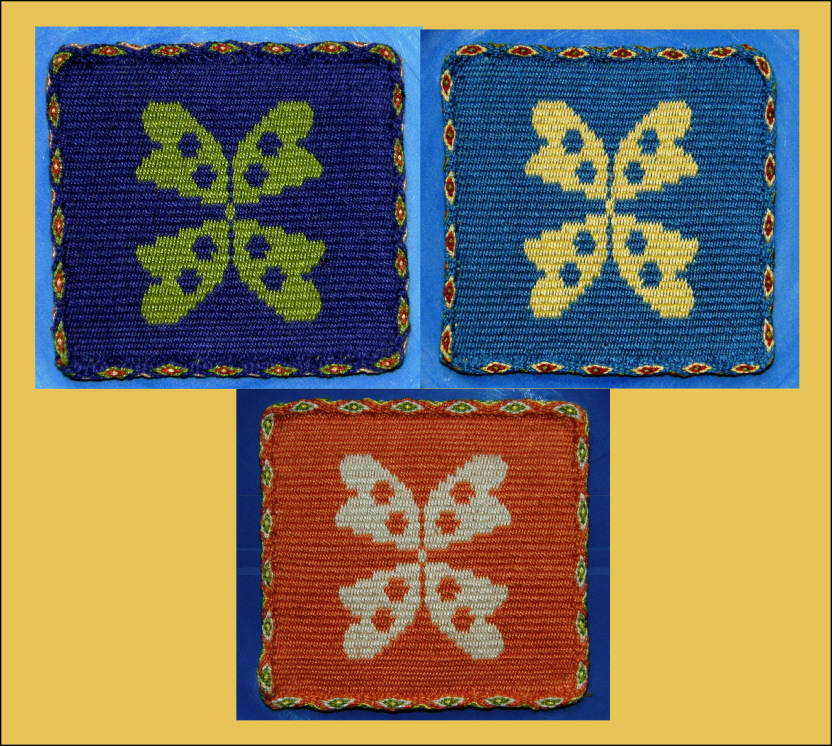
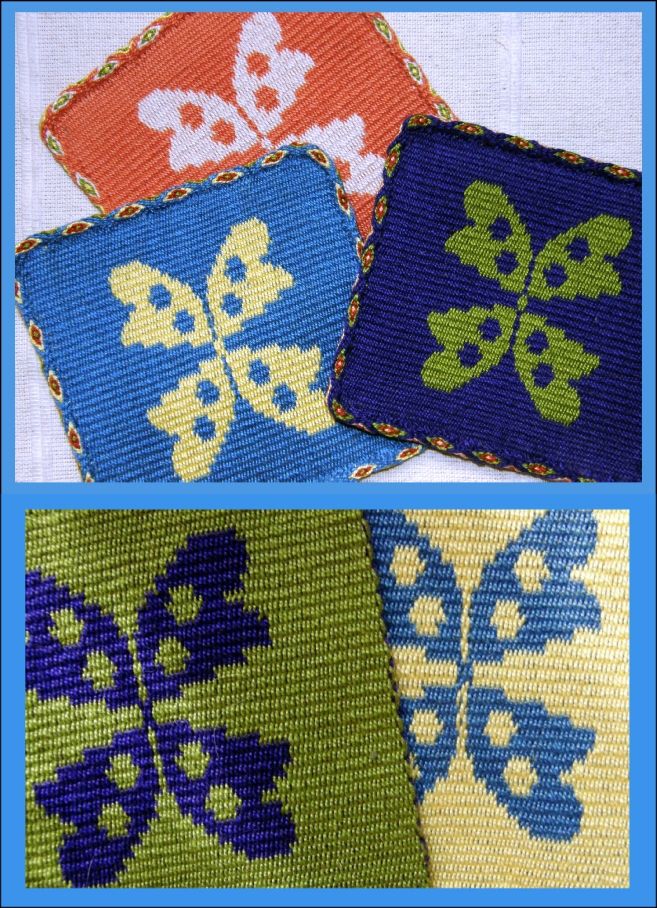
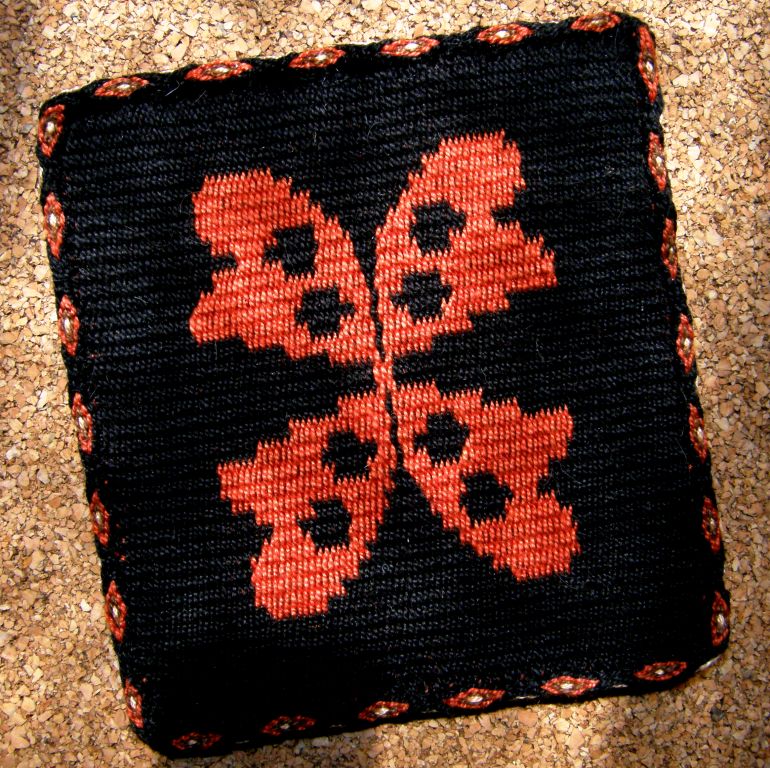
My friend, who has decorated her kitchen with flower and butterfly motifs, saw the prototype I had woven (at left) and asked for a set for her breakfast bar. Now she tells me that they are too pretty to use and that she will put them on her wall.

I have made three and will wait for her to choose the colors for the fourth. The motif is neither butterfly nor flower and is based on a Guaraní leaf design which I wove one way and then mirrored.

The red and black sample, which is larger than the other three, will stay here as my tea mug rug where I work on the floor and the other three will go to Evelyn with a fourth one yet to be made. They have all been edged with tubular bands.

Evelyn’s kitchen is yellow with bits of green and blue in the wall tiles so I think these will look nice there.

It’s hard to decide which face to make the “right” side.

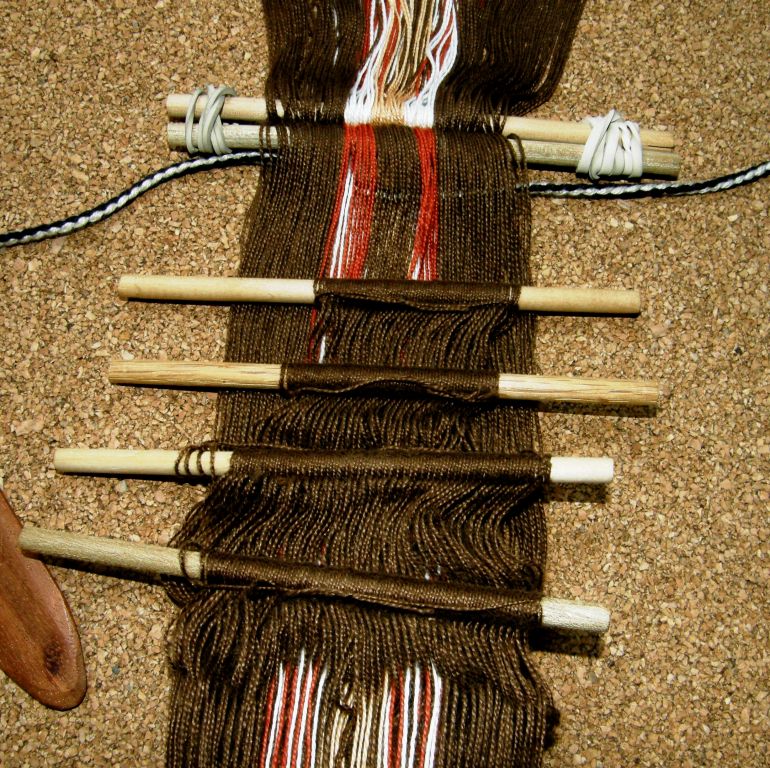
There is another commissioned piece that I have been working on, which I can’t show here yet, but this piece has made me even more enthusiastic about the simple string heddle.

This is a particuarly long but narrow piece that I am weaving in Andean pebble weave and I have set up the warp with four sets of string heddles (two more than I would normally use for pebble weave), and what an incredible time saver this has been! This project is simply zooming along!

The black and white cord that you see in the warp is my “saver cord”. By using these two additional sets of heddles and the saver cord I actually get to do seven consecutive weft passes without having to do any pick-up for this particular design.

String heddles are so cool! I love how they allow you to put one warp thread into multiple sets.

No matter how they are made, whether they are single or continuous, I love them.

You can use one, two, three or four as I am currently using. I am not sure what limit I would put on the number that I would personally consider comfortable or practical for my own backstrap weaving. I have seen backstrap weavers in pictures with many more.

The warp on this vertical loom in Ecuador will have eleven sets of patterning heddles plus one that will control one of the two plain weave sheds.

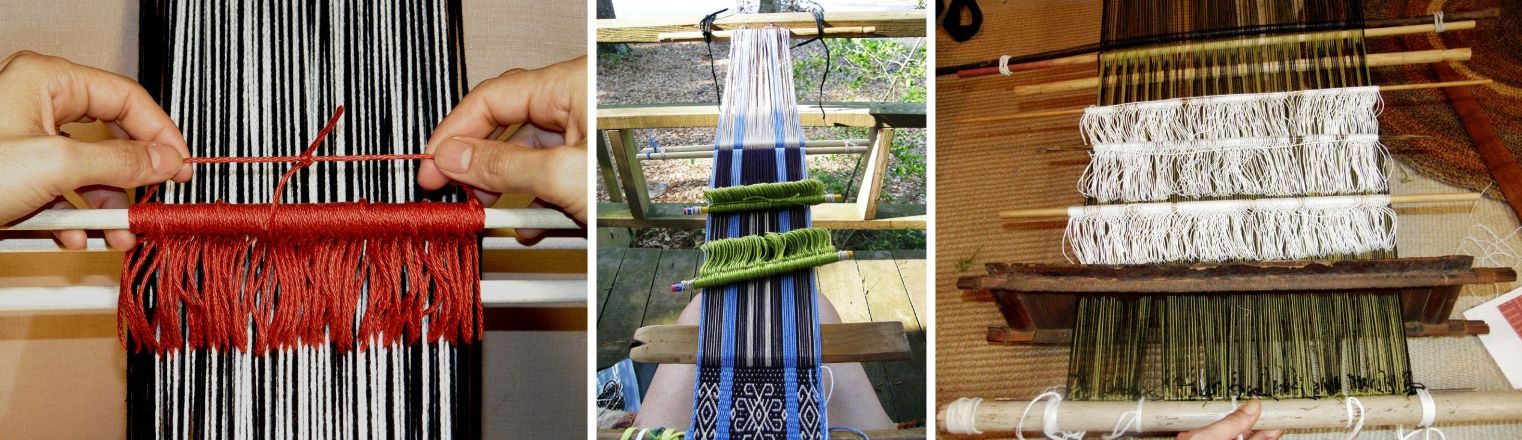
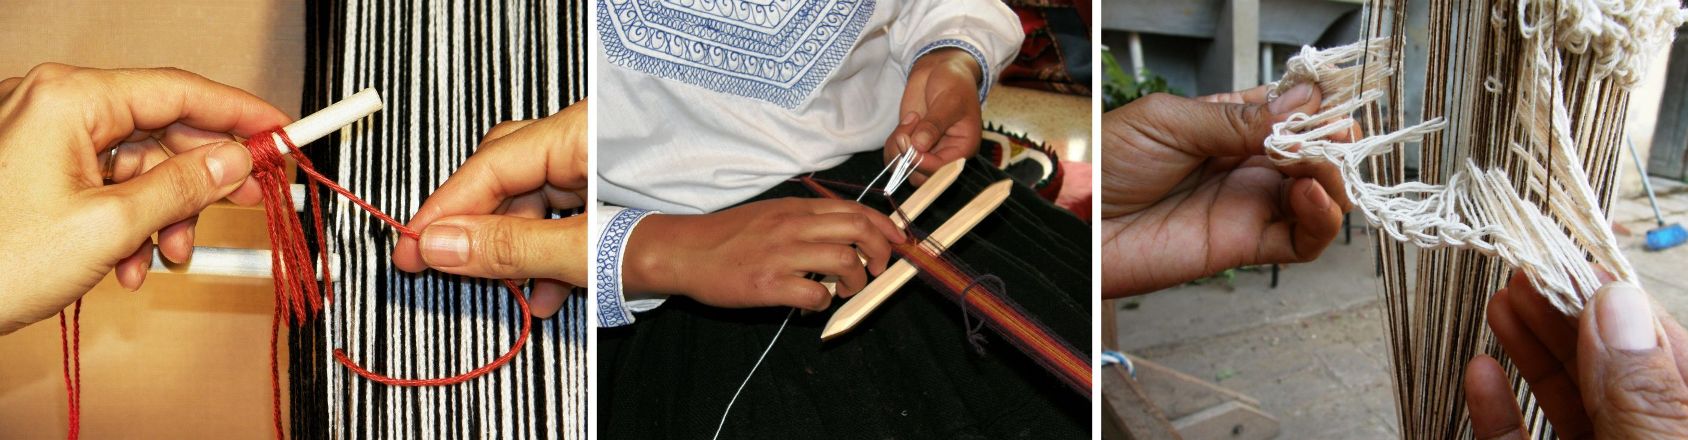
They can be made on a stick, made around the fingers and knotted into a bunch or chained together.

There are so many different ways to make them with no one particular way being the “right” way. I have chosen my favorite ways over the years but love seeing and learning new ones.

Education and More has just posted the following video on YouTube showing a Guatemalan weaver teaching her foreign student the way she makes her string heddles.

While on the subject of Guatemala, it is always fun for me to go to Facebook and see the latest video that Red Corn Tours has posted on Guatemala…weaving, costume, festivals and different aspects of simple daily life from the making of tortillas to the washing all those beautiful hand woven huipiles.

And now for our plain-weave backstrap loom weave-along progress….

We started this week with more people, so far, opting for the balanced weave project after a flurry of pre weave-along DIY reed and hole-and-slot heddle making activity.

Warp-faced projects for the color and stripes challenge from Bobbie in cotton and Jennifer in her homespun wool.

Those who have not joined the weave-along have been turning out projects on their backstrap looms as well.

Jennifer is weaving a balanced piece using hemp yarn and a reed made for her by Janet. She has also finished three plain weave warp-faced panels with her homespun wool which will be joined into a bag.
Here's the beautiful reed that Janet made. Kathi has set up her loom with a rigid heddle with different kinds of yarn for her balanced weave project.
Cindy has joined in showing us her warp wound on its stakes and there she is with loom set up and ready to weave a warp-faced band.
Blomster is using wool in a piece she is weaving with a rigid heddle on her backstrap loom. It is pictured next to the warp-faced band she made with the same warp. She is making a bigger wall hanging using her rigid heddle loom and natural color and madder-dyed wool as, being new to backstrap weaving, she does not feel ready to attempt such a wide piece yet on a backstrap loom. Her wide piece is inspired by the hanging you see nearby which she bought in Oman. She thinks that it was probably made with goat hair.

Both Amber and catknitlatte have reported that they are on their way and we hope to see progress pictures soon.

Fiall and WannaGTD finished these backstraps before the weave-along started but these backstraps could easily be weave-along projects as they fit the plain weave criteria.

The instructions for weaving these backstraps are in my WeaveZine article.

Janet is making a shawl using her 24" rigid heddle and a bunch of different yarns. Her warp is cotton and her indigo-dyed weft will come from her homespun stash. This is really amazing! She will weave it in several panels.

Knitnfrenzy and ElizArtist have both checked in. Knitnfrenzy is going for a warp-faced project while spindleori showed us her homespun, at left, which she will weave up with a rigid heddle to make a bag.

Dygvvi is going to weave fabric which will go around a frame to make a yarn storage bucket.

We are waiting to see what Franco, AuntJanet and Phil have been up to. We know that Phil has a painted warp and can’t wait to see how that is going.

Marsha and Traudi have been working on their patterning techniques on projects outside the weave-along. Marsha's band has designs in both simple and two-color alternating floats ("warp floats galore") while Traudi has been playing with supplementary weft patterns.

And what about my weave-along project? Blush…I had better get going and go warp one up!


Backstrap Weaving – Spinning and Swimming in Floats

I am a “cheap spindler” in much the same way as I am a cheap drunk…it doesn’t take much to make me happy! And don’t waste the good wine on me. I do not have a refined palate. So, it is little wonder that I am content to use my humble Cusco drop spindle when I get the urge to spin. I don’t have a refined palate for spinning tools.

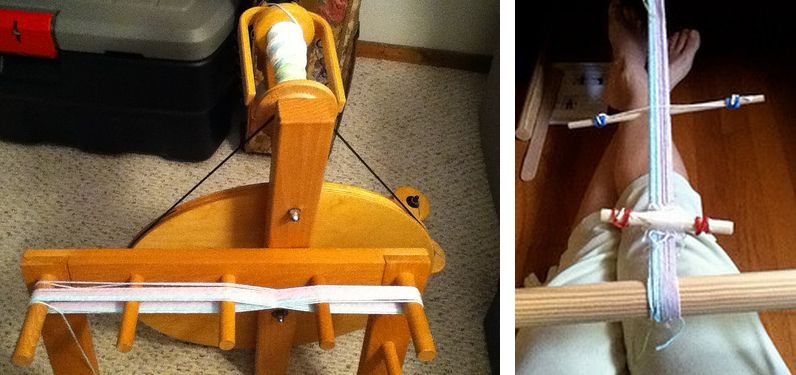
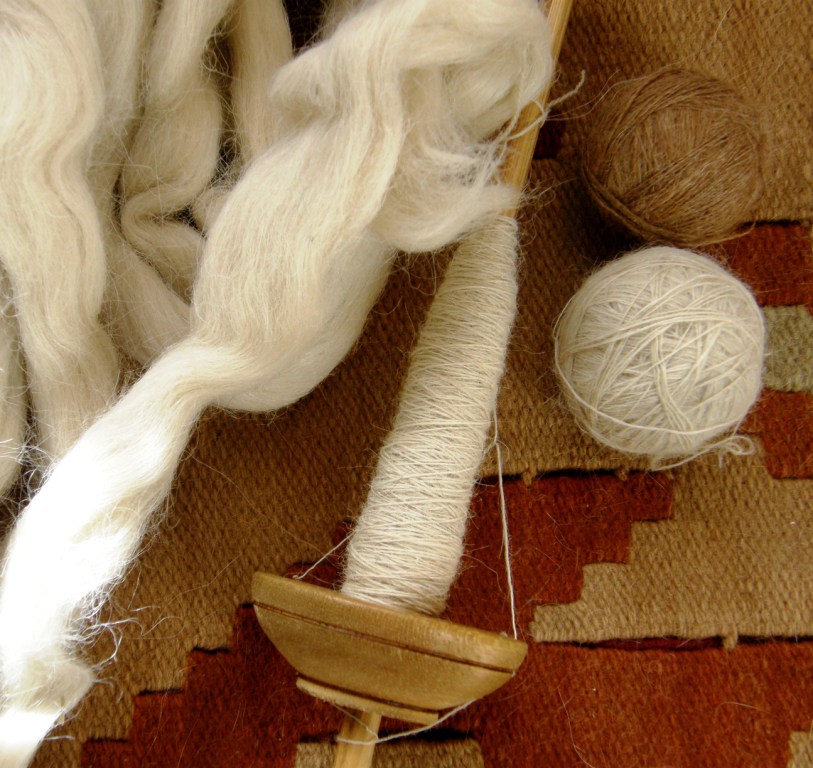
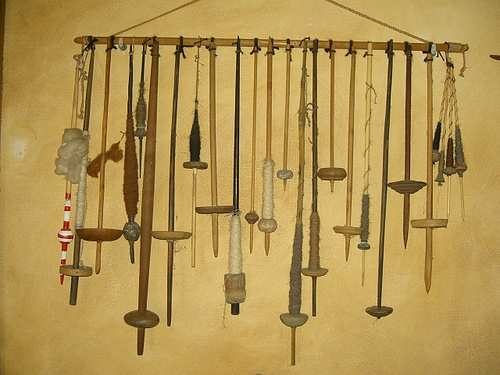
Right now I am spinning some alpaca that my friend Janet gave me so that I can weave with it on my backstrap loom. The Cusco spindle was the second one I ever got, the first being from San Pedro de Atacama in northern Chile. The Cusco one, being more robust, became my constant travel companion. It was practical. Although I have collected many more spindles on my weaving safaris since then, this Cusco one is the one I always use while the others hang on the wall as souvenirs of places I have been and people I have met.

I really enjoy reading the online group forums about spinners and their spindles. The participants’ love and enthusiasm for their tools is wonderful….I totally get it but I just don’t share it. Some of the spindles they show are beautiful pieces of craftsmanship. I just want to get the job done.

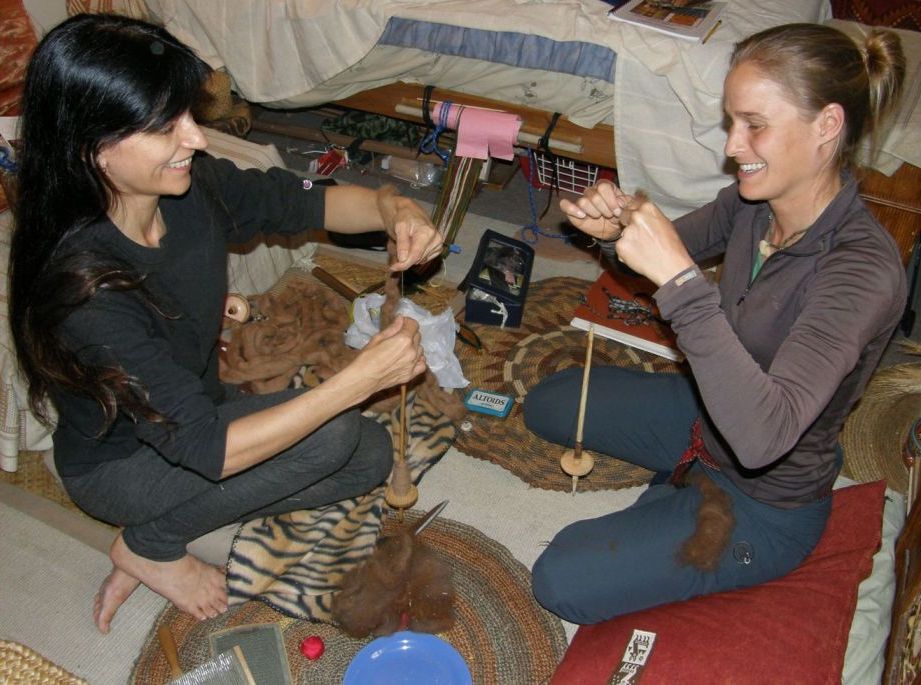
Below you can see the Cusco job in action while my friend Anna takes her first steps spinning on a Bolivian spindle.

It seems that when it comes to spinning I am totally product oriented which is kind of strange as it is quite the opposite when I weave.  I just want to get this stuff done so I can go weave with it. In weaving I am all about enjoying the process.

However, spinning does give me a lot of time to think which is good as I have arrived home from my US trip with a lot of ideas rattling around in my head. I would like them to kindly stop rattling about and settle down into some kind of order. Fortunately I had three warps on looms ready to go when I got home and so could slip back into the loom and weave without having to make many decisions.

This is one of the warps that I had taken away with me….Clea cotton (equivalent to #10 crochet cotton…35wpi).

I warped a narrow pebble weave band into a field of black plain weave. A simple pebble weave pattern meant that I did not have to spend too much time on the pick-up and could rapidly show people the entire process.

I probably only wove a couple of inches while I was away…at a May Day festival, at a Saori Studio and with other weaving friends and so this was the first thing I sat down to weave when I got home.

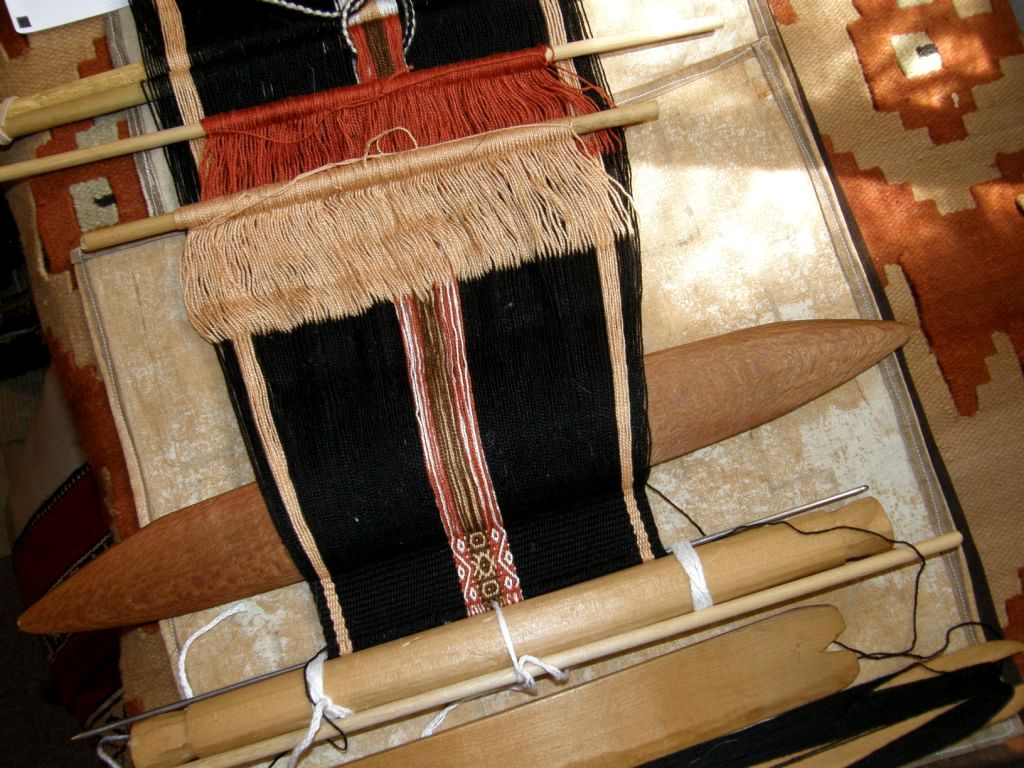
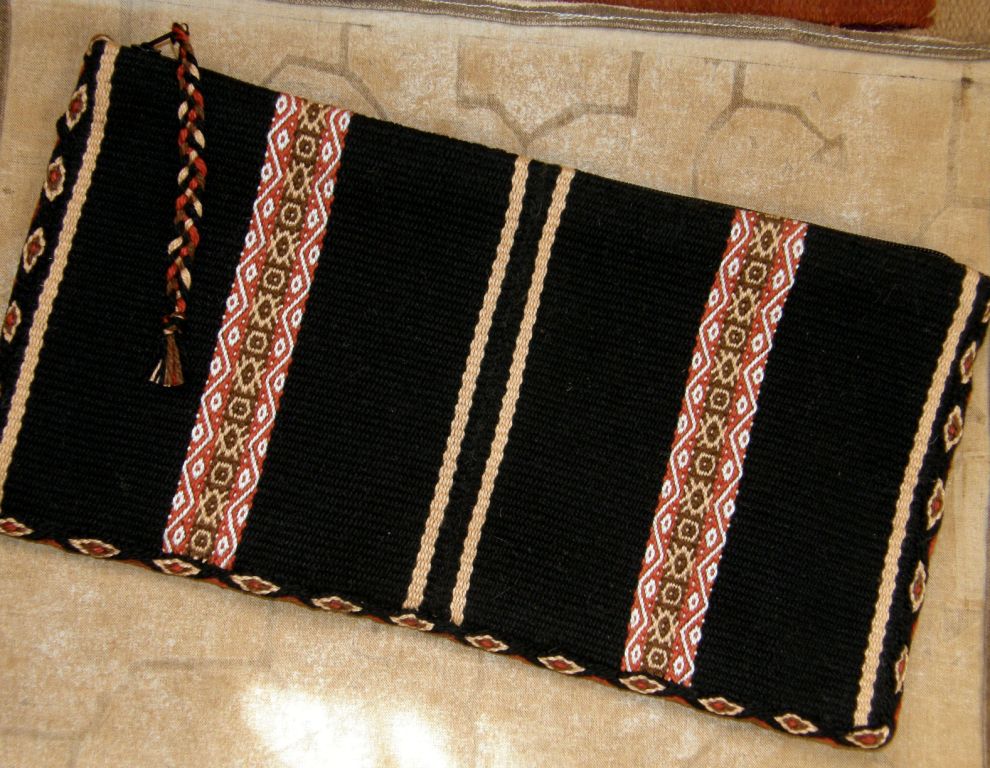
Once the piece was off the loom, I cut it in half and joined the two pieces side by side, added a zip and edged it with a tubular band. The tubular band is in Anne cotton (equivalent to #3 crochet cotton…24wpi).

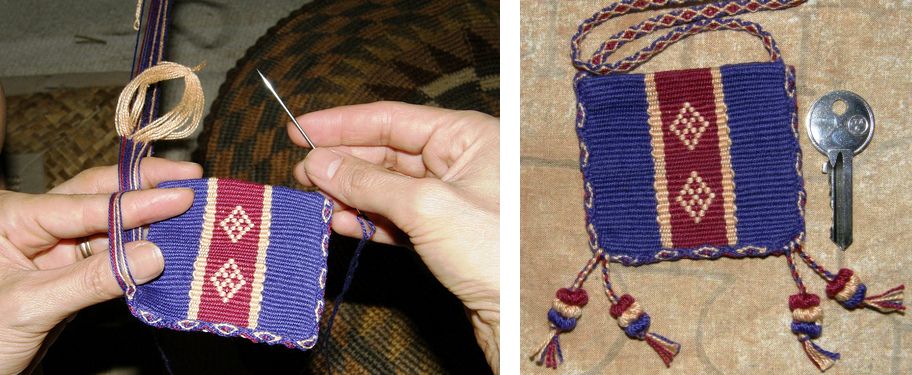
The tubular band is the ñawi awapa that I learned when I went to the Tinkuy de Tejedores in Cusco last year. Unfortunatley I neglected to have pictures taken while I was weaving and sewing it but I have pictures of one in the making that I made some time ago on a wee amulet bag.

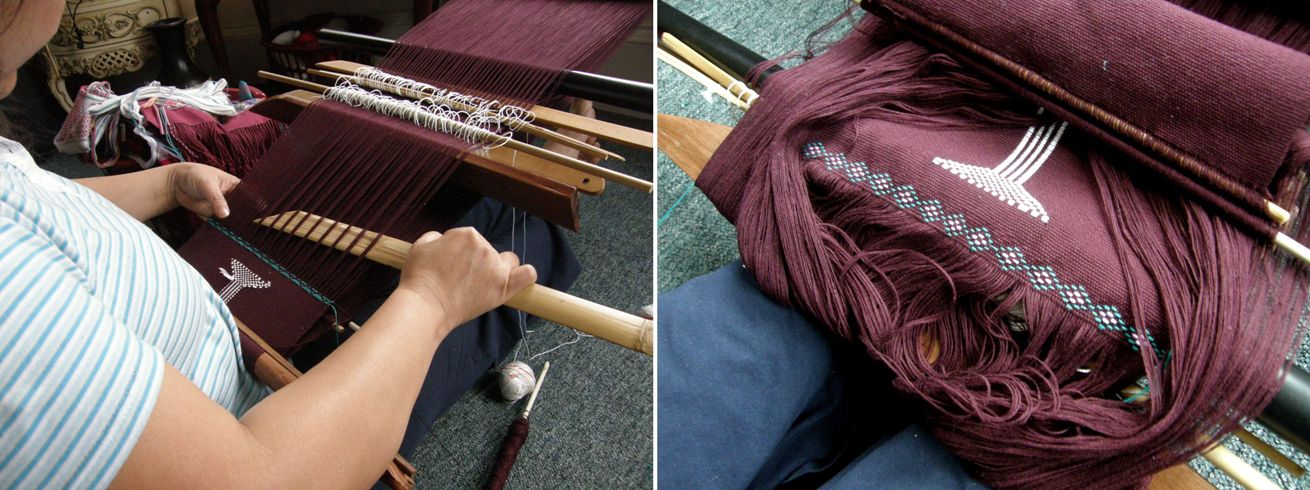
The one I am making in the photo was made following Adele Cahlander’s instructions where she uses string heddles and a shed loop. The way that I learned in Cusco is very different. A forked stick holds the cross and all pick-up is done based on that. The resulting bands using both methods appear to be identical although I have to say that the way I learned in Cusco is far easier. There is, of course, no one right way.

These tubular bands are gorgeous. I have used one here to make the edge prettier. I have been told that the Peruvian weavers apply them to the edges of weavings as they help stop the edges and corners from curling which they tend to do on pieces woven from overtwisted yarn.

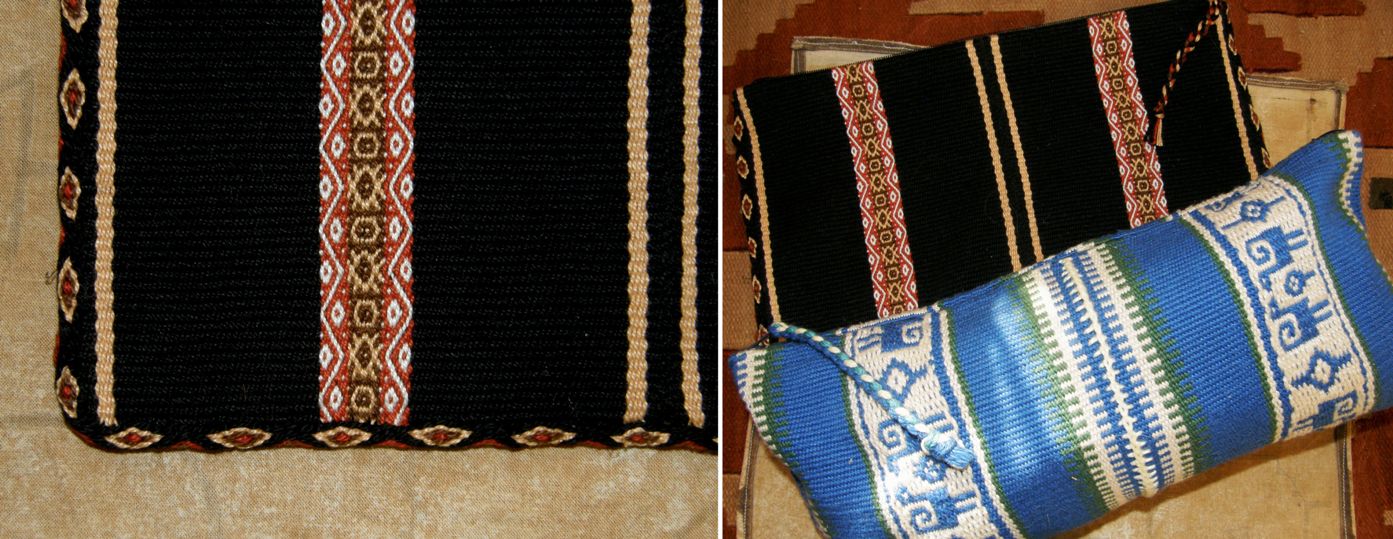
So, this is an extra long tool bag and one that I need as the only other one I have in this length (the blue one pictured below) is completely stuffed with things. It holds many tools for  and is the bag I took traveling with me.

A tutorial on weaving and applying a plain tubular band to the edges of fabrics can be seen here.

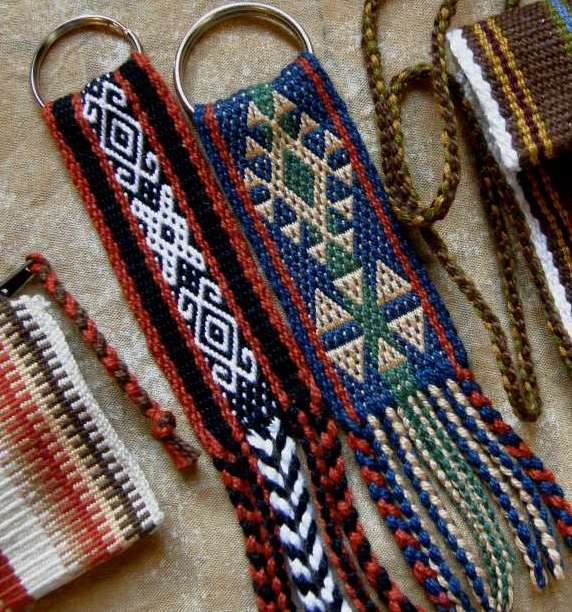
As usual, I made a braid for the zipper pull.

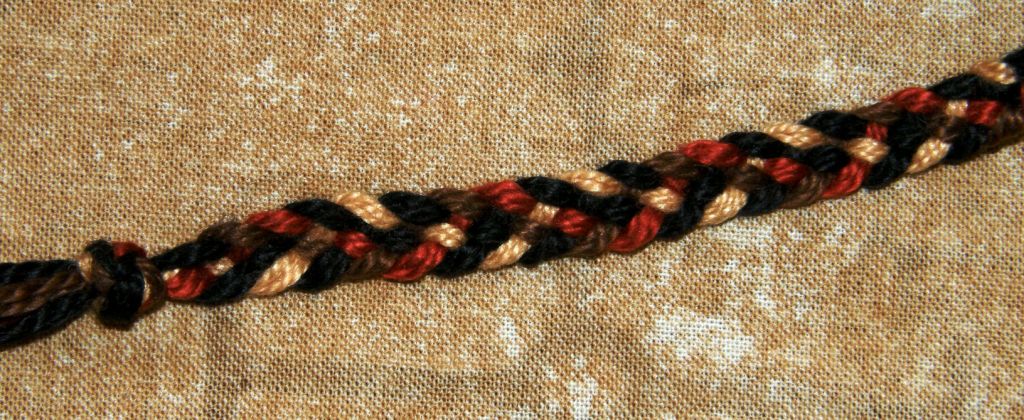
This is a five-strand braid which Yani, who was weaving with me in the US, taught me.

You may know that I often like to finish pieces with lots of tiny four-strand braids.

Well, Yani has no patience for those kinds of details and looked at me like I had gone mad when I suggested she finish her key fob with five or six four-strand braids.

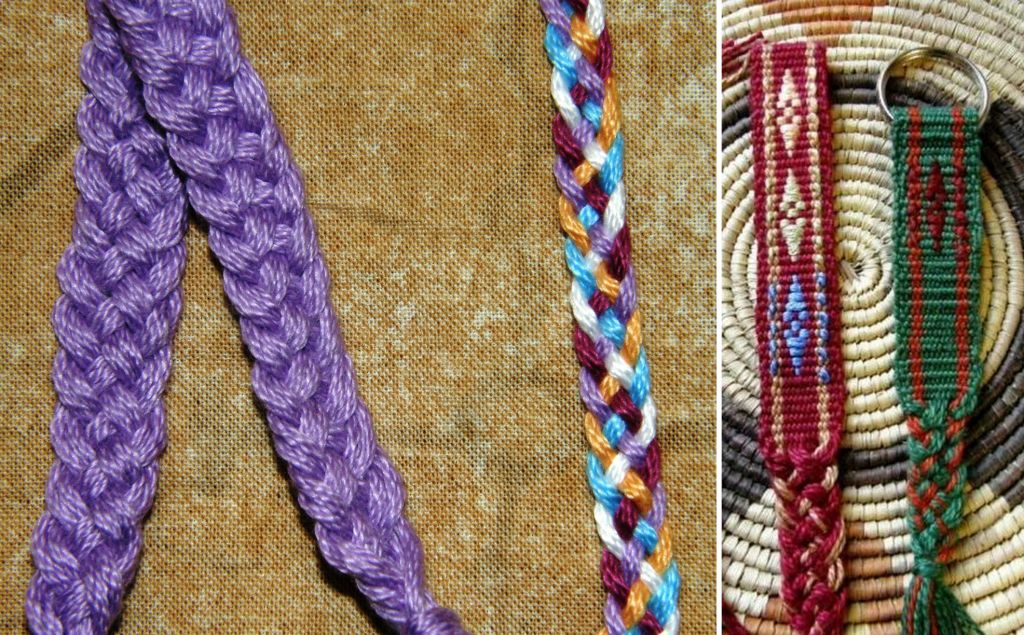
She gathered up all the warp ends and worked one large five-strand braid and it looked brilliant!

This is a really easy flat braid which I think looks great the more warp ends you use.

I have not yet played with it much to see how different arrangements and numbers of colors affect its appearance.

When Yani gathered up all her warp ends she did not even try to separate them by color and the braid still looks great.

Yani’s key fob is on the right. On the left is a braid I made with heavy cotton all in one color and then one in finer cotton in five colors. I have put together a little tutorial on this braid here.

Speaking of braids, I got to spend some time with finger-loop braiding expert Ingrid Crickmore when I was in Santa Cruz, California on this trip. I had met her at the Education Booth at CNCH where she was teaching braiding and I was playing with m by backstrap loom. Ingrid has been hard at work lately putting together her blog and she now has tutorials there so please go and check it out.

Now, back to spinning. It seems to be calling me!

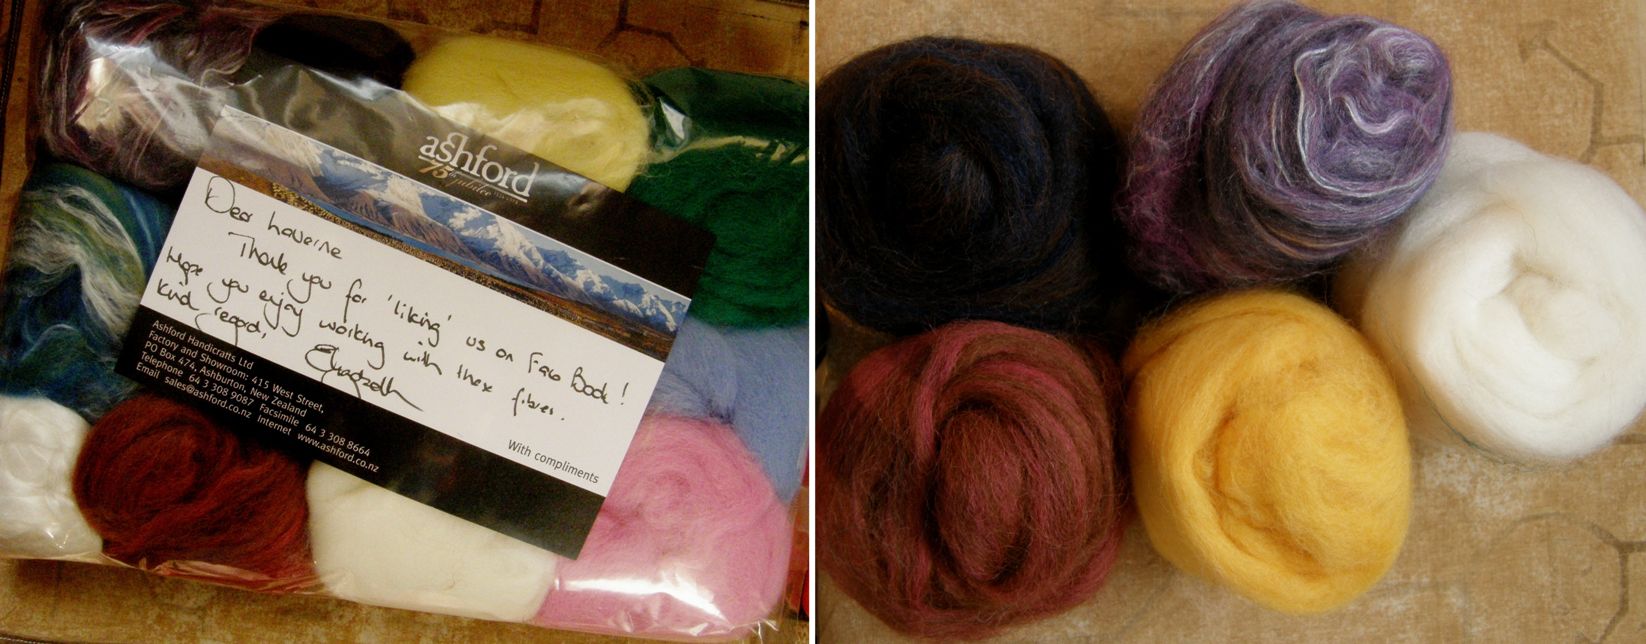
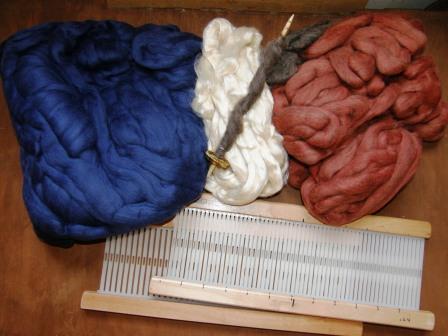
I arrived home to find this package at the post office. I had won a prize from Ashford for being one of the first to “like” their page on Facebook. I had been expecting yarn but I found a bag of roving instead which I shall set to and spin. There is nothing like this to be had here in Bolivia so this is quite a treat and I will enjoy weaving something with this on my backstrap loom.

So, I got one of my pre warped projects done and there are two to go. I had taken another warp on the road to show people the different ways to open the heddle shed when weaving wide projects with fine yarns. I have learned so many different ways, none of which can be considered the one right way. Some I find more efficient than others while others are better suited to particular yarns or warp widths. Again, I wove very little on this warp and actually unwove everything when I got home. I had made a simple two-color horizontal bar warp with no plan in mind at all.

When I got home I quickly decided on a pattern in simple alternating color warp floats as I have come home with a lot of ideas about using these simple warp floats and want to get warmed up with this technique before launching into the new ideas and experiments. I am swimming in warp float ideas!

So, this is what I have going on right now. These are designs from Central Asian yurt bands that I am weaving with Clea cotton which is very similar to the #10 crochet cottons that can be bought in the US.

What am I going to do with this? I have no clue! Something will come to me when it is off the loom. I have been wanting to make a case for my notebook and this just might do.

I would really like to use traditional colors for these pieces….those washed-out reds and blues that I see on the yurt bands are what I would really like to use, the colors that Martha Stanley has so cleverly managed to reproduce without having to wait for her yarn to be sun bleached and dusty!

Then I remembered that I have this in the closet… something I got in a swap for a Bolivian spindle a long time ago. Okay, it’s cotton and yurt bands are NOT made of cotton but aren’t the colors gorgeous?! Spin, spin, spin.

The other thing that is pending…

A warp for another backstrap…it looks terribly wide right now but the blue and white pattern area will shrink down once I start doing the pick up. This yarn is doubled Tahki Cotton Classic and the project will give me practice on a technique that I have neglected for some time.

Ingrid gave me a tip for a source of Anne and Clea cotton yarn. This is the Brazilian cotton that I buy here in Bolivia. It is not as shiny or tightly spun as the crochet thread that I have seen in the US. It is all I can get here and I guess I am lucky as it is good stuff.

#######################################

Some other handy information that has come my way, this time through the Backstrap Weaving Group on Ravelry….

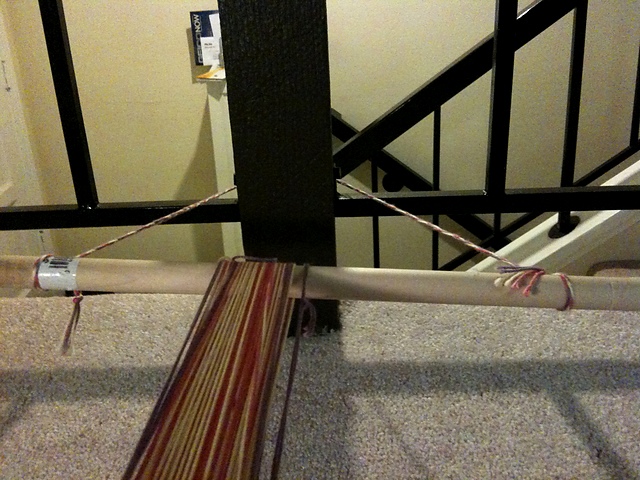
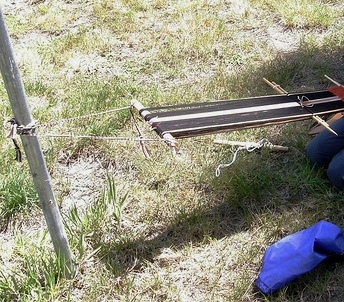
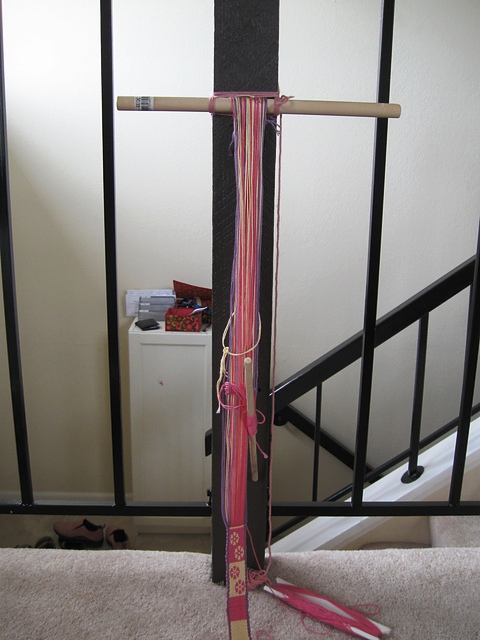
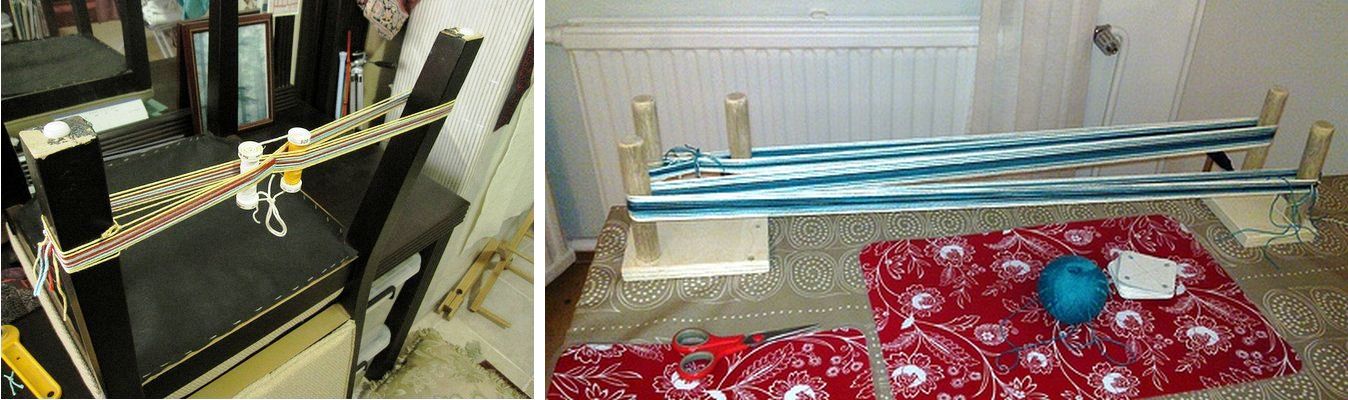
Barry Brown provided us with information on how to tie a loom bar to a vertical post and not have it slide down. It is a real problem sometimes finding a place to attach a loom bar in the home. I know because I spent time in a lot of people’s homes on my trip and sometimes we had quite a time finding hitching places. So, here is another option. This topic came up as Pancha had hitched to her stair rail and was having problems…

Number one problem…she really wanted her warp to be angled more steeply upward.

Number two…the warp kept sliding from left to right on her loom bar and messing up her tension.

As usual many people came along and offered suggestions. That “floating loom bar” tie-up really only works well on wider warps like the one at left. You can see that that loom is much better balanced.

If you are going to use that method, you should try and cut notches into the ends of the loom bars into which the cords which attach the loom to the fixed object can sit. This will stop them from sliding in toward the middle of the bar.

I like having my whole loom bar lashed to something so it can’t move at all but in some homes this just isn’t possible, Even using “C” clamps on a table or counter is not an option for some people. Fortunately Barry has provided Pancha and all of us another option. So here is Pancha’s loom now…

Barry provided this link to a Girl Guides page which gives instructions on how to lash securely to a vertical post. I have added all this information to the FAQ page.

What about in the car? I taught my friend Claudia to make the ñawi awapa tubular band and here she is making one in the back seat of the car.

Her warp is attached to the head rest of the front passenger seat and the other end is tied to her seat belt. I managed to catch this shot on Claudia’s phone. We were on our way to the Reagan National Airport as I was heading home on Sunday of the Memorial Day weekend and so we were competing for space on the highway with all the Rolling Thunder guys. You just see one going by.

And if all else fails finding a tie up spot you could always try this…

This picture of a Li weaver was taken by Pam Nadjowski at the International Folk Festival in Santa Fe. I did try this way once as a last resort but I think it works better with circular warps set up at just the right length rather than ones in a single plane. Mine was just a tad too long and I really wasn’t getting good tension.

I will leave you this week with a finished project from Traudi in the Ravelry group. She used this tutorial on the warp substitution technique and the Bedouin design pattern charts as well as some of her own motifs to weave a hair band (made on an inkle loom). She is using this technique as her stepping stone to one-weft double weave.

Himalaya (Tracy) has also been experimenting with this technique. She has the wonderful opportunity of seeing the Bedouin weavers at work on their ground looms as she lives in Qatar.

And it’s nice to see the simple warp float technique being used by Dyggvi to make a first-ever backstrap project….a backstrap.

The other threads you see in the picture belong to her warp weighted loom. Yes, we have another warp weighted loom weaver in the fold along with my friend Lisa.

Gannet has just joined us with her first pebble weave band in my favorite tone of orange…

Time to go get “drunk” on spinning and floats.  Back to the spindle, back to the loom, back to sorting all those ideas!

Backstrap Weaving – A Little Product Amongst the Processes

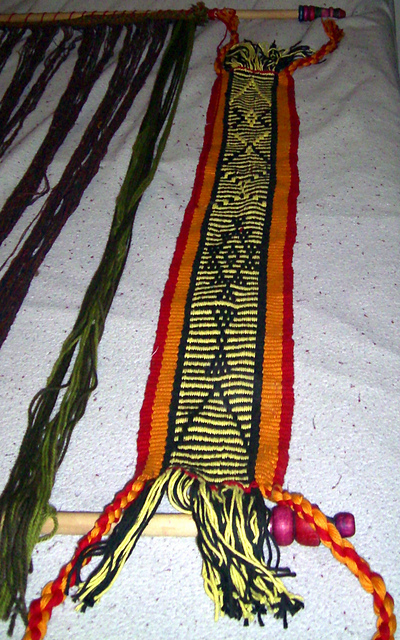
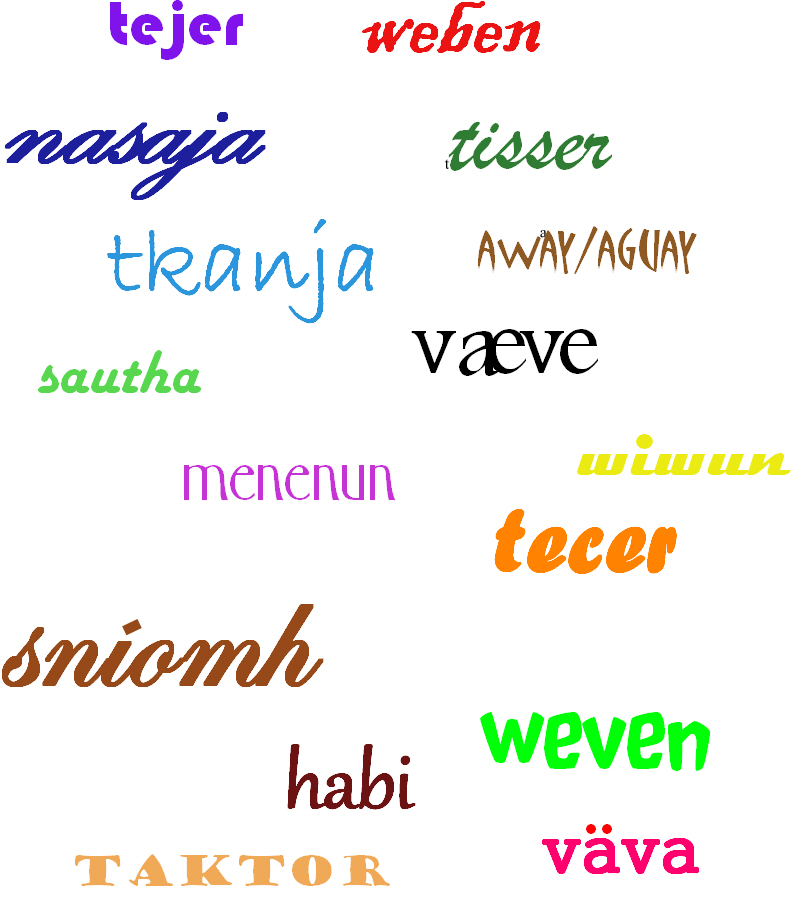
I haven’t wandered off too much around the globe this week but people from around the world, via this blog, Facebook and my online weaving groups, did drop by to help me with my latest twining project…the strap for my proposed loom bag on which I am twining the word “weave” in different languages and fonts.

Here is where I am at so far…

And, if you are thinking that I haven’t advanced very far since last week, you are right! I am used to doing patterns on my backstrap woven pieces in pick up techniques…picking or dropping every single  thread across the width of my warp and I don’t find that slow. However, I have to tell you that twining is SLOW! Reeaaaly slow! But, as you know, I am a process driven gal and what keeps me going on this project is the varying fonts. It is interesting to chart one and then see how it works out on the band. I have, in fact, finished the last word shown above which is “away” or “aguay” (I have seen it spelled both ways) which is the Quechua word for “weave” here in Bolivia.

The next word will be the Gaelic one, sent to me from a Facebook friend in Ireland. I am designing my own lettering form for this one….a cursive hand…and am a bit unsure about how it will look.

Here are the words I have …

Thank you so much to everyone who has contributed so far. I doubt that I will be able to fit all these in and so another project will have to be created. The next one will be in double weave and I will make it all my own lettering style. Double weave will be way faster. See how many languages you can identify. Someone remarked on Facebook that I could just use an online translator. True, but this is more fun. This way I will always remember the person who gave me the word and “carry” them around with me. 😉

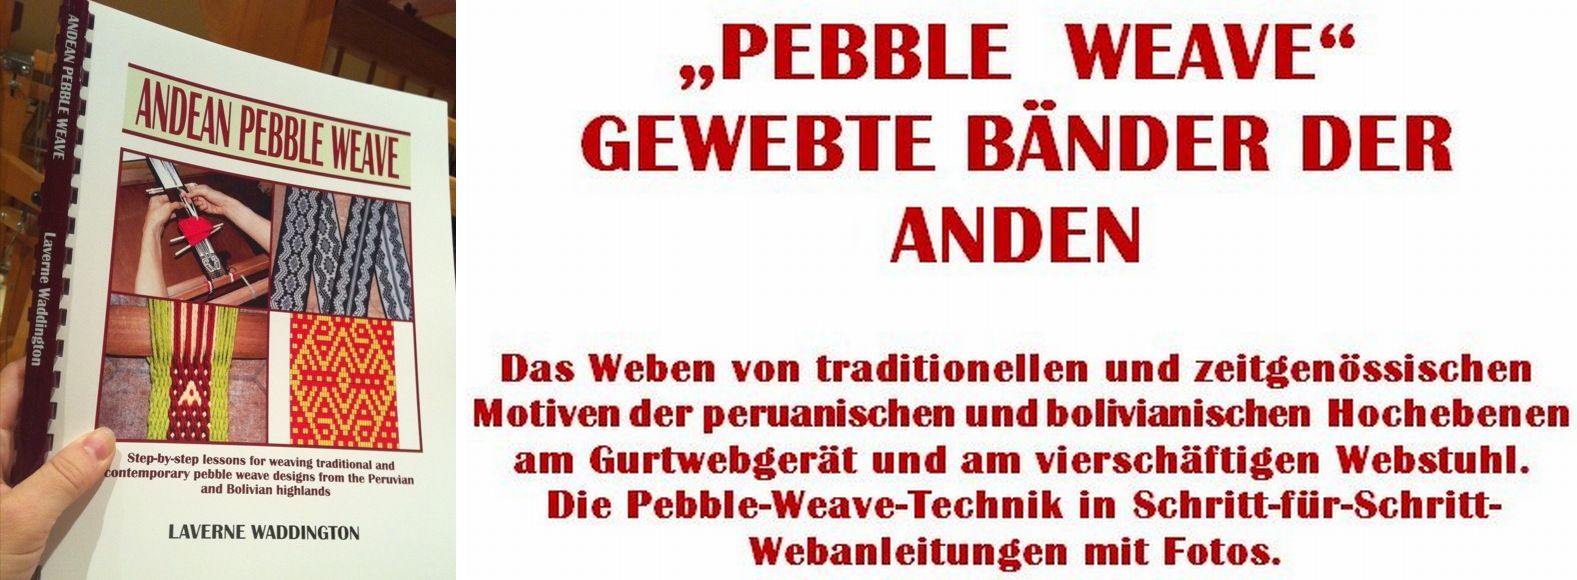
While on this multi-lingual topic, I thought I would tell you that an online weaving friend in Germany took on the heavy task of translating my Andean Pebble Weave book to German. How cool is she, and how grateful am I?! I am in the process now of redoing the layout as it seems that German folk are more wordy than English speakers 😉 and hopefully that will be available soon as a pdf.

Amongst the processes, there are some real products emerging. The twined band above is going to be a strap for a loom bag which I am modeling on my camera tripod bag.

I discovered that this backstrap that I made ages ago with a 13wpi mercerized cotton, (the same stuff I used in the WeaveZine article), is exactly the right width for the front panel of the bag and so I was easily able to calculate how many warps I needed to get started on the body of the bag. I wanted to keep it relatively simple as the strap will be quite busy with all its woven words.

So, here it is…black with just a strip of pebble weave pattern down the middle. These are two of the 8-rev designs that I have in my Andean Pebble Weave book and they look gigantic in this 13wpi thread. What fun it was to weave this up in one sitting in this chunky-ish yarn!

A couple of shots on the loom…

I just managed to get the length I need from my standard 36″ warp. It is wonderful how little waste there is when using backstrap looms. I will make the other large panel and sides in plain black and will then edge it with a tubular band in black and white. There is also a zipper to go in.

Another product to show…yes this is something that I will keep and use myself…

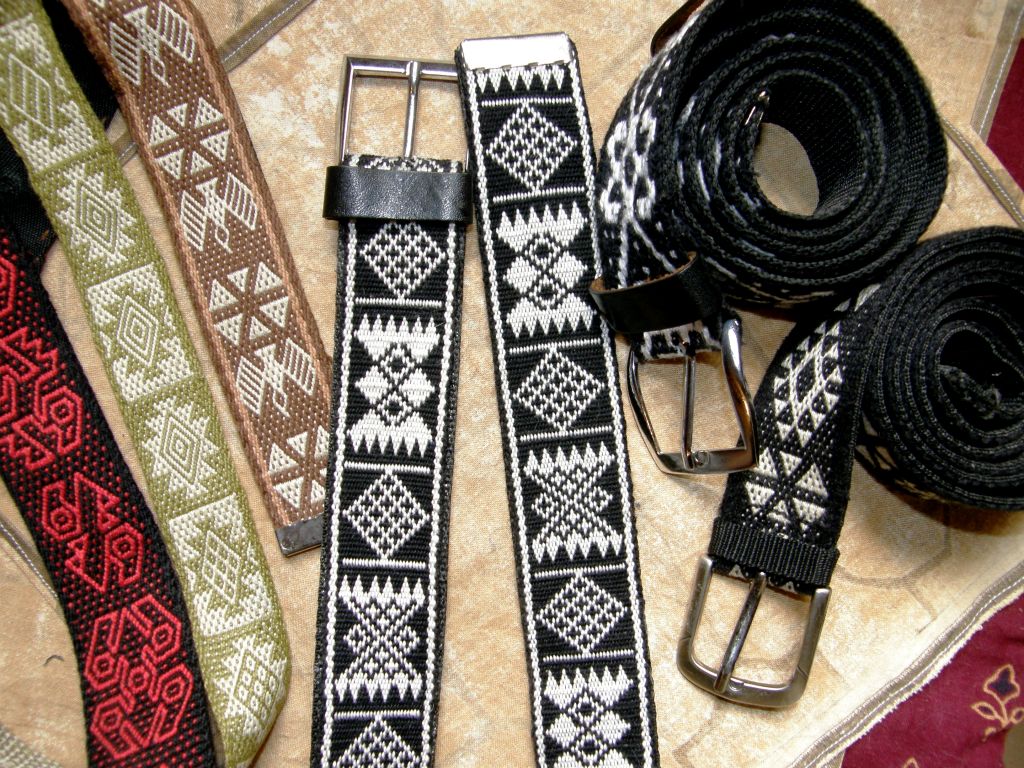
I finished my double weave belt with the Bedouin designs. I had to get an extra wide buckle for it and there weren’t many choices. Fortunately there is a market stall, just down the street from where I live, called “Hebilandia” or, “Buckle Land”! (hebilla being the Spanish word for buckle). Who knew there were so many people out there in want of buckles! The three belts on the left and the one bottom right are patterned in pebble weave. The other one has a design in simple alternating warp floats.

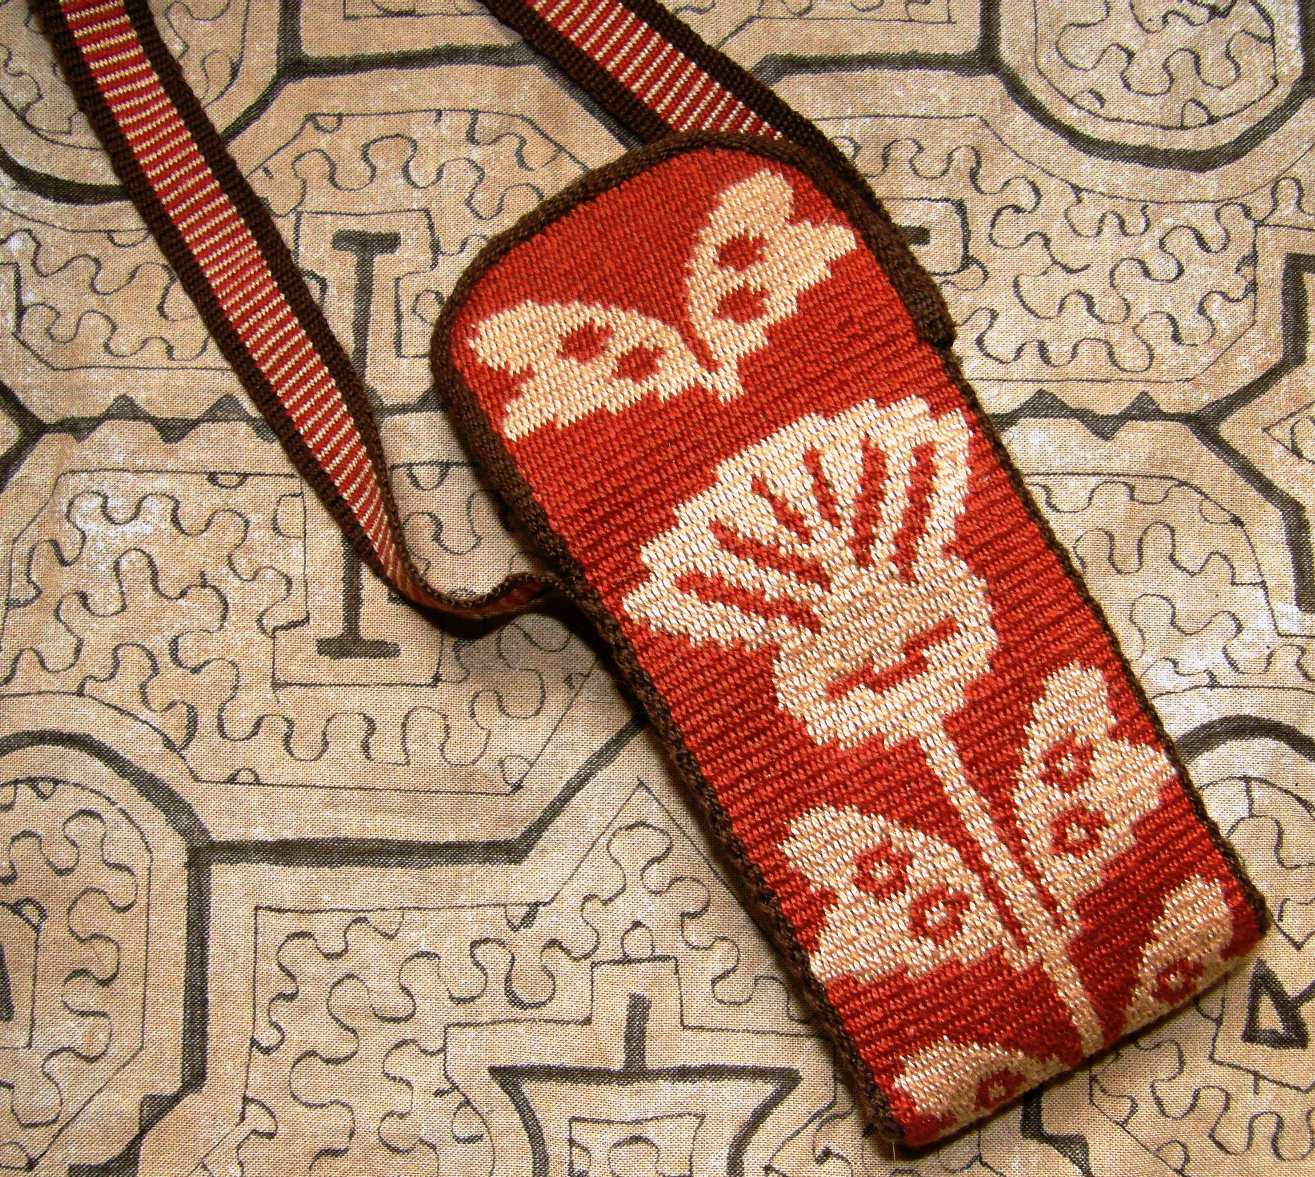
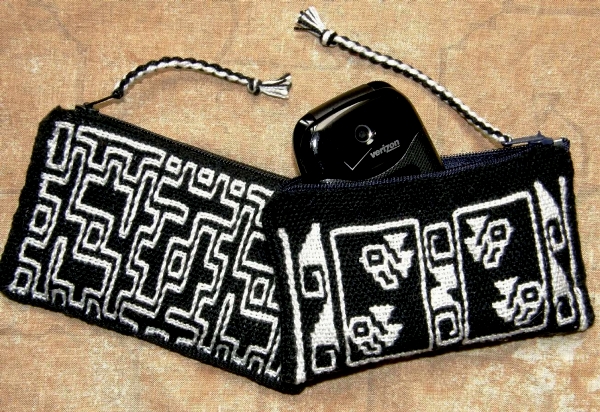
And the final product and my favorite for the week is my cell phone pouch. Yes, my cell phone pouch –  not to be given away or traded.

I finally own a cell phone but it is not for use here in Bolivia. I am happier having my answering machine take the calls here. The cell phone was actually given to me by a friend in the US for use there. As I travel on standby tickets, I really need one in order to let folks know if I have gotten on my flight and am about to arrive. No more begging kind strangers for change for the pay phone or to use their cell phone.

I modeled my cell phone pouch on that made by Guarani weaver, Angela. I bought two of her pouches some time ago, gave one to a friend in the US, and am saving the other for my friend Lisa.

That’s mine above left modeled on Angela’s blue and black one. It is woven in the technique that the Guarnai weavers call Moisy which produces quite a dense fabric.

You may remember that this was the sample piece that I had made to see if I understood what Angela had shown me. I copied her designs with some adaptations, for example, I rounded the flower head and used one of her leaf designs as a butterfly. Angela’s patterns reflect the abundance of lush vegetation here in the Bolivian lowlands. The designs that the Guarani women use on their Moisy pieces are not like any you will see elsewhere in Bolivia. You can read more about my visits with Angela here and here.

Angela had finished her pouch with a plain band which she had woven and sewn simultaneously to the edges using the weft as the sewing thread. I did the same except I used this edging only around the flap. You can see the band with its heddles and shed loop above left. Then came the scary part…

I really loved the shaped flap that Angela had created but couldn’t bring myself to cut the fabric. I was imagining the whole thing fraying away in a jagged mess while I tried to sew on the band and that is precisely what started to happen.

So I sealed all the way around the cut with diluted white glue, waited for it to dry and that did the trick. I will never make a cell phone pouch with a square flap again! This was fun!

I also copied her idea of making a striped band for the sides and strap. A tab of velcro for the flap finished it off.

Something else that has made me smile this week has been following the Weave Along in the Backstrap Weaving Group on Ravelry. There is a lot of enthusiastic participation and sharing, cheers and, sometimes, commiserations. People have been having their successes and frustrations and I think that everyone pretty much agrees that “baby steps” are required…stay with the heavier and friendlier yarns and narrow projects until you really feel that you have the hang of it. There are so many things to think about and get under control before one is ready to move on to new challenges.

Here are a few works-in-progress and finished objects from, from left to right, Firecracker8 (who found that beating harder made her supplementary weft pattern look much nicer and her pebble motif less elongated), Jennifer (who found that size number 3 crochet cotton makes a pretty band and is easy to handle) and Marsha (who used a Gilmore Wave Loom for her first attempt at double weave). We are waiting to see pictures from other participants who can only weave on weekends. No hurry! We will be around 🙂

Lots of cool ideas have been appearing in the forum and I have some more warping options to show you from himalaya and wanderingskopos…

We just had a new member from the UK join the group and the Weave Along. He is a rope and canvas craftsman and net maker. Well, I was curious about this as I had no idea what that entailed and invited him to post pictures of some of his work and he totally blew us all away! I immediately checked out his website. I love the hammocks and rope mats.

In my inbox I found images from Julia who made a band with a bunch of pebble weave motifs using my book. I love the way she has hung it with all the loom parts in place. She did a good job weaving as close to the end as possible which is not easy with cross sticks and two sets of heddles.

I also asked Steve Pretty if I could show the frame loom on which he has been weaving warp faced bands and, most recently, an Andean pebble weave band using my book.

Steve got the idea for this frame loom with its nifty tensioning system from the web site of Dr Carol Ventura. This page on Toba weaving of Argentina on Carol Ventura’s site shows the loom and the technique to produce the band above left. The technique is similar to that which I call Simple Warp Floats.  On the right is Steve’s pebble weave band.

It really puts a big smile on my face to see people in the online groups jumping in enthusiastically to learn these techniques and weave stuff.

I have had the benefit of spending days and, most often, weeks at a time face-to-face with my weaving teachers here.  Not everyone reaches their weaving goals without having that personal contact with a teacher and besides, we all have our different learning styles.

So, I would like to tell you that there are still a few more places available in the Andean Backstrap Weaving class called “Beginning and Beyond” that Abby Franquemont is giving at Beth Smith’s The Spinning Loft in Howell, Michigan from January 28th to 30th, 2011.

Beth tells me that Abby Franquemont first went to Peru around the age of five and was there on and off throughout her teenage years travelling with her anthropologist parents Ed and Christine Franquemont.
She began spinning and weaving immediately upon arriving in the Cusco Region of Peru and, although she is best known as a spindle spinner in the US, she is also a fantastic weaver on the backstrap loom.

######################################################

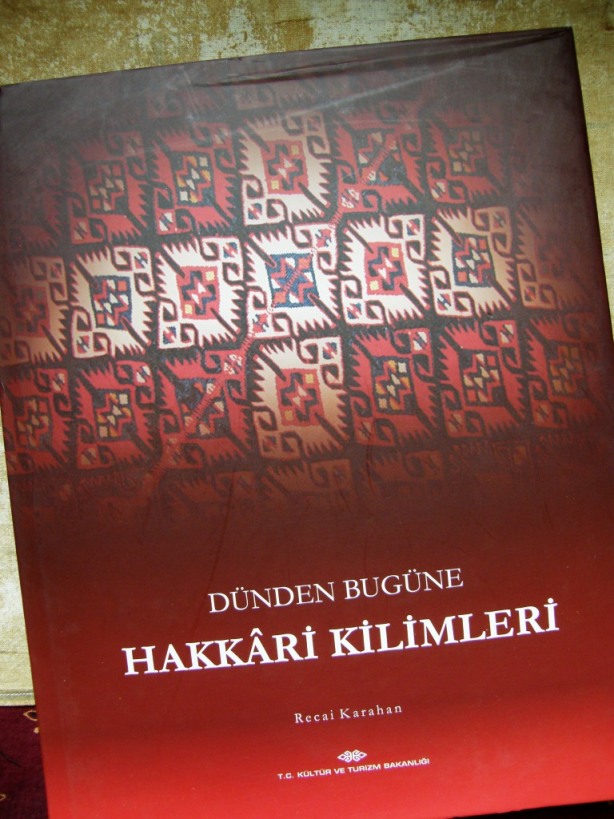
In the post box this week…some inspiration from Turkey. My brother went to Istanbul and got me this locally published book (in Turkish) on Hakkari Kilims. It has lots of luscious photos.

Now to figure out which word from the text is the one for “weave” to add to my band.

And what about those videos that were giving me grief last week?

In the end I had to whittle them down to under ninety seconds so I could load them to my Flickr page and link from there.

So, there is a short video showing warping for one-weft double weave and another on heddle making on the tutorial page.

Nothing new – they are just meant to give further clarification for those who might have doubts.  I also added a video on adding a second cross to stabilize your shed rod to this FAQ page.

What I am planning next for the tutorial pages here is a full project  – Making a Key fob in Double Weave – from start to finish with a few videos.

But for now…the products are done so it’s back to the process…