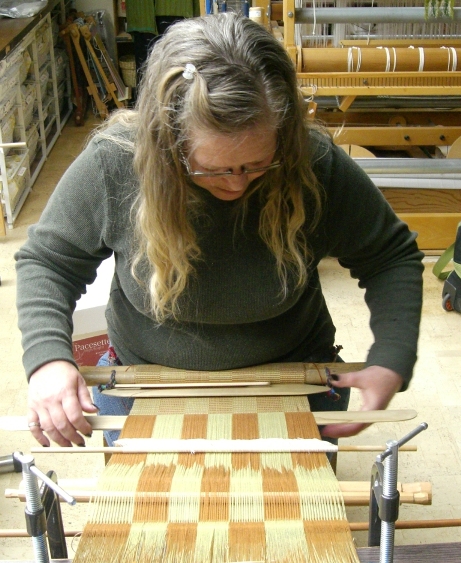
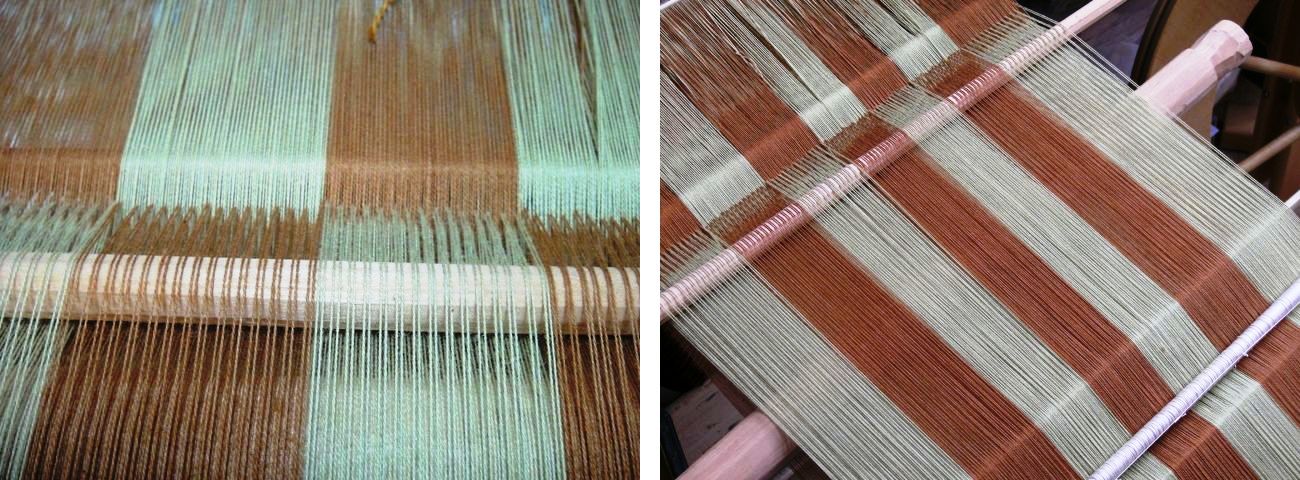
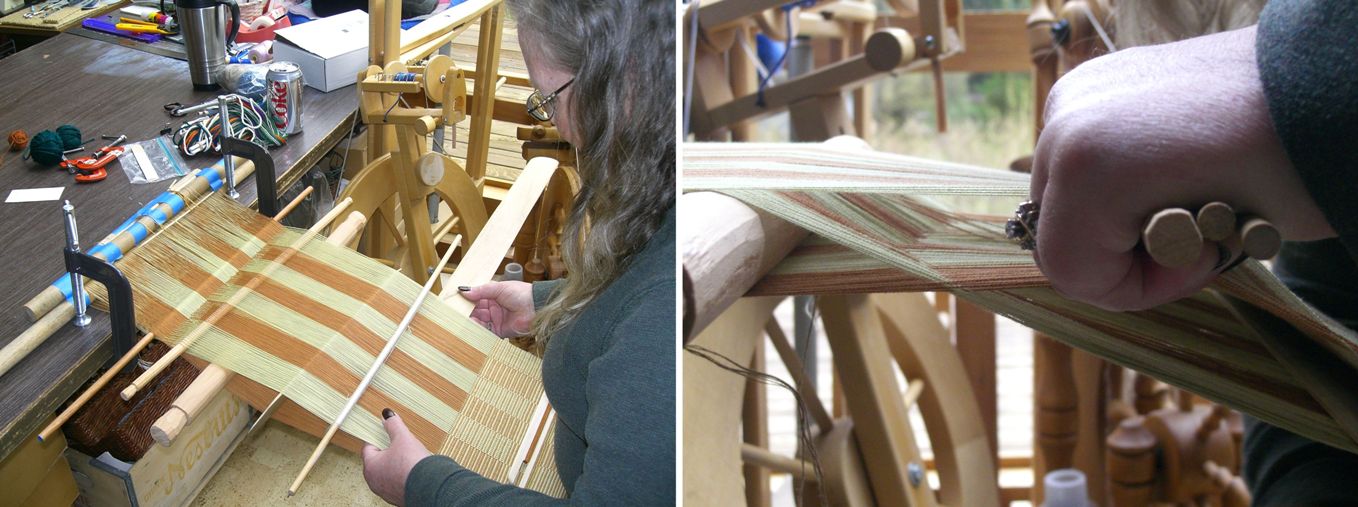
Backstrap Weaving – The Weaving Melting Pot

The Weaving Melting Pot….that is what I have bubbling away here. Every time I start a new piece on my backstrap loom I am so aware of the vast array of sources from which I have drawn technique and inspiration. I have studied weaving on a variety of simple looms here in  South America, in Central America and even in North America  and bring a little of everything to my work when I set up to weave on my loom of choice…the backstrap loom.
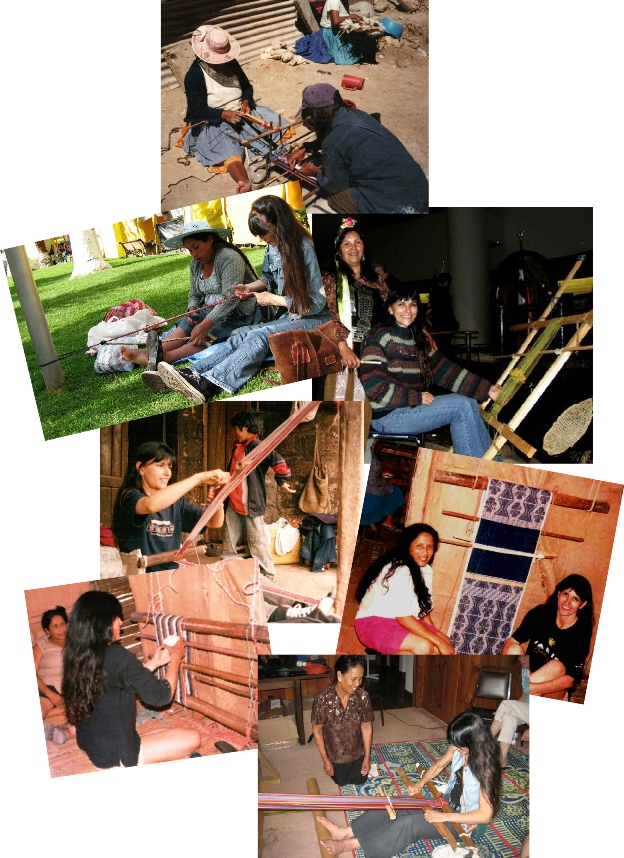
I even draw inspiration from the online weavers who work on floor looms…a handy tip about how to handle the two wefts in rep weave from Tom Knisely, ideas about finishing pieces from shadow weave weave-alongs, lessons in handling floating selvedges from discussions on twill, or from card-woven and inkle loom-woven warp patterned bands…all far removed from the Bolivian weaving environment in which I live.

They all go into the pot….stir, stir, stir….add a dash of ideas I have developed from my own experiments and onto the loom it goes. Some of my ideas having nothing to do with the traditional way of doing things……..
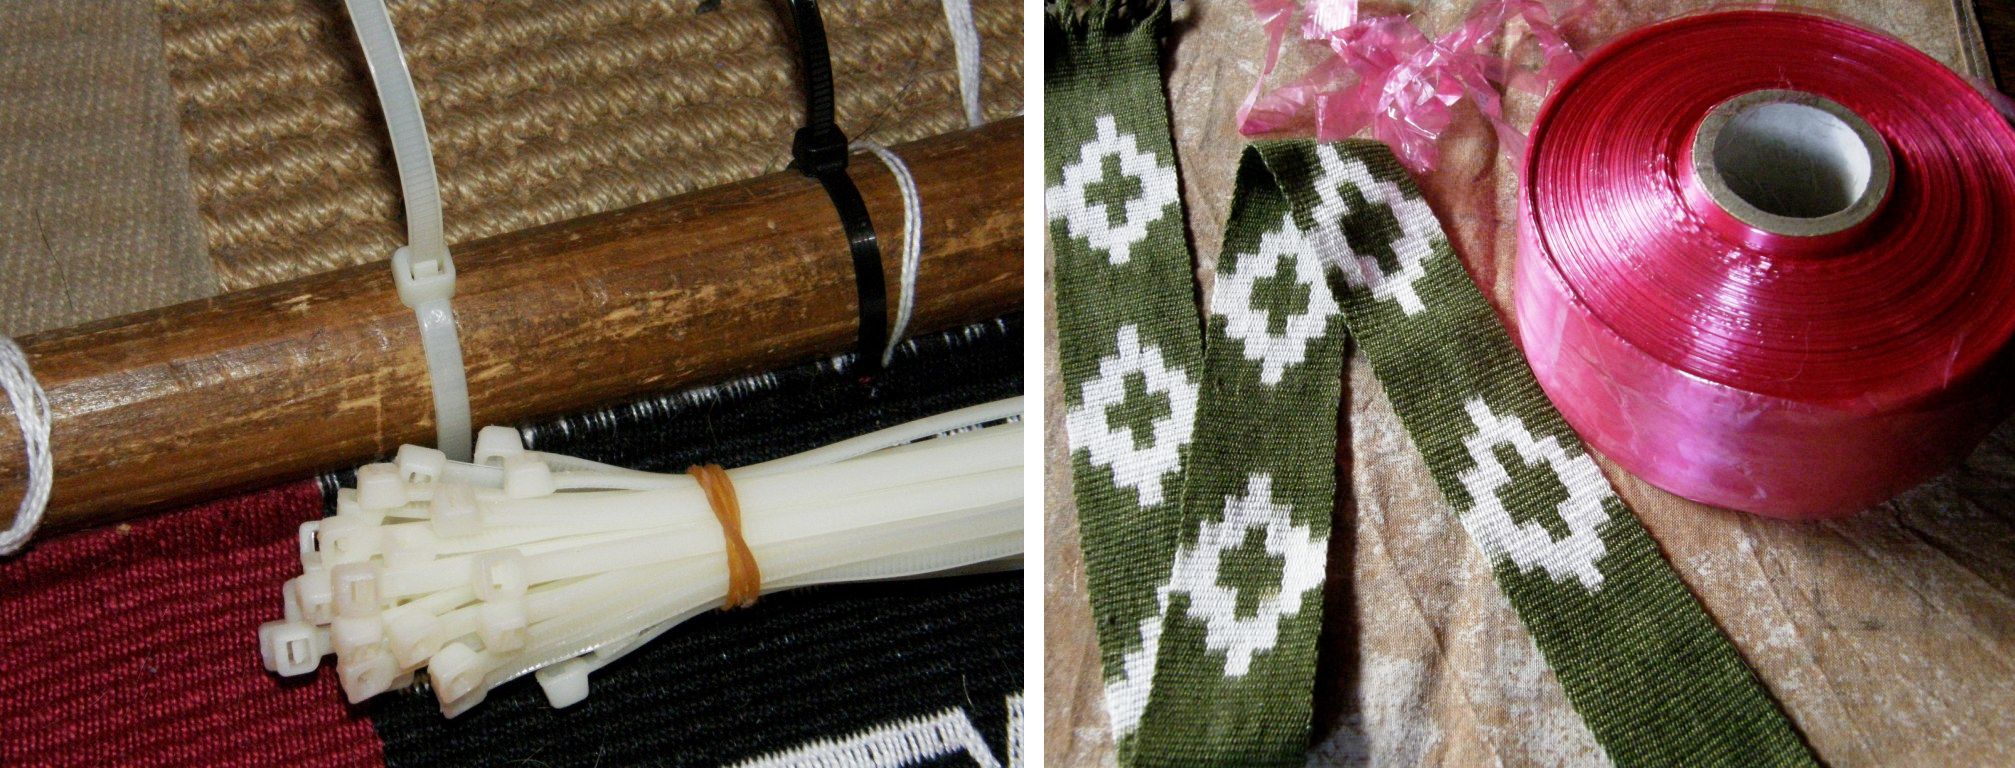
like using cable ties to lash my warp to the loom bar and a bicycle spoke instead of a yarn header cord. I was using cassette tape to wrap my warps for ikat until I was given “proper” ikat tape which seems acceptable in place of cabuya fiber and other natural materials in many “traditional” settings these days.

Plastic and metal??? One of the weavers I met in Candelaria found using what looked like a steel railway spike far more efficient than the traditional llama bone tool for beating in her weft. PVC pipe often replaces wooden shed rods.  It’s like the time I had a lovely wooden Navajo weaving loom made for me when I lived in southern Chile and used rope to tension the warp only to find that a lot of the Navajo weavers are using metal looms and turnbuckles for tensioning. After weaving for some time on that Navajo loom I found that copper pipe for the loom bars worked much better than wood anyway.

I travel from place to place and see things and bring back ideas to add to the ingredients that go into my weaving melting pot.

And now I am about to apply some Bolivian highland weaving technology to a weaving tradition on the other side of the world.

I am jumping the gun this week by sampling for the next piece in my red, black and white wall hanging series and I am concocting quiet a brew in the old melting pot.. I say jumping the gun as I am nowhere near finished the third piece which is coming along veeeeery slowly! The other two pieces while off the loom are not yet completely finished. But the temptation to  put an idea into action once it develops and starts churning in my head is irresistible!

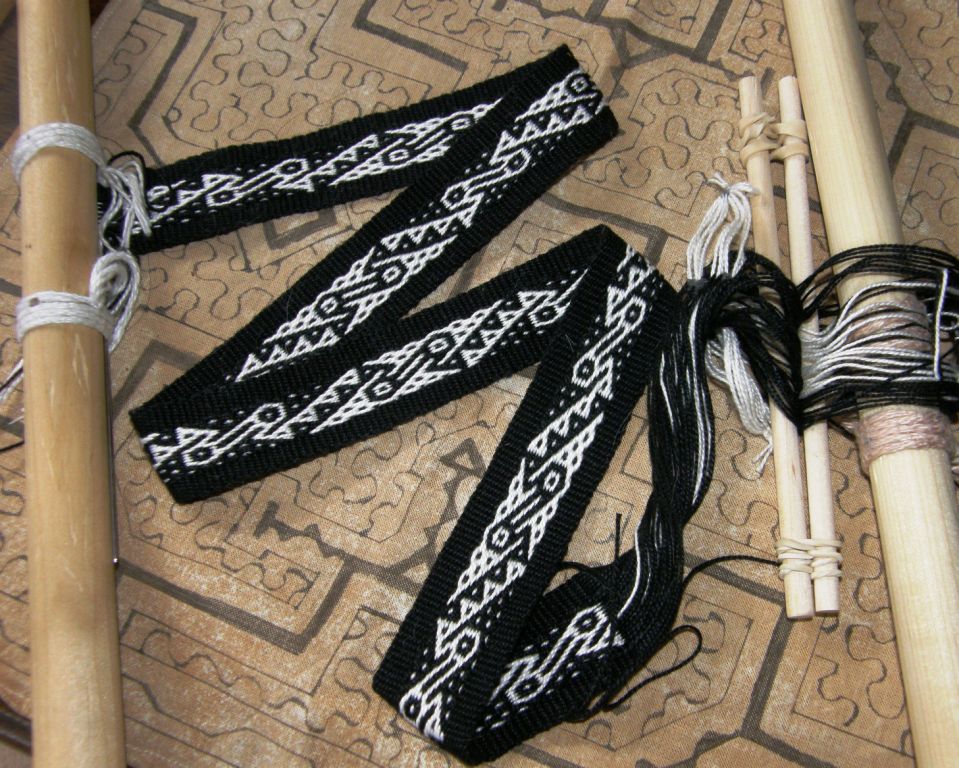
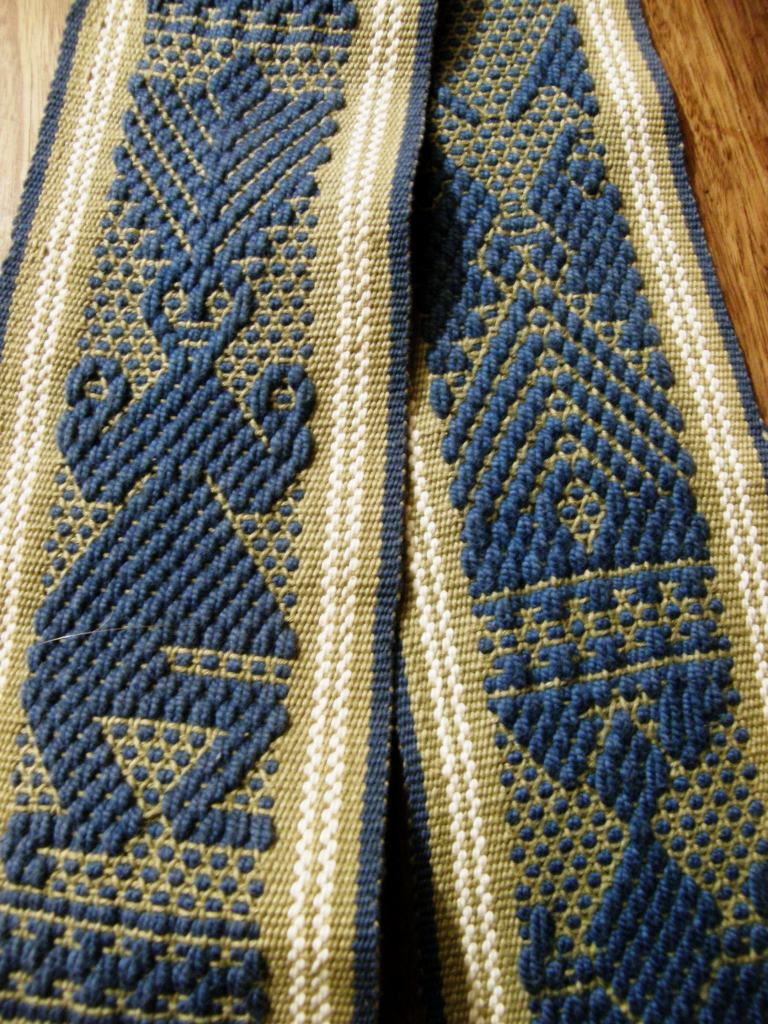
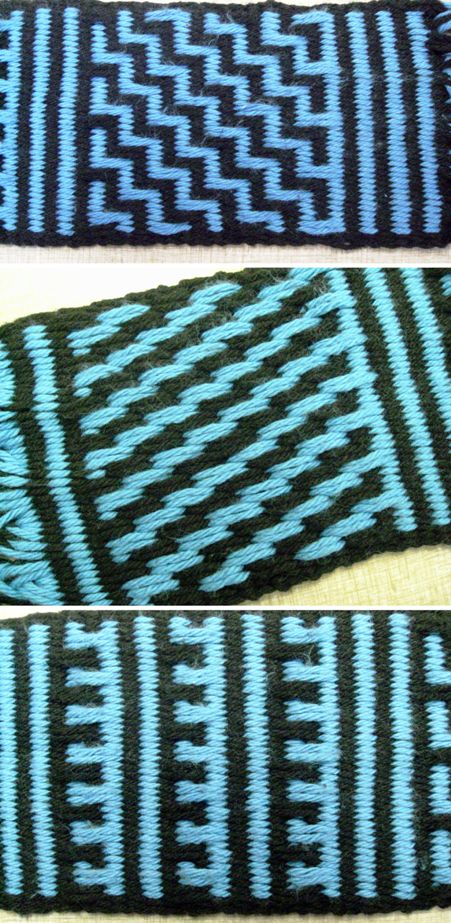
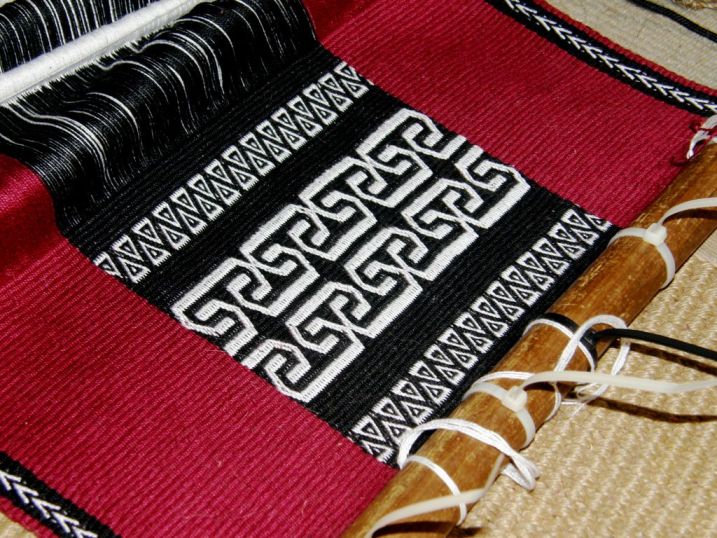
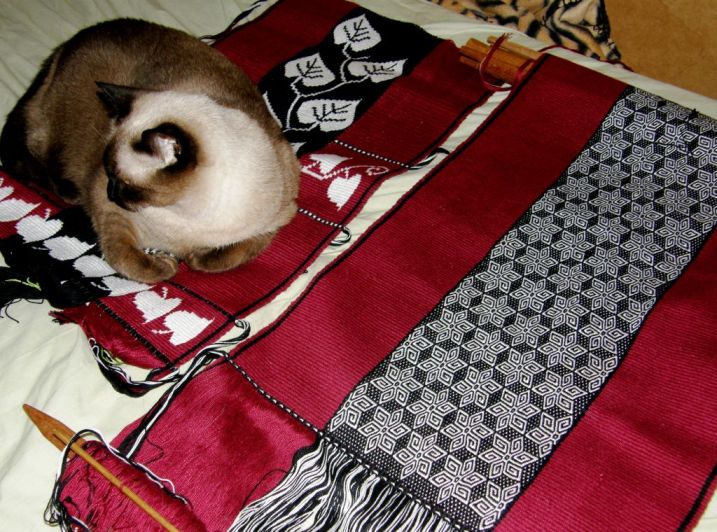
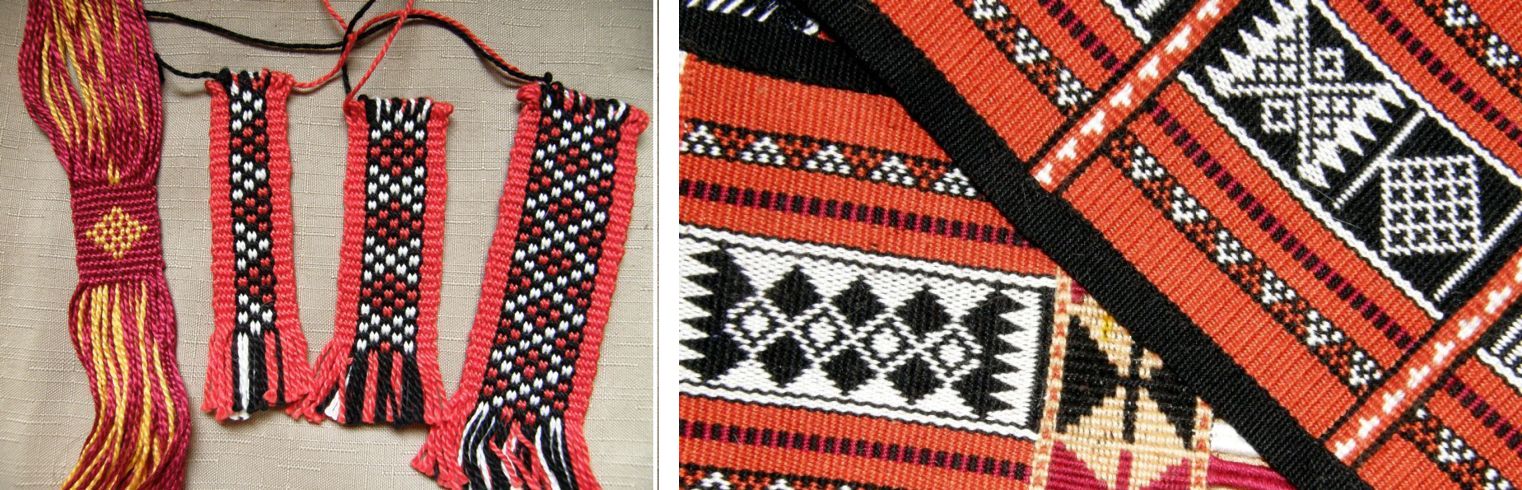
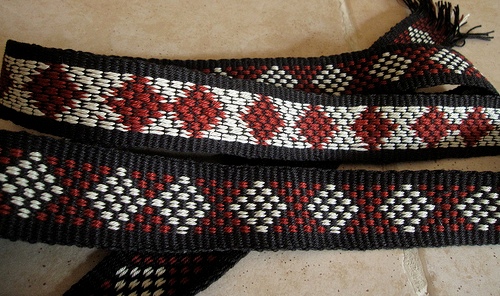
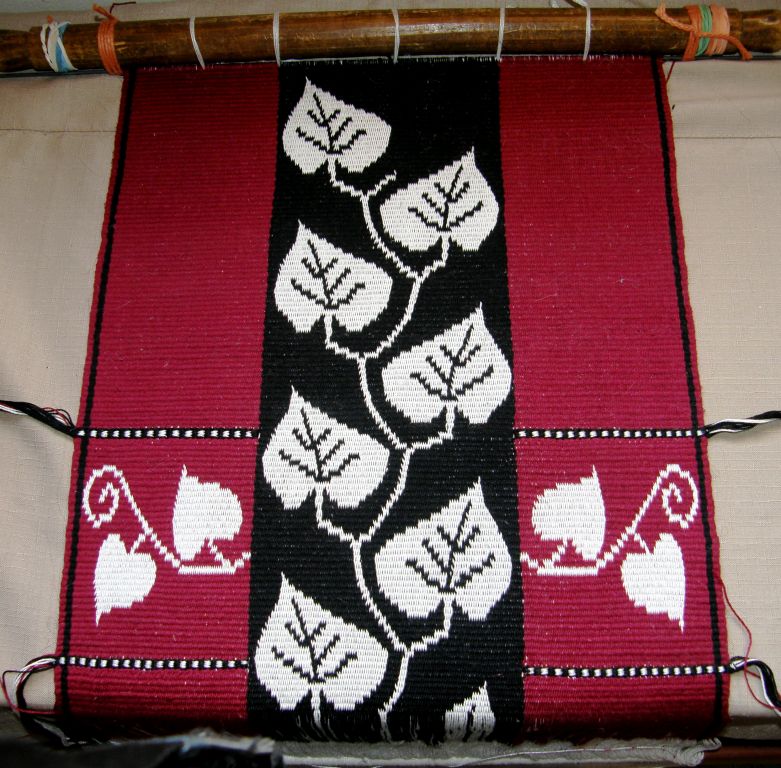
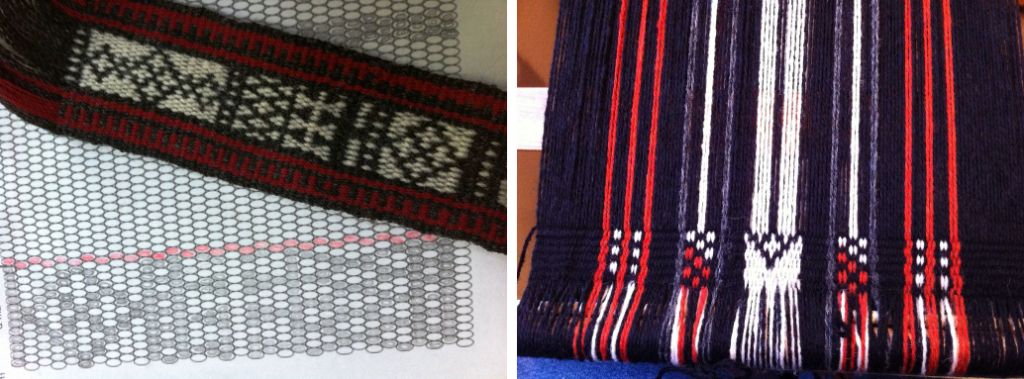
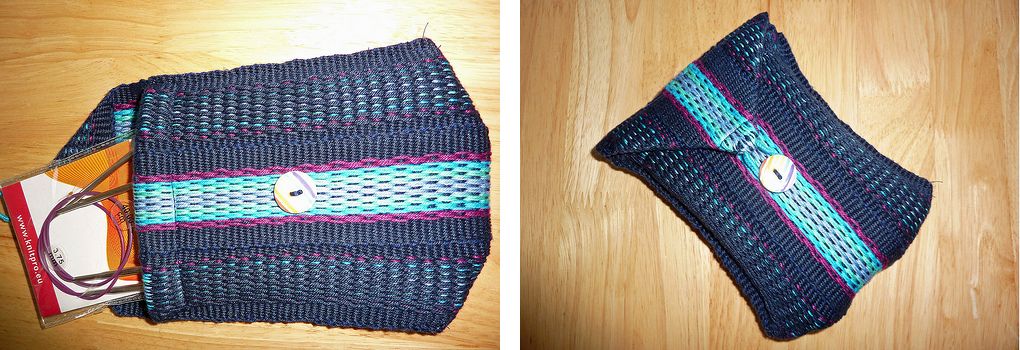
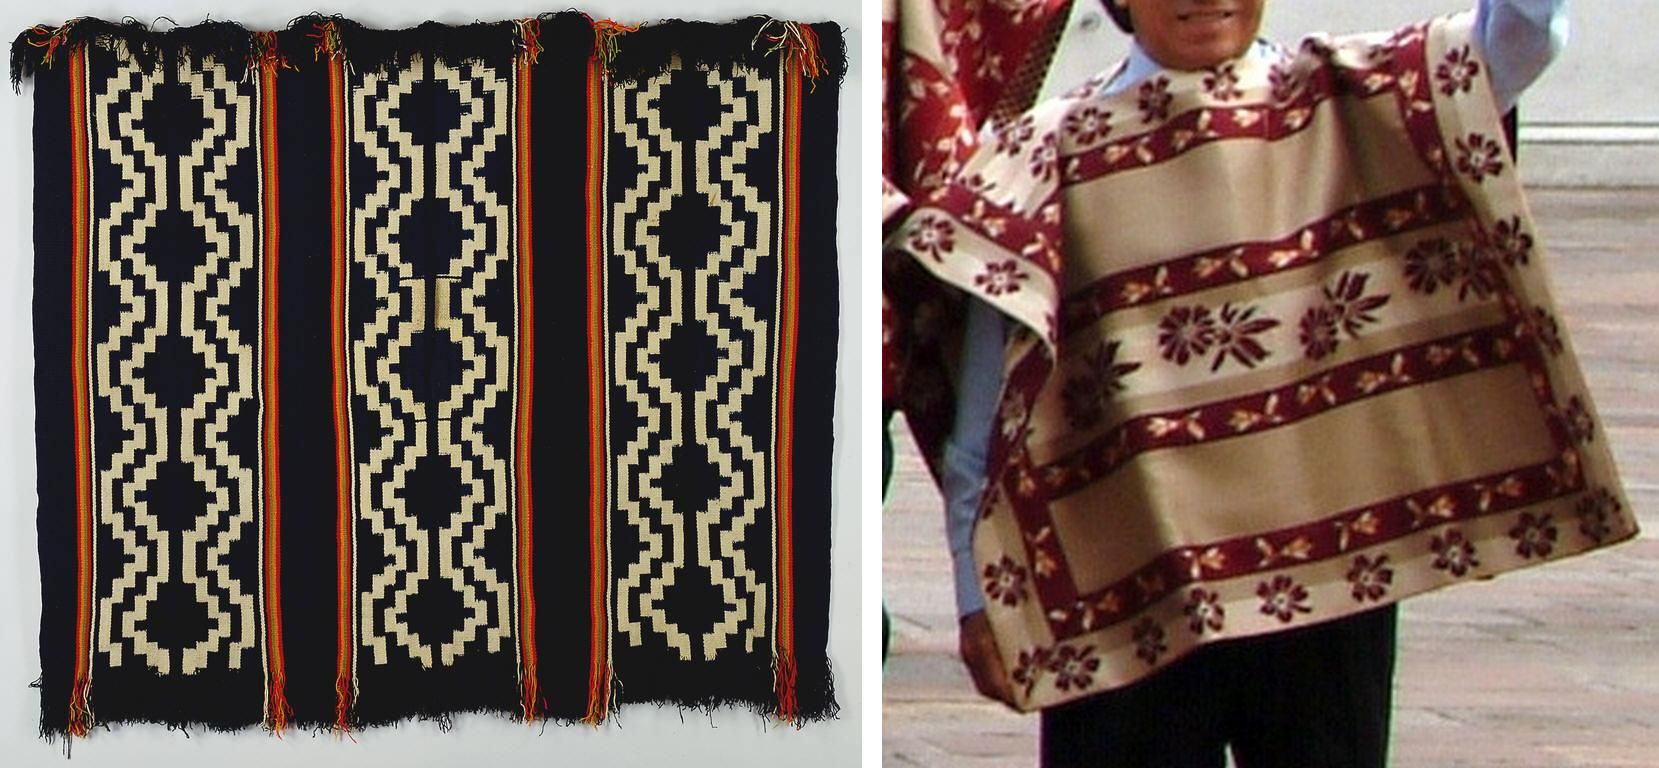
You can see the melting pot at work in the above pieces…I took a motif designed by a German weaver for tablet weaving and wove it in an Andean technique, Chilean ponchos called chamantos influenced the leaf design hanging to which I added weft twining which has nothing to do with Chilean ponchos and the piece inspired by si’ira  weavings of northern Columbia and Venezuela has more than a few of my own added touches.

Some of the traditional colors of Bedouin weaving make that the perfect influence for what will be in the fourth piece in the wall hanging series… in red, black and white, of course.

It was a weird and wonderful path that led me to Bedouin weavings way back in October 2010. I was Googling weft twining techniques after having seen the twined work of Montagnard (Vietnamese hilltribe) backstrap weavers in North Carolina in August 2010.
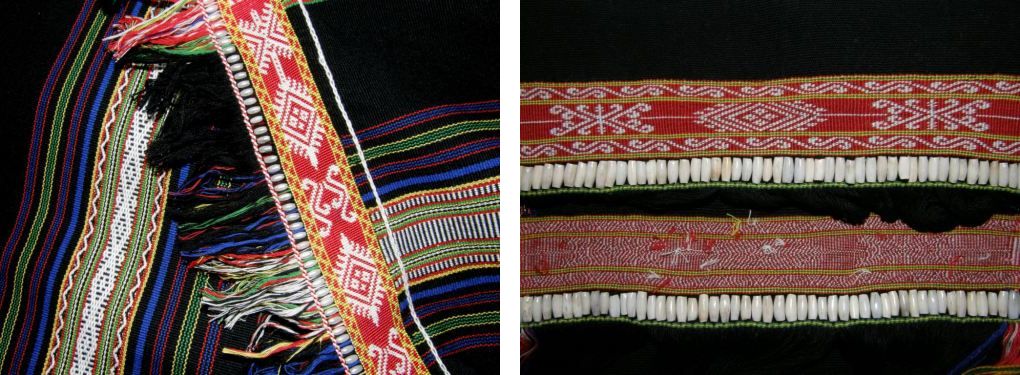
A book on the Taaniko twining practiced by the Maoris of New Zealand helped me to get started on my own off-loom experiments…. a Maori technique for Vietnamese patterns…straight out of the melting pot!
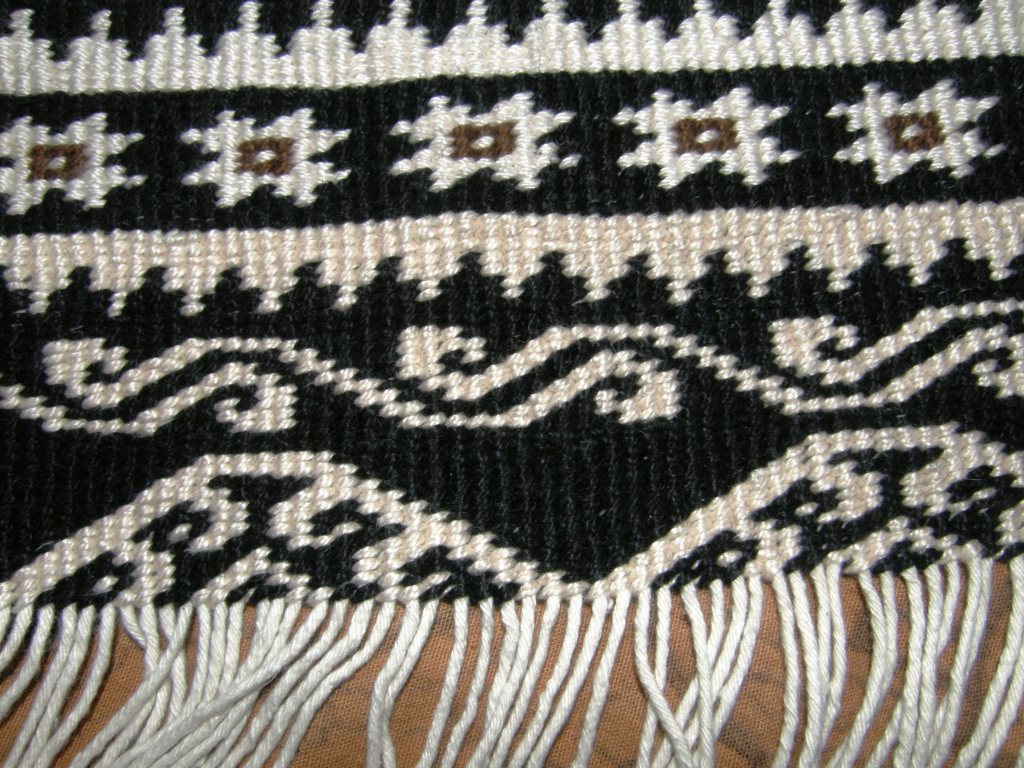
This piece has Montagnard designs as well as motifs found in both Bedouin weaving and twining. My Google searches led me to sites with Bedouin weaving and I was in love! I bought Joy Totah Hilden’s book on Bedouin weaving after finding her website and was pleased to be able to see images of the back of the woven pieces making the technique easy to identify as warp substitution which I already knew how to do. There is a link to a pdf  on Bedouin weaving by Hilden on my RESOURCES page.

It was clear from the book that the Bedouin do their twining  both on and off the loom and so I was interested in trying it on the loom…it’s so much easier when the warp is under tension, as far as I am concerned, and that enabled me to use much finer yarn than I had used for the off-loom piece.

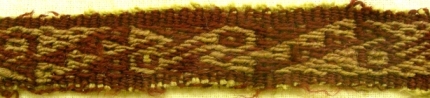
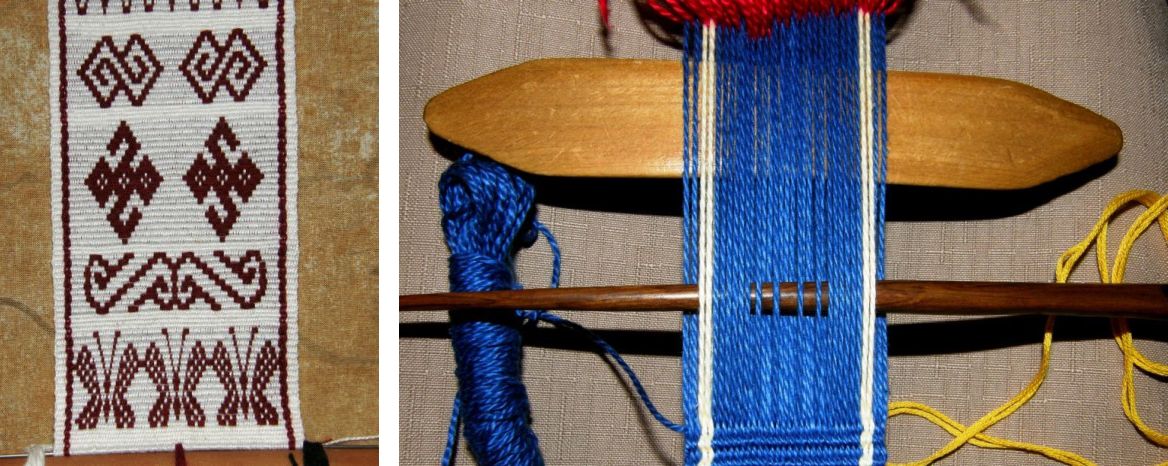
Here is the first piece with its al’ouerjan (in which I had made a warping mistake) and shajarah patterns. The al’ouerjan pattern is the checkerboard type design on the sides.

The twined sections are sometimes worked in the middle of the woven piece as well as at both ends.
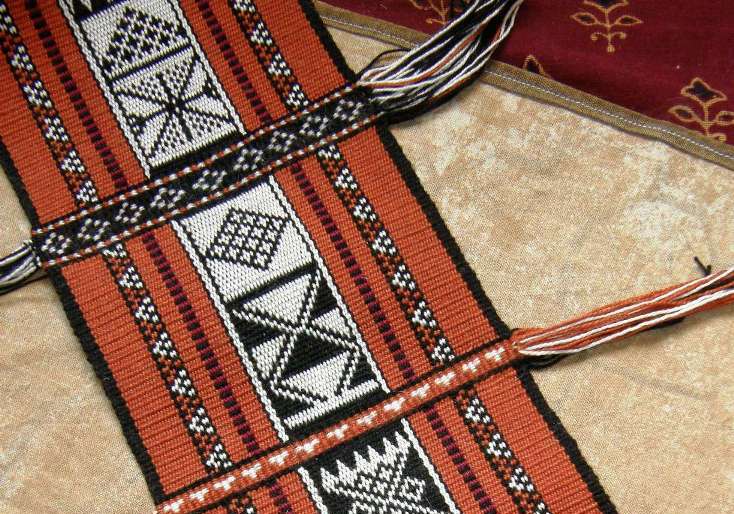
I then dove into the melting pot and added a finish of wrapped warp ends…

I enjoyed the process and I wanted to know more…both about weft twining in general and about Bedouin weaving.

I was especially curious as I found out from Betsy, who works with the Montagnard weavers in North Carolina, that their weft twining technique is done off-loom and this astonished me as the yarn they use for their designs is so very fine (Cebelia #20 or finer). I had to see and learn this! Betsy was happy to have me visit and I was able to learn from Jarai weaver, Ngach.

And in the meantime, Tracy, a member of the Backstrap Weaving Group on Ravelry, started showing us gorgeous pictures of Bedouin textiles from the souk in Doha Qatar where she currently lives and telling us about her experiences watching a Bedouin weaver at work.
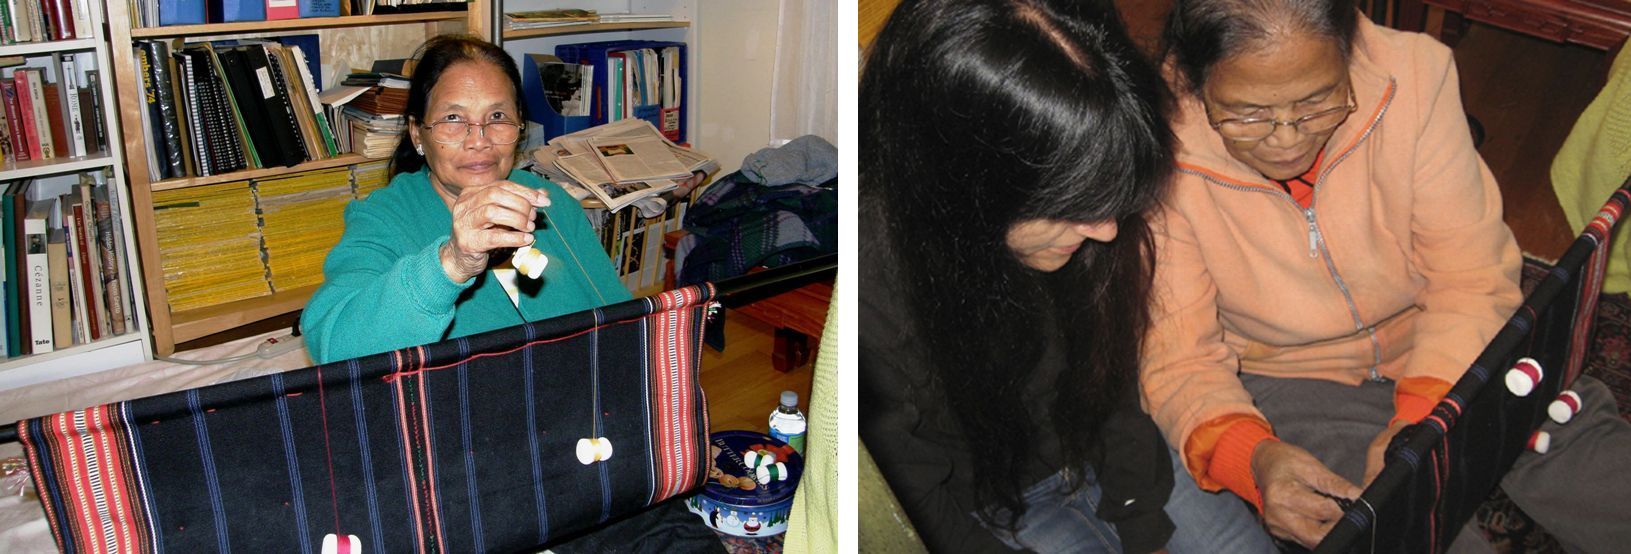
From books and images on the internet to suddenly finding myself seated next to Ngach, watching her bobbins twirl as she gracefully applied weft twined patterns to her large blanket piece off the loom, listening to her stories about her desire and determination as a young girl to learn to make the traditional kteh patterns. It was a dream come true.

Once back home, I stirred the tricks and tips I had witnessed with Ngach about color changes, hiding the ”bump” and other details into the pot and made my own kteh designs on my backstrap woven piece which you can see above.

I did it on the loom as my off-loom techniques still really needed some work! The advantage with off-loom twining is that several backstrap woven pieces once off the loom can be joined together and then the weft twining can be added along the edge of the entire piece. I have yet to do that and will definitely do so one of these days. I have my bobbins and thread ready!

Much later, the following year, came a golden gift in the form of  bag made from pieces of Bedouin weaving that Tracy sent to me through a friend who was visiting Bolivia.

Once again, imagine the thrill of getting to feel and smell the real thing…forgive me but that coarse handspun wool is just begging to be smelled! The bag is pictured above on the right next to the cotton piece that I made.

As you can see below, the floats that form in in the shajarah pattern area (the black and white design strip) are really very long! Some of them are even broken from possibly having gotten caught on things.

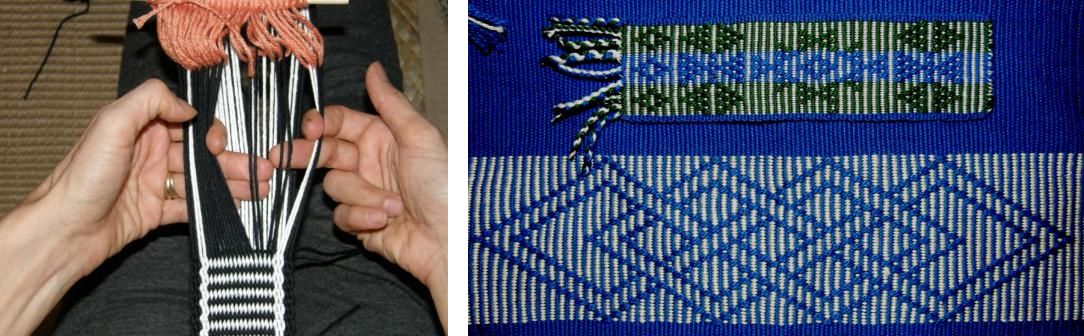
Now back to the sample I am weaving for the fourth wall hanging. I want to do a Bedouin-style piece but I do not want the long floats on the back. Tracy showed us images of pieces from a co-operative in Oman in which the weavers had found a way to tie down the floats  in the al’ouerjan parts (the checkerboard patterns) of their weaving possibly to make the pieces more attractive to foreign customers. It didn’t take long for me to see that they were using a  second fine weft to do so. This makes the woven cloth more practical too.

You can see the long floats that you typically get on the back of the fabric in the lower right hand corner of the image on the right and see how the appearance improves when the second fine weft is used. Unfortunately the second fine weft does not do much for improving the appearance of the shajarah patterns (the larger back and white patterns).
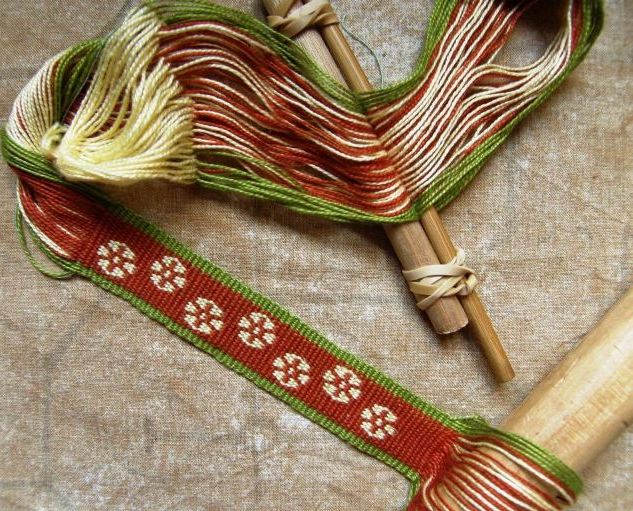
The solution to that is to go once more to the ingredients on the shelf and add some of the Bolivian highland weaving technology that I mentioned earlier to the mix. So I added embedded double weave to my sample, a technique I learned while studying with weavers in Potosi, Bolivia.

This technique allows you to weave sections of double weave alongside plain weave in the one piece. It is essentially the same warp substitution technique but with an extra step or two which basically insures, with the use of a second weft, that all the warps are interlaced with none left to float on either face.

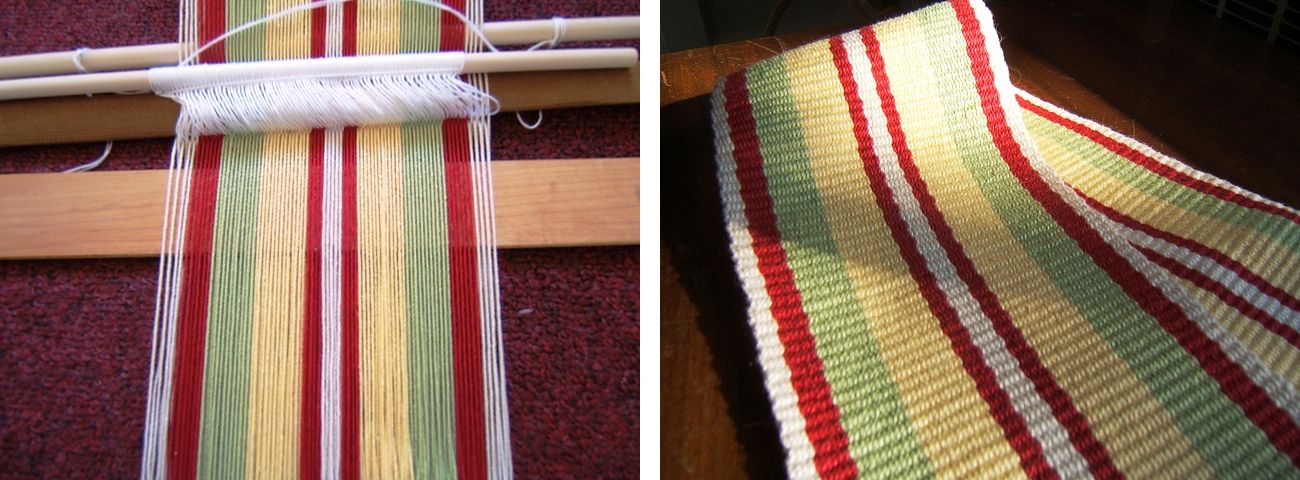
The two-color center section of the band at left is double weave alongside a plain-weave single-color border.

What I sometimes don’t like about the embedded double weave technique is the obvious transition in the fabric from plain weave to double…the climb from single layer to double layer and back again which naturally has to occur….it is sometimes more obvious than at other times depending quite often on the kind of yarn used, and I have been experimenting with various things to help soften that. I don’t want to make the entire piece double weave either.(The three-color double weave that would be required to weave the al’ouerjan pattern is bulky and unattractive).  And that is where I throw my very own bit of spice into the melting pot!

It is still in the experimental stage but what I am trying to do is combine double weave with plain weave, add the thin weft for tying down the al’ouerjan warp floats and make the transition from plain to  double weave section as subtle as possible with a trick I am trying out.
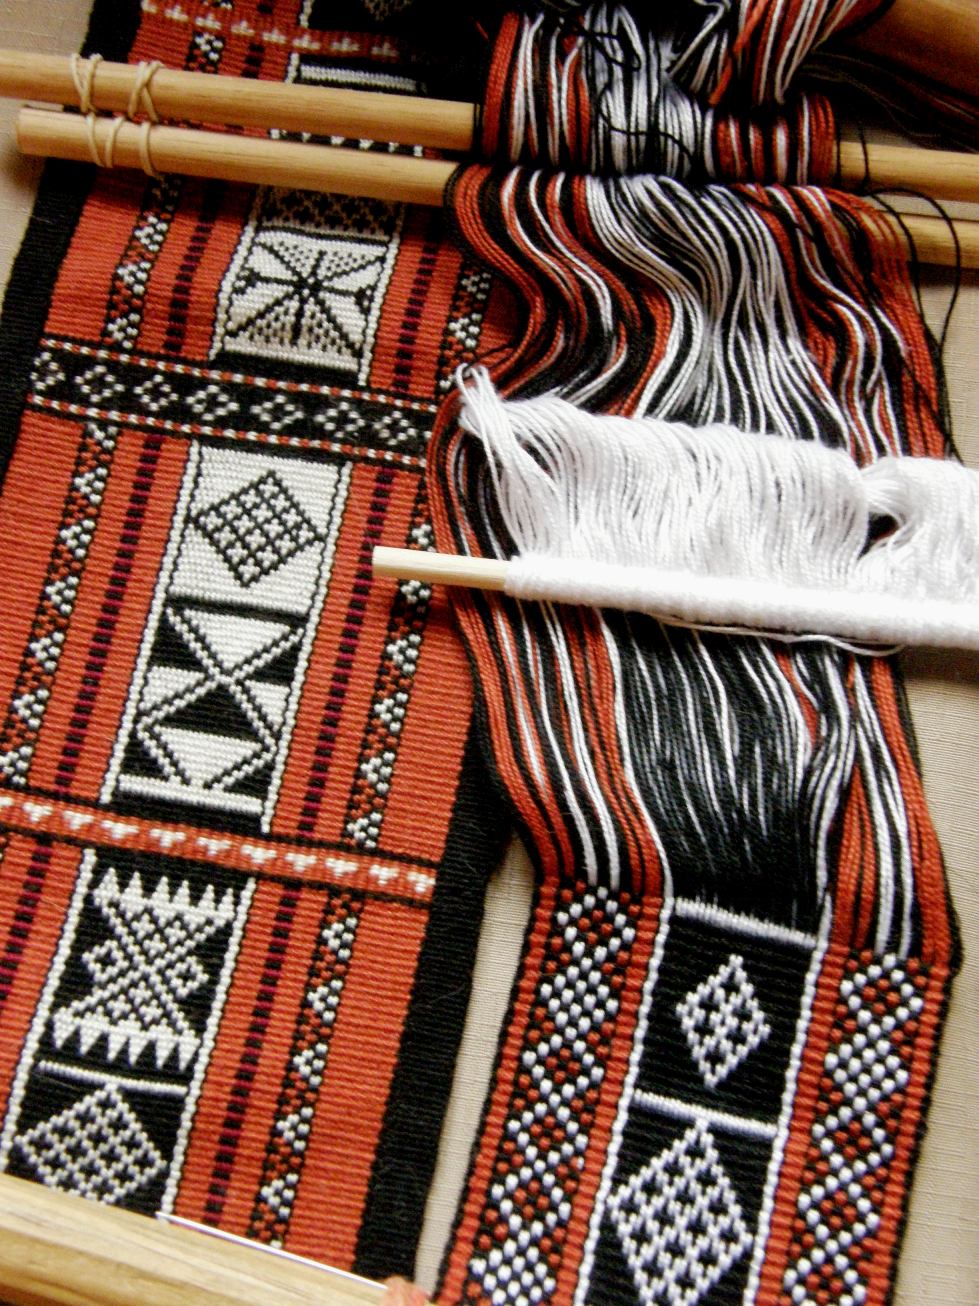
There is my first Bedouin piece on the left and the new sample on the right. The upper surfaces of both look the same and I don’t think you can tell that the center of the new sample is double weave.

The big difference is the back side of the fabric. My embedded double weave sample is on the left and my first sample with its long floats on the right. If this goes along well, I shall use this technique for my fourth wall hanging using the deeper shade of red that I have used for the other piece and incorporating more traditional Bedouin patterns.

So, enough red, black and white for goodness sake! Bring on some other colors. Here are projects from Ravelry group members and other online friends to save the day…

Oops! My bicycling friend Anna in Australia just happens to be using the same colors in a double weave piece. This is a Mapuche design from the book in Spanish by Enrique Taranto.
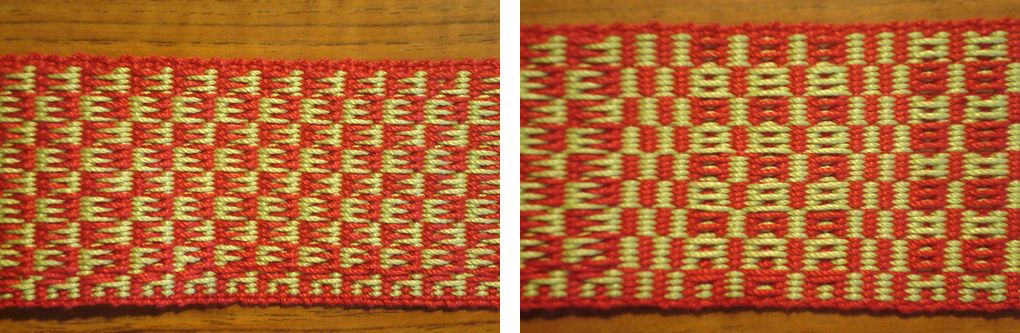
A new member to the Raverly group, Rob, showed us what he has been doing with simple warp floats inspired by a Guatemalan piece that Jennifer found on the Education and More website. You may remember that Bobbie wove a very large version of this in naturally dyed Guatemalan cotton thread that she bought from Education and More. Rob has added his own twist to the pattern at left.

Here are some of his other bands with simple warp floats and supplementary wefts. He used two supplementary wefts in different colors at the same time and says that one color stands out more than the other depending on the angle at which you view the piece….
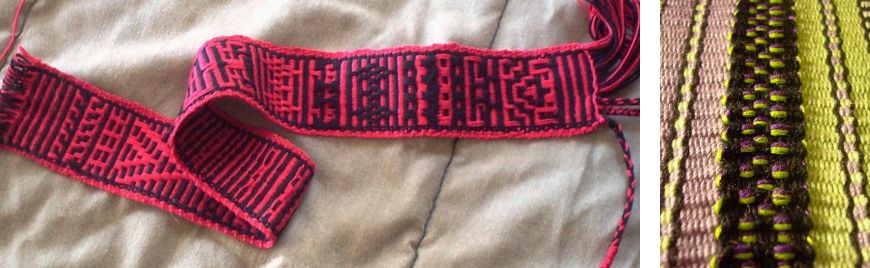
Another new member, Tracy, blew us away with her first ever piece made from her own handspun wool…we love her loom set-up!
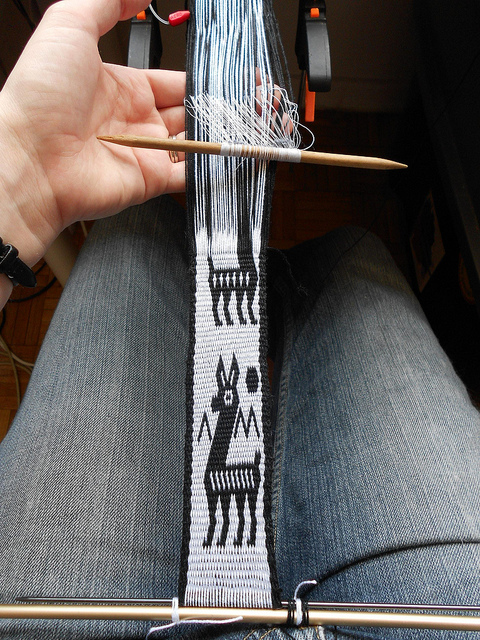
And Xav dove straight into double weave and the llama figures that I have charted here on the blog…her first ever backstrap woven band!
Jeen used her pebble weave experiments as embellishments on a couple of bags she completed. I love what she calls her “ball bag” and I think her use of variegated yarn for the border of her plain pebble weave band is so cool.

From Sweden Camila sent me pictures of her bands….

Some fun and clever designs with simple warp floats….she wove a pattern which is traditionally woven in a complementary- warp technique in the two-color simple warp float technique instead and it looks great!! On the right she has a pebble weave design from my book on her backstrap loom.

Well, I am off to continue my small sample as I think I can make something with it, weave a few rows on the third big wall hanging piece and see what unusual combination of ingredients might inspire the next piece on the loom…..
Backstrap Weaving – A Little Weaving Therapy

I guess that two months isn’t really such a long time to be away from home. It’s just that I haven’t done an extended trip like that in a long time. I am reminded of the times when I lived at the southernmost tip of continental Chile and used to go up to Peru and Bolivia for the winters. I would spend months away wandering about, only going home when I had become too skinny and undernourished (I always traveled on a typical backpacker’s budget!). It is always bewildering after you have seen so much, experienced so many different things, met so many cool people and learned so much to go home and find that everything is the same!

How could this be when you feel so different?! However, returning home this time was a little different because things had changed. Stuff happened, people disappeared, things accumulated….one of them being DUST…two months of the wretched stuff!

But now I am back into the old routine. Yes, here I am blogging away on Thursday in socks and sweaters. Fifty-five degrees…that’s COLD for Santa Cruz. The palm trees look rather forlorn against the grey sky.

Time for some weaving therapy!

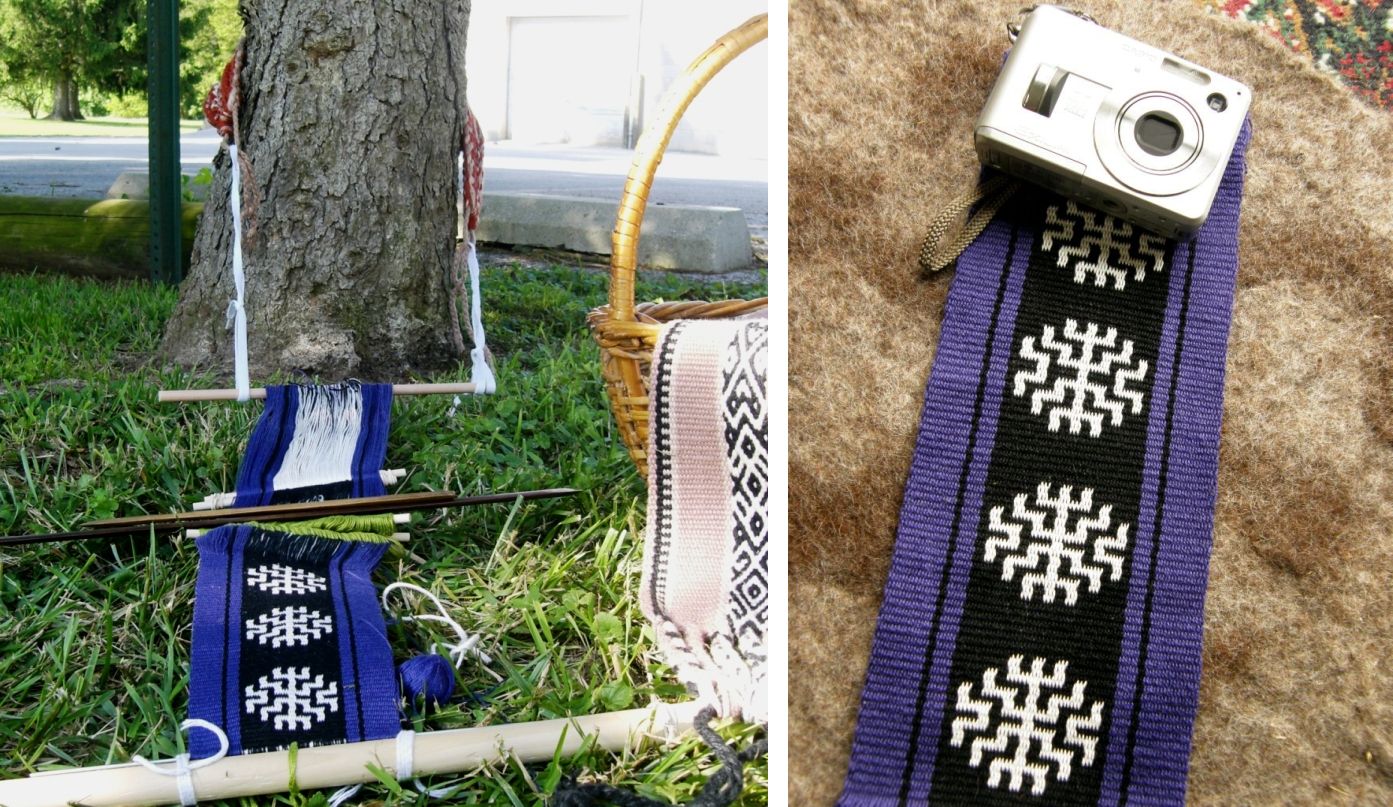
I made up the bag for the wee Casio camera.

This project accompanied me on the road and was hitched to numerous places along the way. I finished the weaving while I was up in Massachusetts. The pattern is one from Bhutanese textiles. Now, how to sew it up?

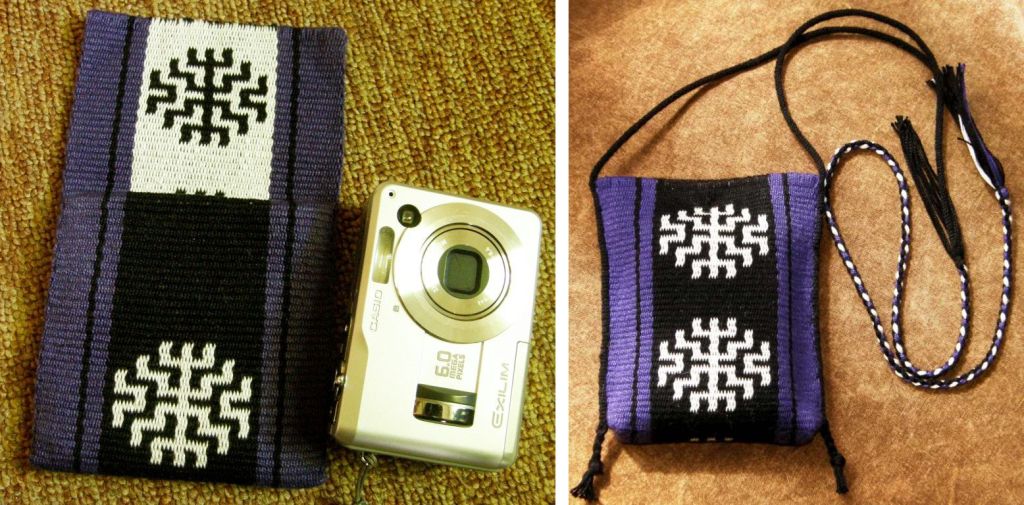
The first idea was the one on the left…a bag with a flap which I would cut and shape and edge with a tubular band. However, the motifs were not ideally placed for that and so I ended up with the style on the right.

I squared off the bottom of the bag and added a single large  snap closure on the inside. It is edged with a sixteen-end black plain-weave tubular band. I continued weaving the tubular band after covering the edge so that I could also use it as a strap and then added a four-strand braid to that for extra length.

The transition from tubular band to four-strand braid is covered by a tassel…a trick I learned from my sling braiding teacher in Peru.

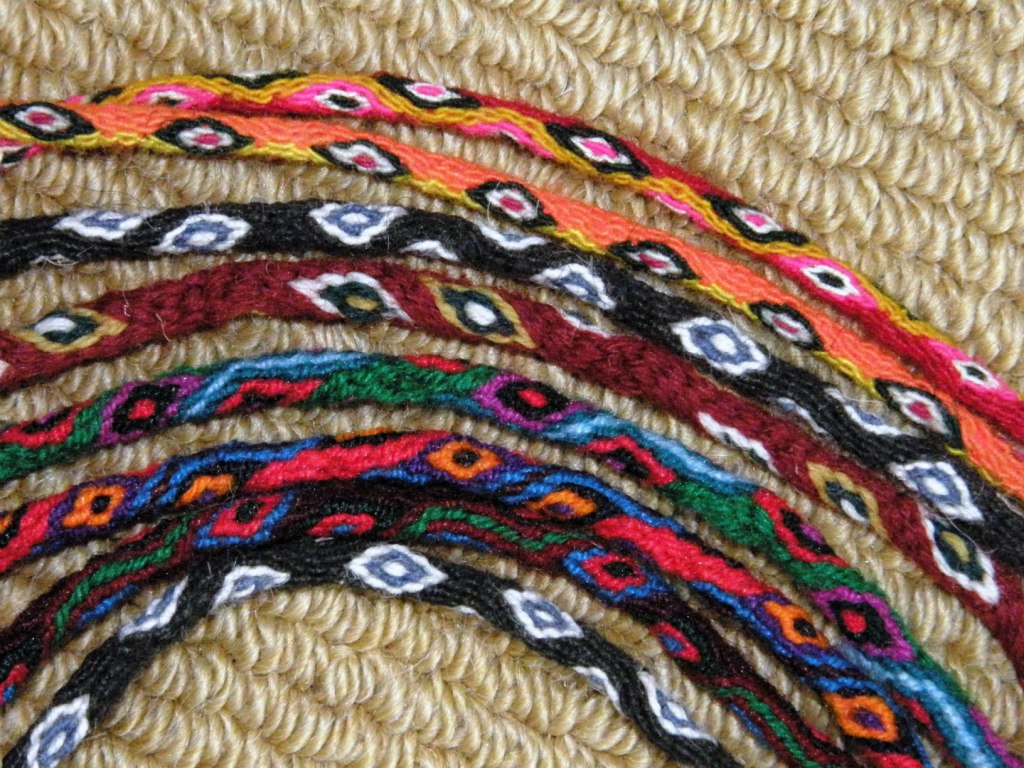
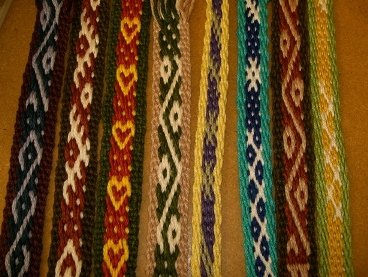
I think these tubular bands are very cool and so handy. I have been playing with some other plain-weave ones in different materials. The one on my bag is in #10 crochet cotton and here are a couple of others that I made in wool.

The yellow and blue one is woven with a DK weight wool I love the way the simple stripes spiral.

The other one is in a lighter weight wool and you can see that even a lightly twisted yarn works. As the warps are so narrow, the problems of stickiness that usually occur when using wool in warp-faced projects are not a big deal. The warps did not break but my weft did once from pulling it very tightly but that was not a  problem.

Another cool thing about tubular bands is that it does not matter what the lower face of the band looks like. That gets hidden within the tube.

I wove a ñawi awapa band (see some ñawi awapa bands pictured on the left) as an experiment as a flat rather than tubular band and saw the chunky chaos of crossed and twisted floats that is created on the back side of the band from all the strange warp crossings and manipulations.

But that does that matter? No! All that gets hidden within the tube.

Now what other technique do I know that has a pretty “right” side and a messy “wrong” side of awkwardly long floats?…the warp subsitution technique, of course!

Actually, any warp-faced band whether it be plain or patterned with any kind of pick-up can be made into a tubular band but, since the warp substitution technique is often overlooked because of the long floats that are created on the reverse of the fabric, why not use it for tubular bands where none of that matters?

So, the other band pictured above has three-color horizontal bars which I was able to create with the warp substitution technique.

All the cumbersome long floats are hidden within the tube.

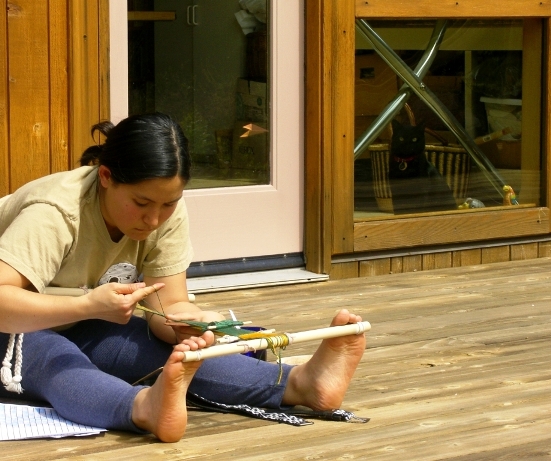
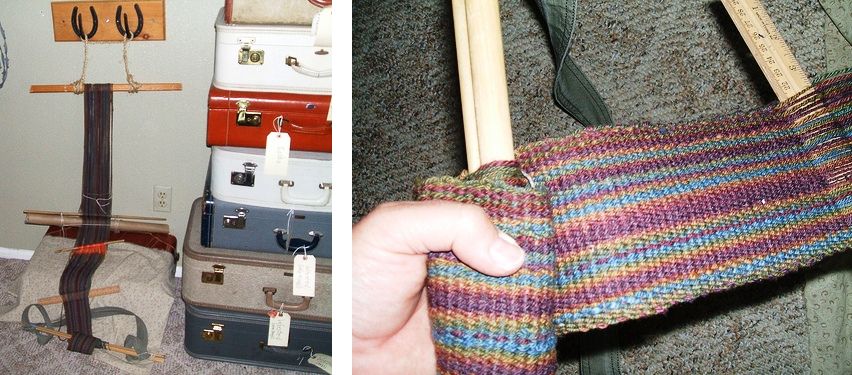
These bands are fast and fun to weave, quick to warp and can be stretched between a toe and finger to weave.

If that doesn’t suit you, you can attach one end to your waist with a cord through the end loops.

If you don’t fancy using your big toe, as the weaver from Tarabuco pictured at left is doing, a cord can be passed through the end loops at the other end of the warp which can then be wedged inside a drawer or looped over a “C” clamp.

I am going to use these tubular bands as pretty ties for my loom and any other time I need cord for my weaving projects and I hope to experiment a lot more with designs and colors.

So, that was one on-the-road project finished. My other demo warp is something quite different. A big white canvas looking at me and asking to be decorated…

There is something very lovely and somehow “earthy” about creating this plain and simple warp-faced white cloth and I want to make any patterning minimal. I have added a couple of weft-twined sections. Perhaps I will do some more weft-twining or maybe some soumak with a bit of added patterning with supplementary wefts. I left a lot of unwoven warp at the start in case I want to add a large weft-twined pattern later. As usual I don’t have plans for the finished piece. I will just see what happens.

Then there was time to do something with a sample piece that I had completed shortly before leaving.

You may remember the ikat weave-along that we were having on Ravelry.

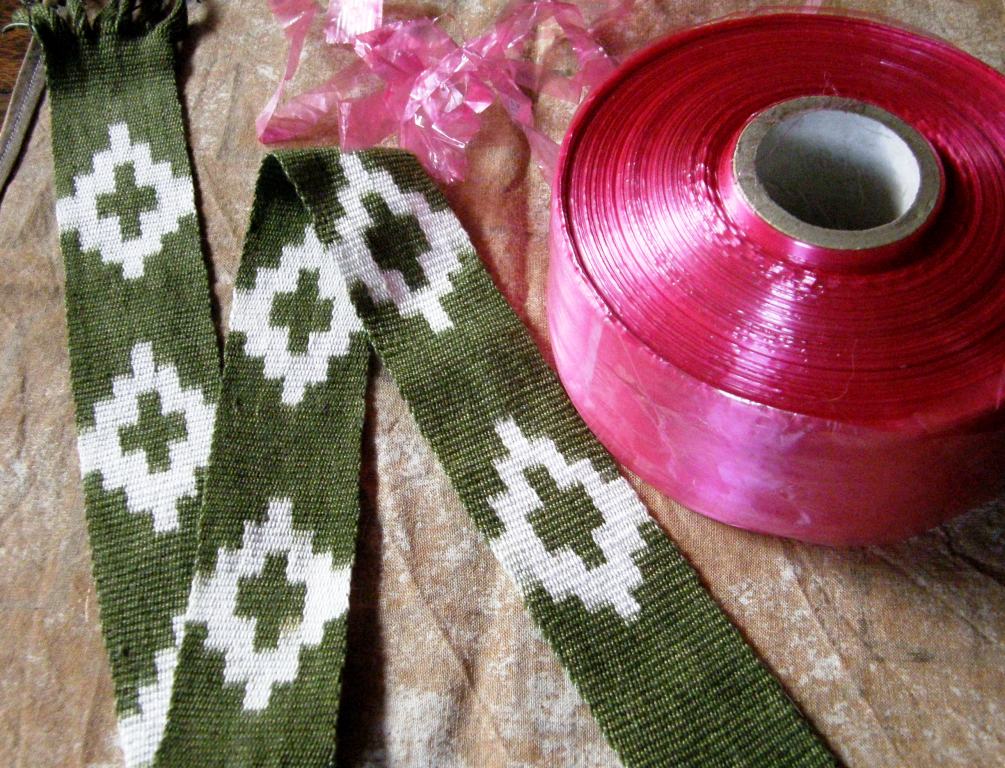
My friend Betty in the US gave me a huge roll of ikat wrapping tape so there will be many more ikat experiments in my future!

I have been using cassette tape until now and had a small “oopsy” in my last project when my dye solution was too hot for the tape.

I am sure that this special tape has been designed to stand up to being boiled in dye baths. It is very wide but tears easily into perfectly straight narrower strips…what a dream!

Here is the second warp which I tried after the green one above. This was my first time trying over-dyeing with a second color and spot dyeing.

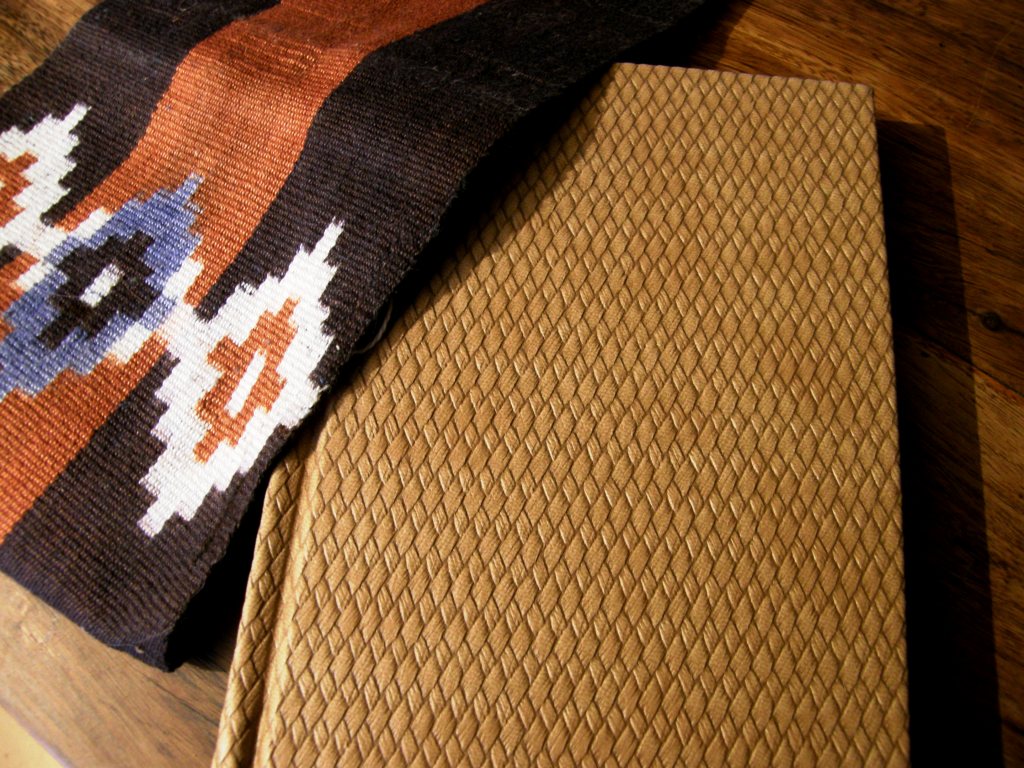
My friend Jeen in the US gave me a lovely travel journal and, even though its cover is very beautiful, I decided that my experimental ikat piece would make a wonderful jacket for this book.

I have to admit I was a little nervous. Was I about to ruin both sample and journal?

I used contact cement which is pretty strong stuff. Would it eat into the material on the journal’s cover and destroy it? Would I mess up and glue it on crookedly?

I have done that before with contact cement when gluing cork sheets to a table top. Once that stuff is ready to go you are pretty much committed and it won’t forgive any mistakes! Fortunately it all came together and I am very happy with the result.

The little vessel in the picture was a gift from a friend in Ecuador. The pen is made from sandalwood and was brought to me from India over forty years ago! Goodness knows how I have managed to hang onto it after all these years of moving around and having to abandon possessions along the way. The mug rug on the far right is part of a set inspired by African designs that I made on my backstrap loom in double weave.

My new-to-me used camera got a dressing up too with a new strap. I was happy to have a chance to weave that bird design again…the one on the old fragment that Tom Knisely showed me…

Here it is off the loom and on the camera…

And here it is on my backstrap loom. I love the way the bird motif changes from black to white along the length of the band.

And now I have a new strap to study which was lent to me by Susan  who visited me when I was traveling. She brought it along and I was delighted to be able to see both sides of it. There are so many pictures online of these bands from Oaxaca, Mexico but you never get to see the back side. There are many more examples of these on Teyacapan’s Flickr page of Mexican textiles.

Perhaps this structure is woven somewhere here in South America too but I have never come across it so this is a great opportunity to take a good look. Maybe it was woven here in pre-Columbian times. She urged me to take it home and just send it back to her when I am done. How cool is that?

I have this urge to go back to some simpler things and explore them more…like the white plain-weave piece I am doing, some more very simple ikat motifs which again involves just plain weave and I have been also looking again at simple warp floats.

One of my weaving friends in the US wove this cool backstrap after having woven simple warp floats with me.

We just played a little with floating both colors and she went on and ran with it.

At left you can see various parts of Kristi’s backstrap which is patterned with floats in two colors. She used it the second time we wove together.

When I was at Maryland Sheep and Wool I got to see many people of all ages being introduced to fiber activities.

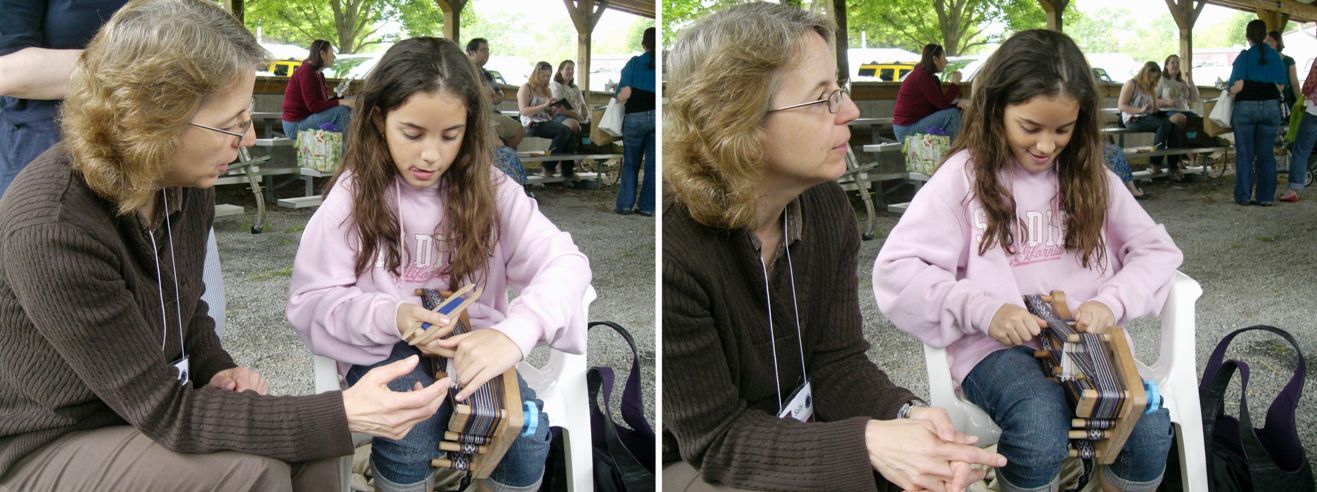
Elisabeth Hill, who I have known some time online and whose fabulous work on deflected double weave I always follow on her Flickr page (she’ll be teaching it at Convergence), came to Sheep and Wool with her niece Kylie. Kylie got a class in inkle weaving from Sally Orgren on her famous and well-traveled loom when we had a Weavolution meet-up at midday. Look at that smile. It looks like a new weaver has been born.

One of Elisabeth’s deflected double weave pieces won first prize in the exhibit at Sheep and Wool. I don’t think the picture I took does it justice so please take a look at her Flickr page to see all her beautiful creations.

Some lessons, like the one Kylie had, were completely impromptu. I wonder if as Kylie grows and continues to weave (and what wonderful inspiration she has in her aunt Lisa) she will remember her very first lesson there in the Rabbit Barn at Sheep and Wool on Sally’s “Inky”. Other classes were more formal…

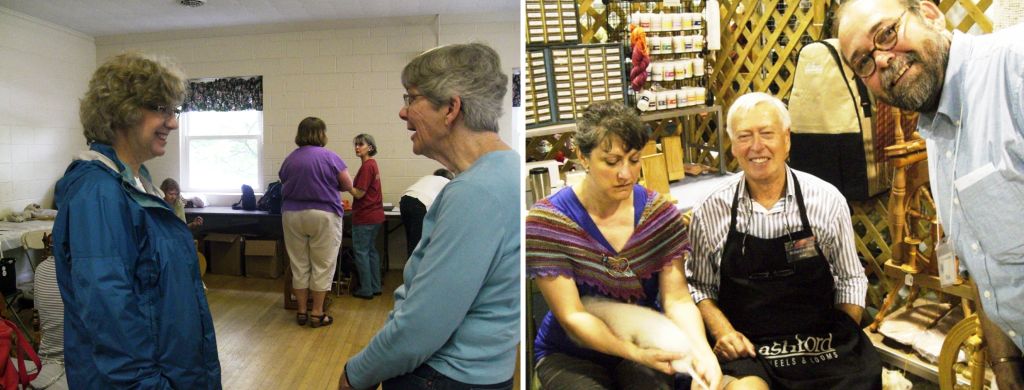
There’s my friend Claudia chatting with spinning teacher Maggie Casey before class and Richard Ashford was at The Mannings booth giving spinning tips with Tom Knisely looking on.

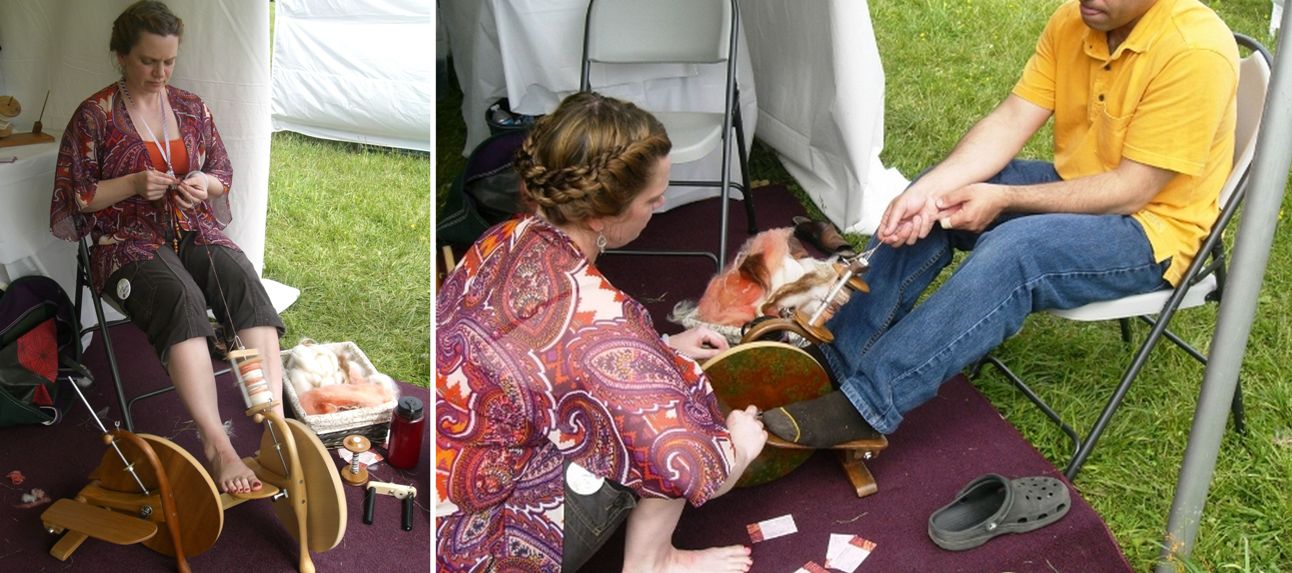
And the guys were into it too. Here is a gentleman having a spinning class on the ”Pocket Wheel” which was a big hit.

It was fun to see the team of young guys and gals who entered the Sheep to Shawl Competition this year.

Some things I saw at Sheep and Wool inspired this little project this week…

A simple little pebble weave band, right? But wait until you see the band that inspired this…

Isn’t that spectacular! Now you can see where my little purple and yellow band fits in! This was woven in Ayacucho, Peru and is probably from the same area or at least very close to the place from which my pebble weave teachers originated. Although they taught me in Huancayo, they are natives of Ayacucho and the little animal motifs on this band are very much like the ones they taught me. I would guess that this band was woven with the same two-heddle method that I learned in Huancayo with some additions for the third color.

The quality of the weaving is superb. Sadly it probably won’t be “popular” with some tourists who generally seem to prefer handspun wool and natural dyes. There is so much weaving in Peru that we just don’t get to see and coming across these bands at the Sheep and Wool festival was such a treat for me especially since I have not seen anything like the motifs I was taught back in 1996 in the books I have on Peruvian weaving.

Except for the purple and yellow section, it is a three-color pebble weave. Aren’t those braids and pom poms beautiful?!

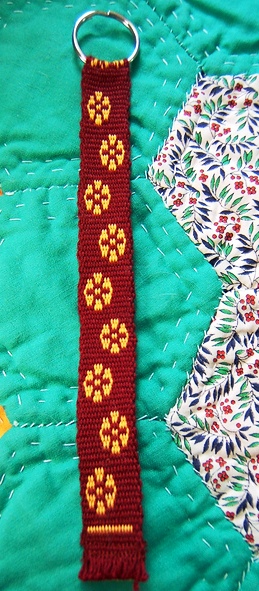
Here is a little something I picked up from the same stand. I was tipped off by braider Rodrick Owen that these were available there….a sweet braid with tassels from Ayacucho being sold as a keyfob.

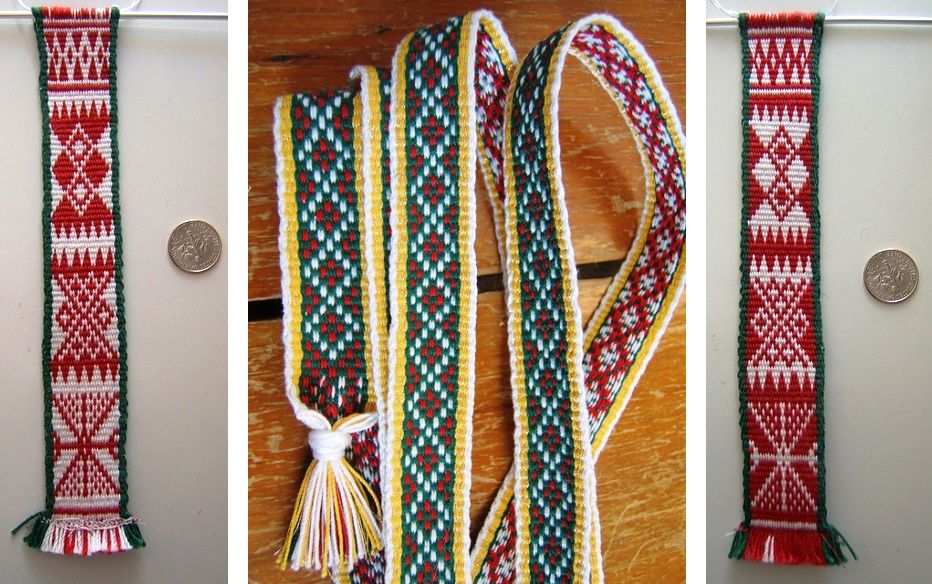
And finally, here is a wonderful display of bands made by Yonat. Yonat feels more comfortable on an inkle loom and so takes what she weaves with me and transfers it to her loom. Not everything here was originally backstrap weaving. Some bands, for example, are from the workshop on Sami weaving by Susan Foulkes and others are Yonat’s original creations.

See you next time. I hope that all of you can take some time off for a little weaving therapy this week.

Backstrap Weaving – Adventures in the North West

I love traveling by train and I love traveling with a reserved seat. As I wasn’t in a real hurry to get anywhere, I took the opportunity of traveling the slow way on Amtrak’s Coast Starlight route from San Jose, California up north to Portland, Oregon.

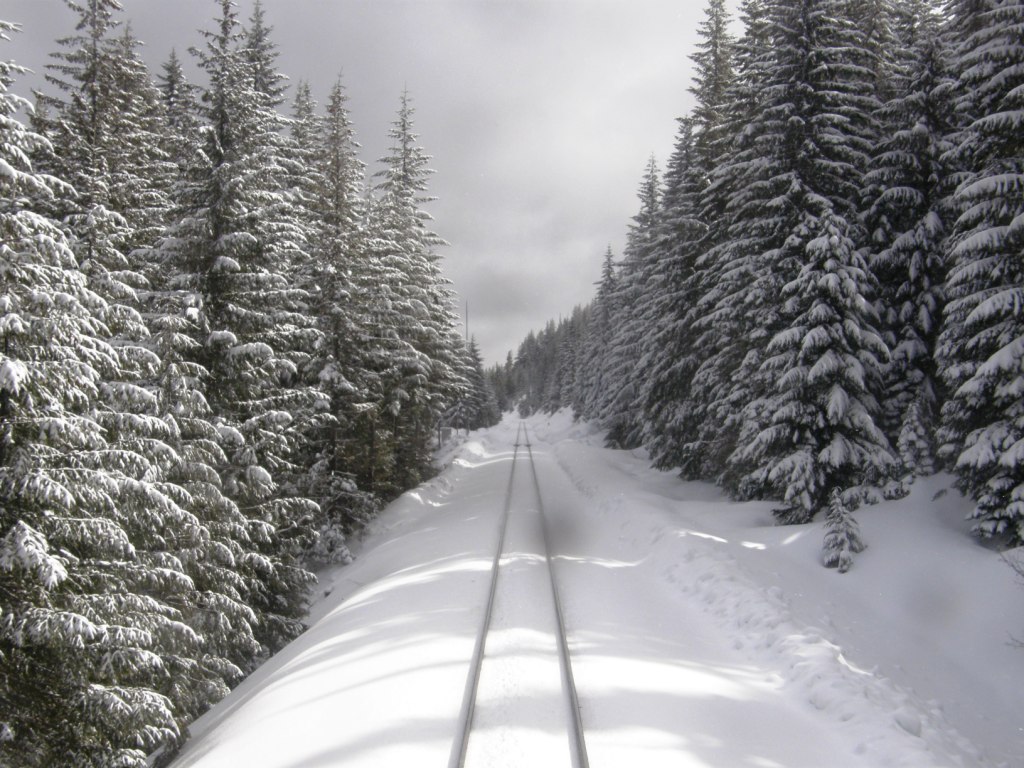
I was disappointed that the train left at night and that I would miss what I imagined would be beautiful coastal and ocean scenes but couldn’t complain when I awoke the next morning to views like this!…

I was fortunate that the Portland and Seattle passengers were seated in the last car which meant that I could stand at the back door and watch the track roll away through these magical wintry scenes. The other passengers had very “been there, done that” attitudes but, for this gal who lives in tropical lowland Bolivia, it was an absolute treat! This meant that I could pretty much hog that back door view for the entire day. I was so tempted to press the door button to see if it would open especially when it started to snow and the glass got covered.

Slowly we rocked our way across mountains, passing through numerous tunnels, emerging to views of deep valleys sweeping away to the right…gorgeous!!

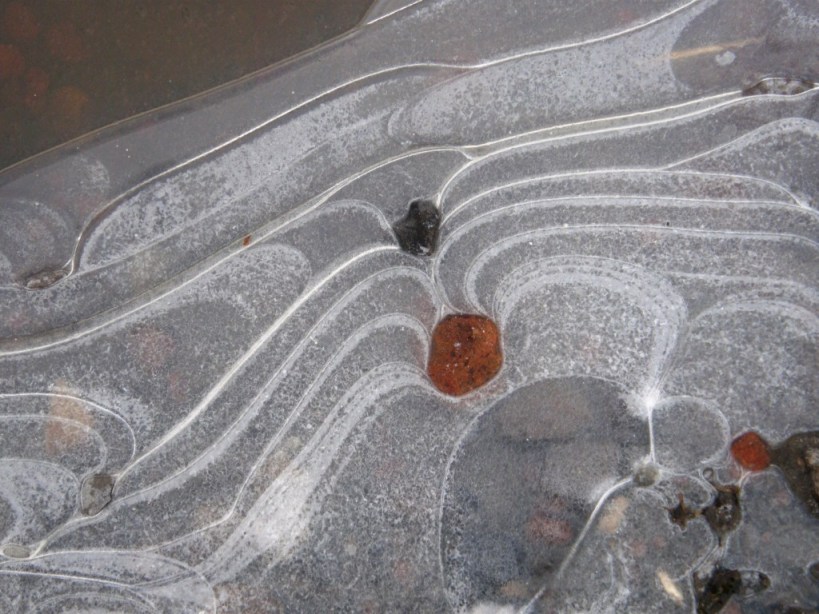
There were plenty of ‘fresh air” stops where we could get out and stretch and see “ice art” in the puddles. It’s probabaly all very “ho-hum” for north-west natives but it was all new and delightful to me.

After Eugene, the snow was over and soon we started to pass through ever increasing suburbia until finally rolling into Portland where I was met by Betty  who was having me as her guest for the next couple of weeks in her home just over the river in Washington state.

While I loved looking at the snow, I was glad to be out of it and into the cool, shady green with hints of spring of Betty’s tree farm.

And this is where my faithful camera friend of the last three years decided to die :-(.

“Internal sensor failure” was the problem I was told…too expensive to make a repair worthwhile. This problem was giving a pinkish hue to my pictures when the camera was in a good mood and weird color-streaked images when it was not. Luckily I have a wee Casio point-and-shoot as a back-up camera but I have to learn its particular quirks and get used to using it…darn!

Those of you who follow my blog may remember that I stayed with Betty on my spring trip last year and showed pictures of many of the fabulous weavings that she has collected in her travels over the years. I would have to be here for months to be able to see and photograph them all. In fact, last time I looked at too many and was quite overwhelmed. You get to the point where you stop seeing the beauty of each individual piece and so it has been great to have this chance to go over the collection again.

Actually there are enough beautiful things hanging on her walls to keep me occupied without even thinking about going through the pieces that have been carefully stored away.

Here are just a few bits and pieces….

I love the simplicity of the striped incredibly fine cotton warp-faced piece on the left with the card-woven strap, which Betty bought in a Tibetan refugee center in India. It’s an apron that forms part of a Tibetan traditional costume with a card-woven waist band. It contrasts with  the riot of color and intricate supplementary weft patterns on the Bhutanese bed cover  on the right.

This is a small selection of textiles from Peru, Bolivia and Ecuador. This group includes an ikat shawl from Ecuador, a double weave belt from Taquile Island, Peru and a small striped poncho from Tarabuco, Bolivia among other things.

I just LOVE the piece from Bhutan above left which has supplementary wefts woven into a twill base…that technique is still on my to-do list along with the discontinuous-warp technique you can see in the piece from Pitumarca Peru on the right (the figure in the center is an adornment that was added by Betty). I have made a few experiments in discontinuous warp after seeing the fabulous work of the Pitumarca weavers at the Tinkuy in 2010…multi-paneled pieces covered in pick-up patterns but I find this simple plain-weave piece in Bettys’ collection particularly inspiring and this following one even more so….

Betty thinks that this piece may be one of those that were made when the Pitumarca weavers were first attempting to recover this ancient technique. It is warp dominant rather than warp faced…you can see the weft and see through the fabric when it is held up to the light. It is nothing like the sturdy heavily-beaten warp-faced cloth that is typically produced. It has been edged with a simple single-color plain-weave tubular band. The over-twisted handspun yarn is still causing the corners to curl.

You can see above left what I am guessing would be called the discontinuous weft where the panels join vertically. The brown weft which is being used in the panel below right turns around the grey weft on the left when the two wefts meet at the join. This means that the color of each panel can be solid. You can also see how the warps dovetail at the horizontal joins between panels.

Betty is not sure how many years ago she bought this piece, but this is the progress that the Pitumarca weavers have made in this technique since then….

This piece has four panels of discontinuous warps with supplementary warp patterning in each.

More treasures on the walls of the rooms and halls of Betty’s home…

Belts and sashes from the Andes and Guatemala and a reverse-applique Mola from Panama.

And then some fun stuff…

I loved this little hanging which is in the guest bathroom. It turns out that this is one of the first weavings that Betty ever made. Knowing the legendary status that Betty has achieved in the world of weaving, this was quite wonderful to see. The other piece is a dear little purse that has been woven from recycled plastic bags in Guatemala.

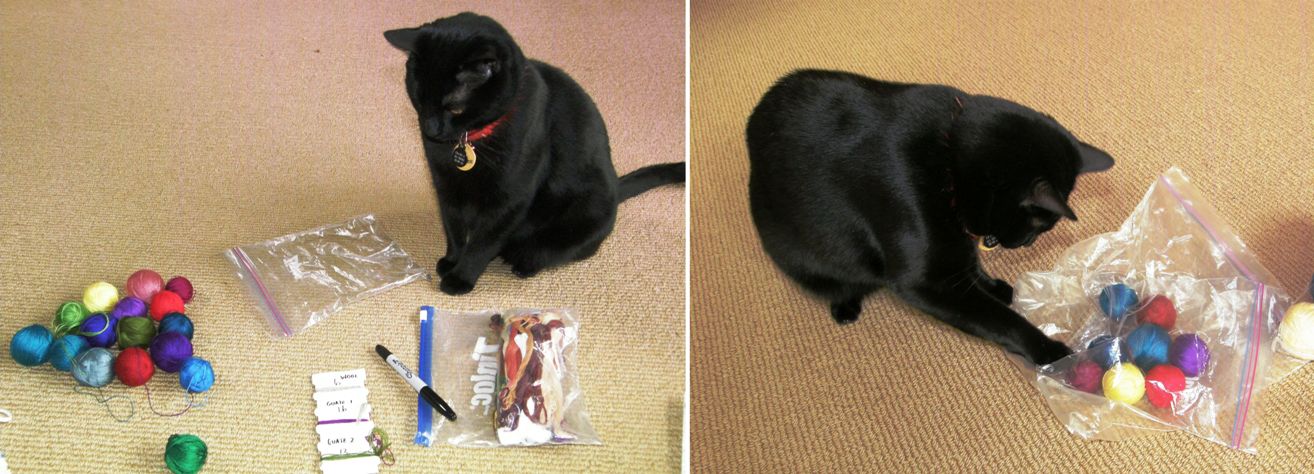
Between all the textile and fiber wanderings in Betty’s home and studio (I got to sleep in the studio again!), I had some organizing to do…not an easy thing among so much distraction! I was emptying bags and bags of yarn and warps on the floor much to the amusement (or perhaps indignation) of Trouble the cat who stood guard in case one of the balls decided to wander off.

Here are a couple of the ladies who came to weave…Sasha (who wants to learn backstrap weaving as it is part of her heritage…any guesses as to where her roots may lie?) and Emi who is interested in all aspects of primitive technologies.

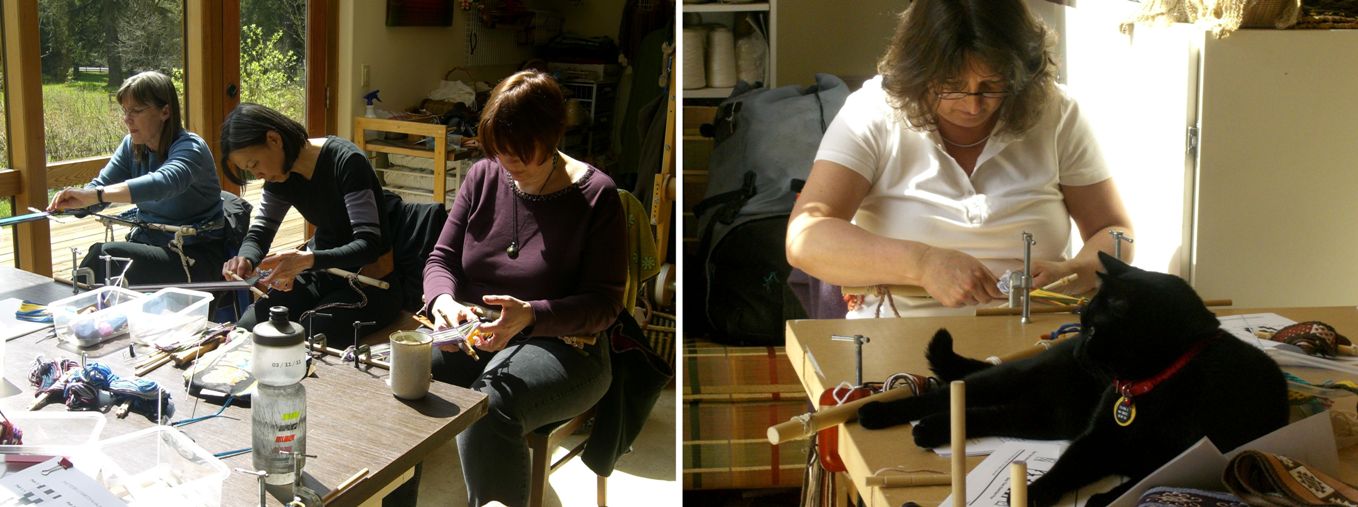
It was great to meet Jenny on the left and Linda who are both members of the Ravelry Backstrap Weaving Group. That’s Judy next to them. All three are working on their second weft patterned bands.

Weaving away! Jenny pauses to figure her next move in her simple warp float pattern. Rona is checking the cross on her four-stake warp before removing it from the stakes. It is funny how people often unconsciously choose yarns that match their outfit.

On the way home from the weaving group, Mt Hood and Mt St Helens put on the most fabulous show for me. Both are heavily laden with snow and looked spectacular in the soft evening light. But there was no where to stop and photograph them!  My back-up point-and-shoot camera does not have the zoom capacity to have done a worthy job in any case. I got to climb a rather different looking Mt Hood in the summer of 1992 as well as fly around Mt St Helens in a friend’s private plane but I much prefer the way these two beautiful peaks look in their winter coats.

Most of the people in this weaving group also promised to come to another the following weekend. I had a busy and fun time in the five days between.

On Tuesday and Wednesday I had a visit from some other Ravelry pals. These are two Backstrap Weaving Group members who have been around since the early days.

Jennifer and Bobbie are strong and very active members, head cheerleaders, back-patters, welcoming committee and “commiserators” and I am so grateful for their continued support and participation. It really was a thrill to have them with me for those two days.

They brought a few of their backstrap woven pieces to show and we marveled at how far they have come since joining the group and that very first weave-along we did in January last year.

We wove patterned tubular bands on Tuesday and I know that they have been hard at it at home since then. Bobbie also brought along the beautiful wide Guatemalan piece with its super fine cotton yarn on which she has been working.

First, lets look at some of Jennifer and Bobbie’s woven work…

On the left is Bobbie’s Bedouin-style runner with al’ouerjan patterning. I think she may have warped this when we had an al’ouerjan warp-along weekend. Next to that is her plain-weave striped piece that I am guessing was part of the plain-weave weave-along we did in the fall of last year. She added some weft twining to that. Jennifer’s backstrap is a gorgeous combination of stripes and colors which was also influenced by Bedouin textiles that we have been looking at in the group. I am pretty sure that this also formed part of the plain-weave weave-along.

Trouble decided to nap on Bobbie’s pebble weave bag. This is the piece she made as part of the very first pebble weave weave-along in January last year. At left you can see her rolled up Guatemalan warp and here she is working on it….

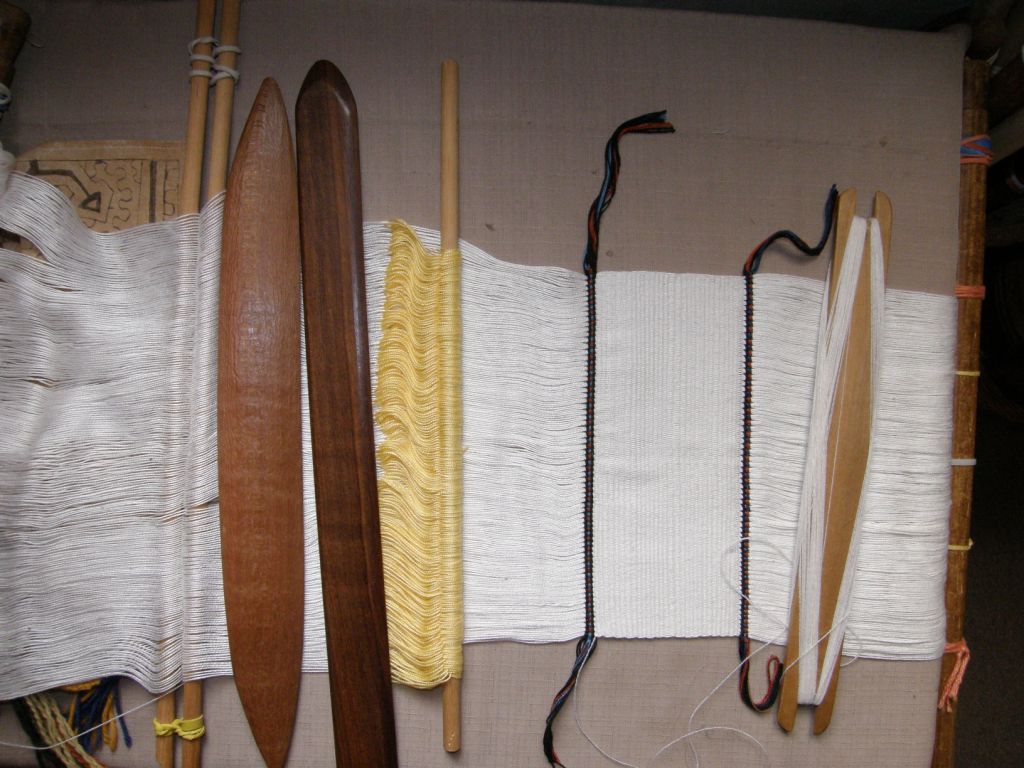
She has a long tale of mishaps to tell of when she was trying to put this warp together but you would never know by looking at it now! She is doing a simple warp pattern which Jennifer showed us in the Ravelry group. She had seen and admired it on the Education and More website. It caught Bobbie’s eye and she asked for suggestions for how to set it up. As the same warps are always floated, she has them permanently stored on a pattern stick. Looking at the sticks in the above picture from bottom to top you see the stick that holds the second cross, the pattern stick, the shed rod, the heddle rod and then the sword.

Certain warps from the shed-rod shed are floated with the warps from the heddle shed. You can see the warps sitting on top of the pattern stick below.

Isn’t that a great looking warp?! Bobbie bought this naturally dyed cotton warp yarn from the Education and More site. Beware! It is very fine stuff. Bobbie shared some with Jennifer who has started a plain-weave piece with it and I believe that some has also gone off to Popsicletote (another Ravelry group member) and maybe we will see a project from her soon.

And just a few days after we all met up, Bobbie announced on Ravelry that she had finished her piece.

Woo hoo! Look at that! She posed a couple of her tubular band practice pieces on top of the finished piece.

Jennifer came alone the following day and we sorted out some questions she had on complementary-warp weaves. These guys have learned so much from just using my online tutorials and books but it is a real help to be able to see things being done in person and ask some more specific questions. It was good going over four-stake warping with them. And it was great just talking!!

On Friday I had a fun day with Emi. Emi joined in with all the weaving groups.

I will let Trouble the cat tell the story…

Well, this is strange….just when I was getting my wee cat head around all this stick-and-string business, this gal comes along and throws her toes into the mix up.” (Of course this way of tensioning the warp is used in many South-East Asian weaving cultures but most often when using a circular warp).

As nice as it is weaving here in Betty’s sun-drenched studio, you must realize that you are wasting a perfectly beautiful day out there. It ain’t raining and you know that that has been a kind of rare occurrence around here lately. Won’t you step outside?

Thank you but, ahem!…I was sort of hoping that I would get to go out too…

Ahhhh….now that’s more like it!

We wove two-color simple alternating floats weaving designs like those I have copied from Krygyz yurt bands. Emi worked on trying to read the pattern directly from my woven belt rather than from a chart and she did a good job! Later on we did some braiding.

And finally, she went home having gotten some practice with handling a wide warp with fine threads. She wove quite a bit on my sample warp learning to operate the sheds smoothly and handle the fine yarn. I think that the two major obstacles that backstrap weavers in my online groups have are fear of finer yarns and wider warps. I am hoping that Emi will be able to pass that obstacle having had this experience with the wider warp.

Here she is using a nice technique to gently and cleanly open the heddle shed.

Before going home she treated me with a lesson in something from her Japanese heritage. I got a demonstration of the tying of the traditional furoshiki cloth and an explanation of what this cloth, and its use in wrapping items, means in Japanese culture.

She showed me one of the wrapping styles and then demonstrated how a Japanese person would present the wrapped goods to another person…beautiful!

And then she showed me how the same piece of cloth with a few clever twists and folds can be transformed into a shoulder bag.

Isn’t this the coolest thing! And just when I was thinking of the best way to weave a special wrapping cloth for myself, Emi showed up to the next weaving group and gave me my very own furoshiki cloth!

The one on the left is the piece that Emi gave me and Betty showed me one that a friend of hers in Japan had given her. I think we all need to have a furoshiki! I am sure that if I Google this I will find a book on 101 ways to fold and tie a furoshiki!

And then it was on to the pebble weave.

We had a beautiful sunny day once again with light streaming through the skylights and all of us wishing we were wearing shorts by mid afternoon.

Most of the first group returned and we also had Anita join us.

We dove right into two-heddle pebble weave and had two days of fun.

That’s Jenny, Sharon and Anita with Linda on the right. Linda took a break from weaving to try drawing designs onto charting paper directly from the sample textiles I had on hand. Emi settled into her warp on the floor and even Betty threw on a backstrap and wove.

Sasha, who wove super fast and found herself ahead of the rest of the group, decided to remake the heddles on her large warp. There is, of course, a story behind that warp which I will tell in a future blog post. She has promised me some pictures in the meantime to make the story more even more interesting.

And there were other gifts!

Sarah, pictured above, gave me an example of her weaving in a lovely lined pouch made with fabric that she wove with sixteen shafts. Anita brought me a fabulous sword/beater cut from South American marblewood…so smooth and glossy, it feels wonderful in my hands.

Last night Betty and I were invited for dinner at Carol and Jim’s home. We listened to their exciting travel stories and saw pieces created by Carol using her handspun yarn…all kinds of fiber from rabbit to camel. Carol and Jim have traveled the Silk Road from China through Uzbekistan and Kyrgyzstan…imagine how my ears pricked up at those names! I was even wearing the belt I wove based on the Kyrgyz yurt band. I got to see a fabulous felt piece that they bought there that has been edged with a band in the two-color simple warp float technique.

I try hard to keep up with happenings on the Ravelry group while I am on the road and there has been a bit of activity lately to report. Jentide has been weaving bands with Bedouin designs. She wove the shajarah motifs in double weave rather than in the traditional warp substitution technique.

Double weave creates a double faced band rather than one with long floats on the back which the latter method produces. She also wove a band with al’ouerjan patterning.

While snooping around her project page I found her double weave key fob woven on a backstrap loom using the sweet Bolivian flower motif that I have charted here in the tutorials.

The small band was woven on her backstrap loom and the longer one on an inkle loom.

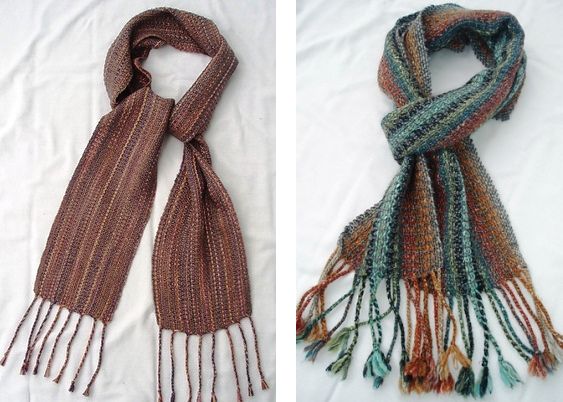
Heidai continues to weave pretty scarves on her Scandinavian-style backstrap loom with its rigid heddle.

On the left is her scarf in alpaca and silk and on the right in noro silk garden.

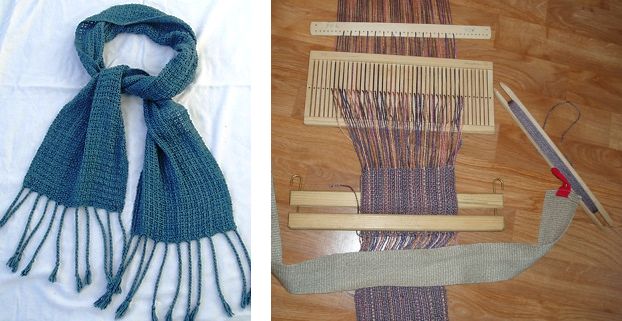
Here’s one more in silk along with the backstrap loom set-up that she has been using…so simple!

A backstrap by backstrap…also by jentide.

Tracy finished her backstrap woven ikat piece for our current weave-along and Alison has just started out using my book for pebble weave and has made her first band on a loom on which she feels more comfortable…the inkle. She followed the instructions for setting up the warp and is using her inkle loom  to tension it.

I think that wraps it up for this week. This is what happens when I miss a post….stuff really starts to accumulate but I am so pleased to see the Ravelry guys weaving away and what a treat it has been to be able to weave with four of them right here in Oregon and Washington! Hopefully, some of the people who wove with me here who are, in fact, already Ravelry members,  will join the Backstrap Group and become active participants…there’s always room for more cheers and encouragement. 🙂

I have had a couple of days free to blog, catch up on mail, and then I will be meeting with a basketry group on Thursday. I am looking forward to seeing their baskets. We have a small group of talented basket makers in the backstrap group too. I am not one of them!

I will see you soon with more backstrap weaving.

Backstrap Weaving – Picking, Dropping, Counting,Twisting….Pattern!

Did I mention last week that this latest piece I am working on is SLOW going? It’s a complementary warp pick-up technique, not one of those friendlier partly-loom controlled ones, and I have almost 600 ends in the pattern section. So, if I show you a picture of where I am at this week you can be excused for thinking that I have done nothing, or at least very little!

I had, in fact, progressed further but I un-wove a fair bit after discovering that the next pattern I had chosen wasn’t coming out anywhere near as big and bold as I had envisioned. I will need to re-chart it at twice its size. It is heartbreaking un-weaving after having picked all those threads but it is bound to be worth it in the end.

And as if the pick-up isn’t slow enough, I have decided to add some weft twining. What is slower than picking and dropping?…twisting and enclosing.

So far I have only added that one thin strip of twining which is one of the elements which will link all the hangings I am making in this series. I am thinking of adding yet another broad strip of patterned twining that will go from edge to edge. I shall think carefully about this as undoing twining is probably the worst kind of ripping out there is!

The Wayuu twine along the bottom of their si’ira belts but I am undecided about whether to use their technique or the one with which I am more familiar.

In the meantime my cat is determined to get as much of her hair as possible over the other two almost finished pieces.

This all had me thinking about this process of  picking, dropping, twisting and enclosing to make patterns and why I love it so much.  It occurred to me as I was writing the first few paragraphs here that I was making the process sound somewhat painful and frustrating when in actual fact it is both relaxing and stimulating.

I have been emphasizing the slowness of it all which may give some an impression of tedium…quite the opposite in fact.

What has made the work on this piece slower than it should be is the lack of planning on my part…it’s all my fault…thus the weaving and un-weaving and yes, that part can definitely be described as frustrating and tedious.

Take a look at this video of weavers in Bhutan (link provided by Toby from the Ravelry group) doing weft inlay patterning. Their tiny picking movements are graceful and delicate and rather than think “oh my gosh, how painfully slow and tedious that must be!” I think “how incredibly beautiful, skillful and relaxing. I want to do that too!” I wonder if I look quite so calm and peaceful as I work!

I do find that I need to stand up from this piece more frequently and take a walk around. I definitely don’t progress the four fingers width that weavers here in Bolivia have told me is the measure of a good day’s work. Sometimes I spend an entire day charting what I think will be the next part of the design only to abandon it! Lets see how far I get with it this coming week.

Fortunately not all the patterning techniques involve picking and dropping every single warp thread across the width of the loom. Many techniques can use pre-programmed patterning sheds and be partly loom-controlled.

Pebble weave is one such technique in which many of the designs can be woven with the aid of two sets of string heddles meaning that you only need to do pick-up in every other shed….pick-up warps by hand in one shed and then enjoy a free ride in the next by simply raising a string heddle and passing the weft.

The Moisy technique which my Guarani weaving teacher Angela uses is another one that rewards the hard work of a row of pick-up with a “free ride”, that is, a weft pass every other row through a heddle controlled shed.

And then there are those techniques which I have nick named “drop-down” rather than “pick-up” methods. Warp substitution is one of them. The weaver simply drops a warp thread out of the open shed in order to create the pattern rather than having to select and pick one up.

Basic supplementary weft inlay is also a technique that I would nick name “drop down”. The weaver drops certain warps out of a shed which creates gaps through which the colored inlaid weft can be exposed to form a pattern.

The simple warp float technique, in the way I was taught to do it, also falls into my invented “drop down” category. Warps are dropped out of the open shed. Those that are kept will float to form the design.

These are all nice ways to get used to counting and handling the warps, dropping, selecting, saving and picking them to form the patterns. Some people may find that one of my so-called “drop down” techniques is the one with which they feel most comfortable.

Others may find that they like the added challenge of selecting, picking and dropping the warps while also being able to enjoy that loom controlled “free ride”.

Yet others will become so enamored with the pick-up process and the patterns it enables them to create that they will be more than happy to sit for hours and be proud of their four fingers width progress each day. Check my tutorials page for links to the various instruction pages.

Here is some beautiful pick-up inspiration from weavers of Peru and Bolivia…

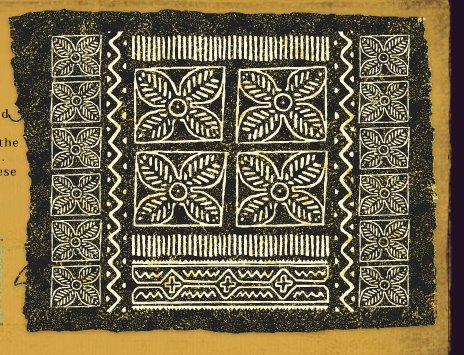
Last week’s mindless fun for my breaks from the loom was juggling. This week I played around online on a site which allows you to create your own mudcloth design. This link was provided by someone in one of the Yahoo groups and apart from a few minutes of fun, it also gave me some nice bold designs which, who knows, could form part of a future weaving.

Here is what I created…

And, thinking back to last week’s post and the crochet work and juggling balls, I see that Education and More are offering some unique crocheted Guatemalan juggling balls on their site.

The crocheted designs on the Wayuu susu bags I showed last week are still enticing. If you are contemplating getting out your hook and trying to make something similar here is Carol Ventura’s (author of Tapestry Crochet) video on a technique that can be used to create such designs. I can’t say for sure if this is in fact the technique used by the Wayuu to make their bags but you could certainly use their designs and colors as inspiration for something in tapestry crochet.

So, what will you be into this coming week…hooking, picking, dropping, twisting, juggling, or clicking the mouse and gathering resources?

Gathering resources?…I have posted more goodies to my RESOURCES page. Take a look 🙂

Backstrap weaving – Staying on Track

I have been trying to resist the urge to warp up for an al’ouerjan project and join in on the fun in the Ravelry group. You may remember that a couple of weeks ago, after having posted the warping tutorial for these traditional Bedouin patterns, Tracy suggested a weekend warp-along. Now we are seeing the increasingly large and impressive results of all that warping practice. Take a look at the bag strap that Tracy made at left.

But…I am staying on track which means that I am sticking to my chamanto-style leaf-patterned wall hanging (although I couldn’t resist throwing in a bit of weft twining). I finished the first pebble weave hanging in this set with weft twining and so I decided that, apart from the common color scheme, the weft twining would be another theme that would tie all my planned wall hangings together.

While I sit and pass the shuttle, strum the warps, beat and coax the sheds open I think about what will be next in this series. I have no problem whatsoever in coming up with ideas…the problem is that I want to weave them all at once!

I stand back and look at this piece and I still can’t get used to it.

It’s not quite like anything I have done before but I have to say that I am having fun with it especially adding in that twined section with the motif within. I had to stop for a bit to chart those smaller leaves on their vine, sample them etc…It took a while to get them right.

I think that all my planned red, black and white pieces will look pretty nice when hung all together. The question is….where? Although I have been doing some major cleaning out, I still haven’t managed to uncover any significant amount of wall space.

Next on the clean up list is my dear old Ashford traditional wheel. Yes, I have a spinning wheel…who knew? It has been sitting there so long unnoticed, dusty and in desperate need of oil…poor thing. It was born in New Zealand and made its way all the way over to the Falkland Islands before finding its way into my home in southern Chile. I left a lot of stuff behind in Chile but the spinning wheel came up to Bolivia where it has sat in the corner for almost 14 years…shameful! I won’t take a picture of it now in its pitiful state. I will clean it up and get it back into shape. I have room to use it now!

I only had it for four months before leaving Chile and just got into using it and being able to turn out something consistent. I did, however, spin enough yarn to construct a vest, knitting the natural colored front and weaving the dyed brown back. The edging has been worked in cross knit looping.

This, too, sits neglected here in this hot steamy climate. It is a souvenir at least of the Patagonian sheep.

But, back to the al’ouerjan and let’s see what else the Ravelers have been up to…

So, there’s the strap that I showed you earlier on the gorgeous bag that Tracy made. She will line the bag  to protect the warp floats on the inside. She used an additional weft to secure the floats on the strap. You can see details about how that is done here. One of Tracy’s other warp-along products is the pillow cover which includes some tapestry-style twining in  the lower left hand corner and a striking and beautifully executed joining stitch.

Aunt Janet’s piece above left is in her own handspun wool. She has three sets of al’ouerjan patterning and that blue looks amazing.

Traudi so loved Tracy’s piece that she got into the act too using brown instead of black which looks fantastic. She twined along the bottom of the piece too. We are seeing more and more twining in this group…cool. Here is the tutorial for basic weft twining.

Jennifer did some charting and planning for the shajarah patterns before warping a wide piece that also includes an al’ouerjan design.

The charting paper with ovals which is useful for double weave, warp substitution and supplementary weft patterns can be found here. A tutorial for weaving these kinds of warp substitution patterns is here.

So, January has gotten off to a great start in the Ravelry group! Pantoffels has been wrangling with what she calles an ancient inkle loom and still managed to make this pretty needle pouch with plain pebble weave patterning.

And then she got a new inkle loom under the Christmas tree and will now try the pebble weave patterns in my book Andean Pebble Weave.

While I have been weaving my “leaf” piece based on the Chilean ponch known as a chamanto, I have been getting out other pictures of ponchos that I have to study the design layout that weavers use on these large pieces.

I own one poncho which I bought in Calcha, Bolivia many years ago. It is made from very fine handspun wool which has been colored with natural dyestuffs. It is patterned with simple stripes, some very narrow and simple ikat bands as well as several very narrow strips of pebble weave.

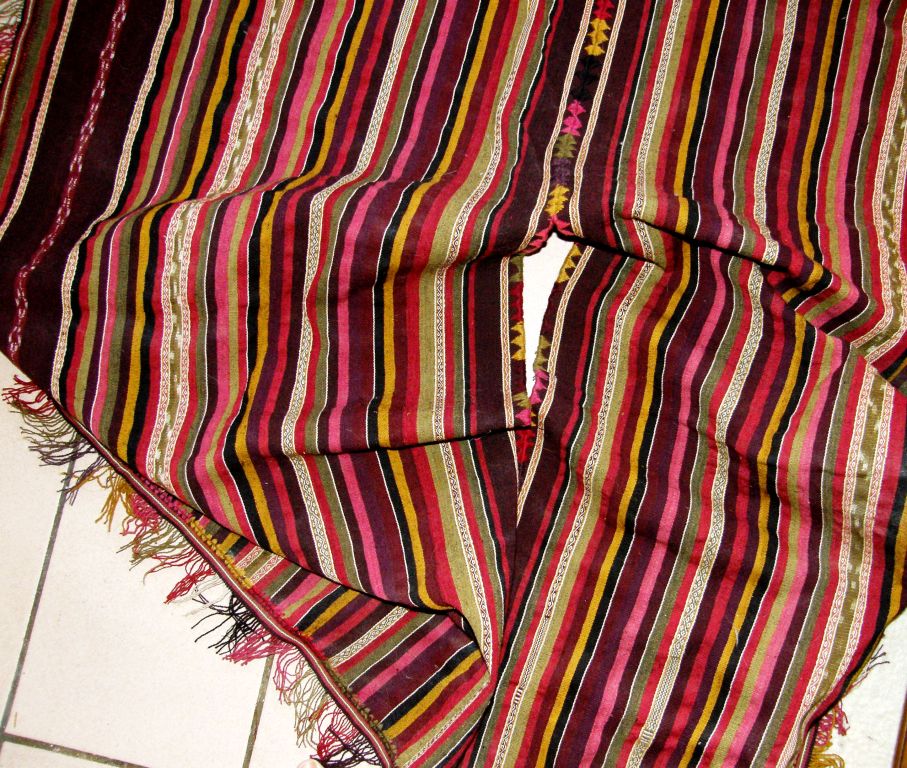
It has been woven as two panels with four selvedges each and a woven band has been sewn around the four edges with an added fringe. Don’t you love that decorative stitch that has been used to join the panels?

There is definitely an art to stripes. You can see the clever placement of fine white stripes to break up some of the richer colors.

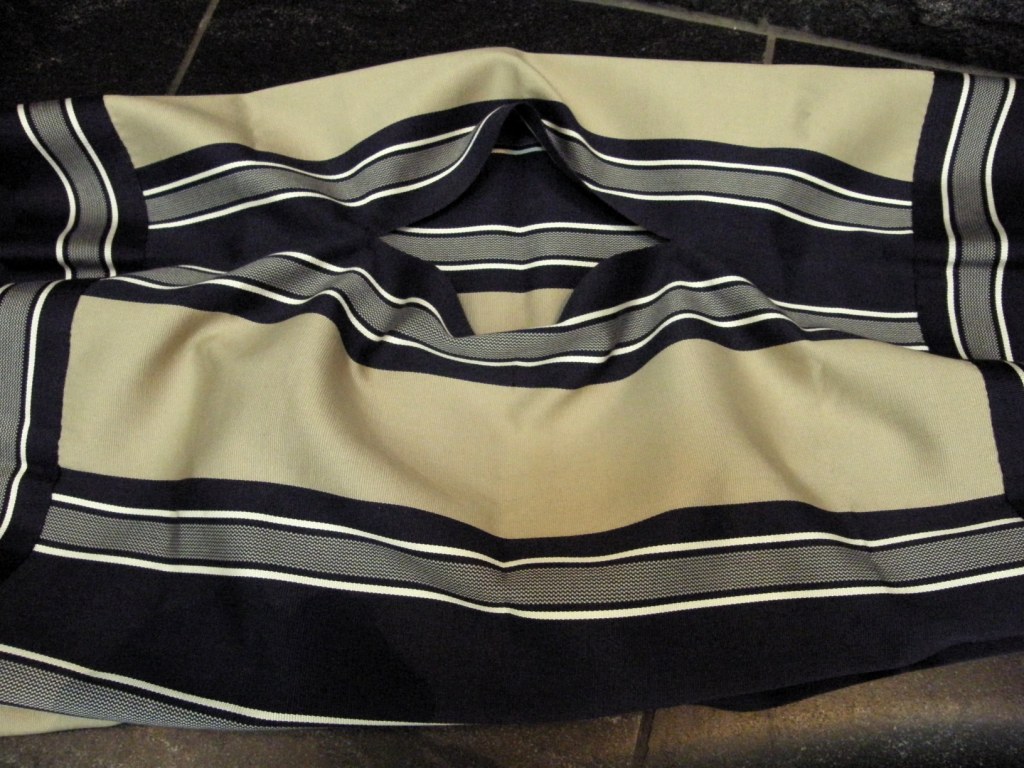
 An extremely fine and simply patterned manta from Chile. It is always interesting to see how the colors and stripes are distributed. As is typical, a broad band has been woven and sewn to the four edges of the piece and there is no fringe.

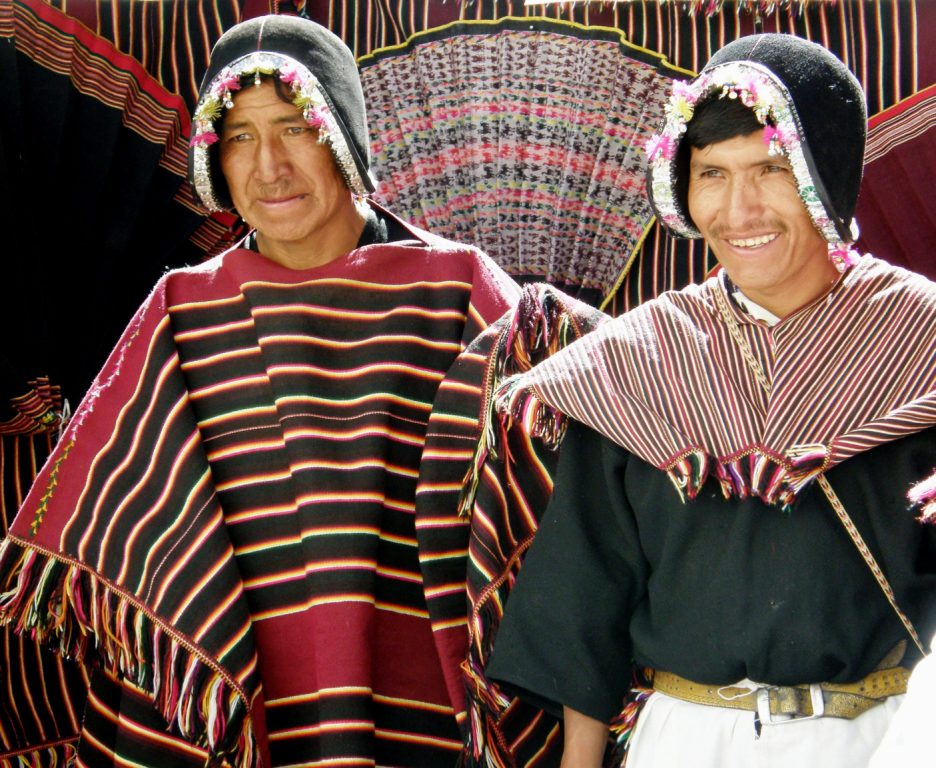
The typical poncho of Tarabuco and the smaller version known as unku can be seen above.

At a handcraft fair in Tarabuco I saw weavers making the long poncho panels. My friend, Anna, showed me the unku on the right that she had bought in Tarabuco when she came to visit me.

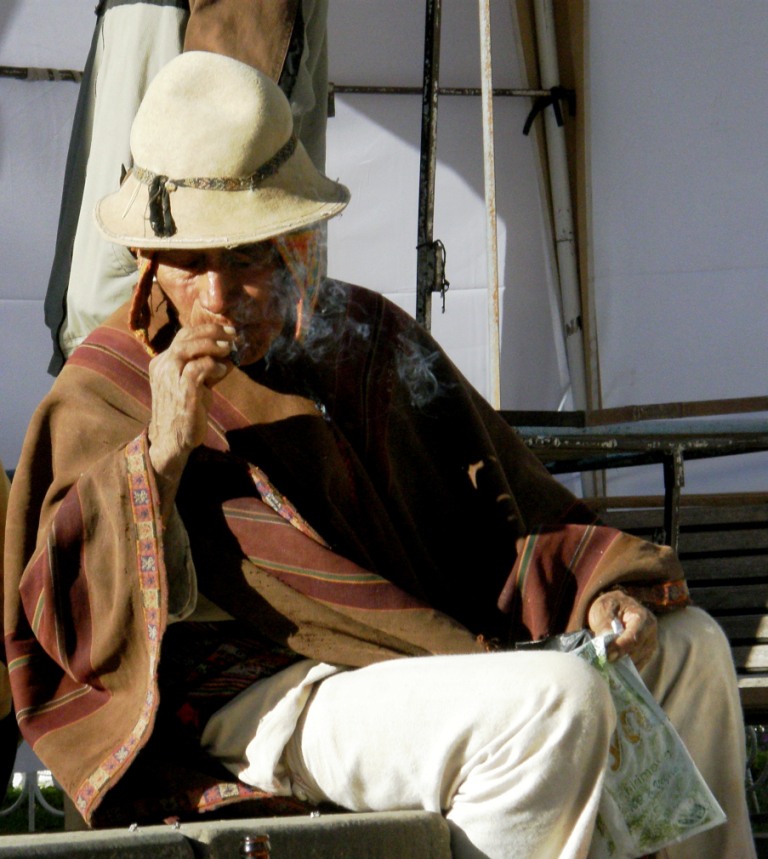
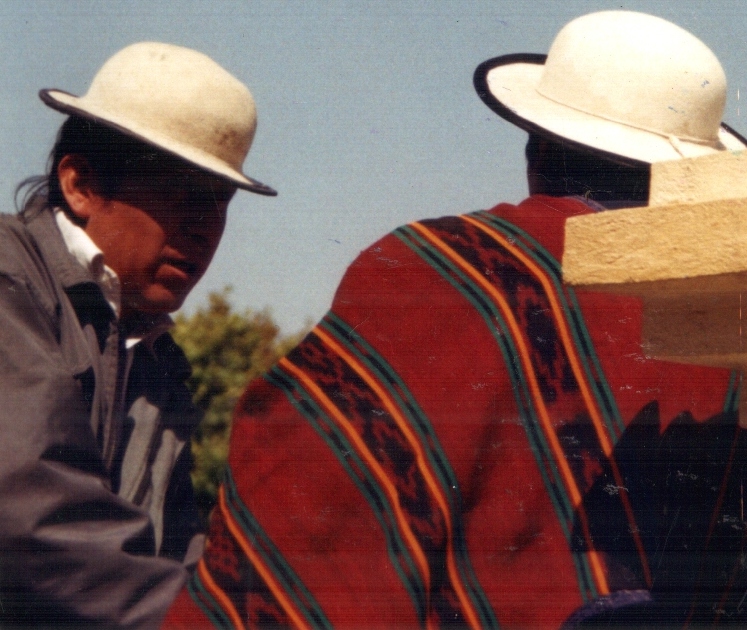
I spotted this gentleman in his much more subdued woolen poncho in a small plaza in Sucre. He was performing an offering to Pacha Mama in the early morning. How wonderfully simple and light the poncho looks although I am sure it is extremely warm and virtually waterproof.

And then you have the incredibly intricately patterned calf-length ponchos woven and worn by the men of Chahuaytire in the Cusco area of Peru.

From Argentina and Chile we have the Mapuche makuñ with its ikat patterning technique executed in such a way that there is virtually no blurring of the design. The popularization of the poncho, from what I have read, is generally attributed to the Mapuche who wove them for their own use as well as for barter. On the right you see the chamanto of the Chilean huaso, with its leaf, fruit and floral motifs, which are said to have both indigenous and Spanish roots.

I have  a few pictures from Ecuador too…scans of old prints…

This is the “jijon” poncho which is factory-made in Quito and worn by those men who can afford one in Otavalo. You can see it being worn with its grey plaid face showing by the gentlemen on the left and with its darker face outward on the right. These men were wearing their ponchos to the market on a regular day. Apparently there is a much more costly blue double-faced poncho which is woven on the backstrap loom made-to-order. The ownership of one of these special ponchos indicates wealth and high social status.

On Sunday, which was both market day and church day in Cañar, a very social time around the main square and surrounding streets, I saw quite a few ikat-patterned ponchos being worn.

And finally there’s Juan below, (my pebble weave student!) with his mother and neighbor. Juan put on his  narrow, black fringe-less poncho and felt hat especially for this picture. On another visit during a festival all the men were wearing their ponchos for the occasion.

You can see the backstrap looms on which I was teaching Juan and Natalia pebble weave tied to the pole. In exchange Anita introduced me to her cousin on my next visit and he taught me to weave the typical supplementary warp patterned belts of Salasaca.

Okay, so I promised you some double weave edge samples this week, right? I am sorry, I didn’t get those done. I was busy trying to stay on track and not get “dis-track-ted” by all the goings-on in the Ravelry group. I want to finish my leafy hanging. but I must say that I have a bowl of tencel calling to me wanting to be made into a scarf…

That blue ball is indigo-dyed Japanese silk…a fabulously thoughtful gift brought to me from Japan by one of my old teaching colleagues here.

Hopefully I will get the leaf piece off the loom this week, plan and warp the next hanging, play a little with my tencel, get the Ashford Traddy up and running and do those double weave samples for the tutorial too….phew!

Oh, and I have started a new page for RESOURCES. You will see the tab for that on the header and I am slowly extracting all the links to interesting sites, articles and products that I have linked to in my 105 posts so far. This is quite a job but I hope to add two or three links to the page every week. I hope you find it useful.

.