Backstrap Weaving – In the Mood for Finnweave

I am back into fabulous Finnweave after a very long break.

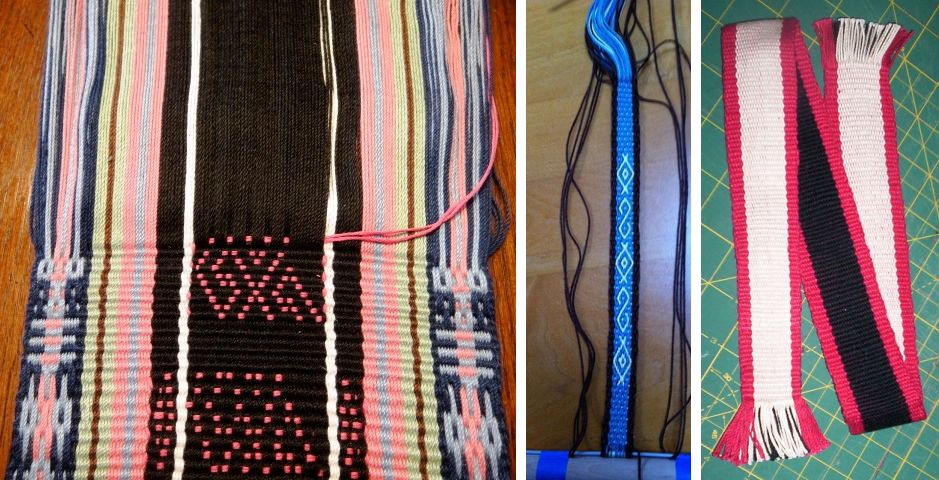
I was trying to think back to when this Finnweave adventure all started and I believe it was in the early part of 2008. I wanted to try and reproduce the structure and motifs on some pre columbian textile fragments that I have which were woven in what Suzanne Baizerman calls balanced double cloth.

Here are some of the fragments that I have collected….

All these pieces were attached to Chancay doll replicas like the one you see above that I have bought in various markets here in South America. I wrote a lot more about these and other textile fragments in this previous blog post.

In  Double Woven Treasures from Old Peru (by Adele Cahlander with Suzanne Baizerman) instructions are given for weaving this technique on a treadle loom rather than on a backstrap loom. I have had this book for over fifteen years and had always skimmed those instructions without paying much attention because I had never used or even touched a treadle loom and I assumed I would never be able to understand them. The notation and charts meant nothing to me. However, something made me go back in 2008 to open the book again at that page and take another look. Nope, nothing new had appeared… it all still looked like a mind numbing maze…so frustrating!

Who else did I know who knew about backstrap weaving and these kinds of structures who might have a clue? I had just made contact with Carol Ventura online through WARP. I had her book on Jacaltenango hair sashes and so I wrote to her. She hadn’t tried this particular structure herself, but she suggested I join a thing called Ravelry where there was a backstrap weaving group where I could ask. Ravelry? What in the world was that?!

I also wrote to Ann Rowe as I had met her on a trip to the Textile Museum in DC and she sent me a picture of a Huichol loom saying that I may be able to figure it out from that. The Huichol people of Mexico still weave this technique. It is no longer woven in Peru.

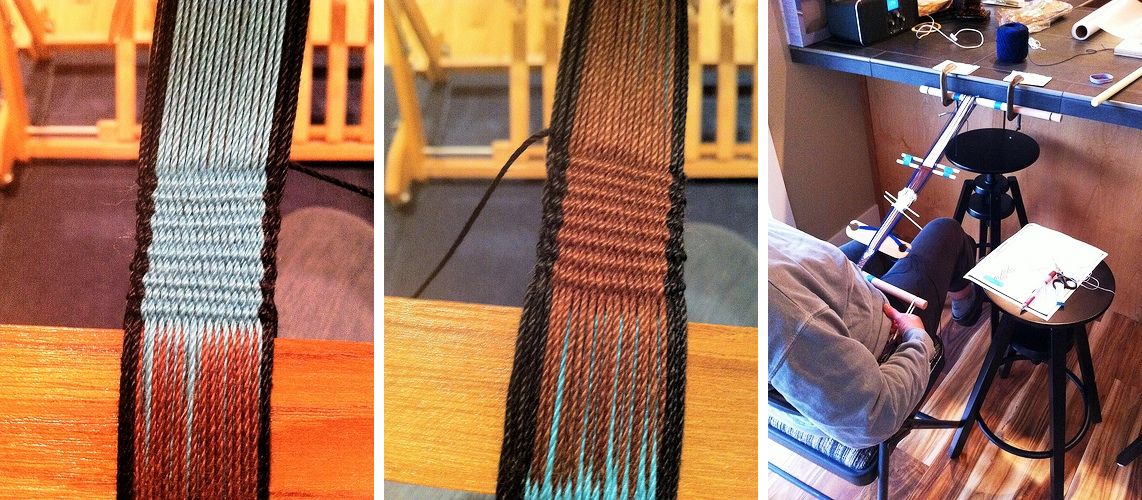
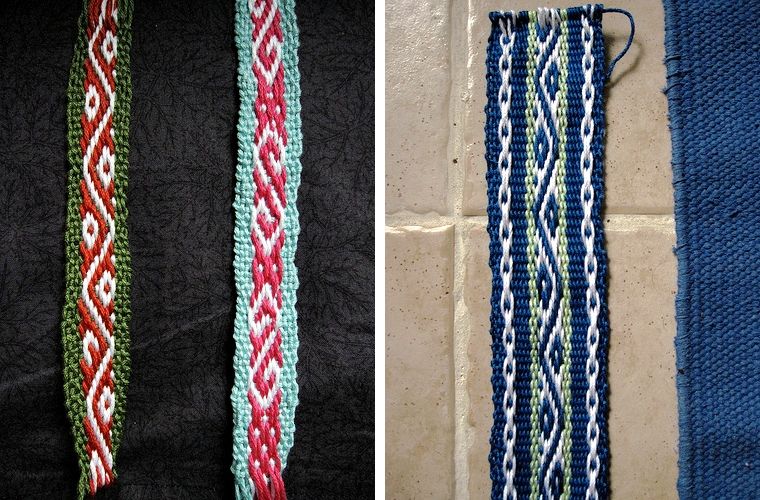
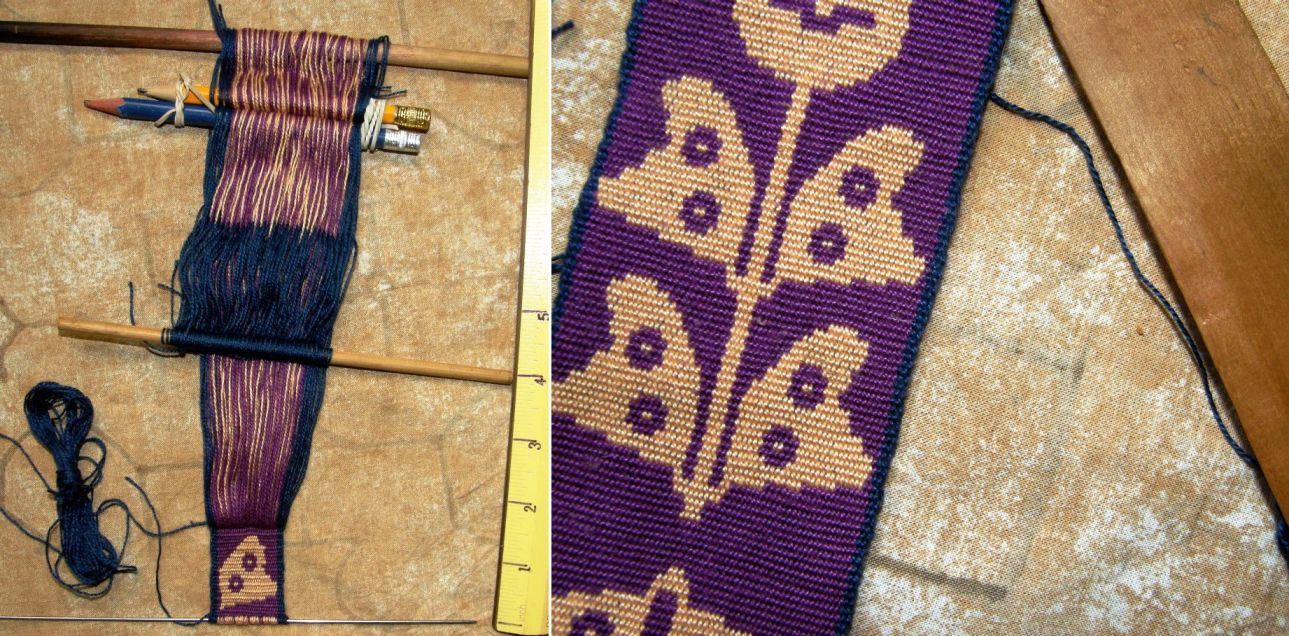
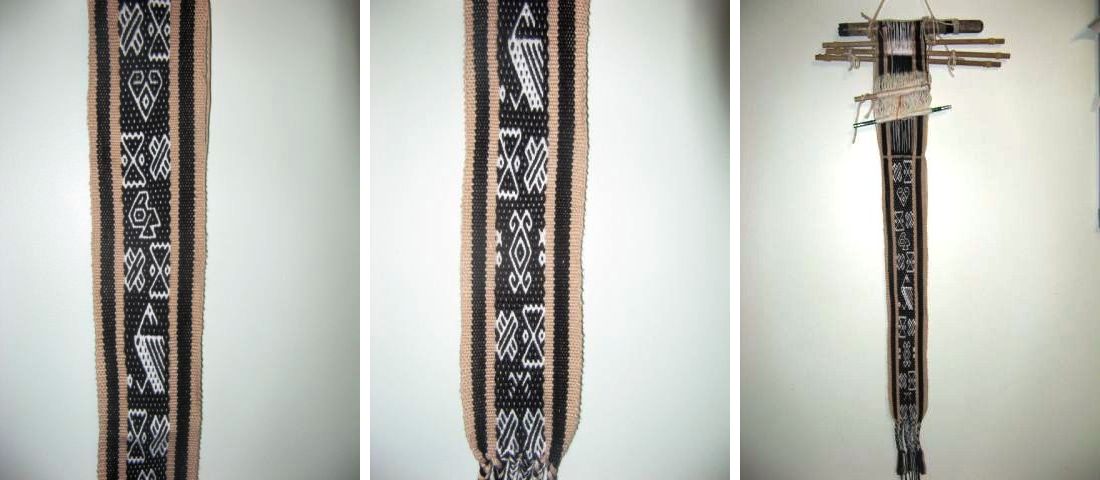
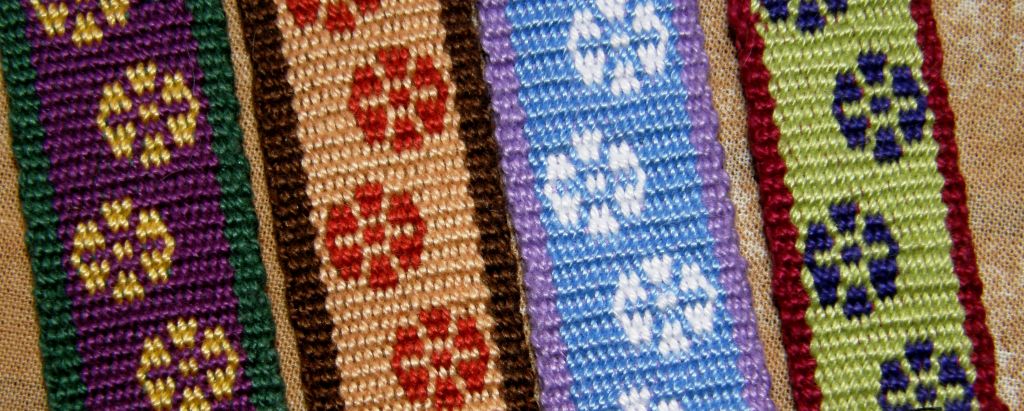
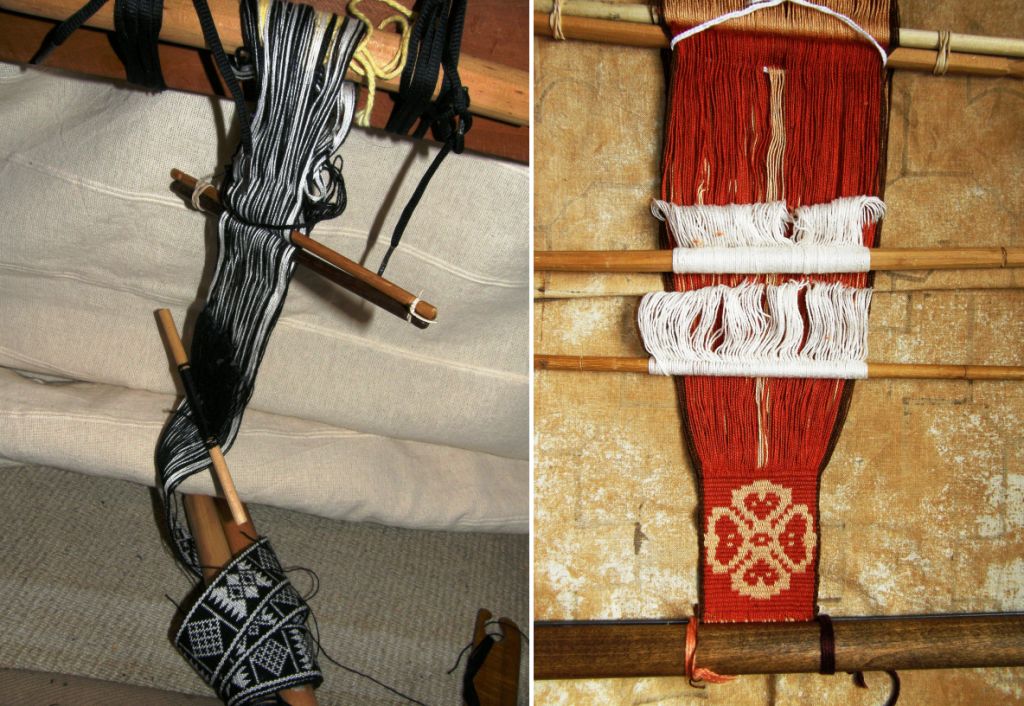
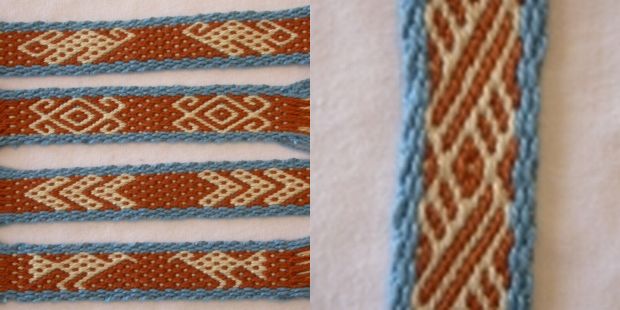
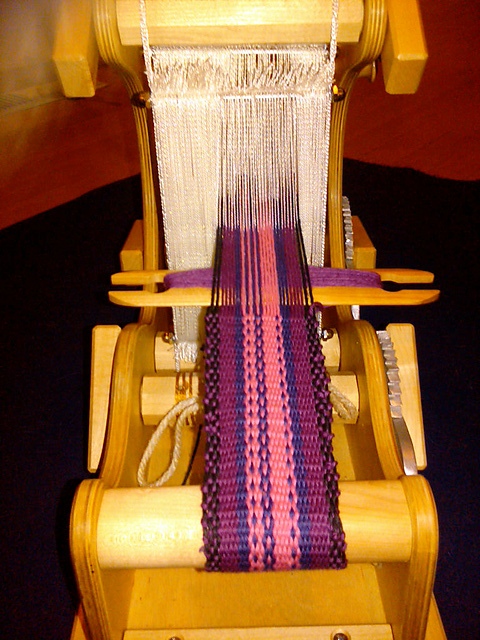
I don’t know what it was in the end that suddenly turned the light bulb on but the next time I went to the book…click!…and I was able to weave the above band. I have to say that the technique is not that difficult. You need to use three sets of string heddles and a shed rod which holds the warps for the fourth shed. That is not as bad as it sounds as it is a balanced weave which means that the heddles can be raised easily and cleanly. What I was having difficulty wrapping my head around was the charting system which takes some getting used to.

It is a technique for those who love pick-up. It uses two different colored wefts and has more steps than warp faced double weave…two weft passes for each layer… but I love the result!

So what happened? Where are all the lovely pre-columbian textile replicas that I had wanted to weave?

“Ravelry” is what happened! But even more importantly, I joined Weavolution, where I started my own backstrap weaving group, and was hit with a tsunami of weaving ideas!

Thanks to Ann Rowe I have two goals now for this structure… to reproduce the motifs on my fragments and to weave traditional Huichol patterns. Actually, the picture that Ann Rowe sent me was not my first encounter with Huichol weaving. It is a funny coincidence that back in 2007 while visiting the National Museum of the North American Indian in DC my eye was caught by a beautiful textile piece. I had no idea what the structure was and did not retain what the label had said but I roughly adapted the motif to pebble weave and used it in a hanging.

And again here…

Well, you probably have guessed that I now know that that is a Huichol weaving. That will be number one on my list of reproductions.

I was feeling uncomfortable by the end of 2008 about this abandoned project and so made it a resolution for 2009 and there it sat for another year as I wandered off on all sorts of weaving paths. Now I have returned but not with the pressure of a resolution weighing on me. I am simply in the mood for Finnweave! What put me there?….THIS!….
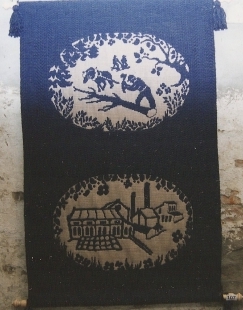
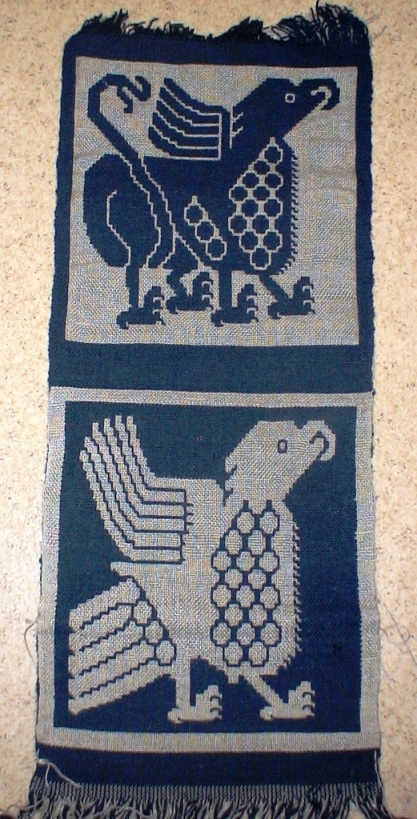
Last week Ane Lisbet posted the above image on Weavolution of a wall hanging she made in Finnweave using a floor loom. How beautiful!

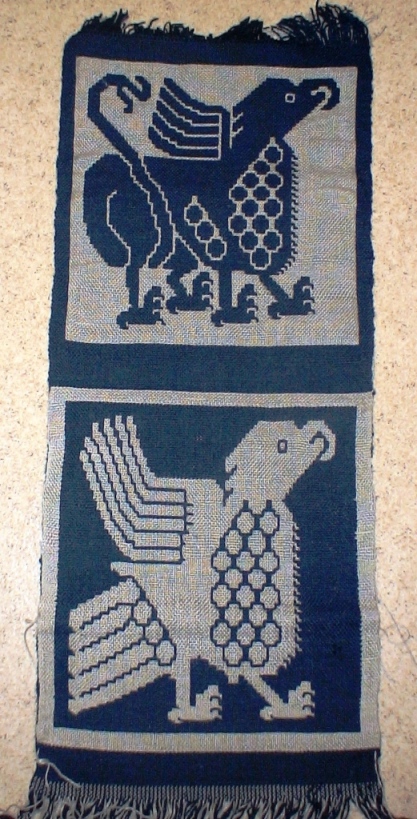
And if that wasn’t enough I was inspired to return to a discussion we had had on Weavolution last year about Finnweave and was able to get reacquainted with this amazing piece at left woven by Manicgirl on a floor loom.

Hans Christensson also participated in that discussion and was very helpful. At that time he was taking part in a project to find new designs, usage and materials for Finnweave. The project concluded with an exhibition at the Museum of Bohuslan in Sweden and now I see that he has written a book on the future of Finnweave with his new computerized way of designing and interpreting patterns. He has plans to translate it to English.

I will have to be patient waiting for the translation. So, out came the instructions from Double Woven Treasures again, the pages now covered with my scribbled notes and, you know what?, it looked like a mind numbing maze all over again only messier this time with all my notes!

Back to square one. Well, not really. I warped up to make the same design as last time and after one repeat, remembered, and  felt confident enough to move onto something else.
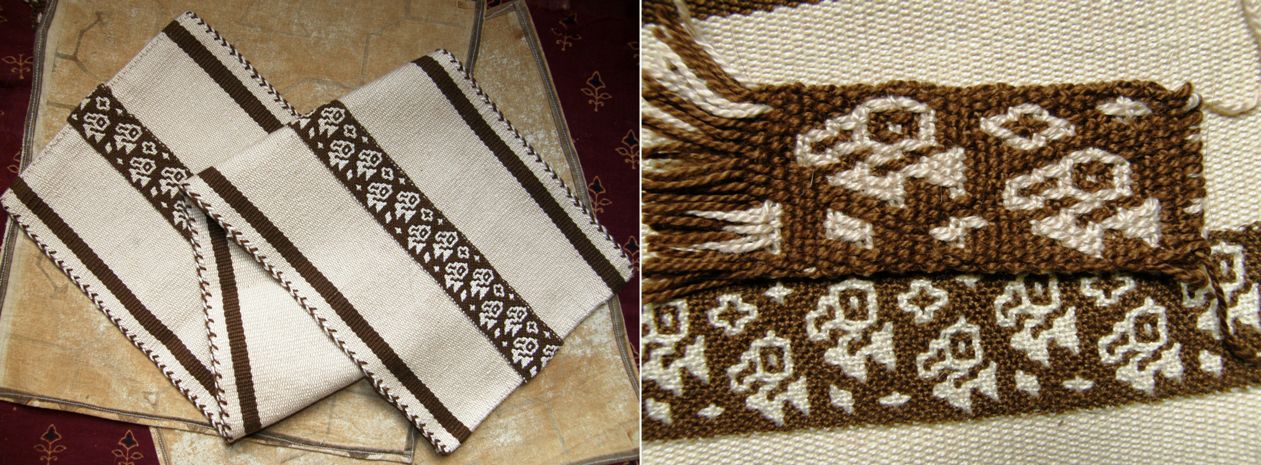
I wove it this time in a heavier yarn and it should be much wider. You can see that the brown areas are more warp predominant than balanced but it helped to refresh my memory and got cut off the loom very quickly.

Thanks to some kind Weavolution buddies I got an article from the Prairie Wool Companion April 1982 issue which introduced me to the wonderful world of weaver and author A. David Xenakis. His article is not a project, not a lesson, he calls it an “Etude”. I love this! Only the other day in one of the forums someone compared sampling to the scales one has to practice when learning the piano and so we can go back to the music lesson metaphor now. I love Mr Xenakis’s writing style…so very proper! He amuses me by saying please when he gives his instructions…please wind the warp…please wind two stick shuttles.

He shows the same charting system as that used by the authors of Double Woven Treasures from Old Peru. Thank goodness, I didn’t feel like learning another! After giving detailed instructions for one half of the motif, we are given this piece of advice…

Take a deep breath, stand up, pace around a bit and relax. Nothing in finnweave will ever be as hard as this first small woven figure. New things always take a bit, do they not? But if you’ll persevere, I truly believe you’ll be rewarded with a sense of accomplishment second to none you’ve ever derived from your weaving.

I am sure the folks in the backstrap weave-along on Ravelry will smile if they read that! The result…
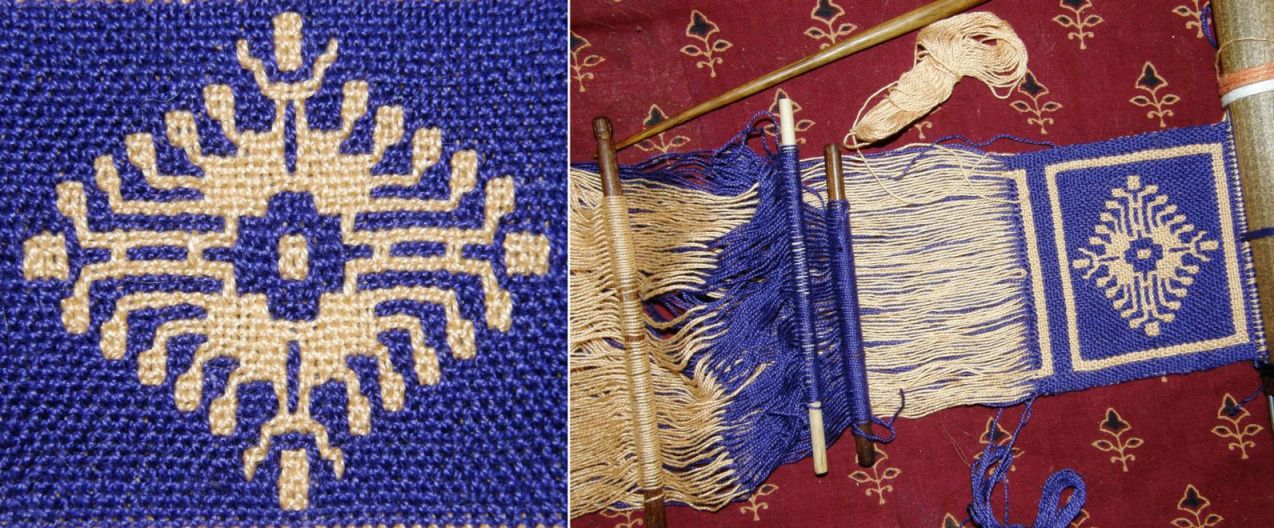
He then gives pattern charts for some lovely traditional Scandinavian designs. So, I am doing my warm-up, my scales and my etudes for the final goal…finding myself comfortable enough with the charting system to be able to chart directly from a textile and reproduce the motifs. I need to experiment a bit with how I turn the two colored wefts at the edges. As always, one edge is neater than the other.

It wasn’t long ago that I knew of only one pick-up technique that enabled one to produce a motif on a solid color background, that is, a background without pebbles, speckles or horizontal bars and with no long floats on the back. Now I know three…
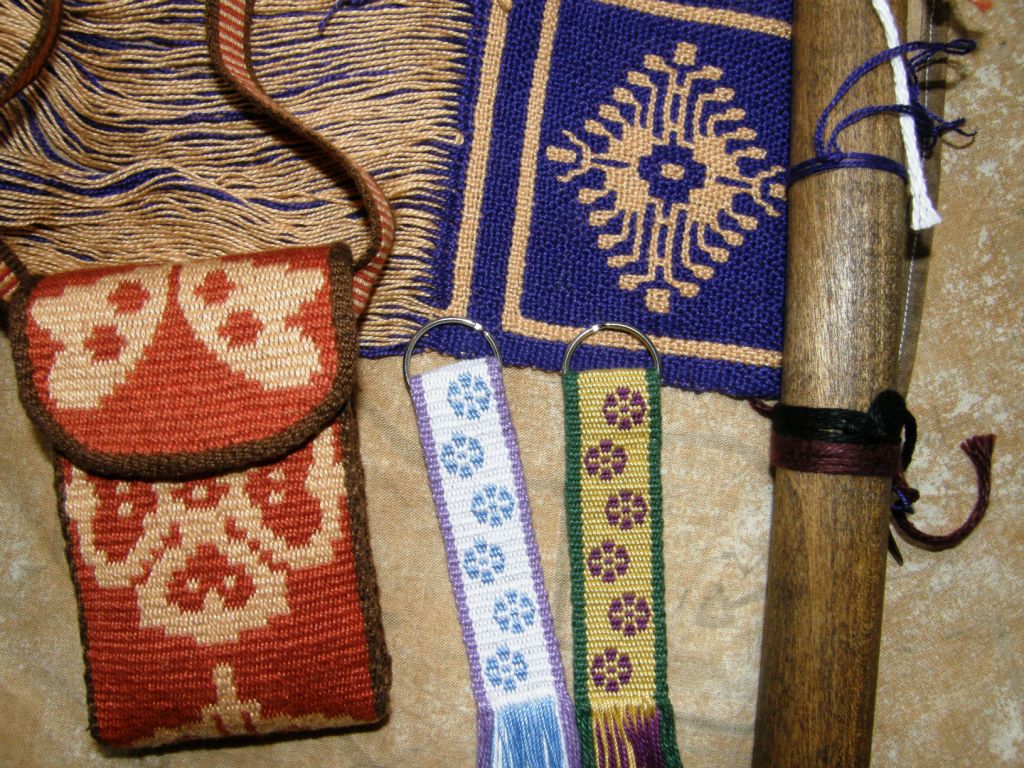
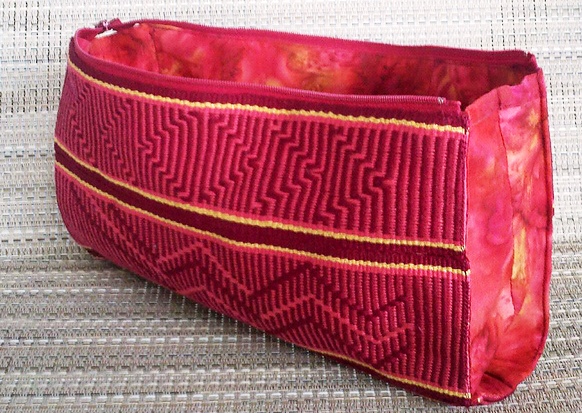
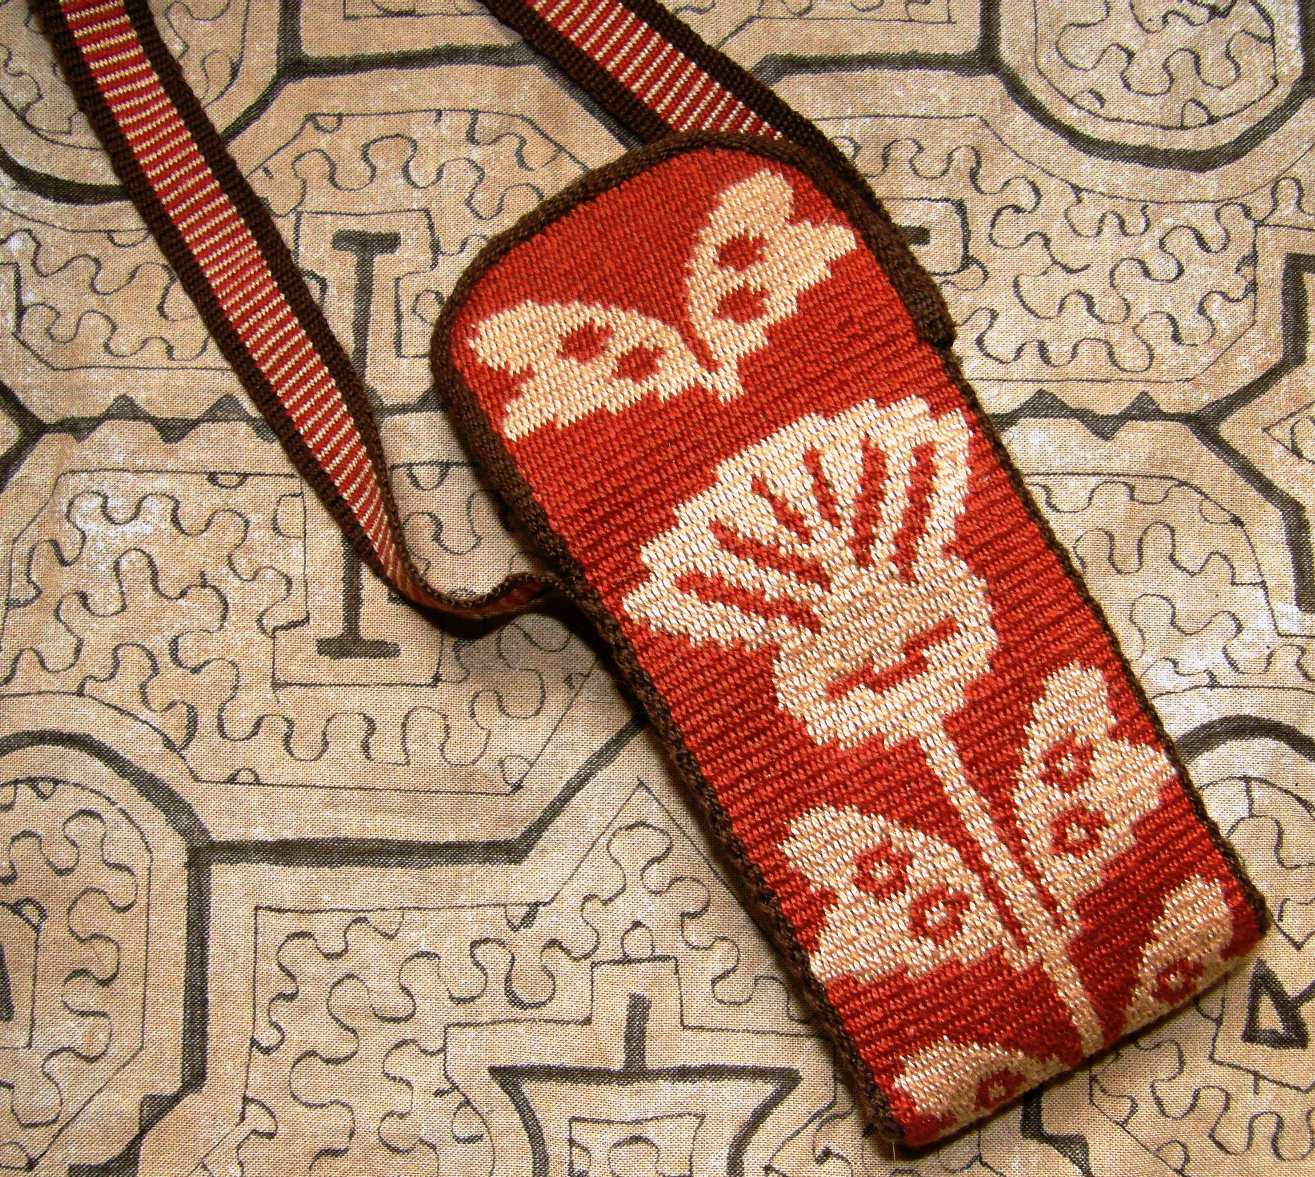
I also finished the warp faced double weave cell phone pouch with the Guarani designs…
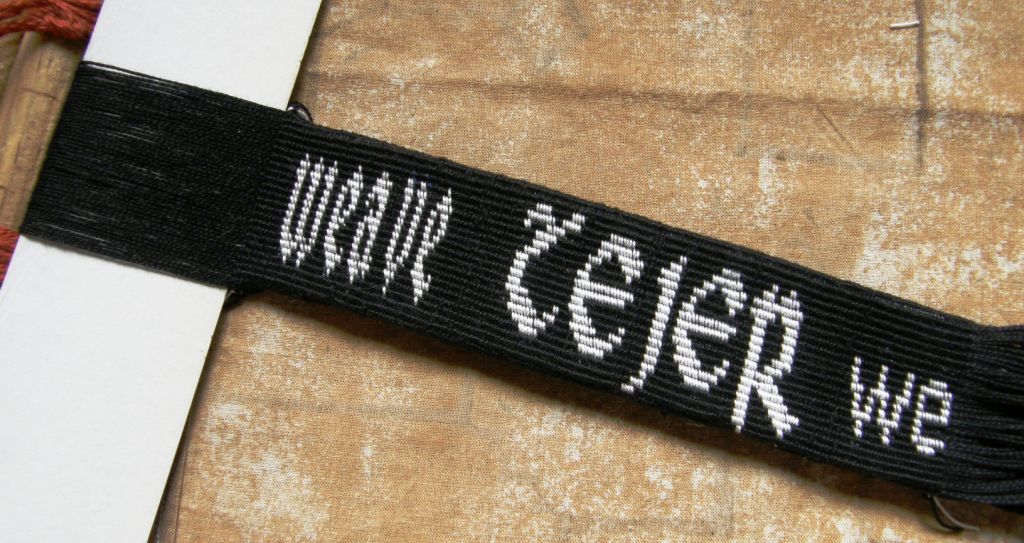
And managed to twine most of another word…
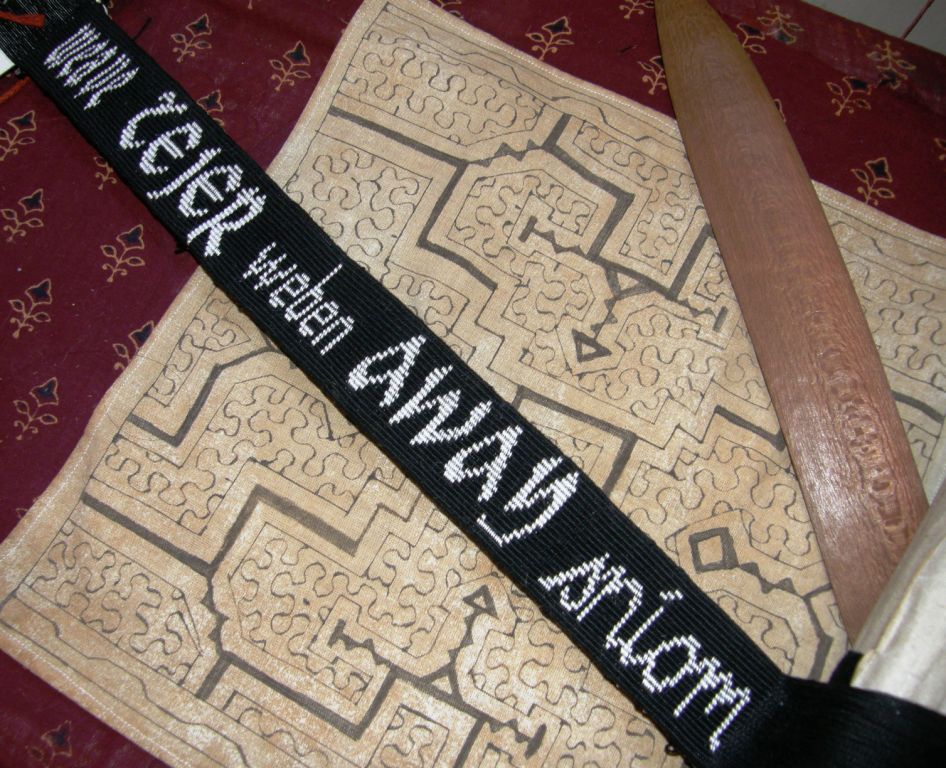
There’s an “h” yet to be twined and that will be the Gaelic word for “weave”.  I received the Navajo word from DY and  the Slovak one from Alexis. This is the strap for my woven loom bag. I am planning the zipper pull. As I have a woven bag and a twined strap I am probably going to braid the zip pull…maybe I’ll do the Margarita braid.
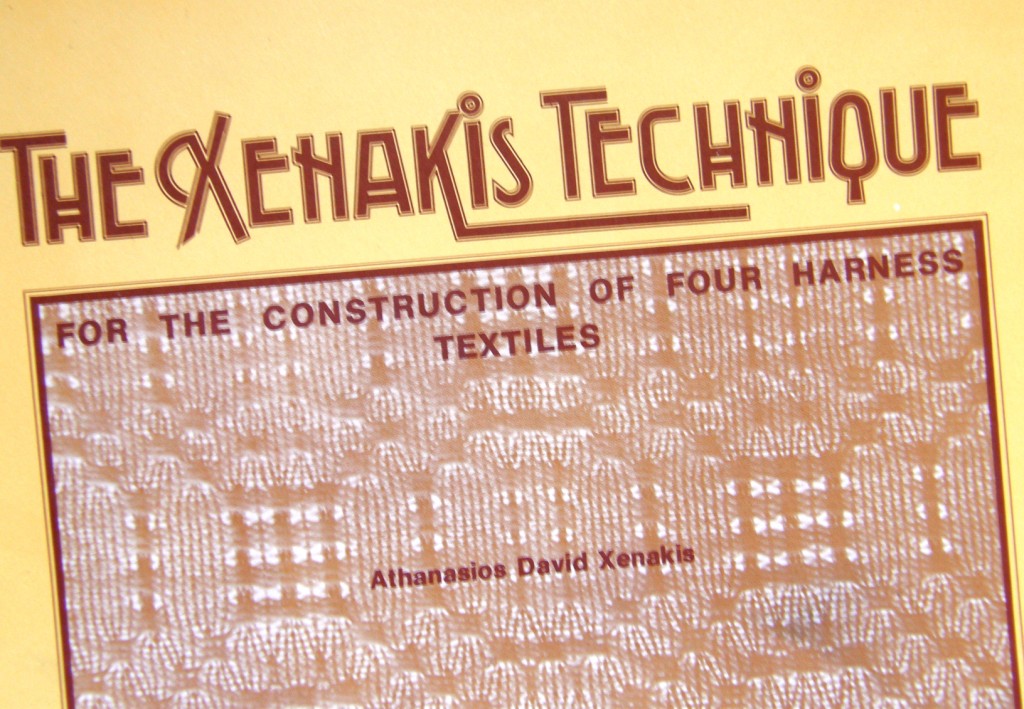
I remembered after finishing Xenakis’s Etude that, on a whim, I had bought his book on weaving four harness textiles on a rigid heddle loom a long time ago. I had done nothing more than flip through it and admire the Finnweave cat on one of the first pages. Here, once more is the very proper writing style. I flipped through it again the other day and his amusing description of string heddles caught my eye. I am a big fan of string heddles. He is obviously not. He says…

“I find the sight of this stringy paraphenalia unappetizing.”

But he goes on to say that if you don’t have a third rigid heddle, you should use a string heddle “without hesitation and appetizing be damned.”

Cracks me up!

So, what’s been happening in the backstrap weave-along this week?

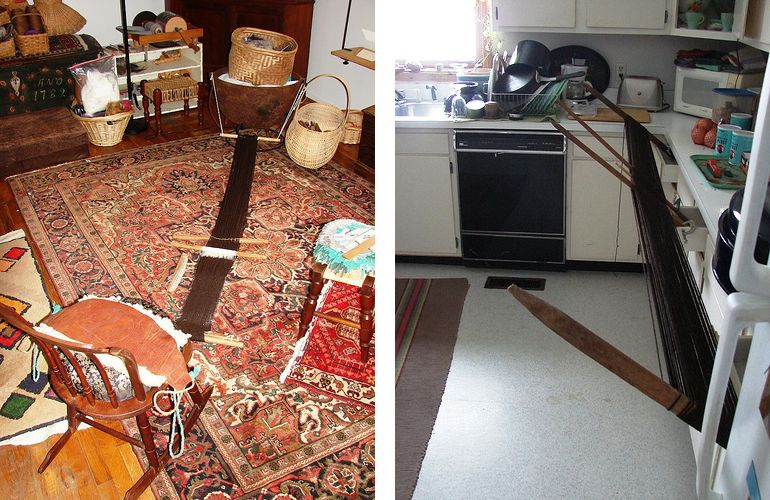
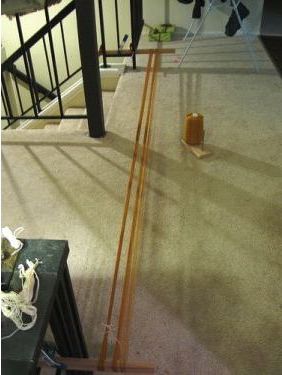
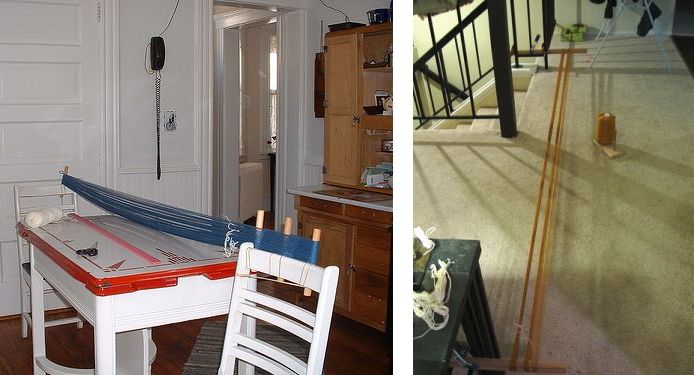
Warping arrangements have been designed and built…

This one was designed by Jennifer and built by her husband.

New places to tie up looms have been found and wool has been prepared…

Phil has moved to his sunny kitchen to weave and has spun a good amount of wool for his next project. He has placed a snake motif on his woven band using a supplementary weft.

New structures have been learned to make thicker, sturdier fabric and a backstrap has been made…
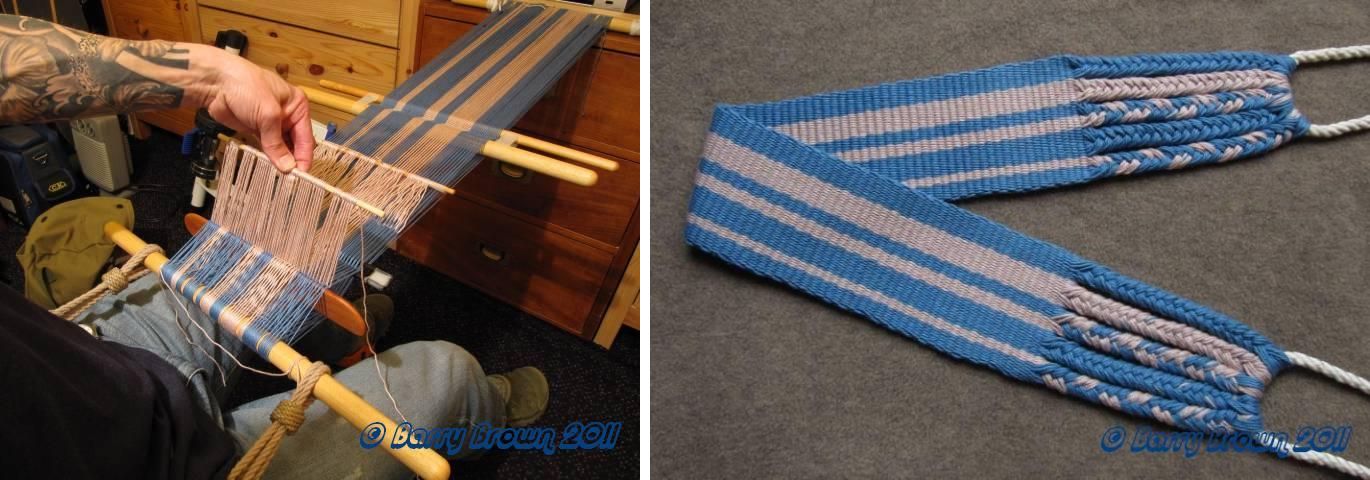
That’s Barry. He finished his backstrap with a five-strand braid.

Pieces were started and finished…

Marsha has started her widest piece ever on her Wave loom. Linda, who is not in the weave-along, has been sharing pictures of her projects with me by email (thanks Linda). She has finished her backstrap.

Jennifer also made a backstrap using a pebble weave motif from The Art of Bolivian Highland Weaving.
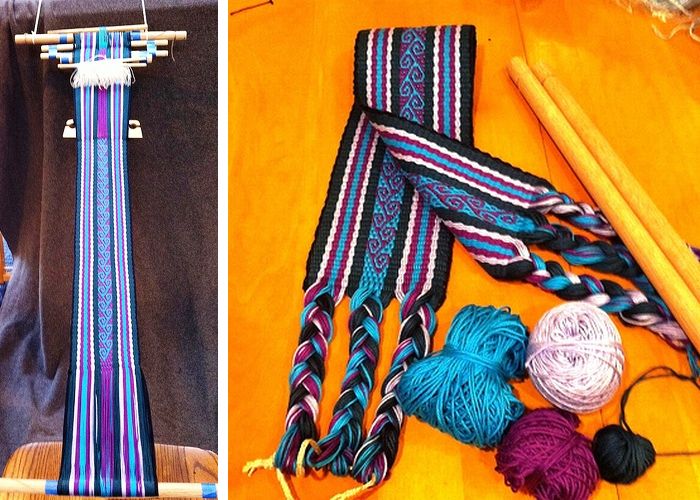
Jenny has been very much inspired by all the beautiful things that Marsha has been producing on her Mini Wave loom so, she ordered one and has just joined us to make her first warp faced project.
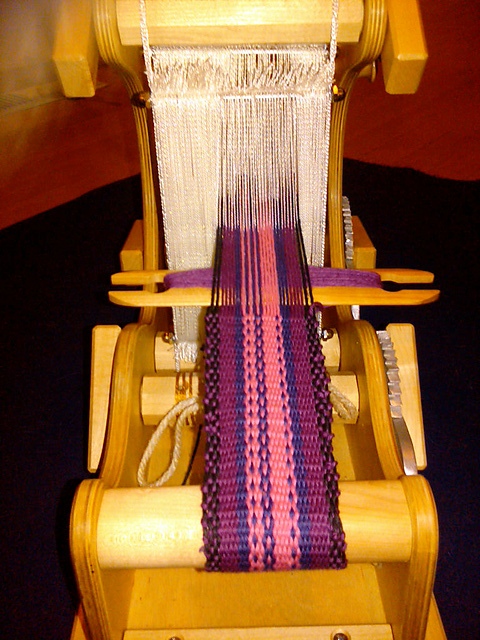

Another week of progress with encouragement from all when things went wrong…the reminder that mistakes are learning opportunities…the fun of seeing Anja’s “mistake” turn into a new pretty pattern.

I will leave you here with Mr Xenakis’s take on mistakes…(which comes in the middle of an explanation of tie-ups and sequences)…

Probably nothing is ever truly an error.  …….it is worthwhile to note that an error – in the words of America’s premier knitter-designer Elizabeth Zimmerman – when repeated, becomes a pattern. Which, were we of a philosophical turn of mind, might be the key to whole new vistas of thought. Think about it: at the very least, the regular repetition of an error indicates persistence.

Your pardon, a freely associative mind hath led us astray.

I think that I will have to drag out my rigid heddle loom just so I can enjoy this author more!

Backstrap Weaving – Barefoot Weaving

As the Backstrap Weave Along progressed on Ravelry this week and I got on with my own projects here at home, I was once again reminded of all the reasons I love the backstrap loom. Two things stood out in my long backstrap loom-love list…

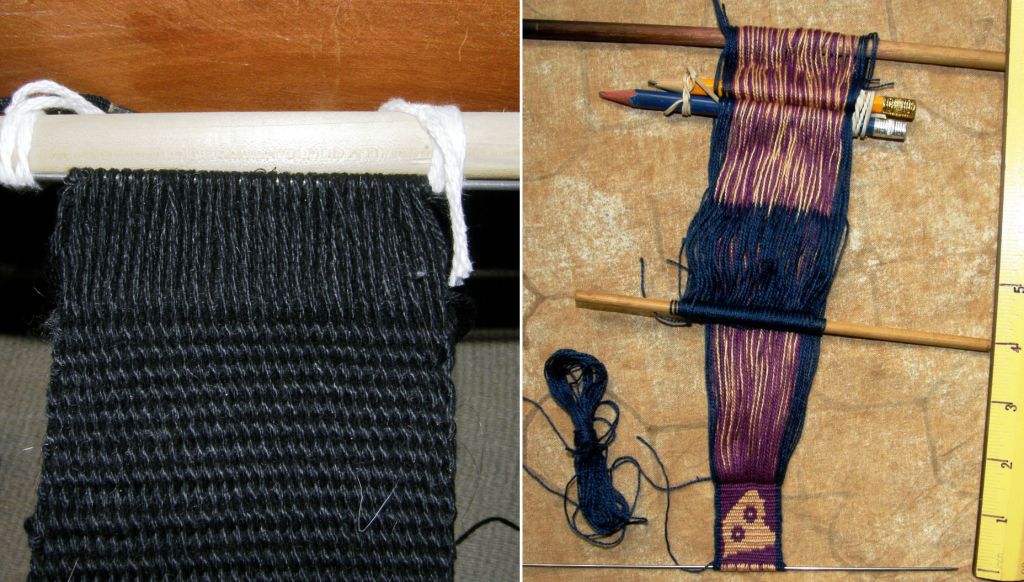
Number one: Minimal loom waste! One and a quarter inches in this case. I could have made it a four-selvedge piece and wasted nothing but that wasn’t necessary for this project. This is the back panel of my loom bag.

Number two: The ability to weave on tiny warps. I needed to sample a new design I was charting to check for scale so I was able to wind and weave on a ten and a half inch warp. In fact, I probably could have gone even smaller.

Which brings me to the title of this blog post:

BAREFOOT WEAVING

When I was teaching English here we had a visit from an American teaching consultant who introduced us to the concept of what she called “barefoot teaching”. She had developed this after having spoken with many teachers, especially those living in the developing world, who had convinced themselves that they simply could not teach effectively without flashcards, computers, dvds, interactive boards and all other kinds of whiz-bang audio-visual aids. It basically involved setting yourself the challenge of leaving all the tools at home and going into class with nothing more than a lesson plan and a piece of chalk (as well as a lot of enthusiasm and creativity)…in other words “barefoot”.

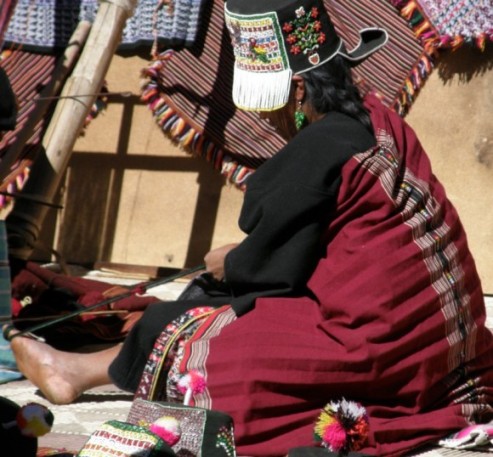
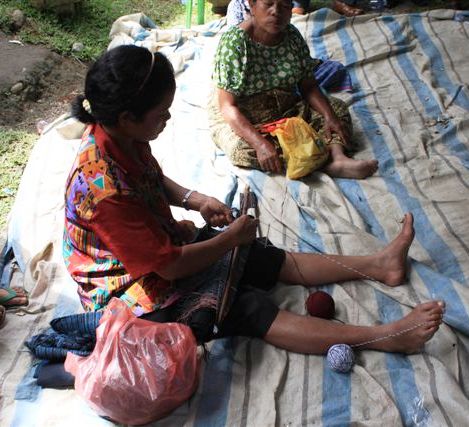
Talk in the backstrap group during the weave along got me thinking back to my first Peruvian weaving teacher and what one really needs to get started in backstrap weaving…basically your back, some thread/yarn and a toe! (and a teacher or an example to follow). Real barefoot weaving!
Little Juan Miguel above has a stake driven into the ground to which his warp is attached – his only real piece of equipment. If it were a shorter warp, he could use his toe. A string passed through the end loops of his warp goes around his waist and acts as his “loom bar” and “backstrap”. He is using a string loop for one shed and string heddles for the other. He isn’t even using a beater or sword. His hands do the trick. After passing the weft he opens the other shed and pulls the upper layer of threads up while pushing the others down in  order to force the weft into place.

A warp can even be wound around a forefinger and toe.

Don’t get me wrong, I won’t be tossing out my loom bars. I like using them even for the tiniest of warps but it is nice to think back to how I got started. We used pencil-width sticks about five inches long for loom bars, slightly longer ones for cross sticks and we had a beater. My teacher tied a cord around my waist and lodged the stick under it. Cord was passed through the other end of the warp which was attached to a rose bush so we could weave tiny pebble weave bands.

Here is my first teacher with her set of small tools. Oh yes, long thumbnails help too for heddle making and separating warps. I am at home now and have let mine grow shamefully long!

So, that was what I was pondering while visiting the weave along forum. Others there have had cause to ponder their yarn and project choices…another week of successes with some frustration thrown in but the sense of humor permeates all…

Here are some results…

Jennifer has gotten started on her first double weave project and has found her ideal place to weave attached to the kitchen counter.

Tracy has left us to go to India for two weeks but posted pictures of her pebble weave bands before she took off.


Jennifer also extended her pebble weave skills to a pattern in Marjorie Cason and Adele Cahlander’s book. Bobbie moved on to fine number 10 crochet cotton and wove a pebble weave band too.

Fliegnepilz finished her pebble weave band. She took a classic design and added her own ‘twist’ by alternating the color of the diamonds. She named this project “Open Sesame!” when she posted it on Weavolution…I must ask her about that. She made this into a keyfob.

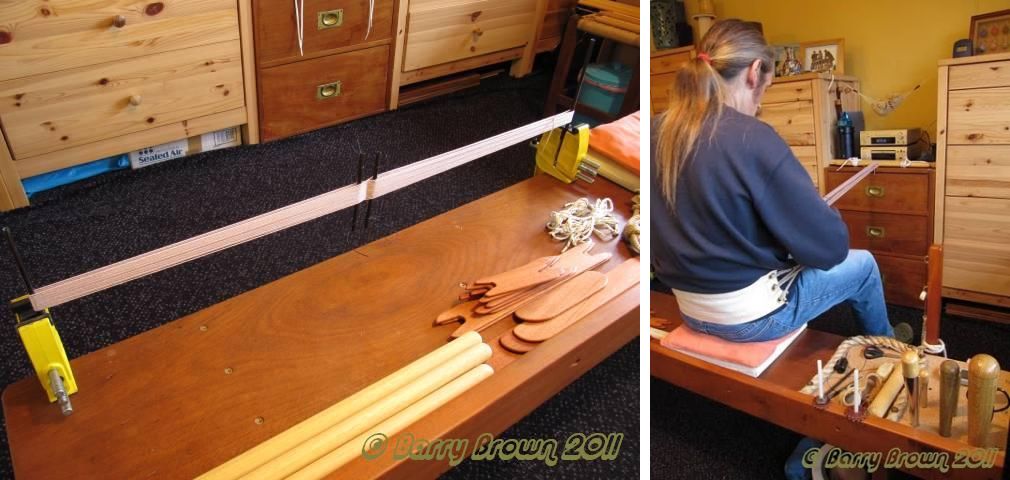
And then there’s Barry who recently joined the group and posted pictures of his warping and weaving set up…all his own handmade tools.

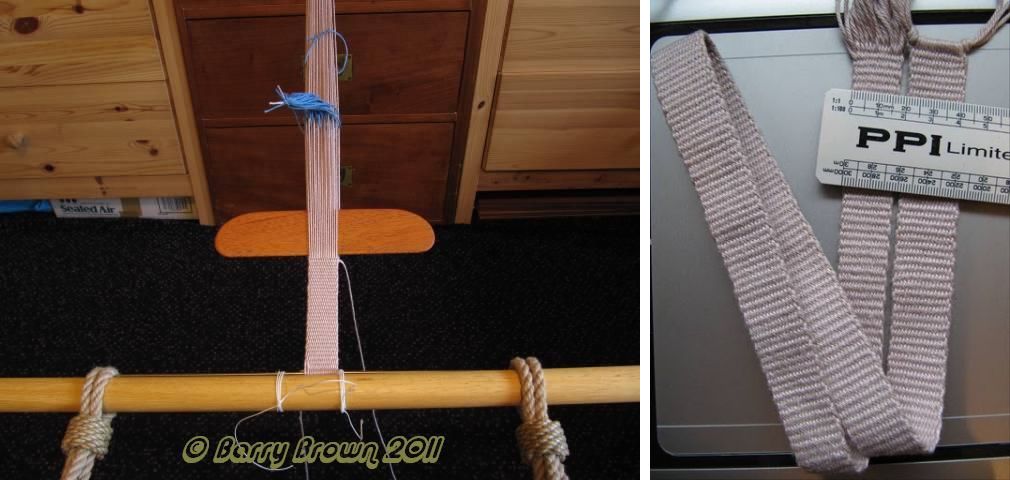
And the result of his work…his first backstrap woven band…

He is pointing out the fact that his band narrowed slightly toward the end, he knows why and knows how to prevent that for his next project.

I also got some pictures from blog reader, Linda who is weaving the practice band that I recommend in my WeaveZine article…


Basically everyone is sticking with narrow bands to learn and practice new techniques which is the best way to develop all those new skills. We have  come to the conclusion that going wider should be taken in baby steps. A couple of people have warped up for wider projects but have decided to stop and rethink as the leap was perhaps too great.

Jennifer has the brilliant plan of sewing several narrow bands together to make a small purse. Marsha has been doing that for some time with her simple warp float projects creating the purses and tote bags that I have shown here in past posts.

I decided to gather some sample bands and leftovers to show you here what one could do to make a simple piece wide enough for a tiny purse. I don’t have great variety of colors to show. These have been done in my thick demo yarn which does not come in many colors.


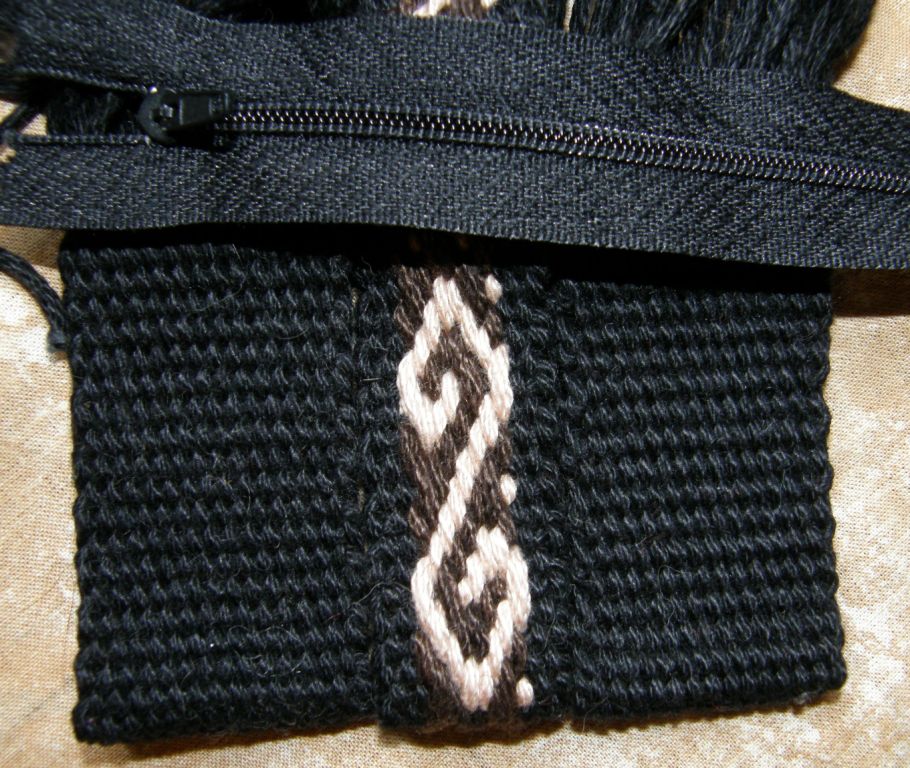
I have these two black off cuts from the loom bag I am making plus a pebble weave sample band I made ages ago. These three bands could be pieced together to make something. I have just placed them here together as an example.  A Van Dyke or other embroidery stitch could cover the joins if they are too obvious.

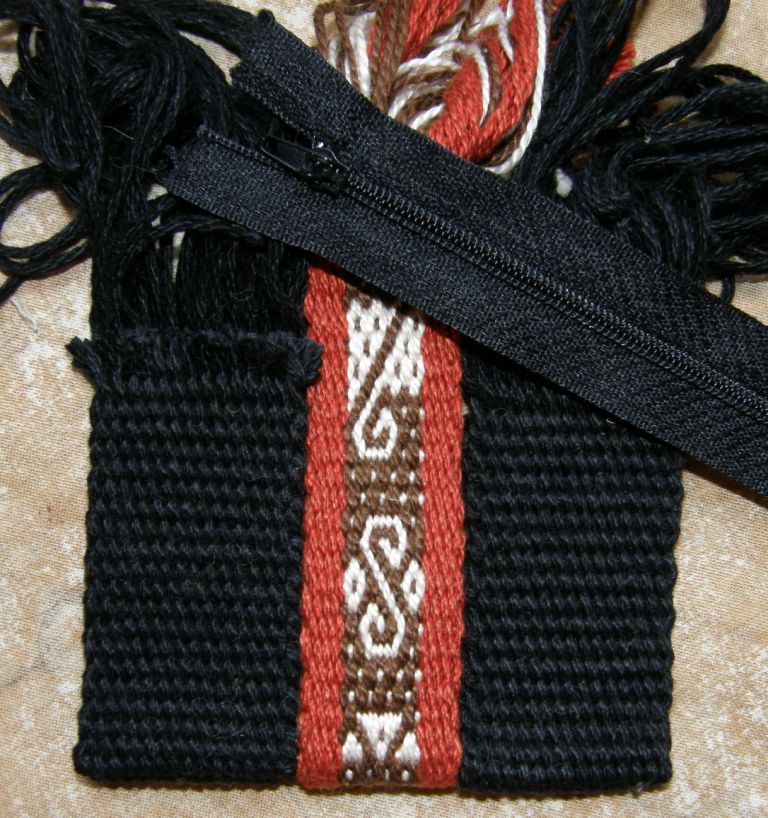
Here are the same two off cuts with another simple sample band that I have made in finer yarn.  Join them , add a zip and voila! a small coin purse or credit card case. You can see another even simpler red and white pebble band below.

Turn over the raw edges and sew in the zip…

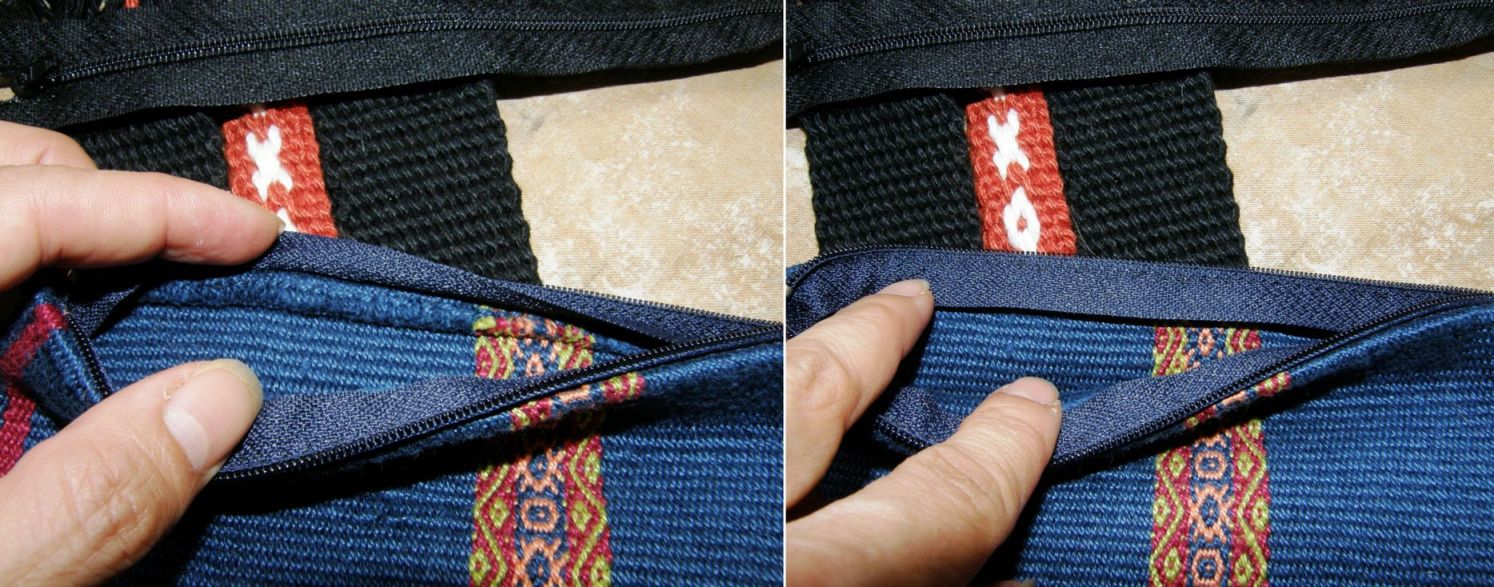
You can see on the inside of this bag that the raw edge gets hidden and protected by the zip. I hand sew and it took me a few attempts to get the knack of correctly placing the zip.

Speaking of zips and hand sewing, the loom bag is coming together…

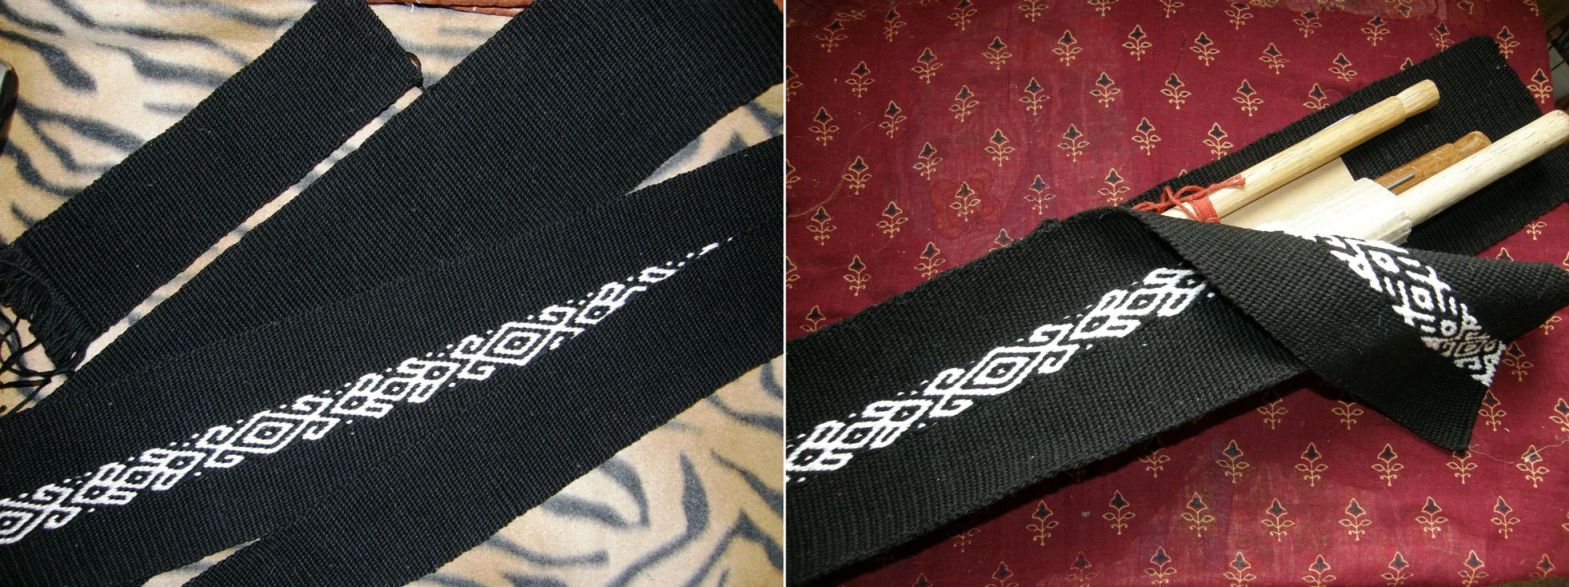
You can see the front and back panels and sides on the left and there it is pieced together on the right. What is missing is two narrow bands to go up the side around the top and back down between which the zip will sit.

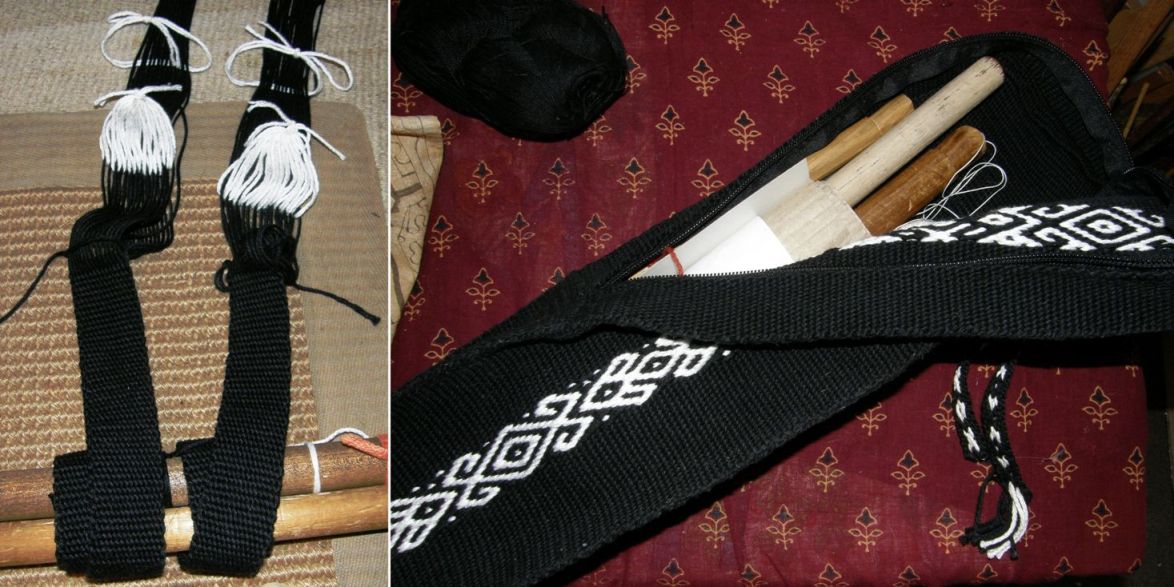
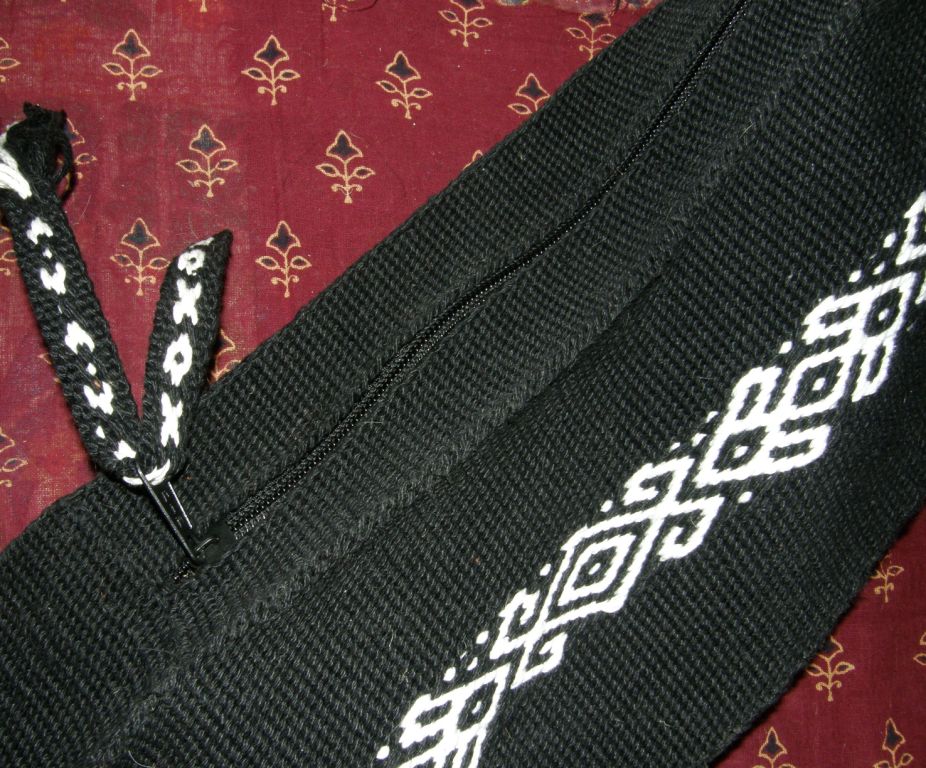
There they are. Just for the fun of it I decided that, rather than weave one long band and cut it in half, I would weave two side by side on the loom. Montagnard weavers often weave bands like this as it helps balance their really long loom bars which have been designed for wide pieces. I didn’t find any particular advantage in terms of speed or efficiency in doing it this way. On the right the bands are in place and the zip has been sewn in too. Thanks to that marvelous market stall called Buckle Land I can buy zips by the meter. They measure out your zip and then add the “pull ”. (What in the world do you call that thing?)


The zipper pull will have a woven tab…I just put that band in there for this photo.

The strap will, of course, be the twined band I have been working on for the last couple of weeks.

I only got one letter twined this week! – the ”s” of the Gaelic version of the word ‘weave’.

I am happy to say that I now have the Navajo, Ladahki  and Finnish words to add to my collection.

And then to decide…to edge or not to edge the bag.

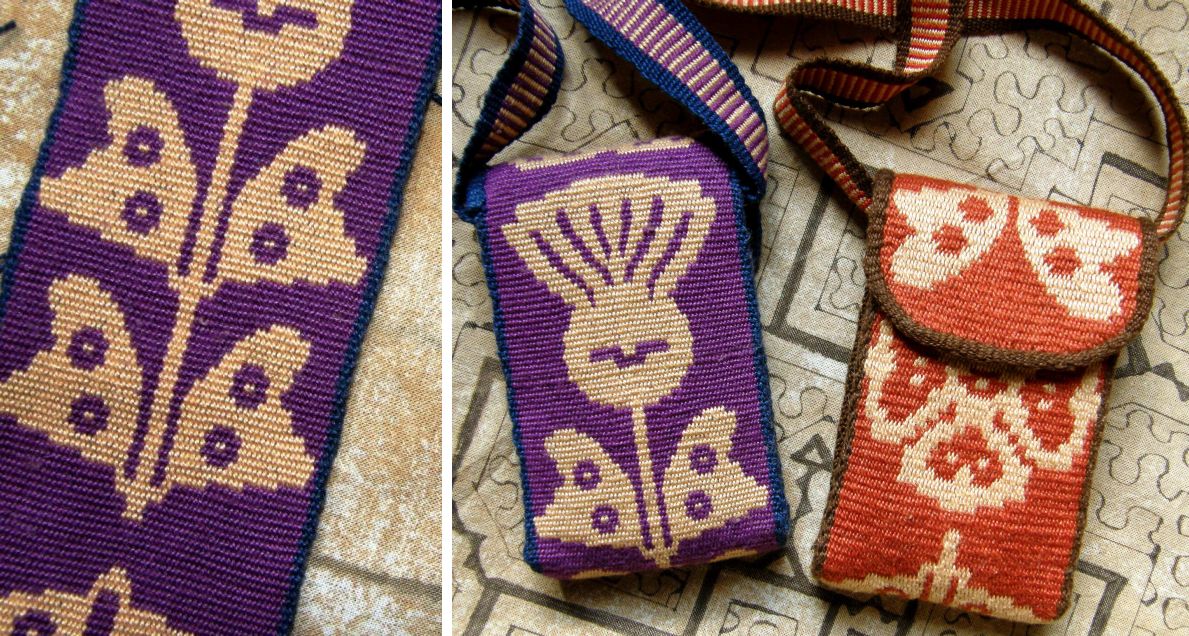
The other thing I was up to was charting the Guarani design from my cell phone pouch and seeing how it looked in double weave. As both double weave and the Moisy technique give a solid color background I was interested in comparing them. Even though I made a sample and then made adjustments to my chart, I didn’t quite get the scale right. It is elongated, but I did find out in the process that it is possible to weave a pretty good looking circle in double weave.

I am up to the head of the nettle (this is what someone on Ravelry called what I had thought was a flower and I think she is right) and have made a warp long enough to make two cell phone pouches.

Here is the same design in the Moisy technique. The design is “softer” this way and I prefer it.

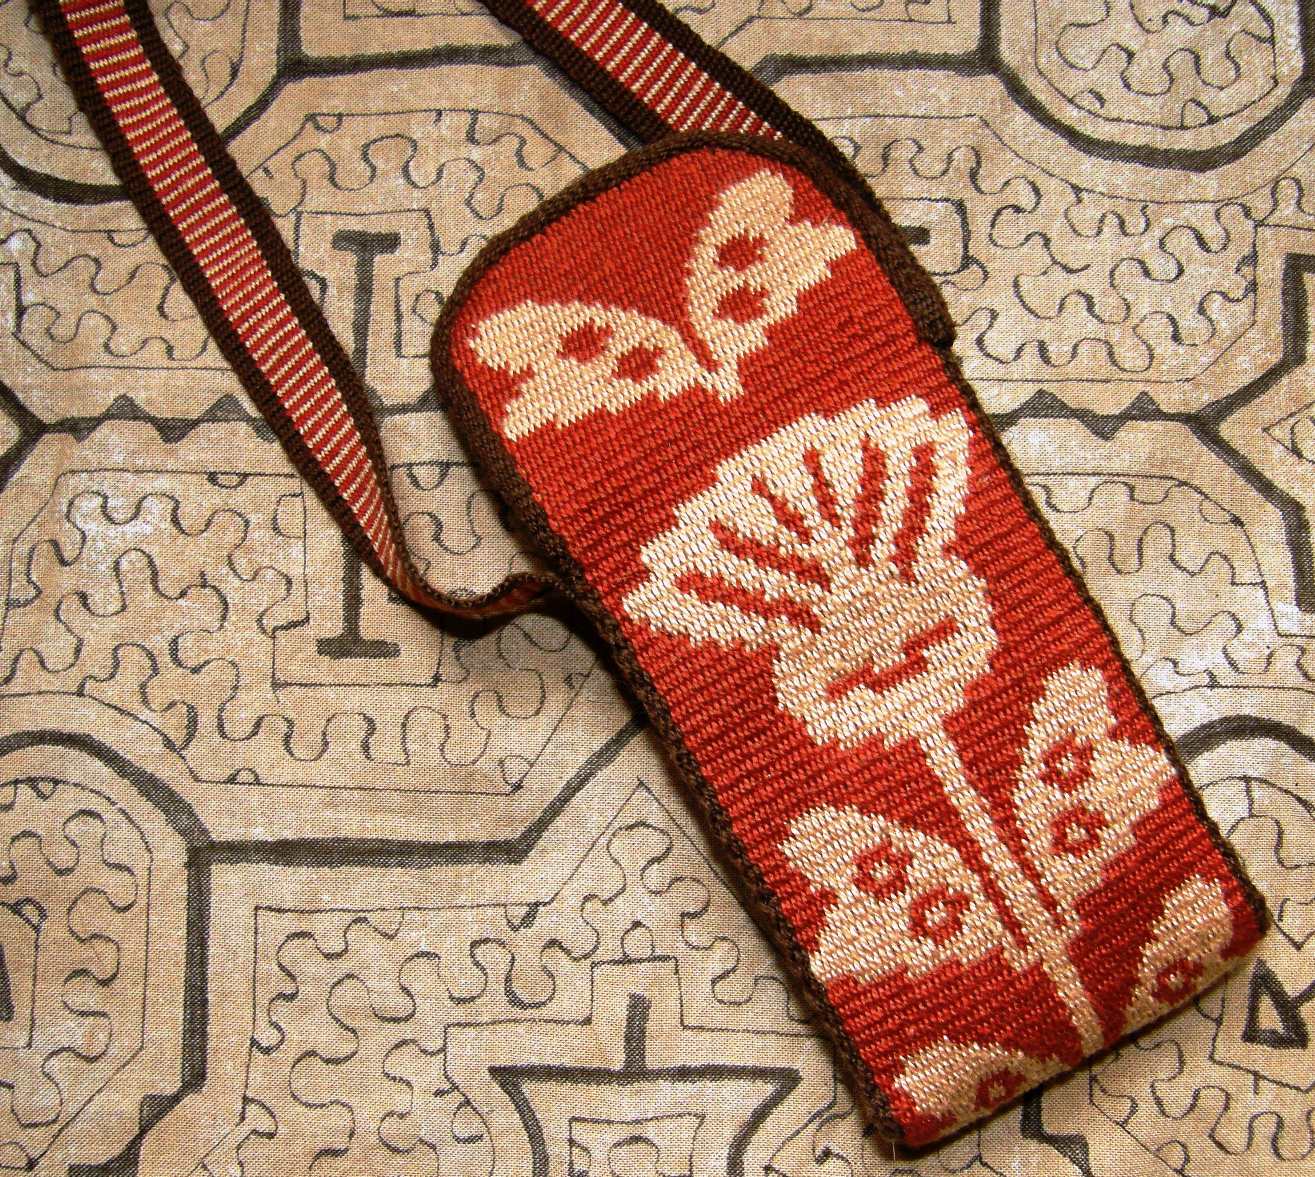
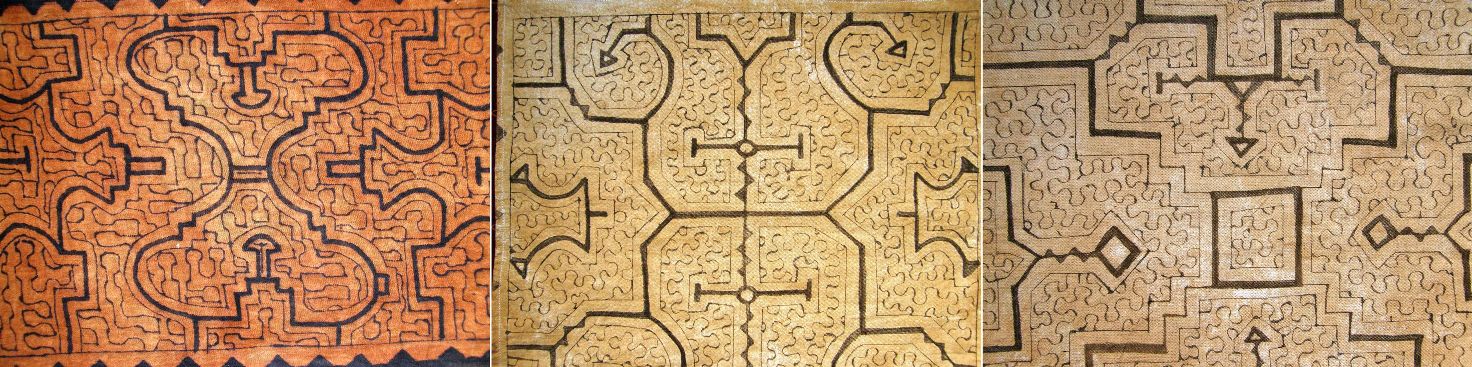
I am reposting this picture because someone asked me about the fabric on which I have posed the woven bag and I wanted to tell you all a little about it. We often forget that apart from the better-known highlands, the countries of the central part of South America also have their tropical lowland areas. In Peru around the city of Pucallpa, (which is, according to Wikipedia a sister city of Miami) in the central eastern part of the country, live the Shipibo people who paint these designs on cotton fabric with vegetable dyes. I am told that rubbing the cloth with a certain kind of mud is also part of the process.

The Shipibo people are also well known for their pottery which is decorated with similar designs. I remember making fabulous plans when I lived in Chile to visit this area which included a three-day river boat trip…don’t know what happened to that itinerary…but I ended up buying pieces of the Shipibo cloth in Quito of all places…

There are two nine-minute long YouTube videos that show the painting process here and here.

And there is something else that I found on Youtube about which I am really excited. It is in Paraguay. I have to tell you that even though Paraguay is a neighbor to Bolivia, it does not make it to my list of places to visit. I would consider flying to Asunción in order to go to Iguasu Falls but that is about it. Well, all that has changed.

I was looking around for information about the Guarani people and their weaving and came across images of what is called the “poncho de sesenta listas” or ”para i” in the Guarani language, the sixty-stripe poncho made by Guarani weavers in the area around Piribebuy in Paraguay. They are basically, as the name suggests, striped, but with a broad patterned woven band sewn around the four edges. They are made from cotton and considered a lightweight summer garment.

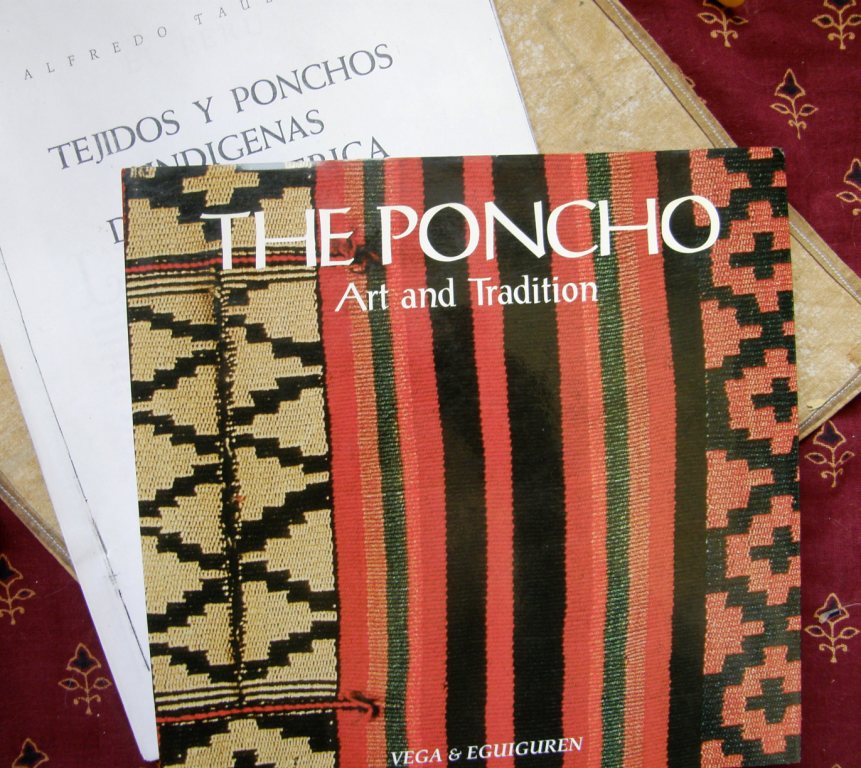
I have a couple of books on ponchos, and although a page is dedicated to the sixty-stripe poncho, the information is mostly historical with barely a mention of the looms used (Creole, it says) or the process.

Thank goodness for the internet. If you use your google translator you can read about them and see a really nice image of one here and it is here that I found out that they are woven on backstrap looms.

How strange, I thought, considering that the Guarani weavers here do not use this type of loom and do everything on vertical looms. Could this be a mistake? I was dying to find out more and then came across this wonderful video…It is lightweight and loads very fast.

The first minute shows scenery of Paraguay and then we get to meet the weaver and see her warping her loom. She warps it end-to-end rather than using a circular or dovetailed warp (which I will tell you about a little further on). Imagine the distance she walks during the three hours it takes to warp. Then see the warp stretched out. I wonder how difficult it is to maintain good tension on such a long warp.

The loom is actually attached to a beam that is fixed to the back of her chair rather than to the weaver herself. It looks like the chair can rock and at one point you can just make out how she rocks forward to take a little tension off the warp to help open the heddles.

Note the stick in the warp attached to rope that she is holding with her foot. I have never seen this before here in South America. The weft is on a little spool which she deftly passes through the sheds. She doesn’t seem to beat very hard either. She must have her cloth somehow clamped and then pulls it through the clamps as the work advances and she seems to be quite comfortable leaning far forward to weave.

And, finally, check out the way the two ladies are making the fringe at the end!

So, when am I going to Paraguay? It is probably as hot and horribly humid there as it is here at this time of year. I might wait for cooler months. I am also waiting for responses from some people I am trying to contact about it.

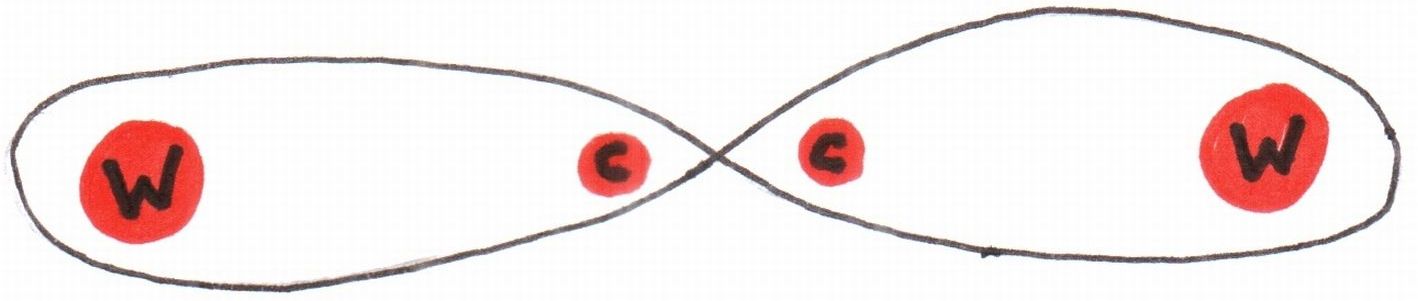
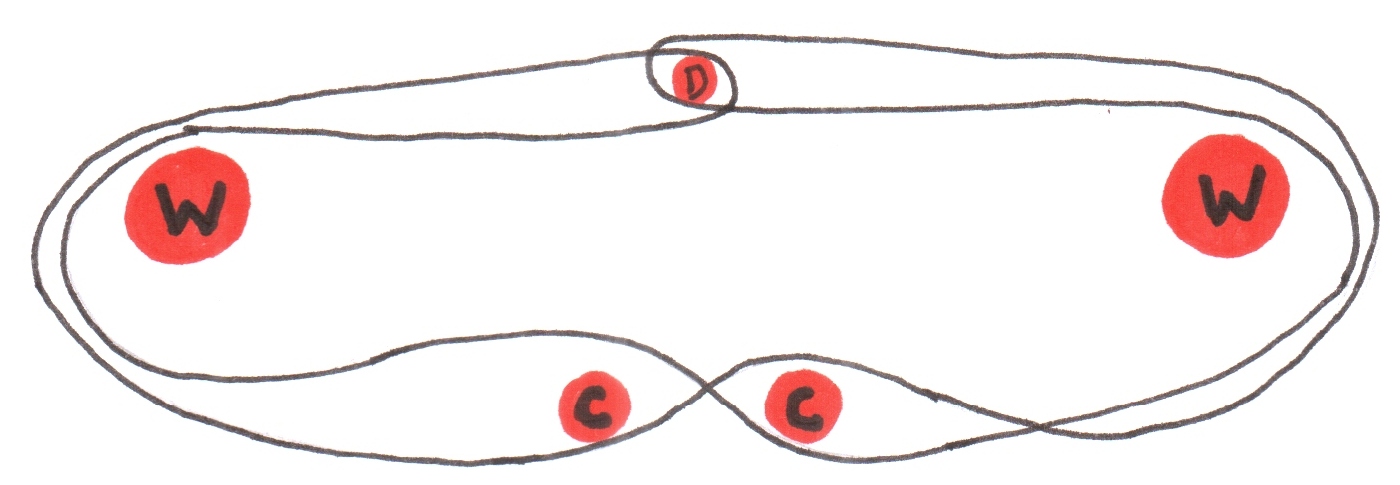
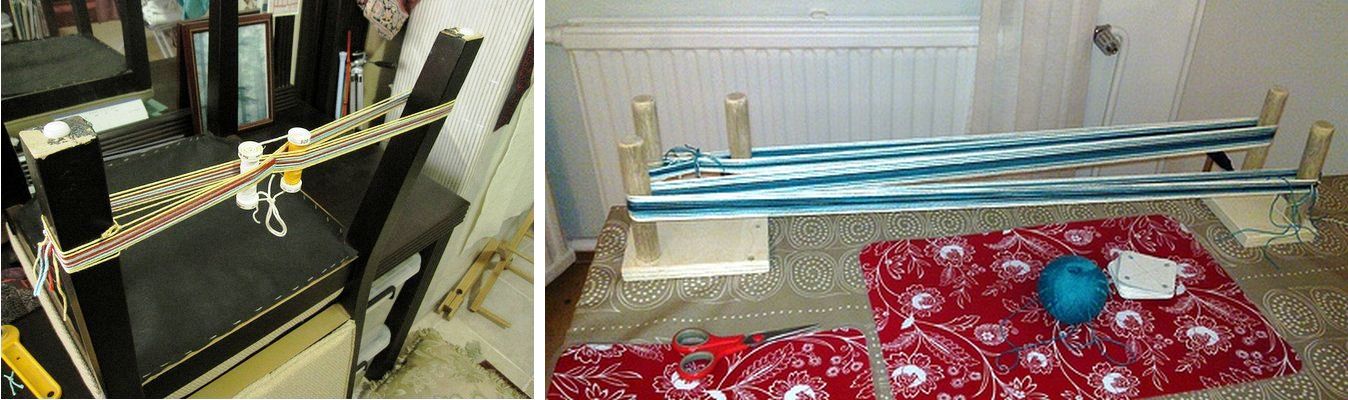
The weaver in the video is warping “end-to-end’ , as I call it…like this:


The warp threads are passed around one stake and then travel to and around the other in a figure-of-eight path crossing themselves in the middle. The length of the woven piece will be approximately what you see in the picture (discounting length lost in take-up of course).

W= warp stake   C= cross stick

Montagnard weavers halve the space necessary in which to weave very long pieces by winding circular warps. This is particularly important to them as they like to use bamboo lengths against which they brace their feet which must be supported against a wall or other immovable object.  This means that they cannot be seated too far away from a wall or other convenient object. Their warps basically look like this:

Trini winds a circular warp on her vertical loom to weave her saddlebags. Pieces woven this way must be cut in order to be opened out to their full length when finished.

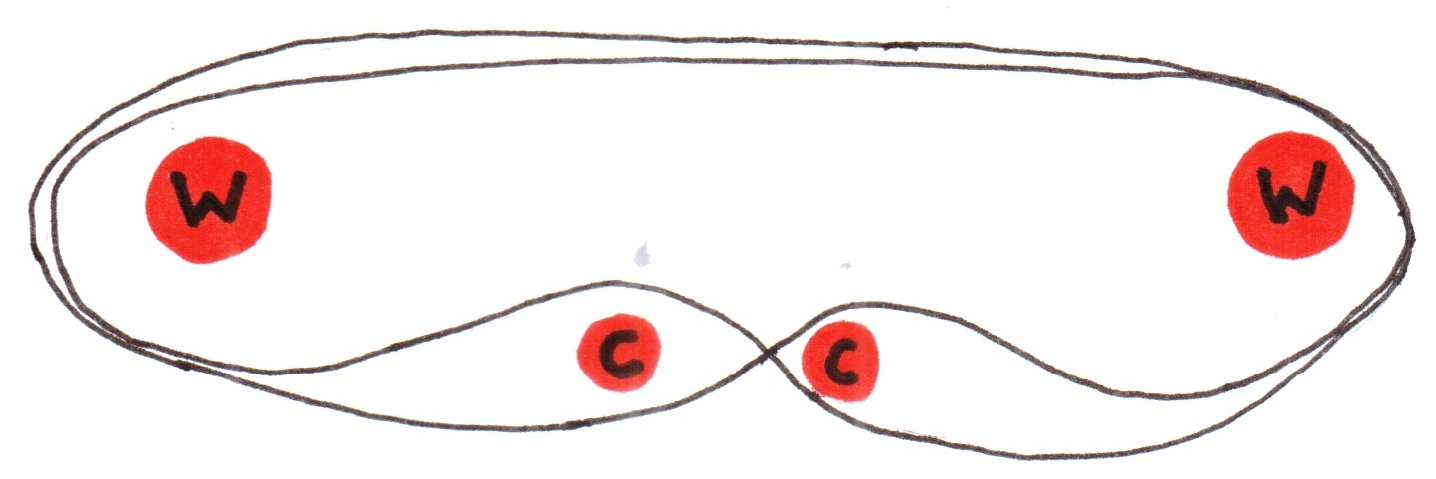
Another option which also halves the space needed to accommodate the warp length is the dovetail method:

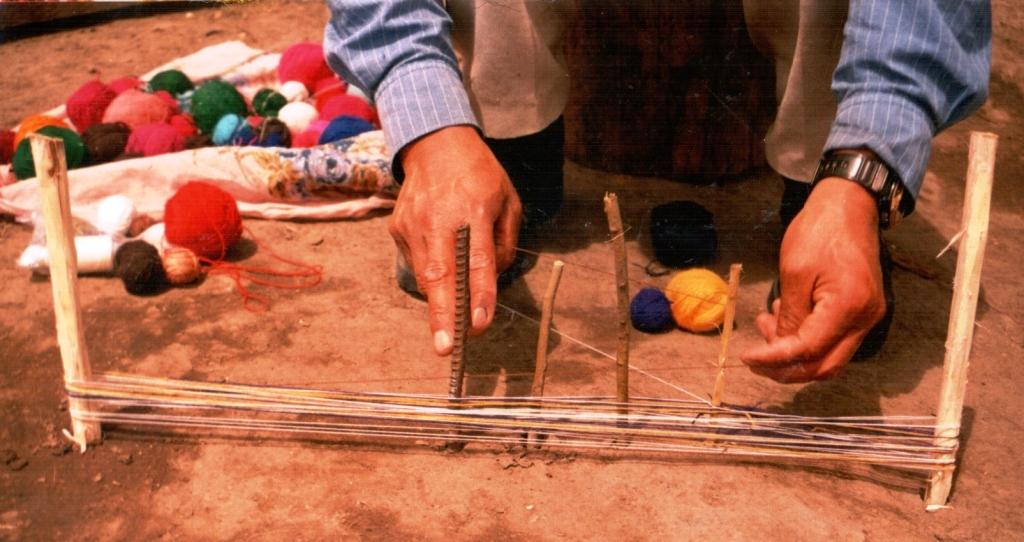
Instead of forming a complete circle, the warp threads pass around a third element marked ”D”  – the “dovetail” stick (this is the name that Ann Rowe has applied to it in her writings), which is sometimes replaced by a cord once the warp is on the loom. Once the piece is finished, the cord or stick is simply removed and the piece can be opened out to its full length. In this way, the warp does not need to be cut.

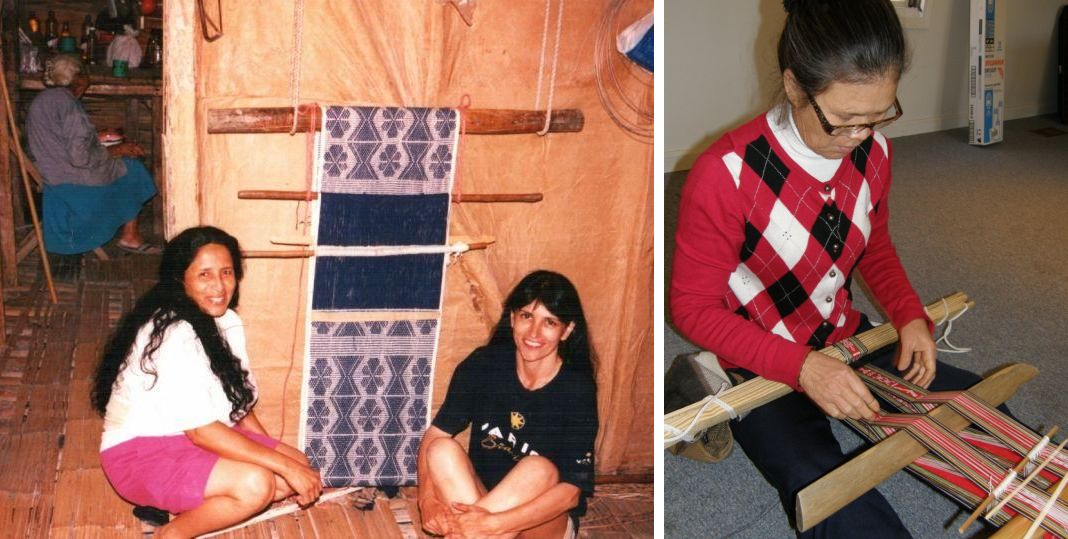
Here in Salasaca, Ecuador, Felipe is teaching me to warp for a backstrap woven belt making a mini warp as an example. The stick nearest his left hand is the dovetail stick. His cross sticks are immediately to the left (our left) of the dovetail stick rather than positioned as in my diagram.

To finish off, here is a video of a woman in Paraguay spinning cotton which will be woven into fine cotton clothing known as ao po’i. Paraguay and its textile arts…so much to learn!


For those of you in the UK, check out the FAQ page on yarns here. Members in the backstrap groups on Weavolution and Ravelry have given me links to yarn sources.

Backstrap Weaving – A Little Product Amongst the Processes

I haven’t wandered off too much around the globe this week but people from around the world, via this blog, Facebook and my online weaving groups, did drop by to help me with my latest twining project…the strap for my proposed loom bag on which I am twining the word “weave” in different languages and fonts.

Here is where I am at so far…

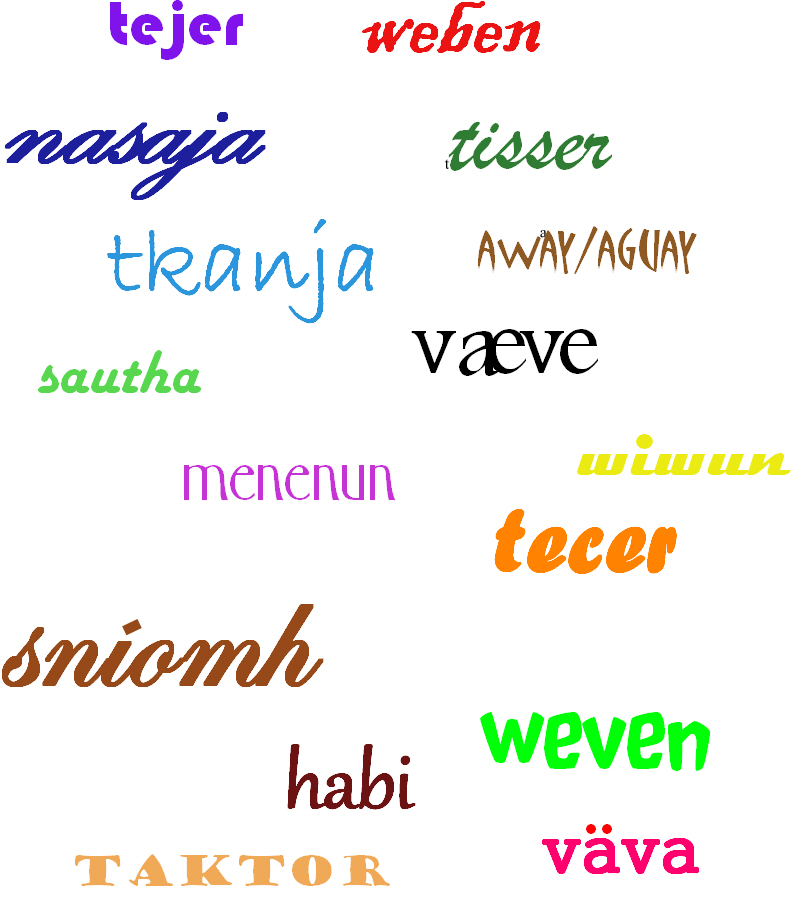
And, if you are thinking that I haven’t advanced very far since last week, you are right! I am used to doing patterns on my backstrap woven pieces in pick up techniques…picking or dropping every single  thread across the width of my warp and I don’t find that slow. However, I have to tell you that twining is SLOW! Reeaaaly slow! But, as you know, I am a process driven gal and what keeps me going on this project is the varying fonts. It is interesting to chart one and then see how it works out on the band. I have, in fact, finished the last word shown above which is “away” or “aguay” (I have seen it spelled both ways) which is the Quechua word for “weave” here in Bolivia.

The next word will be the Gaelic one, sent to me from a Facebook friend in Ireland. I am designing my own lettering form for this one….a cursive hand…and am a bit unsure about how it will look.

Here are the words I have …

Thank you so much to everyone who has contributed so far. I doubt that I will be able to fit all these in and so another project will have to be created. The next one will be in double weave and I will make it all my own lettering style. Double weave will be way faster. See how many languages you can identify. Someone remarked on Facebook that I could just use an online translator. True, but this is more fun. This way I will always remember the person who gave me the word and “carry” them around with me. 😉

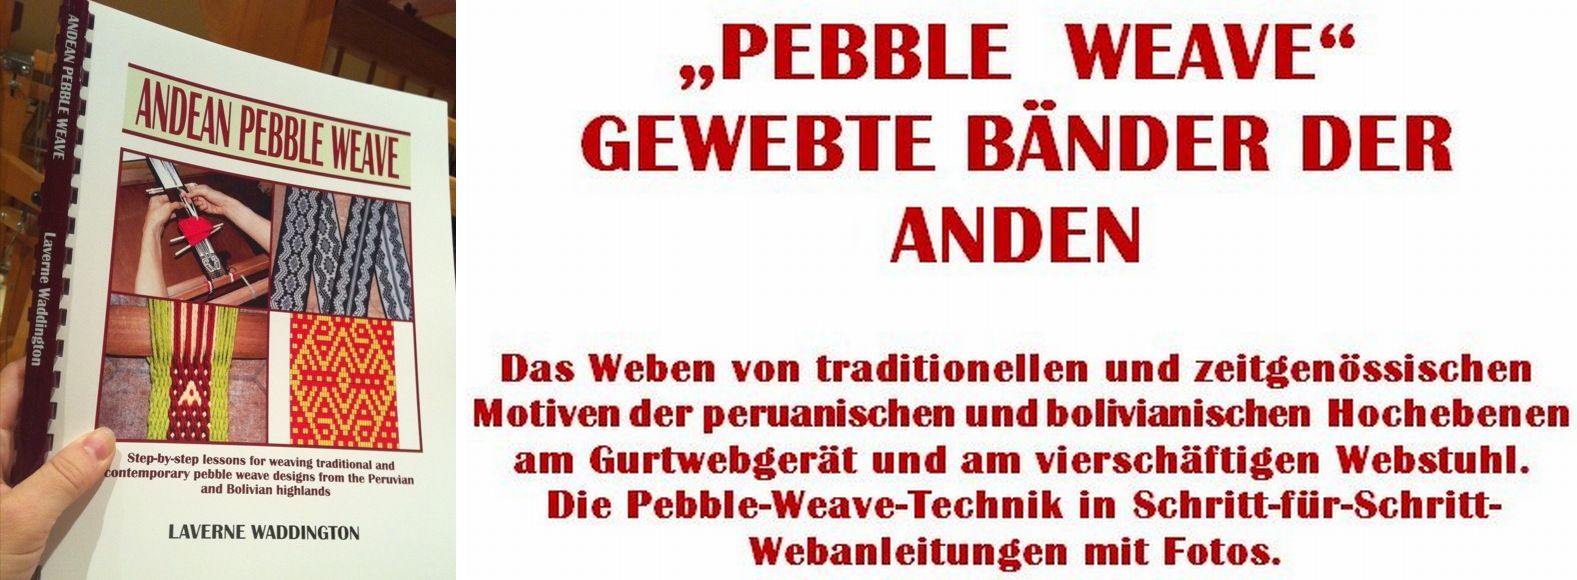
While on this multi-lingual topic, I thought I would tell you that an online weaving friend in Germany took on the heavy task of translating my Andean Pebble Weave book to German. How cool is she, and how grateful am I?! I am in the process now of redoing the layout as it seems that German folk are more wordy than English speakers 😉 and hopefully that will be available soon as a pdf.

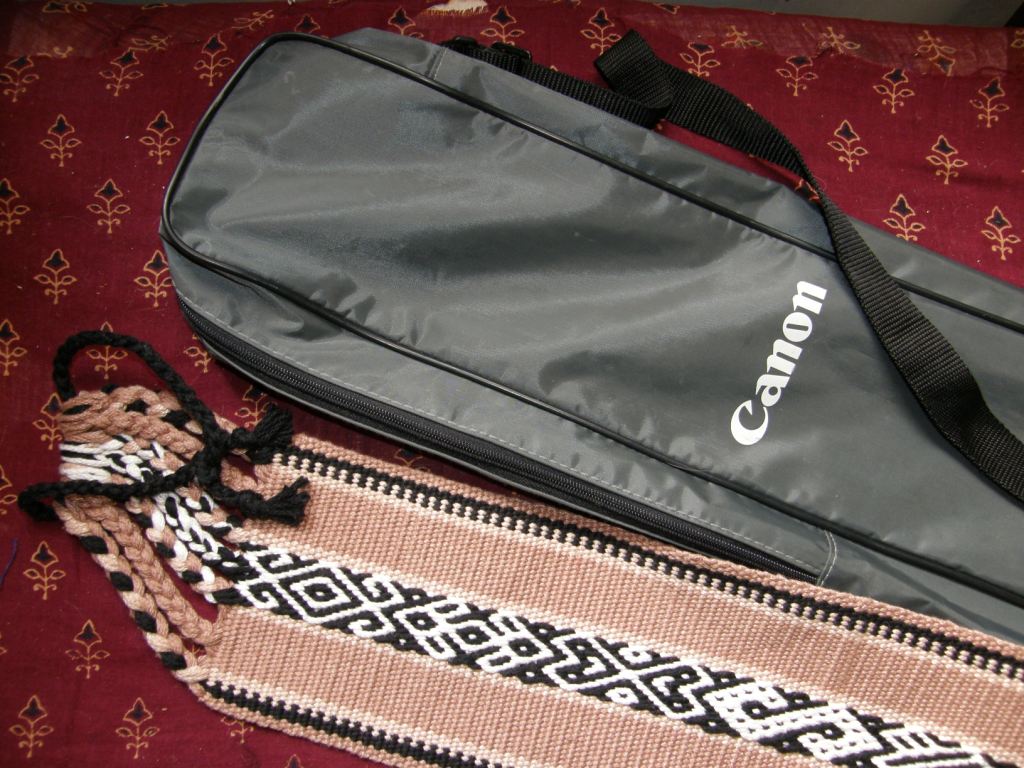
Amongst the processes, there are some real products emerging. The twined band above is going to be a strap for a loom bag which I am modeling on my camera tripod bag.

I discovered that this backstrap that I made ages ago with a 13wpi mercerized cotton, (the same stuff I used in the WeaveZine article), is exactly the right width for the front panel of the bag and so I was easily able to calculate how many warps I needed to get started on the body of the bag. I wanted to keep it relatively simple as the strap will be quite busy with all its woven words.

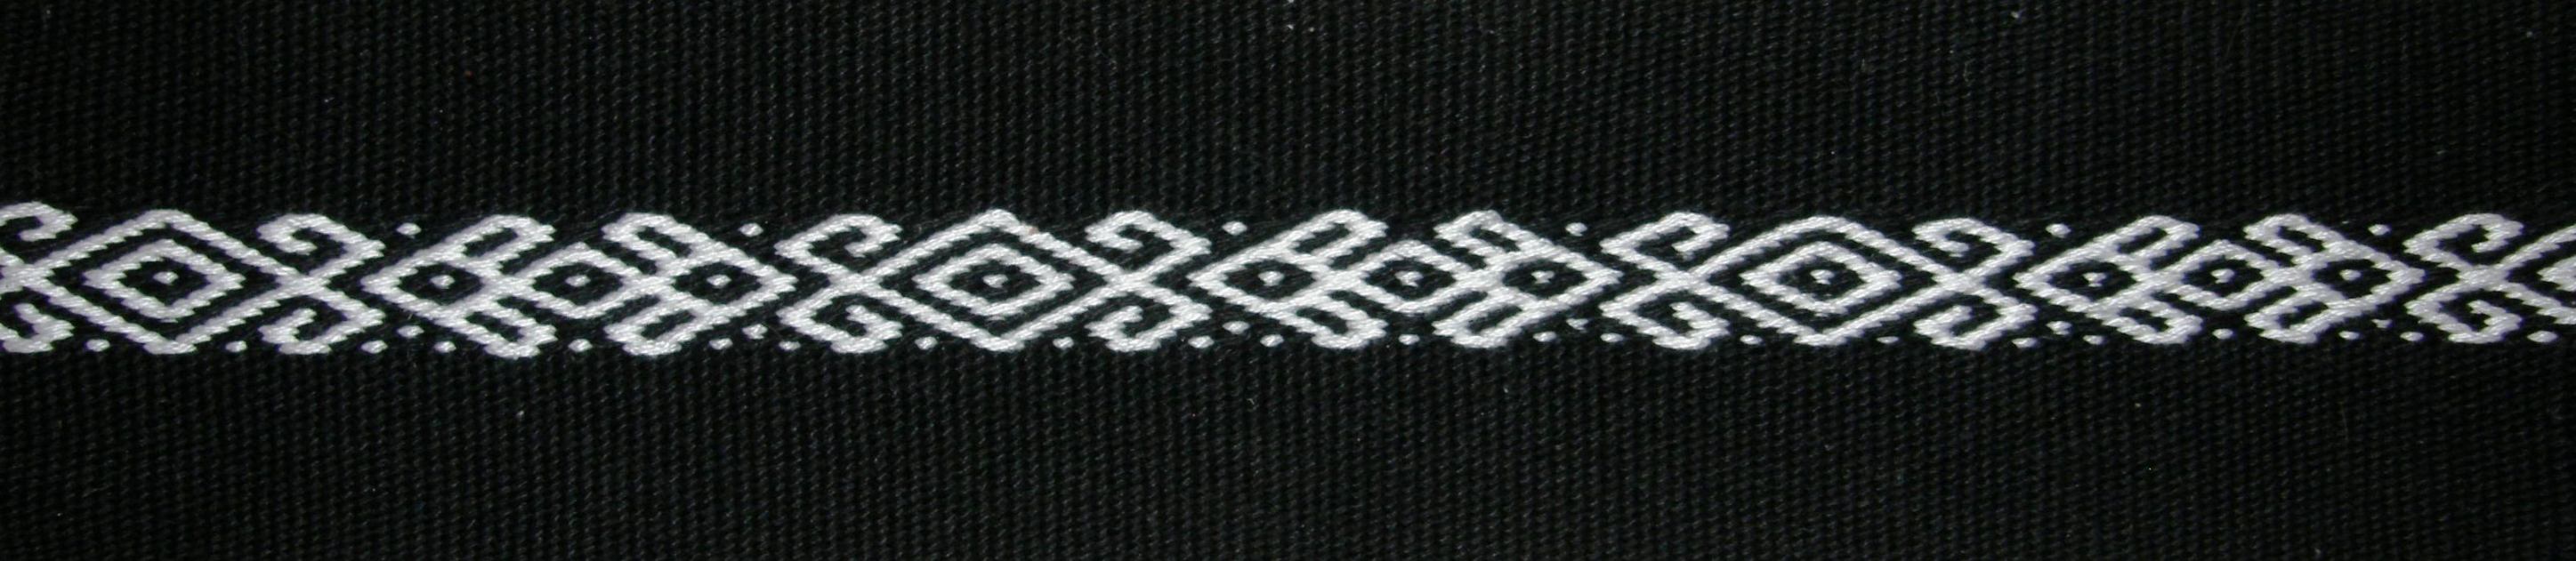
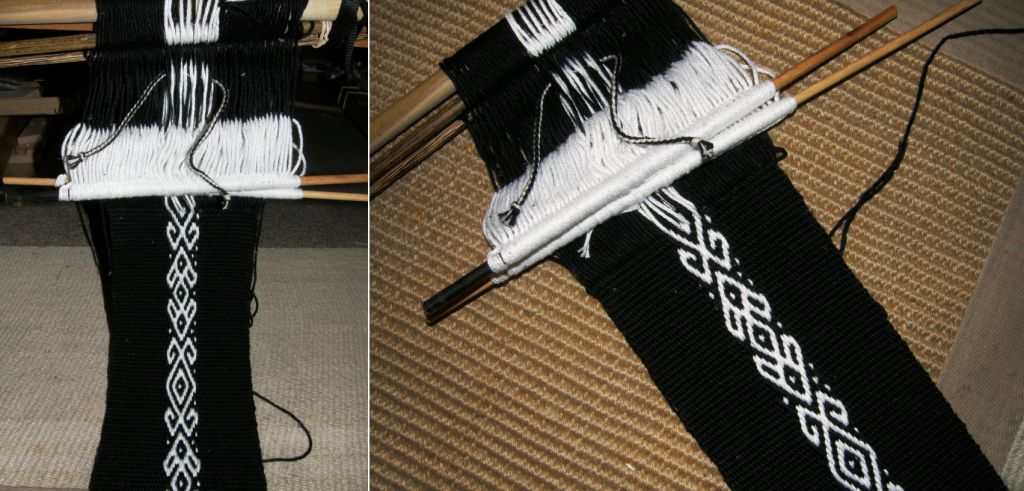
So, here it is…black with just a strip of pebble weave pattern down the middle. These are two of the 8-rev designs that I have in my Andean Pebble Weave book and they look gigantic in this 13wpi thread. What fun it was to weave this up in one sitting in this chunky-ish yarn!

A couple of shots on the loom…

I just managed to get the length I need from my standard 36″ warp. It is wonderful how little waste there is when using backstrap looms. I will make the other large panel and sides in plain black and will then edge it with a tubular band in black and white. There is also a zipper to go in.

Another product to show…yes this is something that I will keep and use myself…

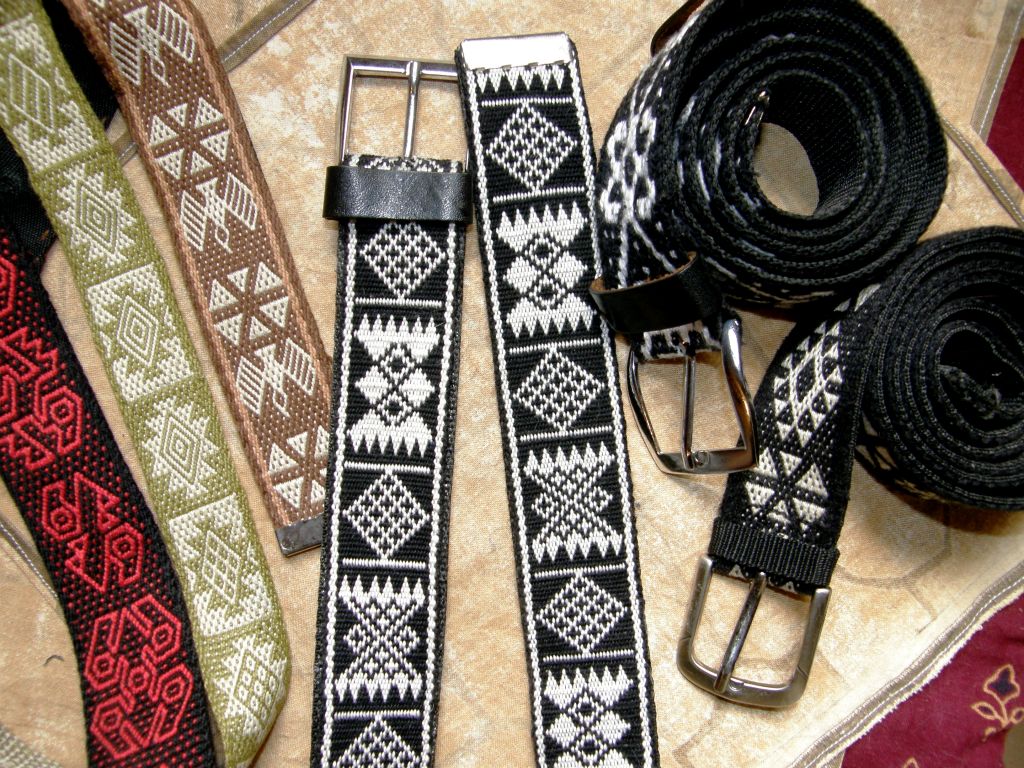
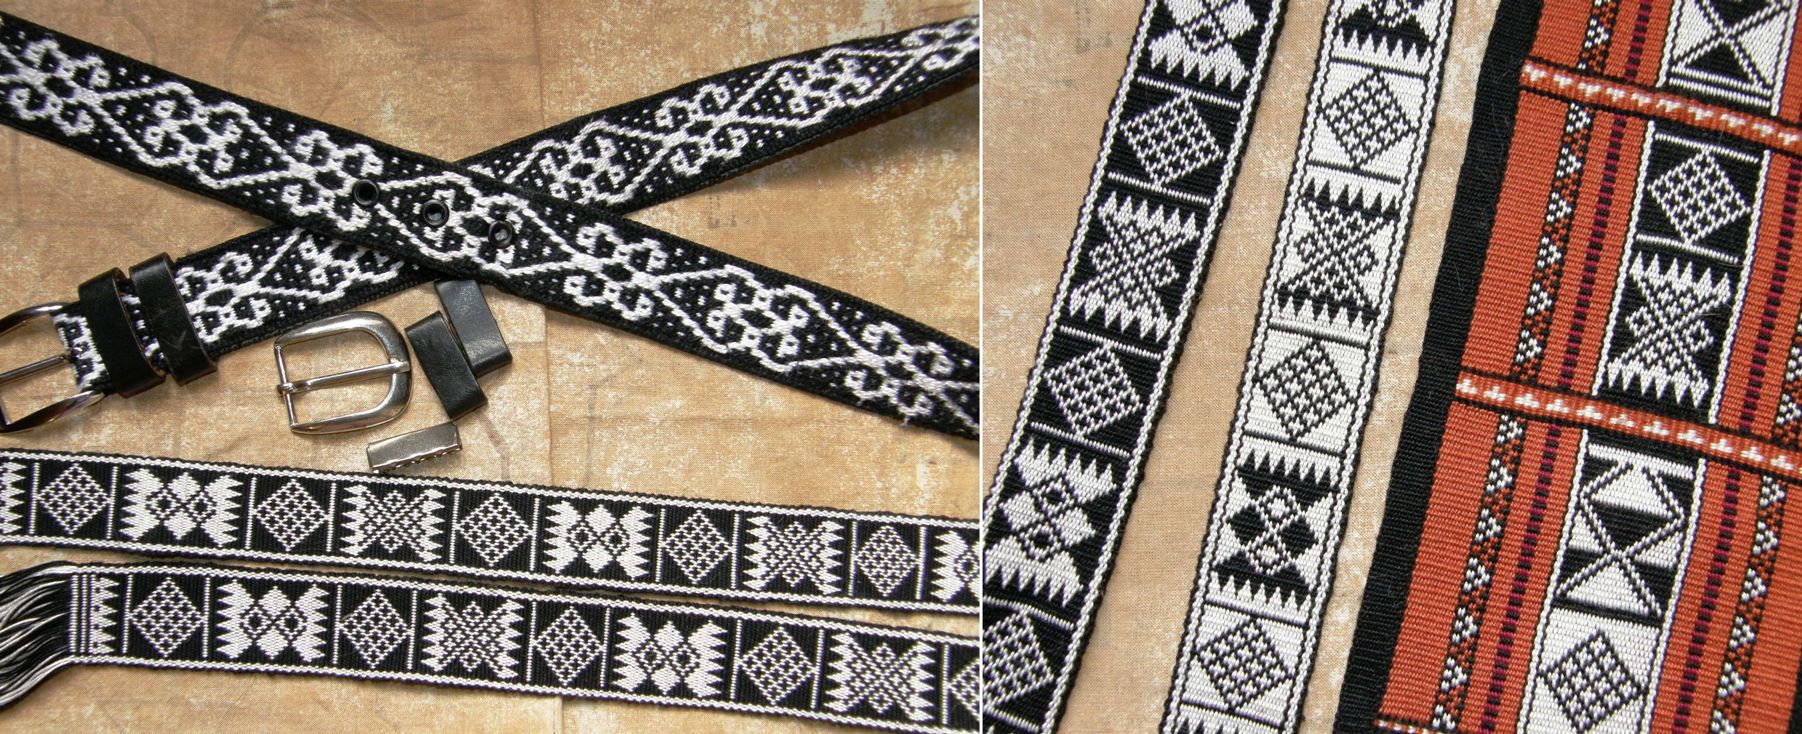
I finished my double weave belt with the Bedouin designs. I had to get an extra wide buckle for it and there weren’t many choices. Fortunately there is a market stall, just down the street from where I live, called “Hebilandia” or, “Buckle Land”! (hebilla being the Spanish word for buckle). Who knew there were so many people out there in want of buckles! The three belts on the left and the one bottom right are patterned in pebble weave. The other one has a design in simple alternating warp floats.

And the final product and my favorite for the week is my cell phone pouch. Yes, my cell phone pouch –  not to be given away or traded.

I finally own a cell phone but it is not for use here in Bolivia. I am happier having my answering machine take the calls here. The cell phone was actually given to me by a friend in the US for use there. As I travel on standby tickets, I really need one in order to let folks know if I have gotten on my flight and am about to arrive. No more begging kind strangers for change for the pay phone or to use their cell phone.

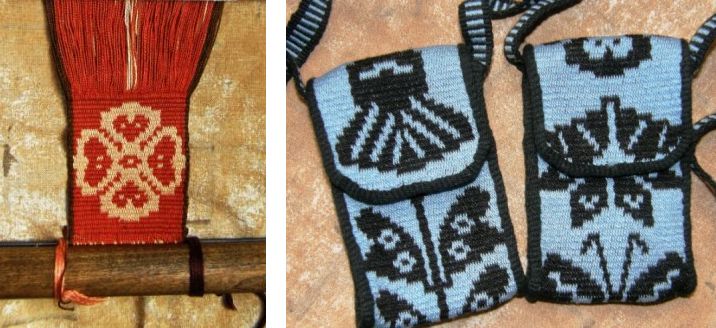
I modeled my cell phone pouch on that made by Guarani weaver, Angela. I bought two of her pouches some time ago, gave one to a friend in the US, and am saving the other for my friend Lisa.

That’s mine above left modeled on Angela’s blue and black one. It is woven in the technique that the Guarnai weavers call Moisy which produces quite a dense fabric.

You may remember that this was the sample piece that I had made to see if I understood what Angela had shown me. I copied her designs with some adaptations, for example, I rounded the flower head and used one of her leaf designs as a butterfly. Angela’s patterns reflect the abundance of lush vegetation here in the Bolivian lowlands. The designs that the Guarani women use on their Moisy pieces are not like any you will see elsewhere in Bolivia. You can read more about my visits with Angela here and here.

Angela had finished her pouch with a plain band which she had woven and sewn simultaneously to the edges using the weft as the sewing thread. I did the same except I used this edging only around the flap. You can see the band with its heddles and shed loop above left. Then came the scary part…

I really loved the shaped flap that Angela had created but couldn’t bring myself to cut the fabric. I was imagining the whole thing fraying away in a jagged mess while I tried to sew on the band and that is precisely what started to happen.

So I sealed all the way around the cut with diluted white glue, waited for it to dry and that did the trick. I will never make a cell phone pouch with a square flap again! This was fun!

I also copied her idea of making a striped band for the sides and strap. A tab of velcro for the flap finished it off.

Something else that has made me smile this week has been following the Weave Along in the Backstrap Weaving Group on Ravelry. There is a lot of enthusiastic participation and sharing, cheers and, sometimes, commiserations. People have been having their successes and frustrations and I think that everyone pretty much agrees that “baby steps” are required…stay with the heavier and friendlier yarns and narrow projects until you really feel that you have the hang of it. There are so many things to think about and get under control before one is ready to move on to new challenges.

Here are a few works-in-progress and finished objects from, from left to right, Firecracker8 (who found that beating harder made her supplementary weft pattern look much nicer and her pebble motif less elongated), Jennifer (who found that size number 3 crochet cotton makes a pretty band and is easy to handle) and Marsha (who used a Gilmore Wave Loom for her first attempt at double weave). We are waiting to see pictures from other participants who can only weave on weekends. No hurry! We will be around 🙂

Lots of cool ideas have been appearing in the forum and I have some more warping options to show you from himalaya and wanderingskopos…

We just had a new member from the UK join the group and the Weave Along. He is a rope and canvas craftsman and net maker. Well, I was curious about this as I had no idea what that entailed and invited him to post pictures of some of his work and he totally blew us all away! I immediately checked out his website. I love the hammocks and rope mats.

In my inbox I found images from Julia who made a band with a bunch of pebble weave motifs using my book. I love the way she has hung it with all the loom parts in place. She did a good job weaving as close to the end as possible which is not easy with cross sticks and two sets of heddles.

I also asked Steve Pretty if I could show the frame loom on which he has been weaving warp faced bands and, most recently, an Andean pebble weave band using my book.

Steve got the idea for this frame loom with its nifty tensioning system from the web site of Dr Carol Ventura. This page on Toba weaving of Argentina on Carol Ventura’s site shows the loom and the technique to produce the band above left. The technique is similar to that which I call Simple Warp Floats.  On the right is Steve’s pebble weave band.

It really puts a big smile on my face to see people in the online groups jumping in enthusiastically to learn these techniques and weave stuff.

I have had the benefit of spending days and, most often, weeks at a time face-to-face with my weaving teachers here.  Not everyone reaches their weaving goals without having that personal contact with a teacher and besides, we all have our different learning styles.

So, I would like to tell you that there are still a few more places available in the Andean Backstrap Weaving class called “Beginning and Beyond” that Abby Franquemont is giving at Beth Smith’s The Spinning Loft in Howell, Michigan from January 28th to 30th, 2011.

Beth tells me that Abby Franquemont first went to Peru around the age of five and was there on and off throughout her teenage years travelling with her anthropologist parents Ed and Christine Franquemont.
She began spinning and weaving immediately upon arriving in the Cusco Region of Peru and, although she is best known as a spindle spinner in the US, she is also a fantastic weaver on the backstrap loom.

######################################################

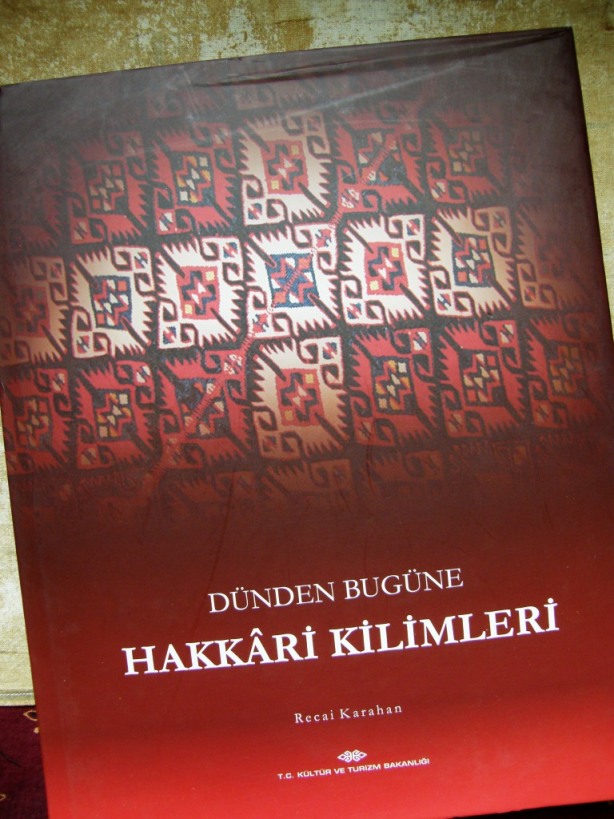
In the post box this week…some inspiration from Turkey. My brother went to Istanbul and got me this locally published book (in Turkish) on Hakkari Kilims. It has lots of luscious photos.

Now to figure out which word from the text is the one for “weave” to add to my band.

And what about those videos that were giving me grief last week?

In the end I had to whittle them down to under ninety seconds so I could load them to my Flickr page and link from there.

So, there is a short video showing warping for one-weft double weave and another on heddle making on the tutorial page.

Nothing new – they are just meant to give further clarification for those who might have doubts.  I also added a video on adding a second cross to stabilize your shed rod to this FAQ page.

What I am planning next for the tutorial pages here is a full project  – Making a Key fob in Double Weave – from start to finish with a few videos.

But for now…the products are done so it’s back to the process…


Backstrap Weaving – The ‘Tis-Done and the To-Do

I bought myself a good old fashioned acrylic board last year to write my “To-Do” list and hung it on the bedroom wall. It is not that old fashioned when I remind myself that my teaching colleagues are still using blackboards and chalk where I used to teach English here but it is indeed old fashioned in the world of IPads and such gadgets. I really need to have that To-Do list up there in front of me with a list made in brightly colored marker pens. It is so satisfying erasing something and saying ‘Tis done! What I really wanted to do was start the year with a fresh gleaming clean white board instead of one still covered with colorful scribbled lists.

These two weaving “To-Do”s were still hanging there from 2010 and I am pleased to say that one of them is about to be erased…well almost.

The double weave belt at left went on a nice trip with me to the US recently. It came out once for a weaving demonstration with a group of Bhutanese weavers in North Carolina and then went back into its bag for the rest of the trip. So, I was determined to at least get this off the loom. You may remember that this belt is a result of my twining investigations with Montagnard weavers which led me to Bedouin twining and then Bedouin warp substitution designs which I then decided to reproduce in double weave on this belt…quite a journey!

You can see the Bedouin design piece I wove above right. The warp substitution technique (see the tutorial here) produces crisp designs on a background of solid color with long floats on the back. The same designs can be produced in warp faced double weave (see the tutorial here) without the visible floats and with the patterns reversed on the back of the band. I have all the hardware ready for the belt and just have to put it together now. I need to thread one end of the belt through the buckle which means having to cut a slot in the band. What I usually do is paint the area to be cut with diluted white glue which acts as “stop fray” and then go ahead and cut.

The finished belt, with buckle in place, in the picture has been woven with simple alternating warp floats using a design from a yurt band (see the tutorial here). So, I am just about to erase this 2010 project from the board.

The other unfinished project that you saw photographed above is the sample I made after visiting Guarani weaver Angela. I had just wanted to see if I could get my head around the Moisy technique she was using so, basically, that was a mission accomplished, but I still think that I could make something useful from this piece and don’t feel like discarding it. So, that is next.

Of course I still won’t be able to wipe the board completely clean as it is now filled up with 2011 stuff. And that is the way it should be!

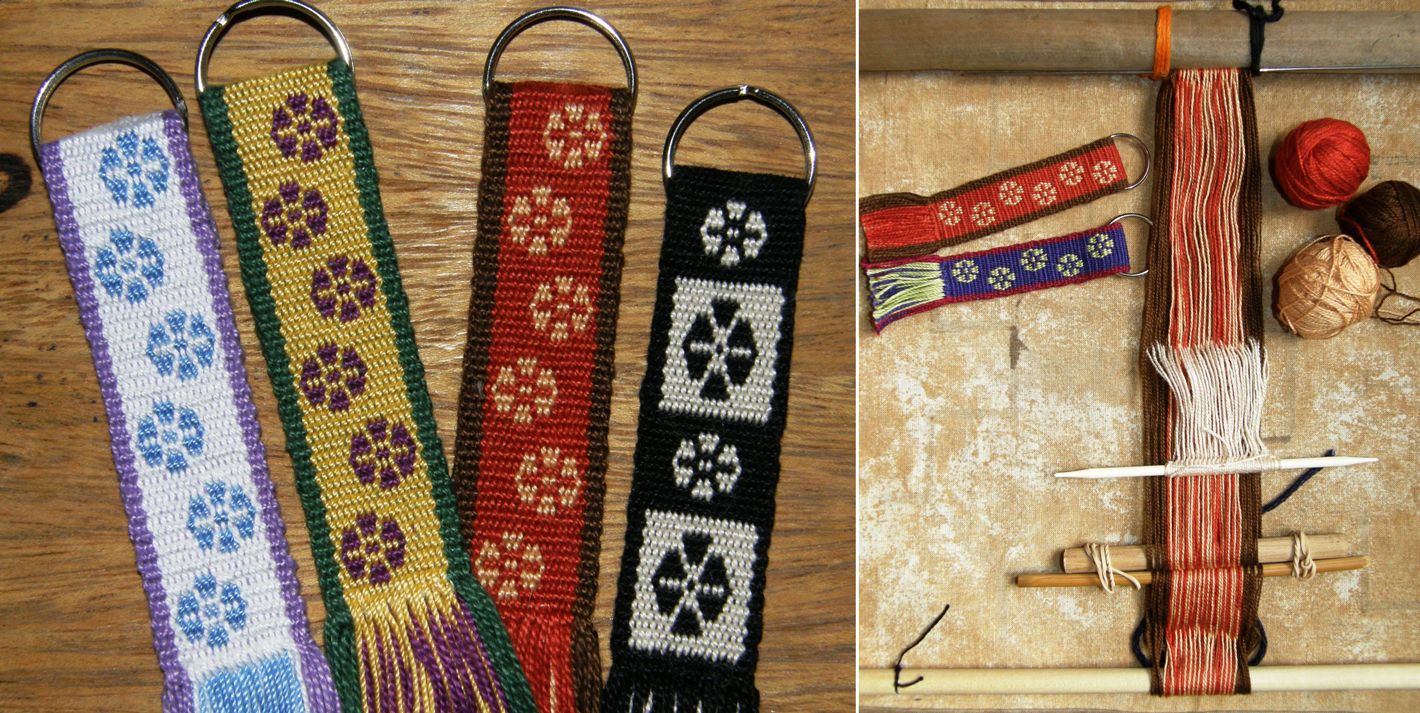
While I was immersed in double weave finishing off my belt, I decided I would make a video showing how to warp for this technique to add to the existing tutorial. Those of you who subscribe to Handwoven may recognize these double weave keyfobs which are shown in the Jan/Feb issue…

This will probably sound completely ridiculous to those of you who are used to winding warps of several yards or meters for multiple projects on your large looms…I wind a tiny warp for each and every keyfob. Warping for double weave and making string heddles across such a narrow warp is such a breeze for me that it doesn’t bother me at all to have to repeat the process for each and every fob. I love the opportunity to play with colors and not have any two fobs the same. I can create a third selvedge for every fob and save time not having to deal with hemming a raw edge which is tricky and often unsightly in double weave. I did weave thirteen identical fobs on an inkle loom once and won’t do that again.

And, as I always say, the only trouble with double weave is deciding which side you prefer…

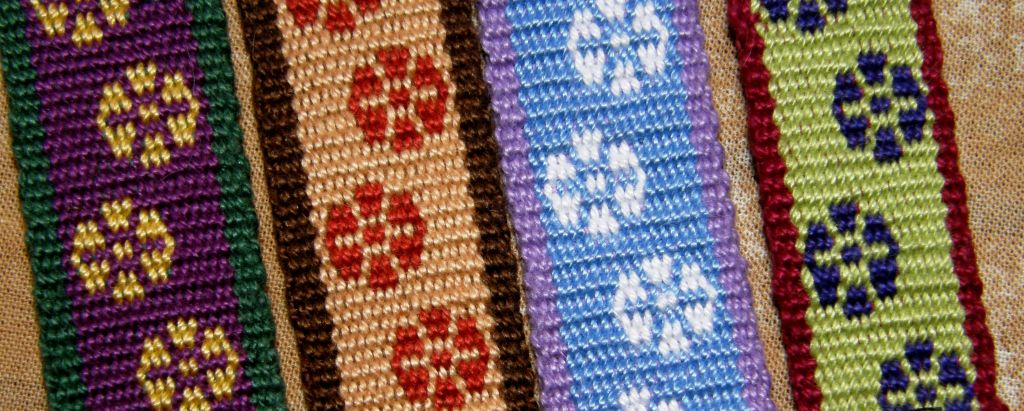
Decisions, decisons…which side do I prefer? Here are the backs of some of the keyfobs shown above.

The big problem for those learning double weave is that it can be painfully slow. There are a lot of steps and, until you understand why you are making the moves, it all seems like a terrible amount to have to memorize.

It is easy to miss a step and make a mess or lose your way if you have to leave it for a moment…just part of the learning process.

I have been told several different versions of what this little design represents by weavers here in Bolivia and I wrote a little about this here. In any case it is a simple neat design, easy to memorize and fun to weave.

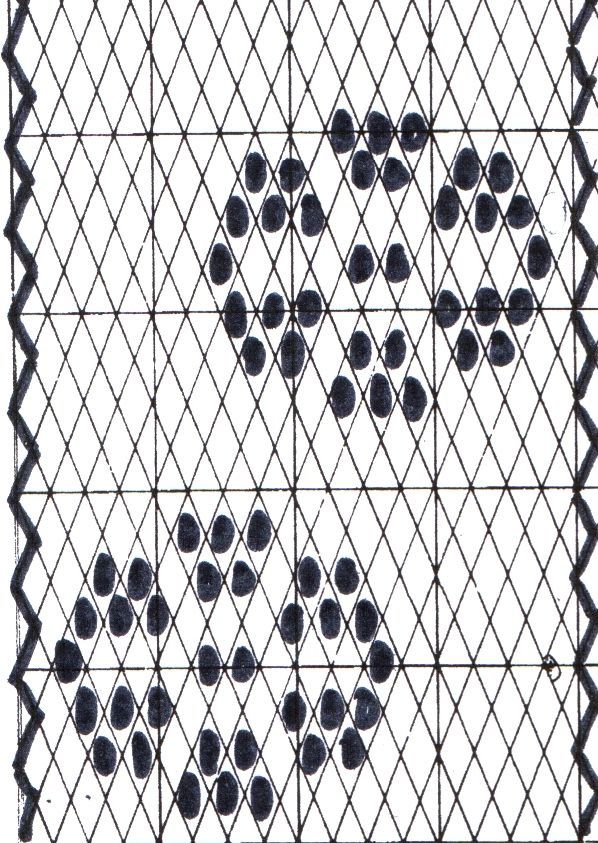
The pattern chart is on the left.

I made several pieces of video covering warping, creating the third selvedge, making string heddles and putting in a second cross to stabilize the shed rod. This week I am trying to just post the warping and third selvedge segments. These videos take so long to upload and my internet connection is not cooperating today. I will add others each week and have them stored on the double weave tutorial page. I hope you find them helpful (once I get them up there).

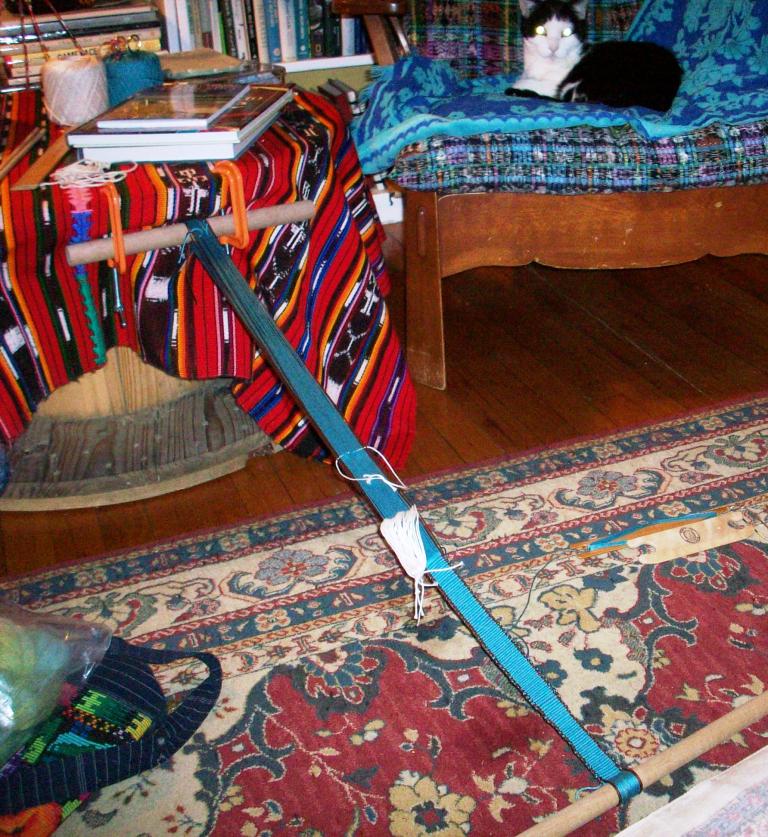
While on the topic of warping, we have started the Weave Along in the Backstrap Group on Ravelry and, hopefully, participants have read my three little tips from last week’s post particularly the one about the importance of having a good stable set up for warping. Some photos of improvised warping have been posted in the online weaving groups in the meantime…

This is from backstrap weaver Fliegenpilz in Germany, whose idea it was to have this Weave Along in the first place. She has warped for a pebble weave band following the instructions in my book.

Phil has himself nicely set up to weave in his rocker. Check out how he wound his warp with stakes lodged in kitchen drawers.

I caught the next picture in another weaving group on Ravelry…


Pancha says that her idea for warping, pictured above, originally sprang from her desire to try backstrap weaving. She has used it for other looms too but is now fed up with bending and walking up and down and has ordered a warping board.

Other weavers from Weavolution have shared their finished projects with me…

Deanna wove these bands decorated with Andean pebble weave designs on her Leclerc Dorothy 15″ table loom following the draft in my book. She also backstrap weaves and ties up her loom to her 40″ sixteen-shaft Macomber loom…a nice sturdy place to attach a loom bar.

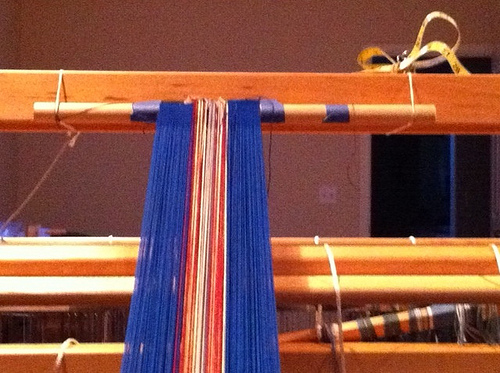
Speaking of which, here is Jennifer’s pebble weave warp tied to the castle of her floor loom…

She has it angled  steeply upward which means that she has the warp threads quite close to her for doing pick up and does not need to bend. Each weaver will find their own way. I prefer a gentler angle.

Marsh Knox of PandulaArts has been following the tutorial on simple warps floats and weaves on a Gilmore Mini Wave loom. I have shown many of her finished bands here. Recently she had some of her bands, which she made with alternating floats, sewn into a mini tote bag for a friend…She calls this the “one-skein project” bag.

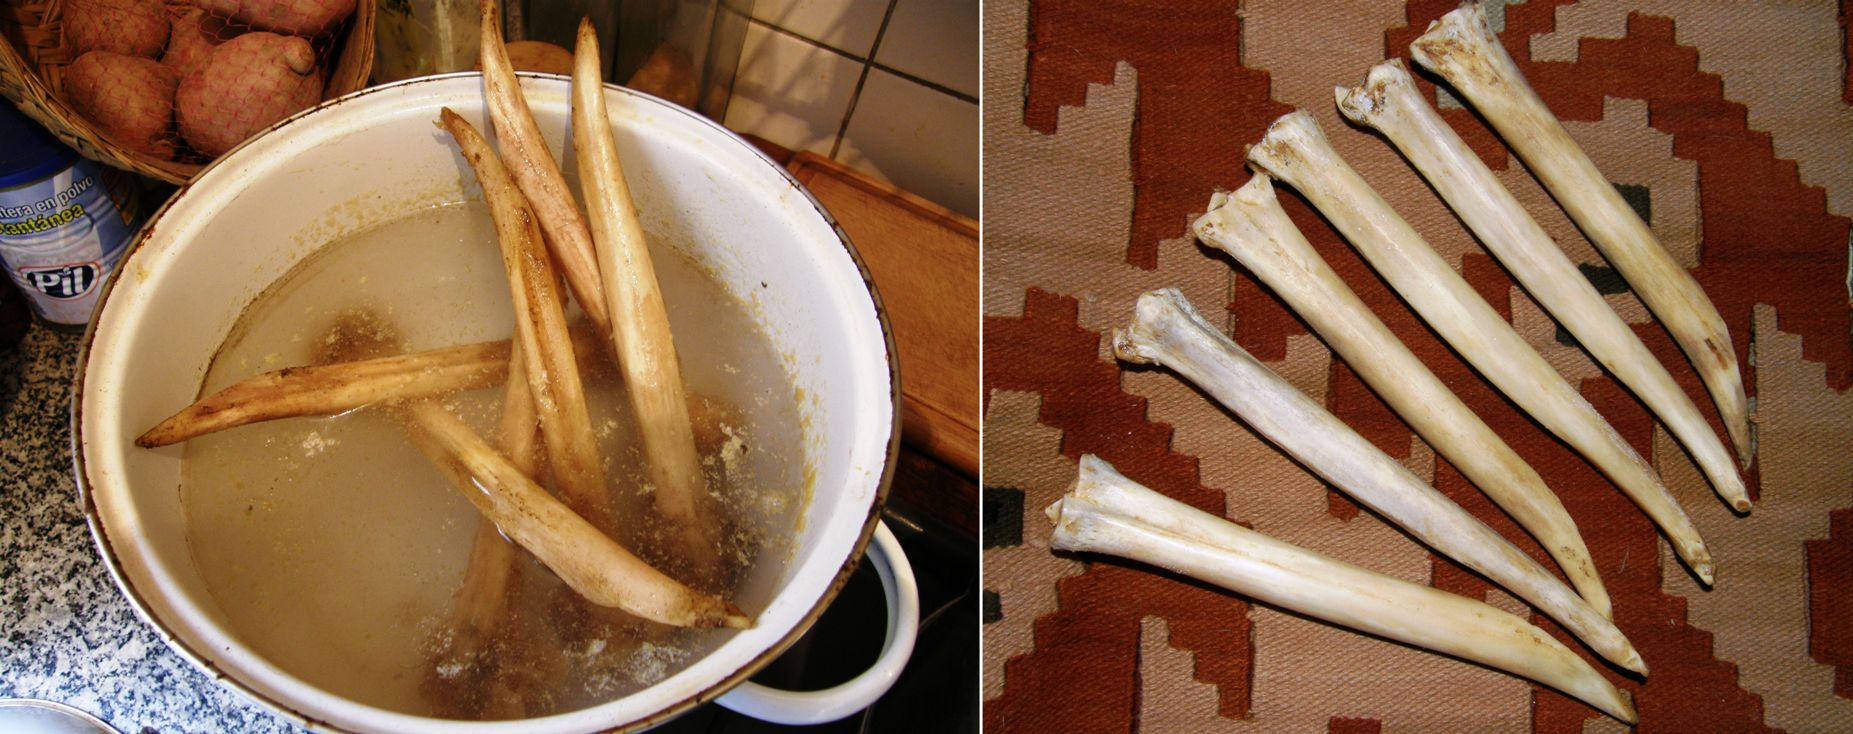
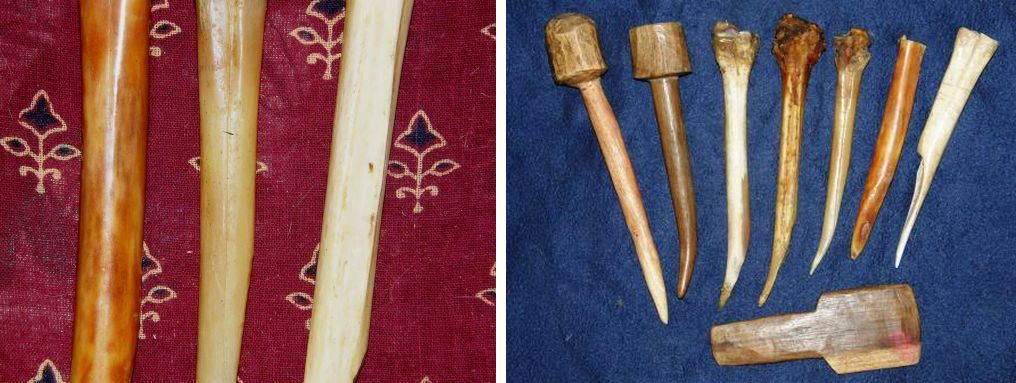
I had a few things going on this week. Firstly we got a short reprieve from the heat and humidity and were able to turn off the a/c and have the windows open for a whole day. This gave me the chance to boil up the nasty llama bones I have had lying around since my friend Anna brought them to me from the highlands a few months ago. These are the wichuñas, the bone tools used by weavers here to beat in the weft and pick up warp threads for patterning. They are also used in Peru where they are called rukis.

Several boilings and changes of water were needed to get them cleaned up. The smell!! There they are on the right –  white and gleaming. The tips could do with a bit of refining but otherwise they are good to go. Several years of use will have them take on the lovely hue of old ivory and I have seen some very old ones that have the tone and shine of polished wood.

That was another 2010 task to gladly erase from the board.

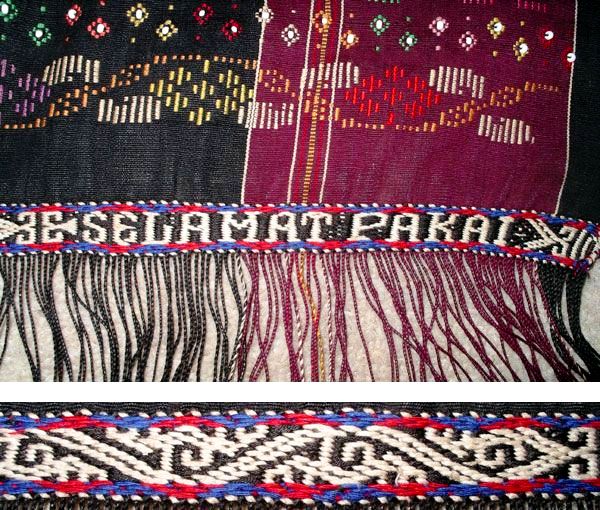
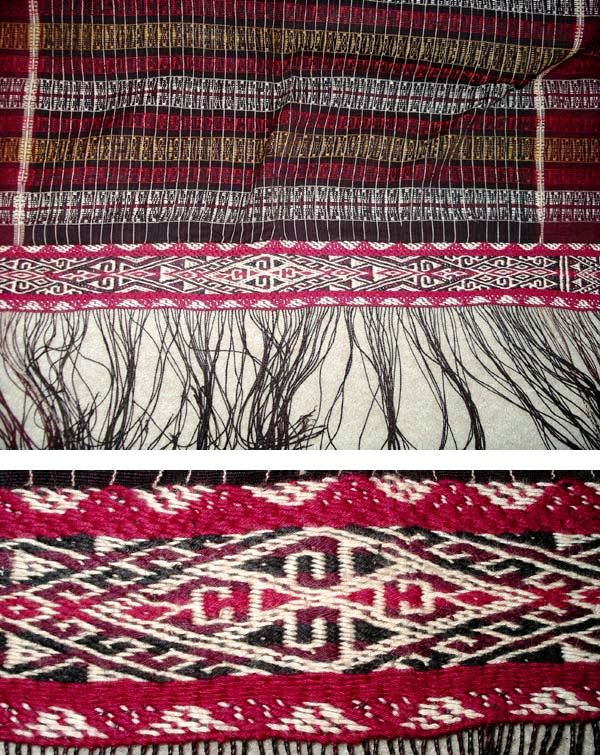
As for the ongoing twining obsession, I started a loom bag project and am twining its strap with letters. Just when I started thinking that I was taking the twining obsession a little too far with this lettering fad, I was shown these fabulous images of Batak twining…The Batak people live in northern Sumatra in the hilly region of Lake Toba.

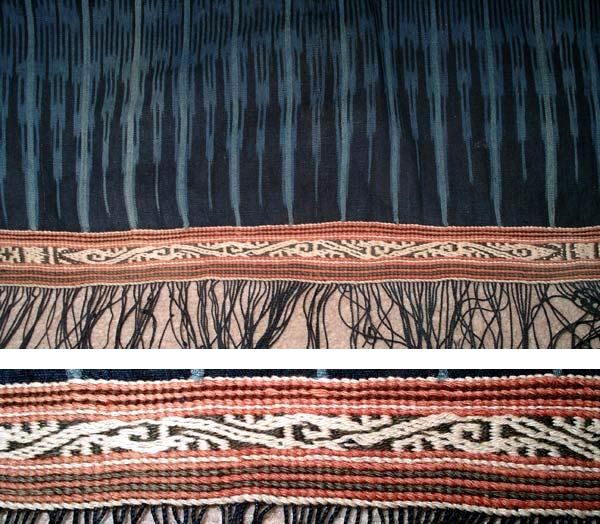
These amazing textiles are part of the collection of Pamela Cross and she has allowed me to show them to you here on my blog. She describes the above piece as a Toba Batak sadum (a woman’s shoulder cloth). Twined lettering! This twining is so very different to that done by the Jarai and Rhade weavers with whom I studied. How beautiful.

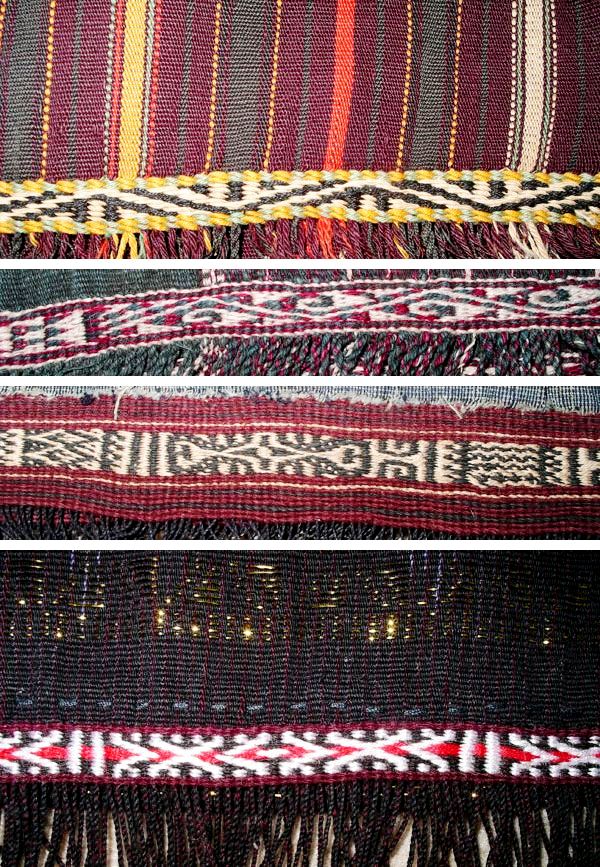
Here are some more images that Pamela shared of the twined bands on other Batak textiles…The following one is a ragi hotang which I understand is a shoulder wrap.

Gasp!

The following is a surisuri. Pamela says that the surisuri is one of three types of indigo-dyed textiles used for Toba Batak rituals.

Here are twined bands from several different types of Batak textiles. The design on the second one from the top is so Andean-looking don’t you think?!

It is exciting to know that there is a book available now by writer/researcher Sandra Niessen, PhD on  Batak textiles:

“Legacy in cloth: Batak textiles of Indonesia offers the first definitive study of the woven heritage of the Toba, Simalungun, and Karo Batak.


The most complete analysis of Batak textiles ever published, it provides a record of more than 100 different design types, including archival and contemporary photographs showing how the textiles are woven and how they are used in Batak culture.


Legacy benefits from fieldwork conducted over two decades and consultation of all major European collections of Batak textiles and private collections in Indonesia.”


Even more exciting for me was being able to make contact with Sandra.

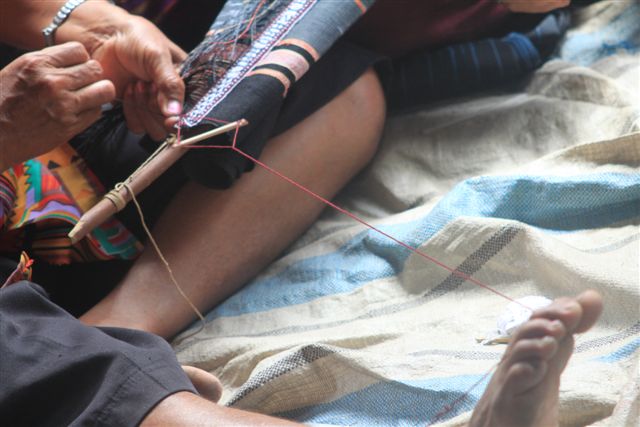
She kindly shared some pictures taken by MJA Nashir of a Batak woman twining. The process is not at all like that practiced by my Montagnard friends.

The weft appears to be tensioned between the toes and a small stick seems to be used to aid in the twisting of the two wefts. No doubt Sandra’s book thoroughly discusses the process and I am itching to get the book and have my curiosity satisfied and learn more about the Btak people and their textiles.

Sandra tells wonderful stories on her blog of how she has been returning to the villages where she conducted her research to present copies of her book to the weavers.

Well…after all that eye candy here is the humble twined bag strap I have been making with twined letters.

The idea is to twine the word “weave” in several languages. I have just begun the German version. I hope to do French, Portuguese, Quechua, Aymara, Guarani, Russian, Jarai and many more, if they will fit, with each word in a different font. I would love to hear from blog readers around the world who can tell me how to say “weave” in their language.

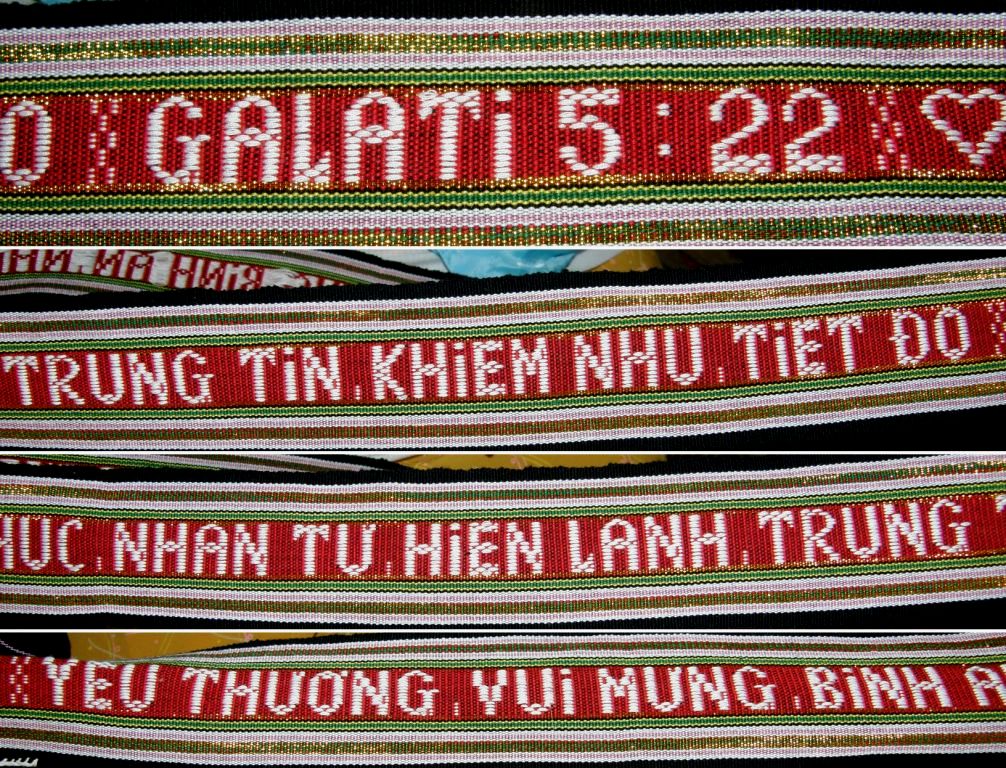
The letters are a munched version of those in Linda Hendrickson’s book Please Weave a Message. Remember that Linda’s letters have been designed for card weaving,  not twining, and are far prettier than the ones I have used here. Check out Linda’s page to see her gorgeous lettered bands.

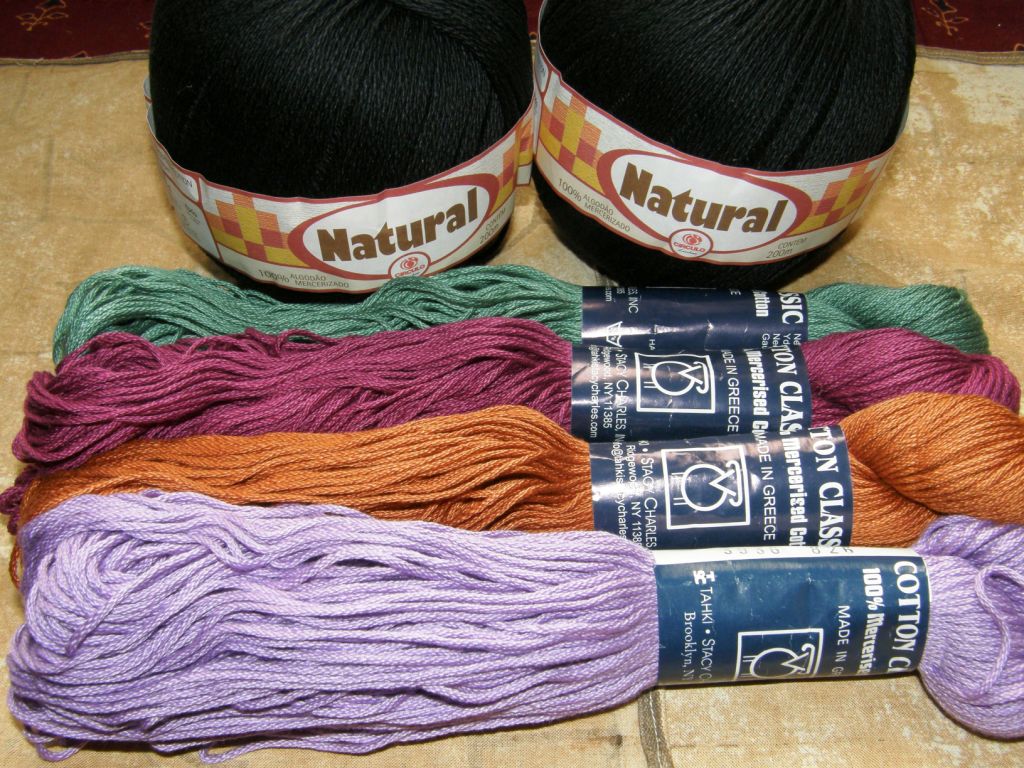
So this will be the strap for the loom bag in which I will carry my backstrap on future trips. The shape will be based on the camera tripod bag which I have been using until now. I haven’t put much thought yet into the body of the bag but I will weave it on my backstrap loom using a heavy-ish black mercerized cotton and some of my new Tahki Cotton Classic thread for patterns and embellishments.

And continuing on the lettering theme,  weaving friend and blog visitor Sharon Kersten completed the chart of letters for the Montagnard warp float lettering tutorial that I did last week and has sent it to me to pass on to all of you. She saw my photo below of various bag straps woven with letters and used it to chart what she thinks the missing letters could look like as well as the numbers. Many thanks!

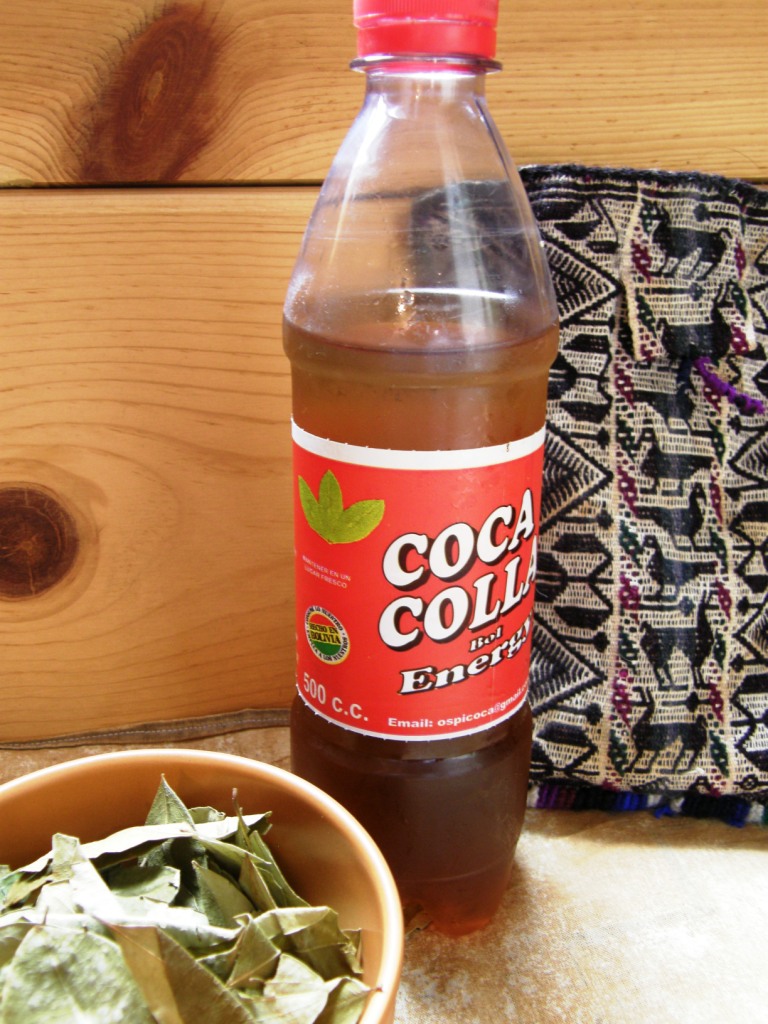
I will leave you here for this week with this new Bolivian beverage…

Peru has its Inka Kola and now we have”Coca Colla”! It’s a play on words, not bad spelling…”colla” being the word to describe people of indigenous origins here in Bolivia (pronounced coya- the oy sounds like the oy in “boy”). It is made with coca leaf extract, is heavy in caffeine and slightly carbonated. All I can say is that…weeeel…. it tastes as good as it looks. 😉 Cheers!