Backstrap Weaving – Embroidery, Tatting, Quilting and, oh yes, the Backstrap Weaving :-)

Back home in Bolivia! My cat seems to have enjoyed her stay away in my absence in a home of Death Metal music fans… a noisy and action-packed home which also includes two kids and two parrots. She appears to need to sleep off all that excitement and has spent much of the last two days flat on her back with legs in the air, dead to the world.

Picture by Annie MacHale

Black Sheep backstrap weaving groupAs for me…I need a rest after all the excitement too! Was it really a whole seven weeks ago that I arrived in California and wove with my friends there? We had a very productive time weaving supplementary-weft patterns and the intermesh technique and spent one relaxing afternoon looking at my images and videos of South American backstrap weavers.

My trip ended in the same area. It was great to meet up with my Ravelry friend, Cookie, once again. She had woven with me at Janet’s place up north two years ago and brought along the pebble weave backstrap that she had woven for herself in the meantime.
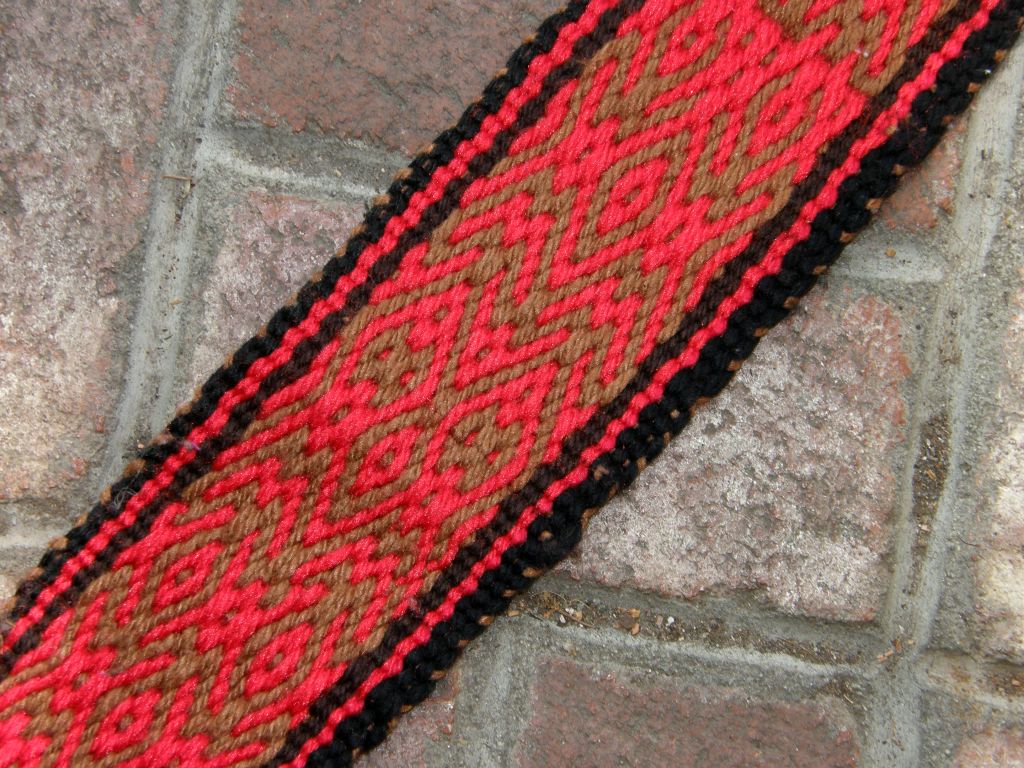
Cookie's backstrap with pebble weave

This is a great example of taking one of the simple 4-revolution patterns from my first book and expanding it by weaving it side by side as a reflection of itself. Cookie also added some other small elements which made the pattern unique. It was almost impossible to recognize the orignal 4-revolution motif. I love it when people create their own pebble weave designs. This is a great way to approach it – with baby steps – first adapt and enhance an existing design and from there go on to create a motif that is entrely your own.

We used sticks to help pick up threads and pass the supplementary wefts. Cookie saw my Guatemalan pick-up stick and went on to create her own from chopsticks! See the original chopsticks on the right and then several versions of the pick-up stick that Cookie made.

Cookie's pick-up sticks from chop sticks

Days were spent weaving in Barbie’s home and I enjoyed my evenings staying with Kathleen. I got to stay in her cottage weaving studio in the garden and listen to the soothing sound of  the waterfall in the forest below. Kathleen’s home is decorated with textiles from Hungary, her husband’s homeland. Here are just a few of them.

hungarian embroidery and feltThe felt piece at top left comprises layers of wafer-thin pieces of felt using applique and reverse applique techniques. A Google search result tells me that this particular design falls into the category of Great Plain motifs, the Great Plain being the central plain of the Carpathian Basin. The motif dates back to the 18th century where it was first seen on the wool cloaks of the Hungarian shepherds.

I then uncovered a website which is a gold mine of information on embroidery techniques when I googled about Hungarian embroidery. This site is amazing! I will leave you to explore it. I will certainly be returning to it to learn more.

wood block for textile printsI can see myself doing embroidery one day should there come a time when I can’t weave with a backstrap loom anymore. As long as my eyesight is up to it!

I spent a fun afternoon with my weaving friend Dorothy. We went to an exhibit of Indian textiles at the San Jose Museum of Quilts and Textiles. It was a hands-on afternoon where we got to learn a little about Kantha embroidery. It was  an introductory session that any embroidery novice could handle just to get a taste as it is based on a simple running stitch. I attempted to embroider a classic paisley motif which is a mango shape. If I ever get it finished I shall show it to you.

We also got to play a little with hand-cut Indian wood blocks which are used to print designs on cloth. You can see the paisley pattern above. I think the wood blocks are a work of art in themselves. I also learned that you need to put some thought into the layout of the deisgn before stamping away like mad. I made a chaotic horrid mess!

I would love to know what embroidery stitch was used to create this piece that Dorothy bought from a Peruvian handcraft website.

dorothy's peruvian embroidery

The yarn was so fluffy that it was very difficult to isolate the path of the threads. The stitch had a braided look to it. I would love to know how to do it. Can anyone help?

dorothy's peruvian embroidery 1

palestinian cross stitch embroideryAt Gloria and Terese’s home, on my last night in the US, I saw this piece of Palestinian cross stitch embroidery that they had collected. I would love to know about the motif in the center. One pattern has been repeated from top to bottom while being rotated 90 degrees. Does anyone know about this motif and what it might represent? For more about these embroideries and the women who create them, take a look at this beautifully made site which has been put together with the support of the Red Cross of Iceland.

And, as always happens, when I learn a little about a new craft, examples of it seem to just fall out of the sky into my hands where ever I go! Not embroidery….tatting! One of the participants in the Indian texiles workshop was a tatter and showed me her work in progress. The larger of the two pieces will be a baby’s cap. I am in awe! Thank you, Vonnie, for teaching me to tatt.
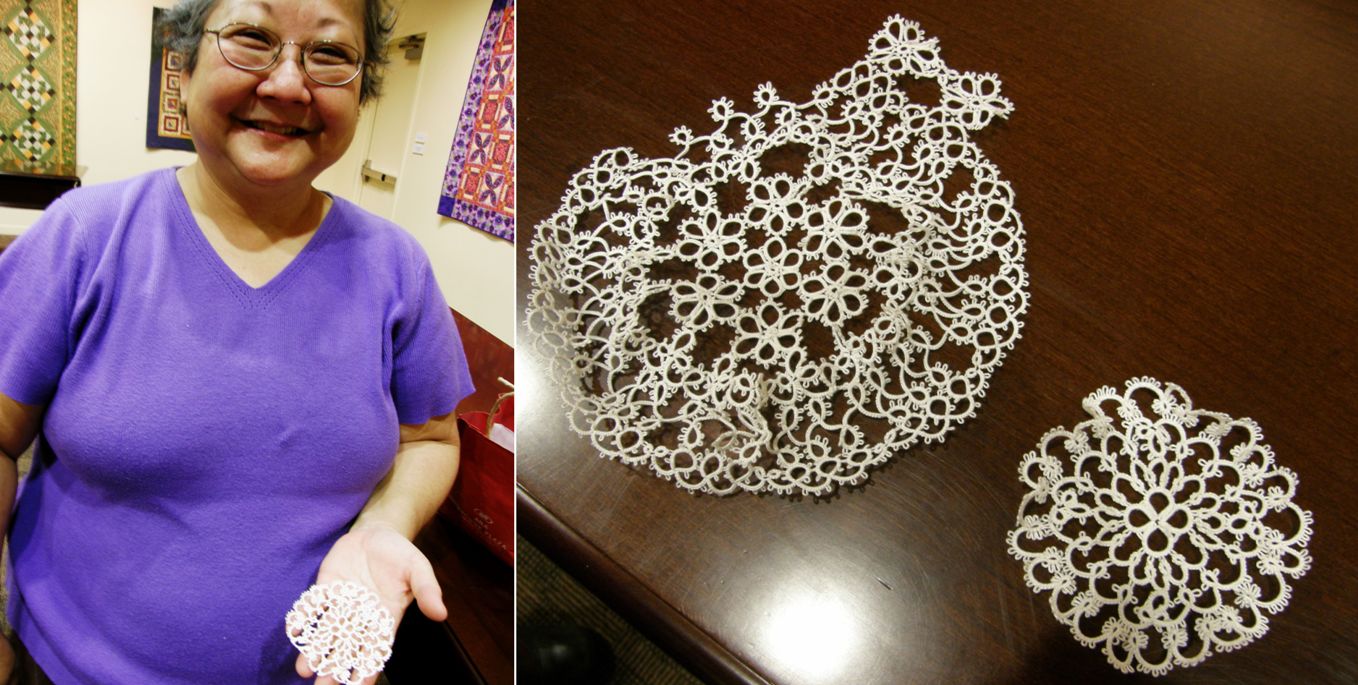
tatting

And then I was chatting with Rachel, the barber, in an old barber shop in downtown Santa Cruz California while staying with my weaving friend Annie (I had created a bangs emergency when I got over enthusiastic while cutting my own). The result of that encounter is this…

tatting shuttlesRachel had recently got these as part of a big purchase of sewing supplies at an estate sale and was happy to pass them on to me. I think I had better get a-tatting! I like the metal one the best with the wee hook on its ponited end. Now the challenge is to see how simple tatting can be applied to my weaving. My online weaving friend Carol, who lives in Nicaragua, told me that this same idea also recently occurred to her. I would probably use wool instead of the super fine thread that is usually used for tatting.

dovetailing of two color warpsFrom embroidery to tatting and now back to a bit of backstrap weaving.

You may remember the discontinuous-warp piece that I got to play on. I wrote about it in my last post and have written several posts, like this one, about the technique.

I need to point out that this warp is not mine to keep. I was simply put in charge of transporting it from Yonat to Dorothy, its new owner, and my fee for the service was being allowed to play on it a bit! In any case, Dorothy needed a hand getting it going and I was happy to be of help.

This warp was used in a workshop on the ticlla technique that was given by Nilda Callañaupa in the US in 1997 and the project was never finished. Dorothy and I both had a lot of fun playing with it.

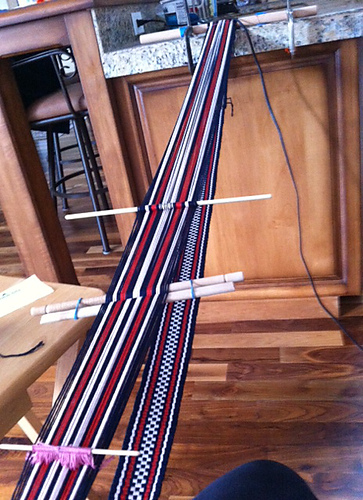
I wove from the end that had been started in the workshop and got the weaving on the other end established so that Dorothy could continue. Of course all the sticks are really too long for this project but this was the way it had been set up in the workshop and we didn’t see any reason to change things.

dorothy weaving the ticlla pieceYou can see that the warp has been turned around and there is Dorothy with the llama bone tool in hand beating in the weft.

dovetail section of discontinuous warp projectDorothy was kind enough to have me stay for a few days and there was precious little time to weave this together as Dorothy teaches art during the day. Coming home from a tiring day teaching art to children is not really a good way to face a tricky piece of weaving. So, while Dorothy was at work, I removed the dovetail stick in the center that holds everything together. A thick piece of thread remained behind in place of the stick. Then the join had to be stabilized by weaving on each side of it as you can see above. It is now up to Dorothy to finish the piece.

discontinuous warp piece stabilizedShe will continue to weave until it is impossible to open the sheds any more using the shed rod and heddles. Before she gets to that point she will be able to make things a little easier by using a thinner shed rod and passing the weft on a needle. The final stage will have her needle-weaving, picking up every other thread on the blunt end of the needle so that she can create a shed and pass the final wefts shots. She will have to do this on both sides of the center as each panel is a separate four-selvedge piece connected by the central dovetail join.

I enjoyed the chance to weave with the beautiful, beautiful handspun yarn that Nilda brought with her from Peru. It was so lovely to be able to bring this weaving back to life again sixteen years after it had been started. Yonat, who has been holding this warp since the workshop, wrote to me to tell me about its owner who has since passed away…

I thought I would tell you about the loom:

The name of the previous owner was Jean Davidson.  She was an amazing artist, curious to no end with an amazing sense of color and structure.

Her unique talent was her chenille-style quilts. She was an awesome lady, and I just feel like her energy is bubbling in that project that you guys are playing with.

Yonat also gave me a link to a site which shows the quilts that were part of an exhibit held in Santa Cruz in 2008 called Dreaming the Earth in which Jean participated.

The pieces in the show were inspired by creation stories from 
the indigenous peoples of Australia to honor the Arboretum’s Australian 
garden.  Most of the stories upon which they based their quilts were drawn
from a collection of Australian Aborigonal folklore by K. Langloh Parker 
(Australian Legentary Tales, 1997) available online (http://www.sacred-
texts/aus/alt/index.htm)  Abbreviated versions of these stories may be found next to the photographs of each of the quilts.


The quilts are beautiful and the stories delightful. It is really worth taking a look at the site. How nice to be able to weave on this piece that Jean started.


seat for backstrap weaving
If you are wondering about Dorothy’s set-up for weaving that I showed earlier, let me tell you more.


She had that built following instructions by my online friend Sharon on her blog. Sharon is really talented when it comes to DIY and improvisation and she told me about a cool seat, foot rest and warp hitching post that she made so that she could sit on the floor with her back against the sofa and weave. I posted the link here, Dorothy saw it and had it made. I got to try it and it is very cool. I like being able to brace my feet against something although I am wondering about the strength of the foot brace. There it is again above with one of my demo warps in place and a cushion on the seat for extra comfort.
synergo arts ergonomic benchMeanwhile, Bobbie from the Ravelry Backstrap Weaving Group reports that she has bought, for around $30, all the parts necessary for making the ergonomic bench  for backstrap weavers according to the plans put online by Synergo Arts.


We all looking forward to seeing how that turns out.
You can find plans for the bench with instructions on how to use which include a video here.


Other interesting textiles that I saw on this trip…
Mark showed me a woven cotton saddlebag. It is from the Piura region of Peru and I had never seen anything like it before…the jaw-dropping diversity of Peruvian weaving!


The red and black designs are warp patterns. The other colors that fill in parts of the main motifs are supplementary wefts. I love it when warp float patterns and supplementary wefts are combined this way and have only seen that once in an old Mexican belt. The tails of the supplementary wefts were left hanging out on the inside of the saddlebag pockets. There is a similar piece on this site which is dated at 1930-39.
saddle bag piura peru
 And, this is a four-selvedge piece!
four selvedge cotton weaving
If you look very closely a little way above the paper label you will see where the very last weft shot would have been needle woven into place. Thinking about doing a four-selvedge piece with cotton makes my hair stand on end! I tried it once….maybe one day I will try again!


I have more to show but will leave it here for this week. Let me end with Jennifer taking up the love of the curious coil rod. She placed one on a band which had started its life on her inkle loom. After transferring it to her backstrap loom she was disappointed to see that it had developed a serious ridging problem…that old corrugated cardboard thing that I have discussed here many times and have finally managed to conquer.

Coil rod to the rescue! More about that next week…
jennifer
This is going to be a beautiful guitar strap!


Well, it’s back to cleaning seven weeks of accumulated dust and getting things in order. Hopefully, I will be back at my loom soon.

Backstrap Weaving – What I love about sharing backstrap weaving

What do I like about sharing my weaving?   One of the best things for me is how much I manage to learn myself from my interaction with my weaving friends. And, there are many other things about it that I love, both tangible and intangible. Let me try to list at least some of the things that make this such a wonderful  experience…..

1.Receiving a picture like this via email shortly after weaving with a group:

Karen's pebbel weave bands backstrap weavingKaren, who wove Andean Pebble Weave with me,  sent this picture to show me what she has been up to since then. She completed the bands that we started together and wove more bands as she continues to work her way through my book. Not that many people rush home and weave and get to this point so quickly but it is just the simple fact that she wanted to show me what she has been doing and keep in touch that makes me really happy.

2.Getting a picture from an onlooker who captures the interest and delight on people’s faces while I am busy showing samples and talking:

134demoThis picture of (from left to right) Karen, Nan, Laura and Stephanie was taken by Franco. I miss some of these little moments while I have my eyes on the textiles.

3.Getting to spend “fiberholic” evenings with my friends, while chatting and cluttering up the place with WEAVING STUFF:

vonnie backstrap weavingMy friend, Vonnie, sits back at home with a very interested onlooker to weave a little on the band that we started itogether.

Vonnie showed me how she makes her tablet weaving a “weave anywhere any time” craft. As always, I am happiest on the floor.

tablet weaving at vonnie's houseI have a stretchy hair band around my neck to which the band is attached (this is just in case you are not wearing a belt to which you can attach) and the other end is hooked to my shoe lace. It was very comfortable!

4.Reconnecting with people I met on previous visits who have now become dear friends:

annie and barbara in santa cruzThat’s Annie and Barbara tackling a skein of hemp (next to Ginna). I  am here to just hang out for a few days with them. We will probably see that beautiful rusty red hemp woven into one of Annie’s gorgeous one-of-a-kind inkle woven guitar straps soon.

5.Meeting lots of fun and enthusiastic people who are interested in something about which I am passionate – backstrap weaving and South American textiles – and helping them to perhaps realize a dream or simply enjoy spending some time trying something completely different:

???????????????????????????????Stephanie, Betsy and Vonnie have just made their first set of string heddles and are putting their newly acquired skills to work  on a narrow band.

6.Having the opportunity to spend time with long-time online friends who have been so helpful, supportive and fun for years. If you are part of any fiber-related online weaving group, you are bound to know Franco Rios!:

franco backstrap weaving7.Putting faces to my more recent online acquaintances:

laura and nan backstrap weavingLaura is a fairly new member of the Ravelry Backstrap Weaving Group and we look forward to seeing more of her. She and her mother, Nan, came to weave together with me.

8.Exchanging ideas and learning new skills:

???????????????????????????????Vonnie knows tatting and now…., so do I! The picture above is, of course, of Vonnie’s fine work. However, I am rather proud of the way mine is coming along in both fine cotton and wool.

my tattingVonnie gave me a shuttle to take away and showed me how pospsicle sticks can do the trick nicely as well. When practicing with the heavier wool yarn, it is very easy to use the yarn straight off the ball rather than place it on any kind of shuttle. However, you can’t help enjoying looking elegant holding the wee shuttle daintily between thumb and forefinger.

lucet cord and braidVonnie taught me to make cord using a lucet (the wooden instruments seen on the left) and I taught her to make a braid using a piece of cardboard and the fill-the-gap technique, something I learned thanks to the ladies of the Braid Society that I met while in the UK. Here is a close-up of my cord and Vonnie’s braid:

lucet cord and vonnie's braidAnd, there are also surprising connections to other Ravelry group members. Vonnie showed me the sweetest homemade rigid heddle that group member Janet had made for her using a sushi mat. It is touching to see how many firm behind-the-scenes friendships form between members of the Ravelry groups.

jenat's heddle and my lucet giftAnd that is the pretty lucet that Vonnie gave me!

9.Coming to weave on a second morning and finding that people had woven at home on their own: 

admiring backstrap bands on day two of classLaura, Caroline, Vonnie and Betsy admire bands on the morning of our second day together that had grown in length overnight. Some of the patterns the ladies wove were of their own invention without the use of charts. Seeing that skill develop makes me exceedingly happy!

supplementary weft patterned bands10.Meeting someone new who shows me what she has managed to learn at home, either by using the free tutorials on this blog, or by following my books:

carolines pebble weave bandThat’s Caroline with a pebble weave band she has been weaving at home.

11.The trust and support that develops among the weavers as they work together. Folks applaud and encourage each other and, with this support, are able to accept little mistakes and mishaps with good humor: 

warping for backstrap weavingTeam warping: that’s Janet on the left with Caroline in the center warping under the watchful eye of her warping partner, Stephanie. This is where I get a chance to stand right back and enjoy watching how people work and solve problems together.

12.Seeing a first-time-ever weaver being nurtured by the rest of the group, taking to it and having fun and seeing the movements used by everyone…experienced weavers and beginners alike… to open the sheds and operate the loom become increasingly automatic and relaxed:

karen new weaverThere’s new weaver Karen working at opening the sheds. She soon learned that a sweater on her lap made a great tool tray.

backstrap weaving group sacramentoHere’s “Team Backstrap” enjoying the sun. We had some spectacular spring weather for us. Many thanks to Betsy and Franco for inviting everyone. Franco kept us entertained with various bird-spottings. We were working right by a large open door and could enjoy the outdoors without being out in the harsh sunlight.

13.Understanding a little more about people’s different learning styles.

14.All the cool stuff I get to do and see and the cool people I get to hang out with. Like…

redwoods sant cruz california…a) roaming around the redwoods….

santa cruz mission…b) admiring and exploring local sites such as the only building left of the mission in Santa Cruz established in 1791. That building would look very much at home in downtown Santa Cruz, Bolivia with its white adobe walls, wooden pillars and red tile roof. Many buildings where I live resemble this one although most are in a state of advanced decay with tropical greenery threatening to take them over….

tapestry in progress by Zapotec weaver sergio martinez…c) seeing other kinds of weaving and sometimes meeting their makers. I had the wonderful luck of being able to examine a tapestry in progress by Zapotec weaver Sergio Martinez. He weaves and shows his work in Old Folsom just down the road from Vonnie’s place. Unfortunately, Sergio had just left for the day when we arrived but I wrote to him to ask permission to show his weaving here and we have been corresponding. The piece in progress is an image from the Aztec codices. Sergio’s woven themes, as far as I could see, are very different to those used by Zenon and Jaime Hipolito whom I visited earlier in this trip. It was very interesting to see how widely the work of  Zapotec weaving artists can vary.

stitched shibori samples by rachelle weissshibori-like fabric in fasion…d) learning about other textile arts such as the art of stitched shibori at a workshop give by Rachelle Weiss at the Santa Cruz Handweavers Guild. Dyeing expert Kris Nardello assisted. It is a technique that historically was largely practiced in Japan and is a way to decorate cloth using dye-resist techniques.

The workshop was very well attended. Rachelle’s instruction and inspiring samples created a lot of excitement and chatter which made it a really fun morning. Participants learned three kinds of stitching techniques, some of which also involved folds, for creating wood grain, undulating lines and circular patterns. Everyone will return in June to complete their projects by pulling the stitiches to ruffle and pucker the cloth and then placing the pieces of fabric in the dye bath. I will have to take my kit home and play with it there….

It was fun to go on from there and find shibori-like fabric (at least to me eye!)  used for a dress in one of the trendy clothing stores along the main street of downtown Santa Cruz (pictured above).

A couple of days later, I visited with Barbara  and she showed me a gorgeous piece of shibori cloth that she had created and sewn into a garment.

barbaras shiboriShe had used techniques that we had not seen with Rachelle. Rather than creating areas of resist and then dyeing the fabric, she applied bleach. You can see how leaves were placed on the black fabric and then bleach was sprayed around creating the reddish background. Pieces were clamped to the cloth to create the bar-like patterns which I think look like sticks of bamboo.

The fabric has been used to create a jacket with simple twisted yarn ties for closures. That was in Barbara’s pre-braiding days. Now she will be able to replace those simple ties with some kind of fabulous braided tie using her takadai or marudai skills. Here are some of her examples created on the marudai and takadai…

barara's tkadai and marudai samplesMy day spent at Barbara’s was her regular twining get-together with Yonat. Both Yonat and Barbara weave with me on every visit and it was nice to see what they had learned when Ravenstail twining expert Cheryl Samuel visited the area. You know how much I love twining! A Google search tells me that Ravenstail is a type of twining and surface braiding that was used by native Americans along the Pacific Northwest coast to create dance aprons, blankets and robes.

Barbara had obviously been very much absorbed with this since last fall as she has already made these three adorable pouches…

??????????????????????I learned a few tricks while Yonat and Barbara worked for making the ending of the twining neater. The basic technique of twisting the “wefts” and changing colors is the same as the technique I use to create the twined patterns that I use on my backstrap weavings. However, there are many specialised moves involved with creating the patterns that you see above with their outlines and embellishments.

yonat's ravenstail leggings??????????????????????Yonat and Barbara are each working on a project to make traditional leggings. This is Yonat’s piece. The working frame alone is a thing of beauty. Barbara’s husband made hers and Peggy’s husband made a few for various members of the group.

ravenstail frameLook at the  inlay work created by Peggy’s husband! What you are seeing there is the lid of a tool box that he cleverly incorporated into the basic framework. The frame comes apart easily so that Yonat can pick up her work and take it home at the end of her study day with Barbara.

And, while the ladies were twining, I got to weave on a discontinuous-warp project that was part of a workshop given to members of the Santa Cruz guild by Nilda Callañaupa way back in 1997! This particular piece was not touched after the workshop and its owner has since passed away. Yonat has been keeping it and is now passing on to another of our backstrap group members, Dorothy. On its way to Dorothy, it fell into my lap and I just had to weave on it! I will be spending this weekend with Dorothy and we will get to play with this together.

discontinuous warp backstrap loomI hadn’t taken a backstrap to Barbara’s place and so just used a piece of cord. It was pretty comfortable, believe it or not! The wool yarn was quite friendly and I got quite a bit woven before lunch. What was unusual for me to see was that this had been warped to include complementary-warp pick-up patterning. All the discontinuous-warp pieces that I have had the luck to examine so far have been either plain warp-faced weaving or patterned with supplementary warps.

discontinuous warp backstrap weavingThe horizontal bars that you see above tell us that the piece was warped for complementary-warp pick-up. Yonat, who also took the workshop back in 1997 remembers having woven a double-faced hooked “s” pattern on her piece. Barbara was also in that workshop and neither of them have worked on their pieces since. I am happy to report that they now feel those unfinished pieces calling to them and, hopefully, they will get motivated to get back to work on them with confidence sixteen years after the original workshop. (By the way, the piece is posed on top of Yonat’s latest clasped weft project in which she used the technique to create a beautiful landscape.)

dovetailing of two color warpsIt was interesting to see how the two colored warp threads in the pattern area were carried while warping. You can see that they were wound together as one thread. They were then separated into two sheds when the heddles were installed.

So….on one short visit with a couple of my now, very dear weaving friends I learned about SO much!…shibori techniques, ravenstail techniques and a bit more about warping for discontinuous-warp projects.

tablet woven wool bands…e) getting ideas from weaving friends and the fun stuff they have lying around.

I saw a bunch of very long wool tablet-woven bands overflowing from a basket in Annie’s living room. Annie acquired these after a deceased guild member’s belonging were given away at a meeting. Each band is ten feet long. Who knows what the weaver’s intention was for these but I am seeing some kind of interlaced project along the lines of the fabulous weaving bench cover I showed here some weeks ago.

The colors are so rich and appealing. What if these were laid out vertically and interlaced with sandy colored bands running horizontally….oh, yes!

Let me show you what Jennifer Williams, aka inkledpink, made by interlacng some inkle-woven bands…

Jennifer williams inkledpink

So, what do I love about sharing backstrap weaving with people? What’s NOT to love?!


Backstrap Weaving – Where the Yarn Grows on Trees

Oh give me a home,

Where the sheep roam,

And the yarn grows on trees…

handspun yarn tree at Janets

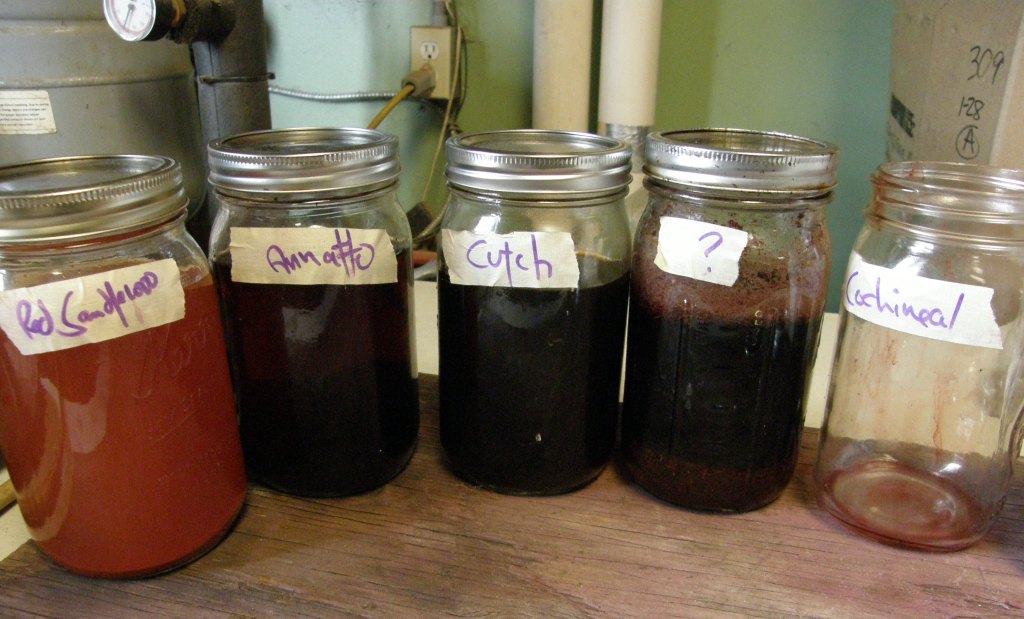
yarn tree sculpture at lydiasThere have been two stops on my trip since I last wrote…one in  Texas and another in Humboldt County in California. Above you can see luscious skeins of Janet’s handspun at her home in Humboldt that I strung up in a tree after a day of dyeing. Janet used these natural substances…

???????????????????????????????…as well as indigo in an old vat.

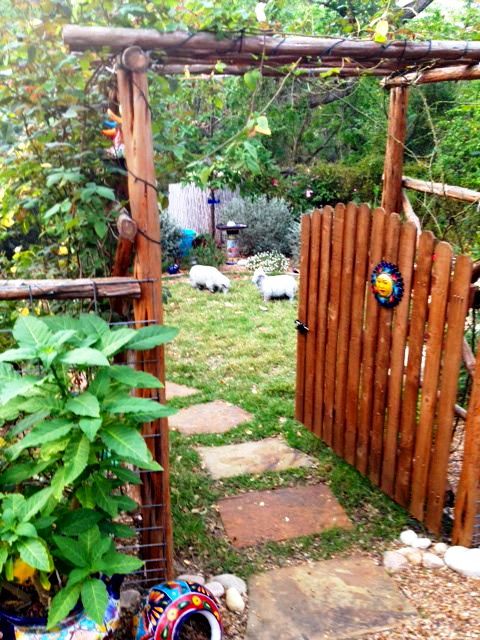
And then there is Lydia’s sculpture wich spans branches in her yarny yard in Texas. It is a patio and garden space that whispers serenity and begs for exploration with plenty of benches and seats tucked in shady spots around every corner on which to sit and simply ponder.

Here’s her garden loom dressed up to greet the spring…

gardenloom031813_mediumAnd she brings the colors of spring, the desert and the garden into her home covering her walls and banisters with her own woven art.

lydias trio

??????????????????????That’s Lydia in the center with Eileen. I stayed with Eileen last year too and we met again in Manchester UK at Braids 2012.

Driving up to Lydia’s home, you get a hint of what is to come within the home and beyond when you see the weaving that stretches between the front porch posts. Lydia would love to have a group backstrap weaving in her home and I think that weaving in her garden would be heavenly!

Speaking of heavenly spots, here is a group of weavers from last weekend in northern California…

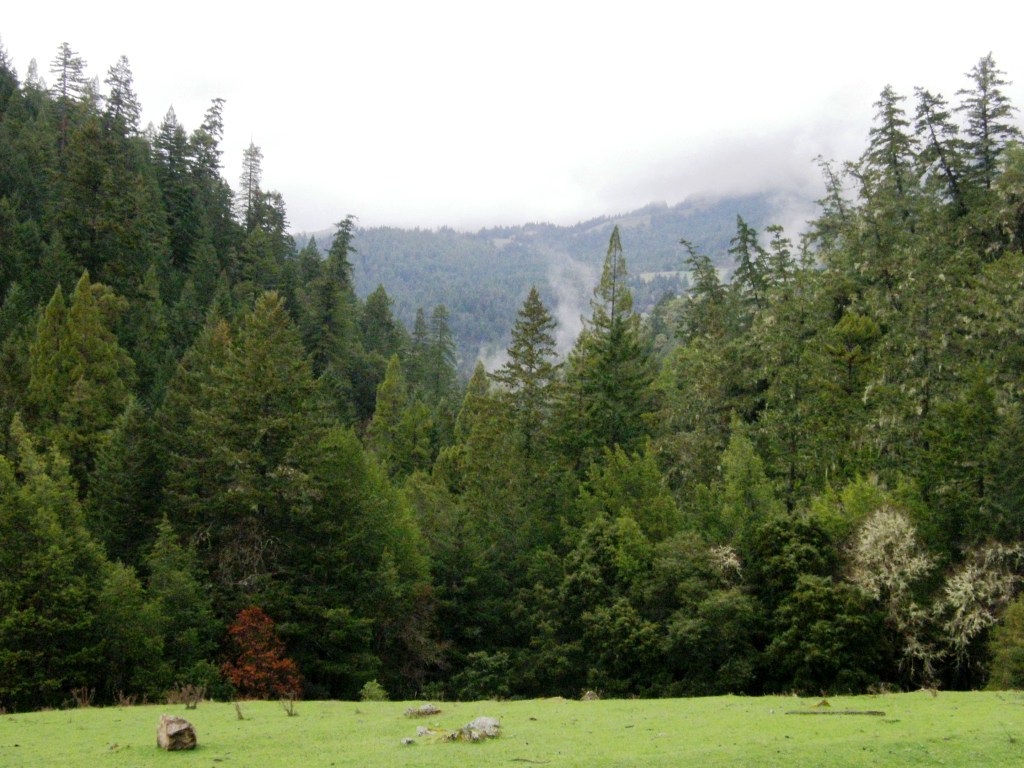
??????????????????????Ace and Pam of Ace ‘n the Hole Romneys offered their home for our group. You can see that neither the weavers nor the weaving are the feature of this particular shot…instead, it’s that amazing view through the glass of the redwood forests and mountains!!

??????????????????????And, while wee resin sheep figures roam in Lydia’s Texan garden…

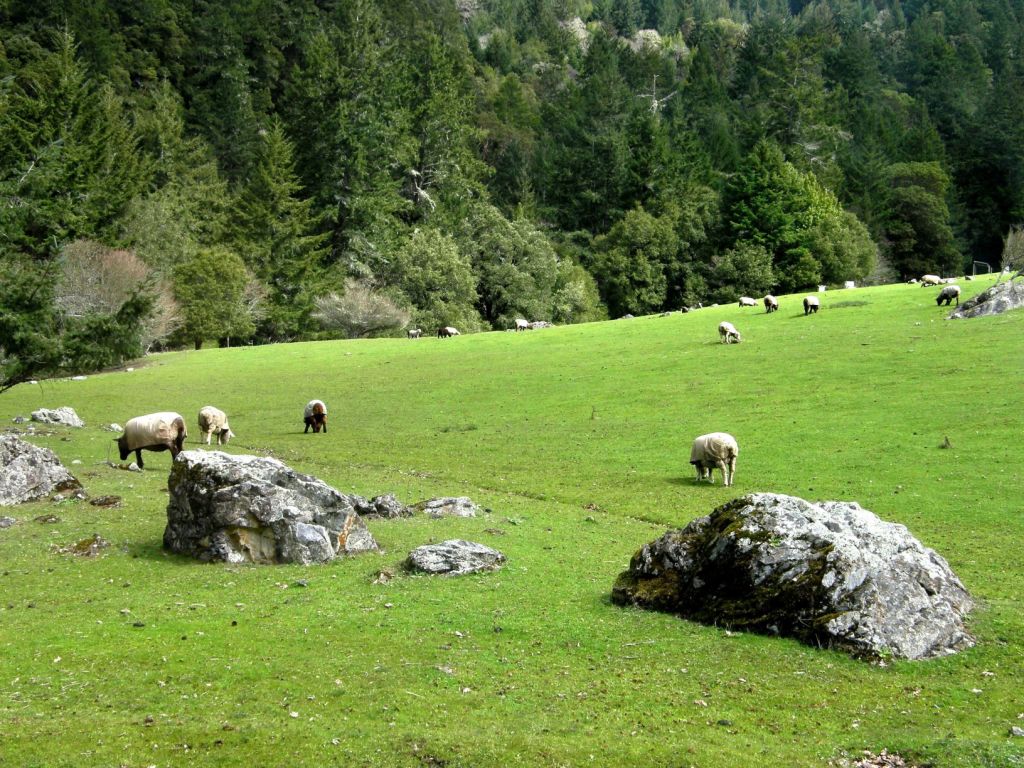
sheepAce’s romneys, whose fleeces have won many ribbons at fairs on both the east and west coasts, roamed the hillsides. Meanwhile,  indoors, we wove pebble weave on backstrap looms.

aces sheep

Janet in the GlimakraAce is a prolific spinner and is finally fulfilling his dream to weave with his handspun having just bought a pre-loved Glimakra counter-balance loom which we put together with Janet at the helm.

Ace and  Janet playfully tease and compete with each other at local fiber fair speed spinning contests. I won’t tell you who wins.

There’s Janet seen through a curtain of heddles on the floor tying up “stuff” (you can tell that I know next to nothing about these kinds of looms!) to get Ace’s loom up and running.

Looking at these things I am  amazed at how people sigh and roll their eyes at the masses of string heddles on my backstrap loom when floor loom weavers have to contend with all those heddles and shafts and treadles!

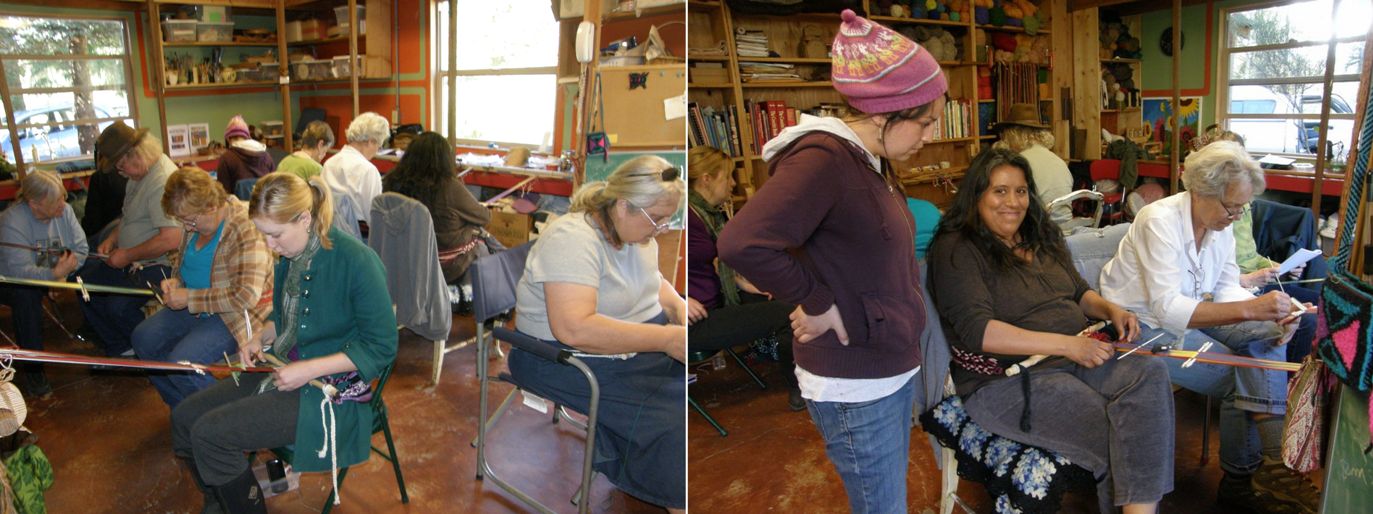
Nine weavers got together at Ace’s place. Two wooden pillars in the living room gave us the perfect places for attaching the looms. We had that beautiful view to enjoy while weaving and during breaks.

backtrap weaving from posts at aces placeIt was fun to see the  bevy of bands accumulating around the posts as the pick-up weaving skills developed and patterns started to take shape.

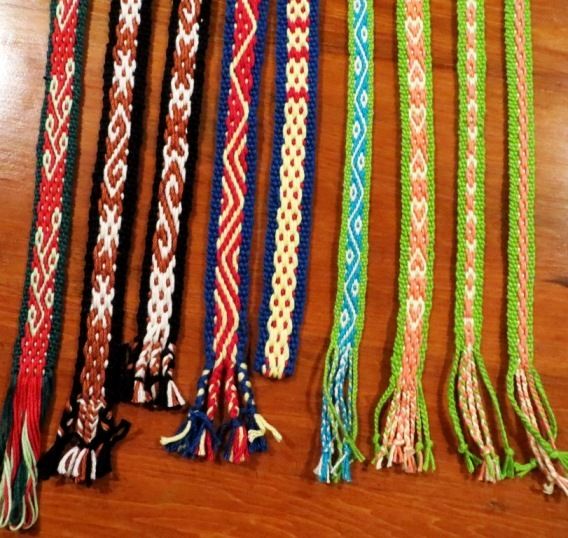
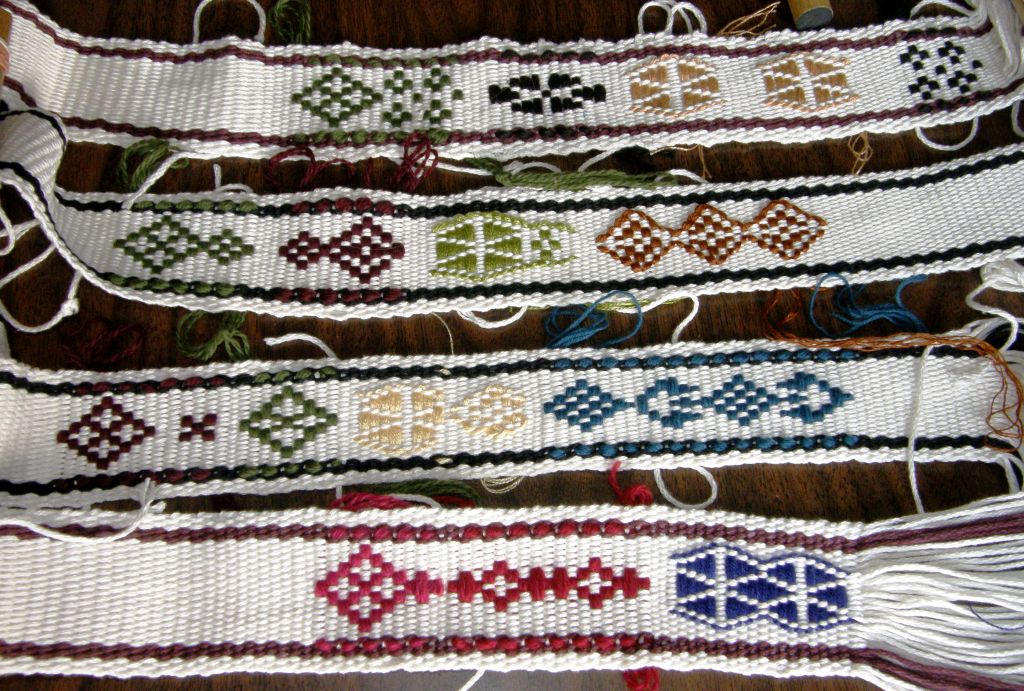
pebble weave bands backstrap looms

Betsy and Janet's pebble weave bands alongside some other pick-up work that we did during the week.
Betsy and Janet’s pebble weave bands alongside some other pick-up patterns that we had played with during the week.

As our bands filled with motifs, the mist would eerily rise and fall over the trees and hills. The sheep would run and scatter at a sudden roll of thunder and the wild turkeys would come out to strut their stuff.

wild turkeysThe previous weekend had been spent with another group in Janet’s mill.

backstrap basics at janetsOn the right you can see Priscilla and Rose whose families are from Ecuador and Peru. Both were excited about experiencing something which has its roots in their South American heritage. Some of these weavers also joined us at Ace’s for pebble weave the following weekend.

That left a week between to have fun in Janet’s mill.

janets processingJanet showed me what she is currently processing in her mill. While the machinery does its stuff, Janet and Betsy can spin and weave. Betsy learned to spin and weave with Janet and you can see the band she is weaving on her backstrap loom using her handspun. This band will participate in our Year of the Snake Weave-Along.

janet and betsy weaving and spinningJanet is just as much at home spinning fine and smooth yarn for backstrap bands, a different weight and quality for blankets and then something completely different yet again for rugs.

janets yarn x 3 aWhile working in the mill she can jump from a backstrap loom to her huge Glimakra floor loom, from her wheels to  drop spindles from wool to silk as the mood takes her. Pretty much every weaving project no matter what size or what loom, involves her own handspun.

Janet at the Glimakra

janets weavingBetsy also creates beautiful pieces of fabric with her handspun which she sews into lined shoulder bags. She weaves the straps on on backstrap loom.

betsys handspun weavingsI wove with Betsy and Janet doing an Andean pick-up pattern during the week and then Connie came over to weave intermesh with Janet.

tanka choro and intermesh

???????????????????????????????

Connie weaving intermeshConnie weaves all kinds of bands and braids and brought her band box over to show her takadai work as well as her inkle loom-woven bands.

Connie's band box

Aunt Janet's Fiber MillThere’s always something good and fibery going on in Janet’s mill and, with its heated floors, it is definitely the place to hang out on chilly mornings and evenings. Fleeces, handspun yarns, rolags and batts spill from the shelves. Half-woven backstrap bands dangle from shelves loaded with books on all kinds of fiber arts and crafts.

Every second Saturday night, the looms are pushed aside and chairs are pulled up all around for Honky Tonk evening. I was lucky to be there for one of those when eleven local musicians, including Janet and her husband Larry, gathered for an evening of jamming….two upright bass, a flute and clarinet, mandolins and guitars, an Irish drum, and spoons!

I got to help rescue a large handspun and naturally dyed ikat project that Janet had started on her backstrap loom. It had been left to languish on the UFO (unfinished object) pile when Janet got a little frustrated with trying to open the sheds.

Janets wool ikat projectYou can see the gorgeous colors she obtained from madder, onion skins and onion skins overdyed with madder. She wrapped the yarn to create rectangular ikat patterns. The problem was that she had pulled the weaving in too much and that was making the sheds almost impossible to open as the warps were pushed together so tightly. I was itching to get into this project!

Standing to backstrap weave

standing to weave tacabamba peruOnce the width had been re-established and some broken warps repaired, I got out my wichuña, the llama bone tool which is used by weavers in Bolivia to strum the warps and separate them. This makes opening the shed-rod shed easier.

The wichuña is also used to push the weft into place. Janet will be able to use a deer antler that she has.

I found that standing to weave this piece made opening the sheds easier. I had seen weavers of wide warps in both wool and cotton standing to weave in Peru and thought that I would try it. I think that having the warp angled slightly upward as well as having one of the large butt-cradling backstraps that I saw the weavers using would have made things a little more comfortable. I am not saying the sheds now pop open magically. There is a technique to apply and you still have to work at getting the sheds cleared.

I was so happy to have had the opportunity to try this.

After all this wooliness, let’s go back to Texas with its vastly different climate. It isn’t one that begs for wool much the same as Santa Cruz, Bolivia where I live. I often look with envy at the lovely socks that people knit and thick wool scarves that they weave. But, who can complain when there is so much beautiful cotton to be played with!

???????????????????????????????

cascade ultra pima and eileen's backstrapHere we are in Eileen’s home shopping for yarn during a break in weaving. We had Sue Ellen of Old Oaks Ranch Fiber Arts Center with us as an added bonus and I asked her to bring her skeins of Cascade Ultra Pima.

This cotton yarn comes from Peru and we called Cascade Yarns to check if it is mercerized. It has such a lovely sheen that we thought that it must be even though the label does not indicate so. It turns out that it is.

Eileen had used it to make her backstrap (pictured above) and it came out beautifully.

I am going back to Bolivia with three skeins to try out for myself.

Karen mary and susan backstrap weavingOf course, it wasn’t all shopping. Here we are weavingg.

??????????????????????It was nice to see some familiar faces in the group. Karen, at left, had woven with me in Pennsylvania and just happened to have a business trip to San Antonio planned which happily coincided with this gathering. Susan, in the green top, had woven with me last year  here. Penny was also a returning.. Mary, pictured next to Susan, was new to this group and backstrap weaving and has been brought up to speed by Eileen.

I was lucky to be here during Austin’s famous SXSW Music and Film Festival. I was astounded afterwards to look online and see all the big names that had been performing at the festival. Eileen and Guy took me out on Saturday evening to stroll through the downtown parks and soak up some of the festival atmosphere.

After visiting Lydia’s home and magical garden, Eileen took me to Old Oaks Ranch. The yarn store was lovely but it was the sculpture garden that really caught my eye.

origami horse sculpture

An origami horse sculpture provides a spot of cool blue among the sandy ground and cactus.

sculpture at old oaks ranchI love this shade-dappled woman astride her giraffe drawing you to gaze up at the tree tops just as she is doing.

bear sculpture at old oaks ranchThe sculpture garden is a soothing place to stroll or sit and chat as these chaps are doing while on a break from weaving class or yarn shopping at Old Oaks Ranch.

It’s almost time to leave Janet’s and head back to the cities. Next stop will be the state capital, Sacramento, where I will get to weave with long-time online weaving buddy Franco. I will get to meet Laura, another Ravelry group member, there too.

Let’s look at some Ravelry group projects before I leave you….

hetty and jenniferThat’s Hetty’s backstrap on the left decorated with pebble weave motifs from my Andean Pebble Weave bookHetty wove with me when I visited the Netherlands last year and it is wonderful to see that she now has her own woven backstrap and is continuing to weave using a backstrap loom. On the right is Jennifer’s band on which she is weaving a pattern of Tinkipaya, Bolivia. This one is charted in my second book, More Adventures with Warp-faced Pick-up Patterns.

cindyq and juliaCindyQ wove a stunning band also using pebble weave patterns charted in my first book while Julia is clearly having a wonderful time adapting traditional Japanese textile patterns to the pebble weave structure. This piece was woven on a floor loom. The instructions for weaving pebble weave on a four-shaft loom are included in the first book. (Edit: Julia has since told me that this piece was, in fact, woven on a backstrap loom) My second book guides and encourages weavers to draw their own pebble weave patterns and Julia has certainly taken up the challenge! She has even include some weft twining. (See the tutorial for this here)

So, it’s back to the mill for one last day with Janet and Betsy. We will weave tubular bands this afternoon. I can see Janet making pretty edgings for her handspun handwoven pieces with those.

janet and betsy on the last dayThat’s Janet on the left weaving a ñawi awapa while Betsy on the right tries to squeeze as much as she can out of one of her pebble weave bands.

I was telling Janet about how weavers in Peru use a tanka, or forked stick, when they weave the ñawi awapa so, we decided to go out stick hunting in the late afternoon sun on this most gorgeous spring day.

stick huntingWho knew how difficult it can be to find the perfect forked stick?! I wanted a large, strong one to use in my warp  for weaving bands like this weaver from Peru…

???????????????????????????????

???????????????????????????????Janet was the best spotter.

The one below, that Mikey has his eye on, turned out to the best one for me. What a nice weaving souvenir to take home from my visit up here. 🙂

forked stick for backstrap weavingHopefully I will squeeze in more posts before heading home. See you then!