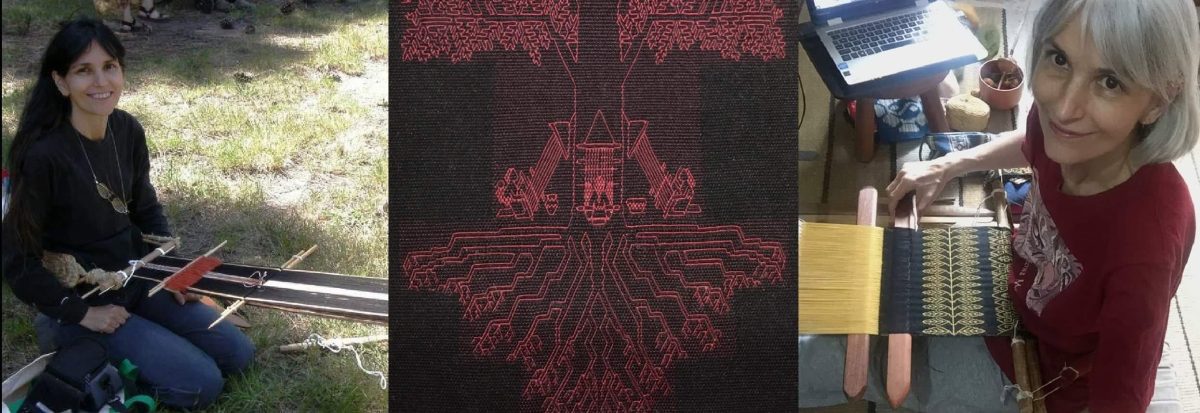
Backstrap Weaving – Taking Stock

As I get ready to hit the road once again…how these seven weeks at home and back at my loom have flown!!…I always find it useful and somehow necessary to stop and take stock of what I have done with my weaving time and think ahead to my return so that I can hit the ground running when I get back. The next time I am home it will be for a full luxurious six months, unless I get restless and decide to go visit with my weaving teachers. Several ideas have already come to mind.

The first thing I finished when I got home seven weeks ago, was the silk paisley-patterned scarf.

If you have been following my blog over the years you will certainly know about my friend Dorinda. She recently left Bolivia to return to her home in the USA after having worked with a group of weavers in the central Bolivian highlands for about a decade. She writes and tells me about her transition back to life in the developed world. It is inspiring for me as I face the the fact that one day, I too, will most likely need to return to my other home in Australia and leave all this behind. This year I celebrate twenty-five years in South America. Leaving seems impossible and the very thought of it breaks my heart. If I could somehow make my home in both countries…..

Dorinda has also been taking stock of many things, one of which is the inventory of woven items she has had brought over from Bolivia recently. Naturally, Dorinda has had a difficult time assuring the weavers she left behind that all is not over and that she will be better able to generate sales for them in the USA than when she was with them in Bolivia. She is eager to give them a new order but funds for materials to create more textiles must come from the sale of existing stock.

This is where I am hoping you can help out. Dorinda has with her in the USA a limited number of bands of various width, zippered pouches and straps all created with the weavers’ own handspun naturally-dyed wool. If any of you have woven tubular bands with me, you will be well-acquainted with this beautiful cloth. I have also shown the pieces many times on my blog.

From Dorinda:

Those of you who enjoy working with the hand spun natural dyed woven cloth to make your own creations will be pleased to know that there are 19  fajas/bands ($38) (70” x 5” ) 6 larger weavings ($68) which are 63” x 9.5”, and 12 straps ($18) which are 74” to 78” long and 1.5” wide available for purchase.

Photo courtesy of Dorinda Dutcher.

There are also zippered pouches…$17 with wrist strap, $16 without, as well as yoga mat straps. Dorinda is particularly keen to promote the yoga mat straps as these are woven by the youngest weavers and sales of the straps encourages  themto continue learning to weave from their elders and advance to wider pieces. Read more of the story in Dorinda’s blog post.

Photo courtesy of Dorinda Dutcher.

You can contact Dorinda directly to order or ask about any of these items by emailing her at dkdutcher@hotmail.com

As for my taking of stock, I am pleased that a couple of the items I completed during this short stint at home will travel with me. I have a new pouch for my iPod and charger as well as a handy neck pouch for carrying my iPod about when I want to use it as a camera.

I finished the neck ribbon for Tracy so that I can complete our fun sprang-for-backstrap-weaving barter agreement…

And, I wove a couple of silk bookmarks which are gifts for some friends. On the first one I used patterns that I haven’t woven for years and which I saw during time I spent with Angela, my Guaraní weaving teacher. I got half way through charting these patterns, but found that it was actually faster to just wing it….something which is fairly easy to do in the intermesh structure.

I wove the mug rugs pictured above many years ago with one of the patterns and still have three of the test pieces which served as my guide for replicating the motif. It had taken me a few attempts to get the tubular edging on those mug rugs right and the two pieces in the picture were duds. I am not showing the ugly edges of the mug rugs in the picture! I have a large tub of these abandoned pieces under my bed in case you believe that everything I weave turns out well first go! Occasionally I pull them out and they become useful.

Speaking of mug rugs, one of the new backstrap weavers on Ravelry has been using the mug rug pattern charts here on my blog to weave sets of mug rugs. It’s nice to see those patterns being used along with the tutorial on double weave. Those mug rugs were a favorite project of mine all those years ago. They wove up so quickly and I still have them scattered all over my home.

I took another silk book mark of the loom and used a 9-strand flat braid for finishing it. The green one was finished with a five-strand version.  I call these my ”lazy” braids…one large braid that is quick to make as opposed to the multiple four-strand round braids that I usually like to do. I have a tutorial for the five-strand version here. The nine-strand one follows basically the same steps except that individual strands go over two and under two instead of over one, under one as described in the five-strand tutorial. It keeps all the fine ends of 60/2 silk nicely under control.

In my last blog post I described my small test pieces for double-width fabric on my backstrap loom and lamented the fact that I didn’t have swords that were long enough to weave the width I want, around 23 inches, in a single layer rather than two.

Well, it turns out that I do! My place is so small it is hard to believe that I could overlook something like this. I have a beautiful sword that goes with a backstrap loom from the Karen people that my friend Bhakti gave me. It would work beautifully on fabric up to 23 inches wide. I also have lots of Navajo-style battens from my tapestry days. They are long. I used to weave 24-inch wide Navajo style pieces back then. These are, however, probably too narrow but would do in a pinch. And, I have four wooden one-meter length rulers that are the perfect width. They have been sitting in a tub alongside uncut broom handles for so long, I no longer even notice them. So, I think I am well set to cut and  shape some nice long swords from those when I return to Bolivia.

The Karen loom with its nice long split-beams and sword.

So, that’s one for the to-do list when I get home. I also want to weave a shoulder bag  with one of the cute pockets that highland weavers here incorporate in their coca-leaf pouches. These pockets are typically very small, about the width of two fingers. I want to weave a patterned wool bag with a much larger pocket that would fit perhaps my iPod, a notebook or other small item.

I learned to weave these pouches with pockets in Potosi, Bolivia way back in 1997. Part of the fun of that project was learning how to decorate the pouch after I had finished weaving it. The bag was edged with a patterned tubular band. The pocket was edged with triple cross-knit looping.

My teachers Julia and Hilda discuss how to set up the warp that includes the pocket. It had been many years since either of them had woven one of these bags.

That’s me weaving the small pouch on the horizontal ground loom. And here’s the finished pouch with its little pocket in some of the lively colors of the highlands.

I attempted to weave one these a few years ago. It resides in that tub of stuff under the bed that I told you about earlier! I had attempted it in cotton and quickly realized that cotton requires a lot more precision for this kind of thing than wool. For something like this, a bit of stretchy-ness is good! So, I have woven a miniature version in wool with a teeny tiny pocket. My notes in my journal on this back in 1997 are quite sparse. I am sure that I thought at the time that it was all just so obvious and not worth noting down. But, it was amazing how things came back to me when I hit the first obstacle in the process.

Above you can see the wee pocket with some triple cross knit looping on the side. I need to practice that some more. Some of these pouches have their pockets edged with tubular bands, like the one at left, and some have no edging at all but may have a small pom pom or tassel or added fringe hanging from them. So, that gives me a second project to come home to. I am hoping to weave the pouch with four selvedges, as is the tradition. I had also hoped to get some ikat experiments done during this time at home but that didn’t happen.

And, to finish my taking-of-stock, it was fun to be able to finally edge the purple lap blanket and put it to use in what has been a winter with unusually lengthy periods of cold-ish weather.


The double weave music band will travel with me as a sample for those who will be weaving double weave with me in Australia.

I will leave you here with some news from Taproot Video. I am sure you must all know by now that Taproot Video is the home of my video class Operating a Backstrap Loom.

Taproot Video offers its classes on dvd or as streamed content. The most recent offering is Carol James’ much awaited class on sprang braiding. Carol has had a free video on the site for some time in which she teaches some of the basics. Now you can explore the topic further with her Introduction to Sprang.

I haven’t tried it myself but I can’t see any reason why sprang wouldn’t work on a backstrap loom. One of these days I’ll do that…after I finish the wide silk piece and the wool shoulder bag and all the ikat experiments and and and…I hope my time at home later this year will see some book projects finished too.

I hope to find time to write some “postcard” blog posts while on the road. Until next time!


Backstrap Weaving – The Bands Play On

The bands play on…

In a time when my weaving goals are geared toward going wider, finer and longer, there is a surprising amount of narrow band-weaving happening on my backstrap loom. I guess I am satisfying the desire to go finer and longer, if not wider, in some of these projects. At least the 110-inch band that I wove as an edging for my wool blanket falls into the long and fine category.

Two years have passed since I took the panels for the wool blanket off my loom and now I have it finished at last along with its red and brown partner.

Now….bring on the cold weather so that I can snuggle under these!

I stayed with fine thread for the next band project which only satisfied one of my three goals. I wove a strap for my new iPod neck pouch. First came the tubular bands for the sides of the pouch followed by the neck strap. I  set up the warp for the strap with four sets of heddles and zoomed along.

I was able to fit three of the four cat patterns from my latest pattern book on the back of the pouch. After attaching the tubular edgings, I sewed coil stitches to cover the raw edges at the bottom of the pouch. The mouth of the pouch ends in selvedges that don’t need protection. I want to re-do the coil stitches as the needle I used was too thick for the weight of wool and I think I can make the coils more compact with the finer needles that I have.

And then it was back to 60/2 silk for another band with lots of pick-up. I am using only two sets of heddles this time and so my pick-up stick is getting a good work out.

This band is for my friend Tracy who makes the most adorable sprang pouches.

I asked her if I could buy one…they are just so darn cute and I loved the colors. I know that it is hard to put a price on these kinds of handmade items and so we came to an arrangement to make a swap…a silk neck ribbon for a sprang pouch. Tracy surprised me by delivering that pouch quick smart. You can see it pictured above.

I am afraid that I am sadly lagging behind on my end of the deal. I am so happy to have this ribbon underway on the loom now.

I am using the same snake pattern that I used for a neck ribbon I wove for myself some time ago. I hang a pendant on it and use it as a necklace. This is a pattern that I adapted to fit the number of threads I am using from a pattern woven by my Guarani weaving teacher. When I showed this to some online friends, one of them pointed out the little red “rubies” that appear in the bends of the snake when you look at the other face. I hadn’t noticed that before.

So there have been a handful of narrow projects on my loom while I have been contemplating my next big project. This one will be wide. I will be on the road again before I can even hope to get this next one started. Besides, I think I need to buy more thread for it and I’ll bring that back with me when I return.

I have played around with a handful of what, for me at least, are wide projects in the past….

This was the first time I tried 60/2 silk as warp.

Another wide-ish one in 30/2 cotton. I’d like to stress that these are only ”wide” in terms of what I normally weave on my backstrap loom. They are not at all wide compared to the pieces that are routinely woven on backstrap looms in S.E Asia! Take a look at these images of backstrap weavers from Laos and Vietnam with their tremendously wide warps (used with kind permission from the folks at Above the Fray Traditional Hilltribe Art.)

I felt I needed to stand to get my friend Janet’s wide wool warp started unlike the gentleman in Ecuador who skillfully works at his wide and very heavy wool warp while seated…

 A Peruvian weaver, below, stands and “dances” with her loom as she manages her 39-inch light cotton warp…

The challenges of going wide…firstly, there’s the equipment. Long beams, shed rods, cross sticks, coil rods and heddle rods are no problem. There no end of wooden broomsticks and such things down the street in the market. What I am lacking are swords of the right length. I rummaged around and pulled out my biggest ones…

Only one is the length that I feel I need. I could have some made for when I return (make them myself?…I am useless at that sort of thing!) But then I started thinking about the double-width cloth that many floor loom weavers make when their looms are not wide enough to accommodate the width that they want to weave. They weave half the width in two layers which then unfold to make one wide piece.

Time to experiment.

I have no idea if the following small experiments will really give me any clue as to how easy this will be to handle with many more warp ends. I guess I was more curious at this point to experiment with sett and how that affects the fold in the cloth.

What I liked while making these experiments was the ability to cut off a sample and clamp off my warp. That way I could wash and press the sample, take notes, plan changes and then continue using the same warp for the next one. The width of the warp you see on the loom below is half the width of the woven cloth.

I suspect that these wooden clamps that I inherited from a guild were home made. I have searched on Google for similar things but haven’t turned up anything yet. I have two of them and they work well at holding the threads while I cut off a woven sample. I clamp one to the unwoven warp while it is under tension and then cut off the woven cloth. I lash the clamp to a dowel when I want to start weaving again.

You can see the first two samples above. I calculated the width I should produce with this number of ends of 60/2 silk based on pieces I have woven in the past. I wove the first small piece at a closer sett. It’s not the width that would normally be produced in my hands and I had to work to stop the cloth from widening.  That resulted in uneven selvedges. The density also made the sheds that much harder to clear. However, of the three samples I wove, this one was the only one where the fold in the cloth was not noticeable at all.

I let the second sample go wider than I normally would, which made shed management much easier. I also practiced a new pattern that I had charted in supplementary weft. The fold in the cloth was quite obvious in this one. It wasn’t noticeable when the cloth was just lying flat but it certainly was when held up to the light. The warp ends were spread further apart at the fold, enough so to create what I would consider a fairly weak spot in the cloth. Again the selvedges were not tidy because I was forcing the cloth to be a width which was not natural in my hands. The only advantage had been that the slightly more relaxed sett made opening the sheds easier.

I let the final sample sit at its natural width…yay, selvedges I like at last. The fold is only slightly noticeable when the washed and pressed cloth is held up to the light but I don’t believe that it affects the integrity of the cloth. It’s amazing how much variation there can be in width while still producing good warp-faced cloth.

Each sample had its advantages…1. invisible fold line, 2. easier loom operation, 3. a more natural rhythm for me and neat selvedges. It’s a toss-up between numbers 1 and 2. I won’t have to decided until I get home from my next trip. Most likely I will want to weave more samples. In the meantime, I can think about colors. Or…if I don’t go with double width, I’ll come home to some new long swords.

As usual, I have some pieces to show you that were woven by my weaving friends. I will limit the selection this week to four different techniques…

Ann wove this wool band using a backstrap set-up and one of my favorite patterns. I discovered this one on a pre-columbian fragment that I was shown and it is charted in my second book (you may have gathered that I have lots of favorite patterns)…

I think it is magical how the pelicans flow from light on dark to dark on light. Of course, you may not be seeing pelicans. You might see cogs and gears, as one weaver remarked. Ann wove this using a temporary picking cross, manually selecting threads for every weft shot.

Kristin’s beauty is based on an adaptation of a central Asian pattern that I charted. Those colors!!! This is stunning. This pattern allows the optional use of two sets of “pebble heddles” and I am pretty sure that that is the method she chose for her backstrap loom.

This is Nicole Stronge’s warp-faced double weave using the two basic sheds on her inkle loom. I have more projects from Nicole to show in which she has continued to create her own patterns, beautifully personalizing her bands for the intended recipients. I will save them for future posts.

Martina has created a really cool set-up for her backstrap weaving in her home. She’s using the backstrap she wove herself and is creating a band decorated with patterns in supplementary weft.

Cut into lengths, the band was made into key fobs and a book mark.

There are free tutorials for the last two techniques right here on my blog. Follow the links I posted above. I am also producing a pattern book and dvd on the double weave technique which extends and deepens the basic tutorial I have provided here.

Now it’s back to my loom and my wee silk ribbon. I also want to follow through on all my good intentions and surprise friends by weaving the bookmarks and ribbons that I have had in mind for them. Goal: get these finished before I hit the road again.

By the way, Australian friends….If you live in the Newcastle area I will be teaching two workshops there in August. There are spaces available! Contact me if you are interested via a comment on this post.