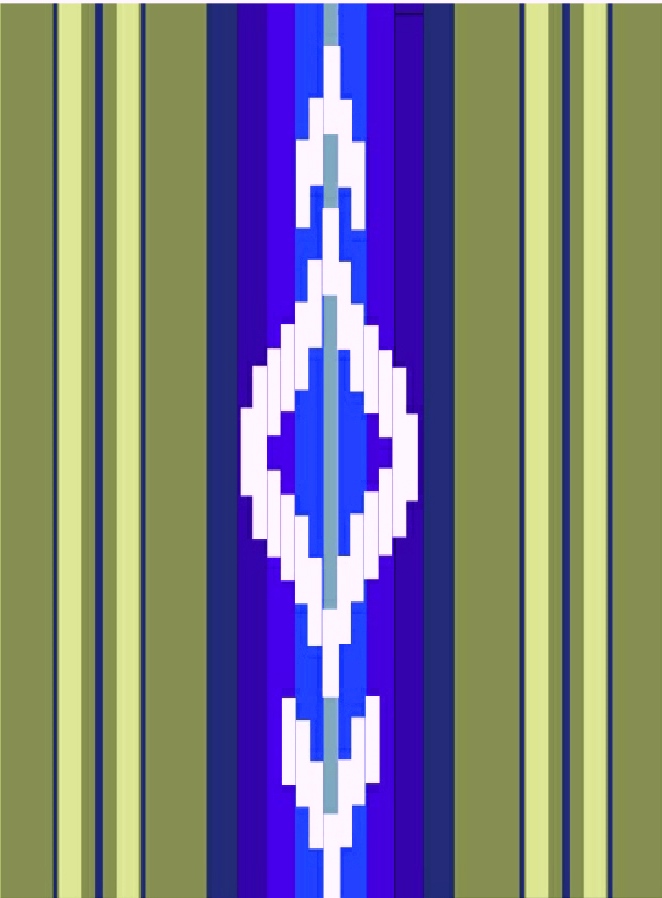
Backstrap Weaving – Bye-bye Traddy

I used left-over scraps of that wheel-spun wool along with some of the wool I used for my Navajo-style weaving in natural dye experiments in Chile. They were wrapped around rolls of paper and coiled into what you see here which I used as the lid for a basket.

I am a “cheap spindler” in much the same way as I am a cheap drunk…it doesn’t take much to make me happy! Don’t waste the good wine on me. I do not have a refined palate. So, it is little wonder that I am content to use my humble Cusco drop spindle when I get the urge to spin. I just don’t have a refined palate for spinning tools.

The Cusco spindle was the second one I ever got, the first being from San Pedro de Atacama in northern Chile. The Cusco one that I got in 1996, being more robust, became my constant travel companion. It was practical. Although I have collected many more spindles on my weaving safaris since then, this Cusco one is the one I always use while the others hang on the wall behind the sofa as souvenirs of places I have been and people I have met.

The spindle I got in Cusco in 1996.
Some of the whorls from the spindles on the wall fell down behind the sofa only to be retrieved later when a friend helped me move it. Here are three that I found there among the cat toys. It’s so interesting seeing the various styles of whorl.

The very first spinning that I did for weaving on my backstrap loom was with some extremely dry, brittle, and filthy llama fiber that I had bought from a farmer while wandering about the back roads of Uyuni in the Bolivian highlands. I cleaned and prepared it. The dust and dirt would have me wheezing and my skin would crawl and eyes run every time I opened the bags to get more. It made for good spinning training. I gave the fiber a tremendous amount of twist because at that time I believed that this was the only way hand-spun yarn could possibly stand up to the abrasion of warp-faced weaving. I have since learned that this is not so. That kind of yarn produces durable, hard wearing cloth and in a tight warp-faced weave can make a garment highly water-resistant. Of course, that isn’t always the kind of cloth I want.

The natural colors of the llama I spun. I was always amazed at how nice it looked when woven. Warp-faced structures are very forgiving in that way.
When I was given a large bag of spearmint leaves by a friend, I decided to use it it to dye some of the llama yarn. One batch gave me a nice neutral taupe color. The second lot my friend gave me produced green. I also had some cochineal for red.
I was able to buy a lovely fine commercial yarn in Chile that was a blend of alpaca and wool and came in earthy colors. I would use my drop spindle to add extra twist as, again, I’d thought that yarn for warp-faced weaving simply must have that tightly spun characteristic. The green in this band I wove with this yarn is actually cotton.
The first time I was given prepared alpaca to spin by my friend Janet, I decided that I simply couldn’t put all that heavy amount of twist into that beautiful fiber. With a bit of extra care in the way I handled it on my backstrap loom, it made lovely warp. The yarn was quite balanced and didn’t kink up on itself.
You can see that this alpaca yarn that I spun lies flat and relaxed when not under tension.
You can see how my teacher Maxima’s handspun wool yarn behaves when not under tension. All the energy from the twist causes the warp lying on the ground to tightly spiral. The yarn will produce hard-wearing cloth.

I really enjoy reading the online group forums about spinners and their spindles. The participants’ love and enthusiasm for their tools is wonderful….I totally get it but I just don’t share it. Some of the spindles they show are beautiful pieces of craftsmanship and I love seeing them. But when it comes down to it, I just want to get the job done. If you like your tools to be uniquely hand-carved pieces of art, take a look at Allen Berry’s work on Instagram (allenrberry). All his fiber tools are amazing.

It seems that when it comes to spinning I am totally product oriented which is kind of strange as it is quite the opposite when I weave.  I just want to get this stuff done so I can go weave with it. In weaving I am all about enjoying the process. I probably would not have been willing to devote any great amount of time to spinning if not for the pandemic. The combination of needing to keep my hands busy during Zoom sessions as well as a dwindling stash had me happily spinning up all the wool I could find in my closet.

Weaving a small tubular band as a test for my handspun wool yarn to see if a) it would be suitable for my warp-faced weaving and b) if there was enough contrast between the three colors for use in a three-color pebble project.
The warp for a three-color pebble project with my handspun “pandemic” wool in purple, pale yellow and a rust.

And then I took on a new adventure…spinning cotton. As with my favored Cusco spindle for wool, I have taken the takli that Elizabeth gave me in Australia as my one and only tool for cotton. It is all I feel the need for right now. It makes for quiet, comfortable, and fuss-free Zoom spinning.

My first lot of Sea Island cotton and the gifted takli spindle. I was pleased with this first attempt but hadn’t known at the time that Sea Island cotton has a longer staple length than other varieties and is therefore easier to spin.

My collection of spindles that I have gathered in my travels includes a few that are used for cotton. Here are two from Guatemala and one that I bought from my Guaraní teacher here in Santa Cruz. The whorl on that one is a piece cut from the sole of a sandal.

Two spindles from Guatemala flank the Guaraní one.
Workshop spindle.
I love the way we are all so focused on our teacher’s demonstration. As it turned out, she is left-handed and we were all righties. She got us all started one by one turning the spindle in one direction and we then proceeded to unspin what she had started for us!
Moving on here to Upland cotton.
The color called Mahogany in the center after being boiled. The pre-boil color is below to the right.

And of course, there is the horizontally-held spindle for cotton spinning that is used by my teachers in coastal Ecuador.

The cotton is draped on a wooden stand called the “rueca” for spinning. It has a notch cut into its top which grabs the cotton and allows the spinner to draw out the fibers under tension. A small basket is woven from plantain fiber underneath on which the spindle sits when not in use. This is a miniature version of the rueca which I made with my teachers’ help so that I could take an example back with me to Bolivia. I need to place something in the little basket to weigh it down because it is so small and light. The typical spindle can be seen at right with its wooden whorl. More often now you will see people using yo-yo halves and metal wheels as whorls.

Here are some tiny whorls from coastal Ecuador that the family had found while ploughing their fields. There were close to forty of them sitting in a bowl on a shelf, just like that.

My very first experience with spinning cotton had been in coastal Ecuador where I got to work almost from scratch, de-seeding, teasing apart, and fluffing up the cotton. It was difficult spinning it on the horizontally-held spindles compared to what I do now with the takli. Unfortunately, I didn’t spend much time on it while there, being much more interested in the weaving part of the process. My teachers already had plenty of spun singles that they doubled for warp so that I could learn how they weave their double-pocket saddle bags and hammocks. We would pass time in the evenings on cotton preparation.

My first attempts with the horizontally-held spindle in Ecuador with my teacher Trini and her mother Luz (rip).

I put in a little practice when I got back home but the loom soon called me away…

My cat got to the point eventually where she paid no attention to my fiber-y pursuits.

I may have never gone back to cotton if not for the pandemic. The loom was always pulling me one way yet my stash of gifted sliver in the closet was growing. Thank you to all those, especially Betty, who were so kind with their gifts when I was visiting in the States.

I have woven with my singles thread. It was an even freakier experience than the first time weaving with my handspun llama yarn all those years ago.I was surprised to see how well it tolerated the string heddles and the close sett on my backstrap loom.

I love the look of all these handspun cotton singles lined up on my backstrap loom.

I’ve used it in plain weave for ikat pieces as well as for pieces decorated with pick-up patterns that I’ve used in small purse and wallet projects.

Wallet project with pick-up patterning in the structure that I call Andean Pebble Weave.

Right now I’m spinning some more brown sliver that I just uncovered in the closet. I’ve yet to use the brown in a project.

Ikat projects in my handspun cotton singles. The lower one uses some of the natural green cotton in both its boiled and not-boiled versions. Most of what you see there is the not-boiled green.

No doubt when I return to Australia I’ll have lots of access to sheep fleeces and will wonder about my Traddy and how it’s being used on this side of the world. I won’t be buying another wheel though, and will slowly work my way through, as is my habit, with my drop spindle. I won’t be displaying my other spindles on the wall either and that might lead me to picking up one of the others for a spin and giving the Cusco one a rest.

See you all next time…

Backstrap Weaving – Cotton Tales

While scrolling through my Facebook feed last week I was surprised and excited to see an ad from the Museo ArteCampo here in Santa Cruz for a workshop being given by two Guaraní ladies on spinning cotton. There are three recognized groups of Guaraní people here in Bolivia living in the lowlands between the Chaco and the Andes. Artecampo has been working with people from the Isoseño group since 1984 helping them to recover and preserve dwindling knowledge of technique and motifs while providing a market for their handwoven hammocks, bags and wall hangings.

Examples of GuaranÍ textiles at the Museo ArteCampo.

The timing of this workshop couldn’t have been more perfect considering that I have only recently started to spend a serious amount of time spinning the stash of cotton sliver that I have accumulated in my closet…all generous gifts from my weaving friends. I haven’t seen anything like this being offered in all the years I have been here and who knows? I may not have considered taking the workshop if it had come along years ago.

Learning to spin cotton in Ecuador in 2007.

Two video classes on cotton spinning by Joan Ruane and Stephanie Gaustad as well as a short in-person demo with weaving friend Elizabeth in Australia (who had gifted me a takli spindle) had helped me to get started with using a takli. I am sure that some of what I had witnessed and tried during my stay with a family of cotton spinners and weavers in coastal Ecuador way back in 2007 also helped. I had really been way more focused on the weaving during that stay. Although I was curious and interested, cotton spinning at that point hadn’t captivated me. I just couldn’t see myself having the desire to do it or having a need for hand-spun cotton thread.

This was also true when I’d had the opportunity to study with Ju Nie, a Montagnard (Vietnamese hilltribe) weaver and spinner. She showed me how she first teased the cotton with a bow and then spun it on her spinning wheel. It was fascinating but I had considered that demonstration of such beautiful traditional skills and tools as just an interesting interlude during my studies of the beautiful patterned weft-twining that she was using on the fringes of her woven pieces. You can see the frame on which we were carrying out the twining work in the background. I recently learned that dear Ju Nie passed away last October.

And so, my time had finally come during the pandemic to focus more closely on cotton spinning. And then came this workshop. A miniature Guaraní loom sat on the table at the workshop with a piece of weaving in progress but I didn’t allow myself to get distracted!

Under a tree dripping with mangoes, fourteen of us gathered to learn how to spin cotton on the typical spindle used by the Guaraní ladies.

I already own a spindle that I had bought from my Guaraní weaving teacher many years ago. She only had a little cotton on hand and had given me a very brief demonstration. That had been enough to satisfy my curiosity as, again, I was much more interested in the weaving at that time. She did tell me at that time that cotton was being grown in the community of Isoso and that the inhabitants were not willing to give the seeds away to anyone….not that I had asked for any. I have nowhere to grow it. At the workshop, however, we were free to keep the seeds that we were removing from the cotton.

Angela back in 2010 giving me a short demonstration of how she spins cotton.

The spindle I bought from Angela as well as the ones we were given to use in the workshop, had thick pieces of rubber for whorls. The rubber pieces look like they have been cut from the soles of sandals. A simple groove is sliced into the end of the shaft.

The workshop spindle.
The spindle I bought from Angela in 2010 has a beautifully shaped end rather than just the simple cut groove.

We took the seeds out of the cotton and teased it apart with our fingers into a light airy sheet. Then we copied our teachers’ movements and rapidly lifted and dropped the sheets multiple times a few inches above the table before very gently forming them into loose rolls. One problem we faced was that Sabina, the teacher at my table, was left-handed. She loaded each spindle from scratch and then handed it off to us. As soon as we right-handed folks started turning the spindles, the thread was un-spun and subsequently broke. Not a big deal. We all laughed.

Sabina gets the spinning started while we prepare the cotton.

Although, I am very much used to the watch-and-copy style of teaching used by my teachers here, I had also had the benefit of lots of spinning explanations from my video and in-person experiences as well as lots of trial-and-error practice on my own. And so, I managed to get on just fine. I could understand very well the struggles of the other participants because it wasn’t so long ago that I was experiencing the same difficulties.

Clara worked with a group of participants at another table.

I really wanted to use this workshop as an opportunity to see how the Guaraní ladies manage to spin much heavier thread than I do. They weave hammocks with their plied thread and it is thick and sturdy and so I spent the workshop time trying to focus on that. I created thread that was just a bit thicker than what I have been creating at home but it was nowhere near as thick as Sabina’s and I wasn’t able to keep it consistent. Sabina kept laughing at my fine thread but also told me, with what seemed to me to be pride, that her grandmother had been able to spin very fine thread. My other interest in the workshop was to chat with the teachers about their experiences learning to spin and weave as children. Plus, I wanted to see if I could manage to spin decent thread from cotton I had prepared myself in such a basic way rather than with the beautifully prepared sliver that I had been given.

Cards had been placed on a table so that we could see the Guaraní words used for describing what we were doing. Our attempts to correctly pronounce the phrases brought on more laughter.

GuaranÍ spinning vocabulary and Spanish translation.

As for my cotton spinning at home, I am still working my way through the color labeled Cinnamon. I boiled the color labeled Mahogany and was astonished to see how much it changed its tone. I love it. Either some of the brown comes off in the water, or this cotton was particularly dirty…the water became a mucky, murky mess!

The boiled Mahogany in the center with the original color below right. Above is the original Cinnamon color with the boiled and not-boiled greens on the left.

Now for the latest ikat project using my hand-spun cotton. I might try this particular idea again some time, but not with my hand-spun cotton. It turned into quite a business! I wanted to have a white ikat pattern on a background of various tones of blue. You might remember a project I did a couple of years ago in which I used a multi-colored warp for ikat. This was industrially-spun and naturally-dyed silk and the project was relatively simple: tie the ikat tape on the multi-colored silk…the dyeing of the warp thread had already been done by someone else…and then dye the whole thing one solid color, in this case, black. I loved the result.

I am able to get quite sharp images when using using uniformly spun thread.
The color-inspiration picture.

The current project is more or less the opposite in that I wanted the ikat to be a single solid color, in this case, white, with a multi-colored background. I wanted the change in the blue tones to be fairly subtle. And so I had to tie the pattern and then split the warp into sections and dye two sections at a time separately so that the outer sections were very dark, gradually lightening toward the center. The very center section was dyed grey (which I now regret doing…I should have just gone with light blue) as I was using a picture of my choosing for color inspiration as part of a group weave-along and grey was part of it.

What a task it became! I was using my hand-spun cotton singles. The small individual sections totally twisted up on themselves in the dye bath and so the dye was not able to fully penetrate some parts. I had to repeatedly remove the thread from the bath and try to separate the individual threads and then poke and prod and pick at them in the water. The poor things took quite a beating. And then they would dry and I would find them to be too light and the contrast between the strips of blue too great and so back into the dye bath they would go. Yes, so next time I try this particular ikat idea, it will not be carried out with hand-spun singles. There was way too much picking and pulling and wrangling of the thread going on. I just knew that I was going to have a lot of shift in the pattern as a result. So much fuss over such a small piece. I had been planning to weave it after adding natural green cotton to the sides to make a piece wide enough for a pouch but I decided not to risk my precious green on a project that seemed doomed to fail. Perhaps it could be a wrist cuff instead.

Another goal of this project was to arrange the angle of the diagonals in the pattern so that the diamond shape was more curve-like. That part seemed to have worked out quite well. As always, I really enjoyed unwrapping the plastic ties to reveal the pattern and then sitting down to finally weave it. One of the center threads broke. That’s a problem when it’s ikat unless you have another tie-dyed thread to replace it. But everything else went smoothly. There was a lot of shift in the pattern but that was expected and I was happily weaving away at this point.

After looking at the finished piece for a few days, I decided that it wasn’t so bad after all. I decided to go ahead and weave the green sides separately so that I could piece together a useful item. Yes, another pouch. After all that work, the ikat piece really deserved to be made into something. I planned the layout combining the darker boiled and not-boiled green with a little blue that I had already dyed for a previous project.

I wove the two strips separately but at the same time…if that makes sense. It fit better in my weaving space if I wove it this way rather than as one long strip cut in two. Besides, I could keep a better eye on matching width this way. Again, it was just lovely to be at the loom doing simple plain weave and enjoying the look and feel of the hand-spun cotton. Three broken threads were easily replaced…no tie-dye to worry about this time. The broken ones happened to be the not-boiled green…coincidence, or does that say something about a change that takes place during the boiling process? The threads broke when I was moving the coil rod. Note to self again…set up the coil rod right at the end of the warp and leave it there.

A first look. The sewing isn’t finished yet. I’ll just use a large snap at the mouth of the pouch. I am very happy with the curviness of the pattern.

Here’s the gang of hand-spun ikat projects all together.. The pattern of the latest one repeats on the back as I had folded the warp to halve its length and was therefore able to tie once and get two patterns.

I have another ikat idea developing using my 30/2 silk and reds…maybe cochineal? In the meantime, I will keep spinning cotton. I want to boil small amounts of the new Cinnamon color for different lengths of time to see if that produces different tones. Right now I have some 60/2 silk on the loom and am using double weave to create some jewelry pieces….experiments. I already have a nice ikat pouch in which to keep them…lol. I am thinking ahead to my eventual move back to Australia and considering the eye-wateringly high cost of living (compared with Bolivia). It will be helpful if I can perhaps sell some woven items at craft fairs.

One other thought that just popped into my head is to once again dye sections of pre-warped (but not ikat treated) hand-spun singles allowing them to twist on themselves. Perhaps the differences in dye penetration along the length and breadth will create interesting patterns. It’s hard to believe that this is me writing this….the one who likes everything to be controlled!

Until next time….

Backstrap Weaving – An Artist’s Residency

I joined a team for this year’s Tour de Fleece event. This is a spinning event that always runs at the same time as the Tour de France. It’s a chance to set yourself a goal and spin along with others, watching their progress, celebrating the completion of their goals, proudly showing off your own work, and learning a heck of a lot about the spinning of all kinds of fiber along the way. There are prizes but I would say that not all that many people are interested in or motivated by that particular aspect. I have made two attempts to play along in a team in the past and have never lasted more than a week, I am embarrassed to say. I got bored!

I enjoy the quietness of spinning in this re-purposed wooden mortar compared to on the pretty plate that a friend gave me. The sound of the metal shaft of the takli against the plate got on my nerves after a while! Still, I treasure the lovely plate and am sure I will find another use for it.

This year, I am trying to spin all the Sea Island cotton that I was given by my friend Betty. I spin a little on my takli spindle after breakfast every day. I feel very motivated and I think it’s because I have specific uses in mind for this cotton thread. That, and the fact that I am pretty new to spinning cotton and am constantly learning, make it more interesting. I also don’t have that nagging need to get as much weaving done as I possibly can, as I used to do, when I would have to drop everything to prepare workshop materials and pack to leave for an extended trip away. Don’t get me wrong…I LOVED those trips away.

This is all pre Tour de Fleece product.

Life has slowed down. I pretend that I am one of those lucky people that go away to escape distractions so that they can spend an extended amount of time focusing on their art. They choose a peaceful or exotic place and do an artist’s residency, drawing inspiration from their new natural and cultural surroundings. That’s me, except that I get to do it in the comfort of my own home and draw inspiration from the internet, lol. I followed along during the several weeks that a Facebook acquaintance recently spent painting in the Shetland Islands on such a residency.

The projects that I have in mind for the spun cotton thread are also “firsts” which I think is another motivating factor. While I spin, my mind runs through the steps that I will take to get those projects off the ground. I try to imagine all the things that could possibly go wrong in the hope that I can avoid them. I am pretty sure that all this will have me sticking with the Tour de Fleece for its entire duration this time. I write down the steps for the new projects in my Weaver’s Journal only to erase or amend them the following day when I figure out a better way.

I had come to the conclusion that I cared very little for the process of spinning and that I am one hundred percent motivated by the product. Now I am not so sure. I have a dismantled Ashford Traditional wheel in my closet that would enable me to spin a whole lot faster, yet I ignore it and stick with my takli for cotton and my good ol’ Cusco drop spindle for wool and alpaca. They somehow just seem to be more “me”. I guess that there are some aspects of the process that I really love after all. I am certainly not purely after finished product as I had once thought.

I had the experience of buying raw cotton, de-seeding it, fluffing it by hand, and then beating it on a sack of grain to prepare it for spinning when I stayed with a family of spinners and weavers in coastal Ecuador. I do understand that all of that is really the most essential part of the process. Being given a large coil of beautifully prepared Sea island sliver to spin is not quite the same, is it?

A photo of one of my prints from Ecuador, 2007. De-seeding the cotton was a typical evening activity in which all family members participated.
Beating the natural brown cotton that the locals call “mico” on a sack of grain.
The method for spinning cotton in this part of coastal Ecuador involves a horizontally held spindle and a distaff. In this picture Luz (R.I.P) uses two fingers to draft while the others regulate the movement of the twist into the drafted area.
As a clumsy beginner, I found it very difficult to get a good rate of spin from the horizontally-held spindle and the positioning and action of the drafting fingers was tough too! I have since been spoiled by the takli.

Afternoons and evenings are for weaving and this is what has been keeping me occupied in my “artist’s residency”. The weaving part of the Finnweave piece with its foliage pattern is finished . I have yet to wet-finish it. If this works as something that I can use to keep my neck covered, I will be pleased. As I mentioned in a past post, I don’t really enjoy wearing the scarves that I have woven. The length and ends and fringe annoy me. I just want something that I can button around my neck (I love the pieces that I knitted that I can just stretch and pull over my head but that doesn’t work so well for woven cloth).

This is the view as I peek over the edge of my bed in the morning. As soon as my feet hit the floor, I am in my weaving studio.

My sampling paid off (it always does). It enabled me to maintain the eight-inch width effortlessly the whole way. This is something that I find challenging when doing a balanced structure without a reed. The sett varies, though! The warp threads between the motifs get a bit a crowded sometimes but then open up again as the positions of the motifs change. I learned from a previous project not to weave motifs in columns because of that crowding problem. I am interested to see how things change after wet-finishing.

I find the pick-up super easy in this technique. Once the first row of a motif has been woven, there’s no more counting to do . It’s very easy to see exactly which threads need to be selected for subsequent rows.

I got the basic idea for the irregular leaf shapes from one of Svetlana Rogatykh’s crochet patterns. The lines in her designs are particularly suitable for Finnweave. The proportions, however, will be quite different and need adjustment. I just took her idea of irregular leaf shapes and went on my own from there. I think that any shape pretty much works. I don’t think that there’s a single “leaf” shape there that actually looks like a leaf on its own. I added butterflies along the way to connect the two layers of the double weave and chose to make them solid rather than outlined shapes. The poor butterflies are flitting about looking for something colorful in that flower-less garden.

Finished and still on the loom. I wove a length that I thought would work well wrapped around my neck, and then some. One thing I didn’t do in my sampling was take before and after wet-finishing measurements. Hopefully not too much of it will be wasted.

And so, while I continue spinning cotton, another project has come to mind. I am really enjoying this exercise of picking through my stash and coming up with projects as opposed to coming up with projects and then shopping for yarn. Years ago, I bought a cone of 20/2 white UKI cotton. I have just finished scouring a good amount of it (I learned the hard way some years ago, that this needed to be done before attempting to dye it) and am planning a warp-ikat project. I want to use the finished fabric to construct something this time…so, no wall hangings, scarves or neck wraps…there will be cutting and hand-sewing involved. Maybe I have become cocky after my successful bag project! It’s been many years since I created an ikat piece with cotton.

The last ikat I did in this same 20/2 cotton became a drawstring bag for my Kindle.

My goodness, the water was soupy after scouring the UKI cotton. Any of you that have UKI in your stash will know about the spinning oil that it carries. I suppose all thread has it but I seem to be more aware of its presence in this particular brand.

Now I have to come up with the motif that I want to create in ikat. I am hoping to use two colors.

In my last post, I said that I was gong to talk more about the backstrap loom in this one. I got carried away talking about other stuff. Let’s see if I can manage it next time 🙂

.

Backstrap Weaving – Bubble, Bubble

Why “Bubble, Bubble”? Because I seem to have spent more time at the pot dyeing yarn and boiling my hand spun cotton than anything else these last days. And that’s okay. I can stand there stirring and thinking about what I am going to weave, or continue with the Bananagrams game that is always in progress nearby. I kept a careful watch over the cotton because I am notorious for letting things boil dry. I don’t know how many times I have stepped away from rice, beans or quinoa on the stove to weave “just a few rows” only to be alerted to a dry pot by the smell of something burning. The pencil cups that I showed in my last post have been working out well for holding these samples of my newbie hand-spun cotton singles under tension. I got a few suggestions from Facebook friends for alternatives when I start producing larger quantities….mostly involving pvc pipe.

I put my juggling balls into the cups to weigh them down and then set them on the window sill to dry. The wind was so strong yesterday that I had to go down the three flights of stairs twice to retrieve everything from the garden below. Versions 2 and 3 seem to to be similar enough to use in a piece of sample weaving. I am not ready to go with the sheer-cloth-and-sizing idea yet. I am thinking of using these samples in my finest reed to weave some balanced plain-weave, something along the lines of this silk sample that I wove some time ago….

I’d like to weave in some tufts of very lightly twisted colored cotton into the cloth now and then. I have a few shades of natural brown and a bit of green. I saw a lovely scarf on Instagram that had been created like that with tufts of wool.

That’s taking second place on the to-do list because I am first weaving fabric for the bag to accompany the three-color pebble strap that I recently finished. It’s funny that this whole project has sprung out of the desire to weave something in the reversible three-color pebble structure and use it in something that would allow both faces to be seen. A bag strap is what I came up with. And so, here comes the bag fabric.

I over-dyed some pale green yarn to this dark blue, hadn’t thought through the project properly at all, and ran out while creating the warp. So then I had to over-dye some pale yellow to finish the warp and have enough for the sides and separate flap. Of course, I can’t expect for a minute to be able to create the same shade of blue when over-dyeing yellow instead of green but this is what happens when you are working with diminishing stash. You either have to plan more carefully around the quantities that you have or just go making it up as you go along! I am usually much more in tune (to the extreme!) with the former of the two strategies and it is interesting finding myself being fairly content with this more carefree approach this time.

I found out when I dyed cotton black for the scarf project above, when it was already too late, that not all blacks are alike. You can probably make out the two strips of darker black in the cloth. They could have been placed at the two selvedges if only I had noticed earlier. What chance do I have, then, of perfectly replicating blue on two different base colors? At least this time I was aware that there was going to be a difference and I placed strips of the “new” blue on the left and right edges of the warp to balance things out. I am weaving in warp-faced plain weave and will add a hummingbird and a flower motif in supplementary weft to one lower corner of the front of the bag and perhaps another pairing in the center of the back. The cloth needs to be fairly “quiet” because the strap is so lively.

I christened the Weaver’s Journal that I had covered with my woven cloth. I haven’t even tried to make my notes neat and pretty because I knew that the effort would not last long at all. Besides, I kind of like my scribblings. 🙂

I haven’t made notes in the Dyer’s Notebook yet because my latest dyeing has been of the more desperate never-to-be-repeated variety.

My Weaver’s Journal covered with cloth in 30/2 silk and patterned with supplementary weft.

This kind of stash scrounging reminds me of when I weaving Navajo-style tapestry pieces in southern Chile in the mid 1990s. I had brought back some Wilde and Woolly wool from the States and topped up my stash some months later via mail order. The rich “Ganado Red” color that I had ordered didn’t arrive. Instead, I got this kind of dusty pink. It worked out okay. I gave this piece to my brother when he visited here and he keeps it under glass on his dining table.

The way the diamond pattern was meant to be aligned.

After that, I decided that I wouldn’t order more yarn by post and that I would only buy in person. I wove several pieces and eventually the bottom of the yarn barrel was in sight with no plans to travel to the States. I had to get into “make-do” mode with whatever I could scrape together. I didn’t want to stop weaving.

Joanne Hall had written a book on tapestry weaving. I had a used copy and I loved some of the Mexican patterns that she had included. The main motif of intertwined black and white lines was meant to be woven as a diamond shape sitting within a square. The square was supposed to be positioned with horizontal top and bottom and vertical sides surrounding the diamond motif….that is, not like I had woven it on the loom.

Because I didn’t have enough of any one color to weave the whole surrounding square, I had to swivel the pattern 45 degrees. And I didn’t have enough yarn to be able to weave the two inner motifs in the same colors. It didn’t look like the picture in the book and I just wasn’t crazy about it when it was done. When I moved to Bolivia, it got left behind in Chile hanging on the wall of the little cottage in which I had lived. I wonder where it is now. Of course, I wish I had it now. What you see here are photos of the only photo I have of it.

The way I had to align it on the loom.

I remember tapping away at a calculator to plan out this piece so that the pattern would fit into the four-selvedged limits and use just the right amount of yarn. My boyfriend at the time asked me if that was how the Navajo weavers plan their pieces….with a calculator…lol. I had obviously put more thought into planning this around my available yarn quantities than my current bag project!

And then I threw almost all the left- over bits and pieces into a pot, dyed them red and wove one last piece….another odd piece with, naturally, multiple shades of red. I got to use the Navajo saddle-blanket structure at the top and bottom of this four-selvedged piece before running out of the tan color and then filled the center with plain weft-faced pattern. Sound familiar? Here I am in 2022 doing the same thing with dye to make the most of my supplies. I like the challenge. I like just making do with what I have on hand.

The twined edging tassels in the corners were sewn down to make the piece less interesting to my cat (who had chewed off the tassels on one of my other pieces as well as a chunk of corner!)
From the archives! 1996 and weaving with my backstrap warp attached to the bottom of the Navajo-style vertical frame.

Of course, it didn’t matter in the end that I had run out of tapestry wool yarn for weft because shortly after all this I went to Peru for the first time and it all became about warp-faced weaving on backstrap looms when I returned, using locally available cotton and the high-twist wool singles that I had been using for warp for my Navajo-style pieces. It all got used! My Navajo-style loom was only used as the anchor point for the end of my backstrap-loom warps after that, except for a couple of quite wide warp-faced pieces which I wasn’t yet ready to handle on a backstrap loom.

Now I am looking at a tiny amount of powder at the bottom of my pot of red-blue dye. My friend Mog had given me some of her supply the last time I was in Australia and it’s almost all gone now. That’s okay. I had a good run with it in some fun projects mixing it to get a variety of blues….

I enjoyed creating different intensities of blue on 30/2 silk for this book cover project.
More fun with dyeing blue on this 60/2 silk ikat warp.

I still have a good amount of a green-blue (again, thank you, Mog) as well as a teal, so who knows what might come of that.

I am reminded that I have credit with Southwest Airlines that expires in September and an empty Traveler’s Diary. But everything is still so unclear and confusing, isn’t it? In the meantime, I am trying to coax my book-writing mojo back into existence. I made a good start but a tripod-fail let me down. I finally got a new one…no excuses now! Please check out the eight books I have published so far at Taproot Video. They’re available as PDFs to download as well as in the form of spiral-bound books. Here are a few…

Until next time.

Backstrap Weaving – Taking My Own Advice

This will be a very sparse blog post, I am afraid. But, the exciting thing is that I have been spending almost all my time working on my next book. I am on a roll! I am weaving samples, washing and pressing them, taking photos, wishing for clear days with good natural light to re-take photos, and writing, writing writing. There have been some very exciting and surprising discoveries along the way. There’s always something new to learn.

October was supposed to be what I considered to be a well-earned ”play” month after two-and-a-half months away from home on the road. Writing was to begin promptly in November.

Well, that didn’t happen. I was having way too much fun weaving, spinning and even knitting. But, by mid-November the books I had started writing earlier this year were calling for attention. I do, after all need to earn a living! Getting everything set up to start is the hardest part. I tell myself to just get over that hump and everything will start to flow. Well-taken advice. I cleaned up my chaotic creative space and set up for writing and photographing just before I went to bed one evening. It turned out that the ”hump” had been the cleaning. I woke up to a clean, organized space and happily jumped into the writing the next morning.

As for my play-time weaving experiments, I took my own advice again and stopped spinning cotton to weave a sample. It would be no use continuing to spin if the thread I was producing was not suitable for the kinds of cloth I want to weave. I am, after all, very new at spinning cotton. What I am producing now is clearly beginner stuff and I don’t expect to be able to produce anything consistent until I spin my way out of this beginner phase and improve my skills. That just takes mileage….lots of it…..and, hopefully, some advice and tips from experts.

I was curious about how my beginner efforts in spinning singles for weaving would hold up. I created a warp for the kind of sheer cloth that I recently wove using the hand spun Guatemalan cotton I had bought. I wanted to spin thread that was finer than that.

Well, my hand spun cotton is finer in most parts, less fine in other parts and shockingly thicker in others…you know, typical beginner stuff! But, I was determined to weave with it anyway. I didn’t use a reed, as if one challenge would not be enough!

There was a fair bit of un-weaving and re-weaving in the beginning as I messed around trying to get the sett right. I didn’t have a sample from which to take measurements. This was the sample. My hand spun didn’t really care for all that fiddling about and a couple of threads broke.

And then I ran out of weft and that is where it stands. Is it worth spinning more thread for weft to finish this or has the sample already told me what I needed to know? You might know by now that I like to make things from my samples if that is at all possible. I’ll let it sit there while I think about it. What I do know is that I have much to learn about spinning cotton.

The other thing I wove, before I got my nose buried in my writing, photo-taking and sample-weaving, was the strap for my little pocket bag. When I use the ñawi awapa tubular band as the edging for a piece, I like to weave a strap with a design that resembles the ‘eye’, or diamond shapes on the edging. A simple pattern like that is easy to set up with four sets of string heddles.

Here’s the finished bag with its strap…

Weaving can zoom along when I use those extra heddles. I have used up to eleven of them when I have needed to quickly knock out a strap or lanyard.

It’s fast and could almost be boring if I didn’t have to busy my mind with remembering which heddle came next in the sequence. I found color coding useful.

And then there’s this…! Those are all heddle rods. This lady certainly knows how to weave a complex pattern without having to do pick-up.

I spent a lot of time watching this lady weave and realized that figuring out the next heddle in the sequence was not a visual thing for her but rather a matter of ”feel”. She could tell by the way the sets of heddles moved along the warp which one was next. The  heddle sets she had already used would slide freely. The next one in the sequence would resist.

Now I am going to take my own advice again and set up a couple of small weaving projects that I can play with as ”rewards” for time spent at the keyboard working on the book. I have been advising a friend who is moving house to take time out and reward herself during the tedious packing-up process. When you live alone, like I do, and don’t have encouragement and support immediately around you, the rewards system seems to work well. I might weave the fabric for some hair barrettes (yes, the going-grey plan is still in action) and add some new pieces to my woven jewelry collection.

Until next time….