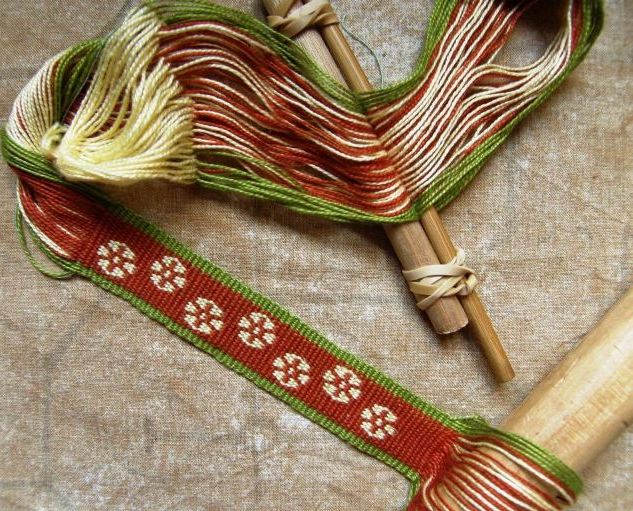
Backstrap Weaving – Tools, Trinkets,Tinkipaya and Treasures from the Lowlands.

It’s been one of those computer weeks…chained to the keyboard…. that has left me with little time at the loom. Still, I discovered a new weaving tool, fell in love with yet another weaving style, made a couple of things from tiny samples and rediscovered some bits and pieces of Bolivian lowland handcrafts that I have had stashed here and there around the house.

First the new tool about which I am very happy…
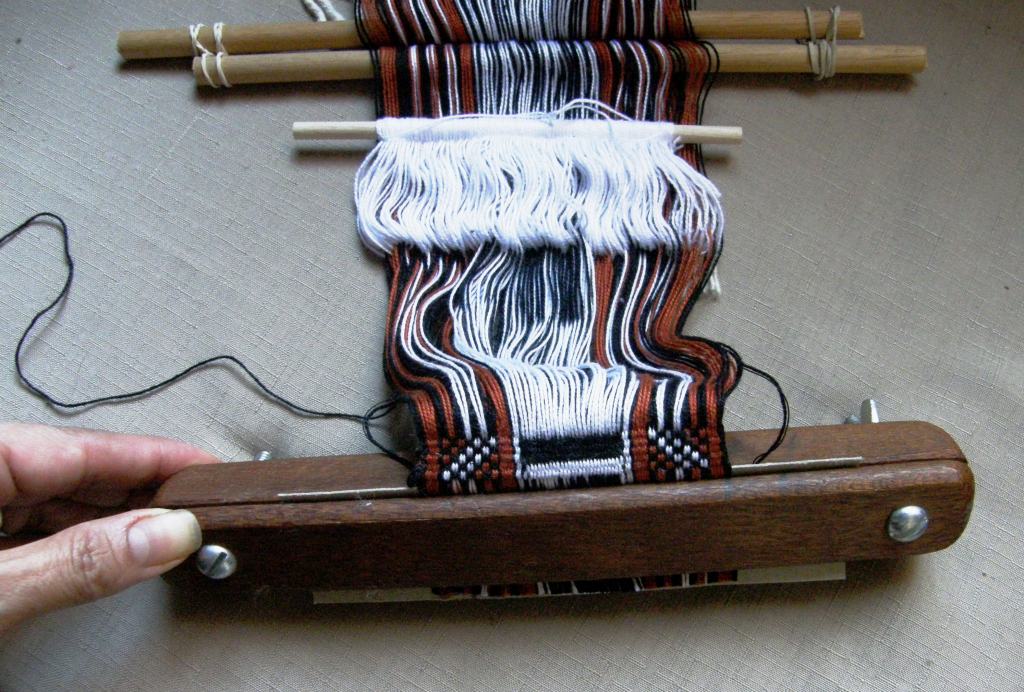
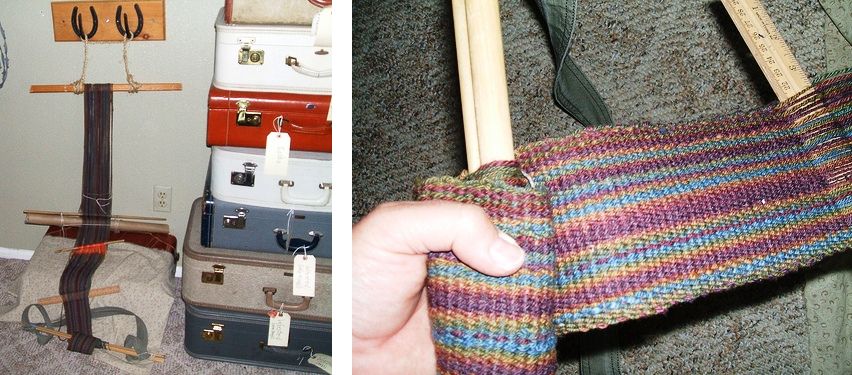
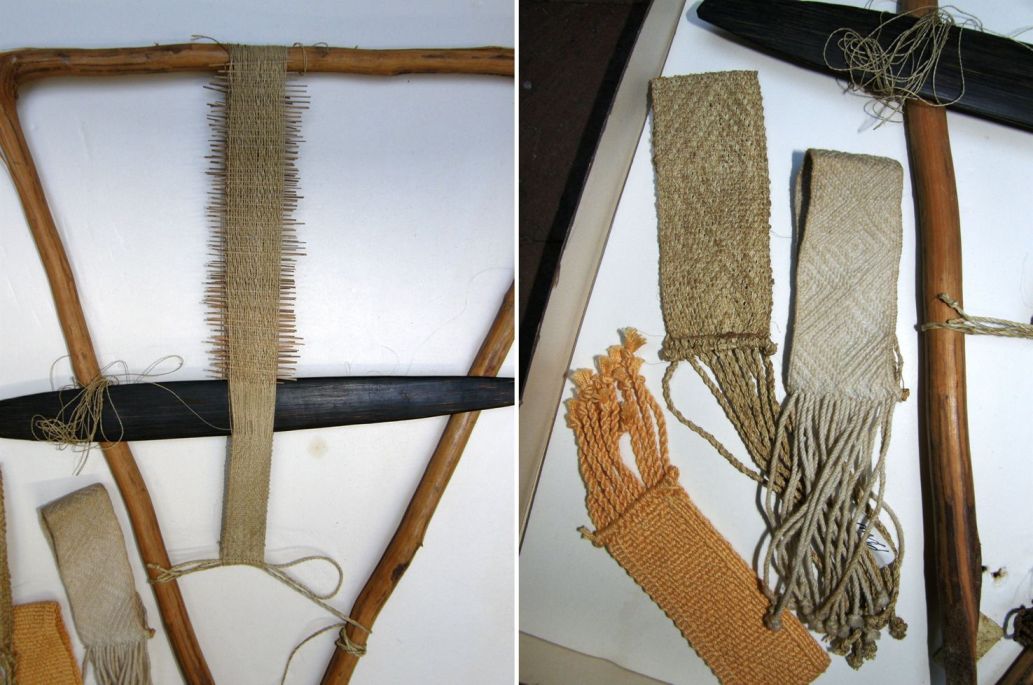
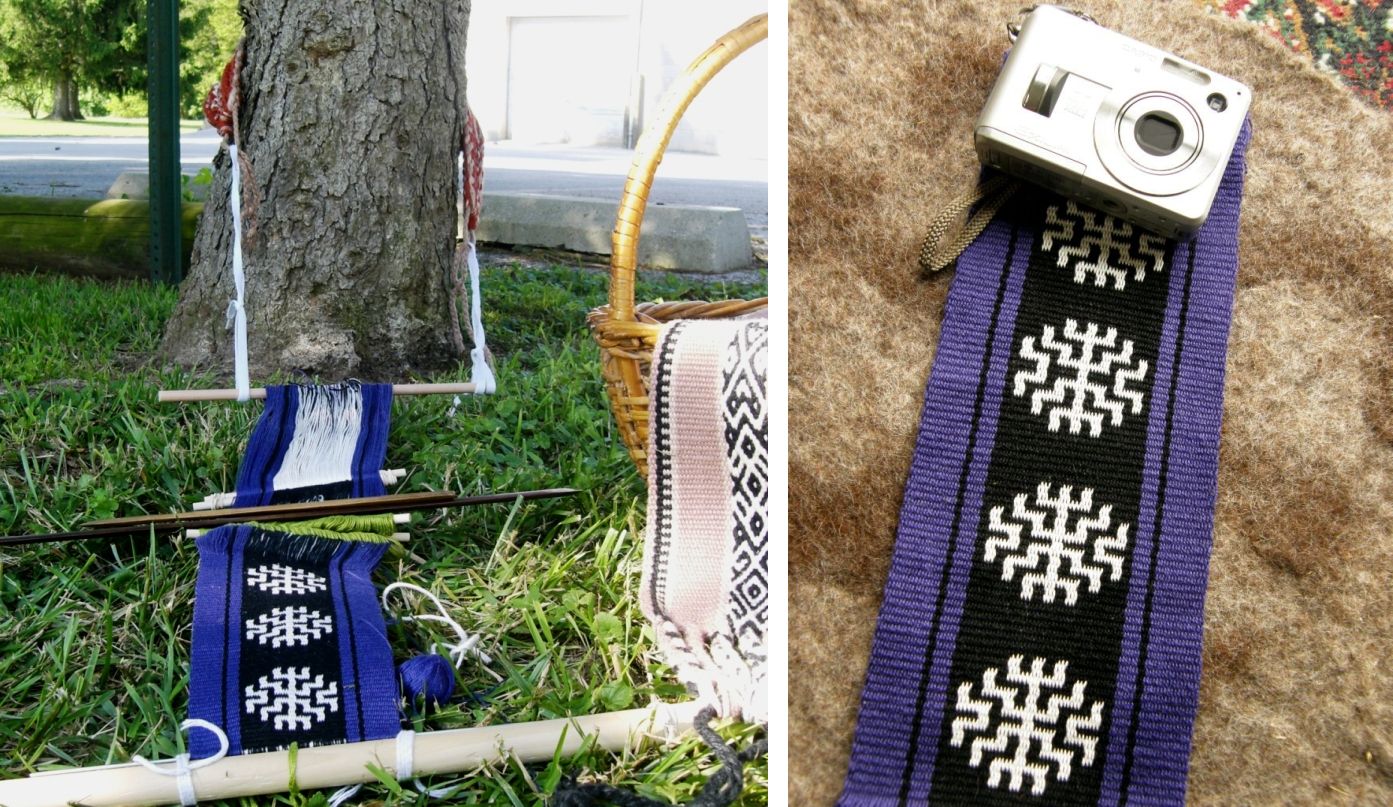
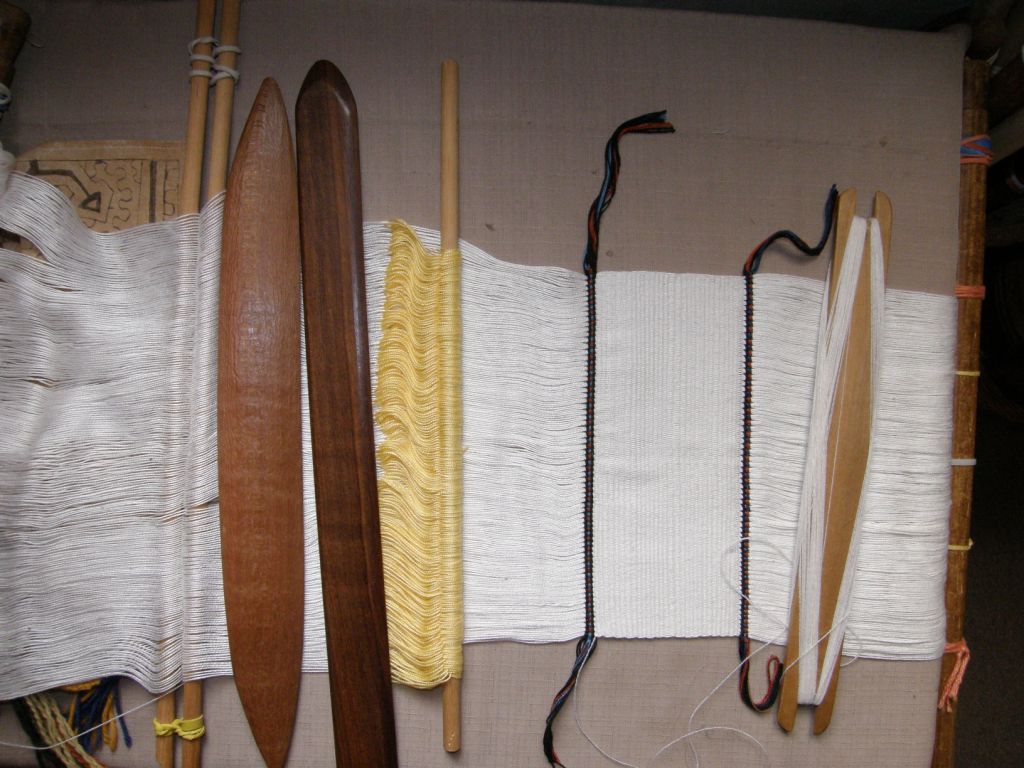
I inherited this from the Santa Cruz Handweavers Guild and it used to belong to Nora Rogers. It was holding the end of a Hopi wedding sash in sprang technique that she was creating. I don’t know if it was bought or home made but it is heavy and solid and does one heck of a job clamping. The beauty of this for me is that I can weave a piece and then clamp this thing onto the warp, cut off the finished piece and continue to weave!

It isn’t just two flat pieces of wood clamped together. The two pieces are shaped so that one piece fits neatly into the other. It holds really well and there is no need to have knots on the end of the warp to stop it from slipping through. I love it!

So, I was able to cut the little Bedouin sample on which I was working last week and carry on weaving on the same warp.

I wanted to make the little Bedouin sample into a small amulet-type bag as a gift for someone and didn’t feel like waiting until the whole warp had been woven, nor did I want to cut off and just abandon the warp and waste the yarn.

I need more of these clamps in different lengths!

So, you may remember that I was experimenting with using double weave for the Bedouin shajarah patterns and that I was trying to handle the two wefts in a way that didn’t make the transition from double to plain weave too abrupt.
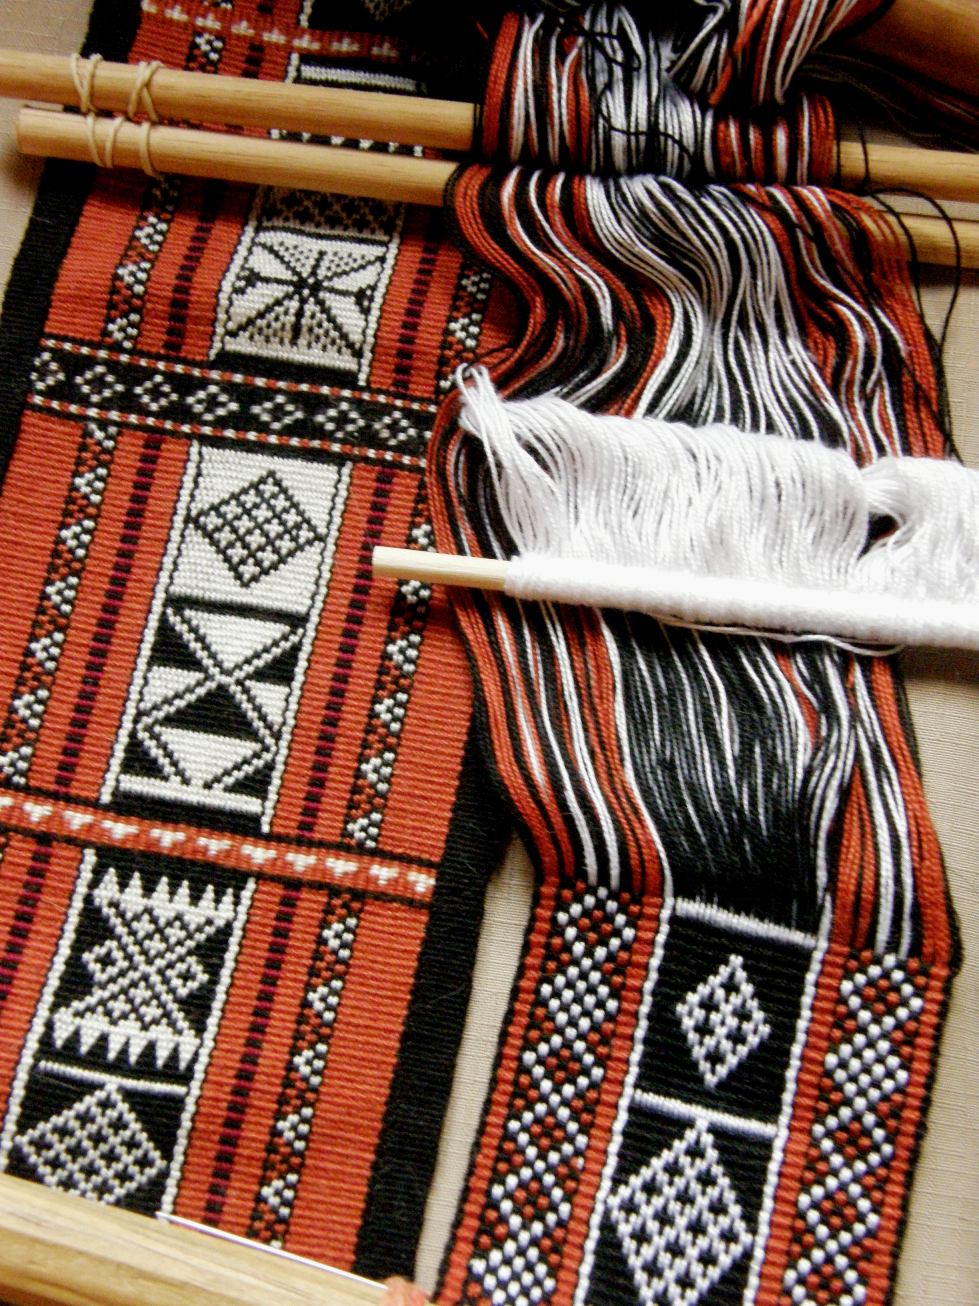
I finished the first sample, added a piece of cardboard to separate the start of the second one, wove a bit, applied the clamp and then cut off the first finished sample.

I was so pleased with it all…the finished piece, the double weave and the nifty new tool… that I had half sewn up the little bag when I realized that I hadn’t yet taken pictures of the inside to show the double weave and the lack of long floats So here is one not-wonderful photo of my trying to hold the thing open while taking a shot… but I think you get the idea.

I love these little amulet bags. What are they good for? I don’t know…they are just so cute! I have decided to call them “doorknob danglers”.

This one is for a friend but others will be dangled from doorknobs and will be used to stash those odd things that one finds on the floor and doesn’t know quite what to do with…like that strange button that doesn’t seem to belong to anything. I guess they could also be used to hold jewelry especially now that my pieces with Bedouin designs no longer have any floats on the inside and, therefore, nothing on which jewelry can get caught…yay!

And they give me an excuse to do the dressing up thing…you know, add braids and tubular bands, cross knit looped edgings etc..

I made a  four-strand braid for this one and then sewed it to the edges. I added extra strands to make the tassels.
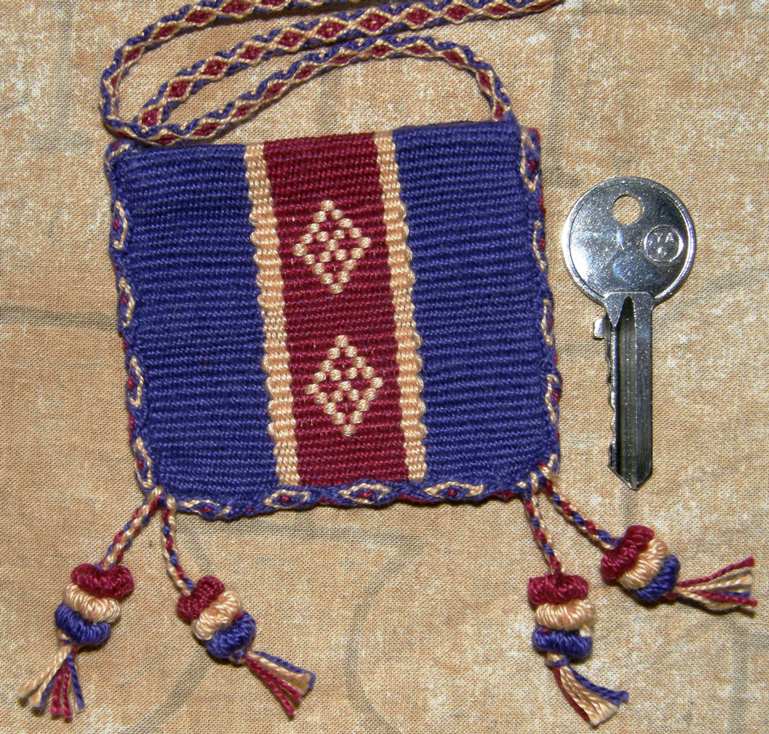
Here’s one I made along time ago and gave away. This was fun to decorate with a ñawi awapa, Bolivian pom poms and a crossed-warp strap.

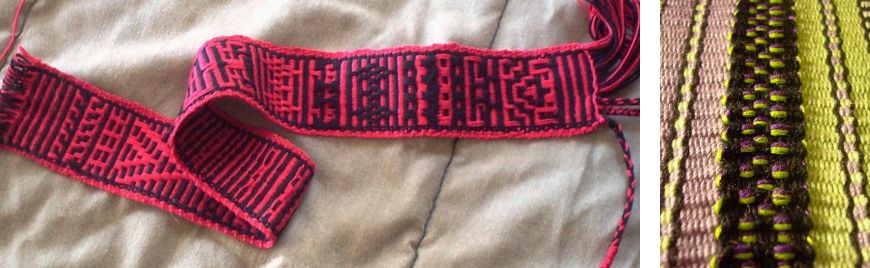
Here is another band experiment that I decided to turn into a ridiculously tiny bag. I  think that this one will hold my house key in my purse. I haven’t had time to dress it up yet and I will probably sew a snap closure to the inside and add a wrist strap.
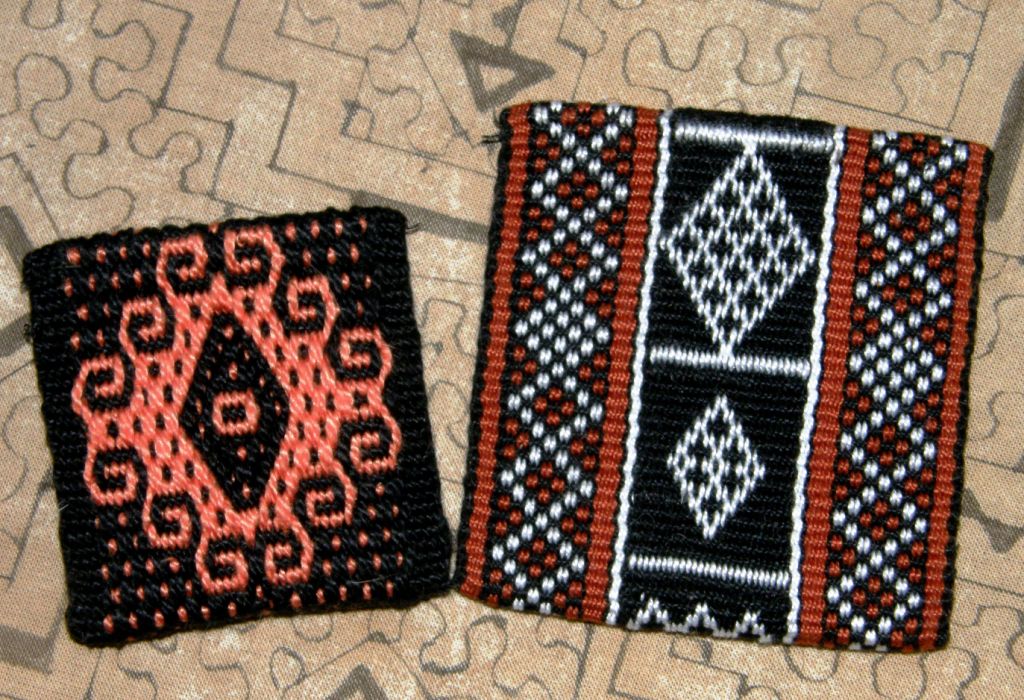
I have already had a friend ask me to make her a tiny one like this for her guitar picks.

Now, what about this weaving style that I have fallen in love with….it’s Bolivian, it’s from Tinkipaya… and it’s “wow”.

I saw a weaver from Tinkipaya at work at the Tinkuy de Tejedores in Urubamba, Peru in 2010, have seen and admired lots of their work for years especially when I was in Potosi learning to weave, have a fabulous book on their designs by Veronica Cereceda and now, after all this time…suddenly it really grabs me.

What I think I loved most about seeing the lady from Tinkipaya weaving when I was in Peru was the reaction and intense interest displayed by the Peruvian weavers. I delighted in watching their stance and expressions while observing the Bolivian weaver at work. And some of the Peruvian weavers were just as intent on capturing the moment, whipping out their digital cameras.

But most times there wasn’t a chance to see as the weaver had a solid wall of admirers around and above her so I had to settle for enjoying watching the watchers and there was much to be enjoyed in that activity.

I enjoyed looking at the hats, the skirts, the footwear, the woven cloth as well as listening to the sound of the conversations in Quechua.

While the Tinkipaya weaver does her pick-up (amazing how she could even do it with all that attention focused on her!), one of the Peruvian ladies appears to be pointing out the picking cross that she is using …held on two cords high above the weaving line and beyond the heddle rod.

Meanwhile, these ladies ponder from above…

There is a wonderful museum in the Bolivian city of Sucre which is currently devoted to the work of the weavers from Tarabuco and Potolo but  which I have heard is going to be expanded to include the weaving of two more Bolivian areas…those of Tinkipaya and Calcha.

I need to gather more pictures so I can show you to what I am referring and why I am so enthralled.

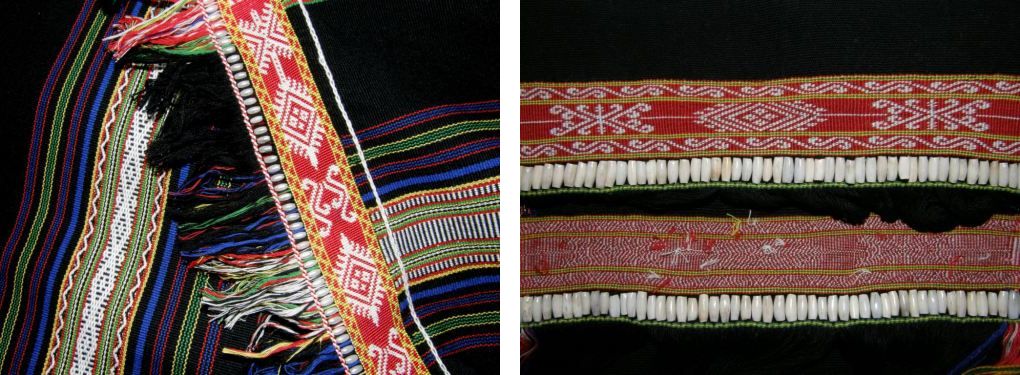
From Tinkipaya in the Bolivian highlands let’s drop down to the lowlands, where I live, so I can show you a few of the crafts of this area…bits and pieces that I have bought from a co-operative store called Artecampo just one block from my house…things which have gotten stashed away as my little home got filled with more and more books! When looking for something this week, I started discovering these things tucked away in corners and decided it would be nice to take a look at them here.

Artecampo sells crafts of the various groups of artisans in the Santa Cruz area which includes the  Ayoreos, Chiquitanos, Guarayos, Izoceños and Criollos.
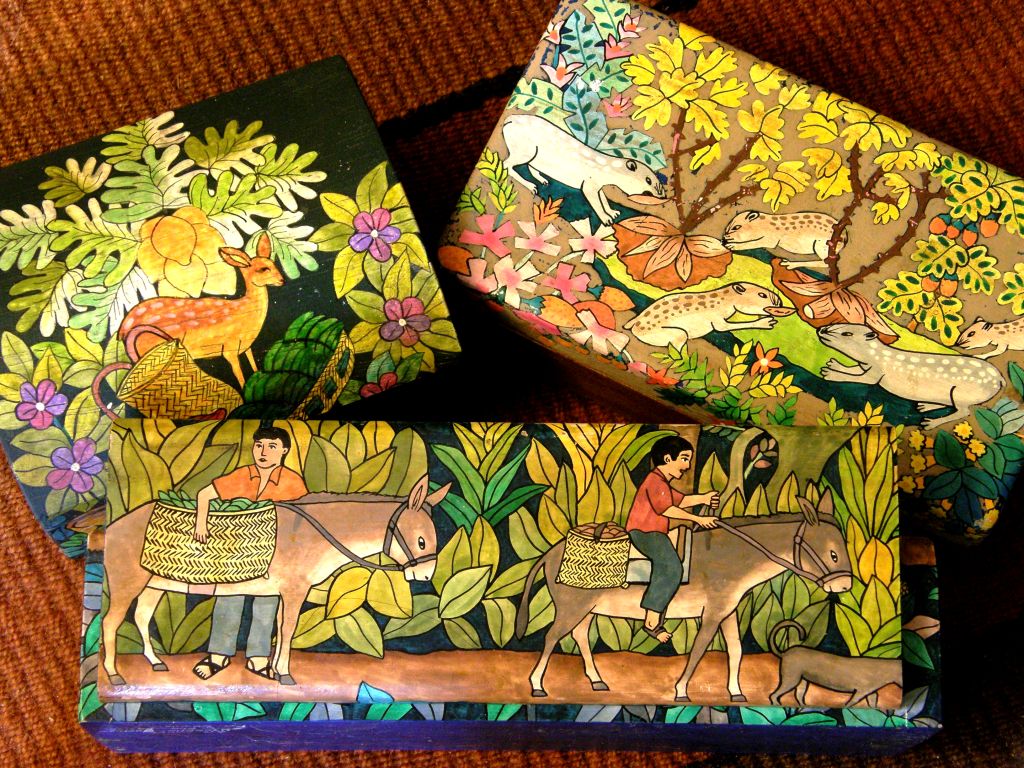
These sweet wooden boxes are painted by a group of boys and girls, the youngest of whom I am told is eleven, from the community of  Guarayos de Urubichá.  The idea for this craft was born when the Center for Research, Craft Design and Cooperative Marketing (CIDAC) made an experiment over twenty years ago in this community by giving the school children paper and colored pencils and asking them to  draw scenes of  life in their community. One youngster was selected to be trained in painting techniques in the city of Santa Cruz and then returned to his community to pass on his skills and knowledge to his young peers.

The boxes are posed on a woollen rug woven in Vallegrande in the foothills of the highlands. Maybe one day I will go there and get to buy some of this wool for my own weaving as there is certainly none to be found here in the city.
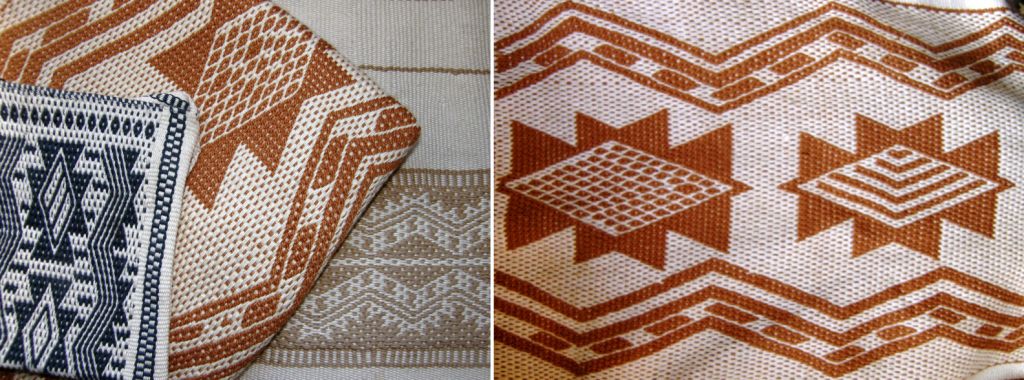
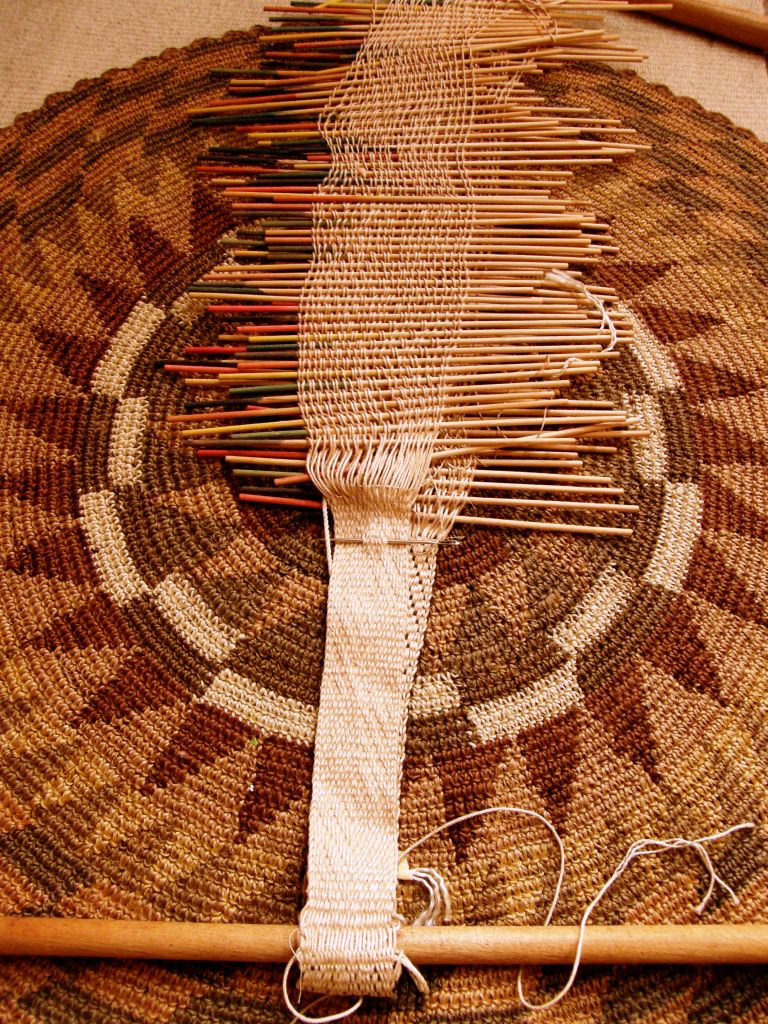
The people of Isoso are a unique mix of Guaraní and Chané cultures and produce woven cotton pieces on leaning vertical looms. Hammocks, table runners, placemats, bags and wall hanging are among the items sold at Artecampo.
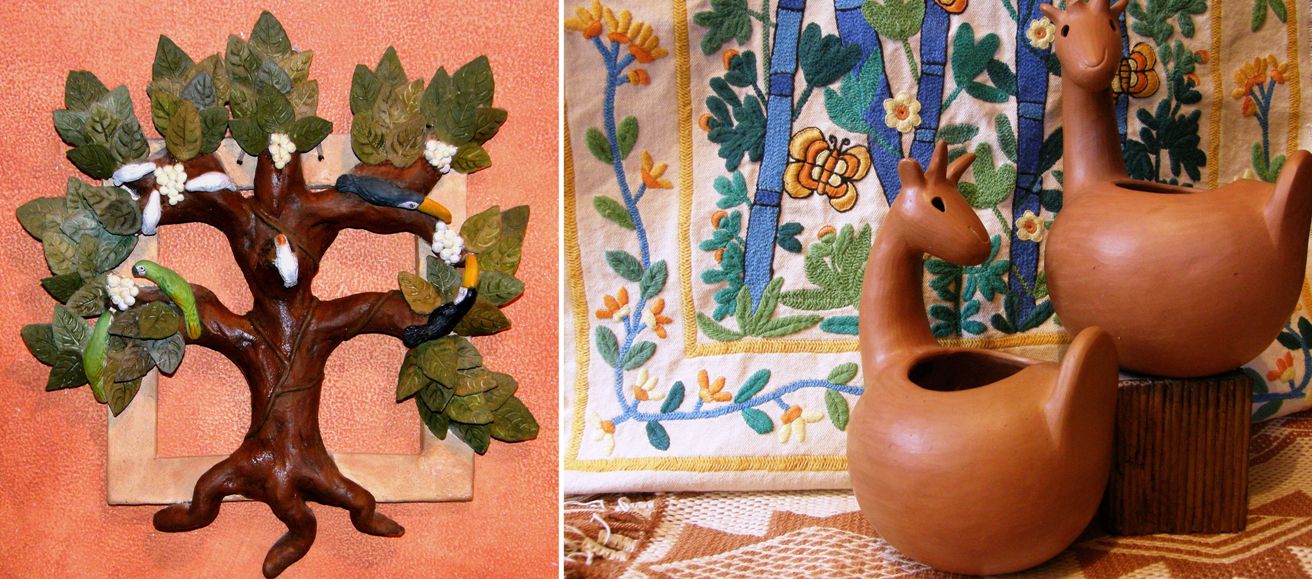
Clay pieces from Guarayos de Urubichá and Cotoca…. The embroidered scene on the cloth in the background is typical of the color, and depictions of  lush vegetation and animal and insect life present in many of the crafts.
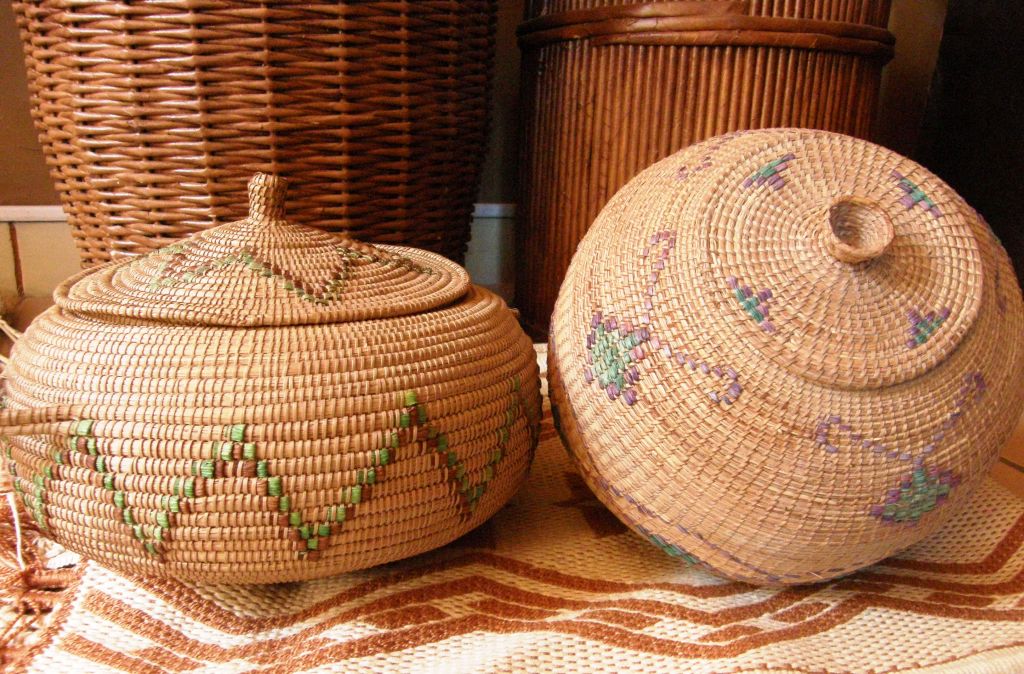
I love these simple solid coiled baskets and must ask the folks at Artecampo to remind me of their origin.
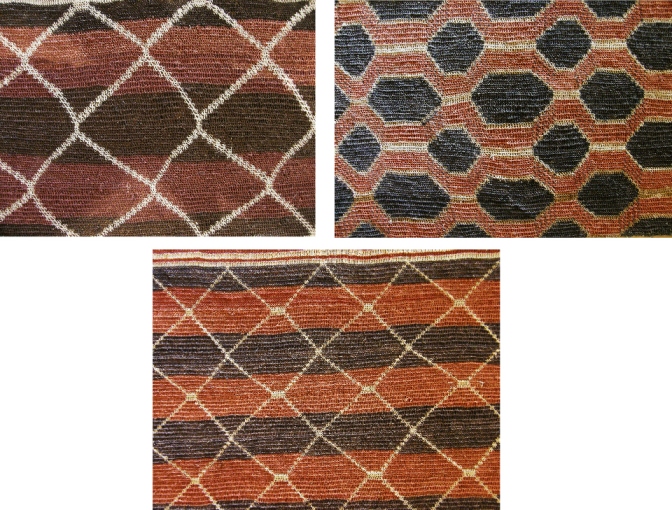
My favorite things of all are the looped bags made by the Ayoreo craftswomen using a fiber called garabatá which is extracted from the leaves of a plant in the pineapple family and twisted by rolling on the thigh. As far as I can tell these are the most “genuine” articles that Artecampo sells. The bags have always been used on a daily basis by the Ayoreo people and have not been altered in any way for the tourist market.

I have opened out the bags and use the pieces as wall hangings. I love the colors and the smell and feel of the fiber. They are on the wall of my bedroom and now, would you believe, it has just occurred to me that these colors must have crept into my mind when I planned  my most recent ikat experiment pictured above.

The other “genuine” piece that I treasure, especially since it is no longer being sold, is the wooden bowl/scoop below left, also made by the Ayoreo people. It is lovely to hold this piece in your hands and feel the cool smoothness of the wood.

Of course, this is just a fraction of the things that are sold at the co-operative store. The store does not allow pictures to be taken and from now on when I take visitors there I will have to make sure that I take pictures of the purchases as I won’t be buying any more things from there…no room! I wish I could show you more of the beautiful textiles they have, both woven and embroidered. I take a lot of pleasure from dropping in there from time to time and seeing what is new. They are quite used to having me come in an stroll around and not buy anything.

Well, time to put this blog post to bed and get back to the other keyboard stuff so that I can then do what I really want to be doing…weaving!
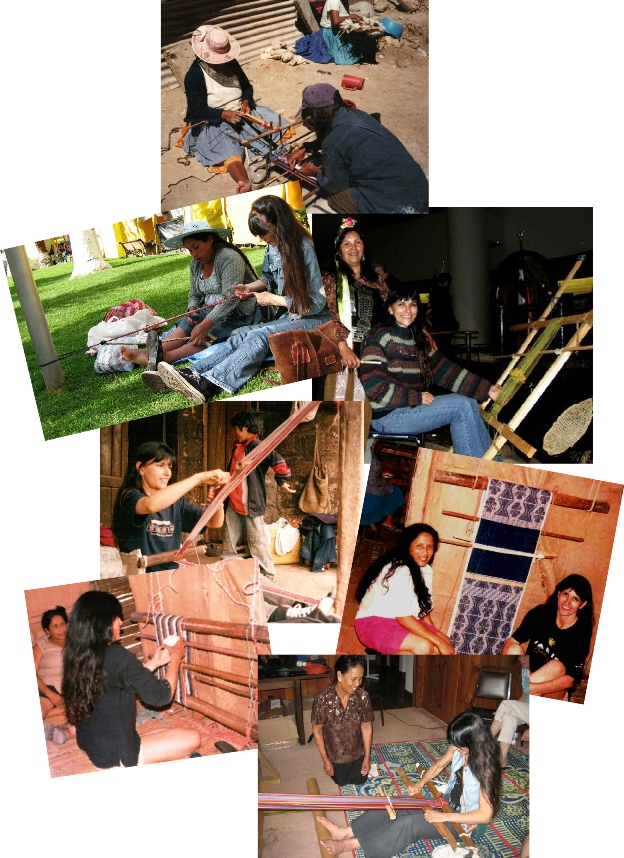
Backstrap Weaving – The Weaving Melting Pot

The Weaving Melting Pot….that is what I have bubbling away here. Every time I start a new piece on my backstrap loom I am so aware of the vast array of sources from which I have drawn technique and inspiration. I have studied weaving on a variety of simple looms here in  South America, in Central America and even in North America  and bring a little of everything to my work when I set up to weave on my loom of choice…the backstrap loom.

I even draw inspiration from the online weavers who work on floor looms…a handy tip about how to handle the two wefts in rep weave from Tom Knisely, ideas about finishing pieces from shadow weave weave-alongs, lessons in handling floating selvedges from discussions on twill, or from card-woven and inkle loom-woven warp patterned bands…all far removed from the Bolivian weaving environment in which I live.

They all go into the pot….stir, stir, stir….add a dash of ideas I have developed from my own experiments and onto the loom it goes. Some of my ideas having nothing to do with the traditional way of doing things……..

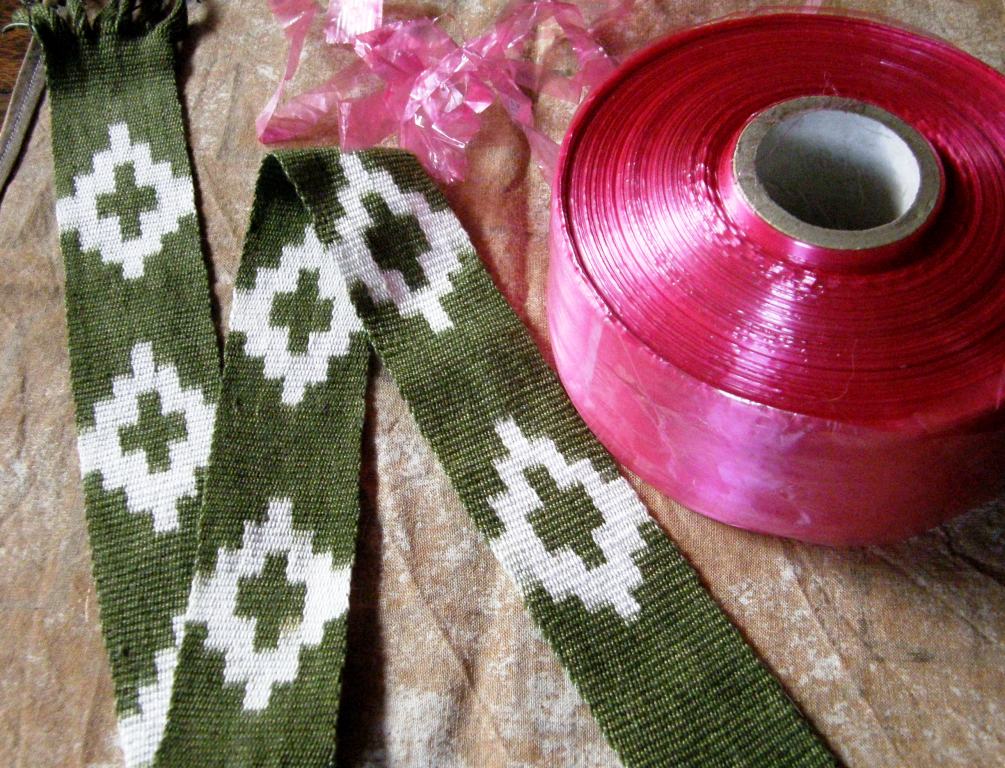
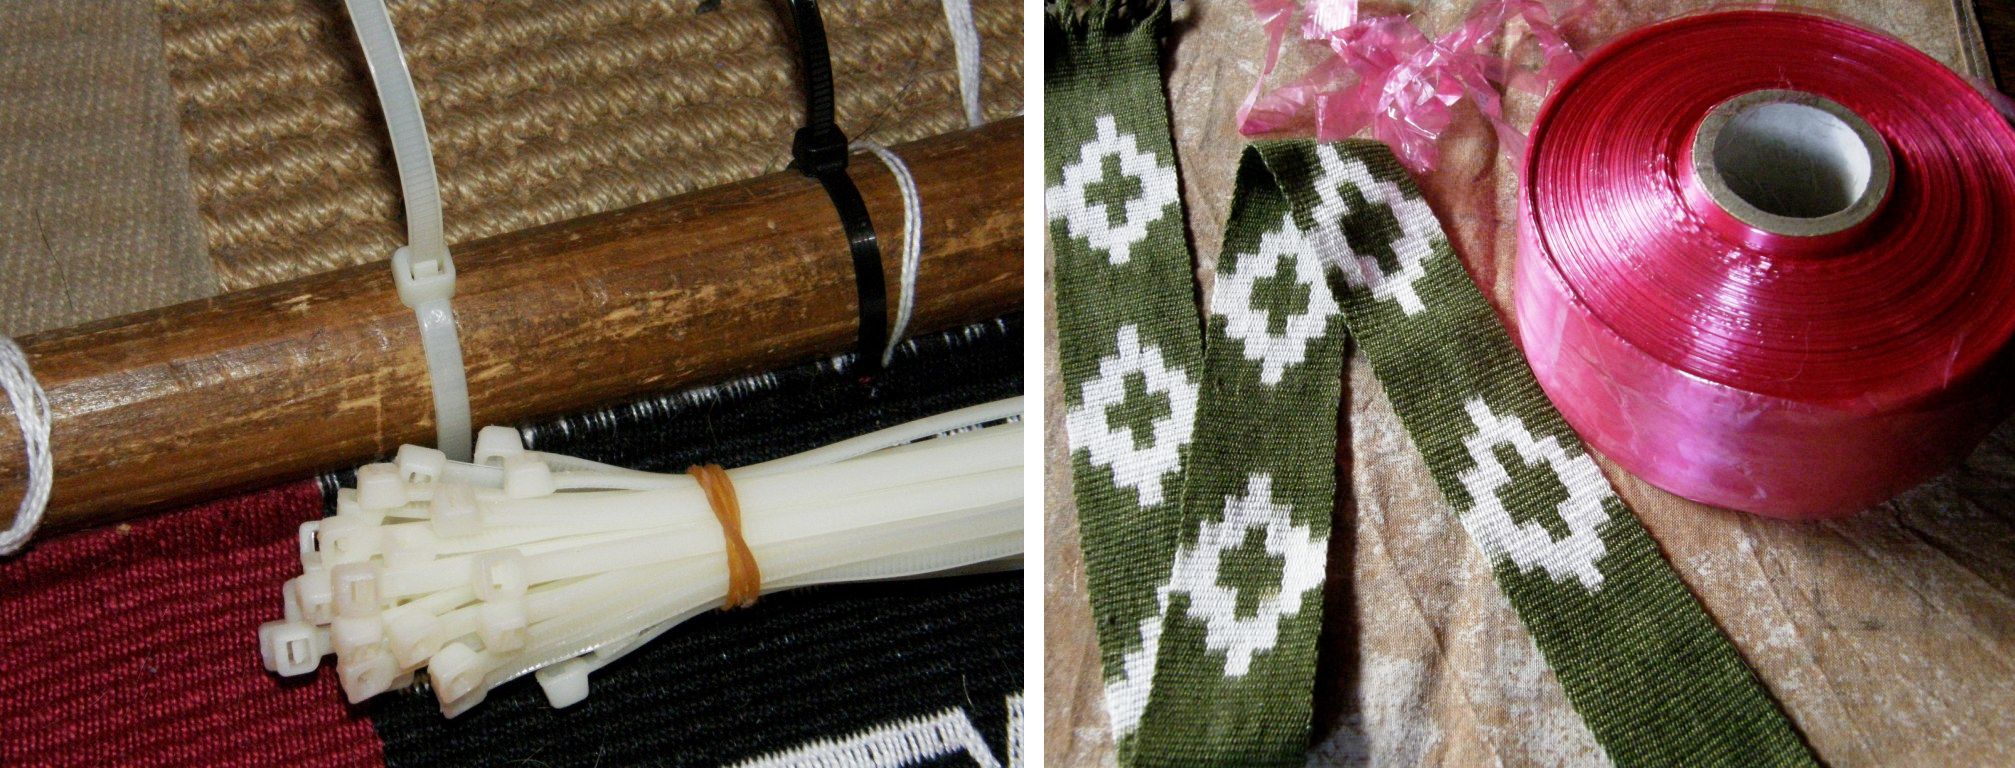
like using cable ties to lash my warp to the loom bar and a bicycle spoke instead of a yarn header cord. I was using cassette tape to wrap my warps for ikat until I was given “proper” ikat tape which seems acceptable in place of cabuya fiber and other natural materials in many “traditional” settings these days.

Plastic and metal??? One of the weavers I met in Candelaria found using what looked like a steel railway spike far more efficient than the traditional llama bone tool for beating in her weft. PVC pipe often replaces wooden shed rods.  It’s like the time I had a lovely wooden Navajo weaving loom made for me when I lived in southern Chile and used rope to tension the warp only to find that a lot of the Navajo weavers are using metal looms and turnbuckles for tensioning. After weaving for some time on that Navajo loom I found that copper pipe for the loom bars worked much better than wood anyway.

I travel from place to place and see things and bring back ideas to add to the ingredients that go into my weaving melting pot.

And now I am about to apply some Bolivian highland weaving technology to a weaving tradition on the other side of the world.

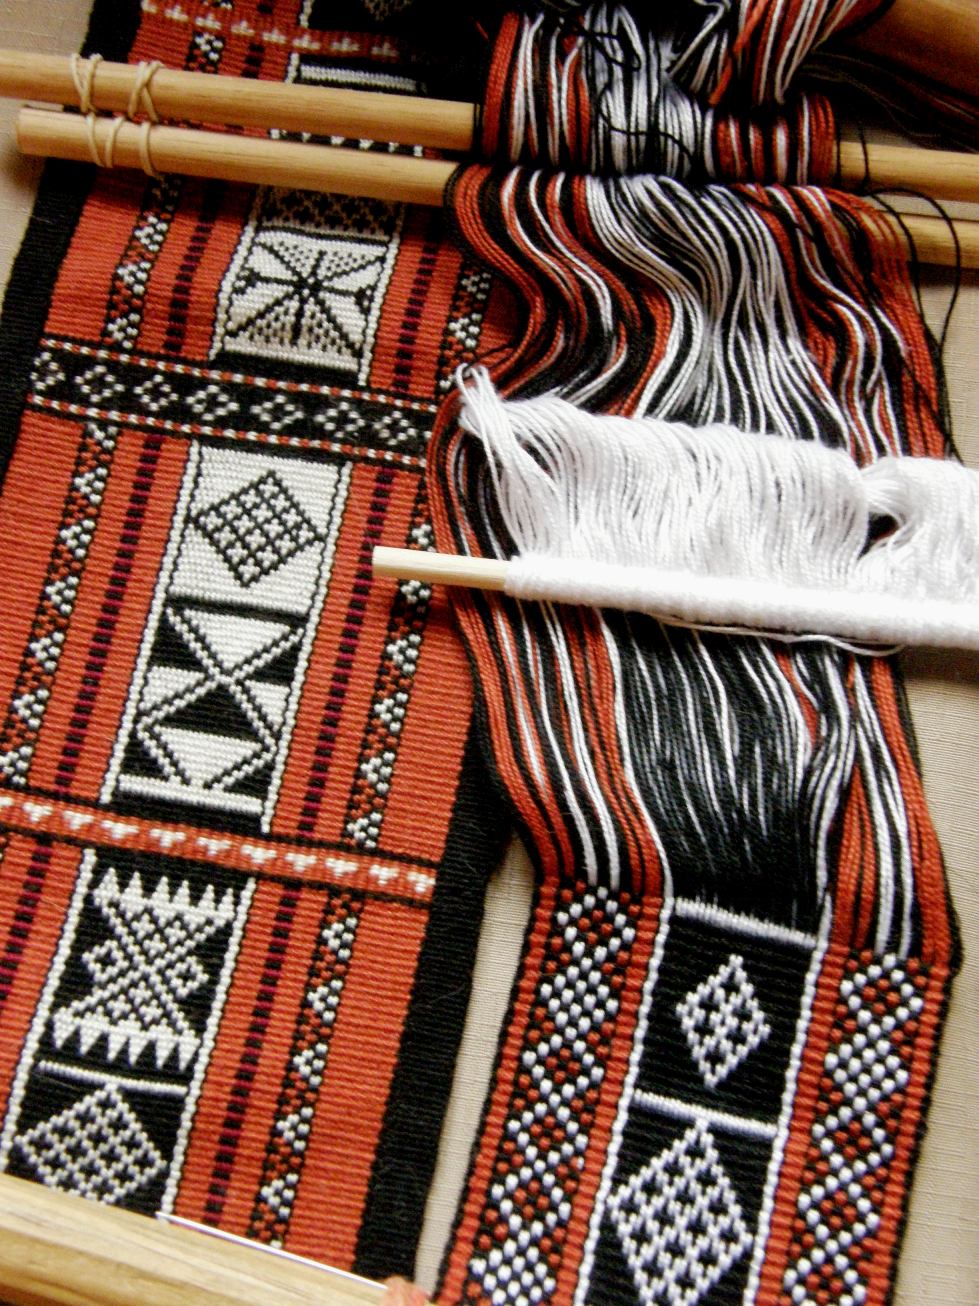
I am jumping the gun this week by sampling for the next piece in my red, black and white wall hanging series and I am concocting quiet a brew in the old melting pot.. I say jumping the gun as I am nowhere near finished the third piece which is coming along veeeeery slowly! The other two pieces while off the loom are not yet completely finished. But the temptation to  put an idea into action once it develops and starts churning in my head is irresistible!

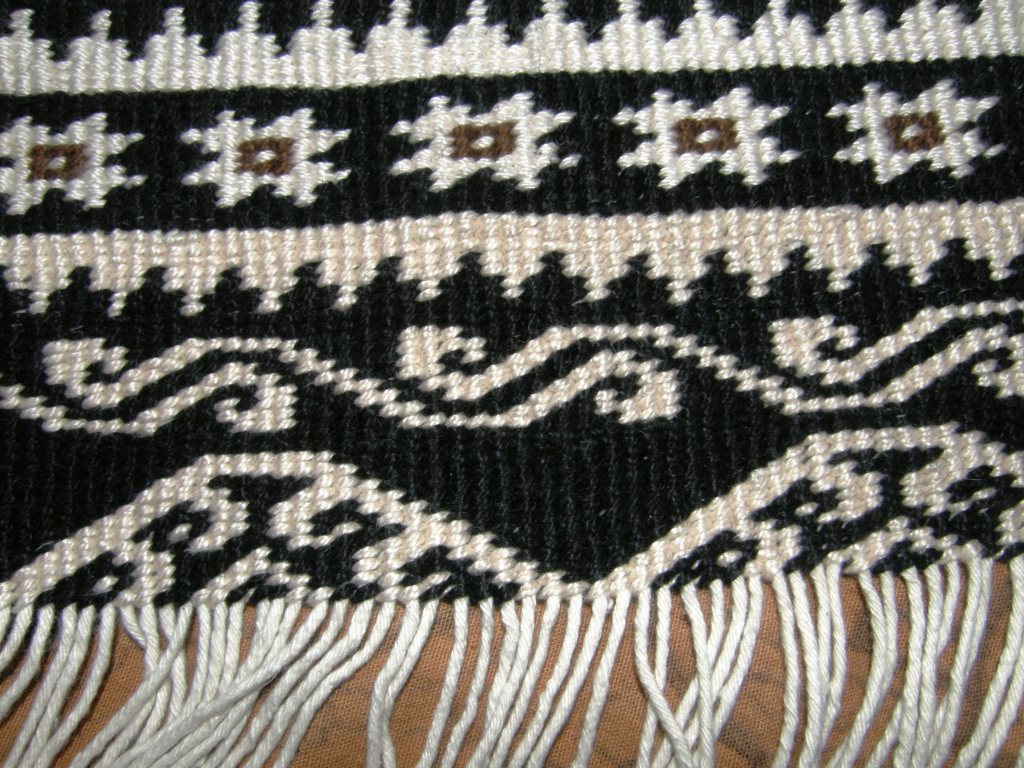
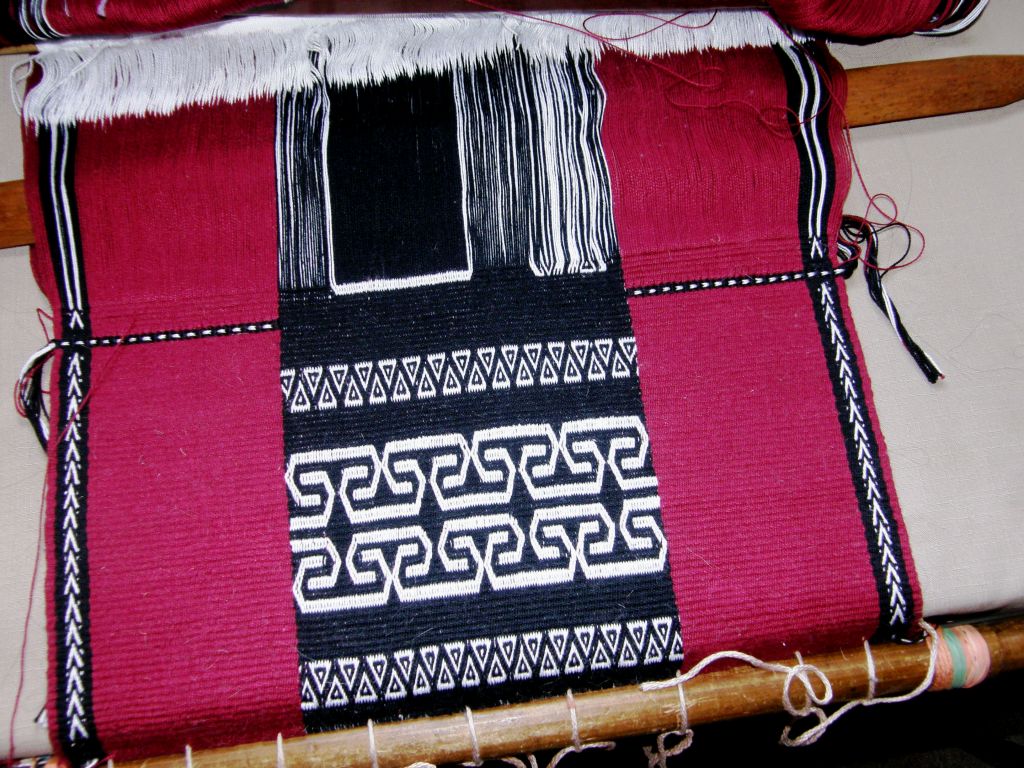
You can see the melting pot at work in the above pieces…I took a motif designed by a German weaver for tablet weaving and wove it in an Andean technique, Chilean ponchos called chamantos influenced the leaf design hanging to which I added weft twining which has nothing to do with Chilean ponchos and the piece inspired by si’ira  weavings of northern Columbia and Venezuela has more than a few of my own added touches.

Some of the traditional colors of Bedouin weaving make that the perfect influence for what will be in the fourth piece in the wall hanging series… in red, black and white, of course.

It was a weird and wonderful path that led me to Bedouin weavings way back in October 2010. I was Googling weft twining techniques after having seen the twined work of Montagnard (Vietnamese hilltribe) backstrap weavers in North Carolina in August 2010.

A book on the Taaniko twining practiced by the Maoris of New Zealand helped me to get started on my own off-loom experiments…. a Maori technique for Vietnamese patterns…straight out of the melting pot!

This piece has Montagnard designs as well as motifs found in both Bedouin weaving and twining. My Google searches led me to sites with Bedouin weaving and I was in love! I bought Joy Totah Hilden’s book on Bedouin weaving after finding her website and was pleased to be able to see images of the back of the woven pieces making the technique easy to identify as warp substitution which I already knew how to do. There is a link to a pdf  on Bedouin weaving by Hilden on my RESOURCES page.

It was clear from the book that the Bedouin do their twining  both on and off the loom and so I was interested in trying it on the loom…it’s so much easier when the warp is under tension, as far as I am concerned, and that enabled me to use much finer yarn than I had used for the off-loom piece.

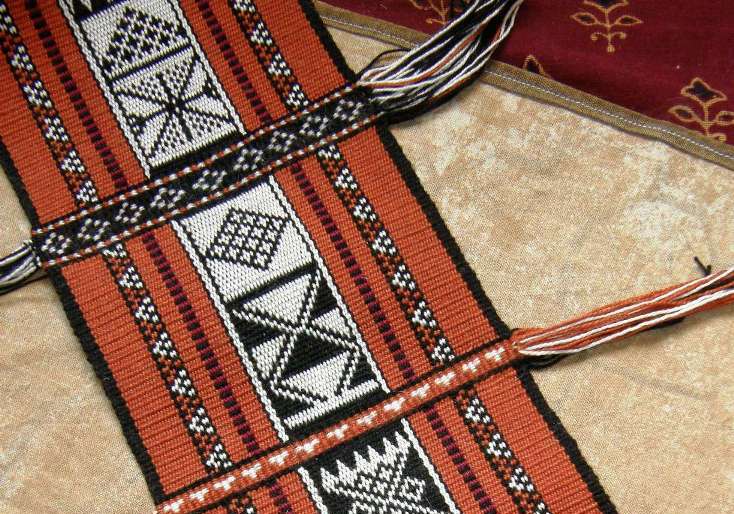
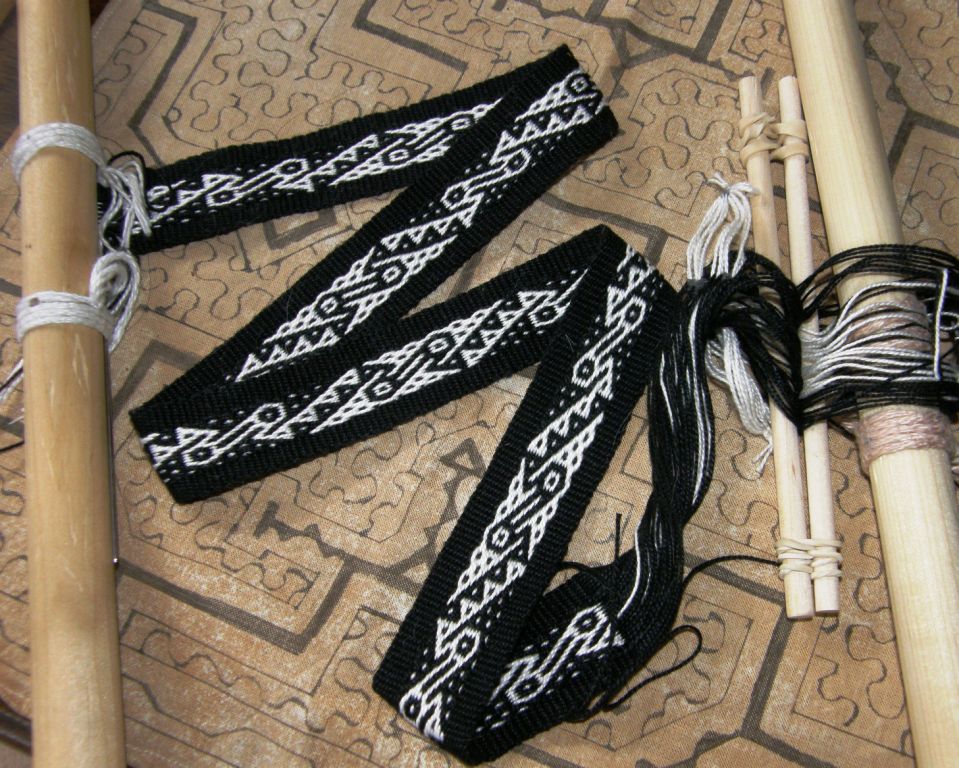
Here is the first piece with its al’ouerjan (in which I had made a warping mistake) and shajarah patterns. The al’ouerjan pattern is the checkerboard type design on the sides.

The twined sections are sometimes worked in the middle of the woven piece as well as at both ends.

I then dove into the melting pot and added a finish of wrapped warp ends…

I enjoyed the process and I wanted to know more…both about weft twining in general and about Bedouin weaving.

I was especially curious as I found out from Betsy, who works with the Montagnard weavers in North Carolina, that their weft twining technique is done off-loom and this astonished me as the yarn they use for their designs is so very fine (Cebelia #20 or finer). I had to see and learn this! Betsy was happy to have me visit and I was able to learn from Jarai weaver, Ngach.

And in the meantime, Tracy, a member of the Backstrap Weaving Group on Ravelry, started showing us gorgeous pictures of Bedouin textiles from the souk in Doha Qatar where she currently lives and telling us about her experiences watching a Bedouin weaver at work.

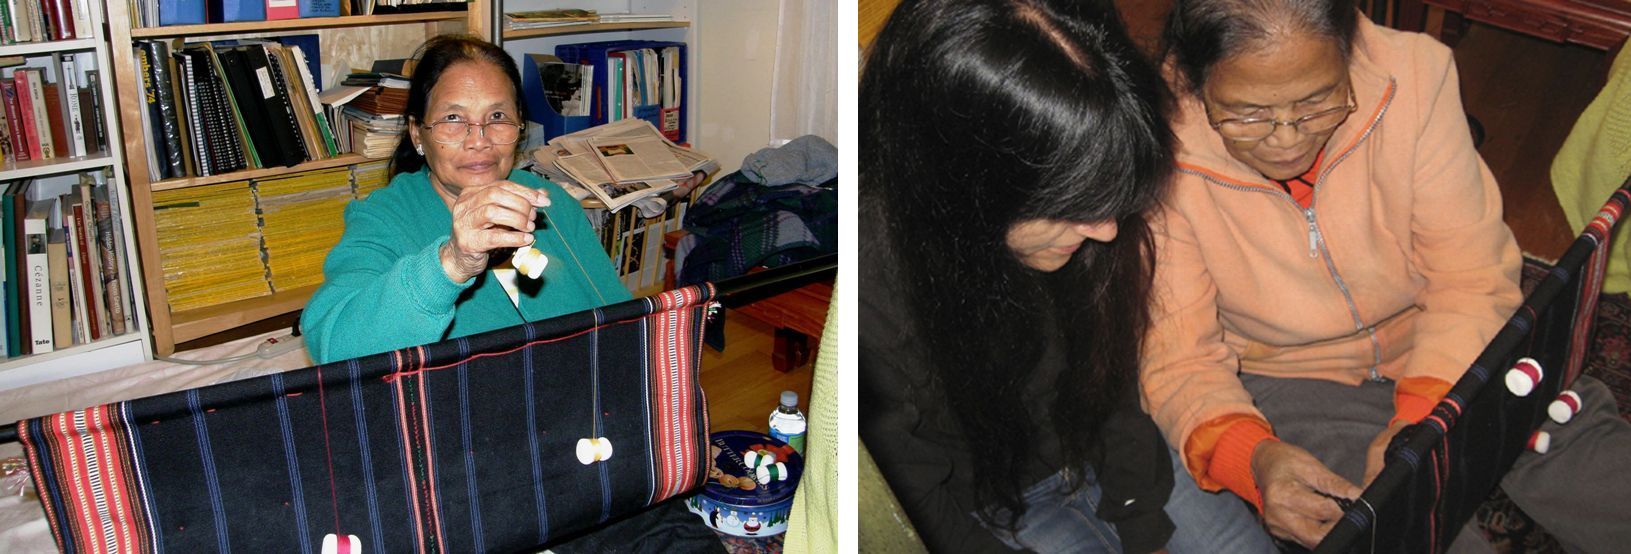
From books and images on the internet to suddenly finding myself seated next to Ngach, watching her bobbins twirl as she gracefully applied weft twined patterns to her large blanket piece off the loom, listening to her stories about her desire and determination as a young girl to learn to make the traditional kteh patterns. It was a dream come true.

Once back home, I stirred the tricks and tips I had witnessed with Ngach about color changes, hiding the ”bump” and other details into the pot and made my own kteh designs on my backstrap woven piece which you can see above.

I did it on the loom as my off-loom techniques still really needed some work! The advantage with off-loom twining is that several backstrap woven pieces once off the loom can be joined together and then the weft twining can be added along the edge of the entire piece. I have yet to do that and will definitely do so one of these days. I have my bobbins and thread ready!

Much later, the following year, came a golden gift in the form of  bag made from pieces of Bedouin weaving that Tracy sent to me through a friend who was visiting Bolivia.

Once again, imagine the thrill of getting to feel and smell the real thing…forgive me but that coarse handspun wool is just begging to be smelled! The bag is pictured above on the right next to the cotton piece that I made.

As you can see below, the floats that form in in the shajarah pattern area (the black and white design strip) are really very long! Some of them are even broken from possibly having gotten caught on things.
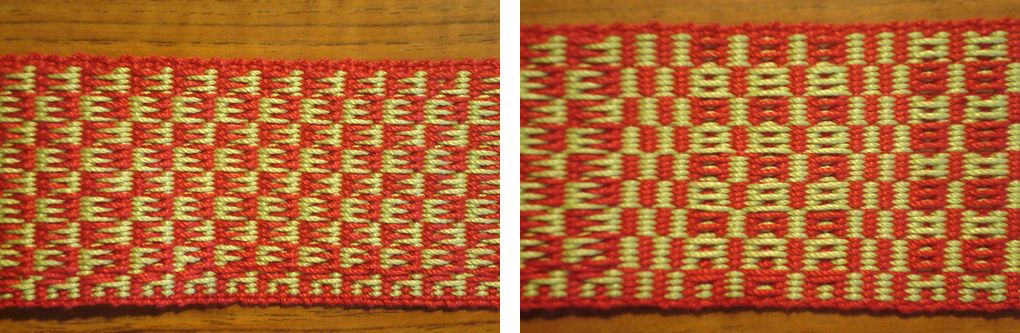
Now back to the sample I am weaving for the fourth wall hanging. I want to do a Bedouin-style piece but I do not want the long floats on the back. Tracy showed us images of pieces from a co-operative in Oman in which the weavers had found a way to tie down the floats  in the al’ouerjan parts (the checkerboard patterns) of their weaving possibly to make the pieces more attractive to foreign customers. It didn’t take long for me to see that they were using a  second fine weft to do so. This makes the woven cloth more practical too.

You can see the long floats that you typically get on the back of the fabric in the lower right hand corner of the image on the right and see how the appearance improves when the second fine weft is used. Unfortunately the second fine weft does not do much for improving the appearance of the shajarah patterns (the larger back and white patterns).
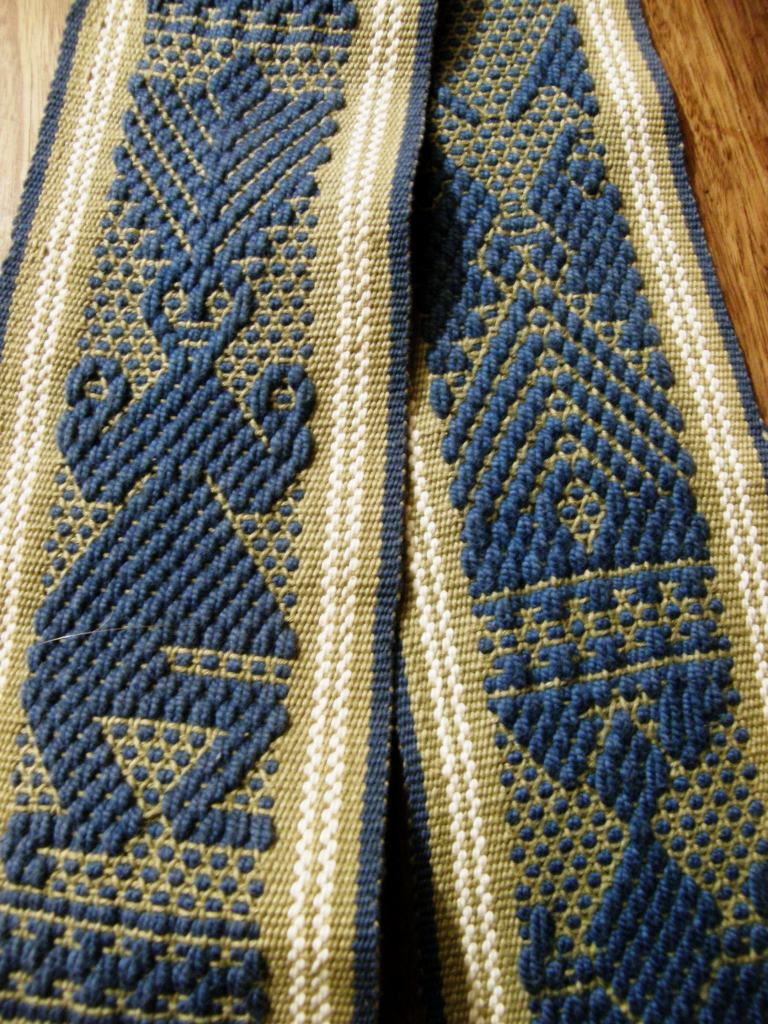
The solution to that is to go once more to the ingredients on the shelf and add some of the Bolivian highland weaving technology that I mentioned earlier to the mix. So I added embedded double weave to my sample, a technique I learned while studying with weavers in Potosi, Bolivia.

This technique allows you to weave sections of double weave alongside plain weave in the one piece. It is essentially the same warp substitution technique but with an extra step or two which basically insures, with the use of a second weft, that all the warps are interlaced with none left to float on either face.

The two-color center section of the band at left is double weave alongside a plain-weave single-color border.

What I sometimes don’t like about the embedded double weave technique is the obvious transition in the fabric from plain weave to double…the climb from single layer to double layer and back again which naturally has to occur….it is sometimes more obvious than at other times depending quite often on the kind of yarn used, and I have been experimenting with various things to help soften that. I don’t want to make the entire piece double weave either.(The three-color double weave that would be required to weave the al’ouerjan pattern is bulky and unattractive).  And that is where I throw my very own bit of spice into the melting pot!
It is still in the experimental stage but what I am trying to do is combine double weave with plain weave, add the thin weft for tying down the al’ouerjan warp floats and make the transition from plain to  double weave section as subtle as possible with a trick I am trying out.

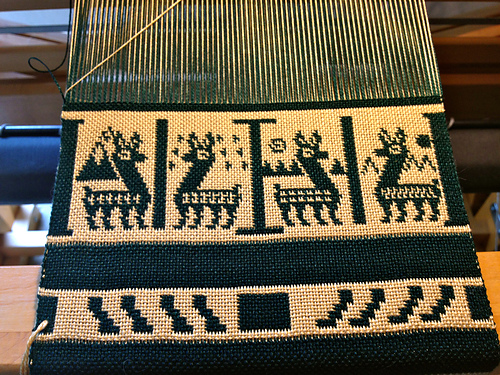
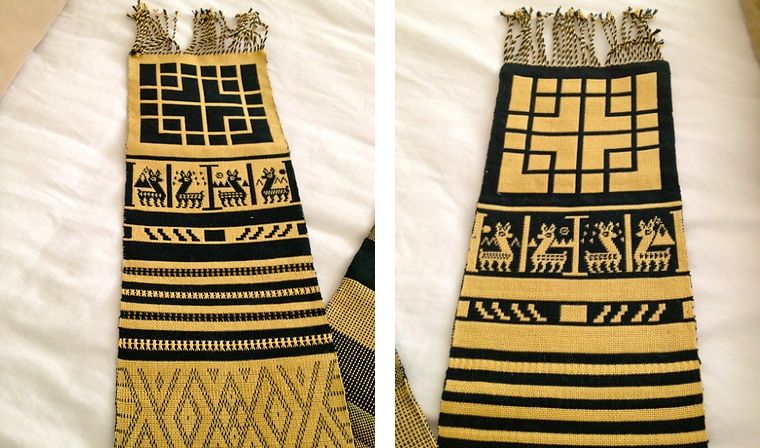
There is my first Bedouin piece on the left and the new sample on the right. The upper surfaces of both look the same and I don’t think you can tell that the center of the new sample is double weave.

The big difference is the back side of the fabric. My embedded double weave sample is on the left and my first sample with its long floats on the right. If this goes along well, I shall use this technique for my fourth wall hanging using the deeper shade of red that I have used for the other piece and incorporating more traditional Bedouin patterns.

So, enough red, black and white for goodness sake! Bring on some other colors. Here are projects from Ravelry group members and other online friends to save the day…

Oops! My bicycling friend Anna in Australia just happens to be using the same colors in a double weave piece. This is a Mapuche design from the book in Spanish by Enrique Taranto.

A new member to the Raverly group, Rob, showed us what he has been doing with simple warp floats inspired by a Guatemalan piece that Jennifer found on the Education and More website. You may remember that Bobbie wove a very large version of this in naturally dyed Guatemalan cotton thread that she bought from Education and More. Rob has added his own twist to the pattern at left.

Here are some of his other bands with simple warp floats and supplementary wefts. He used two supplementary wefts in different colors at the same time and says that one color stands out more than the other depending on the angle at which you view the piece….

Another new member, Tracy, blew us away with her first ever piece made from her own handspun wool…we love her loom set-up!

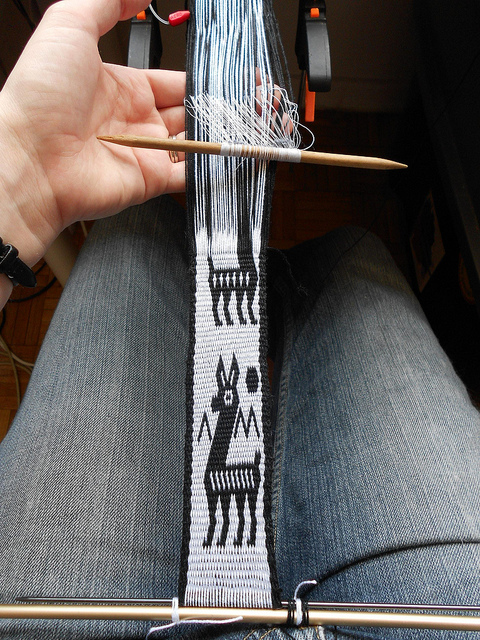
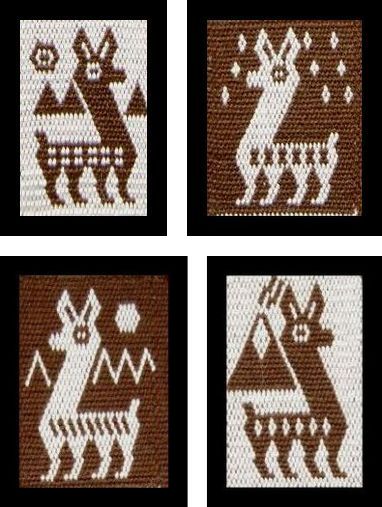
And Xav dove straight into double weave and the llama figures that I have charted here on the blog…her first ever backstrap woven band!

Jeen used her pebble weave experiments as embellishments on a couple of bags she completed. I love what she calls her “ball bag” and I think her use of variegated yarn for the border of her plain pebble weave band is so cool.

From Sweden Camila sent me pictures of her bands….

Some fun and clever designs with simple warp floats….she wove a pattern which is traditionally woven in a complementary- warp technique in the two-color simple warp float technique instead and it looks great!! On the right she has a pebble weave design from my book on her backstrap loom.

Well, I am off to continue my small sample as I think I can make something with it, weave a few rows on the third big wall hanging piece and see what unusual combination of ingredients might inspire the next piece on the loom…..

Backstrap Weaving – Little Things, Big Smiles

I was going to name this post “Taming the Tube” and that would have possibly been one of the weirdest titles I have come up with for a blog post so far but I decided to go with “Little Things, Big Smiles” as I have had a few things to smile about this week. They reminded me that it is often the little things that bring us most joy. Like the fact that my friends are on a road trip in Colorado and Wyoming and post pictures of every step of the way on Facebook so that I can be with them and share a little of the experience. And it seems that the Santa Cruz winter is over and I am back in shorts and tshirts before I can even run out of clean socks.

As for the tube that needed taming, well, I am talking about tubular bands. I have been following on with the experiments I was doing last week. These little things have brought a smile to my face as I figured out at last how to stop them from spiraling. Yes, it’s just a small thing but it gave me quite a kick!

Of course some bands look great when they spiral and that is precisely the effect that you want.

But that wasn’t what I wanted when I made a pebble weave tubular band. I wanted the woven design to lie straight along the tube so that it could be seen if the band was worn as a wristlet.

I am forcing the design to lie straight in the upper picture. As soon as I let it go, it spirals. I suppose the spiral version has its own charm but that is not what I wanted.

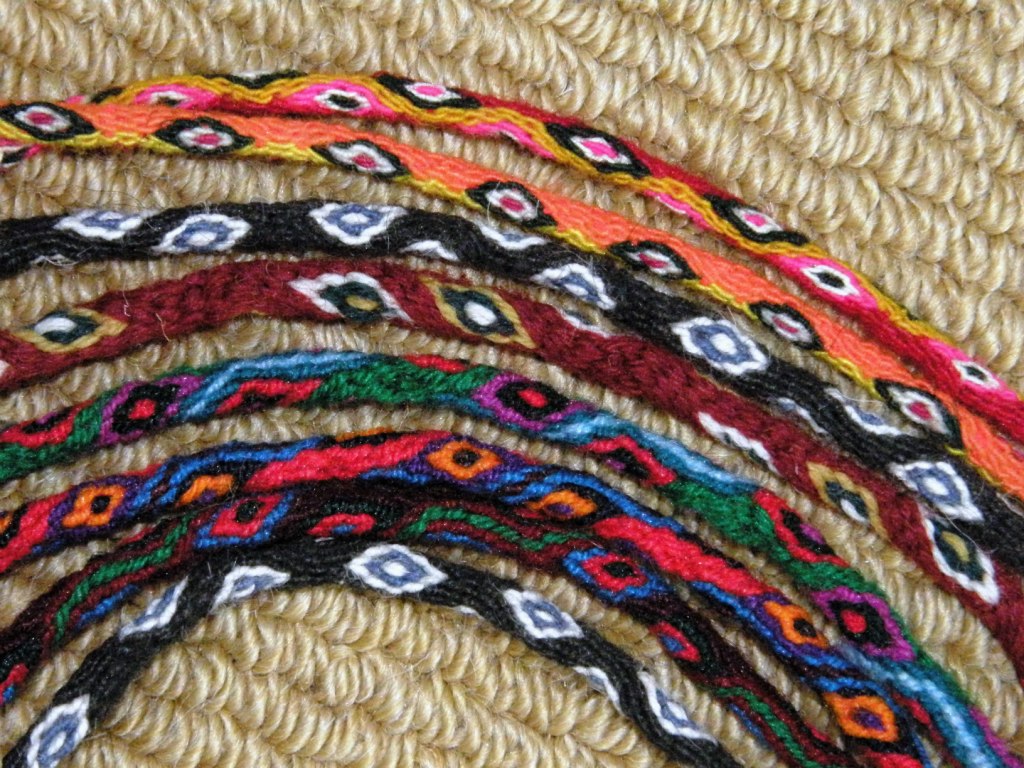
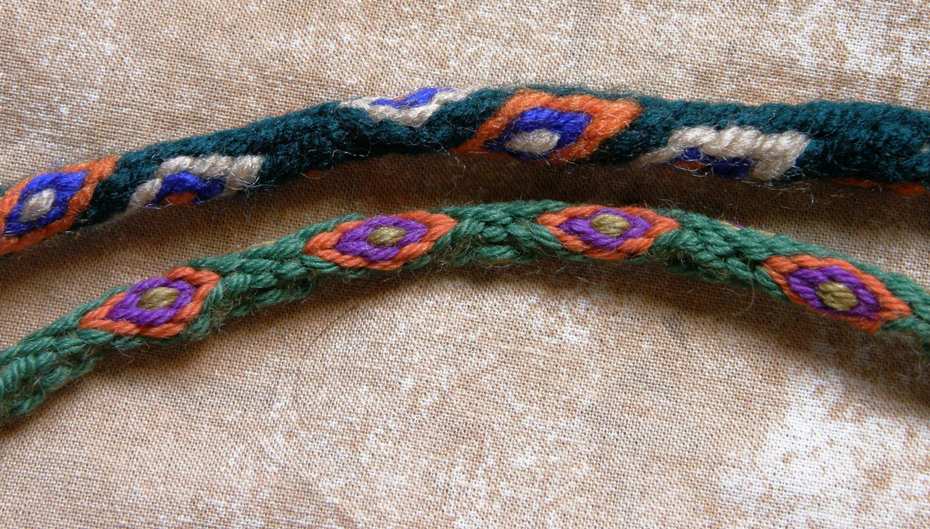
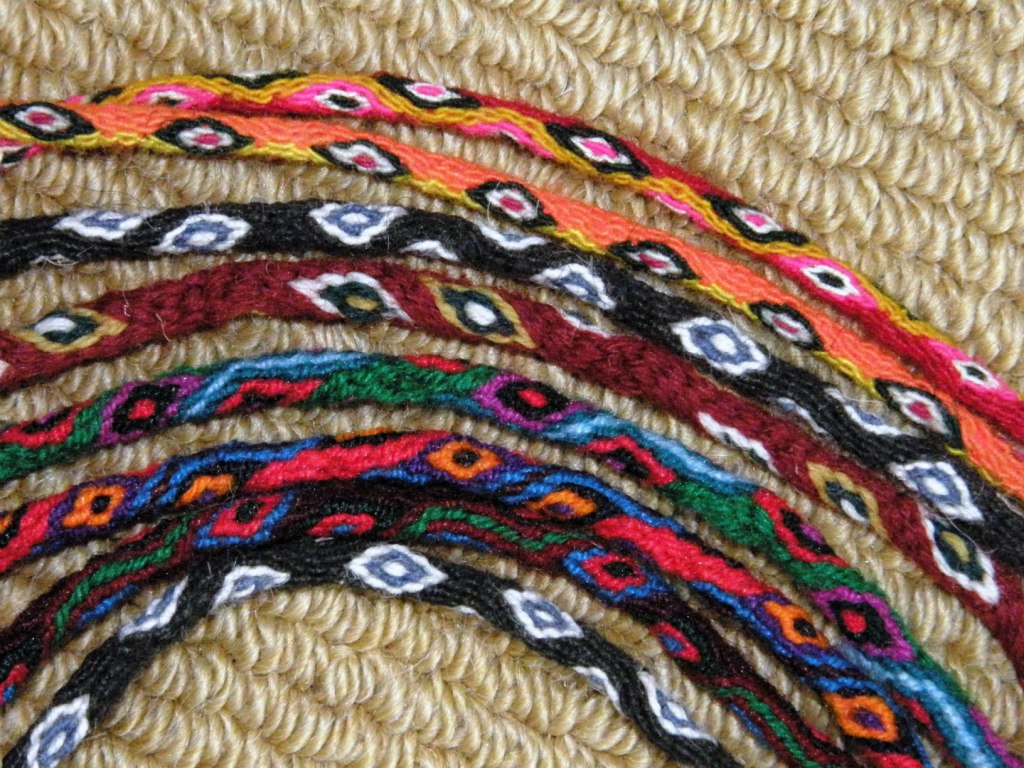
Most ñawi awapa bands that I have seen spiral…some to a lesser degree than others but there are some that pretty much don’t at all as you can see above. The more colorful ones in the center of the group spiral a lot while those above and below them have little or no twist. I LOVE that black one! So, clearly, there is a trick to getting them to lie straight.

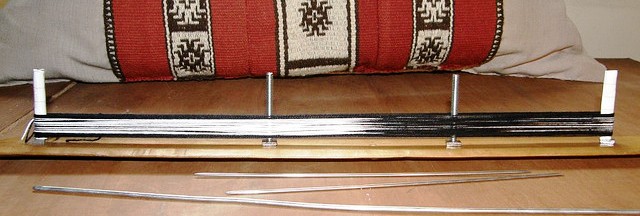
I fiddled with this and that. Many warps went into the trash. Luckily I have my mini warping board and so was able to quickly and easily set up tiny two and four-stake warps so not a whole lot of yarn was wasted. And then I got it! He he…big smile.

So there’s a spiraling ñawi awapa band that I made ages ago and, below it, one I made this week that behaves nicely and lies straight. Again, I say that both types have their charms…it just depends what you want and now I have options.

Of course, when tubular bands are sewn to cloth as in this example from Peru, they are forced to lie straight. I was told by Nilda Callañaupa in Peru that tubular bands are sewn to pieces of cloth to help stabilize the edges and corners which tend to curl due to the highly overtwisted wool warp yarn that is used. Now I am wondering if the spiraling in the tube counteracts the curling in the cloth and is what allows the fabric to then lie flat.

I have always sewn my tubular bands to very sturdy material…edges of bags which are doubled pieces of woven cloth so the spiraling nature of the band has not had any effect on the finished piece….no twisting or distortion of the fabric has resulted.

So, after that, I just had to play with my new discovery and make some more tubular bands.

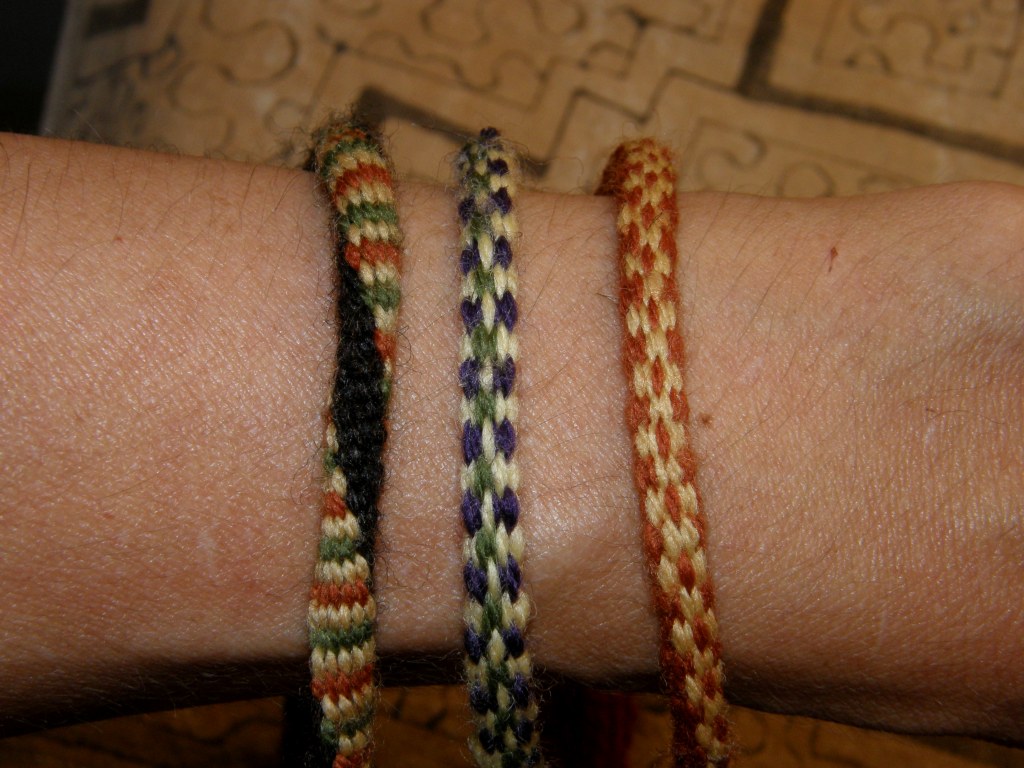
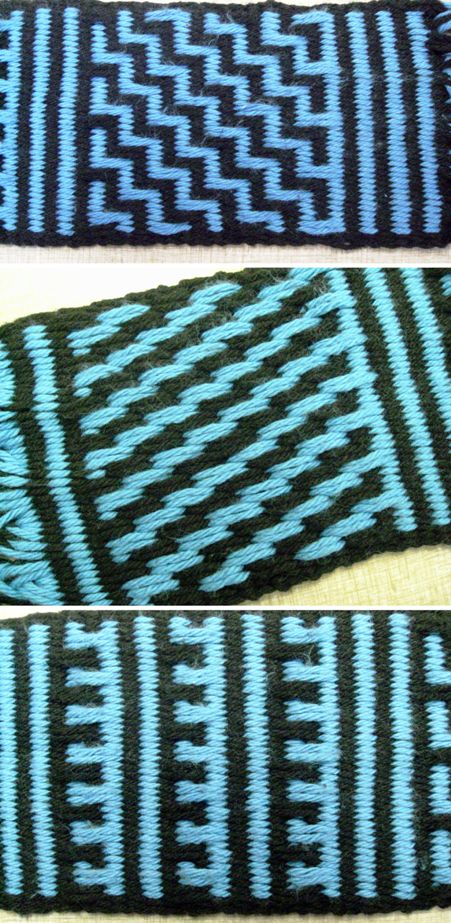
Thick ones, thin ones, in cotton and wool. The wool ones are much smoother and prettier….ñawis with their diverted and twisted warps, plain-weave, pebble weave and warp substitution tubular bands.

Maybe next time I am in the US I will get some caps and clasps and make some wristlets with these although maybe I should just go down to the Buckle Land  store in the street market here and see what I can find.

However, if I am going to wear a wristlet, I think that I would rather make one of these…

These were collected and also reproduced by Anne Blinks and Nora Rogers and now form part of Martha Stanley’s collection. I believe that they were made by the Mayoruna Indians of Peru who live in the same region as the Shipibo in the Upper Amazon Basin. I was given one of Nora Rogers’s pieces in progress on the loom as well as a booklet on the technique from my friend Betty’s vast collection of resources on ethnic weaving techniques.

There it is all ready to be studied!

From tiny to tremendous, I pulled out this monster project this week too….

My tubular bands look quite ridiculous next to it!

That thing is heavy! It is was very weird sitting down to it after not having touched it for so long. It took me a while to get back into the rhythm…which swords do I use when and what sequence of moves had I decided were the most efficient?

Once I was back into it, the first thing I noticed was a mistake in the new pick-up pattern I am weaving which would have had very sad results further down the track. That meant that my first task was to un-weave….sigh! but I am smiling about having caught it in time.

Yes, progress is slow on this piece but if you are thinking that I am getting nowhere, let me show you that I have least gotten the design established. Most of the major scary counting is now over as each row of pick-up is now done based on the last, if  you know what I mean….simply moving a little to the right or the left as the diagonal lines form. It is always exciting to be doing a new design and especially this one as it is my own adaptation of a traditional si’ira pattern of the Wayuu people from Mirja Wark’s book. After all the adjustments I made to have it fit my piece, it now has a lot of my own touches and so I am curious to see just how it will turn out.

So, this week I “tamed the tube” and smiled at many things…like seeing  Jeen zooming on after having woven with her and enjoying herself with my pebble weave book  using her rigid heddle loom. She is now an active member of the Ravelry group.

Now that she has woven the bird motif, she plans to try it with that gorgeous multi-color warp.

And Marge, who also wove with me, is trying warp substitution with Bedouin patterns as a warm-up to double weave.

She was a bit dismayed by the long floats on the back until we  assured her that that is what happens with warp substitution.

She will be able to take the skills she learns from this experience a step further when she tries double weave.

Alison wove a backstrap with a striking pattern and beautiful edges…

And then made a pebble weave band on her inkle loom using many of the motifs from my book.

Jenibug blew me away by taking the llama patterns that I have charted here for warp-faced weaving and adapting them to balanced double weave pick-up on her floor loom…

Here they are in warp-faced double weave…the little llama heads come from a Bolivian band. I added the body embellishments and backgrounds.

And here is Jenibug’s balanced weave project…How neat is that?!

And here it is off the loom and wet finished. Are you sitting down???

Isn’t that spectacular? She took my charts and translated them to balanced weave pick-up…blows me away!

And here are Loli’s pebble weave projects…beautiful bands!

Now can you understand why I am smiling big smiles?!! My experiment with tubular bands brought a smile but seeing cool stuff being made by the Ravelry folks is the best weaving therapy of all.

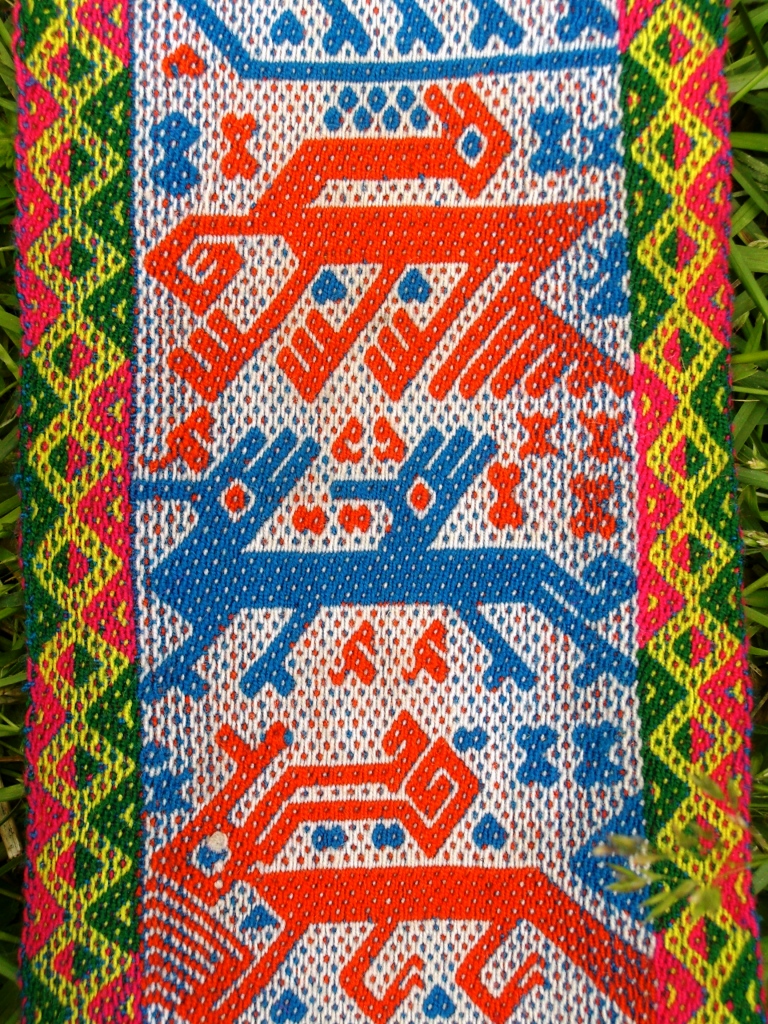
And just in case your socks are still on after seeing all that, I will leave you with another picture of one of the stunning bands from Ayacucho, Peru that I saw at Maryland Sheep and Wool Festival. I will leave you with bright cheerful colors and these playful figures, one of which is so similar to the ones I was taught when I studied pebble weave in Peru.

Backstrap Weaving – A Little Weaving Therapy

I guess that two months isn’t really such a long time to be away from home. It’s just that I haven’t done an extended trip like that in a long time. I am reminded of the times when I lived at the southernmost tip of continental Chile and used to go up to Peru and Bolivia for the winters. I would spend months away wandering about, only going home when I had become too skinny and undernourished (I always traveled on a typical backpacker’s budget!). It is always bewildering after you have seen so much, experienced so many different things, met so many cool people and learned so much to go home and find that everything is the same!

How could this be when you feel so different?! However, returning home this time was a little different because things had changed. Stuff happened, people disappeared, things accumulated….one of them being DUST…two months of the wretched stuff!

But now I am back into the old routine. Yes, here I am blogging away on Thursday in socks and sweaters. Fifty-five degrees…that’s COLD for Santa Cruz. The palm trees look rather forlorn against the grey sky.

Time for some weaving therapy!

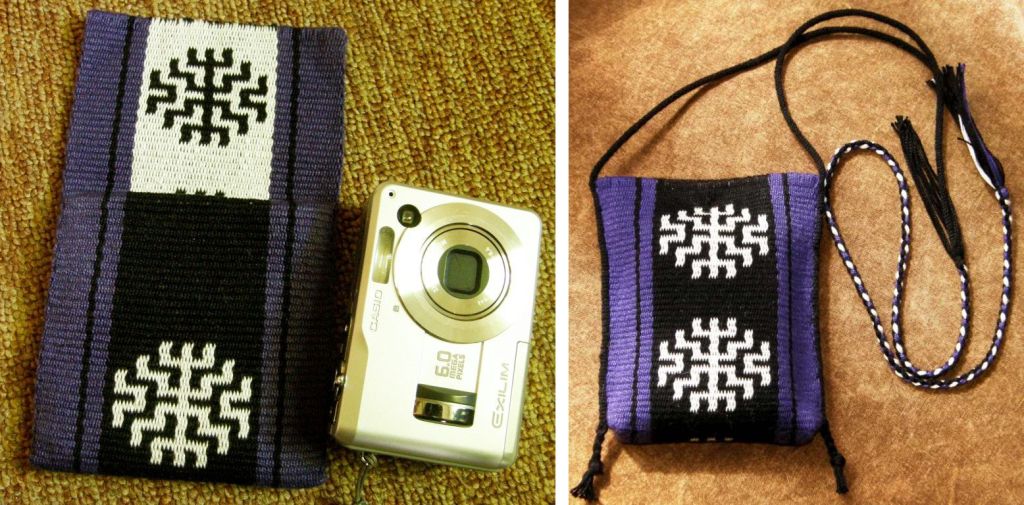
I made up the bag for the wee Casio camera.

This project accompanied me on the road and was hitched to numerous places along the way. I finished the weaving while I was up in Massachusetts. The pattern is one from Bhutanese textiles. Now, how to sew it up?

The first idea was the one on the left…a bag with a flap which I would cut and shape and edge with a tubular band. However, the motifs were not ideally placed for that and so I ended up with the style on the right.

I squared off the bottom of the bag and added a single large  snap closure on the inside. It is edged with a sixteen-end black plain-weave tubular band. I continued weaving the tubular band after covering the edge so that I could also use it as a strap and then added a four-strand braid to that for extra length.

The transition from tubular band to four-strand braid is covered by a tassel…a trick I learned from my sling braiding teacher in Peru.

I think these tubular bands are very cool and so handy. I have been playing with some other plain-weave ones in different materials. The one on my bag is in #10 crochet cotton and here are a couple of others that I made in wool.

The yellow and blue one is woven with a DK weight wool I love the way the simple stripes spiral.

The other one is in a lighter weight wool and you can see that even a lightly twisted yarn works. As the warps are so narrow, the problems of stickiness that usually occur when using wool in warp-faced projects are not a big deal. The warps did not break but my weft did once from pulling it very tightly but that was not a  problem.

Another cool thing about tubular bands is that it does not matter what the lower face of the band looks like. That gets hidden within the tube.

I wove a ñawi awapa band (see some ñawi awapa bands pictured on the left) as an experiment as a flat rather than tubular band and saw the chunky chaos of crossed and twisted floats that is created on the back side of the band from all the strange warp crossings and manipulations.

But that does that matter? No! All that gets hidden within the tube.

Now what other technique do I know that has a pretty “right” side and a messy “wrong” side of awkwardly long floats?…the warp subsitution technique, of course!

Actually, any warp-faced band whether it be plain or patterned with any kind of pick-up can be made into a tubular band but, since the warp substitution technique is often overlooked because of the long floats that are created on the reverse of the fabric, why not use it for tubular bands where none of that matters?

So, the other band pictured above has three-color horizontal bars which I was able to create with the warp substitution technique.

All the cumbersome long floats are hidden within the tube.

These bands are fast and fun to weave, quick to warp and can be stretched between a toe and finger to weave.

If that doesn’t suit you, you can attach one end to your waist with a cord through the end loops.

If you don’t fancy using your big toe, as the weaver from Tarabuco pictured at left is doing, a cord can be passed through the end loops at the other end of the warp which can then be wedged inside a drawer or looped over a “C” clamp.

I am going to use these tubular bands as pretty ties for my loom and any other time I need cord for my weaving projects and I hope to experiment a lot more with designs and colors.

So, that was one on-the-road project finished. My other demo warp is something quite different. A big white canvas looking at me and asking to be decorated…

There is something very lovely and somehow “earthy” about creating this plain and simple warp-faced white cloth and I want to make any patterning minimal. I have added a couple of weft-twined sections. Perhaps I will do some more weft-twining or maybe some soumak with a bit of added patterning with supplementary wefts. I left a lot of unwoven warp at the start in case I want to add a large weft-twined pattern later. As usual I don’t have plans for the finished piece. I will just see what happens.

Then there was time to do something with a sample piece that I had completed shortly before leaving.

You may remember the ikat weave-along that we were having on Ravelry.

My friend Betty in the US gave me a huge roll of ikat wrapping tape so there will be many more ikat experiments in my future!

I have been using cassette tape until now and had a small “oopsy” in my last project when my dye solution was too hot for the tape.

I am sure that this special tape has been designed to stand up to being boiled in dye baths. It is very wide but tears easily into perfectly straight narrower strips…what a dream!

Here is the second warp which I tried after the green one above. This was my first time trying over-dyeing with a second color and spot dyeing.

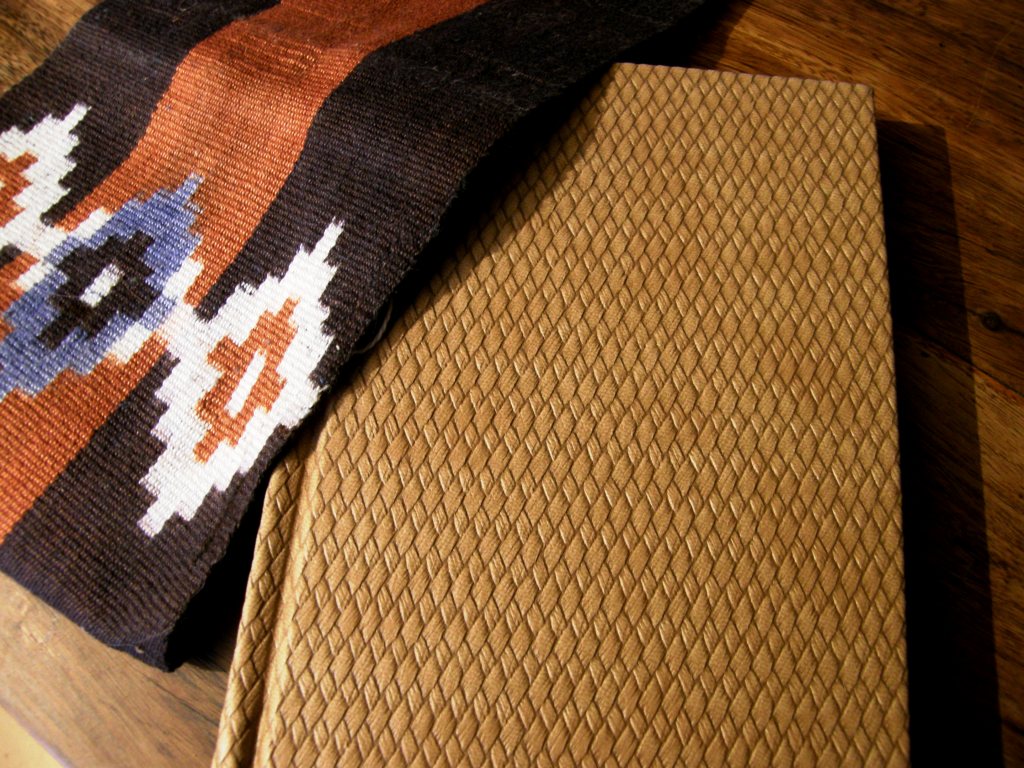
My friend Jeen in the US gave me a lovely travel journal and, even though its cover is very beautiful, I decided that my experimental ikat piece would make a wonderful jacket for this book.

I have to admit I was a little nervous. Was I about to ruin both sample and journal?

I used contact cement which is pretty strong stuff. Would it eat into the material on the journal’s cover and destroy it? Would I mess up and glue it on crookedly?

I have done that before with contact cement when gluing cork sheets to a table top. Once that stuff is ready to go you are pretty much committed and it won’t forgive any mistakes! Fortunately it all came together and I am very happy with the result.

The little vessel in the picture was a gift from a friend in Ecuador. The pen is made from sandalwood and was brought to me from India over forty years ago! Goodness knows how I have managed to hang onto it after all these years of moving around and having to abandon possessions along the way. The mug rug on the far right is part of a set inspired by African designs that I made on my backstrap loom in double weave.

My new-to-me used camera got a dressing up too with a new strap. I was happy to have a chance to weave that bird design again…the one on the old fragment that Tom Knisely showed me…

Here it is off the loom and on the camera…

And here it is on my backstrap loom. I love the way the bird motif changes from black to white along the length of the band.

And now I have a new strap to study which was lent to me by Susan  who visited me when I was traveling. She brought it along and I was delighted to be able to see both sides of it. There are so many pictures online of these bands from Oaxaca, Mexico but you never get to see the back side. There are many more examples of these on Teyacapan’s Flickr page of Mexican textiles.

Perhaps this structure is woven somewhere here in South America too but I have never come across it so this is a great opportunity to take a good look. Maybe it was woven here in pre-Columbian times. She urged me to take it home and just send it back to her when I am done. How cool is that?

I have this urge to go back to some simpler things and explore them more…like the white plain-weave piece I am doing, some more very simple ikat motifs which again involves just plain weave and I have been also looking again at simple warp floats.

One of my weaving friends in the US wove this cool backstrap after having woven simple warp floats with me.

We just played a little with floating both colors and she went on and ran with it.

At left you can see various parts of Kristi’s backstrap which is patterned with floats in two colors. She used it the second time we wove together.

When I was at Maryland Sheep and Wool I got to see many people of all ages being introduced to fiber activities.

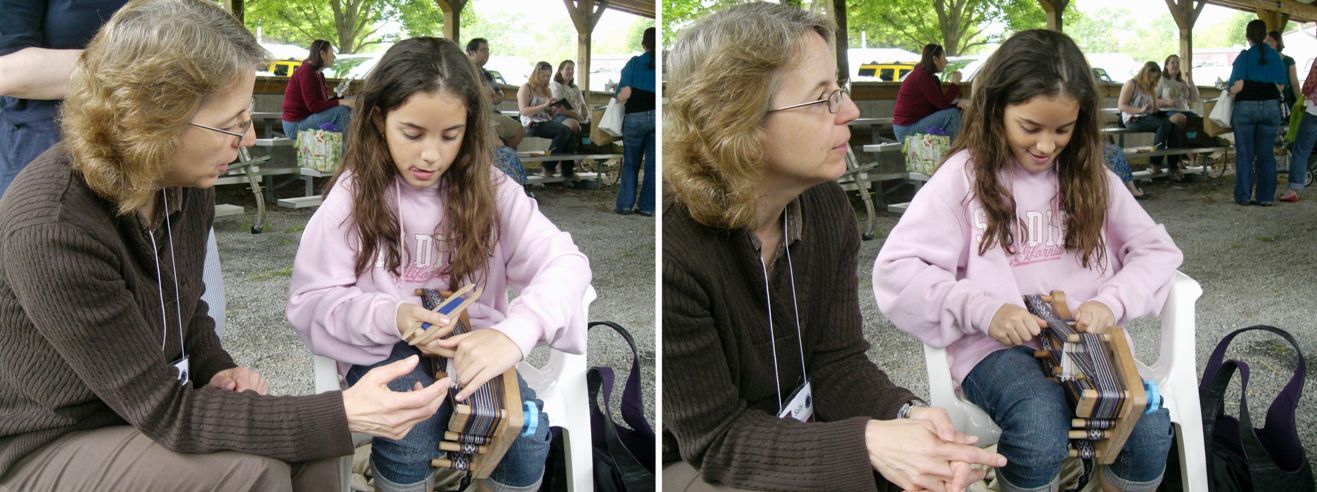
Elisabeth Hill, who I have known some time online and whose fabulous work on deflected double weave I always follow on her Flickr page (she’ll be teaching it at Convergence), came to Sheep and Wool with her niece Kylie. Kylie got a class in inkle weaving from Sally Orgren on her famous and well-traveled loom when we had a Weavolution meet-up at midday. Look at that smile. It looks like a new weaver has been born.

One of Elisabeth’s deflected double weave pieces won first prize in the exhibit at Sheep and Wool. I don’t think the picture I took does it justice so please take a look at her Flickr page to see all her beautiful creations.

Some lessons, like the one Kylie had, were completely impromptu. I wonder if as Kylie grows and continues to weave (and what wonderful inspiration she has in her aunt Lisa) she will remember her very first lesson there in the Rabbit Barn at Sheep and Wool on Sally’s “Inky”. Other classes were more formal…

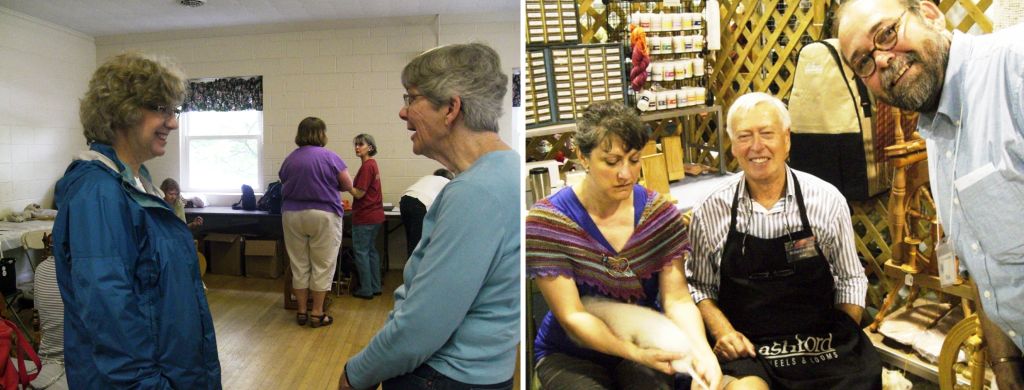
There’s my friend Claudia chatting with spinning teacher Maggie Casey before class and Richard Ashford was at The Mannings booth giving spinning tips with Tom Knisely looking on.

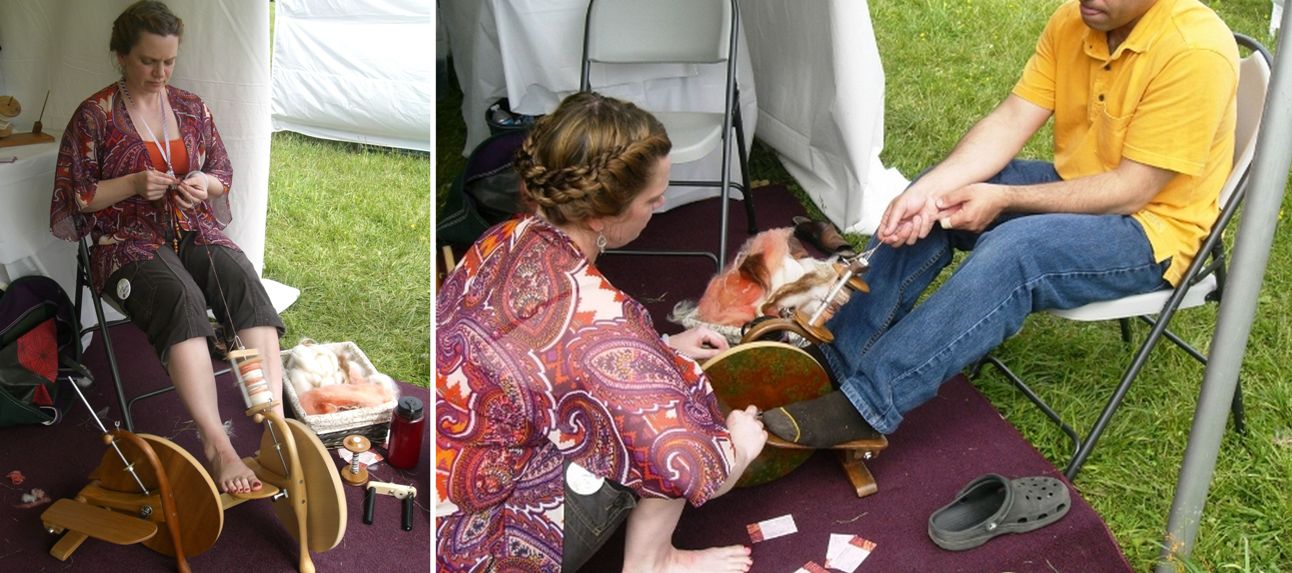
And the guys were into it too. Here is a gentleman having a spinning class on the ”Pocket Wheel” which was a big hit.

It was fun to see the team of young guys and gals who entered the Sheep to Shawl Competition this year.

Some things I saw at Sheep and Wool inspired this little project this week…

A simple little pebble weave band, right? But wait until you see the band that inspired this…

Isn’t that spectacular! Now you can see where my little purple and yellow band fits in! This was woven in Ayacucho, Peru and is probably from the same area or at least very close to the place from which my pebble weave teachers originated. Although they taught me in Huancayo, they are natives of Ayacucho and the little animal motifs on this band are very much like the ones they taught me. I would guess that this band was woven with the same two-heddle method that I learned in Huancayo with some additions for the third color.

The quality of the weaving is superb. Sadly it probably won’t be “popular” with some tourists who generally seem to prefer handspun wool and natural dyes. There is so much weaving in Peru that we just don’t get to see and coming across these bands at the Sheep and Wool festival was such a treat for me especially since I have not seen anything like the motifs I was taught back in 1996 in the books I have on Peruvian weaving.

Except for the purple and yellow section, it is a three-color pebble weave. Aren’t those braids and pom poms beautiful?!

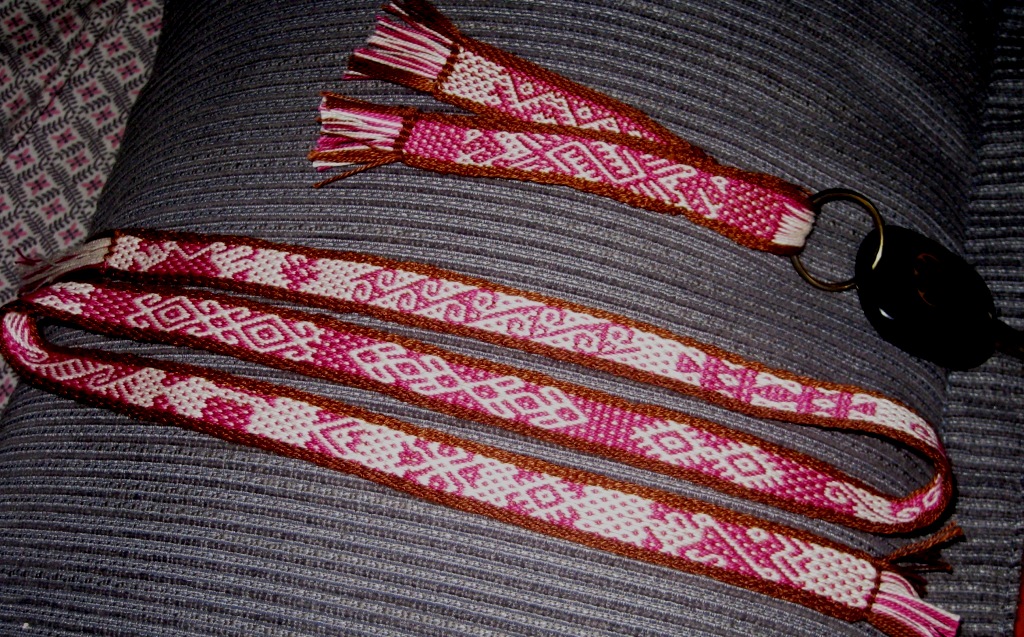
Here is a little something I picked up from the same stand. I was tipped off by braider Rodrick Owen that these were available there….a sweet braid with tassels from Ayacucho being sold as a keyfob.

And finally, here is a wonderful display of bands made by Yonat. Yonat feels more comfortable on an inkle loom and so takes what she weaves with me and transfers it to her loom. Not everything here was originally backstrap weaving. Some bands, for example, are from the workshop on Sami weaving by Susan Foulkes and others are Yonat’s original creations.

See you next time. I hope that all of you can take some time off for a little weaving therapy this week.