Sometimes it is just all about luck.
 You may remember from last week’s post that I was happy about having been able to weave my pick-up pattern uninterrupted all the way from one selvedge to the other on this discontinuous-warp four-selvedge piece. Whether I would be able to pull it off on the other half of the warp remained to be seen.
I measured and estimated. The were four weft shots in the sequence for this tiny motif and I wanted to see if I would be in just the right shed to be able to close the gap between the two woven ends without interrupting the pattern. My estimates told me that it wasn’t going to work. What to do? Well, just weave on and see what I can come up with at the very end. There was nothing at that point that I could have done about it and I might have been able to find some kind of creative solution.
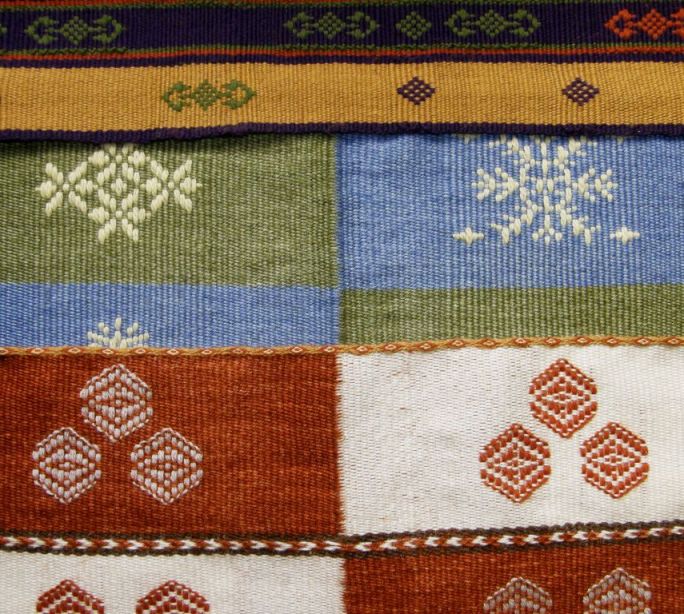
 As it turns out, it worked! My estimates had told me that it wouldn’t, which only goes to show you how little control I really had over it and how much depended in the end on pure luck. The terracotta wool is rather streaky. The ties were too tight on the skein when it was dyed. I am okay with the resulting rustic look. It goes with other defects such as the change in tone when I ran out of white weft and had to use terracotta. It has been a fun experiment.
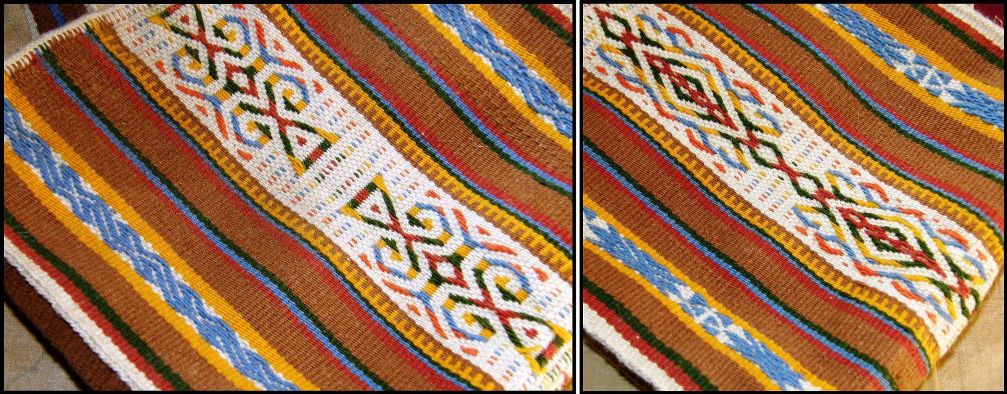
 Bolivian and Peruvian weavers, as far as I have seen, never bother to try and match up their patterns in this way on four-selvedge pieces. My tiny motif is nothing compared to the complex patterns that they generally weave into their pieces. A typical finish on a complementary-warp piece looks like this….(this piece is from Calcha, Bolivia)
 The weaver abandons the pick-up pattern and uses the two basic sheds, in this case, one in each color, to close the gap. The last few weft passes create horizontal bars. That small piece of plain weave comes out wider than the warp-float patterned areas.
Supplementary-warp patterning requires less space in which to maneuver as the weaver does not need to create a picking cross. He or she simply reaches down with fingers or stick to the lower layer of threads and picks up the warps that are needed for the pattern while dropping others from the top layer. As I showed you last week, some weavers who use this structure weave the design uninterrupted right to the very end of the piece and abandon it to the basic sheds only for the last three or four weft passes (the example below is from Pitumarca, Peru).

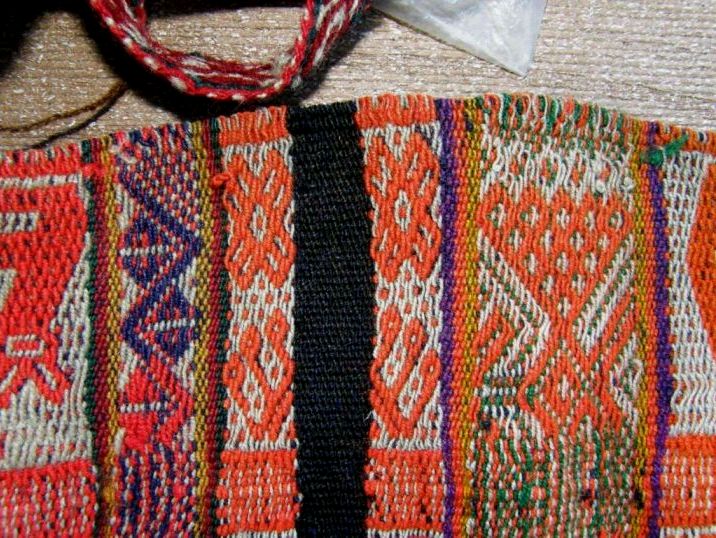 This piece from the Cusco region of Peru has both supplementary and complementary-warp patterns and the weaver has chosen to end all in the same way and place.
Double weave is something else again! My teacher in Potosi showed me when to abandon the pick-up and start using the two basic sheds, each with double the amount of threads for the two layers of cloth now being squeezed into a single layer. The needle-weaving part was horrendous! Here you can see my dear teacher Hilda, poor eyesight and all, showing me the final steps….
 So, my terracotta piece was taken off the loom and I was ready to weave and attach the tubular band . I had created a warp for a tubular band for another piece that I had woven a few weeks ago and had decided not to use it. Although I think that a band with a dark brown base would have suited this piece a lot better, I simply didn’t have any suitable dark brown wool. This was the next best thing.
 First, a wee sample…I had lots of this warp which had been originally planned for a much larger piece so I was able to weave an independent band and lay it along the edge to see if the colors really did suit. As you know, a tubular band is generally woven and sewn to the cloth at the same time using the weft as the sewing thread. I have a tutorial on that here.
 It’s done, and that heralds the end of the summer wool adventure. I learned a lot and have three study pieces to remind me of that.
 Now it is time to get on with other things.
I have ideas swirling in my head about my next piece in the wall hanging series. When I finally have something to show you, you will see that the word “swirl” is very appropriate for describing the design on which I am working.
As is my custom, I am belly down on the floor with charting paper and pencil and a small mountain of accumulated eraser dust. They say that the third time is the charm. Not so. I go to bed thinking that I have everything in place but then wake up next day to see that something very obvious needs changing. I am weaving samples as I go which is a good thing as many of the needed changes that were not so obvious on paper scream at me from the woven fabric!
I plan to weave this fifth wall hanging in three panels and join them with weft twining just as I did for hanging number four. With this piece I hope to represent techniques and design influences from tropical lowland regions of Peru.
 This study piece of a wristlet woven by the Mayoruna people of Amazonian Peru, made by the late Nora Rogers, will help me design the red side panels.
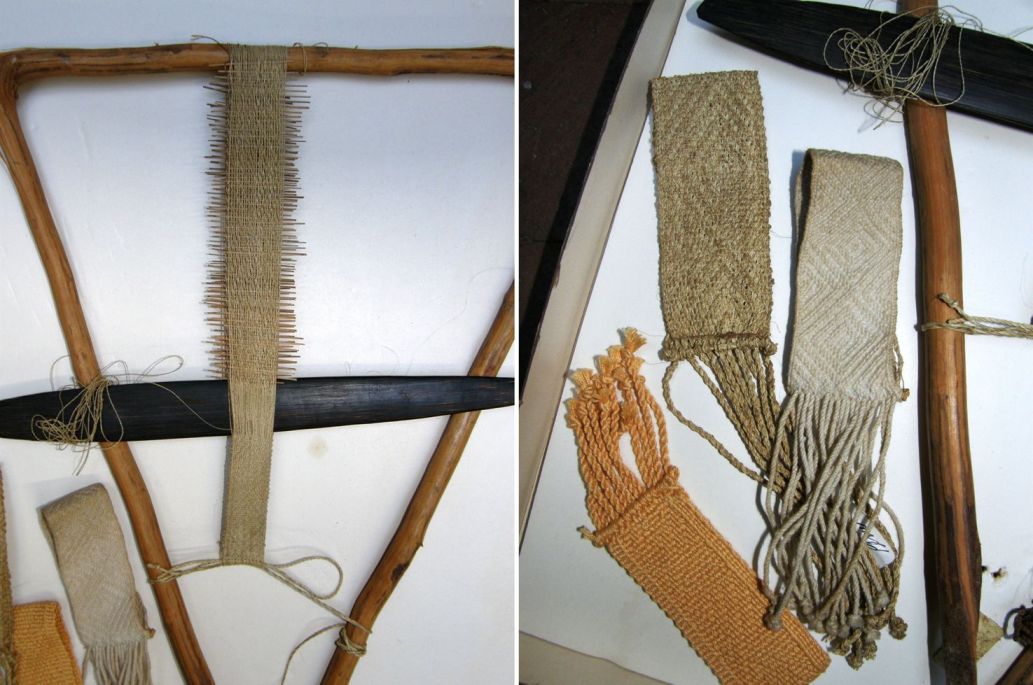 I won’t be using the traditional type of loom, though! All those tiny sticks hold the pattern sheds. The weaver picks up the threads for a pattern shed, passes the weft, inserts a stick and stores it at the end of the warp. He/she continues doing this for every shed. I tried to count the sticks on the above piece and got at least sixty. When the weaver reaches the mid-way point of the pattern he/she can then satrt drawing the sticks forward to open the shed, pass the weft and then discard the stick. The next stick in sequence is then drawn forward and so on until all sticks have been removed. Then the process of inserting the sticks starts again.
I can’t wait to get started but I want to finish charting the pattern for the center black and white panel first.
Here is my sampling warp in black and white….
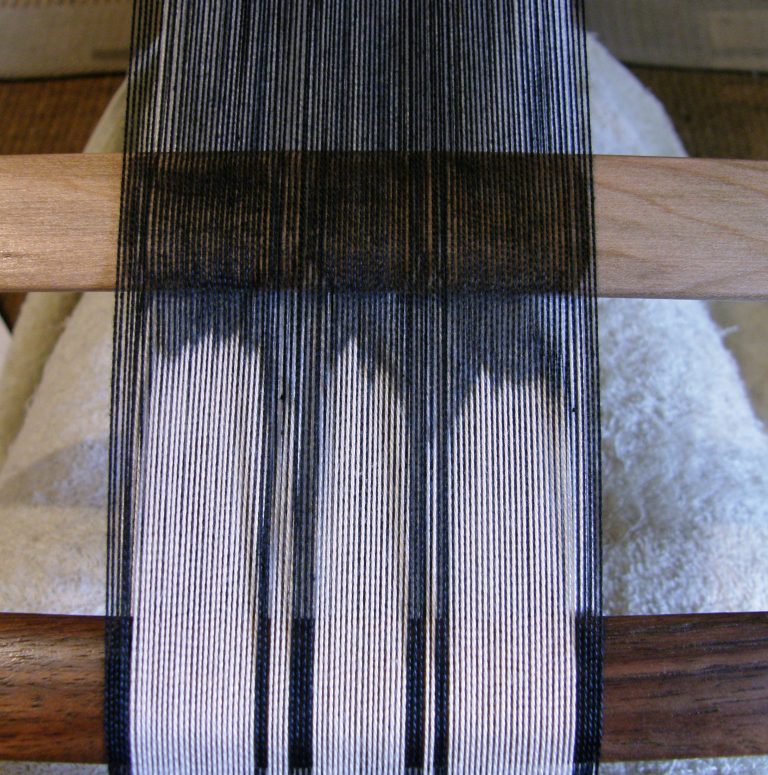 I told you a few weeks ago that I was seeing swirly patterns in my wool warp as I stared down at the lines of warp threads. Those swirly lines are what have led me to this latest project idea and, funnily, also led a friend of mine to write and ask me if I was suffering from some kind of medical condition! Now I stare down at the warp lines in this new sample and, as I open the shed and clear it down to the weaving line, I see ikat-like patterns. I am wondering if this is trying to offer up clues to me as to why warps shift in different ways while weaving (despite your best efforts to stop them!) causing ikat patterns to develop their characteristic feathered effect.
Team Backstrap is starting its weave-along in the Ravelry Group tomorrow as the Sochi Winter Games commence. I have something in mind to make with a sports theme but we will have to see if I can get out to buy the yarn tomorrow. So far, I know that Jennifer is planning to weave a strap for a bag and Julia has something planned with a colorful Guatemalan theme. She was given some 10/2 thread in many colors which she used in this wall hanging…
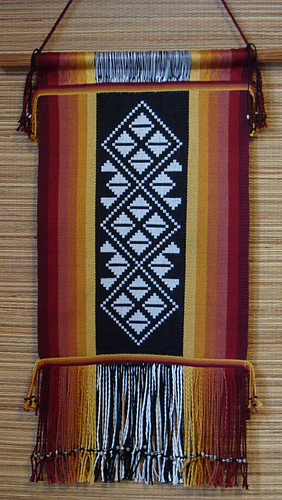 The motif was inspired by designs from Bhutan which you can find in David K Barker’s free downloadable pattern books. Check my RESOURCES page for the links. I love everything about this….the gradation of colors which border the pattern which she also cleverly used in the weft twining. She used the intermesh structure for both the solid and patterned areas. Those of you who have my Andean Pebble Weave book will know the intermesh structure described there in the section on thick borders. I teach intermesh as a patterning technique in my second book. I like the neat braided ends of Julia’s weft twining. I usually leave mine in a state of wildness.
And to finish, as I have been talking about luck in this post, here are two people who have had extraordinary luck rummaging about at thrift stores and garage sales in California….
 My friend Yonat posted this to one of the finger-weaving groups on Facebook in order to be able to identify it for the friend who had picked it up at a garage sale in the seventies. It caused high excitment in that group, I can tell you! One of the experts thinks that it was probably made during the period of Standardization from 1830-1850 and, because of the pink thread that has been used, was most likely made in the region of Lanaudière. What a treasure!
I am so thankful to Lausanne and Brian who took me to Quebec last fall to meet two sash weavers in L’Assomption.
And then, a Facebook acquaintance showed me a lucky find in a flea market in Pasadena in 2001….
 Isn’t that gorgeous?! The Huichol, Cora and Otomi people of Mexico weave these kinds of pieces using a balanced double-weave pick-up structure. From internet sources alone, it is not yet clear to me which motifs in particular belong to which group or if the same motifs are woven by all. After only being able to look at examples online, I would love to touch and handle this belt! I used examples of Huichol and Otomi work that I had found online as well as a surprsingly similar motif from Scandinavia to weave the piece below. It is exciting to be able to see what looks like an old piece in such fine condition.
 That’s all for this week. Here’s wishing you all lashings of good luck in your projects this week!