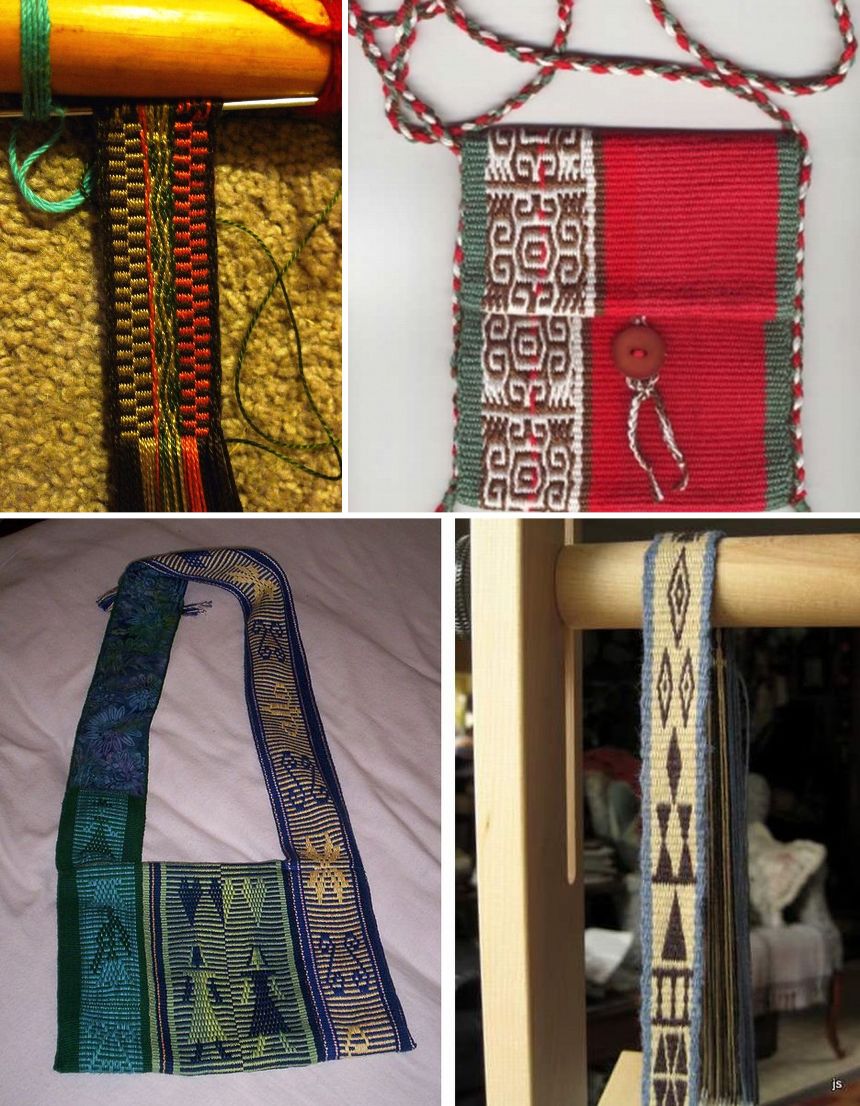
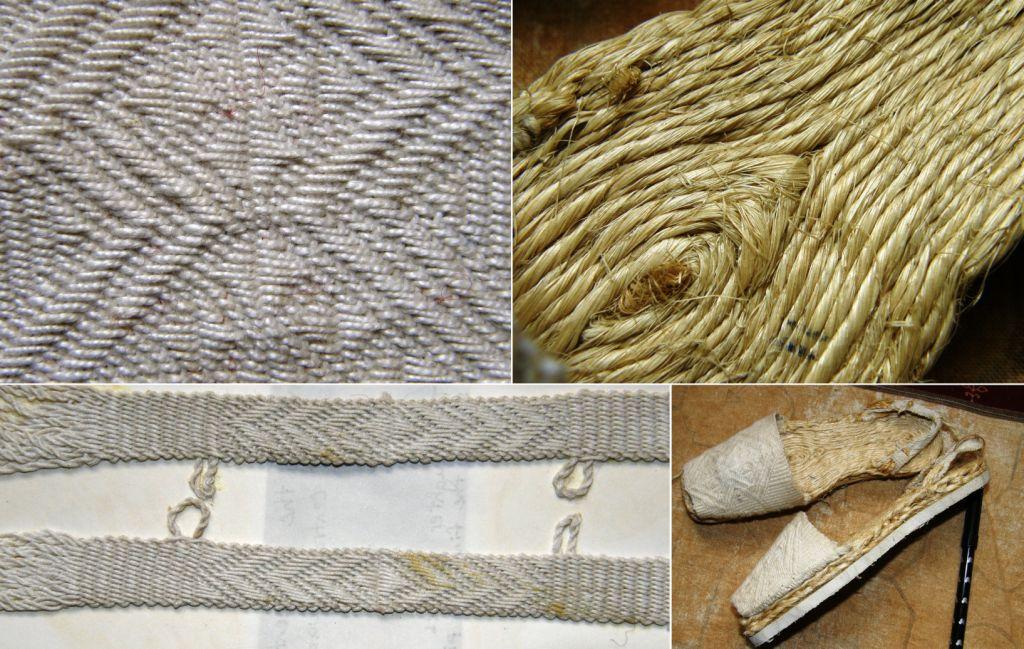
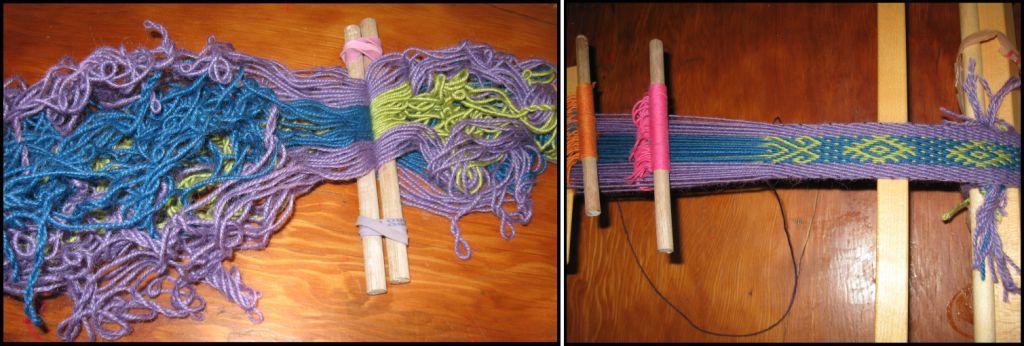
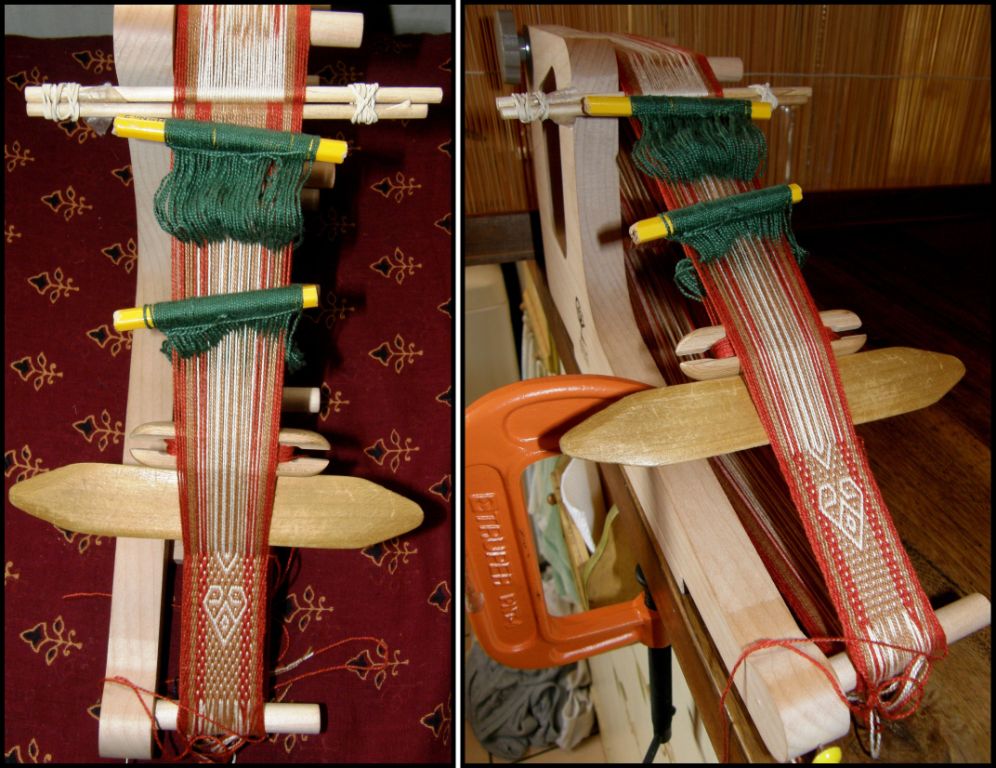
Backstrap Weaving – Lucky Finishes

Sometimes it is just all about luck.

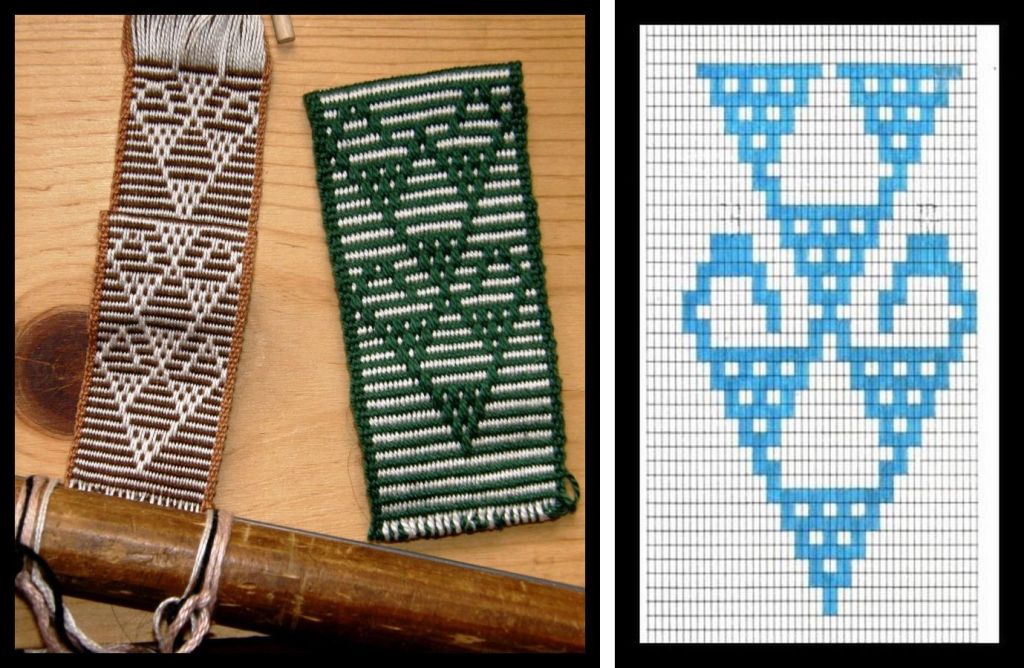
closing gap discontinuous warp four selvedgeYou may remember from last week’s post that I was happy about having been able to weave my pick-up pattern uninterrupted all the way from one selvedge to the other on this discontinuous-warp four-selvedge piece. Whether I would be able to pull it off on the other half of the warp remained to be seen.

I measured and estimated. The were four weft shots in the sequence for this tiny motif and I wanted to see if I would be in just the right shed to be able to close the gap between the two woven ends without interrupting the pattern. My estimates told me that it wasn’t going to work. What to do? Well, just weave on and see what I can come up with at the very end. There was nothing at that point that I could have done about it and I might have been able to find some kind of creative solution.

discontinuous warp finishedAs it turns out, it worked! My estimates had told me that it wouldn’t, which only goes to show you how little control I really had over it and how much depended in the end on pure luck. The terracotta wool is rather streaky. The ties were too tight on the skein when it was dyed. I am okay with the resulting rustic look. It goes with other defects such as the change in tone when I ran out of white weft and had to use terracotta. It has been a fun experiment.

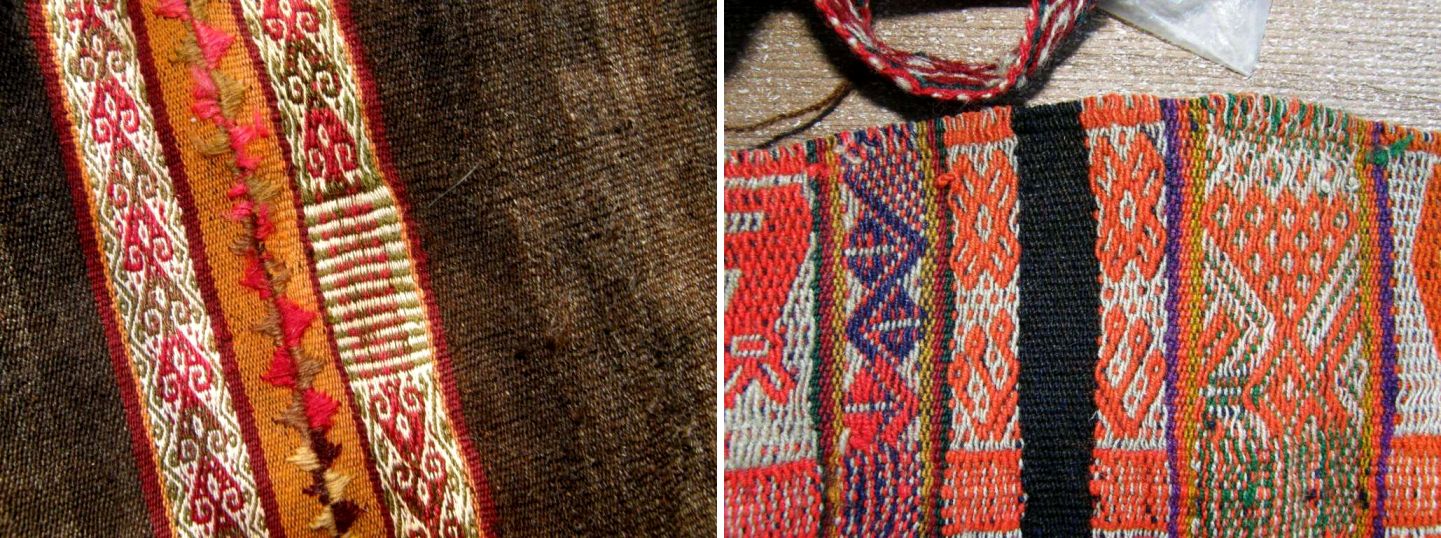
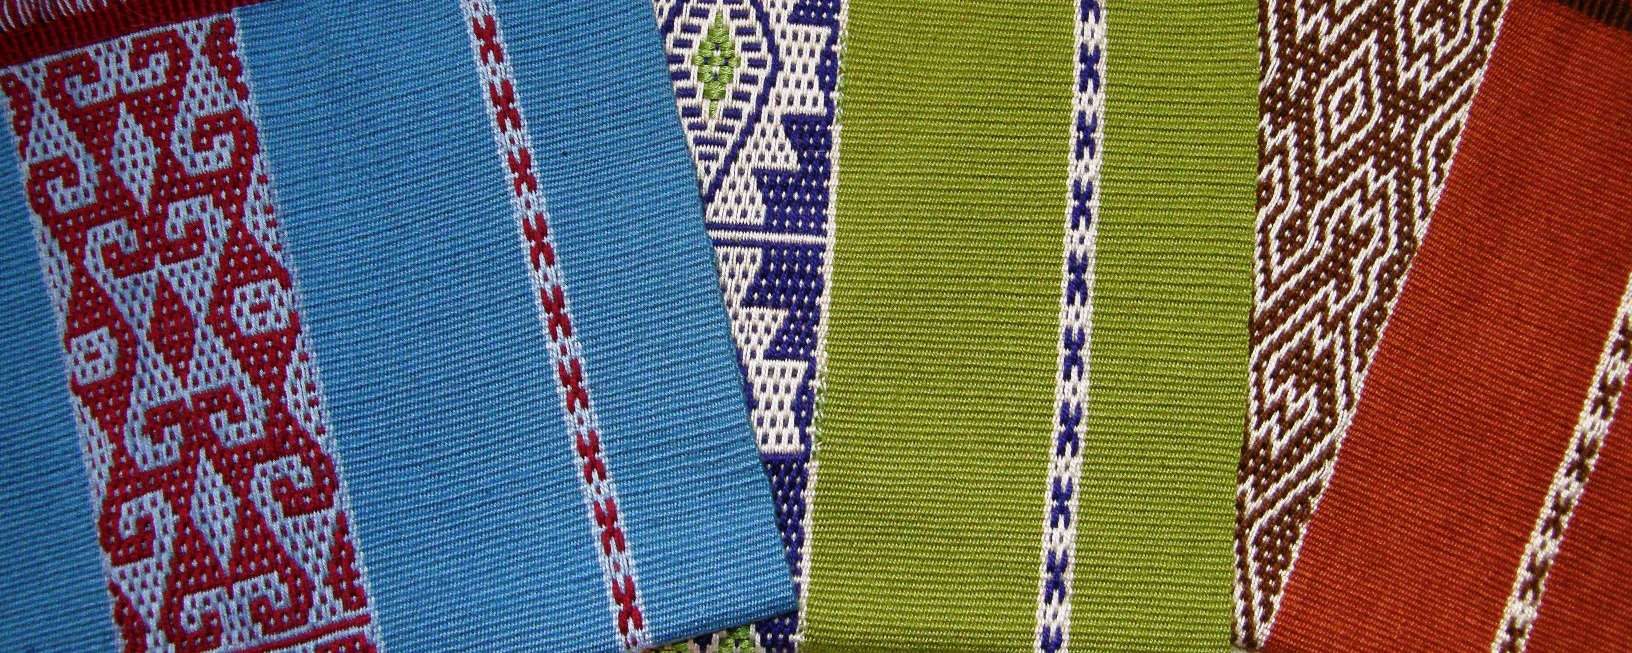
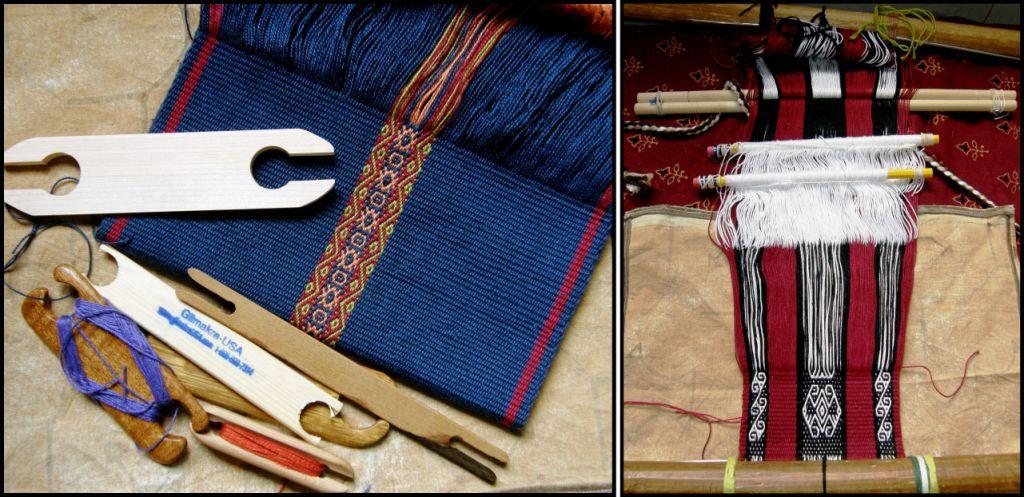
??????????????????????Bolivian and Peruvian weavers, as far as I have seen, never bother to try and match up their patterns in this way on four-selvedge pieces. My tiny motif is nothing compared to the complex patterns that they generally weave into their pieces. A typical finish on a complementary-warp piece looks like this….(this piece is from Calcha, Bolivia)

??????????????????????The weaver  abandons the pick-up pattern and uses the two basic sheds, in this case, one in each color, to close the gap. The last few weft passes create horizontal bars. That small piece of plain weave  comes out wider than the warp-float patterned areas.

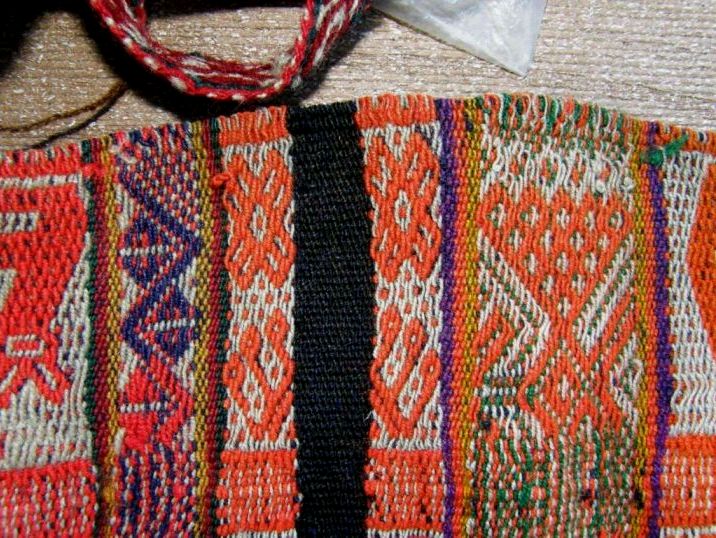
Supplementary-warp patterning requires less space in which to maneuver as the weaver does not need to create a picking cross. He or she simply reaches down with fingers or stick to the lower layer of threads and picks up the warps that are needed for the pattern while dropping others from the top layer. As I showed you last week, some weavers who use this structure weave the design uninterrupted right to the very end of the piece and abandon it to the basic sheds only for the last three or four weft passes (the example below is from Pitumarca, Peru).

finishing-backstrap-weavings

terminal-areasThis piece from the Cusco region of Peru has both supplementary and complementary-warp patterns and the weaver has chosen to end all in the same way and place.

Double weave is something else again! My teacher in Potosi showed me when to abandon the pick-up and start using the two basic sheds, each with double the amount of threads for the two layers of cloth now being squeezed into a single layer. The needle-weaving part was horrendous! Here you can see my dear teacher Hilda, poor eyesight and all, showing me the final steps….

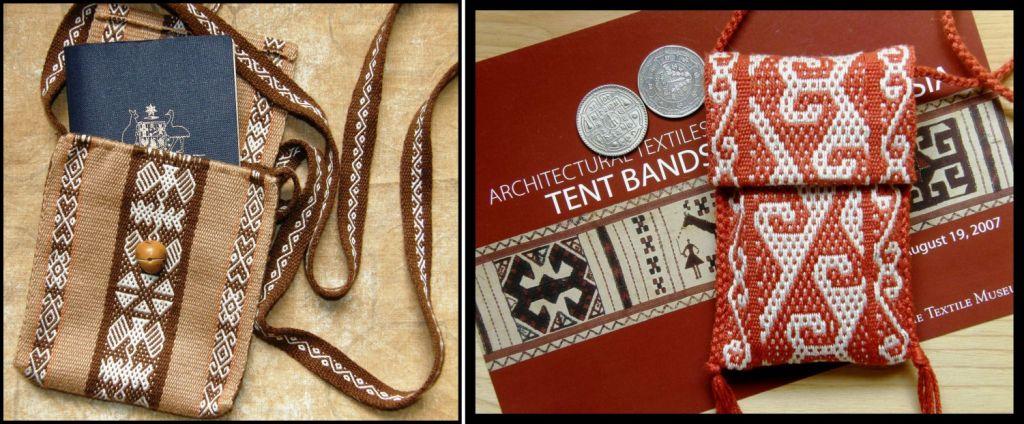
hilda finsihing a pieceSo, my terracotta piece was taken off the loom and I was ready to weave and attach the tubular band . I had created a warp for a tubular band for another piece that I had woven a few weeks ago and had decided not to use it. Although I think that a band with a dark brown base would have suited this piece a lot better, I simply didn’t have any suitable dark brown wool. This was the next best thing.

??????????????????????First, a wee sample…I had lots of this warp which had been originally planned for a much larger piece so I was able to weave an independent band and lay it along the edge to see if the colors really did suit. As you know, a tubular band is generally woven and sewn to the cloth at the same time using the weft as the sewing thread. I have a tutorial on that here.

tubular band on ticlla pieceIt’s done, and that heralds the end of the summer wool adventure. I learned a lot and have three study pieces to remind me of that.
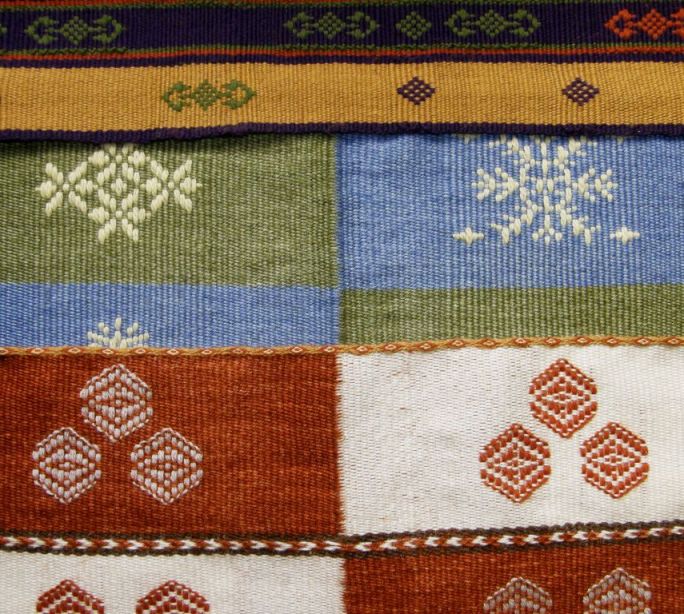
woolstudy pieces four selvedge and ticllaNow it is time to get on with other things.

I have ideas swirling in my head about my next piece in the wall hanging series. When I finally have something to show you, you will see that the word “swirl” is very appropriate for describing the design on which I am working.

As is my custom, I am belly down on the floor with charting paper and pencil and a small mountain of accumulated eraser dust. They say that the third time is the charm. Not so. I go to bed thinking that I have everything in place but then wake up next day to see that something very obvious needs changing. I am weaving samples as I go which is a good thing as many of the needed changes that were not so obvious on paper scream at me from the woven fabric!

I plan to weave this fifth wall hanging in three panels and join them with weft twining just as I did for hanging number four. With this piece I hope to represent techniques and design influences from  tropical lowland regions of Peru.

Nora Rogers experimentThis study piece of a wristlet woven by the Mayoruna people of Amazonian Peru,  made by the late Nora Rogers, will help me design the red side panels.
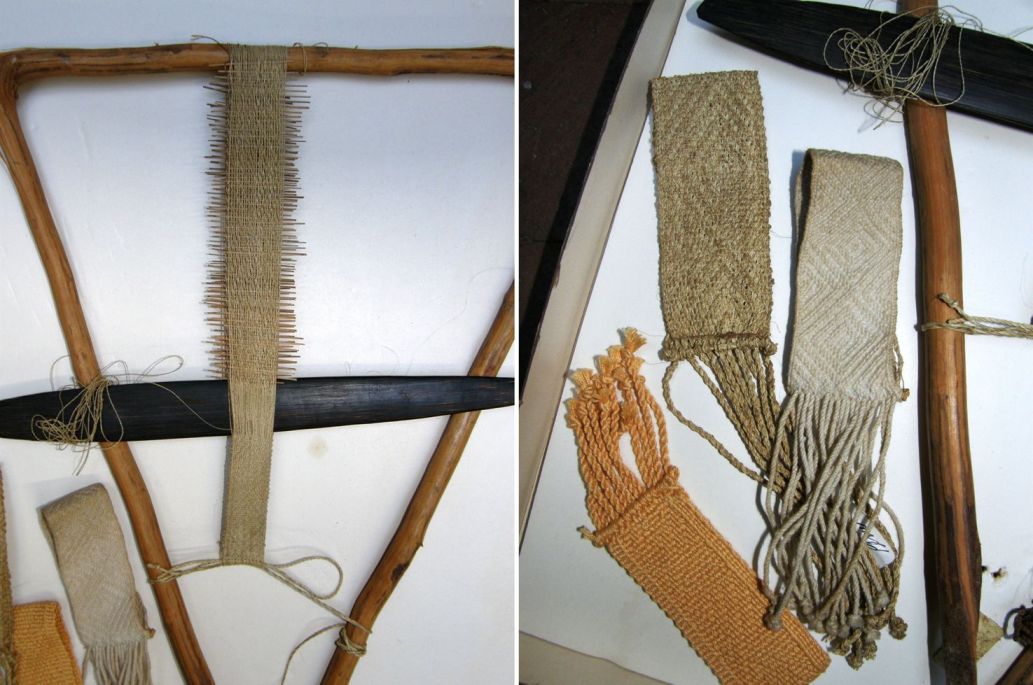
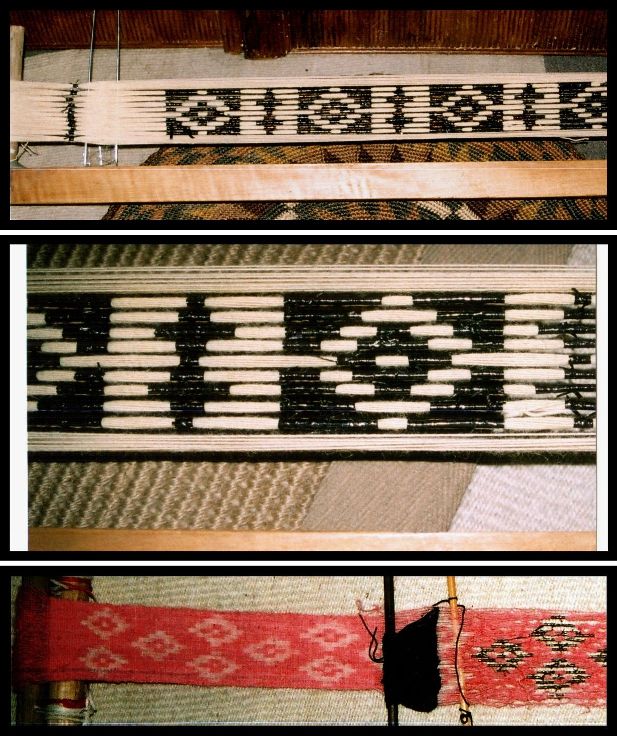
shipibo wristletsI won’t be using the traditional type of loom, though! All those tiny sticks hold the pattern sheds. The weaver picks up the threads for a pattern shed, passes the weft, inserts a stick and stores it at the end of the warp. He/she continues doing this for every shed. I tried to count the sticks on the above piece and got at least sixty. When the weaver reaches the mid-way point of the pattern he/she can then satrt drawing the sticks forward to open the shed, pass the weft and then discard the stick. The next stick in sequence is then drawn forward and so on until all sticks have been removed. Then the process of inserting the sticks starts again. 

I can’t wait to get started but I want to finish charting the pattern for the center black and white panel first.

Here is my sampling warp in black and white….
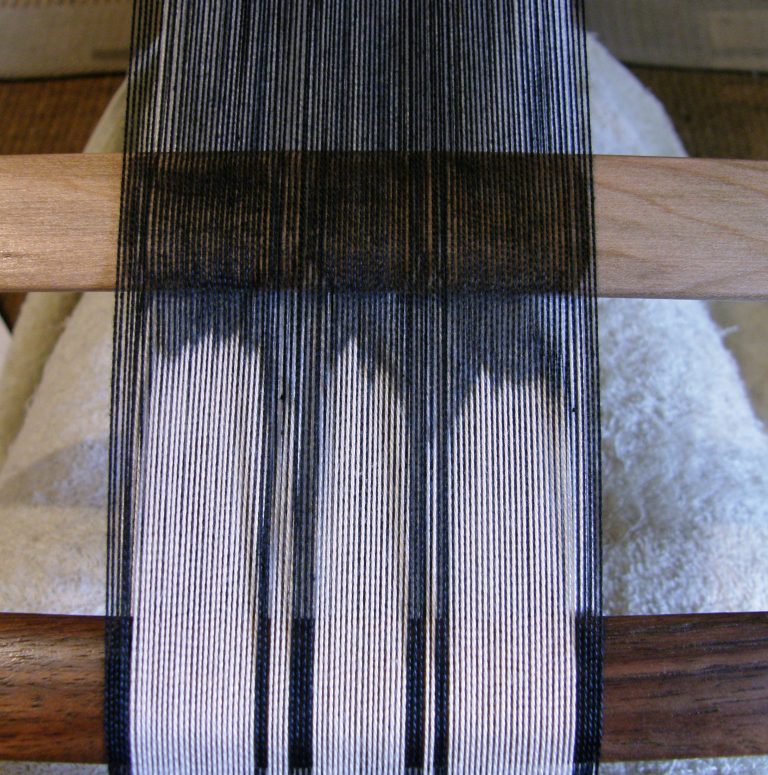
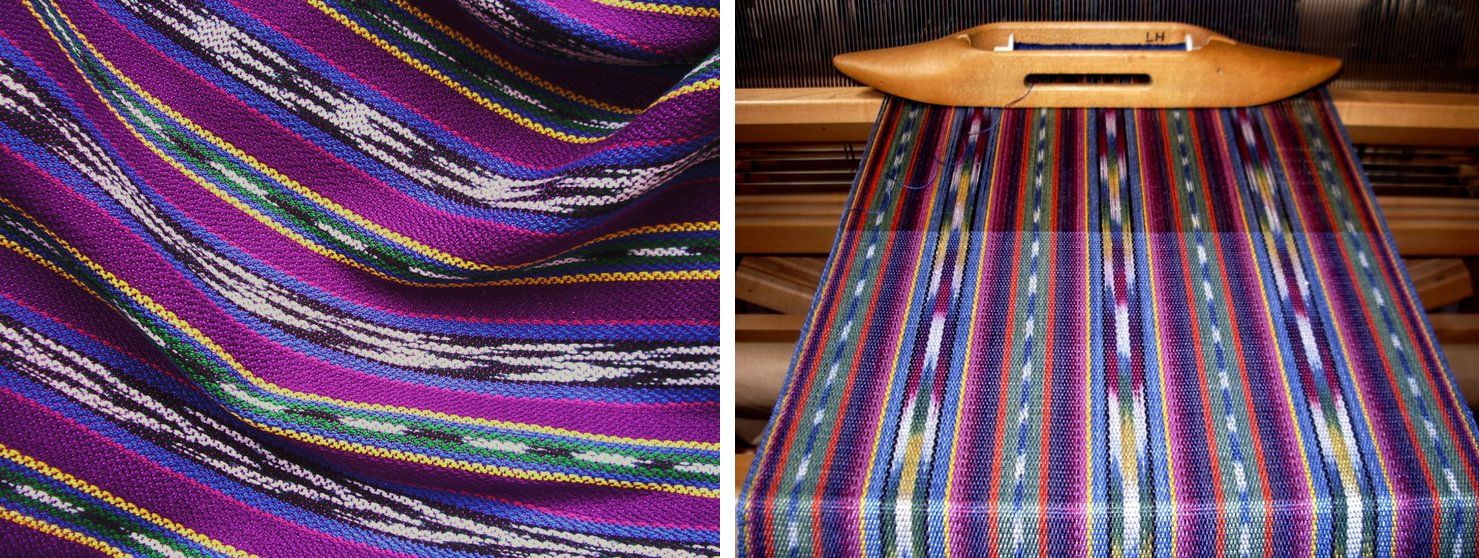
???????????????????????????????I told you a few weeks ago that I was seeing swirly patterns in my wool warp as I stared down at the lines of warp threads. Those swirly lines are what have led me to this latest project idea and, funnily, also led a friend of mine to write and ask me if I was suffering from some kind of medical condition! Now I stare down at the warp lines in this new sample and, as I open the shed and clear it down to the weaving line, I see ikat-like patterns. I am wondering if this is trying to offer up clues to me as to why warps shift in different ways while weaving (despite your best efforts to stop them!) causing ikat patterns to develop their characteristic feathered effect.  

Team Backstrap is starting its weave-along in the Ravelry Group tomorrow as the Sochi Winter Games commence. I have something in mind to make with a sports theme but we will have to see if I can get out to buy the yarn tomorrow. So far, I know that Jennifer is planning to weave a strap for a bag and Julia has something planned with a colorful Guatemalan theme. She was given some 10/2 thread in many colors which she used in this wall hanging…
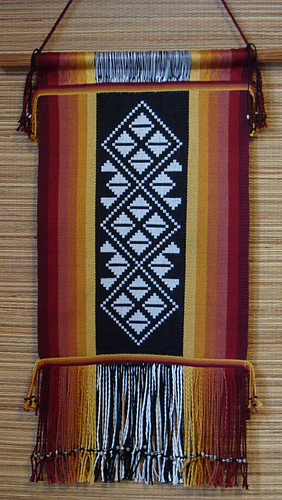
julia bhutan intermeshThe motif was inspired by designs from Bhutan which you can find in David K Barker’s free downloadable pattern books. Check my RESOURCES page for the links. I love everything about this….the gradation of colors which border the pattern which she also cleverly used in the weft twining. She used the intermesh structure for both the solid and patterned areas. Those of you who have my Andean Pebble Weave book will know the intermesh structure described there in the section on thick borders. I teach intermesh as a patterning technique in my second book. I like the neat braided ends of Julia’s weft twining. I usually leave mine in a state of wildness.

And to finish, as I have been talking about luck in this post, here are two people who have had extraordinary luck rummaging about at thrift stores and garage sales in California….

1157544_10203147433553344_313383261_nMy friend Yonat posted this to one of the finger-weaving groups on Facebook in order to be able to identify it for the friend who had picked it up at a garage sale in the seventies. It caused high excitment in that group, I can tell you! One of the experts thinks that it was probably made during the period of Standardization from 1830-1850 and, because of the pink thread that has been used, was most likely made in the region of Lanaudière. What a treasure!

I am so thankful to Lausanne and Brian who took me to Quebec last fall to meet two sash weavers in L’Assomption.

And then, a Facebook acquaintance showed me a lucky find in a flea market in Pasadena in 2001….

huichol otomi bandIsn’t that gorgeous?! The Huichol, Cora and Otomi people of Mexico weave these kinds of pieces using a balanced double-weave pick-up structure. From internet sources alone, it is not yet clear to me which motifs in particular belong to which group or if the same motifs are woven by all. After only being able to look at examples online, I would love to touch and handle this belt! I used examples of Huichol and Otomi work that I had found online as well as a surprsingly similar motif from Scandinavia to weave the piece below. It is exciting to be able to see what looks like an old piece in such fine condition. 

huichol otomoi inspired backstrap weavingThat’s all for this week. Here’s wishing you all lashings of good luck in your projects this week! 
Backstrap Weaving – Everywhere an Eye-Eye

Here an eye, there an eye….

I have been casting my eyes over Veronica Cereceda’s beautiful book on the weaving of the people of Tinkipaya, Bolivia marveling at the complexity of the patterns and the use of certain combinations of color to create light and shadow. According to Cereceda, the colors most used, and this is immediately evident from the many stunning photos in the book, are white, yellow, orange, black, light green, dark green, bright blue, bright pink, dark red and purple. I have yet to find any reference to the type of yarn used and whether it is bought in these colors or dyed by the weavers themselves, but as I said, I have only had the time to simply leaf through the book at this point.

I have to say that it is refreshing to find these bright, obviously synthetic colors in use in these gorgeous textiles.

The bright pinks, lime greens and strong yellows so often favored by the women of the highlands can quite often be jarring to our “Western” eyes.

When one sees the dry, bleak landscape of  the high plains, it is easy to appreciate the desire to create brightly colored cloth.

However, I think that it is the certain placement of these colors on the cloth of Tinkipaya to create the bands of light and shade that make these textiles so attractive.

The piece above from Tinkpaya was most likely made for sale to tourists and may have been adapted slightly color-wise for this purpose. I don’t see anything with that particular shade of blue among the many pictures in Cereceda’s book and the colors generally are a little bit toned down compared to the pieces I see on the pages.

I can actually get a little tired of muted natural dye colors in the same way that I get tired of  wandering from booth to booth of hand painted skeins at fiber festivals. I have always said that I am not a “yarny’ person. Don’t get me wrong, I do love the natural dye colors, but it is very nice now and then, just for a change, to see the brighter and more “acid’ colors used so nicely.

When I learned to weave in Potosi, the same province of Bolivia in which Tinkpaya is located, I had my teacher choose the colors for my second learning piece as I wanted to weave something that was to her taste. My teachers were not from Tinkipaya and the placement of the colors in the pieces I wove with them has nothing to do with the style of textile from Tinkipaya. Yet it is interesting to see the kinds of colors, pictured above, that they favor when we in the west are so drawn to the softer earthy tones achieved when using natural dyes.

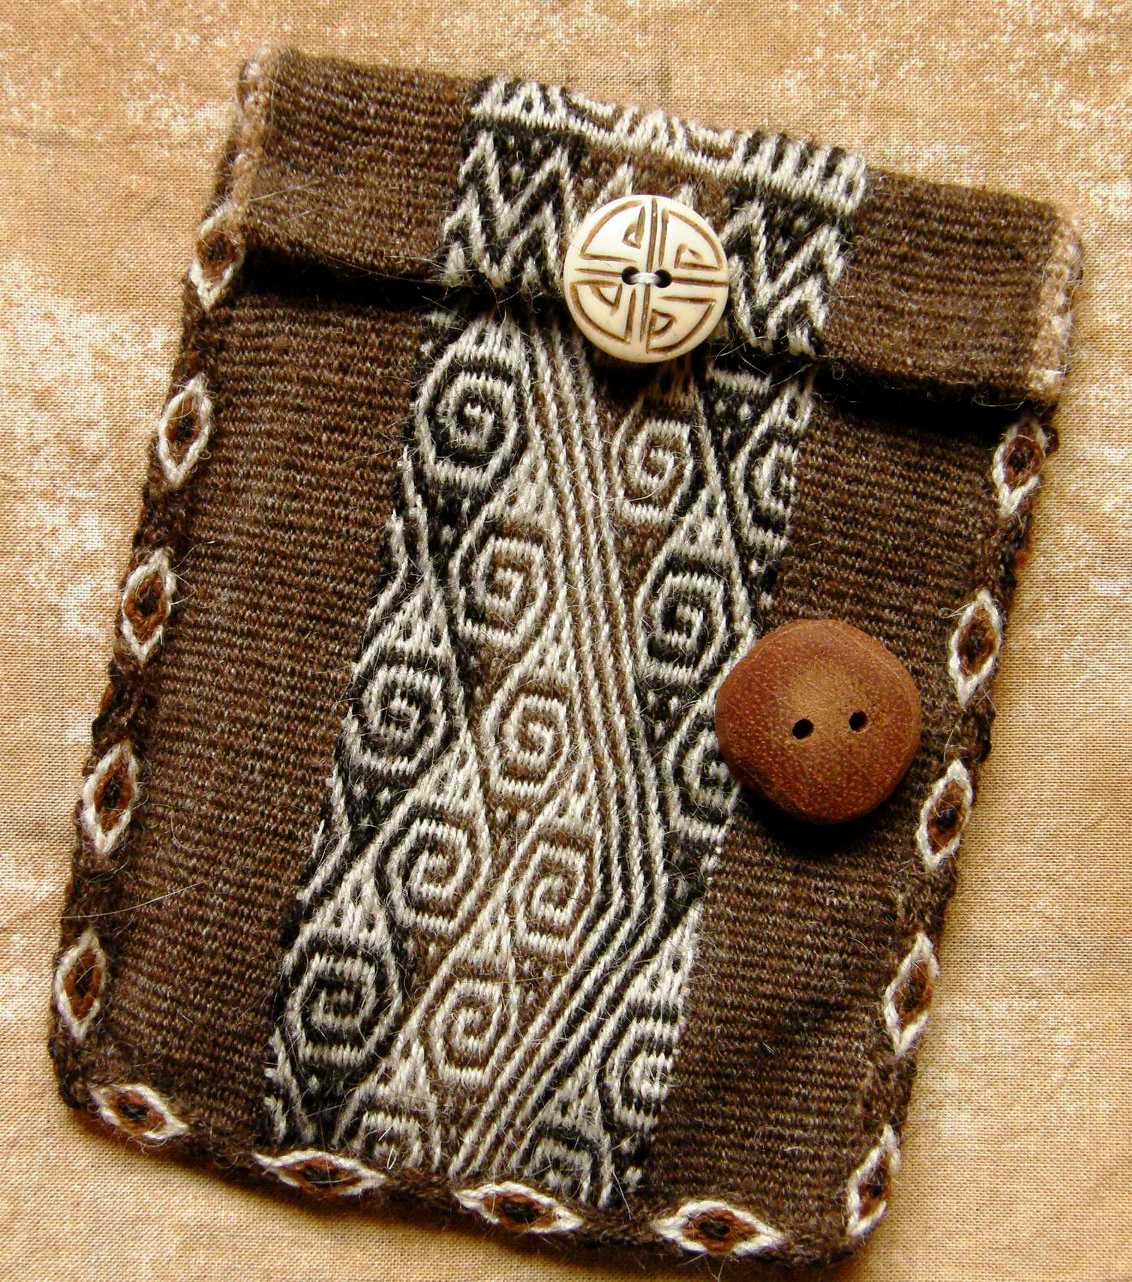
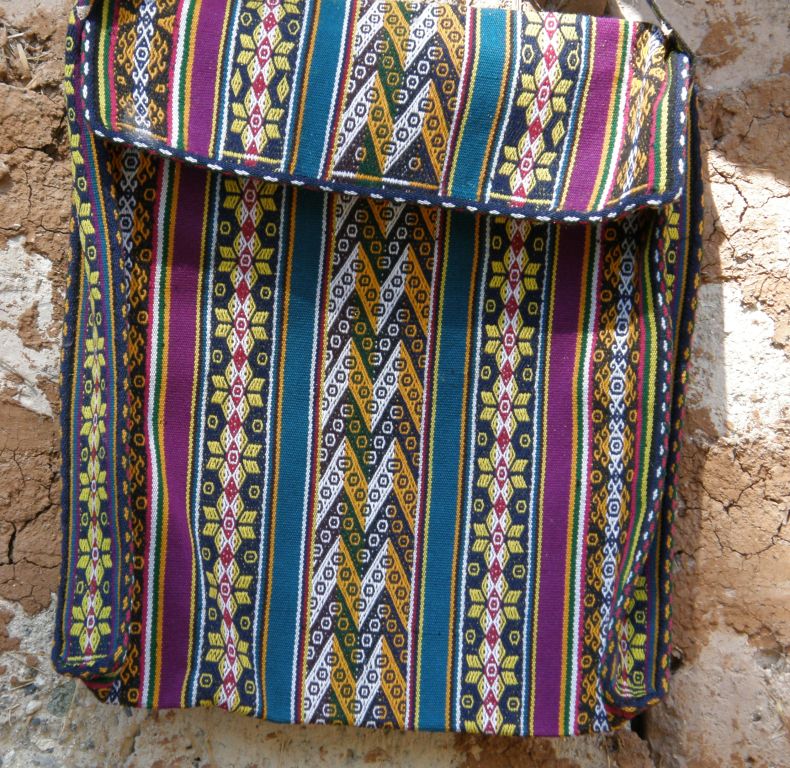
The design that I wove with my teachers on the ch’uspa, the smaller of the two bags pictured above, is woven in Tinkipaya where it is known as ch’uritos,  spirals. I have been told by other weavers that the pattern represents the swirling waters of a fast running river. It is normal in my experience to hear different interpretations of the same designs from different weavers.

The small “circles” on the Tinkipaya textile are very typical and are called ñawis, eyes, according to Cereceda. Weavers that I have met have generally told me the name in Spanish…ojitos. The zig zags on which the ñawis sit, known as kutinaku, are also very typical and are one of the principal identifying elements of textiles of Macha and Tinkipaya.

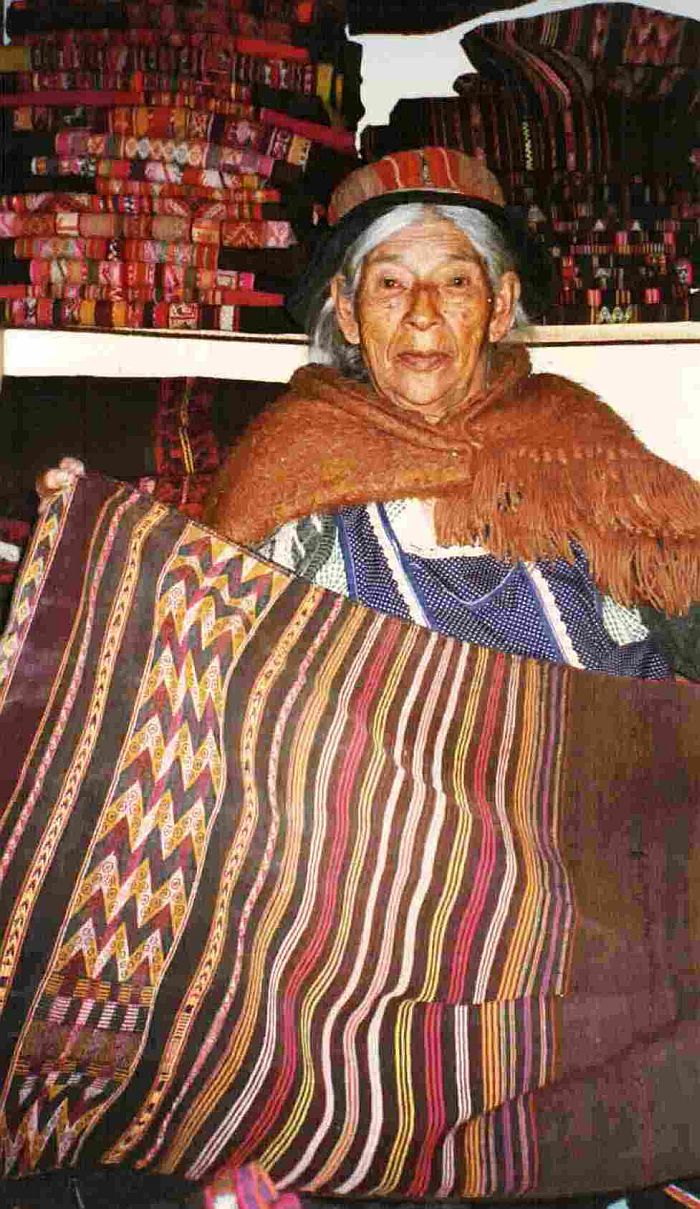
Here is Dona Maxima in her tiny store in Sucre in 1997 showing my friend Ulla and I a weaving from Macha with its kutinaku and ñawis.

I wanted to try weaving  just a small slice of the eye design from one of the Tinkipaya textiles so that was one of my projects this week.

There it is on the purple pouch which has a nice lilac zip from the bag of assorted zips that were given to me by Sharon and Betty. I am always bound to find just the right color in that bag. And I added some more eyes in the form of a ñawi awapa to the perimeter of the bag and braided a zip pull.

And, as the Tour de Fleece is in full swing over on Ravelry (this is a spinning event run in conjunction with the Tour de France cycle race), I pulled out my handspun alpaca pouch with its spiraly eye-like Tarahumara design (now everything looks like eyes to me!) to remind myself that yes, I can and do spin and weave with my yarn and yes, I should contribute something to the Backstrap Weaving group’s Tour de Fleece team.

So far only Janet and Jennifer are doing their bit.

But I mainly got that alpaca pouch out as I found a nice button for it while I was away….bone with a cool etched design and so I wanted to sew that on and fasten some snap closures to the inside (I had been using velcro on the inside of the flap…urrrgh!)

It was a toss-up between the bone button and the sweet wooden one which was made by a gentleman in the town where my weaving teacher Maxima lives. The wooden one is a bit on the bulky side for such a small pouch but boy, does it smell good!
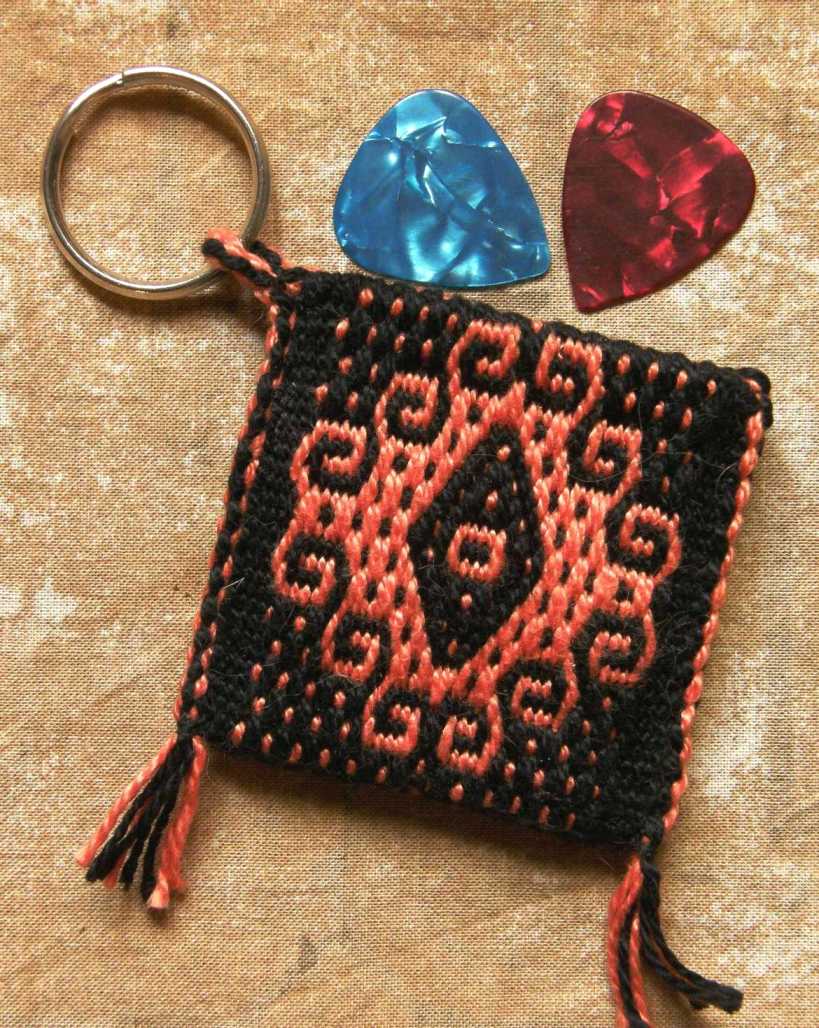
Then there is the wee black and orange bag-let also pictured above…another sample band that got turned into a pouch for guitar picks. My guitar-playing friend spotted it and came up with that idea.

So, a snap closure, braid, tassels and ring was added and off that goes to its new owner.

If you are wondering about the raw edge (I made three selvedges), I had enough band to turn to the inside and all the way to the bottom of the bag.

When I showed the Bedouin bag on Facebook last week, someone said that I should use the brand name CLT (Cute Little Things). Yes, I do like things in miniature and while I still have the eyes for such work I like to go tiny sometimes…

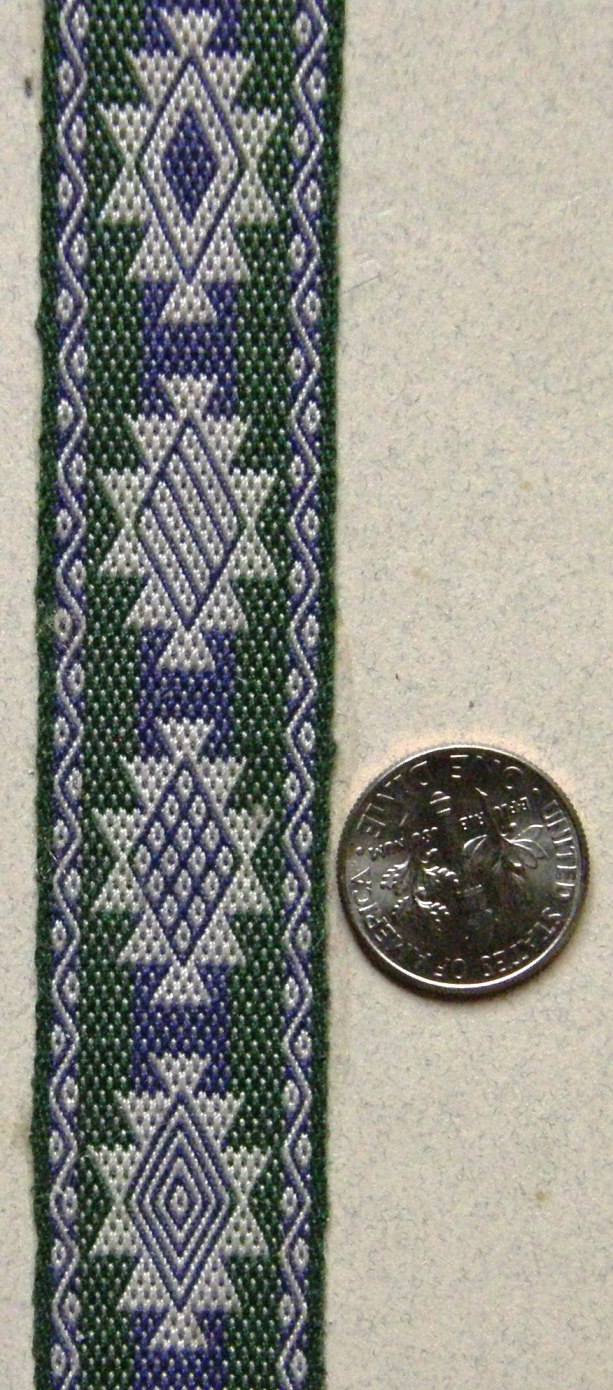
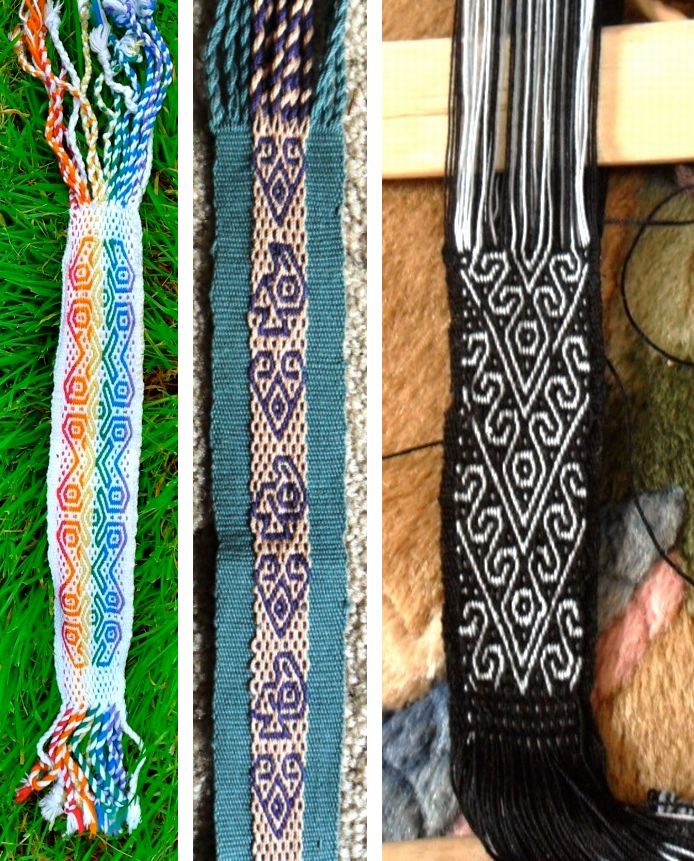
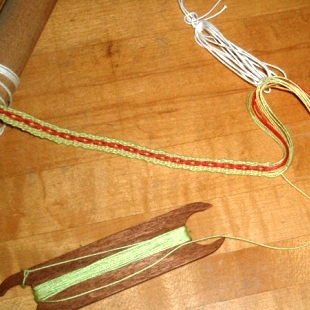
The pebble weave band at left, pictured next to a dime, is made from sewing thread and features stars that were inspired by Bolivian lowland weavings placed within a  highland design.

Poking around among my books is what unearthed the one on the textiles of Tinkipaya which has become a distraction from the other projects on which I have been working…a delightful distraction, I might add. I also came across some other forgotten gems squeezed in between the larger volumes.

I like trying to find locally published books when I am traveling and have a few of those from my collection that I would like to show you…

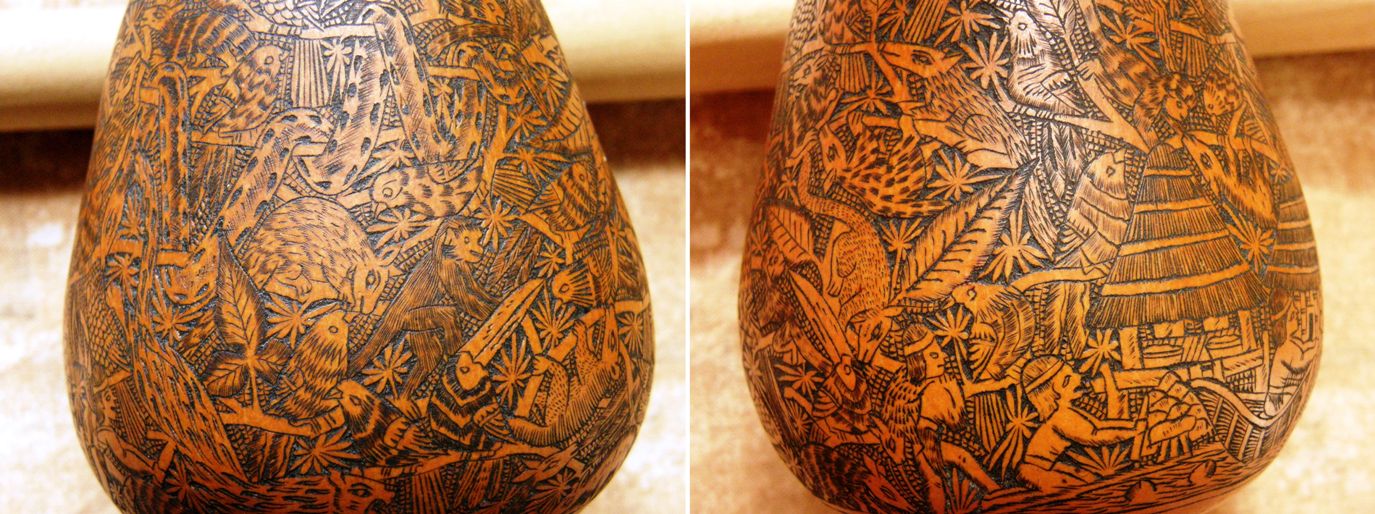
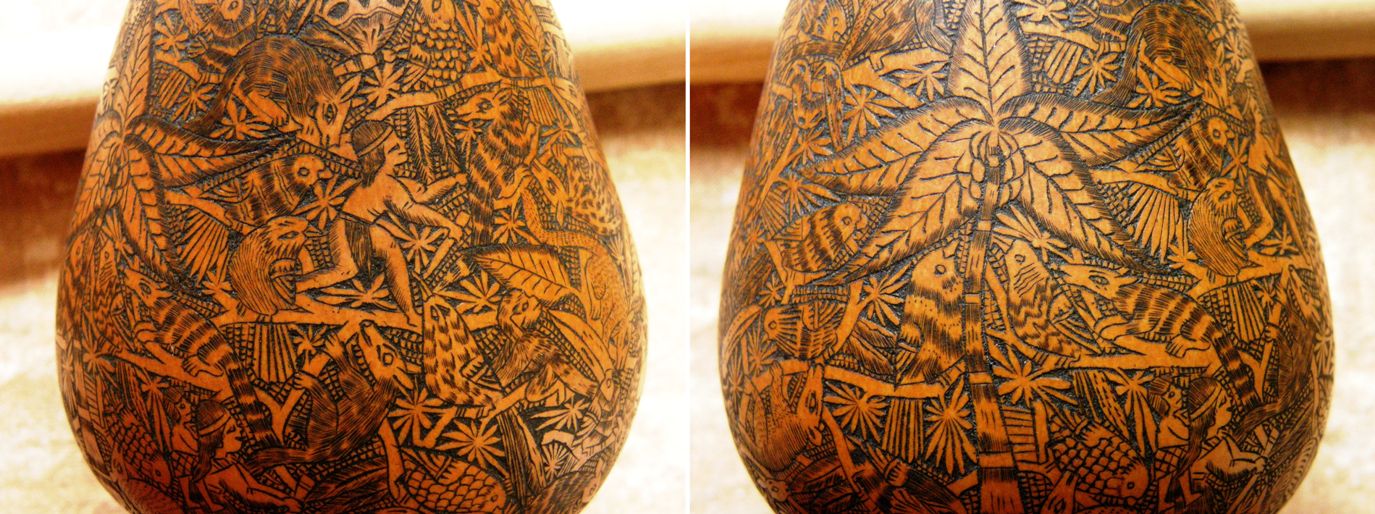
This is a book on natural dyes that I bought in Huancayo, Peru back in 1996. It is very simply made with very much a hand- made look about it and is full of plant and mordant samples in little plastic packages and dyed wool. The processes are explained with charming drawings making  almost unnecessary the ability understand Spanish or even read for that matter. It’s a treasure. The style of drawings reminds me very much of the style of designs that you find etched on the gourds which are also sold in towns around Huancayo….

I bought the gourd, pictured below with its scenes of tropical lowland Peru, in a store in Quito, Ecuador and although I know it is from Peru, I can’t be sure that it is from the towns of Cochas Grande and Cochas Chico near Huancayo which are famous for this particular handcraft. But, in any case, I would like to show you the amazing complexity of the designs etched into its surface.

I think every time I pick this up I see something new in it. Today I noticed the thick snake winding its way among the tree limbs for the first time.

But, back to the book…Here is part of one page with plant samples, dyed wool samples, the local names for the plants and a glimpse of the instructional drawings.

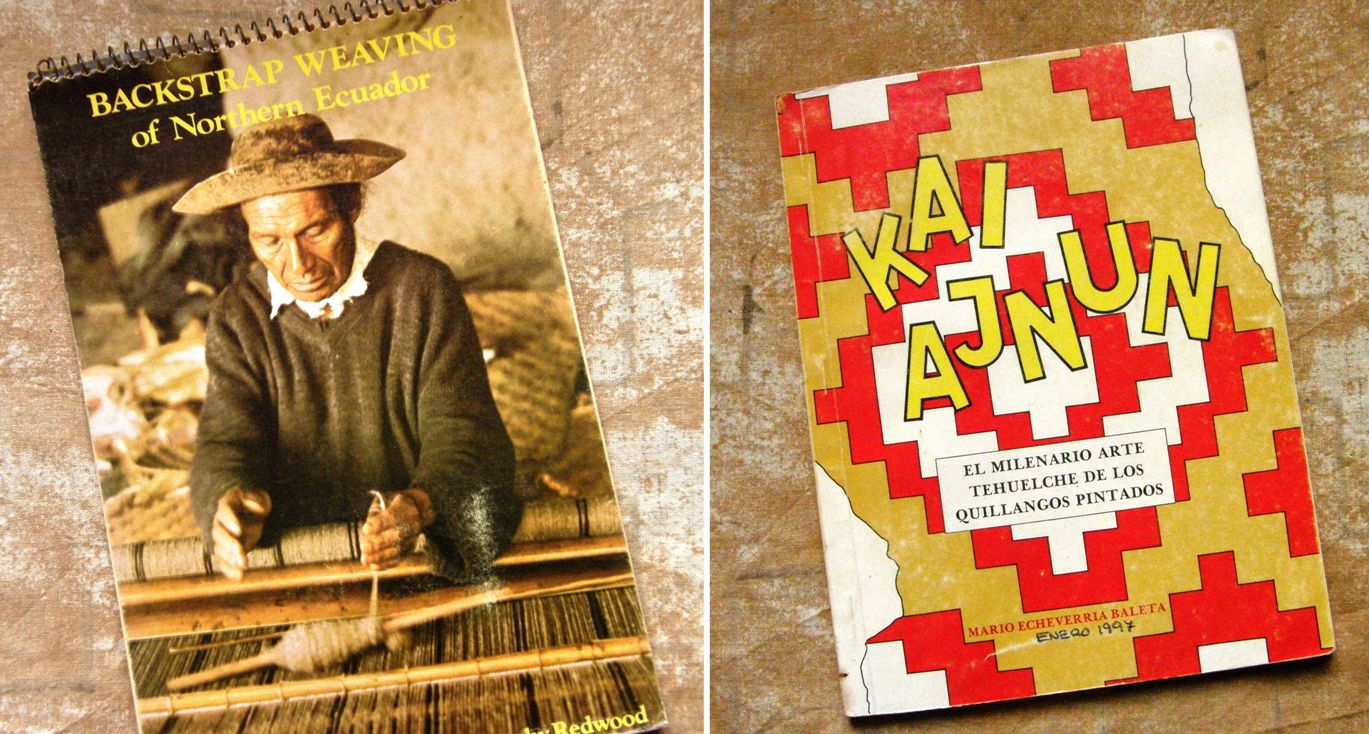
The first book on the left is what I consider a gem of self publishing and was one of the books that most encouraged me to “just do it!”, that is, go ahead and self-publish my own book on the pebble weave structure that I learned in Huancayo. It describes the process of constructing and setting up the kind of backstrap loom used in northern Ecuador and it, too, is filled with hand drawings and even yarn samples.

The differences in the way that warps are wound and looms are set up throughout the South American highlands can be very different…the way heddles are made, the number of crosses that are used, the number of stakes used in warping. These differences are what makes this whole thing so intriguing and interesting to me. It would be ridiculous to think that there is only one proper way to do things.

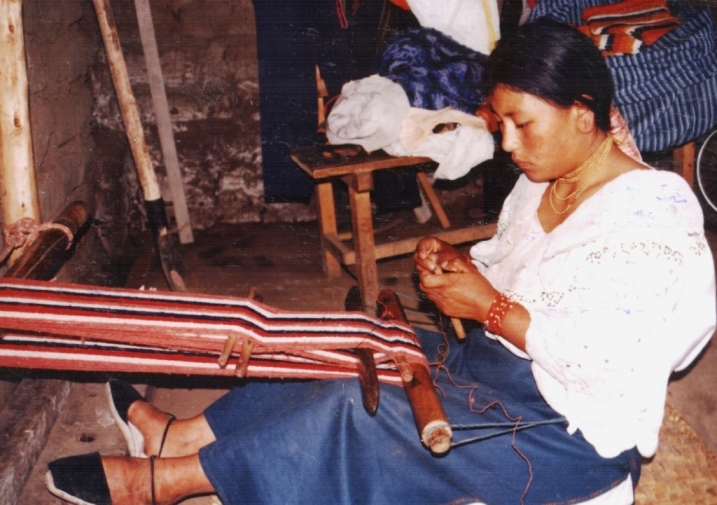
I was fortunate to be able to spend some time with a poncho weaver and his daughter in San Roque, near Otavalo, Ecuador and see the process described so beautifully in Redwood’s booklet, in action. In the picture above the weaver is preparing to make string heddles. Ms. Redwood, wherever you are, I would love to meet you!

The book on the right is not about weaving but catalogs the designs on painted animal skins made by the Tehuelche people of southern Patagonia. This was given to me by a lady from one of the old British families who own many of the large sheep stations on the pampa of southern Argentina. She owned one of the skins described in the book and has donated it to a local museum. One thing is the thrill of looking at the books, another is remembering how I acquired them. There is a a whole rush of memories associated with the visit to that farm on the pampa.

Another wonderfully simple self-published book was given to me by an elderly gentleman in Huancayo who was simply thrilled by my interest in the textiles of his home. The pictures and diagrams are all hand-drawn, it has been written on a typewriter and the paper is grainy and rustic. It includes meticulous step-by-step instructions on the construction of a floor loom and spinning wheel as well as an overview of the weaving tradition in San Pedro de Cajas.

I remember effortlessly finding the book on the left in a store a couple of days after I arrived in Santa Cruz back in 1998. I thought that I must have arrived in a fiber and weaving paradise until I went to the market and had a hard time making people understand that I wanted to buy a spindle…no one knew what that was!  That is the one and only book I have found on the topic and it was only after a few years had passed that I met my first Guaraní weaver from Isoso here in the city.

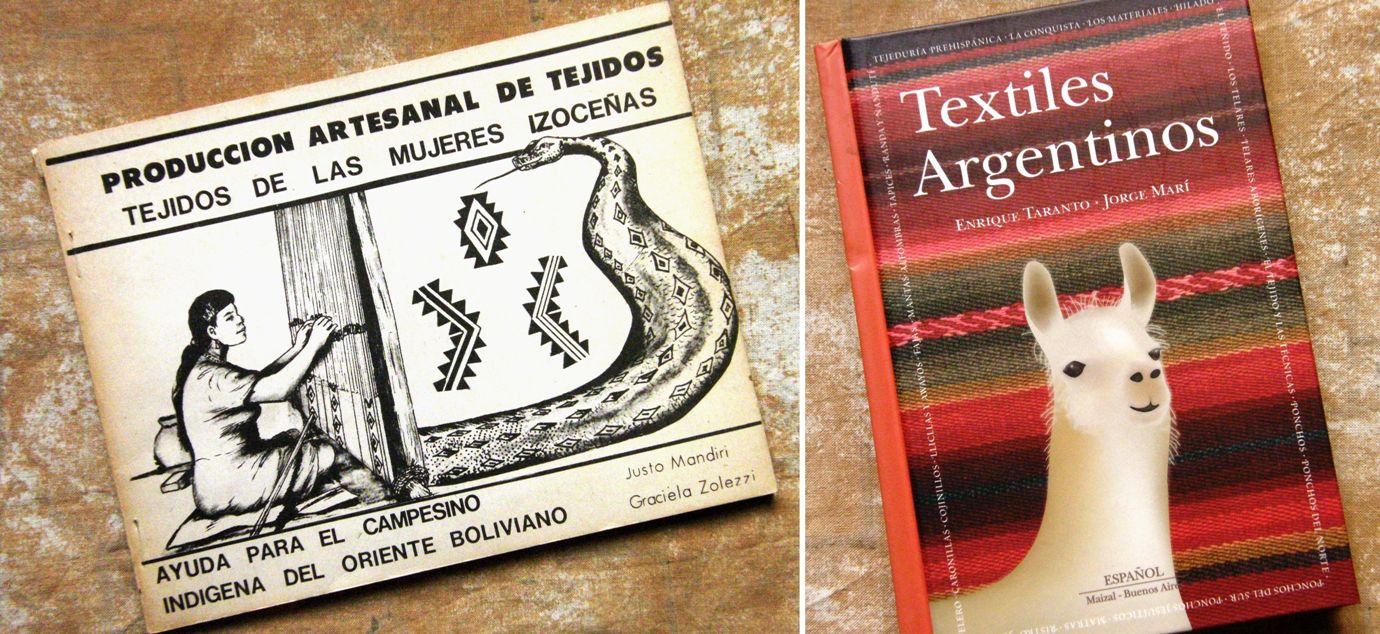
The other small book above, published in Argentina, is also available in English and can be bought online. It is a lovely miniature book with lots of great pictures of Mapuche textiles and woven items used by the Argentinian gaucho, belts and ponchos from the north and south…many of which I have not seen in other publications. It also includes lithographs and paintings from the colonial period and I love those.

And last of all, at least for this blog post, I want to show you some story books about children that I have collected that describe their daily lives in communities of weavers in South and Central America. One is from Bolivia, one from Ecuador and the other, Guatemala.

Dragging myself away from the book shelves, I will finish by showing you some work by Ravelry and other online weaving friends.

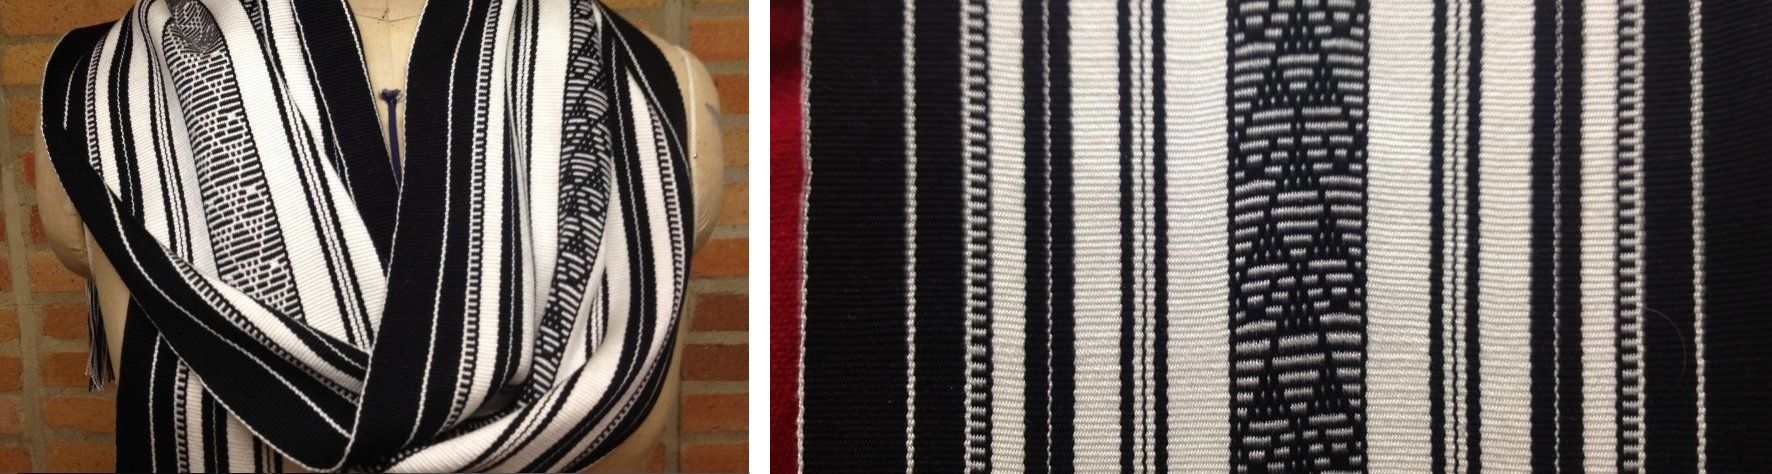
Karren was inspired by a Mexican rebozo to make her own black and white rebozo on her four-shaft floor loom in 8/2 tencel with a  pattern in simple warp floats. The rebozo that inspired her had varying widths of pink and white stripes along with fine horizontal bars that accompany the simple warp float technique. The fringe, like those on many of these rebozos, is a mass of intricately knotted figures.

If you feel inspired to try something similar, the pattern chart for this particular design is here…and I am sure you know where to find the tutorial on my blog.

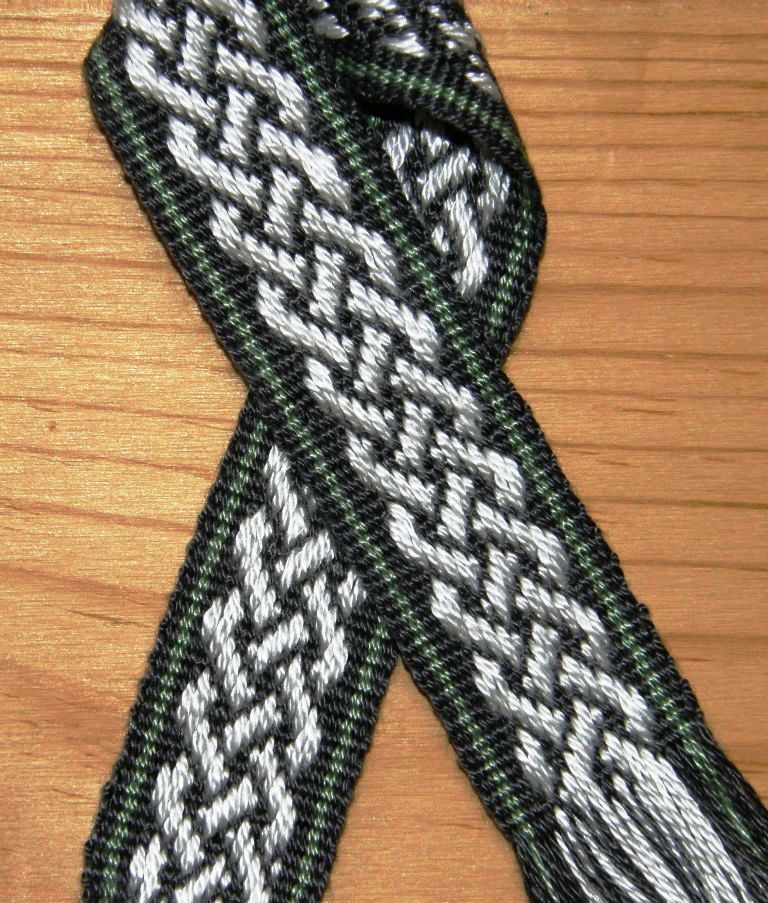
It is hard to believe it’s warp-faced with that beautiful drape. Karren’s project has inspired and encouraged me to use my tencel for warp-faced weaving. I have not been very brave and have only made a small supplementary-warp band with a celtic knot design using my tencel so far.

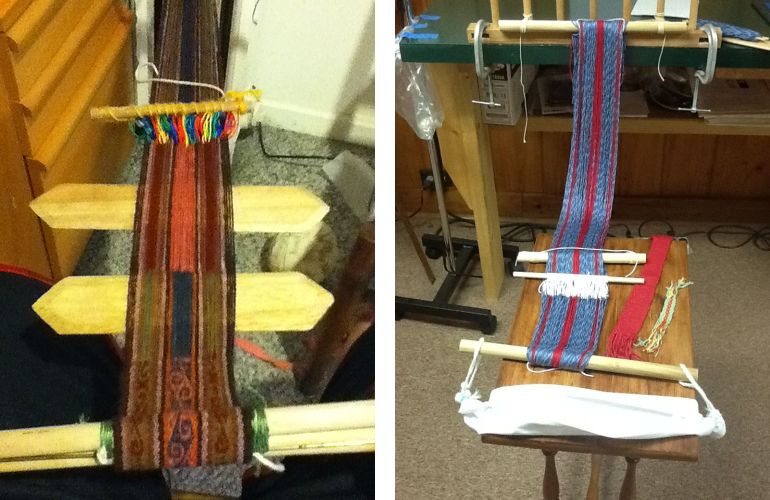
Jane, who has recently returned from a trip to Peru where she studied weaving at the CTTC in Cusco, showed us the band that she is weaving at home. It was warped for her by her weaving teacher using the wonderful handspun and naturally dyed wool yarn of Chinchero while she watched the process and she made the string heddles herself when she got home. She is using the two swords to create a temporary picking cross which will enable her to pick up the threads for the complementary-warp patterns.

On the right, Isabel sent me a picture of her warp set up to make a backstrap following the instructions in my article on WeaveZine. On the table you might be able to make out her first small pebble weave sample which she made using my book.

So, I am off  now to get my favorite spindle and make a plan for spinning this weekend and put the books that I photographed back on the shelf while trying not to get sucked back into to book browsing land….I have way too many other things that need doing!

Backtrap Weaving – Hidden Treasures

I love looking at the four-selvedge textiles that the weavers here in Bolivia and Peru make. They give away some of the little secrets and “back stories”. The terminal area can give information about how the weaver set up the sheds on her warp as well as tell stories about how patient, tenacious and skilled he or she may have been. It generally goes that the smaller the terminal area is, the higher the weaver’s skill level was.

The terminal area is the part on a four-selvedge piece where the weaver finishes. The hand manipulated pick-up patterning suddenly ends and changes to rows of weaving where the weaver is simply passing the weft through the two sheds created by the heddles and shed-rod.

The weaver will have started working at one end of her warp, woven a certain distance and then turned her warp around to start weaving from the other end. As the weaving progresses, the distance between the two ends of woven fabric slowly decreases.

The weaver would eventually come to a point where there was so little space in which to work that it would be impossible to continue picking the patterns by hand. At this point he or she would simply open the two sheds without any patterning manipulations and pass the weft while substituting increasingly thin rods for the big shed stick. It’s the point at which the weaver decides that he or she simply cannot continue picking up warps by hand to form the pattern that shows the weavers skill or perhaps just his or her sheer tenacity.

Some weavers just weave from one end and finish the weaving when they reach the other loom bar.

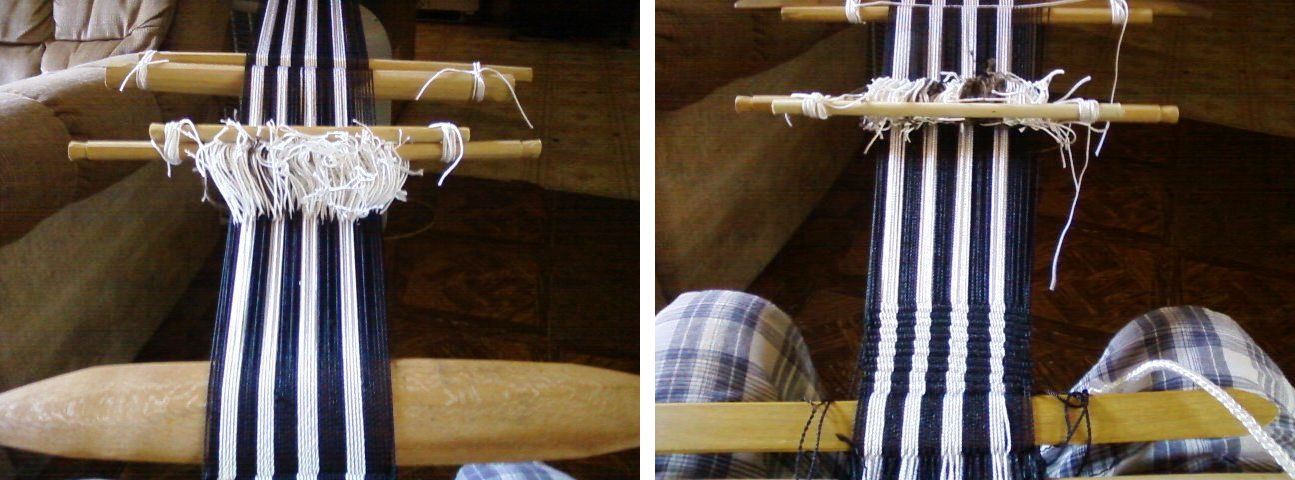
Eventually the shed rod is removed and only the heddles are raised to open the tiniest gap through which the weft can be fed. The threads for every other shed must be painstakingly picked up one by one. The last few weft passes are actually needle woven. Good eyesight, patience, pride in one’s work and a strong desire for perfection are required.

The terminal area on a plain-weave four-selvedge piece created by a skilled weaver will be difficult to spot.

For people like me who like to look at textiles and figure out how they were woven, the information in the terminal area is a gift.

This fact came to mind this week as I was trying to figure out why the edges on the Bolivian double-weave belts that I have are so much neater than the double-weave pieces I make myself.

I do everything my teachers in Potosi taught me yet there is something missing. Some weavers seem to have some special secret that enables them to create those sharp straight edges. My edge warps have a tendency sometimes to roll off the sides as the weft passes from the upper layer to the lower. This can at times produce bumpy edges although, as my boyfriend likes to point out, I am possibly the only one on this planet who notices them. I think all weavers know how that goes!

Now the problem with examining belts is that they are most often not four-selvedge pieces. The ones I have from Potosi have three selvedges and end in tight braids and there is, therefore, no terminal area. No secrets or treasures of information are given away.

So, this is what I did.  I took a deep breath and chopped the braid off one of my Bolivian belts to un-weave and  find the hidden treasure. Sorry! Anyone who has done warp-faced double weave will know that un-weaving it is not fun. I made a mess and I won’t even show it to you but the good news is that I think, and I stress “think” I found the secret. I will probably be traveling up to the highlands next month where I hope to meet a weaver who can confirm this.

I have been weaving a double-weave sample this week to see if I can improve the edges and also to see how the Bhutanese motifs that I wove last week with supplementary wefts look when woven in this technique.


The motifs look so much more sumptuous woven with the supplementary wefts. That is how they were woven on the original textile from which I copied them but it was fun to see how they looked in double weave and also gave me something interesting to do as I wove my sample. I am pretty happy with this sample and shall have to find something I can use it for. I do believe the edges on the double weave piece look better than those I normally produce or is that just my imagination trying to justify my chopping up that poor belt?!

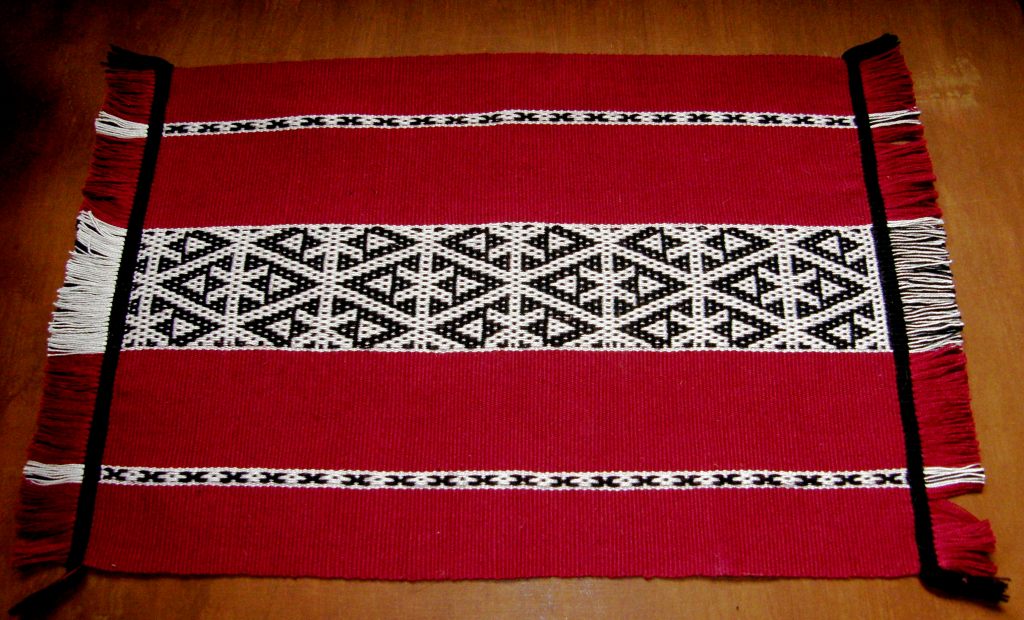
I finished the fourth  and final placemat in my set and was just about to celebrate when I found yet another lovely Mexican pattern in this warp float technique. But, no, that’s enough for the placemat project. I can use that pattern for something else.

The fourth pattern comes from a storage bag from south west Iran which I saw on this site.

So here is the complete set…


Last week I showed you the blue one and its design which was inspired by Central Asian yurt band patterns. Verena, who wove with me on one of my US visits, has taken classes on how to construct a yurt and she gave me the link to the website of her teachers in Nova Scotia. The web page has wonderful pictures of lessons in traditional weaving in Kyrgystan with images of the warping, set up and weaving.

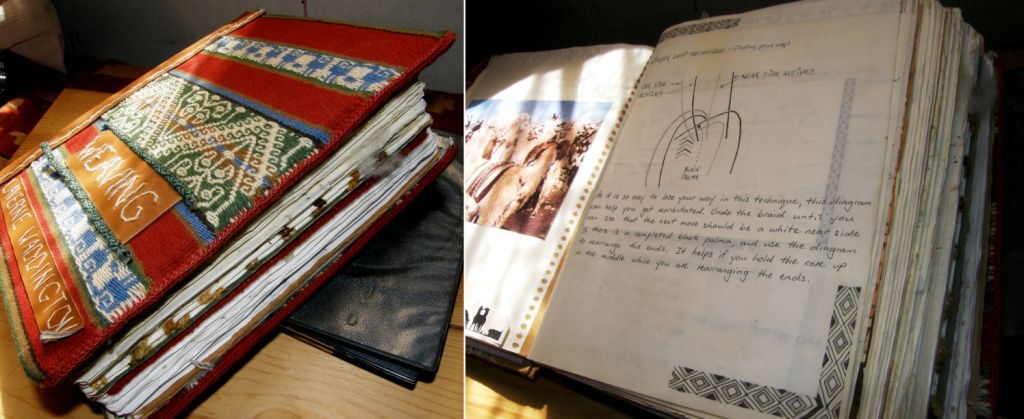
What’s next on the loom? The ideas are swirling around. Lately I have seen some lovely handmade bags which have incorporated all kinds of nifty compartments and pockets and so, I have decided to try and use the technique that my Bolivian teachers taught me for constructing a chuspa, (a bag for carrying coca leaves) with its little built-in pocket to make a bag and pocket all in one piece. I haven’t woven one of these since I studied with Julia and Hilda and so I have had to get out the giant journal to consult.

Hopefully I have done a good job of documenting the process. Sometimes when the memory of the process has started to fade, I return to my written instructions and find that I didn’t include as much detail as I should have. What I normally do is try to consolidate everything immediately on my return by weaving more examples and then I repeat the process at intervals and add to and improve my written instructions.

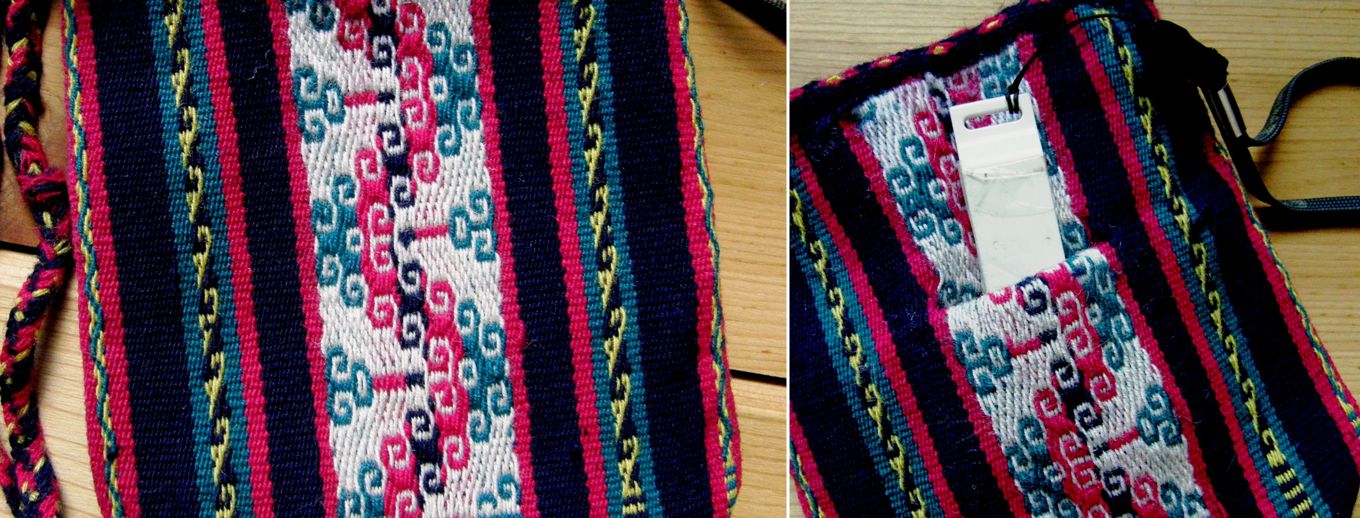
So, my aim is to  make a bag with a pocket all in one piece. A lot of the chuspas here are woven with such pockets. Some of the pockets are so tiny that it is obvious that they were woven as a decoration and couldn’t possibly have any sort of practical use. I guess it is included in many cases simply because it is customary to do so.

This is the chuspa that I made with my teachers. You can see the wee pocket which has been edged with cross knit looping.

The pocket on the traditional chuspa is only accessible from the inside of the bag. I want to have a pocket that I can get into on the outside so that I can easily reach keys, a cellphone or any other treasure that I need to have hidden but in easy reach. When I turn my chuspa inside out I have such a pocket. It was fun seeing the other side of this weaving with its reversed colors for a change which hasn’t seen the light of day since 1997 when I wove this piece.

This probably seems like a ridiculously complicated way to go about having a pocket in a bag but remember that I am pretty much all about process rather than product and this exercise will serve more than one purpose. I would like to weave this bag in the traditional way I was taught by my Bolivian teachers and see if my written instructions are up to scratch. The chuspa I wove in Potosi is a four-selvedge piece. The one I plan on doing now won’t be! Well, not this time anyway. Maybe I will do that later when I have enough handspun. I am going to weave a simple plain test bag first in cotton..

It was interesting to see that even my weaving teachers were forgetting the process and there was much bickering between the two sisters over how it should be done! Here are their two pairs of hands at work setting up the horizontal loom.

As I have been playing around with double-weave this week, I am going to try and put together a tutorial on the two-weft version for the blog next week. I made a tutorial for this on Weavolution ages ago and I think it could use some better photos and an update. The two-weft version allows you to weave bands of double-weave patterns next to regular plain weave.

This piece from Charazani, Bolivia, which is part of Yonat’s textile collection, has been woven in such a way. Motifs can be woven on narrow bands with the smooth solid color background that double weave produces. The bands sit within fields of solid color and stripes which are regular warp-faced plain weave. You can clearly see the terminal area. Finishing a four-selvedge double-weave piece is particularly hard as you have twice the amount of warps to deal with. Trust me, I have done it! This is the technique I wove on the very first four-selvedge piece I made. My teacher and I shared the burden of finishing the piece.

I will leave you here with some projects from online weaving friends and people I wove with on my US trip last spring.

Dwayne was having some problems getting his very first project underway. He didn’t have a nice smooth cotton yarn to work with and was struggling with making the string heddles. Now he is weaving using inkle-type heddles clamped between two dowels. Let’s weave! The continuous string heddles can be practiced later! He has a lovely Guatemalan loom to use.

I showed Kathi’s Saori-style project in its early stages last week. Kathi  was using a rigid heddle segment on a backstrap loom and look what she has made…

This almost makes me wish I lived in a colder climate so I too can make scarves.

Yonat wove supplementary weft patterning with me in California and has just showed me her band made with #10 crochet cotton on which she has been practicing the technique. She really has this down! I also have a tutorial on this in Spanish.

And Verena has been busy with pebble weave….


And that’s it for another week. Now to get my chuspa idea under way. There are bound to be lots of lessons learned in this project!


Backstrap Weaving – “Click, Click” weave weave.

“Click Click” weave weave! “Click Click” is the sound of the mouse as we navigate the internet finding all kinds of free resources for weaving. It is astounding how much information is out there and I struggle to keep the “click click” time to a minimum and the “whack whack” of the beater on my backstrap loom to a maximum. When I look at my blog stats behind the scenes I see that my tutorials are by far the most visited pages and wonder about all the people out there silently following along and hopefully making nice things on backstrap or other looms.

Anne’s first pebble weave band

Every now and then I am surprised by a letter that makes its way into my email inbox from a weaver on the other side of the world showing me what he or she has been weaving using my tutorials.

They have been silent followers on the blog but manage to track me down to share what they have woven.

This week Anne triumphantly showed me her first ever pebble weave piece. This arrived late at night and her enthusiasm simply made my day!

Dwayne wrote to get some yarn tips, Anna, who came to spend time with me in Bolivia and who always stays in touch, sent me pictures of what she is up to and Natasha sent me a bunch of photos of her backstrap weaving adventures.

Take a look…


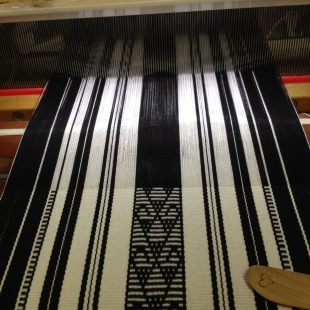
From  top left you can see Natasha’s double weave band on her backstrap loom and next to it some weft twining (there are lots of posts here about that). She is hoping to create earflaps for a knitted hat with this twining. Below left is a hanging in simple warp float technique and  finally she took the motifs from my Mexican mug rug pattern chart page and wove three bands which she put together with cross knit looping.

But this wasn’t her first encounter with pick up weaving. She has clearly mastered the supplementary warp technique. Just look at the Latvian design band at left which she wove on a backstrap loom for the first time.

You have no idea how wonderful it is to receive this kind of feedback from something that started with a simple “click click”.

It makes me smile when people tell me how they have struggled for days to get the technique to work and how fortunate I am to have been able to learn by watching people doing it here in South America.  I think that sometimes they forget or don’t realize that my learning experiences involved quite a bit more than a simple “click click” in my living room!!

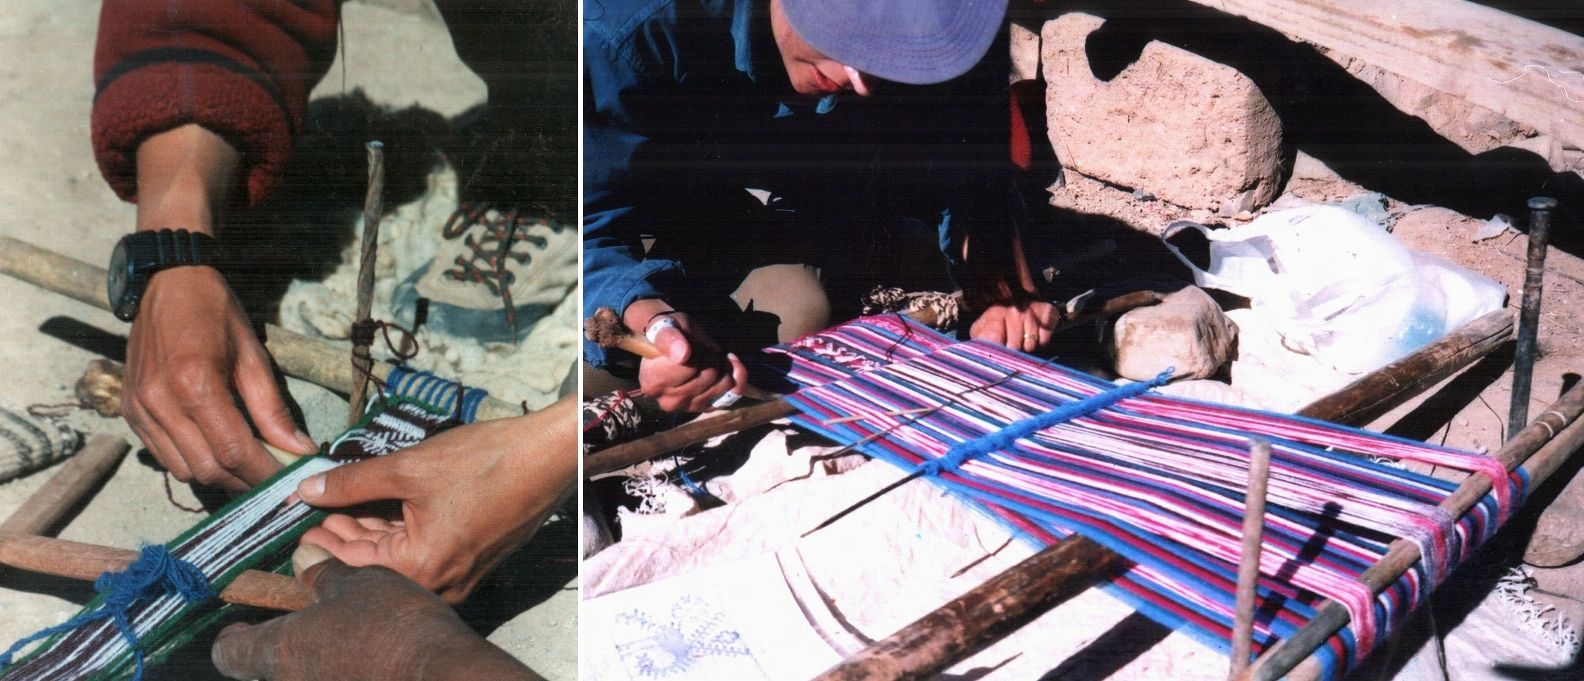
Here I am, for example, during the six weeks I spent with my teachers in Potosi, Bolivia learning double weave and a complementary warp patterning technique bent over the loom…

On the left I am learning the basics of double weave on a narrow band. My teachers wove this technique on a horizontal loom staked out on the ground. At this stage I wasn’t quite sure how to position myself at this awkward loom…one knee up and one down. Then it was on to the wider piece you can see on the right, on my knees on the hard baked ground up at 4000 meters. I spent some of the time quite ill. My teachers would offer me food and, as it would have been offensive to refuse, my poor gringa stomach suffered a lot! I lost a lot of weight on that trip! After rejoicing in the completion of the double weave piece for a day it was back down on my knees to learn another technique…

You can see how strong the high altitude sun is…my hands are baked as brown as my teacher’s. Compare them to the picture on day one where I am weaving the band. So yes, I was lucky as I did get to watch and learn how to do this kind of weaving but most times there were no explanations! Most talk would be in a mix of Quechua and Spanish from my teachers but we formed a nice relationship, found things to share and laugh about and my six weeks there with Hilda and Julia were fun. Ah, the stories I could tell of the fun, mishaps, joy, lonely times, moving times, exciting and even scary encounters I have had along this journey learning to weave here!……

So, I aim to make my tutorials as visual as possible with both step-by-step pictures and in many cases videos so you too can watch and learn and I try to be as available as possible to answer questions and give further explanations in the online groups, here on the blog, on Facebook or through my personal email. And more recently, I have been traveling to meet weavers face-to-face…you just can’t beat that kind of contact and the chance to meet many of the silent visitors to this blog.

Fortunately there is time to weave too! So, this is what I have been up to this week…

I finished the third in my set of place mats. I fiddled all day to get the blue for the patterned portion of the newest place mat using freeze dried indigo. Again, with a “click click” I found instructions and muddled my way through it. I don’t think I did it quite right as I had no way to measure the temperature of the dye bath but in the end I got the tone I was looking for. I have been wanting to weave red on blue for a long time as that is quite typical of a lot of the Central Asian pieces I have seen but the shades of blue that I can buy here just wouldn’t work well with the reds that I have available.

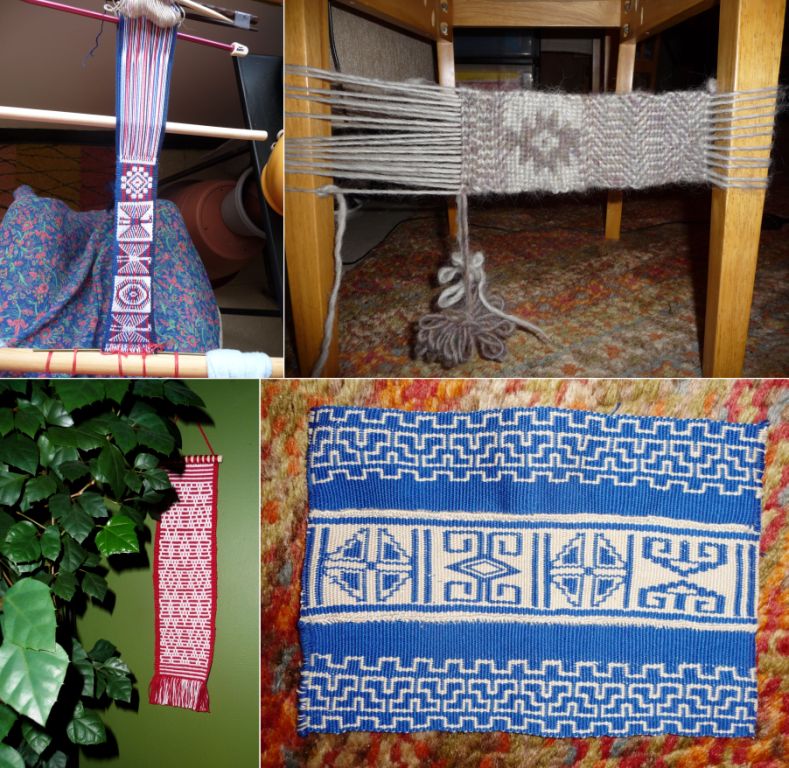
So, there are the three pieces so far…from left to right, a Central Asian yurt band design, a motif taken from a Mexican belt and a Shipibo pattern. The last one in this set will go on the loom this week. I have found the design I want to weave and chosen the colors and I will show that to you next week.

I kind of got into”dyeing mode” after the indigo day and also after having dyed that gorgeous terracotta color for the Shipibo piece. That is a Dylon cold water dye. I decided that since the package of Dylon was open, I may as well do an ikat experiment.

I played a bit with ikat some years ago. For some reason, which I will never understand, I decided back then that I should do it with my handspun llama fiber. As I had nothing else to use, I dyed my piece with a cotton dye which meant that the gorgeous Mexican chilli pepper red that I had been hoping to obtain turned out an awful Barbie pink which gave barely enough contrast to see the ikat pattern. I tied the warps with cassette tape after trying many things none of which were to my liking.

The uppermost project never got dyed after the Barbie incident and did not stand up to the test of time in my closet unfortunately. The lower piece went along just fine except I couldn’t stand the color and, as I can’t find it anywhere now I expect that it got tossed out at some point. I must have really hated it to have done that!

In my wanderings through Latin America I have seen ikat weaving here and there but have never been in the right place at the right time to see the preparation part in progress.

I guess the most time I spent in an ikat weaving area was in the towns and villages around Cuenca in Ecuador.

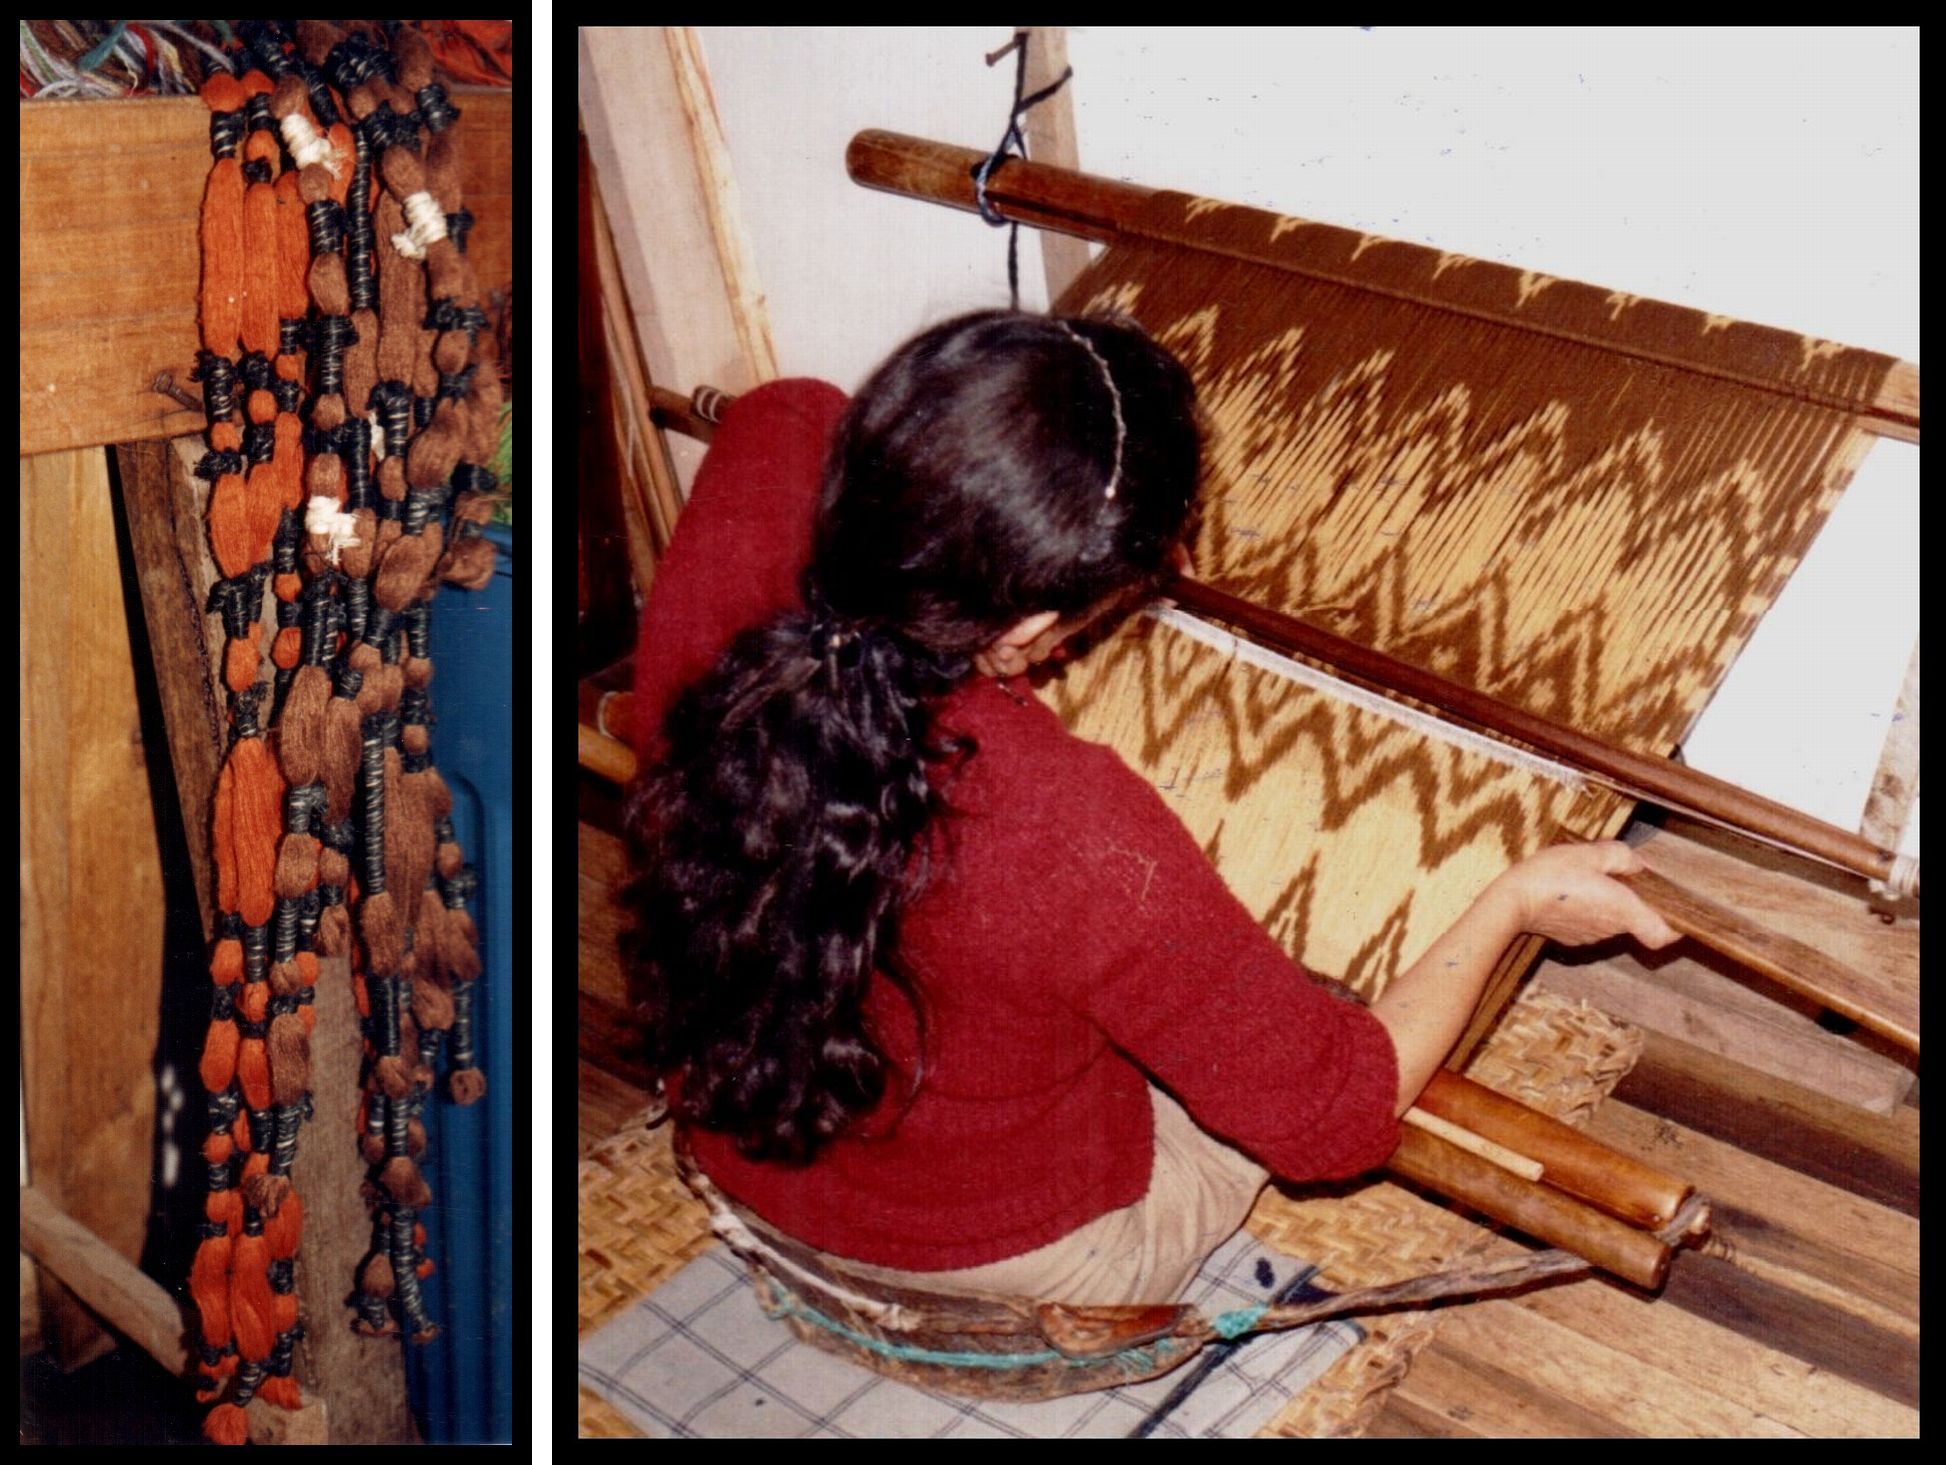
I was at least able to spend some time watching this weaver in Bulcay at her loom and see and handle one of her prepared warps. A lot of these pieces are woven specifically for tourists but local cholas wear a typical shawl or paño which is patterned with motifs in the ikat technique. The name cholo refers to the group of people who fall between indigenous and whites in the social-economic hierarchy. Besides the intricate ikat designs, an outstanding feature of these shawls is the long fringe which quite often measures a third to half the length of the shawl itself. Once the shawl is off the loom, the fringe is knotted in a decorative form and this work is often starched so that the beautiful designs can be more clearly seen.

Dutch weaver Agaath, whom I met through this blog and then again in person at the Tinkuy, sent me this image of a woman knotting the fringe of an ikat shawl which she took on her own travels in Ecuador. The picture at right is one of the knotted motifs that are worked into the fringes. This textile is part of the collection of the late Dennis Penley, author of Paños de Gualaceo. Sometimes the fringes are knotted into a simple mesh onto which figures are embroidered which you can see below right.

These pictures were also sent to me from Mr Penley’s collection.

I am told that the simple white and indigo-dyed cotton shawls are the oldest and I was able to see these in antique stores in Cuenca and in the museums but one day I was lucky to see a woman walking down the street in quite a hurry with one slung over her shoulder and only by trotting along behind her was I able to get a good look and a quick picture!

I dream about being able to create ikat designs like these but there is no need to get crazy and go tying bunches of intricate designs all at once. One has to start somewhere, keep it simple and experiment. I think that even my Barbie band was over ambitious.

Someone who had a strong influence on me was Linda Hartshorn whom I met at CNCH last year. She showed me one of her ikat woven pieces…a carnival of gorgeous colored stripes with simple bands of ikat between. This taught me that the textile did not need to be all about ikat. The ikat patterning could be used simply as a decorative feature on a large piece of fabric. Here are a couple of photos of Linda’s ikat pieces which she has allowed me to show. My encounter with Linda also had me looking at color in new ways.

The piece on the left has been made with commercial cotton and the other is natural dyed silk. The next time I am in Linda’s neck of the woods (Humboldt County where my friend Janet lives) I think I really should take a dyeing class with her.

Anyway, I created a few strips of ikat and incorporated them in a wider piece of warp and decided to weave some supplementary weft motifs in the center. These designs are from Bhutan copied from a textile in a friend’s collection.. While I think the ikat could stand much improvement, and I have some ideas about how to go about doing that for the next experiment, I am on the whole very pleased with this piece. I wove this with my standard crochet cotton and used the appropriate dye this time!


This form of weft patterning is an inlay technique and so the design is not seen on the reverse of the fabric.
It was a fun project even though I am still working out the mystery of aligning the ikat design warps in both sheds. I didn’t use any of the aids that I have seen backstrap weavers use when doing ikat as I wanted to see how the warps behaved. In the next experiment I will use some of those “tricks”.

Another thing that I have just started playing with is the selvedges on double woven bands. I am trying out something looking at several Bolivian double weave bands that I have here to see if I can create a neater edge. As the weft in double weave has to turn and travel around the edge in order to pass through the shed in the lower layer it often pulls the edge warps out of position on its way particularly if those edge warps are a little slack. So, I am looking for something that can sort of bridge the gap between the upper and lower layers. I will show you the results of this experiment next week if, in fact, there is anything worth showing!

Here is what some of my online weaving buddies have been up to…

At top left, Anna in Australia showed me the pebble weave motif she is doing bordered by an alternating comb design. This is cool! Helena in Brazil has made a purse using a design charted by Adele Cahlander. Marsha and Janet are both in the US and Marsha‘s super seamstress friend, Dana sewed three of her simple warp float bands into an amazing bag while Janet is using the tutorial here on my blog to practice double weave. She is weaving it and getting the technique well established on her inkle loom before transferring the skills to her backstrap loom.

The Ravelry group is still spinning away on the Tour de Fleece and, as tomorrow is “challenge” day they hope to warp their looms with their handspun and see how their yarn behaves. I hope my sticky sheds videos will come in handy!

We have a new member, Kathi Pecor aka fiberdance who is doing Saori style weaving on a backstrap loom using a sweet little rigid heddle segment which you can see at left.

And finally, I have embedded a beautiful video about handcrafts of Colombia. This was shared by two of my Facebook friends, Sharon and Danielle. I told you all some time ago about how little I knew about Colombia with a lot of my impressions being sadly tainted by stories of kidnapping and drug trafficking and all kinds of nastiness. And then I met a Colombian weaver at the Weavers’ Gathering that was held here in Santa Cruz some months ago and everything changed.

This is a really lovely piece of video narrated in English and I hope you have time to take a look.

In the video I was excited to see alpargatas being made in what seems to be much the same way as they are in Ecuador.

I spent a lovely day in Ecuador visiting with one of the few remaining alpargata artisans. You can read about that in this post.

And so, here’s the video and thanks Sharon and Danielle for showing me this story with its haunting final phrase “I want to remember with my hands”.

THE HANDS OF COLOMBIA from Club Colombia on Vimeo.

Backstrap Weaving- Color and Weave Along with a new tutorial

COLOR!!

This showed up in my Inbox the other day – something Rodrick Owen says he stumbled upon in his home and was kind enough to photograph and send to me. I can never see enough of these double-woven belts from Potosi and this one has some new designs to add to my collection – some horse motifs which I have not seen before and I can’t wait to chart that particular version of the floral design which appears on a lot of these belts. The floral design rolls along and then suddenly a dog appears. This weaver had a sense of humor!

Its arrival is very timely as I decided this week to put the complete tutorial for one-weft double weave here on a new tutorial page on my blog. You can see it here and I hope you enjoy it.

Here is a reminder of some past projects I have shown here using this technique…

Another reason why I consider the appearance of the colorful Potosi belt well-timed, is that I have been thinking lately about being a bit more bold in my use of color in my weavings.

At left you can see a four-color pebble weave sash that I made way back in 1997. It didn’t seem any problem for me back then to dive into the yarn bag, pull out some colors and whack them all together.

Since then, there has been a drift toward the safe earthy colors –  a splash of red here and there – but nothing too daring.

So I have been trying to look at all my balls of yarn with new eyes, imagining new color combinations and going through the pictures in my ‘ideas” folder. While sorting through my stuff and trying to make room for the new things I had bought in the US, I found a tightly sealed and stuffed black plastic bag at the bottom of the closet. Yet another bag of dusty unspun llama fiber, I thought. However, a small cut in the bag had these contents springing forth…

Firstly I should point out that these yarns, which I bought in Guatemala in 2008, are all acrylic. It is hard not to get color crazy when you are in Guatemala. At first it is all a bit jarring but you get quickly used to it until you are completely addicted by the time you leave. You also quickly overcome any prejudices you may have had against acrylic.

These yarns are used as supplementary wefts for decorating cotton ground weaves.

Simple cotton for the ground weave warp and weft is sold at most markets in Guatemala. The most popular brand seems to be Mish, a local product. I love this ad for Mish painted on the crumbling shop wall.

I wove some pieces when I got back from Guatemala with some of these yarns to consolidate the techniques I had learned there. Then the bag of yarn was put away and forgotten. Now I am going to respin and ply these acrylics – they are very fine – so that I can use them as warp and weave something bright and cheery.

Some of the things that I have been looking at to inspire me in my new “color craze phase” have been these bags from Chincheros, Peru…

What I love is that they are made of natural fibers that have most likely been colored with natural dyes. Well, I have access to all the cochineal I could ever want here. Now I must get that instant indigo I was gifted and put it to work.

At far left you can see my handspun llama fiber colored with cochineal with different mordants and coca leaves – quite dull next to the naturally dyed piece from Calcha on the right.

A Weavolution companion has invited me to her home on my next visit to the US for a dyeing session in her studio. What an opportunity! I can’t wait to get my hands on some logwood.

So, until I can learn how to turn out richer colors in my dyepot and respin all that acrylic, I will play with color using the cottons that I have available here in Santa Cruz. My first project is a zippered pouch for my belt shuttles.

I have been a bit more adventurous here without getting too crazy. Ninety-nine percent of the time I weave a white or off-white motif on a base color. There is not one strand of white in this piece! This is the first part folded in half to show the size of the pouch and I probably have enough warp left to make another. I plan to make a tubular woven band to edge it as I was taught in Potosi. The tubular band I learned with my teacher Hilda is not as complex as the one shown on the blue Chincheros bag above.

I first wove a sample band using three small motifs in Andean pebble weave and decided I liked the green motif on the red background  and the orange one on blue. So I put that all together for my shuttle pouch.

The samples got made into keyfobs.

I was able to make three keyfobs from my sample band.

Other hand woven fabrics that I have at home which I am now seeing with new eyes are…

The piece on the left, from Chichicastenango market in Guatemala, is made from richly colored cottons. The piece on the right is the one that I worked on in Santa Catarina Palopo and has acrylic supplementary wefts on a cotton ground weave. My teacher would quite literally put her hand into the yarn basket without looking and pick up just any ball of yarn to form the little motifs. After a while I would do the same, handing the balls to her to measure and cut according to the motif.
Carolyn aka Seaphish sent me this photo of her curled up warp of respun yarn when she took it off the loom and then at right you can see it "tamed' and on the loom with a nice Andean pebble weave band in progress. I am grateful to her for taking the picture as, when this has happened to me before, I have been far too perplexed to stop and take a photo!

I will respin and ply all those acrylics on my drop spindle otherwise they will never stand up to being used as warp on my backstrap loom.

I aways tell people in the online groups to be careful when using respun yarn when they are removing their warp from the warping stakes. The warp will spring to life and curl up on itself due to the overspin and, if you are not prepared with safety strings in place, you might end up with a disaster!

One of the other things I have been working on is a test piece for the Coats Aunt Lydia’s number 10 mercerized crochet cotton. It seemed obvious to me right from the start that this was going to be a great yarn to work with. I had two balls, one of red and the other of white, and so I combined those colors with some of my black 8/2 mercerized cotton and am weaving a piece in Andean pebble weave technique on my backstrap loom. This is a longish warp and could be a tool bag for my longer cross sticks or a series of zippered coin purses for gifts.

There you have all the information - down to the store name and price! Too fine a yarn for first-ever projects but something to build up to as you gain more experience.

The inklette has been christened! I am still pondering ways to perhaps use the inkle loom’s shedding sytem for Andean pebble weave but I have not found an efficient way yet to do this for any but the very narrowest of bands. For me, the best way is to simply use the loom as a frame on which to place your warp and set it up as shown in my e-monograph. I am inclined to think that nylon heddles may be better when using the inkle loom in this manner.

I found myself last night sitting on the foor with one foot anchoring the tiny inklette as I pulled up on the pebble sheds. Not a problem as I spend a great deal of time on the floor. However, I decided today to try it out in a slightly more civilized fashion by clamping it to the breakfast counter. Look at my tiny shuttle - how cute is that! I have gone back to muted tones on this band I am afraid. According to the leaflet I have a 72" warp on this so I think I'll be getting a new belt with enough leftover for something else. I am using a fairly relaxed tension on this which makes opening the sheds easier and stops the motifs from appearing stretched out.

So, we have been weaving along with pebble weave at Weavolution using my e-monograph. Different people are at different stages…some are warping, some are making their string heddles while others have started weaving.

I think that some are still in the process of choosing their designs and planning their piece.

At left you can see Jennifer’s choice of warp colors. I showed you one of Jennifer’s bands last week. Now she is venturing on to a wider piece. She wasn’t sure if the colors were suited to a pre-Columbian bird motif.

I think it will look great.

A lot of pre-Columbian cotton pieces were woven in either natural brown and white or white and indigo.

Her warp looks beautifully made…nice and even. Wind a good warp and everything else, such as making string heddles and opening your sheds, will be that much easier.


From left to right...Tony's and Caroline's first bands on inkle looms, Jeanne's backstrap piece, Carolyn's band on the frame of her rigid heddle loom and Virag's warp set up for backstrap weaving.

It is all about baby steps. We weave narrow bands first to get the hang of the technique and, in some cases, the loom. Then some more samples will help us to know what to expect from certain yarns. After that we can launch into some more challenging projects. Here are some project ideas…

Keyfobs and hatbands look good even in heavy yarns. Bookmarks are better suited to fine ones. Wider warps with or without pick-up designs can be made into small zip purses for business cards, credit cards, coins and cosmetics.
Going wider, you can make small bags for a passport, iphone or other gadget.
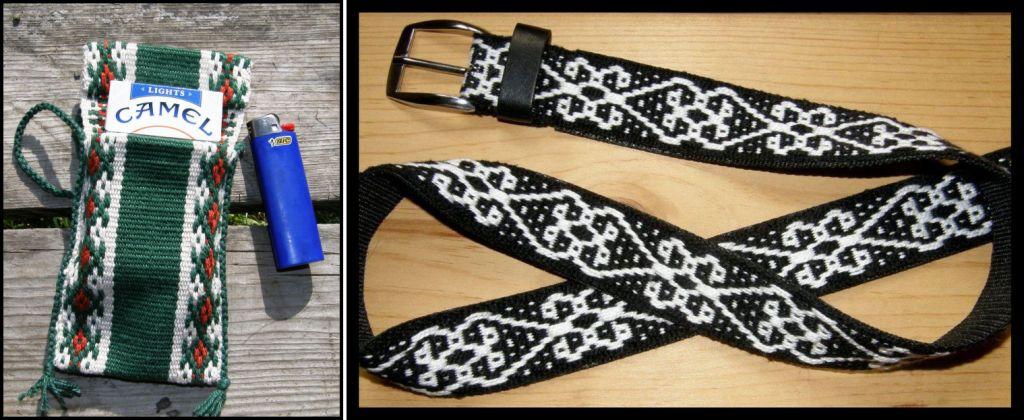
What was originally intended as a cellphone pouch was turned into a cigarette pack holder. Long but narrow warps make nice belts.
Finally, here are my two current small projects. Going wide does not necessarily mean more pick-up. A narrow strip of pick-up can be placed on solid color. The piece at left is weaving up really fast.

######################################

I am putting together some video pieces for next week’s post to show you all how to open the sheds on your backstrap looms smoothly and efficiently. This is one problem I noticed when I visited and wove with some people on my recent trip to the US. Opening the sheds becomes a real struggle when you have a lot of pilling on the heddles. Sometimes it is a matter of a less-than- ideal yarn choice but usually the problem is caused by sliding the heddles around too much when attempting to open them. So, I will have those videos for you next week and NOT just on the dream warp with the perfect yarn! I will show you how to deal with some of those sticky warps as well as wide ones with fine yarns. Included will be tips for working with two heddles for Andean pebble weave.

################################################

I put some photos together to answer a question on the Yahoo group, about using stretchers or tenter sticks on wide warps to help maintain an even width and I thought that I would share them here as well. I don’t use them as I have not woven anything wider than a table runner but I have used them with my teachers in Guatemala and coastal Ecuador.

You can see the upper surface of this Guatemalan weaving at left. The stretcher bar is a hollow piece of bamboo which sits under the weaving just below the weaving line. All those threads hanging out are the ends of the supplementary wefts which may be snipped off when the piece is finished. The stretcher bar is moved up every few inches.
A small nail pierces the upper surface of the weaving just below the weaving line and three or four warps in from both edges. The nails are then turned and inserted in the ends of the bamboo.
This weaver in coastal Ecuador uses a bamboo slat to help maintain an even width for her weaving. It sits on the front side of the textile. Her tenter stick is a bamboo slat made by breaking open a tube of giant bamboo. Weavers will have a collection of these sticks for the various widths that they usually weave. The ends are whittled down to points which pierce the edges of the weaving. I wove on this piece and it was a real struggle removing, moving and replacing the tenter stick, which is held very tightly in its position, as the weaving progressed. The stick doubles as a spacer when the weavers are making their string heddles. These are the cotton saddle bag weavers I spent time with on a research trip with anthropologist Kathleen Klumpp in 2007.

Come and join the Weave Along at Weavolution , or enjoy the tutorial on one-weft double weave here. Don’t forget to send me pictures of your projects!

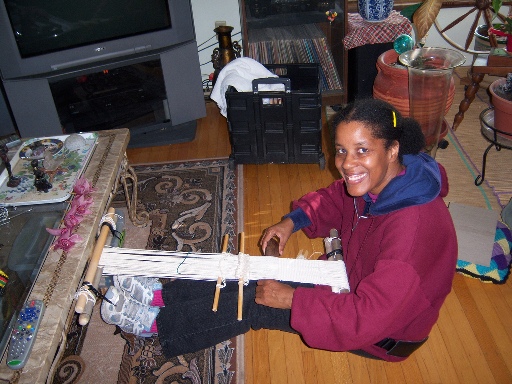
Cookie has allowed me to show you a photo of her first ever backstrap weaving project – here is her woven cotton backstrap.

And here is my favorite – possibly the coolest backstrap photo I have ever been sent as so few people have photos taken of themselves at the loom. I love how she has the remote control in the photo as that is one of my essential weaving “tools” too! This is an excellent set up. Her far loom bar is completely stable tied like that and, as she progresses, her legs will just slide under the table. I envy her being able to sit on the wooden floor like that! Thanks for the pictures, Cookie!