Backstrap Weaving – Lucky Finishes

Sometimes it is just all about luck.

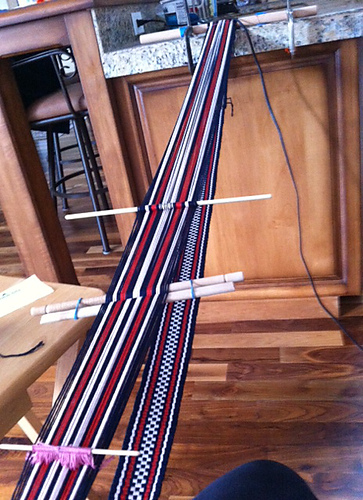
closing gap discontinuous warp four selvedgeYou may remember from last week’s post that I was happy about having been able to weave my pick-up pattern uninterrupted all the way from one selvedge to the other on this discontinuous-warp four-selvedge piece. Whether I would be able to pull it off on the other half of the warp remained to be seen.

I measured and estimated. The were four weft shots in the sequence for this tiny motif and I wanted to see if I would be in just the right shed to be able to close the gap between the two woven ends without interrupting the pattern. My estimates told me that it wasn’t going to work. What to do? Well, just weave on and see what I can come up with at the very end. There was nothing at that point that I could have done about it and I might have been able to find some kind of creative solution.

discontinuous warp finishedAs it turns out, it worked! My estimates had told me that it wouldn’t, which only goes to show you how little control I really had over it and how much depended in the end on pure luck. The terracotta wool is rather streaky. The ties were too tight on the skein when it was dyed. I am okay with the resulting rustic look. It goes with other defects such as the change in tone when I ran out of white weft and had to use terracotta. It has been a fun experiment.

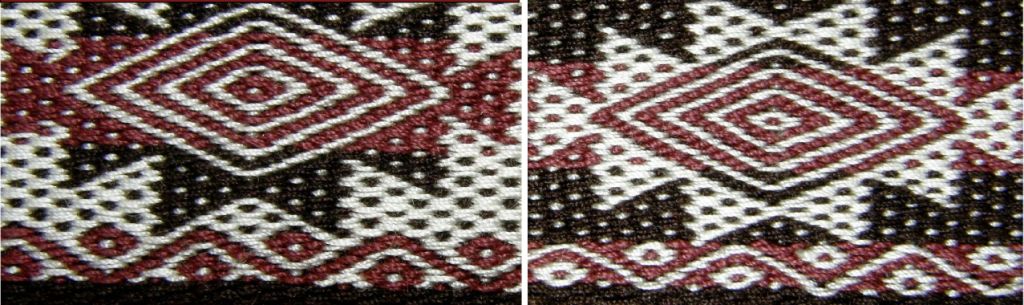
??????????????????????Bolivian and Peruvian weavers, as far as I have seen, never bother to try and match up their patterns in this way on four-selvedge pieces. My tiny motif is nothing compared to the complex patterns that they generally weave into their pieces. A typical finish on a complementary-warp piece looks like this….(this piece is from Calcha, Bolivia)

??????????????????????The weaver  abandons the pick-up pattern and uses the two basic sheds, in this case, one in each color, to close the gap. The last few weft passes create horizontal bars. That small piece of plain weave  comes out wider than the warp-float patterned areas.

Supplementary-warp patterning requires less space in which to maneuver as the weaver does not need to create a picking cross. He or she simply reaches down with fingers or stick to the lower layer of threads and picks up the warps that are needed for the pattern while dropping others from the top layer. As I showed you last week, some weavers who use this structure weave the design uninterrupted right to the very end of the piece and abandon it to the basic sheds only for the last three or four weft passes (the example below is from Pitumarca, Peru).

finishing-backstrap-weavings

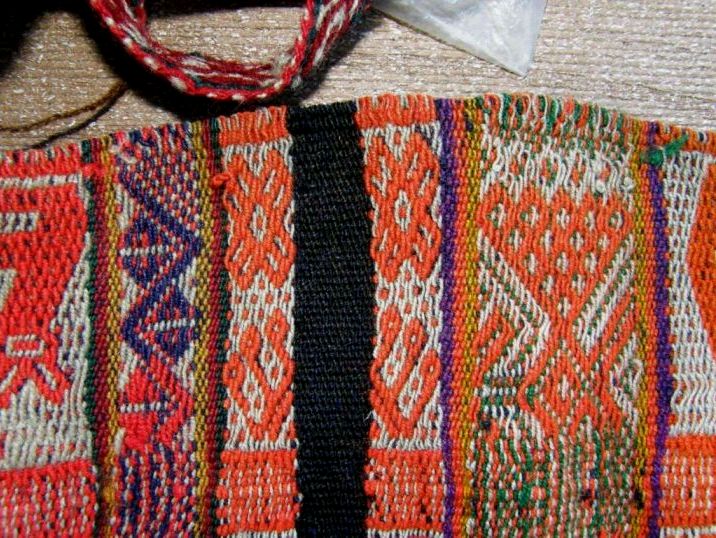
terminal-areasThis piece from the Cusco region of Peru has both supplementary and complementary-warp patterns and the weaver has chosen to end all in the same way and place.

Double weave is something else again! My teacher in Potosi showed me when to abandon the pick-up and start using the two basic sheds, each with double the amount of threads for the two layers of cloth now being squeezed into a single layer. The needle-weaving part was horrendous! Here you can see my dear teacher Hilda, poor eyesight and all, showing me the final steps….

hilda finsihing a pieceSo, my terracotta piece was taken off the loom and I was ready to weave and attach the tubular band . I had created a warp for a tubular band for another piece that I had woven a few weeks ago and had decided not to use it. Although I think that a band with a dark brown base would have suited this piece a lot better, I simply didn’t have any suitable dark brown wool. This was the next best thing.

??????????????????????First, a wee sample…I had lots of this warp which had been originally planned for a much larger piece so I was able to weave an independent band and lay it along the edge to see if the colors really did suit. As you know, a tubular band is generally woven and sewn to the cloth at the same time using the weft as the sewing thread. I have a tutorial on that here.

tubular band on ticlla pieceIt’s done, and that heralds the end of the summer wool adventure. I learned a lot and have three study pieces to remind me of that.
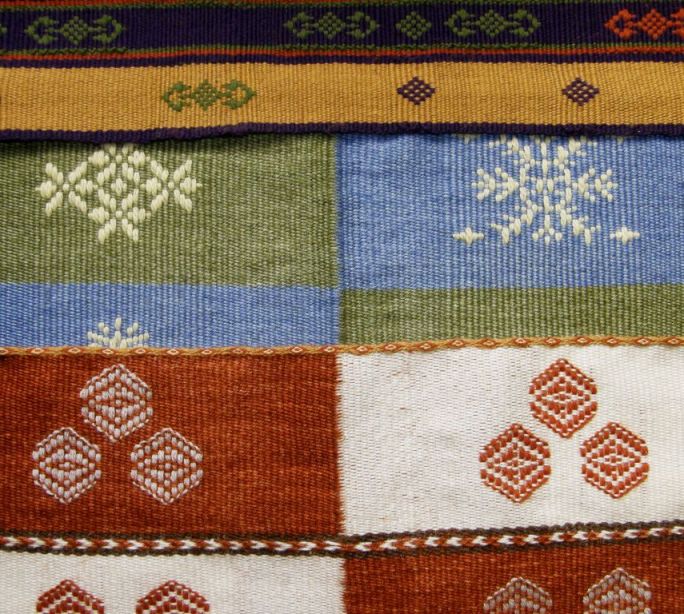
woolstudy pieces four selvedge and ticllaNow it is time to get on with other things.

I have ideas swirling in my head about my next piece in the wall hanging series. When I finally have something to show you, you will see that the word “swirl” is very appropriate for describing the design on which I am working.

As is my custom, I am belly down on the floor with charting paper and pencil and a small mountain of accumulated eraser dust. They say that the third time is the charm. Not so. I go to bed thinking that I have everything in place but then wake up next day to see that something very obvious needs changing. I am weaving samples as I go which is a good thing as many of the needed changes that were not so obvious on paper scream at me from the woven fabric!

I plan to weave this fifth wall hanging in three panels and join them with weft twining just as I did for hanging number four. With this piece I hope to represent techniques and design influences from  tropical lowland regions of Peru.

Nora Rogers experimentThis study piece of a wristlet woven by the Mayoruna people of Amazonian Peru,  made by the late Nora Rogers, will help me design the red side panels.
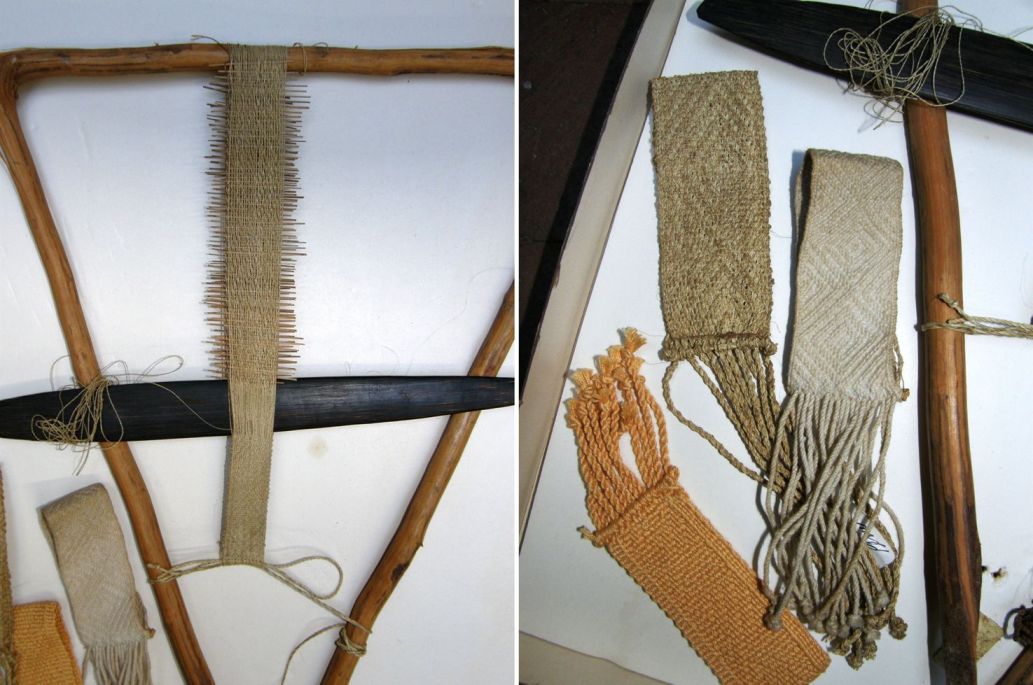
shipibo wristletsI won’t be using the traditional type of loom, though! All those tiny sticks hold the pattern sheds. The weaver picks up the threads for a pattern shed, passes the weft, inserts a stick and stores it at the end of the warp. He/she continues doing this for every shed. I tried to count the sticks on the above piece and got at least sixty. When the weaver reaches the mid-way point of the pattern he/she can then satrt drawing the sticks forward to open the shed, pass the weft and then discard the stick. The next stick in sequence is then drawn forward and so on until all sticks have been removed. Then the process of inserting the sticks starts again. 

I can’t wait to get started but I want to finish charting the pattern for the center black and white panel first.

Here is my sampling warp in black and white….
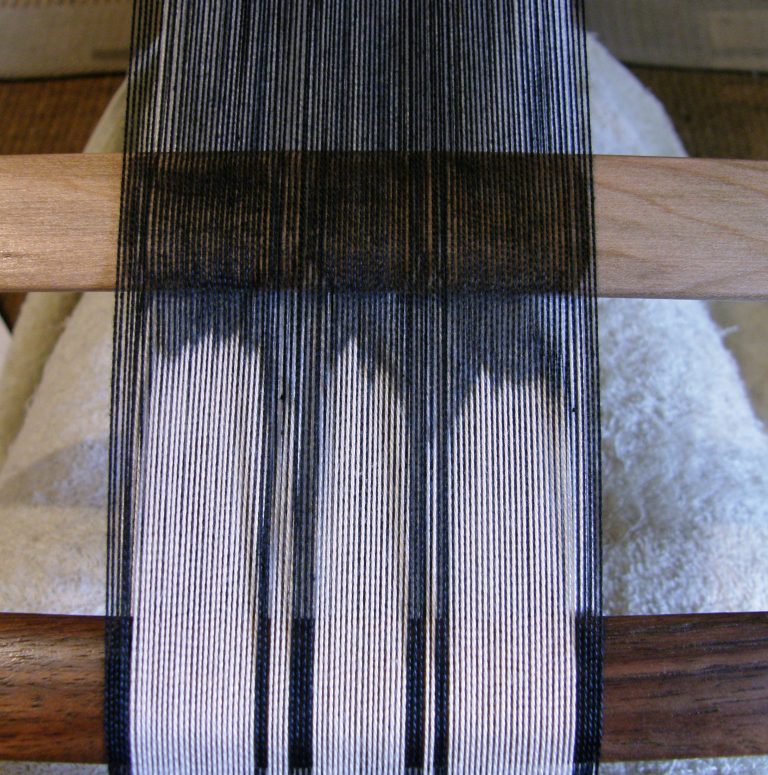
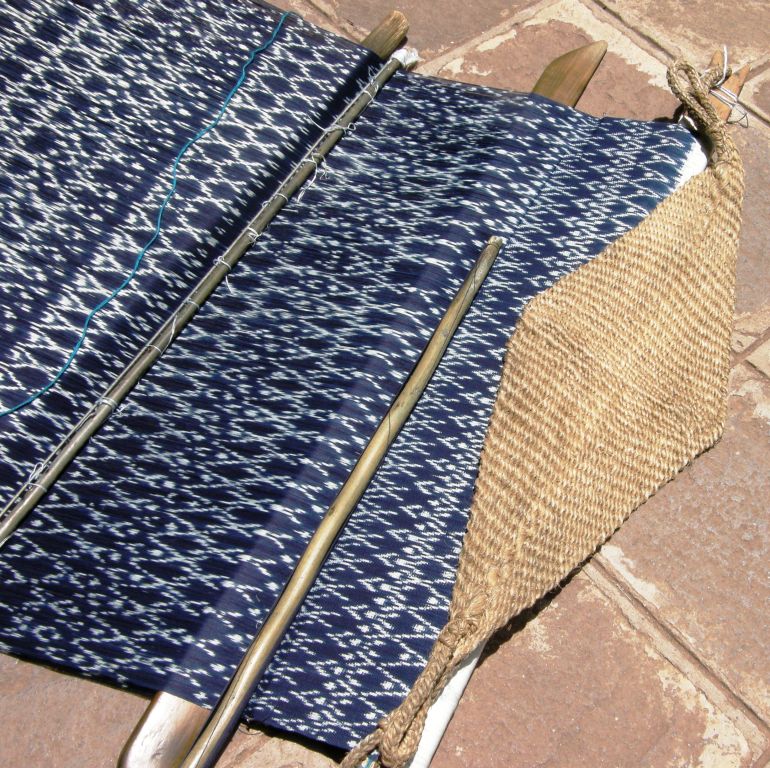
???????????????????????????????I told you a few weeks ago that I was seeing swirly patterns in my wool warp as I stared down at the lines of warp threads. Those swirly lines are what have led me to this latest project idea and, funnily, also led a friend of mine to write and ask me if I was suffering from some kind of medical condition! Now I stare down at the warp lines in this new sample and, as I open the shed and clear it down to the weaving line, I see ikat-like patterns. I am wondering if this is trying to offer up clues to me as to why warps shift in different ways while weaving (despite your best efforts to stop them!) causing ikat patterns to develop their characteristic feathered effect.  

Team Backstrap is starting its weave-along in the Ravelry Group tomorrow as the Sochi Winter Games commence. I have something in mind to make with a sports theme but we will have to see if I can get out to buy the yarn tomorrow. So far, I know that Jennifer is planning to weave a strap for a bag and Julia has something planned with a colorful Guatemalan theme. She was given some 10/2 thread in many colors which she used in this wall hanging…
julia bhutan intermeshThe motif was inspired by designs from Bhutan which you can find in David K Barker’s free downloadable pattern books. Check my RESOURCES page for the links. I love everything about this….the gradation of colors which border the pattern which she also cleverly used in the weft twining. She used the intermesh structure for both the solid and patterned areas. Those of you who have my Andean Pebble Weave book will know the intermesh structure described there in the section on thick borders. I teach intermesh as a patterning technique in my second book. I like the neat braided ends of Julia’s weft twining. I usually leave mine in a state of wildness.

And to finish, as I have been talking about luck in this post, here are two people who have had extraordinary luck rummaging about at thrift stores and garage sales in California….

1157544_10203147433553344_313383261_nMy friend Yonat posted this to one of the finger-weaving groups on Facebook in order to be able to identify it for the friend who had picked it up at a garage sale in the seventies. It caused high excitment in that group, I can tell you! One of the experts thinks that it was probably made during the period of Standardization from 1830-1850 and, because of the pink thread that has been used, was most likely made in the region of Lanaudière. What a treasure!

I am so thankful to Lausanne and Brian who took me to Quebec last fall to meet two sash weavers in L’Assomption.

And then, a Facebook acquaintance showed me a lucky find in a flea market in Pasadena in 2001….

huichol otomi bandIsn’t that gorgeous?! The Huichol, Cora and Otomi people of Mexico weave these kinds of pieces using a balanced double-weave pick-up structure. From internet sources alone, it is not yet clear to me which motifs in particular belong to which group or if the same motifs are woven by all. After only being able to look at examples online, I would love to touch and handle this belt! I used examples of Huichol and Otomi work that I had found online as well as a surprsingly similar motif from Scandinavia to weave the piece below. It is exciting to be able to see what looks like an old piece in such fine condition. 

huichol otomoi inspired backstrap weavingThat’s all for this week. Here’s wishing you all lashings of good luck in your projects this week! 

Backstrap Weaving – Two-fers

One of the things I like about the discontinuous-warp technique I have been playing with lately is that it gives me not one, but two opportunities to practice creating four selvedges….a two-fer. So, with the new piece that I warped this week I get two more chances, which makes five in total these last few weeks. I think my skills are improving. At the very least the process is becoming much less intimidating to me. I wonder if one day I will shrug it off and say that it is “normal” as my young teacher  from Pitumarca, Peru did.

Four-selvedge bands woven by Bolivian teenagers-in-training.
Four-selvedge bands woven by relatively new weavers…Bolivian teenagers-in-training.
The first piece on which I learned the four-selvedge technique in Potosi, Bolivia
The first piece on which I learned the four-selvedge technique in Potosi, Bolivia.

discontinuous warp ticlla closing the gapHere’s where I was at last week when I wrote my blog post. I still had the heddles in place and and had just removed the shed rod from the left hand side.

??????????????????????And here is the piece with the gaps closed. There are a few wobbles here and there but I am pretty pleased with it. Next came the tubular edging band and it took me five attempts to settle on the pattern and size. Part of the problem is that I don’t have much of a wool stash and the colors are very limited so, in the end I had to go with a heavier tubular band than I would have liked.

sewing tubular bandLate night weaving and sewing with poor lighting…not a good idea! I had to unpick a fair bit next day. You can just see near the upper left corner the end of the tubular band. I was left with the problem of what to do with all those warps ends. They are easier to deal with when you sew a tubular band to a bag. The band can be continued down into the bag, its end sewn over and hidden away inside. When you look at an Andean textile that has been finished this way, you have to look  hard to find the start and finish of the tubular edging. On all the pieces I have seen, the end has been sewn over and over and the unwoven warps cut. It has been done so neatly that you can barely tell that the resulting blunt end is there. This is something on which I need to work!

So, I wrapped the place where the start and finish of my band collided. It was obvious and ugly and I wanted to hide it. The small bit of  wrapping looked pretty awful. My solution was then to extend the wrapping to about an inch and wrap all four corners  the same way. This would  transform the wrapping into what we weavers like to call, with tongue in cheek, a ”design element”. You can see two of the wrapped parts below.

threaded in tubular band patternI created a threaded-in pattern for the tubular band rather than do something with pick-up. I warped the pattern off center so you can see the whole design sitting next to the upper face of the cloth rather than having to tip the edge to view it. The band on the back side of the cloth is in a solid color. Underneath all  that you can see this week’s new discontinuous-warp project…another two-fer.  It looks like I will be able to use that discarded tubular band warp from last week after all. I think the colors match this new project well.

What am I going to do with these pieces? Nothing! They are samples, practice pieces, notes and lessons in cloth. I would like to have one of the pieces in my wall hanging series represent the ticlla, or discontinuous warp technique, and so, the pieces I am currently weaving are part of my warm-up for that.

???????????????????????????????I so love sitting in front of a fresh warp like this!…terracotta and natural discontinuous warp in the same Navajo wool warp yarn that I used for the Four Seasons piece. This time I warped for a tiny strip of simple pick-up down the center and re-spun some brown wool to match the twist of the Navajo warp to use as the border color. I wanted to use a complementary-warp technique.

I wanted to decorate this one with supplementary-weft patterns again but I chose a “discontinuous” method this time in that the weft does not travel all the way across the warp to turn at the edge. The weft-turns shadow, or outlines, the motif.

discontinuous supplementary weft weft turnsThe terracotta supplementary-weft yarn that I used could have been thicker. I didn’t get as good  coverage with it as I did with the lighter color. The light bumps at the edge of the terracotta half of the cloth are the main weft turns. I had to go back and forth between white and terracotta weft as I didn’t have enough of either alone to complete the project. Those contrast color weft-turns will get covered by the tubular band later. The turns of the supplementary weft lie beside the motifs in a nice outline.

I wove the pick-up pattern wondering if there was a way I could close the gap between the two woven ends without interrupting the pattern. It was a four-shed pattern and I hoped that I would be able to fix things so that I would be in just the right shed for the last weft pass. I think a lot of it came down to luck in the end. The weaving fairies were with me :-).

gap closed on oe side of discontinuous warpIt worked! Now, let’s see if I can manage it on the other side. Hey, weaving fairies, don’t go away yet. I am disappointed with how noticeable the change from white to terracotta weft is in the white section…oh well.

I am very happy with my wee bit of pick-up on this piece but, before I get too carried away, here’s a reminder of what the Pitumarca weavers achieve as far as pick-up is concerned….

Pitumarca ticlla with supplementary warp pick upGranted it is a little easier to weave supplementary-warp pick-up in the small space at the finish of a four-selvedge piece but, oh my gosh, look at that! I would say, and this is just my guess, that the weaver closed the gap at the outer edges where you can see the tiniest fraction of an inch that is without pattern. The natural alpaca colors are so gorgeous. I don’t remember where the start and finish of the tubular band is located on this piece but your eye is certainly not drawn to any obvious spot where the weaver may have finished.

finishing-backstrap-weavingsAbove you can see a weaver from Pitumarca, Peru nearing the end of the warp. You can see how small the space in which she  picks up the patterns and operates the heddles is. One the right you can see how a four-selvedge piece with supplementary- warp patterns (part of a discontinuous-warp piece) has been finished.

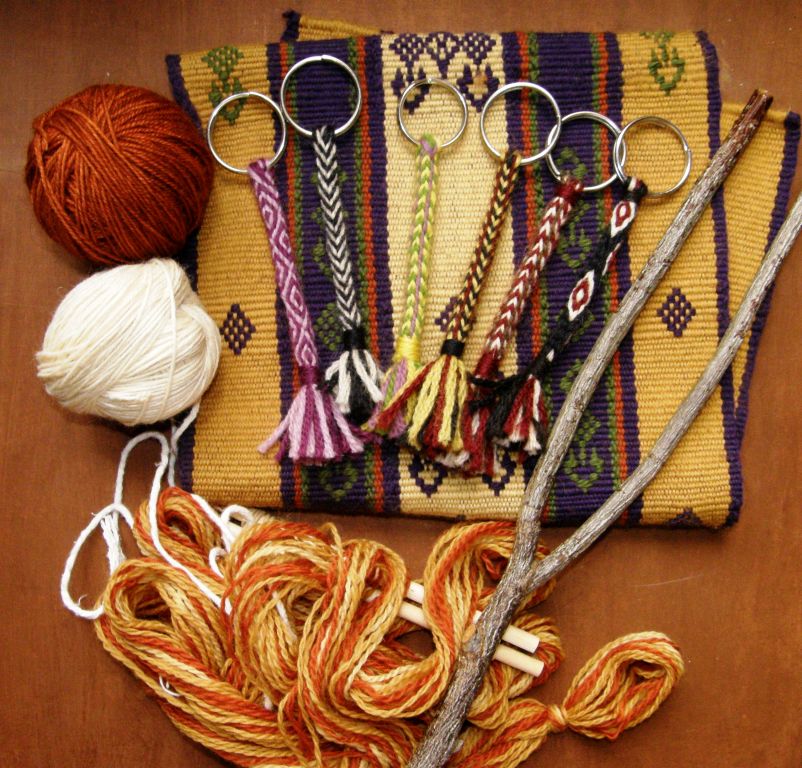
While waiting for the brown yarn to dry and have its twist set, I thought about other possible ways to hide the join in tubular bands on these flat woven pieces. Maybe some cross knit looping? I practiced on one of the braided keyfobs that I have been making, the first one which was bit on the loose side. It could be sacrificed for this experiment.

OLYMPUS DIGITAL CAMERAI am not convinced but I will keep it up my sleeve just in case. I think it looks cute, as if I had knitted a wee wool sweater for the braid! I added another Margarita braid to the collection in red and black. 

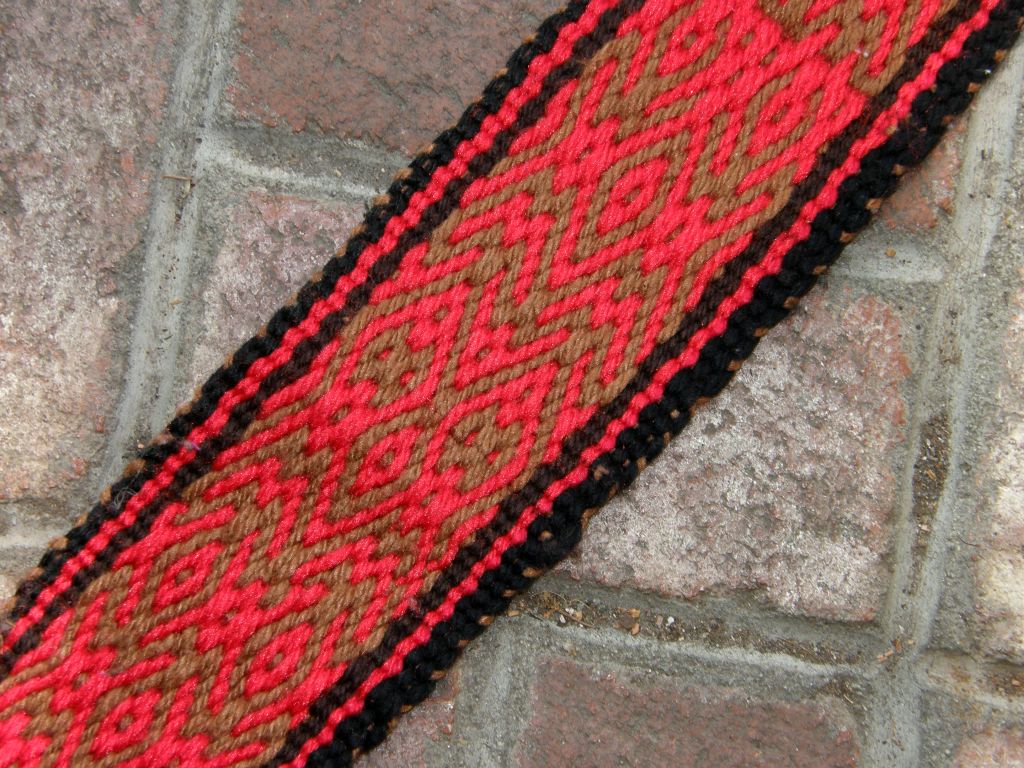
Jennifer finished her stunning hemp piece with pick-up patterns of Chinchero, Peru. I have charted these in my second book. I like to think of complementary-warp structures as two-fers…one weft shot produces pattern on two beautiful faces.

jennifers chinchero pattern finishedNow she has to choose which face with be the outside of the bag she is planning. I am afraid that none of us in the Ravelry group were helpful when she asked us for opinions. We all liked both sides equally, of course! 

And speaking of bags, Julia once again wowed us with her weaving, piecing together and sewing skills….her creativity!

Julias bag with tubular band strapThe main fabric was woven on her floor loom and is stunning in itself. CindyQ, also in the Ravelry group, wove the blue supplementary-warp pick-up band and had given it to Julia as a gift. Julia’s idea for making a shoulder pad for the slim tubular band strap is so clever. She wove the band for the strap in tubular form and then wove it as a flat band for a while. She braided the flat band  to form the shoulder pad. How cool is that?

Kim varland rabbitbrushstudio dot blogspot dot com(2)Kim Varland, yet another Ravelry weaving buddy, has been playing with the yurt band border pattern that I have charted and explained in one of my tutorials. I love her color combination and she shows more examples on her blog.

Kim has used what I call a simple warp-float technique. While the pattern on the back side of the band is attractive and interesting, it is not truly double-faced. I have shown these patterns to weavers who all love the way it looks on the back.

The other day I was explaining to one of our new Ravelry group members what was meant by a “complementary-warp structure”. I was thinking that surely I had put a description of this somewhere on my blog with lots of pictures. I found it in a post back in 2011 which I had written just before going to Cochabamba to weave with my teacher Maxima. I had promised to start a tutorial page on my return which explained some of these terms which are used for some of the common structures woven by backstrap weavers here in South America.

pebble a and bIt turns out that I never did and so , I will copy that portion of the blog post to a new page and will add some other structures to it this week….only two and a half years overdue! Above you can see the double-faced, or two-fer nature of complementary-warp structures.

Backstrap Weaving – Another Woolly Week

Another woolly week in the middle of summer! What’s going on? I have friends in Pennsylvania and Vermont writing and telling me about the extreme cold they have been suffering, shoveling endless amounts of snow, using crampons to get about in their yards and feeling almost like they can’t breathe. And then there’s all the talk about the Winter Olympics, although I have to admit that I am not feeling too festive about that right now with the way things have been going in the lead up.

Perhaps the chilly scenes in my head have had my hands reaching for wool. I am on a roll and can’t stop! I have to say that I actually felt more uncomfortable handling fine silk in the heat last summer. So far the wool has not been bothering me.

four selvedge wool warp backstrap weavingHere is where I was last week with a couple of inches left to go on this four-selvedge wool fabric. The next step was removing the shed rod. It is a little heart stopping removing that rod. I clung and clung to it. With one swift movement the cross was gone! It felt like the safety net had been pulled out from beneath me and I was left floundering in a mass of threads.

closing the gap discontinuous warpHowever, there are benefits to removing the shed rod. It means that when you raise the heddles to create a shed, you can actually insert two weft shots. One shot, if you look at the picture above, will weave the fabric on the left and the other will weave the fabric on the right….the two sides that I am attempting to join. And then you use a needle to pick up the threads that were formerly held on the shed rod. Again, two weft shots can be placed within that shed. Eventually the heddles are removed and it’s all needle weaving after that.

Finally, I got to the point where I could see that just two more shots would do the trick. The problem is that you can’t finish with two shots in the same shed. You have to squeeze one more between them. So, I could either put in one more shot or three more. One more was not going to be enough and three more would be too many. This happened when I finished the alpaca ticlla piece on which I had studied in Peru (see picture above). I squeezed in too many weft threads and it really looked too tight. I removed one and was left with two in the same shed, removed one more and was left with a noticeable gap and a weak spot in the fabric.

discontinuous warp piece off the loomHere is the finished piece. The gap is most noticeable in the white section (notice how the fabric curls due to the over twisted yarn that was used).

So, I decided to go with one fewer weft shot than I felt was necessary and had a slightly sleazy weak spot in the middle of the piece.

Two things marked the spot where the last weft shots lay…a darkish spot right in the center which was a dimple in the cloth, and  wobbly edges. The edge warps simply ended up being too long once I started closing the gap and there wasn’t a whole lot I could do about it at that stage. Loose edges would not support  the weft turns well.

I didn’t like the dimple. I didn’t like the loose weak feel of the fabric in the middle. What to do?

??????????????????????And then it occurred to me…if I needed to stuff more weft into that space to firm up the fabric, why not make the weft a colored supplemental one? So, that is what I did. I needle-wove in a motif with supplemental weft. It turned out to be surprisingly easy to use the blunt end of a needle to get under the warps and weave in the motif. I can’t see myself ever getting away with that with cotton. But wool is friendly and stretchy!

The dimple disappeared but the wobbly edges didn’t. Everything  is a bit on the wobbly side in that area but at least the fabric is now stable. Believe me, it is really firm now! You can see the purple motif in the center flanked by green ones on the sides.

four selvedge piece second finishAnd I did have problems as anticipated with splitting the ply with the needle when needle-weaving. I thought that I had it under control only to find five skips on the back of the fabric where one of the strands in the 2-ply had not been caught on the needle. Oh well.

Lessons learned….when weaving a four-selvedge piece, keep an eye on the edge warps as you go so that you don’t end up with loose ones as the gap is closed. Avoid loosely plied thread. I split the ply so many times and had to back the needle out for a do-over and then there were several times that I didn’t even notice that it had happened.

This piece will be set aside until I can get more purple KnitPicks Palette for the tubular edging band and the sides. I have not one scrap left! I am still hoping to use this as a sleeve to protect a laptop computer.

??????????????????????As I said before, I was on a roll…a woolly roll. I found the wool warp yarn for Navajo-style weaving that I had bought at the Mannings last spring. During my stay there, Carol, Tom and Sara had let me dye it using their dye workshop supplies. I found it strangely heavy for Navajo warp but it had a good firm twist..no chance of splitting those strands apart…and any overtwist seemed to have settled.

I had bought it to use for a discontinuous warp project. In order to benefit from the lessons learned in my latest four-selvedge experience, I thought that I may as well  dive into a ticlla project, as the discontinuous warp technique is known in Pitumarca, Peru . The ticlla technique would give me the fun of weaving not one, but two, four-selvedge panels in the one piece.

Of course, my piece would be very, very simple! Nothing like these masterpieces!!…..

weaver from Pitumarca with discontinuous warpThis piece has multiple four-selvedge panels each incorporating complex continuous pick-up patterns.

bhutan-and-discontinuous-warp-from-peruThis ticlla piece, from the collection of my friend Betty, is stunning in the simplicity of its plain weave structure. However, the layout is anything but simple. Betty has adorned its center with a small brooch from Peru which matches so perfectly the colors of the yarn.

So, here is my warp…..

ticlla discontinuous warpI wish I had had a warping buddy to help with this. I finished it late at night and put the two sets of cross sticks, one for each panel, in place. You can see that I had used a metal rod around which to dovetail the threads in the center. I guess I was bleary eyed as, when I got up the next morning I could clearly see that despite my best efforts to keep everything straight and even, the metal rod had become distorted. I unwound the whole thing and started again using a wooden rod in place of the metal one. 

Below, there is a reminder of the warping path for one kind of ticlla warp so you can better understand what is going on above. You can see that the ladies from Pitumarca are  using a wooden rod for their center stick. I have seen pictures of weavers preparing these kinds of warps with metal rods but I think that two pairs of hands might be needed in those cases to help keep the tension on the rod balanced.

ticlla warp pitumarca peruI had four colored panels and, perhaps because I have had my mind on crazy weather patterns lately,…the extreme cold in the north and the extreme heat in Australia… I came up with a Four Seasons theme and designed some very simple motifs. There were relatively few warps to work with so I couldn’t include much detail and the weft floats could not span more than five warps without being awkwardly long.

??????????????????????There are the Spring and Summer motifs  in place…flowers and suns. The bulky turns of the wool supplementary weft on the edges will hopefully be covered later by a tubular edging band. In this picture I have already removed the dovetail stick and woven on both sides of center for stability. 

As for the edge threads, I did not secure them in any permanent way when I finished warping. I have them hitched to the loom bar so that I can easily get at them and pull to take up any slack as I go. Hopefully they will be as taut as all the other threads when it comes time to close the gap in the weaving. I want to avoid having wobbly edges on this piece.

Four seasons discontinuous warpFall and Winter…leaves with breeze lines between them and a snowflake. Now, all that there is left to do is keep an eye on those edge warps and close those gaps.

discontinuous warp ticlla closing the gapWith less than a quarter inch to go, I just removed the shed rod from the left hand side (I was using a fine metal rod as shed rod at this point). I might just be able to get one shed out of the heddles before removing them and needle weaving. Exciting!

More woolly pursuits….

wool work backstrap weavingI made another keyfob braid. The terracotta and white Navajo warp is standing by for another. I also wound a seven-foot warp with the KnitPicks Palette for a tubular edging band. I was impatient to edge that computer case piece. I went as far as weaving and sewing it to the top edge before I decided that the edging band really need to be based on purple. I will just have to be patient and wait until I can get the purple yarn. Maybe I can use this warp to edge something else.

I uncovered the forked stick that Janet found for me in our garden ramblings when I was on her farm last spring. I had tied the prongs to train them to hold the right shape and it looks like it worked. Should I strip its bark or does this more rustic look contrast nicely with the smooth forked stick that fr. Kyriakos made for me?

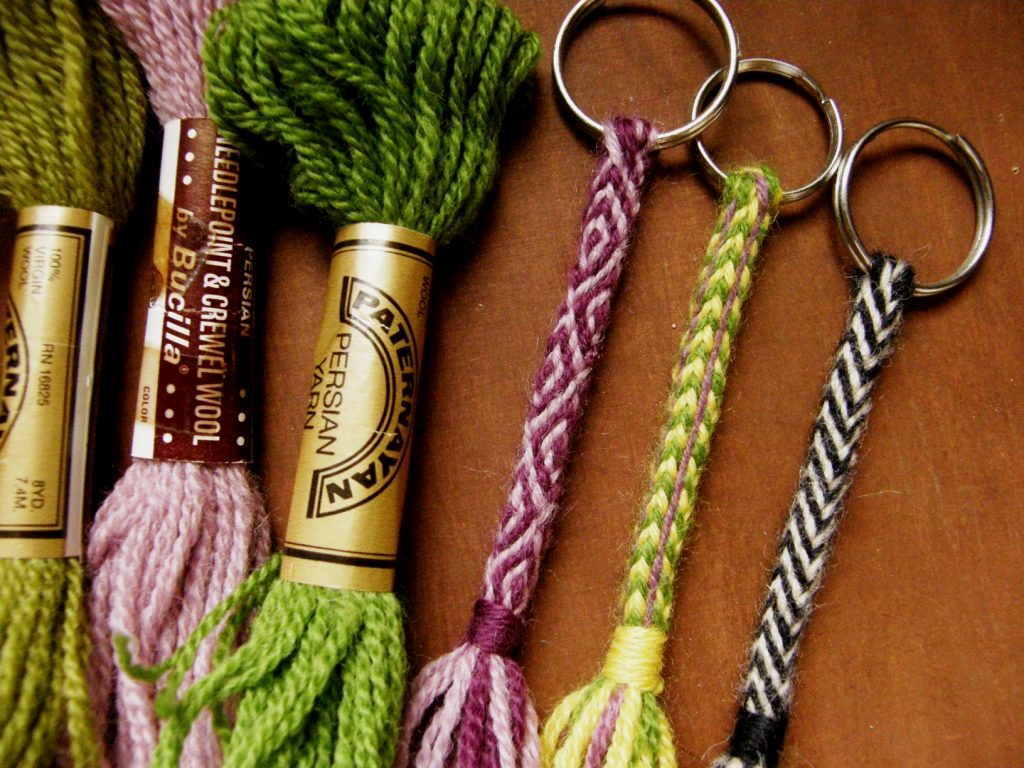
Margarita braid Peruuvian slingsOne of my weaving friends gave me a bag of Paternayan and other wool yarn from her stash and it works beautifully for my keyfob braids. The latest one on the left is the pattern that  my sling braiding teacher in Peru called “Margarita”. There is a tutorial for it here but I recommend starting with the Palma braid first.

I have not 3ven scratched the surface of the world of Peruvian sling braids. In fact, what I learned in Peru is not even a pin prick on the surface! That is why we are all eagerly awaiting the book on Peruvian sling braids on which Rodrick Owen is currently working. In the meantime I will practice the ones that I was taught by Zacarias. Dare I try the Margarita with color changes?  I haven’t tried it since my instruction in Peru in the nineties and am wondering just how good my notes are. We’ll see.

Using that Navajo warp yarn reminded me that when I was in Australia, I got to see a Navajo-style weaving that I had made in 1995 when I lived in Chile. I had given it to my brother when he visited me in Bolivia in 1998 and he has placed under glass on his dining table. How long ago all that seems and there’s my weaving looking like it has just come off the loom!

??????????????????????And there’s more wool in the closet! But, it is time to start planning wall hanging number five.

To finish, I have a rather strange story to tell about peering at my wool warp threads as I wove. As weaving progressed, the wool became hairier. Little fingers of fluff extended and accumulated on the threads creating a sort of shadowy effect. In the shadows I started to see wavy lines…not just random wavy lines, but lines that sort of made sense. They started to remind me of something and suddenly I realised what it was. And there was born the new inspiration for hanging number five! I have abandoned the idea on which I have been pondering all this time and am going with this new one. I’ll let you know more when it is all a bit more concrete.

Now….back to the needle weaving…..

Backstrap Weaving – Embroidery, Tatting, Quilting and, oh yes, the Backstrap Weaving :-)

Back home in Bolivia! My cat seems to have enjoyed her stay away in my absence in a home of Death Metal music fans… a noisy and action-packed home which also includes two kids and two parrots. She appears to need to sleep off all that excitement and has spent much of the last two days flat on her back with legs in the air, dead to the world.

Picture by Annie MacHale

Black Sheep backstrap weaving groupAs for me…I need a rest after all the excitement too! Was it really a whole seven weeks ago that I arrived in California and wove with my friends there? We had a very productive time weaving supplementary-weft patterns and the intermesh technique and spent one relaxing afternoon looking at my images and videos of South American backstrap weavers.

My trip ended in the same area. It was great to meet up with my Ravelry friend, Cookie, once again. She had woven with me at Janet’s place up north two years ago and brought along the pebble weave backstrap that she had woven for herself in the meantime.

Cookie's backstrap with pebble weave

This is a great example of taking one of the simple 4-revolution patterns from my first book and expanding it by weaving it side by side as a reflection of itself. Cookie also added some other small elements which made the pattern unique. It was almost impossible to recognize the orignal 4-revolution motif. I love it when people create their own pebble weave designs. This is a great way to approach it – with baby steps – first adapt and enhance an existing design and from there go on to create a motif that is entrely your own.

We used sticks to help pick up threads and pass the supplementary wefts. Cookie saw my Guatemalan pick-up stick and went on to create her own from chopsticks! See the original chopsticks on the right and then several versions of the pick-up stick that Cookie made.

Cookie's pick-up sticks from chop sticks

Days were spent weaving in Barbie’s home and I enjoyed my evenings staying with Kathleen. I got to stay in her cottage weaving studio in the garden and listen to the soothing sound of  the waterfall in the forest below. Kathleen’s home is decorated with textiles from Hungary, her husband’s homeland. Here are just a few of them.

hungarian embroidery and feltThe felt piece at top left comprises layers of wafer-thin pieces of felt using applique and reverse applique techniques. A Google search result tells me that this particular design falls into the category of Great Plain motifs, the Great Plain being the central plain of the Carpathian Basin. The motif dates back to the 18th century where it was first seen on the wool cloaks of the Hungarian shepherds.

I then uncovered a website which is a gold mine of information on embroidery techniques when I googled about Hungarian embroidery. This site is amazing! I will leave you to explore it. I will certainly be returning to it to learn more.

wood block for textile printsI can see myself doing embroidery one day should there come a time when I can’t weave with a backstrap loom anymore. As long as my eyesight is up to it!

I spent a fun afternoon with my weaving friend Dorothy. We went to an exhibit of Indian textiles at the San Jose Museum of Quilts and Textiles. It was a hands-on afternoon where we got to learn a little about Kantha embroidery. It was  an introductory session that any embroidery novice could handle just to get a taste as it is based on a simple running stitch. I attempted to embroider a classic paisley motif which is a mango shape. If I ever get it finished I shall show it to you.

We also got to play a little with hand-cut Indian wood blocks which are used to print designs on cloth. You can see the paisley pattern above. I think the wood blocks are a work of art in themselves. I also learned that you need to put some thought into the layout of the deisgn before stamping away like mad. I made a chaotic horrid mess!

I would love to know what embroidery stitch was used to create this piece that Dorothy bought from a Peruvian handcraft website.

dorothy's peruvian embroidery

The yarn was so fluffy that it was very difficult to isolate the path of the threads. The stitch had a braided look to it. I would love to know how to do it. Can anyone help?

dorothy's peruvian embroidery 1

palestinian cross stitch embroideryAt Gloria and Terese’s home, on my last night in the US, I saw this piece of Palestinian cross stitch embroidery that they had collected. I would love to know about the motif in the center. One pattern has been repeated from top to bottom while being rotated 90 degrees. Does anyone know about this motif and what it might represent? For more about these embroideries and the women who create them, take a look at this beautifully made site which has been put together with the support of the Red Cross of Iceland.

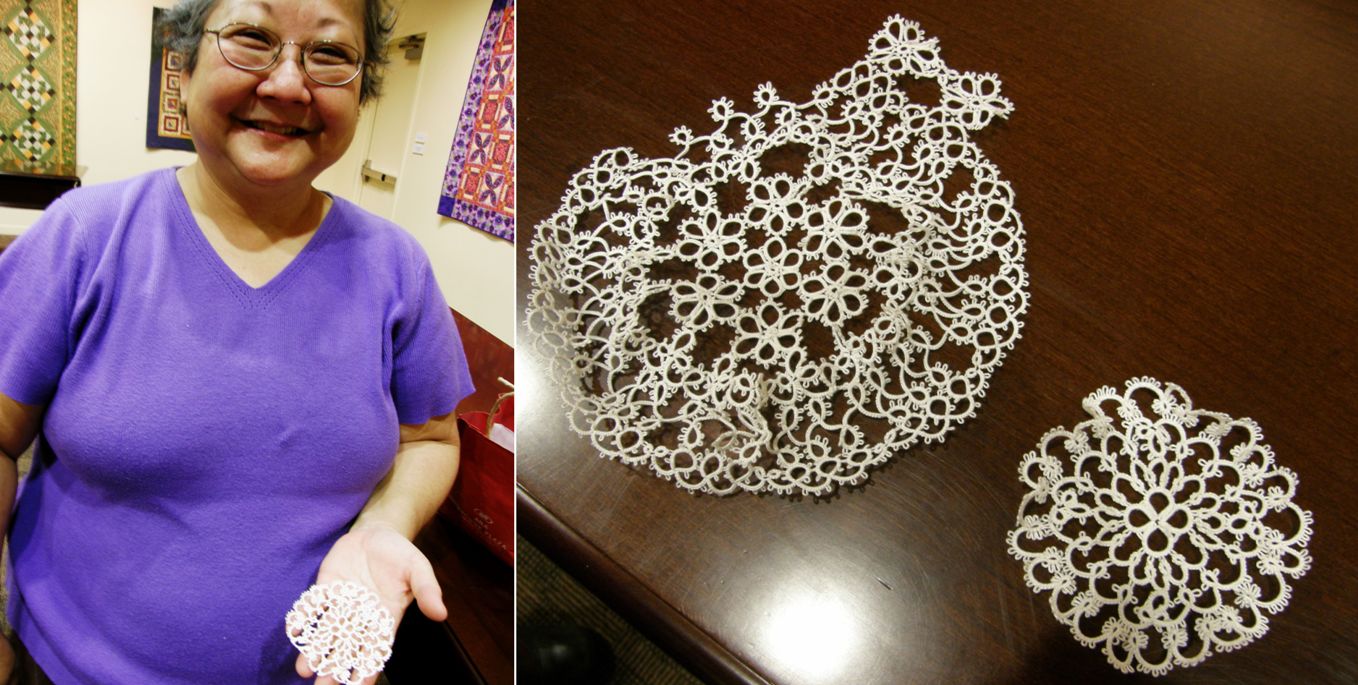
And, as always happens, when I learn a little about a new craft, examples of it seem to just fall out of the sky into my hands where ever I go! Not embroidery….tatting! One of the participants in the Indian texiles workshop was a tatter and showed me her work in progress. The larger of the two pieces will be a baby’s cap. I am in awe! Thank you, Vonnie, for teaching me to tatt.

tatting

And then I was chatting with Rachel, the barber, in an old barber shop in downtown Santa Cruz California while staying with my weaving friend Annie (I had created a bangs emergency when I got over enthusiastic while cutting my own). The result of that encounter is this…

tatting shuttlesRachel had recently got these as part of a big purchase of sewing supplies at an estate sale and was happy to pass them on to me. I think I had better get a-tatting! I like the metal one the best with the wee hook on its ponited end. Now the challenge is to see how simple tatting can be applied to my weaving. My online weaving friend Carol, who lives in Nicaragua, told me that this same idea also recently occurred to her. I would probably use wool instead of the super fine thread that is usually used for tatting.

dovetailing of two color warpsFrom embroidery to tatting and now back to a bit of backstrap weaving.

You may remember the discontinuous-warp piece that I got to play on. I wrote about it in my last post and have written several posts, like this one, about the technique.

I need to point out that this warp is not mine to keep. I was simply put in charge of transporting it from Yonat to Dorothy, its new owner, and my fee for the service was being allowed to play on it a bit! In any case, Dorothy needed a hand getting it going and I was happy to be of help.

This warp was used in a workshop on the ticlla technique that was given by Nilda Callañaupa in the US in 1997 and the project was never finished. Dorothy and I both had a lot of fun playing with it.

I wove from the end that had been started in the workshop and got the weaving on the other end established so that Dorothy could continue. Of course all the sticks are really too long for this project but this was the way it had been set up in the workshop and we didn’t see any reason to change things.

dorothy weaving the ticlla pieceYou can see that the warp has been turned around and there is Dorothy with the llama bone tool in hand beating in the weft.

dovetail section of discontinuous warp projectDorothy was kind enough to have me stay for a few days and there was precious little time to weave this together as Dorothy teaches art during the day. Coming home from a tiring day teaching art to children is not really a good way to face a tricky piece of weaving. So, while Dorothy was at work, I removed the dovetail stick in the center that holds everything together. A thick piece of thread remained behind in place of the stick. Then the join had to be stabilized by weaving on each side of it as you can see above. It is now up to Dorothy to finish the piece.

discontinuous warp piece stabilizedShe will continue to weave until it is impossible to open the sheds any more using the shed rod and heddles. Before she gets to that point she will be able to make things a little easier by using a thinner shed rod and passing the weft on a needle. The final stage will have her needle-weaving, picking up every other thread on the blunt end of the needle so that she can create a shed and pass the final wefts shots. She will have to do this on both sides of the center as each panel is a separate four-selvedge piece connected by the central dovetail join.

I enjoyed the chance to weave with the beautiful, beautiful handspun yarn that Nilda brought with her from Peru. It was so lovely to be able to bring this weaving back to life again sixteen years after it had been started. Yonat, who has been holding this warp since the workshop, wrote to me to tell me about its owner who has since passed away…

I thought I would tell you about the loom:

The name of the previous owner was Jean Davidson.  She was an amazing artist, curious to no end with an amazing sense of color and structure.

Her unique talent was her chenille-style quilts. She was an awesome lady, and I just feel like her energy is bubbling in that project that you guys are playing with.

Yonat also gave me a link to a site which shows the quilts that were part of an exhibit held in Santa Cruz in 2008 called Dreaming the Earth in which Jean participated.

The pieces in the show were inspired by creation stories from 
the indigenous peoples of Australia to honor the Arboretum’s Australian 
garden.  Most of the stories upon which they based their quilts were drawn
from a collection of Australian Aborigonal folklore by K. Langloh Parker 
(Australian Legentary Tales, 1997) available online (http://www.sacred-
texts/aus/alt/index.htm)  Abbreviated versions of these stories may be found next to the photographs of each of the quilts.


The quilts are beautiful and the stories delightful. It is really worth taking a look at the site. How nice to be able to weave on this piece that Jean started.


seat for backstrap weaving
If you are wondering about Dorothy’s set-up for weaving that I showed earlier, let me tell you more.


She had that built following instructions by my online friend Sharon on her blog. Sharon is really talented when it comes to DIY and improvisation and she told me about a cool seat, foot rest and warp hitching post that she made so that she could sit on the floor with her back against the sofa and weave. I posted the link here, Dorothy saw it and had it made. I got to try it and it is very cool. I like being able to brace my feet against something although I am wondering about the strength of the foot brace. There it is again above with one of my demo warps in place and a cushion on the seat for extra comfort.
synergo arts ergonomic benchMeanwhile, Bobbie from the Ravelry Backstrap Weaving Group reports that she has bought, for around $30, all the parts necessary for making the ergonomic bench  for backstrap weavers according to the plans put online by Synergo Arts.


We all looking forward to seeing how that turns out.
You can find plans for the bench with instructions on how to use which include a video here.


Other interesting textiles that I saw on this trip…
Mark showed me a woven cotton saddlebag. It is from the Piura region of Peru and I had never seen anything like it before…the jaw-dropping diversity of Peruvian weaving!


The red and black designs are warp patterns. The other colors that fill in parts of the main motifs are supplementary wefts. I love it when warp float patterns and supplementary wefts are combined this way and have only seen that once in an old Mexican belt. The tails of the supplementary wefts were left hanging out on the inside of the saddlebag pockets. There is a similar piece on this site which is dated at 1930-39.
saddle bag piura peru
 And, this is a four-selvedge piece!
four selvedge cotton weaving
If you look very closely a little way above the paper label you will see where the very last weft shot would have been needle woven into place. Thinking about doing a four-selvedge piece with cotton makes my hair stand on end! I tried it once….maybe one day I will try again!


I have more to show but will leave it here for this week. Let me end with Jennifer taking up the love of the curious coil rod. She placed one on a band which had started its life on her inkle loom. After transferring it to her backstrap loom she was disappointed to see that it had developed a serious ridging problem…that old corrugated cardboard thing that I have discussed here many times and have finally managed to conquer.

Coil rod to the rescue! More about that next week…

jennifer
This is going to be a beautiful guitar strap!


Well, it’s back to cleaning seven weeks of accumulated dust and getting things in order. Hopefully, I will be back at my loom soon.

Backstrap Weaving – Encuentro de Tejedores de las Americas – Part Two – the cloth and the looms.

Read Part One of this story here.

ARE YOU GOING TO WEAVE TODAY?

I probably make a thorough nuisance of myself at weaving events like the Encuentro de Tejedores in Cusco Peru earlier this month. I have so many questions and want to be into everything and not miss a thing.

Calm and serene despite being in the very heart of the city of Cusco, the venue for the conference was beautiful both by day and night. There were plenty of pillars to which looms could be attached for weaving displays and shaded areas under the arches where weavers could show their textiles.

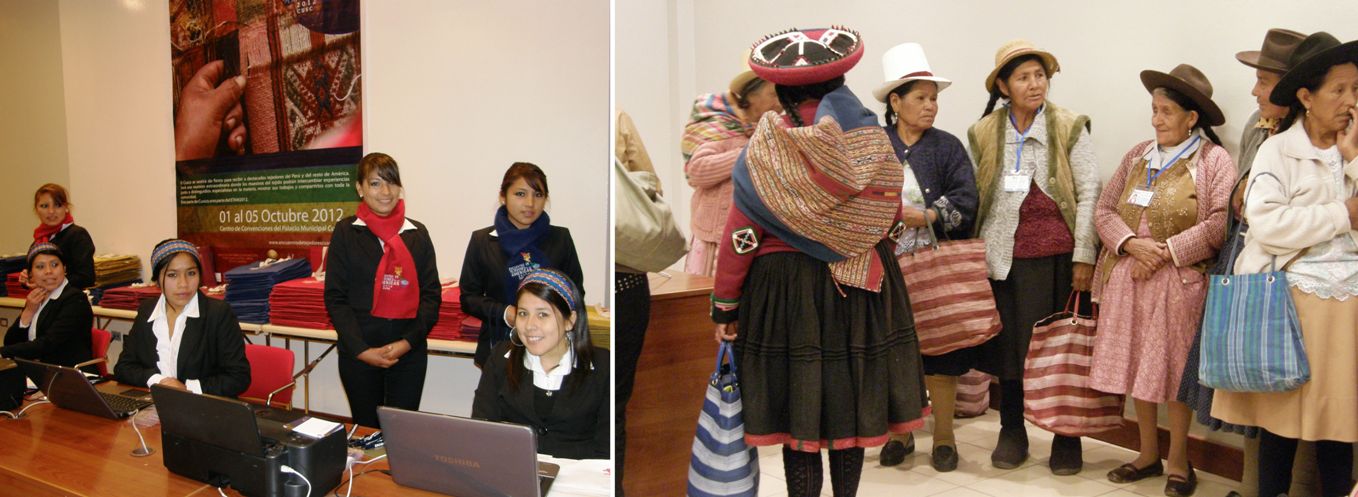
 Bright and early on day one, I registered along with other participants. The receptionists, looking smart in their uniforms with colored conference scarves and headbands, were efficient and clearly trained to be able to handle anything. The whole process was very slick and it was interesting to hear all the different Spanish accents and Quechua being spoken in the line-up of participants from all over Peru and South America. I recognized fondly the accent from Chile where I lived for five years as well as the song of the Argentinean-style of speaking used by my ex-boyfriend and the special way that Bolivian highlanders pronounce “rr”.

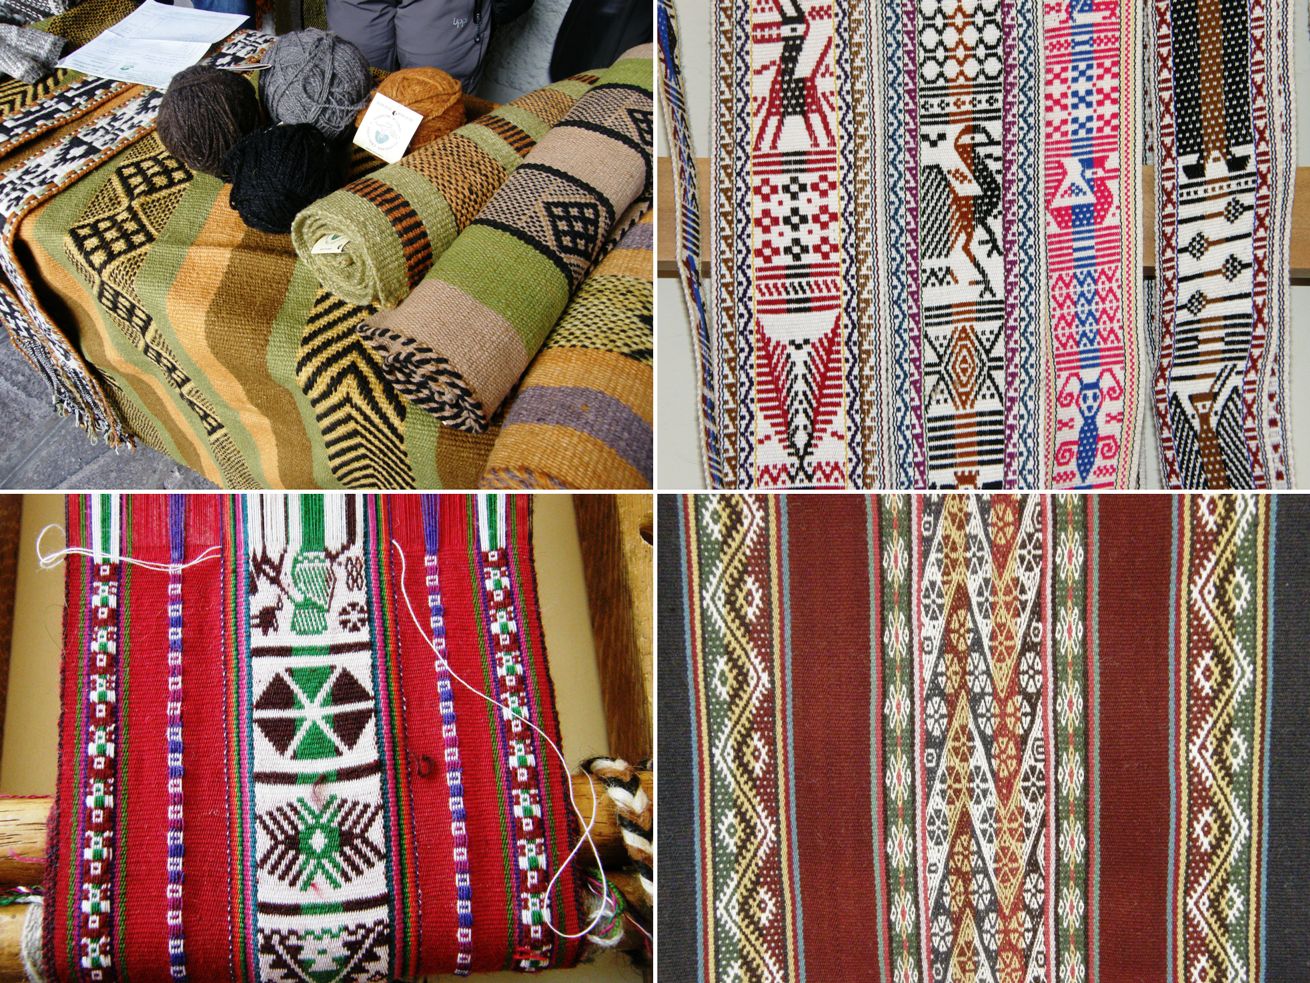
I then stepped outside to the courtyard to another world…a buzz of colorful activity… where I watched all the stands being assembled by weavers from all over Peru, Bolivia and Latin America, saw all the marvelous textiles emerging from travel sacks and being arranged and labeled, touched the fiber, tools and implements which were used to create the colorful cloth and spoke with the creators themselves. Some of them seemed somewhat overwhelmed by the high level of interest in and admiration for activities that are quite normal and commonplace, almost passing without remark, in the communities, villages and towns where they live.

Weavers and knitters from Taquile Island wearing and displaying their textiles and the creators of the wonderful ikat pañones of Tacabamba, Peru

The question that I really wanted to ask everyone right there and then is “Are you going to weave today?” Is today the day when we will get to sit by you and see how you created all these exquisite textiles? And all the while the  excitement is building as I see more and more gorgeous textiles and looms being extracted and arranged. I had already seen at least ten things that I wanted to explore further after having passed just once quickly by each of the twenty-two half-erected stands.

Weavers and spinners from the Navajo Nation, my friend from the Tinkuy, DY, and TahNibaa and Albina from San Ignacio de Loyola showing the crocheted “chullos” and the belt loom full of sticks which is typical of her community. 
The Chol Chol Foundation of Chile was present bringing with them textiles made by the Mapuche weavers that they support including a spectacular ikat- patterned “manta cacique”. Lowland areas of Peru were also well represented with a group of Matsigenka cotton spinners and weavers from Echarate, Bajo Urubamba.

The looms!……

A horizontal loom with a broad belt patterned with double weave and complementary-warp pick-up patterns of Taquile Island and a backstrap loom with a cotton warp-float piece in progress from Echarate.
The simple backstrap loom of Tacabamba, Peru on which the indigo ikat-patterned “pañones” are woven.  The process of creating a pañon is anything but simple. They are up to one-meter wide, covered with tiny motifs and have patterns knotted into their fringes.
A floor loom from Ayacucho, Peru with a tapestry in progress and the leaning vertical loom of Tarabuco, Bolivia.
The cotton weavers of Chiclayo managed to preserve their native cotton despite the fact that its cultivation was banned for many years in Peru. The backstrap loom is used to weave their natural brown and white cotton into saddle bags, belts and table ware for their own use. The Guatemalan loom from Santiago Atitlan holds brocaded cotton cloth destined for the typical woman’s blouse or “huipil”. Panels are sewn together and the neckline embroidered with birds.

Wide warps, narrow warps and everything in between… A Tinkipaya weaver’s leaning vertical loom, holding fabric covered n complementary-warp pick-up patterns, rests on the ground. A weaver from Pitumarca speedily edges her finished woven lliclla with a tubular woven band using three sets of string heddles and a shed loop.

A backstrap weaver from Ayacucho, Peru, creates a belt patterned with supplementary warps. She uses a forked stick to hold a secondary cross, the manipulation of which helps her to open the heddle shed quickly and efficiently. The wide backstrap loom parked against the pillar is from Tanta, Peru where handspun alpaca yarn is often combined with bright synthetic threads to make shawls, ponchos and blankets.

And then there was that tantalizing backstrap loom with its twenty-four heddle sticks…Señora Araceli, are you going to weave today?

First Araceli has to make the twenty-four sets of heddles on this fresh warp. The pattern has already been picked up and saved on sticks.

Just before lunchtime one day when we were indoors listening to speakers, I got the uneasy feeling that I really needed to be somewhere. I got up and tip-toed out at the start of the morning’s final presentation by Manos del Uruguay to find Araceli seated and preparing her warp for an afternoon session of weaving.

Well, you know that I am fascinated by the entire process and so I was happy to be able to sit alone with her and watch her make her heddles. I was tickled to see that she makes her heddles with the extra security hitch just as I have chosen to do. I have seen and learned so many ways to make string heddles for backstrap and other kinds of weaving and this method is by far my current favorite. I always say “current” as who knows what cool new method I will find tomorrow.

Here is a short video clip of Araceli making her heddles. She certainly has a smooth and elegant way of doing so. I know some people don’t like making heddles and dread that part of the process…I like it!

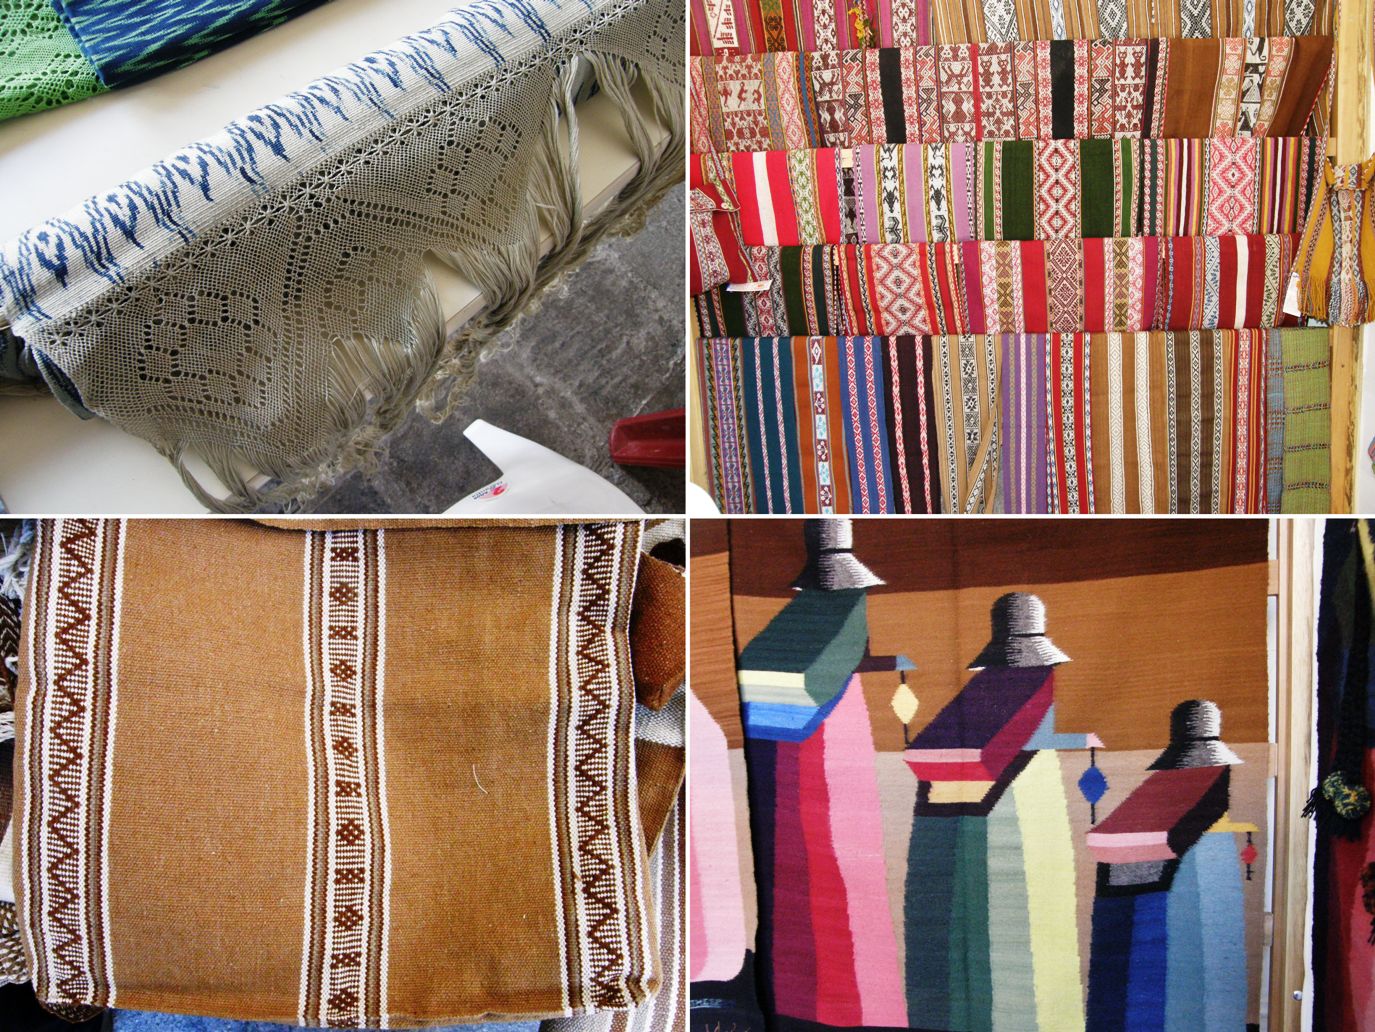
And what about the woven cloth produced by these looms and the pieces produced by talented hands using knotting, braiding and crochet?

Head gear…Crocheted “chullo” from Peru and a woven hatband from Bolivia.

There are four countries represented here….cloth from Mapuche weavers in Chile,  Salasaca, Ecuador,  Taquile Island, Peru and Tinkipaya, Bolivia.

Cloth from different corners of Peru. The variety!

Of course, each piece has its story and it was those stories that we were told in the weavers’ own words in the seminar sessions that were held in the mornings and afternoons. The stories were very inspiring and educational, often with very personal touches which brought life and meaning to the fabric that simply could not be transmitted from the market stall or loom alone. All told of hope, perseverance, strengthening of ethnic identity and a revival of pride in oneself and culture and were often very moving.

The faja sara ( the one created with the twenty-four string heddles) has its own fascinating story. It is part of an unbroken weaving tradition that dates back at least 500 years to Incan times. The belt is described in the chronicles of Mercedarian Friar Martín de Murúa in 1590 A.D. and the knowledge of how to create one has been passed on ancestrally over all these years.

Lynn Meisch has written an article about her research on these belts here. We were told by the weavers that the name “sara’ comes from the verb ”sarear”, although I have never come across this verb before, which means to choose, or in a weaving context,  to pick-up.

Interesting to me from a structural point of view is the rolled edge of the belts which is surprisingly easy to create. I am guessing that it serves the same purpose as the woven bands I have seen added to other textiles in that it strengthens the edge. When I was in Holland, Marijke van Epen and I followed Mirja Wark’s explanation of the rolled edge used by the Wayuu people of the Guajira Peninsula in Colombia and Venezuela and the way the weavers of the sara belts create theirs is equally as interesting and practical.

Here is Araceli in action with a band of spectators. When doubt was expressed by the onlookers about the quality of the cloth since Araceli does not use a ruki, the llama bone tool, to beat in her weft, Araceli immediately invited them all to feel the belt. They were all surprised and impressed by the firmness of the weave. It is a very dense piece of weaving.

The poncho shown above is from Catamarca Argentina and represents the recovery of the exquisitely fine work done with handspun vicuña fiber on floor looms which has the made the poncho Catamarqueño famous for centuries.

Two people weave the pieces side by side and have to coordinate the strength of their beat perfectly to maintain a consistent weave. With the fine vicuña thread a piece that measures 2 meters by 1.30 meters weighs only 320 grams and takes up to eight months to complete.

Fine vicuña shawls are also woven and embroidered using designs copied from old colonial textiles.

We had a chance one afternoon to handle and clean pieces of vicuna fiber and everyone was invited to try their hand at spinning it on the  25cm spindles.

More cloth…..

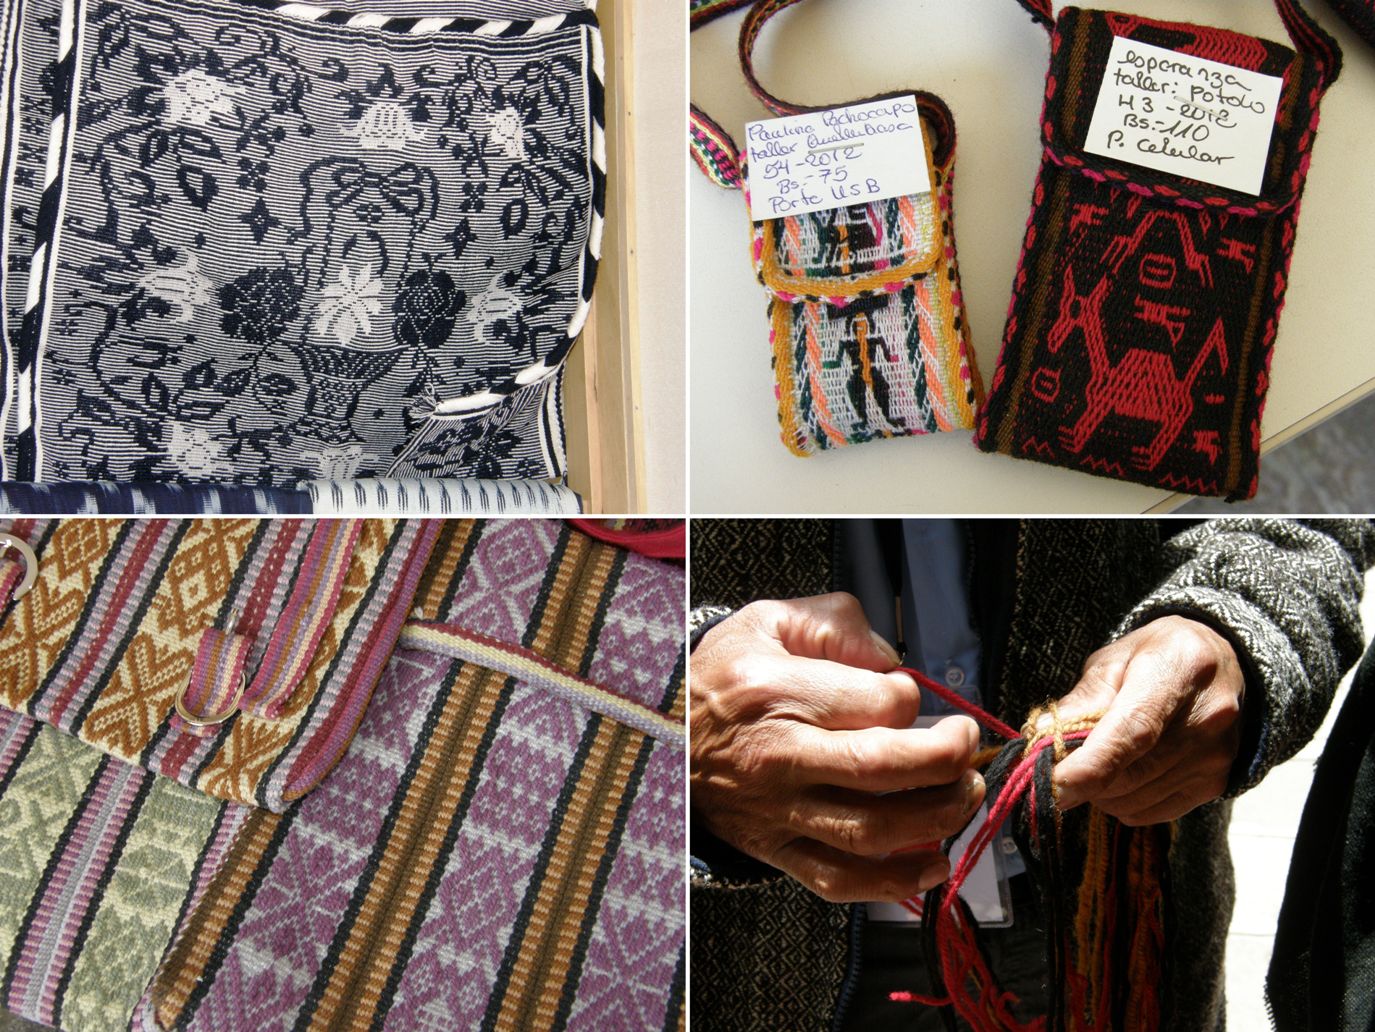
…. a bulsico , or cotton double-pocket saddle bag from San Ignacio de Loyola with beautiful patterns in simple warp floats worked in two colors. The weavers from Tarabuco and Potolo in Bolivia of course brought large fine examples of their textiles. I decided to show you here some very small and practical pieces that they also brought to sell. The tiny USB pouch is from Tarabuco and the cell phone pouch with its woven khuru figures is from Potolo.

The supplementary-warp patterned pieces in lovely pastel colors are from Ayacucho, Peru and the last shot is of an impromptu sling-braiding demonstration from one of the Peruvian presenters in the coffee break.

More lessons along the way…

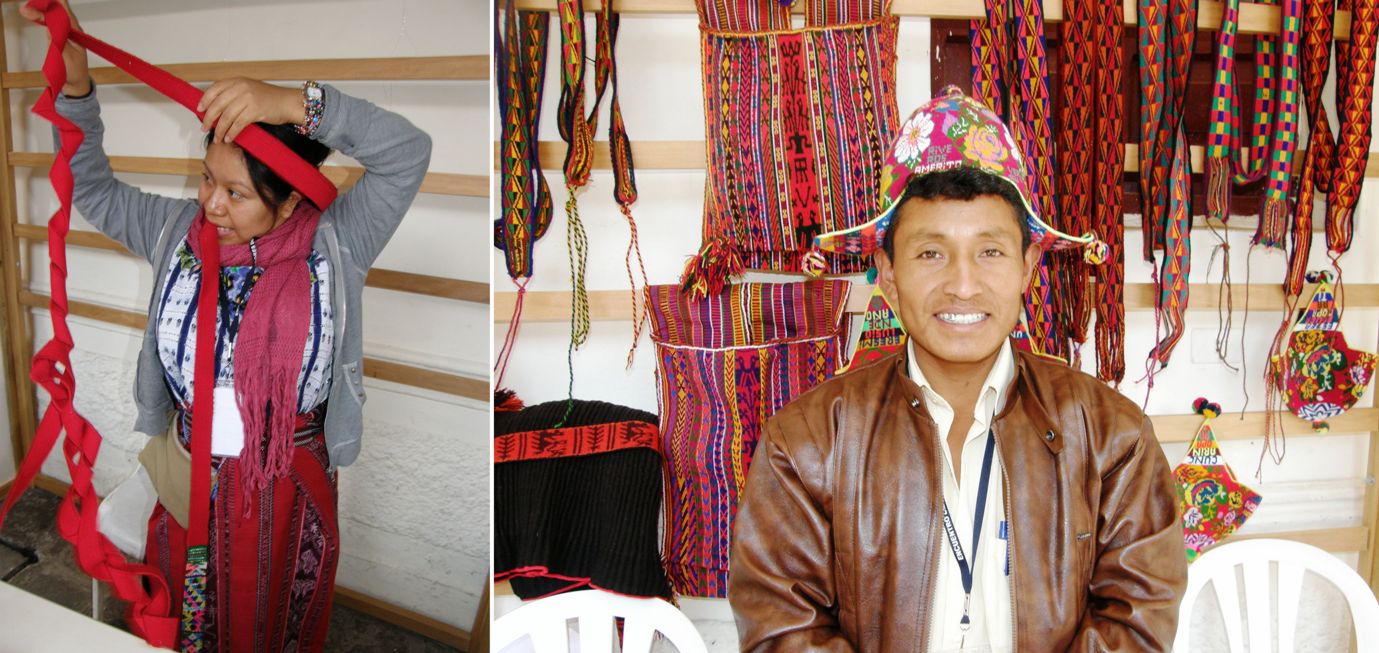
Diana from Santiago Atitlan in Guatemala showed me how to wrap her hair and head with a woven hair sash. You can see that most of the band is plain red with just the last part, which will be seen on the outside, decorated with pattern. Albina’s husband showed me how married men wear the typical chullo of his home…with the flaps standing out sideways. A single man will wear his with the flaps pointing out front and back.

So, now you have seen a selection of the stands, looms and textiles and heard a few backgroud tidbits about some of the weavings and the people who produce them. You are probably dying now to see the weavers in action, right?

ARE YOU GOING TO WEAVE TODAY?

Sorry, but I am saving that segment for the next blog post as uploading the video will be so much easier for me when I am in the US.

In the meantime I am packed and ready to leave tomorrow and I did manage to finish the discontinuous warp piece that I started in the workshop on the last day of the Encuentro. Handling alpaca fiber is not a nice business in this heat with sweaty hands, I can tell you!

Here is my ticlla piece off the loom and all curled up…

The overspun alpaca yarn made the grey and black panels curl in and the other two panels curl under. You can see my finish line on the white panel. I ended up removing one weft as I had packed too many in. I really need to remove two as now I have two wefts in the same shed. The finish line isn’t as noticeable on the other panels. I am really pleased with this!

I wove and sewed on a tubular band to the edges….… in the same way as the Pitumarca weaver that I showed earlier in this post, using three sets of string heddles and a shed loop. See how nicely the piece lies flat now? I hemmed the sides before applying the tubular band because I didn’t like the way the warp stripe at the edge was interfering with the color of the tubular band.

Here’s a better look at the tubular band and that lovely dovetail join of colors…

Done! I am keen to try this all again!

See you next time from the US 🙂