Backstrap Weaving – Ikat – Turning “Blips” into Beauty

IKAT! Ikat can be a little hard to deal with for someone like me who is into planning, charting and precision. I count my warps carefully…this one needs to be floated, this one doesn’t and, oh no, I made a mistake and must un-weave and…. darn!, the design is not looking as I thought it would…better un-weave and re-chart. I am not one for “winging” it or just throwing a warp on the loom and seeing where it takes me. I am even less crazy about letting a “blip” become a “design element” although my work often has such blips!

When I have tried ikat, the tie-dyed warps wandered off as they pleased once I started weaving, blurring the design to the extent that the original planned pattern became totally unrecognizable! You can wrench the warps about and try to get them to behave or just let them go and appreciate the beauty in the “blips”. You can probably guess which one I am more inclined to do.
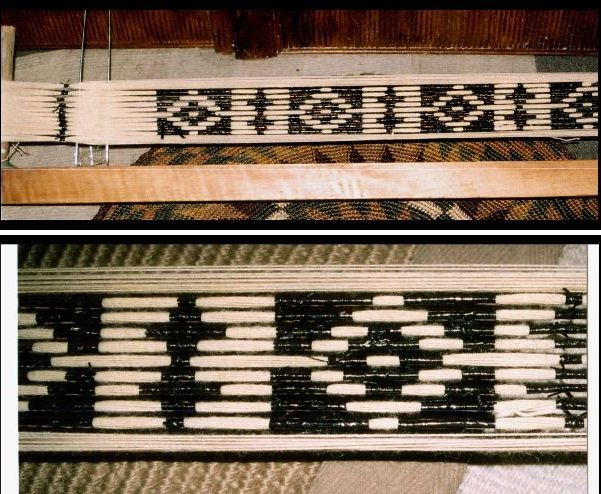
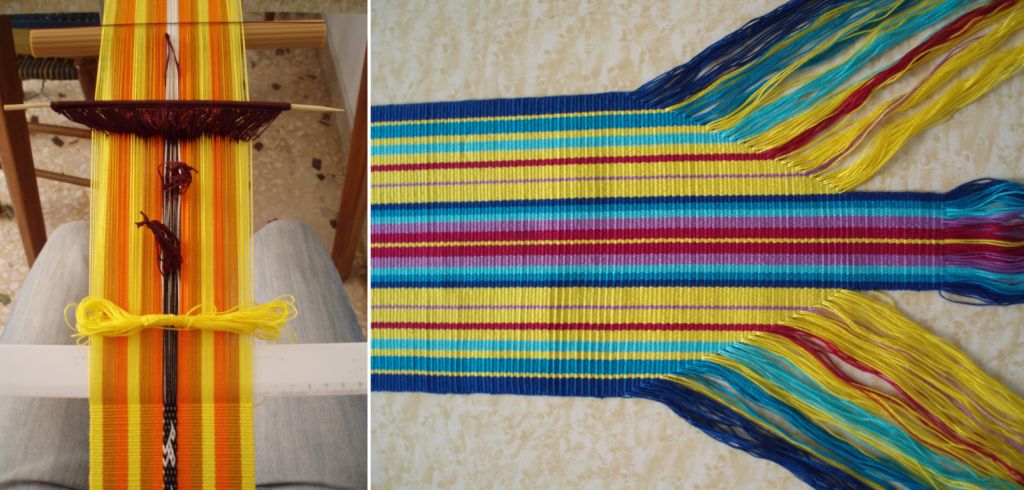
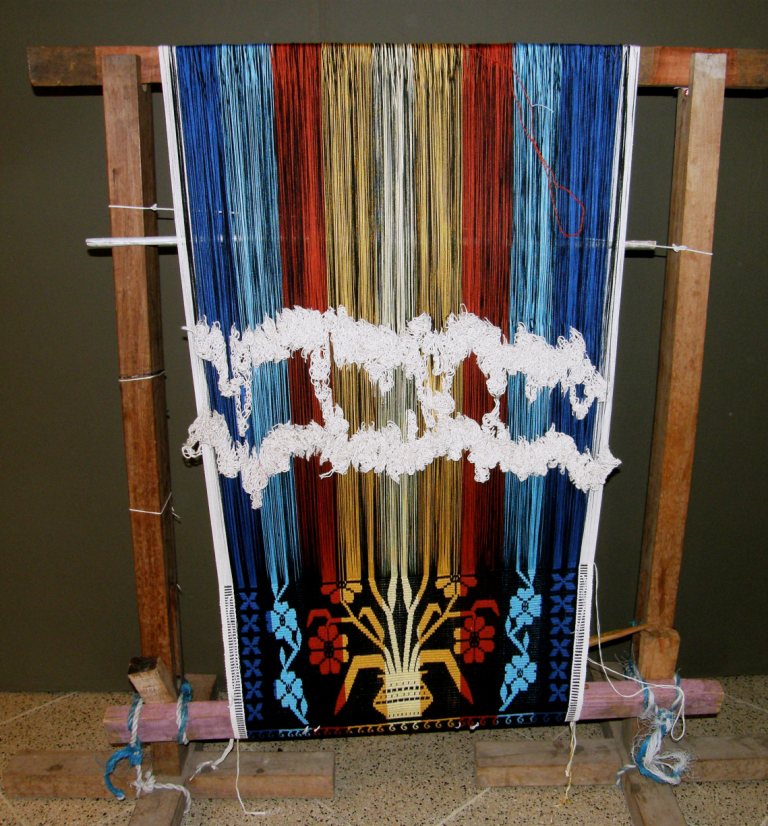
Way back when I first tried ikat on the above warp I thought that it was all about the tying and dyeing and I was so nervous. Had I used the right wrapping material? It took me a while to settle on cassette tape after trying cabuya fiber (a kind of agave) and then strips cut from plastic supermarket bags. Had I tied tight enough? Was I using the right kind of dye (answer: NO…I used cotton dye on wool which gave me a wishy washy pink instead of  the Mexican red promised on the package). Would the wrapping allow the dye to seep?

Once I had dyed the warp and unwrapped part of it to see my lovely crisp and sharp pattern I was delighted. Now to get to the weaving…the easy part, right? Just plain weave, a piece of cake. And that is when everything went quite mad. The warps slipped around out of position with every move I made, the parts of the design wouldn’t line up and I was terribly disappointed.

Then came this….

On my trip to Guatemala in 2008 I bought this…a prepared ikat warp ready to go on the loom. “Ikat the easy way”! I exclaimed. This warp had been prepared by the experts and surely it would turn out nicely. I took just one section of it and put it on my loom….it was coming out even worse than my own experiment. At least on mine the first motif looked kind of okay. I put it aside very quickly. I just couldn’t bear the thought that someone had gone to all the trouble to tie and dye this warp only to have me come along and mess it up. It’s still there in the closet.

Once you have had an ikat disappointment, it is not really something that you feel like launching into again in a big hurry…all that time spent tying, dyeing, waiting for it to dry. In any case, I felt that I hadn’t really learned anything from the exercise to warrant another attempt. I needed to do some thinking about what needed to change about the way I was handling the warps.

But I did take something away from the experience – a growing awe and respect for the ikat weavers around the world! My gosh, the work they do creating those amazing images in their cloth. The motifs  have that wonderful fuzziness in their outlines which is what makes the technique so attractive.

This is a piece from Indonesia from a collection  of textiles owned by Phil Willett that he and the late  Dennis Penley collected. Of course the warps move out of alignment but not so much that the image is completely lost as mine was. Just the right amount of shifting is what makes this piece beautiful.

I saw an ikat bed cover that my weaving teacher in Candelaria was weaving with both hers and her husband’s names spelled out in the tie-dye technique, watched ikat weavers with their backstrap looms in the towns around Cuenca in Ecuador, saw ikat warps being prepared for floor looms in Salcaja in Guatemala, gazed at the amazing Central Asian ikat robes at the recent exhibit at the Textile Museum in DC and got to touch and examine a Mapuche ikat warp for a poncho on the loom at an exhibit at the National Museum of the American Indian in DC late last year.
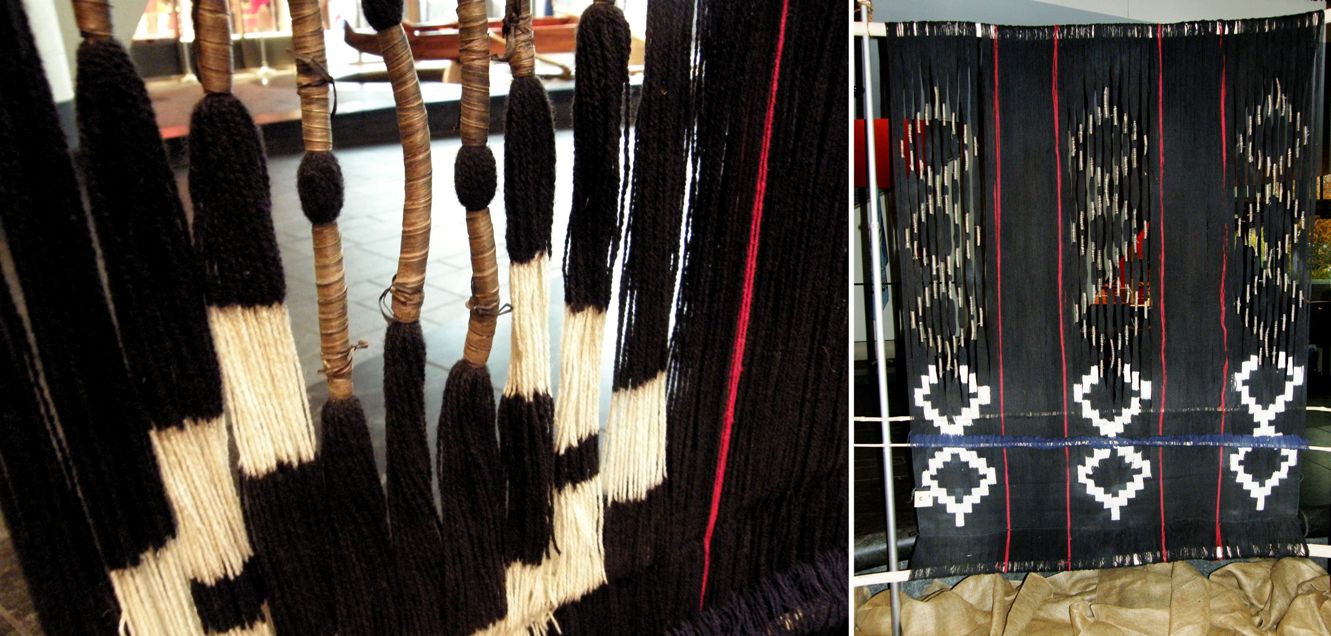
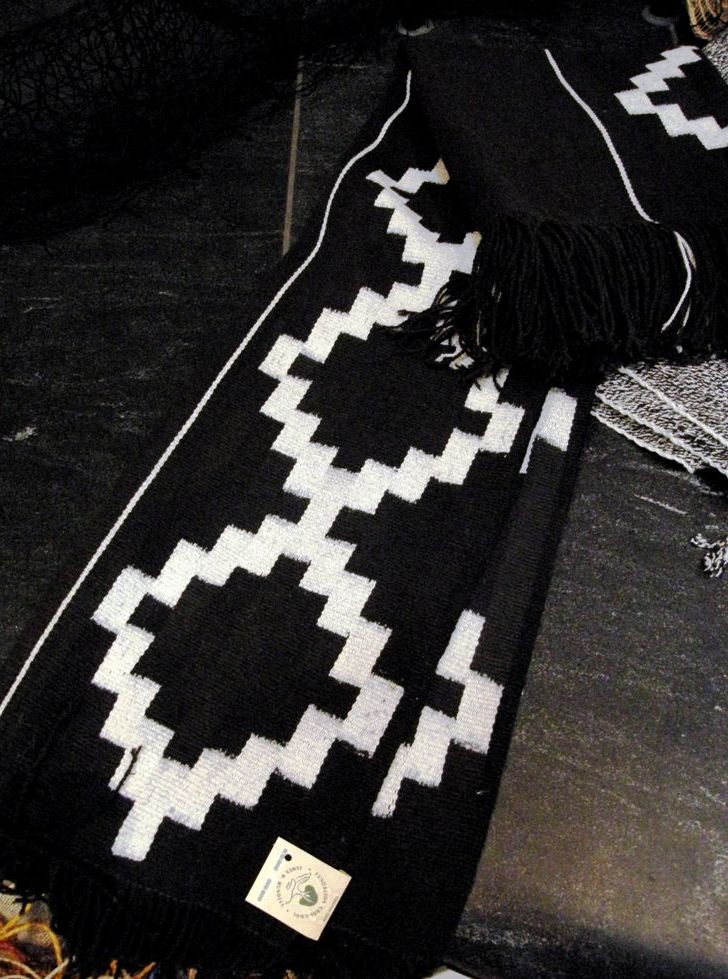
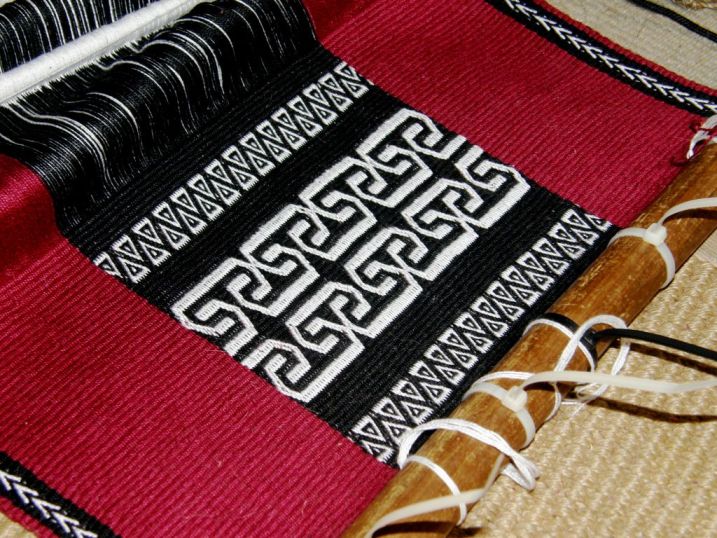
The Mapuche ikats are known for the minimal shifting of the warps in the design and the relatively clean and crisp outlines the patterns have as a result.

Ikat! Sigh! I read an article here just today that describes it as “as trendy as anything ancient can ever claim to be”. I am not trendy by any stretch of the imagination and wasn’t aware that it was so. In any case, the “trend” does not appear to have reached Santa Cruz, Bolivia. The article says that “this kind of pattern now lends interiors a kind of dressed up Bohemian vibe”.

Let’s hope that this is good news for the artisans and that people are aware of the incredible amount of time and skill that goes into the pieces and will be prepared to pay fair prices accordingly.

This video, which was embedded on Ravelry recently, shows one group’s enterprising way of mimicking the appearance of ikat. They produce large lengths of cloth with large fuzzy-outlined ikat-like images without the long tying and dyeing process….

Schumacher – Darya Ikat Weaving Process from Schumacher on Vimeo.

And I have seen other interesting ways to imitate the look of ikat in the online weaving groups…the “faux ikat” using painted warps. Weaver Bonnie Tarses has a video here that shows how to set up for what she calls “almost ikat”.
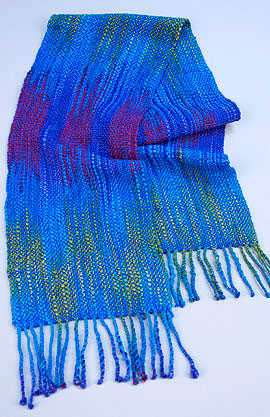
In this WeaveZine article Syne Mitchell shows how to create an ikat effect with painted skeins on a rigid heddle loom.

The beauty of the piece is all about the very misalignment of the colored warps that I have been struggling to avoid.

See how the “blips” are turned into beauty!

I would love to weave something like that but I know that I would spend the whole time fussing with the warps and trying to get them to line up! I just wouldn’t be able to stop myself!

Ravelry member jtellier wove a faux ikat scarf on her rigid heddle loom, which you can see below, and shared it with us for inspiration when we were planning  our plain weave weave-along in the Backstrap Group.

Now we are doing an ikat weave-along and have four participants so far.
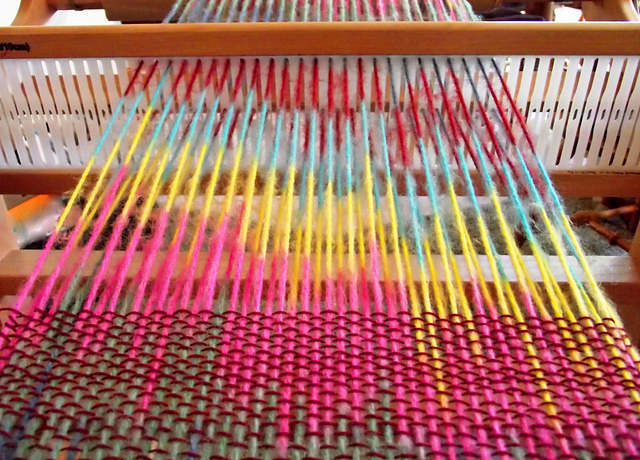
In this current weave-along we are trying to do true ikat by tying and dyeing the warps. We recognized that we needed to go into it with the right attitude. I didn’t want people to end up as disappointed and frustrated as I did after my first attempt and so we are all participating with the idea that we will definitely create something “interesting” if not exactly what we had in mind in the planning stage.

I have got some ideas and theories together about how to create my ikat pattern with a minimum of blurring in the design. My weaving friend Tracy and I discussed how the Mapuche weavers appear to leave all their ties in place on the warp and only unwrap enough of a bundle to give them the minimum of space in which to open the sheds and pass the weft. I have tried weaving without unwrapping everything beforehand (the warps still slipped) but not to the extent that the Mapuche weavers do.

I was also intrigued by this picture on the Education and More website, on their backstrap weaving page, of a warp in Guatemala which has been glued to the loom bar with corn masa. (Karen from Education and More tells us that it is used as a paste to secure the threads).

Hmmm… I thought. Maybe I can use diluted white glue to do the same.

Karen from Education and More shared this image with us in the Raverly Backstrap Weaving Group:
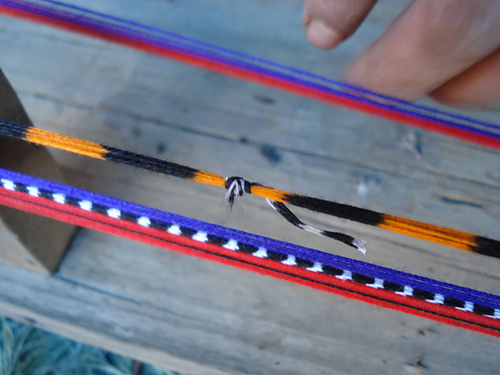
It shows how some ikat weavers, with whom she works in Guatemala, tie cotton around the sections of dyed warps to stop the warps from moving. I suspect that cotton against cotton holds well and does not slip. I have tried doing that with the cassette tape. The tape is far too slick to be effective. Doesn’t that warp look gorgeous!

And the final inspiration came from a Chilean lady on Facebook. A Facebook friend of mine “liked” her picture which is what allowed me to see her at work on an ikat piece on a wooden frame loom. I so wish I could have posted the picture here but I have not yet made contact with the weaver and, if I do, I will post the picture next week. I saw that she too was working in a very small space between the partly unwrapped ties and the weaving line.

She had a separate bar which appeared to part of the frame loom which was her shed rod. Unfortunately only a very small part of the loom can be seen. What interested me was that she had multiple sets of small heddles around  the groups of warps that she had wrapped. Each group had its own string heddle rather than having one large string heddle across the entire warp.

So I decided to use all these tactics in my project. As an experiment, it is not a very well conducted one as I will never be sure which of the new tactics will be responsible for the result…one or any combination of all of them.  Ah well.

First came the warping and wrapping. I set up the warp on a frame to wrap with cassette tape…still my favorite medium. I did not get carried away with the size of the warp. I guess that tells you something about my confidence, or lack thereof, in the success of the project! This is a cotton warp.
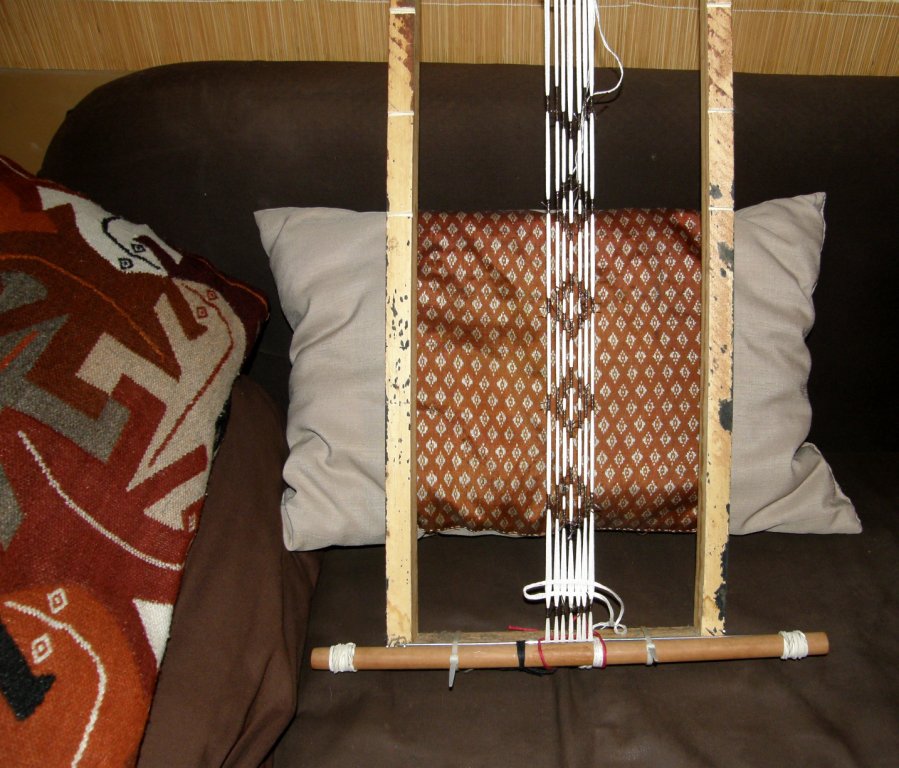
Here it is after dyeing with Dylon Olive Green cold water dye. I had dyed a skein of Plymouth Yarn with the green and this warp got tossed in at the end. The color is a little uneven and I kind of like the sort of washed-out look.
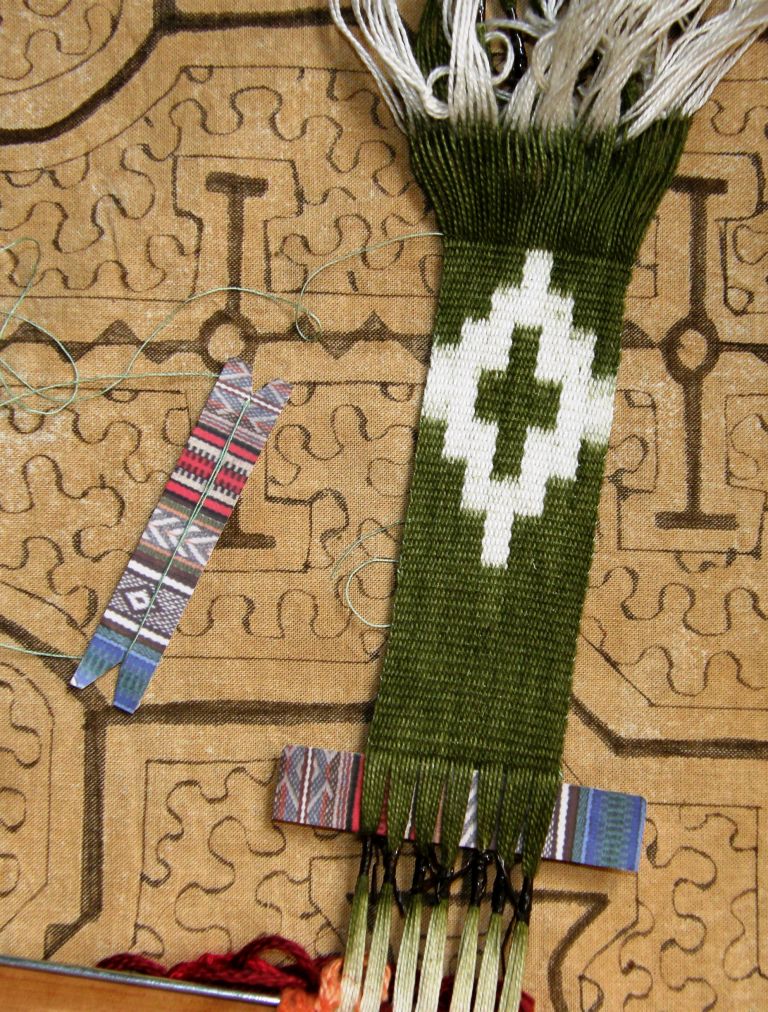
So here is the first motif. I was very pleased but still reserved in my excitement as I know from experience that the first motif generally works quite well. Things tend to go mad after the frst one.

My friend Annie will recognize the business card that she gave me back in 2010 which I am using to start the weaving and as a wee shuttle. I still have it, Annie and I hope you will give me a new one when I see you in March!

The warp at the loom bar is stiff with white glue which never entered the dye bath. The cassette tape ties down there are fairly ineffective. The warps just slide right through those but I like to think that they help a little. Cotton ties like the Guatemalan use would have been better. You can just see the bunches of white string heddles.

And I used a very fine weft. The warp is similar to a #10 crochet cotton. Of course I forgot to dye yarn for weft. I wove with this fine weft to start and finish the rep weave piece I showed last week and I really liked the feel of the fabric it produced.

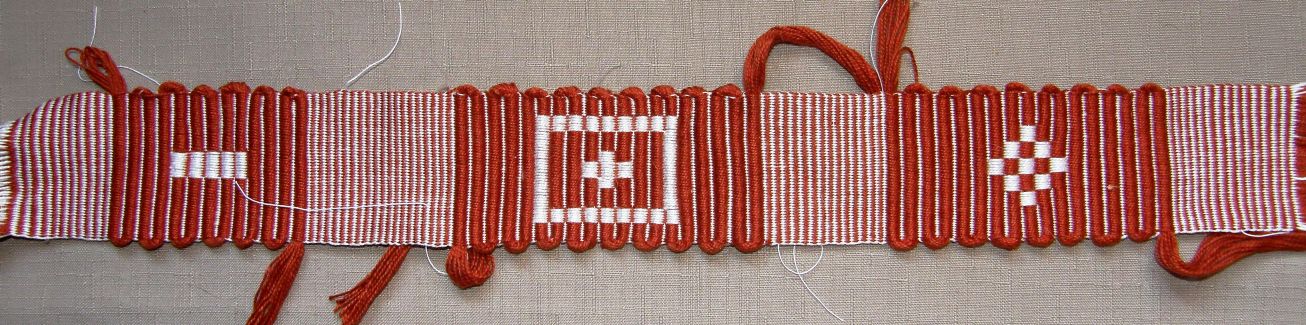
Here are three finished motifs and all is well. The motifs are all a little different. I was not precise in my measuring and wrapping of the segments. The space in which I open the sheds is tiny and I am thankful for the fine sword that came with a Guatemalan backstrap loom that Linda in California gave me. I am using shed loops for the non-heddled shed. One shed loop for each section.

Three more motifs to go and I will be done…short and sweet! Very sweet! I am pretty happy with this. Now, which tactic or tactics produced these pleasing results? Good question!

What about the backstrap weavers who just go and unwrap all the ties, throw the warp on the loom and weave away producing beautiful results?…no “glue” or teeny tiny weaving spaces with teeny tiny bunches of heddles. I am completely in awe of these people.

And what about the ikat weavers in Uzbekistan?

My friend Pam took this picture in Uzbekistan and has allowed me to show it here. The ikat Master marks the mordanted warp and the ladies do the tying. Often the warp is mounted in layers on the frame so that multiple layers can be included in each wrap to repeat the patterns along the length of the entire warp. I got the idea of mounting my warp on a frame to wrap from seeing this picture.

The Education and More site which I linked to above and Flickr page have lots of beautiful pictures of Guatemalan weavers and textiles including many images of ikat weavings.

Did you know that Education and More is selling naturally dyed cotton from Guatemala on their website now?


Bobbie who is in the Ravelry group is not joining us for the ikat WAL.

She has just received her shipment of naturally dyed cotton yarn and has launched herself into a new project which has been inspired by this Guatemalan piece.

It is from the Education and More page and Jennifer discovered and shared it with us. It is the simple warp float technique and very effective.

I am sure Bobbie is going to do a beautiful job with it. Look at the Bedouin piece that she just finished:
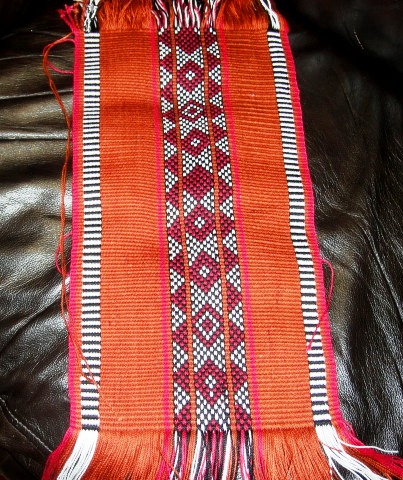
As for ikat….will I go to all this trouble again? Yes! Now I am thinking multiple colors and trying to figure out how best to do the layering….it will be another sample. I will probably sew the current piece onto a piece of woven fabric. It is fine enough to do so, I think, and I would really like to use it.

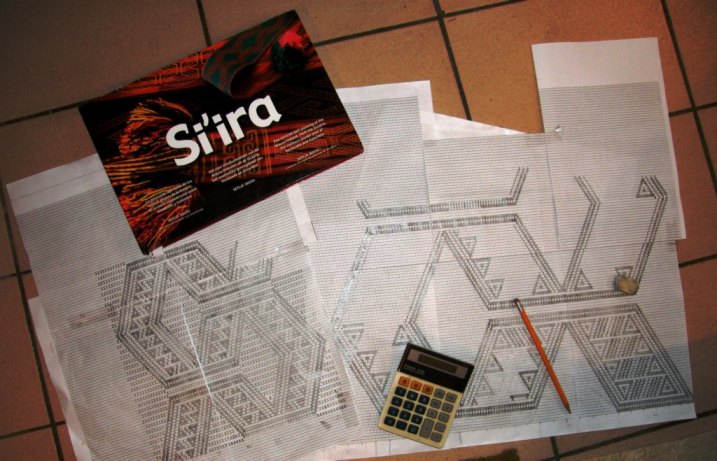
In the meantime, I have started the next part of the si’ira inspired piece. All that counting had me procrastinating I am afraid…576 ends in the pattern area. The first row of pick-up is crucial. All other rows are picked up relative to that one and I can tell you that it is not fun to discover on row 20 that the lines in the motif are not meeting as they should because the first row was picked up incorrectly! So I really have to be in the right frame of mind to work on that first row…check and re-check.

And, it is done! and I am off and running.
Backstrap Weaving – Books and Blessings

I don’t do Christmas. I don’t have any family here and so it seems kind of pointless but it seems that Christmas does me! And all my Christmases came at once, as they say, this month when four packages were waiting for me at the post office this week on top of a couple that I had received the week before. Two were purchases that I had made some time around Christmas and the rest were gifts.

One was from Argentina, another from Morocco via Australia, one from Bangladesh, one from Sweden, one from the UK, one from India and yet another from Australia. Luckily, I now have space for all this new stuff!

I can’t decide which one produced the biggest smile.

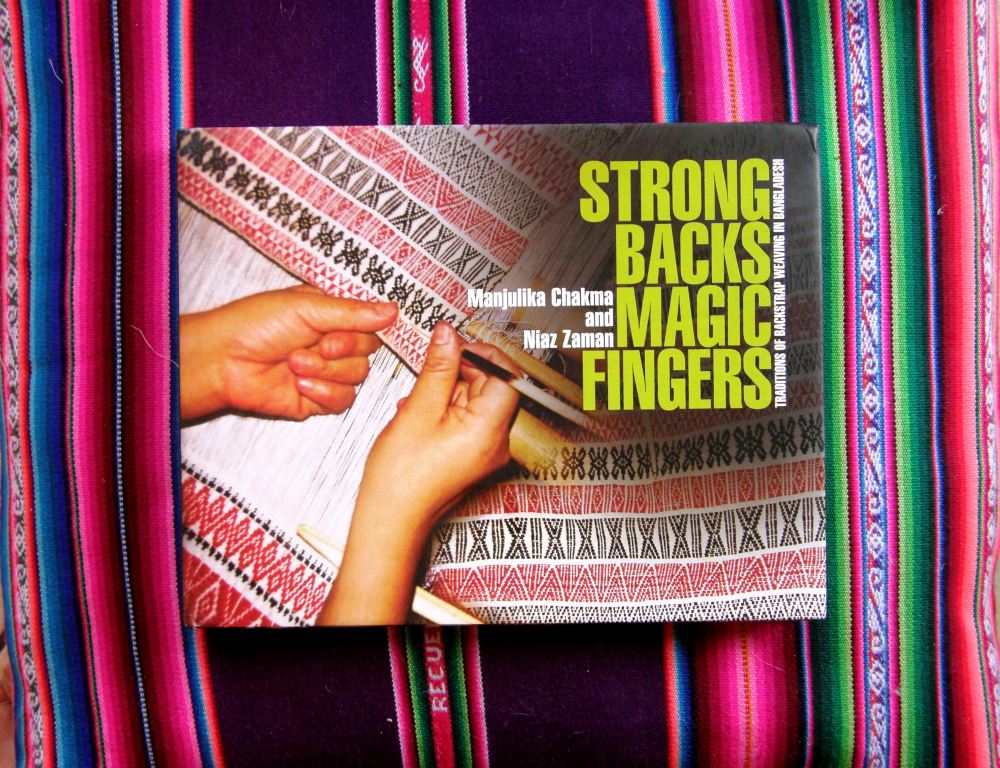
Let’s start with the book from Bangladesh on backstrap weaving. I suppose this is the one about which I feel most triumphant.

I have been trying to get this book since the middle of 2010 when I ran across a newspaper article about it online. Letters to the publisher didn’t produce any response. I tracked down an Australian journalist who had written a review on it but she couldn’t help. I asked my Godmother in India to try through some friends of hers in Bangladesh…no luck there either. I met a teacher from Spain on Ravelry who is working in Bangladesh who offered to try and get it…she couldn’t manage it… and finally, a Facebook acquaintance, Ananda, who works as a fashion designer in Bangladesh, came through.

He had heard of one of the authors, Manjulika Chakma and seen the book at a book fair. He managed to find the author, go to her house, where he said he enjoyed seeing her collection of tribal textiles, buy the book from her, tease me by posting a picture of it on Facebook and then send it to me! We were both very nervous about the mail as we both live in countries in the developing world where things often don’t work quite the way they should.

Well, I have been blessed because here I have it in my hands and it is really lovely.

I have only read the first few pages of Chapter Two which is about the Chakma weavers and it starts with a lovely story of how, in order to encourage the tribal backstrap weavers to start weaving again the traditional sampler known as alam as well as to see just how many of the 210 designs could be recovered, a competition was organized among twenty weavers to see who could produce the best example. And the story goes on from there telling about the preparation for the weaving, the loom, the process. I can’t wait to read more.

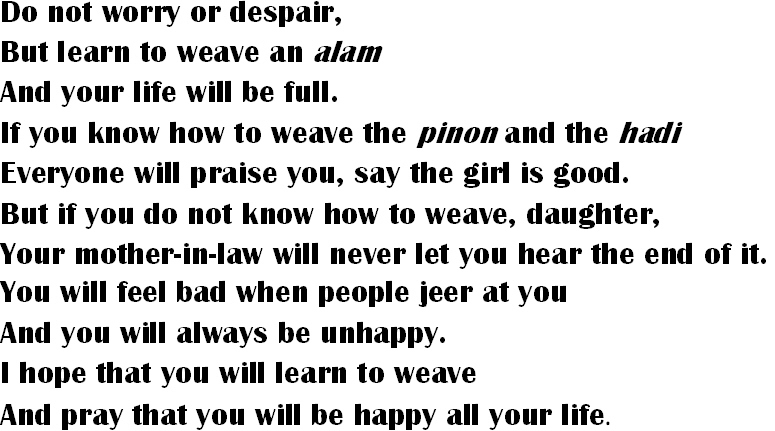
One thing I would like to share with you are some lines from The Song of the Loom by Chiranjib Chakma translated by Niaz Zaman which appears at the very start of the book. This is just a part of the song:

How I wish I could hear this sung in its original language!

Twelve chapters in the book deal with twelve different tribes and their work. One disappointment is that the index promises a bibliography on page 164 but my book ends at page 160! Too bad…I love bibliographies. 

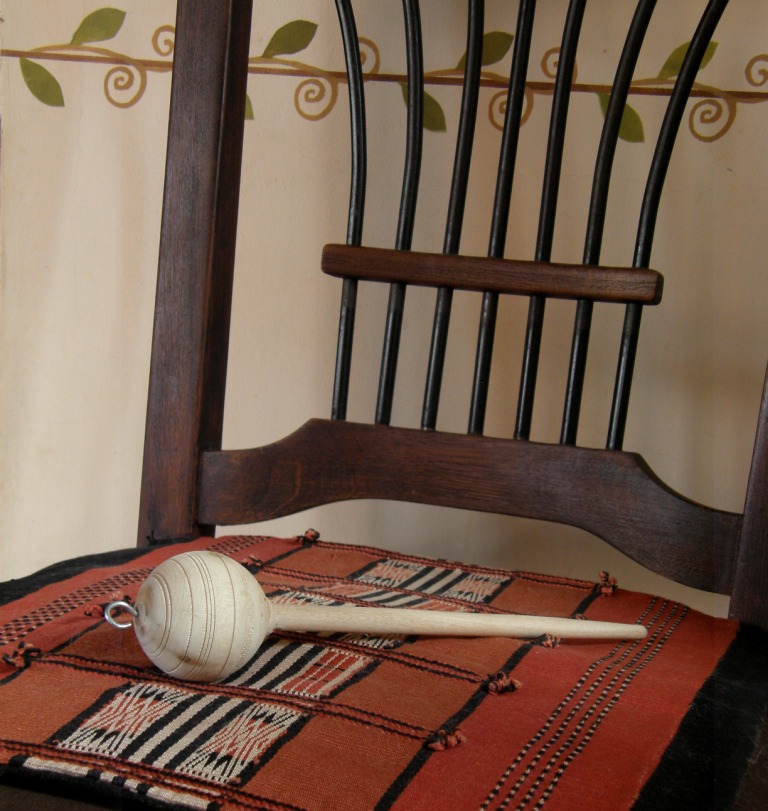
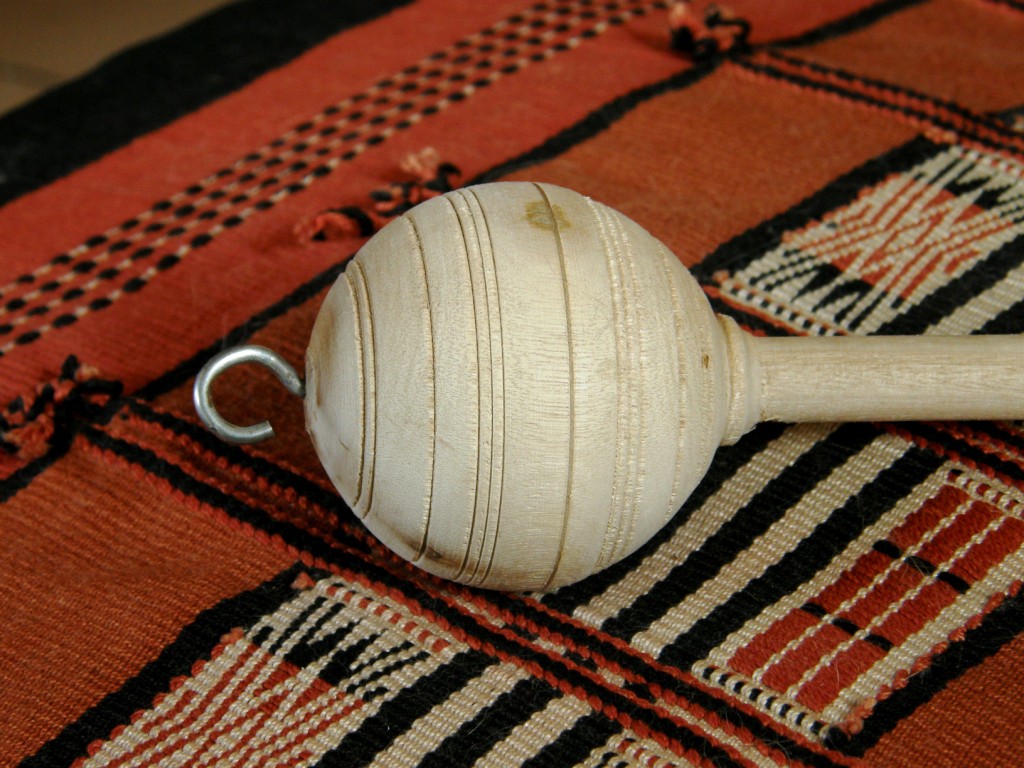
From Morocco via Australia came this spindle…

A friend of mine in Australia, Linda, went to Morocco last December and I asked her to get me a typical spindle. I have since decided to make this a gift for my friend Lisa in North Carolina. It isn’t for me anymore after my recent de-clutter campaign…books will always be welcome but I have enough spindles!

I actually had no idea what a typical Moroccan spindle looked like and Linda is not a spinner and told me that she had quite a difficult time finding one in the markets. Eventually an elderly gentleman told her that, if she came back the next day,  he would have one for her. Linda thinks that he had this specially made for her.

I asked the ladies in the Spindle Lore group about this particular kind of spindle and got many helpful responses.

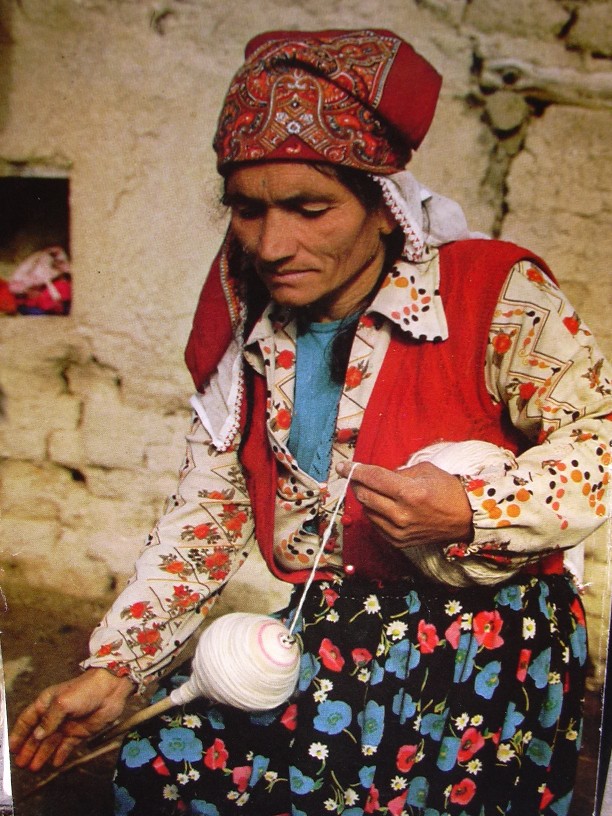
Tracy sent me a link to this site about Turkish tribal textiles which has this image of a woman using a very similar spindle.

I know that Lisa will use and enjoy this spindle. If it stays here with me, it will be left hanging on the wall. I am happy to see it, handle it and take pictures of it and learn a bit about it in the process.

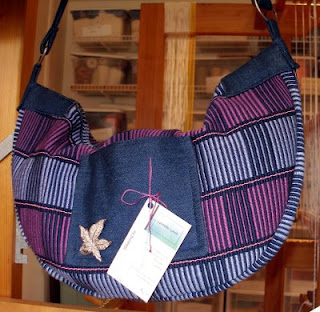
To Think With a Good Heart…Wixárika Women, Weavers and Shamans by Stacy B Schaefer came to me as a used copy from the UK (copies for under $3 are out there!) after having been recommended to me by Hopi weaver Luis Garcia. Luis and I met online through a mutual interest in Huichol, or Wixárika double weaving.  Here is one of Luis’s pieces in progress. He is weaving almost exactly the same motif as I chose for my bag above.

The book is described as being …”a fascinating journey into a realm of ancient beliefs and traditions woven into the story of a way of life constantly threatened by the outside world…..(It) addresses both the technology of weaving as well as the dramas and personalities in a community.”

In the words of Stacy B Schaefer herself…

A woman’s weavings reflect the changes and transformations she undergoes as she follows her life’s path, and her rites of passage from childhood to adolescence and marriage are marked by her abilities as a weaver. As a wife and mother, she is the provider of woven items for her family until she is physically no longer able to weave. But, never idle for long, she takes up spinning to help the younger women in the family carry on the weaving tradition. A woman’s life is so integrally tied to her identity as a weaver that she carries her loom to the grave, where it is buried with her.

In this book, I hope to bring Wixarika women into visibility by focusing on the medium of loom weaving. I present a descriptive ethnography of Wixárika women’s lives in chapters organized in interconnected sections that discuss gender roles, the life cycle, economics, religion and cosmology.

The book is the result of Schaefer’s having apprenticed with master weavers in two Wixárika families but it is not a how-to book.

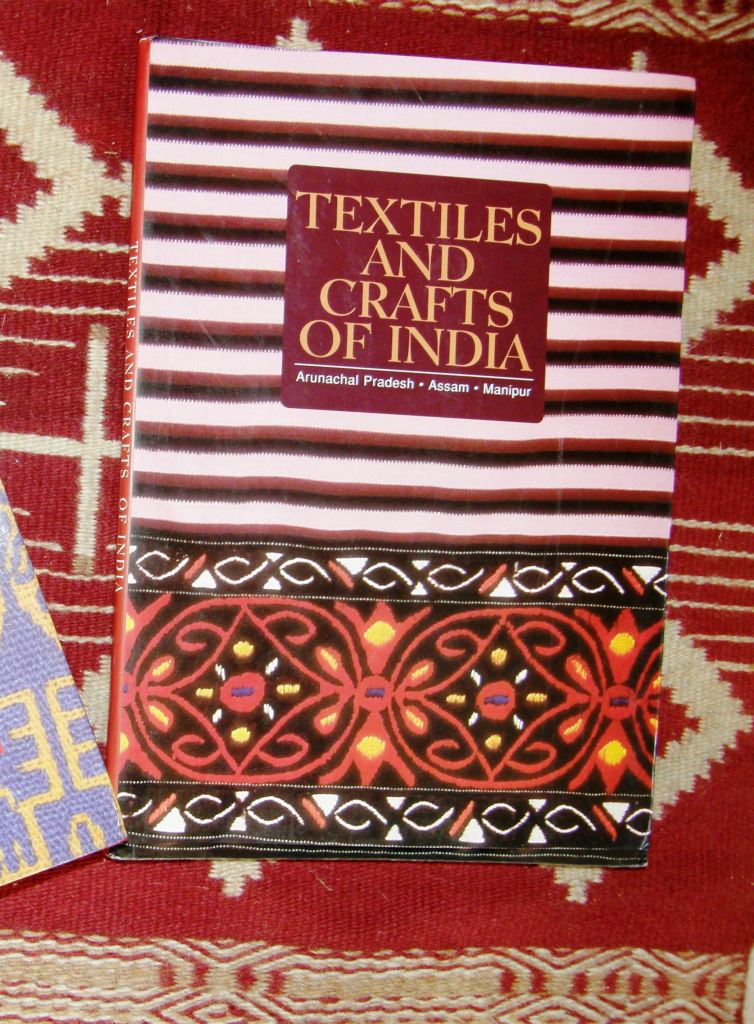
From India I received a book that was recommended by a weaving friend in Canada who just returned from a trip to the northern states of India.

Beautiful pictures and plenty of luscious inspiration! One particular textile jogged my memory from back in 2007 of a bag that one of my Youth Hostel roomies in the Washington DC Youth Hostel had. She said that a friend in Sri Lanka had given it to her.

What a great color scheme! I think I need to try something like this.

From Argentina…

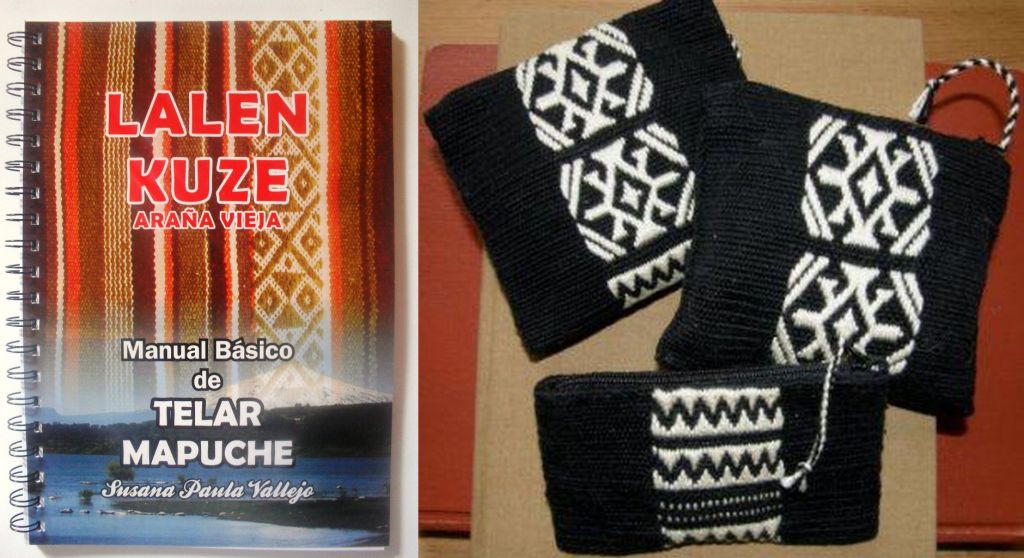
This is Susana Vallejo’s updated edition of her Manual Básico de Telar Mapuche. This revised edition has many more beautifully taken step-by-step photos than the original. Susana and I are online weaving buddies and we swap our books and ideas. I first swapped my Andean Pebble Weave book for a copy of her first edition. I will send her a copy of my next book in exchange for this copy of hers. She lives in Mar del Plata, Argentina where she runs a very active weaving school and I find her always buzzing with energy and so wonderfully charming!

Here is a picture that Susana herself put online to show what her new edition looks like…

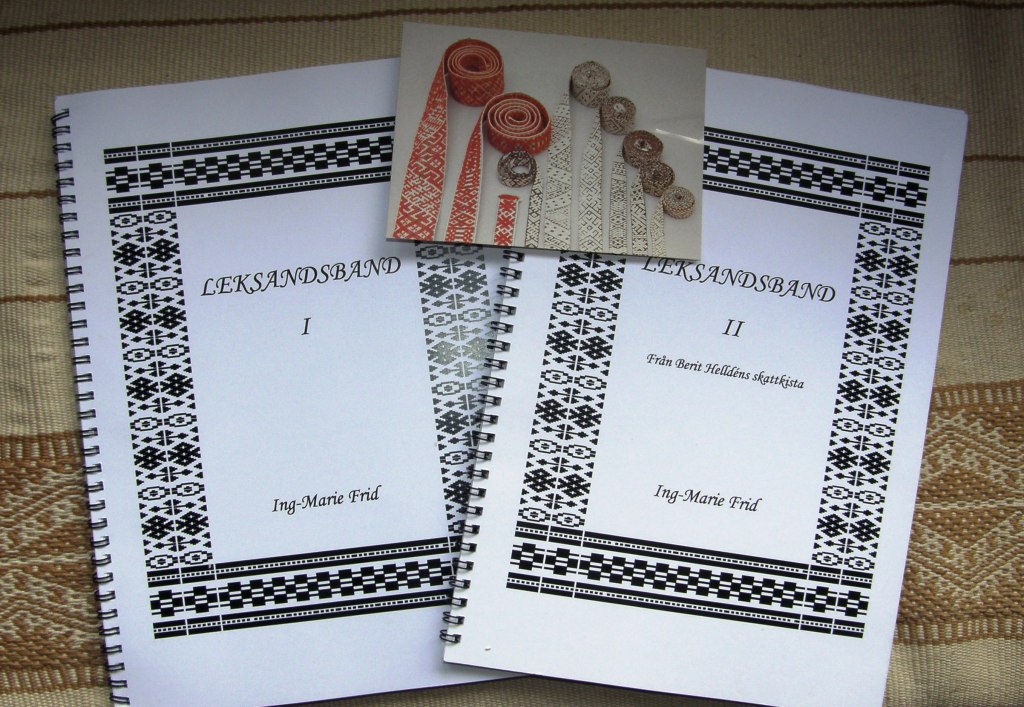
Two gifts from Sweden via my online weaving friend Olle-Petter…

What a beautiful piece of work author Ing-Marie Frid has made with page after page of meticulously charted designs from these wonderful traditional bands. Photos of the original bands accompany every chart and they are simply stunning.
It wasn’t all about opening packages and playing with all my gifts and purchases this week. I did some preparation for future weaving projects too.

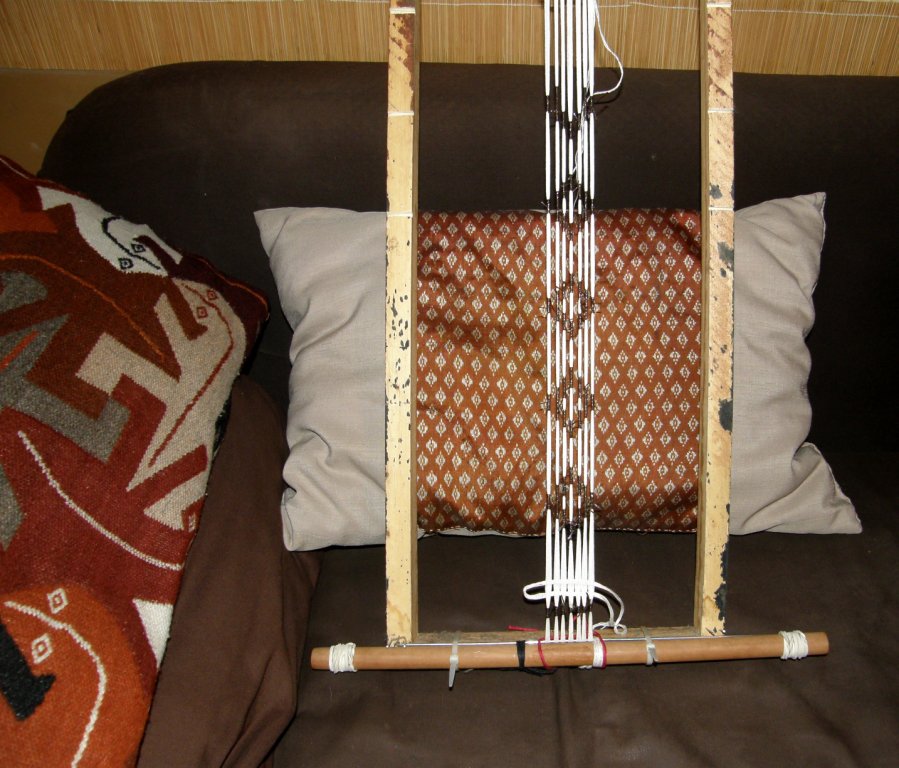
I am preparing a sample ikat warp putting into practice some thoughts and theories that I have on how to keep the threads better aligned. I am still not being terribly brave or adventurous about this and am using a simple diamond motif and keeping things small. I wrap the warps for one diamond a day, slowly and methodically while I think about different strategies for successfully weaving it.

I have the warp set up on a frame for now as I wrap and here it is sitting in front of a silk piece, with a similar simple ikat pattern, from Cambodia. I am using cassette tape to wrap.

I was pretty happy about my last attempt at ikat, which was just narrow strips within a larger textile, but I would  like to make some improvements…

The ikat is part of our new weave-along and we have Janet and Tracy so far wrapping away as well.

The other preparation project which was really taking a long time to get off the ground was the charting for the continuation of my Wayuu inspired wall hanging. Well, dither no more, it is going and appears to be successful! (although the proof will be in the weaving).

Mirja Wark has charted the traditional design in her book but it is not entirely symmetrical as that is the way the Wayuu weavers choose to weave it. I, however, have this need for symmetry and so I adapted and recharted it only to weave it and find it too small and delicate for my wall hanging and the thread I am using. Now I am changing it yet again to be big and bold enough for my piece. I kind of like the fact that I am changing it so much as there are now several  pieces of “me” in the design!

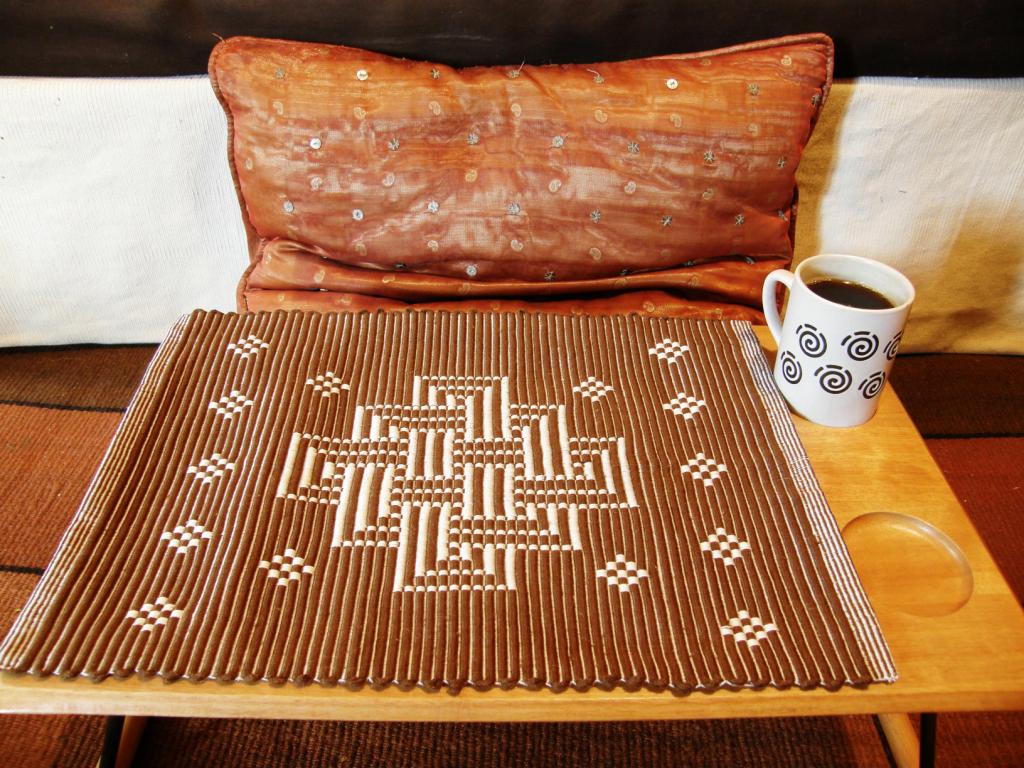
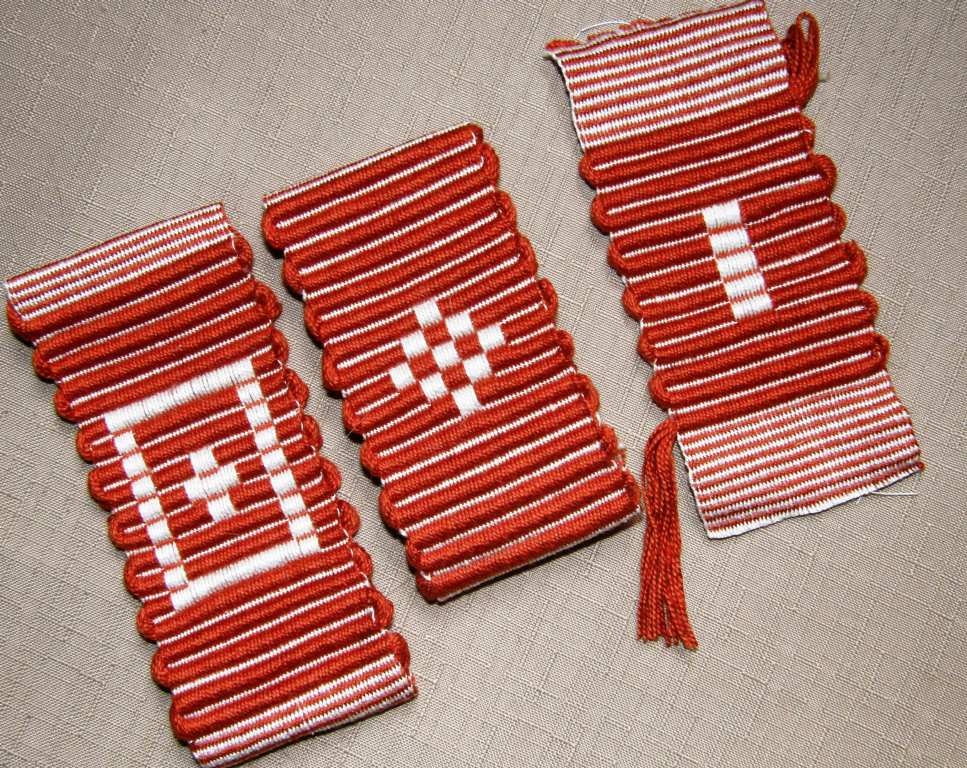
The rep weave sample came off the loom and got hemmed. I had some width issues so this definitely goes in the “sample” category. It fits my tray table perfectly though and will certainly be put to use to stop my bowls from sliding about.

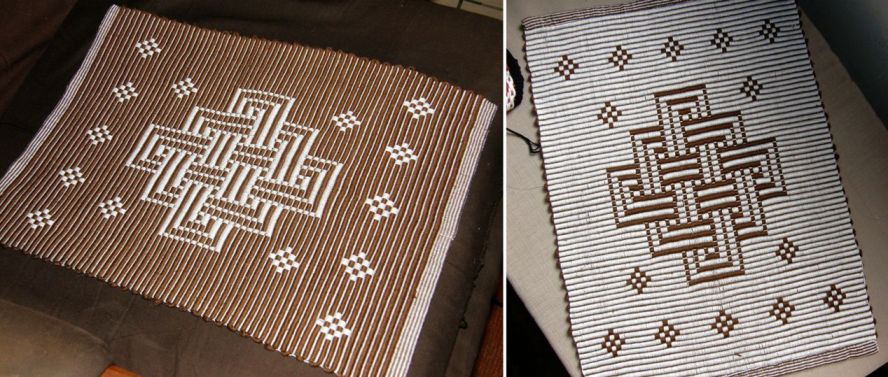
And then Jorge came and said that he preferred the other side…not terribly practical white side up… but now I can’t decide which side I prefer! Thank you Marijke for your card woven  knot pattern!

Some Bedouin activity from online weaving friends…

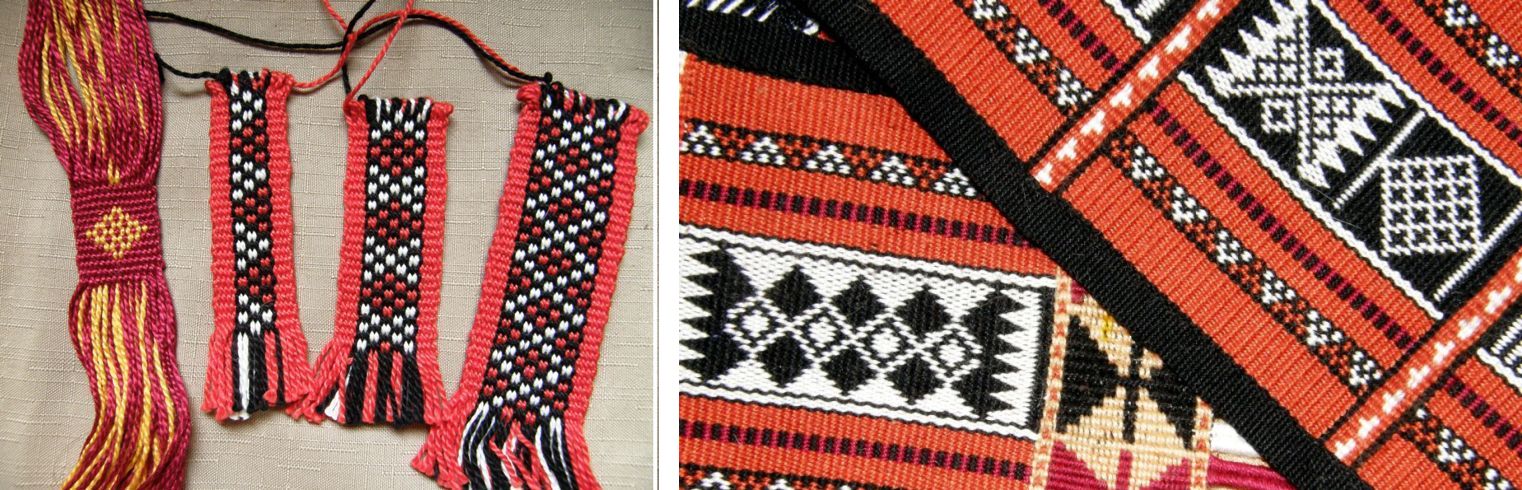
Bobbie, from the Ravelry group is weaving this lovely piece using that yummy Dylon Cold Water terrcaotta dye on her cotton. She is weaving one of the al’ouerjan variations. Yonat wove Bedouin Warp Substitution  with me last fall and is weaving this band with many variations of the al’ouerjan pattern on her inkle loom. It is a sample band of the different patterns and she is practicing her weft twining along the way. She says that she is not crazy about the colors she chose but I love them!

We have exciting news from Tracy Hudson in the backstrap group who lives in Doha Qatar. She has written an article on Bedouin spinning which will be in the spring issue of Spin Off.

And that brings to me to wrapping this up with the unwrapping of the last “Christmas-comes-late” gift.

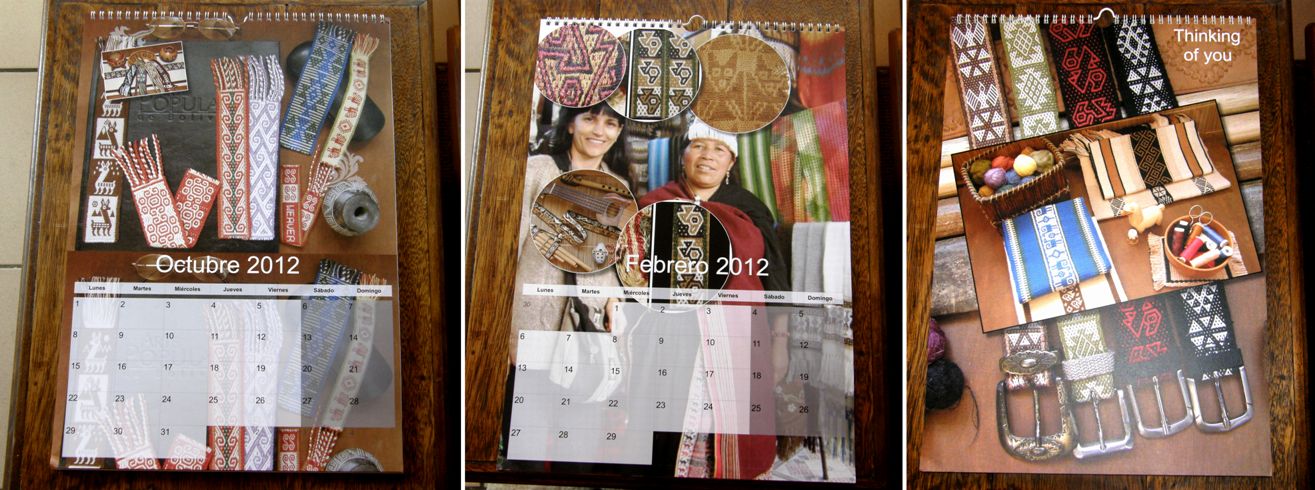
My dear sister-in-law made me an amazing calendar with pictures of some of my weavings mixed in with Navajo and other bits and pieces that she saw on her recent trip to south-west USA.  She didn’t have many pictures of my stuff to work with…just a handful of pictures I had sent to my brother for editing about two years ago but she did a tremendous job putting it all together.

And, wise and clever woman that she is, she left January 2012 off the calendar and replaced it with January 2013 at the end knowing that I probably wouldn’t get this until February. I don’t get to see Deb and the family very often and am way overdue on a visit to Australia. She blew me away with this!

And finally, I have to tell you that my book Andean Pebble Weave will soon be speaking French! I am very close to getting this e-edition up on the Patternfish website. And don’t worry, I didn’t translate it! It has been translated by a weaver in France about whom I shall tell you more once the e-book is ready for sale. Here’s a sneak peek at the cover…


Backstrap Weaving – Roaming and Repping

There I sat with a mass of tiny blank squares in front of me. I was supposed to chart the next motif on my Si’ira inspired wall hanging.

I want to use one of the motifs already charted in Mirja Wark’s book but make some adjustments and basically double its size so it will be bigger and bolder on my wall hanging.

I don’t know why, I just couldn’t get motivated to start it.

I knew very well that once the first few squares were filled I would be off and running and having fun but I put down the pencil and decided to roam a little online instead.

And there it was…one of those delightful distractions. Someone revived an old thread in the Warped Weavers Group on Ravelry – the rep weave weave-along thread – and it reminded me that I had returned from my fall trip to the US with ideas about trying this on my backstrap loom. After all, it’s warp-faced and seemed like quite a natural thing for me to do. All that is required is the use of alternating thick and thin wefts. There is a very nice article here about the basics of rep weave.

Some time ago, before I had ever heard of rep weave, I had played a little with this basic idea when doing simple warp floats.

In an attempt to make the horizontal stripes less distracting on the band on the right I had used a #10 size weft under the white warps and a #3 under the colored ones. Obviously the difference in thickness wasn’t enough to be noticeable and I suppose if I had gone thicker, this piece would not have been practical for its intended use as a bookmark. And that is as far as I got with that.

And then rep weave came very much to life for me when I was staying at The Mannings last October during that big wet early season snow fall. Through the wintry wet, whiteness and darkness (we had three-day power outage) came this…

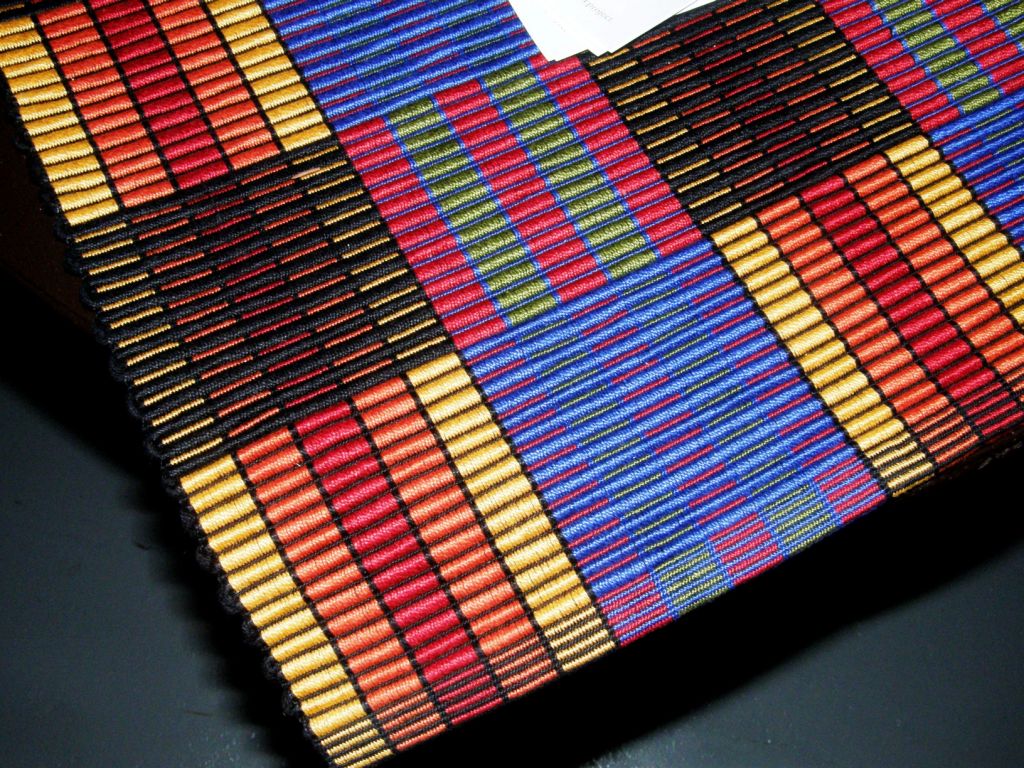
Color!! This was woven by The Mannings’ instructor Tom Knisely and made the front cover of Handwoven’s Jan /Feb 2011 issue, an issue that was near and dear to me because I had a little article in there myself. Little did I know that I would run into both the cover piece and its weaver in person.

So what are you to do when there is no power and you are the guest of owners of a weaving store?….sit down with piles of back issues of Handwoven and enjoy! It seemed that almost every issue I picked up had rep weave in it or maybe it was just that my mind was now tuned into it. There was this gorgeous rep weave rug in one issue….

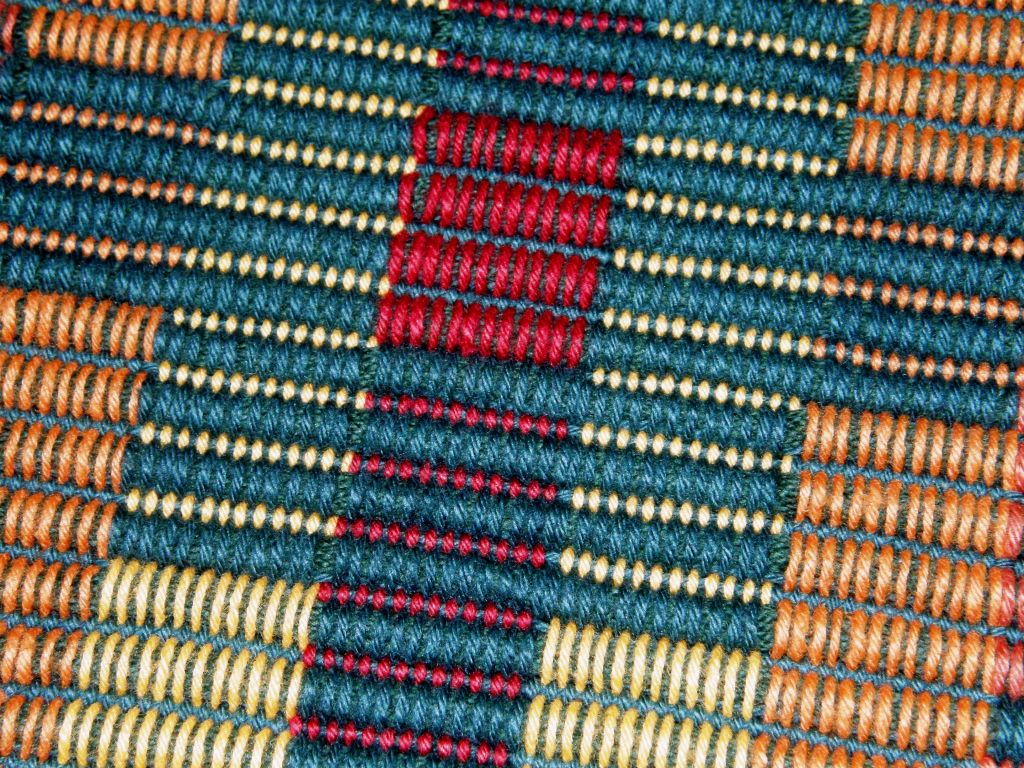
And it turns out that it was hanging right there in one of the rooms in The Mannings store. I had been far too occupied weaving to notice. So, I got to take a look at this one as well. It was also woven by Tom. I learned that the warps don’t always have to be sett to completely cover the weft as they are in the first cover piece I showed above. In this piece the weft can be seen a little between the warps. Of course you can’t even notice that from a distance.

Perhaps this little bit of space helps you to achieve a clean shed more easily. Personally I like the more solid look.

So, between Tom’s pieces and the articles I read in the magazines I came home with ideas which went onto the “to-do” list. I decided that now was a good time to try something in rep weave. I wasn’t in the mood for charting and just wanted to weave! I already knew the design I wanted to try and hooray, it didn’t need charting.

First to sample…just how thick should that thick weft be? And what about the thin one?

This is what worked with my Clea cotton (Clea is close to a #10 crochet cotton): I used sixteen strands of Clea for the thick and some tatting thread for the thin. The plain weave sections between the rep samples came up beautifully using the tatting thread as weft….no ridging and such pretty selvedges! A tip from one of the members in the Ravelry weave-along about finishing made me weave those plain weave sections. They can be folded under and hemmed and end up being pretty much the same thickness as the rep weave sections.

And that takes care of those thick weft tails too. They can be concealed within the folds. The hemmed plain weave pieces can be folded partly or all the way under. In the picture above I have just folded them but haven’t yet sewn them into place.

There were lots of nice tips on the weave-along thread. Some people finished their rep weave mug rugs with fringes. In that case I guess that the thick weft tails are somehow added to the fringe. Some people hem- stitched the ends.

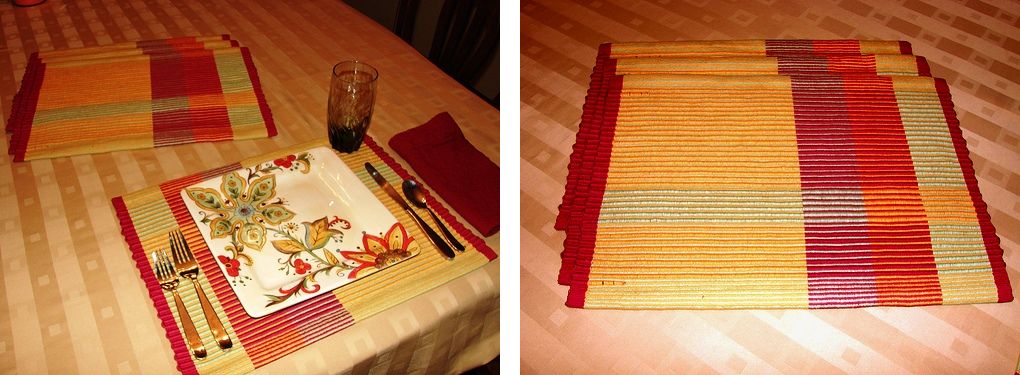
Here are a couple of the results of the weave-along. A lot of the participants were using a four-harness mug rug kit from Yarn Barn and this four-shaft one for placemats.

Dawn MacFall hemmed her set of mug rugs while Donna finished hers with fringe.

Geri made this beautiful set of placemats…

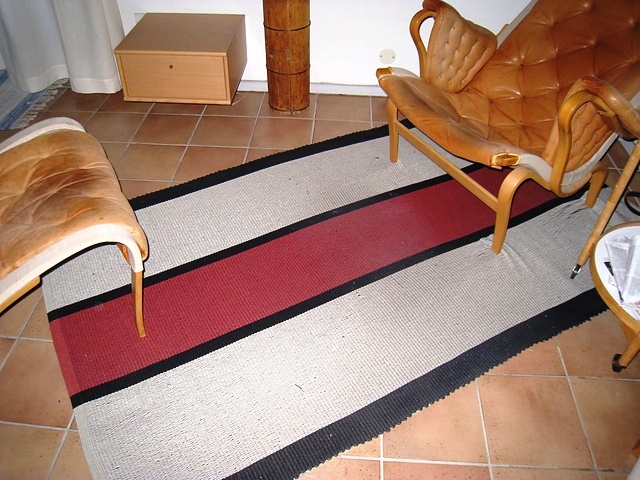
And it doesn’t have to always be about two alternating colors in the warp. This rug made by Ellen Turner uses the same colors in both sheds….clean and simple!

There were tips about handling the two shuttles of weft in the weave-along thread as well but, to be honest, the tip I liked the most was one by Tom Knisely in his Handwoven article (darn I didn’t write down the issue date). The article is called Getting Started with Warp Rep.

If you want to see some amazing bags made from rep weave fabric take a look here. I love these!! Lynnette, who created these gorgeous bags, has allowed me to post a picture here but please do go to her blog to see all the bags.

Eva Stossel has some terrific designs for four and sixteen shafts on her blog here.

Well you know me…clean and simple is elegant and beautiful but I have a thing for motifs and I wanted to adapt this design to rep weave…

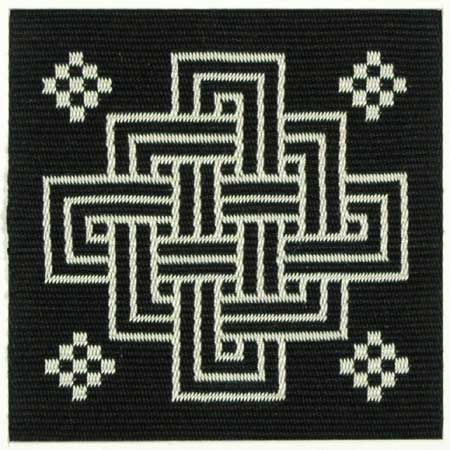
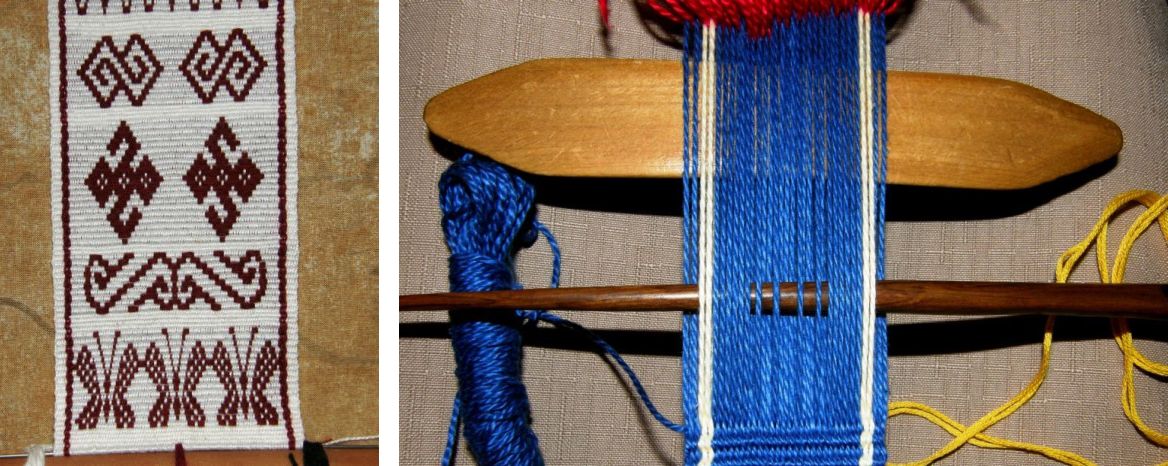
This image is from the web site of Dutch tablet weaver Marijke Van Epen and I have been admiring the knotwork designs she has there for a long long time. She has a page of all these beautiful black and white squares with knot designs and when I saw them for the first time, the idea of mug rugs immediately popped into my head. I wrote to Marijke and asked her permission to use her patterns which she kindly gave. But once I got into planning my mug rug project, I thought that I should come up with some patterns of my own…

So here I am once again admiring Marijke’s designs and wanting very much to do something with them. I could weave them in double weave like I did with the Abba Yohanni motif I wove below (which also happens to be on Marijke’s page) but I thought it might be fun and challenging to try one of them in rep.

What I have on the loom now I am calling a sample for a table runner. The brown yarn was the only color of which I had enough to make both warp and weft. The sixteen strands required for the thick weft chews up a lot of yarn. I used two sheds…the usual shed rod and string heddles and hand manipulated the warps to create the pattern.

So, this is the sample. For the real piece I have an idea for a much more interesting border design and I will make those diamonds beside the main motif larger. I lost a tiny bit of width so I will make adjustments for that next time too.

Once the first row of the main motif has been placed, there really isn’t any major counting to do and that is nice for a change. Also, can you imagine how fast this weaves up with that chunky weft?!

My calculations of width to height worked out pretty well. If I had made the verticals in the motif wider to match the thickness of the horizontals the motif as a whole would not have turned out square.

Here’s a peek at the back…

It was nice to return to Marijke’s site as she and I have been corresponding lately about a possible visit in September. I will be in the UK for the Braids 2012 conference in August and then plan to go over to The Netherlands. And I am secretly hoping to meet Mirja Wark somehow!

So, this has been fun! Normally when I weave I can’t listen to music that has lyrics as I automatically want to sing along and all my pick-up counting goes out the window. So, I have enjoyed being able to weave and sing at the same time with this project. The B52’s Cosmic Thing album was my choice…no love songs, no broken hearts, nothing deep or analytical…just pure fun. One of my favorites is “Roam”. We used to sing that back in my ski bumming days in the 80’s when we literally would “roam around the world” following the snow.

Now I roam around the world via the internet and the world comes to me too. This week Greece paid a visit when Andreas sent me pictures of his latest backstrap weaving. My oh my, he has been getting on with it and brought me a cheerful splash of color.

Color and all plain weave except for the one little pebble weave motif. I like the nice large shed rod he is using and the knitting needle heddle rod.

There he is teasing me with the special shaped finish that he does so well. I must try that again some time. Sweden also dropped by in the shape of two beautiful books on Leksandsband that were sent as a gift.

But it will be back to Colombia and Venezuela for me this coming week so I can get my design for the wall hanging ready. I will buy some yarn for the rep table runner and continue roaming the web for rep weave pattern ideas.

Check out my RESOURCES page…I added a couple of new goodies.

Backstrap Weaving – Picking, Dropping, Counting,Twisting….Pattern!

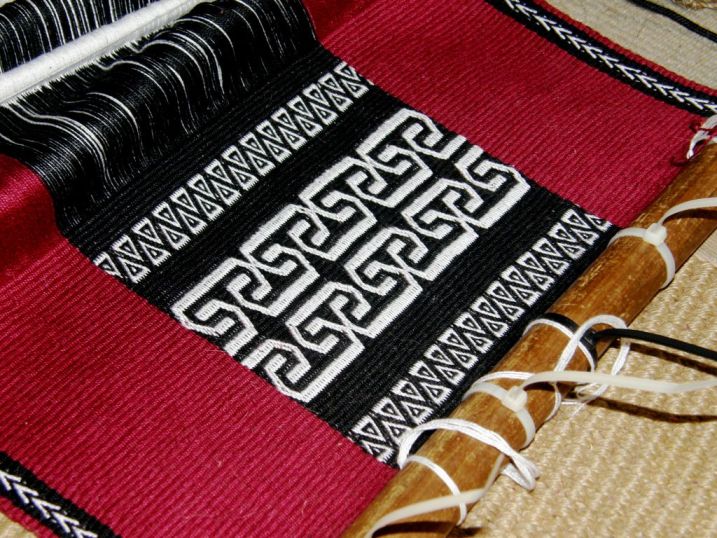
Did I mention last week that this latest piece I am working on is SLOW going? It’s a complementary warp pick-up technique, not one of those friendlier partly-loom controlled ones, and I have almost 600 ends in the pattern section. So, if I show you a picture of where I am at this week you can be excused for thinking that I have done nothing, or at least very little!

I had, in fact, progressed further but I un-wove a fair bit after discovering that the next pattern I had chosen wasn’t coming out anywhere near as big and bold as I had envisioned. I will need to re-chart it at twice its size. It is heartbreaking un-weaving after having picked all those threads but it is bound to be worth it in the end.

And as if the pick-up isn’t slow enough, I have decided to add some weft twining. What is slower than picking and dropping?…twisting and enclosing.
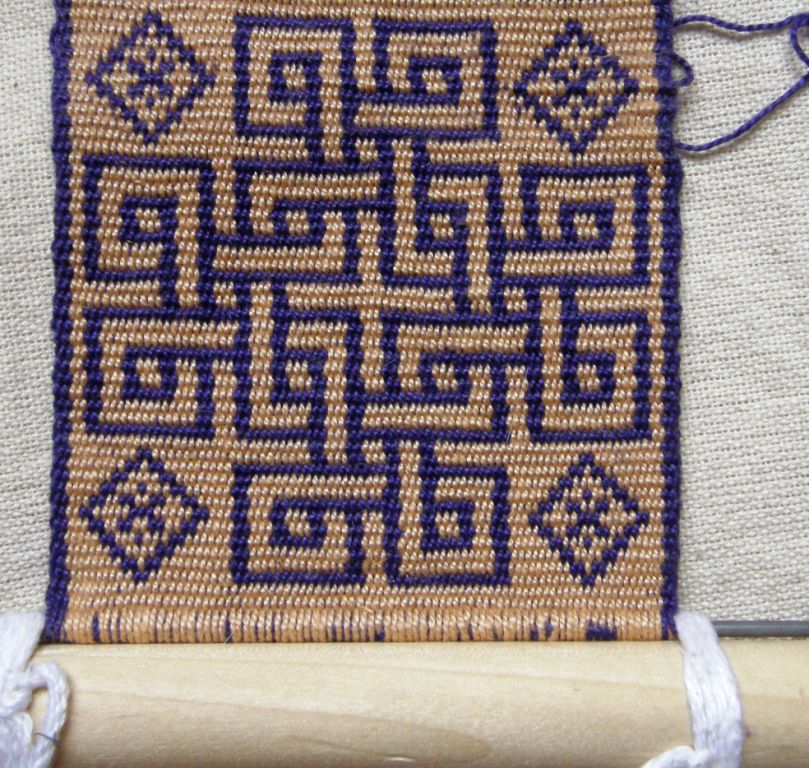
So far I have only added that one thin strip of twining which is one of the elements which will link all the hangings I am making in this series. I am thinking of adding yet another broad strip of patterned twining that will go from edge to edge. I shall think carefully about this as undoing twining is probably the worst kind of ripping out there is!

The Wayuu twine along the bottom of their si’ira belts but I am undecided about whether to use their technique or the one with which I am more familiar.

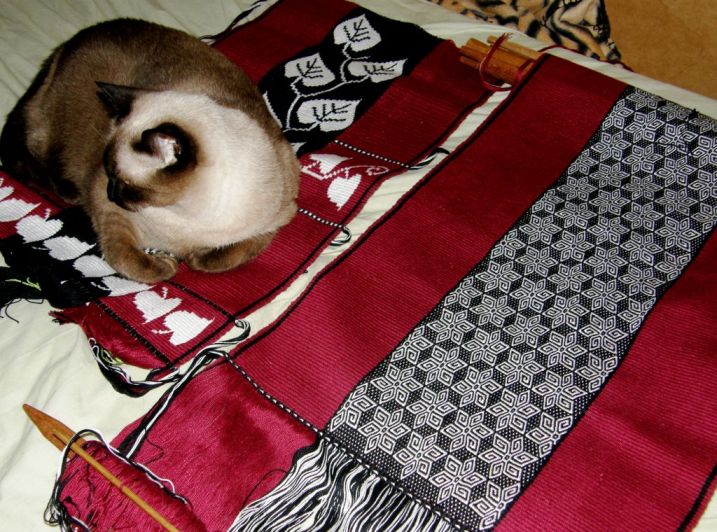
In the meantime my cat is determined to get as much of her hair as possible over the other two almost finished pieces.

This all had me thinking about this process of  picking, dropping, twisting and enclosing to make patterns and why I love it so much.  It occurred to me as I was writing the first few paragraphs here that I was making the process sound somewhat painful and frustrating when in actual fact it is both relaxing and stimulating.
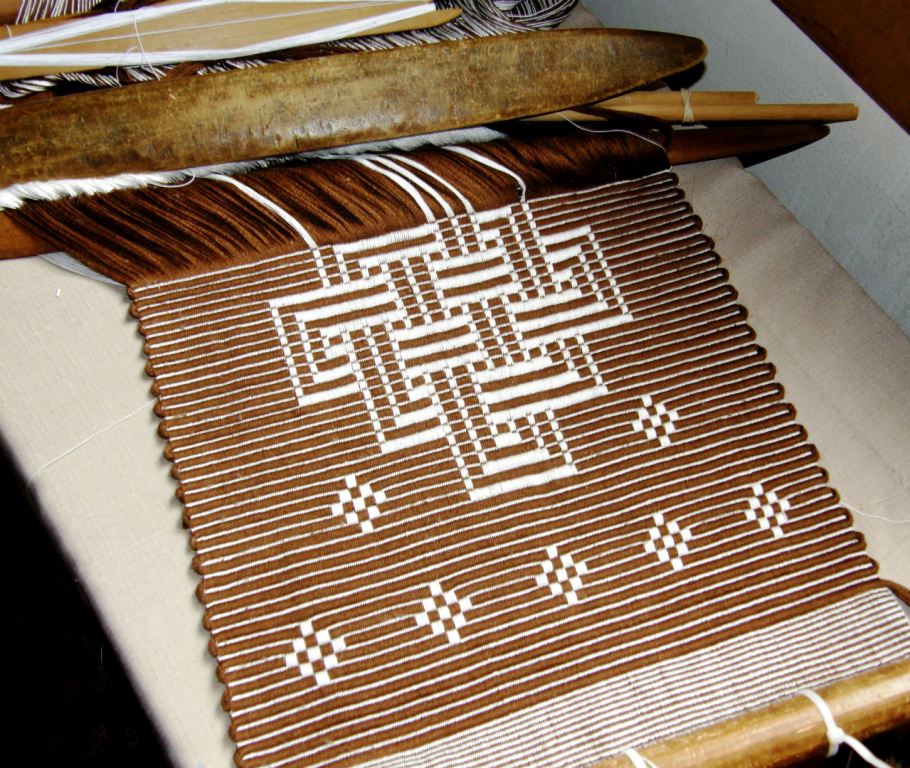
I have been emphasizing the slowness of it all which may give some an impression of tedium…quite the opposite in fact.

What has made the work on this piece slower than it should be is the lack of planning on my part…it’s all my fault…thus the weaving and un-weaving and yes, that part can definitely be described as frustrating and tedious.

Take a look at this video of weavers in Bhutan (link provided by Toby from the Ravelry group) doing weft inlay patterning. Their tiny picking movements are graceful and delicate and rather than think “oh my gosh, how painfully slow and tedious that must be!” I think “how incredibly beautiful, skillful and relaxing. I want to do that too!” I wonder if I look quite so calm and peaceful as I work!
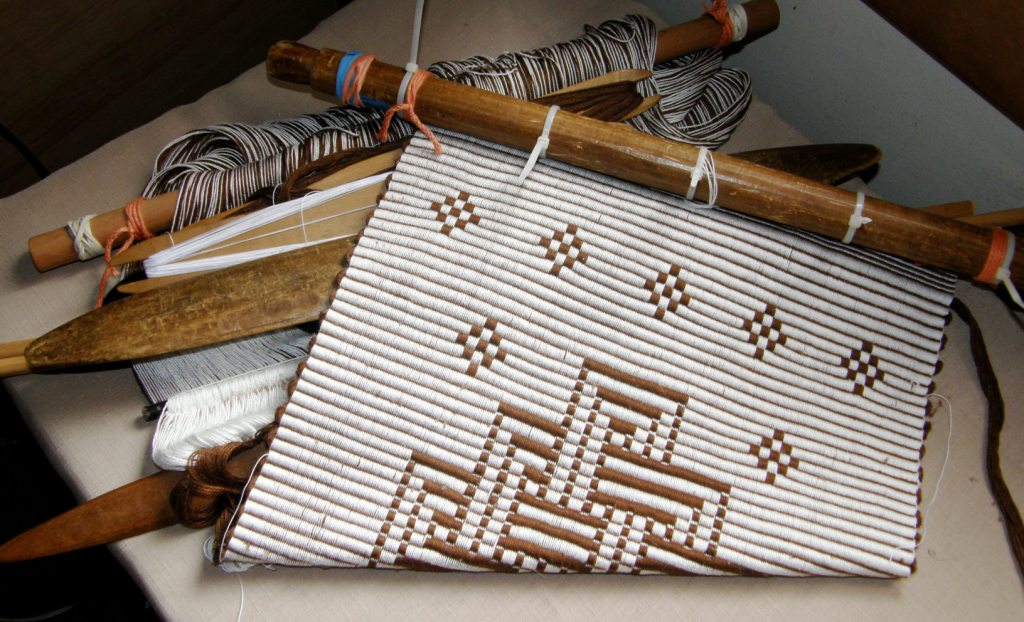
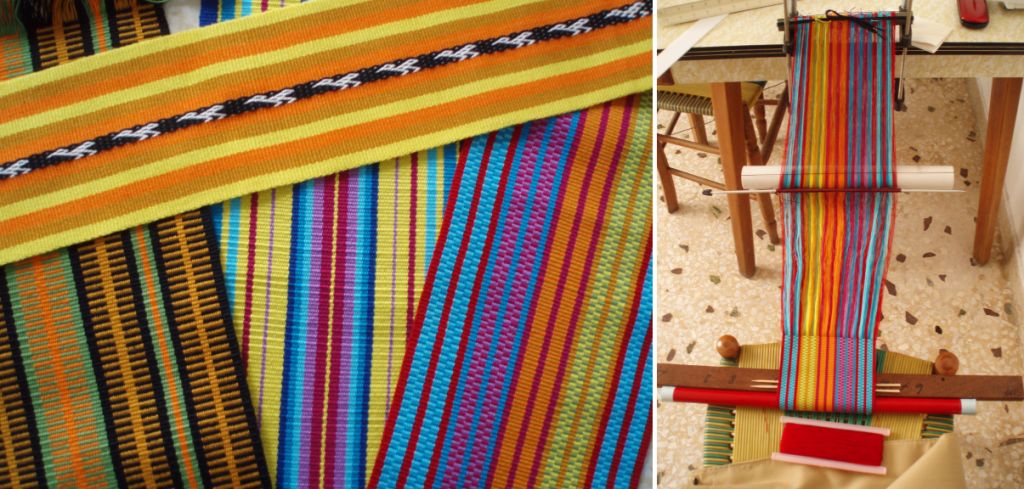
I do find that I need to stand up from this piece more frequently and take a walk around. I definitely don’t progress the four fingers width that weavers here in Bolivia have told me is the measure of a good day’s work. Sometimes I spend an entire day charting what I think will be the next part of the design only to abandon it! Lets see how far I get with it this coming week.

Fortunately not all the patterning techniques involve picking and dropping every single warp thread across the width of the loom. Many techniques can use pre-programmed patterning sheds and be partly loom-controlled.

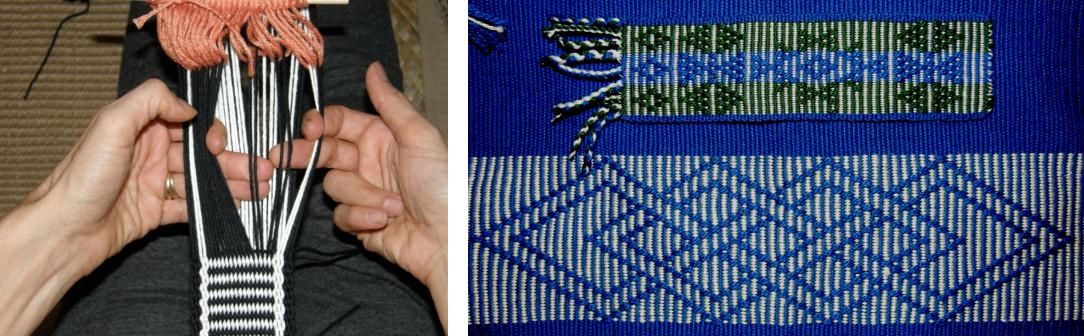
Pebble weave is one such technique in which many of the designs can be woven with the aid of two sets of string heddles meaning that you only need to do pick-up in every other shed….pick-up warps by hand in one shed and then enjoy a free ride in the next by simply raising a string heddle and passing the weft.

The Moisy technique which my Guarani weaving teacher Angela uses is another one that rewards the hard work of a row of pick-up with a “free ride”, that is, a weft pass every other row through a heddle controlled shed.

And then there are those techniques which I have nick named “drop-down” rather than “pick-up” methods. Warp substitution is one of them. The weaver simply drops a warp thread out of the open shed in order to create the pattern rather than having to select and pick one up.

Basic supplementary weft inlay is also a technique that I would nick name “drop down”. The weaver drops certain warps out of a shed which creates gaps through which the colored inlaid weft can be exposed to form a pattern.

The simple warp float technique, in the way I was taught to do it, also falls into my invented “drop down” category. Warps are dropped out of the open shed. Those that are kept will float to form the design.

These are all nice ways to get used to counting and handling the warps, dropping, selecting, saving and picking them to form the patterns. Some people may find that one of my so-called “drop down” techniques is the one with which they feel most comfortable.

Others may find that they like the added challenge of selecting, picking and dropping the warps while also being able to enjoy that loom controlled “free ride”.

Yet others will become so enamored with the pick-up process and the patterns it enables them to create that they will be more than happy to sit for hours and be proud of their four fingers width progress each day. Check my tutorials page for links to the various instruction pages.

Here is some beautiful pick-up inspiration from weavers of Peru and Bolivia…

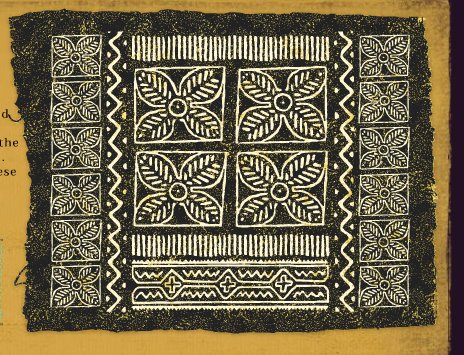
Last week’s mindless fun for my breaks from the loom was juggling. This week I played around online on a site which allows you to create your own mudcloth design. This link was provided by someone in one of the Yahoo groups and apart from a few minutes of fun, it also gave me some nice bold designs which, who knows, could form part of a future weaving.

Here is what I created…

And, thinking back to last week’s post and the crochet work and juggling balls, I see that Education and More are offering some unique crocheted Guatemalan juggling balls on their site.

The crocheted designs on the Wayuu susu bags I showed last week are still enticing. If you are contemplating getting out your hook and trying to make something similar here is Carol Ventura’s (author of Tapestry Crochet) video on a technique that can be used to create such designs. I can’t say for sure if this is in fact the technique used by the Wayuu to make their bags but you could certainly use their designs and colors as inspiration for something in tapestry crochet.

So, what will you be into this coming week…hooking, picking, dropping, twisting, juggling, or clicking the mouse and gathering resources?

Gathering resources?…I have posted more goodies to my RESOURCES page. Take a look 🙂