Another woolly week in the middle of summer! What’s going on? I have friends in Pennsylvania and Vermont writing and telling me about the extreme cold they have been suffering, shoveling endless amounts of snow, using crampons to get about in their yards and feeling almost like they can’t breathe. And then there’s all the talk about the Winter Olympics, although I have to admit that I am not feeling too festive about that right now with the way things have been going in the lead up.
Perhaps the chilly scenes in my head have had my hands reaching for wool. I am on a roll and can’t stop! I have to say that I actually felt more uncomfortable handling fine silk in the heat last summer. So far the wool has not been bothering me.
 Here is where I was last week with a couple of inches left to go on this four-selvedge wool fabric. The next step was removing the shed rod. It is a little heart stopping removing that rod. I clung and clung to it. With one swift movement the cross was gone! It felt like the safety net had been pulled out from beneath me and I was left floundering in a mass of threads.
 However, there are benefits to removing the shed rod. It means that when you raise the heddles to create a shed, you can actually insert two weft shots. One shot, if you look at the picture above, will weave the fabric on the left and the other will weave the fabric on the right….the two sides that I am attempting to join. And then you use a needle to pick up the threads that were formerly held on the shed rod. Again, two weft shots can be placed within that shed. Eventually the heddles are removed and it’s all needle weaving after that.
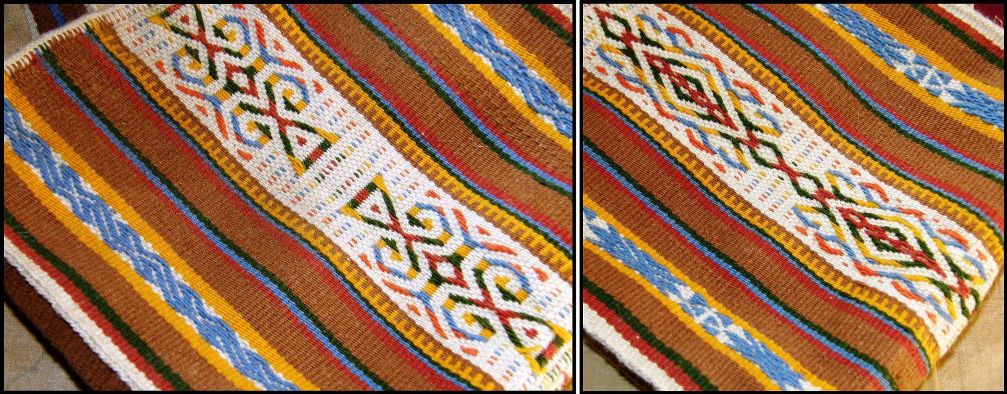
Finally, I got to the point where I could see that just two more shots would do the trick. The problem is that you can’t finish with two shots in the same shed. You have to squeeze one more between them. So, I could either put in one more shot or three more. One more was not going to be enough and three more would be too many. This happened when I finished the alpaca ticlla piece on which I had studied in Peru (see picture above). I squeezed in too many weft threads and it really looked too tight. I removed one and was left with two in the same shed, removed one more and was left with a noticeable gap and a weak spot in the fabric.
 Here is the finished piece. The gap is most noticeable in the white section (notice how the fabric curls due to the over twisted yarn that was used).
So, I decided to go with one fewer weft shot than I felt was necessary and had a slightly sleazy weak spot in the middle of the piece.
Two things marked the spot where the last weft shots lay…a darkish spot right in the center which was a dimple in the cloth, and wobbly edges. The edge warps simply ended up being too long once I started closing the gap and there wasn’t a whole lot I could do about it at that stage. Loose edges would not support the weft turns well.
I didn’t like the dimple. I didn’t like the loose weak feel of the fabric in the middle. What to do?
 And then it occurred to me…if I needed to stuff more weft into that space to firm up the fabric, why not make the weft a colored supplemental one? So, that is what I did. I needle-wove in a motif with supplemental weft. It turned out to be surprisingly easy to use the blunt end of a needle to get under the warps and weave in the motif. I can’t see myself ever getting away with that with cotton. But wool is friendly and stretchy!
The dimple disappeared but the wobbly edges didn’t. Everything is a bit on the wobbly side in that area but at least the fabric is now stable. Believe me, it is really firm now! You can see the purple motif in the center flanked by green ones on the sides.
 And I did have problems as anticipated with splitting the ply with the needle when needle-weaving. I thought that I had it under control only to find five skips on the back of the fabric where one of the strands in the 2-ply had not been caught on the needle. Oh well.
Lessons learned….when weaving a four-selvedge piece, keep an eye on the edge warps as you go so that you don’t end up with loose ones as the gap is closed. Avoid loosely plied thread. I split the ply so many times and had to back the needle out for a do-over and then there were several times that I didn’t even notice that it had happened.
This piece will be set aside until I can get more purple KnitPicks Palette for the tubular edging band and the sides. I have not one scrap left! I am still hoping to use this as a sleeve to protect a laptop computer.
 As I said before, I was on a roll…a woolly roll. I found the wool warp yarn for Navajo-style weaving that I had bought at the Mannings last spring. During my stay there, Carol, Tom and Sara had let me dye it using their dye workshop supplies. I found it strangely heavy for Navajo warp but it had a good firm twist..no chance of splitting those strands apart…and any overtwist seemed to have settled.
I had bought it to use for a discontinuous warp project. In order to benefit from the lessons learned in my latest four-selvedge experience, I thought that I may as well dive into a ticlla project, as the discontinuous warp technique is known in Pitumarca, Peru . The ticlla technique would give me the fun of weaving not one, but two, four-selvedge panels in the one piece.
Of course, my piece would be very, very simple! Nothing like these masterpieces!!…..
 This piece has multiple four-selvedge panels each incorporating complex continuous pick-up patterns.
 This ticlla piece, from the collection of my friend Betty, is stunning in the simplicity of its plain weave structure. However, the layout is anything but simple. Betty has adorned its center with a small brooch from Peru which matches so perfectly the colors of the yarn.
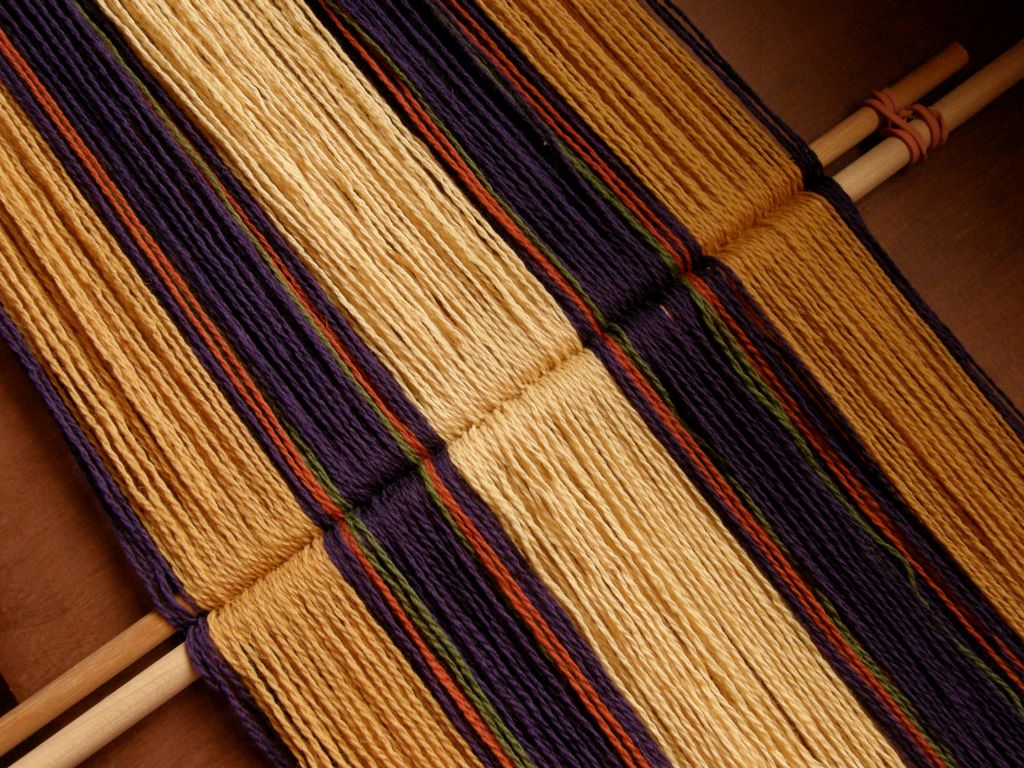
So, here is my warp…..
 I wish I had had a warping buddy to help with this. I finished it late at night and put the two sets of cross sticks, one for each panel, in place. You can see that I had used a metal rod around which to dovetail the threads in the center. I guess I was bleary eyed as, when I got up the next morning I could clearly see that despite my best efforts to keep everything straight and even, the metal rod had become distorted. I unwound the whole thing and started again using a wooden rod in place of the metal one.
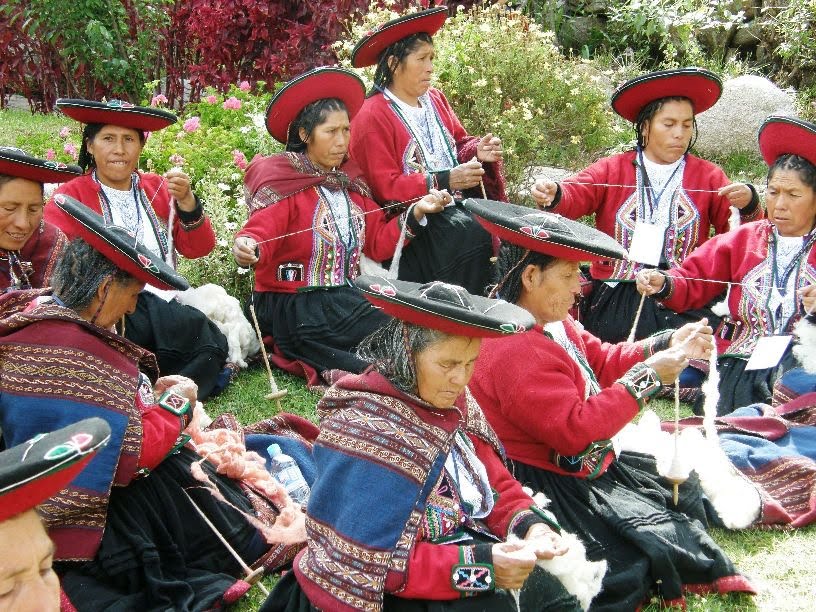
Below, there is a reminder of the warping path for one kind of ticlla warp so you can better understand what is going on above. You can see that the ladies from Pitumarca are using a wooden rod for their center stick. I have seen pictures of weavers preparing these kinds of warps with metal rods but I think that two pairs of hands might be needed in those cases to help keep the tension on the rod balanced.
 I had four colored panels and, perhaps because I have had my mind on crazy weather patterns lately,…the extreme cold in the north and the extreme heat in Australia… I came up with a Four Seasons theme and designed some very simple motifs. There were relatively few warps to work with so I couldn’t include much detail and the weft floats could not span more than five warps without being awkwardly long.
 There are the Spring and Summer motifs in place…flowers and suns. The bulky turns of the wool supplementary weft on the edges will hopefully be covered later by a tubular edging band. In this picture I have already removed the dovetail stick and woven on both sides of center for stability.
As for the edge threads, I did not secure them in any permanent way when I finished warping. I have them hitched to the loom bar so that I can easily get at them and pull to take up any slack as I go. Hopefully they will be as taut as all the other threads when it comes time to close the gap in the weaving. I want to avoid having wobbly edges on this piece.
 Fall and Winter…leaves with breeze lines between them and a snowflake. Now, all that there is left to do is keep an eye on those edge warps and close those gaps.
 With less than a quarter inch to go, I just removed the shed rod from the left hand side (I was using a fine metal rod as shed rod at this point). I might just be able to get one shed out of the heddles before removing them and needle weaving. Exciting!
More woolly pursuits….
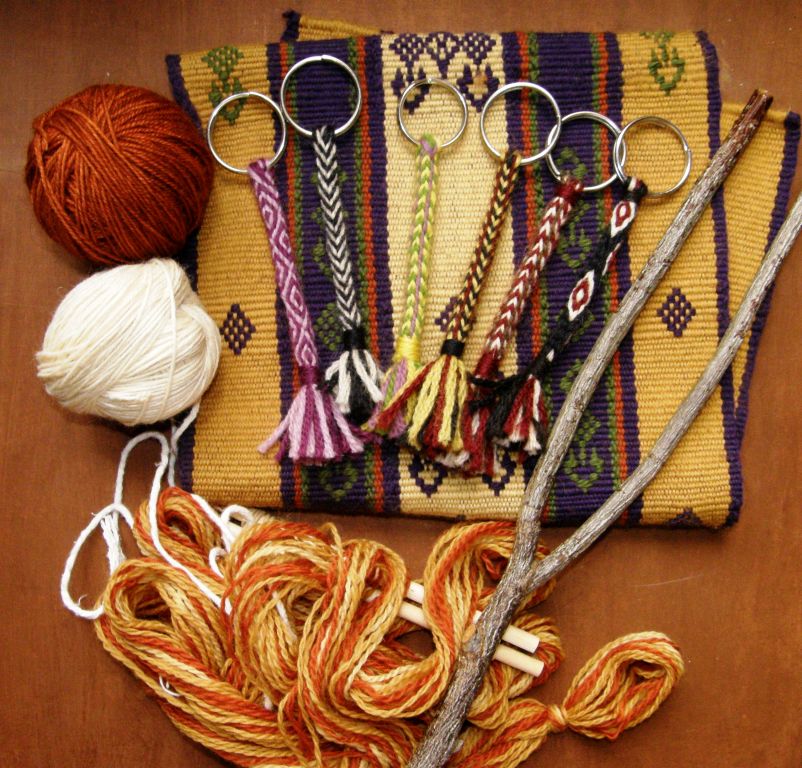 I made another keyfob braid. The terracotta and white Navajo warp is standing by for another. I also wound a seven-foot warp with the KnitPicks Palette for a tubular edging band. I was impatient to edge that computer case piece. I went as far as weaving and sewing it to the top edge before I decided that the edging band really need to be based on purple. I will just have to be patient and wait until I can get the purple yarn. Maybe I can use this warp to edge something else.
I uncovered the forked stick that Janet found for me in our garden ramblings when I was on her farm last spring. I had tied the prongs to train them to hold the right shape and it looks like it worked. Should I strip its bark or does this more rustic look contrast nicely with the smooth forked stick that fr. Kyriakos made for me?
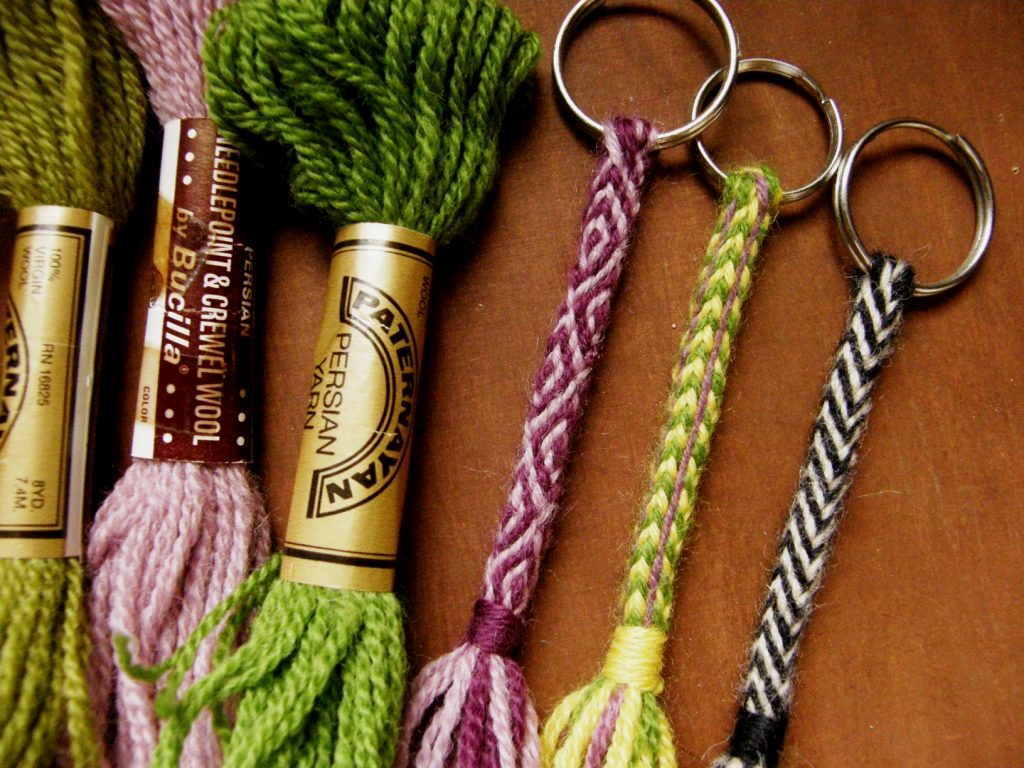 One of my weaving friends gave me a bag of Paternayan and other wool yarn from her stash and it works beautifully for my keyfob braids. The latest one on the left is the pattern that my sling braiding teacher in Peru called “Margarita”. There is a tutorial for it here but I recommend starting with the Palma braid first.
I have not 3ven scratched the surface of the world of Peruvian sling braids. In fact, what I learned in Peru is not even a pin prick on the surface! That is why we are all eagerly awaiting the book on Peruvian sling braids on which Rodrick Owen is currently working. In the meantime I will practice the ones that I was taught by Zacarias. Dare I try the Margarita with color changes? I haven’t tried it since my instruction in Peru in the nineties and am wondering just how good my notes are. We’ll see.
Using that Navajo warp yarn reminded me that when I was in Australia, I got to see a Navajo-style weaving that I had made in 1995 when I lived in Chile. I had given it to my brother when he visited me in Bolivia in 1998 and he has placed under glass on his dining table. How long ago all that seems and there’s my weaving looking like it has just come off the loom!
 And there’s more wool in the closet! But, it is time to start planning wall hanging number five.
To finish, I have a rather strange story to tell about peering at my wool warp threads as I wove. As weaving progressed, the wool became hairier. Little fingers of fluff extended and accumulated on the threads creating a sort of shadowy effect. In the shadows I started to see wavy lines…not just random wavy lines, but lines that sort of made sense. They started to remind me of something and suddenly I realised what it was. And there was born the new inspiration for hanging number five! I have abandoned the idea on which I have been pondering all this time and am going with this new one. I’ll let you know more when it is all a bit more concrete.
Now….back to the needle weaving…..