Backstrap Weaving – When the Weft Struts its Stuff

In the kind of weaving that I like to do on my backstrap loom, that is, warp faced weaving with pick up patterns, the poor old weft thread rarely makes an appearance. When it does, it usually means that something has gone wrong…a warp did not get raised in one of the sheds thus exposing the weft in its place, the warps haven’t been well spaced to completely cover the weft or the selvedges have been poorly woven.  I even use weft colors that match the edge of the fabric so that the tiny turns of weft at the edge blend in with the warp color and are, therefore, less visible.

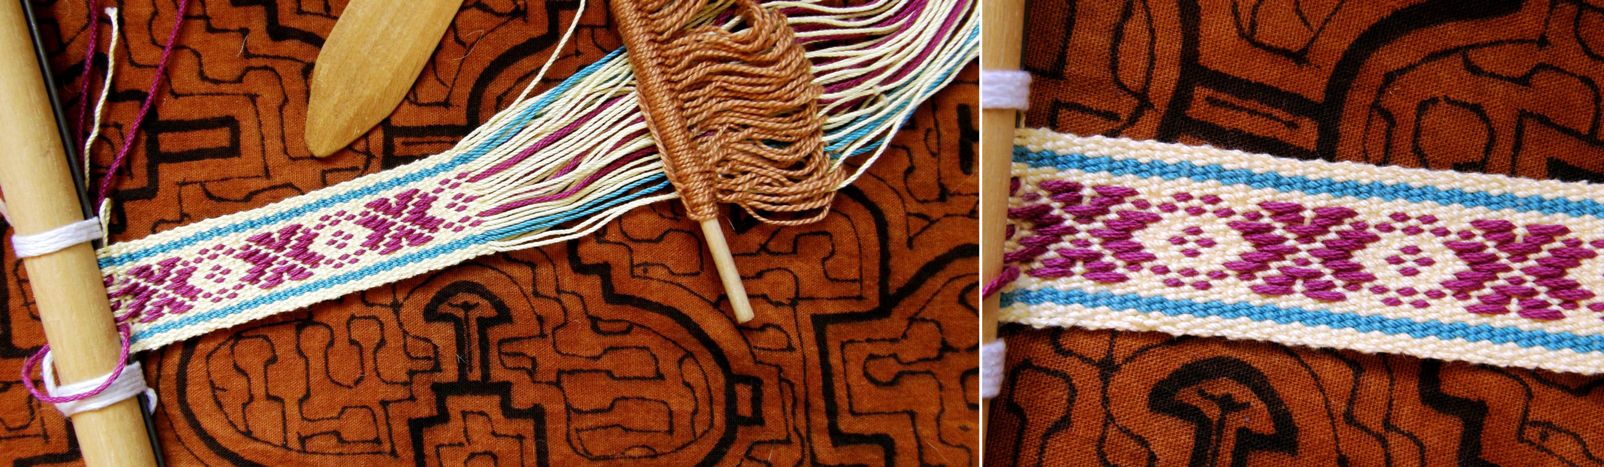
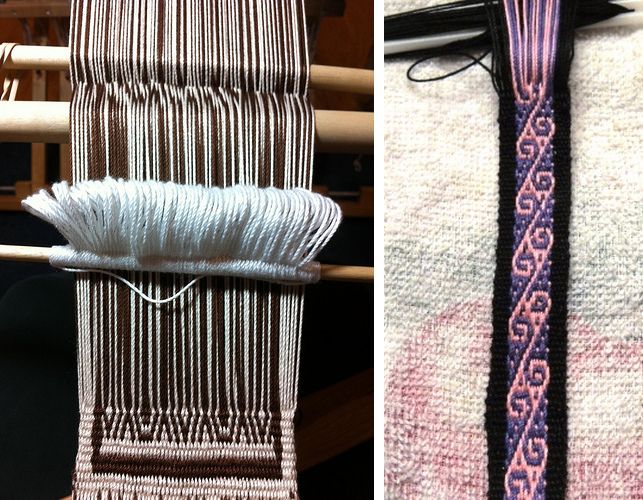
This week I have been playing with a technique that gives one weft at least, the starring role…the supplementary weft. (See the tutorial on this technique here). In some backstrap weaving cultures, everything is about brocade which is created with supplementary wefts, and it is the warp threads that take a back seat.
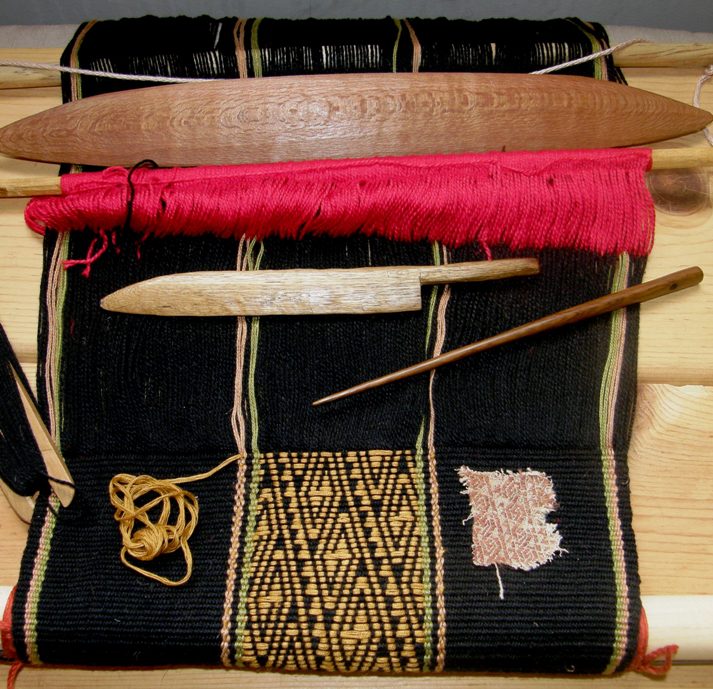
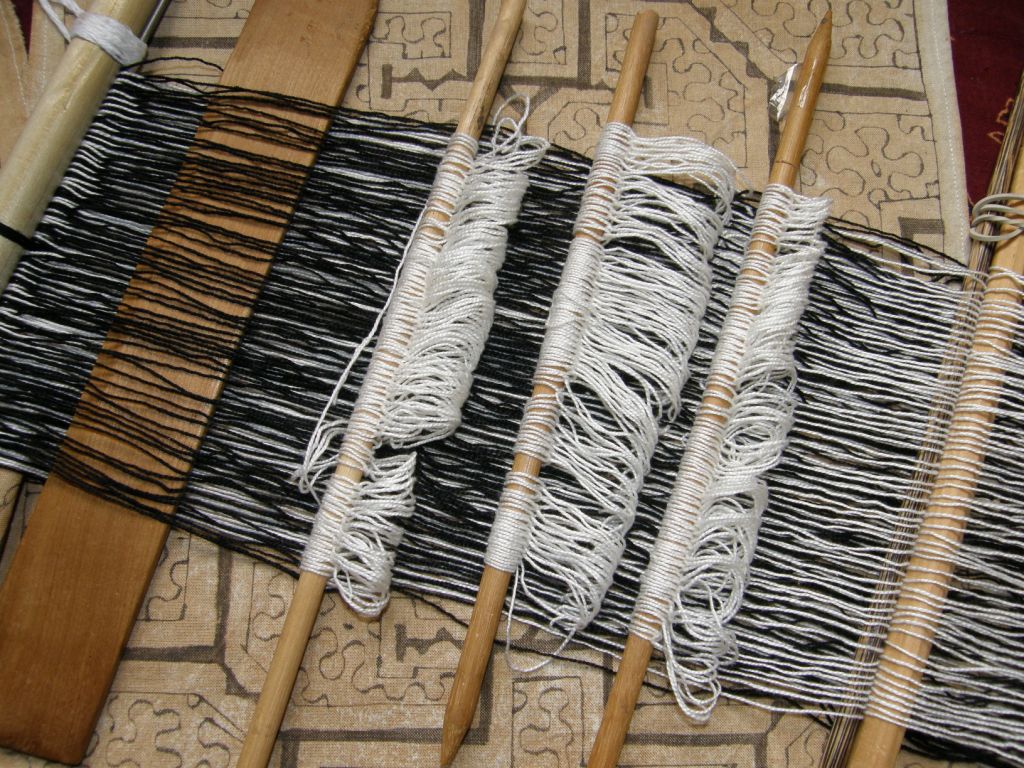
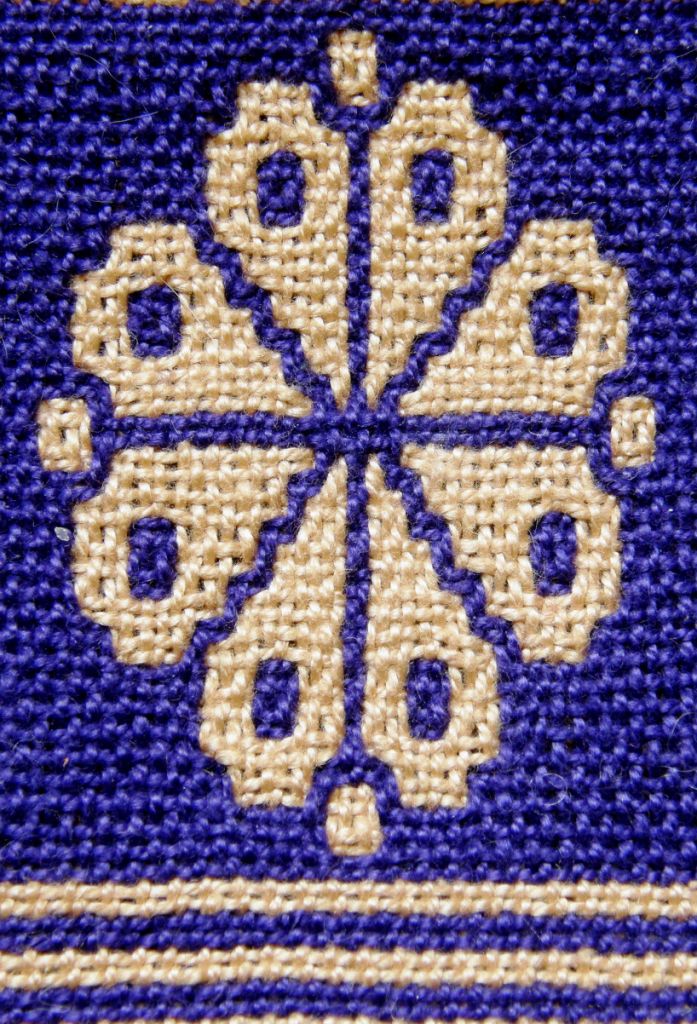
This all started when I uncovered a project lurking in the closet. I wove this supplementary weft piece as an attempt to reproduce a design on an old textile fragment that I have – the only one which has a design in a supplementary weft. I took this loom to show at CNCH last April so it has been hanging about here untouched for some time. Not feeling inclined to continue with this design as the exercise had served its purpose, I decided to use the rest of the warp to sample other traditional designs  which I had been saving in a folder.

Here are some of the textiles that inspired this project…
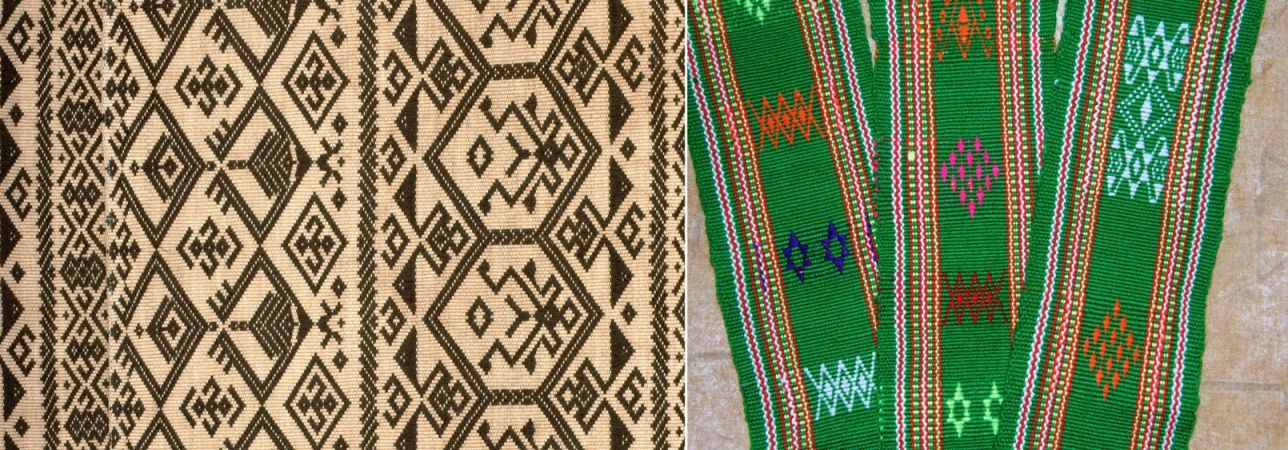
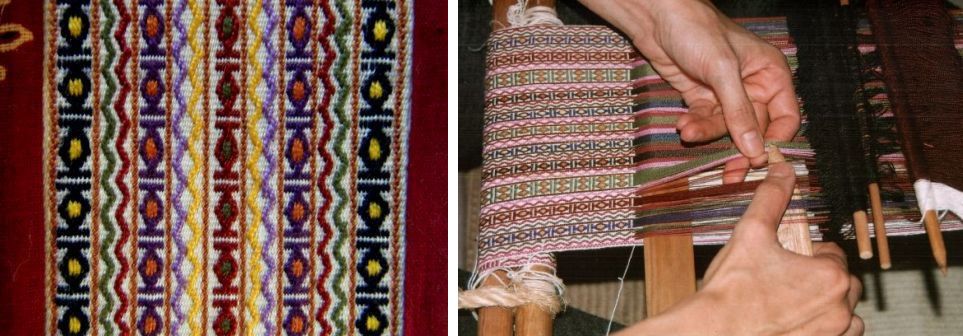
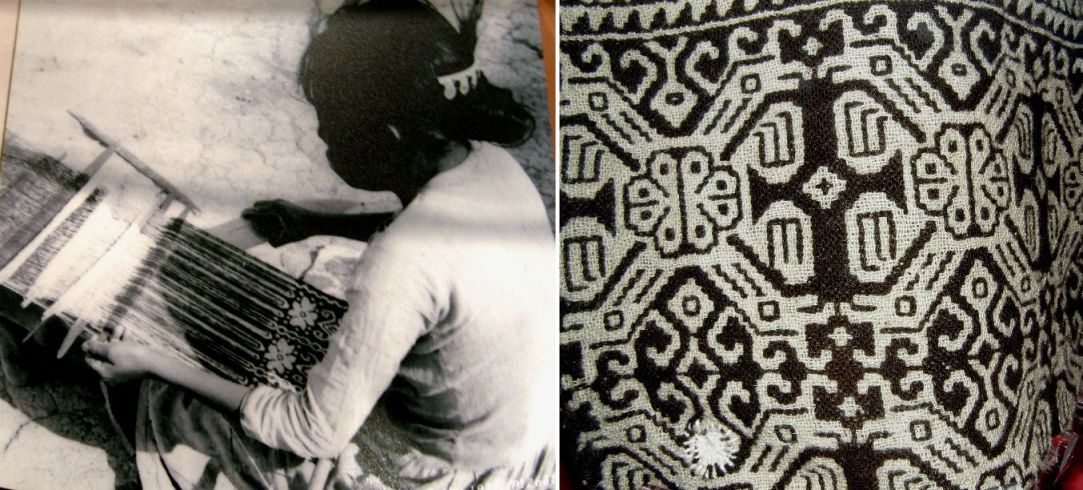
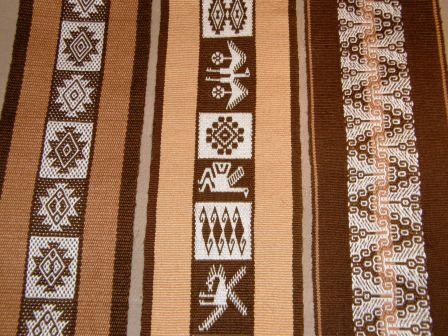
On the left, Chris Buckley had sent me this image of a blanket made by a Li weaver of Hainan Island. Montagnard weaver Ju Nie made this Rhade head band with many small motifs woven with supplementary wefts.
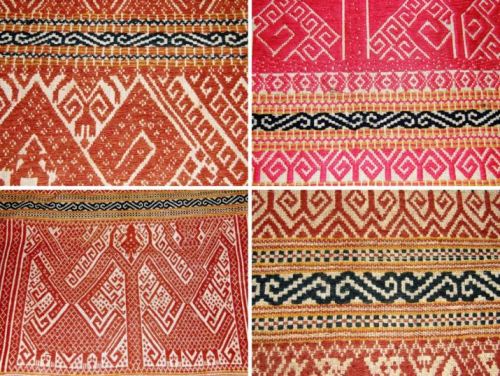
These are some of the many gorgeous Indonesian pieces that I admired at the Dancing Threads stand at Convergence last year.
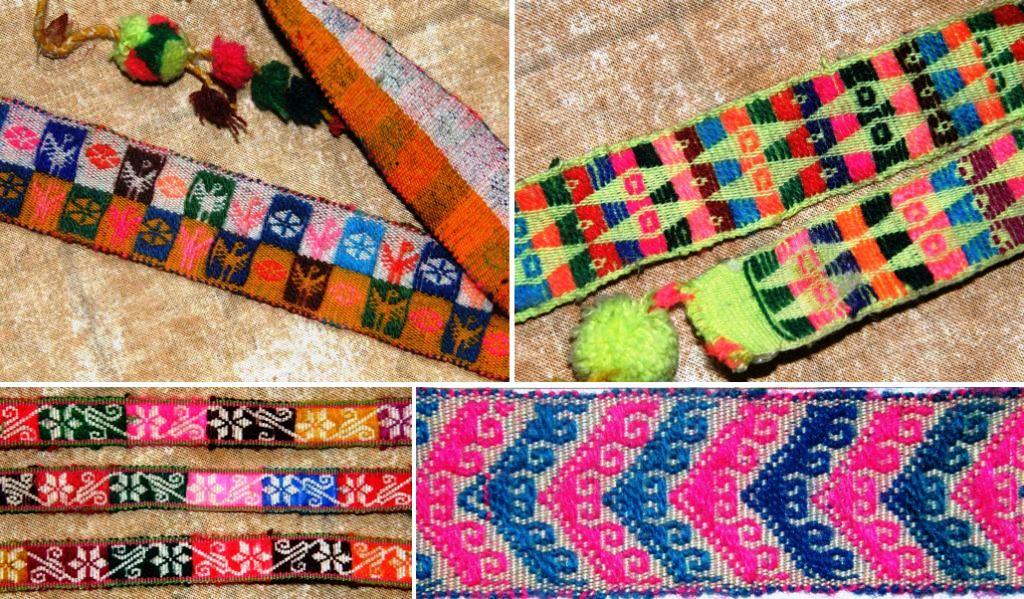
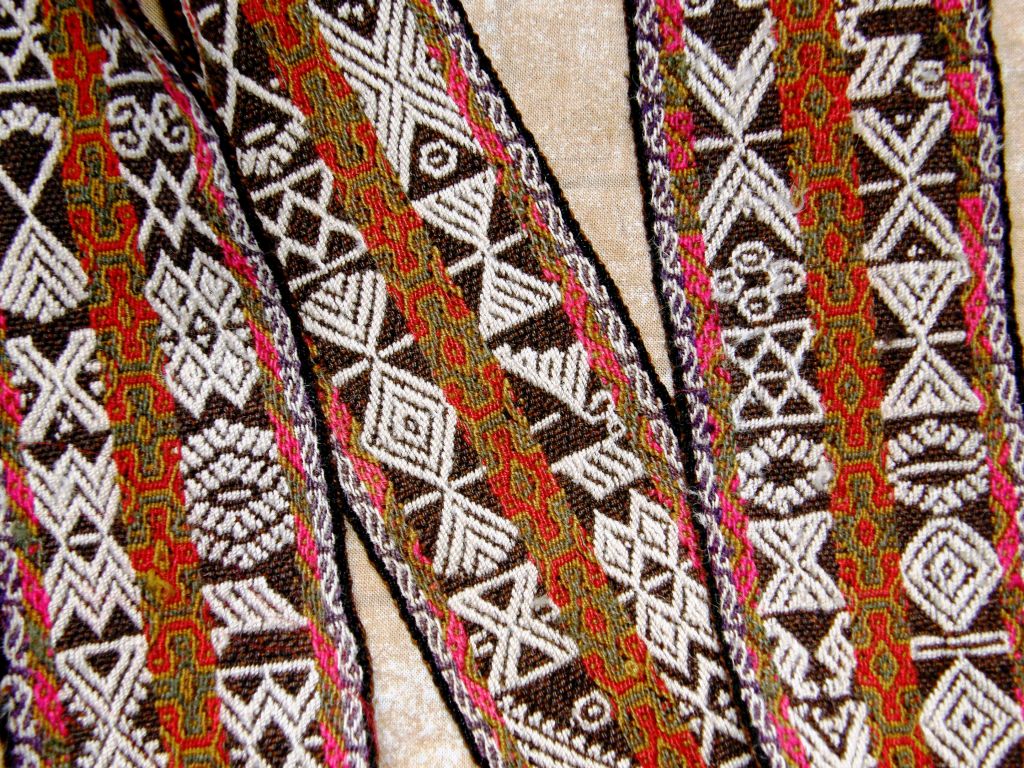
Ladies wearing hats decorated with weft patterned hat bands can sometimes be seen in the streets here and I have managed to purchase a few of the bands in my travels in the highlands.
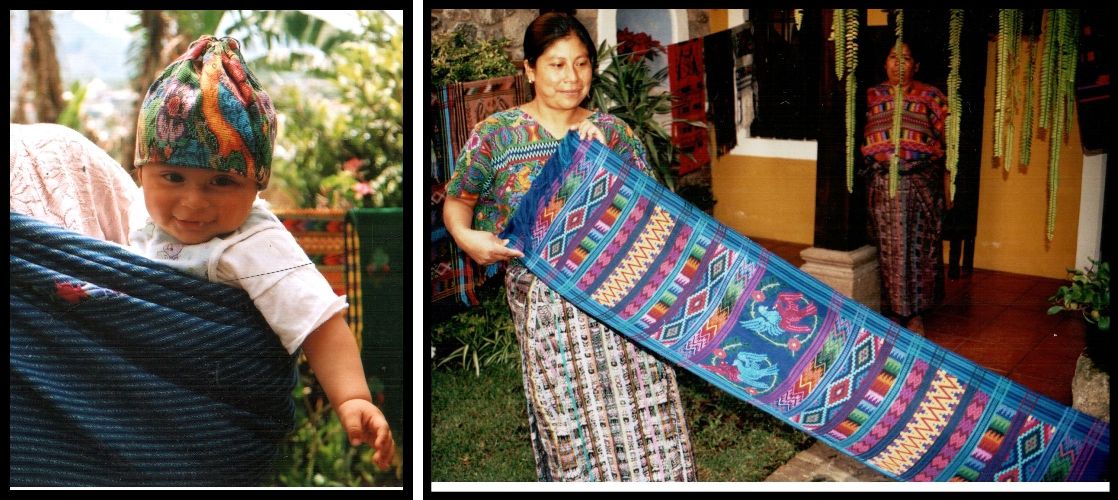
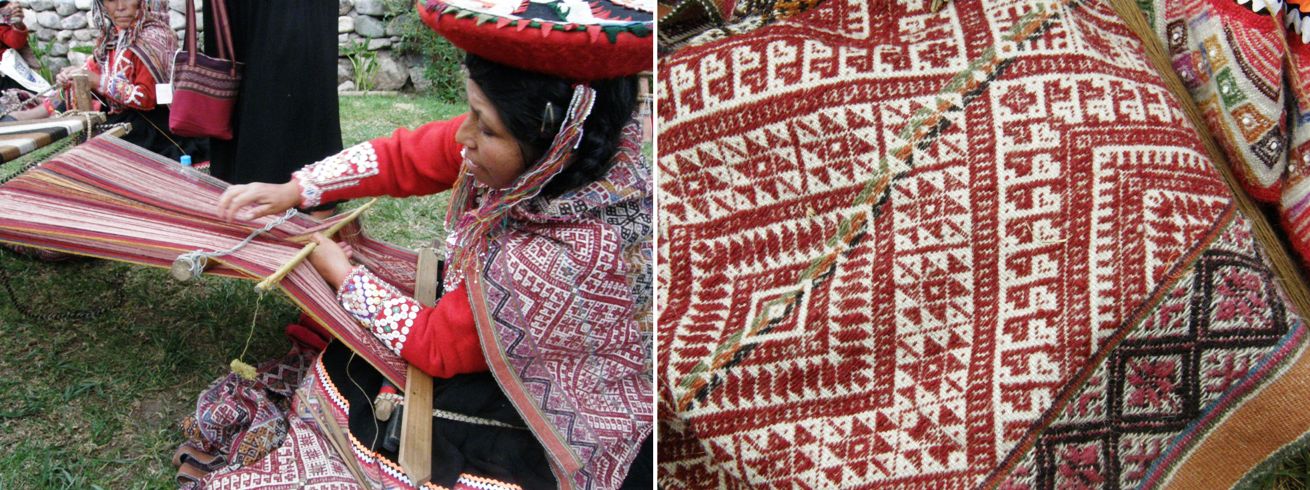
I will never forget the beautiful Guatemalan textiles and the weft patterning techniques I learned with my teachers there.

I even uncovered these cotton Indian pillow covers that my aunt had brought back from Chennai. I had had to put them away as my cat was chewing the twisted ends of the weft twined sections. Here supplementary weft patterns have been combined with small sections of weft twining. The little warp float section is interesting too as very thick and thin warps have been combined, the thick black warp pushing aside the white to expose the white weft.
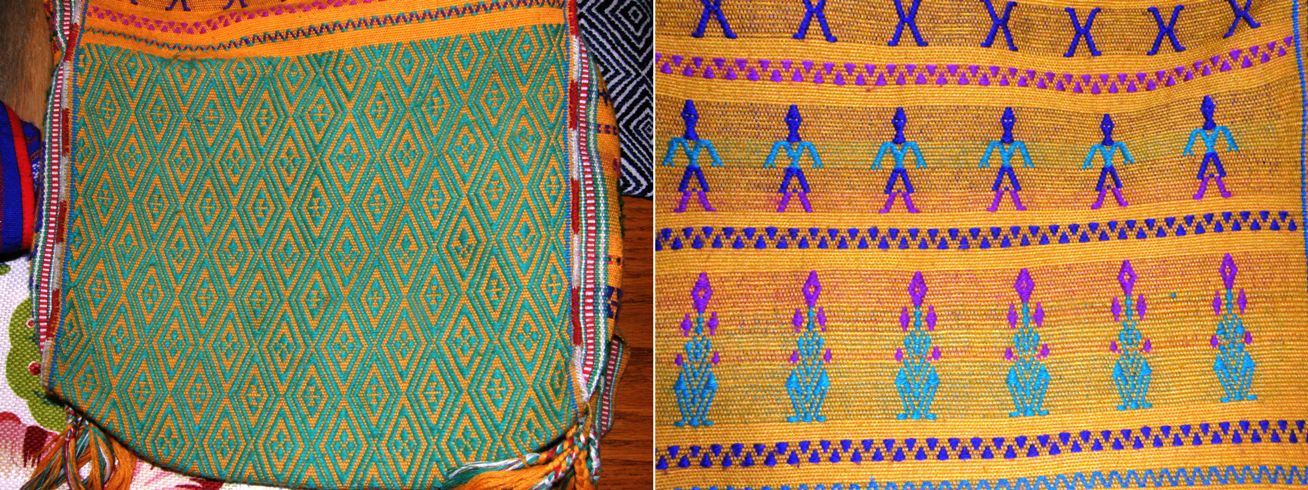
On my last visit with Betsy Renfrew and the Montagnard weavers I got to see these Bunong weft patterned textiles for the first time.

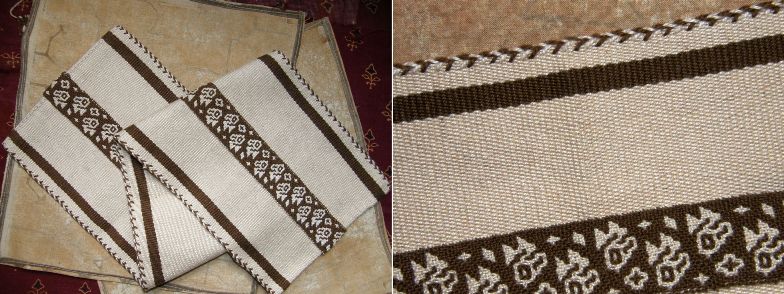
Of course, Karen Elwell’s fabulous Flickr page of Mexican textiles will always inspire me. Someone pointed out to me the other day some Huave pieces with their little suppementary weft figures woven in what appears to be natural white and brown cotton – quite a contrast to the bright and lively colors in most of the pieces above.

So I took a bit of this and that and wove some samples.
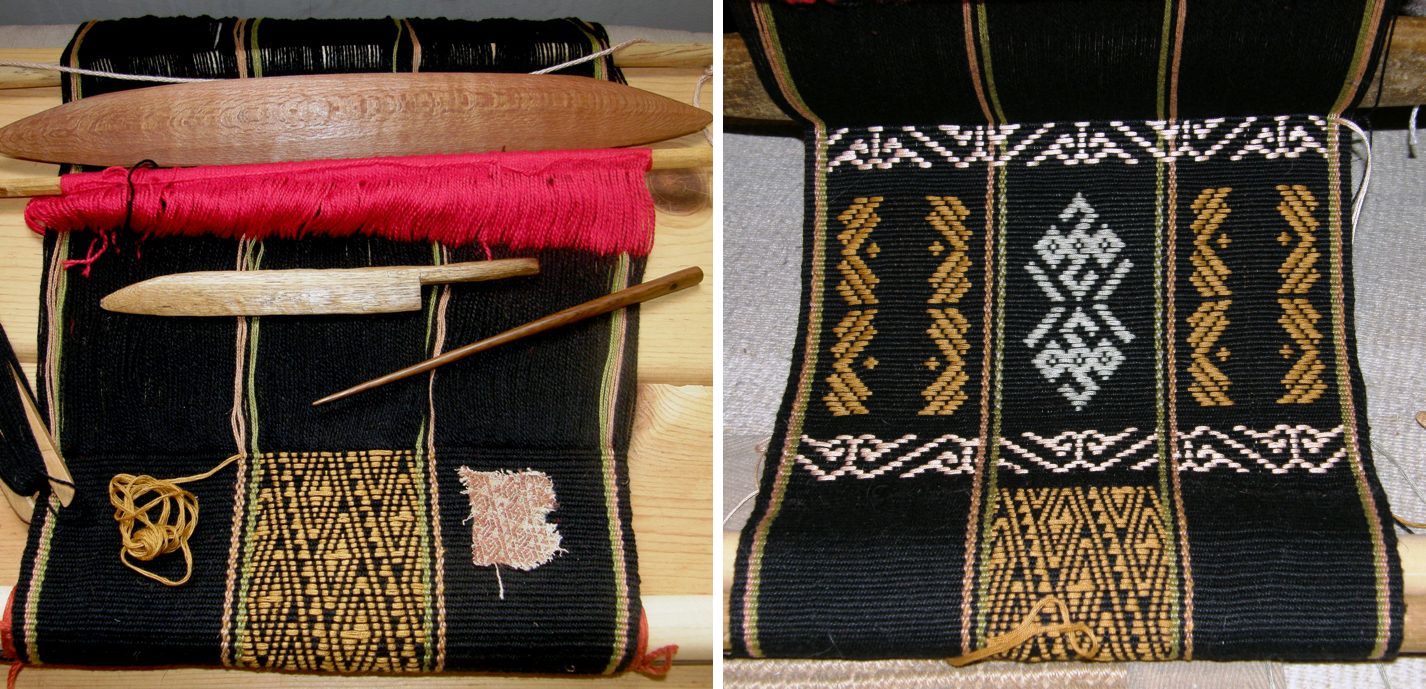
The stripes that I had included in the warp kind of got in the way. First I took an Indonesian motif and tried to weave it in behind the stripes and decided I didn’t like that. Then I put it on top of the stripes…nope, I didn’t care for that either. It was time to move on to a new warp. The designs in between are taken from the Li blanket with some changes of my own.

The ground warp is a 24 wpi crochet cotton with two different kinds of thread for the supplementary wefts.
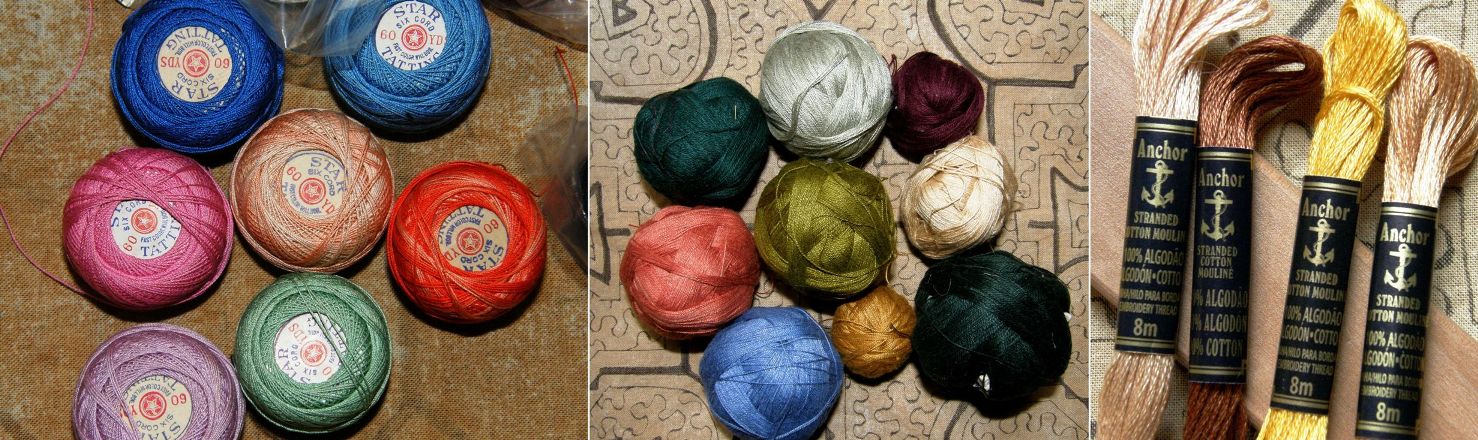
24 wpi ground warp and weft patterned with doubled strands of embroidery floss.

For the textile fragment reproduction I used 6 strands of cotton patterning thread that I bought in Guatemala (center picture). The thread is sold in skeins of single strands. It is easy putting the six threads together and they work well as they lie flat on the surface of the weaving. I used doubled lengths of the embroidery floss (pictured on the right) for the first band of pattern above that. This works well but, as the lengths are ever so slightly twisted, the two pieces tend to separate in the longer floats. If I had no other option, I would pull out each of the individual strands and put them back together again without the twist.

One day my Guatemalan thread will run out and I am thinking that the tatting thread pictured above left  might do the trick.

My friend Sharon in the US sent me an enormous bag of tatting thread recently and it is very similar in size to the Guatemalan stuff although stiffer.

The black warp got cut off the loom and will be a sample piece. I gathered up all the designs I wanted to weave and made a new warp, this time with 35 wpi crochet cotton as the ground warp and weft.
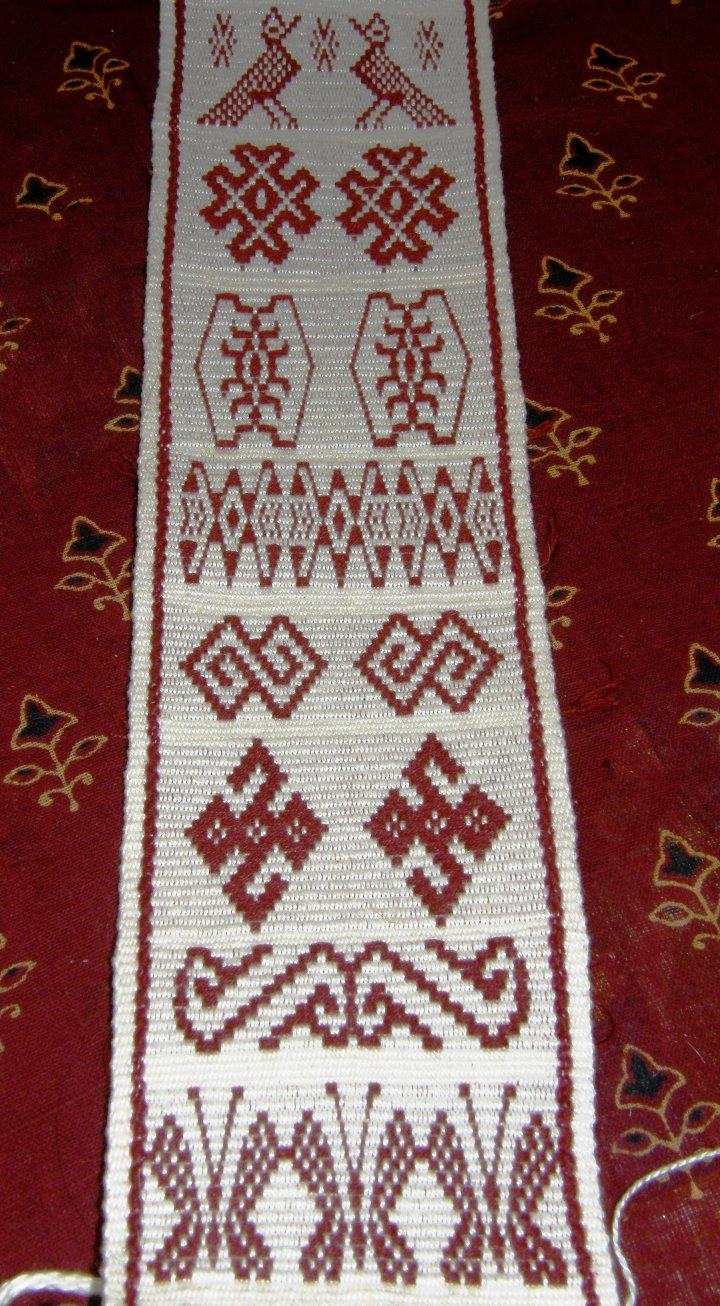
I collected Huave butterflies, Indonesian borders, Central Asian supplementary warp motifs which I adapted to supplementary weft, patterns from Montagnard and Li textiles,  Guatemalan birds, brocade designs from Lithuanian sashes as well as one of my own inventions. I still have some Mexican and Miao motifs to play with and am looking about for more ideas from other cultures.

One thing that I wasn’t quite so aware of was the different kinds of supplementary weft patterning techniques and the ways in which they are classified. I have always wondered about the precise definitions of brocade, inlay and supplementary weft patterning and if, in fact, all three terms refer to the same thing.

Fortunately I have Marla Mallett to put me straight. In her book Woven Structures  A Guide to Oriental Rug and Textile Analysis she says:

Brocading uses extra yarns – supplementary weft yarns – to ornament a ground fabric, with floats on at least one face…….If we want to be fancy, we can call brocading, “extra weft patterning”. But the simple word brocading is adequate.

She then decribes different kinds of brocading: overlay-underlay, underlay, overlay, reciprocal and inlaid, the latter being the kind that I am playing with here. She also notes that in oriental textiles inlaid brocade yarns and knotting often share the same pattern row which makes my head spin with new possibilites!

Another look at my sampler…
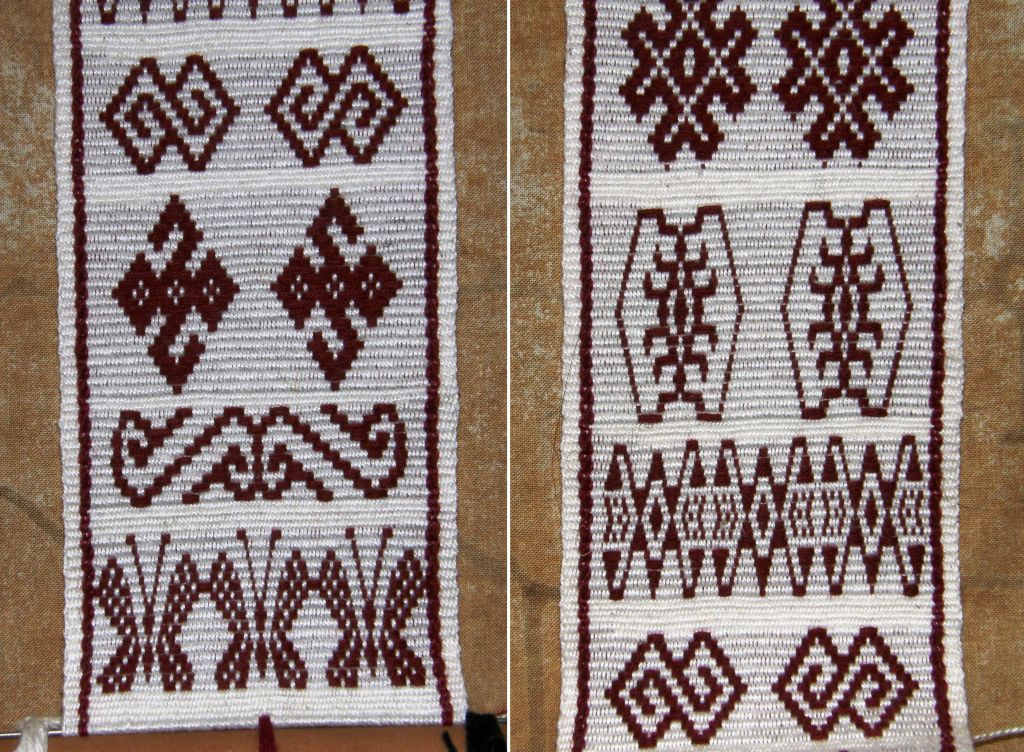
With this 35 wpi ground warp I used six strands of the Guatemalan thread. Once I have finished all my planned designs, I will start experimenting with the tatting thread. What I like about this kind of patterning is that your warp is basically a blank canvas on which you are free to change colors and place designs as you please.
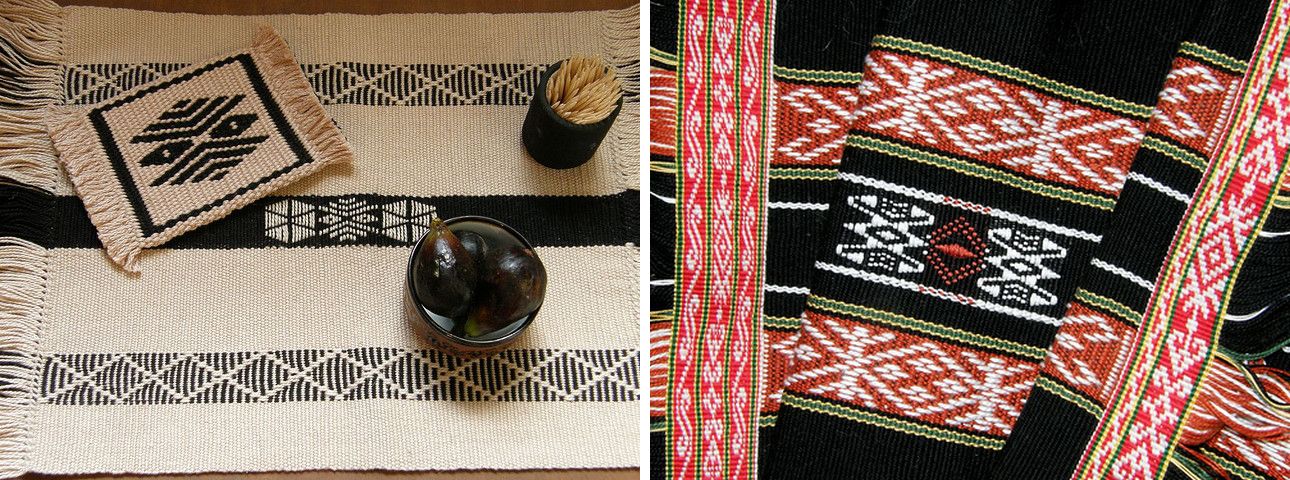
Here are a couple of examples of warps that I prepared for warp float patterning to which I decided to add supplementary weft motifs pretty much as an afterthought. On the piece on the right I used one and half strands of embroidery floss. On the piece on the left I used single strands of the ground weft which left gaps and gave the design the same striped effect as the outer columns of warp float designs.
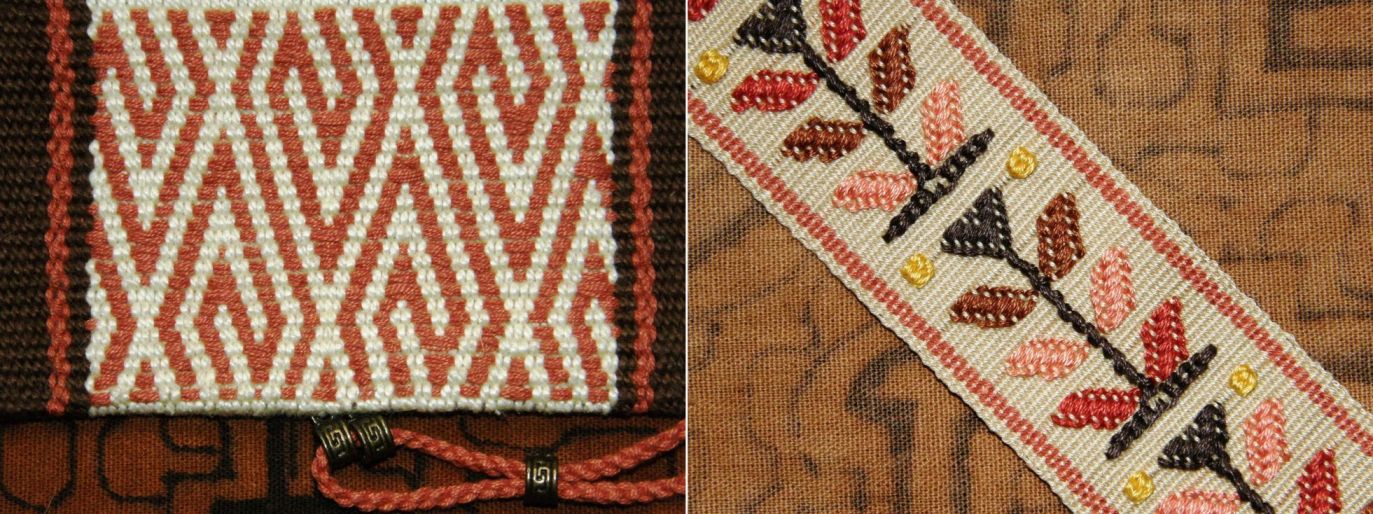
A couple of other brocaded pieces that I wove using the Guatemalan thread on the left and embroidery floss on the right. The piece on the right combines the inlay technique with wrapping to create the long horizontal and fine vertical lines that would not be practical using the inlay method.
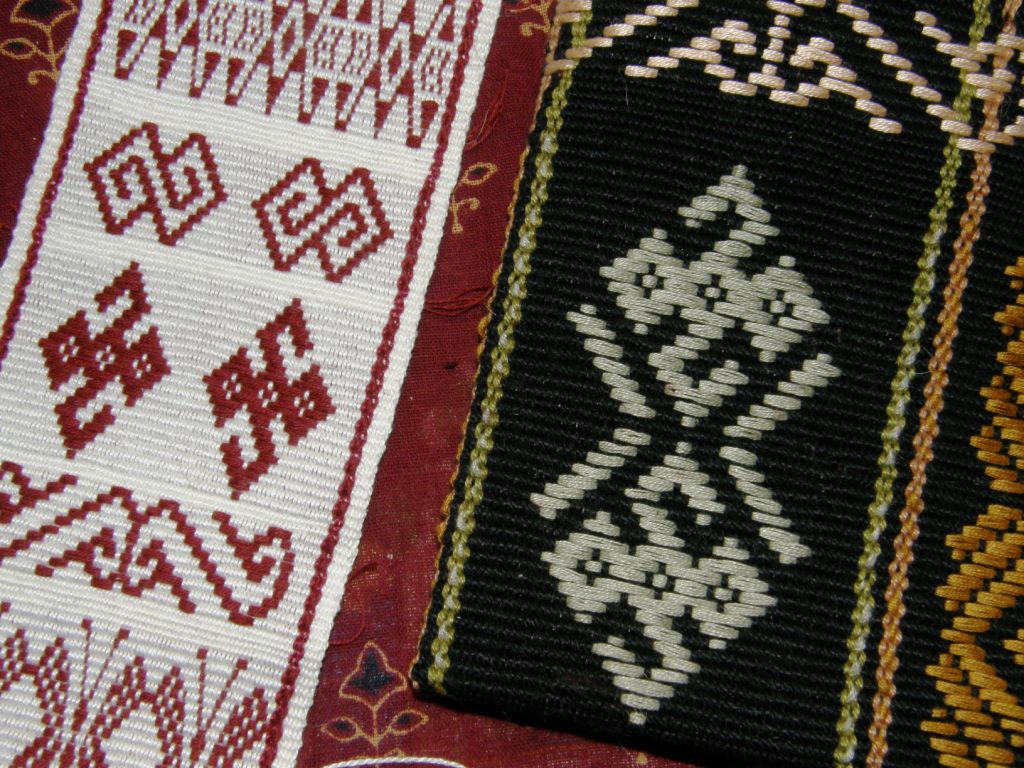
Here is a view of the two samplers showing the difference in the weight of the threads I used.

Why didn’t I do any of the Bolivian hat band designs, you ask? Those have been done in super fine thread which allows them to have very long floats in their supplementary weft. You simply would not get away with such long floats in heavier thread as they would be long, cumbersome and unsightly. You can be sure that another warp in sewing thread will be coming soon so that I can indeed do these designs. I am also looking forward to doing designs where the supplementary weft actually fills in the negative rather than the positive spaces.
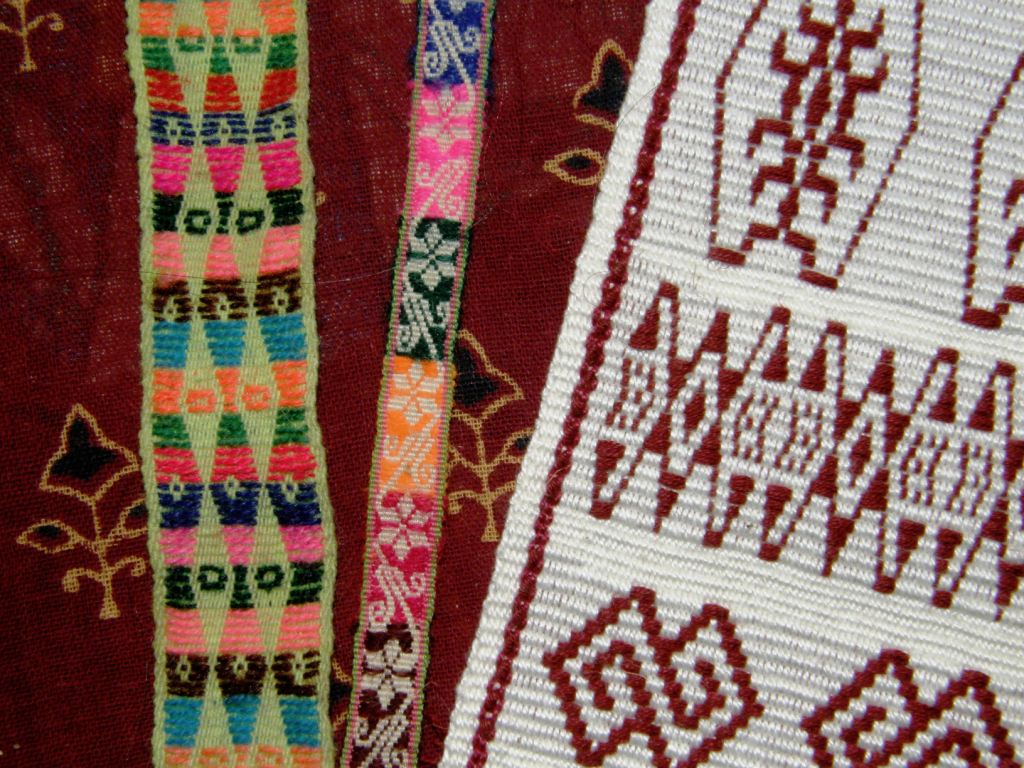
Here you can compare the size of the hat band thread with my 35 wpi thread. And don’t get me started on the mind boggling fineness and complexity of the brocades from Laos!!

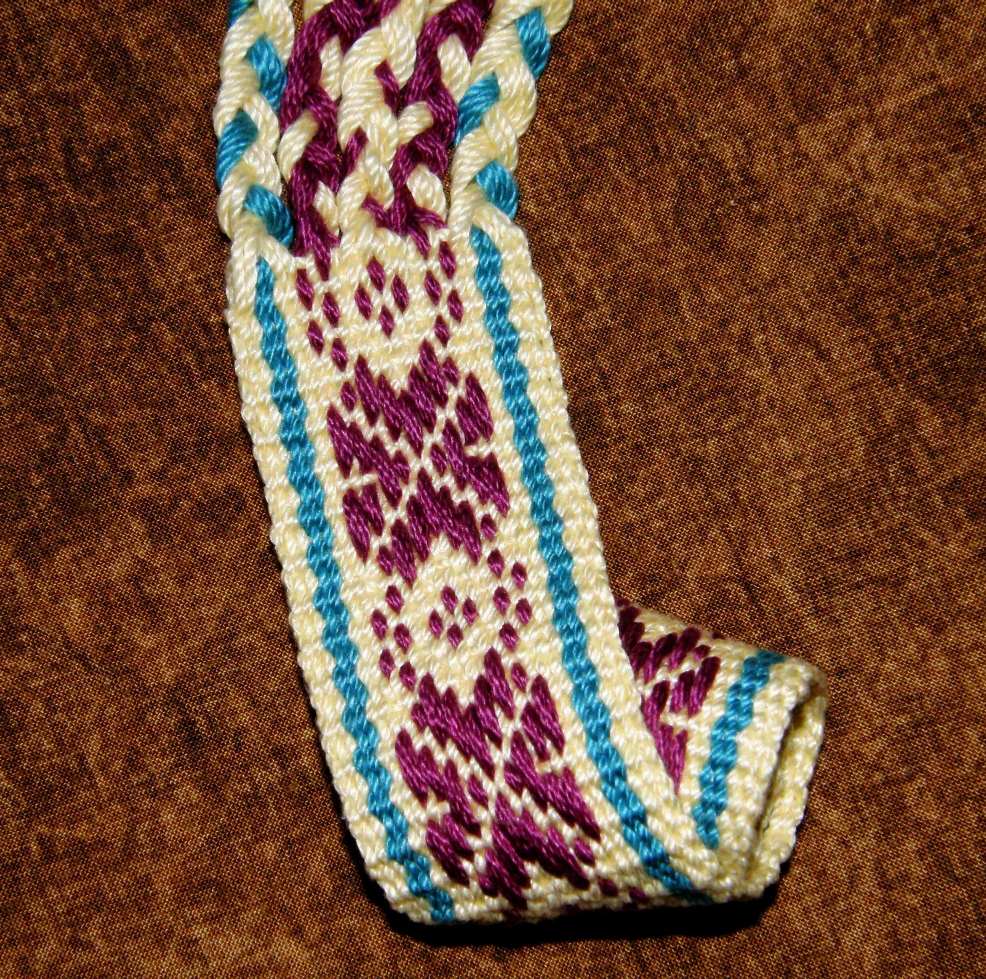
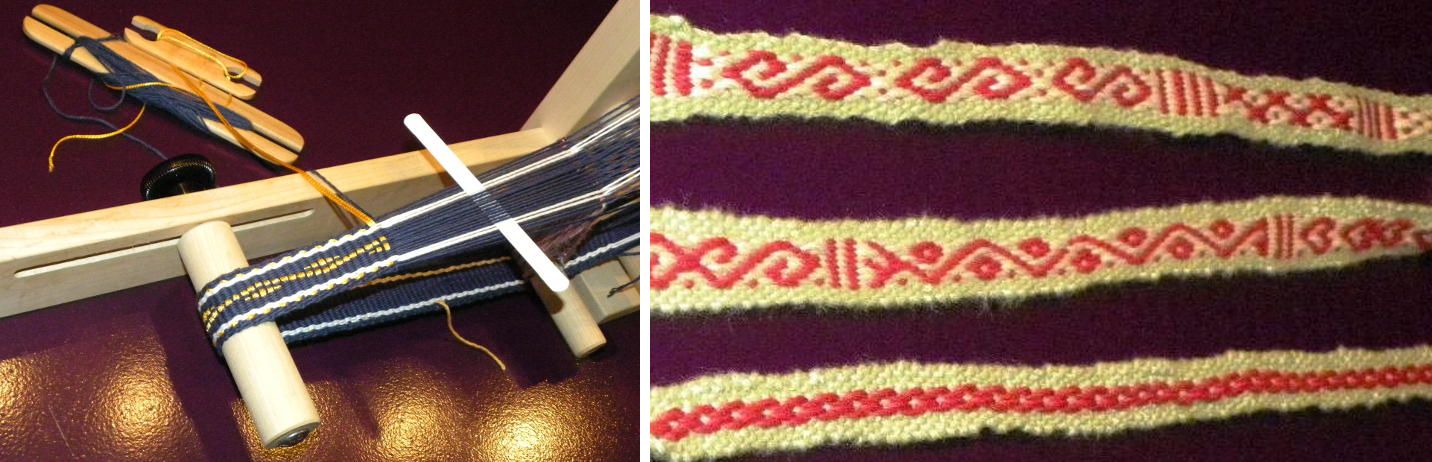
From supplementary wefts to supplementary warps….you may recall from last week’s post that I wove my first Sami pattern band in a supplementary warp technique. I want to explore and use this technique more as a supplementary warp patterned sash will be part of my big “sash project”. This is actually one of the techniques where you could allow the weft to play a role if you chose to.

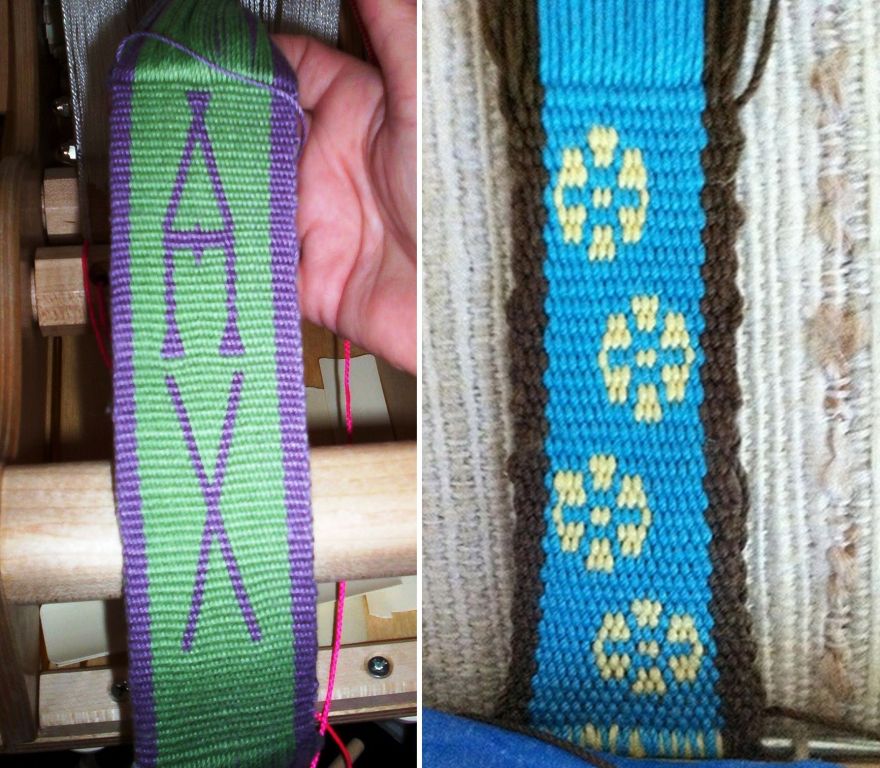
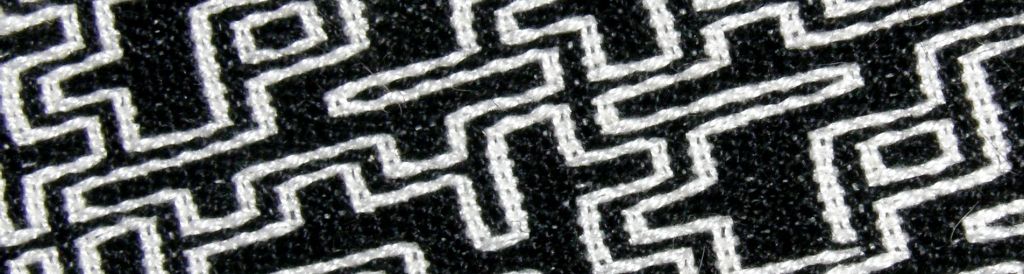
In the examples at left you can see the little orange weft spots showing through as orange weft has been used to match the edges. If yellow weft had been used the background would appear to be a solid color. My weaving teacher liked the decorative effect of the weft spots. The band on the right appears to have a solid background of white as white weft has been used. You can just see the white weft turns on the edge.

For my next supplementary warp experiment I used the handout that we had been given in Robin Spady’s inkle weaving presentation at CNCH last year.

Included is a pattern for a Celtic knot. This experiment served two purposes as I also wanted to try out some tencel that I had received in a swap with a weaving friend in Denmark last year. I really wanted to see how the colors would look together…a light green and a gray-ish purple along with an off-white that I bought at the Mannings. I have never used tencel before and was looking forward to see how it looked and felt when woven. I made this on my backstrap loom.
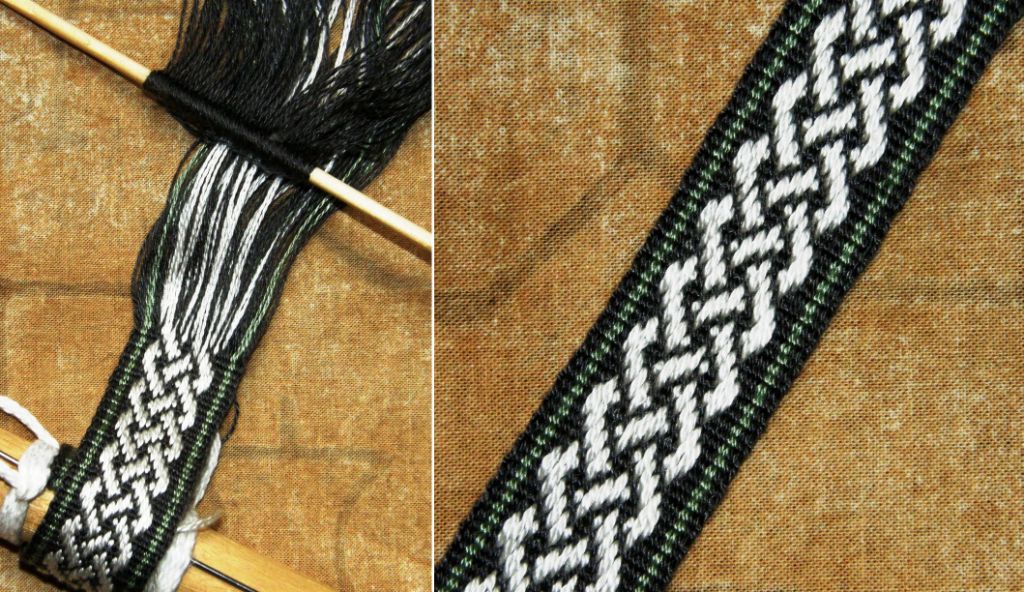
Just as everyone says, it has a lovely sheen and is very sleak. The weft did want to wiggle out a little and I found I had to put it back in place each time I changed sheds but I love everything about this…the colors, the pattern, the texture and the sheen!

This is a thirteen-pattern-thread design which Robyn calls “my all-time favorite pick-up pattern”.

Karen Madigan gives the pattern for a twelve-thread Celtic knot (which she says is based on a design from Sara Lamb) on her Curious Weaver blog. By the way, I know a lot of people have Sara Lamb’s Woven Treasures book.  Sara teaches this supplementary warp technique right there in her book… just in case you missed it.

Take a look at a different version (the pink one) on Annie MacHale’s blog here.
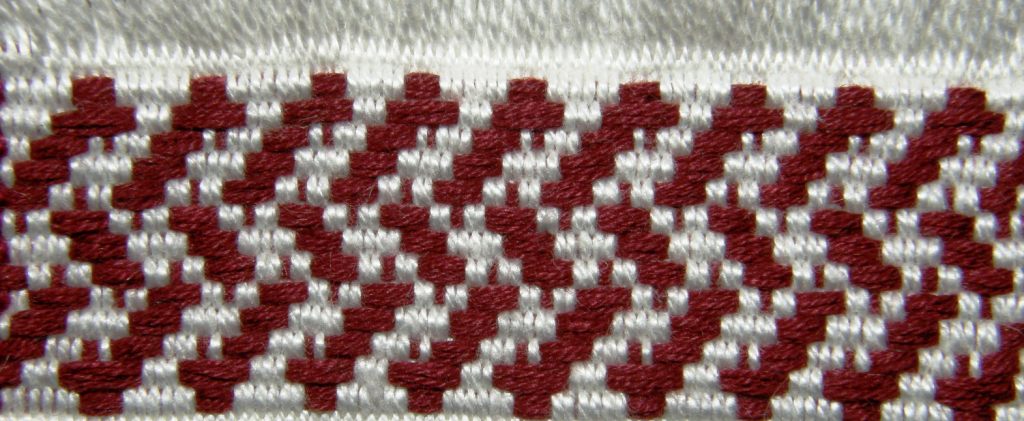
I couldn’t resist tipping this Celtic knot pattern sideways and trying it in a supplementary weft.

I know that I can improve on this if I decrease the spacing and have the edges curling over more. That’s something to work on further this week.

I thought that I would pull out some older pictures of other knotty-like designs I have woven…
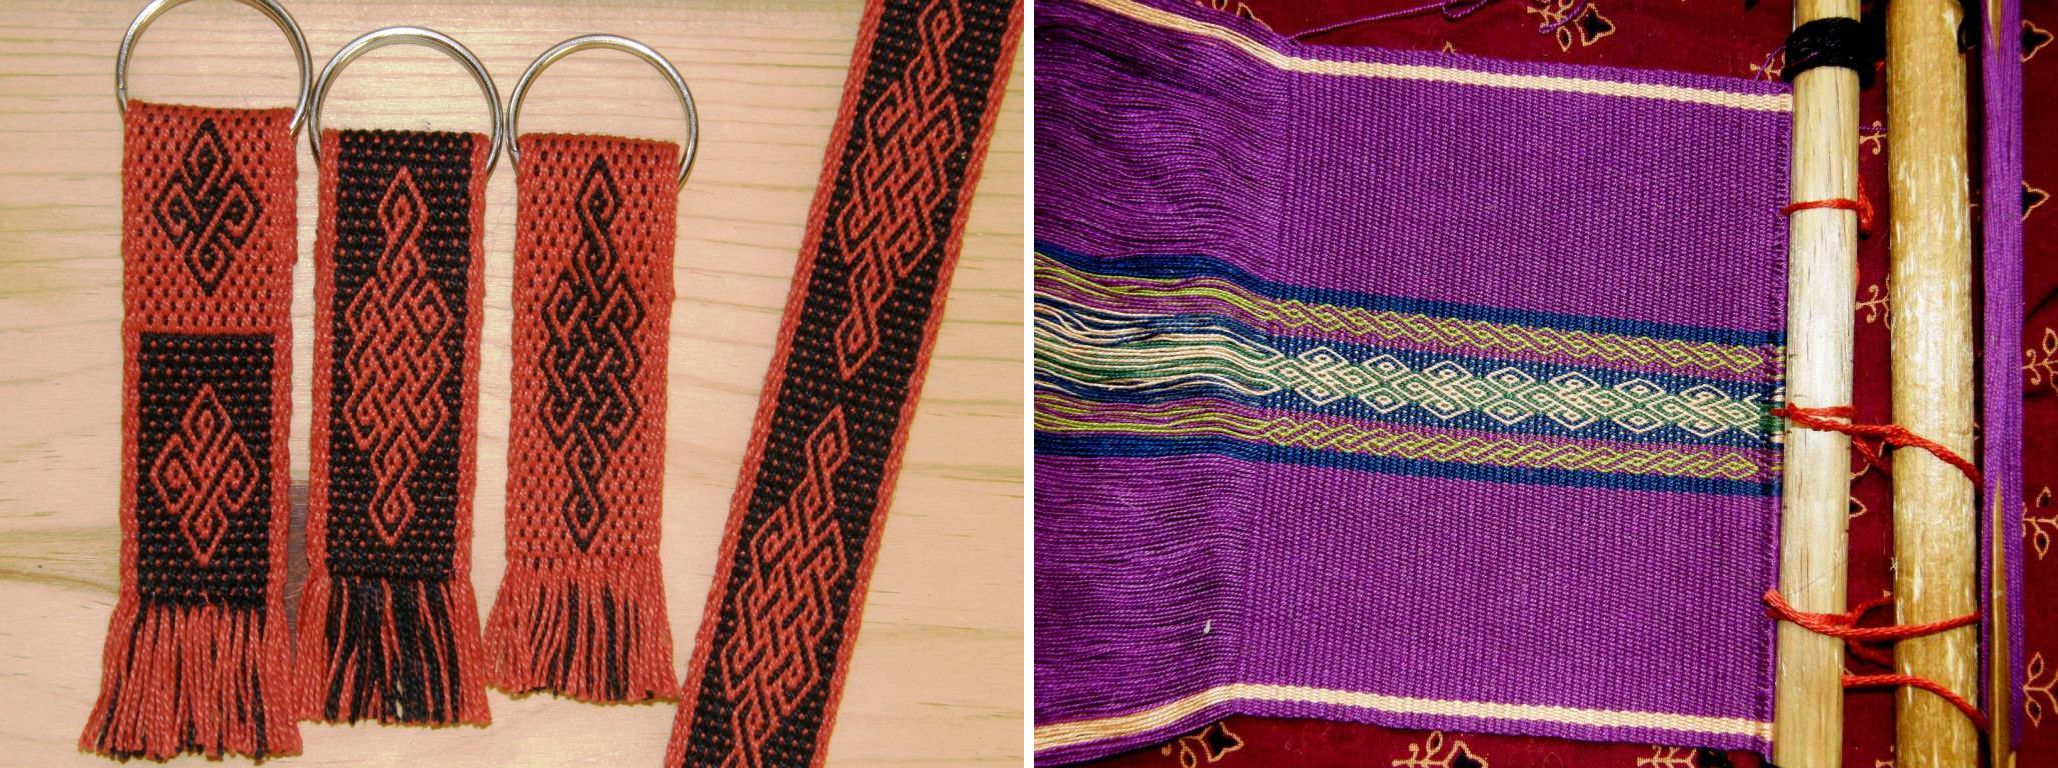
The designs above and below were taken mostly from tablet-woven bands and I wove them using the Andean pebble weave technique that I teach in my book.
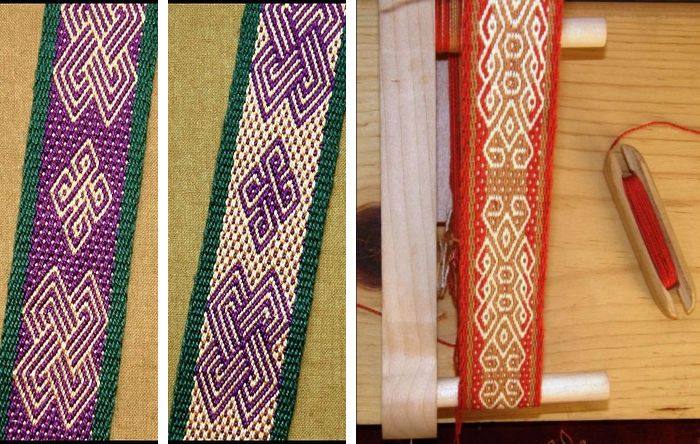
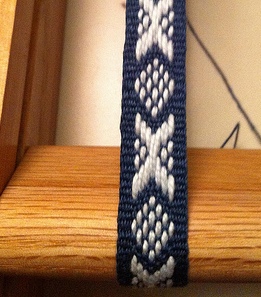
Jennifer from the Weave Along group made her first Sami band on her inkle loom this week (at left) as well as Tanyabe who says that she actually has a drop or two of Sami blood in her. Hopefully we shall see her pictures soon.

The Weave-Along has become rather quiet. I suspect that folks are working on their “secret” project for the grand finale. I also like to think that the Weave-Along has helped create confident independent weavers who are trouble shooting, experimenting and problem solving on their own….let’s see!

And the loom bag project continues. This loom bag will weigh a ton by the time I have all the bits in place!
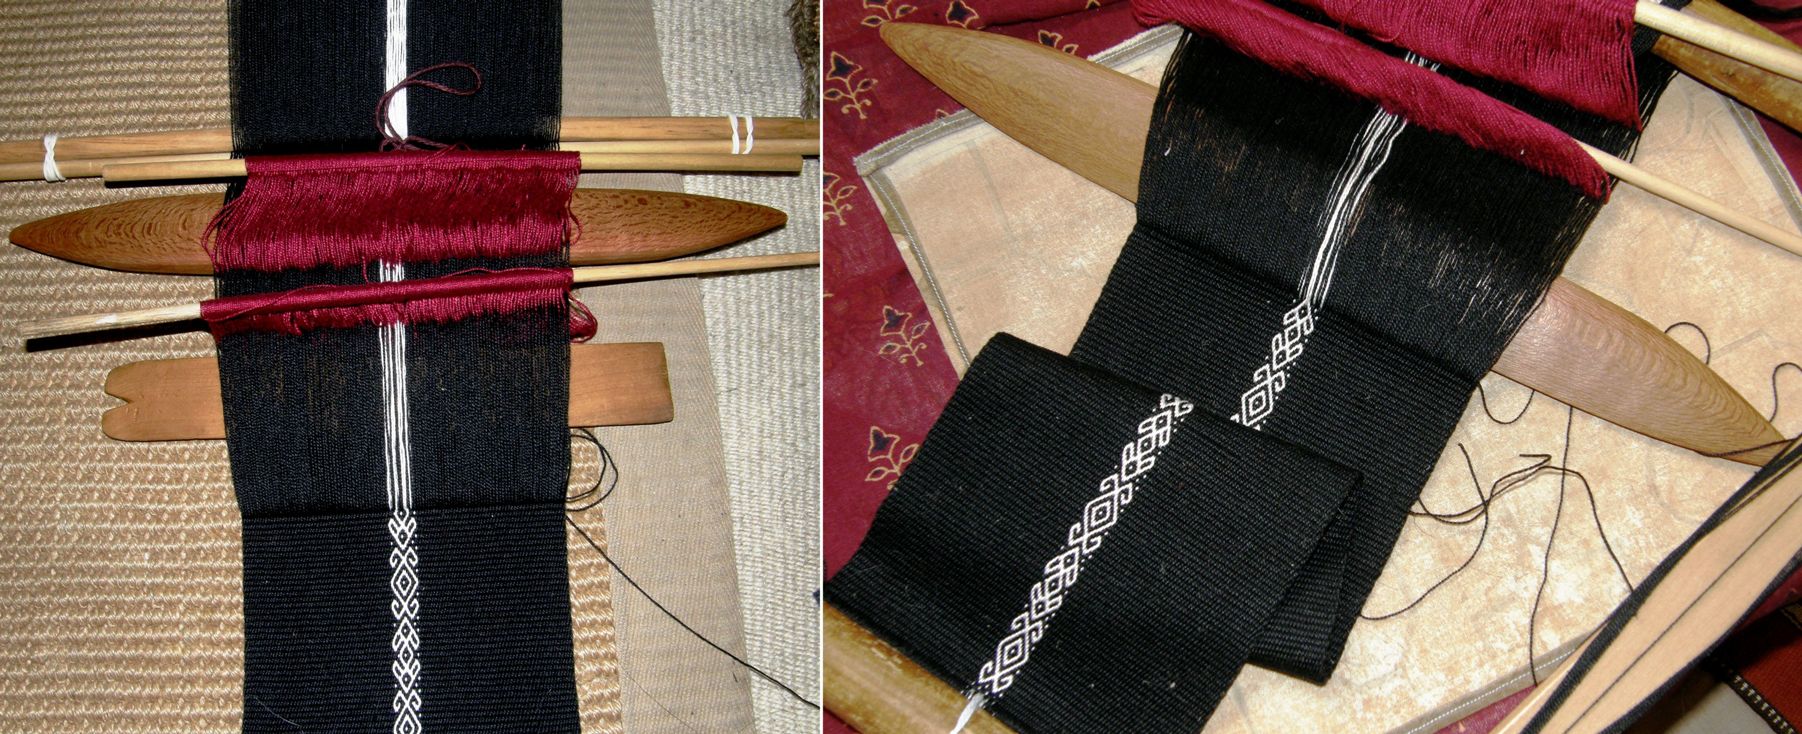
This piece of fabric with its pebble weave design will be used to  make the three zippered pockets on the back of the bag for holding belt shuttles, elastic bands, scissors, tapestry needles and all that stuff.

Finally, I got a nice note from Kathleen on Ravelry with all this information on other articles in the Weaver’s Journal which are available to download free from the online digital archives at arizona.edu

Kathleen says:

Thanks for the references re the Andean braids in Weaver’s Journal. (Actually, we all have Jennifer to thank for these references).I didn’t know they were all available on line. I have some but was happy to find the others.

There are quite a number of other interesting articles that might also be of interest to you or other members of the backstrap weaving groups.

Issue 4 – A Tubular Edge Braiding from Bolivia by Adele Cahlander and Marjorie Cason.

23 – A Special Andean Tubular Trim woven without Heddles by Adele Cahlander, Ed Franquemont and Barbara Bergman (color!)

24 – A Guatemalan Brocade Border

25 – A Braided Strap from Columbia by Adele Cahlander

28 – Gifts from Ancient Peru by Ulla Nass

35 – A unique Finish from an Amazonian Bracelet by Micheline Thabet

37 – Unraveling the Mystery of a 7 – loop Braid by Adele Cahlander

42 – Embellishment of the Rain Scarf (Hopi) by Suzanne Baizerman

45 – Peruvian Technique for Dimensional Knotting by Monica Bravo

46 – Color and Design in Andean Fabrics by Blenda Femenias

Thank you Kathleen!

The downloading takes too too long for me but considering the topic of this week’s post, I think I must look at issue # 24!


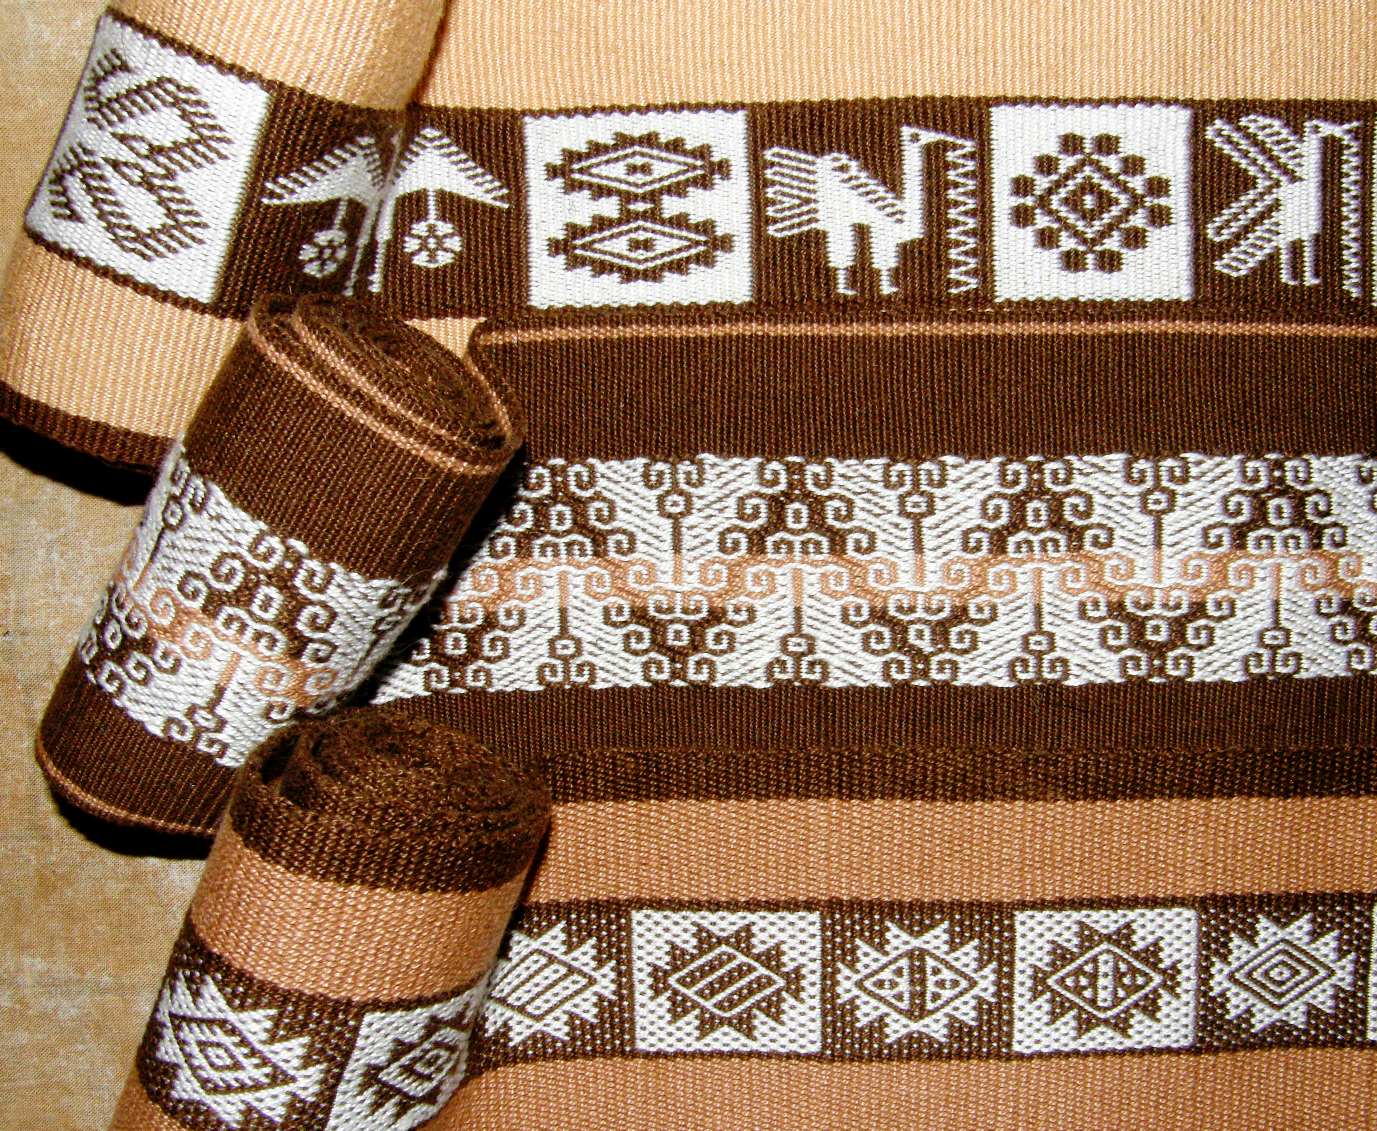

Backstrap Weaving – From North and South and Somewhere In-between

Inspiration arrived from north, south and somewhere in-between this week.

First, my friend Anna who has been bicycling with her boyfriend Alistair from Alaska to Ushuaia sent me some pictures of pre-Columbian fragments in balanced double weave that she spotted on display in a cafe in El Calafate in the very south part of continental Argentina. The pieces were behind glass and not easy to photograph but I have never seen such large figures woven in this technique before.

There are my favorite little birds again along with a human figure and a llama. They are certainly a long way from home down there in the Argentinean Patagonia. Another piece that showed up far from home was this…

This piece is part of an exhibit of tribal arts and textiles in San Francisco which a weaving friend photographed for me. It is a piece of Swedish finnweave…funny that Sweden is not a country that springs to my mind when someone mentions”tribal”! So, this was my visitor from the far northern lands.

Then, between the southern end of Argentina and Sweden in the far north came patterns from Mexico in balanced double weave. I got the copy I ordered of Atwater’s Finnweave and the Mexican Double Weave which has both Mexican and traditional Swedish pattern charts.

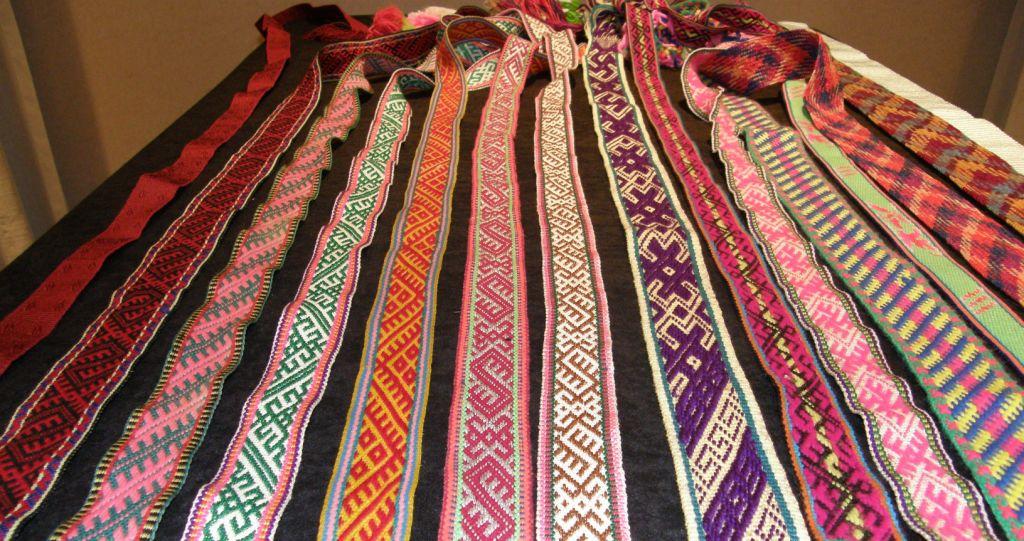
My ultimate goal with all this recent focus on the balanced double weave pick up technique is to add to an ongoing project which involves weaving nine sashes representing the weaving techniques that I have come across here in South America. Three of these nine can be seen above.

Nine, of course, does not even begin to cover it and this may end up being a life long work as I learn more and more patterning methods. I had been hoping to span the continent with the techniques on my collection of sashes but had gotten stuck in eastern lowland Bolivia unable to proceed eastward. I knew nothing about Brazil. However, my involvement in Weavolution enabled me to meet Helena who introduced me to the work of the Huni Kuin people of tropical Brazil and I can now go on to learn more about their work and hopefully one day weave a sash using their techniques too.

So here is where I am at, getting closer and closer to the design I will use on the fourth sash. Yet another sample and more refinements to be made, but I think that I have settled into this technique now and can trust my measurements to be consistent for the final project.

I have two textile fragments on which I am basing this design bought at two different times and in two different countries. The design is exactly the same on both but the density of the fabric is completely different…two different weavers with two different beats.

The person who wove the piece on the right had a much firmer beat and used a closer sett. The beige stripe on the right of her piece is, in fact, warp faced double weave and that little segment is a tube. The piece on the left is much more light and airy. So, which way is “correct”? I guess that being so used to the firmness of warp faced weaving, I am more comfortable with a heavier beat that produces a fabric more like the one on the right and that is how I am choosing to go on my sash project.

So my discontinued sash project has been revived. This project is in some ways a casualty of my entry to the world of online weaving groups and all its distractions but, on the other hand, I have learned so much from the groups which can enhance and enrich it.

Speaking of distractions, I threw all finnweave aside yesterday to take a look at the online workshop on Sami band weaving in the Yahoo bands and braids group. Sue Foulkes has been providing notes throughout February on the techniques of traditional Sami band weaving. Sami bands are woven on a body-tensioned loom using a small rigid heddle to create two sheds. They are warp faced and decorated with pick up patterns using  supplementary warp threads.

I decided to try it using string heddles and a shed rod.

It’s fast and fun! Sue recommends using a pattern thread that is twice as thick as the ground weave thread for best results. I think my pink thread is probably about one and a half times as thick as the yellow. The pink is Tahki Cotton Classic and the yellow and blue are Coats Royale #3. I didn’t use the border threading suggested by Sue.

I have to admit that the technique is not new to me although it differs slightly from what I learned in Huancayo (from weavers from Ayacucho) and Cabanaconde in Peru. In the Sami method that Sue teaches, only the pattern warps are picked and dropped. In Peru, both my teachers taught me to also manipulate some of the warps in the ground weave and each of my two teachers had her own version.

I have never been a big fan of this technique but, as it is one that I would like to include in my sash project, I think that it is time I embraced it and found something that I like doing with it. I think that part of the problem is that in the areas where I first learned it, it is often used to weave very irregular figures which result in long floats on the back of the fabric, something which I really dislike.

Above left you can see figures woven with supplementary warp threads on a textile from Ayacucho. The orange and blue bands are those I wove while learning with my teachers in Huancayo and the white and blue one is what I wove with a teacher in Cabanaconde.

I also learned to weave patterns using supplementary warps in Salasaca in Ecuador as this is how their traditional belts are woven.


I bought a lovely belt on my first ever trip to Cusco partly decorated with supplementary warps.

Attending the Tinkuy de Tejedores last November in Chinchero, Peru gave me a chance to see weavers from communities in Cusco using these patterning techniques, like this lady from Accha Alta…


I guess the designs that I have most liked in this technique have been those woven by the Mapuche people of central Chile and Argentina.

Although I have several books about Mapuche weaving and have been able to experiment with some of their designs, I think I have always hoped that I would one day go to Chile to one of the small Mapuche settlements and learn from the weavers themselves. The small purses I made at left are decorated with Mapuche designs.

Above are two examples of things I made using supplementary warp patterning and Mapuche designs…a shoulder bag made in colorful wool and a sample band in cotton.

Recently on Weavolution, Luchita, who lives in Argentina, showed the beautiful Mapuche design band she wove at left using a vertical loom based on the traditional Mapuche ones.

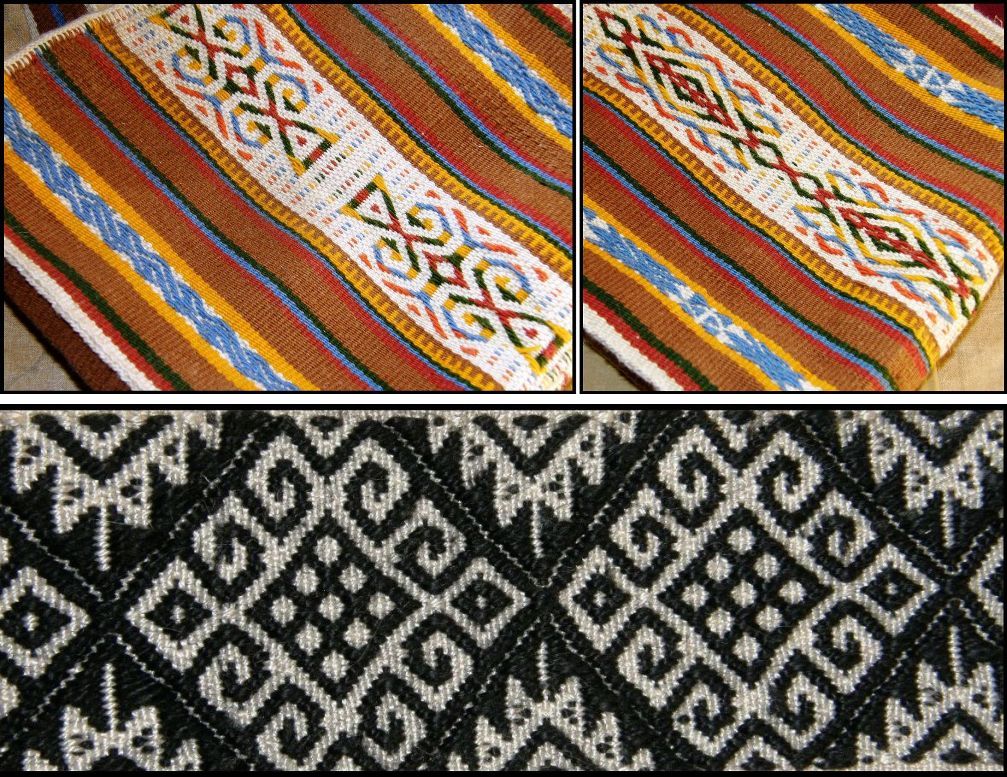
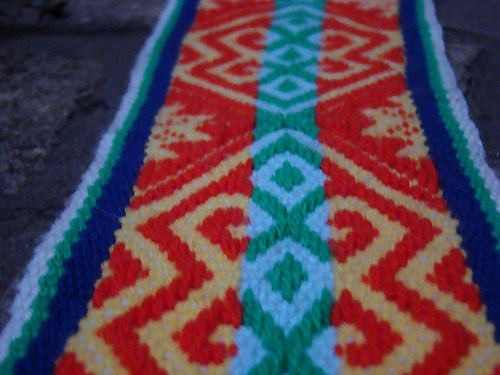
Another reason to get re-acquainted with this technique is to be able to weave some of the beautiful designs used on the belts of the Russian Old Believers.

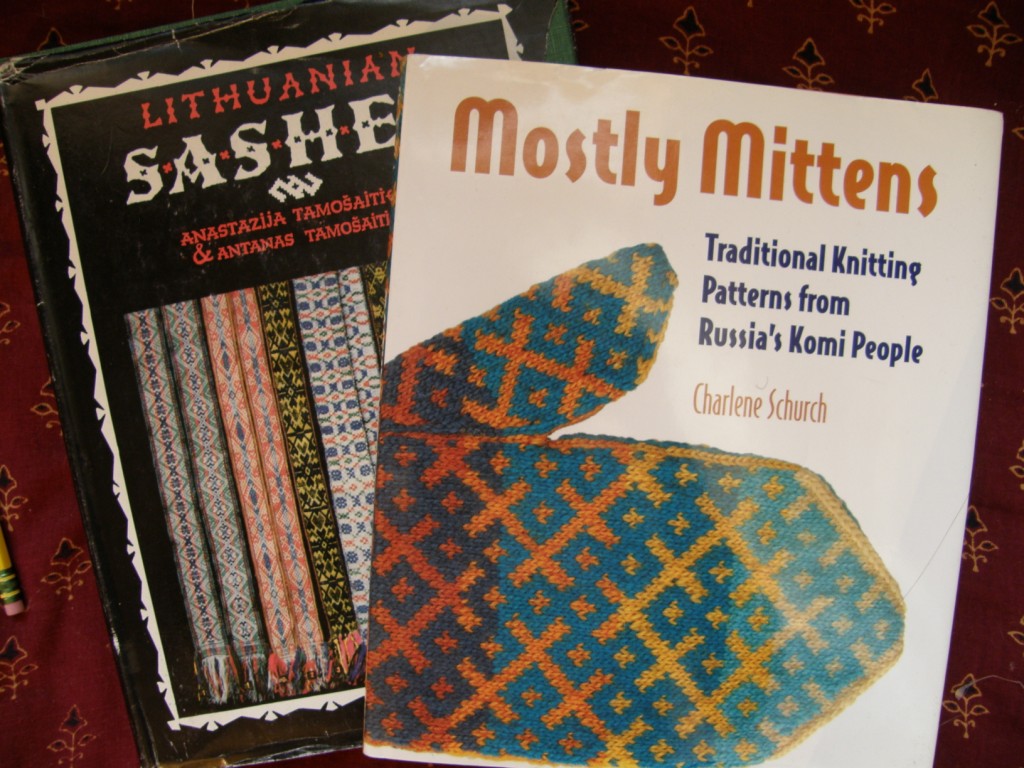
Books like these ones below are full of these wonderful patterns from the northern lands…

I learned of the Komi people after seeing some beautiful knitting projects on Ravelry and learned that they were also weavers. The mitten book gives me access to some of the traditional patterns which would be easy to adapt to weaving. The book on Lithuanian sashes was a much treasured gift from weaver Annie MacHale. (ASpinnerweaver).

So, if this technique and these kinds of patterns appeal to you, take a free class with Sue Foulkes in the Yahoo bands and braids group or, if you prefer, Sue has a book on Sami Bands available here.

I can’t guarantee that this is exactly the same technique used to produce all the bands and sashes that I have shown here, but learning the structure used to produce Sami bands will give you a good start in supplementary warp patterning.

There were slight regional differences in the technique even within Peru.

I finished my first band with braids and can use it as a bookmark.

From Scandinavia to the Middle East….Tracy aka himalaya left us in the Weave Along to travel and then returned to her present home in Qatar via Damascus, Syria where she went looking at textiles. She shared some pictures with us knowing of my interest in twining…

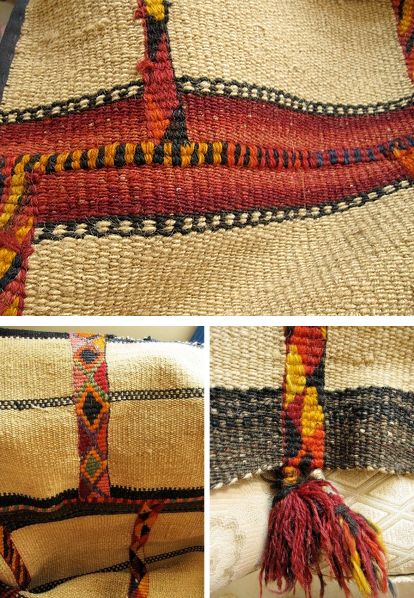
This beautiful piece now adorns her sofa. I am guessing that the colored bands  have been twined. I love the tassels they have made with the ends of the twining yarn. I can never figure out what to do with those pesky ends. I also love the big bold stitches that have been used to join the panels. This piece was woven as a tent divider and Tracy told us that, according to Joy Totah Hilden in her book Bedouin Weaving of Saudi Arabia and its Neighbors, these dividers are used to separate the male and female living areas with the most beautiful side being exposed to the men in order to show off the woman’s weaving skills.

No doubt Tracy will post more pictures of these textiles on her blog. Take a look now at the beautiful images of Damascan doors she has posted there.

Jennifer, who is also one of the Weave Along gang, made a nice find when she discovered articles by Adele Cahlander on crossed warp bands and tubular bands (seen at left) in the Weaver’s Journal which are available as free downloads here (page 10) and here (page 38).

What a good thing as the out-of-print book on this topic seems to be very hard to find these days.

Between finnweave and Sami band weaving I got in a bit of twining on the strap that was supposed to finish off my loom bag.

I am half way through the Nigerian words for “weave” and have now decided to add some zippered pockets to the back panel of the bag for storing belt shuttles and such things that would otherwise be left to rattle around in the bottom of the long bag. This plan is turning in my head now as I try to figure the best way to go about it.

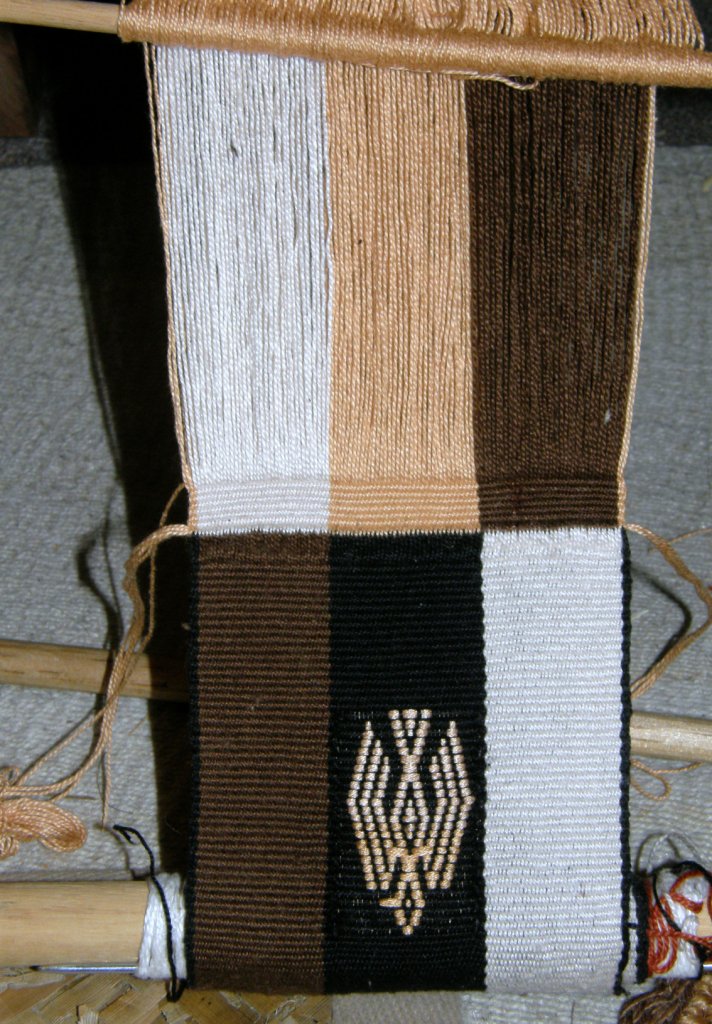
I also decided quite suddenly to dive into another discontinuous warp experiment. You may remember the wonderful discontinuous warp pieces that I got to see being woven at Convergence and at the Tinkuy de Tejedores last year by weavers from Pitumarca, Peru.

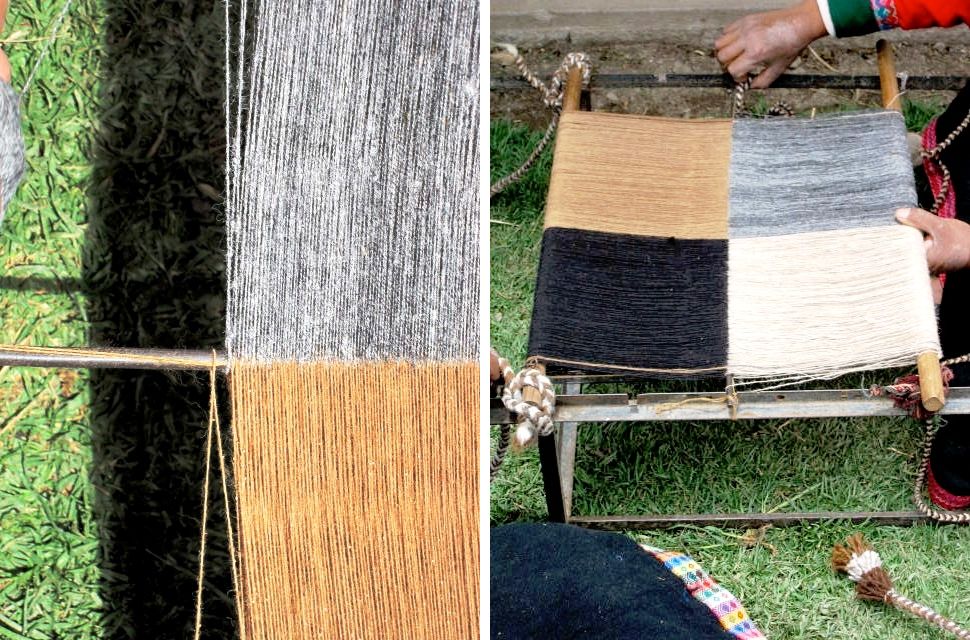
This is how these kinds of pieces are warped. DY Begay has kindly allowed me to use these pictures she took on a visit to the community of Pitumarca.

This technique allows you to weave joined panels of different colored fabric, something which is not normally possible in basic warp faced weaving. You can see these master weavers above creating intricate pick up designs within the panels…mind blowing!

My goal was much simpler!!

I just wanted to weave a few joined panels and create an acceptable panel with four selvedges.

In my first attempt I used cotton.

Creating  the joined panels was not so hard but finishing the four-selvedged piece proved almost impossible in cotton, Well, I did it but it was a horrid mess. I added a bit of decoration using supplementary weft.

I abandoned the project shortly after reaching the point you see above.

This did not produce a sample that can be made into anything. It just serves as a reminder of what not to do next time!

Attempt number two came this week but this time in wool. My friend Claudia had given me some wool yarn while I was visiting her in the US which I overspun while there to make it suitable for warp faced weaving.

I went with three panels this time, the first and last would have fringe and only the center one would have four selvedges. I planned plain weave with some patterning with a supplementary weft…keeping things as simple as possible. I laid in yarn along with the metal warping rods so that when the rods were removed, the yarn would be there to take their places (something I neglected to do on the first attempt which forced me to get creative!)

Here is the result off the loom. I used eight strands of my handspun llama singles for the supplementary weft which worked really well. I have never seen wool used as a supplementary weft here and it was Phil in the Weave Along group who gave me this idea. He wove a snake design in wool using several tones of natural wool thread as his supplementary weft and it looked great.

The join worked well. The bumpy bit in the panel in the center picture shows the final weft passes that went in to close the four-selvedged piece. An experienced four-selvedge weaver would probably have squeezed in a few more wefts but I was done at that point!

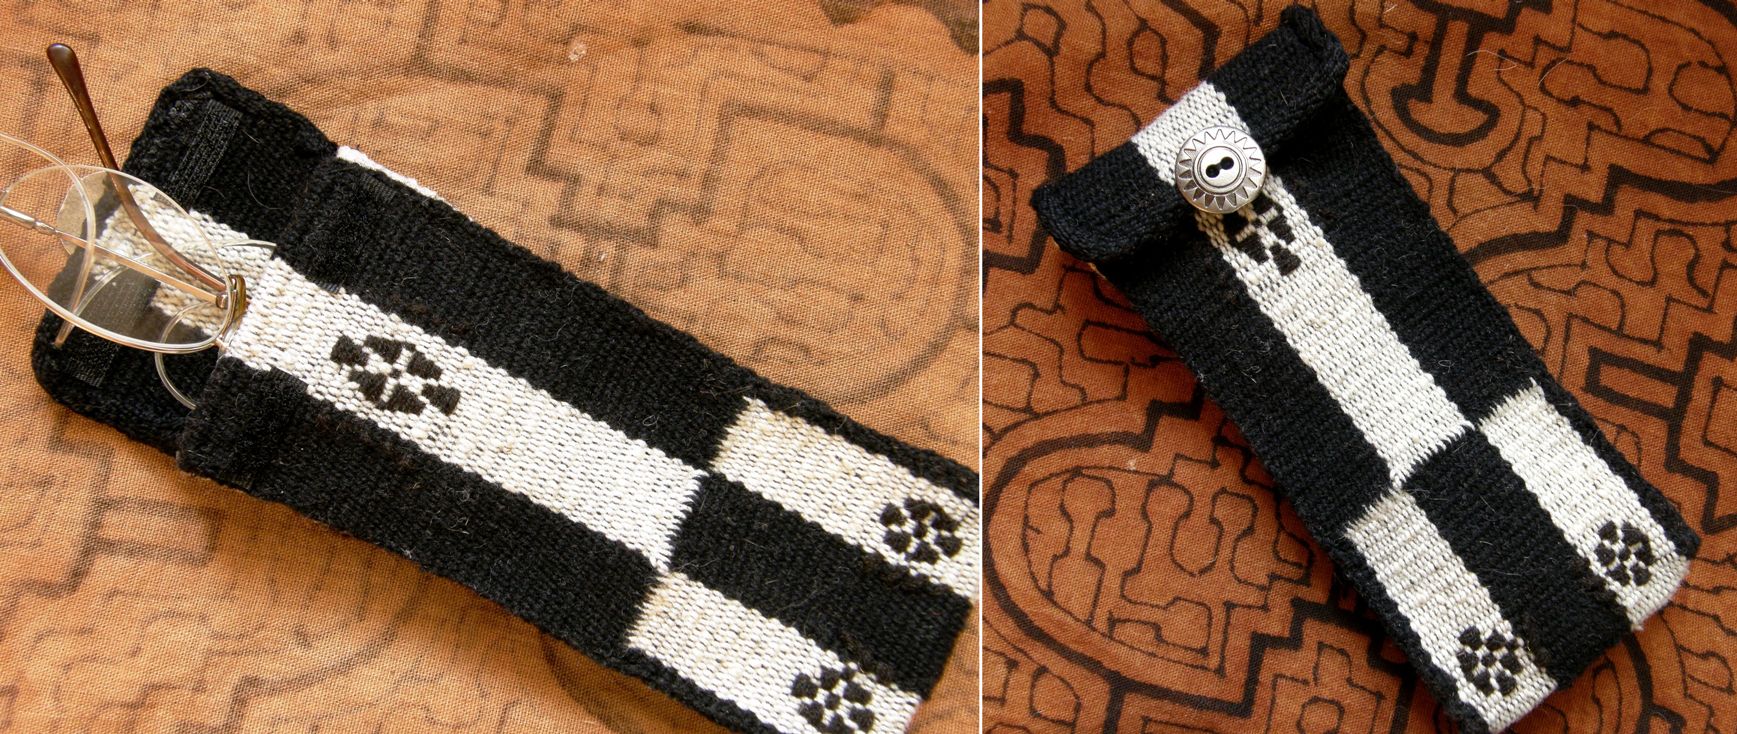
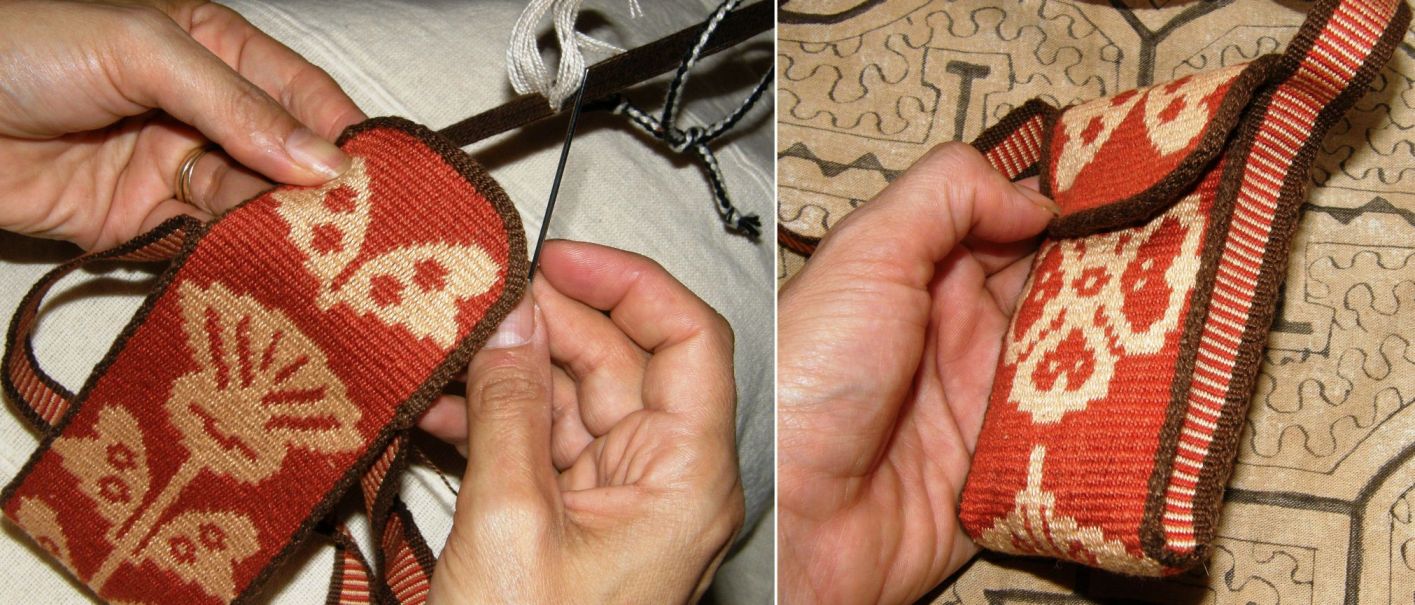
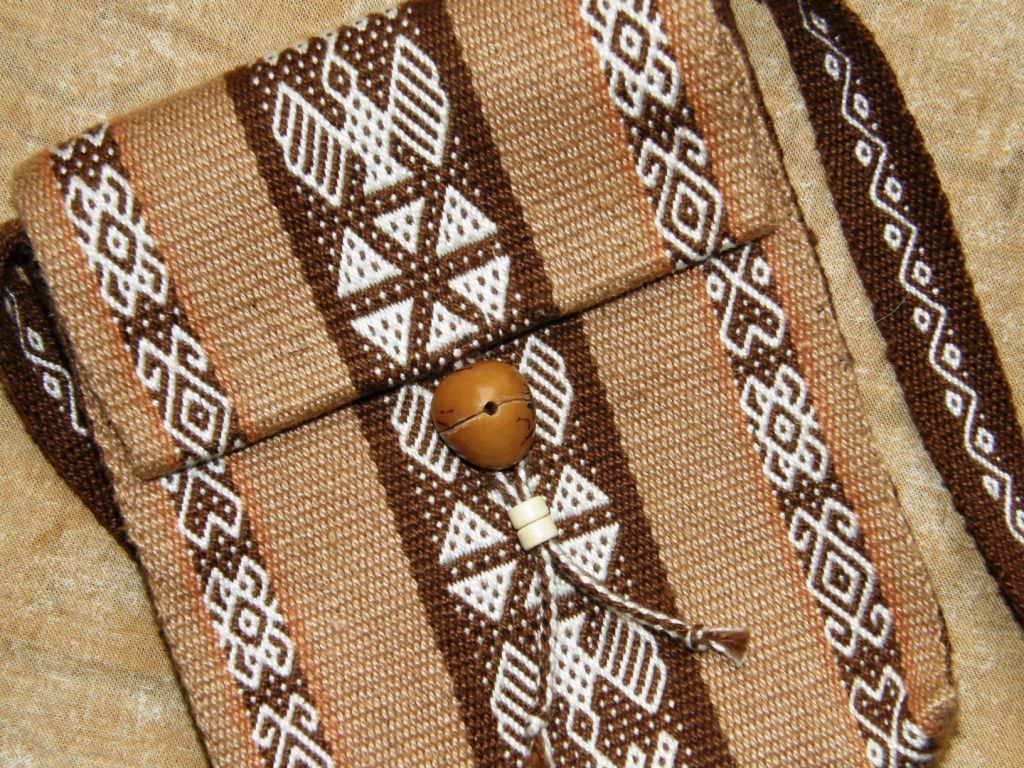
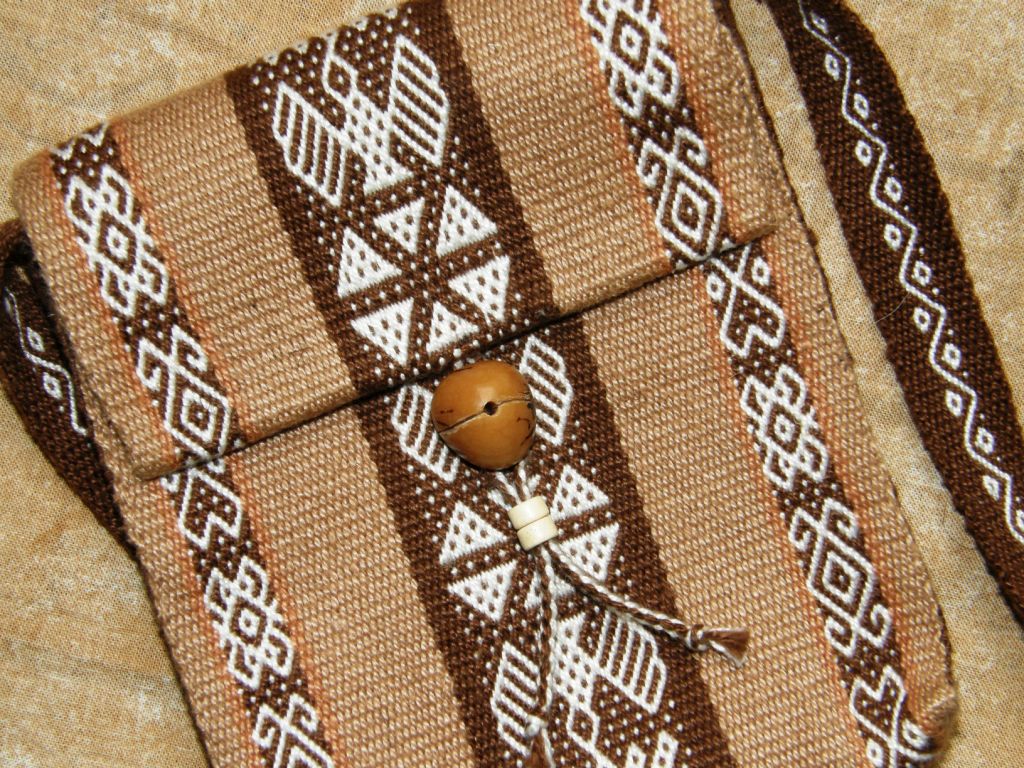
So, I was quite pleased with this second attempt and learned a lot and I even got to make something from the sample. No, not a cell phone pouch….an eyeglass case.

I wove a band with the same wool to make the sides. The bumpy bit mentioned above conveniently positioned itself at the bottom where the piece folds.

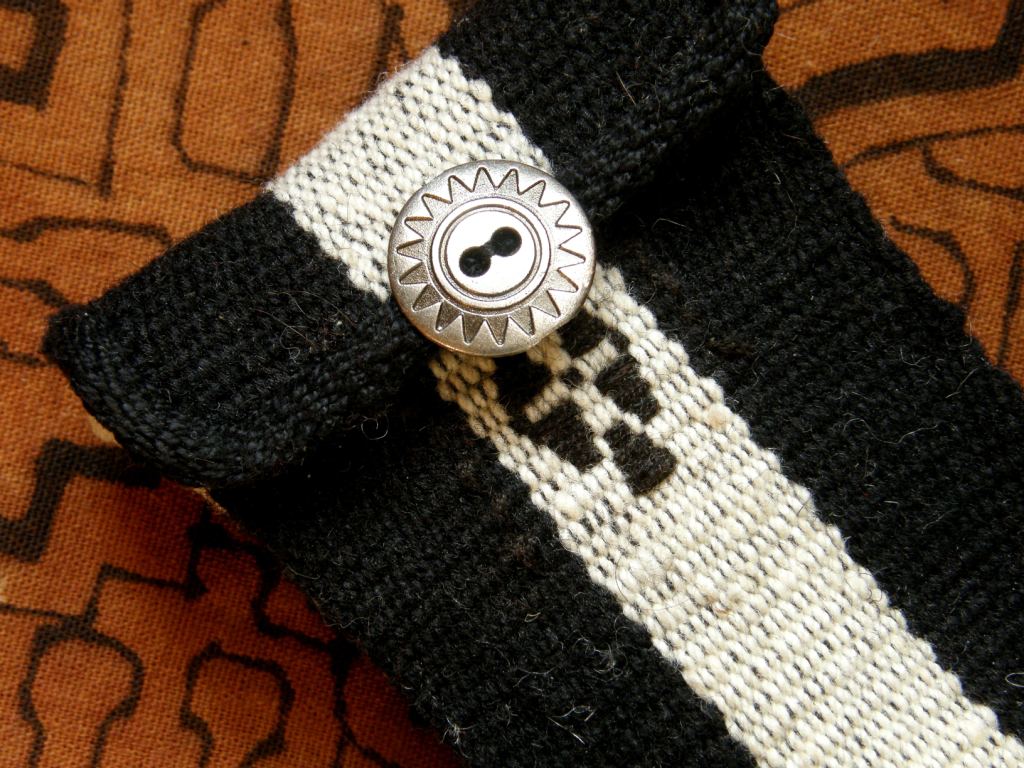
The flap is edged with a woven band which I wove and sewed on using the weft as the sewing thread and this protects one of the raw edges. The other edge is turned and sewn to the inside. The button is just decorative. Two velcro tabs hold the flap in place.

It was a fun project. I don’t know what my next step in the discontinuous warp study will be. I am determined to do this in baby steps. First I need to overspin more wool.

The Weave Along….yes, we are still going! but we have all decided on March 6th as the grand finale so we can end with a bang rather than with a whimper. Weave Alongs usually just kind of come to a sputtering halt. Everyone is planning a ”secret” project to show on the last day and I am hoping that folks will have a little to say about their progress and what they learned as well as offer tips and tricks about the equipment and the weaving techniques for others to come along and benefit from later.

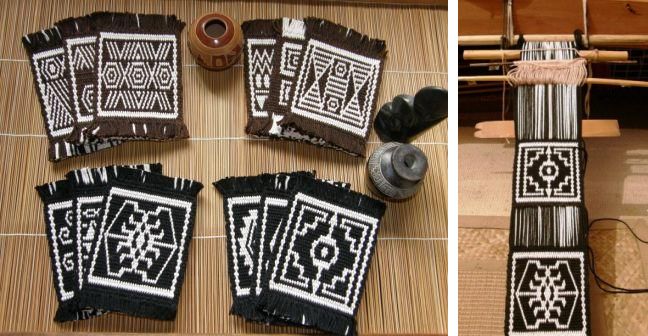
Jennifer is weaving her first mug rugs in double weave while Bobbie had her “aha!” moment with pebble weave and wove one of the more difficult designs.

Linda is taking her first steps in simple warp floats after having practiced bands with horizontal bars and popsicletote is working her way through the first pebble weave lessons.

Sandrine runs the Tricofolk forum in French and has visited and commented on my blog before. I hope she doesn’t mind seeing her work here. She has been doing pebble weave on her inkle loom and has finished quite a few samples there on the right. On the loom at left she is doing a supplementary weft pattern using one of the pattern charts here.

I just found out that Linda Hendrickson’s new book  How to Make Ply-Split Baskets is available. I got to see the book and some of Linda’s baskets at Convergence. The book has superbly clear and beautiful step-by-step photos and the baskets are gorgeous. Go to Linda’s site where you can see pictures of all twelve baskets and read about them and order the book. Check out her card woven calligraphy while you are there.

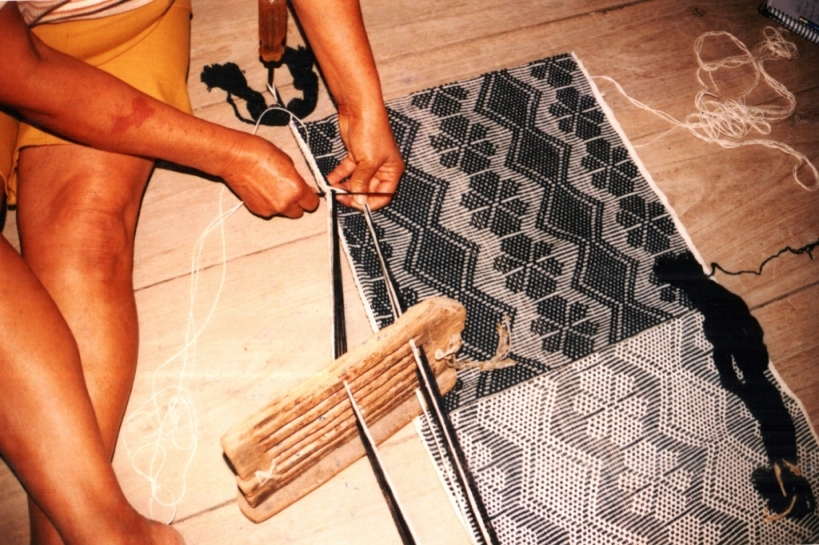
I hope to do a tutorial very soon on attaching bands to edges using the weave-and-sew method and I will leave you with some pictures of this. I use a warp with string heddles and a shed loop as I was taught here. Look at how my teachers in Ecuador sew bands to the edges of their cotton saddlebags using a nifty homemade rigid heddle that slides sideways to create the sheds. There is no one right way!

Backstrap Weaving – Smoothing out the rough.

SMOOTHING OUT THE ROUGH.

SAMPLE! My own words are ringing in my ears….if you are using a new yarn or a new technique on your backstrap loom….sample, sample, sample. And don’t trust your first samples for making width measurements for future projects. You have yet to settle into the new technique and things are still bound to change. Keep practicing while you slowly smooth out the rough bits. Sample away happily knowing you can probably make something from the samples, no matter how small or silly! If not, put it in your notebook with lots of notes beside it…believe me, you will forget if you don’t write it all down.

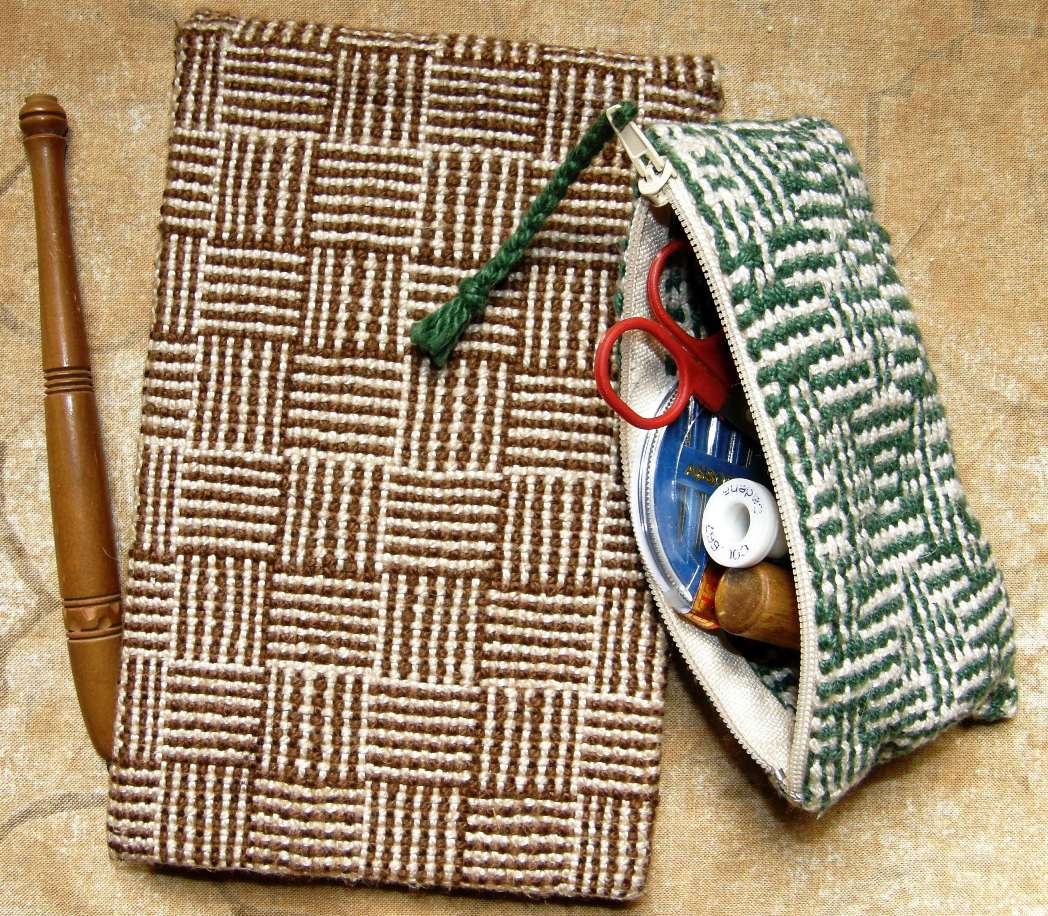
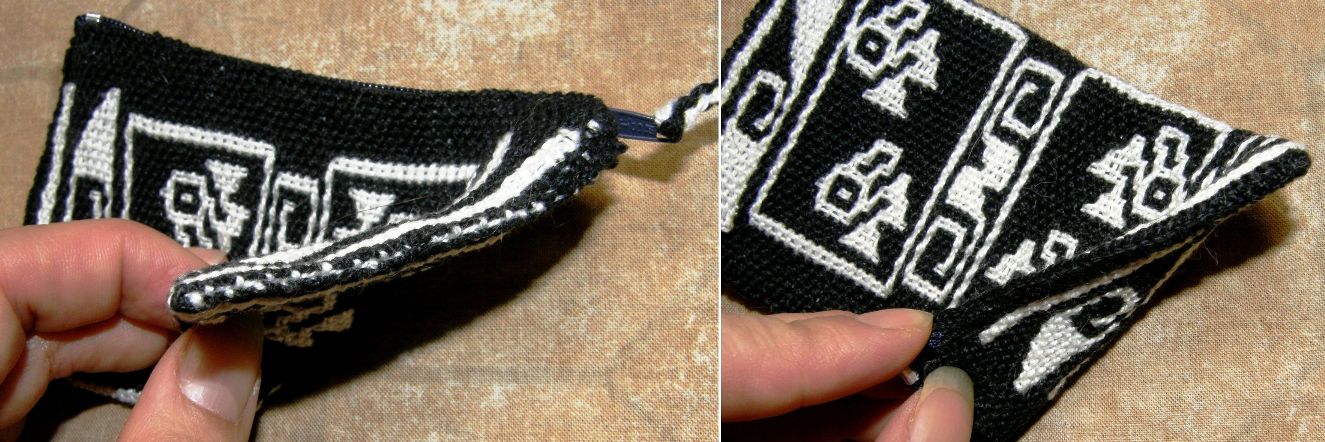
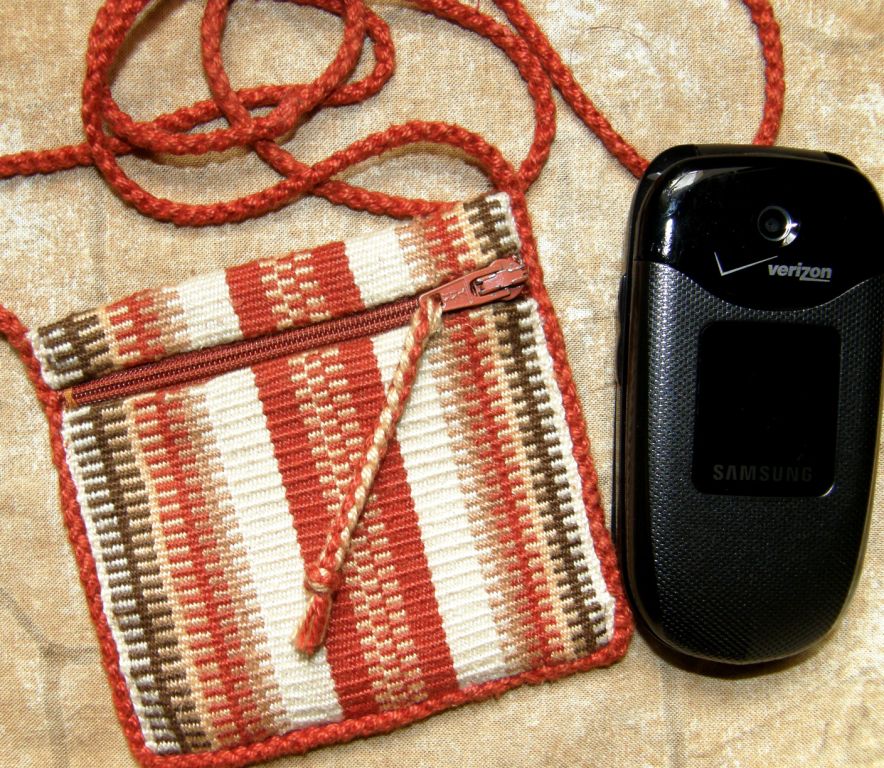
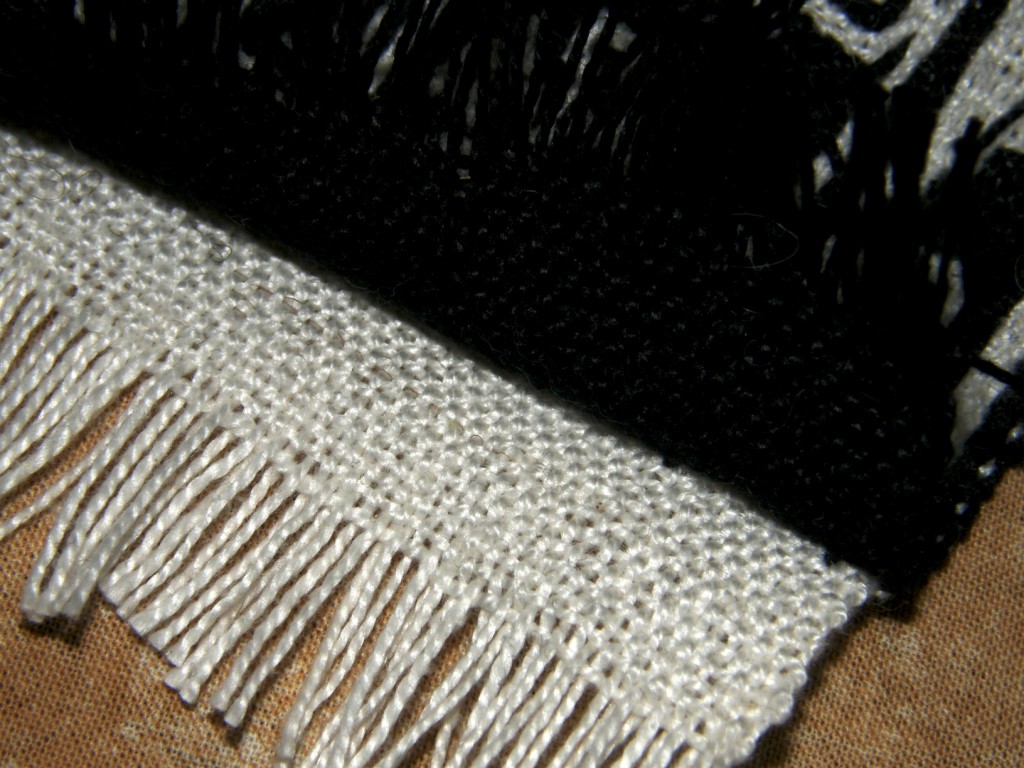
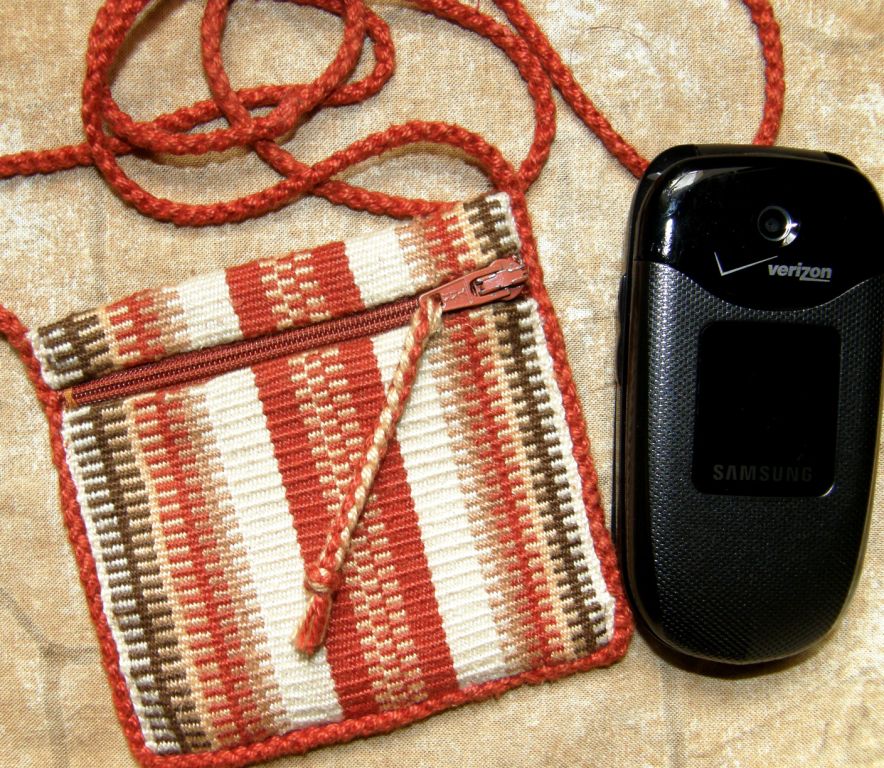
Here are a couple of small samples that I managed to make into decorative and useful things. My log cabin sampler got used as the cover of a flip notepad that always goes with me on my travels. This notebook is now full and I need to get the cover off so I can somehow fix it to another notepad. My first ever shadow weave sample got pulled off the loom as I was satisfied once I saw that it was working and I didn’t really care for the color combination. It got made into a small sewing kit purse which also goes traveling with me.

And never mind if your sample ends up with wonky selvedges and you don’t know what to do with  those pesky raw edges. There is usually a way around all that. The edges of my log cabin piece were turned around the ends of the notebook cover and glued down. Another piece of fine cardboard glued to the inside covered those edges for a neat finish. The zip took care of hiding and protecting the raw edges of the shadow weave piece.

I thought I would show in this blog post some of the finishes that I have used for my pieces, uses I have found for samples and different ways that I have dealt with raw edges.

You may remember from these previous posts here and here that I have been trying out finnweave on my backstrap loom. My first samples did not prove trustworthy for calculating the dimensions of my next project and so, what I had hoped would turn out as squares, ended up being more rectangular. Here is my warp set up for my square design samples…

And here are the rectangular results…

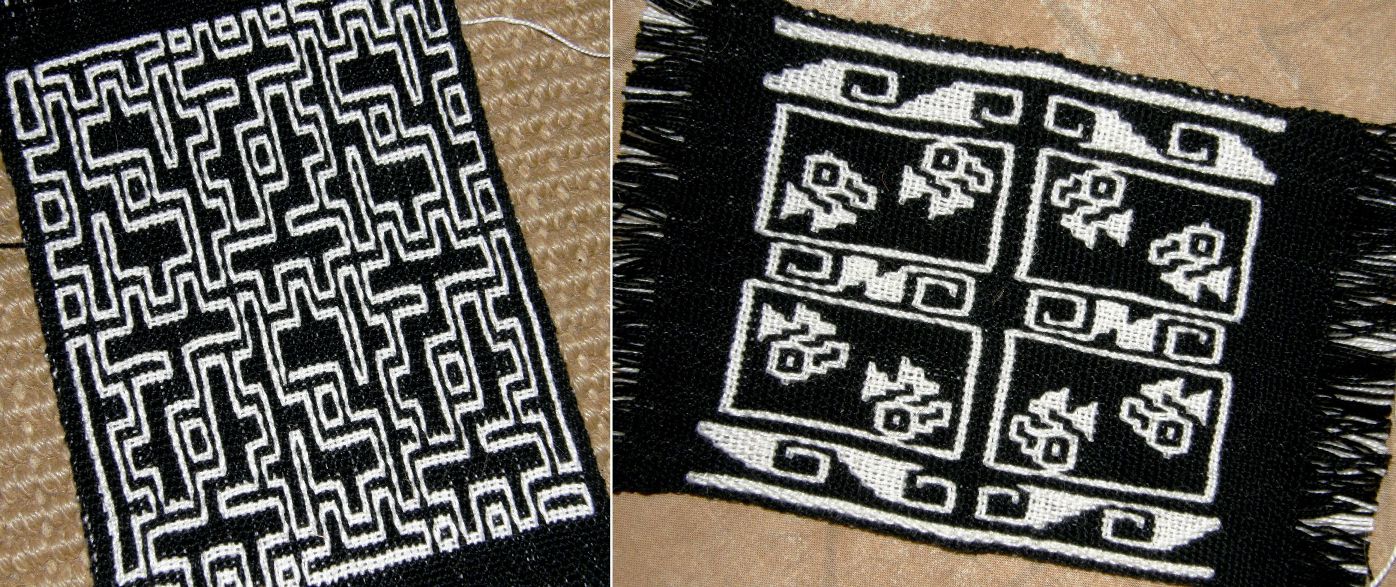
Width needed some adjustments and I learned to beat a bit harder as I progressed. I learned a lot about how to read from the weaving rather than from the chart with the design on the left. This is from one of the Prairie Wool Companion 1982 issues. There is a Chinese lattice work design charted and then three variations provided so that one can weave a set of four placemats. The version I chose is the one furthest removed from the original Chinese design. The design on the right is one I invented using the little pre columbian birds that I wove before and gave me more practice with filled-in shapes.

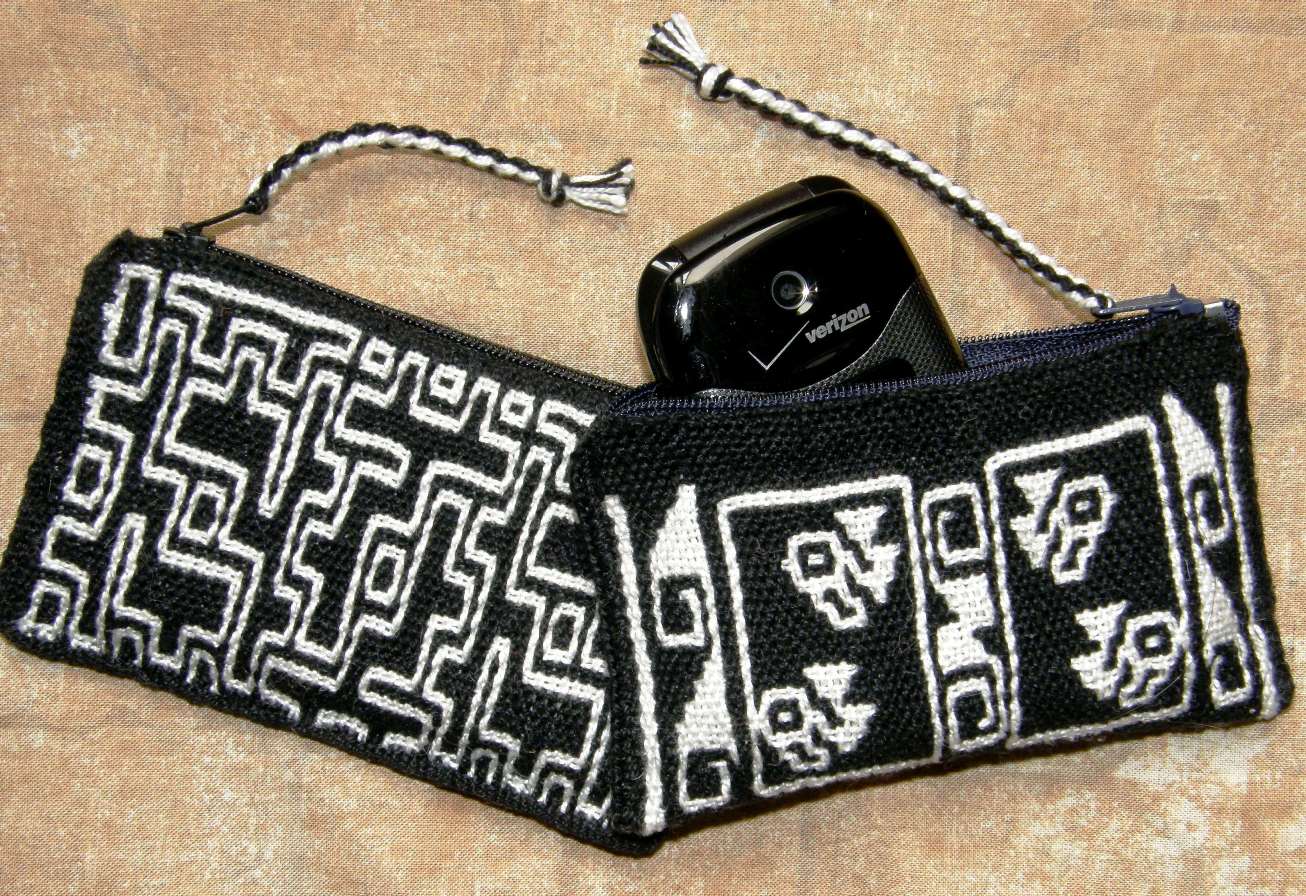
I was able to make something cute from the two samples…

This is a double weave and it is particularly tricky dealing with its raw edges. Folding over two layers to hem is bulky and unsightly and so I followed the advice that I read in an article and wove the start and finish of each piece as two separate layers with open edges.


The idea is to turn both edges inward and sew them together like that. However, I didn’t do that. As I was going to sew in a zip, I cut the white layer back as far as I could and then simply turned the black layer over it. The black turned edge got sewn down and hidden under the zip so all is well and protected and nice and neat to boot.

One thing I was not so happy about was the edges…

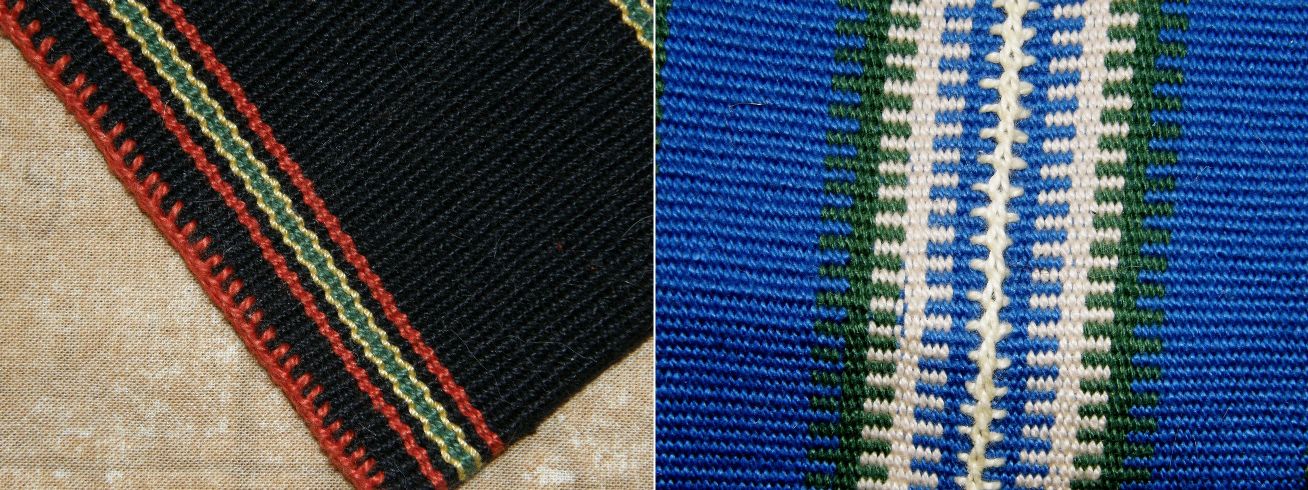
This may just be something that I am goofing up, but to my eye, the edge is ugly as you can clearly see how both layers of contrasting colors come together. A row of single cross knit looping covered that up nicely as you can see on the right. However, my eyes just about fell out…black on black. I had to stand right by the window in good light to do this.

So that was one solution to the ugly edges. On the other little bag, I added one of those woven bands that are woven and sewn simultaneously using the weft as the sewing thread. I used it down the side and along the bottom and it broke the design up nicely between the two faces. A four-strand braid for the zipper-pull was the finishing touch.

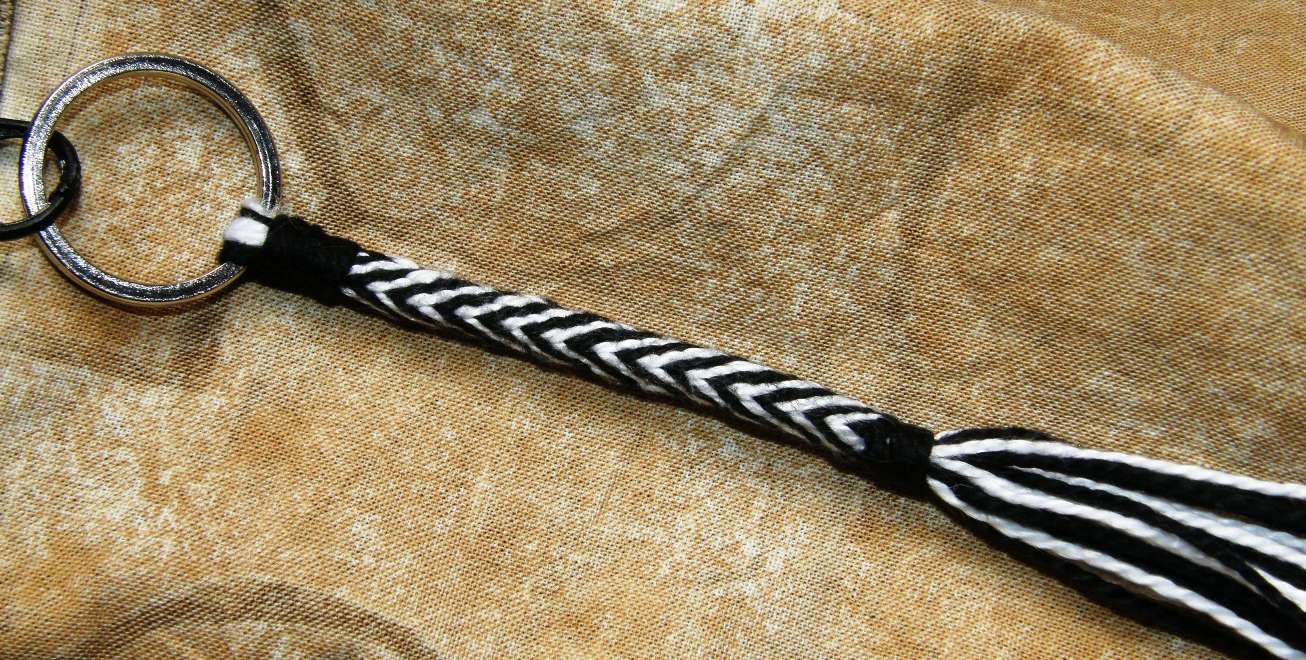
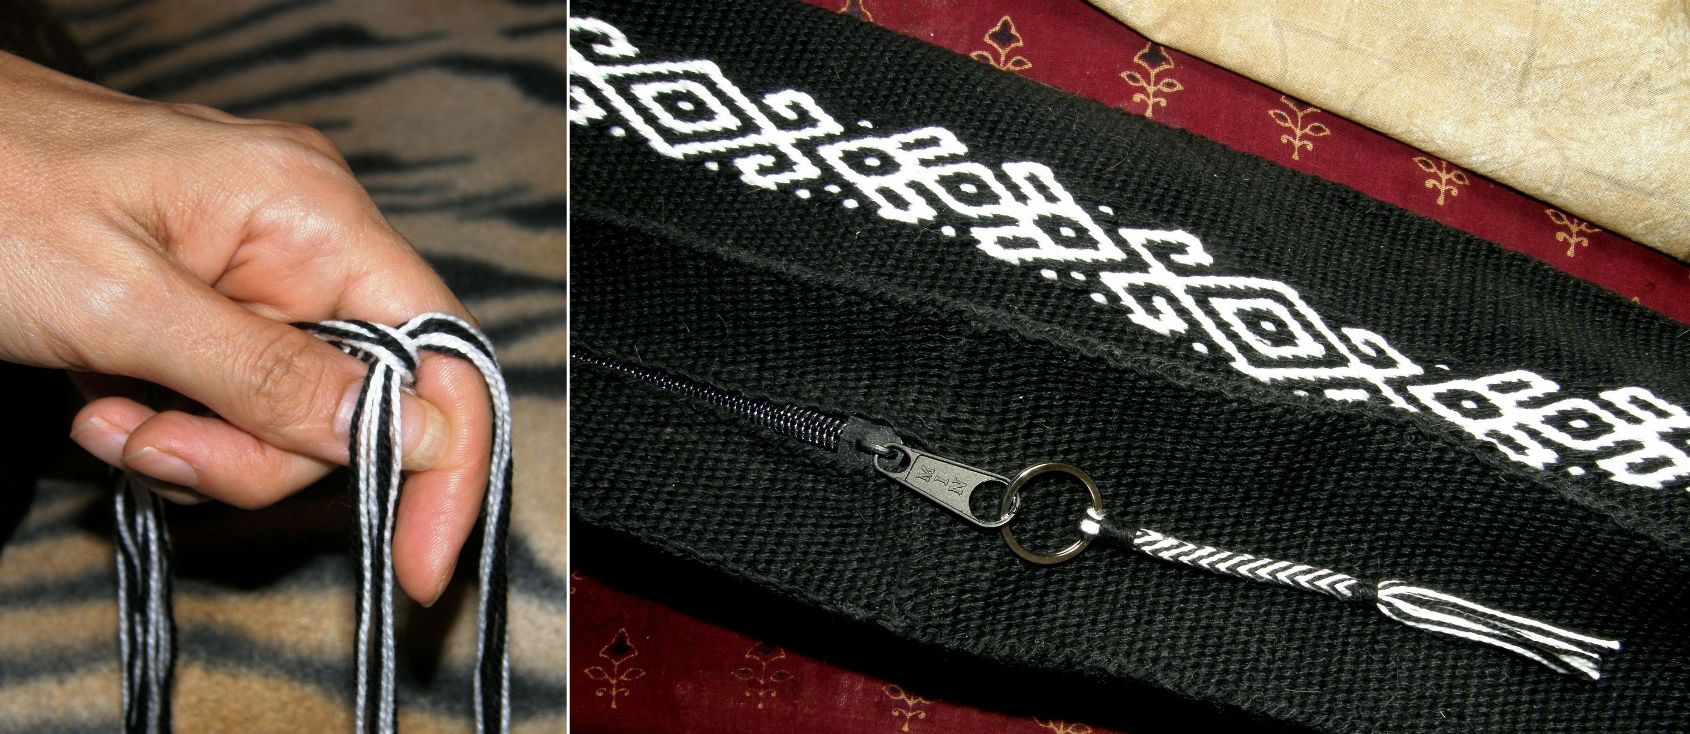
Speaking of braids I made the zipper-pull for my loom bag project…remember? – woven bag, braided zip-pull and twined strap.


It’s a 24-strand braid worked in the hand as my Peruvian sling braiding teacher had shown me.

I had not done this kind of braid in this size yarn before and so it was a bit of a challenge.

This is the base of the Margarita braid but as, I was so focused on just keeping everything in order while muttering the moves to myself, I did not venture into doing the changes in sequence that produce the diamond designs on the Margarita-style braid.

The cross knit looping that I used to hide the ugliness on my finnweave piece can sometimes be added to perfectly good looking selvedges as an extra decorative feature or it can be used to draw attention to or hide the place where two pieces of fabric are joined. This is also known as Van Dyke stitch in embroidery (see the video embedded in this blog post).

Other things that can be used to disguise a less-than-perfect edge or brighten something that is a little too plain are braids.

A two-color stitch can look good on the edge of a very plain one-color piece or hide its wonkiness if necessary!


This was a sample I made for a plain warp-faced weave weave-along. I sewed a four-strand braid around the edges which also served as a strap. Again, the zip handily hides and protects the raw edges.

This little pouch was started with a third selvedge which you can see on the right. I sewed across the raw edge with very visible stitches as neatly as I could by hand and then sewed that edge down.


Then there’s good old hem stitching which I only learned fairly recently from this video. I got such a kick out of learning and doing this the first time, I wanted to go around and hem stitch everything!

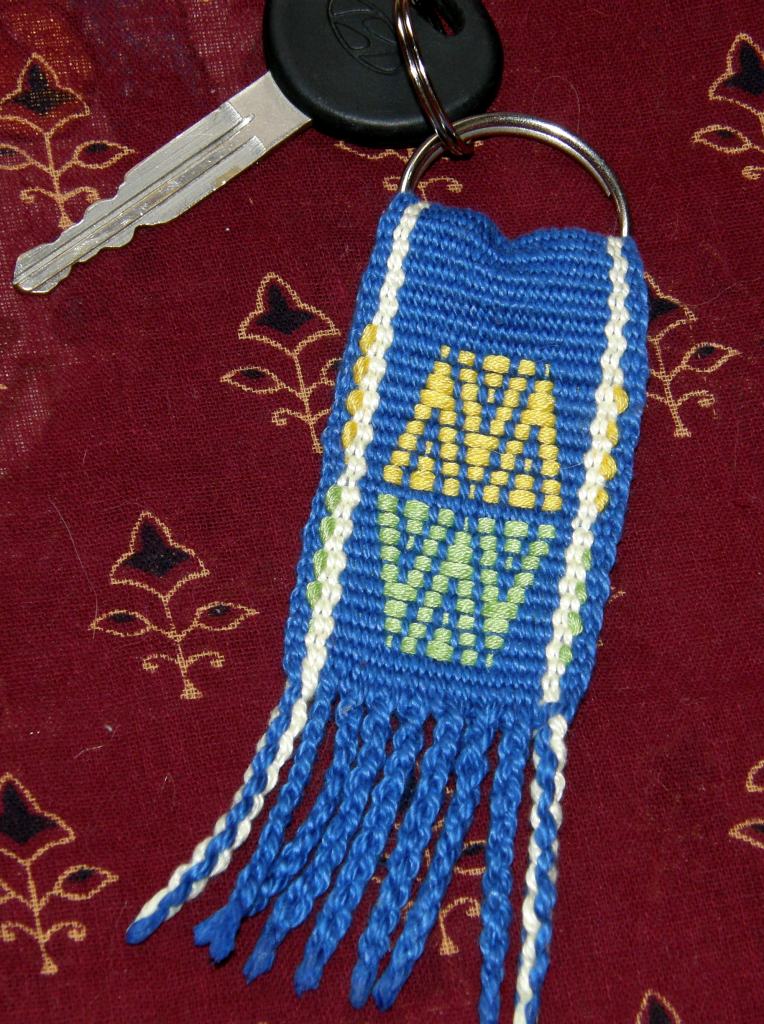
Teeny tiny “invisible” hand stitches seem to work well at the bottom of book marks and keyfobs. Warp ends can also be braided. I like to dab the ends of the braids with diluted white glue and squeeze them into a tapered shape as they dry. I think it looks better than having knots in the ends.


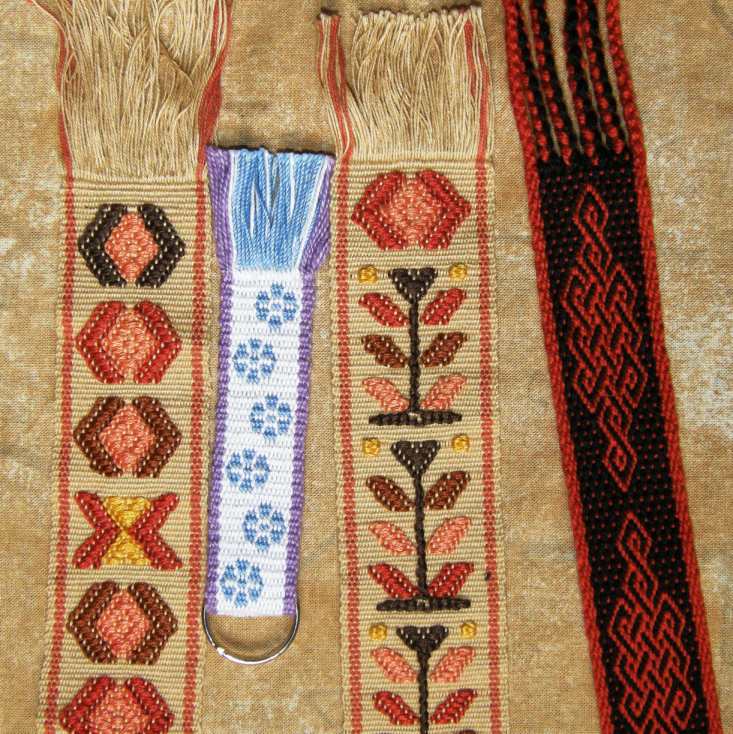
Above are some bookmarks decorated with Guatemalan supplementary weft designs, a double weave key fob and a pebble weave Celtic knot pattern.

I am not so convinced about the way that I chose to deal with the raw edges on these very thick double weave mug rugs.

This came after many attempts to sew them neatly and invisibly. They are too thick for the method I suggested earlier where you weave the two layers separately and turn them in on each other.

I figured if I couldn’t make the stitches invisible I would go for very visible and decorative, and something in keeping with the ethnic nature of the design.

This is the back side. The brown thread cannot be seen on the front.

I sewed these while they were still stretched out on the loom and had to put a mirror in my lap so I could see how the stitches were being placed on the back.

I am open to suggestions for improving this!


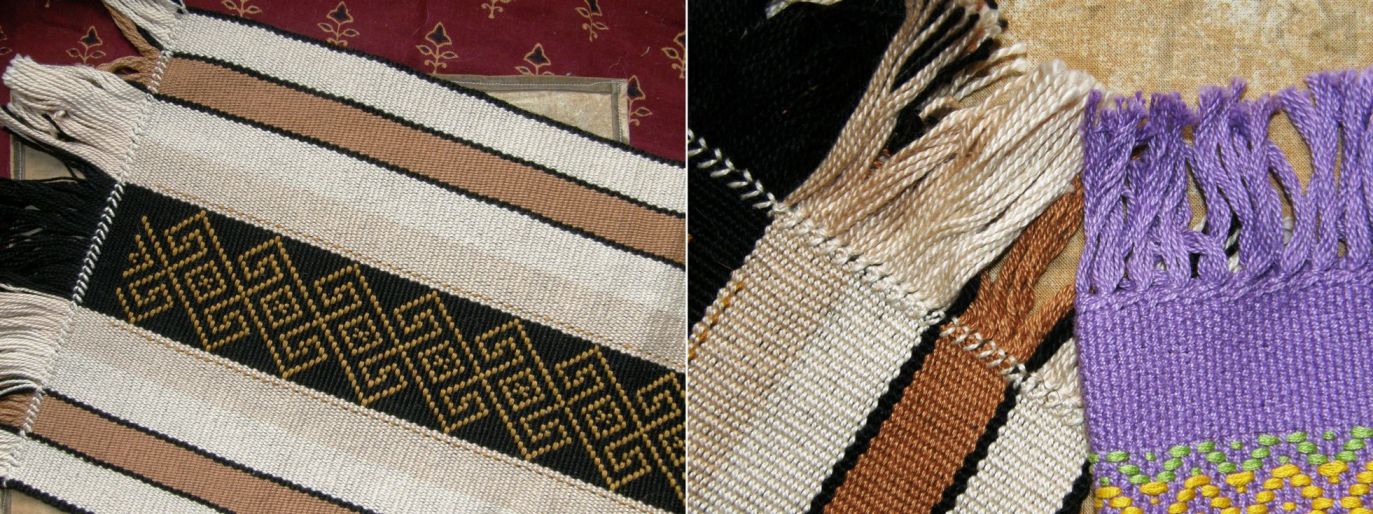
Montagnard (Vietnamese hilltribe) weavers often finish their weavings with weft twining. They then add beads and often a few more rows of weft twining. I wasn’t convinced that the weft twining would stand in place on its own and sufficiently “finish” a piece until I tried it myself. It is firm and sturdy and there is no way those twined wefts are going to work their way loose. Here is some twining I did in a traditional Jarai design on the end of a warp-faced piece…

On the Bedouin design wall hanging that I did on the right I also twined the edge and finished it off with wrapped warps.

Warp wrapping, braiding and other finishing techniques are covered in Finishes in the Ethnic Tradition by Karen Searle and Suzanne Baizerman.

My latest favorite edging which I learned at the tinkuy de tejedores in Cusco last November is the tubular woven band which is woven and sewn simultaneously to edges shown below on the right. This is another one that totally grabbed me. I had to stop myself from tubular banding everything in sight!

I decided to try a plain weave single-color band as an edging after seeing how Guarani weaver Angela edges her pieces and I used it on the cell phone pouch above. It very nicely covers and protects the raw edge where I cut and shaped the flap.

Well, enough about smoothing out the rough, brightening the plain and taming those wild warp ends. Back to finnweave. I am still enjoying the Cora and Huichol pieces and traditional Scandinavian patterns and have just learned that another Mexican group, the Otomí, also practice this technique. However, I am returning to my original goal now and am about to chart my first pre columbian design based on one of my textile fragments. This will be another sampler and I will wet finish this one.

#############################################

What have the weave-alongers been up to?

Linda wove her first band with horizontal bars getting warmed up for simple warp floats. She also made supplementary weft samples so she could learn about the scale of her charted designs against the woven fabric before launching into a project. Bobbie finished her piece with the central supplementary weft pattern. The chart for this design is here. I really like the effect of the different colored horizontal bars design that she used on the edges.

After finishing another pebble weave piece, Jennifer shifted to double weave and enjoyed sampling the technique in #3 crochet cotton. The llamas are charted here.


Tracy is back from her trip and back at the loom doing pebble weave.

Tracy’s latest band is on the left and Jennifer’s finished piece is on the right. You can see that her knitting needle is not standing up to the task of creating her third selvedge. You can read some tips about starting with a third selvedge here.


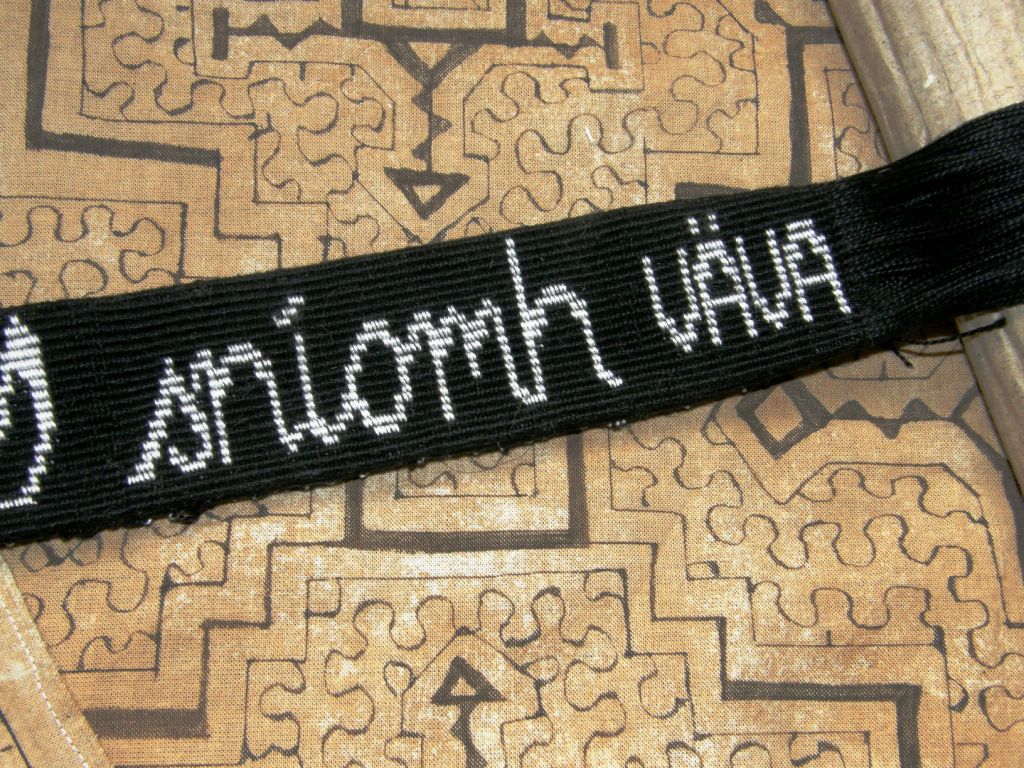
Both Marsha and Jennifer tried double weave in #10 thread but decided it was too fine to tackle yet. Marsha is doing a double weave band, her first with a pattern, in #3 thread. She is writing the name of her roommate on what will be the strap for a camera bag. Jennifer made a keyfob as her first attempt with #10 thread and is happy to continue sampling with #3.

And just wait until you see this…

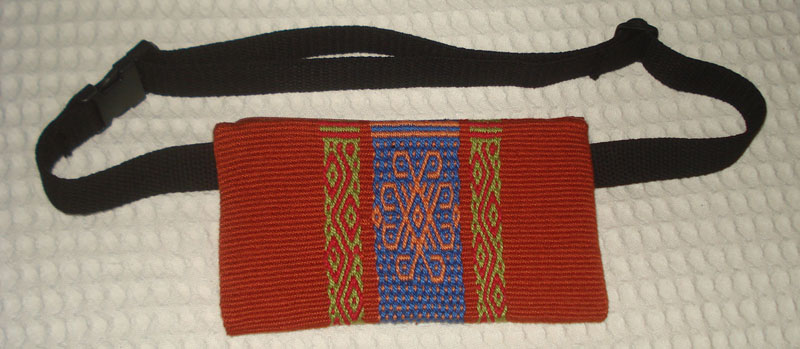
Helena in Brazil finished her pouch and has attached an adjustable band with buckle for her sister to use on her trip to Australia. I love that orange! There are ideas here for fun ways to combine colors, right?

The central design is one I invented and include in my book. I made it to go in a wall hanging along with the adaptation I made of a Huichol motif. This design includes the diamonds, spokes and curls that were also elements in the Huichol pattern.

I will leave you with our Weave-Along group’s learning mantra:

Short, Narrow Warps and Sample, Sample, Sample!


Backstrap Weaving – Care Packages

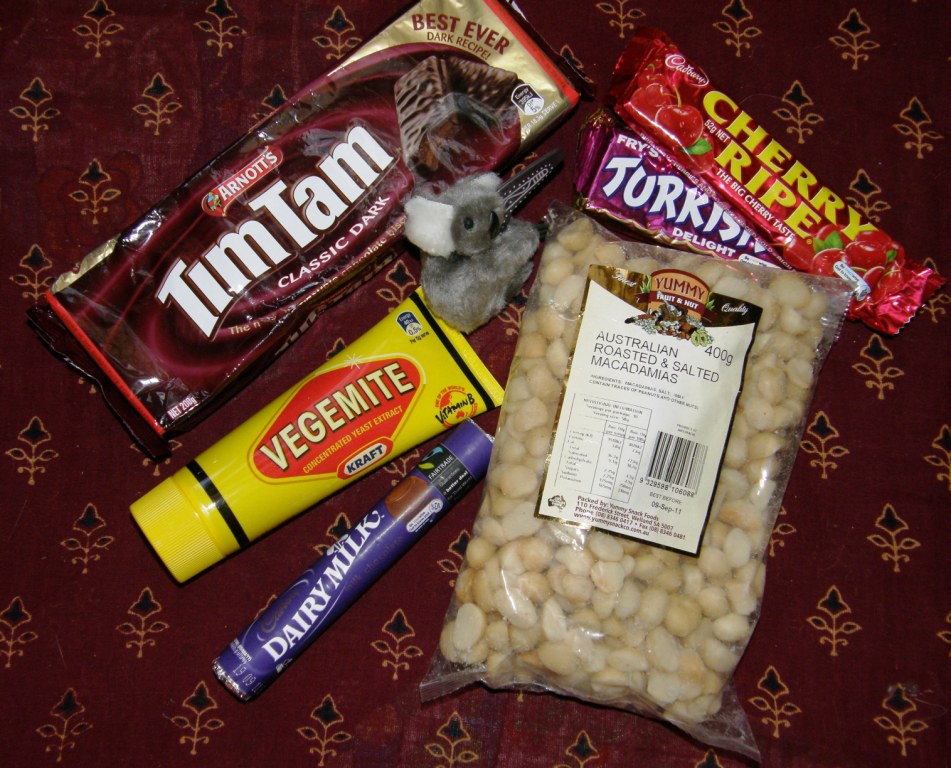
Mmmmmm 🙂 Care packages….this is part of a five-kilo box that showed up in the mail this week…

A huge cliche, I know, but I do like to have my Vegemite and Tim Tams. I have tried the gourmet cookies but nothing tops good old Arnott’s biscuits. This is just a fraction of what was in the box!

I suppose if I ever go back to Australia I will be having care packages sent from here….dried cuñapes, pots of dulce de leche,  facturas, alfajores and “Sublimes“! I must gather them all up so I can show you what they are.

It has occurred to me that I get care packages all the time…not necessarily cartons of stuff in the mail box at the post office, but rather, emails from people all over the world with links and photos and information about things that they know will be of interest to me…notes of concern if they hear of a new outbreak of social unrest or natural disaster in this area….words of comfort if life throws me a little disappointment on a more personal level. Nothing says more clearly “I care” than all that.

A certain person’s exceeding generosity has helped me to be the owner of this….

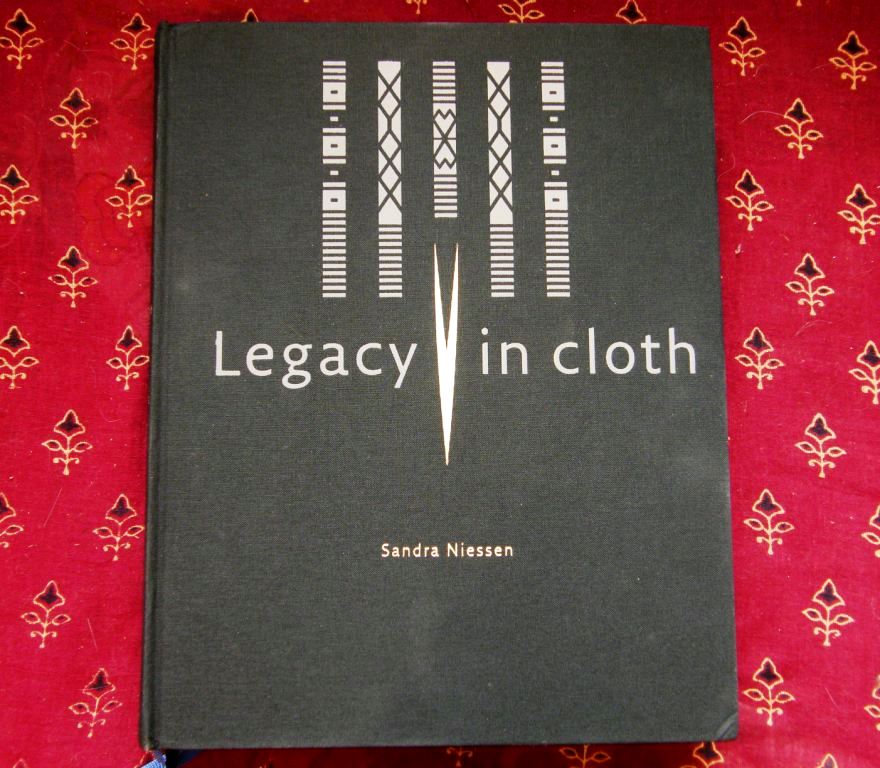
“Legacy in Cloth” – this book contains the results of Sandra Niessen’s thirty years of research on the weaving techniques and textiles of the Batak people of Indonesia. Five hundred and sixty-eight pages of text and luscious photos!

I am not even going to touch it until I have quality time available to give it the attention it deserves. This is not something to just flip through.

Sandra writes a fabulous blog packed with stories about her time spent in Indonesia with the Batak people, writing the book and then taking the book back to the villages.

She is currently in Indonesia making a film on Batak weaving inspired by a Batak poem, a project about which you can read here. Many thanks to Pamela Cross who gave me this information and sent me the link. You can see photos, also generously provided by Pamela, of Batak textiles with their twined edges in this previous blog post.

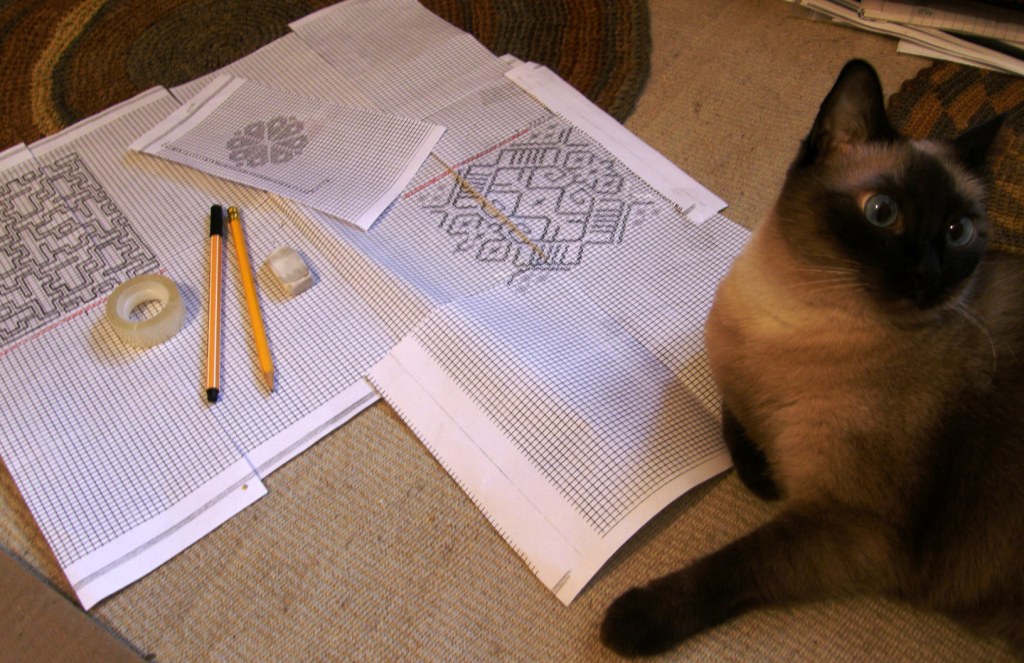
This week there was some time spent at the loom and a lot of time spent at the drawing board, the drawing board being my bedroom floor.

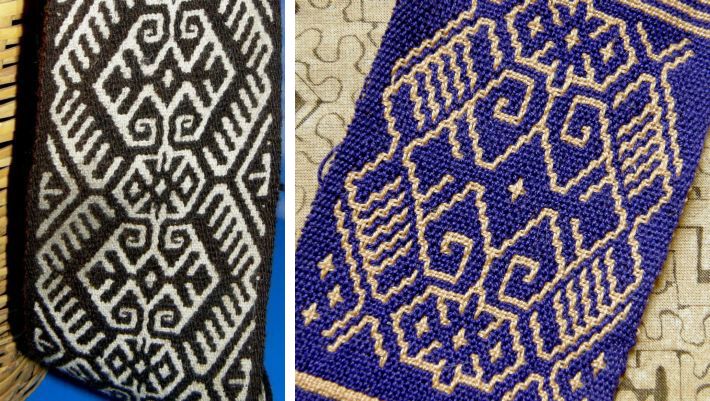
I love charting! I am still in finnweave mode and made an attempt at reproducing the design on a piece of Huichol weaving that I was able to photograph at the National Museum of the American Indian in DC. This was a great learning experience as I can really see now how my lines on paper transfer to cloth, how much space is created between rows of charted squares etc so that next time I should be able to make this a precise reproduction rather than an “adaptation”.

I knew from the get-go that this was not going to be faithful to the original. I couldn’t get the spacing of the outer “spokes” right, for example, but there was really only one way to figure it out…go ahead and weave it. Certain parts came out quite well while others obviously didn’t. Without the comparison I think it stands up as a nice design.

I read in one of Mary M Atwater’s articles in Handcrafter (a free download from the arizona archives..thanks Jeannine and Helena) that large areas of solid color should be avoided (much the same as in warp faced double weave) as, in these areas you end up with two separate layers that can tend to bulge and billow.

For that reason I wove the three small crosses at the bottom of my replica  piece to help fill in that negative space and bond the layers. I omitted them from the top corners so I could compare and found that the crosses made very little difference. I think the design looks less cluttered without the crosses and that it is nice to have areas of solid color if you can get away with it.

I then returned to the Xenakis article in the Prairie Wool Companion on which I had been working last week and wove the traditional Scandinavian design, for which a chart is provided, at left…

How amazing is the close resemblance it bears to one of the motifs on this other Huichol piece that I photographed in the museum in DC.

And then I was tidying up my bookshelf and was about to shift my copy of Verla Birrell’s The Textile Arts to another spot when right there on the cover I see a tiny image of a  loom and textile with a flower motif that even more closely resembles the Scandinavian one.

I guessed that it was a Huichol piece but it turned out to be a double weave piece of the Cora Indian culture of Mexico. So much to learn!!

Speaking of books, I managed to find a copy of Atwater’s The Finnweave and the Mexican Double Weave at Amazon. The search for this dates back to when I first started playing with finnweave back in 2008. Can’t wait to read it!

I had been thinking while trying to chart the Huichol piece that perhaps I had made an incorrect assumption and that the Huichol pieces are not, in fact, woven in finnweave technique at all. This world of balanced double weave pick up is very new to me and so the article in the latest Handwoven (Jan/Feb 2011) by Doramay Keasbey couldn’t have been better timed.

Many thanks to Caroline for pointing this article out to me. Doramay Keasbey writes about five balanced double weave pick up variations which she has woven in bookmarks showing how both faces of one design look when woven in each of the five techniques. What a nifty article! It has helped me, who has so little experience in this, to see what elements can identify a piece as having been done in finnweave.

It also helped that Hans Christenssen, who has authored a book on finnweave, confirmed the technique used for the Huichol pieces.

He also gave me some background on the piece I showed last week that was woven by Weavolution member Manicgirl. Manicgirl has disappeared from Weavolution for the time being and I hope she comes back soon to find out why her ears are burning so!

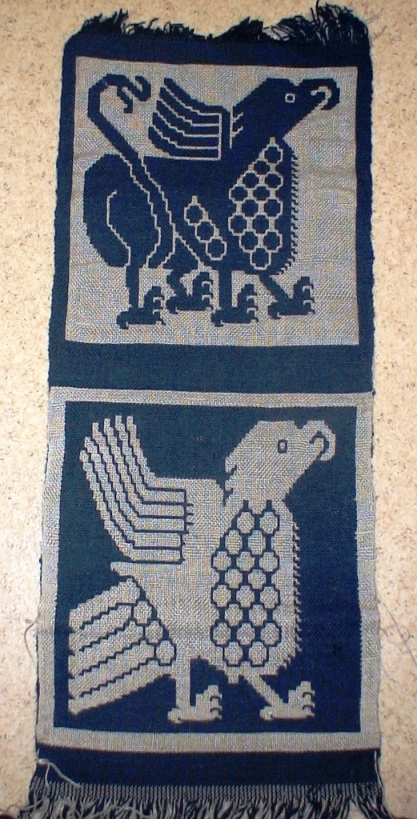
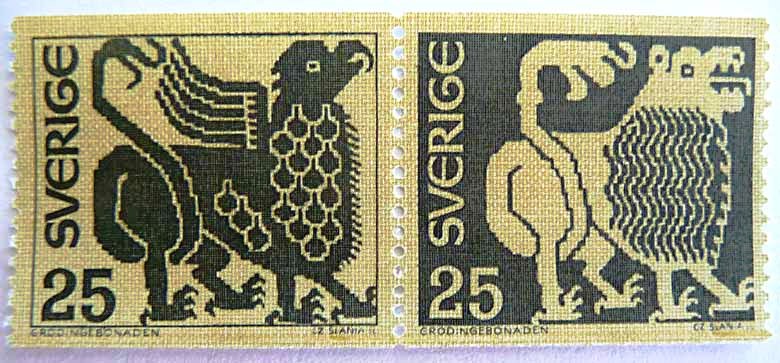
On top of giving me this link to the original piece in a Stockholm museum (click on the image in that link to see a much larger view), he told me that it is a 15th century piece from Grodinge, Sweden that has been analysed and reproduced in part by Ulla Feltzing, THE expert in finnweave in Sweden..

Two motifs from reproductions that Ms Feltzing made were the subjects for these two beautiful Swedish postage stamps and instructions for weaving some of the motifs appeared in an issue of Vavmagasinet.

Now you see how I have wandered off again. This all started with a desire to reproduce some textile fragments of pre-columbian Peru and now here I am in 15th century Sweden.

Back to Bolivia to my studio a.k.a my bedroom floor. I have decided to weave up a set of squares with some finnweave designs I have been collecting here and there hopefully with something to represent each of the cultures in which I have found a traditional use of this technique. I want to do something along the lines of the warp faced double weave mug rugs I made some time ago. (pattern charts here)

These were made in a 12wpi cotton and are super thick. In order to get the detail I want in the finnweave designs I will need to use finer cotton and make larger squares, around 5 1/2 – 6″ and so I will call these “table toppers”…something on which to pose a small pot plant or a bowl of candy or whatever. And if you are thinking that this sounds like just an excuse to weave something you are right. I don’t actually have a clear table on which to put these!

I have prepared the warp which may end up being a sampler…


And now to chart the designs and make adjustments to my first reproduction attempt.

At left you will see that I finished twining the Gaelic word for “weave” on my bag strap and have added the Swedish one. Next stop…Nigeria.

I didn’t get a start on the Margarita braid for the zipper pull – maybe this week.

A Weave-Along update….

A small group of members in the Backstrap Weaving Group on Ravelry have been participating in a weave-along. I suspect many more are doing a watch-along…

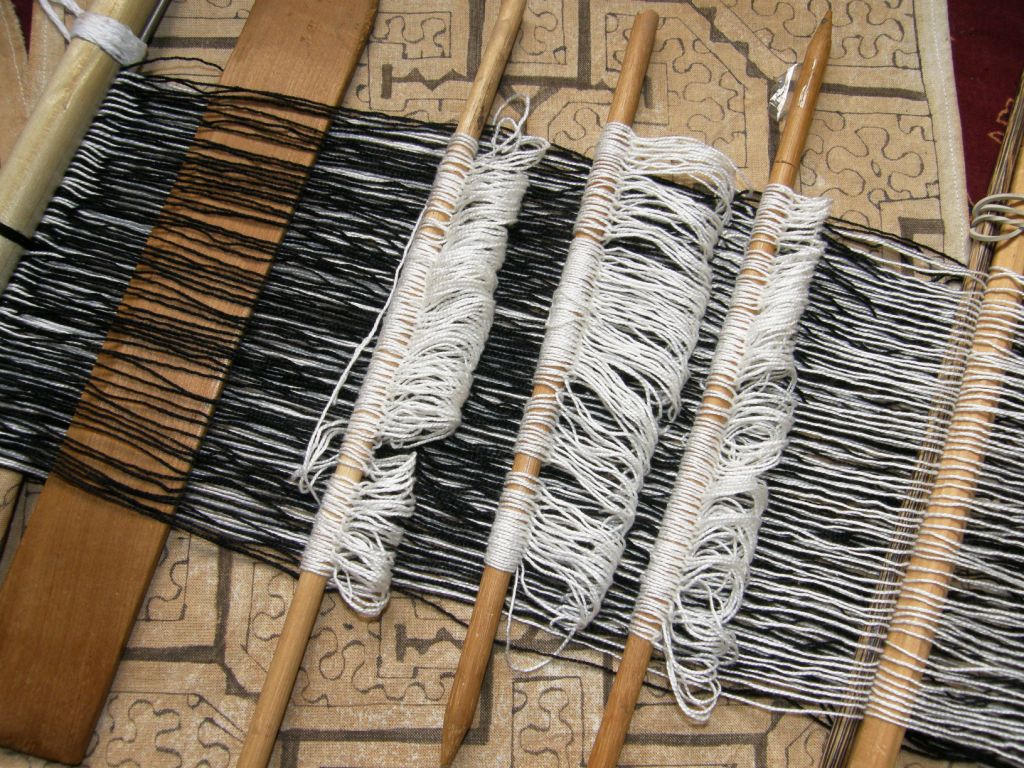
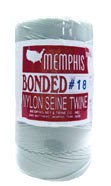
Something I learned this week from weave-along participant, Barry: there is such a thing as bonded nylon and apparently it makes great heddle string. All the weavers I saw in Guatemala use nylon for their heddle string. None of the weavers I have encountered here do. They use their warp yarn for heddles and I do too. I hate nylon…it’s slips around on the heddle stick and won’t hold knots – horrid stuff. But, apparently this bonded variety is very cool.

This is the picture from the Memphis Net and Twine Co web page. Barry has been using size#6 which he says works well with the #3 mercerized crochet cotton thread with which he is weaving. Using nylon cuts down on possible abrasion of the heddle string on the warp which can cause pilling. Excessive pilling will be a problem as warps will eventually start sticking together. Those who have been backstrap weaving for a long time will have learned to open their heddle shed with the minimum of abrasion but for those just starting out, this pilling can be a very annoying problem. Apparently this bonded nylon holds knots well…yay! Below you can see Barry’s loom with bonded nylon heddles nicely gripping the heddle stick.

And here is his backstrap with finished five-strand braid (link provided by Barry) and first pebble weave project following instructions in my book

Linda sent me these pictures of a supplementary weft patterned band she is making which has been inspired by a design on a Guatemalan huipil.

She built herself a mini warping board and, wise woman, is making short pieces suitable for keyfobs and bookmarks while she learns the techniques.

Last I heard, the blizzard has kept her at home and she is trying horizontal stripes and four-stake warping.

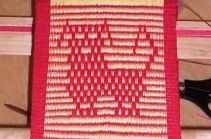
Marsha wove her dog, Wiggles, into her simple warp float band. She was inspired by a dog she found charted in one of Mary M Atwater’s books.

I have seen that dog and Marsha’s is way cuter.

Helena in Brazil wove this piece and showed it on Weavolution. It is destined to be a waist pouch for her sister. The center pebble weave design is charted in my book. Wanderingskopos (Reetta from Finland) is using the practice patterns that I provide in the one-weft double weave tutorial to make her first double weave band.

#####################################

There is an online workshop on the traditional Sami band weaving of Scandinavia being run in the Yahoo Braids_ and_ Bands group this month of February. Sue Foulkes is presenting the workshop and, if you follow the second link, you can click on the image in the top right hand corner and see some examples of Sami bands. Although they are warp faced, they are traditionally woven with a small rigid heddle on a backstrap loom.

The files will remain in the group’s archives if you are unable to participate in the workshop this month – always more fun to do the workshop though. Last November Sue presented a workshop on Baltic Bands, also done with a rigid heddle, in the UK Online Guild of Spinners, Weavers and Dyers. You can see some images of the bands members produced on their public web page.

Kimberly Hamill, a wonderful backstrap weaver whom I met at Convergence last year, is giving a backstrap weaving class March 11-13 at Weaving Southwest in Taos. You can see one of her backstrap woven artworks at left which has been accented with a little embroidery.

##############################

Finishing off here and going back to the loom…. I would like to give a big thanks once again for all those behind the scenes, too numerous to name, for all the wonderful “care packages”.