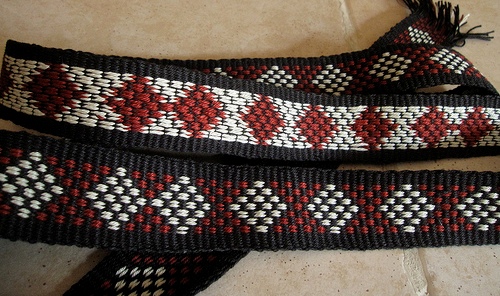
Backstrap Weaving – Juggling!

Juggling! Yes, here I am juggling…weaving my wall hanging project, warping, writing and taking pictures for my new book, putting together the translated versions of my first book, planning articles, answering online questions from new backstrap weavers. I have had to come up with some new routines to fit all this in.

Most people roll their eyes and sigh in dismay at the word “routine”…dull, boring repetitive. I, on the other hand, am all for it, that is, if it is a routine of my own making and not one that is imposed. Having a fixed routine is the most efficient way in which I can operate.
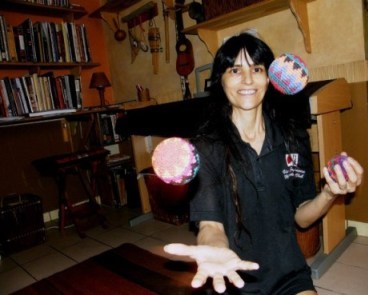
And I do take time out for a little mindless fun!

Juggling is both relaxing for the mind and a darn good work-out for the body…at least for an inexpert juggler as indeed I am….with lots of crawling around on the floor picking up dropped balls.

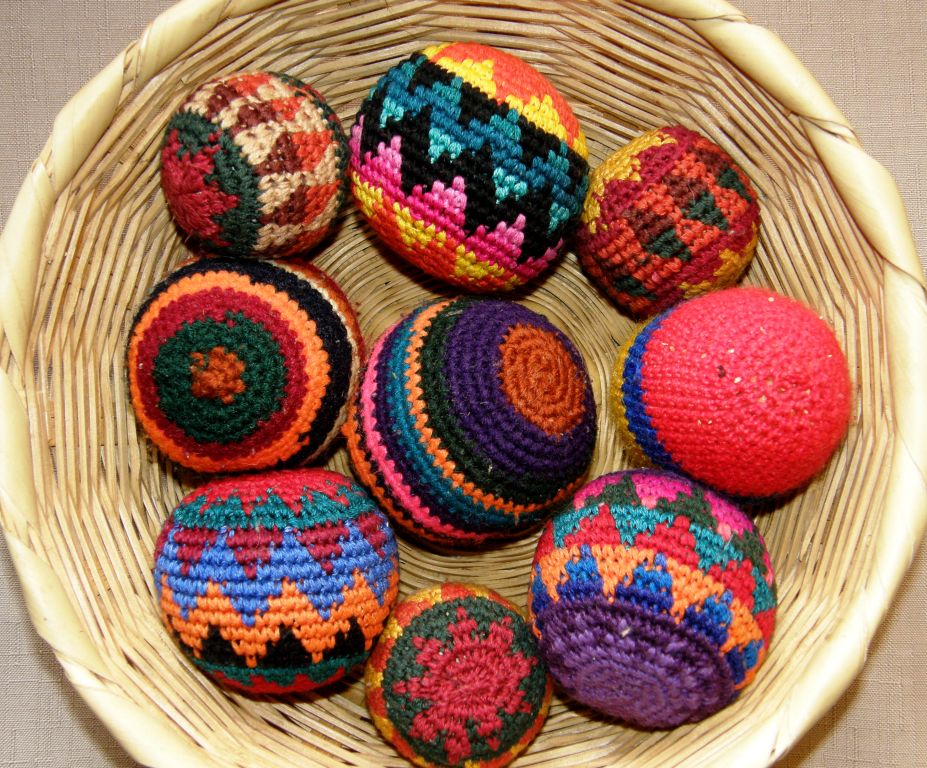
What prompted me to drag out the Guatemalan juggling balls from the depths of one of my woven storage bags?….They are crocheted and I wanted to take a look at how they had been made.

We talk about the simplicity of the backstrap loom and what can be achieved with a loom comprising just a few sticks, or sometimes no sticks at all.

What about the wonders that can be created with one small stick with a hook on the end?

And what led me to all this?… pictures in Mirja Wark’s book on the woven belts of the Wayuu people of northern Colombia and Venezuela. The designs on these belts are the inspiration for my latest wall hanging project. One picture shows a man wearing a belt with a small patterned bag at his side which Wark says is crocheted. She describes crocheted cotton bags that are used by both men and women. The women carry a medium-size bag called susu. Men have smaller crocheted money pouches called susuchon and other pouches which can hold tobacco, keys and amulets.

So it was off to Google and Youtube Land to learn more. I have decided to do without air conditioning and pay for a faster internet service instead so Youtube viewing does not make me want to tear out all my hair anymore! But, finding time to watch all those videos is yet another ball that must be added to the juggling mix.

These images of Wayuu susu, which are also sometimes referred to on these sites as mochilas, are from the online store of the Wayuu Taya Foundation.

I found that these traditional crocheted bags became very popular outside Colombia a couple of years ago and even prompted an article in the NY Times.

On many sites the bags are described as having been “woven”, “knitted” or “woven in crochet” but we have Mirja Wark who tells us that they are, in fact, crocheted. One article describes the straps as having been created on looms.

I love the big bold designs! The bag at left is from CordoBags.

The following is probably the nicest video I found in my alotted Youtube time showing the Wayuu people and their terribly harsh environment. A woman can be seen carrying her susu, there’s a little weaving showing those loose joined heddles that I talked about last week, some fast and efficient twining in progress (love that part!) and there are two brief segments showing the women crocheting bags.

So, here is my latest project which has been inspired by the work of the Wayuu people and the beautiful designs on their woven si’ira which I have been able to see in Mirja Wark’s book.

I have made a few adaptations of my own. The triangular “border” design is my own pattern as I wanted something bolder than those shown in the book. The larger design is one of many “block patterns” as Wark calls them and, as I charted this one myself, I cannot be absolutely sure that it is faithful to the traditional design. It falls into a group of patterns called schichirujuna paa which means “like the nose of a cow” in which there are eleven variations.

I like how the herringbone design on the edges is similar to the weft-twined design I plan to do along the bottom edge.
This is slow work, I can tell you….lots of threads to count and pick up!! I was very unsure about this piece last week and was on the point of putting it aside for a while and working on something else to clear my head. But, I persevered and am now happy with the result.

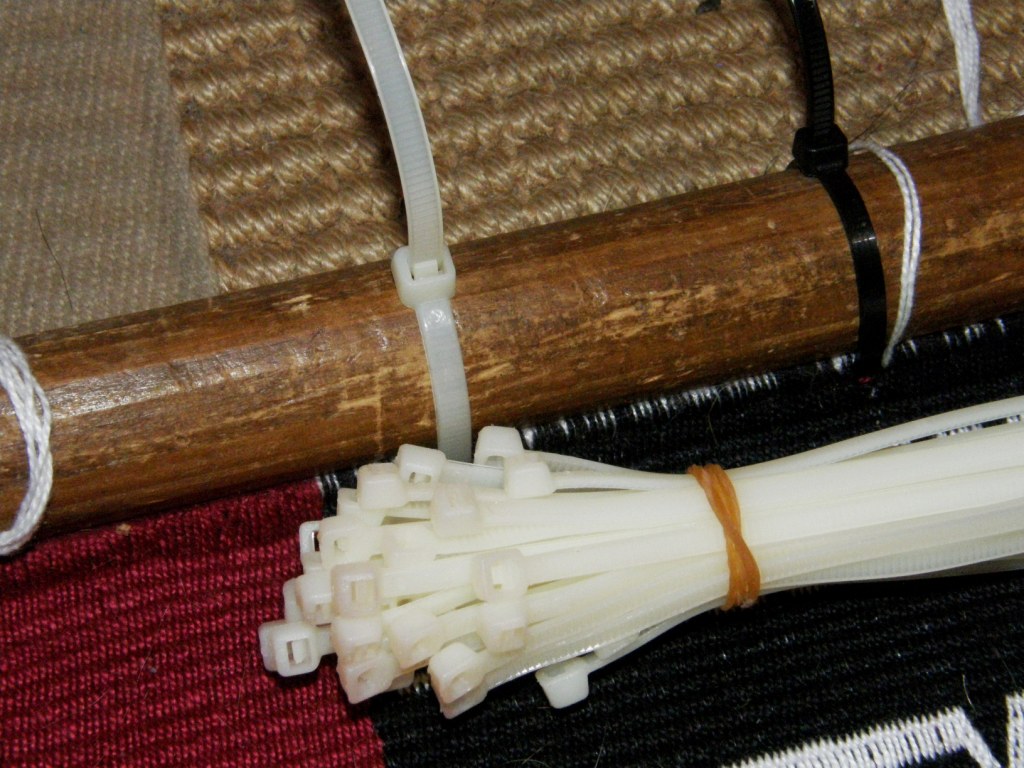
And you may have noticed my new favorite addition to the toolbox at left…cable ties.

These are absolutely brilliant for lashing the warp on its piano wire to the loom bar and creating a third selvedge. I was getting really fed up with my lashing cords on this project working their way loose.

They always do and I usually just wedge thin dowels between then and the loom bar to tighten them up. This time for some reason, nothing I did was solving the problem.

In my recent home de-clutter mission I found a bag full of these cable ties in the junk drawer in the kitchen. They are perfect for lashing but, unfortunately, can only be used for one project as they will have to be cut in order to remove the finished weaving. I wouldn’t use them to lash right from the start as they are wide and space the warps. I would only use them once the weaving has progressed an inch or so to replace the lashing string, which has probably already started to work its way loose.

Now back to the crochet. No, I am not about to add this to the juggling act! But, who knows, the next time I am thinking about some on-the-road projects, maybe I will toss a hook in my bag. I know the very basics of crochet. When I went to Ecuador and visited the artisans who work with cabuya fiber, I stayed with a lady who taught me how to crochet this little pouch.
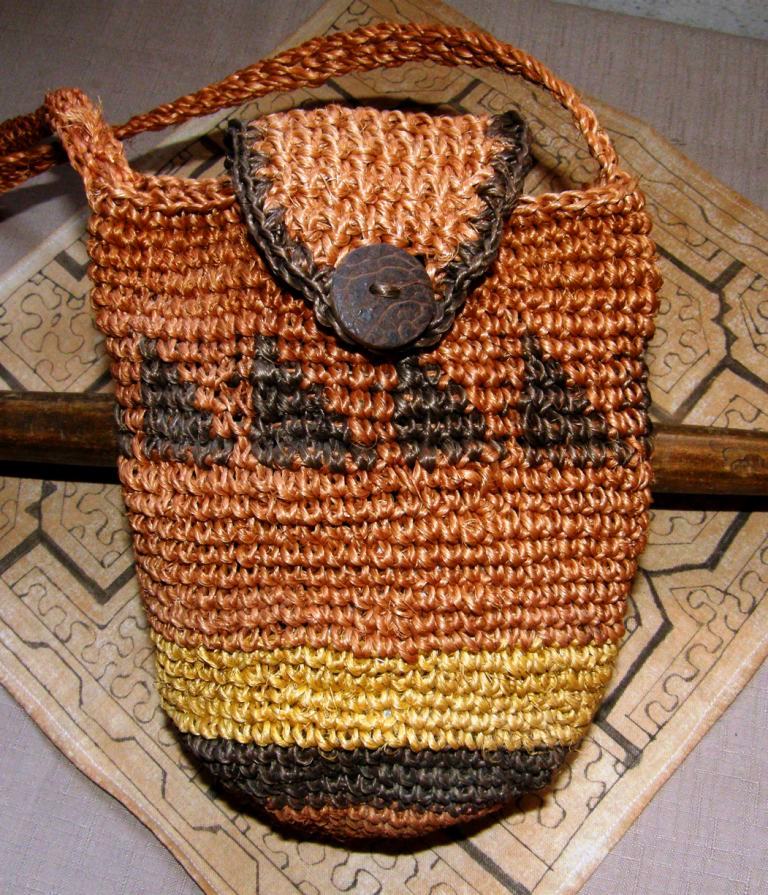
She was kind enough to say that it wasn’t too bad for a first attempt. The button is made from the tagua nut and the dye for the cabuya fiber comes from natural sources.

I was happy to learn how to do color changes and carry the thread. Whether this color change technique is what is known as tapestry crochet, I do not know. I noticed that there is a group for tapestry crochet on Ravelry and another for fair-isle crochet. I am guessing that indicates that there are differences in techniques.

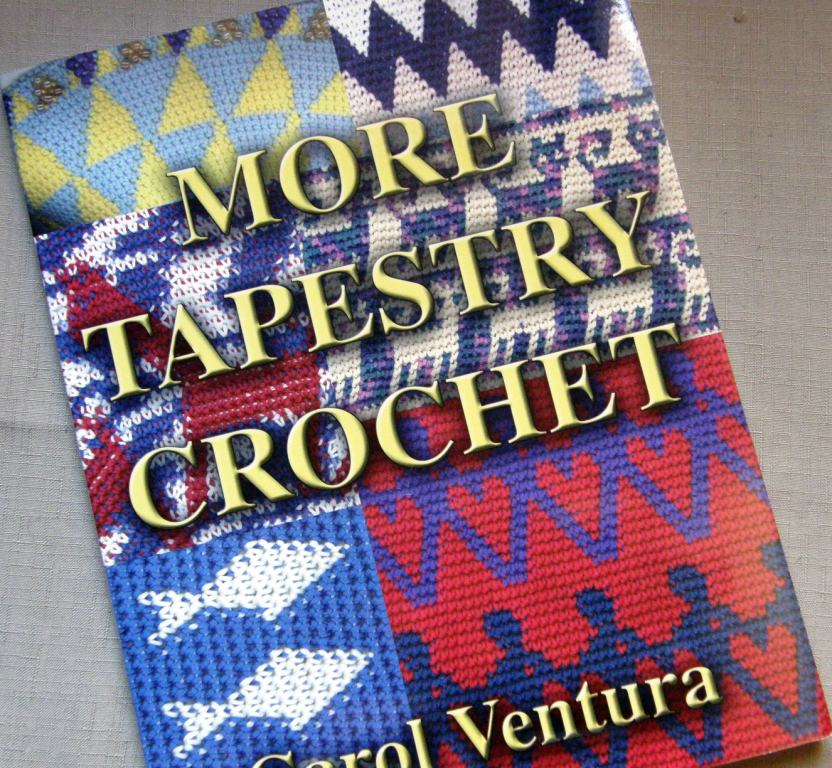
I was given Carol Ventura’s second book on the tapestry crochet technique many years ago and, although I have enjoyed looking through it, I haven’t used it yet. There are some beautiful projects in there for those of us who like imagery and bold geometrics in our handwork.

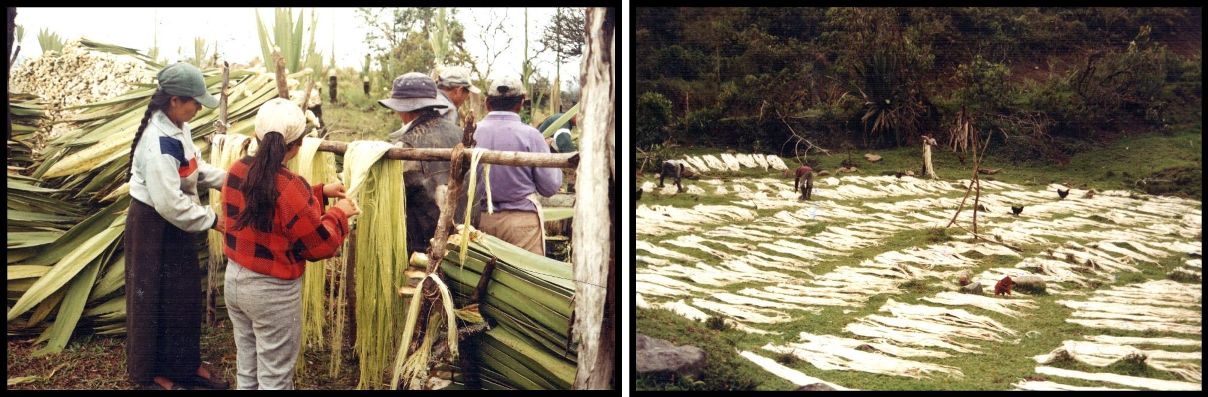
Here is some of the beautiful crochet work that the cabuya fiber artisans from the Intag valley of Ecuador do…a round mat on my bedroom floor…
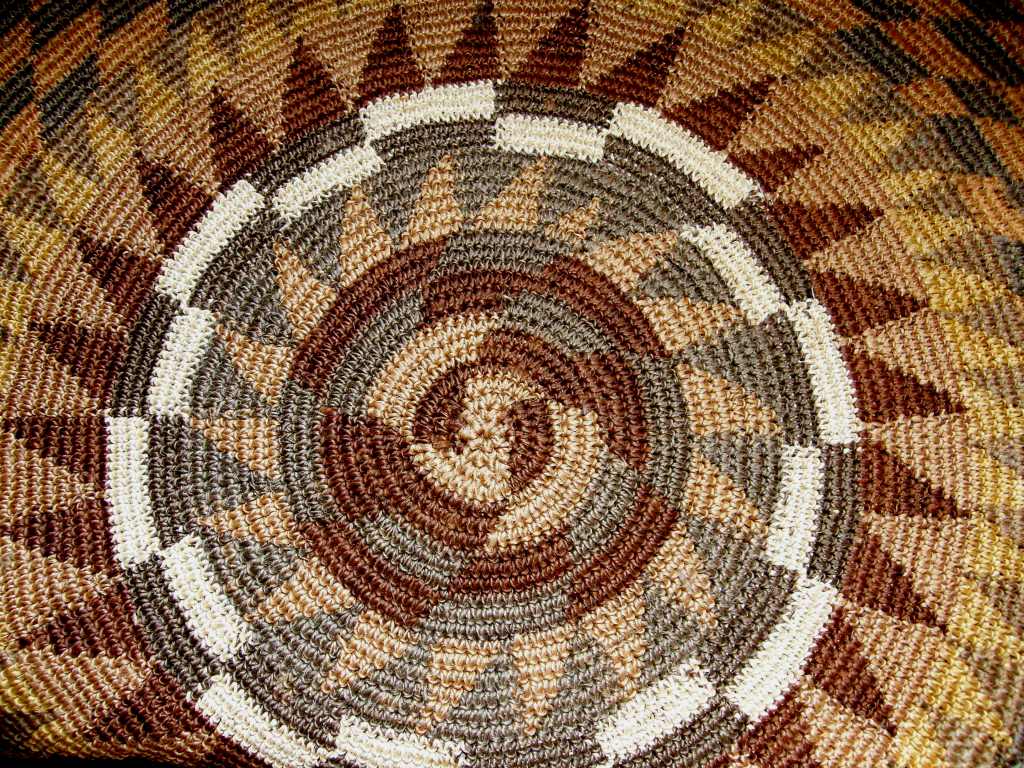
I wrote a post some time ago about the cabuya fiber and how it is processed if you would like to know more.
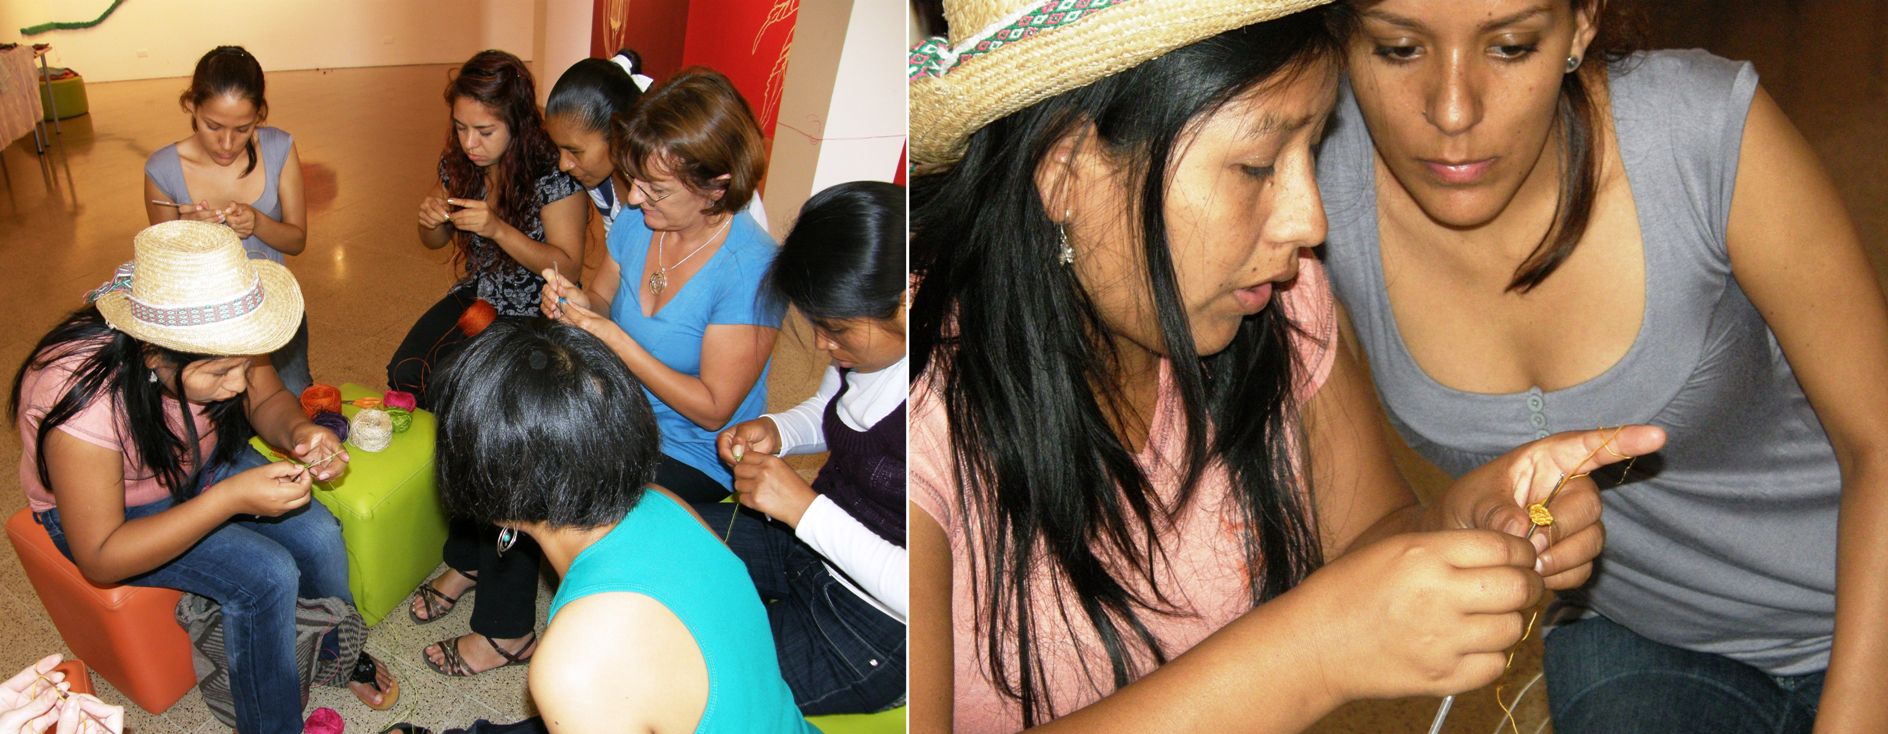
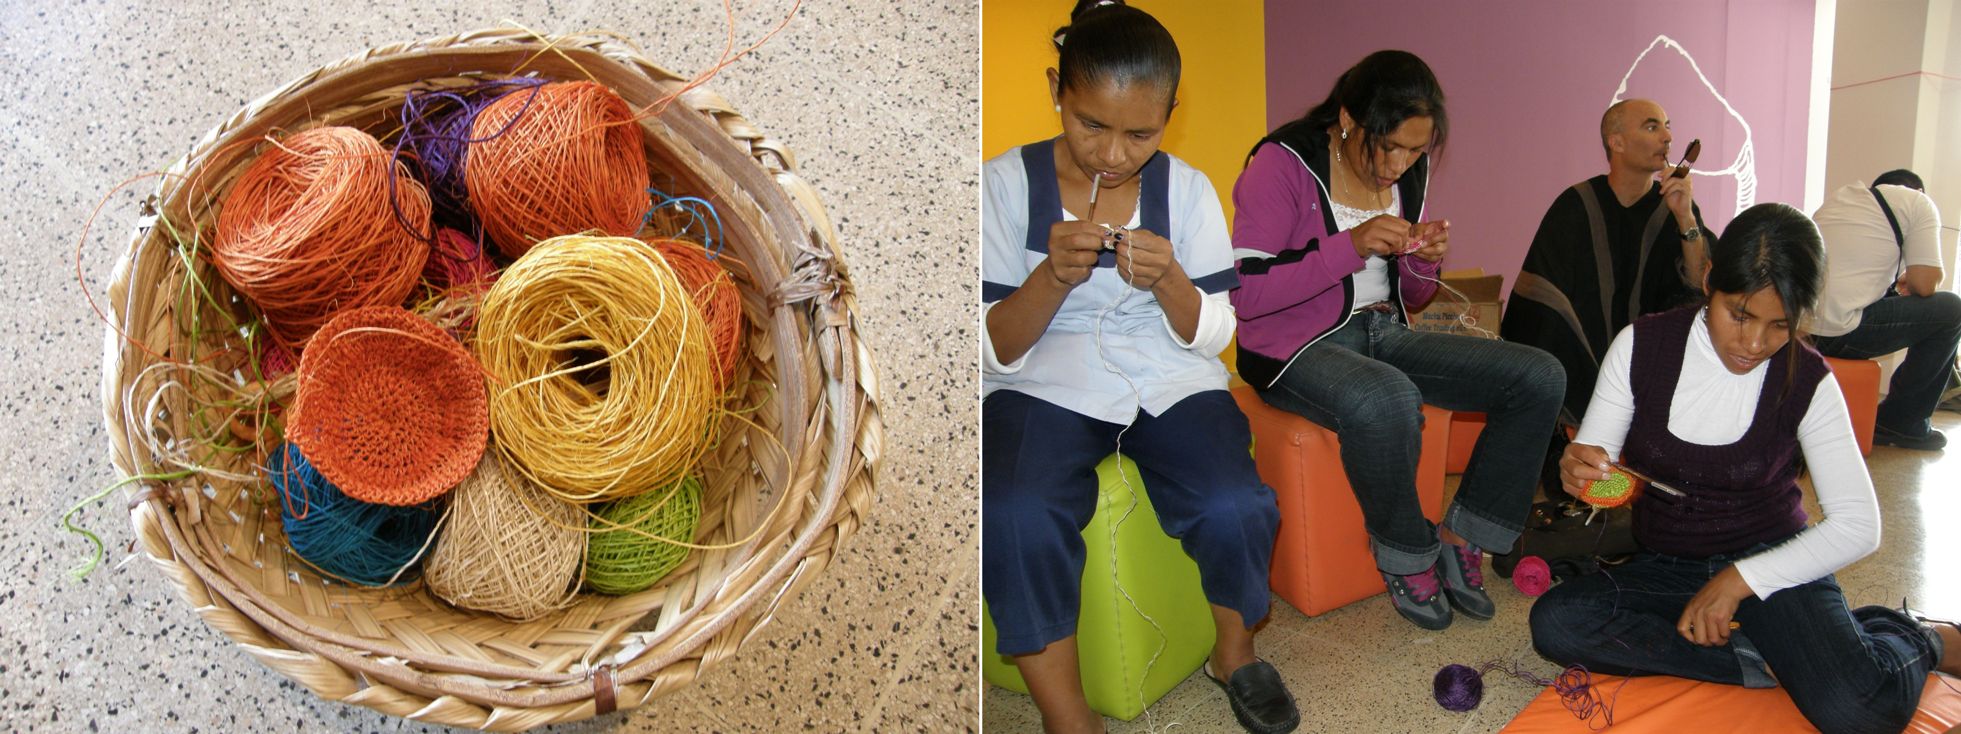
Last year we had a gathering of artisans here in Santa Cruz and Maritza came from Colombia to show us how to crochet with cabuya fiber. Weavers and craftspeople from Chinchero in the Peruvian highlands, coastal Ecuador, the highlands of northern Chile and lowland Bolivia as well as Santa Cruz locals joined in to learn.
I think the thing that has most gotten me all charged up about crochet this week is the beautiful crocheted scarf that Marit from Norway, aka yarnjungle on Ravelry, recently finished and posted.
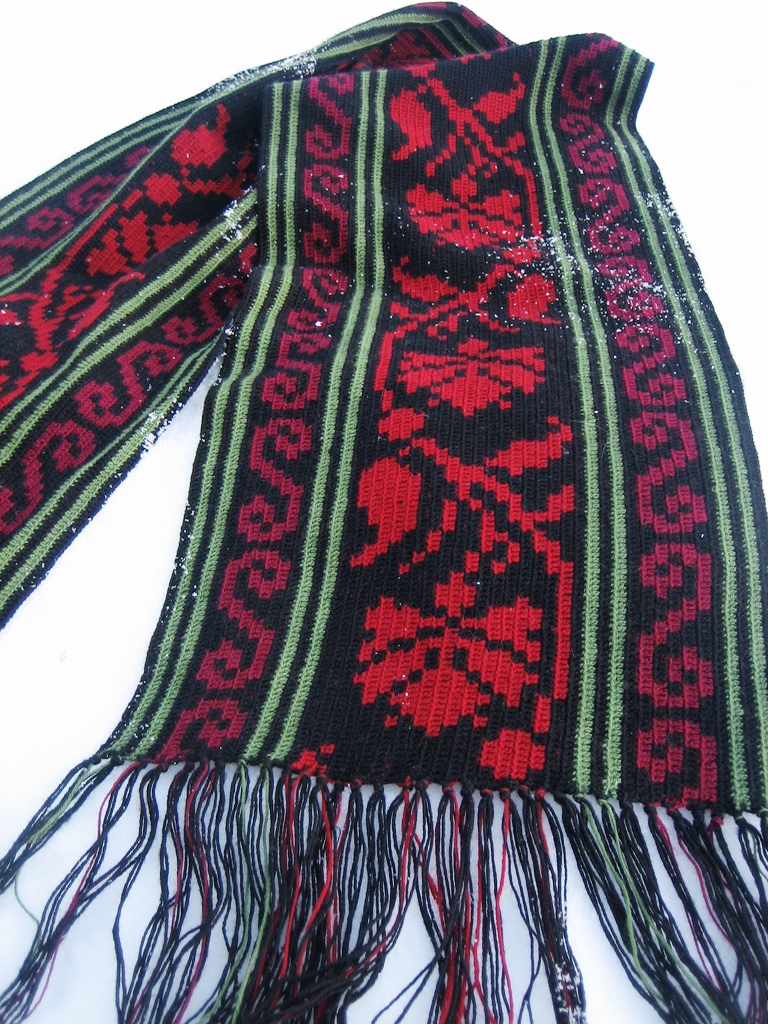
There’s that black and red again! Doesn’t this make you want to grab your hook?

In Marits’s own words…I saw a picture of a crocheted men’s scarf from Sweden in a magazine about nordic folk costumes. It had a flower pattern in tapestry crochet technique, worked lengthwise, but with double crochet stitches instead of single. Made my own version by throwing together some antique cross stitch patterns.

I have come across images online of belts in Mexico woven with flower designs that are quite similar to this. I notice them as, to my eye, they look “un Mexican”, if you know what I mean (funny how we form this idea of what “Mexican” should look like). Again, I wonder, as I was wondering last week, about how patterns may travel and turn up in unexpected places or how they may just develop independently on opposite sides of the globe. Some of the motifs in Huichol weavings are so similar to traditional Scandinavian finnweave ones.

Well, I shall finish this week with some pictures of beautiful work that Sylvie in France has been doing combining her woven bands with leather to make a wallet and purse.
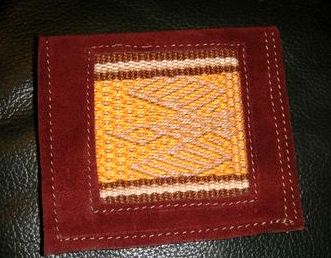
This bird motif in pebble weave is in  my book and comes from the island of Taquile on the Peruvian side of Lake Titicaca. What a lovely job Sylvie has done.
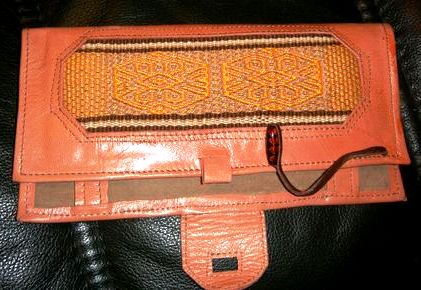
This motif is also in the book and is one that I invented for a wall hanging. These are great projects and Sylvie definitely has the hang of pebble weave! As this motif is one of the last ones in my book, I expect that Sylvie may be wanting more….hold on, a second book is coming!

It seems that this is a shorter post than usual as I have finished early and so have a gap in my schedule…what shall I do? I think I’ll go and look for my crochet hooks and sit down and have a good read of Carol Ventura’s book. 🙂
Backstrap Weaving – Weaving Wanderings and Wonderings

The Worldwide Weaving Web brought a new book into my home last year which has inspired my third wall hanging project.

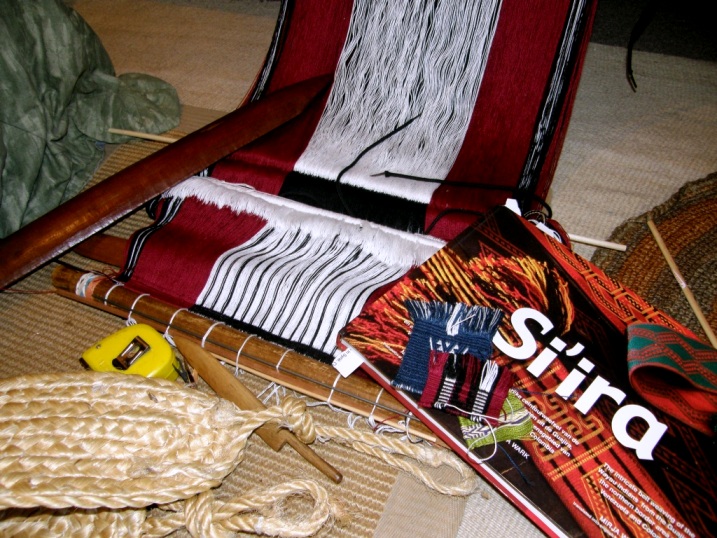
If you can’t bear to look at yet another of my red, black and white warps on the loom ready to be woven, you had better look away now because here we go again!

There isn’t a whole lot to show for a week of work, is there? What you don’t see is the reading, sampling, un-weaving, re-warping, charting, erasing and Googling. In fact, as I sit in front of this warp, I have the uneasy feeling that I may be jumping the gun and launching into the big project too early. I have actually unwoven the first line of pattern twice and made adjustments. Clearly my sampling didn’t cover all I had in mind.

I am using the work of the Wayuu people of Venezuela and Colombia as my inspiration for this project through Dutch author Mirja Wark’s book Si’ira. A lady in one of the Ravelry weaving groups posted about the existence of this book in the middle of last year and I was on a mission to get hold of it. My friend Anna in Australia, who is from The Netherlands, took care of the local payment and then offered the book to me as a birthday gift. Thank you, Anna!

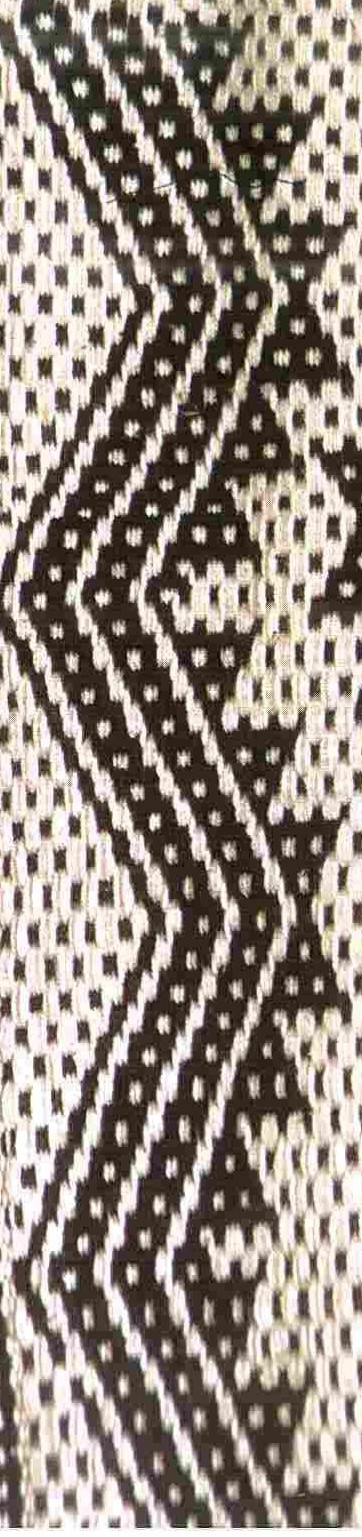
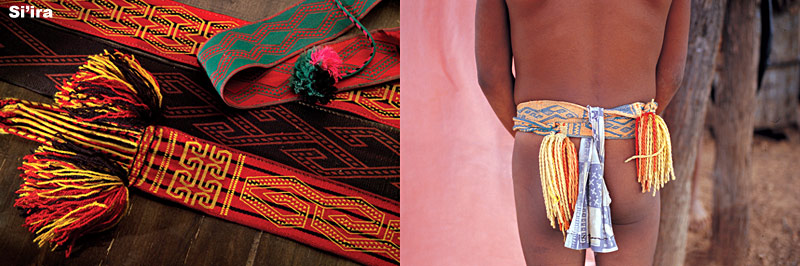
It is a beautiful hard cover book full of drawings and photos of the si’ira which are worn by men, their designs, the weavers and the vertical looms that are used to make them. The skills required to make a si’ira  include weaving, twining, braiding and tassel making.

This image is from Mirja Wark’s web page.

The Wayuu live on the Guajira peninsula which is the northernmost border between Colombia and Venezuela. Wark describes this area as a flat, dry semi-desert over which a continuous hot wind blows. It is always interesting to me to know more about the people, weaving and textiles of lowland regions of this continent.

Many different colors are used and I especially love the pictures of the si’ira in the book that comprise a red and black background on which yellow motifs have been woven. Other belts are black with red motifs…very striking…and so they are perfect for the color theme of my wall hanging project.

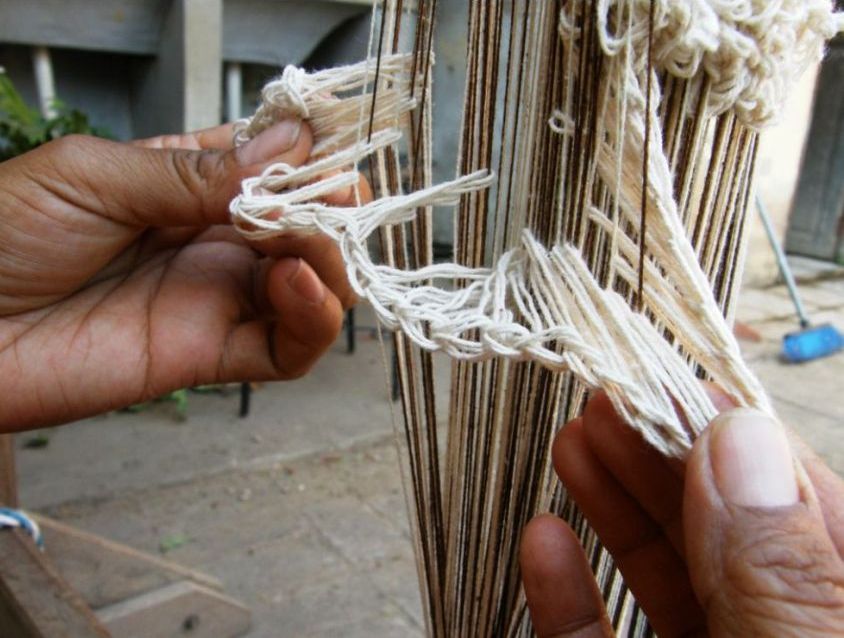
It is also interesting for me to see that the Wayuu weavers use the same style of joined loop heddles used by the Guaraní weavers, another group that inhabits lowland regions, here in Bolivia.

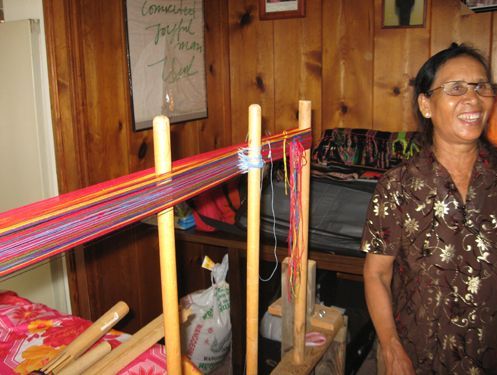
At left you can see my Guaraní teacher, Angela, showing me the unusual way her string heddles are chained together.

What I would like to see is how the Wayuu weavers manipulate the heddles and if it is the same method that Angela and other Guaraní weavers use.

Angela most often has three sets of string heddles on her loom which are required by the technique she employs for the kinds of structures that she weaves. Watching Angela do her pick-up work jumping between two sets of the string heddles is fascinating!

The Wayuu weavers use one set of these kinds of string heddles on their warps but I imagine that they would need to work them in a similar fashion to the way Angela does.

I can’t help but notice some small similarities in some of the motifs of the Wayuu and Guaraní people although the weaving structure employed is different.

So, this will be the basis for wall hanging number three in the red, white and black series.

Another of the many interesting things about the si’ira is that they are woven with what Wark calls a “hollow selvedge” which serves to strengthen the edge of the belt. It is funny that on a visit with my friend Pam in Massachusetts we had talked about a rolled selvedge that Harriet Tidball describes in Shuttlecraft Monograph 26. Pam was trying it out on a band of her own.

Tidball writes that it was used by the ancient Peruvians and that available evidence shows that it was used on bands and belts.

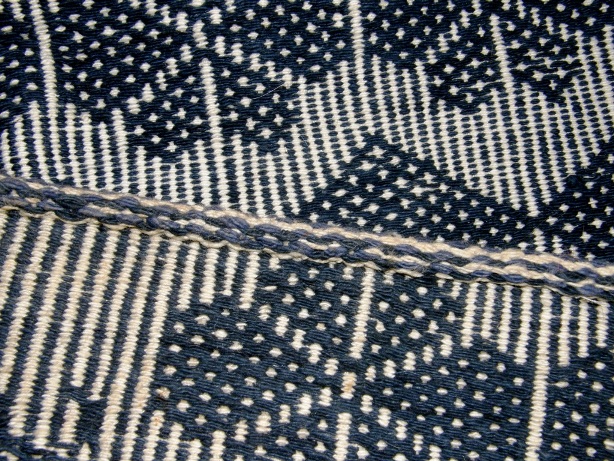
The rolled selvedge creates a thick tubular edge.

Separate tubular bands like the one on the edge of the purse pictured at left are often applied to Bolivian and Peruvian weavings  for various reasons, one of them being to strengthen and reinforce the edges of the textiles.

You may be able to make out the thick edge which is the hollow selvedge on this image from the cover of the Si’ira book.

How clever to think of a way to form the tubular edging from the band itself so that it forms as weaving progresses and does not need to be added later. I wonder why this technique fell out of use in Peru.

I love seeing how these things turn up here and there, disappear here, remain there, evolve further there, are replaced by something even more ingenious somewhere else…The fact that these heddles are used by the Wayuu in their arid lowland home and also by the Guaranì here in steamy jungly lowland Bolivia, so far away, fascinates me.

The Worldwide Weaving Web, about which I often speak, means that I can have a new online weaving friend in rural Turkey asking me about backstrap weaving and telling me about the catalog of woven Turkish motifs that his mother has while a weaver and clothing designer in Bangladesh shares with me what he knows about backstrap weaving in his country. Techniques and information are shared instantly across the globe. I wonder how in ancient times designs and techniques were transported and shared and adapted among the weavers of this continent.

And then you have weavers who live along the relatively short length of Ecuadorian coastline who apply bands to strengthen the edges of their cotton saddle bags. Different techniques are used to both set up the loom to create the patterns and finish the woven pieces in different areas along the coast.. I am familiar with the way the members of one family of weavers in Manabi province finish their work by applying a woven band using a home made rigid heddle which I have shown many times here before. Yet it is worth looking at again..it is so cool!

This picture, taken by Kathleen Klumpp, shows my weaving teacher Trinidad weaving and sewing a band to the edge of a small bag.

This is how the edging looks on the fabric.

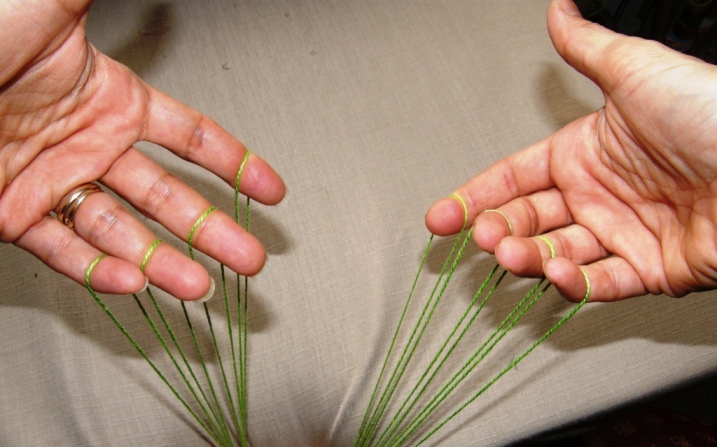
And then I see from an article in the Textile Museum Journal that further north on the Ecuadorian coast, on the Santa Elena peninsula, weavers also apply bands to the edges of their saddle bags but use a very different method which requires an extra pair of hands.

While one person sews the band to the fabric, another person manipulates the warp threads  passing the warps which are looped on the fingers of their two hands from one hand to the other. The extra pair of hands would look like mine above (modeled on a drawing in the Journal article).

These are two very different ways to add a reinforcement band to the edge of a woven textile and both are being used within a relatively small area.

Do similar techniques develop independently or do they travel and get shared and eventually adopted and adapted? Why do some methods remain so different within relatively small areas? I know there are people who devote themselves to studying just this kind of thing. Me? I sit here and ponder!

Something that seems common in certain areas of Asia is the addition of string heddles to the warp while the actual warping is in progress on the stakes. Was it developed simultaneously in various areas or did it travel and get adopted? It seems like such an ingenious and time-saving thing to me. However, it is not something I have ever seen in use in my part of the world.

I know how to do it as I watched the Montagnard weavers warp when I visited them in North Carolina and, more importantly, filmed the process so I could study it over and over when I got back home….it was all happening so fast!

Even though I say it is clever and time-saving, I have not adopted this technique for my own weaving. I stubbornly cling to my favorite way of making heddles with the extra hitch which has the heddle loops  held snugly on the heddle rod.

In the same way, perhaps the weavers of Manabi province in Ecuador and those on the peninsula further north are aware of each other’s techniques yet stick with their own methods believing them superior…who knows? My anthropologist friend Kathleen Klumpp no doubt can tell us that.

Here is the video I made of Ju Nie warping with two colors and making her heddles around one of the two as she goes. That is followed by a video I made in which I do it slowly and explain the process.


Angela, my Guaraní weaving teacher, certainly didn’t hesitate to ask to be taught how to make the kind of string heddles I use when she saw them on my loom and she started using them on her warp to replace one of her sets of chained string heddles straight away. She had seen string heddles on a stick before, wondered about them, but didn’t have anyone to show her how to make them.

And she was keen to learn how to do the three-color version of the technique she employs when an Aymara weaver visited from highland Chile.

And so, techniques and methods travel and get shared and then I guess one day no one will remember anymore how that particular technique managed to cross the Andean high plains and descend to the Bolivian jungle.

Well, enough pondering. Let’s see what has been happening in the Ravelry group where some weavers are still having fun with the Bedouin techniques.

Here’s Jennifer’s wall hanging which uses the al’ouerjan pattern and shajarah techniques. Many of the motifs in the central section were created and charted by Jennifer herself.

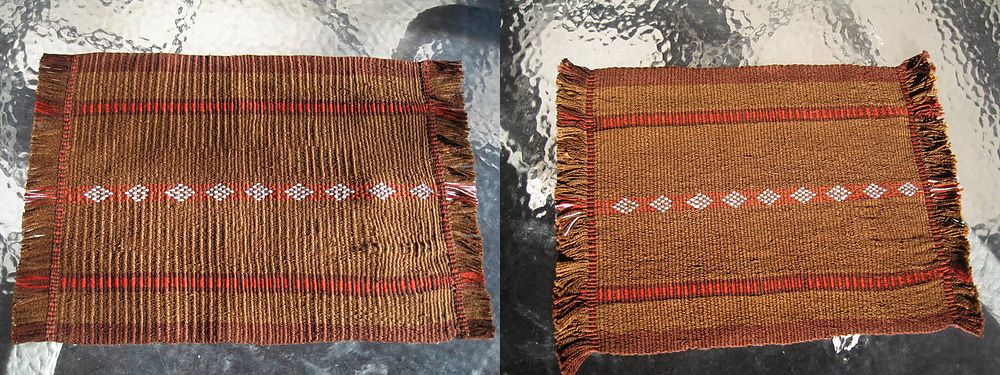
Traudi provided us with helpful pictures of her piece before and after washing. She made a placemat and had some tension issues and a bit of puckering, which didn’t all come out in the wash but, what is nice to see, is that the severe ridging that had formed in her cotton cloth disappeared with washing and pressing.

She used weft twining on both ends before leaving the fringe and her center pattern is the traditional Bedouin al’ouerjan design.

And to finish, I ‘ll just let you know that I put one more tidbit on my RESOURCES page this week. I am slowly but surely gathering up all those links.

Backstrap Weaving – Forgotten Resources

My new Resources page is up but bear in mind that it is a work in progress. You can click on the tab on the header of my blog or on the red image (the same as the one at left) that is on the sidebar.

The idea is to dig out all the links to articles, sites and other resources that I have used in my posts over the last two years and gather them in one convenient place. I know how easy it is to forget that all that good stuff is out there.

It’s even worse to remember that it is out there and not be able to find it! Ask me how I know.

Slowly I am going through old posts and finding those links and re posting themhere. I often wonder if people go back and re read my old posts. I surprise myself sometimes when I do a Google search and run across something from my blog about which I have completely forgotten.

So, you will find a handful of links that I have put there for now. One of them is completely new – a free book on Mapuche weaving.

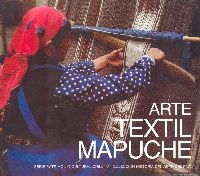
Many years ago, when I was still living in Chile, I bought a book in Spanish on Mapuche textiles from the Museo Chileno de Arte Precolombino. My friend Caroline, in Australia, told me about the free download of this book that is available some time ago, possibly before I even started my blog.

Recently Luchita on Ravelry reminded me of it when she provided a link to the site where you can still download this book for free.

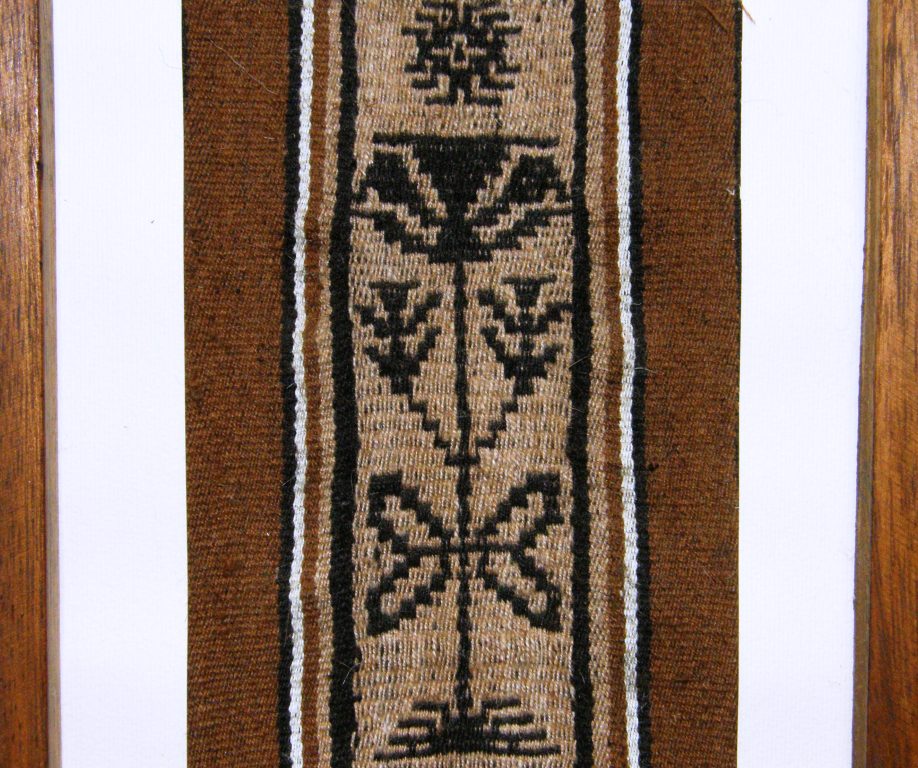
If you go to the RESOURCES page you will find the link. The woman on the cover is weaving a large piece, possibly a blanket or a poncho, which has a plant motif. Copying it from the cover image, I was able to make this the second Mapuche design that I ever wove many many years ago.

Here it is in my handspun llama fiber and it also happens to be the first time I ever wove with my handspun. I was so pleased with the result that I framed it even though it is rather wonky! I guess I didn’t think at that time I would ever weave with handspun again. It is a tiny piece as, if I remember correctly, many of the warp threads were breaking and it was a trial of patience.

Fortunately my handspun improved as a result of this initial experiment and I have no problem weaving with it now. It is interesting to see variations of this plant motif on old Mapuche textiles and notice how it has changed over time.
While skipping about on the net this week I ran into another almost forgotten resource…WeaveZine!

Of course it is not entirely forgotten for me as my article is there but you tend to forget that WeaveZine has been around since early 2008 and there is a lot of great stuff on there.

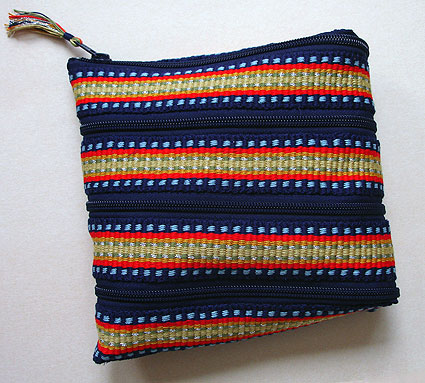
It was the article by Erica de Ruiter on this cute spiral zippered pouch made from a warp-faced band that took me there (go to the RESOURCES page if you want the link!).

As editor Syne Mitchell puts it, WeaveZine is no longer in production, but as weaving is timeless, so is the content within this archive.

I wish I had two months to just sit down with all my books and go through and refresh my memory of all the wonderful resources I have on hand. Many of them have little Post-It notes sticking out of them with inspiration for that next exciting project and the next and the next…

I was clearing up a bit more today and decided to put away the Textile Museum Journal that has been lying about here for ages under a pile of cat toys. Of course this provided a nice excuse to sit down, browse and stop tidying up and I was curious to know what had made me buy this issue of the Journal in the first place.

Oh yes, it was the article on the weavers of cotton saddlebags on the Santa Elena Peninsula in Ecuador. This article, among other things, gave me the little twin bird motif in the simple warp float technique that is shown on a cotton saddle bag from this region in the article. My version is at left.

Talk about forgotten resources.

I usually buy these journals for one particular article, sometimes two, and just glance through the others and it is funny how months later suddenly one of the other neglected articles jumps out at me.

This time it was the article in this 1983 issue by Maaike Knottenbelt on backstrap woven Mitla cloth of Mexico. According to the article the cloth was woven in skirt lengths for local use or for trade. Sadly, the article is in black and white and I was curious to see the traditional colors that are used in these skirt fabrics so I went online.

A Google search didn’t turn up anything that looked like the cloth pictured in the article. And then….Teyacapan to the rescue! Of course I should have known to go directly to Karen Elwell’s fabulous Flickr page on Mexican crafts. This is, as far as I can tell, a example of the Mitla cloth shown in the article.

The cloth has two faces, one which is warp-faced which we would normally consider the “right” side  and one which has exposed wefts. According to the article, the side with the weft floats is the one that develops as the upper face while the cloth is being woven and that is the face that can be seen in the picture.

In her article Knottenbelt quotes from Irmgard Weitlaner Johnson:

In 1957 only five weavers (men) knew how to weave this cloth, and only four Indians (men and women) knew how to warp the complete traditional pattern.

Knottenbelt published her article 26 years later and now almost 30 years after that I can’t find anything online about this kind of cloth being woven today and could only come up with Teyacapan’s photo of a museum piece. I wonder if it has completely disappeared.

The article goes into a lot of detail of the warping process where the warp threads are separated into their various sheds on the warping stakes themselves. The warp threads are not wound in a simple figure-eight and then rearranged later once on the loom. This is one of the aspects that the author found particualrly interesting.

Eight stakes are used to set up this warp for a skirt length. Six can be used for shorter lengths. Of course, I have seen this kind of thing done here in South America. Extra stakes are added to the basic warping set-up to conveniently separate warps into different sheds according to the structure being woven.

Felipe in Salasca, Ecuador is making a dovetailed warp for a supplementary warp belt using six stakes. The belt will be woven on his backstrap loom.

Above is the set-up I created at home to practice what Felipe had taught me except that my set-up is for a warp in a single plane and so doesn’t have the dovetail stake. I actually added an extra stake to further separate one of the colors. Hopefully I will be able to use this to try the Mitla cloth. I just wish there were more pictures out there. Even the simpler four-stake version is a variation of this idea…separate the colors into sheds on the warping stakes themselves….such a time saver!

I wonder what will leap out at me from the pages of that Journal if I pick it up again in a few months. There are three other articles in there and there is already a Turkmen tent band in there calling out for attention!

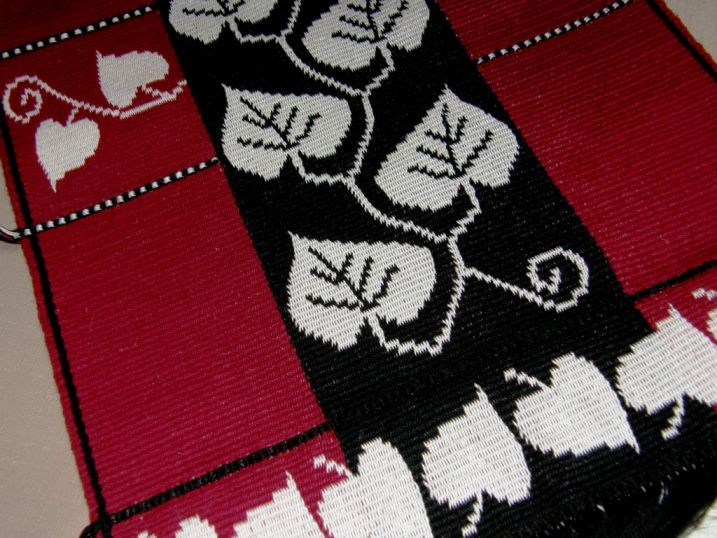
In the meantime, I have just about finished my chamanto inspired wall hanging.

The question is… how much pattern is too much pattern? I am not sure if I went overboard with the last row of leaves.

I am now re-twining the bottom of the Starry Night hanging so that it better matches the twining on this piece. That didn’t seem like a fun thing to do at first as the piece was already off the loom but it turned out not to be a problem as I had not yet cut the end loops.

I much prefer to twine on loom than off so that the warps are under tension.

I was able to slip the far loom bar back through the loops and then clamp and roll the weaving so I could twine with the warps once again under tension.

I have this nifty split loom bar that I bought from the Burmese backstrap weavers in Massachusetts. It is a typical round dowel-like bar which has been split in half and is used by the weavers to clamp and anchor their circular warps so that they don’t slip when beaten. The first thing that comes to mind is that surely it would be easier to just use two flat sticks but, they like the loom bar to be rounded, and I could see good reason for that once  I put it into use. Lucky for me I got to buy one ready made.

The third hanging in this series is on the drawing board. It will be influenced by South American weaving from a country a little further north this time. I hope to have made a start by next week’s blog post although there is a lot of sampling to be done first.

Now, about that double weave edge experiment that I mentioned two weeks ago… I made my samples and photographed them. Unfortunately the pictures don’t really tell you anything so you will have to take my word for it!

Both these bands have the same number of ends except that the one on the left has two revolutions of single thread on the very edges and the one on the right has only one revolution of single thread. Both methods improve the appearance of the edges for the reasons I gave in this blog post.  The band on the left has a flatter square-ish edge while the one on the left has a more rounded transition from upper to lower layer. I will post all this information on the tutorial page for double weave.

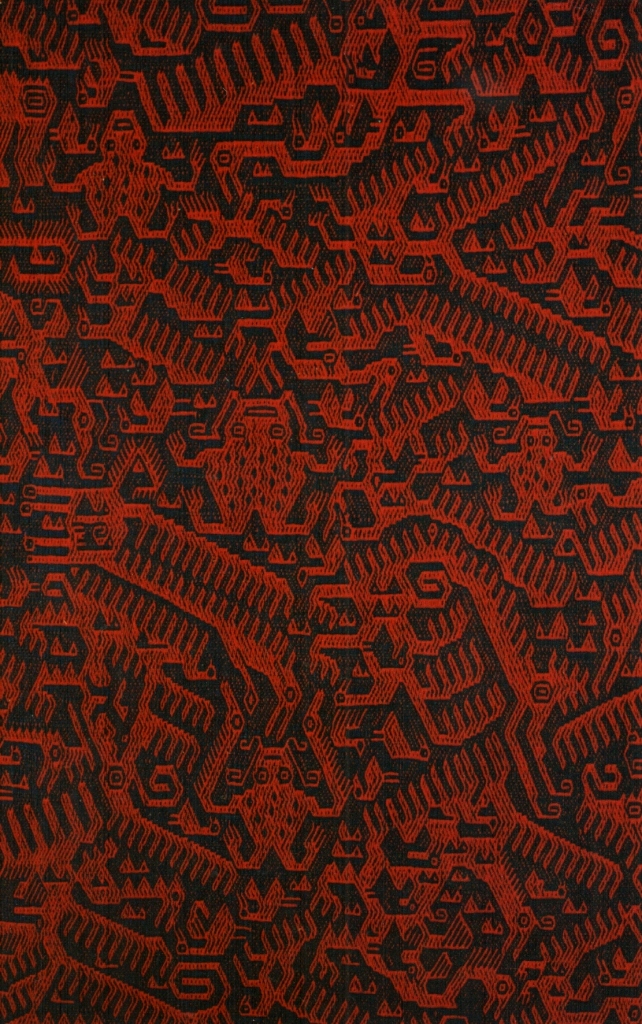
As for my earlier question… how much pattern is too much pattern?…I will leave you to ponder this with something truly spectacular….

This kind of weaving is made by the Jalq’a people from Potolo in Bolivia on leaning vertical looms. There is barely any space that does not contain a motif. You even see motifs within motifs but, as the idea is to convey a sense of chaos, it all feels and looks just right, doesn’t it?

Backstrap weaving – Staying on Track

I have been trying to resist the urge to warp up for an al’ouerjan project and join in on the fun in the Ravelry group. You may remember that a couple of weeks ago, after having posted the warping tutorial for these traditional Bedouin patterns, Tracy suggested a weekend warp-along. Now we are seeing the increasingly large and impressive results of all that warping practice. Take a look at the bag strap that Tracy made at left.

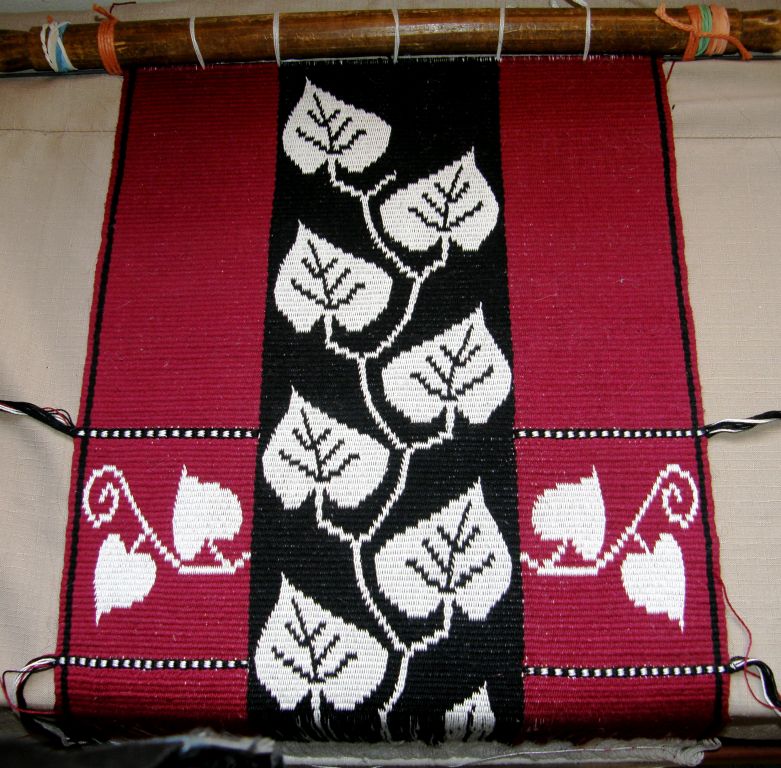
But…I am staying on track which means that I am sticking to my chamanto-style leaf-patterned wall hanging (although I couldn’t resist throwing in a bit of weft twining). I finished the first pebble weave hanging in this set with weft twining and so I decided that, apart from the common color scheme, the weft twining would be another theme that would tie all my planned wall hangings together.

While I sit and pass the shuttle, strum the warps, beat and coax the sheds open I think about what will be next in this series. I have no problem whatsoever in coming up with ideas…the problem is that I want to weave them all at once!

I stand back and look at this piece and I still can’t get used to it.

It’s not quite like anything I have done before but I have to say that I am having fun with it especially adding in that twined section with the motif within. I had to stop for a bit to chart those smaller leaves on their vine, sample them etc…It took a while to get them right.

I think that all my planned red, black and white pieces will look pretty nice when hung all together. The question is….where? Although I have been doing some major cleaning out, I still haven’t managed to uncover any significant amount of wall space.

Next on the clean up list is my dear old Ashford traditional wheel. Yes, I have a spinning wheel…who knew? It has been sitting there so long unnoticed, dusty and in desperate need of oil…poor thing. It was born in New Zealand and made its way all the way over to the Falkland Islands before finding its way into my home in southern Chile. I left a lot of stuff behind in Chile but the spinning wheel came up to Bolivia where it has sat in the corner for almost 14 years…shameful! I won’t take a picture of it now in its pitiful state. I will clean it up and get it back into shape. I have room to use it now!

I only had it for four months before leaving Chile and just got into using it and being able to turn out something consistent. I did, however, spin enough yarn to construct a vest, knitting the natural colored front and weaving the dyed brown back. The edging has been worked in cross knit looping.

This, too, sits neglected here in this hot steamy climate. It is a souvenir at least of the Patagonian sheep.

But, back to the al’ouerjan and let’s see what else the Ravelers have been up to…

So, there’s the strap that I showed you earlier on the gorgeous bag that Tracy made. She will line the bag  to protect the warp floats on the inside. She used an additional weft to secure the floats on the strap. You can see details about how that is done here. One of Tracy’s other warp-along products is the pillow cover which includes some tapestry-style twining in  the lower left hand corner and a striking and beautifully executed joining stitch.

Aunt Janet’s piece above left is in her own handspun wool. She has three sets of al’ouerjan patterning and that blue looks amazing.

Traudi so loved Tracy’s piece that she got into the act too using brown instead of black which looks fantastic. She twined along the bottom of the piece too. We are seeing more and more twining in this group…cool. Here is the tutorial for basic weft twining.

Jennifer did some charting and planning for the shajarah patterns before warping a wide piece that also includes an al’ouerjan design.

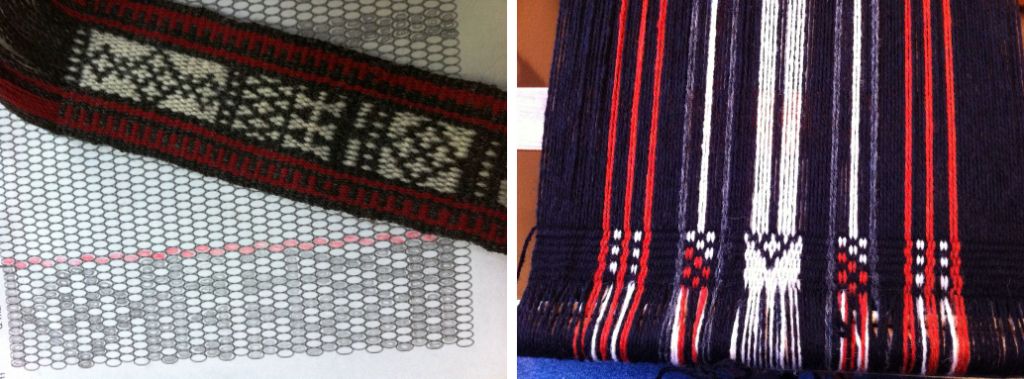
The charting paper with ovals which is useful for double weave, warp substitution and supplementary weft patterns can be found here. A tutorial for weaving these kinds of warp substitution patterns is here.

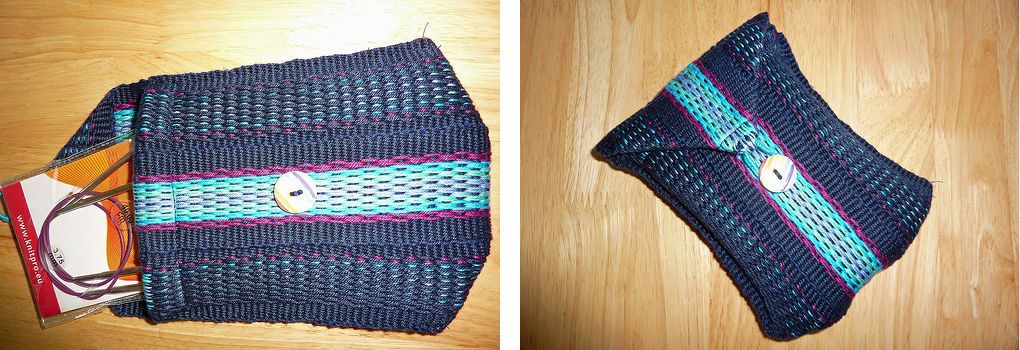
So, January has gotten off to a great start in the Ravelry group! Pantoffels has been wrangling with what she calles an ancient inkle loom and still managed to make this pretty needle pouch with plain pebble weave patterning.

And then she got a new inkle loom under the Christmas tree and will now try the pebble weave patterns in my book Andean Pebble Weave.

While I have been weaving my “leaf” piece based on the Chilean ponch known as a chamanto, I have been getting out other pictures of ponchos that I have to study the design layout that weavers use on these large pieces.

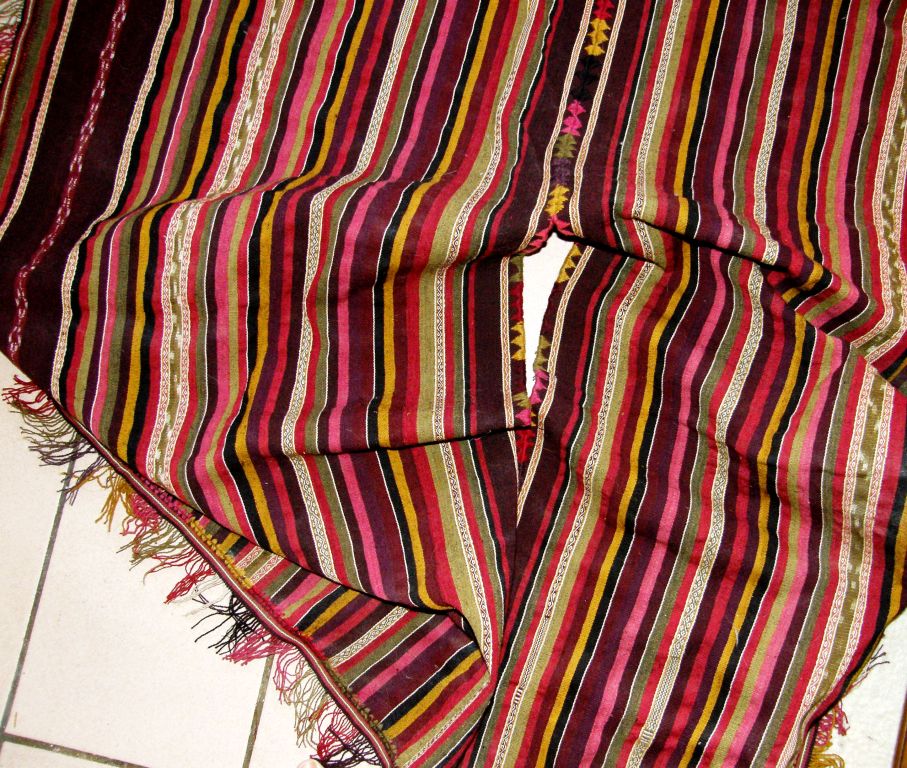
I own one poncho which I bought in Calcha, Bolivia many years ago. It is made from very fine handspun wool which has been colored with natural dyestuffs. It is patterned with simple stripes, some very narrow and simple ikat bands as well as several very narrow strips of pebble weave.

It has been woven as two panels with four selvedges each and a woven band has been sewn around the four edges with an added fringe. Don’t you love that decorative stitch that has been used to join the panels?

There is definitely an art to stripes. You can see the clever placement of fine white stripes to break up some of the richer colors.

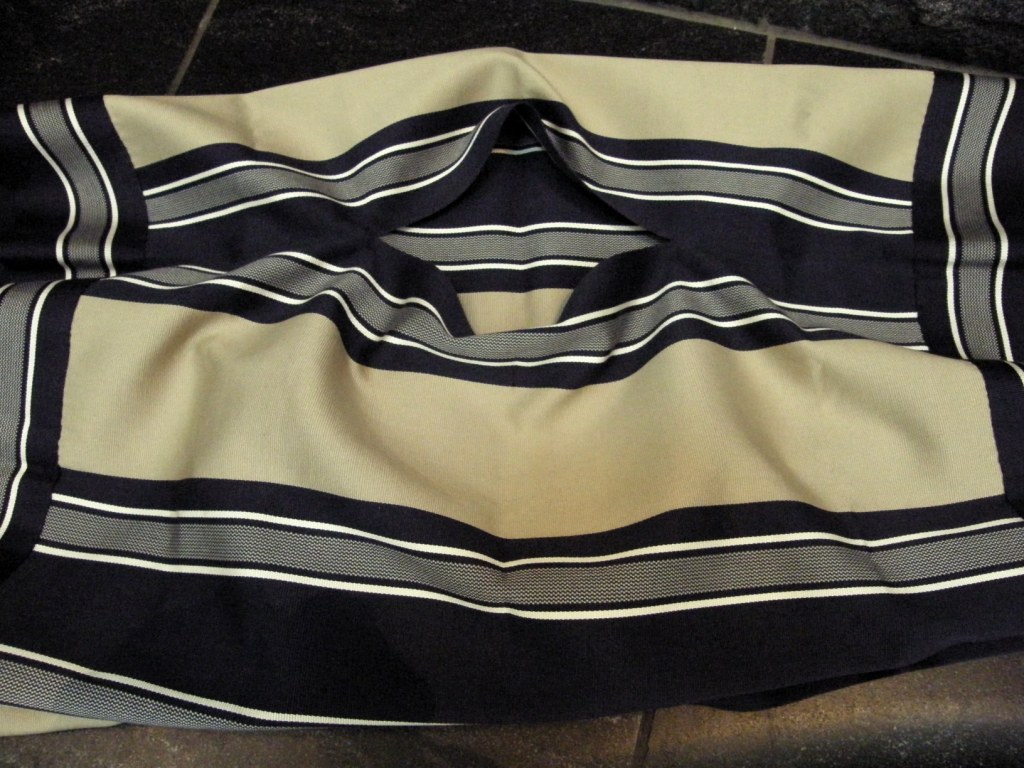
 An extremely fine and simply patterned manta from Chile. It is always interesting to see how the colors and stripes are distributed. As is typical, a broad band has been woven and sewn to the four edges of the piece and there is no fringe.

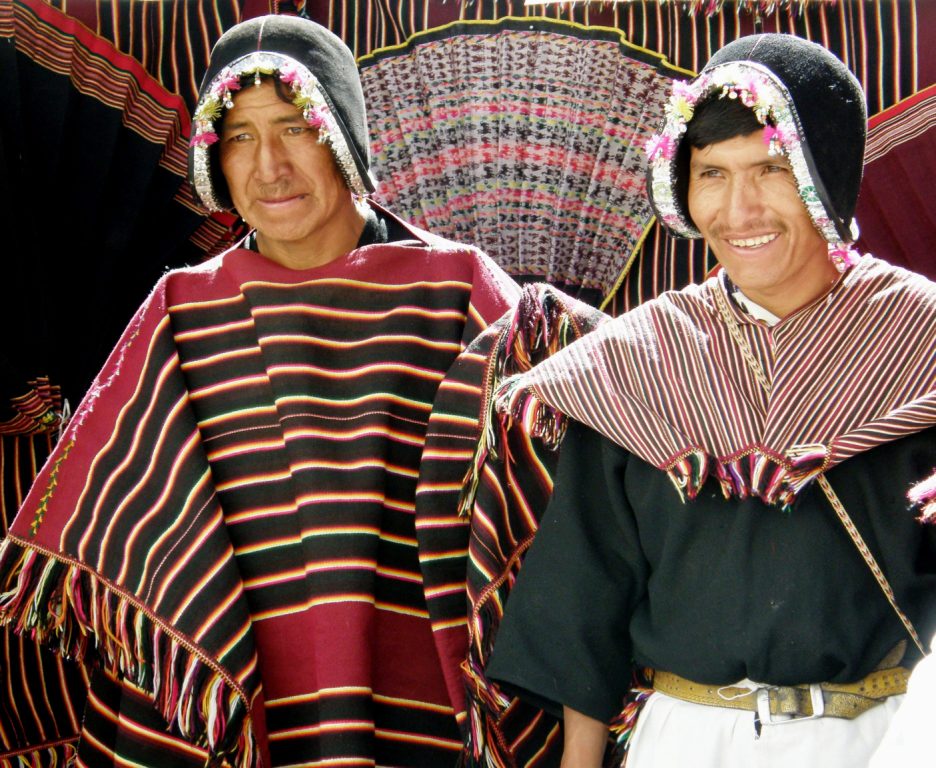
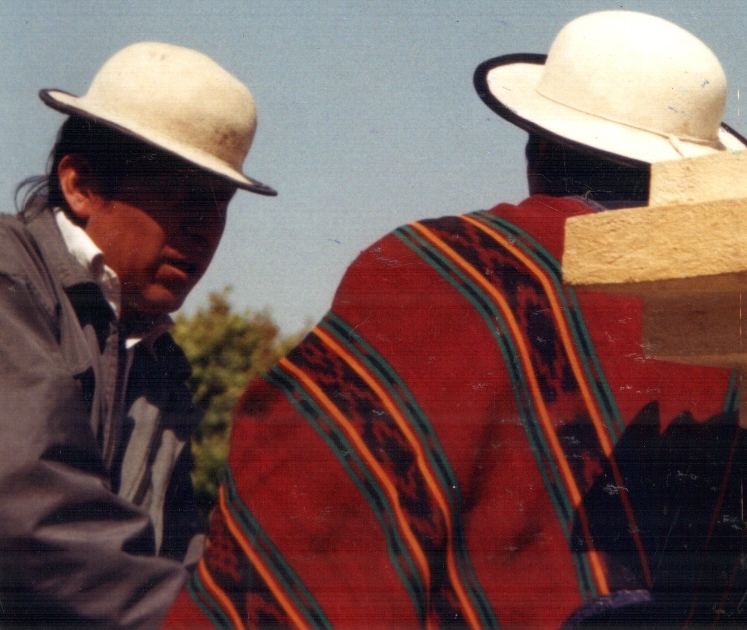
The typical poncho of Tarabuco and the smaller version known as unku can be seen above.

At a handcraft fair in Tarabuco I saw weavers making the long poncho panels. My friend, Anna, showed me the unku on the right that she had bought in Tarabuco when she came to visit me.

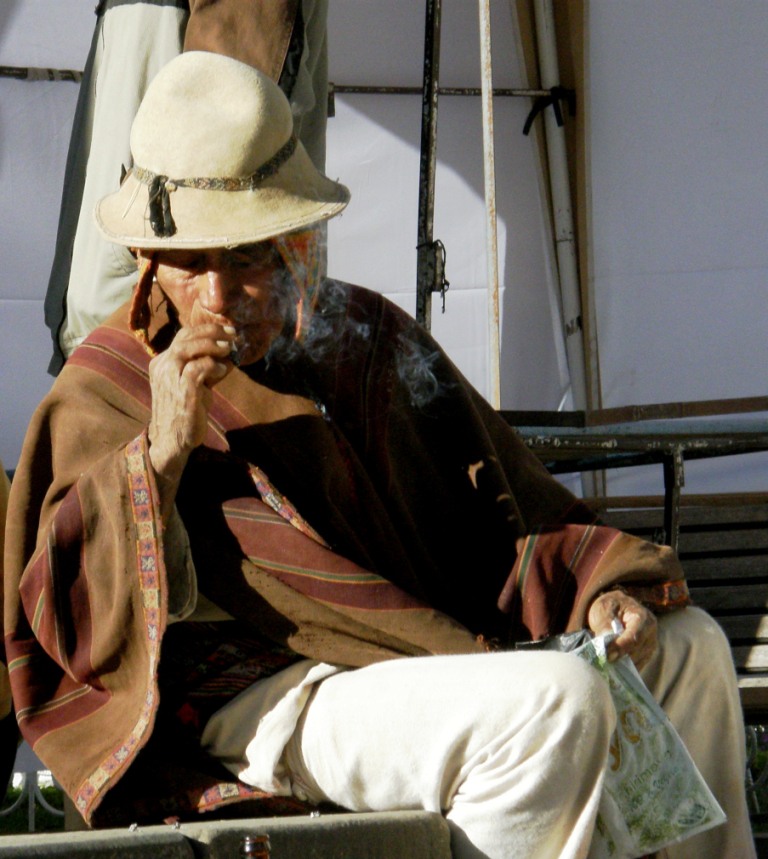
I spotted this gentleman in his much more subdued woolen poncho in a small plaza in Sucre. He was performing an offering to Pacha Mama in the early morning. How wonderfully simple and light the poncho looks although I am sure it is extremely warm and virtually waterproof.

And then you have the incredibly intricately patterned calf-length ponchos woven and worn by the men of Chahuaytire in the Cusco area of Peru.

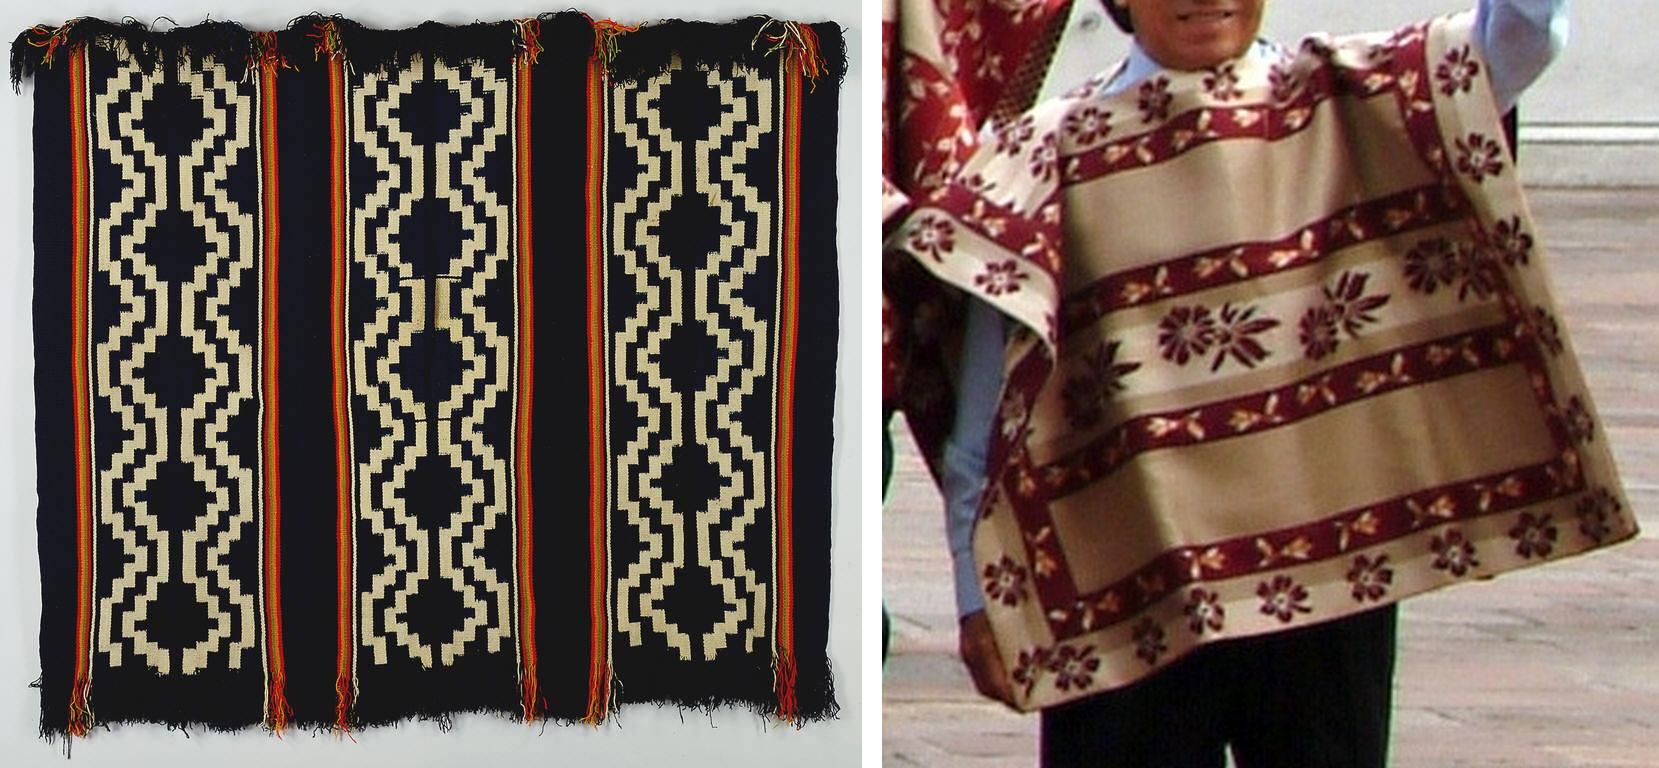
From Argentina and Chile we have the Mapuche makuñ with its ikat patterning technique executed in such a way that there is virtually no blurring of the design. The popularization of the poncho, from what I have read, is generally attributed to the Mapuche who wove them for their own use as well as for barter. On the right you see the chamanto of the Chilean huaso, with its leaf, fruit and floral motifs, which are said to have both indigenous and Spanish roots.

I have  a few pictures from Ecuador too…scans of old prints…

This is the “jijon” poncho which is factory-made in Quito and worn by those men who can afford one in Otavalo. You can see it being worn with its grey plaid face showing by the gentlemen on the left and with its darker face outward on the right. These men were wearing their ponchos to the market on a regular day. Apparently there is a much more costly blue double-faced poncho which is woven on the backstrap loom made-to-order. The ownership of one of these special ponchos indicates wealth and high social status.

On Sunday, which was both market day and church day in Cañar, a very social time around the main square and surrounding streets, I saw quite a few ikat-patterned ponchos being worn.

And finally there’s Juan below, (my pebble weave student!) with his mother and neighbor. Juan put on his  narrow, black fringe-less poncho and felt hat especially for this picture. On another visit during a festival all the men were wearing their ponchos for the occasion.

You can see the backstrap looms on which I was teaching Juan and Natalia pebble weave tied to the pole. In exchange Anita introduced me to her cousin on my next visit and he taught me to weave the typical supplementary warp patterned belts of Salasaca.

Okay, so I promised you some double weave edge samples this week, right? I am sorry, I didn’t get those done. I was busy trying to stay on track and not get “dis-track-ted” by all the goings-on in the Ravelry group. I want to finish my leafy hanging. but I must say that I have a bowl of tencel calling to me wanting to be made into a scarf…

That blue ball is indigo-dyed Japanese silk…a fabulously thoughtful gift brought to me from Japan by one of my old teaching colleagues here.

Hopefully I will get the leaf piece off the loom this week, plan and warp the next hanging, play a little with my tencel, get the Ashford Traddy up and running and do those double weave samples for the tutorial too….phew!

Oh, and I have started a new page for RESOURCES. You will see the tab for that on the header and I am slowly extracting all the links to interesting sites, articles and products that I have linked to in my 105 posts so far. This is quite a job but I hope to add two or three links to the page every week. I hope you find it useful.

.