Backstrap Weaving – The Long-awaited Book Update!

Rugged up for winter hiking with my Wednesday Walking Women’s Group at Wentworth Falls. Spinning wool for a lap blanket project at the Springwood Spinners and Weavers Group. We meet weekly! Attending a Jane Austen Tea Dance in Sydney…yes, I’m doing English Country Dancing and am quite obsessed! It’s good to add some non-hand activities. as my poor wrist and hand will probably never fully recover from my accident.

SO, HERE’S THE UPDATE….

Demonstrating weaving and spinning at Winterfest Medieval Fair while making new fiber friends.
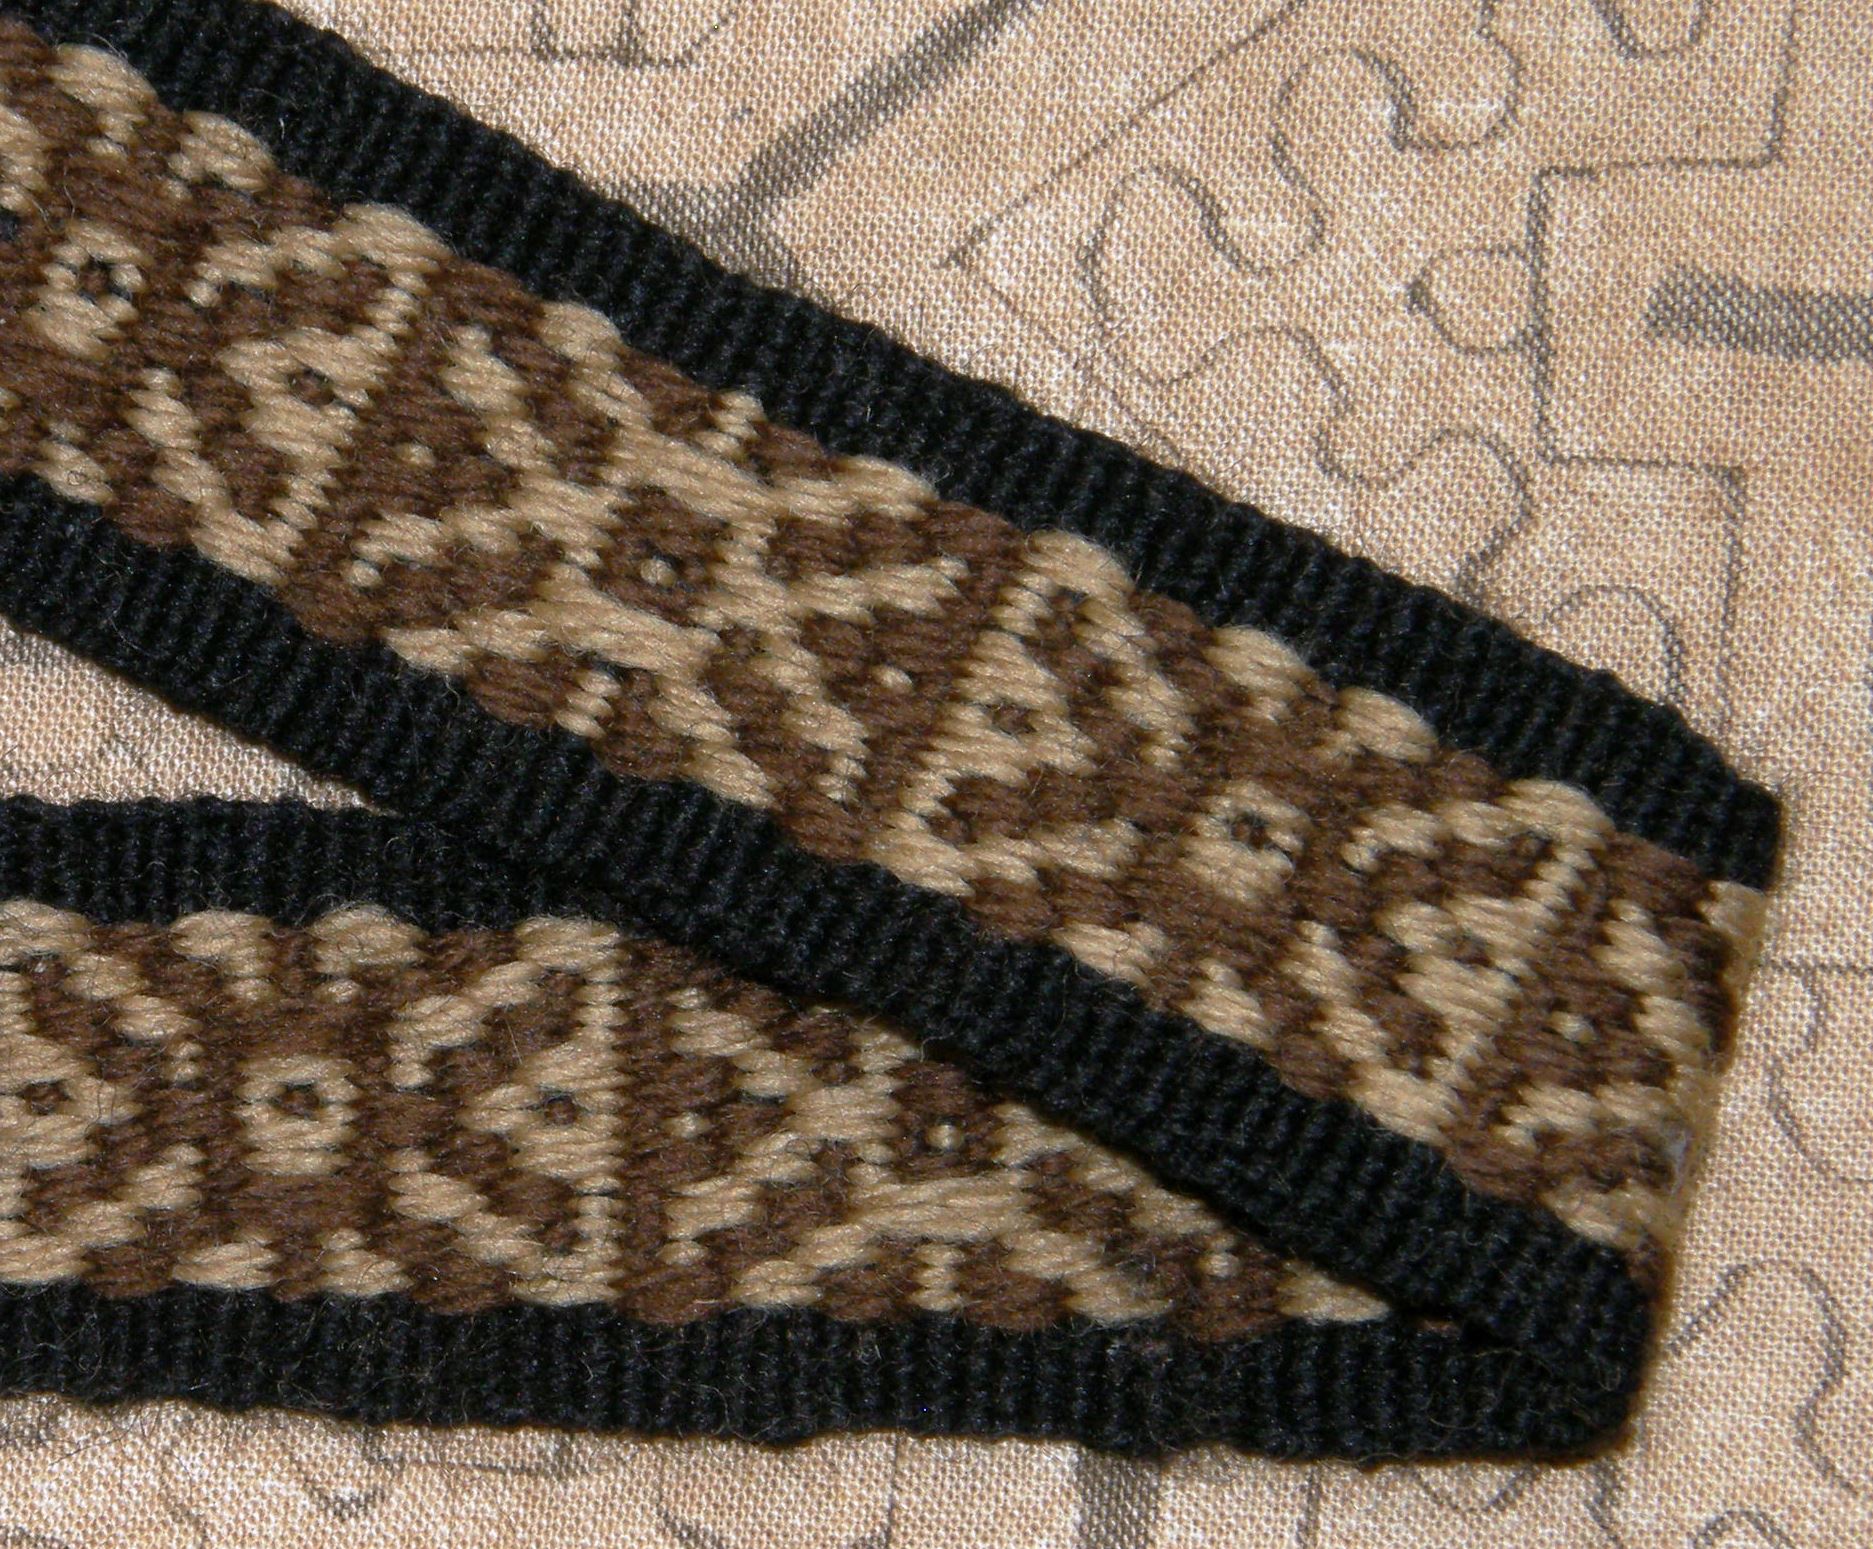
I chose to weave a pattern that I had transposed to the structure that I call Andean Pebble Weave from a historic tablet-woven band for the demo at the Medieval Fair. It has a little dragon-like figure which I thought appropriate. It is charted in the More Andean Pebble Weave Patterns book.

Some of these patterns are charted in this first book.

(More suitable starter books for those who use inkle or other band looms are Complementary-warp Pick-up for all kinds of looms that allow you to weave bands or Andean Pebble Weave on Inkle Looms specifically for inkle looms. See their descriptions below).

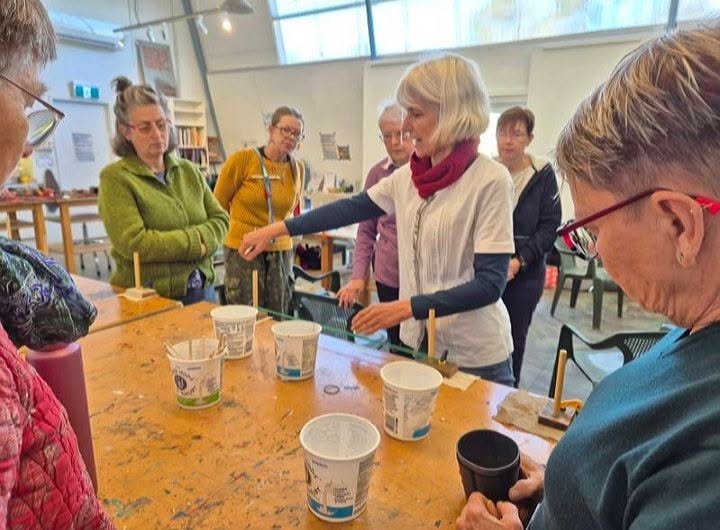
Teaching backstrap loom weaving at the Blackheath Arts Society here in the Blue Mountains. All those serious focused faces turned into smiling ones once they’d settled and started to feel comfortable with the techniques. Some had never ever wove before and can now call themselves weavers!


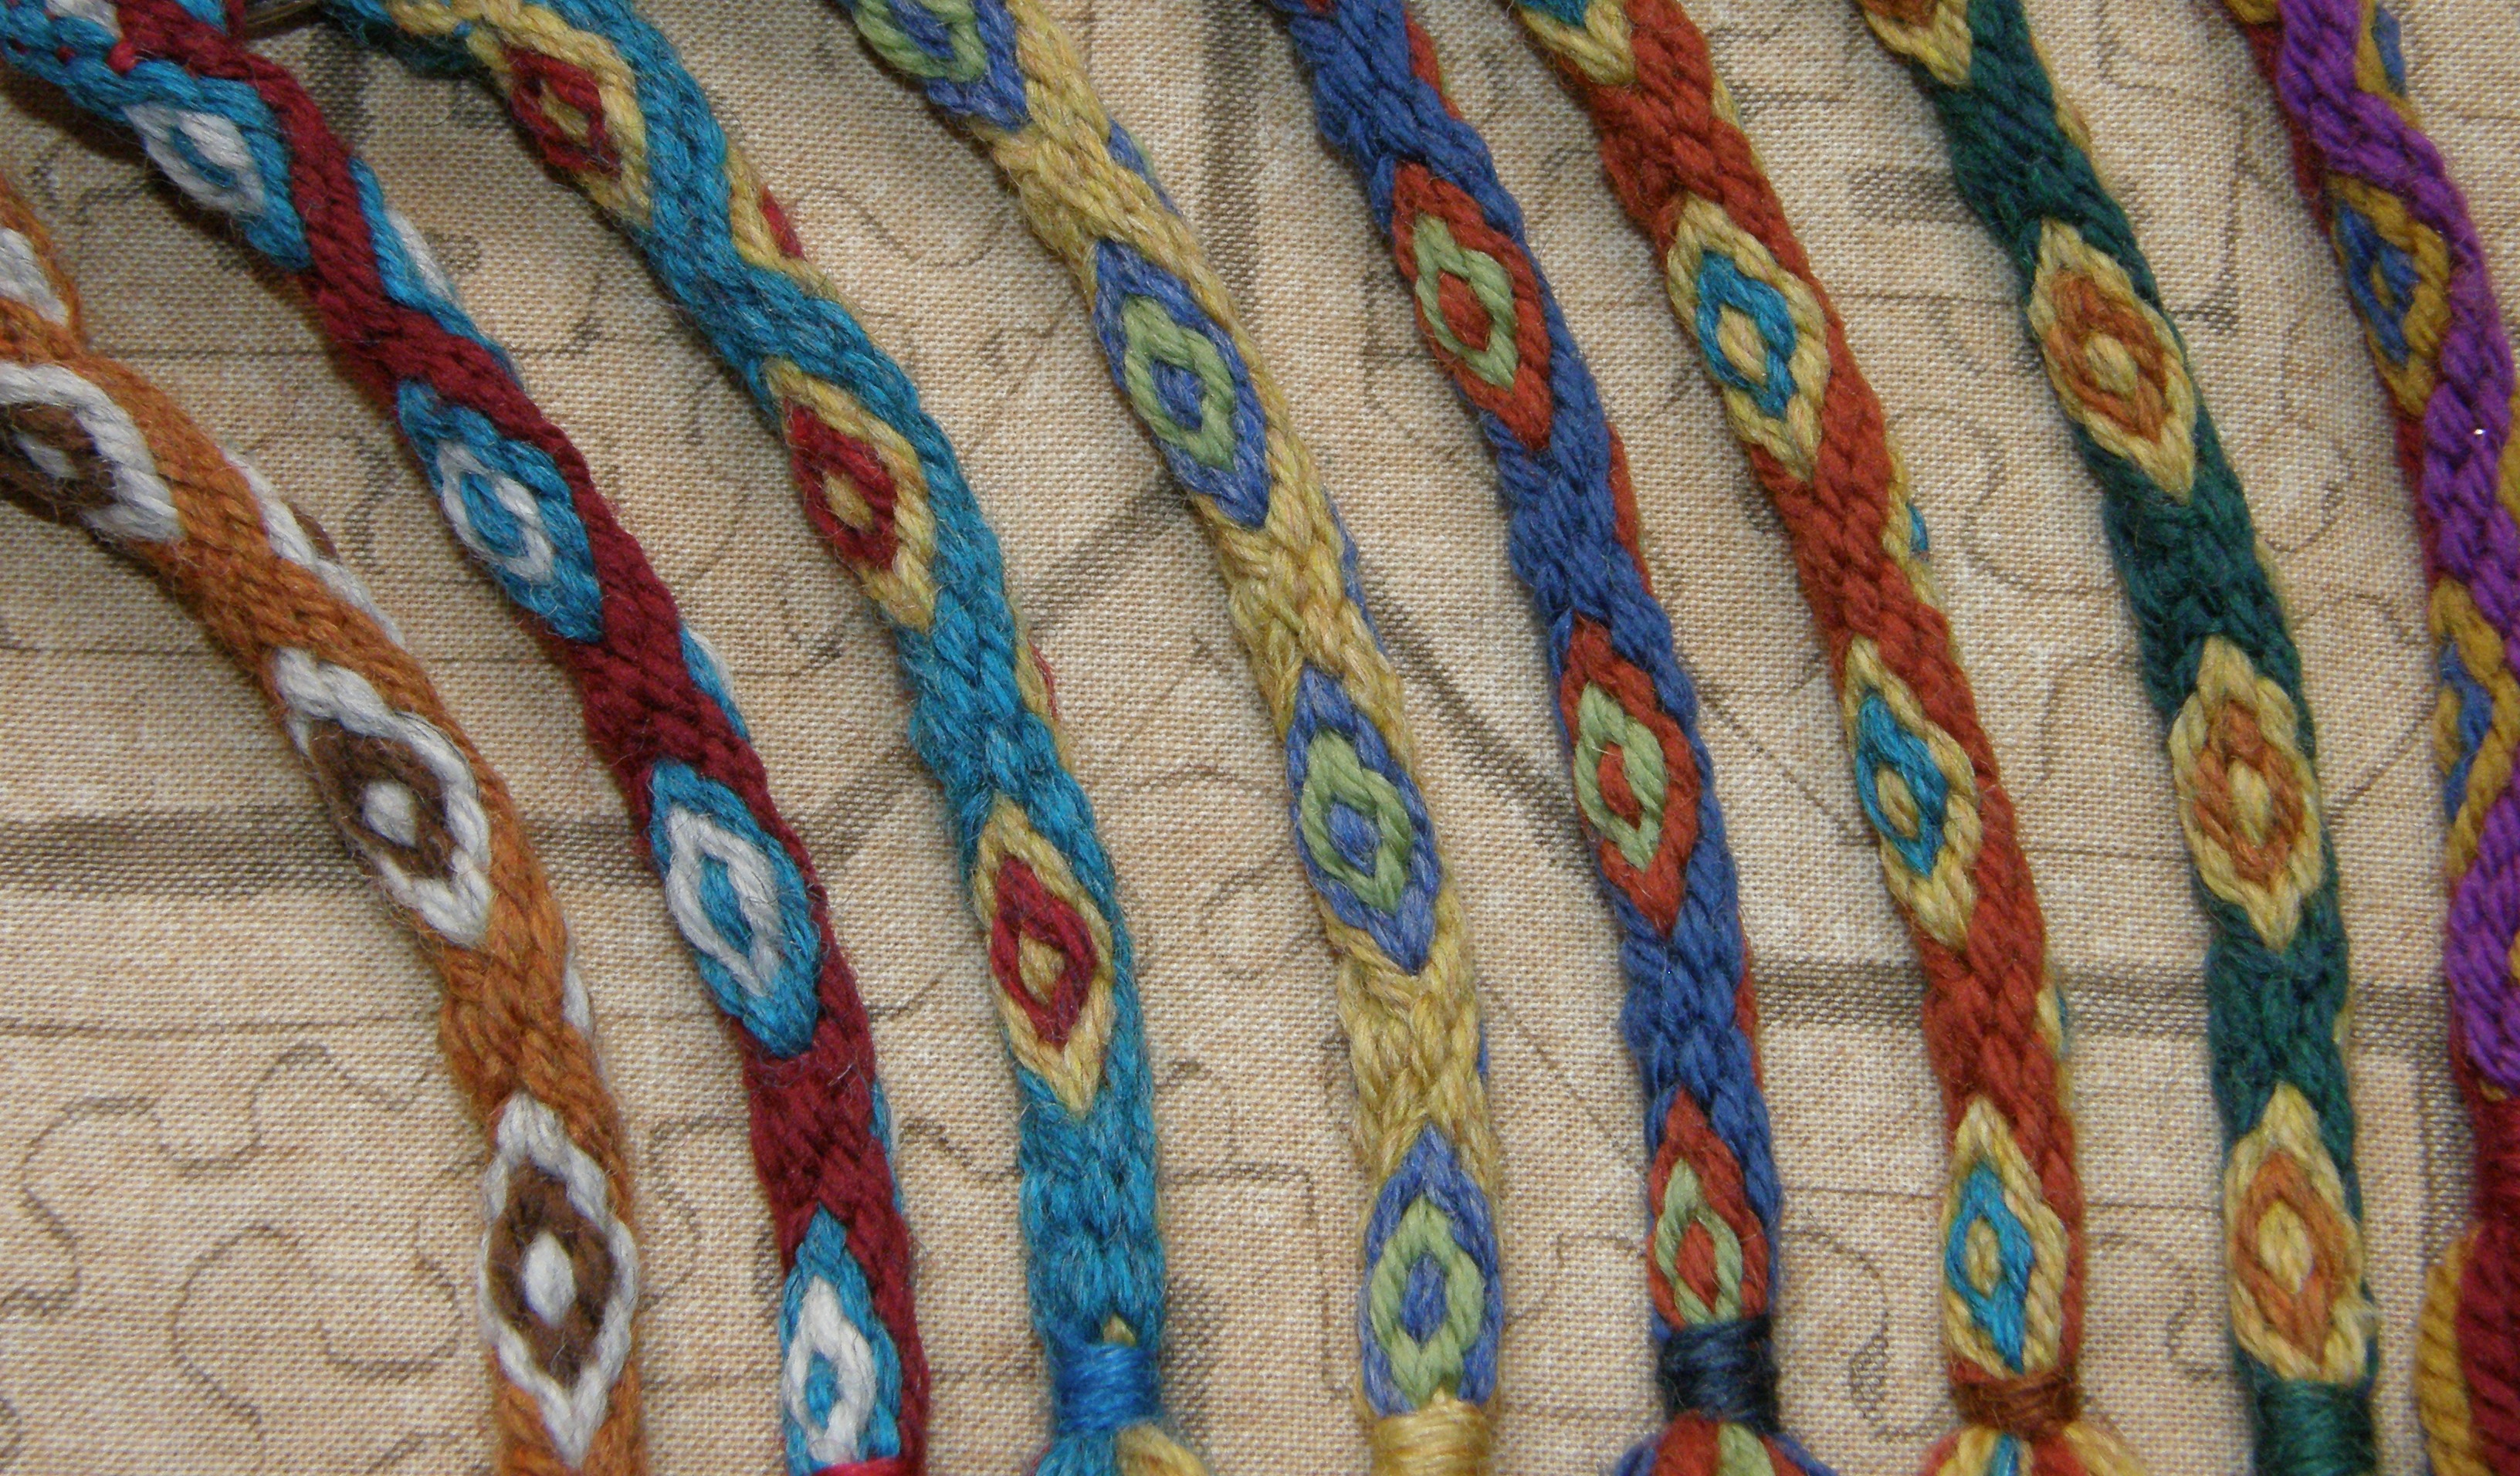
The colors I’ve been achieving lately in my natural dye experiments perfectly matched the Autumn colors here in my Blue Mountains home. The most recent color came from lichen which gave me the lovely lavender.


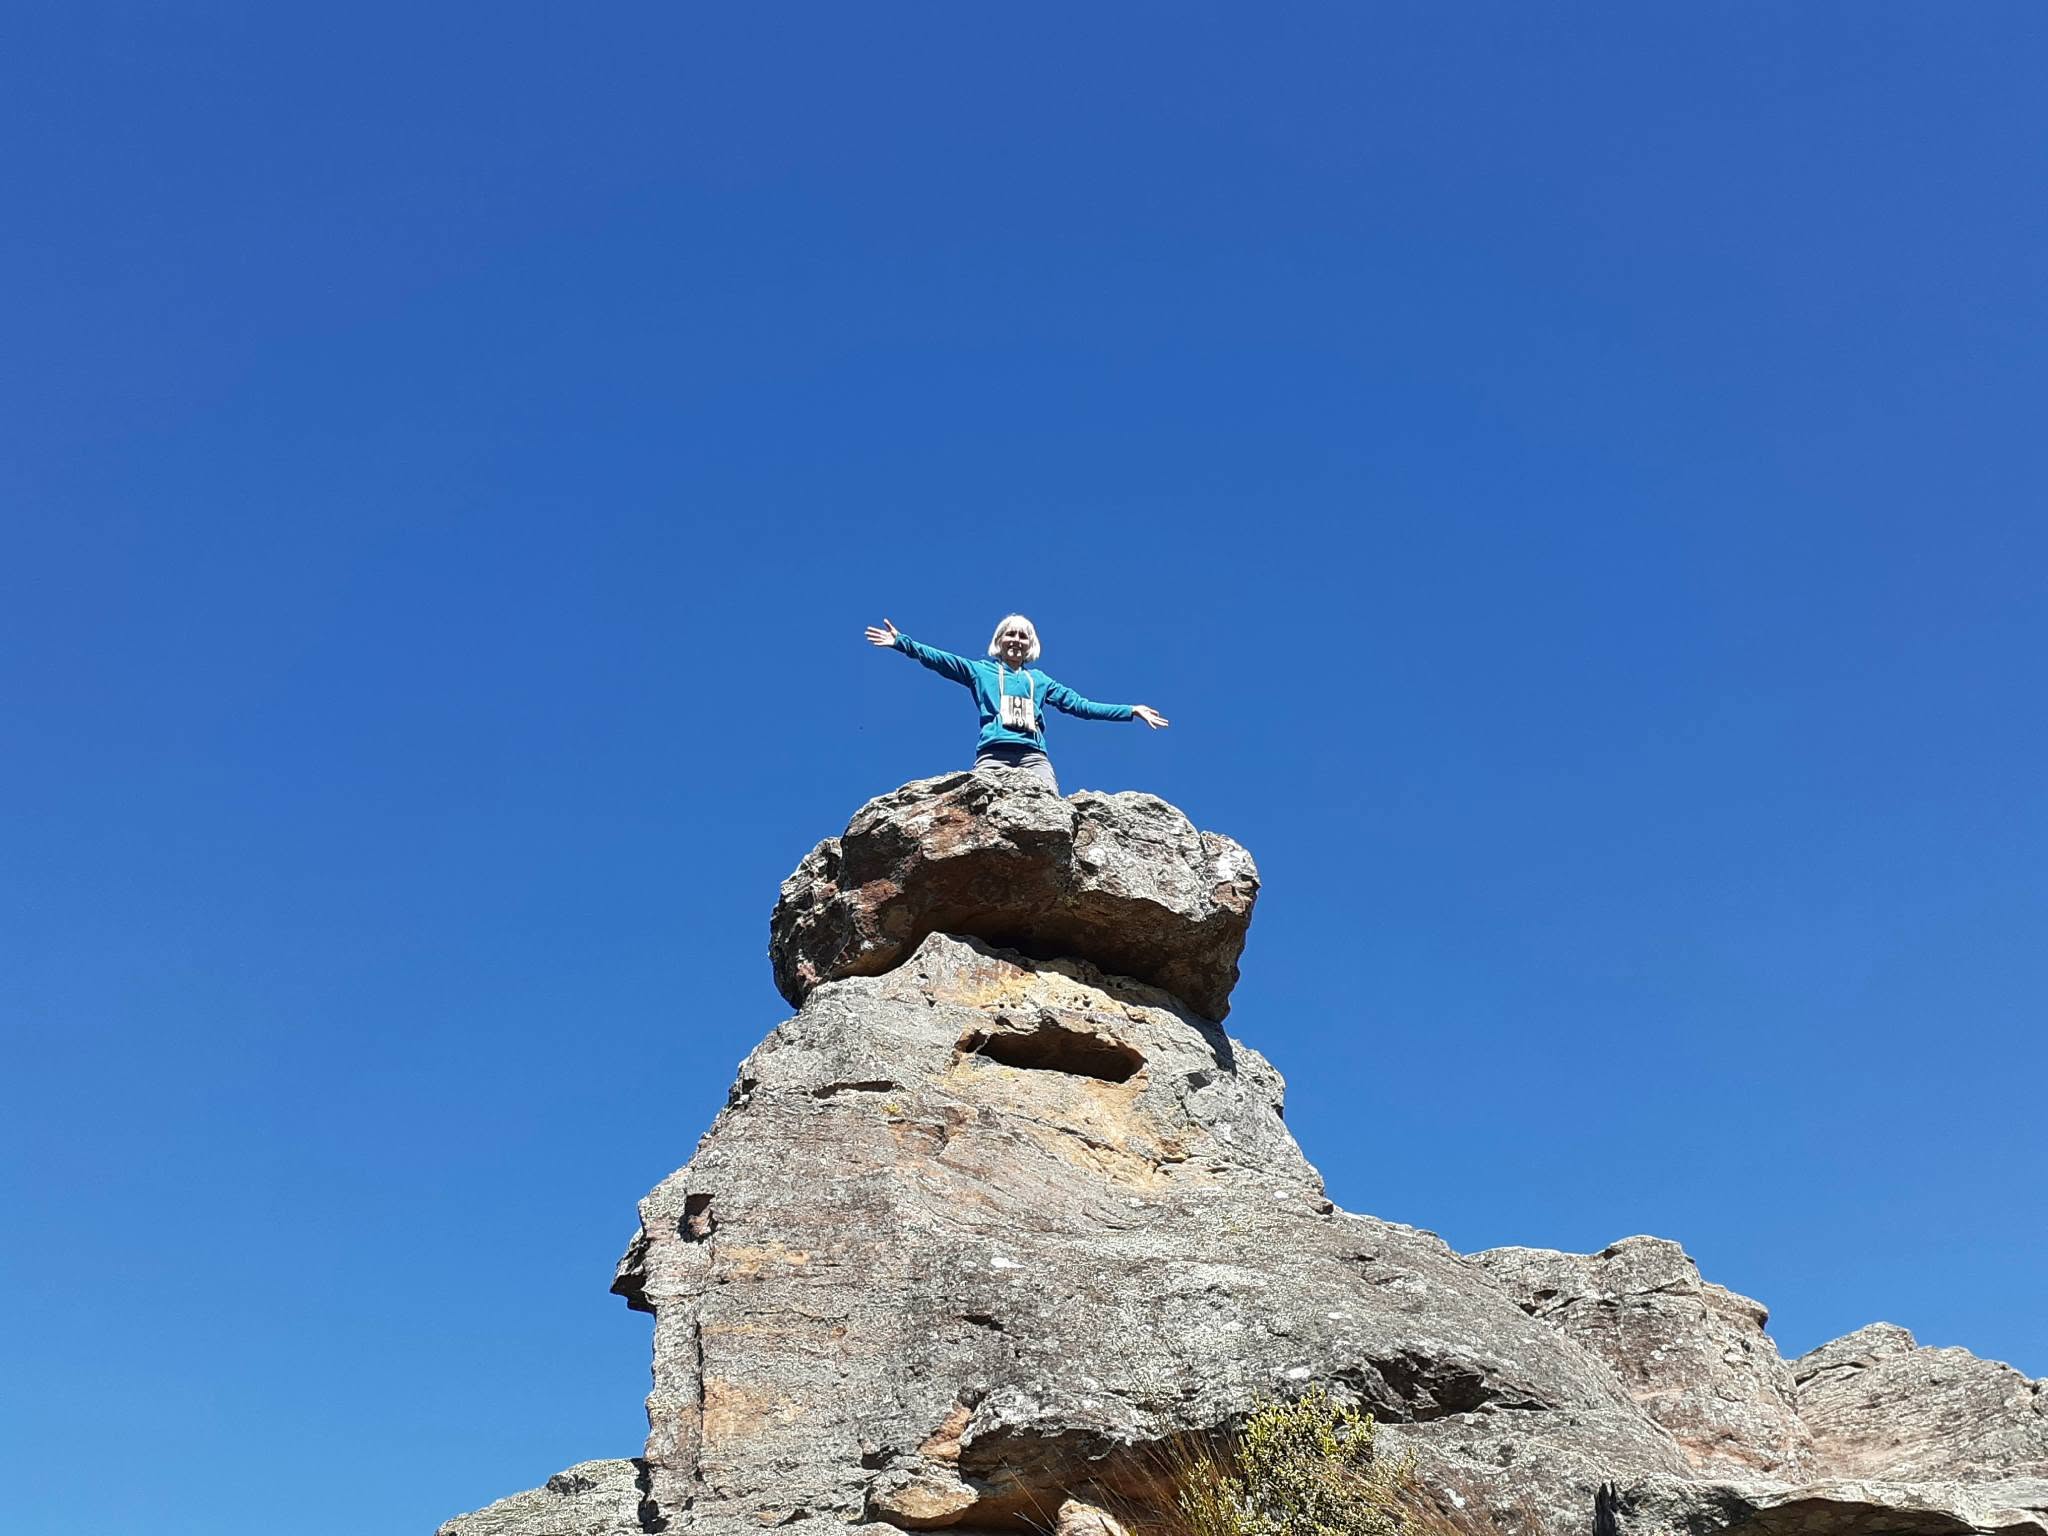
Being King of the World on Ruined Castle deep in the Jamison Valley, Blue Mountains NSW Australia. Day 3 of my three-day birthday celebration a couple of weeks ago…haha. No it wasn’t one of the milestone birthdays but the Beatles thought the age important enough to write a song about!

Backstrap Weaving – Finding Joy

Here’s just a quick hello and update (as I’m typing with one finger of my left hand)…

I’m still in transition mode living on the mid-north coast with my brother and sister-in-law (and loving it!) while working on rehabilitating my hand. I did end up having a second surgery because it was all pretty messed up….tendons and a very irritated nerve were encased in scar tissue and stuck together. Another tendon had become adhered to the bone, plus the plate that was too bulky for my small frame was removed. I had been expecting a minor miracle after that but it was, in fact, a move back to square one rehabilitation-wise. Expectations were adjusted and I’m back to work exercising.

In the meantime, there have been several textile-related exhibits to visit at Port Macquarie’s fabulous Glasshouse. I was drawn to this piece by Hannah Garside called Book of Hands because of the hand theme. These well-used and worn gloves “darkened with age and use gently interlace evoking touch, intimacy and the presence of former wearers “

I managed to get one more key fob gift woven before being advised to stop weaving until I’ve recovered wrist rotation. It’s quite limited right now. I was kidding myself thinking I could manage weaving with my injured hand. I was, in fact, compensating with my shoulder and ended up injuring it.

This fob is for my hand therapist, an occupational rather than physio therapist, and has the name of her business. The name will only make sense if you understand that the last two letters are capitals and are pronounced Oh-tee.

So, weaving is on the back-burner once again and I am entertaining myself by designing a hand-themed triptych which will be a story of my Indian roots, my 32 years in South America and the new possibilities that will come to me now that I’m back in Australia.

I’ve joined an organisation here called the Fibre Artisans Network and am excited about being able to exchange ideas and share skills and perhaps exhibit some of my work alongside that of the other members one day. We’ve met up twice already and will do so again tomorrow. The first thing I’d love to learn more about is dyeing with eucalypts.

I’m going to leave you with something I’ve posted before but which brings me joy and makes me want to share it again. I hope the melody isn’t an ear-worm for you. I’ve added some bits since I last showed it to you.

MY FAVORITE THINGS (a few of)

Intricate patterns on bamboo and gourd,
A beater, a shuttle, a small weaving sword,
Plant fibers twisted and woven like string,
These are a few of my favorite things.
Bone tools and wooden ones shaped just for picking,
Others to strum across threads that are sticking,
Laid out before me the pleasure they bring,
These are a few of my favorite things.

Books that tell stories of teachers I’ve known,
Covered with fabric and carefully sewn,
They hold the memories to which I will cling,
These are a few of my favorite things.
Spindles a-whirring turn fleece into thread,
Dipped in a dye pot of cochineal red,
Patterns of summer, fall, winter and spring
,
These are a few of my favorite things.

When I must wait,
Cannot cre-ate,
And I’m feeling sad.
I simply remember my favorite things
And then I don’t feel
So bad.

Spring has sprung here and it’s glorious! The air is drenched with the aroma of jasmine and the sound of bees. An increasing number of surfers can be spotted bobbing about in the waves and it’s time to make friends with all the magpies I encounter on my walks lest they start swooping me at nesting time.

Until next time when maybe I can reveal some of my hand-themed patterns. I’ve made some good thrift store purchases of cotton (I love how thrift stores here in Australia are called “op shops”) which I’ll dye for this project…..or maybe I’ll use eucalypt-dyed wool. It’s exciting to think about.

Backstrap Weaving – Bye-bye Traddy

I used left-over scraps of that wheel-spun wool along with some of the wool I used for my Navajo-style weaving in natural dye experiments in Chile. They were wrapped around rolls of paper and coiled into what you see here which I used as the lid for a basket.

I am a “cheap spindler” in much the same way as I am a cheap drunk…it doesn’t take much to make me happy! Don’t waste the good wine on me. I do not have a refined palate. So, it is little wonder that I am content to use my humble Cusco drop spindle when I get the urge to spin. I just don’t have a refined palate for spinning tools.

The Cusco spindle was the second one I ever got, the first being from San Pedro de Atacama in northern Chile. The Cusco one that I got in 1996, being more robust, became my constant travel companion. It was practical. Although I have collected many more spindles on my weaving safaris since then, this Cusco one is the one I always use while the others hang on the wall behind the sofa as souvenirs of places I have been and people I have met.

The spindle I got in Cusco in 1996.
Some of the whorls from the spindles on the wall fell down behind the sofa only to be retrieved later when a friend helped me move it. Here are three that I found there among the cat toys. It’s so interesting seeing the various styles of whorl.

The very first spinning that I did for weaving on my backstrap loom was with some extremely dry, brittle, and filthy llama fiber that I had bought from a farmer while wandering about the back roads of Uyuni in the Bolivian highlands. I cleaned and prepared it. The dust and dirt would have me wheezing and my skin would crawl and eyes run every time I opened the bags to get more. It made for good spinning training. I gave the fiber a tremendous amount of twist because at that time I believed that this was the only way hand-spun yarn could possibly stand up to the abrasion of warp-faced weaving. I have since learned that this is not so. That kind of yarn produces durable, hard wearing cloth and in a tight warp-faced weave can make a garment highly water-resistant. Of course, that isn’t always the kind of cloth I want.

The natural colors of the llama I spun. I was always amazed at how nice it looked when woven. Warp-faced structures are very forgiving in that way.
When I was given a large bag of spearmint leaves by a friend, I decided to use it it to dye some of the llama yarn. One batch gave me a nice neutral taupe color. The second lot my friend gave me produced green. I also had some cochineal for red.
I was able to buy a lovely fine commercial yarn in Chile that was a blend of alpaca and wool and came in earthy colors. I would use my drop spindle to add extra twist as, again, I’d thought that yarn for warp-faced weaving simply must have that tightly spun characteristic. The green in this band I wove with this yarn is actually cotton.
The first time I was given prepared alpaca to spin by my friend Janet, I decided that I simply couldn’t put all that heavy amount of twist into that beautiful fiber. With a bit of extra care in the way I handled it on my backstrap loom, it made lovely warp. The yarn was quite balanced and didn’t kink up on itself.
You can see that this alpaca yarn that I spun lies flat and relaxed when not under tension.
You can see how my teacher Maxima’s handspun wool yarn behaves when not under tension. All the energy from the twist causes the warp lying on the ground to tightly spiral. The yarn will produce hard-wearing cloth.

I really enjoy reading the online group forums about spinners and their spindles. The participants’ love and enthusiasm for their tools is wonderful….I totally get it but I just don’t share it. Some of the spindles they show are beautiful pieces of craftsmanship and I love seeing them. But when it comes down to it, I just want to get the job done. If you like your tools to be uniquely hand-carved pieces of art, take a look at Allen Berry’s work on Instagram (allenrberry). All his fiber tools are amazing.

It seems that when it comes to spinning I am totally product oriented which is kind of strange as it is quite the opposite when I weave.  I just want to get this stuff done so I can go weave with it. In weaving I am all about enjoying the process. I probably would not have been willing to devote any great amount of time to spinning if not for the pandemic. The combination of needing to keep my hands busy during Zoom sessions as well as a dwindling stash had me happily spinning up all the wool I could find in my closet.

Weaving a small tubular band as a test for my handspun wool yarn to see if a) it would be suitable for my warp-faced weaving and b) if there was enough contrast between the three colors for use in a three-color pebble project.
The warp for a three-color pebble project with my handspun “pandemic” wool in purple, pale yellow and a rust.

And then I took on a new adventure…spinning cotton. As with my favored Cusco spindle for wool, I have taken the takli that Elizabeth gave me in Australia as my one and only tool for cotton. It is all I feel the need for right now. It makes for quiet, comfortable, and fuss-free Zoom spinning.

My first lot of Sea Island cotton and the gifted takli spindle. I was pleased with this first attempt but hadn’t known at the time that Sea Island cotton has a longer staple length than other varieties and is therefore easier to spin.

My collection of spindles that I have gathered in my travels includes a few that are used for cotton. Here are two from Guatemala and one that I bought from my Guaraní teacher here in Santa Cruz. The whorl on that one is a piece cut from the sole of a sandal.

Two spindles from Guatemala flank the Guaraní one.
Workshop spindle.
I love the way we are all so focused on our teacher’s demonstration. As it turned out, she is left-handed and we were all righties. She got us all started one by one turning the spindle in one direction and we then proceeded to unspin what she had started for us!
Moving on here to Upland cotton.
The color called Mahogany in the center after being boiled. The pre-boil color is below to the right.

And of course, there is the horizontally-held spindle for cotton spinning that is used by my teachers in coastal Ecuador.

The cotton is draped on a wooden stand called the “rueca” for spinning. It has a notch cut into its top which grabs the cotton and allows the spinner to draw out the fibers under tension. A small basket is woven from plantain fiber underneath on which the spindle sits when not in use. This is a miniature version of the rueca which I made with my teachers’ help so that I could take an example back with me to Bolivia. I need to place something in the little basket to weigh it down because it is so small and light. The typical spindle can be seen at right with its wooden whorl. More often now you will see people using yo-yo halves and metal wheels as whorls.

Here are some tiny whorls from coastal Ecuador that the family had found while ploughing their fields. There were close to forty of them sitting in a bowl on a shelf, just like that.

My very first experience with spinning cotton had been in coastal Ecuador where I got to work almost from scratch, de-seeding, teasing apart, and fluffing up the cotton. It was difficult spinning it on the horizontally-held spindles compared to what I do now with the takli. Unfortunately, I didn’t spend much time on it while there, being much more interested in the weaving part of the process. My teachers already had plenty of spun singles that they doubled for warp so that I could learn how they weave their double-pocket saddle bags and hammocks. We would pass time in the evenings on cotton preparation.

My first attempts with the horizontally-held spindle in Ecuador with my teacher Trini and her mother Luz (rip).

I put in a little practice when I got back home but the loom soon called me away…

My cat got to the point eventually where she paid no attention to my fiber-y pursuits.

I may have never gone back to cotton if not for the pandemic. The loom was always pulling me one way yet my stash of gifted sliver in the closet was growing. Thank you to all those, especially Betty, who were so kind with their gifts when I was visiting in the States.

I have woven with my singles thread. It was an even freakier experience than the first time weaving with my handspun llama yarn all those years ago.I was surprised to see how well it tolerated the string heddles and the close sett on my backstrap loom.

I love the look of all these handspun cotton singles lined up on my backstrap loom.

I’ve used it in plain weave for ikat pieces as well as for pieces decorated with pick-up patterns that I’ve used in small purse and wallet projects.

Wallet project with pick-up patterning in the structure that I call Andean Pebble Weave.

Right now I’m spinning some more brown sliver that I just uncovered in the closet. I’ve yet to use the brown in a project.

Ikat projects in my handspun cotton singles. The lower one uses some of the natural green cotton in both its boiled and not-boiled versions. Most of what you see there is the not-boiled green.

No doubt when I return to Australia I’ll have lots of access to sheep fleeces and will wonder about my Traddy and how it’s being used on this side of the world. I won’t be buying another wheel though, and will slowly work my way through, as is my habit, with my drop spindle. I won’t be displaying my other spindles on the wall either and that might lead me to picking up one of the others for a spin and giving the Cusco one a rest.

See you all next time…

Backstrap Weaving – One Method doesn’t Fit All.

This is the mill-spun wool singles yarn that I bought from a farmer while weaving with friends in Petaluma, California.
Two of the plain-weave projects that I’ve completed with this wool….a travel documents pouch on the left and mobile phone case on the right.
Taming the mill-spun singles into a three-color pattern in the structure that I call Andean Pebble Weave.
Using 8/2 Tencel in the same structure.
The camera strap in which I could play with changing the background color, the hummingbird outline color and filler color. It was a bit brain bending but fun.
A little further along with some cloth already rolled up.
Now to decide on whether to join the three pieces without overlapping them using one of the decorative stitches that I’ve learned from my teachers here, or join them with the tiniest of seams.
The heddles from the two warps remained pretty much fluff-free. The one on the left is from the pattern warp and is discolored. I’m guessing that a fine film of fluff has discolored it.
This little pouch for my pin loom is made up of three pieces joined together with a tiny seam. The center is a piece I wove from my own handspun llama yarn that I was rescuing from an old project. I added sides made from the mill-spun wool singles.
A subtle joining stitch in cotton connecting two panels that don’t overlap. I’d woven a very long band on a circular warp and Karen-style backstrap loom that had been given to me. I cut the band into five pieces and joined them to make a table square.
The completed table square.
The stitch can be decorative as well as functional when worked in a contrasting color. I used it to join the panels of this wool lap blanket that I wove.
Another kind of stitch that my Vietnamese backstrap weaving teachers use. I used it to connect two bands and make a tool bag.
Sometimes the joining stitch can be one of the main features. I used this stitch which was shown to me by one of my teachers in the Bolivian highlands to join two cotton panels that I had woven. Maxima stitches it in many bright and lively colors.
Picture courtesy of PAZA Bolivia shows Maxima’s carrying cloth with its colorful joining stitches.
Natural brown handspun cotton singles waiting to be washed. I use these metal mesh pencil cups to hold the thread under tension in the pot.

Backstrap Weaving – The Big Bag Theory

In my last post I left you with the fabric that I had woven for pockets for my new tote bag. It’s part of a stash-busting project using the small balls of Omega Sinfonia cotton that I’ve accumulated over the years.

Fabric for two pockets that I wove using the structure that I call Andean Pebble Weave. My backstrap loom enables me to create a nice neat third selvedge at the start of the fabric.

Then came the task of weaving the fabric for the body of the bag. Again, I wanted to be able to use up as much of that stash of Omega Sinfonia as possible. I knew that I could over-dye the lighter colors dark blue. But the dark colors would have to be dyed black. There weren’t enough lighter colors to allow me to create entirely blue fabric but I didn’t want the bag to be completely black either. I decided the cloth would be both blue and black. Oh my gosh, I had so many doubts about what this was going to look like!

The fact that each color that I overdyed would give me a different tone of blue and black was another thing to consider. This could be a mess. The differences in tone were not fully apparent until the warp had been wound and spread out before me. I suppose I could have taken the time to arrange the stripes in some sort of clever Fibonacci sequence of widths but once the warp was wound and on the loom beams, I wasn’t keen on fiddling around with it.

You might notice the absence of a coil rod on this warp. I’m in the habit of using one when I do warp-faced plain weave using material that has little to no stretch. Inserting one locks the two layers of threads together and stops them from see-sawing back and forth around the warp beam as I operate the loom. That see-sawing can cause the cloth to form a corrugated look. This time, I wove a inch or so at the far end of the warp to lock the two layers together instead before turning the loom around to start weaving at the knot-less “good” end.

I planned the cloth to be 19 inches wide. That’s a fair bit wider than what I usually have on my backstrap loom but certainly not as wide as the cloth I have seen on the backstrap looms of weavers in Indonesia and other parts of SE Asia. The widest cloth that I have seen on a backstrap loom in my travels in South America was 39 inches. It was light cotton cloth and the weaver had to stand to weave it.

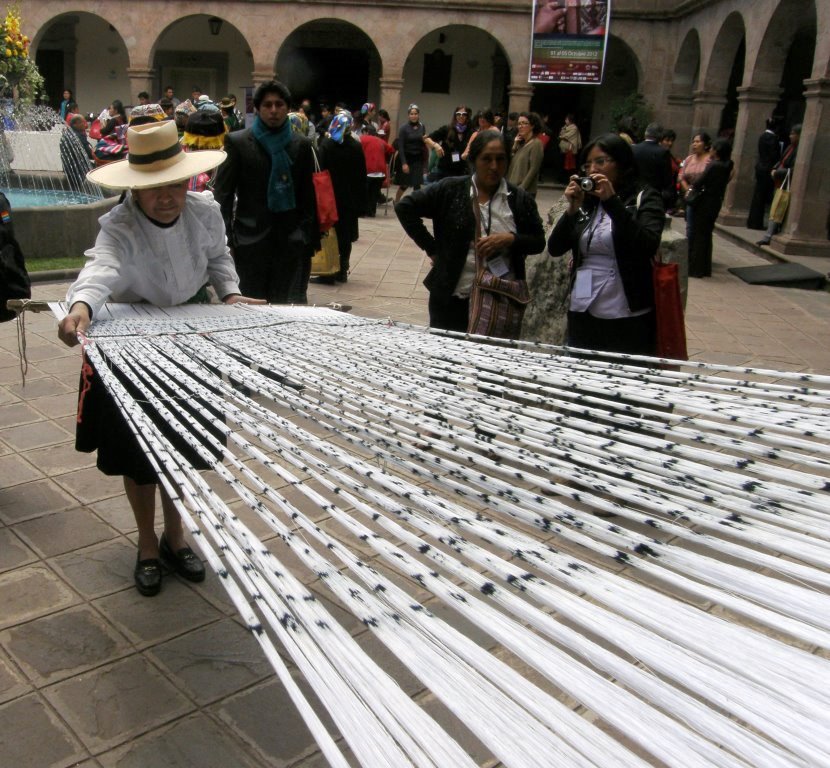
This weaver in Peru stands weaves a wide, light, cotton ikat warp.

I had to get out the long sticks and swords.

The sword on the right was just right for this project.
Laying the pocket fabric on top to see if I could imagine what the end product would look like.
Almost there.

Omega Sinfonia is quite hefty thread compared with what I have become used to using over recent years and so it was quite a work-out operating the loom and beating. My longest sword is not a particularly hefty one.

Before and after wet-finishing and pressing. The straps in the picture on the right don’t belong to this bag. I had just placed the cloth on top of another tote that I own to get an idea of strap placement.

The original idea had been to have two outer pockets, one on each side, showing the two faces of the Andean Pebble Weave pattern. In the end I went with one outside and one inside pocket instead. It was a fairly basic sewing project. I created box corners and then set about weaving the straps.

It has already been on its first grocery-shopping outing….

Its a winner. I’m really pleased with it. Well, that took care of about a third of the Omega Sinfonia scraps. What’s next? I have two kinds of reds and three kinds of browns left, none of which look good together, and a bunch of other odds and ends. I have in fact used red and brown together before but I guess that they just have to be the right kinds of red and brown in order to work…

Two wool panels that I wove and later sewed together to make a lap blanket.

People often ask me how I go about weaving wider pieces. For me, it’s all about the warping. Once a good evenly tensioned warp has been created and you are seated at the loom, there’s not a whole lot of difference in the process of dressing the warp and weaving. Additional sticks and other tools might be needed but operating the backstrap loom with a wide warp works on the same body-movement principles as with a narrow warp. It just requires more physical effort.

I have a few tips for creating and managing wider warps. I stress that this is just the way I do it. There are many different ways and of course, no one single correct way. This isn’t a step-by-step description…just some tips that I can share after perhaps having made every possible mistake over the years.

Tip 1: Make sure you have a stable warping set-up with stakes that aren’t going to shift or bend:

I always warp in sections and won’t pile up any more than two inches of threads on my warping stakes to avoid having them lean. I tie off and remove each section from the stakes and place them on beams and cross sticks that are waiting on the floor. Always use safety strings in case there’s an accident along the way!

First of several sections of a silk warp I created some time ago removed from the warping stakes and placed on beams and cross sticks on the floor.
This is the second warp that I created after returning from my first weaving lessons in Peru in 1996. I was in a big hurry to create a wide piece using both the Andean Pebble Weave and supplementary-warp structures that I had been taught but I didn’t yet have a good warping set-up. Take a look at the disaster on the warp beam!

Tip 2: Know your yarn, know your width, know your technique:

What I am saying is, don’t go wide with a yarn you have never used before. First weave a decent-sized sample.

I know that some people don’t bother with sampling but I like to know the width I am aiming for rather than just warping up and seeing what turns out. So, there is a lot of measuring and calculating that goes on based on samples that I have woven, preferably fairly recently, with the yarn I plan to use. I had a sample using the Omega Sinfonia thread for my bag project in both warp-faced plain weave and Andean Pebble Weave and used it to make my calculations. That way I knew exactly the number of ends I would need for each of the two structures to create my 9-inch-wide pocket fabric. The plain weave sections in the pocket actually came out slightly wider than expected (perhaps my sample had been too old and I have since then unconsciously changed the way I handle the weft). I was able to use that updated information to plan the warp-faced plain-weave cloth for the body of the bag.

One of my sampling warps. This one was more about sampling a motif that I was designing but it also gave me a chance to update the ends-per-inch information that I have for this 20/2 cotton warp as I plan to use this thread as part of my next project. It turned out that my epi info hasn’t changed since the last time I worked with this thread.

My brother still has the wedge-shaped wall hanging that I had gifted to my mum back in the early days. I had woven it with new-to-me yarn, so no sampling had been done, and I started off too narrow. It started to widen and didn’t stop widening all the way to the end. There’s an inch difference in width from start to finish. But because it never settled down into a consistent width, the gradual widening almost looks intentional.

Another thing worth mentioning that applies to wide warps more than narrow ones, is that I find it best to set up my loom in one place at one angle and then keep it there for the duration of the project. I had started my mum’s wall hanging in Bolivia and taken it unfinished to Australia. It got set up in a few different places at various angles while I struggled to finish it in time. I even had to work on the short warp with the warp beam awkwardly lodged behind my feet for a while (I didn’t have another rod or cord handy to extend its length). That awkwardness accounts for the fact that the cloth isn’t straight.

Many lessons were learned from this one project from back in the day.

I wouldn’t attempt a wide piece with a technique that I had just recently learned either. (Obviously I hadn’t added this to my advice list on that red warp back in 1996!)

Tip 3: Warp undisturbed and don’t disturb the warp:

Have everything you need for warping close at hand including the loom bars and cross sticks….scissors, rubber bands or tape, lashing string, string for tying off groups of warps for counting etc.

Try to warp in one uninterrupted session…turn off the kettle, put the cat out, ignore the phone, forget that cup of coffee! It’s amazing how things can change from one day to the next. I never leave a warp half-done until the next day.

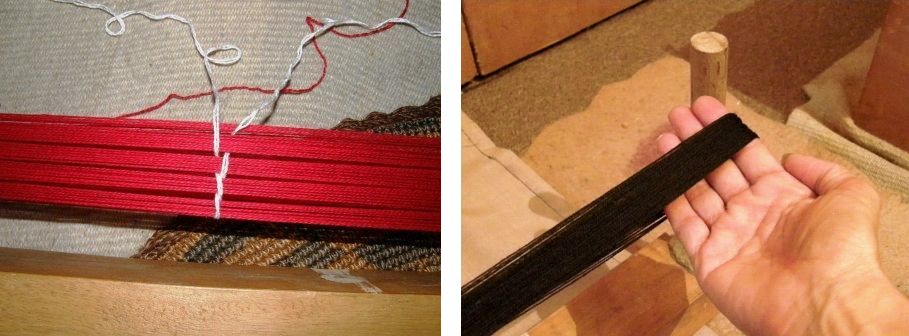
Once you have wound that beautifully-tensioned warp, do your very best not to disturb it. When I slide a section of warp off the warping board I try to keep my hand under the ends so that they are all lying flat across my fingers and not bunching up. Then I place them very carefully onto the beams. This saves a lot of tugging and rearranging later when I’m seated with the warp and tension and getting ready to weave. A lot of tugging can mess up your tension. Below right, you can see how I place my hand to lift the threads off the warping stake. Another thing you can do is chain thread around groups of threads as I’ve done on the red warp. It can help stop threads in a larger section of warp from shifting and climbing on top of each other, which all means less work and less time spent straightening things out later. One of my Guatemalan teachers did this.

Tip 4: Slow and steady…take the time to set-up and start well:

If necessary, settle the threads one by one along the cloth beam untwisting any that have overlapped. I learned to love doing this from my teacher in Guatemala. She so calmly and patiently lifted each thread on the tip of her pointed sick and placed it on the beam and I’ve learned to do the same. This is not entirely necessary if you are starting with a fringe and using waste yarn or cardboard strips as weft for your first few inches, but if you’re going for a third selvedge, this exercise will give you the neatest possible start.

Learning the patterning technique with supplementary weft with my weaving teacher in Guatemala. The cloth did not have a third selvedge. She carefully arranged the threads along her cloth beam which enabled her to press her first shots of weft hard against the beam for the least possible amount of loom waste.

Then I measure sections so that I know that my sett is consistent the whole way across the warp. There are varying degrees of “warp-facedness”. In some sections your threads might be crammed up tightly next to each other. In others they might be just a hair’s breadth apart. Mine tend to be the latter and I want that to be consistent. It’s especially hard to tell when you are working with dark colors or very fine threads. The overall width might be correct but the warp threads may still not be evenly distributed across that width.

I calculate the width that each of those sections that I removed from my warping stakes should be and make sure that the threads in each section are settled at that width. I can sometimes use up a whole morning fiddling around with this! However, with the right amount of prep, once I have thrown the first shots of weft and measured once again, I know that all will be smooth sailing from there on…just pure fun!

I’m going to finish with the The Big Bag again because after spending so much time doubting the success of this project, I now love it so much!