Backstrap Weaving – Bye-bye Traddy

I used left-over scraps of that wheel-spun wool along with some of the wool I used for my Navajo-style weaving in natural dye experiments in Chile. They were wrapped around rolls of paper and coiled into what you see here which I used as the lid for a basket.

I am a “cheap spindler” in much the same way as I am a cheap drunk…it doesn’t take much to make me happy! Don’t waste the good wine on me. I do not have a refined palate. So, it is little wonder that I am content to use my humble Cusco drop spindle when I get the urge to spin. I just don’t have a refined palate for spinning tools.

The Cusco spindle was the second one I ever got, the first being from San Pedro de Atacama in northern Chile. The Cusco one that I got in 1996, being more robust, became my constant travel companion. It was practical. Although I have collected many more spindles on my weaving safaris since then, this Cusco one is the one I always use while the others hang on the wall behind the sofa as souvenirs of places I have been and people I have met.

The spindle I got in Cusco in 1996.
Some of the whorls from the spindles on the wall fell down behind the sofa only to be retrieved later when a friend helped me move it. Here are three that I found there among the cat toys. It’s so interesting seeing the various styles of whorl.

The very first spinning that I did for weaving on my backstrap loom was with some extremely dry, brittle, and filthy llama fiber that I had bought from a farmer while wandering about the back roads of Uyuni in the Bolivian highlands. I cleaned and prepared it. The dust and dirt would have me wheezing and my skin would crawl and eyes run every time I opened the bags to get more. It made for good spinning training. I gave the fiber a tremendous amount of twist because at that time I believed that this was the only way hand-spun yarn could possibly stand up to the abrasion of warp-faced weaving. I have since learned that this is not so. That kind of yarn produces durable, hard wearing cloth and in a tight warp-faced weave can make a garment highly water-resistant. Of course, that isn’t always the kind of cloth I want.

The natural colors of the llama I spun. I was always amazed at how nice it looked when woven. Warp-faced structures are very forgiving in that way.
When I was given a large bag of spearmint leaves by a friend, I decided to use it it to dye some of the llama yarn. One batch gave me a nice neutral taupe color. The second lot my friend gave me produced green. I also had some cochineal for red.
I was able to buy a lovely fine commercial yarn in Chile that was a blend of alpaca and wool and came in earthy colors. I would use my drop spindle to add extra twist as, again, I’d thought that yarn for warp-faced weaving simply must have that tightly spun characteristic. The green in this band I wove with this yarn is actually cotton.
The first time I was given prepared alpaca to spin by my friend Janet, I decided that I simply couldn’t put all that heavy amount of twist into that beautiful fiber. With a bit of extra care in the way I handled it on my backstrap loom, it made lovely warp. The yarn was quite balanced and didn’t kink up on itself.
You can see that this alpaca yarn that I spun lies flat and relaxed when not under tension.
You can see how my teacher Maxima’s handspun wool yarn behaves when not under tension. All the energy from the twist causes the warp lying on the ground to tightly spiral. The yarn will produce hard-wearing cloth.

I really enjoy reading the online group forums about spinners and their spindles. The participants’ love and enthusiasm for their tools is wonderful….I totally get it but I just don’t share it. Some of the spindles they show are beautiful pieces of craftsmanship and I love seeing them. But when it comes down to it, I just want to get the job done. If you like your tools to be uniquely hand-carved pieces of art, take a look at Allen Berry’s work on Instagram (allenrberry). All his fiber tools are amazing.

It seems that when it comes to spinning I am totally product oriented which is kind of strange as it is quite the opposite when I weave.  I just want to get this stuff done so I can go weave with it. In weaving I am all about enjoying the process. I probably would not have been willing to devote any great amount of time to spinning if not for the pandemic. The combination of needing to keep my hands busy during Zoom sessions as well as a dwindling stash had me happily spinning up all the wool I could find in my closet.

Weaving a small tubular band as a test for my handspun wool yarn to see if a) it would be suitable for my warp-faced weaving and b) if there was enough contrast between the three colors for use in a three-color pebble project.
The warp for a three-color pebble project with my handspun “pandemic” wool in purple, pale yellow and a rust.

And then I took on a new adventure…spinning cotton. As with my favored Cusco spindle for wool, I have taken the takli that Elizabeth gave me in Australia as my one and only tool for cotton. It is all I feel the need for right now. It makes for quiet, comfortable, and fuss-free Zoom spinning.

My first lot of Sea Island cotton and the gifted takli spindle. I was pleased with this first attempt but hadn’t known at the time that Sea Island cotton has a longer staple length than other varieties and is therefore easier to spin.

My collection of spindles that I have gathered in my travels includes a few that are used for cotton. Here are two from Guatemala and one that I bought from my Guaraní teacher here in Santa Cruz. The whorl on that one is a piece cut from the sole of a sandal.

Two spindles from Guatemala flank the Guaraní one.
Workshop spindle.
I love the way we are all so focused on our teacher’s demonstration. As it turned out, she is left-handed and we were all righties. She got us all started one by one turning the spindle in one direction and we then proceeded to unspin what she had started for us!
Moving on here to Upland cotton.
The color called Mahogany in the center after being boiled. The pre-boil color is below to the right.

And of course, there is the horizontally-held spindle for cotton spinning that is used by my teachers in coastal Ecuador.

The cotton is draped on a wooden stand called the “rueca” for spinning. It has a notch cut into its top which grabs the cotton and allows the spinner to draw out the fibers under tension. A small basket is woven from plantain fiber underneath on which the spindle sits when not in use. This is a miniature version of the rueca which I made with my teachers’ help so that I could take an example back with me to Bolivia. I need to place something in the little basket to weigh it down because it is so small and light. The typical spindle can be seen at right with its wooden whorl. More often now you will see people using yo-yo halves and metal wheels as whorls.

Here are some tiny whorls from coastal Ecuador that the family had found while ploughing their fields. There were close to forty of them sitting in a bowl on a shelf, just like that.

My very first experience with spinning cotton had been in coastal Ecuador where I got to work almost from scratch, de-seeding, teasing apart, and fluffing up the cotton. It was difficult spinning it on the horizontally-held spindles compared to what I do now with the takli. Unfortunately, I didn’t spend much time on it while there, being much more interested in the weaving part of the process. My teachers already had plenty of spun singles that they doubled for warp so that I could learn how they weave their double-pocket saddle bags and hammocks. We would pass time in the evenings on cotton preparation.

My first attempts with the horizontally-held spindle in Ecuador with my teacher Trini and her mother Luz (rip).

I put in a little practice when I got back home but the loom soon called me away…

My cat got to the point eventually where she paid no attention to my fiber-y pursuits.

I may have never gone back to cotton if not for the pandemic. The loom was always pulling me one way yet my stash of gifted sliver in the closet was growing. Thank you to all those, especially Betty, who were so kind with their gifts when I was visiting in the States.

I have woven with my singles thread. It was an even freakier experience than the first time weaving with my handspun llama yarn all those years ago.I was surprised to see how well it tolerated the string heddles and the close sett on my backstrap loom.

I love the look of all these handspun cotton singles lined up on my backstrap loom.

I’ve used it in plain weave for ikat pieces as well as for pieces decorated with pick-up patterns that I’ve used in small purse and wallet projects.

Wallet project with pick-up patterning in the structure that I call Andean Pebble Weave.

Right now I’m spinning some more brown sliver that I just uncovered in the closet. I’ve yet to use the brown in a project.

Ikat projects in my handspun cotton singles. The lower one uses some of the natural green cotton in both its boiled and not-boiled versions. Most of what you see there is the not-boiled green.

No doubt when I return to Australia I’ll have lots of access to sheep fleeces and will wonder about my Traddy and how it’s being used on this side of the world. I won’t be buying another wheel though, and will slowly work my way through, as is my habit, with my drop spindle. I won’t be displaying my other spindles on the wall either and that might lead me to picking up one of the others for a spin and giving the Cusco one a rest.

See you all next time…

Backstrap Weaving – Spoiler Alert

You might be able to spot the rogue section of black in the uppermostlarge diamond.
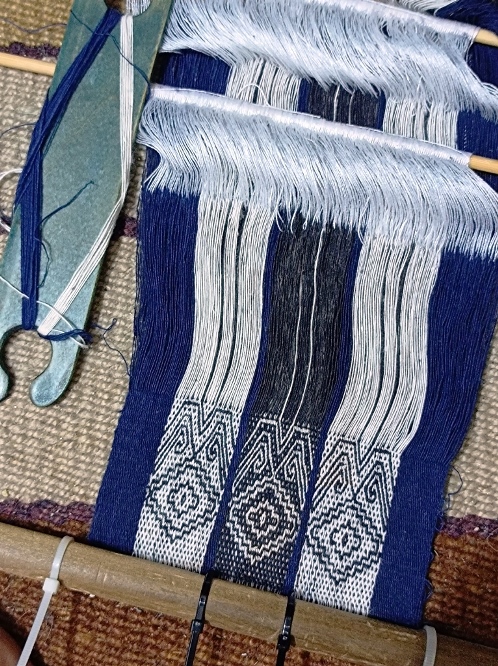
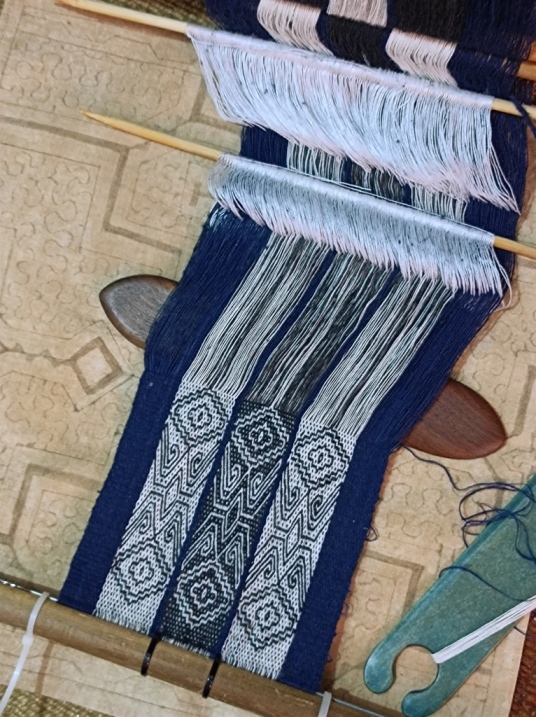
You can see the sections of diamond that I spot-dyed black in the uppermost diamond and some spot-dyeing in progress at the very top of the image. I’ve put a sheet of plastic beneath that section to protect the rest of the warp.
We’re still only seeing half the width of the warp at this point. I finished this part late at night and waited until the next day to unfold the warp to its full width.
This might be my favorite part of all…the impression of order before I have to start handling the threads that are now loose and running free outside of their nice controlled wrapped bundles.
Heddled and ready to go.
Here’s a comparison photo with the blue purse ikat warp I created some time ago. Both are in my handspun cotton singles thread. The main difference is that I used more threads in each wrapped bundle in my latest so that the piece would be wide enough for my wallet project. The half diamonds on the edges are also colored differently.
My stitched shibori cloth is ready for the dye pot.
It has never occurred to me to do a multi-color stitched shibori but once I’d dyed the cloth red, I realized that there were some small open spaces that I could stitch to reserve the red color.
The outside of the wallet with its tubular edging in place. The little tab of fabric on the left edge covers the cut end of the tubular band.

Until next time……….

Backstrap Weaving – The Empty Wallet!

The finished sample showing its two faces. I used the structure that I call Andean Pebble Weave.
Here are my 632 ends set up with the two sets of heddles that give me my “pebble sheds”. It’s so satisfying sitting there and finally making the very last heddle and knowing that I’m all set to go.
A little progress and all going well. No broken threads yet. In the end, only one broke.
At this point, I was ready to put a bit more thought into exactly how I was going to construct the wallet and therefore, the layout of the pattern.
Here are the completed pieces. From left to right, the front, plain back and closure flap. Construction can begin.
The tiny key pocket is just to the right of the card slots. There’s a zippered pocket on the right for other odds and ends.
I remember being so pleased when I discovered that my key fit perfectly in the tiny pocket in this pouch that I wove. This pocket is part of the original warp and was not added later. Creating that special kind of warp that includes a pocket is a technique that I learned with one of my teachers here in Bolivia.
It was nice being able to use the sample for something.

Backstrap Weaving – Cotton Tales

While scrolling through my Facebook feed last week I was surprised and excited to see an ad from the Museo ArteCampo here in Santa Cruz for a workshop being given by two Guaraní ladies on spinning cotton. There are three recognized groups of Guaraní people here in Bolivia living in the lowlands between the Chaco and the Andes. Artecampo has been working with people from the Isoseño group since 1984 helping them to recover and preserve dwindling knowledge of technique and motifs while providing a market for their handwoven hammocks, bags and wall hangings.

Examples of GuaranÍ textiles at the Museo ArteCampo.

The timing of this workshop couldn’t have been more perfect considering that I have only recently started to spend a serious amount of time spinning the stash of cotton sliver that I have accumulated in my closet…all generous gifts from my weaving friends. I haven’t seen anything like this being offered in all the years I have been here and who knows? I may not have considered taking the workshop if it had come along years ago.

Learning to spin cotton in Ecuador in 2007.

Two video classes on cotton spinning by Joan Ruane and Stephanie Gaustad as well as a short in-person demo with weaving friend Elizabeth in Australia (who had gifted me a takli spindle) had helped me to get started with using a takli. I am sure that some of what I had witnessed and tried during my stay with a family of cotton spinners and weavers in coastal Ecuador way back in 2007 also helped. I had really been way more focused on the weaving during that stay. Although I was curious and interested, cotton spinning at that point hadn’t captivated me. I just couldn’t see myself having the desire to do it or having a need for hand-spun cotton thread.

This was also true when I’d had the opportunity to study with Ju Nie, a Montagnard (Vietnamese hilltribe) weaver and spinner. She showed me how she first teased the cotton with a bow and then spun it on her spinning wheel. It was fascinating but I had considered that demonstration of such beautiful traditional skills and tools as just an interesting interlude during my studies of the beautiful patterned weft-twining that she was using on the fringes of her woven pieces. You can see the frame on which we were carrying out the twining work in the background. I recently learned that dear Ju Nie passed away last October.

And so, my time had finally come during the pandemic to focus more closely on cotton spinning. And then came this workshop. A miniature Guaraní loom sat on the table at the workshop with a piece of weaving in progress but I didn’t allow myself to get distracted!

Under a tree dripping with mangoes, fourteen of us gathered to learn how to spin cotton on the typical spindle used by the Guaraní ladies.

I already own a spindle that I had bought from my Guaraní weaving teacher many years ago. She only had a little cotton on hand and had given me a very brief demonstration. That had been enough to satisfy my curiosity as, again, I was much more interested in the weaving at that time. She did tell me at that time that cotton was being grown in the community of Isoso and that the inhabitants were not willing to give the seeds away to anyone….not that I had asked for any. I have nowhere to grow it. At the workshop, however, we were free to keep the seeds that we were removing from the cotton.

Angela back in 2010 giving me a short demonstration of how she spins cotton.

The spindle I bought from Angela as well as the ones we were given to use in the workshop, had thick pieces of rubber for whorls. The rubber pieces look like they have been cut from the soles of sandals. A simple groove is sliced into the end of the shaft.

The workshop spindle.
The spindle I bought from Angela in 2010 has a beautifully shaped end rather than just the simple cut groove.

We took the seeds out of the cotton and teased it apart with our fingers into a light airy sheet. Then we copied our teachers’ movements and rapidly lifted and dropped the sheets multiple times a few inches above the table before very gently forming them into loose rolls. One problem we faced was that Sabina, the teacher at my table, was left-handed. She loaded each spindle from scratch and then handed it off to us. As soon as we right-handed folks started turning the spindles, the thread was un-spun and subsequently broke. Not a big deal. We all laughed.

Sabina gets the spinning started while we prepare the cotton.

Although, I am very much used to the watch-and-copy style of teaching used by my teachers here, I had also had the benefit of lots of spinning explanations from my video and in-person experiences as well as lots of trial-and-error practice on my own. And so, I managed to get on just fine. I could understand very well the struggles of the other participants because it wasn’t so long ago that I was experiencing the same difficulties.

Clara worked with a group of participants at another table.

I really wanted to use this workshop as an opportunity to see how the Guaraní ladies manage to spin much heavier thread than I do. They weave hammocks with their plied thread and it is thick and sturdy and so I spent the workshop time trying to focus on that. I created thread that was just a bit thicker than what I have been creating at home but it was nowhere near as thick as Sabina’s and I wasn’t able to keep it consistent. Sabina kept laughing at my fine thread but also told me, with what seemed to me to be pride, that her grandmother had been able to spin very fine thread. My other interest in the workshop was to chat with the teachers about their experiences learning to spin and weave as children. Plus, I wanted to see if I could manage to spin decent thread from cotton I had prepared myself in such a basic way rather than with the beautifully prepared sliver that I had been given.

Cards had been placed on a table so that we could see the Guaraní words used for describing what we were doing. Our attempts to correctly pronounce the phrases brought on more laughter.

GuaranÍ spinning vocabulary and Spanish translation.

As for my cotton spinning at home, I am still working my way through the color labeled Cinnamon. I boiled the color labeled Mahogany and was astonished to see how much it changed its tone. I love it. Either some of the brown comes off in the water, or this cotton was particularly dirty…the water became a mucky, murky mess!

The boiled Mahogany in the center with the original color below right. Above is the original Cinnamon color with the boiled and not-boiled greens on the left.

Now for the latest ikat project using my hand-spun cotton. I might try this particular idea again some time, but not with my hand-spun cotton. It turned into quite a business! I wanted to have a white ikat pattern on a background of various tones of blue. You might remember a project I did a couple of years ago in which I used a multi-colored warp for ikat. This was industrially-spun and naturally-dyed silk and the project was relatively simple: tie the ikat tape on the multi-colored silk…the dyeing of the warp thread had already been done by someone else…and then dye the whole thing one solid color, in this case, black. I loved the result.

I am able to get quite sharp images when using using uniformly spun thread.
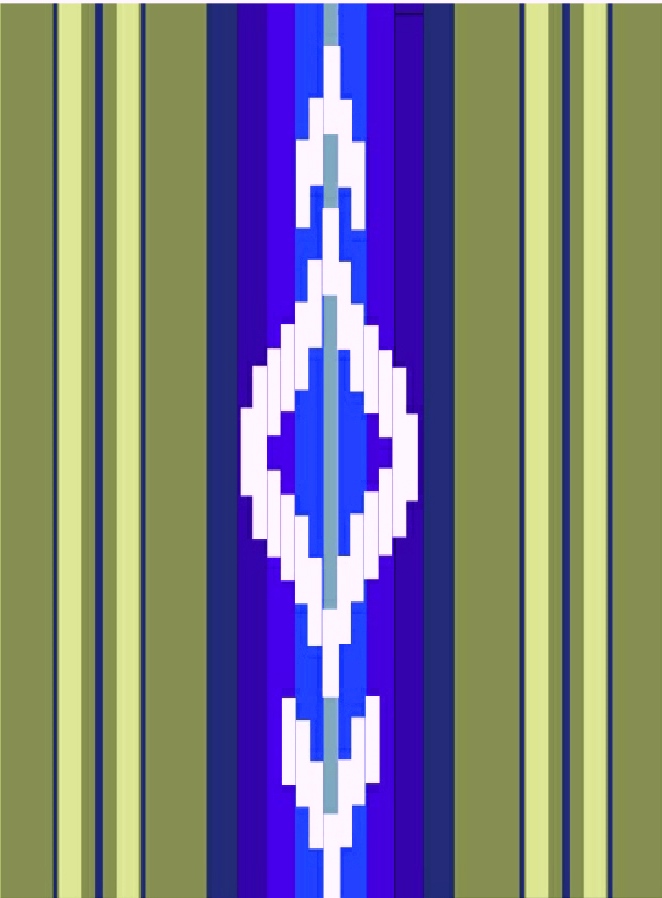
The color-inspiration picture.

The current project is more or less the opposite in that I wanted the ikat to be a single solid color, in this case, white, with a multi-colored background. I wanted the change in the blue tones to be fairly subtle. And so I had to tie the pattern and then split the warp into sections and dye two sections at a time separately so that the outer sections were very dark, gradually lightening toward the center. The very center section was dyed grey (which I now regret doing…I should have just gone with light blue) as I was using a picture of my choosing for color inspiration as part of a group weave-along and grey was part of it.

What a task it became! I was using my hand-spun cotton singles. The small individual sections totally twisted up on themselves in the dye bath and so the dye was not able to fully penetrate some parts. I had to repeatedly remove the thread from the bath and try to separate the individual threads and then poke and prod and pick at them in the water. The poor things took quite a beating. And then they would dry and I would find them to be too light and the contrast between the strips of blue too great and so back into the dye bath they would go. Yes, so next time I try this particular ikat idea, it will not be carried out with hand-spun singles. There was way too much picking and pulling and wrangling of the thread going on. I just knew that I was going to have a lot of shift in the pattern as a result. So much fuss over such a small piece. I had been planning to weave it after adding natural green cotton to the sides to make a piece wide enough for a pouch but I decided not to risk my precious green on a project that seemed doomed to fail. Perhaps it could be a wrist cuff instead.

Another goal of this project was to arrange the angle of the diagonals in the pattern so that the diamond shape was more curve-like. That part seemed to have worked out quite well. As always, I really enjoyed unwrapping the plastic ties to reveal the pattern and then sitting down to finally weave it. One of the center threads broke. That’s a problem when it’s ikat unless you have another tie-dyed thread to replace it. But everything else went smoothly. There was a lot of shift in the pattern but that was expected and I was happily weaving away at this point.

After looking at the finished piece for a few days, I decided that it wasn’t so bad after all. I decided to go ahead and weave the green sides separately so that I could piece together a useful item. Yes, another pouch. After all that work, the ikat piece really deserved to be made into something. I planned the layout combining the darker boiled and not-boiled green with a little blue that I had already dyed for a previous project.

I wove the two strips separately but at the same time…if that makes sense. It fit better in my weaving space if I wove it this way rather than as one long strip cut in two. Besides, I could keep a better eye on matching width this way. Again, it was just lovely to be at the loom doing simple plain weave and enjoying the look and feel of the hand-spun cotton. Three broken threads were easily replaced…no tie-dye to worry about this time. The broken ones happened to be the not-boiled green…coincidence, or does that say something about a change that takes place during the boiling process? The threads broke when I was moving the coil rod. Note to self again…set up the coil rod right at the end of the warp and leave it there.

A first look. The sewing isn’t finished yet. I’ll just use a large snap at the mouth of the pouch. I am very happy with the curviness of the pattern.

Here’s the gang of hand-spun ikat projects all together.. The pattern of the latest one repeats on the back as I had folded the warp to halve its length and was therefore able to tie once and get two patterns.

I have another ikat idea developing using my 30/2 silk and reds…maybe cochineal? In the meantime, I will keep spinning cotton. I want to boil small amounts of the new Cinnamon color for different lengths of time to see if that produces different tones. Right now I have some 60/2 silk on the loom and am using double weave to create some jewelry pieces….experiments. I already have a nice ikat pouch in which to keep them…lol. I am thinking ahead to my eventual move back to Australia and considering the eye-wateringly high cost of living (compared with Bolivia). It will be helpful if I can perhaps sell some woven items at craft fairs.

One other thought that just popped into my head is to once again dye sections of pre-warped (but not ikat treated) hand-spun singles allowing them to twist on themselves. Perhaps the differences in dye penetration along the length and breadth will create interesting patterns. It’s hard to believe that this is me writing this….the one who likes everything to be controlled!

Until next time….

Backstrap Weaving – Time and Time Again

Panel 1: Within These Walls, a pandemic project.

My relationship with Time seems to be changing. I know that I am not the only one who got lost during these last two strange years, overcome by the feeling that time was speeding by… weeks and months merging into a hazy uneventful blob. Even now I struggle to separate 2020 from 2021. But I just recently realized that the passage of time is slowing down for me and starting to resemble something like normal, something recognizable from the pre-pandemic days. The calendar map that I have always carried in my mind’s eye is starting to reappear.

I resist the urge to go back and try to account, in terms of productivity, for the 24 months that have passed since we first went into lock-down here in Bolivia. Today marks the anniversary of the confirmation of the first known Covid case here. That any of us achieved anything meaningful at all is cause for celebration. And now I am talking as if it is all over. Of course, I know it isn’t, but there is definitely a change in my state of mind.

Three-panel wall hanging: Textile Trails

On the theme of Time, I am reminded of a question that I am very often asked when I show my woven work….. “How long did it take to weave that?”

I am trying very hard to think back to a time before I started weaving to see if perhaps I would have asked this question myself to a craftsperson and what might have motivated me to do so. Would it be because I was thinking of trying to make the object myself and needed to see if the time involved was worth my effort? Or perhaps I would want to know if the asking price for the object reflected the amount of time that had gone into creating it.

In any case, I find it a very difficult question to answer. How long does it take?…As long as it takes! I honestly don’t keep track. I don’t sell my work and so I need not consider time in order to fairly price an item. I am not weaving to a deadline. There is usually no exhibit for which the work has to be completed…the three pieces above were an exception as I had woven them for an exhibit at the ANWG conference in 2015. I would probably have to go back to my blog posts if I wanted to give an accurate answer in terms of the number of weeks on which I worked on a project. However, I would be at a complete loss when it came to the total number of hours.

I met a craftsperson some years ago and witnessed his response to the question…

“How long did it take to make that?”

His response:

A    l  i  f  e  t  i  m  e

I can only imagine that he very rightly considers that a lifetime of his accumulated knowledge, experience, skill and inspiration went into this and every piece that he has completed. I love his response.

So, I am willing to pour as much time and effort as is required into every piece I weave. There have been a couple of times, though, when I just wanted to get the thing done! One such time was when I had volunteered to weave six lanyards for a conference. The long piece of half-inch band with its small repeated motif did not excite me at all when the time came to weave it. I installed eleven sets of string heddles to move it along. I didn’t have to do any pick-up and that rather unique experience suddenly made the project very interesting as I came up with ways to remember which heddle came next in the sequence.

What I don’t like, is making silly mistakes and wasting time. Okay, I will admit that a mistake is always a learning experience and valuable for that reason but sometimes you just turn around and do the same old thing again!

A circular warp for a cotton scarf

Like the time I was using a coil rod for the first time on a circular warp many years ago. The coil rod (sometimes called rolling stick) is the uppermost stick in this cotton circular warp and I was using it because it seemed like an important part of a circular warp set-up. At the time, I didn’t fully understand its purpose. One of my aims for using it in this project was to figure that out.  While trying to move the rod as weaving progressed, I mishandled and broke the coil rod. I did it once…I learned something. I did it a second time…I cursed…but then I learned some more. The third time I broke it, it got flung to other side of the room and I continued without it. It was then that I started understanding its purpose because it was very much aware that it was a different experience weaving without it. And so I was happy to sit patiently and install it once again. 

(Note that I am talking about circular warps here. I do, however, continue to use the coil rod on both circular and single-plane warps if I am doing plain weave with cotton or silk (materials that have little to no stretch). I have written a lot about this tool in blog posts over the years. If you are interested in learning more, you could start here.) 

Maybe this is something that we don’t consider when we ask the craftsperson how long it took to complete the project. Do we want them to include the time used to fix “oopsies”? After all, the fixing of the oopsies adds to that lifetime of experience about which my craftsman friend was speaking.

The first six inches of this warp were woven and unwoven twice before I found just the right weight of material for the supplemental patterning weft.

While the amount of time needed to weave a piece is not important to me, I am always interested in learning about techniques that weavers have developed to help make the whole process more efficient, like the use of multiple string heddles and pattern storage sticks, for example. However, there is one thing that I have always been a bit stubborn about and that is the use of sizing.

In weaving, sizing is a substance that is used to coat warp threads that are hairy or “sticky”, or have other characteristics that make it difficult to achieve clean sheds. Basically, it smooths the threads. I resist using it purely because of the “ick” factor. That is, I hate to think of the mess of dunking my warp into a bath of starchy goo and I don’t think I would enjoy the feel of the stiffened coated threads as I weave. Keep in mind that my hands are usually in almost constant contact with the threads as I weave pick-up patterns. Of course, it all washes off in the end and you are left with the original softness of the yarn but yech, I just don’t like the sound of it. I prefer to stay away from the sizing and just adjust my loom-operating methods instead.

Adapting my methods to the materials in use: I was able to weave with Knit Picks Palette….a soft, loosely-plied wool and create a four-selvedged piece.

My approach when working with sticky materials is to adapt the way I operate the loom…take a lot of care when opening sheds by working the threads in sections, using my finger tips to help release the grip a thread may have on its neighbors. I advance the warp more often so that sticks and heddles are not sitting on and abrading any one section for too long, causing it to shed and pill. Yes, it does slow things down but, as I said, I am not in any hurry. I suspect that using a sized warp on a floor loom is a different experience in that the weaver isn’t necessarily handling the warp threads during the weaving part of the process.

Another way to avoid using sizing might be to add extra twist to commercial wool yarn to make it smoother. My weaving teachers here create relatively smooth hand-spun yarn by using a high amount of twist. They also add twist to the synthetic thread that they buy in the market. This kind of yarn creates a certain kind of cloth. The thing is that I don’t always want that kind of cloth.

Two wool lap-size blankets that I wove using Mora yarn. It’s worsted spun which helps somewhat with the stickiness issue. I didn’t add any extra twist.

My latest project has been with mill-spun wool singles….sticky stuff. I could get a tiny heddle shed which I would then proceed to open further with my fingers. I didn’t want to use sizing. I didn’t want to ply it or add extra twist. I love the way it feels. The supplementary weft is my own plied hand-spun wool.

From the 27-inch warp I got 21 1/2 inches of cloth and my string heddles came up remarkably clean.
I always love the way the back of these supplementary-weft patterned pieces look.
There was a small amount of curl in the cloth at its opposing corners. Folding it to make a pouch for my phone and edging it with a patterned tubular band took care of that.

The fresh warp in the above photo was for a small closure tab. I used my plied hand-spun for that. I used a dense structure of three-span floats (intermesh) to produce a sturdy band…hence the two sets of string heddles.

The finished pouch.

I wet-finished the small piece on the right under the sword. The warp threads shifted slightly closer together, I took measurements, but I didn’t notice any real difference in the feel of the cloth. I didn’t wet-finish the pouch piece as I was a little concerned about color run in the supplementary weft. I had bought that roving already colored. As the supplementary weft is tightly wedged between the two layers of warp in several places, I don’t think that even a color-catcher cloth would stop the color from bleeding onto the grey wool. If wet-finishing had made a significant difference to the way the cloth felt, I may have reconsidered.

I hope that I get a chance to show this, the first of many projects in the mill-spun wool singles, to the farming couple whose sheep provided the fleece. My original plan had been to use this yarn for a shoulder bag project. I would dye the yarn to match the three-color strap that I had already woven…

I used my plied hand-spun wool for this strap. I don’t feel that I was heavy-handed in the amount of twist I used. The strap lies perfectly flat and the yarn was beautiful to weave with.

However, now that I have seen the cloth that this yarn produces, I can’t bring myself to dye it. I love all the subtle color variations from this blend of natural white and black. I’ll be using it as is perhaps for a pillow cover and will add color with supplementary weft instead.

So, I will turn once again to my Mora yarn for the bag project. I over-dyed a pale green color that I didn’t particularly like to get a dark blue that is close to the strap color. It will be mostly plain blue and with a very narrow strip of three-color pattern in the center. I have used Mora for a bag project before and know that it performs well on the loom as well as with use.

Fabric for a bag with built-in pocket woven with Mora wool.
If you are curious about the Mora yarn, here it is. It’s 20/2 worsted spun and I know that both Vavstuga and Eugene Textile Center carry it in the USA.

One skein of Mora goes a long way. It gives me material to work with for dyeing with cochineal for other projects. It’s taken two years but I finally got some alum. Just before the pandemic I had been out and about looking everywhere for the “precious” stuff…precious only because I suddenly could not find it anywhere. The usual pharmaceutical supply stores weren’t carrying it any more. The little hardware stalls in the market (there are dozens of them) didn’t have it. I tried the Mennonite market because I know that they can and pickle but they told me to go to the pharmaceutical places. The little McCormick jars of alum are not available here either. I am guessing that the Mennonite folk have a massive supply of it at home and are possibly not yet aware of it no longer being available. My friend Dorinda sent me some from Cochabamba a couple of weeks ago.

I have used cochineal in the past to dye my hand spun llama yarn. With an alum mordant I get the crimson color you see in this image.

The stones you see are a mineral that goes by the Quechua name millu. Dorinda sent it along as a bonus. It is not something that is required for dyeing with cochineal but she thought that I might enjoy experimenting with it. In the co-op, they use it to darken colors. It is also sold as a home remedy and it is in those stalls that it is found in the street markets. Now that I know what it is, I will most likely be able to find some here in Santa Cruz although I suspect that the amount Dorinda sent me will go a long way. Maybe I will also dye some silk with cochineal for an ikat project.

These are all time-consuming processes. I am not concerned about the amount of time it takes. If you have ever tried ikat, you will know what I mean by time-consuming. Slow processes are just perfect for someone who is working with dwindling stash!

When I told a friend of mine about having finally got hold of some alum via Cochabamba, he took on the challenge of hunting it down in Santa Cruz and came up with this in a very upmarket store of natural vegan-friendly cosmetics. One large chunk came contained in a cloth bag inside a fancy carry bag as if it were something terribly precious…and yes, the price was precious. The accompanying card shows someone applying it to their armpits. So I guess supplies, at least here in Santa Cruz, have been entirely diverted to the cosmetics industry.

Another “slow” project is my learning to spin cotton on a takli spindle. Version One didn’t have enough twist. Version Two had…you guessed it… what I suspected was too much twist. Version Three, which is in progress, is bound to have some other problem. And on it goes. I love the little takli spindle! And Joan Ruane’s video class on it has been so good. I’ll never forget the time I was with Joan at the Mannings. I had set up a backstrap loom and she had wanted to see what that was all about. I was doing pick-up and her reaction was “Oh my god, it’s slower than tapestry!” This from a woman who spins her own cotton for weaving! She made me laugh. I guess we all have our own feelings about Time.

As for Version Two with it’s crazy amount of twist, I decided to see if it was possible to set the twist on my singles (because that’s how I want to eventually use this thread…as singles) and did some reading about that. I have Stephanie Gaustad’s book on cotton, flax and hemp and there are also online resources about simmering and immersion. The trickiest part was having to immerse the thread under tension. My solution for that is a bit wacky. It worked for these small samples.

The thread went into the pot tightly wound around these metal mesh pencil caddies. I do want to use this thread as singles so that I can once again try to weave something approximating the sheer cotton cloth that is woven in the Alta Verapaz region of Guatemala. I want the thread to be finer than the hand-spun that I used last time in this piece…

Woven with hand-spun cotton singles that I had bought in Guatemala.

And this is where that icky topic of sizing comes back into it. I will probably give in and size the thread. I wove the above piece using a bamboo reed to maintain sett. The weavers in Alta Verapaz don’t use one and I am curious to know if the stiffening of the thread from the sizing is one of the factors that enables them to maintain the sett without the aid of the reed. I stress ONE of the factors because, of course, their supremely high level of skill gathered from years and years of work is going to be the main contributing factor. In videos, I have been able to hear the sound of their picking stick on the threads. The weavers are in the habit of slowly scraping the pick along the warp threads from selvedge to selvedge right at the weaving line as if, I am guessing, to encourage the threads to remain separated and not drift into warp dominant positions. That sound is not one that I would expect to hear from naked hand-spun cotton. The sizing that is used gives the threads a coating that produces that sound. Perhaps I will need to use sound as my guide when I try this myself.

All time-consuming stuff. But I am not here to just consume time. Hopefully, I will be using it to continue learning. When I recently explained to someone my plans for my own hand-spun cotton, they asked how long it would take before I would be ready to start the weaving. I sensibly replied….years.

Until next time…..