Backstrap Weaving – Process and Product and all that Lies Between

In my last post, I showed you what happens when I become way too immersed in the process and forget about the product. I ended up with a new strap for my camera in the lovely reversible three-color pebble weave on which the hummingbirds were upside down on one end! Friends told me that this was done on purpose so that I could see them the right way up when I looked down. I have some very nice friends :-).

I am trying to think of a time when the reverse was true and product may have overtaken my thoughts about process. I guess there was this example where I needed a wool band fast-fast for a work shop I was teaching in which way more people signed up than expected. I forgot all about my backstrap loom and jumped onto my friend Pam’s floor loom. Pam offered to set up the loom. After all, she would do it far more quickly than I would have been able to given my limited experience. Then I took over to weave.

The message on my top was appropriate for the task. I needed to put my head down and weave!

In my latest project, I find myself slipping back into process mode. I guess my focus is on designing and structure for this one as I am using a structure that I don’t often use….Finnweave. The product? I’ll make one up along the way.

I didn’t learn this one from any of my indigenous weaving teachers. That and the fact that I seldom use this structure, had me pulling out my notes to remember how it all works. Learning it from a teacher in Mexico, for example, where it is still practiced, would have involved days, if not weeks of study. Prior to that, there would have been days spent looking for teachers, more days spent waiting for them to discuss with family and/or friends the price they should charge, time spent preparing yarn if there wasn’t any on hand, and possibly even more time spent scratching about for loom parts which were perhaps long since out of use and maybe even re-purposed. One of my teachers in the highlands was using one of her warping beams as a fence rail.

And then there would be the days or weeks of interaction with my teacher as I watched and tried to imitate her movements at the loom. I can only describe some of my earlier learning experiences as a real struggle when no verbal explanations were being given or patterns provided on paper. Of course, there is more than one way to impart knowledge and skills and I learned to adapt. All that combines to implant some pretty firm memories which make it much easier to just pick-up a technique that I haven’t used in a long time and slip easily back into it. Obviously it’s not the same as learning something from a book.

It annoys me having to study a structure all over again! Why won’t it sink in and stay there?! In the process I improve my notes so that it will be easier and quicker the next time. And yes, it does get faster each time. My notes include tips that I have come up with myself for remembering, for example, the home position of the two shuttles, which color comes next, and the changes I make to the basic loom set-up depending on whether I am weaving a narrow or wide piece. These are things about which I need to be reminded when I first get back into it.

A very narrow sampling warp in 20/2 cotton that I used in the past to test the proportions of basic shapes.

This time I am using 20/2 wool for the first time in Finnweave. I needed to sample again for a width gauge and to see if the proportions of my motifs in this material matched those of the figures on my old charts.

I have to figure out all over again just how hard to beat. You can see how different the two figures look when I change beat. After wet-finishing the sample, I could see that the firmer beat had produced the better cloth.

Those figures are adapted from a crochet pattern by Svetlana Rogatykh (she does amazing work in crochet!). This is a smaller version that I drew of the much larger one I showed earlier. The larger one is much closer to Svetlana’s creation for crochet.

I had decided that I wanted to weave a foliage pattern and set about creating leaf patterns….my usual thing…basic oval-like shapes with veins. They were all too large and also difficult to position at different angles. I wanted something more delicate that would climb and twist its way up the warp and not something static and repetitive. This structure allows horizontal and vertical lines. Diagonals are harshly stepped. I was about to give up until I decided to look at Svetlana’s work again. She offers a free foliage pattern and that gave me the spark that I needed to get this going. Her leaves are also in horizontal and vertical lines and in all kinds of hard blocky shapes that alone would not be recognizable as leaves at all. However, place them all on a stem and make them all just a little bit different, and suddenly you have a lovely pattern of flowing foliage, somewhat delicate despite the hard stepped diagonals and block-like shapes…..at least to my eye.

So, I had to create another sampling warp.

I would have loved to have designed some hummingbirds but that just wasn’t going to work. I went for tiny butterflies instead…simple enough, just two triangles. I was thinking that if I swapped those butterflies for fish, this could also make a nice aquatic scene.

This second sample gave me another opportunity to test the proportions of my woven figures against my charted ones and confirm the width information that the first sample had provided. I added my large leaves to compare….nope, they really are too big.

Then it was onward to the real project. The samples finished off my supply of black 20/2 wool but there is still a lot of green…perfect.

This 20/2 cotton Finnweave piece works nicely as a “neck wrap”. Maybe this wool one will too.
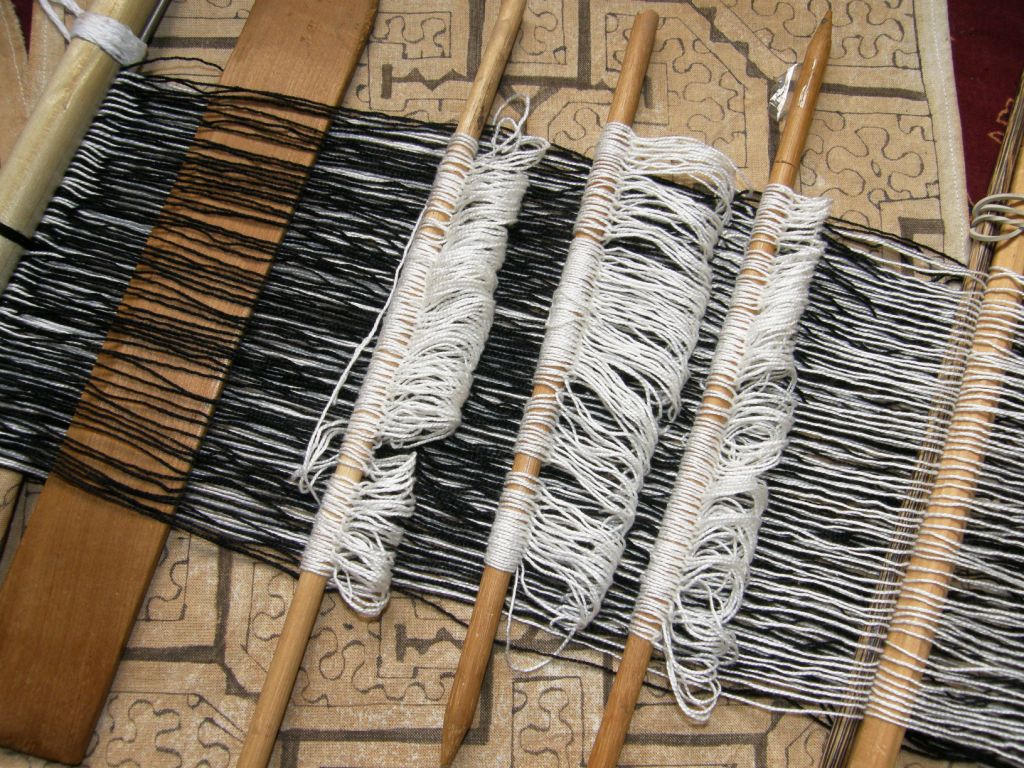
Almost ready to go. I still had to remove the original cross sticks and insert a coil rod. As I am not using a reed to help maintain sett in this balanced weave, I find that the coil rod is particularly helpful for maintaining the established width beyond the shed rod.

I took a lot of time at the start settling the threads and trying to make sure that the spacing between the warp threads is as consistent as possible across the eight inches of warp. I find it handy to be able to divide the warp in half and then in quarters with my lashing cable ties. I count out the threads to make sure that I place the ties in the right places. I can then focus on one section at a time making sure that each half measures four inches and each smaller section two. I check that the threads are as evenly spaced as possible within those sections.

Maintaining that sett without a reed is much easier for me to do in this double-weave structure as opposed to plain weave. Something about the exchange of colors between the two layers of the double weave seems to help. As soon as I stop weaving patterns and the layers separate, I risk losing control of the sett.

Coil rod in place and weaving underway.

Of the course, the last ten or so edge warp-ends are the ones that most want to snuggle together and hide the weft. I don’t usually weave patterns all the way to the very edge and so those warp threads are left free to misbehave. I was watching a weaver in Mexico weaving plain balanced weave on her backstrap loom in a video and noticed that after every four weft shots or so, she would take a pointed stick from where it had been parked in her hair and strum the warp threads in the last inch at the selvedges. She would strum outward. I figure that she must be coaxing those problem threads apart. I must remember to do that too.

I feel like I have been neglecting my loom’s role in this whole process. I seem to be taking my beloved backstrap loom for granted and I think that I will devote my next post to more about the loom and how it works in my hands. I guess I just see it more and more as a part of my body when I am weaving in the same way that I used to feel that skis were just an extension of my feet!

I love the way the warp extends from my body.

Until next time.
Backstrap Weaving – Multiple String Heddles in Action

The lanyards are done and packed away ready to be sent off. I made six in the end and really enjoyed the task.

6 lanyards backstrap weaving

With so many structures and techniques at my disposal, it was hard to decide which to use for the sixth. I made another Andean Pebble Weave one. I would have liked to have made one in double weave and another with supplementary weft patterns but the idea was to weave them quickly and Andean Pebble weave was better suited to the use of multiple string heddles. I could still make a fairly complex pattern without having to go overboard with the number of heddles. One day, when I am in less of a hurry, I would like to make a set of lanyards representing each of the structures that I have learned in my twenty years of backstrap weaving.

lanyards

multiple heddles Andean Pebble weaveThe lanyard on the right is the last I made using a 2-ply crochet cotton that is similar in size to #10. In addition to the two Pebble heddles, this one only needed four sets of string heddles. One shed was repeated within the pattern which made things even more efficient.

I made a short video of myself weaving this last band. The two light green heddles nearest to me hold the threads in the Pebble Sheds. They are alternated with the other four sets of Pattern heddles. I use a Pebble heddle and then a Pattern heddle, a Pebble heddle and a Pattern heddle and so on.

I work one Pebble heddle against the other as an aid to opening a clean shed. The idea of the video is just to show you the use of multiple heddles and what that involves. There is a constant process of straightening and moving the heddles so that the sheds furthest from me can be cleared to the front of the loom. After a few pattern repeats, the sequence becomes second nature. I was surprised, when viewing the video later, how gentle my little tappity-tap beat looks. There is actually quite a bit of firmness in that beat.

On a visit to Peru, I was able to watch a weaver from Chahuaytire using multiple string heddles to weave the tubular band that is used in her community to edge textiles.

chahuaytire weaver with tubular band

Picture by Virginia Glenn

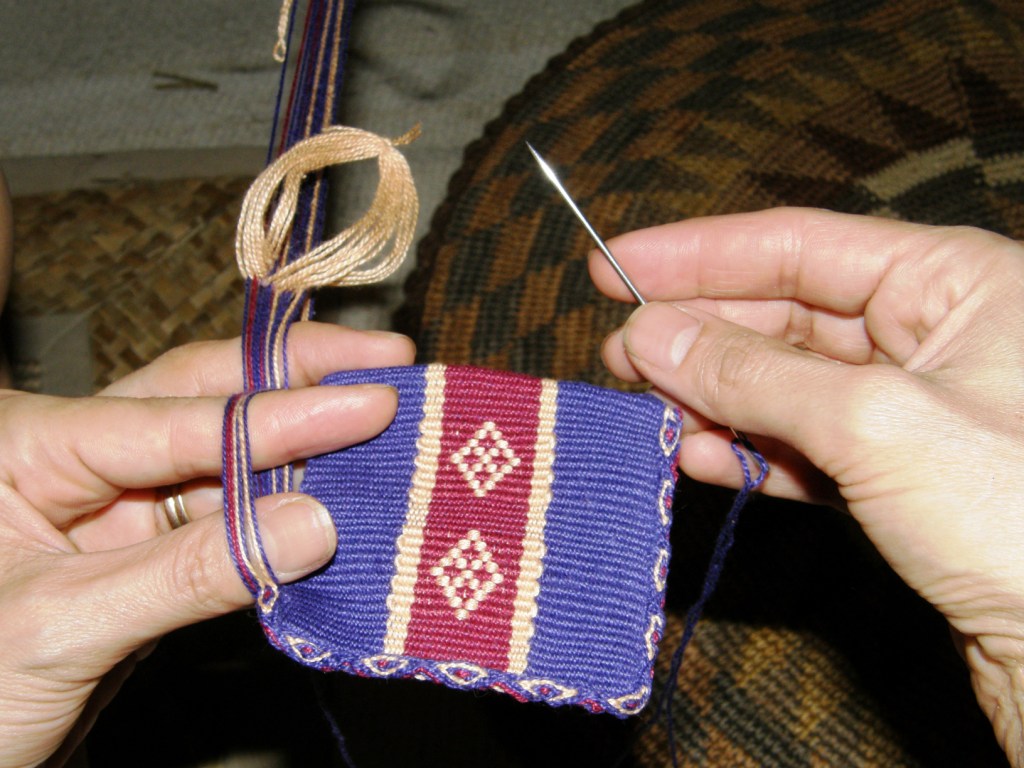
You can see the pattern on the band emerging along with the weaver’s hands hard at work. This pattern requires four sets of heddles. I used it myself to edge a tool pouch that I wove using my own handspun llama fiber….

pouch edged with chahuaytire tubular bandIt is certainly a faster band to weave than the ñawi awapa of Chinchero, the pattern for which requires some fairly radical moves and, therefore, all manual pick-up.

In this next video you can enjoy watching a weaver from Chahuaytire using her various sets of string heddles while she weaves and sews the tubular band to the edge of the cloth.

And, finally, I would like to show you a weaver from San Ignacio de Loyola in Peru who uses many sets of string heddles to make her complex band pattern entirely loom-controlled. I think there is a definite limit to the number of heddles that I would want to use while remaining comfortably positioned at the loom. This weaver spends a lot of time with arms extended and leaning forward to reach the far heddles. I imagine she has a strong back and firm abs.

weaver san ignacio de loyolaShe is using a similar method to that which I showed in my video in that she alternates the Pattern sheds at the back of the loom with the two heddles nearest her. She also works one of the two front heddles against the other in order to easily open a clean shed. This is the two-heddle intermesh technique that I teach in my second book. This is the structure that I used for the blue and white silk lanyard. I only needed six sets of heddles for the simple pattern…four pattern heddles and two intermesh heddles.

Here is a video of the weaver from San Ignacio de Loyola showing how she works her multiple heddles….

silk bookmark backstrap weavingI’ve decided that I am not entirely finished with lanyards. I  want to make one for my nephew who is a triathlete. Some time ago, I attempted to weave a silk bookmark for him with the words of one of his favorite inspirational quotes for training… ‘’The pain of discipline is nothing like the pain of failure.’’ My letters are adapted from fonts provided in Linda Hendrickson’s tablet-weaving book ‘’Please Weave a Message’’.

I felt that the bookmark looked too cluttered with its three lines of text and so I am now weaving it as one long line of text on a lanyard. I would like to flank the text with triathlon symbols…a swimmer, a cyclist and a runner. This is one of the many nice things about warp-faced double weave….it gives a lot of designing freedom. However, I only have 35 pattern threads with which to work. Let’s see what I can squeeze in there. The bookmark has been washed and pressed to show off the glorious sheen of the silk.

I wove a width sample for the lanyard in 60/2 silk. It looks quite dull in its unfinished state. It was quite some time ago that I wove the bookmark and I didn’t trust it to give me a reliable width reading. Years go by, your weaving changes, and old pieces can’t be relied upon to give accurate information.

double weave warp backstrap weavingAnd it’s a good thing I sampled as my width estimation was off and the band widened. Now it has settled into a consistent inch and I can start over with a fresh warp and get the pencils and eraser out for some charting.

The heddles you see there are not pattern heddles. They simply hold threads in the two sheds for the two layers of the double weave. I was initially taught this structure using only two heddles but I find four heddles handy when using many warp ends or very fine thread. With few threads or heavier yarn, I find it easier to use just two heddles and use my fingers to select the threads. The pattern sheds in both methods are all picked up manually.

Narrow warps like this one have also been on some of my weaving friends’ looms. Janet made a hatband in cotton using the Andean Pebble Weave structure. It’s gorgeous….

janets hatbandAnd, Anne decorated her hat with an intermesh band in cotton…

annes hatbandThere are so many cool things for which narrow bands can be used but, even if you don’t have a particular use in mind, they are simply fun to weave. They can be displayed on a wall with no other purpose  than to delight the eye. They can be kept rolled up in a trinket or treasure box and taken out now and then simply for the fun of running them through your fingers and enjoying the different textures.

I hope that whoever gets my lanyards will enjoy them.

6 lanyards front and back


Backstrap Weaving – Care Packages

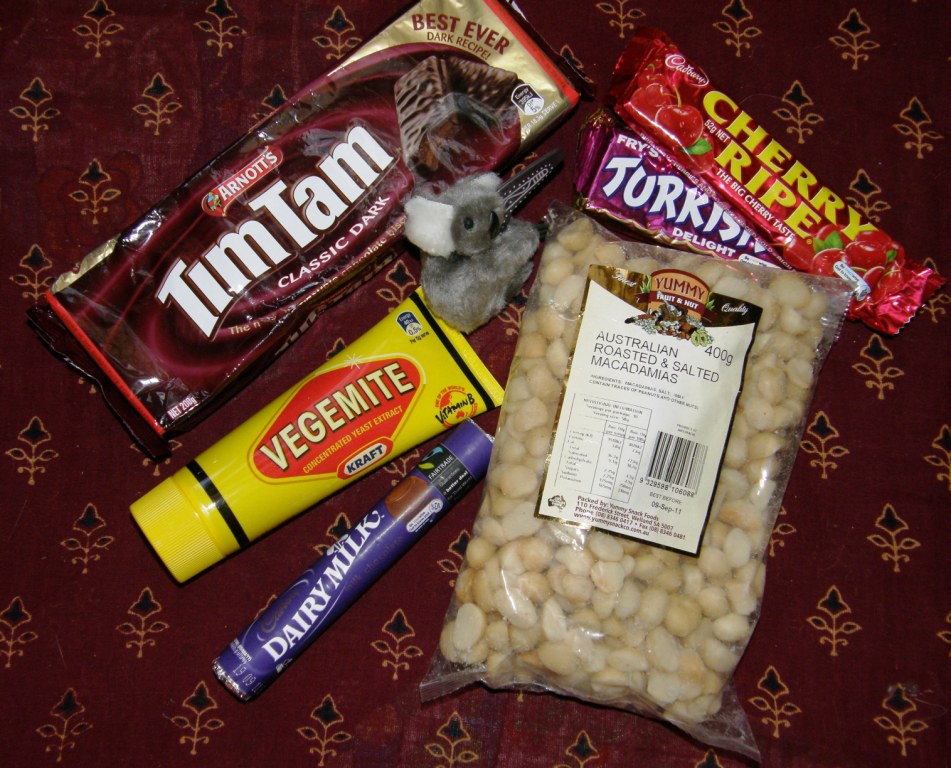
Mmmmmm 🙂 Care packages….this is part of a five-kilo box that showed up in the mail this week…

A huge cliche, I know, but I do like to have my Vegemite and Tim Tams. I have tried the gourmet cookies but nothing tops good old Arnott’s biscuits. This is just a fraction of what was in the box!

I suppose if I ever go back to Australia I will be having care packages sent from here….dried cuñapes, pots of dulce de leche,  facturas, alfajores and “Sublimes“! I must gather them all up so I can show you what they are.

It has occurred to me that I get care packages all the time…not necessarily cartons of stuff in the mail box at the post office, but rather, emails from people all over the world with links and photos and information about things that they know will be of interest to me…notes of concern if they hear of a new outbreak of social unrest or natural disaster in this area….words of comfort if life throws me a little disappointment on a more personal level. Nothing says more clearly “I care” than all that.

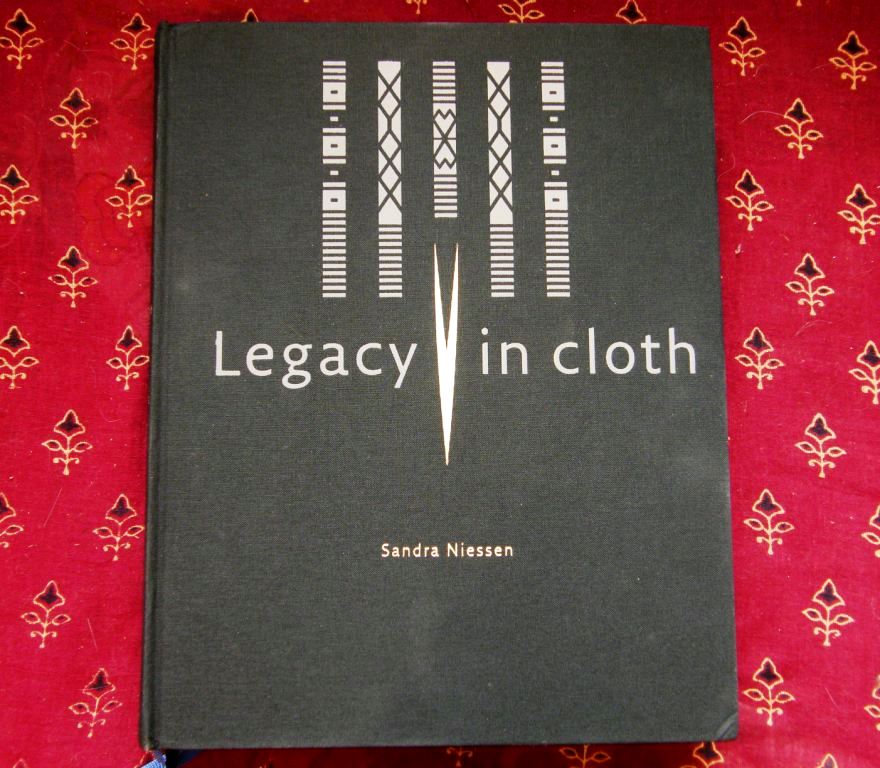
A certain person’s exceeding generosity has helped me to be the owner of this….

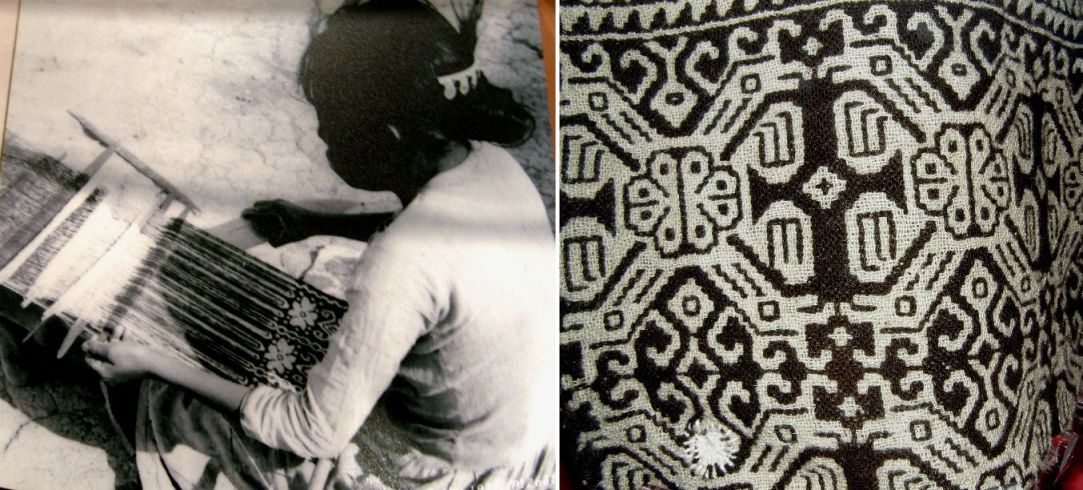
“Legacy in Cloth” – this book contains the results of Sandra Niessen’s thirty years of research on the weaving techniques and textiles of the Batak people of Indonesia. Five hundred and sixty-eight pages of text and luscious photos!

I am not even going to touch it until I have quality time available to give it the attention it deserves. This is not something to just flip through.

Sandra writes a fabulous blog packed with stories about her time spent in Indonesia with the Batak people, writing the book and then taking the book back to the villages.

She is currently in Indonesia making a film on Batak weaving inspired by a Batak poem, a project about which you can read here. Many thanks to Pamela Cross who gave me this information and sent me the link. You can see photos, also generously provided by Pamela, of Batak textiles with their twined edges in this previous blog post.

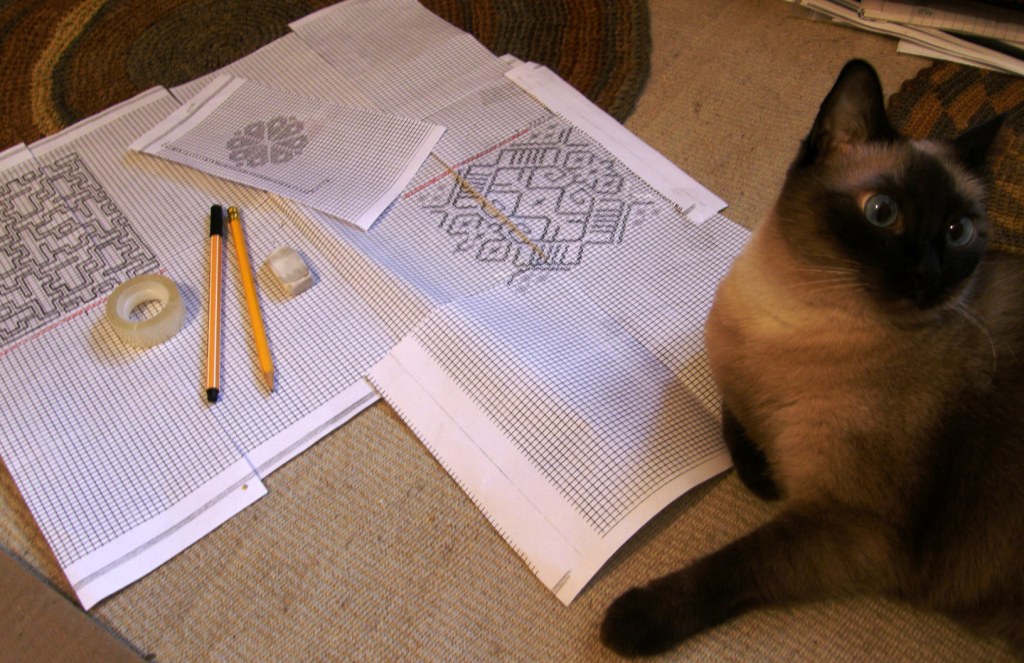
This week there was some time spent at the loom and a lot of time spent at the drawing board, the drawing board being my bedroom floor.

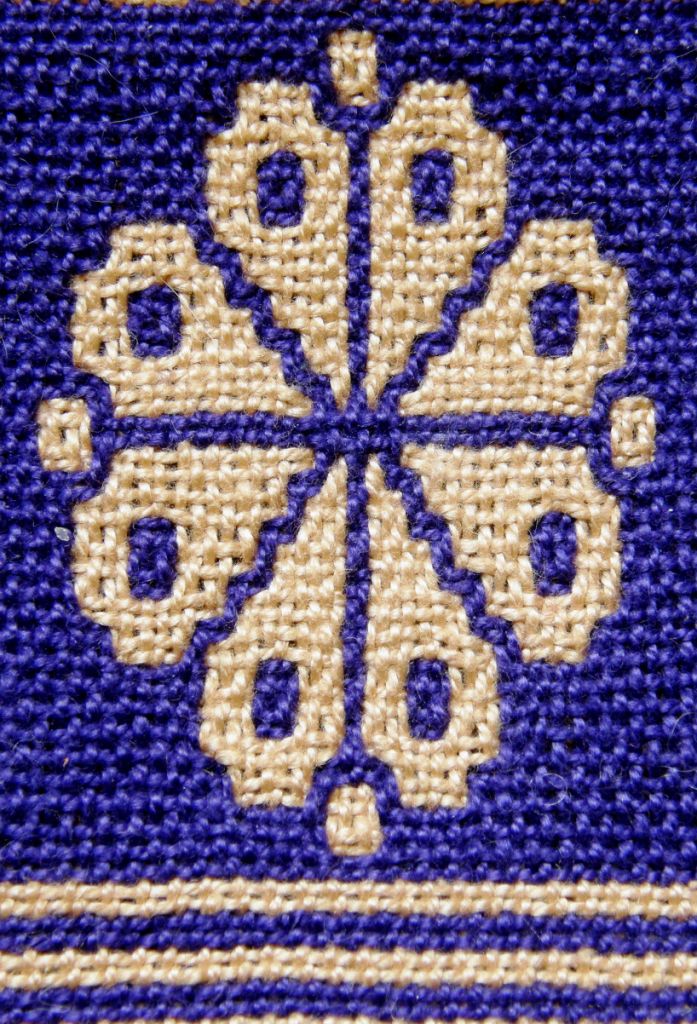
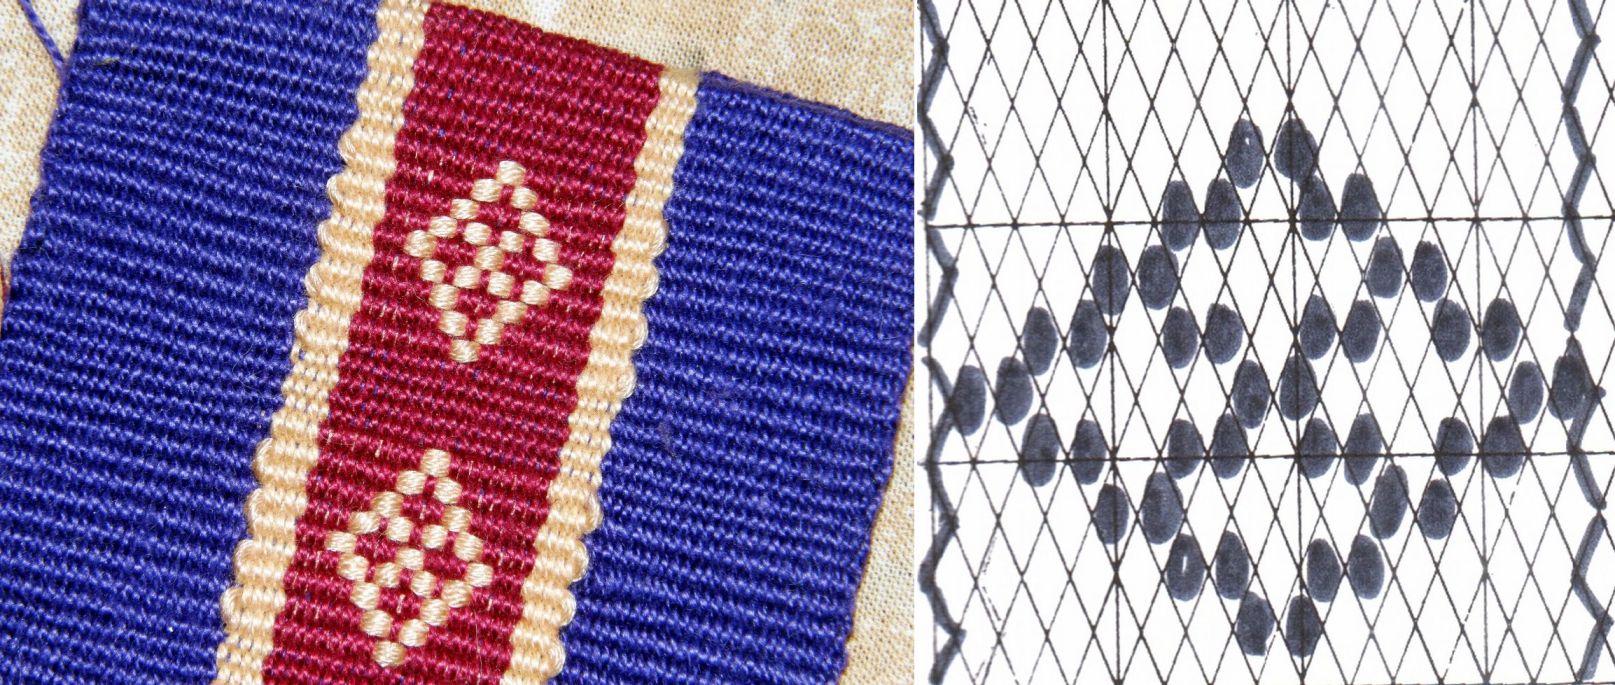
I love charting! I am still in finnweave mode and made an attempt at reproducing the design on a piece of Huichol weaving that I was able to photograph at the National Museum of the American Indian in DC. This was a great learning experience as I can really see now how my lines on paper transfer to cloth, how much space is created between rows of charted squares etc so that next time I should be able to make this a precise reproduction rather than an “adaptation”.

I knew from the get-go that this was not going to be faithful to the original. I couldn’t get the spacing of the outer “spokes” right, for example, but there was really only one way to figure it out…go ahead and weave it. Certain parts came out quite well while others obviously didn’t. Without the comparison I think it stands up as a nice design.

I read in one of Mary M Atwater’s articles in Handcrafter (a free download from the arizona archives..thanks Jeannine and Helena) that large areas of solid color should be avoided (much the same as in warp faced double weave) as, in these areas you end up with two separate layers that can tend to bulge and billow.

For that reason I wove the three small crosses at the bottom of my replica  piece to help fill in that negative space and bond the layers. I omitted them from the top corners so I could compare and found that the crosses made very little difference. I think the design looks less cluttered without the crosses and that it is nice to have areas of solid color if you can get away with it.

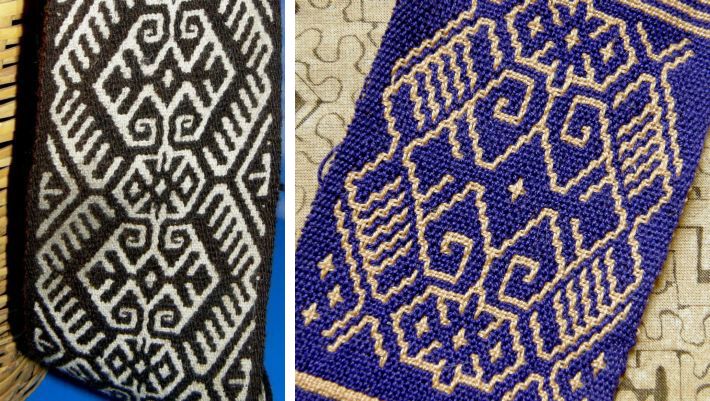
I then returned to the Xenakis article in the Prairie Wool Companion on which I had been working last week and wove the traditional Scandinavian design, for which a chart is provided, at left…

How amazing is the close resemblance it bears to one of the motifs on this other Huichol piece that I photographed in the museum in DC.

And then I was tidying up my bookshelf and was about to shift my copy of Verla Birrell’s The Textile Arts to another spot when right there on the cover I see a tiny image of a  loom and textile with a flower motif that even more closely resembles the Scandinavian one.

I guessed that it was a Huichol piece but it turned out to be a double weave piece of the Cora Indian culture of Mexico. So much to learn!!

Speaking of books, I managed to find a copy of Atwater’s The Finnweave and the Mexican Double Weave at Amazon. The search for this dates back to when I first started playing with finnweave back in 2008. Can’t wait to read it!

I had been thinking while trying to chart the Huichol piece that perhaps I had made an incorrect assumption and that the Huichol pieces are not, in fact, woven in finnweave technique at all. This world of balanced double weave pick up is very new to me and so the article in the latest Handwoven (Jan/Feb 2011) by Doramay Keasbey couldn’t have been better timed.

Many thanks to Caroline for pointing this article out to me. Doramay Keasbey writes about five balanced double weave pick up variations which she has woven in bookmarks showing how both faces of one design look when woven in each of the five techniques. What a nifty article! It has helped me, who has so little experience in this, to see what elements can identify a piece as having been done in finnweave.

It also helped that Hans Christenssen, who has authored a book on finnweave, confirmed the technique used for the Huichol pieces.

He also gave me some background on the piece I showed last week that was woven by Weavolution member Manicgirl. Manicgirl has disappeared from Weavolution for the time being and I hope she comes back soon to find out why her ears are burning so!

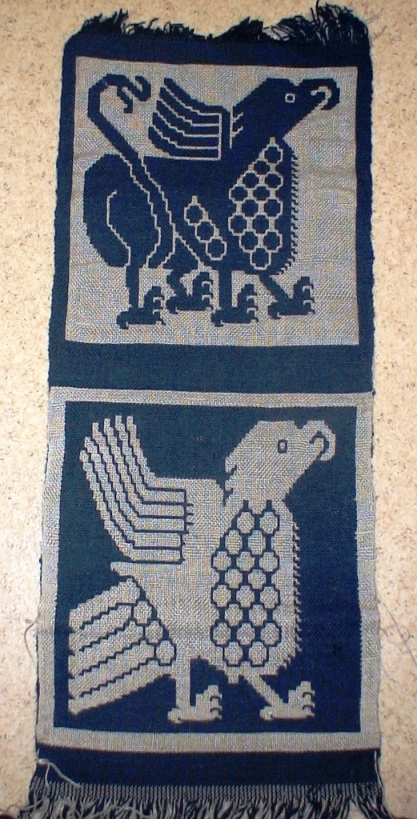
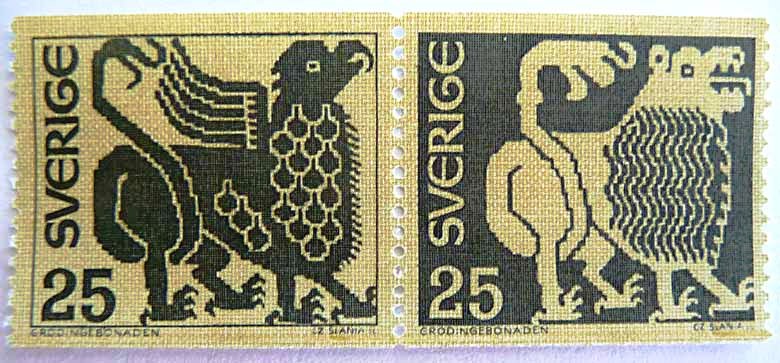
On top of giving me this link to the original piece in a Stockholm museum (click on the image in that link to see a much larger view), he told me that it is a 15th century piece from Grodinge, Sweden that has been analysed and reproduced in part by Ulla Feltzing, THE expert in finnweave in Sweden..

Two motifs from reproductions that Ms Feltzing made were the subjects for these two beautiful Swedish postage stamps and instructions for weaving some of the motifs appeared in an issue of Vavmagasinet.

Now you see how I have wandered off again. This all started with a desire to reproduce some textile fragments of pre-columbian Peru and now here I am in 15th century Sweden.

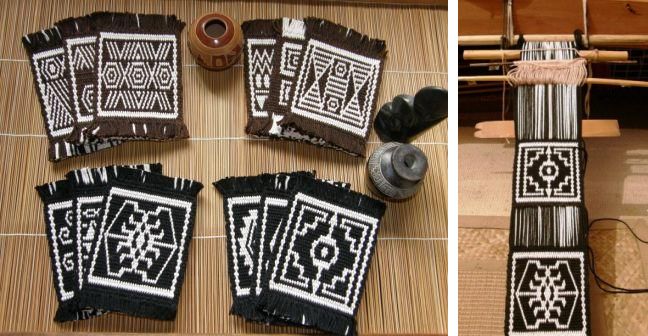
Back to Bolivia to my studio a.k.a my bedroom floor. I have decided to weave up a set of squares with some finnweave designs I have been collecting here and there hopefully with something to represent each of the cultures in which I have found a traditional use of this technique. I want to do something along the lines of the warp faced double weave mug rugs I made some time ago. (pattern charts here)

These were made in a 12wpi cotton and are super thick. In order to get the detail I want in the finnweave designs I will need to use finer cotton and make larger squares, around 5 1/2 – 6″ and so I will call these “table toppers”…something on which to pose a small pot plant or a bowl of candy or whatever. And if you are thinking that this sounds like just an excuse to weave something you are right. I don’t actually have a clear table on which to put these!

I have prepared the warp which may end up being a sampler…


And now to chart the designs and make adjustments to my first reproduction attempt.

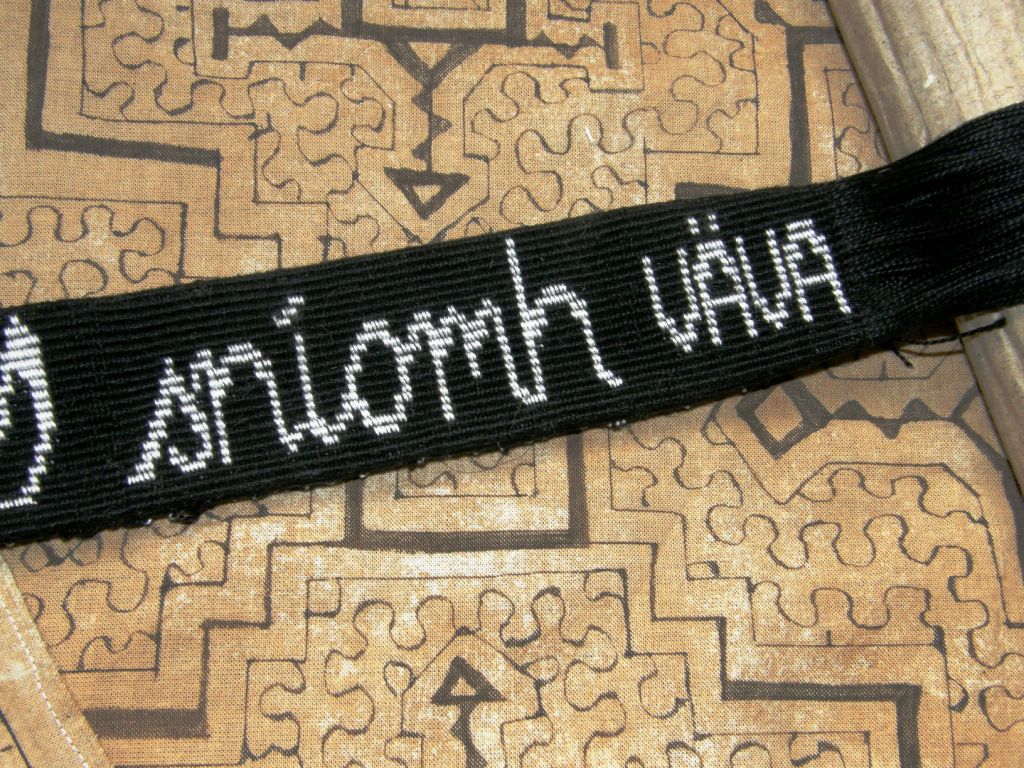
At left you will see that I finished twining the Gaelic word for “weave” on my bag strap and have added the Swedish one. Next stop…Nigeria.

I didn’t get a start on the Margarita braid for the zipper pull – maybe this week.

A Weave-Along update….

A small group of members in the Backstrap Weaving Group on Ravelry have been participating in a weave-along. I suspect many more are doing a watch-along…

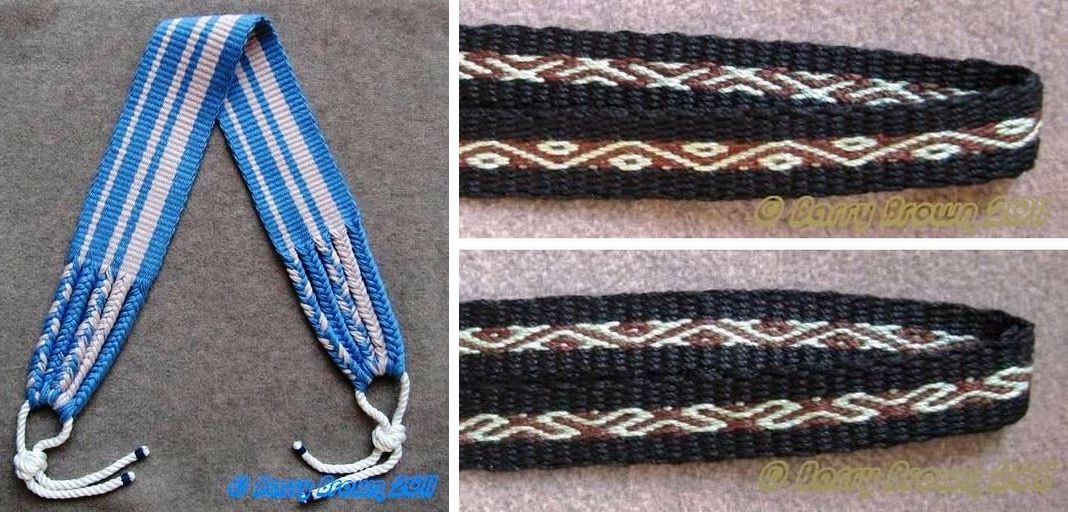
Something I learned this week from weave-along participant, Barry: there is such a thing as bonded nylon and apparently it makes great heddle string. All the weavers I saw in Guatemala use nylon for their heddle string. None of the weavers I have encountered here do. They use their warp yarn for heddles and I do too. I hate nylon…it’s slips around on the heddle stick and won’t hold knots – horrid stuff. But, apparently this bonded variety is very cool.

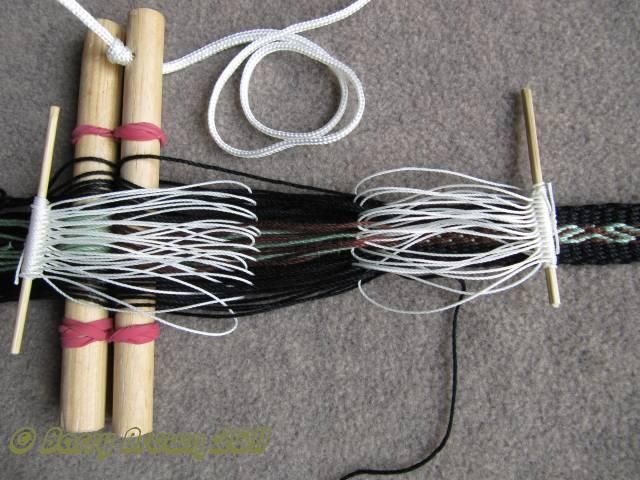
This is the picture from the Memphis Net and Twine Co web page. Barry has been using size#6 which he says works well with the #3 mercerized crochet cotton thread with which he is weaving. Using nylon cuts down on possible abrasion of the heddle string on the warp which can cause pilling. Excessive pilling will be a problem as warps will eventually start sticking together. Those who have been backstrap weaving for a long time will have learned to open their heddle shed with the minimum of abrasion but for those just starting out, this pilling can be a very annoying problem. Apparently this bonded nylon holds knots well…yay! Below you can see Barry’s loom with bonded nylon heddles nicely gripping the heddle stick.

And here is his backstrap with finished five-strand braid (link provided by Barry) and first pebble weave project following instructions in my book

Linda sent me these pictures of a supplementary weft patterned band she is making which has been inspired by a design on a Guatemalan huipil.

She built herself a mini warping board and, wise woman, is making short pieces suitable for keyfobs and bookmarks while she learns the techniques.

Last I heard, the blizzard has kept her at home and she is trying horizontal stripes and four-stake warping.

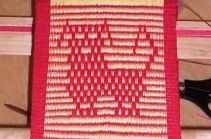
Marsha wove her dog, Wiggles, into her simple warp float band. She was inspired by a dog she found charted in one of Mary M Atwater’s books.

I have seen that dog and Marsha’s is way cuter.

Helena in Brazil wove this piece and showed it on Weavolution. It is destined to be a waist pouch for her sister. The center pebble weave design is charted in my book. Wanderingskopos (Reetta from Finland) is using the practice patterns that I provide in the one-weft double weave tutorial to make her first double weave band.

#####################################

There is an online workshop on the traditional Sami band weaving of Scandinavia being run in the Yahoo Braids_ and_ Bands group this month of February. Sue Foulkes is presenting the workshop and, if you follow the second link, you can click on the image in the top right hand corner and see some examples of Sami bands. Although they are warp faced, they are traditionally woven with a small rigid heddle on a backstrap loom.

The files will remain in the group’s archives if you are unable to participate in the workshop this month – always more fun to do the workshop though. Last November Sue presented a workshop on Baltic Bands, also done with a rigid heddle, in the UK Online Guild of Spinners, Weavers and Dyers. You can see some images of the bands members produced on their public web page.

Kimberly Hamill, a wonderful backstrap weaver whom I met at Convergence last year, is giving a backstrap weaving class March 11-13 at Weaving Southwest in Taos. You can see one of her backstrap woven artworks at left which has been accented with a little embroidery.

##############################

Finishing off here and going back to the loom…. I would like to give a big thanks once again for all those behind the scenes, too numerous to name, for all the wonderful “care packages”.


Backstrap Weaving – There is no one “right” way

THERE’S NO ONE “RIGHT” WAY….and A NEW TUTORIAL

I went to visit Angela again (see last week’s post) one morning this week to see how she has been progressing on her wall hanging and give her copies of some of the photos I had taken during the previous visit.

She had several projects going at once and was very pleased as she had just been given an order for 1500 woven greeting cards from her regular Christmas customer. Now she is planning a trip to her hometown of Isoso to organize the other weavers there to help complete the order. She told me that when she took on this task last year she had been able to weave ten cards a day.  Imagine!

The smaller of her two looms is occupied with this gorgeous wall hanging which I watched her warp on my last visit. As I told you last week, the designs that the Guarani women weave in the Moisy technique are nothing like anything you will see anywhere else in Bolivia.

And here is something else she is working on in the Moisy technique…


The band says Centro Cultural Boliviano Americano which is the institute where I taught English for eleven years. The teachers are wearing these around their necks to hold their ID cards. Gee, I wish we had had these when I was there! The band includes a small snake skin design. There are over sixty teachers there and so I imagine that this task is keeping her somewhat occupied as well!

Lettering! I was excited to see that but haven’t taken a good enough photo to get a really detailed look.  I think I will ask her to weave me an alphabet band if she ever has the time!

Another thing about which I am very tickled is that she has put one of her sets of heddles on a stick (see photo above). She had asked me to teach her how to do it on my last visit and now here she is using it. If you watched the pick up video in my last blog post you will see that opening the lower of the three sheds is a little tedious with the loose string heddles that she makes. So now she is using the stick on this lower heddle with the extra hitch as I showed her.

The actual stick that she is using as her heddle stick is a large wooden needle which she uses to pass the weft when she is weaving a four-selvedge piece. When she is closing the final piece of weaving and there is very little room in which to manipulate the sheds, she passes the weft under and over each warp with this needle until there is so little room that she has to use a regular steel needle. I loved this needle and, as she has three, she offered to sell me one.

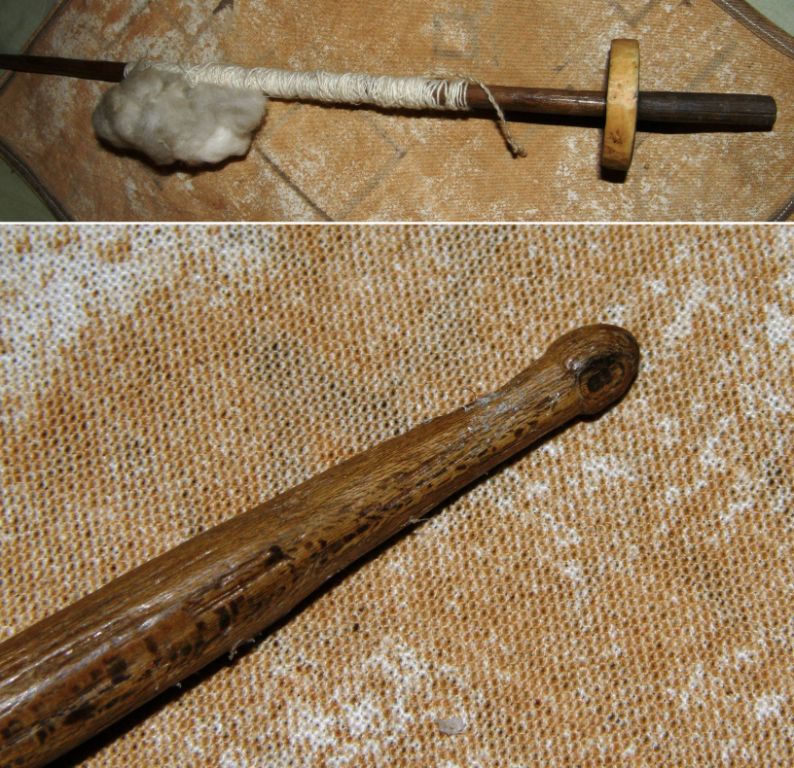
And then I remembered to ask her about spinning. Yes, of course she knows how to spin cotton and she had a tiny bit of cotton to demonstrate. Just a touch of saliva on the spindle tip got her started. Of course, she is usually seated when she spins. This was just a quick demo. She told me that in Isoso both white and brown cotton is still cultivated (there is not a single boll to be found around Santa Cruz although it used to be a very large and important cotton growing area) and that several women still spin and ply their own cotton and carry their spindles about with them when they are plying.

However, she told me that those who grow the cotton are very careful to keep their hold on the small market and won’t sell it with the seeds. Sounds good to me! Deseeding cotton is not a fun task. I did a bit of that in Ecuador although it was fun there as we sat together in a chatty group and worked.

Angela’s whorl is plastic and a spindle that I bought years ago from the store where she used to work has what appears to be a piece of the sole of a shoe as its whorl. However she tells me that in Isoso, clay whorls are used. Guess what I have asked her to bring me from Isoso when she returns next Wednesday.

Above you can see the spindle I bought here in the city. The shaft is essentially the same as that on Angela’s spindle. I love the little knob carved into its end.

I also took home the yellow and black sample pebble weave band that Angela was warping up in the video that I put in last week’s post. She has warped this and set up the heddles quite differently to the way I was taught in Peru and so I can take a closer look at it now at home.

And this is kind of what I am alluding to in the title of this post. There is no one “right” way to do these things and I am constantly astounded by the similarities and differences I see in the way people are setting up their looms and weaving as I travel around. I had never seen anyone make string heddles the way Angela does and she was keen to learn the way I had been taught by my Navajo weaving teacher years ago. There is always room to learn something new and adapt your techniques. I am looking forward to a chance to try Angela’s way of doing pick up. It doesn’t work on the backstrap loom, believe me I tried it!

I wish I could do a tutorial on all the ways I have been shown to make string heddles so that you can try them all and see which way you prefer. Making the string heddles takes practice…string and fingers all over the place and then you just get them done and find that there are some that are woefully short…

I ran into Jamie’s blog last weekend where she had been battling to make string heddles following my video. It’s a good thing that resourceful Jamie came up with her own solution to the problem, made some heddles and wove a pebble weave piece.

Above right you can see the individual string heddles that she made and successfully used on her warp. She says that this way is much faster. Well, I had to tease her about that because I disagree 🙂 but I can definitely see that these are much easier in that you get guaranteed even length heddles. If you are an inkle weaver you probably already have a bunch of these heddles lying around that you can use. If you don’t, Jamie made a nice tutorial on her blog showing you how to make them.

Above left you can see Helena’s (telarahna on Weavolution) solution with her nifty re-useable heddles. She says she needs to clean them after a project as bits of yarn fluff adheres to them but then they are good to go.

So, if you have been trying to make heddles the way I have shown it here and have been getting frustrated, there you have two nice solutions. Try different ways and see which you prefer and, as Jamie so rightly says in her blog, it’s easy “once you get the hang of it”.

Speaking of “getting the hang of ” something, I spent a great part of last weekend trying to get the hang of tubular woven bands and am pleased to say that I succeeded!…eventually.

This is kind of my warm up for the tinkuy (gathering of weavers) which I will be attending in Cusco next week. I signed up for a class on tubular woven bands but, as it is only a morning session I have doubts about whether we will have time to cover the tubular band that I really want to learn.

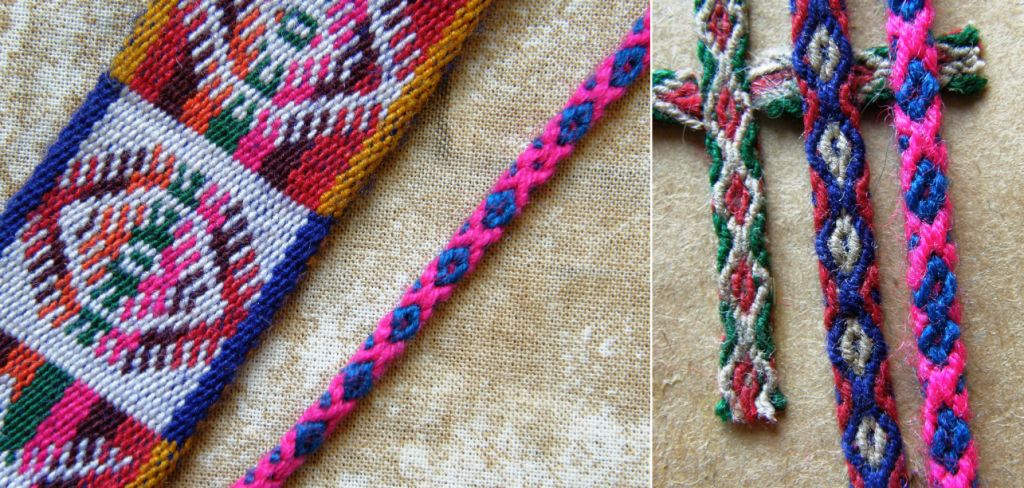
I used Adele Cahlander’s booklet pictured above. It is still available out there for under ten dollars. I have had this book for at least thirteen years and have never made the tubular bands. I guess I tried at one point as I have scribblings in the margins and have penciled in the colors that I was using but it seems I gave up as I have nothing to show for it.

The book has two versions of the band that I wanted to make. One has a sequence of six steps and the other eight. The problem is that there is not a picture of what the six-step version is supposed to look like. It is in fact a slightly imperfect version of the eight-step one and I spent a lot of time trying to figure out why my six-step band did not look like the bands on the cover of the book. I did not feel encouraged to try the eight-step version if I could not even get the simpler version right but in the end I decided I would just go ahead and try it.

In the pictures above you can see the eight-step version on the left. See how it has two neat diamonds enclosing a center spot. In the six-step version the diamonds are not quite so neat and well defined, they overlap and cross and they actually get progressively messier as you proceed. This is just so you know what to expect if you buy the book and have a go yourselves.

Once I had this sorted I had the crazy urge to edge everything I could get my hands on with this tubular braid! I learned a tubular braid here in Bolivia many years ago but it is a very much simplified version of this one and looks nowhere near as nice.

This is one of those bands that are generally simultaneously woven and sewn to the edge of a textile using the weft as the sewing thread. So this is what I did with my Tarahumara bag and I love it!

I was so excited about having learned how to make these bands that I could have quite easily dug out everything I have woven and edged them all with them . But I resisted and decided to weave a miniature piece where I could put several finishing techniques to use. The Cahlander book also has instructions for crossed warp bands which are very interesting. So I decided to make  a small amulet type of bag, edge it with a tubular band and make a crossed warp band as a strap.

Crossed warp bands are used here in Bolivia as ties on the ends of belts like the one from Potosi seen above left and as chin straps for hats like the two wider bands on the right.

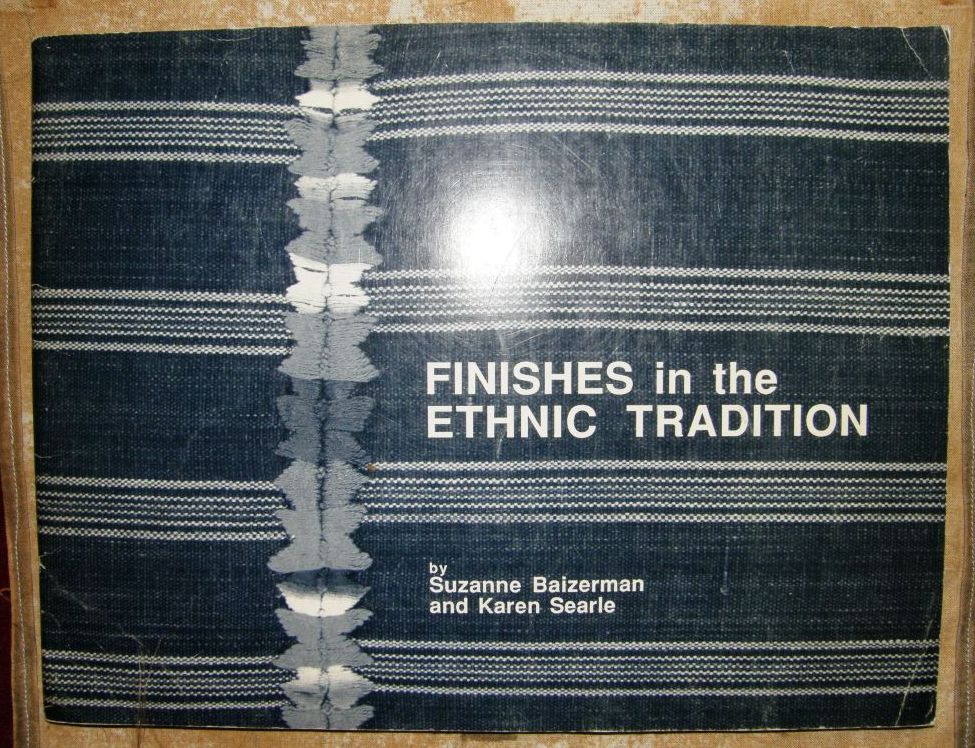
And then I fished out Karen Searle and Suzanne Baizerman’s wonderful work on finishing techniques and found the instructions for Bolivian pompoms I had made years ago to decorate my zampoña.

This book is full of all kinds of useful finishing techniques from around the world

First I had to brush up on the crossed warp techniques.

Then I wove the wee bag. I decided to keep it simple and warped up for plain warp faced weave so I could weave in a small motif with a supplementary weft (see the tutorial here).

A very simple design and there’s the pattern chart for you if you would like to use it.

Next I wove and sewed on the tubular band.

And I had fun making and attaching the tiny Bolivian pompoms.

But darn, I didn’t have time to make the crossed warp band for the strap so I have just placed thread there in the photo so you can get the idea. I am thinking of doing cross knit looping as an edging for the top of the bag too. Now I am mad for not thinking about this earlier. I think that these would have made nice gifts to take to the tinkuy- bags covered with little Bolivian techniques (although the suplementary weft motif is not Bolivian).

However I did find time to put together a NEW TUTORIAL. This one is on warp faced weaving with warp substitution which is the technique I used to weave the band with Bedouin designs that I showed you a couple of weeks ago.

Below is the sample band I wove in order to put together a set of instructions for you.

This is a great stepping stone to one-weft double weave.

You will learn the kind of pick up you need to do for one-weft double weave without having to deal with the extra manipulations and steps involved with weaving the doubled layers.

If you are interested in Bedouin weaving Helena (telarahna on Weavolution) gave me a link to an article by Joy Totah Hilden, author of the book on Bedouin weaving from which I got a lot of these designs.

Alaa (weave2 on weavolution and Ravelry) also gave me two great links to follow on this topic here and here.

And for the Spanish-speaking visitors to my blog, I have put up one tutorial so far in Spanish – the one on simple warp floats (although I haven’t found a way to say “simple warp floats” in Spanish. The literal translation sounds ridiculous!). There is a tab on the header photo and side bar.

Para las personas que hablan español he traducido el primero de los tutoriales que puedan ver aqui. De vez en cuando pueden chequear haciendo “click” en la pestaña “tutoriales en español” en la parte de arriba de la pagina. Alli podran ver si he traducido algun otro tutorial mas.

I may have time to squeeze in one more post before I go to Cusco on November 4th, but if you don’t hear from me you will know where I am 🙂