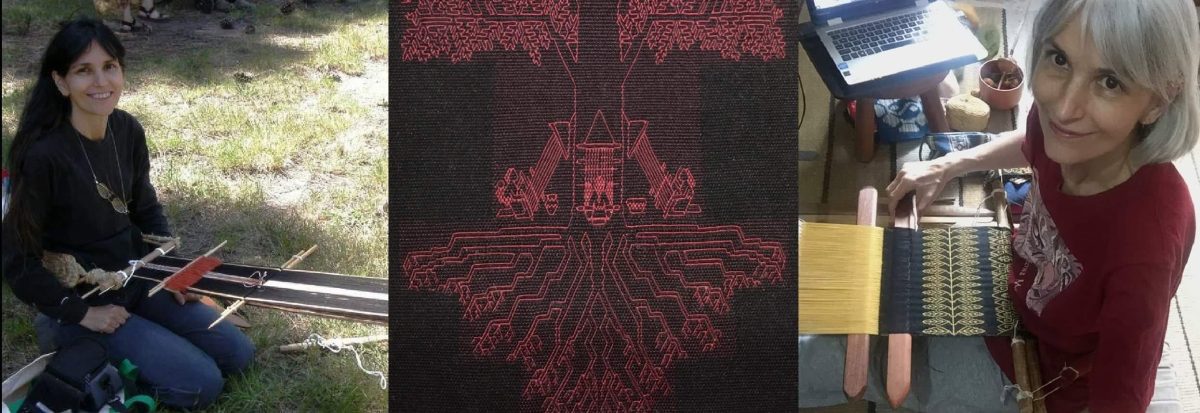
Surprising and amazing things come to me via Messenger or email and I so appreciate people’s willingness to share their stories with me.
Recently when I was posting some of my ikat work on Facebook, Christina Palafox contacted me to share photos of her experience learning about the ikat work of Camelia Ramos Zamora and José Mancio Gutiérrez in their studio, Taller Xoxopastli in Malinalco, Mexico. After meeting José and Camelia at an event in Texas, Christina went to Mexico in 2019 to study with these Masters in the art of creating fringed cotton shawls, or rebozos, on both floor and backstrap looms. The shawls that they weave are patterned in the ikat, or jaspe, technique in which parts of the unwoven warp threads are bound before the warp is dyed. The bound areas resist the dye and form a pattern on the unwoven warp which can then be placed on the loom and woven into cloth.

I learned a little about the ikat technique on my first visit to Ecuador in 2005, a tiny bit more on a visit to Guatemala in 2008, and have been playing with it with varying degrees of success ever since. I have added to my knowledge base through trial and error but also via the internet and am grateful to those who take the time and make the effort to so beautifully document and share techniques.
Now I have yet more to add to my knowledge base and even more reason to admire the artists that create these magnificently detailed pieces.
Christina was taken through the steps for creating a jaspe warp for a single rebozo on the backstrap loom while at the same time being able to witness the process for setting up the ninety-meter japse warps that are woven by the workshop artisans on floor looms. Commercially available synthetic dyes are used on those long production pieces. The backstrap loom pieces are dyed with natural substances.

Here’s a description in Christina’s own words of the start of her adventure in Malinalco…
My course began on the day after my arrival. After great local coffee and pan dulce (Mexican pastries) we entered their sanctuary of fiber and tools. I was thrilled to hear the clacking sounds of the standing pedal looms (4) the sound was like a symphony to me. The weavers were in ages 18 to 80 and most were kin or friends to José and Camelia. Jesus was the youngest, Guillermo, Oscar, and Antonio were fast at work creating textiles. The rhythm was delicious. I felt like I was in heaven surrounded by textiles, threads of various colors, old looms, handmade warping mills and hand-cranked bicycle wheels that served as bobbin winders and other miscellaneous weaver’s tools. The ambience was enhanced by four great and well-behaved street dogs that had unique and pleasant personalities and who provided a nice diversion from my zealous attempt to learn the multiple processes I had never attempted. An added visual delight was that the studio was beautiful and set in the foothills of Malinalco. Wrought-iron glass doors and windows swung open to the beautiful mountains and yard of his house. There were hummingbirds (colibri) darting around the bougainvillea. Before work and after coffee, the weavers ceremoniously but quietly light a candle to the Virgen de Guadalupe, patron saint of Mexico, ensuring the day’s work goes well and thanking her for watching over their work.
Because I have had a little experience of my own creating ikat pieces on a backstrap loom, what initially stood out for me when Christina first started telling me about her experience in Mexico, were the differences in the methods and tools that were being used. I have been using a Japanese plastic tape to wrap the threads after a few false starts in which I tried to use agave fiber and then cassette tape. It was interesting to see the use of cotton string as the resist material in José and Camelia’s work. The other interesting thing was their use of liquid corn starch sizing before they tied the patterns. The starch helps to keep the fine threads stiff in their bundles and, therefore, easier to wrap. The warp is stretched out to dry and I love the idea of placing bottle caps between the bundles to stop them from sticking together as the starch dries.


Here are a couple of screen shots from a video that Christina sent me which shows José wrapping bundles with the cotton thread. He uses a blade that is strapped to his hand and with a flick of the wrist is able to cut the string when he finishes with each bundle. It’s ingenious but I know I would create havoc if I were to try using something like that!


I use charcoal pencil to mark the pattern on my warp after having read about the use of charcoal by ikat weavers in Uzbekistan. I once used a black marker pen but the yellow component of the black ink bled into my pattern. Jose and Camelia mark with ink which doesn’t bleed and which gets covered by the dark dye colors. Some patterns are marked free-hand while for others, wooden blocks are used….very handy for the tiny repeated patterns. The measuring and marking is quite a job and the blocks must make the process so much easier. I have seen other ways of marking patterns in India in which an entire grid of perfectly spaced lines is drawn onto the warp so that the “wrapper” does not need to stop and do any measuring of wrap length or spacing along the way.

The long floor-loom warps weigh around 20kg when wet. It’s quite a job wringing them out when they emerge from the large galvanized buckets of dye.

Christina’s backstrap-loom warp took three days to dye in blue and green. Plain green warp threads would be placed alongside strips of blue jaspe thread.


Of course, string heddles need to be made before weaving can commence. But there is also another task. Any remaining corn starch is removed from the threads with the aid of the brushes (the best ones are made from agave fiber) that you can see here in this display of tools.


Christina tells me that although there are 90-meter synthetically-dyed warps on the floor looms, José and Camelia spend time every day weaving single one-of-a-kind naturally-dyed pieces on backstrap looms. These are their finest pieces which are often entered in shows and awarded as well as worn on catwalks at shows that honor Mexican craftsmanship.

I have a backstrap weaving friend in Mexico who has just finished his first japse patterned rebozo on a floor loom. In his Facebook post he states that a rebozo without a knotted fringe is simply not a rebozo. And so, it would be remiss of me not to mention the beautiful knotwork, rapacejos, that goes into the fringe once the cloth is off the loom. Two sisters in their seventies who live in a remote village and who have been knotting fringes since childhood, do this finishing work for José and Camelia.

In Christina’s words….
Camelia and family with their textile business support 70 indigenous families in the communities around her, others who like these sisters do the finish work on the rebozos. Camelia knows how to do the knotwork as well, but since she is so busy being the jefa (chief) negotiator, designer, shopkeeper, she prefers to farm out the finishing to the nearby villages. Camelia’s work ensures sustainability for these little communities.
Here is an example of knotwork on a shawl that Christina commissioned to honor her grandmother…

You can see more of Camelia’s work on her website, on Instagram and on Facebook . José and Camelia are happy to welcome students to their home. Maybe one day I will be able to travel there and meet them. You can contact them via these links to ask about that. Many thanks to Christina for sharing all this with us.

I will leave you with my little ikat efforts for the first time on my own hand-spun cotton. I am not willing to attempt anything grander for the time being until I have woven this and seen how my hand-spun cotton behaves. If it works out reasonably well, I’ll sew the cloth into a zippered coin and card purse something like these that I made many years ago.


I have folded my warp of hand-spun cotton so that it is half its width so that I can tie the pattern onto two layers of warp at once. When I later unfold the warp, I will have the mirror image of what you see here on the other half. I am going to use the same blues that I used for my recent cross-body bag. Again, I am not willing to try anything new until I know that my hand-spun cotton is up to this. I had been thinking about using cochineal but decided not to risk it.


One thing about dyeing at night….it’s hard to tell what color you are getting under artificial light. This isn’t as dark and inky as I would have liked it to be. I will unwrap one of the light blue sections and see if I like the way the two blues look together. If not, this will go back in the dye bath with a bit more black added to the blue…and I will dye in daylight! I just don’t have the instruments to accurately weigh and measure these very small quantities and so it is hard to follow the notes I have made for other larger dye projects.
Because I am using cotton singles, I expect the woven cloth to curl. You can already see the curl in the threads in the above photo. I hope to use a tubular edging on the little purse which will flatten the cloth. Andean weavers often add tubular edgings to their pieces. Perhaps the primary purpose is to strengthen and protect the edges of the cloth but the tubular bands also have the effect of calming the curl in the cloth that has been woven with their high-twist plied wool yarn.
This is the discontinuous-warp piece that I wove in high-energy hand-spun alpaca yarn from Pitumarca, Peru. Once off the loom the piece would not lie flat…..

Here is the same piece after I applied the tubular band. The tubular band has its own curling energy which possibly works against the curl of the cloth. The piece then lay nicely flat.

To finish, I am would like to show you some bands that have been woven by friends on Ravelry. Brettchenweberin contributes to the Backstrap Weaving Group while the other ladies have been contributing to a band weaving WAL that has been running these last few months in one of the other weaving groups. The band-weaving WAL brings us all kinds of band-weavers who use string heddles, rigid heddles or tablets to create their pieces using backstrap, inkle or shaft looms. I have been thrilled to see people using and enjoying both my instructional and pattern books and will use this opportunity, if I may, to also remind my readers of my publications. Things have been a little slow lately business-wise and I am guessing it’s because this is the first summer in the north since the start of the pandemic that people feel comfortable enough to get out and about. I have vague plans to travel next February and hope that things only further improve for all of us between now and then.

Brettchenweberin has used figures from my two pattern books – Complementary-warp Pattern Book and More Andean Pebble Weave Patterns. If you have used either my Complementary-warp Pick-up book or any of my books on Andean Pebble Weave to learn the technique, you will be able to weave all the patterns in the pattern books. I love the color combination and think that there might be plans to sew these strips together to make a wider piece.

This one from Beverly has one of my favorite patterns because of the memory it brings me of a cool sunny winter’s afternoon sitting on the grass in the Bolivian highlands with my teacher Maxima. She had taught me the technique so that I could continue on my own without her supervision. That allowed her to continue with her own weaving and sewing projects and we sat side by side concentrating on our work and enjoying the peaceful afternoon together. This pattern is charted in my Andean Pebble Weave on Inkle Looms book as well as in my Complementary-warp Pick-up book.
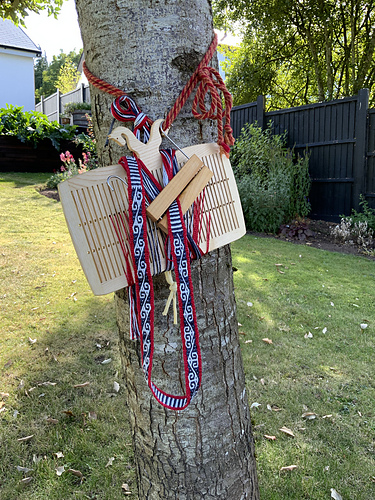
I love everything about this picture from Dunja Roberts. Can you imagine sitting on the grass in the shade of that tree weaving this? I love living in the tropics but I am afraid that this kind of activity is not so pleasant here. It is either too hot and humid or there are too many bugs! This pattern is charted in the Complementary-warp Pick-up book.

Rebekkah has been weaving lots of motifs from my pattern books. The knotwork pattern on the left is one of several in the More Andean Pebble Weave Patterns book. She added a wavy border to it which looks great. Then she took the little viscacha figure from my Complementary-warp Pattern Book and created her own layout for the little guys.

This is adorable! Nancy has been weaving patterns from my books for some time now and has just sent me her latest original creation…her own Andean Pebble Weave pattern of a cardinal. I love it when people feel inspired to start creating their own patterns.
And here’s some more “adorableness”. This comes from Brettchenweberin. She used my tutorial on the Bedouin al’ouerjan pattern (free for all to use right here on this blog) to weave a band and use it so beautifully on a bag that she sewed.

And with that, I shall leave you all until next time. I am hoping that I like the way the two blues look on my ikat project because I would really like to get back at my loom and put the dye pot away!


