My relationship with Time seems to be changing. I know that I am not the only one who got lost during these last two strange years, overcome by the feeling that time was speeding by… weeks and months merging into a hazy uneventful blob. Even now I struggle to separate 2020 from 2021. But I just recently realized that the passage of time is slowing down for me and starting to resemble something like normal, something recognizable from the pre-pandemic days. The calendar map that I have always carried in my mind’s eye is starting to reappear.
I resist the urge to go back and try to account, in terms of productivity, for the 24 months that have passed since we first went into lock-down here in Bolivia. Today marks the anniversary of the confirmation of the first known Covid case here. That any of us achieved anything meaningful at all is cause for celebration. And now I am talking as if it is all over. Of course, I know it isn’t, but there is definitely a change in my state of mind.

On the theme of Time, I am reminded of a question that I am very often asked when I show my woven work….. “How long did it take to weave that?”
I am trying very hard to think back to a time before I started weaving to see if perhaps I would have asked this question myself to a craftsperson and what might have motivated me to do so. Would it be because I was thinking of trying to make the object myself and needed to see if the time involved was worth my effort? Or perhaps I would want to know if the asking price for the object reflected the amount of time that had gone into creating it.
In any case, I find it a very difficult question to answer. How long does it take?…As long as it takes! I honestly don’t keep track. I don’t sell my work and so I need not consider time in order to fairly price an item. I am not weaving to a deadline. There is usually no exhibit for which the work has to be completed…the three pieces above were an exception as I had woven them for an exhibit at the ANWG conference in 2015. I would probably have to go back to my blog posts if I wanted to give an accurate answer in terms of the number of weeks on which I worked on a project. However, I would be at a complete loss when it came to the total number of hours.
I met a craftsperson some years ago and witnessed his response to the question…
“How long did it take to make that?”
His response:
A l i f e t i m e
I can only imagine that he very rightly considers that a lifetime of his accumulated knowledge, experience, skill and inspiration went into this and every piece that he has completed. I love his response.
So, I am willing to pour as much time and effort as is required into every piece I weave. There have been a couple of times, though, when I just wanted to get the thing done! One such time was when I had volunteered to weave six lanyards for a conference. The long piece of half-inch band with its small repeated motif did not excite me at all when the time came to weave it. I installed eleven sets of string heddles to move it along. I didn’t have to do any pick-up and that rather unique experience suddenly made the project very interesting as I came up with ways to remember which heddle came next in the sequence.

What I don’t like, is making silly mistakes and wasting time. Okay, I will admit that a mistake is always a learning experience and valuable for that reason but sometimes you just turn around and do the same old thing again!

Like the time I was using a coil rod for the first time on a circular warp many years ago. The coil rod (sometimes called rolling stick) is the uppermost stick in this cotton circular warp and I was using it because it seemed like an important part of a circular warp set-up. At the time, I didn’t fully understand its purpose. One of my aims for using it in this project was to figure that out. While trying to move the rod as weaving progressed, I mishandled and broke the coil rod. I did it once…I learned something. I did it a second time…I cursed…but then I learned some more. The third time I broke it, it got flung to other side of the room and I continued without it. It was then that I started understanding its purpose because it was very much aware that it was a different experience weaving without it. And so I was happy to sit patiently and install it once again.
(Note that I am talking about circular warps here. I do, however, continue to use the coil rod on both circular and single-plane warps if I am doing plain weave with cotton or silk (materials that have little to no stretch). I have written a lot about this tool in blog posts over the years. If you are interested in learning more, you could start here.)
Maybe this is something that we don’t consider when we ask the craftsperson how long it took to complete the project. Do we want them to include the time used to fix “oopsies”? After all, the fixing of the oopsies adds to that lifetime of experience about which my craftsman friend was speaking.

While the amount of time needed to weave a piece is not important to me, I am always interested in learning about techniques that weavers have developed to help make the whole process more efficient, like the use of multiple string heddles and pattern storage sticks, for example. However, there is one thing that I have always been a bit stubborn about and that is the use of sizing.
In weaving, sizing is a substance that is used to coat warp threads that are hairy or “sticky”, or have other characteristics that make it difficult to achieve clean sheds. Basically, it smooths the threads. I resist using it purely because of the “ick” factor. That is, I hate to think of the mess of dunking my warp into a bath of starchy goo and I don’t think I would enjoy the feel of the stiffened coated threads as I weave. Keep in mind that my hands are usually in almost constant contact with the threads as I weave pick-up patterns. Of course, it all washes off in the end and you are left with the original softness of the yarn but yech, I just don’t like the sound of it. I prefer to stay away from the sizing and just adjust my loom-operating methods instead.

My approach when working with sticky materials is to adapt the way I operate the loom…take a lot of care when opening sheds by working the threads in sections, using my finger tips to help release the grip a thread may have on its neighbors. I advance the warp more often so that sticks and heddles are not sitting on and abrading any one section for too long, causing it to shed and pill. Yes, it does slow things down but, as I said, I am not in any hurry. I suspect that using a sized warp on a floor loom is a different experience in that the weaver isn’t necessarily handling the warp threads during the weaving part of the process.
Another way to avoid using sizing might be to add extra twist to commercial wool yarn to make it smoother. My weaving teachers here create relatively smooth hand-spun yarn by using a high amount of twist. They also add twist to the synthetic thread that they buy in the market. This kind of yarn creates a certain kind of cloth. The thing is that I don’t always want that kind of cloth.

My latest project has been with mill-spun wool singles….sticky stuff. I could get a tiny heddle shed which I would then proceed to open further with my fingers. I didn’t want to use sizing. I didn’t want to ply it or add extra twist. I love the way it feels. The supplementary weft is my own plied hand-spun wool.


The fresh warp in the above photo was for a small closure tab. I used my plied hand-spun for that. I used a dense structure of three-span floats (intermesh) to produce a sturdy band…hence the two sets of string heddles.

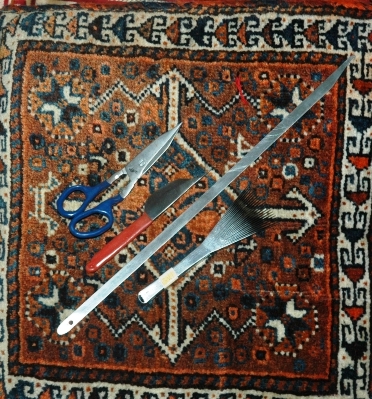
I wet-finished the small piece on the right under the sword. The warp threads shifted slightly closer together, I took measurements, but I didn’t notice any real difference in the feel of the cloth. I didn’t wet-finish the pouch piece as I was a little concerned about color run in the supplementary weft. I had bought that roving already colored. As the supplementary weft is tightly wedged between the two layers of warp in several places, I don’t think that even a color-catcher cloth would stop the color from bleeding onto the grey wool. If wet-finishing had made a significant difference to the way the cloth felt, I may have reconsidered.
I hope that I get a chance to show this, the first of many projects in the mill-spun wool singles, to the farming couple whose sheep provided the fleece. My original plan had been to use this yarn for a shoulder bag project. I would dye the yarn to match the three-color strap that I had already woven…

However, now that I have seen the cloth that this yarn produces, I can’t bring myself to dye it. I love all the subtle color variations from this blend of natural white and black. I’ll be using it as is perhaps for a pillow cover and will add color with supplementary weft instead.
So, I will turn once again to my Mora yarn for the bag project. I over-dyed a pale green color that I didn’t particularly like to get a dark blue that is close to the strap color. It will be mostly plain blue and with a very narrow strip of three-color pattern in the center. I have used Mora for a bag project before and know that it performs well on the loom as well as with use.


One skein of Mora goes a long way. It gives me material to work with for dyeing with cochineal for other projects. It’s taken two years but I finally got some alum. Just before the pandemic I had been out and about looking everywhere for the “precious” stuff…precious only because I suddenly could not find it anywhere. The usual pharmaceutical supply stores weren’t carrying it any more. The little hardware stalls in the market (there are dozens of them) didn’t have it. I tried the Mennonite market because I know that they can and pickle but they told me to go to the pharmaceutical places. The little McCormick jars of alum are not available here either. I am guessing that the Mennonite folk have a massive supply of it at home and are possibly not yet aware of it no longer being available. My friend Dorinda sent me some from Cochabamba a couple of weeks ago.

The stones you see are a mineral that goes by the Quechua name millu. Dorinda sent it along as a bonus. It is not something that is required for dyeing with cochineal but she thought that I might enjoy experimenting with it. In the co-op, they use it to darken colors. It is also sold as a home remedy and it is in those stalls that it is found in the street markets. Now that I know what it is, I will most likely be able to find some here in Santa Cruz although I suspect that the amount Dorinda sent me will go a long way. Maybe I will also dye some silk with cochineal for an ikat project.
These are all time-consuming processes. I am not concerned about the amount of time it takes. If you have ever tried ikat, you will know what I mean by time-consuming. Slow processes are just perfect for someone who is working with dwindling stash!
When I told a friend of mine about having finally got hold of some alum via Cochabamba, he took on the challenge of hunting it down in Santa Cruz and came up with this in a very upmarket store of natural vegan-friendly cosmetics. One large chunk came contained in a cloth bag inside a fancy carry bag as if it were something terribly precious…and yes, the price was precious. The accompanying card shows someone applying it to their armpits. So I guess supplies, at least here in Santa Cruz, have been entirely diverted to the cosmetics industry.

Another “slow” project is my learning to spin cotton on a takli spindle. Version One didn’t have enough twist. Version Two had…you guessed it… what I suspected was too much twist. Version Three, which is in progress, is bound to have some other problem. And on it goes. I love the little takli spindle! And Joan Ruane’s video class on it has been so good. I’ll never forget the time I was with Joan at the Mannings. I had set up a backstrap loom and she had wanted to see what that was all about. I was doing pick-up and her reaction was “Oh my god, it’s slower than tapestry!” This from a woman who spins her own cotton for weaving! She made me laugh. I guess we all have our own feelings about Time.
As for Version Two with it’s crazy amount of twist, I decided to see if it was possible to set the twist on my singles (because that’s how I want to eventually use this thread…as singles) and did some reading about that. I have Stephanie Gaustad’s book on cotton, flax and hemp and there are also online resources about simmering and immersion. The trickiest part was having to immerse the thread under tension. My solution for that is a bit wacky. It worked for these small samples.

The thread went into the pot tightly wound around these metal mesh pencil caddies. I do want to use this thread as singles so that I can once again try to weave something approximating the sheer cotton cloth that is woven in the Alta Verapaz region of Guatemala. I want the thread to be finer than the hand-spun that I used last time in this piece…

And this is where that icky topic of sizing comes back into it. I will probably give in and size the thread. I wove the above piece using a bamboo reed to maintain sett. The weavers in Alta Verapaz don’t use one and I am curious to know if the stiffening of the thread from the sizing is one of the factors that enables them to maintain the sett without the aid of the reed. I stress ONE of the factors because, of course, their supremely high level of skill gathered from years and years of work is going to be the main contributing factor. In videos, I have been able to hear the sound of their picking stick on the threads. The weavers are in the habit of slowly scraping the pick along the warp threads from selvedge to selvedge right at the weaving line as if, I am guessing, to encourage the threads to remain separated and not drift into warp dominant positions. That sound is not one that I would expect to hear from naked hand-spun cotton. The sizing that is used gives the threads a coating that produces that sound. Perhaps I will need to use sound as my guide when I try this myself.
All time-consuming stuff. But I am not here to just consume time. Hopefully, I will be using it to continue learning. When I recently explained to someone my plans for my own hand-spun cotton, they asked how long it would take before I would be ready to start the weaving. I sensibly replied….years.
Until next time…..