The bands play on…
In a time when my weaving goals are geared toward going wider, finer and longer, there is a surprising amount of narrow band-weaving happening on my backstrap loom. I guess I am satisfying the desire to go finer and longer, if not wider, in some of these projects. At least the 110-inch band that I wove as an edging for my wool blanket falls into the long and fine category.
 Two years have passed since I took the panels for the wool blanket off my loom and now I have it finished at last along with its red and brown partner.
 Now….bring on the cold weather so that I can snuggle under these!

I stayed with fine thread for the next band project which only satisfied one of my three goals. I wove a strap for my new iPod neck pouch. First came the tubular bands for the sides of the pouch followed by the neck strap. I set up the warp for the strap with four sets of heddles and zoomed along.
 I was able to fit three of the four cat patterns from my latest pattern book on the back of the pouch. After attaching the tubular edgings, I sewed coil stitches to cover the raw edges at the bottom of the pouch. The mouth of the pouch ends in selvedges that don’t need protection. I want to re-do the coil stitches as the needle I used was too thick for the weight of wool and I think I can make the coils more compact with the finer needles that I have.

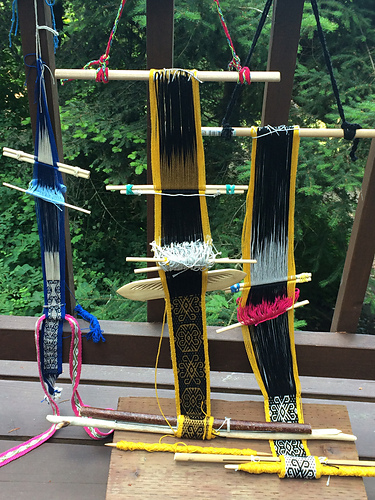
 And then it was back to 60/2 silk for another band with lots of pick-up. I am using only two sets of heddles this time and so my pick-up stick is getting a good work out.
This band is for my friend Tracy who makes the most adorable sprang pouches.
I asked her if I could buy one…they are just so darn cute and I loved the colors. I know that it is hard to put a price on these kinds of handmade items and so we came to an arrangement to make a swap…a silk neck ribbon for a sprang pouch. Tracy surprised me by delivering that pouch quick smart. You can see it pictured above.
I am afraid that I am sadly lagging behind on my end of the deal. I am so happy to have this ribbon underway on the loom now.
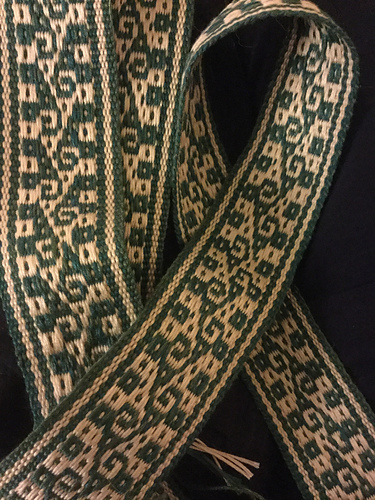
 I am using the same snake pattern that I used for a neck ribbon I wove for myself some time ago. I hang a pendant on it and use it as a necklace. This is a pattern that I adapted to fit the number of threads I am using from a pattern woven by my Guarani weaving teacher. When I showed this to some online friends, one of them pointed out the little red “rubies” that appear in the bends of the snake when you look at the other face. I hadn’t noticed that before.

So there have been a handful of narrow projects on my loom while I have been contemplating my next big project. This one will be wide. I will be on the road again before I can even hope to get this next one started. Besides, I think I need to buy more thread for it and I’ll bring that back with me when I return.
I have played around with a handful of what, for me at least, are wide projects in the past….
 This was the first time I tried 60/2 silk as warp.
 Another wide-ish one in 30/2 cotton. I’d like to stress that these are only ”wide” in terms of what I normally weave on my backstrap loom. They are not at all wide compared to the pieces that are routinely woven on backstrap looms in S.E Asia! Take a look at these images of backstrap weavers from Laos and Vietnam with their tremendously wide warps (used with kind permission from the folks at Above the Fray Traditional Hilltribe Art.)


 I felt I needed to stand to get my friend Janet’s wide wool warp started unlike the gentleman in Ecuador who skillfully works at his wide and very heavy wool warp while seated…


The challenges of going wide…firstly, there’s the equipment. Long beams, shed rods, cross sticks, coil rods and heddle rods are no problem. There no end of wooden broomsticks and such things down the street in the market. What I am lacking are swords of the right length. I rummaged around and pulled out my biggest ones…

Only one is the length that I feel I need. I could have some made for when I return (make them myself?…I am useless at that sort of thing!) But then I started thinking about the double-width cloth that many floor loom weavers make when their looms are not wide enough to accommodate the width that they want to weave. They weave half the width in two layers which then unfold to make one wide piece.
Time to experiment.
I have no idea if the following small experiments will really give me any clue as to how easy this will be to handle with many more warp ends. I guess I was more curious at this point to experiment with sett and how that affects the fold in the cloth.
What I liked while making these experiments was the ability to cut off a sample and clamp off my warp. That way I could wash and press the sample, take notes, plan changes and then continue using the same warp for the next one. The width of the warp you see on the loom below is half the width of the woven cloth.

I suspect that these wooden clamps that I inherited from a guild were home made. I have searched on Google for similar things but haven’t turned up anything yet. I have two of them and they work well at holding the threads while I cut off a woven sample. I clamp one to the unwoven warp while it is under tension and then cut off the woven cloth. I lash the clamp to a dowel when I want to start weaving again.
You can see the first two samples above. I calculated the width I should produce with this number of ends of 60/2 silk based on pieces I have woven in the past. I wove the first small piece at a closer sett. It’s not the width that would normally be produced in my hands and I had to work to stop the cloth from widening. That resulted in uneven selvedges. The density also made the sheds that much harder to clear. However, of the three samples I wove, this one was the only one where the fold in the cloth was not noticeable at all.
I let the second sample go wider than I normally would, which made shed management much easier. I also practiced a new pattern that I had charted in supplementary weft. The fold in the cloth was quite obvious in this one. It wasn’t noticeable when the cloth was just lying flat but it certainly was when held up to the light. The warp ends were spread further apart at the fold, enough so to create what I would consider a fairly weak spot in the cloth. Again the selvedges were not tidy because I was forcing the cloth to be a width which was not natural in my hands. The only advantage had been that the slightly more relaxed sett made opening the sheds easier.

I let the final sample sit at its natural width…yay, selvedges I like at last. The fold is only slightly noticeable when the washed and pressed cloth is held up to the light but I don’t believe that it affects the integrity of the cloth. It’s amazing how much variation there can be in width while still producing good warp-faced cloth.
Each sample had its advantages…1. invisible fold line, 2. easier loom operation, 3. a more natural rhythm for me and neat selvedges. It’s a toss-up between numbers 1 and 2. I won’t have to decided until I get home from my next trip. Most likely I will want to weave more samples. In the meantime, I can think about colors. Or…if I don’t go with double width, I’ll come home to some new long swords.
As usual, I have some pieces to show you that were woven by my weaving friends. I will limit the selection this week to four different techniques…
Ann wove this wool band using a backstrap set-up and one of my favorite patterns. I discovered this one on a pre-columbian fragment that I was shown and it is charted in my second book (you may have gathered that I have lots of favorite patterns)…
 I think it is magical how the pelicans flow from light on dark to dark on light. Of course, you may not be seeing pelicans. You might see cogs and gears, as one weaver remarked. Ann wove this using a temporary picking cross, manually selecting threads for every weft shot.
 Kristin’s beauty is based on an adaptation of a central Asian pattern that I charted. Those colors!!! This is stunning. This pattern allows the optional use of two sets of “pebble heddles” and I am pretty sure that that is the method she chose for her backstrap loom.
 This is Nicole Stronge’s warp-faced double weave using the two basic sheds on her inkle loom. I have more projects from Nicole to show in which she has continued to create her own patterns, beautifully personalizing her bands for the intended recipients. I will save them for future posts.
 Martina has created a really cool set-up for her backstrap weaving in her home. She’s using the backstrap she wove herself and is creating a band decorated with patterns in supplementary weft.
 Cut into lengths, the band was made into key fobs and a book mark.
There are free tutorials for the last two techniques right here on my blog. Follow the links I posted above. I am also producing a pattern book and dvd on the double weave technique which extends and deepens the basic tutorial I have provided here.
Now it’s back to my loom and my wee silk ribbon. I also want to follow through on all my good intentions and surprise friends by weaving the bookmarks and ribbons that I have had in mind for them. Goal: get these finished before I hit the road again.
By the way, Australian friends….If you live in the Newcastle area I will be teaching two workshops there in August. There are spaces available! Contact me if you are interested via a comment on this post.