A short post this week as I get my sticks, strings, shuttles and spindles together for another trip to the US flying out tomorrow (Friday the 16th).
Andean Pebble Weave is now in print! It will also be available for purchase in its e-version on the WeaveZine site. (UPDATE: Now it is available in 4 languages at Patternfish.com along with the follow-up book, only in English.)
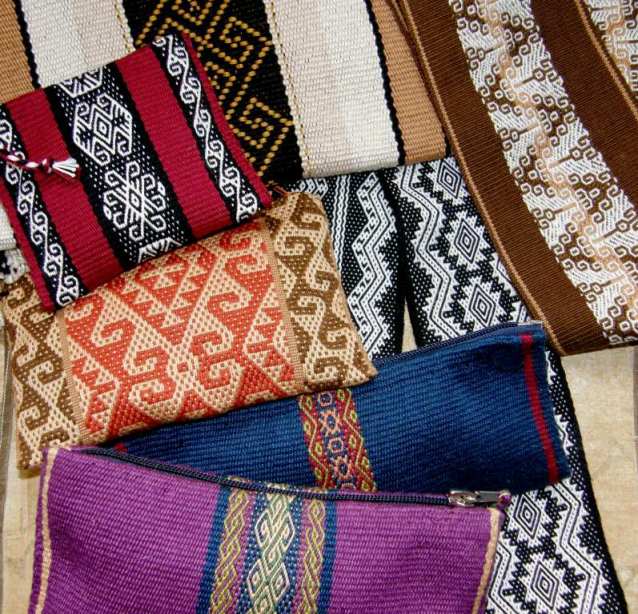
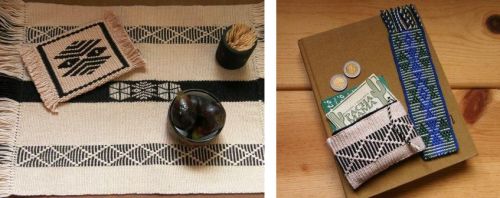
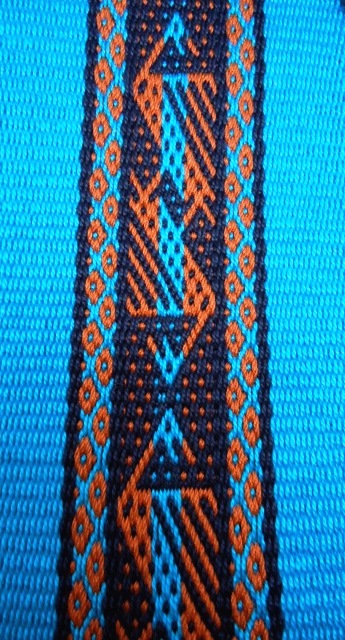
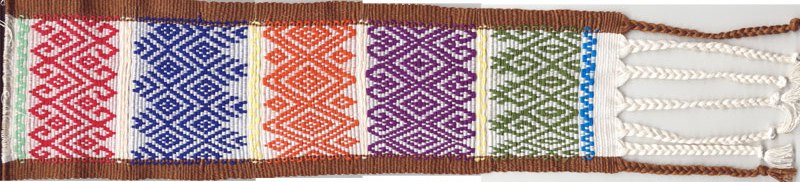
With all the loose ends that needed tying up and the time spent working with Syne Mitchell to get the print version of my monograph ready, I didn’t expect to get any weaving done this week. But then I had an idea and ended up weaving a bunch of keyfobs. I thought it would be fun to give a keyfob away with the first 20 copies of Andean Pebble Weave. So I sat with my basket of cotton thread and had a great time combining all sorts of colors to make the 20 keyfobs to accompany the books. I combined several small pebble weave motifs and now I can definitely see the benefits of weaving the same design over and over as some indigenous weavers do. I could probably weave this with my eyes shut now!! As long as there were new colors to combine it never got boring. Only one or two color combinations are repeated as I made tiny warps and wove one at a time.
And I didn’t stop at twenty as I thought that these fobs would make nice gifts all year round. I will be weaving these where ever I can find a spot to tie up my loom – in the Vendor Hall and probably to my bunk bed in my hostel!! as I am packing my mini warping board and crochet cottons.
I am also taking my wobbly Bolivian drop spindle and some of the alpaca fiber that my friend Janet gave me on my last visit. I just spun a little to get it started on the spindle and it is so so beautiful to spin! This is not the first alpaca I have ever had to spin. I bought some many years ago in Peru and it was in a dried-out, brittle and filthy state. I lost a good third of it in the cleaning process and I knitted rather than wove with it. Now I have this prepared smooth luscious fiber to work with – what a dream! It almost feels like cheating! I’ll be spinning it to weave with on my backstrap loom.
I am hoping to squeeze some of my smaller weavings into the backpack to show people who drop by the Weavolution booth at Convergence. I am also taking them to show some folks in North Carolina. I found out about a group of Montagnard people who have a small community in North Carolina. This is wonderfully convenient as North Carolina is on my trip route on my way home after Convergence. My good weaving buddy Lisa lives there and we have been invited to go visit the Montagnard community as there are backstrap weavers among them. What’s more, it seems that they have been recently joined by Karen and Nepali weavers. We hope to share our textiles and backstrap techniques and I am so excited about this opportunity. You can read a bit about the Montagnard people here and watch a video on one of the weavers in the North Carolina community here.
Betsy Renfrew who has been working with the weavers, and who extended the invitation to me after my initial enquiries, has started a blog about the group’s activities.
My backpack will also be full of sticks as I will be staying with one of the Weavolution founders in Washington and she may have some friends over to weave. I have loom bars and backstraps for several people so we can all weave together.
So…come and visit me at Convergence!! I will be with Weavolution founder Alison at the Weavolution booth or wandering about most likely with a bunch of sticks protruding from my tote bag. I would love to meet you and show you my weavings and loom. You can check out the new print version of my book. I hear that there will be a weaver from the Textile Center in Cusco demonstrating backstrap weaving too so I will definitely be there watching her.
Hopefully next week’s post will be full of Convergence events to report and stories of all the wonderful weavers I have met.
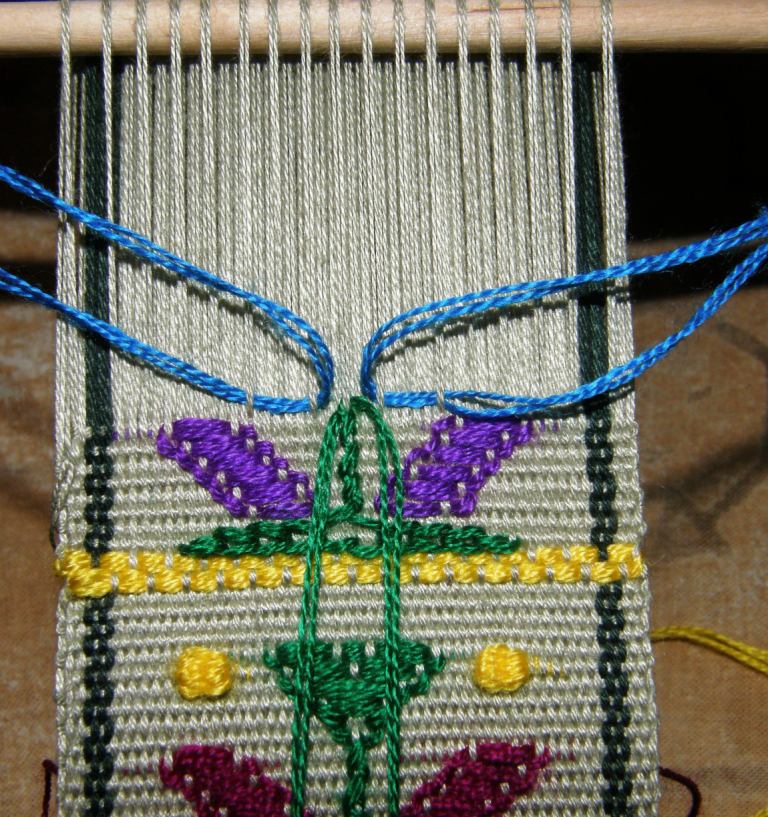
I have put the full tutorial for the simple warp float technique shown above on a new tutorial page along with two videos I made that show the process. In this technique, warps of one color form a design which sits on a background of horizontal stripes. By working slowly through the steps and the two follow up tutorials on warp floats, you will build up the skills necessary to weave the kinds of pieces where floats of two colors are used to completely cover the surface of the weaving. This is the technique used in the yurt band piece below.
My yurt band reproduction moved along this week and, after having done a couple of repeats of the design, I decided that I had had enough practice on this piece and that I would make a new warp adding some plain weave and weave it again to make something useful. So it has finished up like most of my samples with a zip and will be used to store stuff or gifted. Actually, I wouldn’t mind weaving it this size again but on a much longer warp and sewing it onto brown suede for a laptop bag.
Now to chart the designs on these other yurt band pieces. I know I have shown these here before but they are well worth another look…so gorgeous! The designs are very similar and, after having charted the one above, I am sure that it won’t be too hard to do these.
Chris Buckley in Beijing was kind enough to allow me to use these images of yurt bands in his collection. The band immediately above left belongs to Lisa and Ryan Matthews. Remember that there are tutorials on my blog for weaving the red and white border design as well as the yellow and brown one.
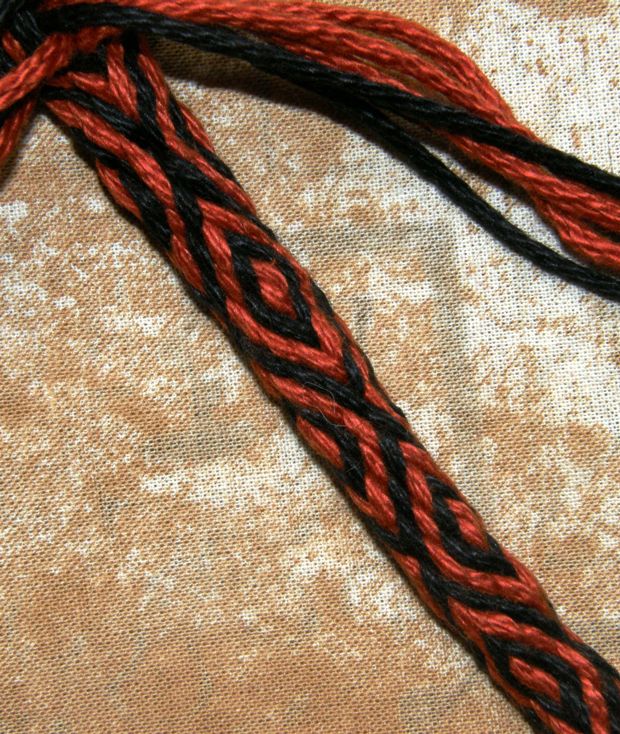
I got a little braiding time in this week too but couldn’t find the Margarita braid that I had started for the tutorial I posted here. I suspect my cat made off with it during the night so I made another.
Braiding is fun but I have never really used the braids for anything. One is being used to hang one of my weavings on the wall.
This braid I am working on now in the 12wpi cotton is so thick and sturdy I am sure it will make a brilliant bag handle. So I will make the braid and then think about a bag to match – kind of putting the cart before the horse.
I had started a Palma braid some time ago to use as a handle for an existing bag but the colors were not a good match and that idea was abandoned.
These are the two main braiding styles I learned with a sling braider in Peru many years ago.
Here is a summary of the steps to this braid following on from the original tutorial here:
Part 1,2,3,4,1,2,4,3,2,1,4,3,2,1,3,4,1,2,3,4,1,2,4,3,2,1,4,3,2,1,3,4,1,2, etc……..
This is turning out to be a very red dominated page especially with this, my latest project…
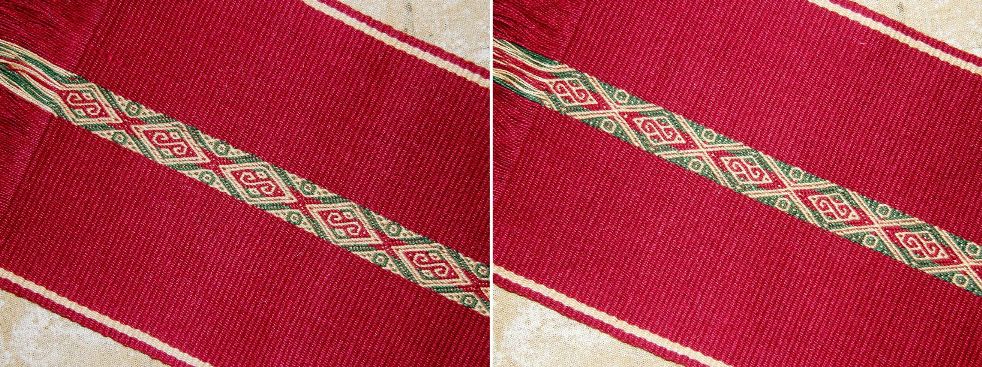
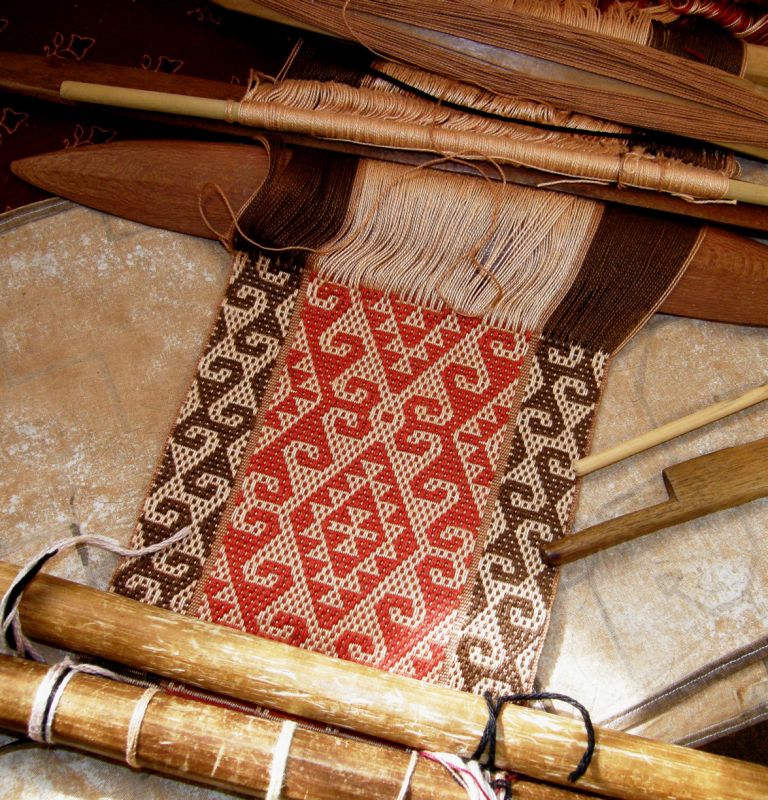
This is both faces of a piece that is destined to be part of the colorful tool bag collection I am making. The design is a classic one from Chinchero, Peru which turns up on so many of the beautiful textiles from there.
Although I have been to Chinchero and bought weavings I only really noticed this particular design for the first time when I was in Sydney of all places at the Saturday Paddington market. An American chap was promoting and selling the knits and weavings of the Cusco and Ausungate areas and amongst his goodies were some beautiful bags with this motif which he allowed me to photograph. I tried to persuade him to sell me a ball or two of the handspun yarn he had there in the basket without success. Since then, I have seen this motif over and over again in various gorgeous pieces of Chinchero and have been waiting for the opportunity to get down and chart and weave it.
It was only when someone participating in the Andean pebble weave weave-along, that I ran recently at Weavolution, asked if this motif could be charted for the pebble weave that I described in my e-monograph, that I took a good hard look at the structure. (This is one of the many things I love about the weave-alongs I run…I get to learn stuff too!)
Certain small elements of the Chinchero motif alone could be woven as a partly loom-controlled piece like the pebble weave I learned in Huancayo. The central “s” and diamond motifs as well as the “eyes” would be easy to chart and weave using pick-up and two sets of string heddles. However, the structure of the other parts of the design make this impossible if one wants to exactly reproduce it. It has to be totally weaver-controlled which means pick-up for every single weft pass.
From what I have seen, the Chinchero weavers use four colors in their design, two for the central motif and another two for the outer ones. I only used three. I confess that I started with four and my color choices were sougly that I had to unweave a good five inches and take out those warps and replace them! That’s the price you pay for not doing a sample!
I also noticed that they usually divide the design in three sections of ten warp pairs. I divided mine as nine, twelve, nine so that the diamonds would be split down the center.
In the close-up above you can see the little pebble spots in certain areas which is what had me hoping that this could be woven using the Huancayo technique.
I love looking at these different structures and comparing and contrasting.
Recently on Weavolution a link was posted to a guild gallery of Peruvian weavings purchased in the 1990s that one of the members had brought in and there was a beautiful Chinchero design band in black and white still on the loom. I love this picture as it also shows the overtwist in the handspun wool.
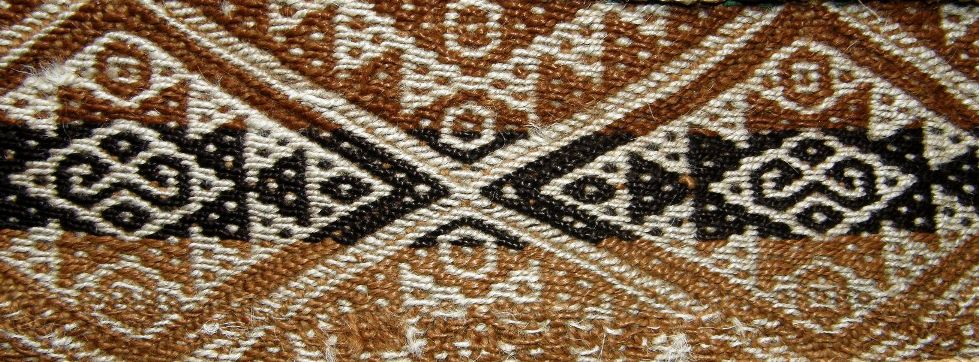
So now I have taken a closer look at the very first weaving I ever bought in Peru (actually the first in South America) on my trip there in 1996. I was in Cusco before I made my way to Huancayo and learned pebble weave and this used belt in one of the market stalls caught my eye.
I sewed this belt onto a cushion in my living room and it has been there so long that I just don’t notice it any more. At first glance you see it covered with pebble spots and it looks like the partly loom-controlled pebble weave that I learned in Huancayo. However, those two sets of long diagonals that enclose the main motif do not follow the pebble weave warp float arrangement. I wove a shoulder bag in my handspun llama fiber many years ago with a motif in the Andean pebble weave I learned in Huancayo using a design based on this belt.
You can see that the central motif is the same except that I chose to weave an “S” in the very center but I was not able to exactly duplicate those diagonals as I did in my latest project, the red piece above. Believe me, the Andean pebble weave that I learned in Huancayo is a lot faster for me with the two sets of string heddles. However, I know that the Chinchero weavers are very fast at pick-up and, whatsmore, have this motif well memorized. I haven’t woven this motif enough yet to be able to let go of the pattern chart I made and that slows me down.
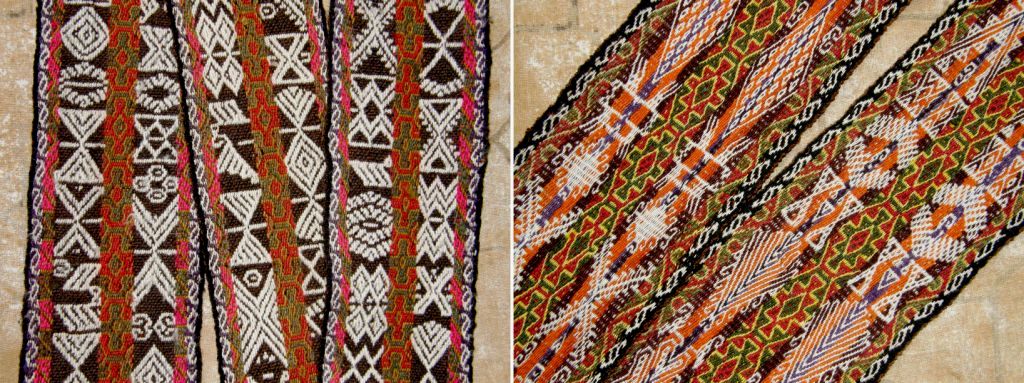
Here are a couple of other pieces I bought on this first trip to Cusco…
Although I have been a few times to Peru, I have only been once to Cusco and am looking forward to seeing it again this November during the tinkuy de tejedores – a gathering of weavers in Urubamba, near Cusco over four days. I finally registered and am so looking forward to going and know quite a few people from the US and a few from Europe from my various online groups who will be there. I will have the opportunity to meet some of the people that I didn’t manage to see on my US visit in Cusco instead! The tinkuy promises to be a wonderful event with weavers from South America and beyond meeting to share techniques. Experts in the field, including Ann Rowe and Mary Frame will give lectures and presentations on various aspects of indigenous weaving. Workshops are also being offered on Andean knitting, dyeing and weaving techniques. It is not too late to sign up!
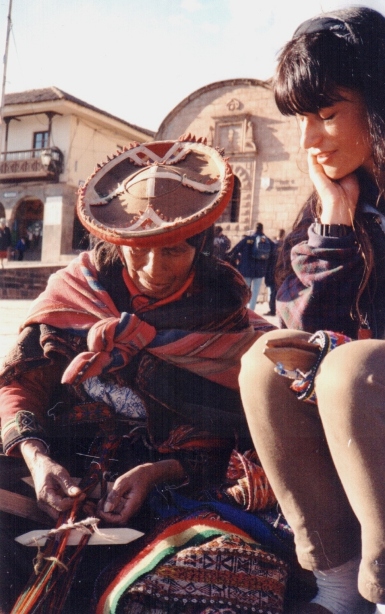
Watching a weaver at work in the main square of Cusco
I thought I would show you a few shots of my visit to Cusco and the Scared Valley in 1996.
I am wondering how much Cusco may have changed.
I have to admit that I was slightly disappointed at first as I was expecting to feel some sort of spiritual vibe from the place similar to what I had felt in Kathmandu when I was there in the mid 80s.
It was soon obvious that I wasn’t going to experience this sitting in the main plaza of downtown Cusco and my special place turned out to be Ollantaytambo.
I felt it as soon as I stepped off the bus at sunset.
My bus had broken down and we had gotten in late after having repaired the mechanical problem with banana skins!
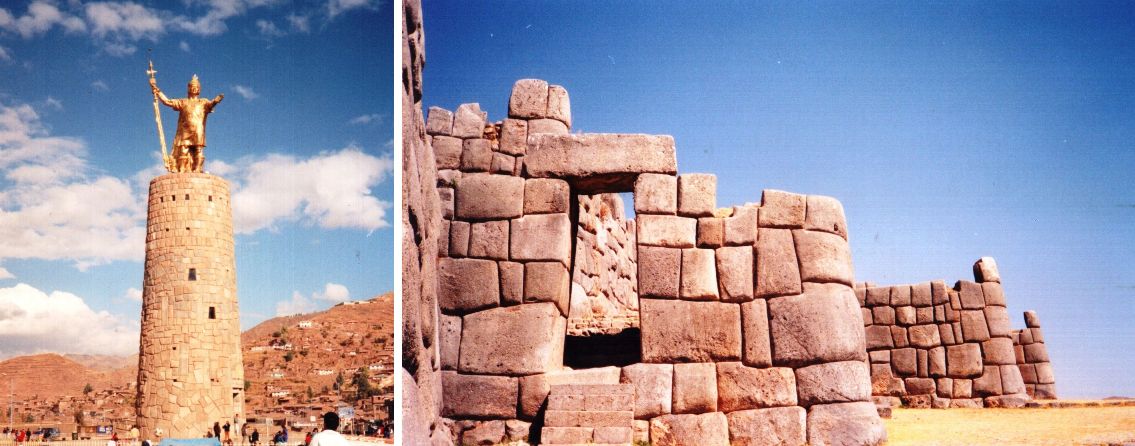
The Sunday market at Chinchero. I bought one of the typical hats and caught the woman at right watching me, probably wondering what in the world I was planning to do with it. I smiled and walked up to her and she took off her old hat, put on the new one and handed the old one to me! I was actually very pleased to have the older one which had some character. A man, who I assumed was her son, came along and they had a good laugh about it.Walking around Cusco itself you can see the statue of the Inca king Pachacutec with whom the history of the Inca empire begins. He is behind one of the great expansions of the empire in the 15th century. The ruins of Sacsayhuaman with its examples of Inca stonework can be reached on foot from the center of Cusco.
A spinner and weavers near Pisac. The weavers are making the band that decorates the edge of their skirts. I have since learned from Nilda Callanaupa’s book that this kind of weaving is called golon. It is a twill tapestry weave.
There are lots of photo ops with the ladies and their lovely llamas. At right is the train station at the bottom of Machhu Pichu. Remember that this is 14 years ago. I had the “Cusco cough” and wasn’t in any shape to hike the Inca Trail and so I did a day trip to Macchu Pichu. Things look completely civilized in this picture but I have to tell you that when the train came in, everything went to hell! People were jumping on and throwing backpacks onto the train before it could even come to a halt. There were no reserved seats and far more passengers than seats and the guys who had spent three days hiking the Inca Trail were determined not to have to stand the 5 hours back to Cusco. I don’t think anyone stood in the end. There were bodies everywhere on the floor on top of backpacks in the aisles, four to a double seat etc….all very cozy, friendly and a wee bit smelly and we had a nice trip back!
Finally, after viewing my pictures from fourteen years ago, let me show you one of Guaman Poma de Ayala’s drawings of Cusco from his chronicle written in the early 17th century:
Finally, a reminder that my e-monograph on Andean Pebble Weave now has an appendix with instructions for weaving this technique on a four-shaft loom.
I am hoping to warp up for a large pebble weave project on my friend Lisa’s floor loom on my next visit to the US. I leave in a week! Lisa and I wove a narrow band last time I was there.
Here is a new image of the wall hanging that Lydia made on her floor loom using one of the bird motifs that I wove in Huancayo.
Lydia calls this “Fish or Fowl” as she spent some time thinking it was a fish until I told her otherwise! She can see both a fish and a bird. I can’t see the fish at all!
Jennifer’s new backstrap at left and Lisa’s practice band on the right.
The appendix shows how to weave Andean pebble weave motifs using a combination of shafts alternated with pick-up. There are no string heddles involved. Plain pebble weave can be totally loom controlled.
So I am off to the US next week slowly making my way to Convergence!
I will be hanging out at the Weavolution booth and wandering the vendor hall with my backstrap loom. Please come and visit, bring your loom and weave for a while. I hope to have an Easy Weaver warped up for pebble weave too. Just come along and weave with me!
While people in my online weaving groups are posting pictures of lilies, poppies and butterflies in celebration of the northern summer, here in the southern hemisphere winter is in full swing. The Bolivian President Evo Morales suddenly declared June 21st, the winter solstice, Aymara Day and a national holiday. Bolivia is now known as Estado Plurinacional de Bolivia rather than La Republica in recognition of the various indigenous groups which it comprises and this has me wondering if we will be having Guarani and Quechua Days as national holidays too.
However, it is hard to believe that we are in the middle of winter here in Santa Cruz, Bolivia where I sit at my laptop in tshirt and shorts wondering whether I should turn on the air conditioner as the suns comes around the building and throws golden rays through my bedroom window.
The highlands are experiencing their dry season and it is COLD. I spent most of one July and August up in Potosi at 4000 meters in a shabby room in a backpacker hostel – bare cement floor, pinned down in my bed under kilos of thick hand woven blankets and still cold! I remember trying to squeeze myself into the thinnest possible package in order to fit under the tiny trickle of hot water that came out of the electric shower head. The lowest possible water pressure was the only way to get hot water. Washing clothes in the cold water brought tears to my eyes!
At left you see dry, dusty and sparsely vegetated Potosi with its landmark mountain Cerro Rico whose silver deposits sustained the Spanish economy for centuries.
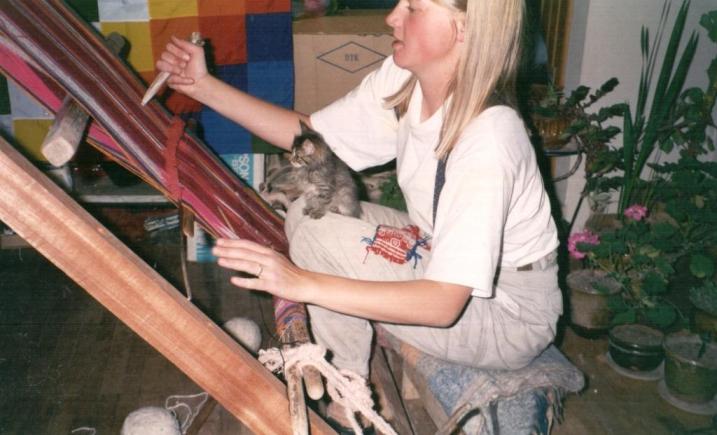
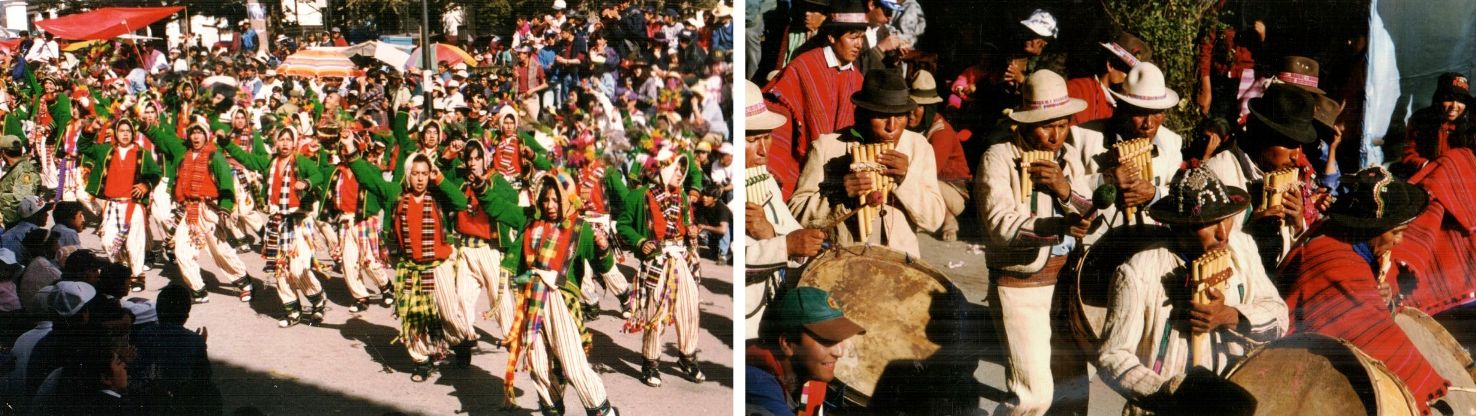
LEFT: Miners keep effigies of the devil, whom they call El Tio, in various places within the mines as they believe that he is the owner of the minerals and needs to be appeased with offerings of cigarettes, coca and alcohol. RIGHT: You can beat the winter chills with a soak in the thermal waters of the volcanic crater lake at Tarapaya. I must confess that this photo was taken on a second visit to Potosi in January when it wasn’t so cold. Rumors that there are whirlpools in the center of the lake which suck people in keep most visitors in the cement pools in the valley below. I kept close to the edge of the lake at all times!On my first visit to Potosi in 1997, I met Ulla, a Danish girl who was staying on in Potosi after having spent a year there as an exchange student. We learned to weave together with sisters Julia and Hilda. As Ulla didn’t have a patio, she set up an oblique loom in her warm little apartment and was able to weave comfortably there. It certainly beat having to bend over the grond loom. On her lap, apart from the kitten, you can see the “saca” or little woven sample that the weavers use to help them remember how to weave the designs.I was fortunate to be in Potosi on August 31st for the Chu’tillos festival which celebrates San Bartolome. Dancers in typical costume from all over the province of Potosi parade in the street on the first day followed by dancers from all over Bolivia on the second. The best part is actually the weeks leading up to the festival as the groups rehearse late at night in the empty streets and laugh and chatter and have a lot of fun while doing so.
Bolivia extends from the dry, dusty highlands to the lush green lowlands known as the “oriente”, where I live. They are like two totally different countries in so many ways. In recognition of that, Bolivia has not one but two national flowers, the patuju from the oriente (below left) and the kantuta from the highlands (right).
Both contain the colors red, yellow and green, the colors of the Bolivian flag. Santa Cruz abounds in flowers, trees and greenery at all times of year. It just never really feels like winter. Electric cables disappear within mazes of tree branches and it sometimes feels like the city is on the verge of being swallowed by the jungle that lurks on its outskirts.
The “tajibo” and “torobochi” trees that line the streets.The pattern barely shows on the back of supplementary weft patterned pieces
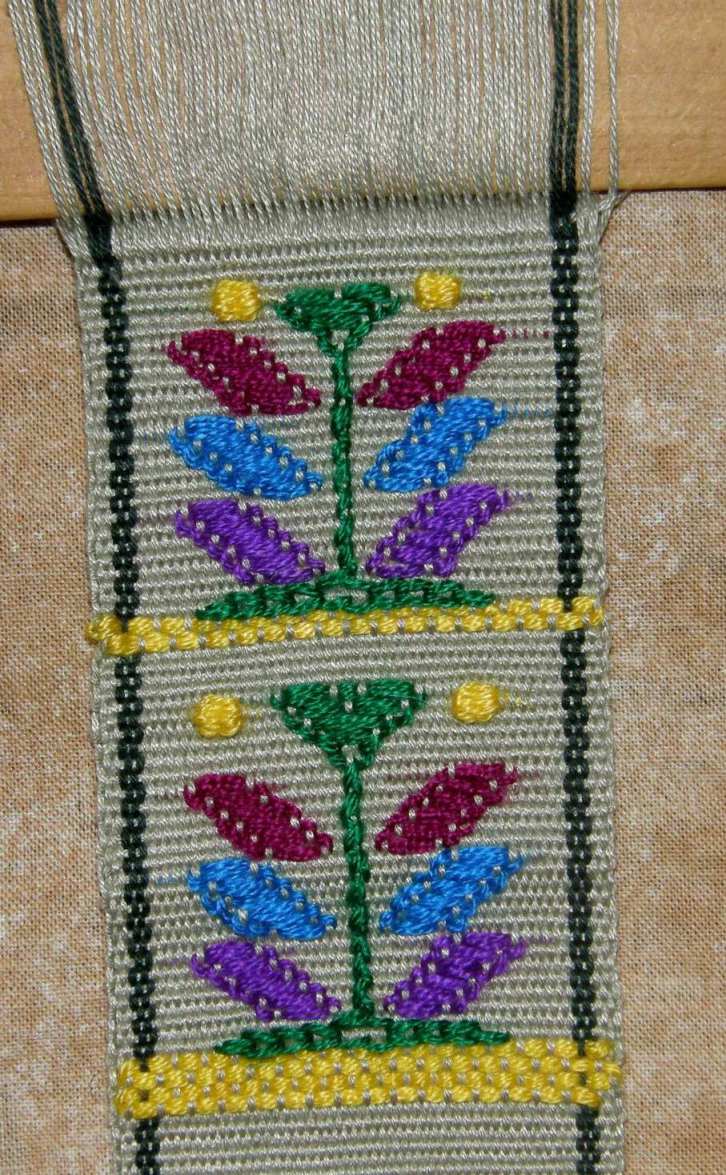
So with all this in mind I have been weaving some sunny tree and flower designs in the single face supplementary weft patterning technique that I learned in Guatemala in Santa Catarina Palopo.
This is a fun technique with little or no counting involved which allows you to play freely with shapes and colors.
The resulting weaving looks like a piece of embroidered cloth except that the “stitches” only appear on one side of the fabric.
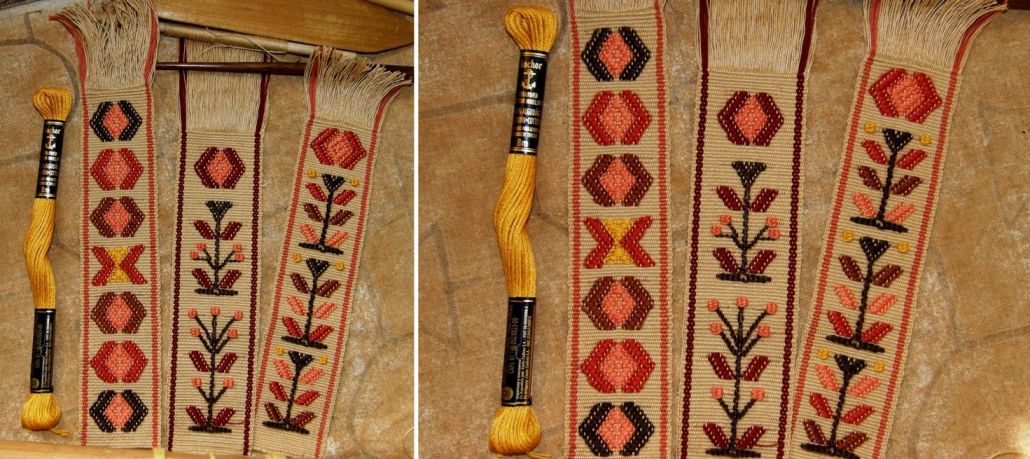
Bookmarks made with Guatemalan tree and sun motifs
Last week when I started the tutorial on this technique, I was using acrylic threads that I had brought back from Guatemala to create bright mutlicolored trees on a green background, pictured at left.
I decided to buy some embroidery floss to work with and it took some time to get just the right thickness to go with my chosen ground weave warp. The ground weave is a 50 wpi cotton and I used 4 strands of embroidery floss to do the patterning.
The 50 wpi warp produces a wonderfully thin cloth just right for bookmarks although the pattern wefts do add some bulk.
So, let’s continue with the tutorial.
I have done a recap of what I showed you in Part 1 of the tutorial last week on a video. I have used thick cotton and only a few warps to demonstrate the picking of the warps for the two patterning sheds, the placement of the patterning sticks in the loom, the technique for opening the patterning sheds and the weaving sequence. I don’t recommend using such thick yarn for your own supplementary weft project!
All the colored wefts that form the patterns pass under or wrap around the warps in the two patterning sheds. This green piece has 86 ends between the dark green border stripes.
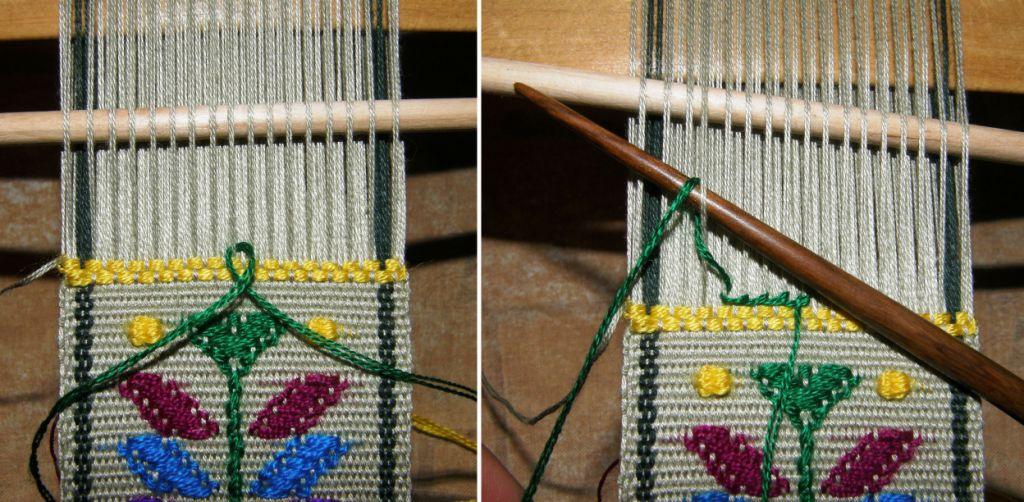
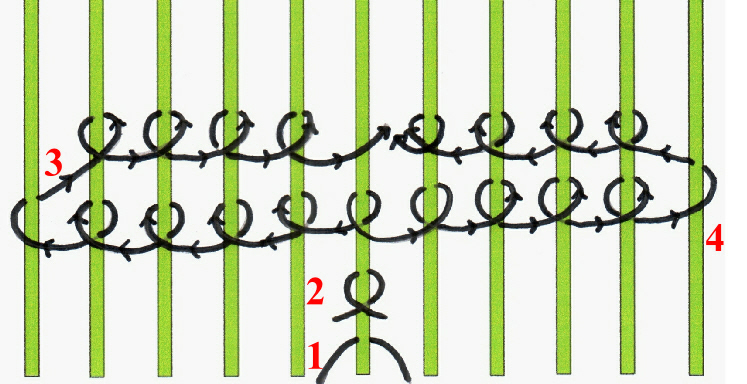
The base of the little Guatemalan tree is a double horizontal line. STEP ONE: To form this, place a strand of around 40cm/16″ of supplementary weft under the central patterning warp. The two ends on either side should be of equal length. The central warp in my set up just happens to be in patterning shed 2 so I have started in the heddle shed.STEP TWO: Cross the ends of the supplementary weft. STEP THREE: Start wrapping the left hand end around the 5 warps to the left of the central warp and return wrapping around 4 warps. The diagram below shows how this is done.The steps for horizontal wrapping are shown here. The left end of the weft wraps to the left and returns and the right end wraps to the right and returns. These four steps all take place in the same pattern shed. The wefts wrap around four warps on their return journey to the center. STEP 5: Pass the main weft through the complete shed.
Open the next shed, which is, in my case, the shed rod shed and pass the main weft.
Open the heddle shed and raise the patterning warps in patterning shed 2.
Patterning shed 2 contains my central warp.
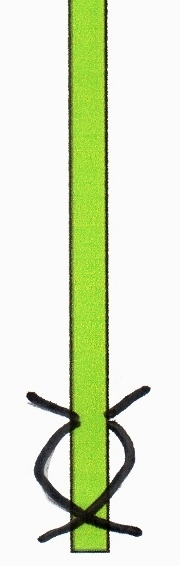
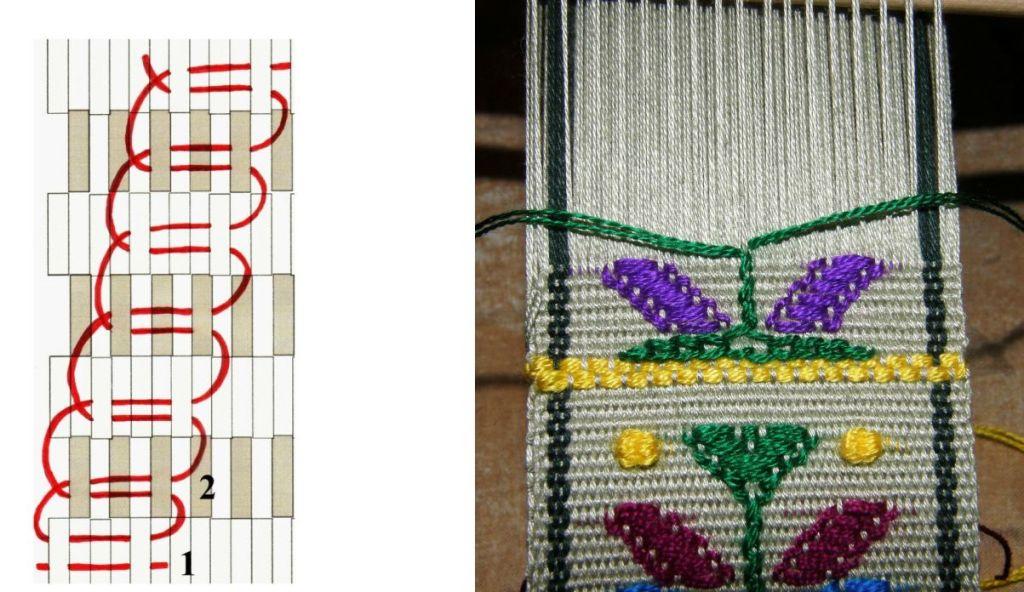
Every time I raise the warps in patterning shed 2, I will wrap my green tree base weft around the central warp to form a stem. The drawing at left shows the very simple vertical wrapping method.
The stem, therefore, is woven only in every second shed.
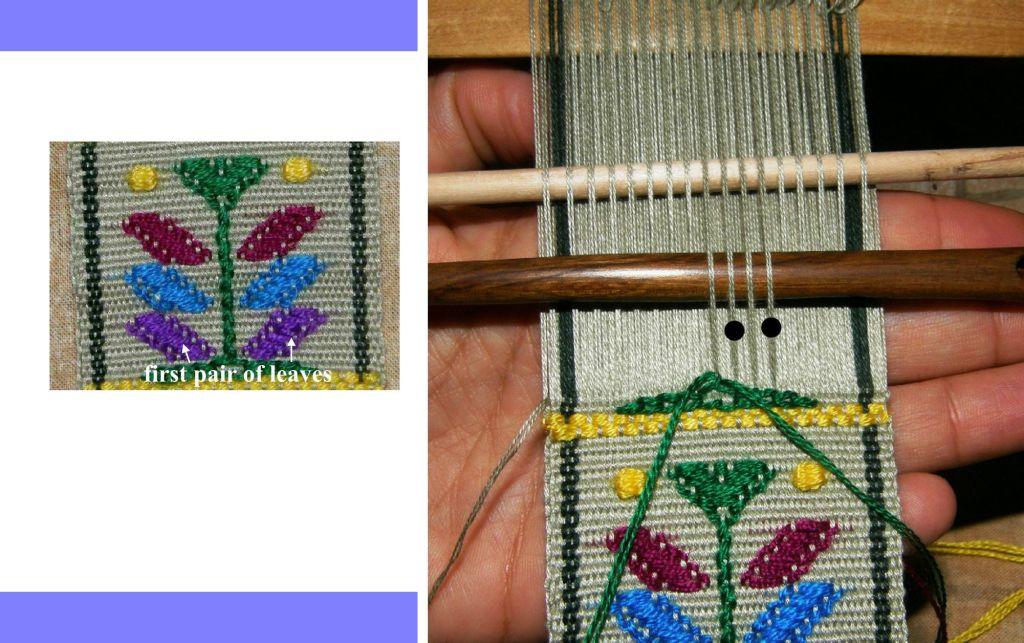
In this shed I will lay in the wefts to form the first pair of leaves.
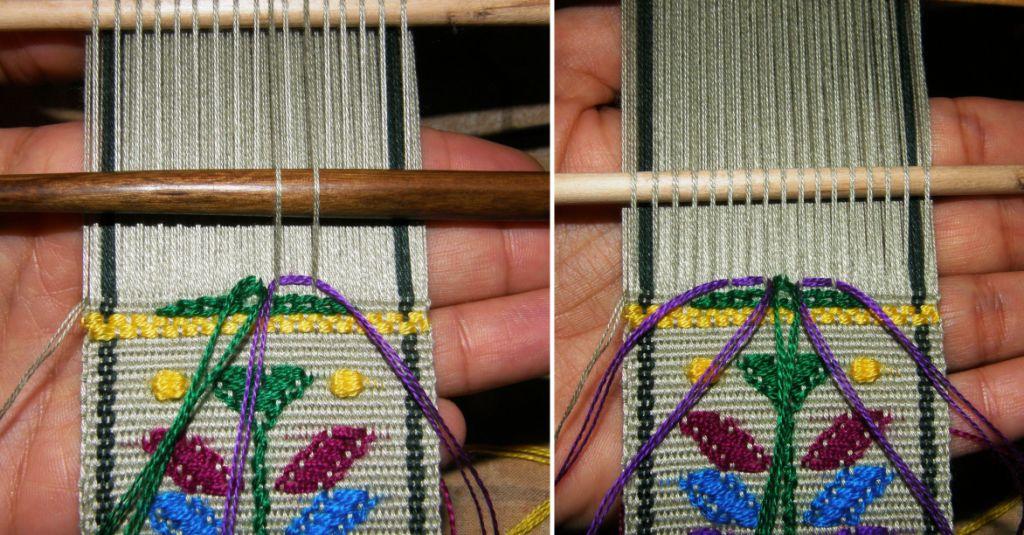
Cut two lengths of weft around 24cm/9 1/2” long for the two leaves.
Starting the second leaf.
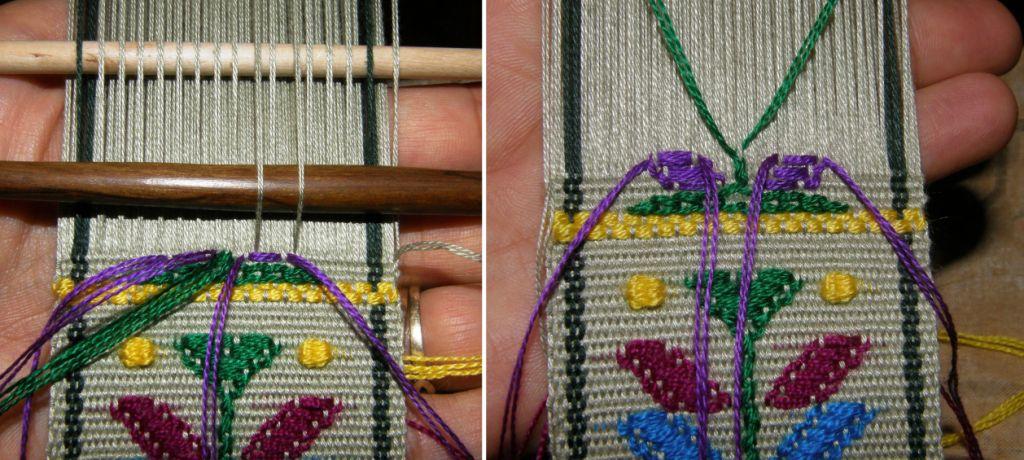
The little Guatemalan tree has three pairs of leaves and the stem continues growing until it eventually widens out into the tree top.
Once you have woven your six leaves, I am sure that it will be very easy for you to see how the tree top is formed.
You are weaving your stem with two strands of weft – one will start traveling to the right and one to the left while filling in the tree top in the same way that you filled in the leaves.
Finally there are the little spots that the Guatemalan weavers like to use to fill in blank spaces between motifs. I used them in my bookmarks as flower buds. You can see two yellow spots in the photo above.
To make a spot, you use two adjacent patterning warps as shown in the drawing above left. Use a strand of weft half the thickness that you would normally use. Around 12cm/5″ length should be plenty. First pass the weft behind the warp on the right as shown. Then join the two ends together and go wrapping them back and forth in the same shed about six times. Pass the ends through the main shed and out the back of the weaving.
The drawing above right shows how to make a diagonal line for a branch.
It is very easy to improvise with this technique. Have fun with it!
#############################################
It seems I was in the mood for autumn colors as I got back to work on the yurt band piece that I started a while ago and really had a good time picking that up again. At first I found it very confusing after having spent so much time on Andean pebble weave lately. Usually one is picking up light warps on a dark background or viceversa but in this technique you pick up lights for one weft pass and then darks for the next. This is a simple warp float technique ( see this tutorial and this one) that can look a lot like Andean pebble weave but is totally different in structure. I copied the design from an image of a Turkoman yurt band that my friend Lisa had showed me on the net,
The original Turkoman band on the left next to my reproduction. I left out the triangles that run down the sides separating the two main pattern areas.
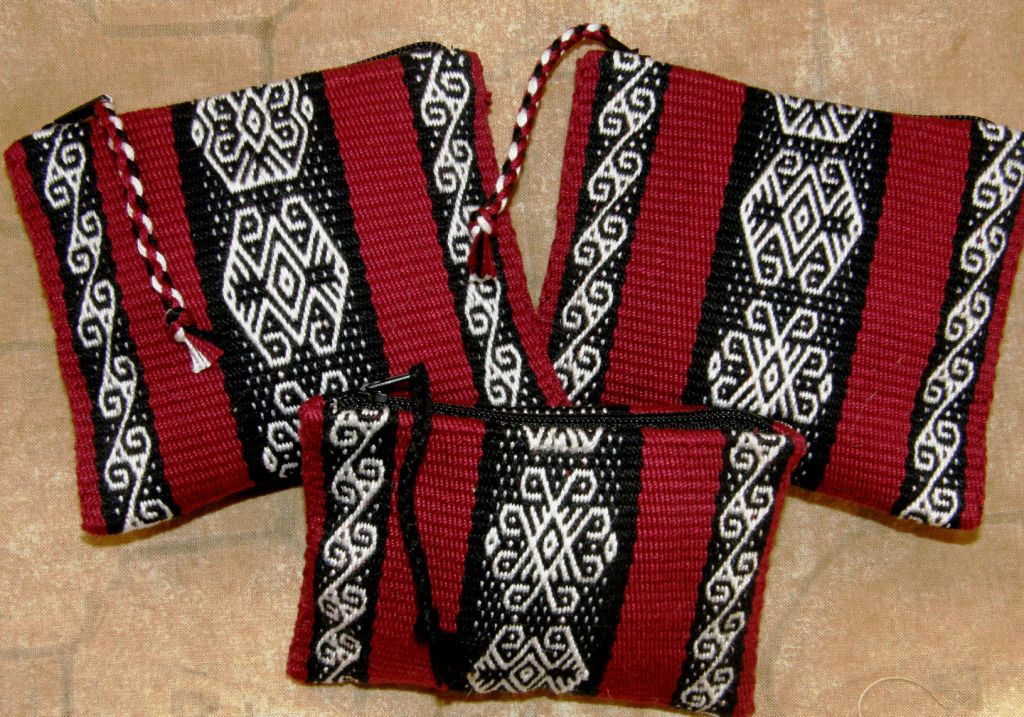
The other project I worked on this week was finishing off the red and black piece, sewing it up into three coin purses and putting in those dastardly zips! I believe that I am actually getting the hang of these zips now.
Three coin purses with North and South American motifs in Andean pebble weave.
Today, (July 1st), the appendix to my e-monograph with instructions for weaving Andean pebble weave on a four-shaft loom went out!
Those who have already purchased my monograph will automatically receive it and it will be included in all future downloads of the monograph from now on at no extra cost.
My testers have made some lovely things on their four-shaft looms which I have been showing here on my blog over the last few weeks.
Lisa wove a band with several small motifs. Lydia made a wall hanging with a bird motif of Huancayo and Jennifer is going to turn her piece with the design from one of the Russian Old Believer belts into a backstrap.
Finally I would like to show what Helena, who is in the backstrap weaving group at Weavolution, has made in supplementary weft patterning using various colors and Mexican designs. Beautiful!


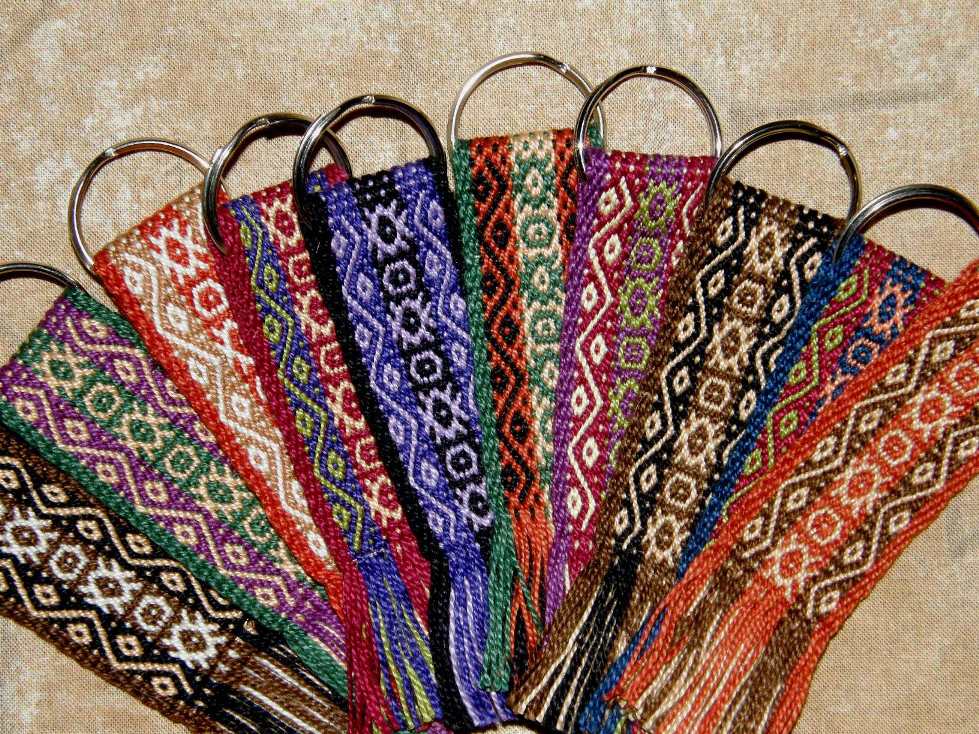 With all the loose ends that needed tying up and the time spent working with Syne Mitchell to get the print version of my monograph ready, I didn’t expect to get any weaving done this week. But then I had an idea and ended up weaving a bunch of keyfobs. I thought it would be fun to give a keyfob away with the first 20 copies of Andean Pebble Weave. So I sat with my basket of cotton thread and had a great time combining all sorts of colors to make the 20 keyfobs to accompany the books. I combined several small pebble weave motifs and now I can definitely see the benefits of weaving the same design over and over as some indigenous weavers do. I could probably weave this with my eyes shut now!! As long as there were new colors to combine it never got boring. Only one or two color combinations are repeated as I made tiny warps and wove one at a time.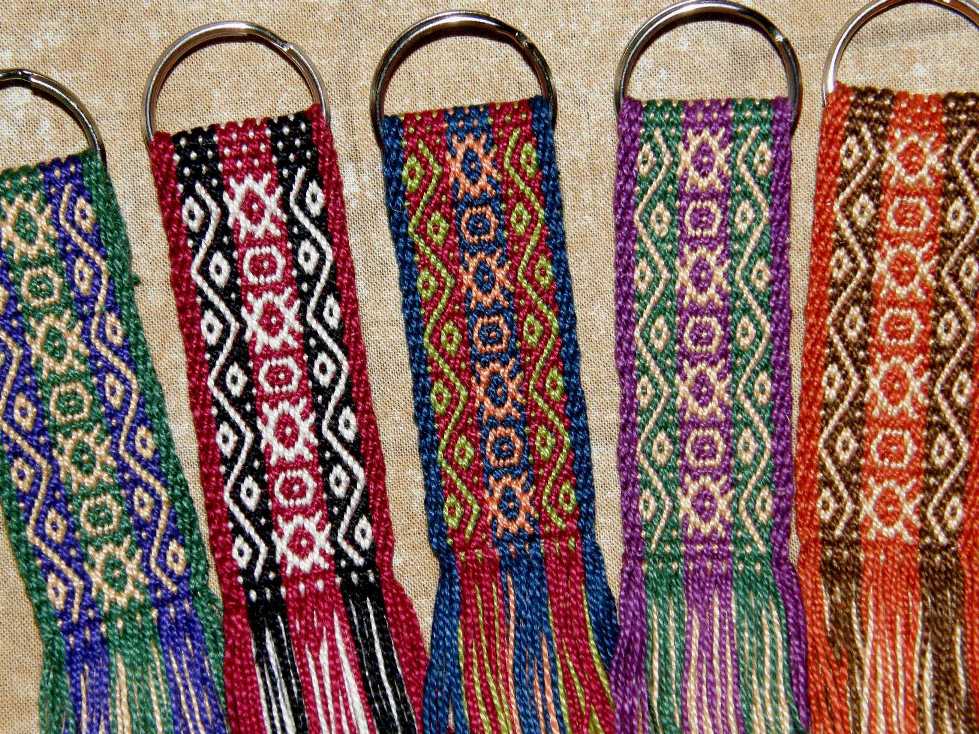


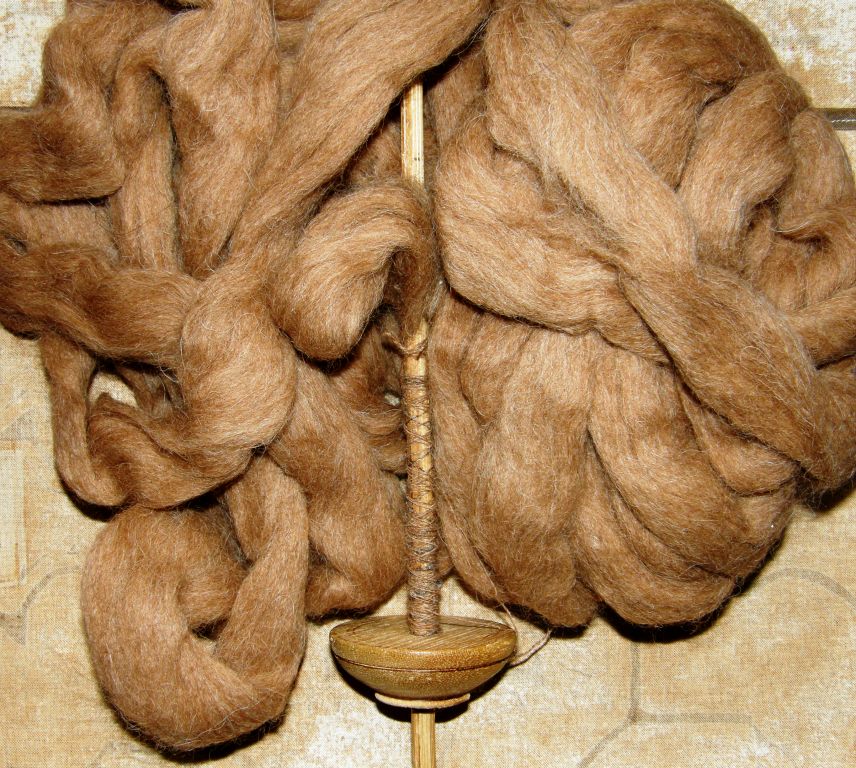 I am also taking my wobbly Bolivian drop spindle and some of the alpaca fiber that my friend Janet gave me on my last visit. I just spun a little to get it started on the spindle and it is so so beautiful to spin! This is not the first alpaca I have ever had to spin. I bought some many years ago in Peru and it was in a dried-out, brittle and filthy state. I lost a good third of it in the cleaning process and I knitted rather than wove with it. Now I have this prepared smooth luscious fiber to work with – what a dream! It almost feels like cheating! I’ll be spinning it to weave with on my backstrap loom.