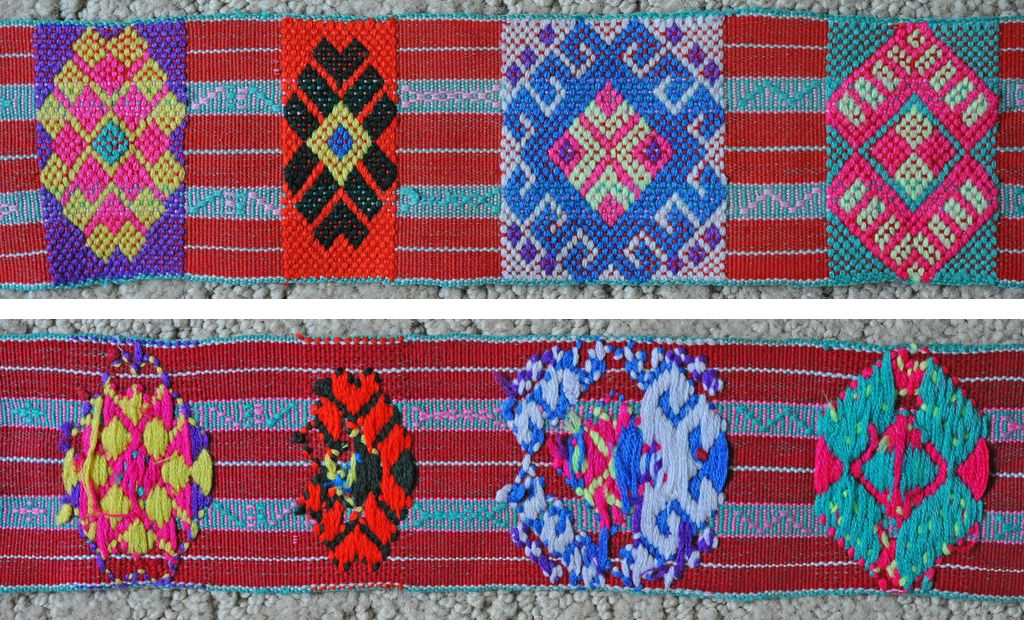
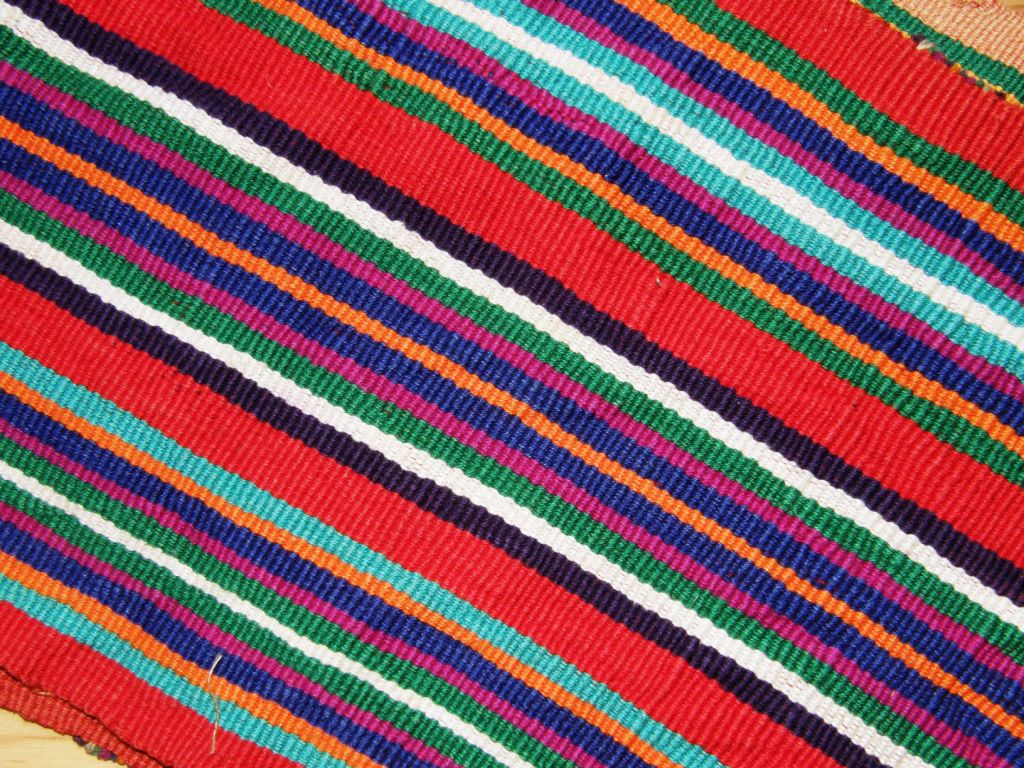
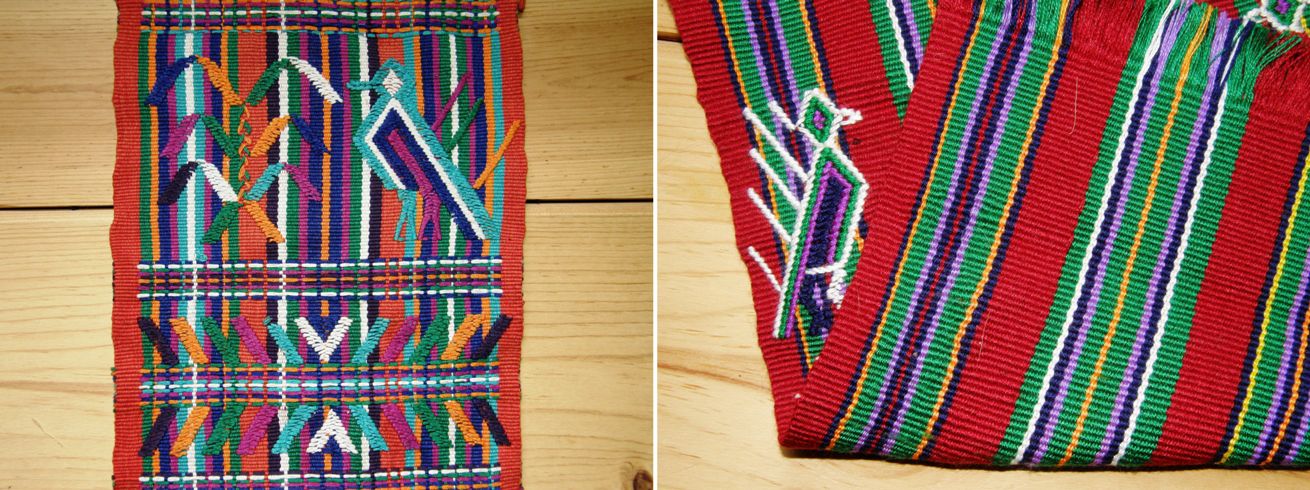
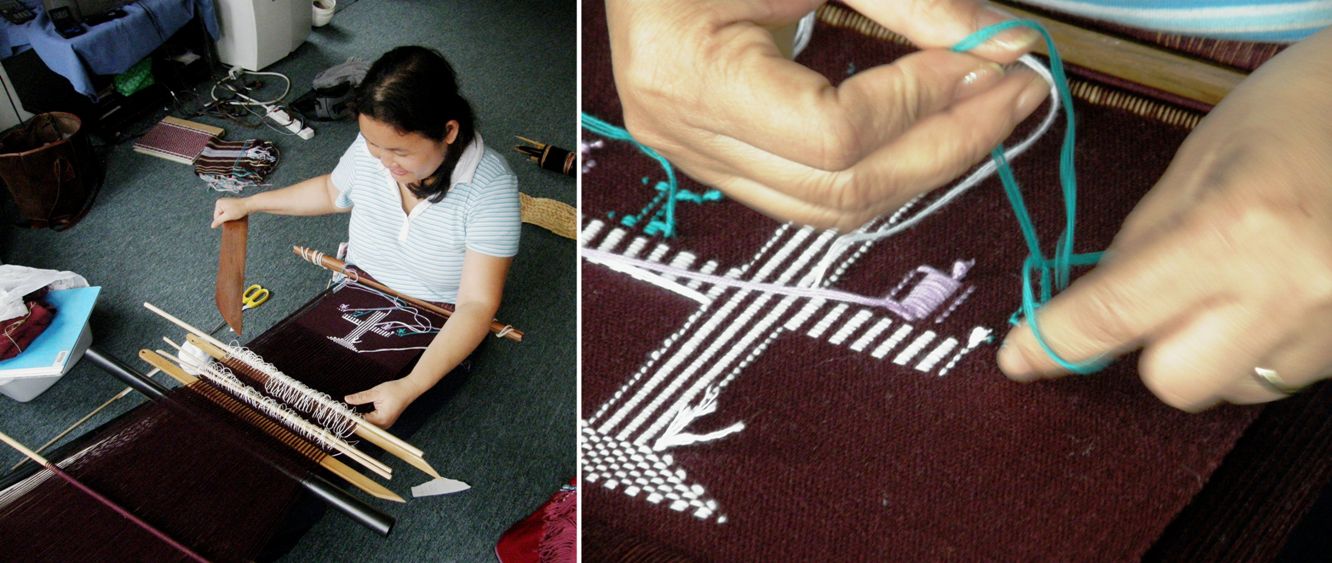
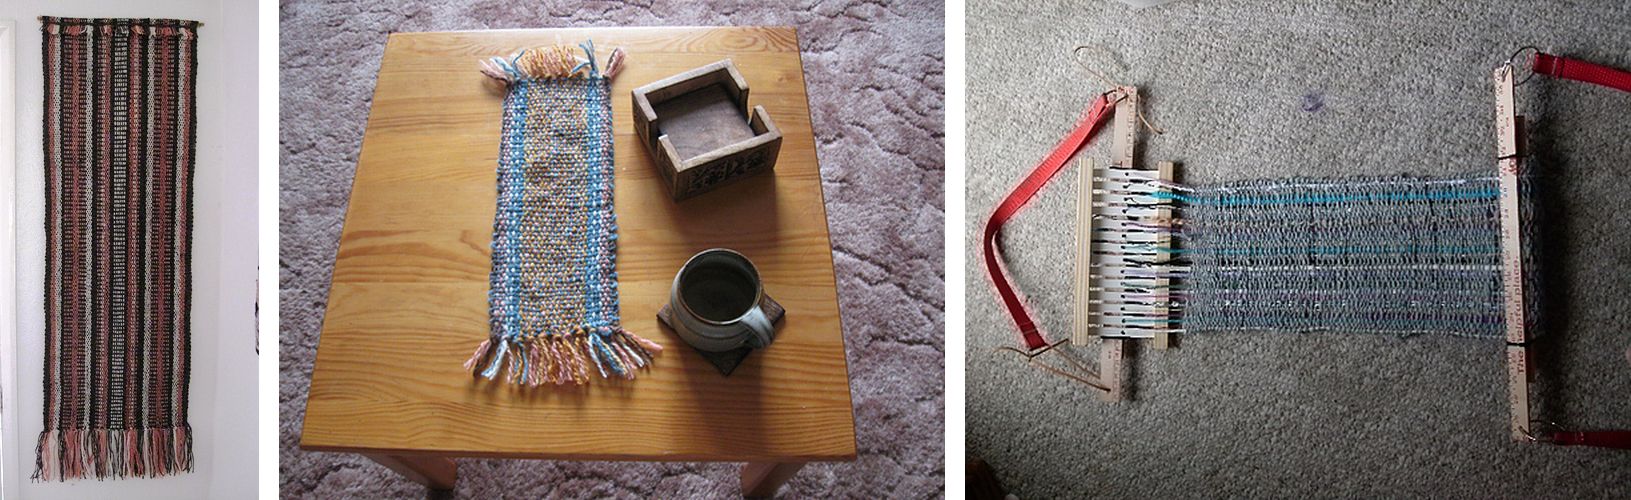
Backstrap Weaving – Bag Mad

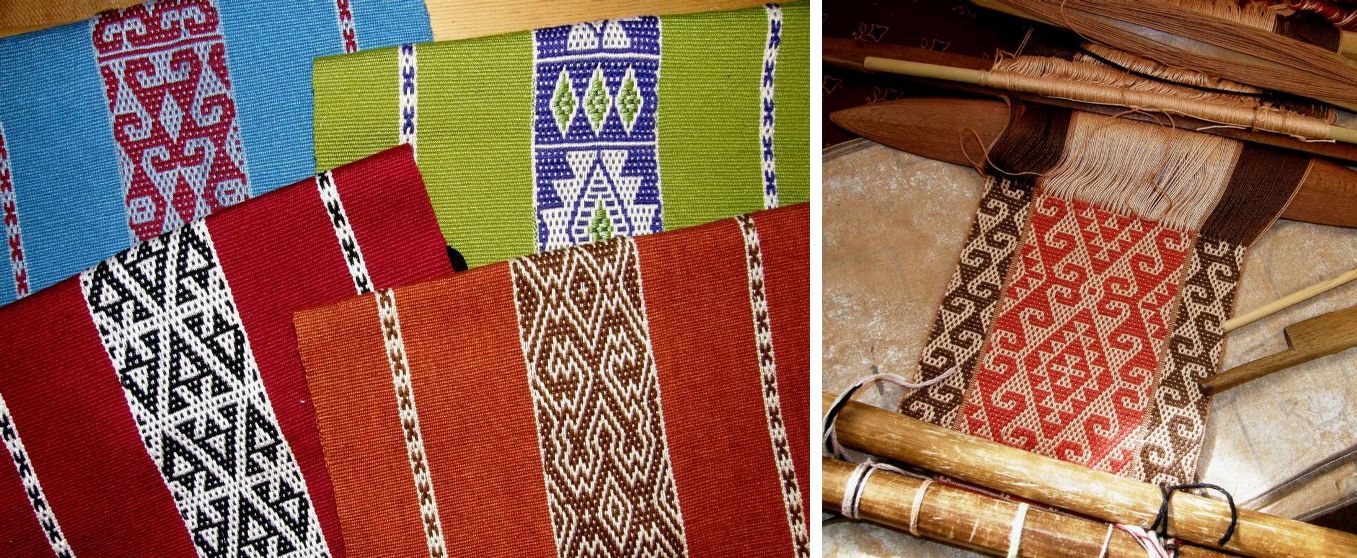
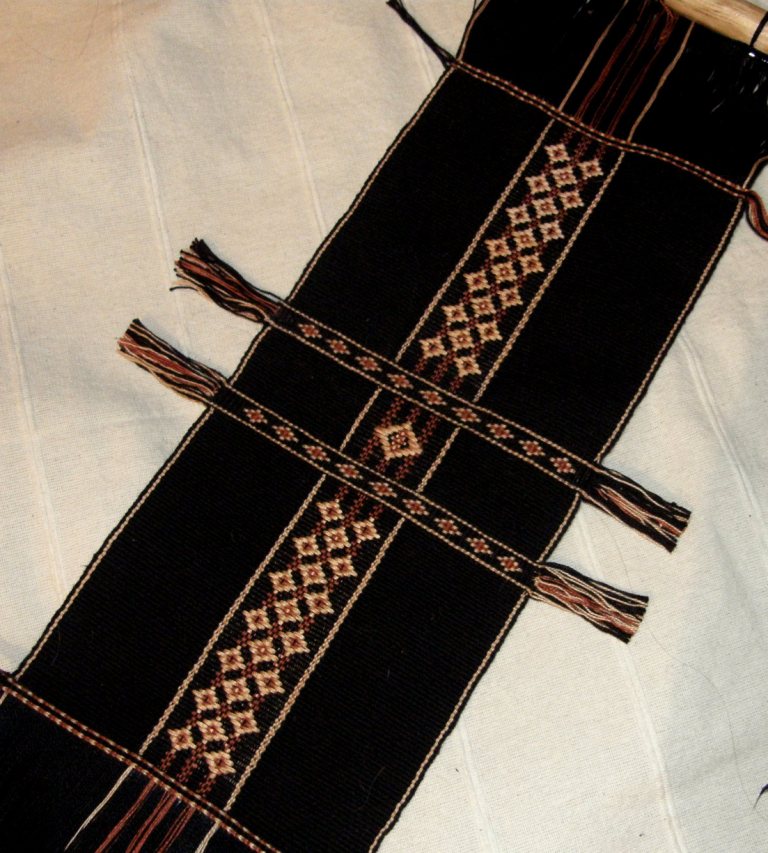
Look out…I have been sewing again. I challenged myself in my blog post last week by saying that I need to sew this piece, with its supplementary weft pattern and weft twined bands…..


into something that would extend my meager sewing skills. So, I had to resist the temptation to simply fold it, flip the end over to make a flap and sew up the sides…done, easy, onto the next project. I decided that I wanted to make a kind of sausage bag, that is, one with a flat bottom and rounded sides – a sewing challenge indeed for this inexperienced sewer. I Googled away for instructions and found none. How to get the straight edge of the main piece to bend neatly about the rounded ends??….for me it was kind of like trying to get the square peg to fit the round hole.

I will show the still unfinished bag to you a bit later and then you can judge for yourself whether I succeeded!

And now I can even better appreciate why so many bags made by the weavers I have met here are simple rectangles, folded in half and sewn up the sides. Of course, it makes perfect sense after having worked weeks to weave a piece to want to use it ALL…not cut it up, tuck and pull it about to make an ”interesting” shape and besides, it will hold more that way too.

So, I have been looking through some of my photos of weavings and here and there online and have some bag pictures to show you. What a wonderful variety of designs, structures and materials I saw but all with the same highly practical shape…a basic square or rectangle.

The bag on the left is knotted using a fiber extracted from a plant related to the pineapple which is called “garabata” here and is made by the Ayoreo people of eastern lowland Bolivia. The one on the right, from Betty’s collection, was made by people of the hilltribes of northern Thailand and appears to be made up of several bands sewn together.

The Ayoreo work their pieces as rectangles which are folded and then sewn together at the sides. According to Peter Collingwood in The Maker’s Hand, bags or bilums, some made with the same knotting technique used by theAyoreo, are made in Papua New Guinea but worked as a tube rather than a flat piece….only one seam to sew.

Above left is a dual-pocket cotton saddlebag or alforja from coastal Ecuador. Both ends of the woven fabric are folded in toward the center to form the two pockets. On the right is a cotton bag from tropical lowland Peru. You might recognize the design from my recent placemat project.

Two coca leaf bags or ch’uspas from highland Bolivia and Peru made with cotton, acrylic and wool.

The Montagnard (Vietnamese hilltribe) weavers make what they call “Bible bags” with commercial cotton thread. Verses from the Bible are often woven into the straps. Cotton satchels with zippered compartments and buckles are being made by one family in coastal Ecuador for the tourist market using ancient weaving techniques and often their own homegrown and spun cotton.

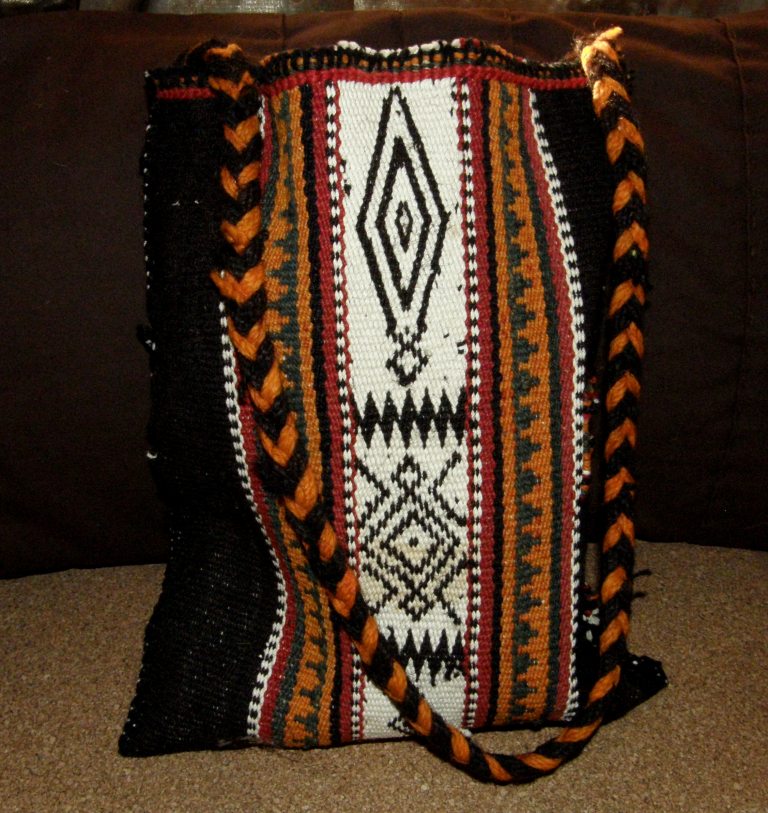
I would say that the bag made in Tinkipaya, Bolivia on the left is destined for the tourist market too. The double weave bag on the right is from Mexico and has motifs that are commonly woven by the Otomi and Huichol people.
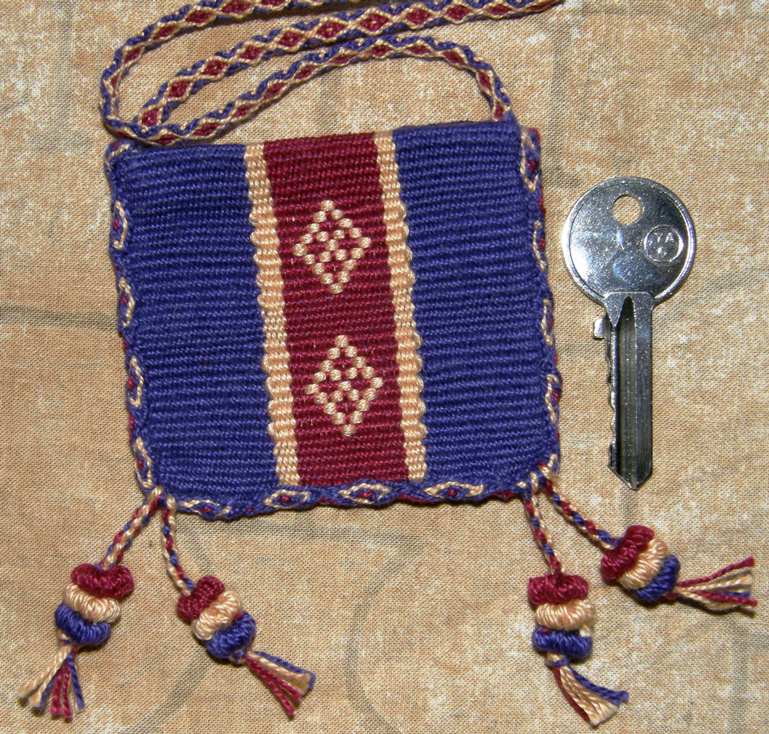
I think that the weavers make up for what may be seen as a lack of “shapeliness” in their bags by using various finishing techniques. I am a big fan of finishing techniques and I too enjoy “dressing up” a piece with pretty straps, pom poms, baubles, braids, tubular bands, cross knit looping, fringes, tassels and other frills, fluff and stuff.

The tiny amulet bag at left has a crossed-warp strap, tubular band edging, braided tassels and Bolivian-style pom poms.

The body of  ceremonial ch’uspas are quite often completely dwarfed by a myriad of tassels, giant pom poms, braids and coins making them both colorful and musical as they jiggle about on a dancer’s hip.

I love the braided treatment of the warp ends on the Mexican bag.
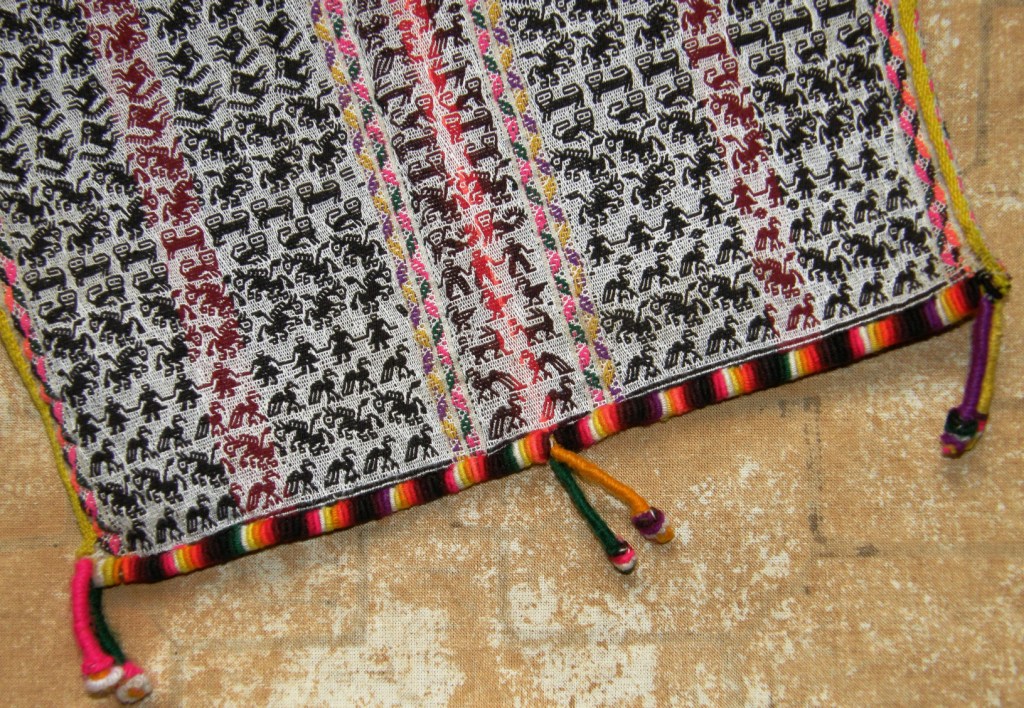
Colorful edgings are added to pieces sometimes to strengthen and reinforce the edges or prevent the tendency for fabric which has been woven with overtwisted yarn to curl . And sometimes it is there solely for decoration.
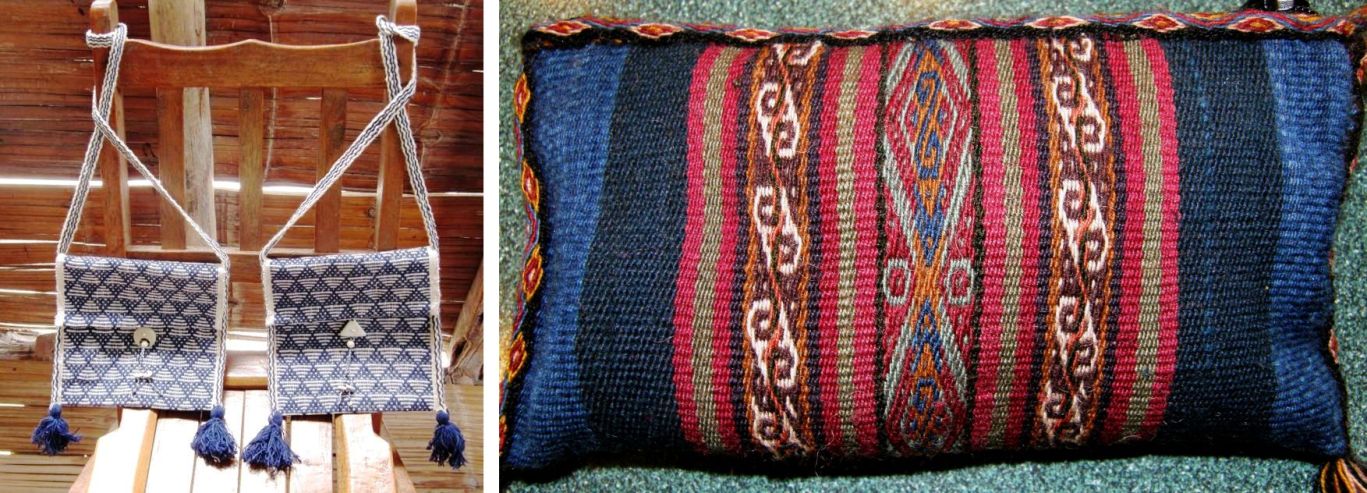
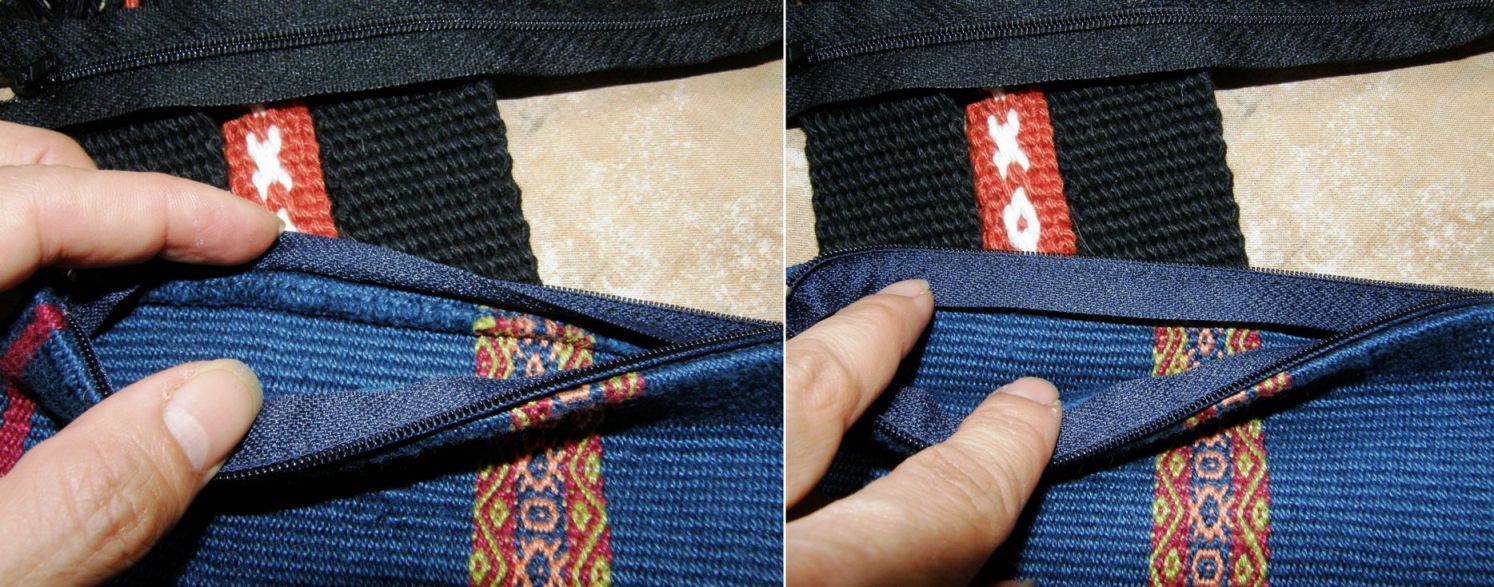
The cotton bags above left from coastal Ecuador, which have been made for the tourist market,  have been edged with plain-weave bands and have had large tassels added at the corners. The technique is the same as that used on the traditional saddlebags where the bands are used to strengthen the edges. I have been told that tubular woven bands are added to large pieces in Chinchero to help stop curling. I would say that one has been added to the small zippered purse above for decoration.
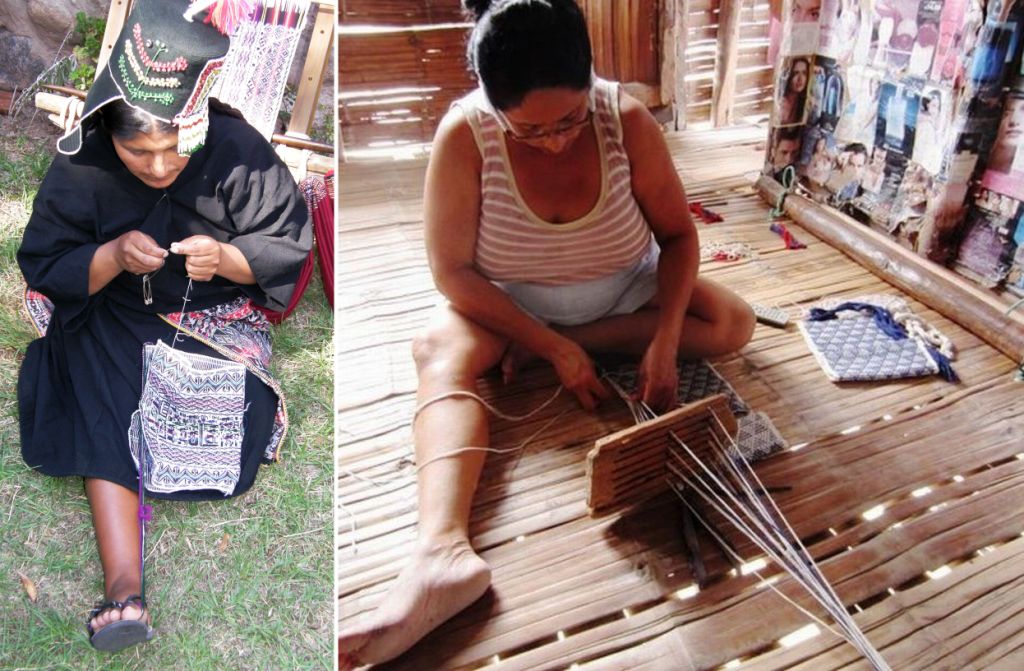
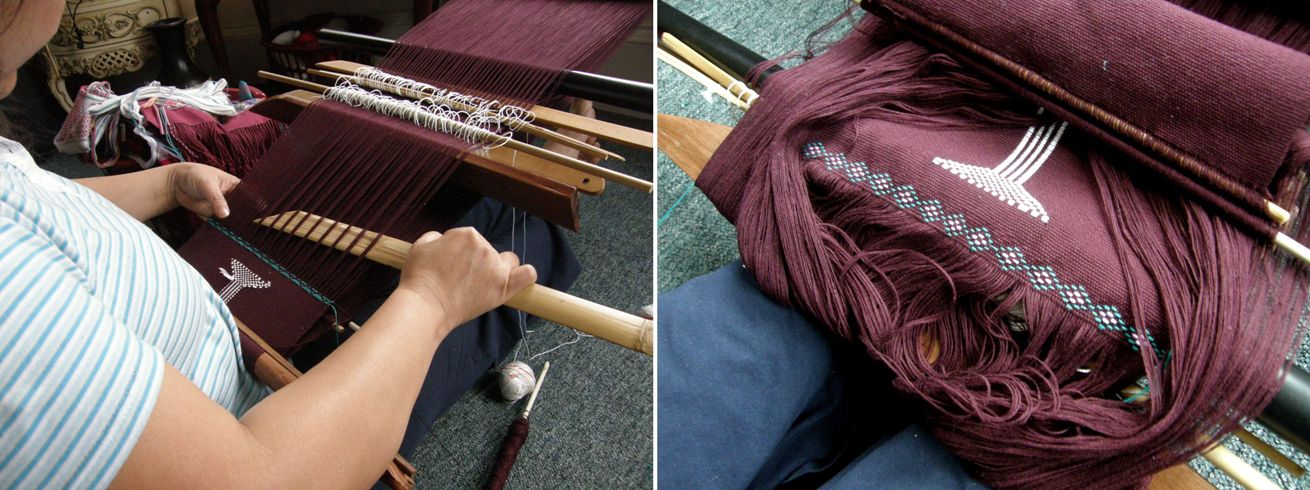
Here you can see highland and lowland weavers adding bands to the edges of their woven pieces using different techniques. The edging bands used by both weavers are sewn and woven at the same time using the weft as the sewing thread. (see the videoshere ). The weaver from  the Tarabuco area of Bolivia uses a toe and finger-tensioned warp with a heddle and loop shedding system. Trinidad from Manabí province in Ecuador uses a homemade rigid heddle to create her sheds. One end of the warp is generally attached to a screwdriver which is wedged between the floor boards and the other end to a wall beam or other fixed point.

I have yet to get a zip I like for my bag creation this week. I have just pinned a metal zip into place for the time being.
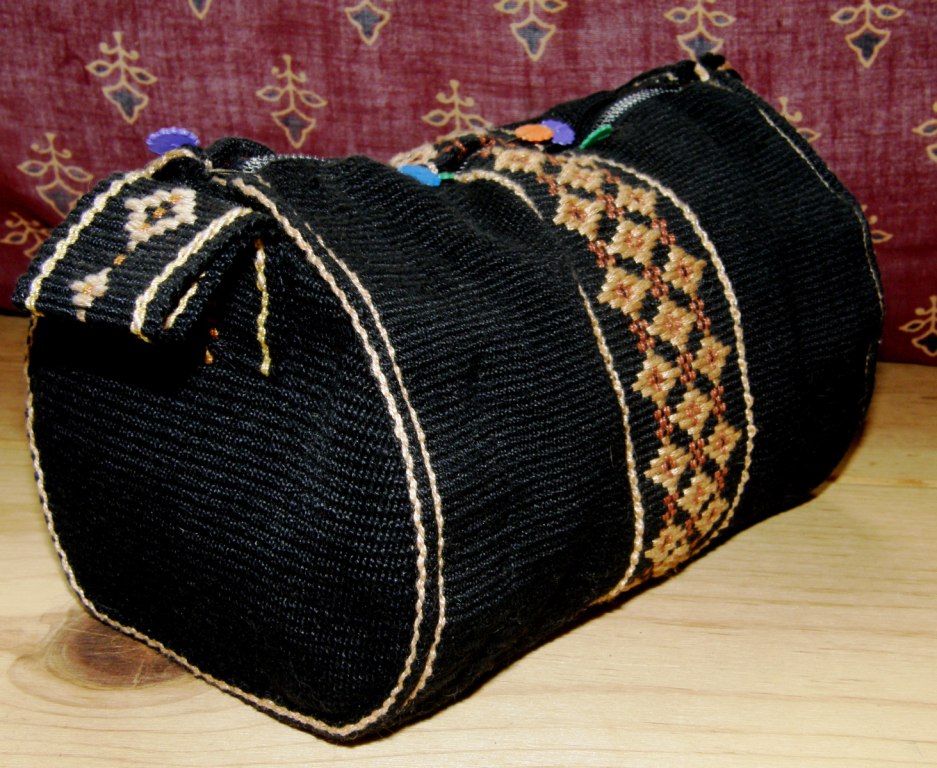
This looks like a giant sports duffel bag, doesn’t it, but it actually only measures 7″ x 4 1/2″. It’s a nice size for a travel cosmetics bag. The sides are made from left over material from one of my purse projects and were woven using the three-shed method that I describe in my Andean Pebble Weave book. This produces a nice dense piece of cloth which worked well for this purpose. I cut them after a generous application of a “stop fray” product and then came the fiddly sewing process. I made use of my sample band to add a tab…something to hang onto while pulling the zip open.

I added black-and-beige tubular bands to both sides to outline the rounded inserts but, darn, you can’t even tell they’re there!! And sadly, the weft twining ended up on the bottom. That will teach me for weaving away with no end product in mind! But, sewing skills were extended and that was the post- weaving plan.

My Huichol piece is slowly moving along…
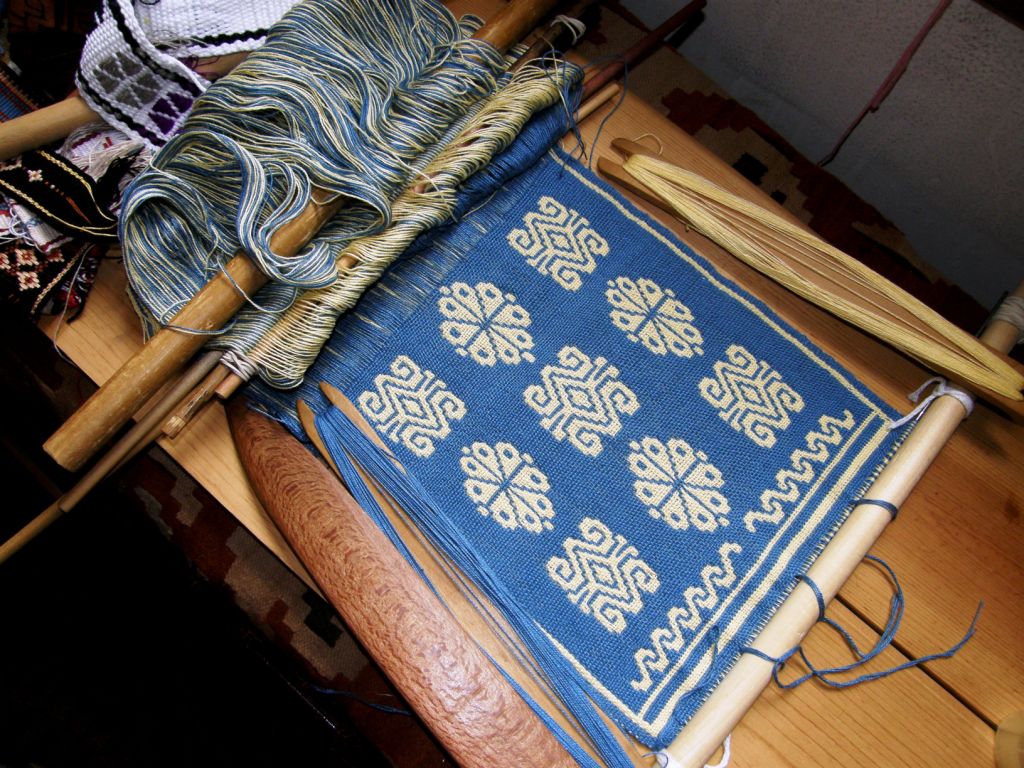
You may remember me saying that this finnweave technique behaved very well for me in that I did not need to use a reed to maintain the warp spacing. Well, it turns out that I may need to rethink that. You can see that the warps are spaced wider in the center than on the sides and I am having to fight a little with the right hand edge where the warps are threatening to scoot over next to each other.

All in all I am pretty pleased with it. I will just weave on until there is no more room to make the manipulations and see what kind of bag I can make from this. I have been searching about online for the kinds of designs that the Huichol and Otomi weave in this technique and have only come across bags and belts…..the kinds of items where you would ideally want a fairly sturdy fabric. The piece I am weaving would stand up quite well as a bag. I certainly wouldn’t call it light and “drapey” but not sturdy either. So, I was blown away this morning when I saw this on Teyacapan’s Flickr page

An Otomi shawl, or rebozo made in what I am guessing is the same technique. Look at the braided fringe treatment. Now my question is “what’s on the other side?” (see last week’s post). The other side of my piece shows the same motifs with their colors reversed but they are clearly imperfect. That is the nature of this technique. I have seen Huichol belts online that have the same “flawed” motifs on the back while on others the motifs are clearly perfectly reversible. I shall ask Karen if I may have a peek at the other side.

Doramay Keasbey described in a recent article in Handwoven magazine (Jan/Feb 2011) five different types of double weave pick-up showing both sides of the fabric to compare the motifs. Some have varying degrees of feathering around their edges but are reversible while the motifs in the finnweave example have smooth edges but are not reversible. I wrote about this article in a previous post but I thank Marsha Knox, who has been making her own experiments in double weave pick-up, for reminding me about it.

Ah well, I shall just continue with my ten-inch wide piece and dream about one day being able to make a rebozo!

Something else I played with a little this week was two-color alternating warp floats. This comes via the “Worldwide Weaving Web”.

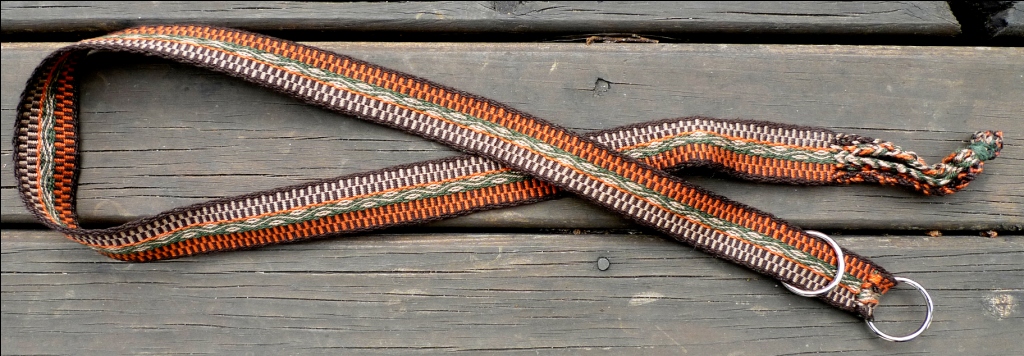
Yonat cast the first strand in the web by weaving some bands in this technique and posting them on Facebook.

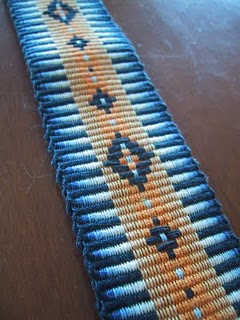
Annie (ASpinnerWeaver) picked it up and went from there creating her own piece, a guitar strap, and posting it on Facebook too.

That’s her piece pictured at left.

I saw it and immediately loved it. It reminded me so much of something but I couldn’t quite pin it down.

Someone on Facebook commented that it looked Egyptian while Annie herself remarked that it reminded her of some Hmong designs she had seen.

Yet another said it looked like a person standing with open arms and legs.

In any case I wanted to weave it.

And then I remembered a motif from Bhutan that I have in a book which has some of the basic elements. This is what Annie’s piece reminded me of.

I wove something based on Annie’s design making some changes to make it my own version.

I used a solid color stripe down the center and added in a five-span float on the outside.
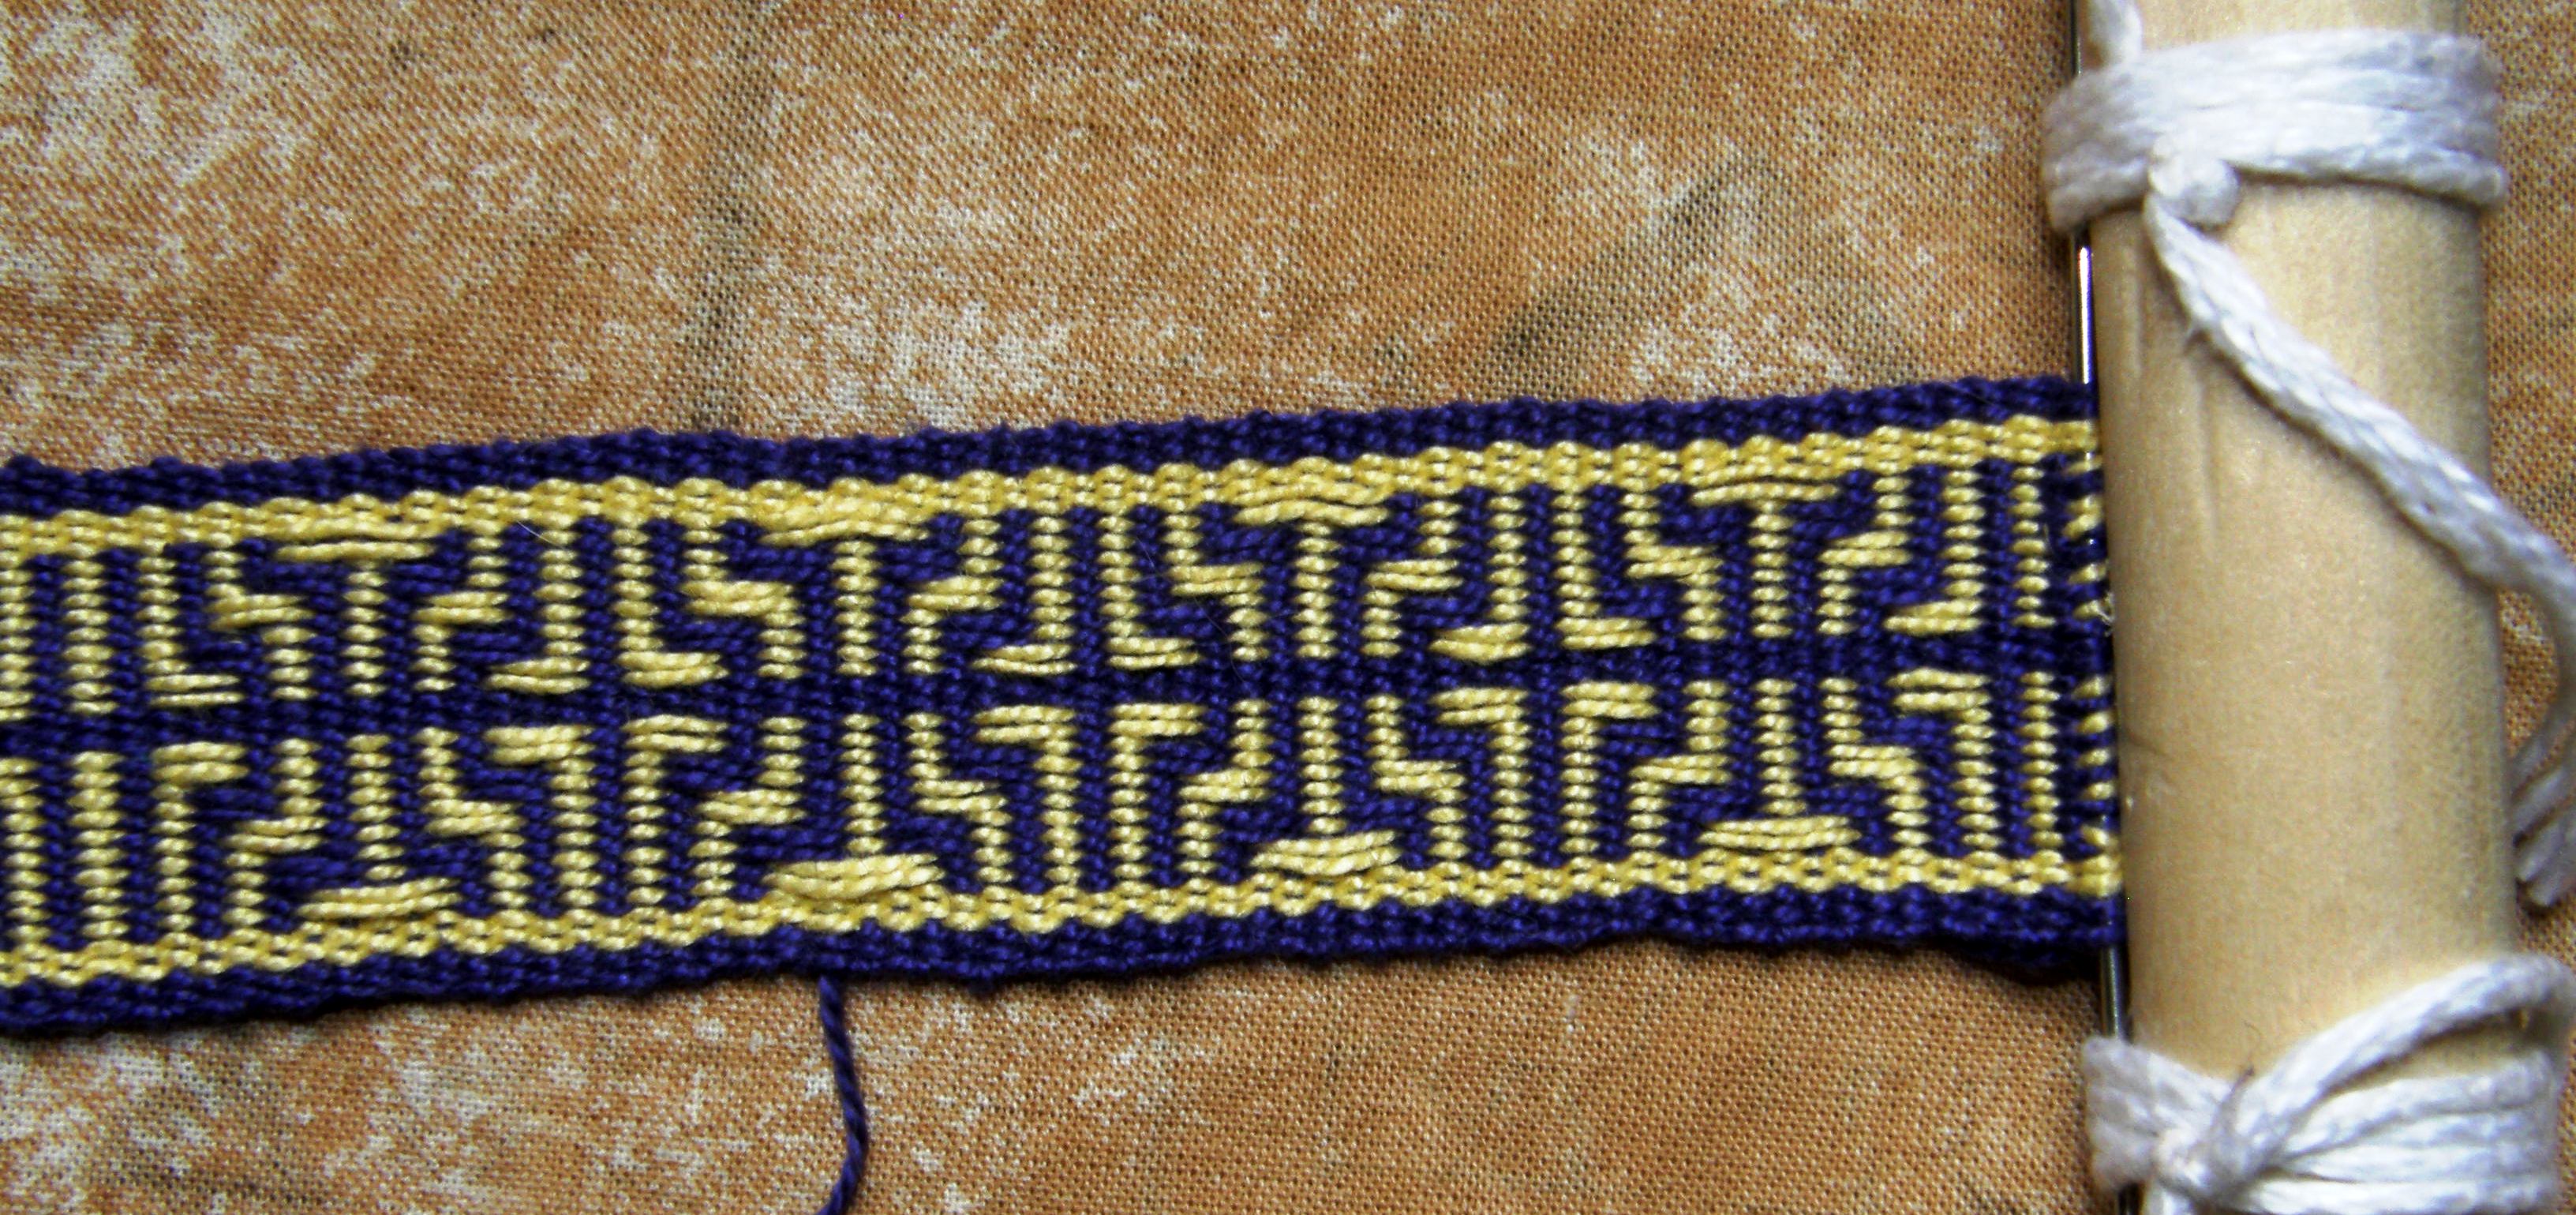
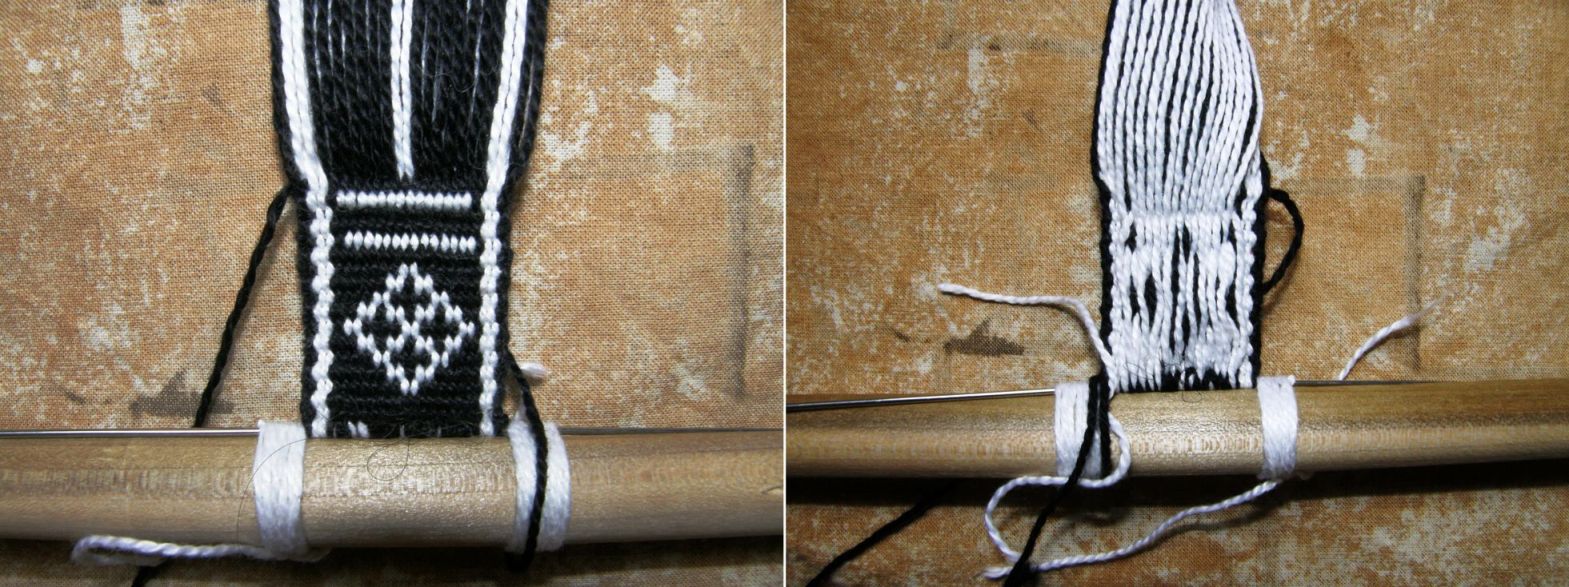
What I didn’t realize was that by adding that single-color center stripe I had changed it into one of those “eye-bending” designs which changes when you shift your focus somewhat like those 3-D designs years ago that we all used to go cross-eyed over. It was only when I turned the band over to see “what’s on the other side” that I saw the other design. I wonder if you see it too.

Look at the image, below left, of the back of the band with its diamonds for a while and then look at the one on the right of the front. What do you see now? Do you still see the stick-like patterns or do you see diamonds?
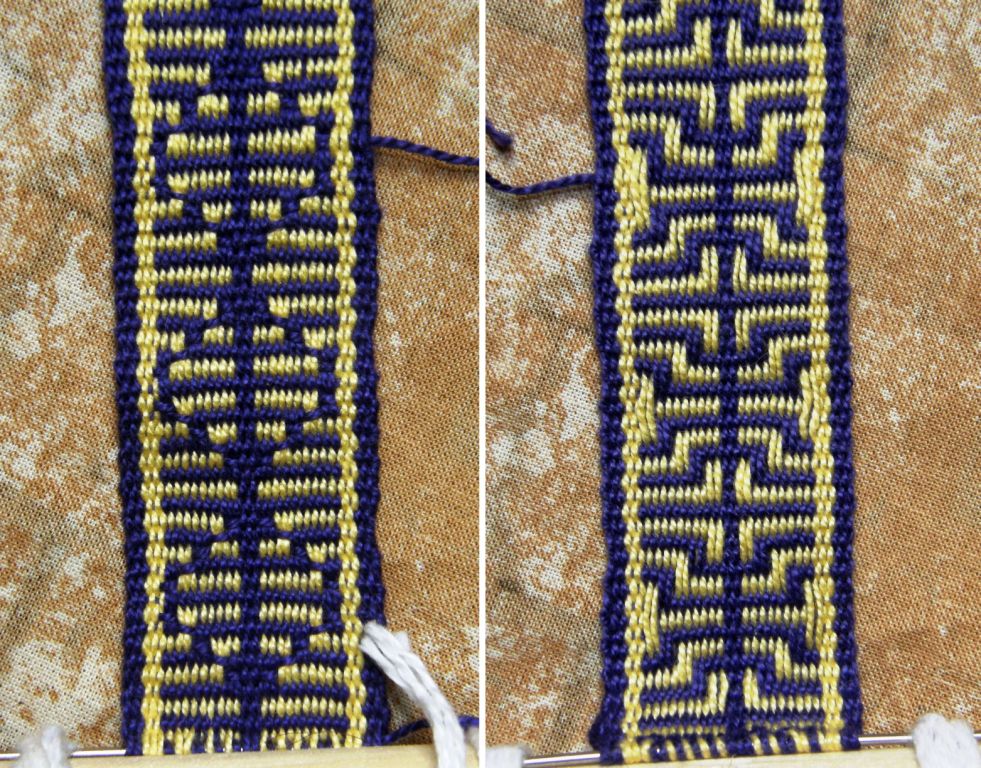
After that, all I could see was diamonds!!

I had to go take a break and come back to be able to see the nice stick pattern once again.

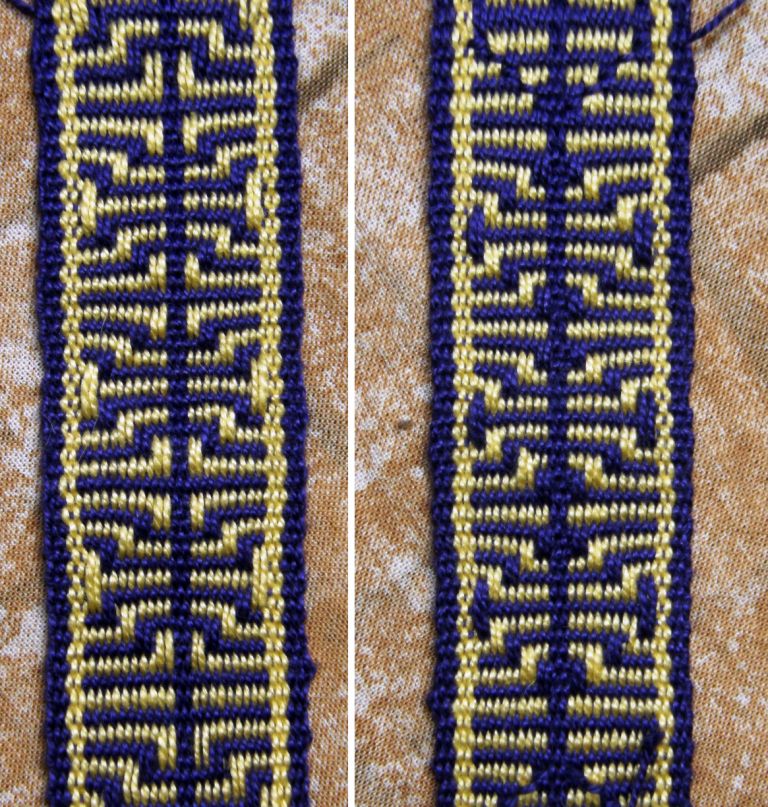
Then I continued weaving it as a complementary warp technique which made the design reversible. It also compressed the motif so that the five-span floats were less cumbersome.

Looking at it now all I can see is diamonds once again.
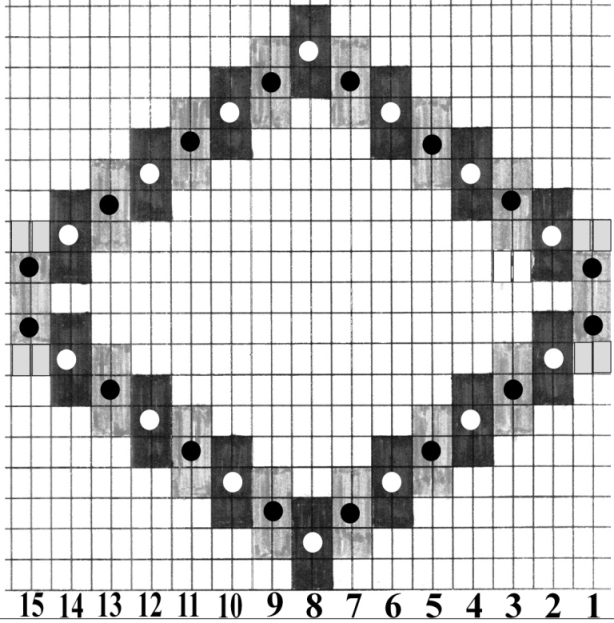
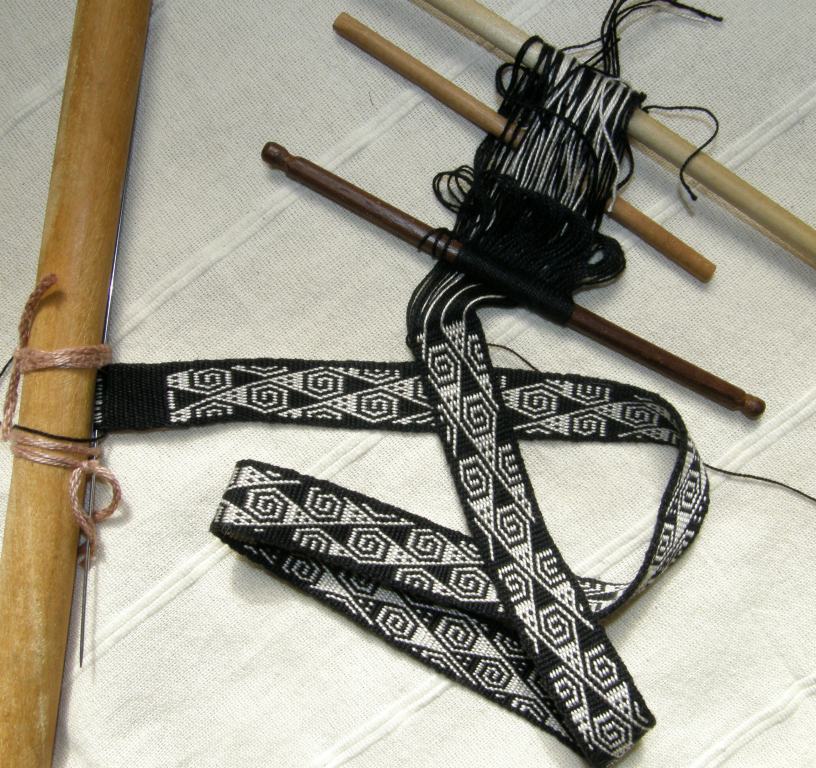
The design is just made up of floats of alternating colors starting in the center and working their way out to the edges. Here is a chart for a very large version of this pattern.

So that was all a bit of a fun distraction!

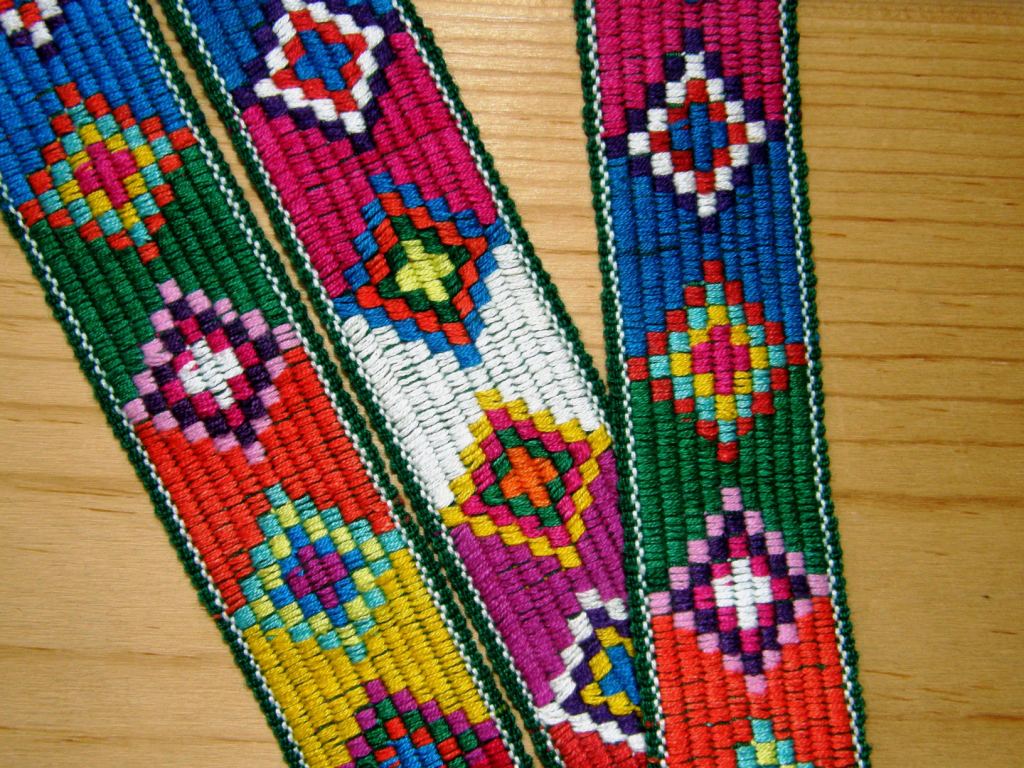
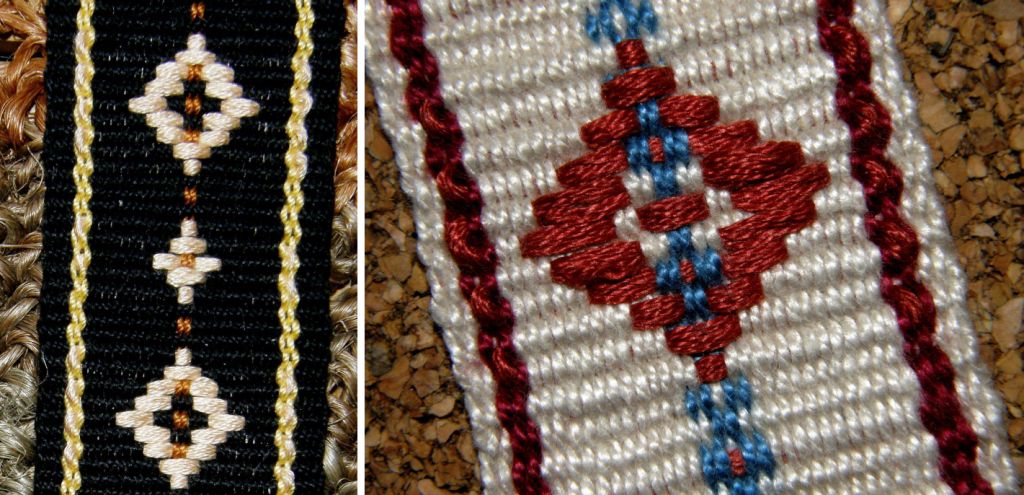
I have a band that I bought in Guatemala where the weaver has made use of some of these eye-bending motifs. It is in basic black and white which is very unusual in Guatemala where bright colors abound. I bought this belt in the same town that is famous for  hair sashes which scream with color and are heavily laden with supplementary weft designs.

When the black and white floats alternate in succession they produce quite a three-dimensional effect.

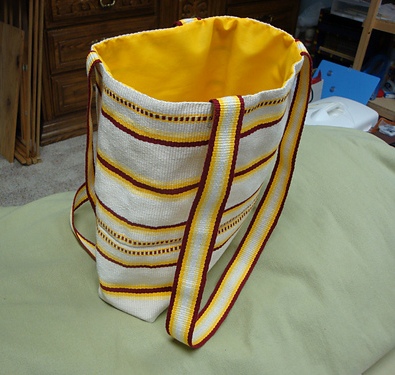
I have lots to report on the Ravelry group backstrap Weave-Along but I will save it for next week except for Amber’s amazing finished work which is in keeping with the bag theme in this week’s post. Look at her gorgeous lined tote bag! Okay, lining has to go on my list of sewing skills now….
Oh, and one more thing –  another delicious distraction arrived, this time in the post…a birthday gift from my friend Anna in Australia. My goodness it was hard not to drop everything and get into this but I shall do so on the weekend. All my off-loom time this week has been spent sewing,  trying to get that square peg into the round hole!

 This book, by Dutch author Mirja Wark, is about the si’ira, which is the intricate belt weaving of the Wayuu Indians from the Guajira, the northern border area of Venezuela and Colombia.

I flicked through and was immediately struck by a couple of things. It appears that the Wayuu make and operate their heddles in the same way as the Guaraní weavers here do, a way that is completely different to anything I have seen in the highlands or elsewhere. (see the pictures and video in this post) One of the Wayuu designs strongly resembles the design in the Ayoreo bag in this post. I imagine the Wayuu inhabit lowland regions like the Ayoreo and Guaraní….I need to stop here and go read!

Backstrap Weaving – What’s on the Other Side?

I have been looking at and thinking about what is on the “other side” of woven cloth and about the different attitudes of weavers from different cultures to what can be seen on the “wrong side” of the fabric. Some weaving structures are completely reversible as is the case of most complementary warp structures.

You can see both sides of my pebble weave piece at left and can probably appreciate that sometimes it is difficult to decide which side to make the “right” one as I had to in the case of this guitar strap when putting on the length adjustment buckle. As this is being sent to friend, I have actually left the decision up to her and only pinned the fabric in place around the buckle.
I always start with what I expect to be the right side facing me as I weave and find that sometimes I completely change my mind abut which side I like best once the piece is off the loom.

The wrong side of the weaving can also reveal just the information that is needed to be able to quickly identify the weaving structure.

For a while I was scratching my head over pictures of the yurt band that my friend Lisa had bought thinking it was pebble weave until she eventually sent me a picture of what was obviously its wrong side and I was then able to see that it had been woven using what I call simple warp floats.

At that time I didn’t much care for techniques that didn’t produce two “good” sides but who could resist trying to weave these gorgeous yurt band patterns?

Then it was a matter of getting the charting paper out, searching the net for more images of these bands and getting down to weave.

I must admit that lately I have gone a little crazy about this technique as I find more and more examples of its use in places like southern Iran, Mexico and tropical lowland Peru.

This weaving structure produces a definite right side. However, even though the wrong side with its exposed wefts looks nothing like the upper face, it can still be quite appealing depending on the color weft that you choose to use.
In the case of the yurt bands, only one side of the band is visible anyway when it is wrapped around a yurt. The piece I wove above right was made into a zippered purse and so no one needs to know what the inside of the purse looks like.

I am guessing that the day will come when there is a nasty spill on one of the place mats pictured above left and that I will be wishing that I could just flip it over and have the same design on the other side…oh well.

I might mention here that I just received my copy of The Journal for Weavers. Spinners and Dyers from the UK which has a beautiful article on  Kyrgyz textiles by Stephanie Bunn which includes yurt bands made in this kermé technique. She quotes a Kyrgzy person who says “Kyrgyz weavers are all mathematicians”. Bunn  then goes on to say “I found that trying to make the rhythmic pattern of kermé was the kind of experience that made me want to weep, although time improved matters.” You can read that article here.

I am infinitely grateful that I was taught the base of this technique by my wonderfully patient weaving teachers in coastal Ecuador and so taking the next step to  kermé was relatively easy.
The two pieces if weaving below have been woven in another technique with the same basic warp manipulations but their “back” sides are vastly different…


The motif above right is a smaller version of one of the Bedouin motifs on the belt above left.

The belt has been woven in warp-faced double weave and so the motifs are exactly the same on both faces with their colors reversed.

Unfortunately both sides will never be appreciated as only one face is ever seen! I wove this in double weave as this technique produces something sturdy enough to be used as a belt.

The camera strap I wove at left makes better use of this technique and I didn’t have to decide which face to make the “right” one.

Now look at the back of the piece above right which I show below…

This piece has been woven using the simple warp substitution technique which produces as you can see long floats. Most people do not have a good reaction to these long floats. I have to admit that I am not a big fan of them but it depends on your intended use for the piece. If this band were mounted on webbing, for example, it would make a good strap for a camera or a belt and it is a very simple weaving technique.

And this is where people in different cultures see things in different ways. While we may wrinkle our noses at the excessively long floats, the Bedouin people use this technique to weave motifs into very large pieces of fabric that are used as tent dividers. Both sides of the fabric are seen (although I have read that they are hung so that the  “right” side faces the men’s living area). They are not pieces of fabric that are being continually handled and so I guess that the long floats are not impractical.

You can see the very long warp floats on the back of the Bedouin piece that Tracy in Qatar sent me. Some of the warps have even broken through age or use….hard to say which. What I do love about these particular long floats is that I get to really handle and examine the Bedouin handspun wool.

And then what about all the different kinds of supplementary weft techniques? I have only just scratched the very surface in this having learned the inlay technique on warp-faced fabrics which produces a single face of pattern and a double faced technique from Guatemala .

The double-faced technique can be seen above left on a Guatemalan weaving. This particular technique, as far as I know, is unique to San Antonio Aguas Calientes. My reproduction on the right was glued down onto the cover of my notebook in which I documented the technique so the other equally pretty face cannot be seen!

Even the weavers in Guatemala don’t get to show off the other face as they use this technique largely on their huipiles (blouses) alongside single-faced techniques.

Small babies’ caps are also made with fabric woven using only this double-faced method.

This hair sash from Jacaltenango was woven with a supplementary weft technique that produces two equally beautiful faces.

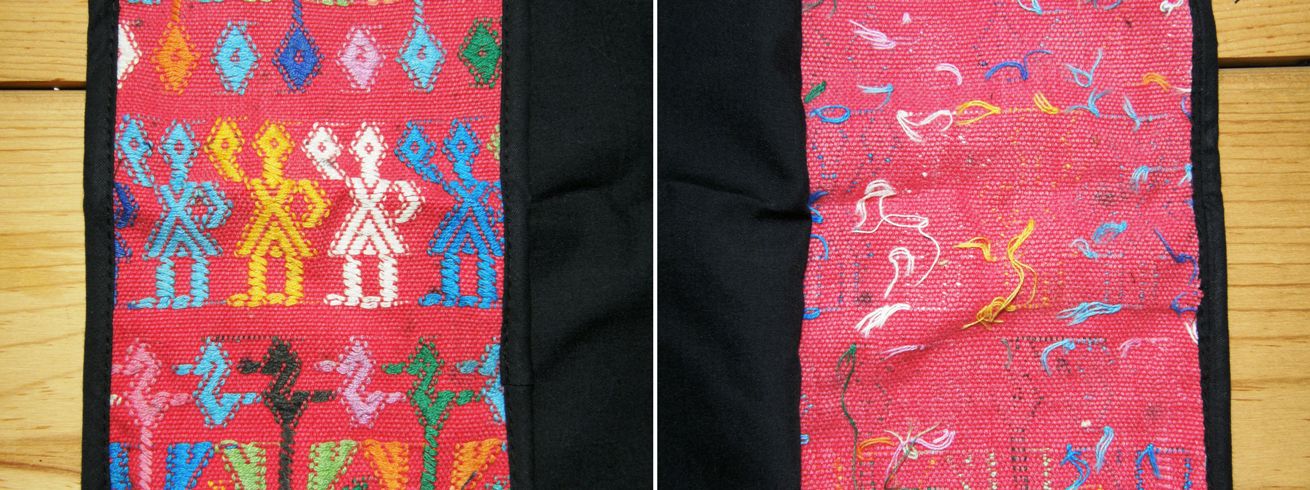
Sometimes the back of a piece patterned with supplementary wefts is left with small weft tails hanging…

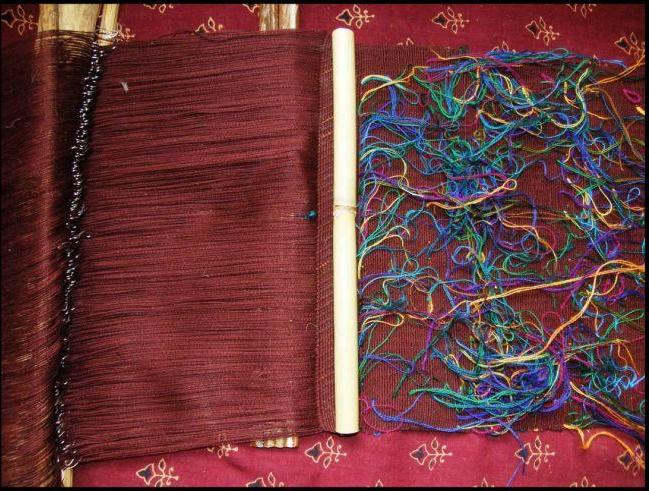
They can be a merry mess while the piece is in progress…

Or they can be cut right off and hidden entirely within the sheds so one would never know by looking at the back of the cloth that the other side was a riot of supplementary weft pattern. Look at the plain red back and colorful front of this hair sash from Aguacatan…

Look how much pattern weft material is used in those tassels!

When the weft patterning is particularly profuse the resulting weft tails on the back can be quite a sight! This is an old piece of huipil from, I was told, Chichcastenango. Many years of laundering have created quite a tangle of weft ends on the back. This is all quite acceptable to the Guatemalan weavers.

I was very much taken with the following Guatemalan belt that Teyacapan has on her Flickr page and asked her to photograph the back so I could see how the pattern had been worked.

I love the blocks of pattern that the weaver has used! As I was saying in last week’s post, the supplementary weft pattern does not have to be worked on a blank canvas. It looks like this weaver has worked her weft pattern on tiny strips of fine warp float designs.

How is this for a canvas for supplementary weft patterns?

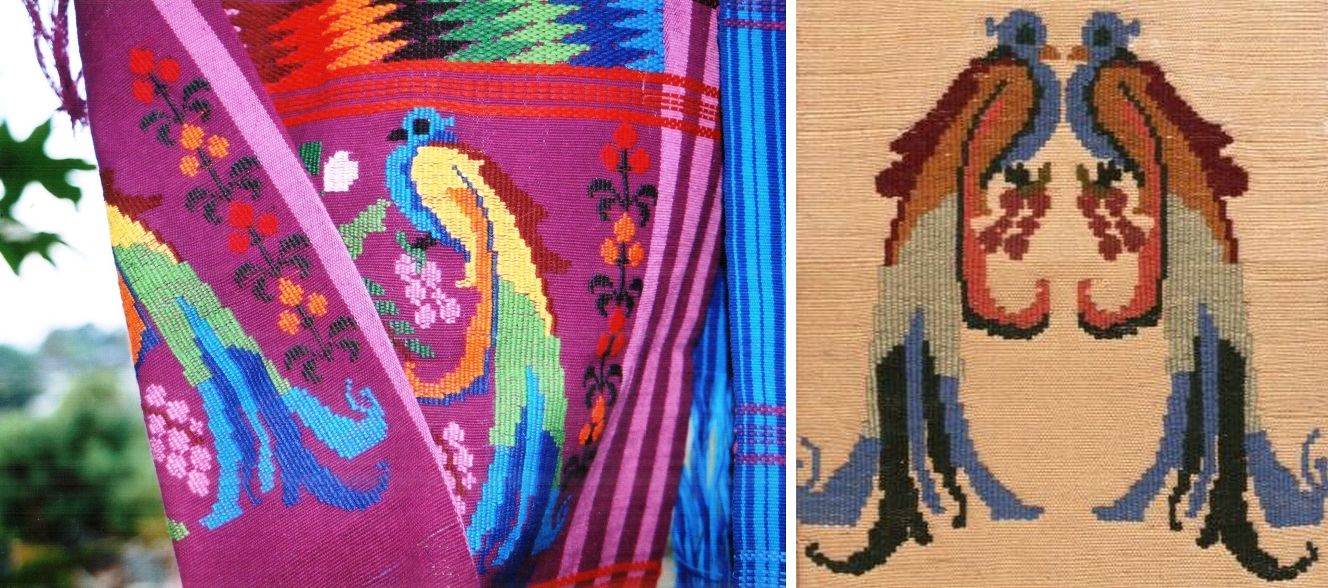
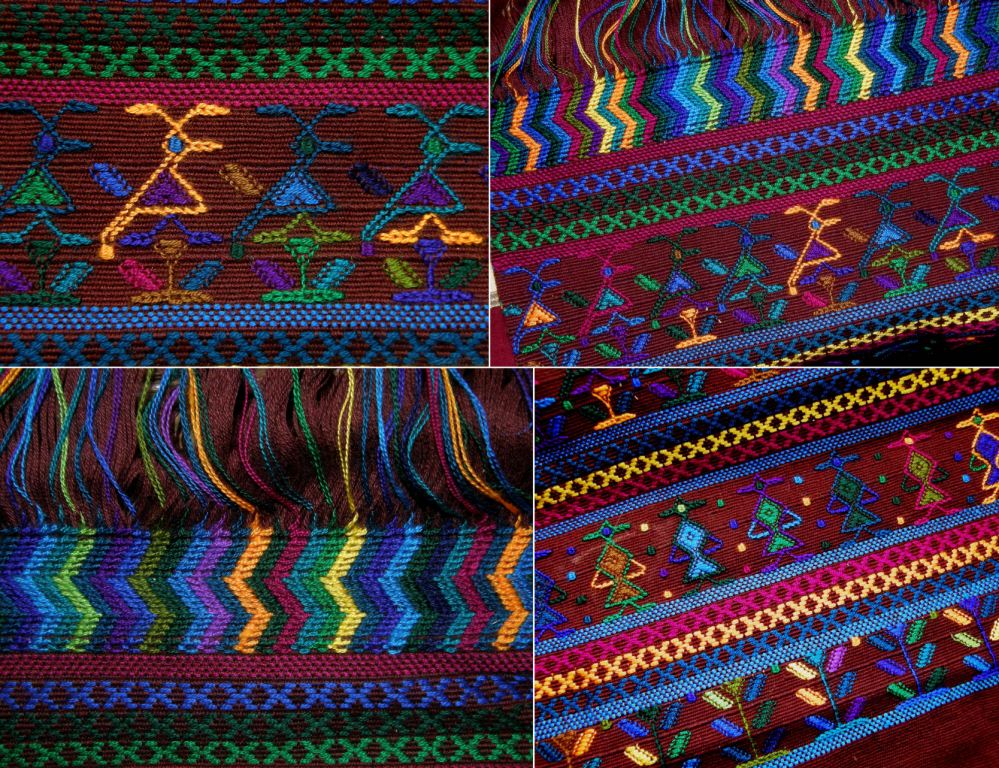
These pieces are from the areas of Nebaj and Cajul in Guatemala and again show how one face of the fabric can be completely different to the other. You can choose to show your bright stripes one day (free of any weft ends) or birds flitting about the corn plants another.

Some weavers actually work doing their supplementary weft patterns with the wrong side of the fabric facing up.

I got to visit Burmese weaver Dar Ku on my last visit to the US. She was happy to demonstrate for me while giggling and saying “It’s easy, it’s easy”. Her beat is surprisingly light and she does indeed make it look easy. Of course we all know not to fall into that trap! What fun to turn the piece over and see the right side with its neat patterns.
Franco shared a video of Lahu weavers from Thailand weaving supplementary weft patterns into tremendously long warp-faced pieces. The weaver is using a single-faced technique laying the supplementary wefts from edge to edge within the pattern sheds controlled by heddles and pattern sticks.

Here is another nice video of supplementary weft patterning from Acatenango Guatemala…one of the many videos that Red Corn Tours posts to its Facebook page every week. I watched this happily while asking myself “What’s on the other side?” and then the videographer, good chap, filmed from under the loom and I got to see the other side. What happy colors!

This is what has caught my attention most recently. I fished this out from the hundreds of photos I took on my US trip last spring when I got to photograph some gorgeous textiles from Bhutan in the collection of Betty Davenport.

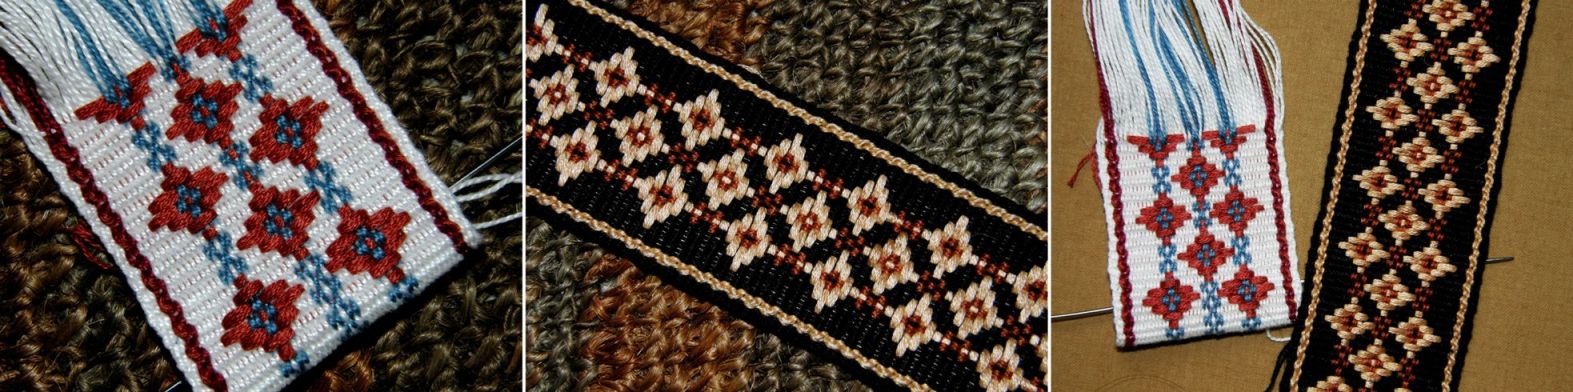
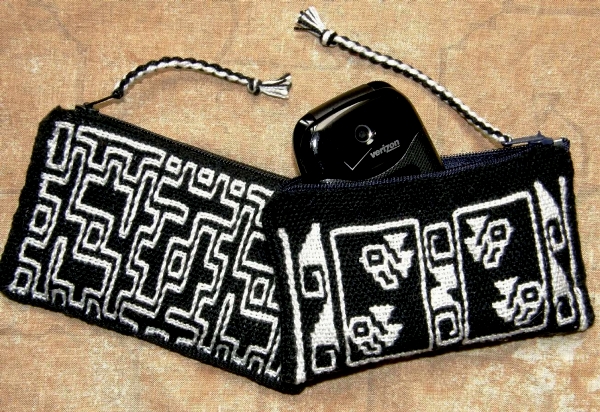
I wove some motifs from one of the pieces into one of my more recent projects and now I have my eye on doing something like these zippered purses which Betty made from her samples using patterning techniques from Bhutan.

The supplementary weft pattern has been worked on a twill (on the left) and balanced plain weave (on the right) ground. Aren’t these pieces striking? There has been some talk of twills in our Ravelry backstrap weaving group which is what turned my mind to this project…that and my recent dabbling in supplementary weft patterns on interesting ‘canvases”. What’s on the other side? I don’t know…I didn’t think to look!

I wove a small twill sample a long time ago on my backstrap loom.

I don’t know a whole lot about non-warp-faced weaves (but I am slowly learning!) and so I just looked at a picture of a twill  in my copy of Irene Emery’s Primary Structure of Fabrics and set up my loom with three sets of string heddles and a shed rod holding the warps in the four sheds. I am not sure if I got the sett right…it was all guess work.

Not having any kind of reed to use at that time, I spaced the warps by lashing between them on the loom bar. It worked well for this small sample using #3 crochet cotton for both warp and weft. I had just read a discussion on Weavolution about the use of floating selvedges and so decided to try one of those too. And, as usual, I used the tiny sample  as a business card pouch. I learned a lot!

Another one of these non-warp-faced weaves that I find quite easy to handle on the backstrap loom without the use of a reed is finnweave. It behaves well enough for me. I have had the benefit now of seeing ”in person” the Huichol bags woven in this technique in the collections of two of my friends in the US so I know what I need to be striving for.

This is 10″ wide and is one of the storage bags I planned to make this month. Having used up pretty much all my black thread on some unexpected distractions, I chose blue and yellow for this project instead of the planned black and white. The designs are taken from Huichol and Otomi bags and belts. The flower design is actually taken from traditional Scandinavian finnweave pieces. The Otomi use a motif  that is so very similar but I prefer the Scandinavian version.

I am using three sets of string heddles and a shed rod to hold the fourth shed. And what’s on the other side, you ask? This technique I am doing is not truly reversible. You could get away with showing certain motifs on both sides. They wouldn’t be mirror images but they would look okay. However, the patterns I have chosen are not really amongst those.

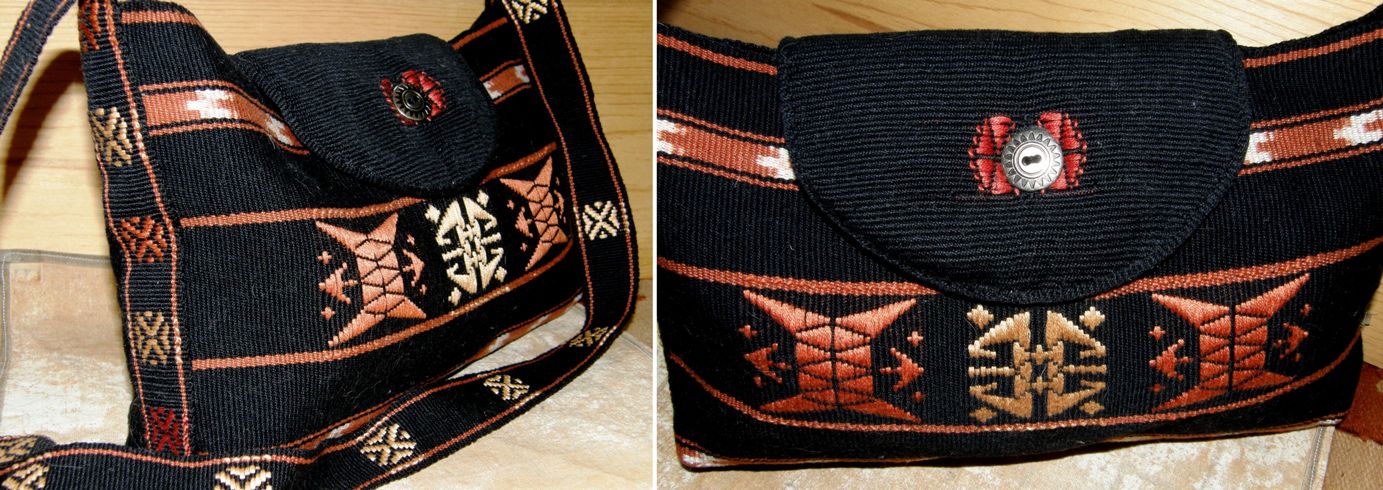
Now here is the other project about which I am CHOCHA!! (chocha is used here in Bolivia and Argentina to mean “exceedingly pleased”!). I guess a lot of the pleasure comes from the fact that I am not skilled with a sewing needle, don’t own a machine and have never sewn anything from my handwovens larger than cell phone pouches and eye glass cases and a couple of very box-like shoulder bags.

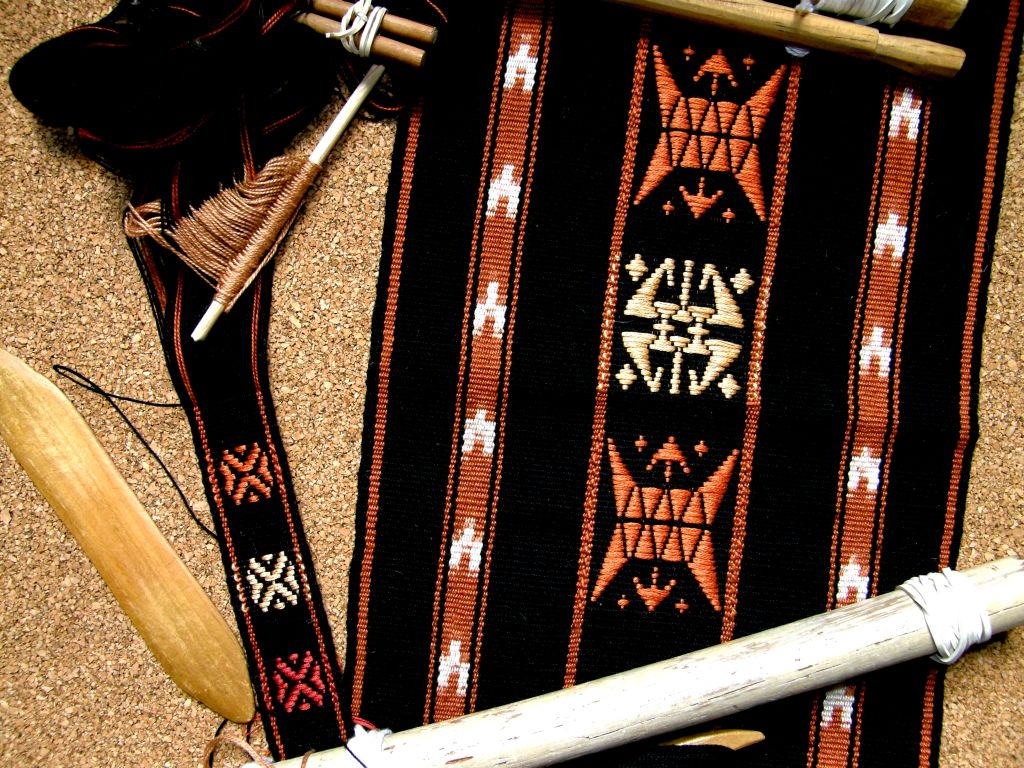
I just love how this all started as an experiment in ikat design with no intention whatsover to end up with a bag. I was bored with weaving the plain black piece of fabric with its two ikat strips and so added some supplementary weft patterns…motifs from a weaving from Bhutan in Betty Davenport’s collection. Then I decided I wanted to do something with it and the bag idea developed. I wove a strap and then another piece of plain black fabric for the back and finally a small piece of plain black for the flap.

How wonderful is the backstrap loom for enabling me to weave up the small pieces to put this bag together with very little waste.

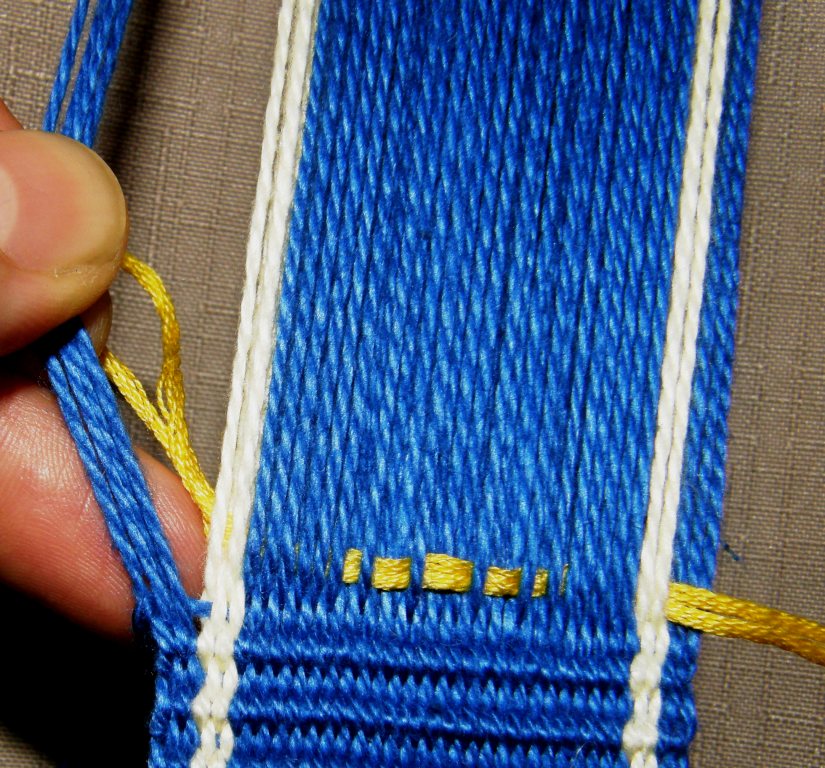
Jentide from the Ravelry Backstrap Weaving Group showed us how she made a flat bottom for her tote bag and so I used that sewing technique and Amber had created a button hole in one of her bags so I did the same by separating the warp in the middle and weaving with two wefts. I wove a small supplementary weft motif on either side of the button hole.

I cut and shaped the flap edging it with a tubular band to cover the raw edge. The bag is still missing a zip. Zips are nice for the way they can hide raw edges.

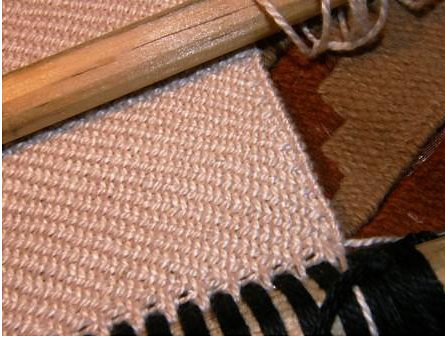
However, I turned the fabric sideways to sew this latest bag and so have two nice clean selvedges at the top.

And if you haven’t seen enough black yet, here is the other thing that I am still working on…

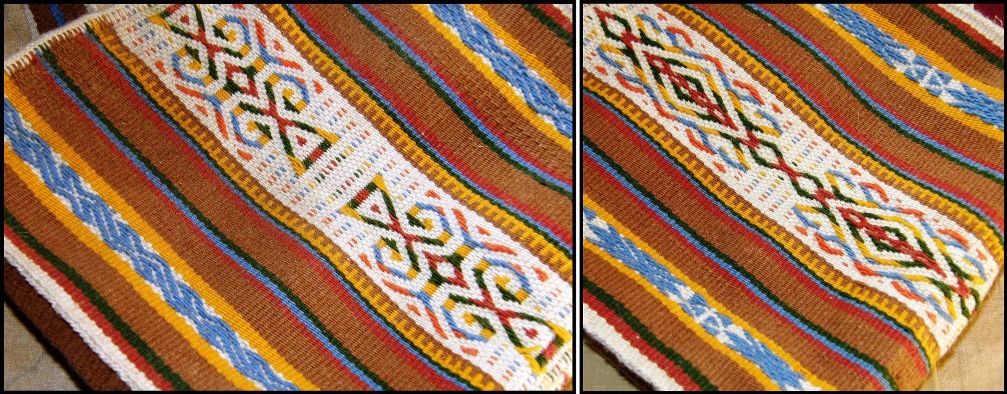
Here is the supplementary weft pattern on its “spotty” canvas that I wrote about in detail last week. I added some weft twining in the middle and am still working on the weft twining at either end. I have no immediate plans for this piece but am bound to come up with something to further test and hopefully extend my meager sewing skills.

Now I am planning a tote bag in bright Guatemalan style stripes….enough black, right?!

Some progress from the third week of our backstrap plain-weave Weave-Along…

Marsha has chosen fall colors to make a piece which she says reminds her of Halloween, Thanksgiving and candy corn. Amber is making a tote bag by sewing two of her backstrap woven panels together. It is gorgeously simple and beautifully woven.

Misskineta, our newest active member, has started her first ever warp-faced piece while Tracy, fresh back from her summer vacation has jumped straight back into the loom with a lovely balanced piece which I believe is already off the loom. Janet is making progress on the panels for her indigo-dyed shawl. Her picture collages tell the story…

I dug out all my textile photos from my spring trip to get the shots of Dar Ku and Betty’s purses to post here and now have a whole lot more images and ideas swirling! Let’s see what materializes….

Backstrap Weaving – Delightful Distractions

If all had gone to plan, I would have had one and a half storage bags done by now as part of my three-bag goal for the month of September. My black bag with the supplementary weft motifs from Bhutan should have been sewn and ready to stuff and hang and my Huichol design bag in finnweave should have been at least half woven.

However, some delightful distractions came my way and had me wandering off in other directions. That Worldwide Weaving Web that I am always talking about came a-knockin’ and the Band Weavers’ Grape Vine came a-tappin’.

At left you can see a band woven by JacQueline Teller on her inkle loom. You may remember that I recently posted a picture of a bag she had made by sewing several plain-weave inkle bands to canvas which we were using in our Weave-Along group for inspiration.

Annie MacHale (ASpinnerWeaver), queen of sashes, drew my attention to the band at left on JacQueline’s blog and, apart from the gorgeous multiple tones of blue and peach that she has used, I was fascinated by the fact that she had used spots in her warp to enhance her supplementary weft pattern.

Whenever I have started a supplementary weft patterned piece I have always created a blank canvas of single color weave on which to place my patterns. It never occurred to me that the canvas doesn’t necessarily need to be blank and that colors that have been incorporated into the warp can be used to supplement the inlaid weft patterns. JacQueline has used the light blue warp spots as part of her design and I love how she used the dark blue supplementary weft to create alternating color spots between the main motifs.

So, I wanted to play with this and, again, I just have to point out what a wonderful thing the backstrap loom is for making tiny samples.

The experiment grew from one column of warp dots to three and I found that when I made samples in black, a Sharpie was very handy for making adjustments to the pattern, blacking out unwanted exposed weft to get different effects.

The three columns of warp spots grew to three columns of three and after some applications of Sharpie to the black one, I decided on the design I liked for a bigger project.

So, this is what is on the loom at the moment…(speckled with fluff and stuff)….see what you started JacQueline? This is the black thread that I had just bought for my Huichol design bag!

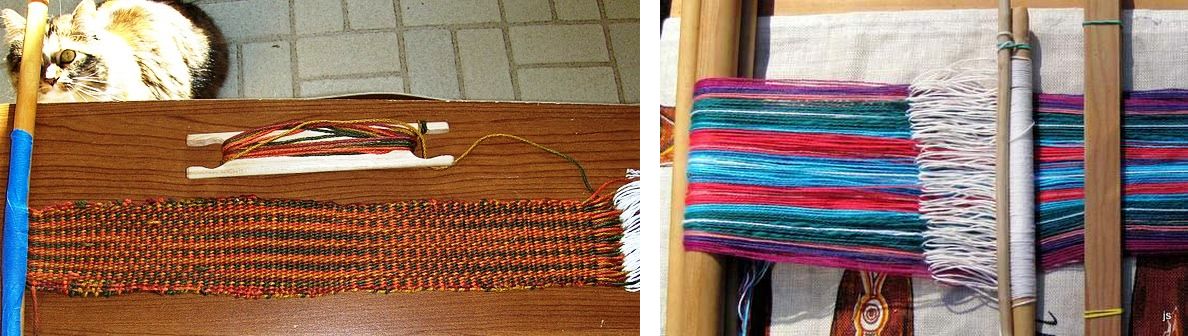
I have just finished adding a band of weft twining and I will twine that same design along the beginning edge when I have finished weaving.

I think I will do a single large supplementary weft motif in the very center followed by another band of twining and then repeat the beginning. What is it going to be? I have no idea but it has been fun getting back into the weft twining. This is the first time I have done three colors together in one row of twining in #10 cotton. What to do with all those weft ends?…I will try to bunch them into a nice tassel as the Bedouin weavers do. You can read about how I learned the twining technique and watch a video of my teacher Ngach at work in this blog post.

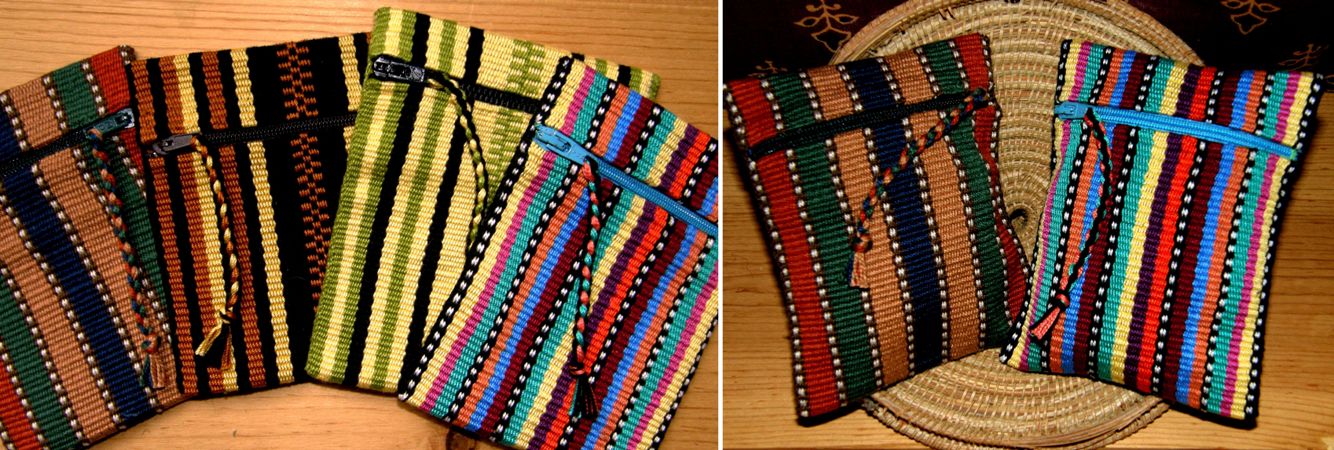
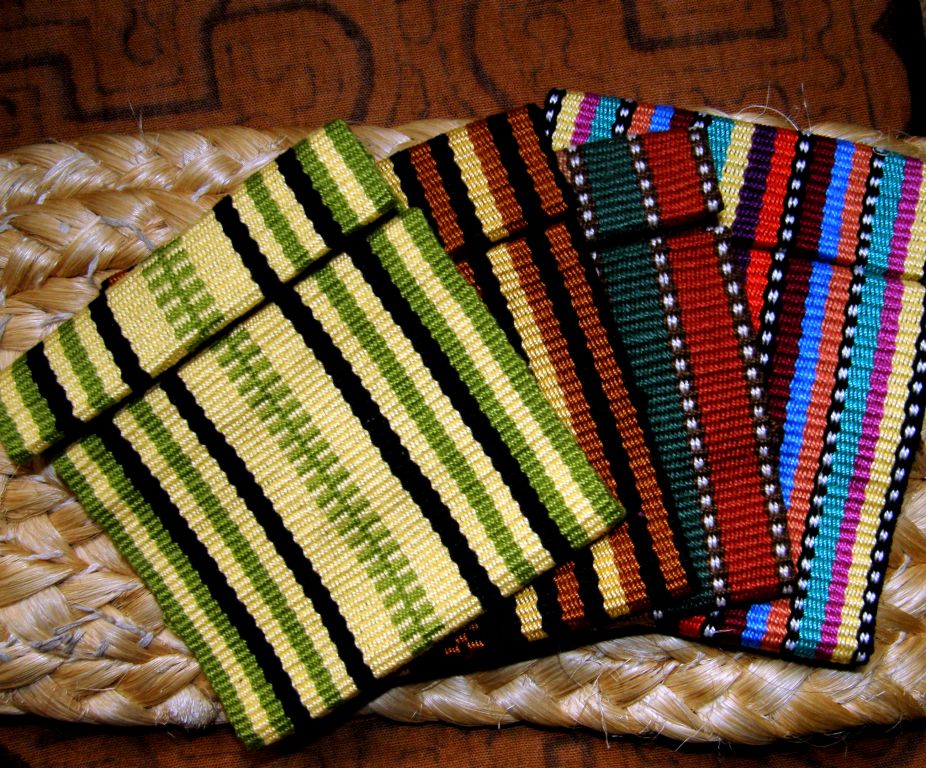
Before the distractions completely took over my weaving week, I did manage to sew up my weave-along projects into little zippered purses.

And I wove the back panel of my black Bhutan/ikat bag before my new ball of black thread got swallowed up by the distraction. And that was when I got side tracked yet again by jentide’s weave-along project which you can see at left.

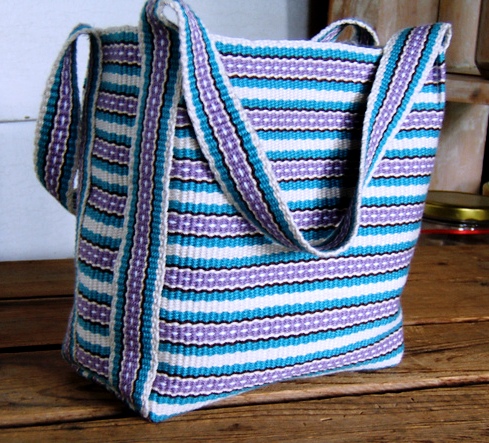
She made the fabric for this fabulous mini tote bag on her backstrap loom with the strap made on her inkle loom.

I love her stripe design but, apart from that, I am completely in awe of people who can sew. Of course I had to pester her with a bunch of questions about the construction of this bag and she pointed me to this wonderful web page where you can learn how to create a flat bottom for a bag.

This has had me pulling out the Reader’s Digest sewing book, that I had just about forgotten I owned, determined  to learn once and for all some basic sewing skills (without the aid of a sewing machine, that is)and pinning and folding and pulling my poor Bhutan bag into all shapes.

Here is its latest pinned form…

Meanwhile I am looking out for other suitable materials to use as supplementary weft. I have some gorgeous hand painted 10/2 tencel that my friend Lisa gave me that works beautifully and one skein goes a long way. Wool works well too as it fluffs out on the surface to give good coverage without “fattening” the shed in which it is laid.

And then I remembered the fine loosely plied and fluffy skeins of acrylic that I had bought in Guatemala.

What I would really like to do is make super fine supplementary weft pieces using sewing thread as the ground warp and weft just like the ladies do here in Bolivia to make their hat bands. Their supplementary wefts are acrylic and much the same as the Guatemalan thread that I have.

The fineness of the weave means that they can get away with having quite long weft floats.

I love how the wefts are often used to fill in the negative spaces and outline the motif in the ground weave rather than forming the motif itself.

The floats are particularly long when they do that and I have not been able to reproduce these ”negative space” designs  yet as my patterning material has been too heavy and would have resulted in long and cumbersome floats. I have not yet reproduced any of the pretty Bolivian hat band designs.

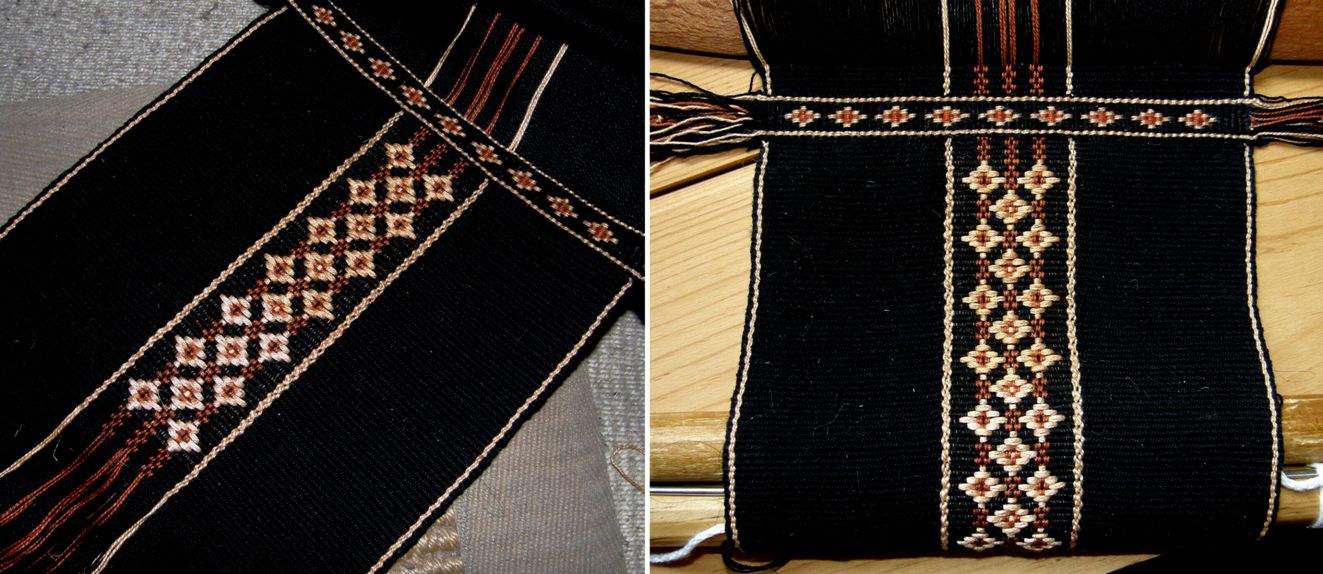
One more thing I did this week was to experiment with the traditional Bedouin al’ouerjan patterns using non- traditional colors. The most common color combination I have seen is black, red and white.

Can you tell that black, terracotta and yellow is my current favorite color combination?

This warp substitution technique produces long floats on the back of the fabric which are not so bad in #10 cotton.

It is interesting to look at the many different variations of this design to see which one produces the shortest floats.

###########################################

I will finish with this week’s Weave-Along round-up…

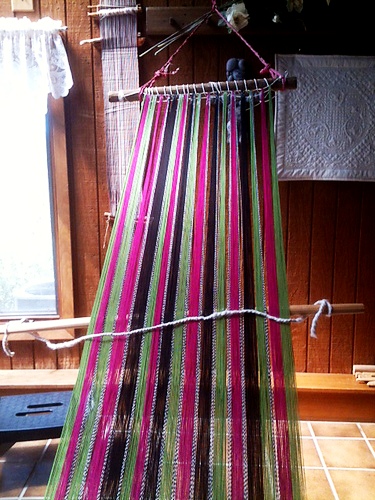
Peg is weaving on a backstrap loom for the first time ever and using Plymouth Yarn Fantasy Naturale mercerized cotton which I think is just perfect for first projects. See how quickly she has tamed that warped and how much she learned about laying in the weft and controlling the edges in such a short space. That yarn is so pretty. I have never woven anything with these multi-color type yarns. On the right, Janet has warped colorful stripes inspired by a piece of Guatemalan fabric that she has.

Dyggvi turned her narrow striped band into a neat zippered pouch and gave us the link to the instructions. Sylvie in France posted a picture of the making of her continuous string heddles on a gorgeous bright striped warp.

Jennifer’s homespun piece is under construction and Karri, who just completed her third ever backstrap woven piece is casting her critical eye over everything she produces and learning lots of lessons. We think her third project looks wonderful.

Both Amber and Marsha continue to turn out consistently straight, smooth, beautiful and useful pieces. Amber’s piece is one of two that will be sewn together to make a seat cushion. Marsha has hung her piece on a section of twisted vine. She has plans to modify it for its ultimate use. We’ll see about that next week.


Jennifer has taken the leap from homespun wool in natural colors to wild cotton stripes while Yonat, outside the weave-along, has been experimenting with those eye bending alternating warp float patterns.

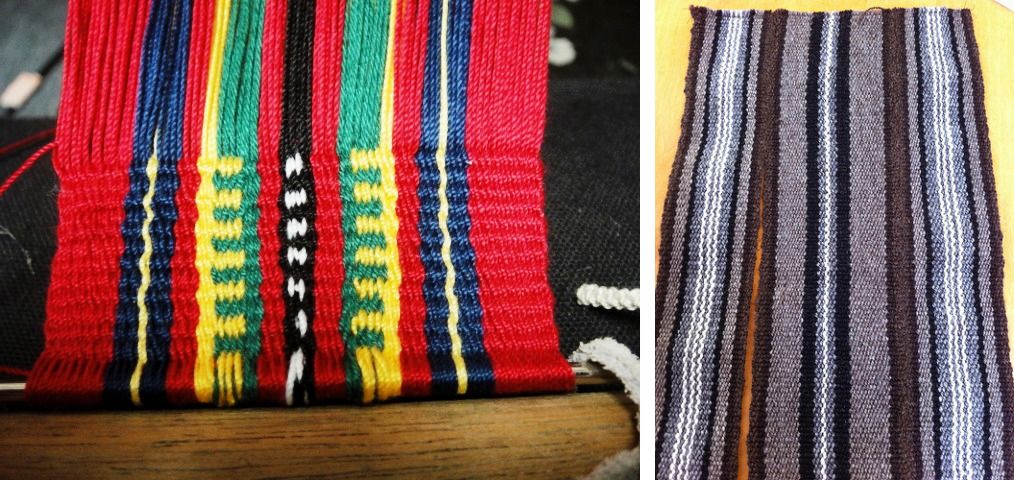
Phew, quite a job winding all those colors! Many of us have come to know the “fun” of adding in all those strips of colors on the warping board and the special challenge all that cutting and tying makes for creating even tension. “Perfect” tension is something we all strive for and I think that we all come up with clever ways to somehow compensate for uneven tension once the warp is on the loom long before we are able to create that perfectly tensioned warp on the warping board. Unfortunately uneven tension will show up immediately in warp-faced plain weave in the form of ridging and cotton is particularly unforgiving.

All we can do is make sure that our warping stakes are firm and sturdy and then just practice, practice, practice. Some days are good warping days and some not!

Ridging will turn up unexpectedly and most annoyingly in a piece I am working on and I have found that a worn out hole and a leaning stake on my mini warping board has been the culprit on quite a few occasions. Cranking up the edge warps too tightly caused the particular ridging problem in the piece pictured at left.

Fortunately the ridging shows up in plain weave and not in float patterning which is what I mostly do.  On the other hand, I know people who actually like the effect of the ridging. It’s a pesky and temperamental phenomena! I tried to weave a band specially for this blog post to show the ridging that results from crammed warps. The darn thing refused to ridge!

I suppose we could always do as my Montagnard weaving teacher, Ju Nie, does…

Many Montagnard pieces are woven with a multitude of fine stripes. Ju Nie joins the colors on the warping stakes with slip knots and then, once the warp is on the loom, she unties each and very knot, adjusts the tension and reties. It is not tedious for her. This is the way she was taught to do it and her large pieces woven in that “unforgiving” cotton are perfect!

Oh, and one more distraction to speak of before I go…one of my online friends just came back from Mexico where she bought a Huichol woven bag and is going to send me pictures. So, I am thinking it is just as well I didn’t get my bag project underway as her pictures are bound to have me changing my design plans. Thank goodness for those delightful distractions!

Backstrap Weaving – Pondering Plain Weave

What exactly is a backstrap weaving? I talked about this a bit in a previous post and looked at some of the different kinds of fabrics that can be produced. It doesn’t have to be all about pick-up patterns and it doesn’t have to be warp-faced.

For some people it may bring forth visions of narrow Scandinavian warp-faced bands decorated with pick-up patterns. Others may think of the fine ikat fabrics of Indonesia or the brightly colored supplementary weft patterned pieces of Guatemala, rich Asian silk inlay or the heavy woollen ponchos of Ecuador.

It is any kind if fabric that is produced on a body-tensioned loom and I have only just scratched the very surface in my exploration into what can be woven on these simple looms.

And if you are still thinking stiff-ish warp-faced cloth, take a look at this…

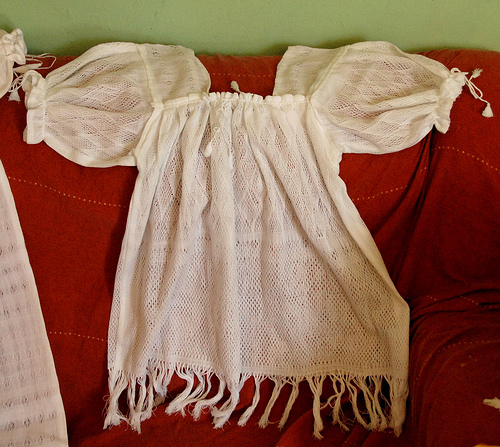
I just gasp every time I see this!! This picture is from Teyacapan’s fabulous Flickr page. The weave is known as tejido patakua and the blouse was made in Aranza Michoacan, Mexico.

Here is another picture of a similar piece of fabric on the loom….(again, courtesy of Teyacapan)

Spectacular!

In our backstrap weave-along on Ravelry we have been leaving behind the pick-up patterns for a while to play with plain weave in warp-faced and balanced weaves. It has been amusing for me to spend more time on warping and making continuous string heddles for a piece than actually weaving it. That never happens when I am doing pick-up! Plain weave is so very fast.

I decided to play with stripes…no rules…go mad, stash bust. It has been a fun way to get rid of all those annoying teeny tiny balls of colors that are always sitting in a tangle at the bottom of the basket that I have never been able to bring myself to throw away. Warp up stripes, stripes and more stripes.

I decided to do as one of my Guatemalan weaving teachers, Carmel, would do. She would sit at her loom and just plunge her hand into her basket of yarns and use whatever color she grabbed first for her supplementary weft patterns…a wild combination of colors!

I only did this on one piece. That is about as wild as I was going to get for this weave-along and then I put a bit of planning into the other pieces. Who knew that combining stripes would be that hard?

My Guatemalan multi-colored juggling balls were used to influence the color choices of the first two and then I chose some woody tones for the next. The yellow and green one was supposed to represent my home of Santa Cruz…yellow and green for pineapples and jungle and somehow black got into it too. The multiple stripes were tedious to warp but these pieces were fun to make. It was novel to be able to zoom along in plain weave.

I plan to fold them as shown below and make four small purses with the zips on the front. They will be big enough for credit and business cards. Thanks to Sharon and Betty I have two large bags of colored zips to choose from.

Now to get down to the sewing. There is still a lot of planning and warping and weaving going on in the weave-along so I may have time to do a balanced weave project as well using one of my rigid heddles or my bamboo reed. Figuring stripes in balanced weave is even more mind boggling for me!

For warp-faced stripes I found a couple of sites. On the Handweaving.net site there is a book by Ralph E. Griswold entitled Warp-Faced Stripes. Sounds perfect, right? I have to admit that I didn’t find it, at first glance, all that helpful and got a bit fed up after five pages. Apparently there are 687 drafts in the collection and one of these days I must sit down and go through it thoroughly. I am sure it is an invaluable resource.

Another page which I found more immediately inspiring was a set of textiles with woven stripes and bands in the collection of the Knoxville Museum of Arts on Flickr.

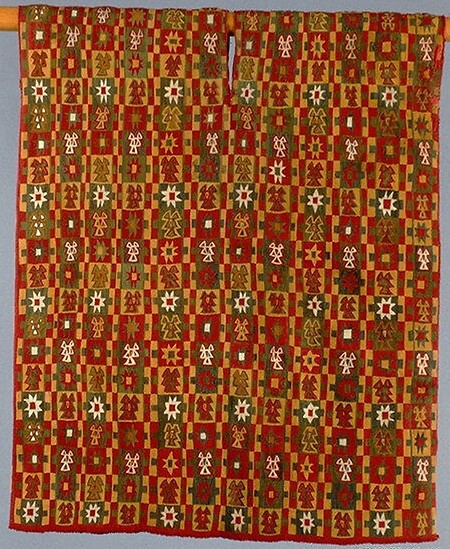
As for bold colors and bands of striking motifs take a look at the site of the Metropolitan Museum of Art which shows its current exhibit of Andean Tunics 400BCE-1800BCE (thank you Sally for the link).

How nice that they allow those of us who can’t get to the exhibit to see these images. The exhibit will close in mid October before I get to the US (darn).

Now I find that it was open when I was in the US last May (double darn).

After all the color, I am wallowing in safe black-and-white yet again as I sample for my finnweave bag project. This will be my first large-ish finnweave piece and, as I haven’t woven this structure for a while, I figured that I should do some width samples and try out some of the motifs that I might be using.

I have been practicing some of the more common border motifs that I have seen on Huichol and Otomi bags and belts.

The diamond motif on my sampler is a Scandinavian one which I just thought I would throw in there. I have a couple more border patterns to try and then I will plan the large project which will be one of the hanging storage bags that I talked about last week.

One lesson learned about that: storage bags must be hung high as my cat is already getting her claws into my Bedouin one.

My Bhutanese motif storage bag project is on hold until I can get more black thread but I did finish the hanging strap as well as the guitar strap that was so fast to weave with its four sets of string heddles and saver cord.

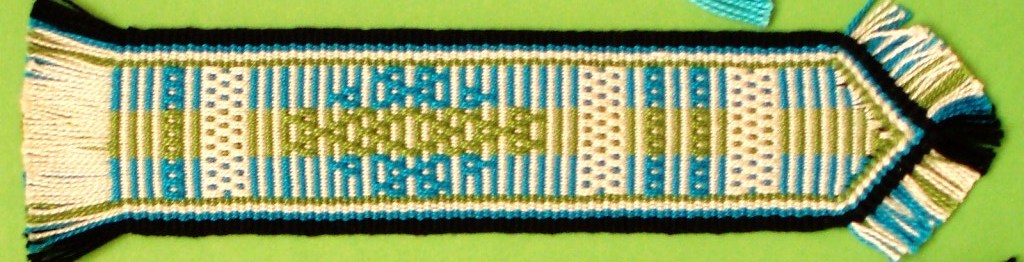
Now I am working on perfecting the beautiful finish that Andreas used on his woven bookmark. See how he has shaped the end?

It is straightforward enough as he explained. Just eliminate warp ends gradually to reduce the width of the band and then twine the warps ends down the sides. That I can do but it is getting all the twined ends neatly interlocked at the tip which has been defeating me. Perhaps I should take my own advice and try this first with thick yarn and not #10!

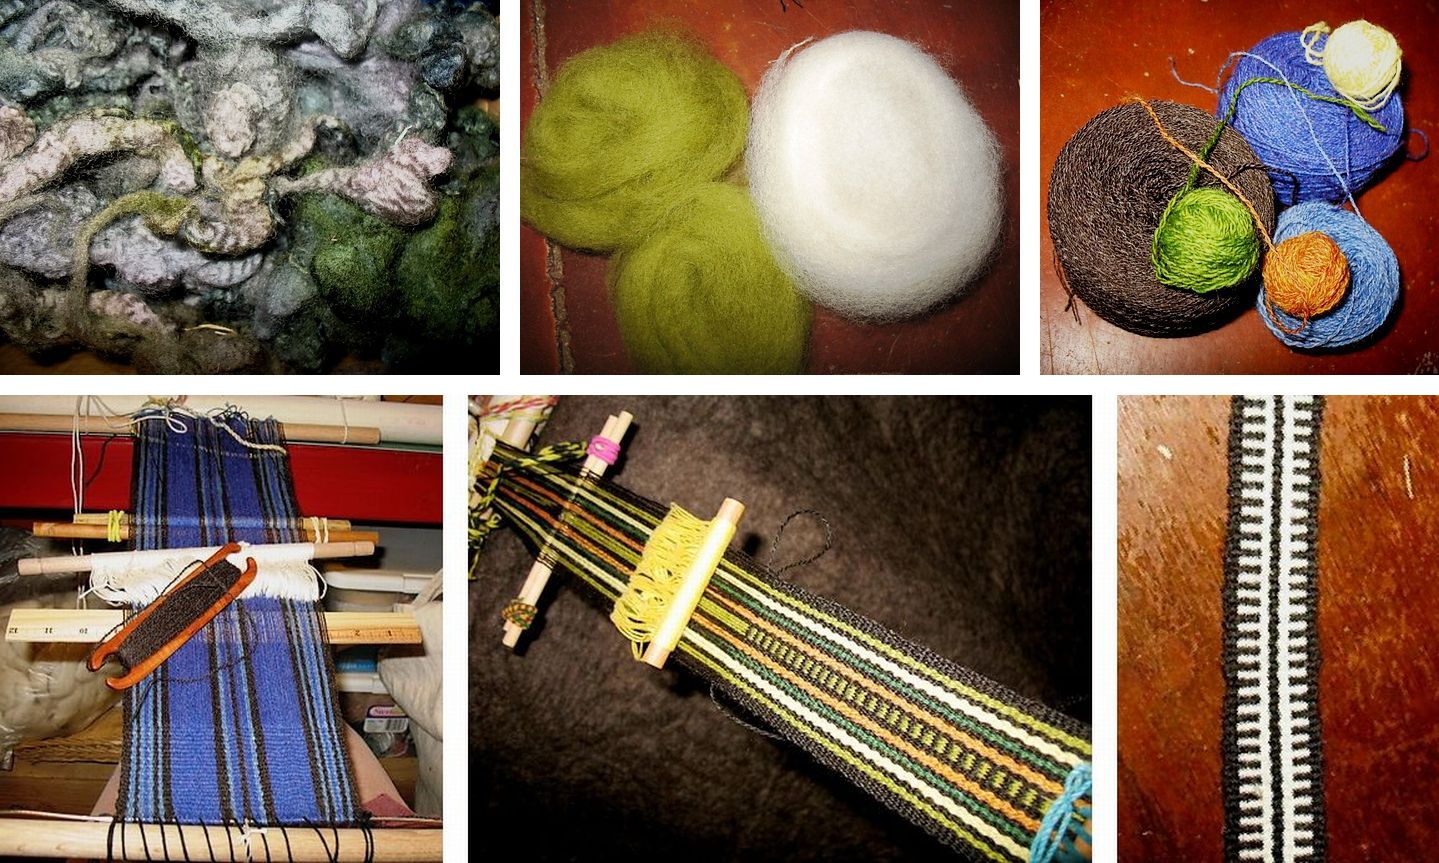
So, weaving-along on Ravelry we have Janet aka AuntJanet who gave us a photographic tour of the whole process behind her lovely handspun weave-along pieces…

She started off with the raw wool which she dyed and combed to produce that gorgeous fluffy top, spun the yarn and wove her three projects. The blue one will be a bag and she is currently weaving its strap.

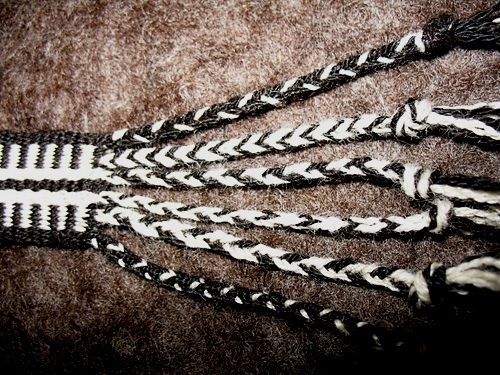
She has been looking around Ingrid Crickmore’s wonderful blog on loop braiding and has been braiding her warp ends using different techniques.

This gives me the perfect opportunity to tell you about the online loop braiding workshop that Ingrid is offering in the Yahoo braids-and-bands group this month. All you need to do is join the group to have access to the files and Ingrid will be around to answer questions.

I met Ingrid at CNCH in 2010. She was teaching braiding at the Education Booth where I was playing with my backstrap loom and I could see that she was a wonderful highly energetic teacher. She has also woven with me on a couple of occasions.

Our other Janet, aka popsicletote, made one of the photo collages that we all love so much…

I just love all the different tones of her indigo-dyed weft. The piece has leaf and flower details in it. I am not quite sure how they were constructed but here’s a close-up of one…

More weave-along projects and progress…

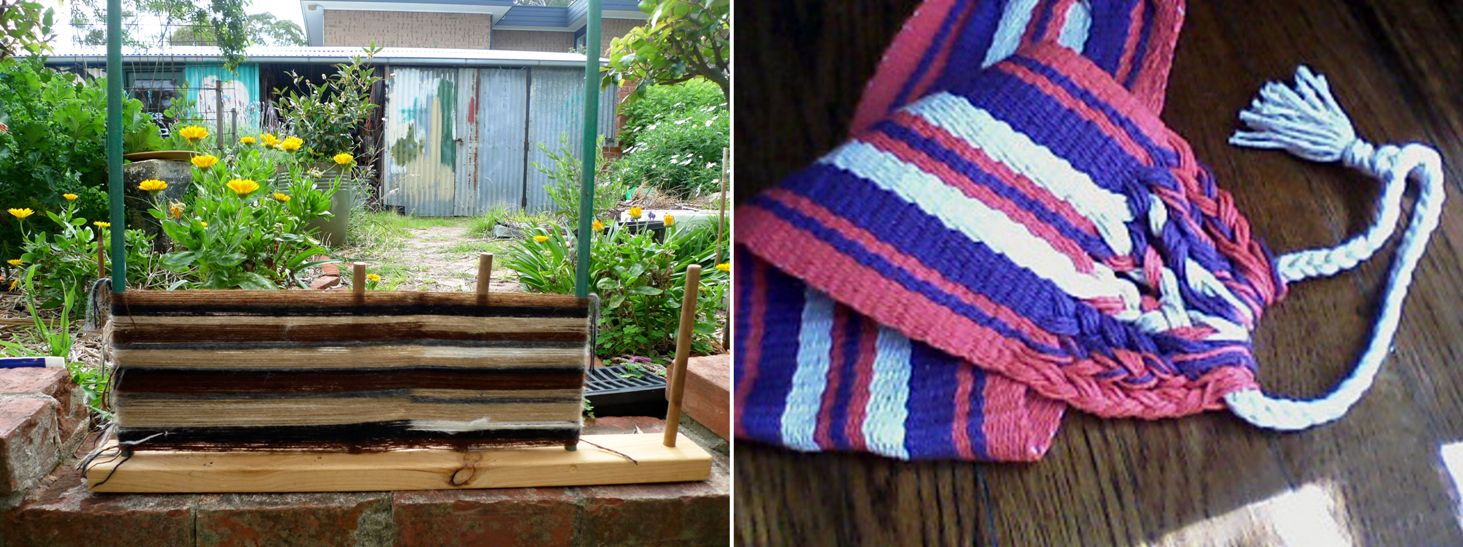
Anna has warped some beautiful natural handspun alpaca that she bought in Chile. Even though Karri  finished her plain-weave striped backstrap- her second backstrap woven project ever- just before she joined the weave-along, I am counting it in.

Here’s her latest warp which she says is inspired by “gorgeous southern sunsets”.

Cindy is weaving her first ever band with stripes and a little help from a friend and Dyggvi has a nice striped band going too.

Kareanni is a volunteer with Education and More and often manages to have a weaving lesson on her visits to Guatemala. She has incorporated strips of warp thread, prepared in the ikat technique that she bought in Guatemala, into her pink, black and green warp.

Blomster’s wall hanging, which she based on a textile she bought in Oman, is off the loom. That one she made on her rigid heddle loom and the little  piece to the right, which was made using a rigid heddle on her backstrap loom, is also done.

Kathi, whose project you can see above right, reports that her homemade rigid heddle works perfectly. There is actually a fair bit of woven fabric rolled up on the front loom bar which we can’t see. Her alpaca handspun weft had beads added to it while it was being spun, a technique she learned during the Tour de Fleece.

Here are the two participants so far who are weaving balanced weave pieces without the aid of any kind of reed. Marsha made a prototype for a back scrubber in worsted weight cotton. She incorporated the braid at the start of the weaving and will try to do a four-selvedge piece next time so both ends will be the same. Phil is weaving his painted handspun warp. He feels it may have looked better warp-faced but I think that the exposure of the weft gives the image the lovely softness of a water color painting.

And then jentide blew us all away with her stripes!

Outside the weave-along Yonat continues to make me smile with the bands she is turning out on her inkle loom.Her bands are patterned with, from top to bottom, Andean pebble weave, simple warp floats and supplementary weft. Her Judaic bookmarks on the right, patterned with simple warp floats and supplementary weft are her contribution to a winter art sale at her temple.

Anna, who bicycled her way through the Americas and stopped off to visit me for some weaving time, sent me a picture of the pebble weave and comb design belt that she has made since getting back to Australia.

Before I leave you for this week I would like to tell you that registration opens on September 15 for Braids 2012 – 2nd International Conference on Braiding which will be held in Manchester, UK August 19-25, 2012. I am very excited that I will be attending and that Ingrid Crickmore will also be there giving an introduction to making “double braids” along with many other international tutors/authors teaching a variety of  braid and band related topics….Jacqui Carey, Rodrick Owen, Carol James, Robyn Spady…I am not even going to attempt to name them all!

I would love to meet up with blog followers and backstrap weavers in the UK so do drop me a line if you think this will be possible.

Backstrap Weaving – Ready, Set…Weave Along!

I fear the truth in the adage ”out of sight, out of mind”. You wouldn’t believe my computer desktop! It is a cluttered mass of folders and icons. I just know if I put anything away into a file, I will forget about it and I have new ideas coming up all the time.

The same goes for my bedroom/work space. We have had to come up with some interesting solutions to the lack of space in this little home which means we have two single beds side by side, one of which folds away during the day so I can have some floor space on which to work.

Everything has to be rolled up, picked up and put away at the end of the day so the bed can come back out. You would think that that would keep things fairly orderly…

I still seem to end up with piles of stuff on the floor everywhere…weaving sketches, books, tools, baskets of yarns, things I don’t dare put in a cupboard or closet because they serve to remind me of the latest new weaving idea I have had. They have to be covered so the cat won’t get at them. It is a merry mess, it lives and grows and never stagnates. But, it’s time for a change!

The fact is that there simply isn’t anywhere to put things anymore as my books have completely taken over…no more floor, shelf or closet space left but aha! there is wall space!

So, I am going to have lovely woven storage bags hung on the wall to hold my project bits and pieces and, on the whiteboard, a nice orderly list of what’s waiting to be explored. The bedroom will start to look like some kind of crazy textile bazaar! Actually it kind of does already.

Storage bag ideas: I love the woven sacks that are used up in the highlands for storage, transport and display in the markets and fairs. I have been searching for ideas for interesting bag shapes but I have to admit in the end that a rectangular piece of cloth folded in half and sewn together at the sides is probably the most economical if not the most elegant way to create a practical bag from a piece of handwoven fabric.

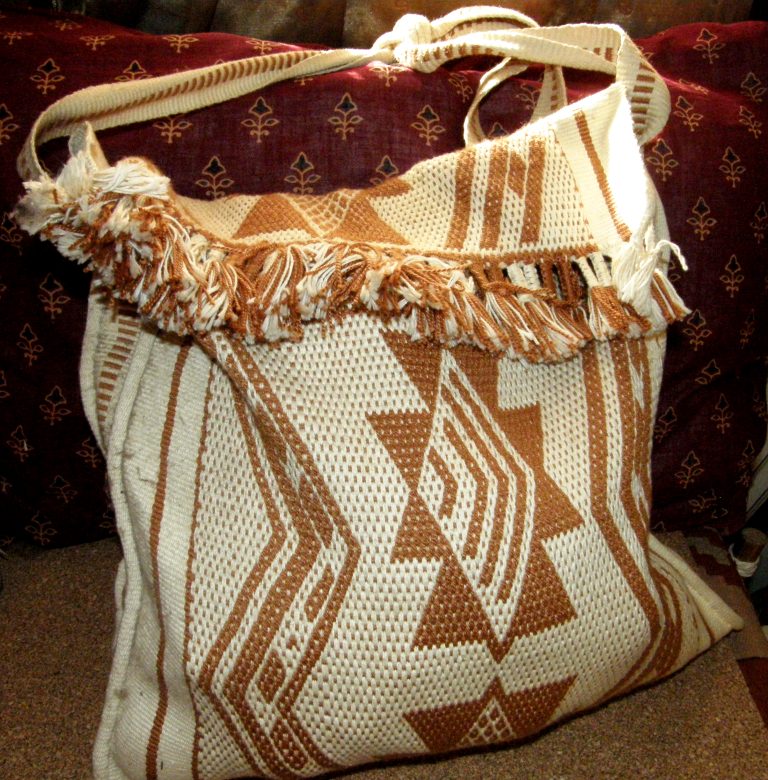
You can see one deep storage bag that I have at the top of this post that Tracy sent me from Qatar. The wool fabric is part of a Bedouin tent divider. That currently holds all my Tour de Fleece gear.

This wool bag that I made years ago with  Mapuche designs woven with supplementary warps hangs on a doorknob and holds all my camera stuff…battery recharger, cables, tripod attachments etc.

This gigantic cotton bag with Guarani pebble weave designs, which was bought here in Santa Cruz, hangs off one of the bed posts.

So there are more bags to be made so I can get everything off the floor and onto the walls! Well, you all know that I am just looking for an excuse to weave more things.

So, I am in the process of weaving a hanging strap, which I couldn’t resist decorating, for what will be a new storage bag made from a piece of fabric I wove some time ago as an ikat experiment. The strap has motifs from Bhutan as does the bag fabric.

It will also need a back and some sides in plain black…it will be very fast to weave those.

This will hang on the wall and hold what is currently being stored in a large basket on a shelf. The basket will go and yes! that way there will be more room for books or at least something that is currently on the floor. (I have a new book coming in the mail…thanks Anna!)

The motifs have been woven using supplementary wefts. I used one and a half strands of embroidery floss as the supplementary weft with my 35wpi cotton warp and weft. Veeeery slowly things may become a little better organized.

I have been admiring the designs made by the Huichol people of Mexico in balanced double weave for a long time ever since I first ran across their work in a museum in the US in 2007. They make bags on which they add large corner tassels and have an unusual way of braiding the warp ends.

These are a couple of samples I made in this technique some time ago.

 I prefer the patterns that they use in their belts and so I will probably try to make a storage bag in this double weave with motifs from their belts. I wonder if I can figure out how they work those warp ends.

The other project I worked on this week was the mug rug set.

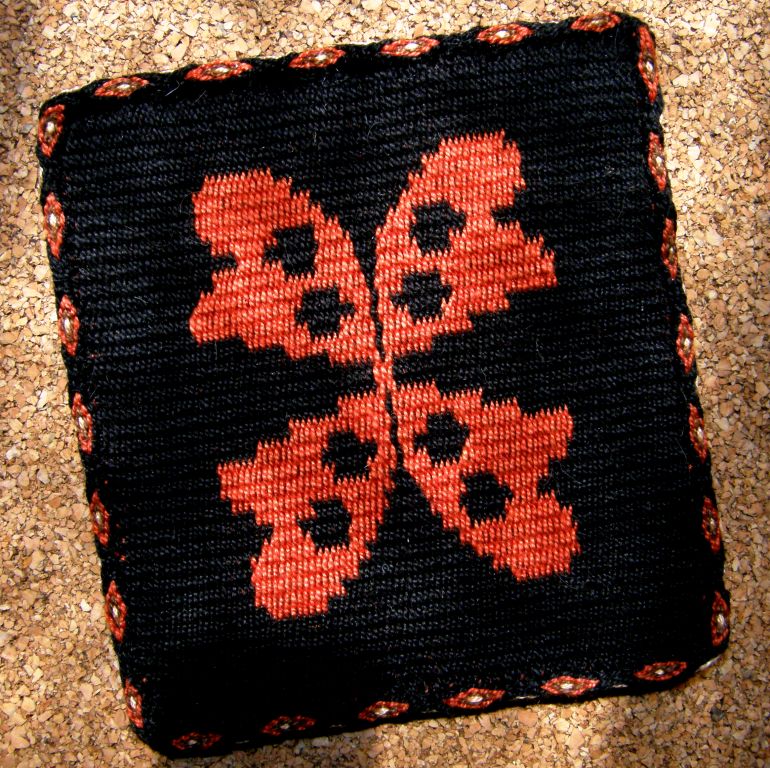
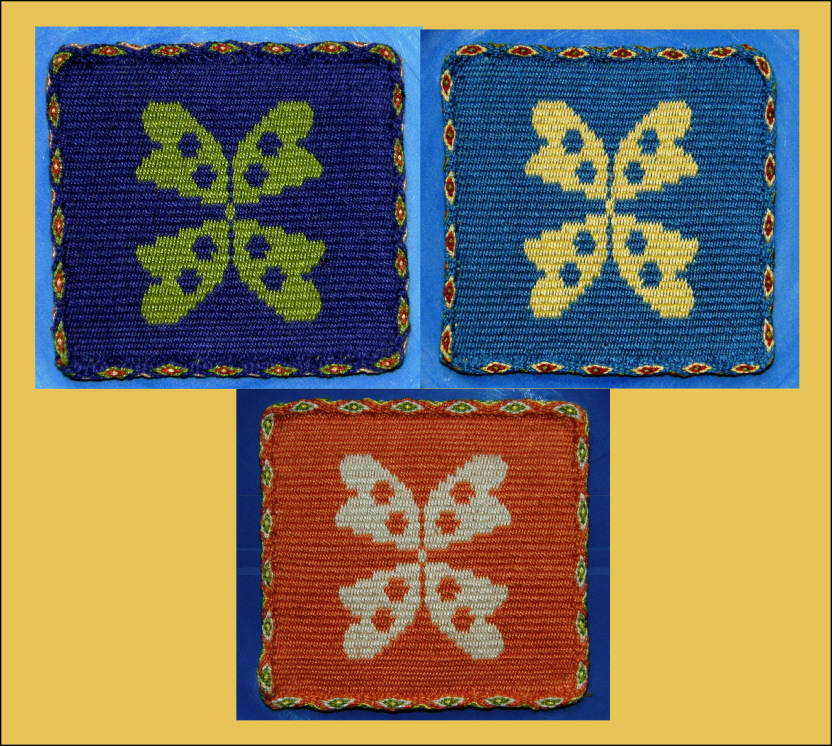
My friend, who has decorated her kitchen with flower and butterfly motifs, saw the prototype I had woven (at left) and asked for a set for her breakfast bar. Now she tells me that they are too pretty to use and that she will put them on her wall.

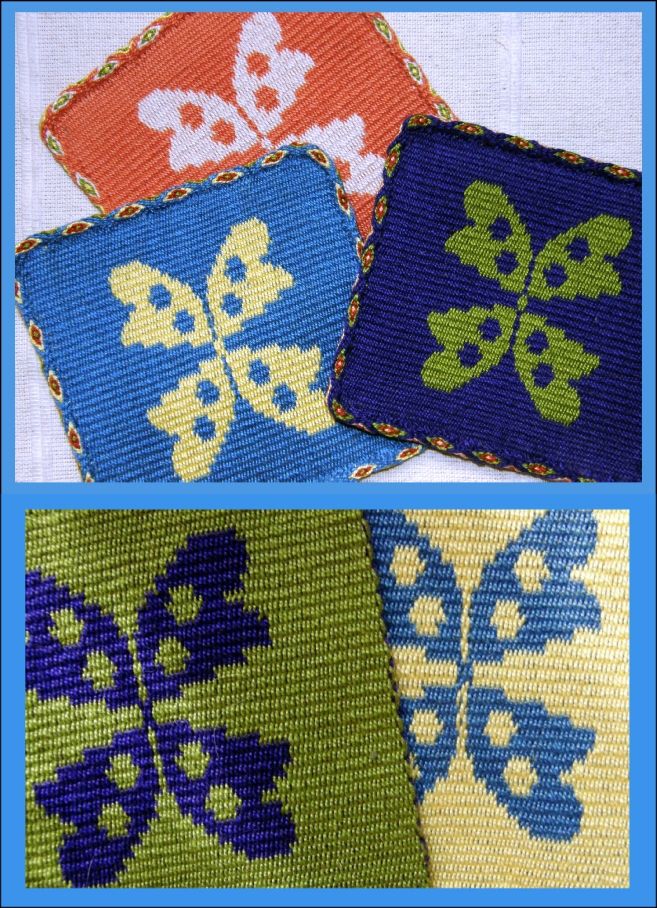
I have made three and will wait for her to choose the colors for the fourth. The motif is neither butterfly nor flower and is based on a Guaraní leaf design which I wove one way and then mirrored.

The red and black sample, which is larger than the other three, will stay here as my tea mug rug where I work on the floor and the other three will go to Evelyn with a fourth one yet to be made. They have all been edged with tubular bands.

Evelyn’s kitchen is yellow with bits of green and blue in the wall tiles so I think these will look nice there.

It’s hard to decide which face to make the “right” side.

There is another commissioned piece that I have been working on, which I can’t show here yet, but this piece has made me even more enthusiastic about the simple string heddle.

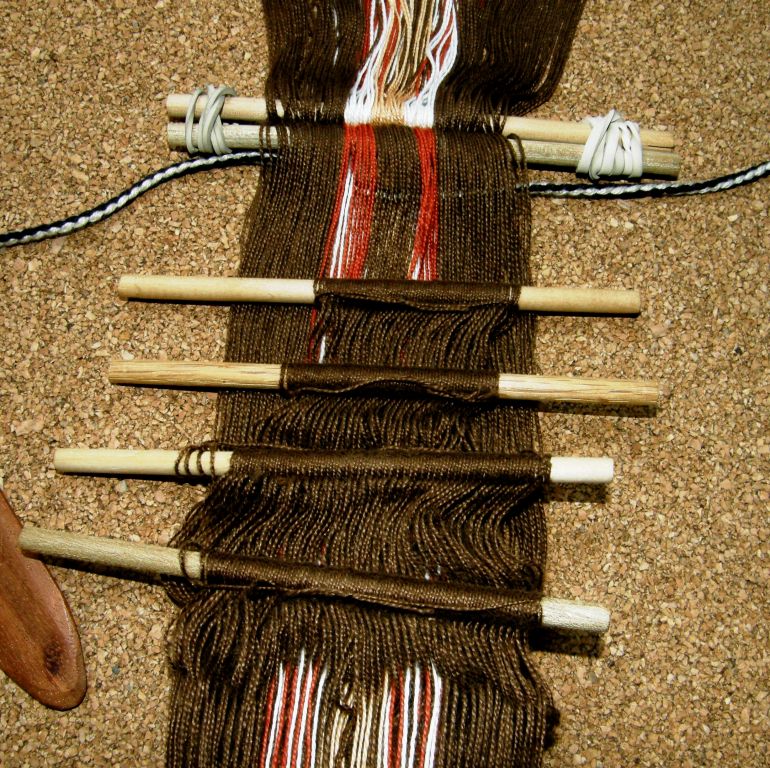
This is a particuarly long but narrow piece that I am weaving in Andean pebble weave and I have set up the warp with four sets of string heddles (two more than I would normally use for pebble weave), and what an incredible time saver this has been! This project is simply zooming along!

The black and white cord that you see in the warp is my “saver cord”. By using these two additional sets of heddles and the saver cord I actually get to do seven consecutive weft passes without having to do any pick-up for this particular design.

String heddles are so cool! I love how they allow you to put one warp thread into multiple sets.

No matter how they are made, whether they are single or continuous, I love them.

You can use one, two, three or four as I am currently using. I am not sure what limit I would put on the number that I would personally consider comfortable or practical for my own backstrap weaving. I have seen backstrap weavers in pictures with many more.

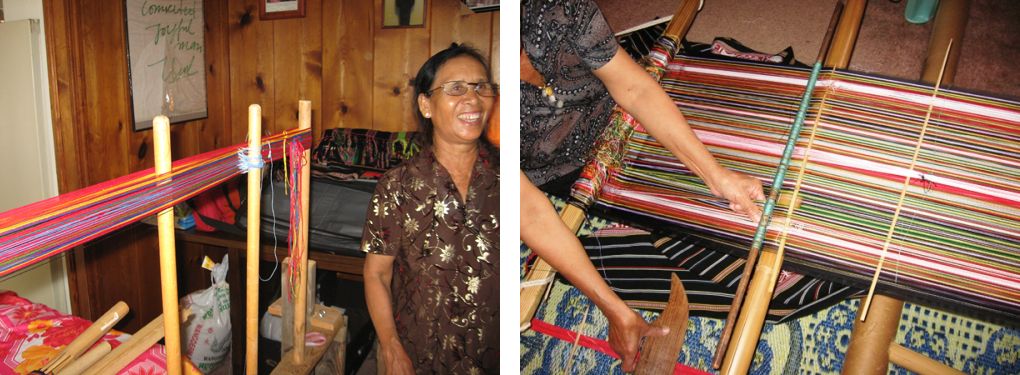
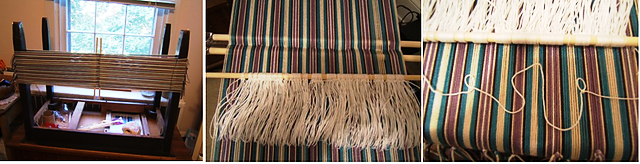
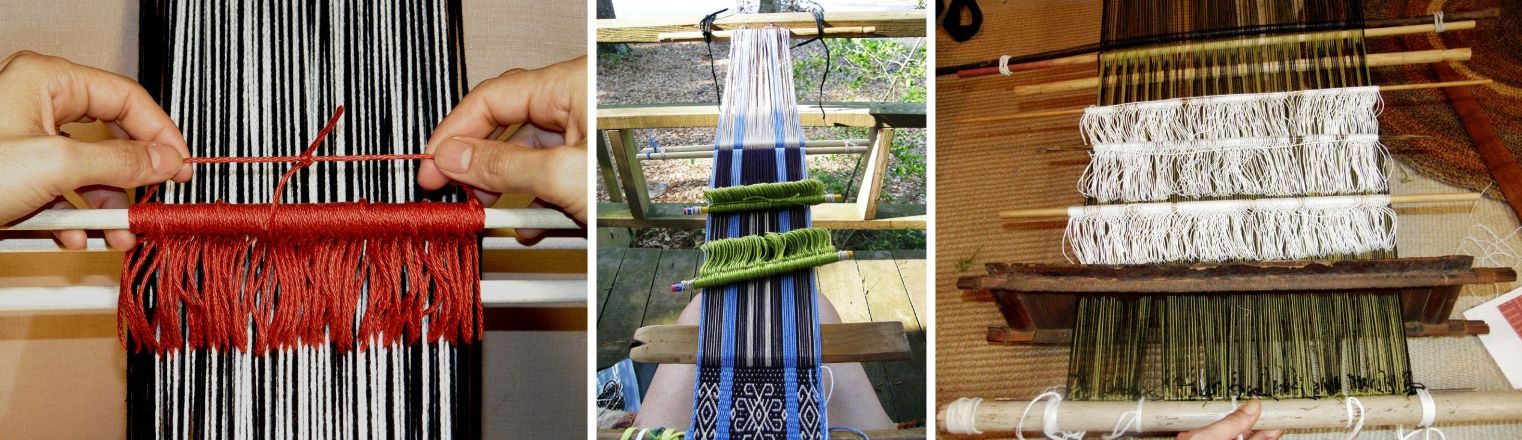
The warp on this vertical loom in Ecuador will have eleven sets of patterning heddles plus one that will control one of the two plain weave sheds.

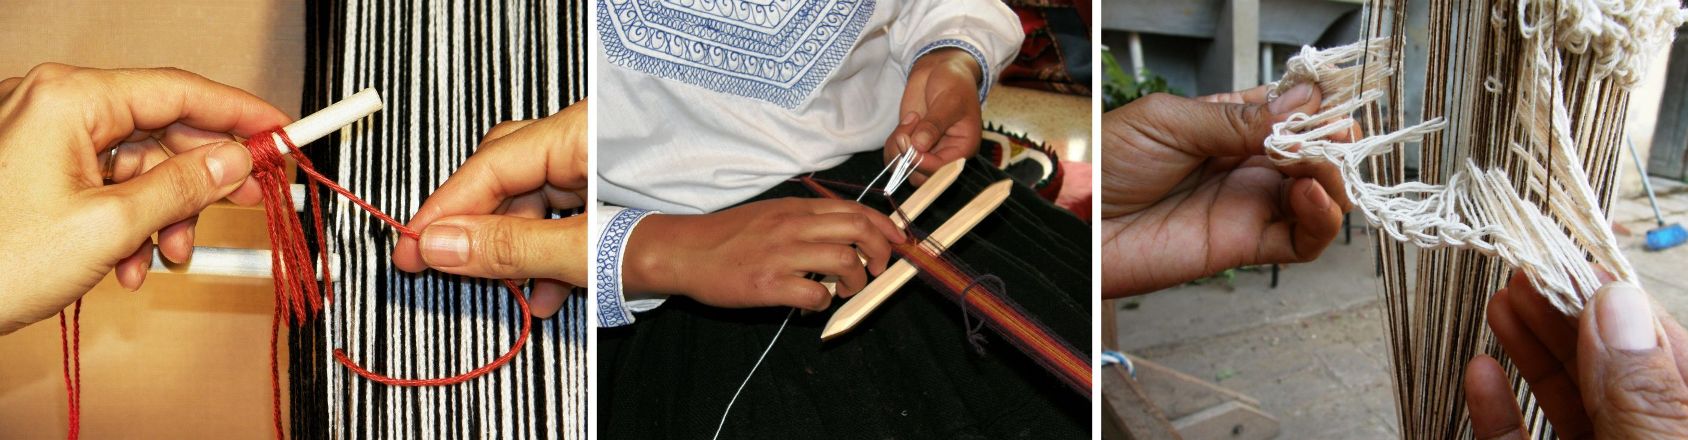
They can be made on a stick, made around the fingers and knotted into a bunch or chained together.

There are so many different ways to make them with no one particular way being the “right” way. I have chosen my favorite ways over the years but love seeing and learning new ones.

Education and More has just posted the following video on YouTube showing a Guatemalan weaver teaching her foreign student the way she makes her string heddles.

While on the subject of Guatemala, it is always fun for me to go to Facebook and see the latest video that Red Corn Tours has posted on Guatemala…weaving, costume, festivals and different aspects of simple daily life from the making of tortillas to the washing all those beautiful hand woven huipiles.

And now for our plain-weave backstrap loom weave-along progress….

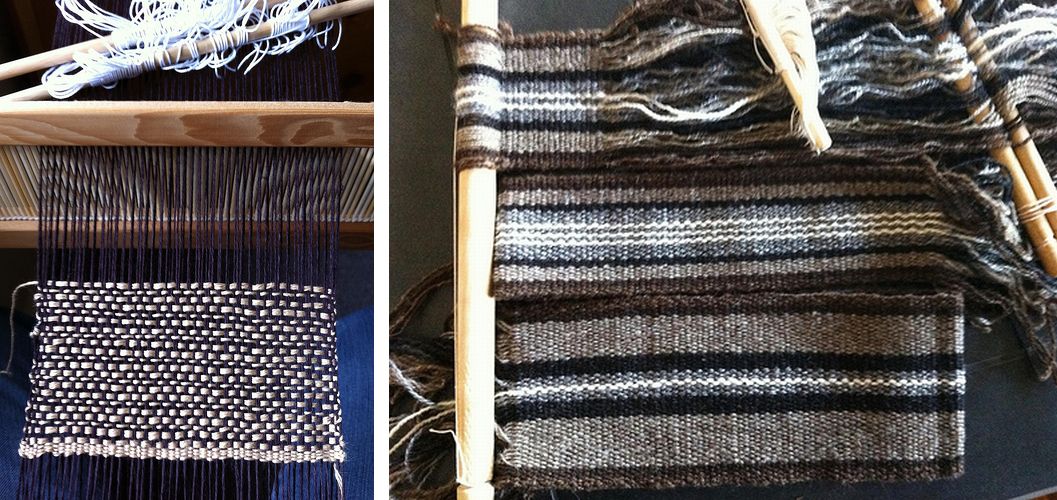
We started this week with more people, so far, opting for the balanced weave project after a flurry of pre weave-along DIY reed and hole-and-slot heddle making activity.

Warp-faced projects for the color and stripes challenge from Bobbie in cotton and Jennifer in her homespun wool.

Those who have not joined the weave-along have been turning out projects on their backstrap looms as well.

Jennifer is weaving a balanced piece using hemp yarn and a reed made for her by Janet. She has also finished three plain weave warp-faced panels with her homespun wool which will be joined into a bag.
Here's the beautiful reed that Janet made. Kathi has set up her loom with a rigid heddle with different kinds of yarn for her balanced weave project.
Cindy has joined in showing us her warp wound on its stakes and there she is with loom set up and ready to weave a warp-faced band.
Blomster is using wool in a piece she is weaving with a rigid heddle on her backstrap loom. It is pictured next to the warp-faced band she made with the same warp. She is making a bigger wall hanging using her rigid heddle loom and natural color and madder-dyed wool as, being new to backstrap weaving, she does not feel ready to attempt such a wide piece yet on a backstrap loom. Her wide piece is inspired by the hanging you see nearby which she bought in Oman. She thinks that it was probably made with goat hair.

Both Amber and catknitlatte have reported that they are on their way and we hope to see progress pictures soon.

Fiall and WannaGTD finished these backstraps before the weave-along started but these backstraps could easily be weave-along projects as they fit the plain weave criteria.

The instructions for weaving these backstraps are in my WeaveZine article.

Janet is making a shawl using her 24" rigid heddle and a bunch of different yarns. Her warp is cotton and her indigo-dyed weft will come from her homespun stash. This is really amazing! She will weave it in several panels.

Knitnfrenzy and ElizArtist have both checked in. Knitnfrenzy is going for a warp-faced project while spindleori showed us her homespun, at left, which she will weave up with a rigid heddle to make a bag.

Dygvvi is going to weave fabric which will go around a frame to make a yarn storage bucket.

We are waiting to see what Franco, AuntJanet and Phil have been up to. We know that Phil has a painted warp and can’t wait to see how that is going.

Marsha and Traudi have been working on their patterning techniques on projects outside the weave-along. Marsha's band has designs in both simple and two-color alternating floats ("warp floats galore") while Traudi has been playing with supplementary weft patterns.

And what about my weave-along project? Blush…I had better get going and go warp one up!