I just wanted to quickly show what I made with the fabric I was weaving in my last post.
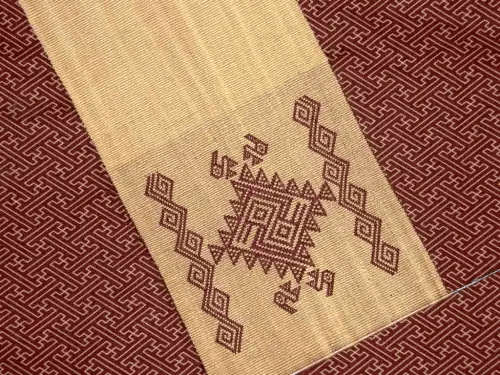
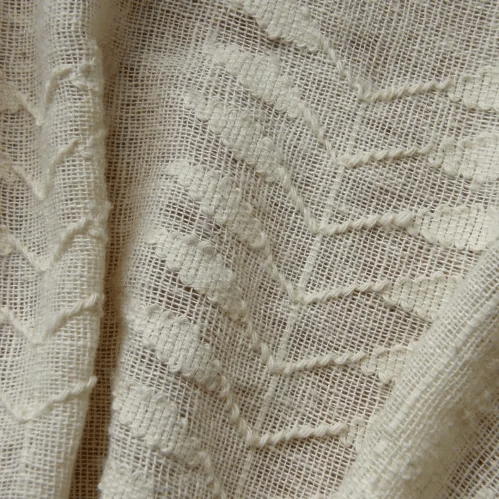
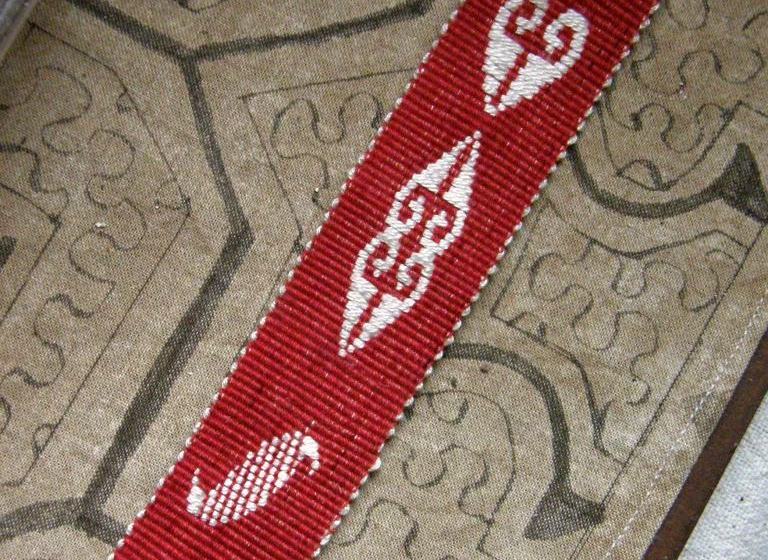
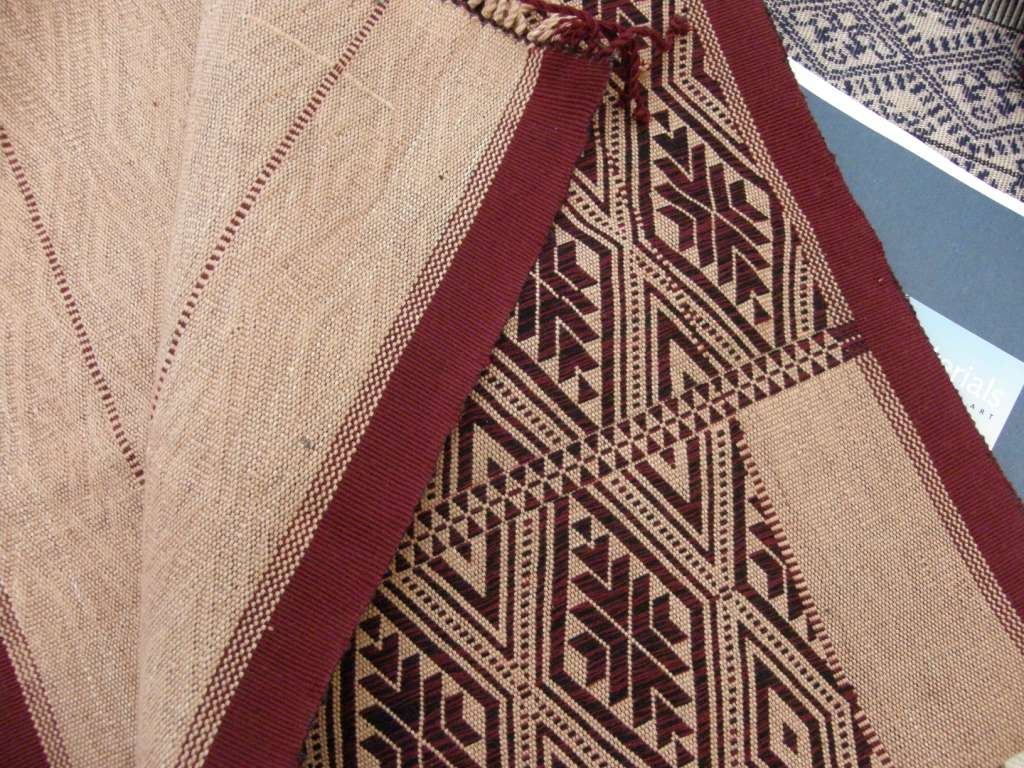
Supplementary-weft motifs in red silk on cotton.
Bear in mind that I am not much of a sewer and that my thrills from sewing successes, therefore, come cheaply. I do love stitching by hand, though.
I really liked a box-like purse that Handymum had shown in a video tutorial. She doesn’t speak at all in these videos and explains everything with hand gestures and occasional text in English. When I can also mute the music, it becomes my favorite way to watch these kinds of videos. They play at high speed and so I need to watch them several times to be able to catch everything. I save only the very simplest ones while I improve my skills. I’m not going to risk my handwoven cloth on something that is beyond my skill level.
YET, if I’d really respected my lack of experience and sewn a sample with fabric I have floating around, I would have avoided a silly mistake I made.
The unusual layout of the pattern is due to the nature of the box-like purse I planned to sew. The plainblue that flanks the pattern would be the sides of the “box”.
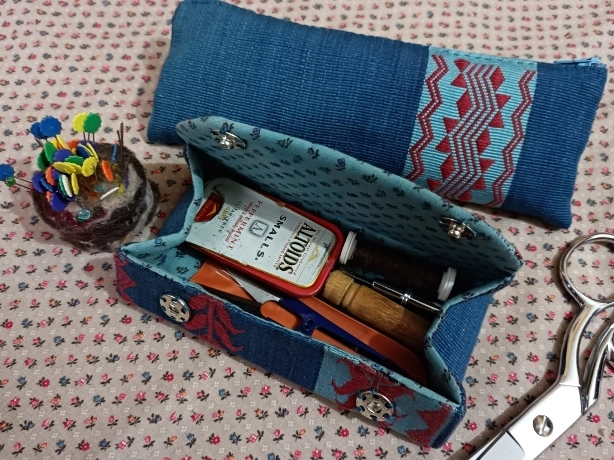
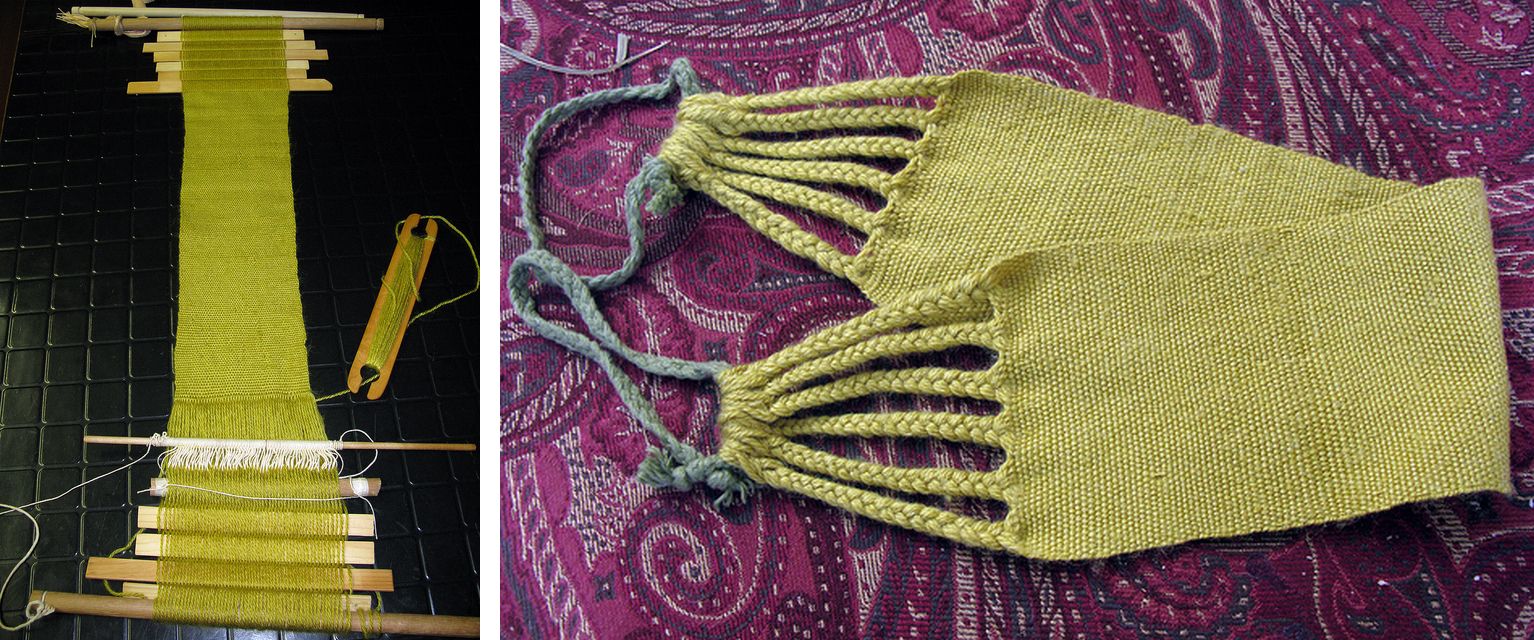
I managed to get a second product, a slim zippered tool case, from the extra bit of warp I had put on the loom. Iswitched to a different patternfor thatbased on warp-float snake designs that are woven here in the lowlands of Bolivia.
Guaraní weavers here create snake patterns in the structure that I call Andean Pebble Weave. (They call it kara kara pepo) There are so many versions of it, both simple and complex. This is my modified version of one of them. I love how it looks in supplementary-weft in my latest project.
The sides and front of the box shape collapse inward so that when closed, the purse lies quite flat. I thought this design was really cute. What I love is that you can unclip the flap, open it up and clearly see everything laid out inside instead of having to dig around inside a zippered pouch. I occasionally have to tip out all the contents of some of my larger tool pouches in order to find something.
I dyed a piece of the fabric on which the pieces sit here light blue to use as the lining.I’ve put basic sewing supplies in there…a tin of pins, a wooden needle case, snips, a stitch ripper and some dark thread.
This was the first time I had sewn in the lining before sewing up the piece and the first time I sewed everything before flipping the whole thing right-side-out. I told you about my cheap thrills, right? I was so pleased with myself! As for the mistake, I sewed too close to the thick interfacing. In her video, Handymum sews on the lines she has drawn onto the lining and you can’t see how close she is to the interfacing on the other side. Rather than draw lines, I flipped my piece over and sewed around the interfacing instead, but much too close considering the thickness of the interfacing (I used two layers). I’m all for ripping things out and doing them over but it was too late. I’d already snipped the curve of the top, cut the points off the outer corners and cut into the inner ones. And so, the seams are really strained and stretched over the interfacing and some of my (black!) stitching shows as a result.
I have some of the same Guatemalan cotton in a color called champagne and I might have another go at this sewing pattern but in a longer version using fabric woven from that thread.
Like the indigo cotton, the champagne-colored cotton from Guatemala is slightly finer than 20/2. I love weaving with this stuff.
I’m sad to see my supply of that indigo-dyed Guatemalan cotton getting low although stash-busting is my goal after all. I just know that I’ll probably never get to replace it. It’s special because of the way it has faded after all these years. I love the way it weaves up with all its variations of shades of blue. I still have loads of the champagne color, though. I’m assuming that it was also dyed with natural substances but it doesn’t seem to have faded. I’ll know for sure when I compare the thread on the inside of the cakes to the outside layers of thread.
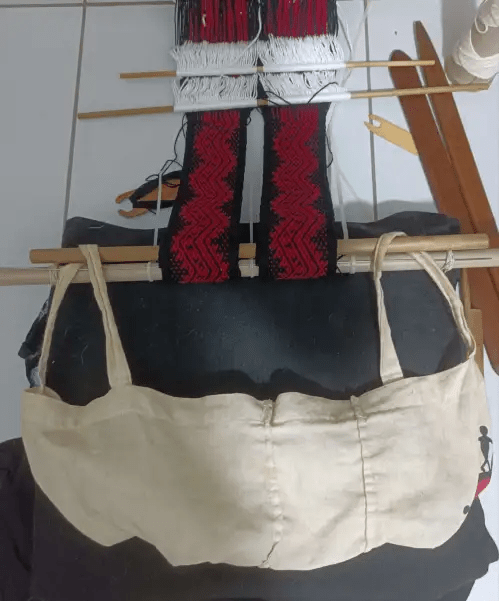
As for the next project, it will be yet another bag, hopefully. Not another, you say?! But I like to think that I’m thinking a bit out of the box with this one. I have this crazy idea of making a long bag in which to carry my backstrap loom that doubles as a backstrap.
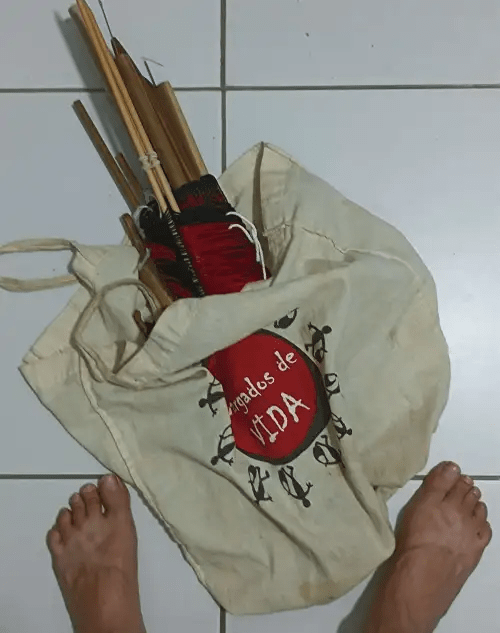
When I was house-sitting last year, I took my loom with work-in-progress to my new digs in a large cotton tote bag……
…..only to find that I had forgotten to bring a backstrap. It turned out that the tote bag in which I had carried it made a fairly decent emergency backstrap. From this came the idea.
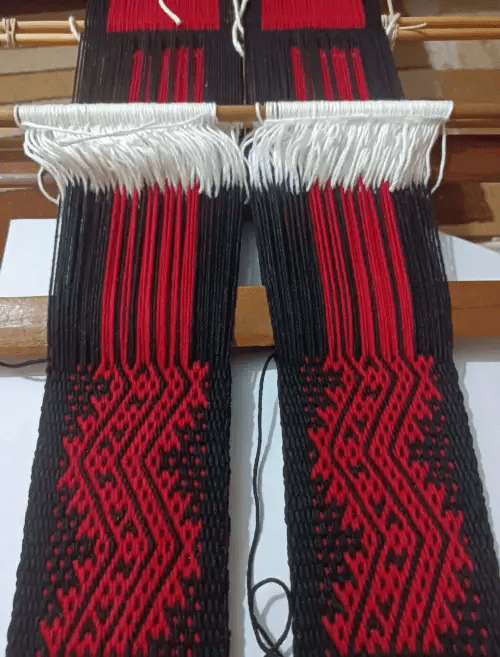
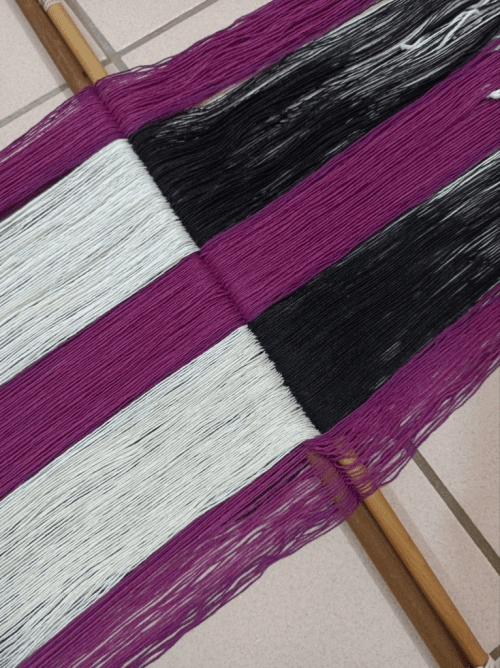
I’m using Guatemalan cotton again except this is somewhat heavier stuff, also from Mayan Hands, that my friend Kate gave me. I dyed the black and it accompanies cochineal-dyed purplish-red (dyed in Guatemala) and natural white. I’m back to one of my old faithful color combinations.
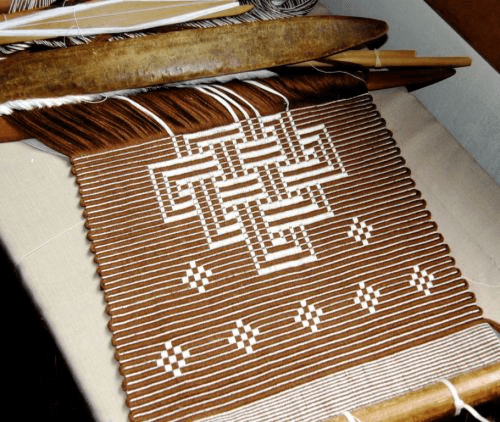
I’ve tossed around various ideas for the structure and pattern and I think that I’ve finally (almost!) settled on rep weave to give me good sturdy fabric with complementary-warp pick-up patterns. I do try to learn something new with each project. I have in fact woven rep once before and so its not entirely new, hence the “almost” in parentheses. I keep thinking that I need to add a twist to this somehow. If not, creating the strange backstrap/tote bag may have to be the new part of this project.
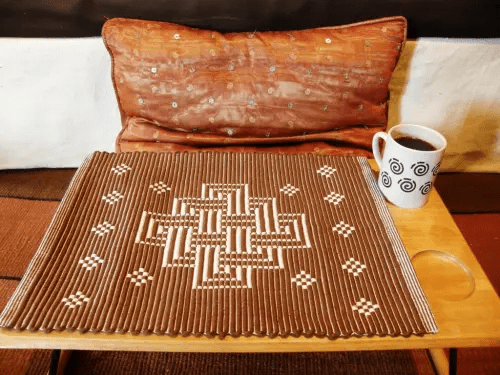
The only rep weave piece I’ve woven so far.
It makes a nice placemat for my tray table so that things don’t slide around.
In the two new projects that I’ve shown in this post, the thread has come from Guatemala. The finer stuff was bought from Mayan Hands at a conference many years ago in Bellingham. The heavier thread, also from Mayan Hands, was given to me Kate.
Kate working with her Guatemalan loom and warp when I visited in California.
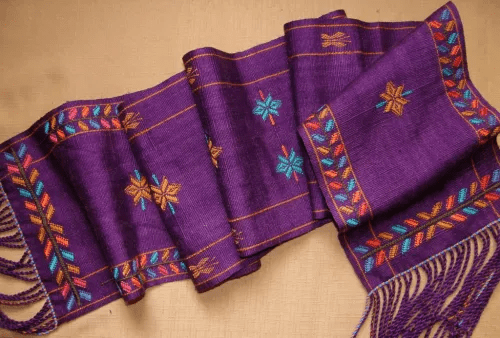
I wove this scarf using fine cotton thread from Guatemala that was given to me by Betty. She had bought it in the 1980s!
I used patterning techniques that I’d learned in Guatemala to decorate it.
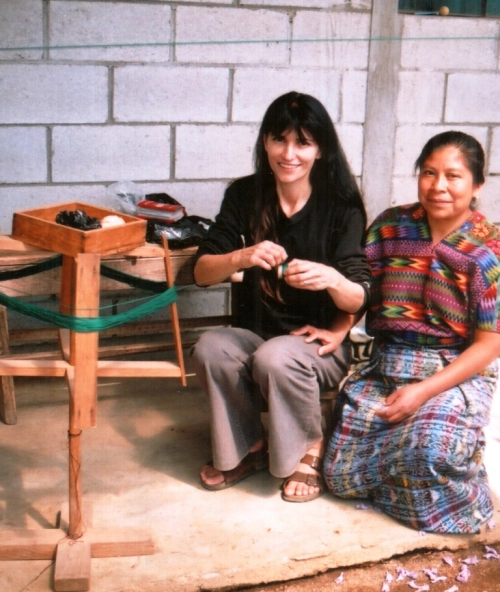
I went to Guatemala myself in 2008, met my teacher Lidia and also brought back some cotton of the kind that you see here on the swift.Lidia took me shopping to get the best prices!
I haven’t done a whole lot with it because the quantities were quite small. I’d bought it with the idea of using it as supplementary weft rather than as warp. But here’s one thing I ‘ve used it for….
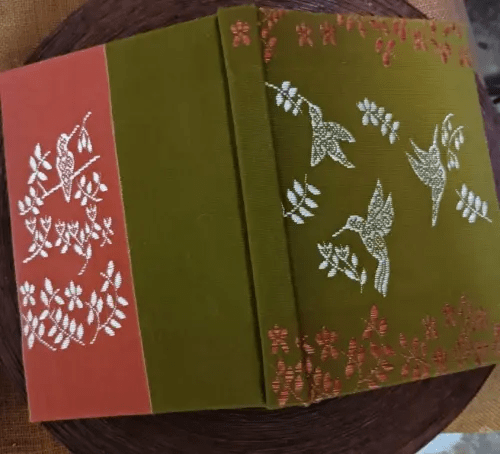
Fabric for a book cover. There wasn’t enough of any one color and so I had to step outside my color boxand combine two.
So, that’s another stash that I’d like to get into. And, on that same trip I bought a ball of handspun cotton singles from a spinner. The ball sat in the closet for close to ten years and then I got to use pretty much all of it for this sheer scarf project….
I love this white-on-white supplementary weft technique.
I haven’t been to Guatemala since 2008 but every now and then someone puts a Guatemalan warp in my hands and I get to take a trip down Guatemalan-weaving Memory Lane….(and it seems that this post is also turning into one!)
I hope to make another trip to Australia in October and I’m thinking that maybe I could make a little side-trip to Guatemala from Miami on the way back when I’ll be virtually empty-handed. Who knows?
As for now, I need to go and figure out what to use for the thick weft in my rep piece, if in fact rep is my final decision for this project. See you next time.
Since I last wrote, I had the luck to cross woven paths with a lady who lives on Hainan Island in southern China. She found her way into my inbox via my blog after she had spent time with some backstrap weavers on Hainan Island from the Li minority group.
I imagine that it had been a very intense time watching the weavers at work trying to absorb and make sense of everything they were doing. Megan told me that although she speaks Mandarin, the weavers speak a local dialect. They were only able to communicate using some very basic Chinese words. It reminds me of weaving with Quechua-speaking ladies here in Bolivia and Peru. One of my teachers had the habit of throwing a word in Spanish at the end of long sentences in Quechua hoping, I suppose, that it would somehow give context to what she was saying. Believe it or not, it sometimes actually did help me to get the gist of what she was saying! None of it was instructional, though. It was basically chit-chat and the way that we tried to bond talking about our families.
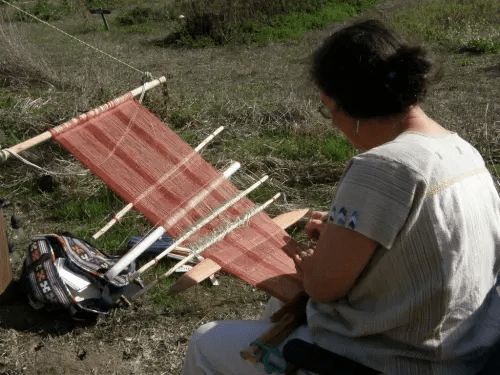
Here’s Megan observing one of the Li weavers at her foot-tensioned loom.
She told me that the loom had been warped and fabric had been woven before she arrived and so she was able to watch the steps to creating the patterns with the supplementary weft threads but had not had a chance to see the loom being set up.
She took home a loom with its partly woven fabric but was understandably a bit confused about the process and unable to sit and continue the weaving on her own. As she was about to travel to Europe and wanted to take the loom with her, she did not have a chance to return to the weavers and have her questions answered. I am glad she found me! She sent me a brilliant high-resolution photo of the loom with the parts numbered and an email in which she named the parts as best she could. I love to trouble-shoot but I can’t do so without good pictures that I can enlarge. I couldn’t have asked for more from the pictures that Megan had sent me. The piece is decorated with supplementary weft.
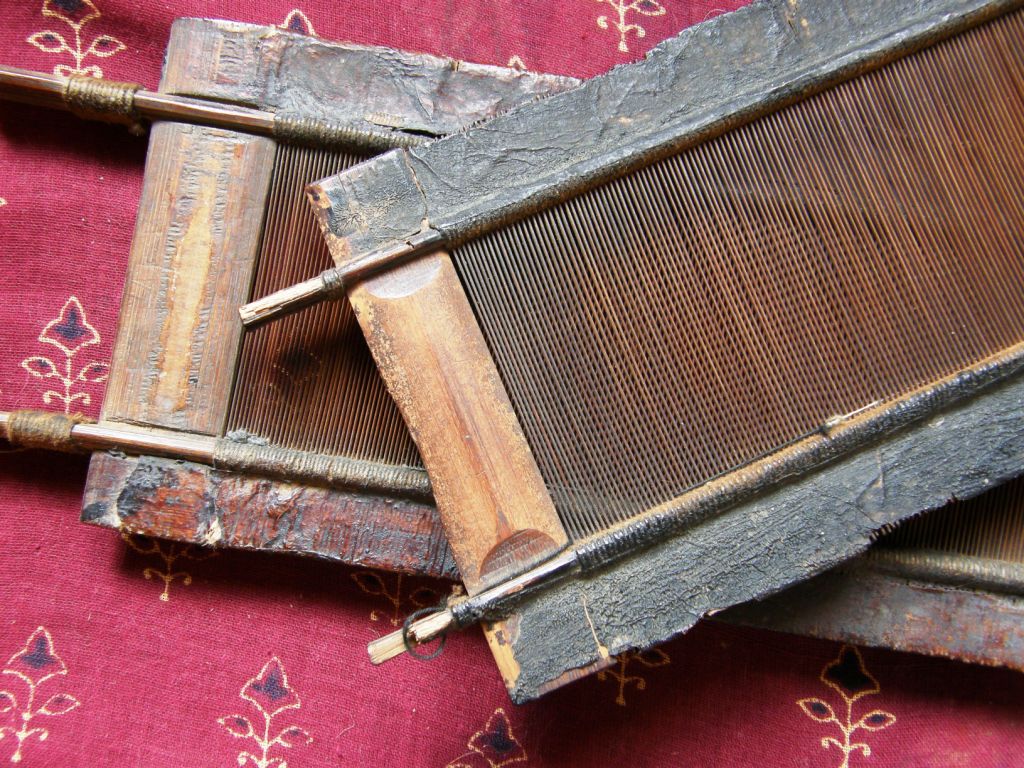
It was exciting because I had seen Li backstrap looms when I was at Convergence in 2010. Pam Nadjowski had a booth in the Vendor Hall with textiles and weaving implements of various Chinese minority groups and the Li loom was one of them. That’s it pictured below. I was tempted to buy one because the pieces were so beautiful However, I eventually settled on buying two fine bamboo reeds instead that have served me very well in my weaving projects.
Pam had sent me and allowed me to use pictures of the Li weavers that she had taken during the Santa Fe International Folk Art Market one year. Clearly they use several different kinds of techniques to decorate their woven cloth, not only supplementary-weft inlay.
I love the paddle-like ends of the beam against which the weavers place their feet. Megan’s loom is much simpler. I like how a piece of plastic tube has been used in hers as the shed rod. The caps on the ends are handy for helping to stop the rod from sliding out of the warp. Weavers in Peru often use pvc pipe for the shed rod in their backstrap looms. They thread a safety string through the hollow pipe and tie the ends together which helps to stop the pipe from sliding completely out of the warp. You can see how beautifully the paddle ends on the Li loom are decorated in my photo from Convergence.
When I examined the photo with the numbered parts that Megan had sent me, I was excited to recognize the set-up as one that had been taught to me by two of my weaving teachers in Guatemala in 2008. That’s one of my teachers, Carmen, in the picture at left. I have even written a tutorial on this blog for the set-up and technique.
So, I was able to help with an explanation. Because Megan had named the loom parts in her email to me, we already had a common vocabulary with which to work. I could point her to my tutorial which also has video and, with those prompts, she was able to remember what the weavers had been demonstrating and she was on her way! She too remarked on how much fun this connection was. In her words…
This was exactly the advice I needed, as now everything works PERFECTLY! I am so happy, not only because I managed to move on my own, but also because a lady on the other side of the globe, who works with native people of different culture, was able to give me solutions. I find this very awesome 🙂
Here she is contentedly weaving at her loom….I have to say that she seems to have the right toes for this.
Now we can take another look at the picture Megan sent me with the numbered parts and I can name them for you. The rods hold a circular warp which are, as far as I know, far more common in Asian backstrap weaving than single-plane warps. In South America I have only seen circular warps used by backstrap weavers in Ecuador and I have read that they are also used in far northern Peru. The Vietnamese hilltribe weavers with whom I studied also use circular warps as did the Burmese weaver that I spent some time with one day.
#1 and #10….the warp beam and cloth beam…or near beam and far beam as I usually call them
#2 coil rod or rolling stick
#3 patterning shed stick 2
#4 shed rod
#5 patterning shed stick 1
#6 heddle rod
#7 and #8 patterning swords
#9 main sword
Half the black warp threads lie on top of the shed rod. The other half are enclosed in heddle loops and are raised when the weaver lifts the heddle rod. Patterning shed stick 1 holds certain threads from the shed-rod shed. Patterning shed stick 2 holds certain threads from the heddle shed. It’s these threads under which the supplementary weft is passed to form the patterns. The patterning sticks raise groups of threads and the weaver selects threads from these groups according to the pattern she is creating.
Here’s the video that I created a few years ago to show how to set up a warp with these patterning sticks. I am using heavy cotton thread and a really narrow warp just to demonstrate this. The second part of the same video shows how to operate the loom and use the sticks to create patterns. You can pass the supplementary weft from one edge of the cloth to the other as Megan’s weaving friend has done or you can create smaller discontinuous patterns by passing the weft back and forth just from edge to edge of the motif itself as I demonstrate in the video. My Guatemalan teachers use both techniques.
You can see the rest of that tutorial here. This is the cloth that my teacher and I wove together in Guatemala. The X patterns used continuous weft from edge to edge. The little figures were woven using the discontinuous method. Simple inlay as well as wrapping and soumak-like techniques are used to create these kinds of patterns. The blue checkered pattern is supplementary weft passed through the two unaltered patterning sheds. I used these methods to weave this cotton scarf some years after that trip….
Every now and then a student will bring me a warp that they bought in Guatemala with partly-woven cloth and I get to play on it! You can see the two patterning sticks in the warp just to the left of the shed rod….one on top and one below. Guatemalan weavers use single-plane warps rather than circular ones.
I am not sure what kind of system the Li weavers use to clamp and roll up their circular warps. The warp does need to be secured before weaving can begin or it will slide around the beams every time the weaver beats. I own an implement that I got from Dar Ku, a backstrap weaver from Myanmar, that I was able to spend some time with. It’s a split beam, the two pieces of which are placed above and below the unwoven warp ends and then joined and rolled to secure the circular warp and stop it from slipping around the beams. So far, I have only used it in more unorthodox ways.Right now, I am using it to secure to my current piece of weaving…
I found that I could no longer roll up the woven cloth around two beams as I usually do, as the little built-in pocket is bulky and was creating a bump. That was messing with the tension on the unwoven warp threads. So, I removed the cloth beam and had to find another way to attach myself to the piece so that I could continue weaving and be in comfortable reach of the weaving line and heddles. I have clamped the cloth between the split beam. I add another beam and can roll the cloth around both. Two rolls get me to a good position where I can start weaving again. That is working well.
Now I am on the home stretch having passed the half-way mark and have finished the diamond section of the pattern. Now I will weave the two weaving ladies again. This time I get to weave them the right way up rather than standing on their heads! I am thinking of trying to design a tree under which they can sit and weave in the shade.
Progress hasn’t been as fast as it could have been because I am working on another book. I realized that it is not often that I get to spend this much time at home and that I really need to take advantage of that. Too many of my book projects have been started and left standing with the interruption of travel. I am also very buzzed about the fact that I can include video clips with my publications on Patternfish. This is highly motivating!
Here are some projects from students and online weaving friends…..
Christine, who came to weave with me in Maine, is using a Harrisille Designs band lock, in much the same way as I am using the split beam, to clamp her band. She took this project away with her and reported that this was the easiest way to bring weaving along on her trip in carry-on luggage.
Caroline designed and wove this cute snail motif on a warp-faced double weave band that we started together.
Gonit Porat in Israel wove a fabulous band with several patterns from my book of traditional and original Andean Pebble Weave designs. She uses the two-heddle method which is just one of several ways to set up a loom for this structure. Click on her name to visit her website and see the amazing work she does with hundreds of tablets.
Yehudit is making striking key fobs using patterns from my Complementary-warp Pick-up book. That book shows another way to create Andean Pebble Weave patterns without using additional string heddles. And this is what Lenora is weaving using the same book. It is amazing how a little imagination in the arrangement of colors in the borders can give a band an extra bit of zing. I love it.
Lausanne finished the wool band with its aquatic patterns that she started during my visit to Vermont last year. She also used the two-heddle method for these Andean Pebble Weave patterns that are charted in my Pattern Book.
And, I was right in guessing that Kristin would be the first one to show me a project in which she wove and sewed the eye-pattern tubular band as an edging for her hand-woven cloth. This was all made with her own hand-spun alpaca yarn. It’s a beautiful finish for this piece.
Some feedback from an online weaving friend on these tubular bands and my most recent book, in which she compares the bands to potato chips, brought a smile to my face and really made my day 🙂
Oh my, these little bands are just like potato chips, but way healthier. I just can’t stop at one! I was in a bit of a weaving slump, but now I’m dreaming of things I can weave, just so I can add this lovely edging. I can hardly wait to finish one band so that I can try another in a different colour combo. I’ve been waiting for a book like this for years, down to earth and easy to understand. Thank you Laverne!
Lizzie Ruffell has been weaving bands using some of the knot-work pattern that are charted in my second book. She says that she is now completely comfortable with the spotted charts, has managed to adapt a tablet-weaving pattern (the dragons) to pebble weave and chart it, and is keen now to create some designs of her own.
While my northern hemisphere friends huddle indoors away from some of the coldest temperatures in decades, and Australia recovers from its recent heatwave, I am enjoying a few days of cooler temperatures here. I was filming video clips during a stretch of particularly hot days last week (I still can’t get a tech to come out and look at my broken air conditioner!). I have to get myself into some pretty awkward positions sometimes to film and give people the weaver’s view of what I am doing. At one point I had to stop filming because sweat from my forehead was dripping onto the band I was attempting to weave. I can tell you that holding some of the positions is doing my abs a whole lot of good!
I will leave you with a bright band and some spring-like images to brighten up your cold days, or soften some brutally hot ones. I call this band Birds, Bees, Butterflies and Blooms.
One weaving tool which hasn’t really made its way into my kit is the temple, an instrument that helps weavers maintain consistent width in the cloth they are producing. I have never really felt the need to use a temple and that’s most likely because I haven’t used my backstrap loom to create the kind of cloth that I felt required one. The ladies with whom I studied in Guatemala used temples. They were wonderfully simple tools….a piece of bamboo that sat underneath the cloth with a couple of small nails holding it in place.
I have to admit that I would cringe every time we pushed those nails into the edges of the woven cloth. When I took the pieces that I had started weaving with my teachers in Guatemala back to Bolivia to finish, I continued using the temples for a while. However, I soon abandoned them as I really felt that they weren’t doing anything for me. I have seen some fine Bhutanese textiles with horrible holes gouged at intervals into the edges from the sharp ends of the temples and that, more than anything, has really put me off using them.
But, now as I am typing, I am remembering that there has actually been one piece of cloth that I wove where I could see a clear need for a temple. It was a wide silk piece that I wove some time ago. I did manage to get away without using a temple because I couldn’t bear the thought of pushing nails or even pins into the edges of the silk.
When weaving this wide piece, I was finding that the cloth would ripple slightly as I propped the shed open ready to pass the shuttle. I had to try and grab the edges of the cloth, first one side and then the other, to straighten and smooth the cloth so that I could be sure that I was laying in the right amount of weft. A third hand would have been handy! It was clumsy and slowed me down but I was willing to do it to avoid using the ”dreaded” temple.
My Montagnard (Vietnamese hill tribe) weaving teachers used wooden temples with carved pointed tips for the cloth they wove on their backstrap looms. They even used them for narrow bands…
And, my weaving teachers in coastal Ecuador who wove on vertical looms rather than backstrap looms, used a similar style of temple cut from a large tube of bamboo that they attach to the upper face of the cotton cloth on the loom. I remember really struggling to bend that slat of bamboo into place each time it had to be re-positioned on the cloth. This heavy-ish sturdy cotton did not suffer at all from the pointed tips of the temple.
Why all this talk of temples? Well, I would like to weave another sheer cotton piece like the one I just wove but using much finer cotton. I don’t have a reed that is fine or wide enough for the piece I have in mind and so I will have to resort to trying to maintain the sett and width by other means just like the Guatemalan weavers in Alta Verapaz do. The temple will help with the width. Maintaining the sett will be another story! What tool do the ladies in Guatemala use?….skill and lifetimes of experience and know-how passed down through generations!
Until I get the fine cotton singles that I would like to use, I will practice with the little bit of hand spun cotton that I have left over from my most recent project. For that project I used a reed and so I have a sample from which to take calculations for width and something to guide me to determine and try to maintain the spacing between warp threads. I have wound a short warp with half the number of ends that I used for my scarf. Wish me luck!
Here are some bits and pieces I have gathered together for possible temples…
The piece at the bottom of the picture is the temple that came with a Karen loom that a friend gave me. Pins have been taped to a piece of wood and the temple was sitting on the back side of the warp-faced cloth. The bamboo pieces are the temples I was using with my teachers in Guatemala. The nails that pierced the cloth and then turned into the open ends of the bamboo, are sitting on top of the tongue depressor. I was wondering if cutting points into a piece of heavy cardboard like the black stuff you see there and reinforcing it with a tongue depressor would also work.
Or, there’s this….contributed by friend Franco to the backstrap weaving group on Ravelry many years ago…
It was working well for Franco. I would love it if I could get something like this to work for me. It measures and maintains width all at once!
As for my current project…it is finished! Except for the very first part which I un-wove and turned into fringe, I got a consistent 9 1/8 inches of width.
First patterns underway.
After finishing the hem-stitching the far end, I slowly unrolled the cloth and worked my way back to the start, burying weft ends as I went. Then I cut the weft out of the first wider part of the cloth and hemstitched that end.
Here it is off the loom waiting to have its fringe twisted before being washed and pressed.
Procrastinating! Enjoying the cloth and taking pictures because I was nervous about what was going to happen to it when it was washed!
Moe procrastination…yes, it’s sheer now but will it lose this translucency when it has been washed?
A whole day has gone by. Tomorrow I’ll wash this thing.
Post-wash and press: it lost between 1/8” and 1/4” in width and the warp threads moved closer together ever so slightly. It feels so soft!
Post-wash cloth with twisted fringe.
Post-wash verdict: I love this super soft supple cloth that is so unlike anything I have woven before!
Now I am thinking about dyeing it. Should I?
During all the pre-wash dithering, I decided to take a sample that I had woven before my last trip away and make it into something. You might remember that I wanted to make a wool shoulder bag with a built-in pocket in the style of the ch’uspas (coca-leaf bags) that the Bolivian weavers make. I learned how to set up the warp and weave the pocket back in 1997 with my teachers in Potosí. This small green piece is the wool sample that I most recently wove to refresh my memory of the technique. I edged the little pocket with triple cross-knit looping.
I decided to go ahead and make this into a little zippered pouch. I edged it with a tubular band style that is woven in Chahuaytire, Peru which also served as the strap. The bottom is decorated with coil stitches and the pocket is edged with single cross-knit looping. A four-strand braid makes a nice zipper tab.
The wool surface loved to attract the stray bits of cotton that I have had flying around during my latest project.
I had started gathering materials for this project before I had finished weaving the cotton scarf. I thought about what I could possibly fit into the tiny pocket and found that my door key sat within it perfectly. Two days later when I wanted to go out, I turned my apartment upside down looking for my door key. I was locked in and had completely forgotten about having placed the key in the little pocket. I had to call a friend who keeps a spare for me to come and let me out. Another two days went by before I picked up the little green bag once more to work on it and discovered the secret contents of the little pocket. Duh!
So….I guess the hand spun-cotton-with-temple experiment is next. I have also wound my skeined silk into balls ready for warping. I am thinking about weaving a silk cowl….just a simple tube to drape around my neck instead of a whole scarf. At three-and-a-half months into the grey hair transition I am still thinking about wearing color around my face to brighten things up a bit. Until next time……..
Facebook has started reminding me that it was five years ago that I opened my account. Every few weeks I get a Facebook Memories reminder showing me a picture I posted on that day five years ago with the option of sharing it with the public. It seems they consider five years the period of time that should pass before a person can look back on an event with nostalgia.The first one I got was this:
This was taken the day before my birthday five years ago. I was in North Carolina and went to visit some ladies from Vietnam – Montagnard, or hilltribe, backstrap weavers – to look at their textiles and watch them weave. They dressed me up in one of their traditional skirts. The skirts are made of two panels which are woven on backstrap looms. The panels are sewn together and the join is covered with decorative stitching. The entire piece is then placed on a frame so that it can be edged with weft twining. They also gave me one of their shoulder bags to carry for the picture.
The following day I returned to watch Ju Nie prepare her warp. I learned a lot about her use of the coil rod on a circular warp and heddles that are applied during the warping process. It was a perfect way to spend a birthday. I was lucky to be able to return to visit Ju Nie and Ngach again a few months later and study their weft twining technique.
I went home and wove something to put into use some of the things I had learned and seen…a patterning technique using warp floats, patterning with supplemental weft and weft-twining.
I can’t believe it has already been five years since I did this. It takes me back to the time of my beginnings in the online weaving communities, the purchase of my first digital camera and the start of this blog. So much has happened since then in my world of weaving and even more had happened prior to that. I am in my 20th year of backstrap weaving now.
I can’t believe that it has already been eight years since I went to coastal Ecuador to study cotton spinning and weaving with Trini and her family.
This has been on my mind because my friend, Janet, has just returned from time spent with this same family and it has been amazing seeing some of her pictures. Trini’s nieces and nephew have grown and one even has a child of her own now. I am waiting for Janet to send me pictures so I can show you. She has been busy practicing the simple warp float technique that she learned there…the patterning technique that you see on the piece in the above picture. She also came back with the confidence to warp up a 10-foot long piece using a dovetailed warping system (see below) on a large vertical frame to make a plain-weave panel for a hammock.
She will weave and sew two panels together to make the complete hammock in the same way that my Vietnamese hilltribe teachers sew panels together to make their skirts and blankets. The dovetail warping system allows a weaver to work her way around the circle of warp and then open out the cloth once it is off the loom without having to cut the warp ends. Stick D in the above drawing is simply removed and the intact end loops of the warp can be used to form the ends of the hammock.
Guaraní weavers here in the Bolivian lowlands where I live also use this system. They use vertical frames and cotton thread and weave their hammocks with pick-up patterns all in one piece.
Picture courtesy of Aude Rossignol.
It’s been thirteen years since I first met my Guaraní teacher, Angela, pictured above warping for a hammock, here in Santa Cruz. She left shortly after to return to her community. It was only in 2010 that I found her again back in the city.
I have had the joining of woven panels on my mind lately which is partly what has been responsible for all these thoughts about my past experiences with this practice and the weaving teachers who showed it to me. My latest project is about weaving two identical panels and then joining them using a decorative stitch.
I have done this in the past using narrow pieces which gave me a chance to put to use one of the decorative stitches that my Montagnard backstrap weaving teachers use. Below, you can see how I joined two bands to make a tool bag…
You can see the stitching down the center. I also joined a long belt that I started weaving on a floor loom at a friend’s house and finished at home on my backstrap loom. This is the piece that I used to put together my instructions for Andean Pebble Weave on a four-shaft loom.
I cut the long strap in half and sewed the two pieces into a backstrap. It has been used by many people who come to weave with me and is a favorite. I used the same stitch as the one I used on the tool bag for this project.
I came across some belt weavers in Peru who sew their pieces together to make satchels to sell to tourists. They create neat joins which they do not cover with embroidery.
I decided to be moderate in the width of this project rather than fill my loom bars up completely with thread. Weaving two very wide pieces with pick-up patterning and joining them is my ultimate goal. These panels are just under 12” wide with 1100 ends of Guatemalan cotton in each. I am weaving a pattern using silk supplemental weft along the four edges and leaving the center blank as I hope to sew large stitches over the seam where the two pieces will be joined.
The project has progressed with all the challenges that I had anticipated and then some more!
Firstly, I wrongly assumed that this brown cotton from Guatemala was the same as the red cotton I used in the project I showed you in my last post. I calculated to get a 30cm width based on measurements taken from the red piece but, once I started weaving, the piece clearly did not want to be that wide. So I unwove and started over at 27.5cm.
Both panels have exactly the same number of ends and are the same width yet the one on the left is exposing more of the white supplemental weft than the other. I have three broken warp threads in the one on the left and several others are looking kind of sad. Meanwhile, the threads on the one on the right are in excellent shape. I am scratching my head about that. I also have to be on the lookout for the need to adjust my beat as the picks per inch on one panel tend to outnumber the ones on the other. So far, it is pretty much under control. I expect the embroidery over the join will be another challenge and I think I will practice on other cloth before I attempt it it on this piece.
I have the idea that creating identical panels in plain weave in this fine thread may be more difficult than doing so using a warp-float structure. I think that finishing this project will place me in a good position for a second one in Andean Pebble Weave.
I played around a little with supplementary-weft designs before starting this piece. I had seen a picture online of a flower motif and wanted to try something new in the way I used the supplementary weft. The image was so tiny that it was impossible to see any kind of detail by enlarging it, but it gave me ideas.
One of the limitations of the single-faced supplemental-weft patterning technique that I use a lot is that you can’t really create and fill in large solid shapes. You are limited by the length of the weft floats. This is simply because very long floats are not practical. They won’t lie flat and can get caught on things and pulled. One of the supplementary-weft threads around the buttonhole in this bag that I made got pulled right out of the shed. It got caught on a finger nail as I fastened the button. It was too long and placed in a high-traffic area.
Naturally, the finer the thread you use, the more detailed the patterns can be. With fine thread, the weft could float over 15 warp ends, for example, and not cause any problems, whereas heavier yarns might make anything more than a 5-span float impractical. This means that if you want to fill in a large shape with supplemental weft, you need to break the weft floats into several short segments.
This is the picture I saw online…
I am not even sure if this is a handwoven piece of cloth or what the technique is but I like the idea of having the shapes of the leaves and petals broken into those regular diagonal sections. It gives the shapes the look of being solid without being heavy. It is a lovely delicate look and I would love to create something like it.
At the bottom of this red band you can see my first rather clumsy experiment with this idea. I wasn’t pleased with this and will definitely keep working on it. In the meantime, I decided to go with something more Andean-like for the current project and wove a couple of samples to test design proportions.
My Guatemalan weaving teachers have their ways of dealing with large shapes. I took out my Guatemalan samples pieces and journal to refresh my memory and, again, I had to pause in disbelief at the realization that it has already been 7 years since I went there to study.Below, you can see one of the patterns that is typical of San Antonio Aguas Calientes. You can see that the large shapes, that look quite solid when viewed from a distance, are made up of several short weft floats. Three short floats take the place of one long one which would simply not be practical on a woman’s blouse.
The weavers of San Antonio Aguas Calientes use both single and double-faced techniques when patterning with their supplementary weft threads. The double-faced technique allows them to create truly soild looking shapes without the sort of ”speckled” effect created by the exposed warp ends that you can see in the single-faced method above,
The bird and flower motifs that I wove above are made with the double-faced technique. The motifs look exactly the same on both faces as you can see below. Although the figures actually comprise a series of several short weft floats, they look solid.
Here’s a brief explanation of how the double-faced method works. This is not meant to be a tutorial as I have not gone into details of thread weight and how to actually start and end a pattern. I just want to give you an idea of how the solid look is created as I have been asked many times about this especially by my backstrap weaving friend, Eladio, in Mexico. I hope he is reading this!
The ground cloth is warp-faced plain weave. The next shed in the weaving sequence is opened and the band is beaten. Then, blue supplemental weft is worked over and under the warp ends on a closed shed, that is, the weft goes over and under all the threads rather than just the threads in any one shed. The supplemental weft goes over and under groups of four warp ends…two ends are taken from the upper layer of threads and two from the lower layer to form this group of four threads.
In the first picture, you can see the weft going from right to left over, under, over, under four groups of threads. The weft then turns around behind the last group and passes from left to right (see the second picture above) going over, under, over, under. The supplemental weft needs to be laid quite loosely in the shed. The original shed is then reopened and the main white weft is passed.
The next shed in the sequence is then opened and the band is well beaten. The two passes of supplemental weft will pack to look like a solid line. After beating, it is time to use the supplementary-weft again on a closed shed to build up the pattern as you can see below. The supplemental weft shows on both faces of the band.
Below, you can see the little bee motif which was the first one that I was taught by my Guatemalan teacher. The weavers often use sheets and booklets of cross stitch patterns for design inspiration. Lidia took me yarn shopping and the little stores had many cross stitch magazines and individual pattern sheets. One of Lidia’s wishes was to to find patterns to which no one else in her community had access. Competition to sell weavings is fierce.
You can see how I have chosen to chart the bee motif. Each filled square represents four passes of the supplementary weft (my two explanatory photos above show how to make two passes). A half-filled square, therefore, represents two passes. What is critical to the success of this technique, as with all work with supplemental weft, is finding the right balance in the weight of the ground weave material and the supplemental weft. That is a matter of trial and error. Supplemental weft that is too light will not provide enough coverage. The opposite will make it difficult to maintain a horizontal weaving line.
One of these days I will make this a complete tutorial, take much better pictures than the blurry ones I took in low light this morning and fill in all the details.
However, I have to tell you that this is the slowest and most tedious technique I have done so far! I wove my large piece with the quetzal birds (at left) when I got home as well as a couple more samplers, and I have not done anything with the double-faced technique since!
I used the quetzal piece as my journal cover which was not such a great idea as you can’t see the other side and appreciate the double-faced nature of the technique. However, the Guatemalan weavers’ double-faced work is also hidden on the inside of their blouses.
It’s time to get out some cloth and start practicing my stitching for the join in my two panels. I want my sewing to be as neat and pretty as my teacher Maxima’s is. I hope to sew triangular shapes, as she has, and I chose the supplementary-weft motif that I am weaving, with its sort of triangular base, with that in mind.
Picture courtesy of PAZA Bolivia and Dorinda Dutcher.
I will leave you with a couple of hat bands that Anne wove using the intermesh technique that we wove together on one of my visits. My teachers in Huancayo 19 years ago, taught me the intermesh structure with a two-heddle set up which makes it partly loom-controlled. You can see Anne’s two heddles and sticks holding her picking cross below.She has used the lettering that I include in my second book in which I also teach this structure. The other design is charted in my second book and was adapted from a Mexican tapestry motif. Anne started the hatband as part of a weaving get-together we had on one of my trips. It is lovely to see it finished. I think her hatbands have come out beautifully.
I keep picking up the white paper bag that is lying on the chair in the bedroom half buried under a pile of tubular bands and warps. I scratch my head and wonder “What on earth is this?” My idea was to stop putting weaving things away in the closet. I fear the old “out of sight, out of mind” thing. So, the bag remains on the chair. I open the bag…oh yes, the contents of the paper bag are too precious to be left just lying about. However, they are out of sight in the bag and, therefore, I keep forgetting what a gorgeous delicate object it is that lies within.
It is the wee Guatemalan backstrap loom that I bought at the Santa Fe International Folk Art Market in July. I gaped at the stunningly beautiful and delicate cotton gauze huipiles on the Guatemalan stand of weaver Amalia Gue with their white-on-white supplementary-weft patterns and was thrilled when I found that I could take home a relatively inexpensive example of these remarkable pieces.
Amalia represents Ixbalamke, a cooperative of women dedicated to the production of traditional textiles and preservation of traditional weaving. They live in the community of Samac de Cobán in Alta Verpaz and are inspired by the landscape and beautiful views of the region. The members of the cooperative maintain the intricate technique of gauze weaving and the use of coyuche, or natural brown cotton – practices that are rapidly disappearing. They also have a project making little looms for younger generations to continue to learn the tradition of weaving.
The cotton warp and weft is very fine and rather soft and a bit fluffy. It had not been sized. A thicker very loosely spun cotton is used for the supplementary weft. I haven’t looked at it closely enough to see if it is one thick strand or several fine strands combined. I am afraid that I will have to pull out one of the motifs in orderto ascertain that.
There are no obvious start and finish weft tails for the figures. The little bird figures just mysteriously start and finish. By picking at the weft I can see that the cotton used to weave the figures is most likely just twisted to undo the spin a little so that it can be torn when the motif is finished rather than cut to give a blunt end. The torn end then just sits obediently within the shed. I think the fluffiness of the supplementary weft and the thread used for the ground weave causes all the fibers to interact and somehow mesh and this is what prevents the motifs from unravelling….just my guesses and ramblings.
So insanely delicate. Yet, this is the fabric of huipiles that I assume are frequently washed.
As it turns out, I have three large skeins of natural and bleached white Guatemalan cotton that is the same as the thread used in this piece. It has sat in the closet since 2008. It was an impulse buy and, when I got it home, I figured that it was way too soft for warp-faced backstrap weaving. I decided that one day I would size it and use it for something. For me, the biggest challenge will be achieving that even gauze-y ground weave. How in the world do the weavers manage that? The good thing is that I have a ton of the thread and can afford to experiment and fail and try again.
I haven’t done supplementary-weft patterning on an open weave like that before. There will be much to learn! He is one of the huipiles for sale on the Gautemalan stand. This one was easier to capture in a photograph than the white-on-white ones.
So, while on the subject of the workings of supplementary wefts to create patterns, let me show you a few more things that I saw while in Santa Fe.
This is the work of weavers in the Sna Jolobil cooperative in Chiapas, Mexico headed by Pedro Meza Meza…
And from Myanmar, Chin weaving…..
….brought to the Market by Khun Shwe and Pa Mang, experts in the textiles of the 40 subgroups within the Chin culture.
All the textiles I looked at on Khun Shwe’s stand were created with the single-faced weft inlay technique that I describe in my tutorial here.Below, you can see the “clean” back side of one of the pieces.
If you are in Santa Fe outside of the weekend of the International Folk Art Market there are still plenty of ethnic textiles to be seen at the Travelers’ Market not far from the downtown area. Many thanks to Marilyn who put me onto this place. It kept me happily occupied during one of the days leading up to the Folk Market.
There, I got to catch up with Pam Nadjowski whom I had met at Convergence 2010 in Albuquerque. Pam has a booth in the Travelers’ Market with textiles, jewellry and artefacts from Chinese minority groups that she has collected over the years. It was from Pam, in the booth she had at Convergence, that I bought the beautiful fine bamboo reeds that I use on my backstrap loom when I want to weave balanced cloth. These are treasures to me!
Pam allowed me to examine and photograph the beautiful silk brocade cloths, with pattern appearing on both sides, which come from the Quiandongnan area of China. They are used as baby carrying slings.
Sadae Torimaru in “Spiritual Fabric. 20 Years of Textile Research among the Liao People of Guizhou, China” briefly describes the patterning technique. She shows a weaver working at a floor loom and writes that each row of supplementary weft pattern takes 7-8 minutes to pick. The book includes 3 pages of images of individual symbols that are traditionally woven into the baby carrying slings and information about what they represent….such things as roosters’ feet, grass in paddy fields and a big tiger’s claw. It is interesting to go through the photos I took and identify the symbols in the book.
Here is just one of many pieces that I photographed. What an amazing piece of fabric in which to carry a baby.
I’ll show you just one more thing from Nagaland, a state in the far north-easten part of India. There happened to be an exhibit of Nagaland textiles while I was visiting the Travelers’ Market. Here is a very striking piece of fabric patterned with supplementary wefts. It is quite a contrast to the delicate Miao brocade. I like the way the supplementary weft extends from the sides of the cloth to form a fringe….an interesting solution to bulky weft turns on the edge of the fabric. I have more interesting pieces to show from Nagaland….another time.
As for my own weaving, it is a little “on hold” as I am counting down to my departure.
My living room floor has once again turned into a hop-scotch field of baskets of skeined yarn, all sizes of balls of yarn arranged in possible color combinations, sticks, elastic bands, tape, warping boards and STUFF. This is where I warp. I love the speed and efficiency that comes from winding many warps this way….choose the colors, wind the warp, put the warp on the sticks, make heddles. For the simplest warps I make the heddles after the warp is wound right there on the warping board….Done!…NEXT!
The bedroom remains the paradise where I do the actual weaving. It is simply a smaller version of the chaos of the living room but has many more sticks as well as scattered cushions on which to sit and weave.
Now that I don’t have my cat anymore, I don’t need to put everything away from kitty claws at night. This means that things can remain in sight and in mind at all times rather than being put away in the closet to be possibly forgotten. There is quite an array of bits and pieces scattered about to remind me that there is this certain thing that I wanted to investigate further, or that color combo that I wanted to try or that pattern that I wanted to chart. I see them during the day and step on them in the middle of the night if I need to visit the bathroom.
I now have several weaving anchor points in the bedroom so I don’t even need to roll up a project and put it aside when I feel like working on another for a change of pace.
Between spurts of warping which can be rather mind-numbing, I wove one more pattern on the four-color pebble weave band and rearranged the colors a little for the repeated motif. This is certainly something that can “un-numb” my mind!
And then, when my head is good and clear, I work on my supplementary-weft wall hanging. It’s not a sampler. I don’t want any mistakes in it and so, I leave that project for the times when I feel relaxed and want to reward myself after a good long bout of warping. I will give you a break from seeing that project this week.
Let’s look at what others have been up to….
I taught Janet the two-heddle intermesh technique that I teach in my second book, when I was visiting with her in northern California last spring. She wove this guitar strap using her own handspun wool and…. look at that, first prize at County Fair! The strap has bird, leaf and hummingbird patterns. I got to see it when I was at her place in July but wasn’t allowed to show it here at that time because of the rules of entry in the Fair. I have been waiting and waiting to show you how fabulous this is.
Photo by Zev Eisenberg
Figmentling, from Ravelry, told me that she learned how to twine from the basic tutorial here on my blog. This is another resource that she consulted as well as this discussion on Weavolution where my friend, Franco Rios, lists many more resources for instructions and information. Then, she took it so so much further and created the bag you see above! It has interesting finishing techniques and a braided strap that she learned to make from Ingrid Crickmore’s loop braiding blog.She drafted her own pattern which she says commemorates the new bak’tun in the Mayan calendar.
DigitalLeaf from Ravelry shared pictures of her backstrap project.
It looks wide and very comfortable, has nice edges and is beautifully finished. I hope that she will get a lot of use from it.
And finally, I would like to share a comment I got from a reader this week. As one of my goals in writing my second book was to have people feeling confident and inspired enough to design and weave their own pebble weave patterns, I can’t tell you how happy this comment made me:
Thank goodness! I have finally cracked it. Having worked my way through the first Andean pebble weave book I was looking forward to dipping into the second and then I noticed that you had changed the pattern format. My heart sank and I put that book away for a month. But I looked at it this weekend, tried one of the smaller bands without any notations (thought it best just to throw myself into it) and by the time I was halfway through the first repeat it all made perfect sense and I can now read them perfectly and am presently designing my first band from scratch
Thank you Laverne – you have opened a whole new range of patterns to me.I will post my first effort when it is completed (if it works, that is)!