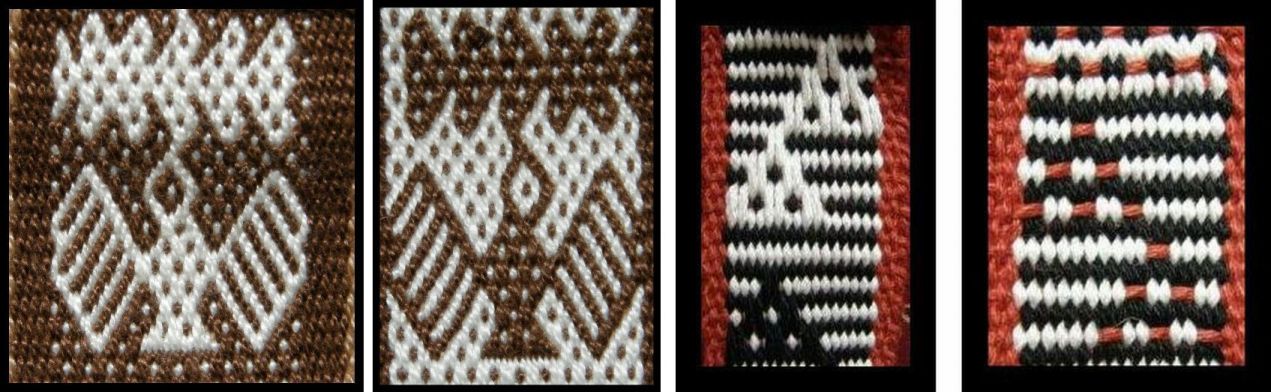
Backstrap Weaving- Easter colors in Guatemala and a new tutorial

Easter is upon us. Here in Santa Cruz, the stores stock aisles of chocolate Easter eggs but people have not really warmed to this tradition so we usually see these same Easter eggs sitting forlornly at the check out well into October when they are replaced with Halloween goodies. Now Halloween is something  that has really taken off here.

The night of Holy Thursday here has its own special tradition. All the streets of the downtown area get closed off to traffic and become a gigantic pedestrian walkway full of strolling families and teenagers out and about socializing, eating – there are food stands set up every few yards – and stopping in at the various churches. The idea is to visit nine churches. My mother tells me that this was the tradition amongst Catholics in India too when she lived there.

In Guatemala it is a very different story. So let’s see what activities and traditions surround Easter there. Of course as soon as Guatemala is mentioned, you know what to expect…

################# LOTS OF GLORIOUS COLOR #############

A sawdust "alfombra" laid out in wait for the Good Friday procession in Huehuetenango

Easter weekend was my final one on my trip to Guatemala in 2008. I don’t usually move around all that much when I travel. I like to find two or three nice places and a few weaving teachers and stay put but, as all my weaving classes were over, I was taking the opportunity to visit as many spots as possible before heading back to Guatemala city for my flight on the Monday after Easter. This meant that I got to take in the Easter celebrations in three different places.
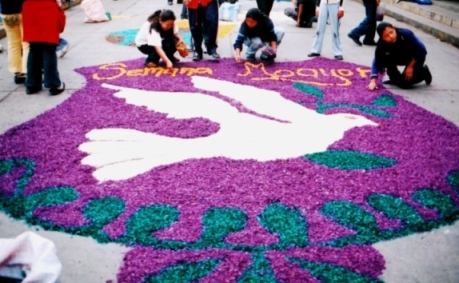
I arrived in the city of Huehuetenango the Wednesday before Easter hoping to travel further into the highlands the following day. Little did I know that the whole of Huehuetenango would be shut down on Holy Thursday as an unofficial "hang over" day after Huehuetenango Day celebrations on the Wednesday night - food and music including a "battle of the marimbas" in the main plaza until the wee hours. So there was no transport to be had and Thursday was a very dull day indeed. BUT, I woke up to the preparation of these fabulous sawdust "alfombras" on Good Friday morning.

Now, Antigua is THE place to be in Guatemala  if you want to see the most spectacular sawdust alfombras. People come from all over, the city is packed to the gills and prices rise so I was determined to avoid Antigua for those very reasons. I had no idea the alfombra tradition was carried out in almost every city, town and village in Guatemala and so I got to enjoy a smaller but no less colorful version of it in Huehuetenango. 

Alfombra means carpet in English and the tradition is to create these fantastic carpets from colored sawdust on top of which the Easter processions will pass. Other carpets are made from pine needles , flowers, stones and even vegetables. Large metal and wooden stencils are used to form the shapes and designs and the entire carpet is intermittently sprinkled with water to weigh down the dust and hold it in place. The themes are most often religious and once the procession passes they are completely destroyed.

What amazed me most was how quickly and efficiently the designs were measured out and put into place. Everyone worked quietly on what is, after all, a somber day but it was very hard to feel somber with all those gorgeous colors about. Watching the whole process was irresistible and I had to drag myself away to take my bus into the highlands. I was actually glad that I wasn't around to see all that hard work destroyed.

Read an excellent article here which gives a lot of information about the origin, history and significance of the alfombra-making tradition. To quote just a little…

“HISTORY

The custom of making carpets was brought from Spain and the Canary Islands. However, it is believed that in pre-Hispanic times the Maya made carpets for various ceremonial reasons. Possibly the carpets were used in altars to induce positive energies and absorb negative ones. Thus the constant destruction of the carpet is necessary to remove bad energies and bring new positive ones with the construction of a new carpet or offering.”
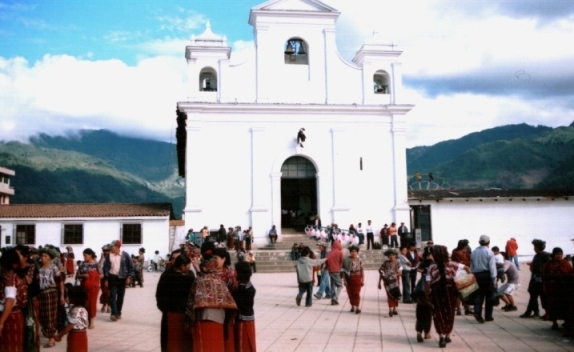
The church in the main square of Nebaj with an effigy of Judas hanging on a noose above the main door. In the afternoon young men came to shoot at it.

Next stop was Nebaj, a small town of adobe dwellings tucked away in a highland area known as the Ixil triangle. There I was also treated to splashes of color but in this place the color came in the form of the women’s traditional huipiles (blouses) and cortes (skirts).

People from the neighboring villages of Chajul and San Juan Cotzal had come into town for Easter to see and be seen in their very best hand woven huipiles decorated with animal and geometric figures in supplementary wefts and warp wrapping.
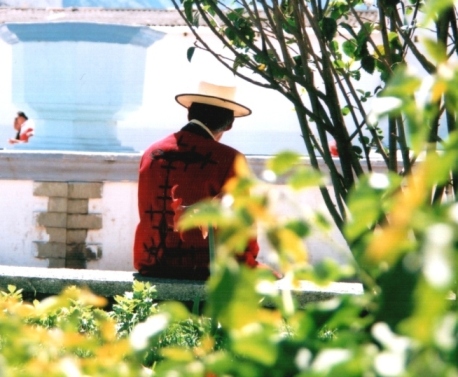
The typical scarlet jacket decorated with black embroidery worn by the men of Nebaj for festivals. Apparently the jacket is modeled on that of Spanish officers from colonial times.

Good Friday was no somber occasion here. The atmosphere was festive with even a ferris wheel set up near the market and cotton candy, icecream and balloon vendors strolled amongst the crowd. The older men too, were wearing their festival gear – scarlet jackets embroidered in black. In this way I got to see the traditional clothes of all three areas in one place. All I had to do was sit in the plaza and watch it all go by while trying to discreetly snap a photo or two.

The icecream vendor is wearing one of the typical backstrap woven hair sashes of the area complete with enormous tassels-quite a weight to be carrying around. So much decoration and color on every huipil!

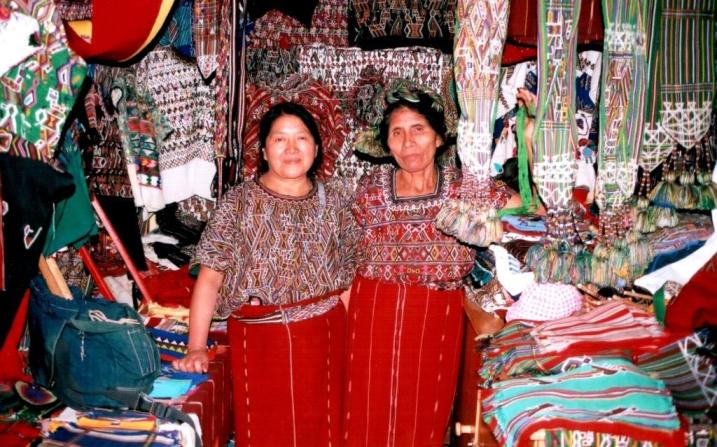
Finally on Saturday when things had settled back to normal I visited the artisans market and met two of the coolest weavers and vendors there. Such a shame that I was at the end of my trip and couldn't spend more time with them. We swapped heddle making tips and weavings.
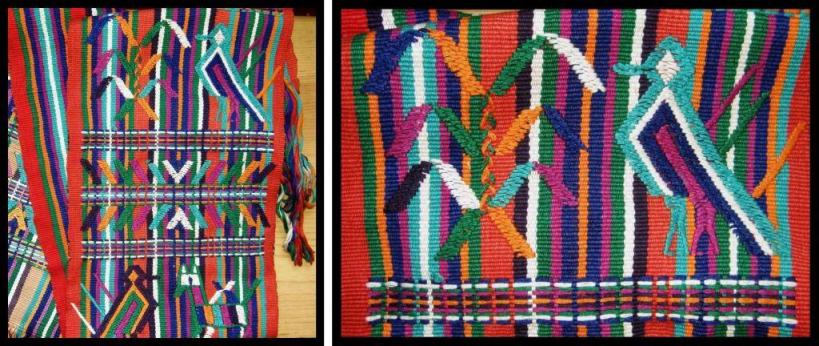
This is a lively Nebaj textile that I received as a friendly swap for one of my own weavings. I would have loved to have stayed longer in Nebaj but it was time to move on to Chichicastenango.

Colorful in its own way, the market town of Chichicastenango is more a tapestry of sights, sounds and smells. It was even more chaotic than usual on Easter Sunday. It was my second visit there and I could really tell the difference as this time the locals who had come into town for the Easter Mass far outnumbered the tourists. The Easter celebration was a strange and interesting mixture of  Catholic and indigenous rituals.

One of the clogged market alley ways on the left - spot the tourist! Fortunately there are some places where one can escape the madness. The Hotel San Tomas allows you stroll around its beautiful colonial-style courtyards and enjoy the marimba music.
Of course I had to revisit my favorite stall - guess which one!
LEFT: Thread which the vendors were calling "seda" (silk) - only available in green and pink. Why only these colors? I was told quite simply that these are the colors of Chichicastenango. RIGHT: The steps of the church gave a nice high vantage point from which to survey all the activity until I nearly got run down by the emerging Easter procession.

After all this frantic travel and activity I went to Guatemala City and onto Miami where I spent three nights stuck in the airport waiting for a flight back to Bolivia – the hazards of stand-by travel!

##################################################

FROM A FRENZY OF COLOR TO BASIC BLACK AND WHITE…

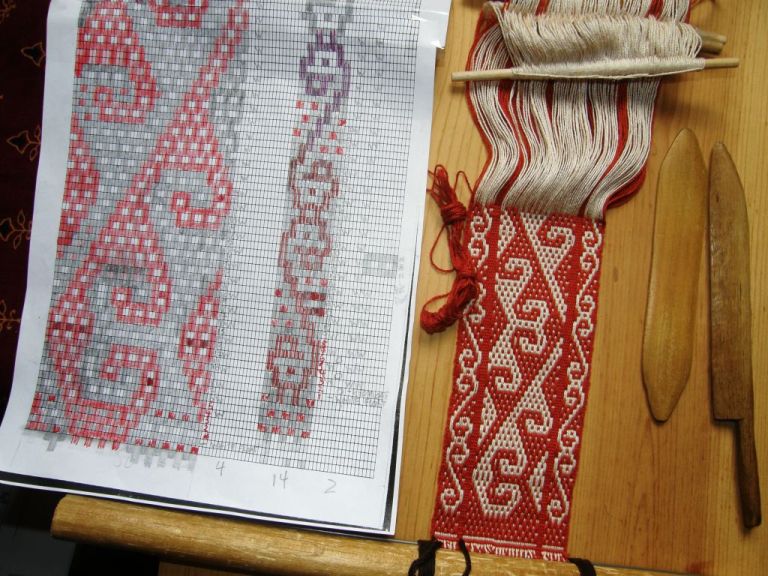
The double "S" band on the loom

As promised, I have  made a tutorial on weaving another of the yurt band border designs using simple warp floats. I used this design on the cell phone pouch that appeared in this previous post. I warped up this week to weave the design with the tutorial in mind. However, there were obviously other things on my mind as well as, instead of warping up the required fourteen warps, or seven pairs, I warped fourteen pairs and so ended up with a warp twice as wide as necessary. So I wove the “S” border design in two columns as mirrored images and found that it was the perfect width for a belt.

THE TUTORIAL…

You will find the tutorial here.

Continuing with the black and white theme, you may remember the Abba Yohanni piece that I showed you in this previous post.
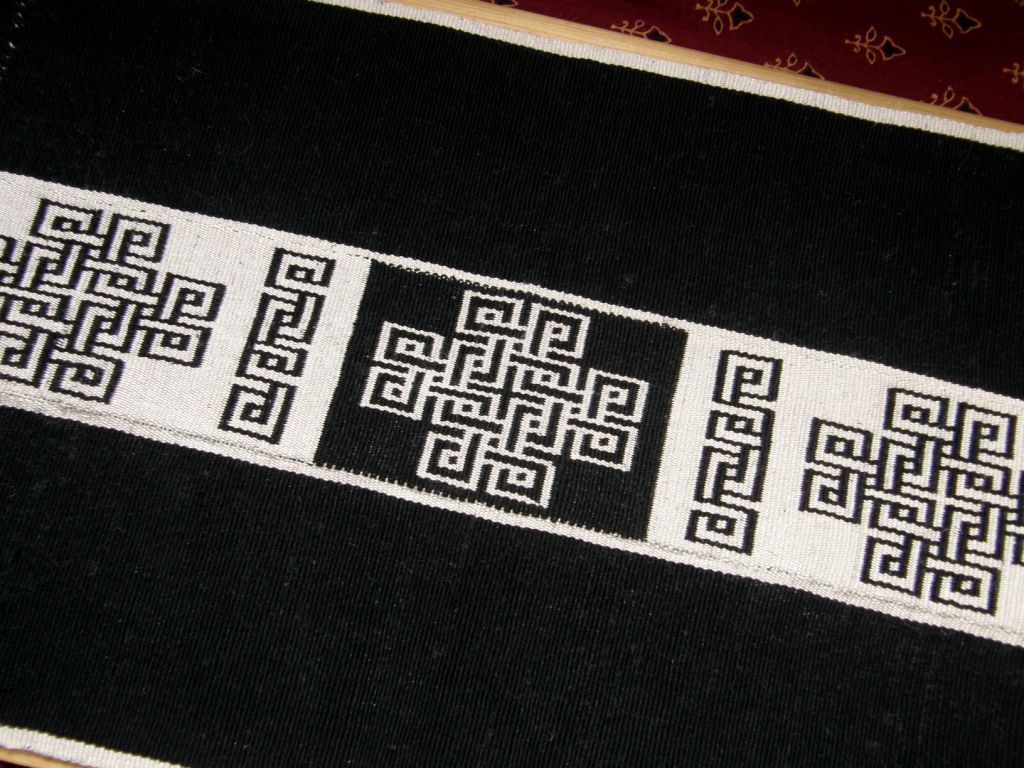
The cross motif taken from a curtain in an Abba Yohanni cave church in Ethiopia

Here I can show you the table runner finished (which I think I am going to turn into a wall hanging) but I mostly wanted to revisit this topic as Alexis Tancibok in London, whom I met on Weavolution, recently emailed me with some interesting background information on these motifs and the curtains on which they were woven. (which I quote below). I am very grateful for this as I had not been able to turn up much on the net about it and was mistakenly under the impression that these curtains dated only as far back as the 17th Century…

“Curtains like this were a common feature of churches in N. Africa & the
Middle east from at least the fourth century. They were often devotional
items commissioned or donated by individuals making a vow, fulfilling a vow,
or as an act of piety.
Similarly fabric woven with religious motifs – such as Abba Yohanni’s cross,
and stylised scenes from the Gospels, and Apocryphal texts were designed and
worn by people at all levels of society as talismans – the V&A has a rather
decent collection, so too does the Louvre. The best extant versions are
Coptic (Egyptian) which is relevant to the Abba Yohanni piece because the Coptic church and the Ethiopian church have strong historic links…

Early christian art motifs are still extant in the Eastern tradition and in many cases almost unchanged from when they first emerged. The shape of the cross for example is commonly made in twisted leather both in Ethiopian and Coptic pendants.

Devotional curtains/veils/textiles serving different functions in Eastern Christian settings are still used today – especially in Ethiopian churches and shrines.”

################################################

I couldn’t keep away from the colors for too long….
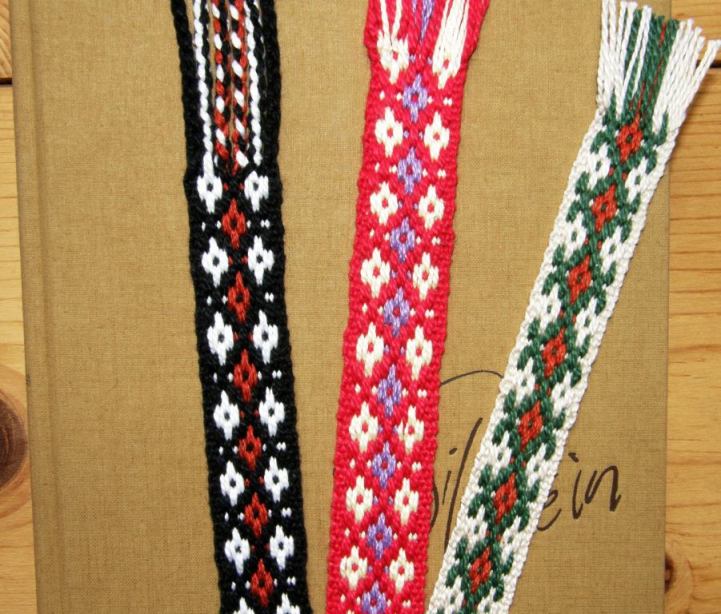
I have another wonderful thing to share courtesy of a new online acquaintance. Chris Buckley in Beijing has generously allowed me to use images of his yurt band pieces. Those of you who saw the X and O yurt band border design in the tutorial on simple warp floats last week will recognise it here on this piece worked in two colors…


I am excited to have yet another yurt band design to chart and attempt to weave. Chris tells me that these Kyrgyz yurt bands were cut and sewn together to make mats and that he acquired them on a trip to far Northwestern China. I have only just started exploring his fascinating blog.

And here is another gem from Chris…

Here is a slight variation of the 'S' design featured in this week's tutorial! Ah...the colors!! If only I could get red and blue to work together so well for me!

######################################

And to finish, a contribution from a blog reader. Sharon finished her first mug rug in one-weft double weave with her own butterfly motif…

I have seen the rest of her butterfly charts and they are so pretty. Hopefully we will get to see the whole set of mug rugs as they come off the loom.

Oh… and I spied Grace Hatton on her blog working on the yurt band border from last week’s tutorial. She has a fun post entitled “Loom Porn – Size Doesn’t Matter” where you can see a photo of her band and other small looms.

Enjoy the new tutorial and keep the projects coming…remember, I love to hear from you all! 🙂


Backstrap Weaving-Simple Warp Floats: a little less simple, a lot more stunning!

SIMPLE WARP FLOATS – a little less simple, a lot more stunning!

I have been playing around with simple warp float patterns this week looking for new designs in books and on weavings that I have bought in my travels. I found a nice one in a photo of a textile fragment from the north coast of Peru in Ann Pollard Rowe’s Warp Patterned Weaves of the Andes which I will show you later. I also pulled out a belt full of warp float patterned motifs which had been sadly neglected at the bottom of my box of Guatemalan textiles. I guess it had been ignored and forgotten as it is a simple black and white piece looking very humble and plain next to the wildly colored  weft patterned pieces that are so typical of Guatemala.

What is strange is that I bought this belt in the same town where the women wear a particuarly wide and richly decorated hair sash – it is quite a contrast to see the two pieces together. I wonder if they are both woven by the same weavers.

Belt and hair sash of Aguacatan

As you can see, the belt does not have a continuous design, rather, a series of small motifs. No two motifs are exactly the same. As I pull the belt through my hands to examine the motifs, I can almost imagine the fun this weaver had deciding what motif to display next on her 9-foot 3-inch canvas! There are mistakes. There are motifs that obviously didn’t go quite the way she had planned but I get a feeling of playfulness from this belt that I just don’t get from the heavily ladened hair sash.

I have been thinking about what elements can make this simple warp float patterning more interesting and fun for weavers. I have written a tutorial for this technique here but it is a technique that never seems to get fully explored – just a “stepping stone” on the way to the more advanced techniques.

Here are a few ways, for starters, to make a piece patterned with this technique a little more stunning.

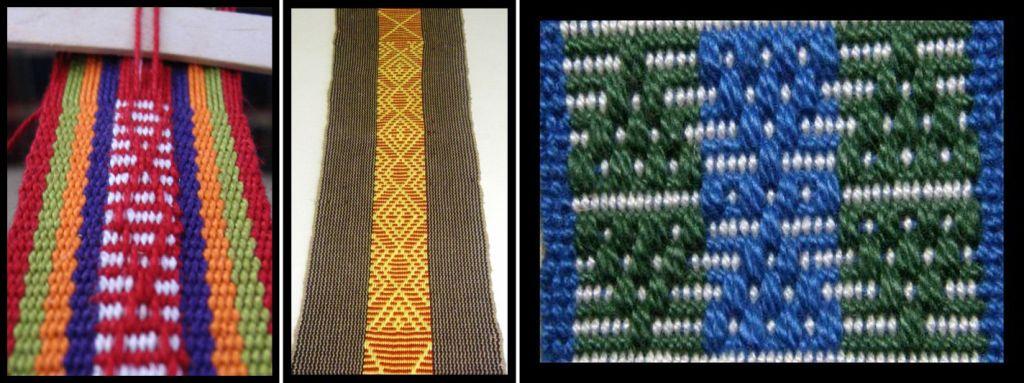
Three pieces woven using a simple warp float technique.

On the left and in the center are two pieces made by members of the Backstrap Weaving Group at Weavolution. Historicstitcher used bands of bright and lively colors alongside her warp float pattern. She used single rather than paired floats to give a more delicate look. In the center, Jeannine designed her own sunny warp float pattern and wove it beside a more somber border of vertical stripes. I think it looks amazing! And on the right is part of a bookmark that I made using three colors across the width of the design rather than two as is more usual.

As the name implies, this is a simple technique. If you imagine looking at a warp in profile, you will see in the following diagram exactly what is going on in this technique as it is woven.

A profile view of a warp where green warps are “floated” over a base of red and green stripes to form the patterns.

Let’s take another look at the black and white Aguacatan belt and see the different motifs the weaver has created – from very simple to not-so-simple.

As you can see, it all starts on the left with a base of black and white stripes. Then the weaver can decide which color she wants to float over the surface to make her designs. Her first design has been made with black floats, the next design to the right has been made with white floats. Moving along, she has made a quick succession of black and white float designs.

On the left, the weaver is again swapping from black floated designs to white, and back again. The one on the far left has an almost three dimensional effect. On the right she has started to combine black and white floats within the one motif. This means that in one weft pass she will be floating black warps. In the very next weft pass she will float white ones. When I went to weave this it took me a while to get my head around it!

She is getting increasingly adventurous now with her combination of black and white floats all within the one motif. Those designs on the left really play tricks with my eyes!

But, of course, things don’t always go to plan. On the far left it looks like she was trying to combine single warp floats with pairs but ran ino a few problems. Next to that, she didn’t manage to get the white design centered. While I don’t find mistakes in my own work terribly amusing, I do like to look at these little mishaps in other weavers’ pieces and imagine what was going on to cause the lapse in concentration. Perhaps her husband was telling a funny story, a neighbor dropped by for a chat or one of her kids was swinging off her loom. In any case, my examination of this band makes me really want to meet this weaver!

On the right is a different band where the horizontal stripes in one part are not evident at all as the entire surface has been covered with black warp floats.

All of this finally led me to my project of the week…

Simple warp floats used to reproduce a yurt band design.

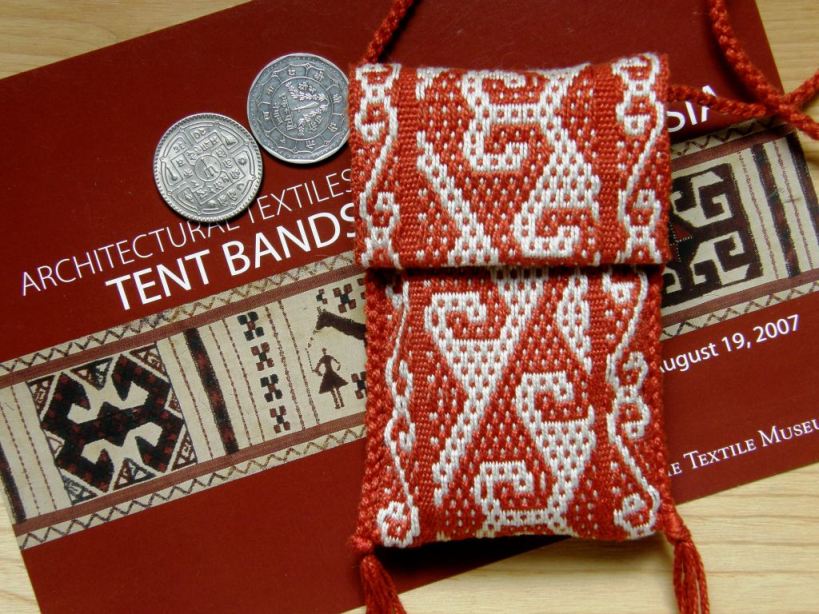
This piece has been woven with the simple warp float technique using floats in both colors in one continuous motif. The horizontal stripes cannot be seen as the entire surface of the weaving has been covered with warp floats – the same simple three-span floats shown on the Aguacatan belt. Where the outline of the design changed direction, I had to use five-span floats.

A cell phone pouch for Lisa

I charted the design from a photo of a yurt band that was sent to me by Lisa Matthews of North Carolina. Ever since Lisa and I met on Ravelry back in June last year, she has been sharing  not only photos of Central Asian weavings with me, but also her love and enthusiasm for all the textile and fiber crafts of that region so I thought it would be a great idea to make this piece into a cell phone pouch for her.

On the turned edge of the flap you can just make out the horizontal stripes where I started this piece. From there on the stripes got covered by floats.

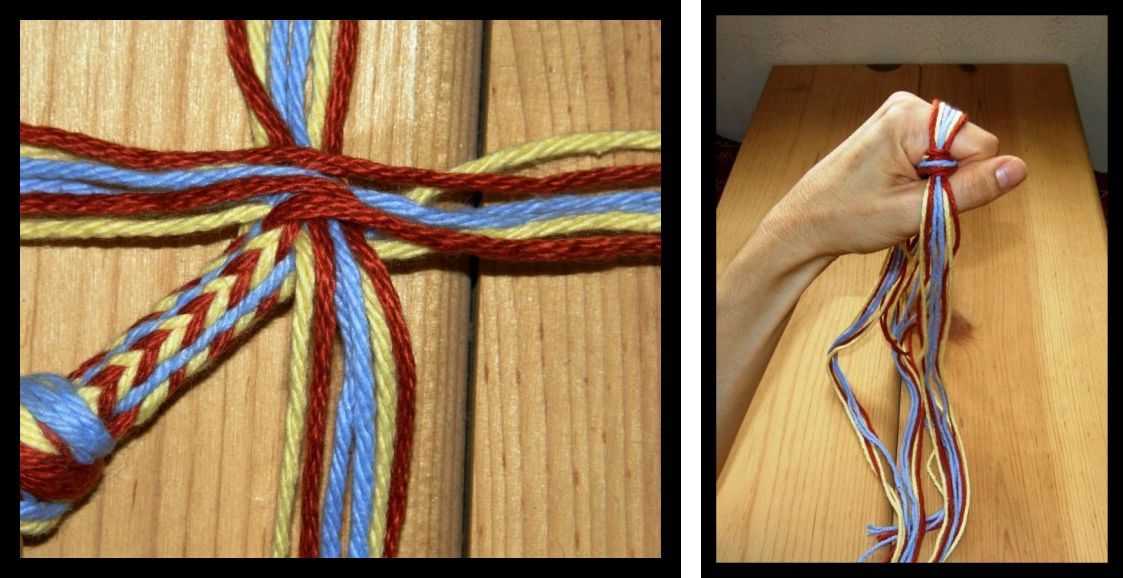
I edged the pouch and made a strap using a four-strand braid. Although I learned this braid a long time ago,  my weaving teachers in Potosi taught me a new and really fun and quirky way to do it by looping the braid strands on my fingers. I have made a tutorial for this with step-by-step photos and a video which you can see here.

Lisa writes a fascinating blog about her explorations into the crafts of Central Asia and has kindly allowed me to use photos of her yurt band here. In her own words here she describes her passion:


“I’m extremely interested in the cultures of Central Asia both past and present.  Within the context of the historical reenactment group I participate in I am attempting to learn how to portray the daily life of a 10th to 11th century Steppe Nomad.  To do this I have been learning how to make yogurt, cook flat bread, camp in a yurt, felt, spin, and weave so far.  I’m very interested in both felting and weaving and feel that weaving on the Nomadic ground loom brings the ability to weave fantastically patterned pieces to even the novice weaver with a very, very small outlay of cash to set up the loom and get weaving.  The versatility of the ground loom is that you can weave anywhere you go and anything from fabric for clothing to tent bands to cut pile rugs and kilims on the same loom.  Yurt bands are something that especially interest me and I am in the process of learning how to weave them.  My husband and I were lucky enough to purchase a 48 ft long band thought to have been woven by the Krygyz and its handmade beauty has really inspired me.”


I love the simple border motifand I am thinking thatI may be able to do a tutorial on that here next week so you can all learn to do the two-color floats.

At first glance, you may think that this weave is Andean pebble weave, but a look at the back of the weaving will show you that it is not. Andean pebble weave is double faced, that is, the same warp float motif appears on the back of the weaving with its colors reversed. On a simple warp float piece, however, the warps that float on the upper surface create a gap on the lower surface through which the weft is revealed.

LEFT: The front and back of an Andean pebble weave motif. RIGHT: The back of a simple warp float motif reveals the red weft.

I was really fortunate to run into Lisa online but this wasn’t my first encounter with these Central Asian tent bands. I was lucky to happen to be in Washington DC when there was an exhibition of these pieces at the Textile Museum in 2007. This certainly made up for my initial disappointment at not finding any Andean weavings in their permanent displays. On top of that, I had a wonderful time sitting on the floor with a pile of books in their bookstore and spent hours in their library. Meeting Ann Rowe there was the icing on the cake!

The finished pouch on the Textile Museum’s post card. I still haven’t found a suitable closure for the pouch – open to suggestions!

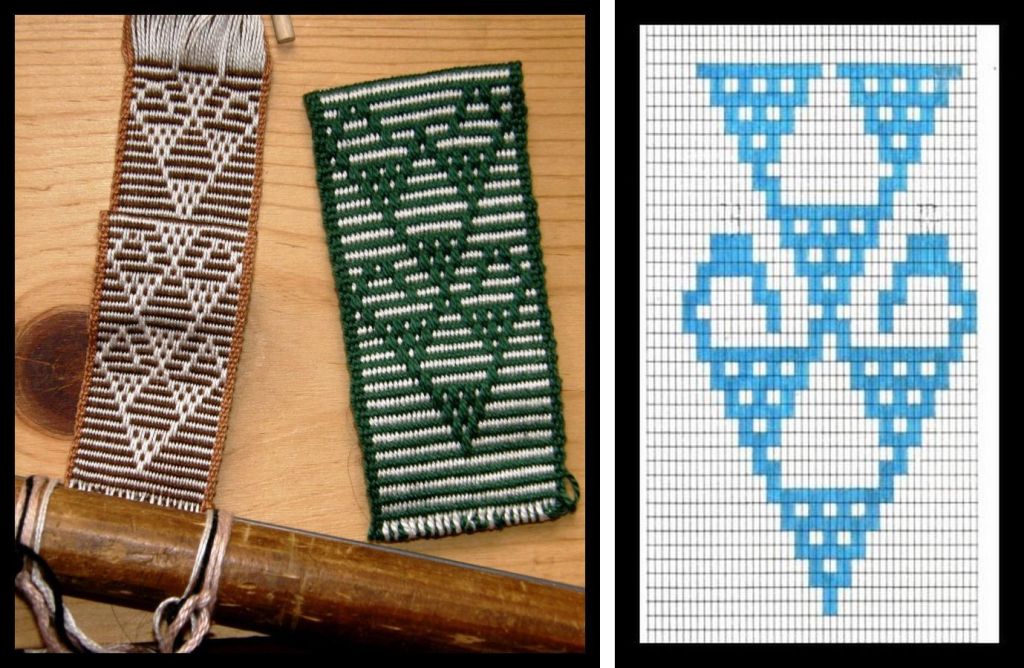
Here is the new pattern that I charted from the old Peruvian textile fragment. There are several woven versions here as the picture in the book was not very clear. I finally decided on the motif on the upper left hand side. A larger version  of the chart is here.

Warp floats of brown and white cover the surface of the weave.

Above, the motif is woven on a background of horizontal stripes. If you were to cover the surface completely with floats, it would look like the photo at left.

According to Ann Rowe in Warp Patterned Weaves of the Andes, no archaeological examples of this two-color float weave have been found in the Andes although twentieth century ponchos have been made with this technique in Northern Argentina. There is a  photo of one such poncho with bold geometric motifs in Ann Rowe’s book

#####################################################

A few bits and pieces to finish off…I received some comments from people last week about how difficult it is to find a suitable place to tie up their backstrap looms at home. I know what this is like! I am fine here at home, but when I go to visit my mother in Sydney (my backstrap loom goes everywhere with me!) there is nowhere to tie up my loom so I braid in the evenings when we are sitting about and chatting. My brother and sister-in-law have been kind enough to put some hooks into the side of a large dresser in their guest room in their home so that I can slip a dowel in and weave away.

Here are a few photos of some tie-up options…


LEFT: Tied to a STRONG doorknob. Not the best option for narrow warps as the warp will slip on the rods and cause the loom to tip from side to side. RIGHT: Hooks in a piece of heavy furniture.
LEFT: The loom bar can be lashed to a heavy piece of furnture, a stair or porch rail, or the ladder on a bunk bed. RIGHT: The loom bar can be wedged behind a pair of clamps.

If you are at all into DIY, you should check out Sharon’s (aka Rose Goldilocks) blog where she has invented a nifty seat, footbrace and tie-up place all in one.

#################################################################################

One more thing…

Sharon emailed me last weekend to tell me about a new Interweave publication – a magazine called Knitting Traditions 2010. Apparently it has instructions for Peruvian needle knitting, or cross knit looping, for making finger puppets. I would love to learn how to make three dimensional things with this technique. Well, that is definitely going on my shopping list for my up and coming trip to the US.

There are some gorgeous knitted finger puppets  for sale in the craft markets here but they are made in regular two- needle knitting as far as I can tell. All kinds of animals are made and they are pretty hard to resist.


LLama and sheep finger puppets
Front and back of my “knit” pre-Columbian fragment

And while we are on the topic of knitting, I  found some information about one of my pre-Columbian fragments, once again, in Ann Rowe’s book. Apparently these pieces, which are constructed with what look like knit stitches and which are very thick, were used as straps and belts by the Incas and were made using a 4-strand warp twining technique. No evidence has been found yet to explain how exactly this was achieved…but it’s nice to know at least this little bit about one more of the fragments on my little Chancay dolls.

At right I’d like to show you the pencil pouch that siseltikva, from the Weavolution group, wove on her backstrap loom and edged with cross knit looping. It’s a really nice project idea for a narrow band and , as always, I am thrilled to see my tutorials being put to use.

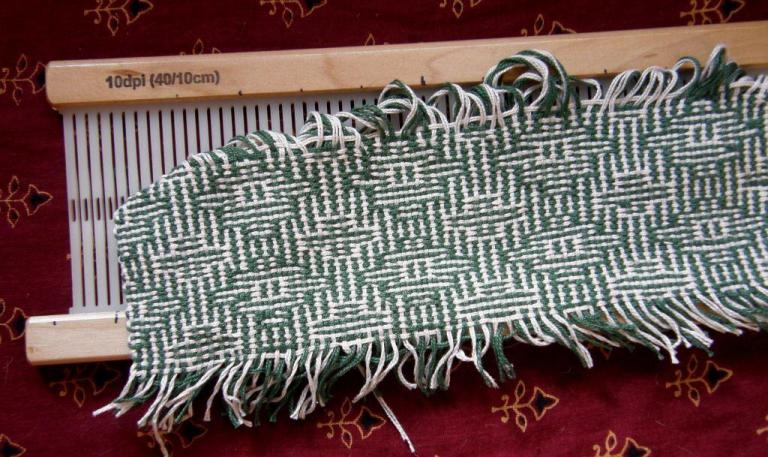
My shadow weave sample using a 10dpi rigid heddle on my backstrap loom

Let me leave you with this picture of my latest experiment with balanced weaves on my backstrap loom. I wove this tiny shadow weave sample  using four sets of string heddles and a rigid heddle as a spacer. I can’t say that I am crazy about it! There are a few examples of careless heddle lifting there. I have been told that this looks great done in four colors – two contrasting colors for the warp and two tones of those colors for the weft. I really enjoy doing these balanced weaves – they are a nice change of rhythm and beat so I will choose my colors carefully and see if I can make something I like better from this weave.


Backstrap Weaving-MORE mysterious sticks and beautiful braids

MORE MYSTERIOUS STICKS!

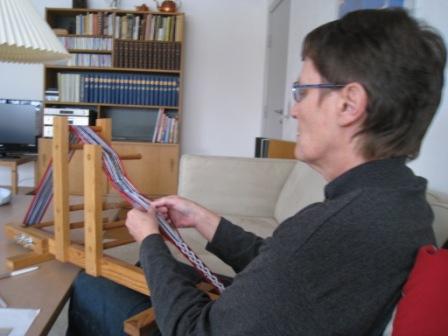
I set up  my loom yesterday to weave a narrow band – just 28 ends. Once I had made my simple heddles, tied them in a bunch and added the shed loop I realized that my entire loom consisted of just two simple sticks – the two loom bars and that’s all – one attached to a bed and the other to me. My weft was tied in a butterfly – no sticks there. The only other stick involved was a wooden beater to prop open my sheds and beat in the weft. How much simpler can it get?

I filmed the entire process from warping stakes to ready-to-weave if you would like to take a look. (Donna, I made this especially for you!)

So, again I ask you, how much simpler can it get?

Actually it can get simpler! I was in Tarabuco recently and watched a weaver sitting on the ground deftly wind a warp around her hand and foot. She tied one end of the warp around her foot, passed a length of yarn through the end loops at the other end and secured it to her waist. Then she made simple heddles around her hand, added a shed loop and started to weave. Briiliant! All in a matter of minutes.

A weaver in Tarabuco using a “toe” loom

You are probably thinking: okay, a simple loom for a simple weave– but even very complex weaves can be done on a very basic set-up.

A weaver from Tarabuco creating a complex design on a simple loom

You may recognize Felicia above with her sleepy cat from the video in this previous post. She has a shed rod, a heddle stick and some bars between which to stretch her warp. She has just inserted a couple of thin sticks to help with the pick-up but look at the photo at left and see the complex designs that she creates on this simple set up.

Now what about those looms that you see in pictures on the internet and in those Youtube videos? Some of them are loaded up with sticks – all those mysterious sticks – what in the world do they do? Hopefully I can solve the mystery behind at least some of them here. I have to admit that there are Asian looms that I have seen online with a multitude of patterning sticks and that I still haven’t figured out how some of those sticks work.

An extra stick added in a second cross in Guatemala

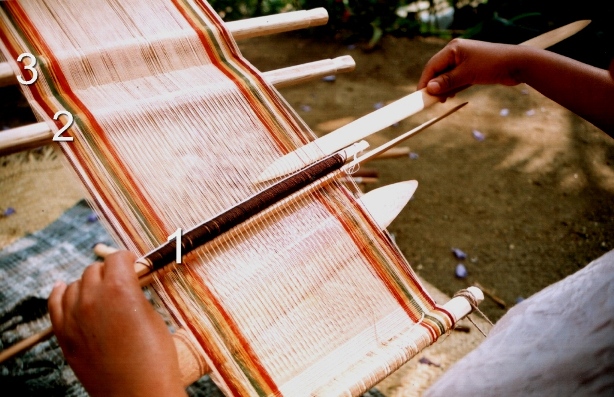
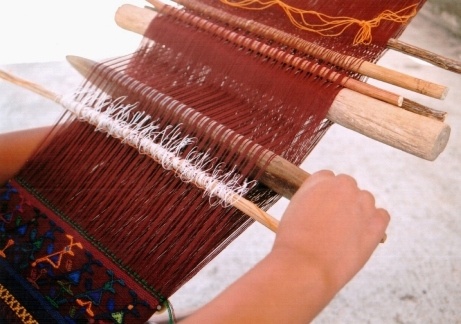
But at least I can let you know a bit about  the sticks I have seen here in my travels in Central and South America and what they do. In the picture at right, number 1 is the heddle stick and number 2 is the shed rod. We are familiar with these. But what about number 3? This is an extra stick to hold a second cross. A lot of weavers wind a second cross as they warp. I don’t.  I find that the fewer twists and turns I make on the warping board, the easier it is to wind a warp with  good even tension. I only use a second cross  on narrow warps to stabilize my shed rod which tends to slip from side to side and be a thorough nuisance. Making a second cross and putting a stick within will lock the shed rod into position.  It is very easy to create a second cross once your warp is already on the loom. Here are the steps…

LEFT: Your loom is set up with heddles and a shed rod. RIGHT: Open the shed rod shed, place your beater within and draw it down to the weaving line. Remove the shed rod. It is important that the beater not fall out at this stage as it is saving your shed rod shed. Use a back up safety string if necesary.
LEFT:Open the heddle shed and place an additonal stick within. RIGHT: Tilt the beater to open the shed up beyond the heddles and place your original shed rod within. Tie or tape the shed rod and additional stick together.You have created your second cross.
Another Guatemalan loom with a second cross installed. The shed rod is pvc pipe which is often used as it can be thick without being heavy. Notice the orange safety string – if disaster strikes (and it most probably will with those 3 little guys hanging about!) and all this weaver’s sticks fall out, the safety string will save her cross. Even the experts use them! Look at the little future weaver there on the left. She is wearing the typical long “corte” skirt and even has her own woven belt.

Some looms have a mind boggling amount of sticks but the reason can be very simple!!

LEFT: The 11 sticks on this upright loom in Ecuador will become heddle sticks. The 22-row design, which is horizontally symmetrical, will be programmed into these 11 heddles. RIGHT: This is one of my own warps set up on my Navajo loom in Chile. As I am using 4 colors in my pebble weave I have extra sticks to separate and keep the colors in order for the pick up.
Miguel Andrango’s granddaughter poses with one of the looms. You can see the two shed rods above the heddle stick. The space for the extra shed rod is programmed into the warp by using an extra stake during the warping process.

In Ecuador I saw the use of an extra stick which I have not noticed anywhere else. This is especially useful for wide warps or particularly fine yarns but I saw it being used on warps of all widths and yarn sizes in Ecuador. It is an extra shed rod. I know from my own experience that the shed-rod shed on a wide piece with fine yarns is really difficult to open. It was a very slow and tedious process on my Abba Yohanni piece, for example. The extra shed rod in Ecuador holds every second warp that passes over the main shed rod. This means that half the number of warps can be raised using the extra stick. Then it is very easy to use the main shed rod to raise the rest of the warps.

This is one of Miguel Andrango’s looms. He is a very well known weaver from Agato, a small town near Otavalo. You can watch a video of his work here. Fifty-seven seconds into the video you will get a very nice close up of the two shed rods. You will also see the typical white woven alpargatas he is wearing. I spent some time with an alpargata weaver and hope to blog about that some time. Miguel Andrango is not a large man and, although the piece above is not particularly wide,  he weaves some of the widest backstrap woven pieces I have ever seen!

A weaver near Otavalo is preparing to make her string heddles. She is using the extra shed rod on her loom. This rod has a dual purpose as it also serves to stabilize the main shed rod.

Now we come to the patterning sticks that are used by weavers in Guatemala to create designs using supplementary wefts. The supplementary wefts are either laid in to form block patterns or wrapped around warps to form little figures.

It is not my intention here to teach you how to insert and use these sticks. So, don’t worry if you don’t quite get it. No doubt, I will be doing a tutorial on this in a future post. I just want to take a little bit of the mystery out of it so that when you are looking at weavers and looms in books and on the net you may have a better understanding of what all those sticks do. For now, read on and  just enjoy the beautiful textiles!!

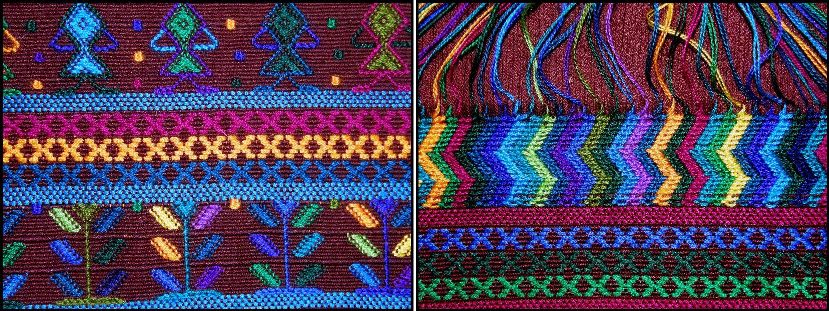
Typical designs of Santa Catarina Palopo.LEFT:Supplementary wefts have been laid in to make designs like the X’s in the center or wrapped around warps to form figures, like the stem of the plant below and the arms of the woman above. RIGHT: The upper design has been woven using the technique employed in making the typical huipil of this town.
LEFT: Bands woven using patternig sticks and offered to toursits. RIGHT: The typical huipil of Santa Catarina Palopo. These colors are a relatively recent introduction. Old huipiles in crimson and white can be seen in paintings by Carmen Pettersen. My teacher told me that only the very oldest women in the town may still have the old huipiles.
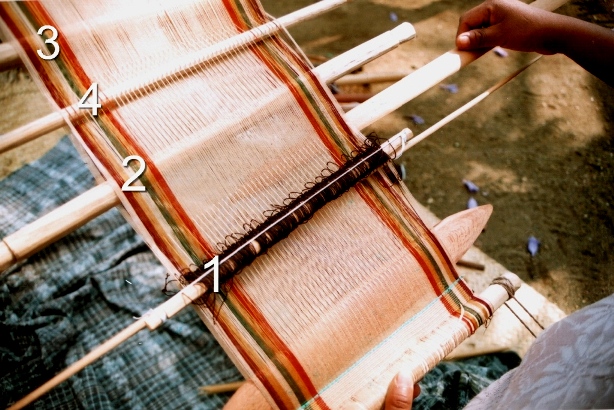
Carmelita is teaching me on this loom in Santa Catarina Barahona. Number 1 is her heddle stick, number 2 her shed rod, number 3 the stick in the 2nd cross and number 4 is her newly introduced patterning stick.

These patterns are created by adding two extra sticks to the loom – the patterning sticks. In Santa Catarina Barahona, the weavers open the shed-rod shed and pick up every fifth warp. They store these warps on a stick – the patterning stick that sits up behind the shed rod.

The heddle shed is then opened and, once again every fifth warp is picked up but in such a way that each picked up warp sits between two that were picked up on the first patterning stick. The warps are stored on another patterning stick which sits behind the shed rod but, this time, under the warp.

Here is how the loom looks with both patterning sticks installed.

Number 1, heddle stick. Number 2, shed rod. Number 3, stick in 2nd cross. Number 4, 1st patterning stick and number 5 the 2nd patterning stick. The patterning sticks are simply drawn down towards the heddles to create sheds for laying in the supplementary wefts.
This diagram shows a loom in profile with the positions of the patterning sticks
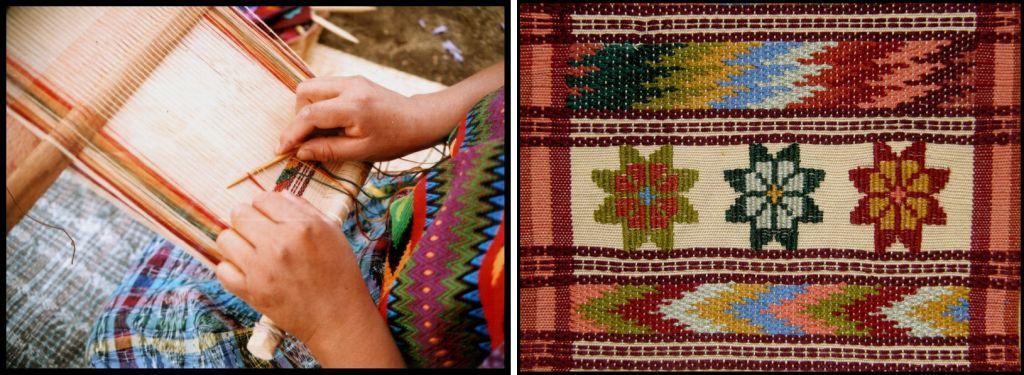
LEFT: Lydia is laying in a supplementary weft in one of the patterning sheds. RIGHT: The patterns at top and bottom were made with the aid of the two patterning sticks.

Sometimes a second pair of  patterning sticks is inserted when the weaver wants to change the design. These are only temporary and will have to be removed when she wants to return to the original design.

Take a look at the photo below…can you name all the sticks?!

Two pairs of patterning sticks are in this loom

################################################################################

BRAIDS AND FINISHES

A sling braid made from llama fiber from the Colca Canyon area of Peru. It comprises a braid with a finger loop in one end and a cradle in which the stone to be hurled sits.

Now to return to the simplicity with which I started this post…………some braiding and edging techniques with few or no tools required.

After having done the tutorial on cross knit looping last week, I  remembered another interesting edging that I learned with my sling braiding teacher in Yanque, Peru. We used it to edge the cradle section of an Andean sling braid.

I made one sling with him and he taught me to make three different braids. Men in Peru braid their slings holding all the braid strands in their hands – no other equipment is required – and can quite happily stroll along the road while braiding. Two of the braids I learned had twenty-four strands and the other twelve. I was told that the main use of the slings these days is to hurl stones in order to  keep control of animals straying from the herd.

LEFT: The single cross two-color edging that I was taught on my sling. RIGHT: A double cross two-color edging on an Andean sling that I bought.
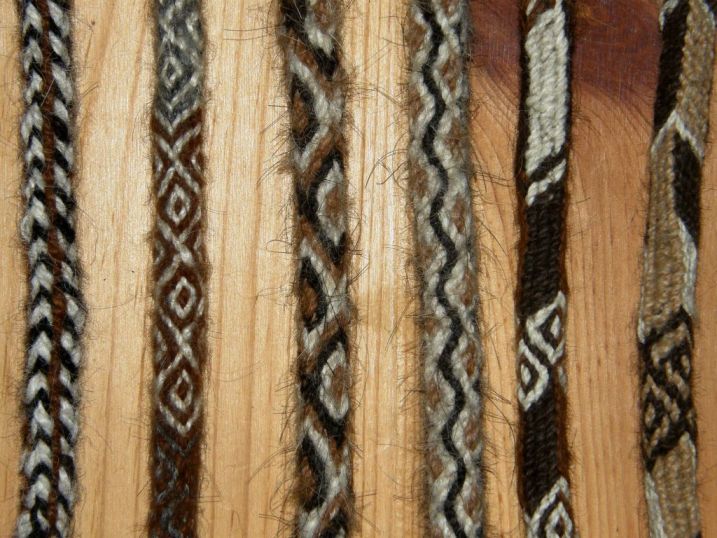
A few of the braids used for Andean slings. Named from left to right…PALMA, MARGARITA (2nd and 3rd),SALSA and CAJAMARCA (5th and 6th)

When making an Andean sling, first, one half the braid is made. The strands of llama fiber are measured from the tip of the nose to the toes and then doubled. The first section usually includes the finger loop. More strands are added to weave the cradle in tapestry technique and then work the braid for the other half.

The cradle is woven on a backstrap set-up tying the braid to the waist while the strands which serve as warp are tied to a fixed point.  Then the second half is worked in two braids – first a thick one and then a thin one to finish.

Decorative tassels and edgings are the last things to be put in place. Some of the tassels can be quite flamboyant. My teacher didn’t care at all for the more extravagant decorations!

I love these slings as there are several skills involved. Without even realizing it, this was my very first taste of backstrap weaving and with this one teacher I learned so much. He taught me the Palma and Margarita braid styles and a thin version of the Palma which didn’t seem to have a name, a little tapestry weaving by backstrap as well as tassel making and decorative edging.

LEFT; The very start of the Palma braid with the 4 sets of 6 strands used to make it. RIGHT: My hand in the braiding position. Two opposing sets of strands are interchanged. The braid is then rotated  90 degrees so the other two sets can be worked.

Zacarias was a marvelous teacher with a lot of patience. He would get me started on my work and leave me while he harvested the barley crop – plans were afoot to make some alcohol – moved the animals from one field to another and generally took care of things on his property.

LEFT: My sling braiding teacher, Zacarias on his property near Yanque, Peru. RIGHT: A woman by the shores of Lake Titicaca shows me how to hurl a stone with a sling braid.

################################################################################

WHAT HAVE YOU GUYS BEEN UP TO?

I know that backstrap weaving isn’t for everyone and I am so glad that people are still able to make use of the instructions here and at Weavolution and use the techniques and designs on other looms. Ellen Turner, in Denmark, has woven a double weave band on her inkle loom using my tutorial at Weavolution.


She made a celtic design inspired by something she saw on the internet.

I also ran into Jessica’s blog where she has been experimenting with double weave on an inkle loom too. Check it out.

Kristina in Germany  wove a double weave band on her inkle loom using her own handspun llama fiber. She commented that it put a lot of stress on her inkle loom so that is one important thing to take into consideration.

So if you have been enjoying the designs and have found the tutorials interesting and tempting but are still hesitating about getting strapped in, remember that you can adapt these techniques to other looms. I have set up warps on my rigid heddle loom and woven bands with string heddles rather than with the rigid heddle.

I have to tell you, though, that for me the backstrap loom wins hands down for the ease with which I can adjust tension with the slightest of body movements.

And, finally, I mentioned above the paintings of Carmen Pettersen. Check if your library has a copy of “Maya of Guatemala-Life and Dress”. Her paintings of Guatemalan people in traditional dress are stunning.

Backstrap Weaving- A Word or Two and a Video on Warping.

I love how easy it is to warp for backstrap weaving especially after reading and hearing about what is involved with warping those bigger table and floor looms-all that threading! However, finding the place and equipment for warping for the backstrap loom is often the problem. Finding the sticks  to put a loom together seems to be relatively easy, making a nice beater takes a little time and thought but where and how to wind that warp-now that can be tricky.

As you can see above, my first weaving teachers in Peru taught me to make tiny bands using a tiny warping board. I learned two techniques with them and was eager when I got back to my home in Chile to incorporate both into one large piece.

Perhaps a  little over ambitious but you can see the results of my attempts to wind a longer wider warp. My warping stakes leaned horribly and I ended up with this wonky thing-look at the far loom bar and the tilt on it! Firmly grounded warping stakes are a must.

Well,  I persevered and put a lot of work into that piece but it was never quite right. At least I was satisfied that I could weave the techniques without the supervision of  my teachers.The piece itself ended up in a box. Recently I got it out and salvaged what I could and am now using it to cover some small photo albums that I take with me on my travels.

The colors and layout were inspired by woven sashes that I had seen on Taquile Island on Lake Titicaca,  Peru.

Photo album covers made with the two patterning tecnhiques I learned in Huancayo, Peru.

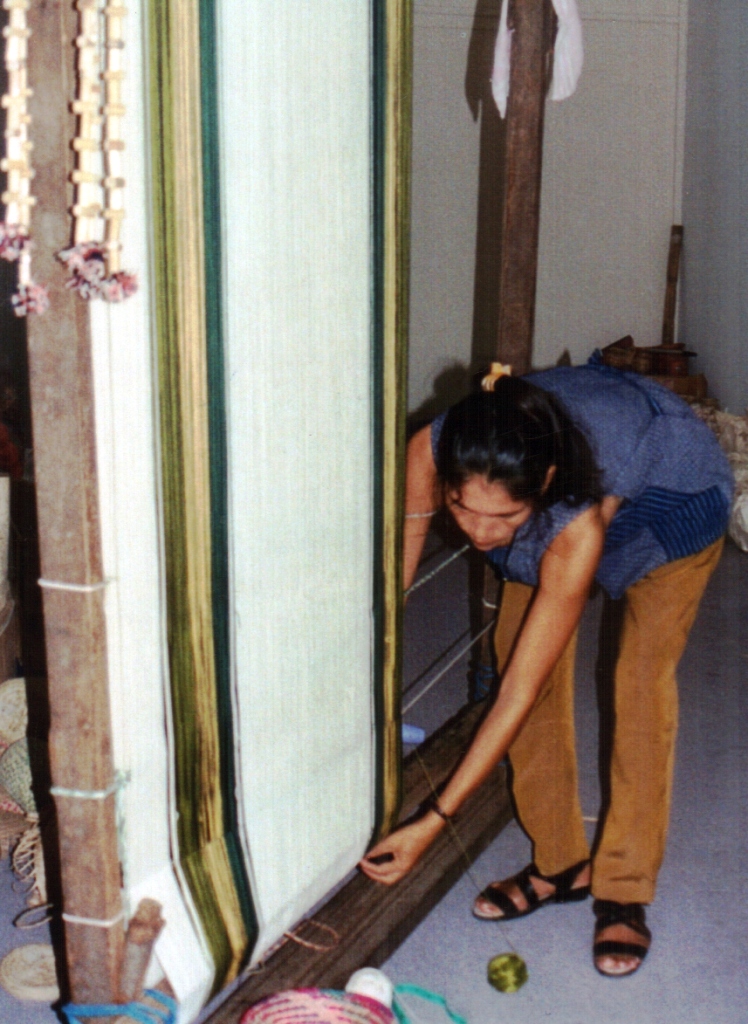
A year later I went to Bolivia and studied with two sisters in Potosi. They weave their large pieces on a staked-out ground loom and only use a backstrap set-up for small bands. I love the way they warp there. Two women seat themselves at each end of the loom and roll the ball of yarn back and forth while winding the figure-of-eight. The only problem–you tend to talk too much and lose count. Neither of us was counting in our native language-Hilda’s being Quechua and mine, of course, English. Between that and the chatting we lost count many times!

We are using respun acrylic yarn in the bright colors that the weavers in Potosi love. With two people, this would be a great way to direct warp for backstrap weaving.

The weaving I worked on in Potosi is almost finished here. It is a four-selvedge piece and there are a couple of inches to go to close the gap. It took all day to weave that last bit!
Warping the Potosi way (almost)

Probably nostalgia for the fun I had had with Hilda and her sister Julia in Potosi led me to try the following way of warping  when I got back home to Chile.

I can tell you right now that it is not as entertaining to do alone and it is pretty slow and difficult trying to manage two colors at once as you need to do for double weave and complimentary warp weaves.

Neverthless I got this warp done, it was well tensioned and even and I wove a big bold design inspired by designs of the Mapuche people of central Chile and Argentina.

One of the Mapuche inspired designs I wove into the above piece.

I traveled a lot more, met many weavers and saw a lot more ways to warp for a variety of looms and techniques, some of which I’d like to share with you here.

Making a dovetail warp for the collar of a poncho in Otavalo, Ecuador. Note the horizontal bar that helps stop the stakes from leaning in towards each other.
In Salasaca, my teacher Felipe wound a mini dovetail warp for me to take home just in case I forgot how to make one for the belt weaving technique he taught me. This was put together hastily. The sticks leaned and the resulting warp was crooked but it was just meant as a reminder and served its purpose..
Look at this beauty from Guatemala at a nice height so you can stroll up and down with your yarn.
Warping for a hammock in Santa Cruz, Bolivia. This would certainly give you a work out.
With my teacher, Trini, looking on I am learning to make a dovetail warp for a mini hammock in Zapote, Ecuador
Probably the set-up I would most like to have–just the 5 stakes that my teacher in Santa Catarina Palopo is using here.
My favorite way—group warping! We are making a straight warp here with stakes and metal rods driven into the ground-Salasaca, Ecuador.

Probably the most interesting system I saw, which, unfortunately, was impossible to photograph, was near Huancayo, Peru where a woman had stakes embedded in the walls of the hall of her home at chest level so she just had to walk up and down the length of the hall to warp. Now if only I had a longer hall……….

So what do you do if you don’t have a warping board? I have seen a Youtube video where a guy wedges stakes between books in his book case and warps around those.

I was lucky to have this chair to use when I first got settled in here in Bolivia.  It was useful for narrow projects- practice bands, small bags and bookmarks.

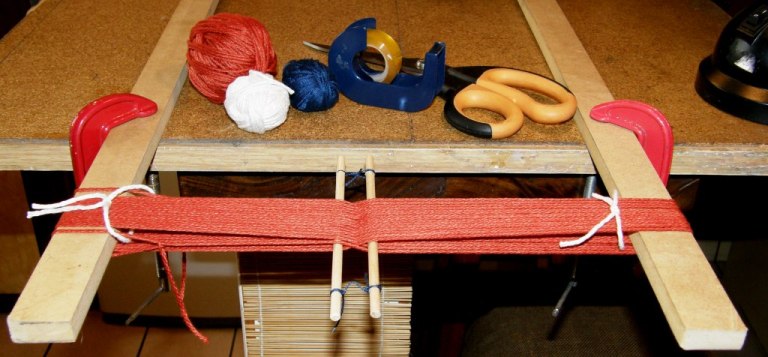
The way that I showed in my WeaveZine article using clamps  is fine as long as you can clamp those stakes down really well . Don’t use your good table for this. I have heard of people turning chairs and tables upside down and using the legs. I once used a coat rack in a hostel room where I was staying. Whatever way your creativity and circumstances lead you, just make sure that the stakes or posts are very well grounded and will not lean in at all as you wind your warp. Even the smallest amount of lean will make a difference.

If you see yourself continuing in backstrap weaving and making longer and wider pieces, it will be worthwhile buying a warping board or making something sturdy and more permanent. It doesn’t need to be fancy as you can see from my little ”beauty” here.

This allows me to wind a 36”  long warp which I have used to make shoulder bags, sets of three mug rugs, placemats, table runners, pillow covers  and wall hangings. For making longer pieces such as belts and guitar straps, I have had to get creative.

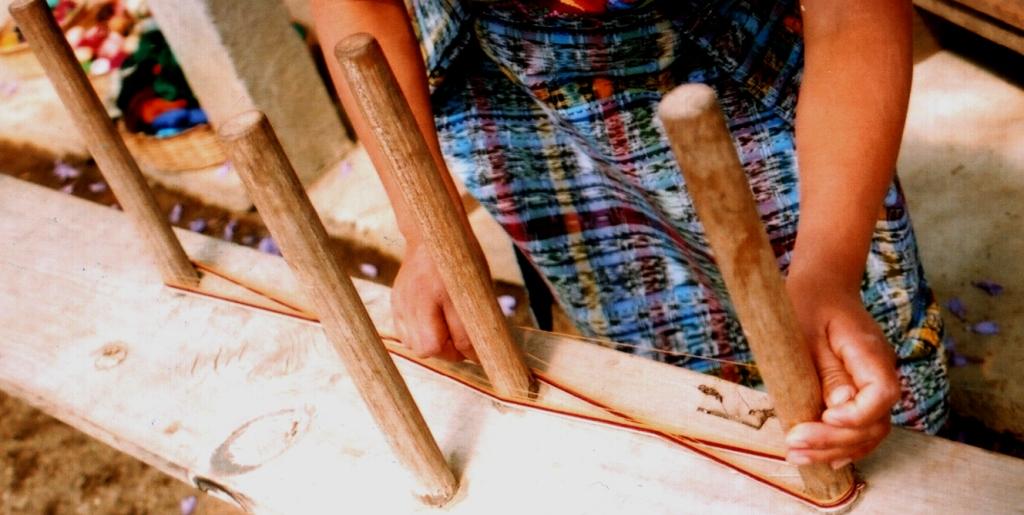
Basic warping involves winding your yarn around two stakes, like those seen above, in a simple figure-of-eight path. Your loom bars will replace the two warping stakes and the cross you have created will allow you to set up your two sheds using a shed rod and continuous string heddles. I often put a second cross in once my warp is on the loom. (More about that in a future post)

Warping with a single color

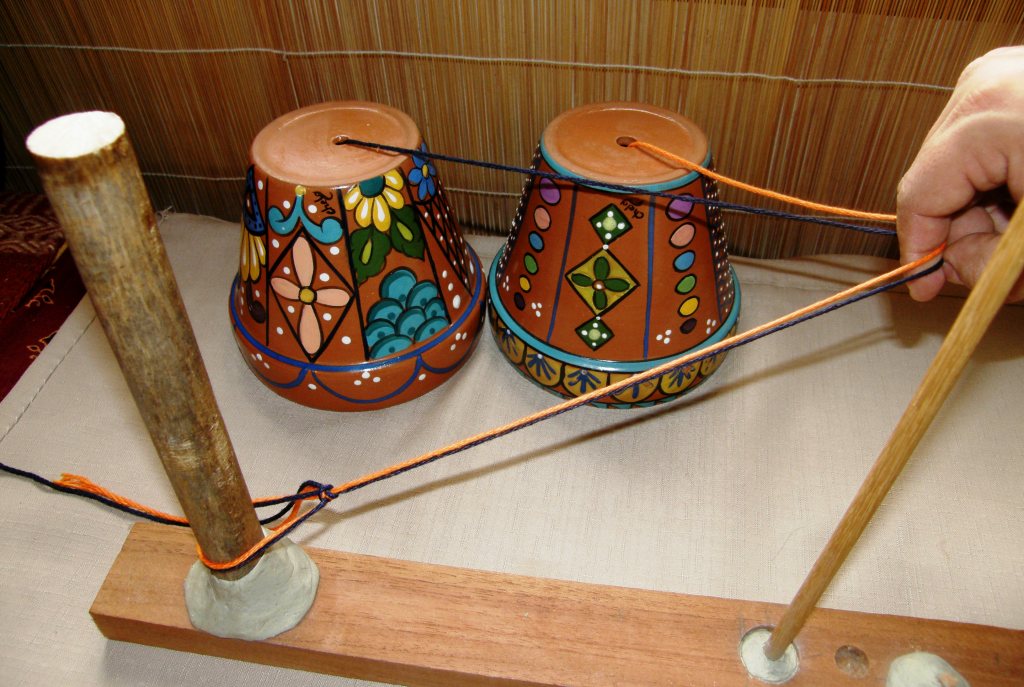
If you want to weave a  piece with horizontal stripes in two colors or weave simple warp float patterns or any other complementary warp technique you will need to wind two colors together. Again, this can be done on just two stakes. I like to place my balls of yarn in flower pots so they don’t roll about and get tangled. Other hints and tips will come up in future posts or you can find them in the Backstrap Weaving Group forum at Weavolution.

Winding red  and yellow yarns together
Preparing to wind 2 colors together on my smaller warping board.  Note the large loop of yarn around the warping stake which can be easily slipped off the stake and onto your loom bar.
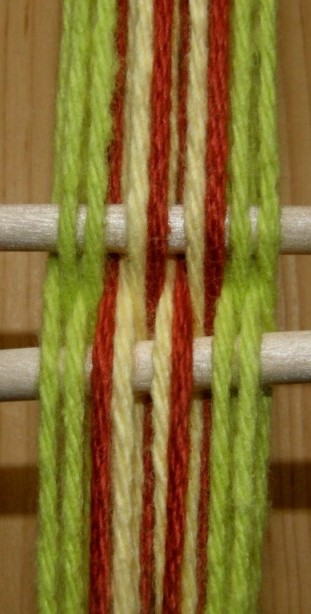
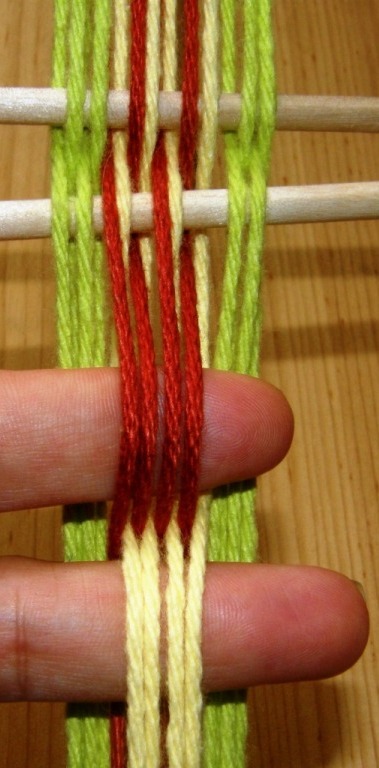
Warping with 2 colors together will result in a cross like this.
The colors on this tiny band can then be rearranged so that the original cross can be replaced by a new one where each color along with the green borders is in its own shed.
Many Andean weaves are complementary warp weaves and require an arrangement of warps into sheds of two colors as shown above right. This arrangement of warps will allow you to weave something as simple as horizontal stripes or more complex warp float patterned weaves.

FOR THE ADVENTUROUS!!

The following is a video from my Flickr page which shows how I was taught in Peru to warp with two colors using four stakes. The colors are separated– each color into its own shed on the warping board itself as you warp–fast and efficient and especially recommended for wide warps. (The two additional stakes that you see in the video are temporarily fixed to the warping board with ”blu-tack”).

Just to finish off, here is what I am working on at the moment……

Two-weft double weave piece in progress

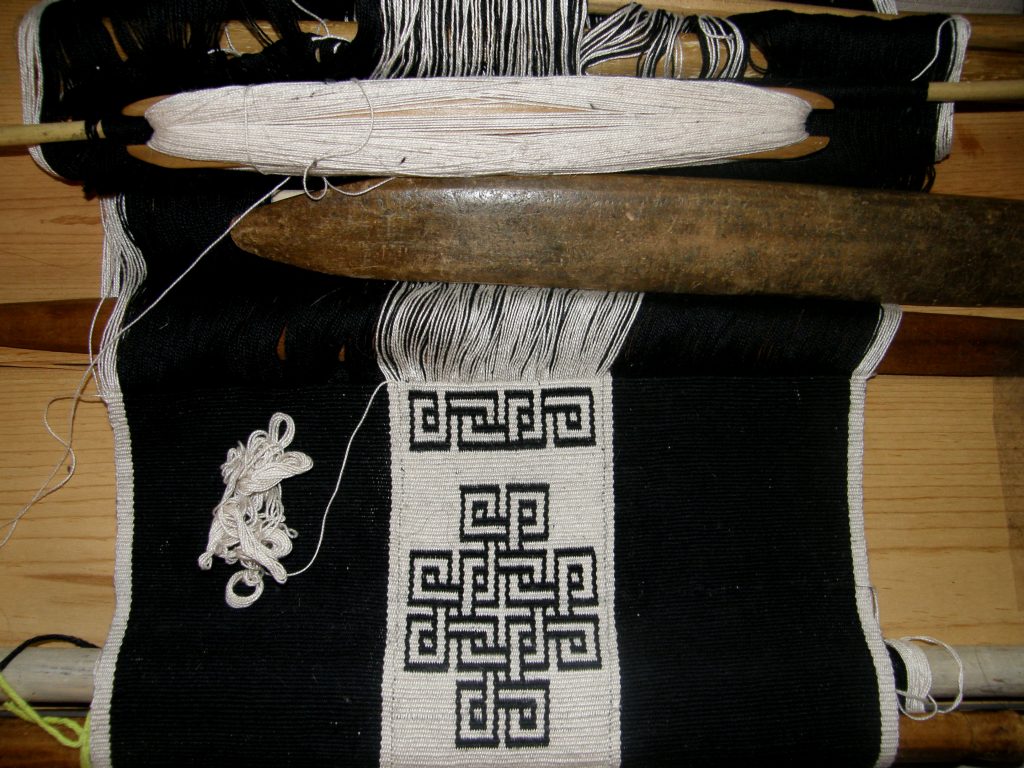
I fell in love with this design the moment I saw it posted at Weavolution. A member had woven a reproduction of a tablet woven curtain that hangs in a cave church in Abba Yohanni, Ethoipia. These curtains were produced and hung in many such churches in Ethiopia in the 17th Century. Rob S, who wove the reproduction, used over 300 tablets. This is just a small part of the overall curtain design. I am weaving it  in two-weft double weave. I have a strip of double weave bordered by plain weave. One weft weaves the plain weave and upper layer of the double weave. The second weft weaves the lower layer of the double weave.

This is quite a change after making all those colorful key fobs but now I have to deal with the black picking up every single speck of dust in the house! I hope to now reverse the pattern and weave a white motif on a black base. I am not sure what I will make of this piece. I’ll decide when it is done. 🙂
Backstrap Weaving-Supplementary weft patterning and learning to weave in Guatemala

SUPPLEMENTARY WEFT PATTERNING

Lately I have been playing with supplementary weft patterning and, once again, have been inspired by Weavolution members. One member joined my Backstrap Group as she is interested, amongst other things, in reproducing a Central Asian yurt band. She has introduced me to many beautiful Central Asian designs and often sends me photos of pieces she has seen at reenactmant events that she attends.

Together we figured out the technique on a yurt band she had bought and even wove it simultaneously- all coordinated by email!

When she sent me this photo (at left) of a Central Asian piece she had photographed at one of the historical events, I couldn’t wait to weave the design into something. The technique wasn’t clear in the photo and, as I wasn’t concerned with reproducing the original technique,  I decided to weave it in either double weave or supplementary weft patterning. I chose the latter as, since studying this technique in Guatemala in 2008, I hadn’t put it to much use.

In this technique, it is really important to get the right balance between the weight of the warp yarn and that used for the supplementary weft and so I quickly wove a sample and then went ahead and made the table runner below in 4/2 cotton (24wpi) warp with 6 strands of the patterning thread that I had brought back from Guatemala as the supplementary weft. You can see that I added a little embellishment of my own to the pattern.

My colors are rather bland compared with the original. I love that orange zigzag next to the main design. Perhaps I will be more adventurous with color next time!

My table runner with a Central Asian inspired design

My other source of inspiration has been a Brazilian member of Weavolution who has generously shared what she knows about the weavings of the Huni Kuin people who live in the tropical forest of Brazil and Peru. They weave with backstrap looms using cotton that they spin and dye themselves. You can see a video of their work here and a photo of a Huni Kuin weaver here. Although they do not use  the supplementary weft technique, I chose to use this method to weave one of their designs into a bag.

A small bag with supplementary weft patterning inspired by a traditional Huni Kuin design.

Here in Bolivia, the supplementary weft technique is used by women to weave bands to decorate their hats. It is in these hatbands that I have seen the widest variety of woven designs. Except for in Calcha, where it seemed that the women had decided on one hatband design to represent their village, I have never seen two hatbands alike.

This Potolo woman is using three hatbands at once.
Hatbands from Bolivia

Sometimes the supplementary weft is used to form the motif as in the small condors on the upper half of the center band above. At other times, it is used to fill the negative space to outline the motif on the ground weave.

From having purchased some hatbands here, I was able to see how they were woven. I made a few sample bands but, as I didn’t get the right warp to weft ratio, I wasn’t too pleased with the results and never really went on to explore this technique further- that is, until I went to Guatemala in 2008 and studied weft patterning with three teachers there. It was my first time in Guatemala and an absolute explosion of color and inspiration was awaiting!

The traditional hair sash of the women of Aguacatan, Guatemala

So I would like to spend the rest of this post introducing you to my first teacher in Guatemala and showing you how I learned supplementary weft patterning with her.

Lidia lives in the very small town of Santa Catarina Barahona near San Antonio Aguas Calientes in Guatemala. The typical blouse, or huipil of the area has designs woven in single and double faced supplementary weft patterning. The large areas of double faced patterning are those that most distinguish the huipiles of this area.

Typical huilpil of San Antonio Aguas Calientes.
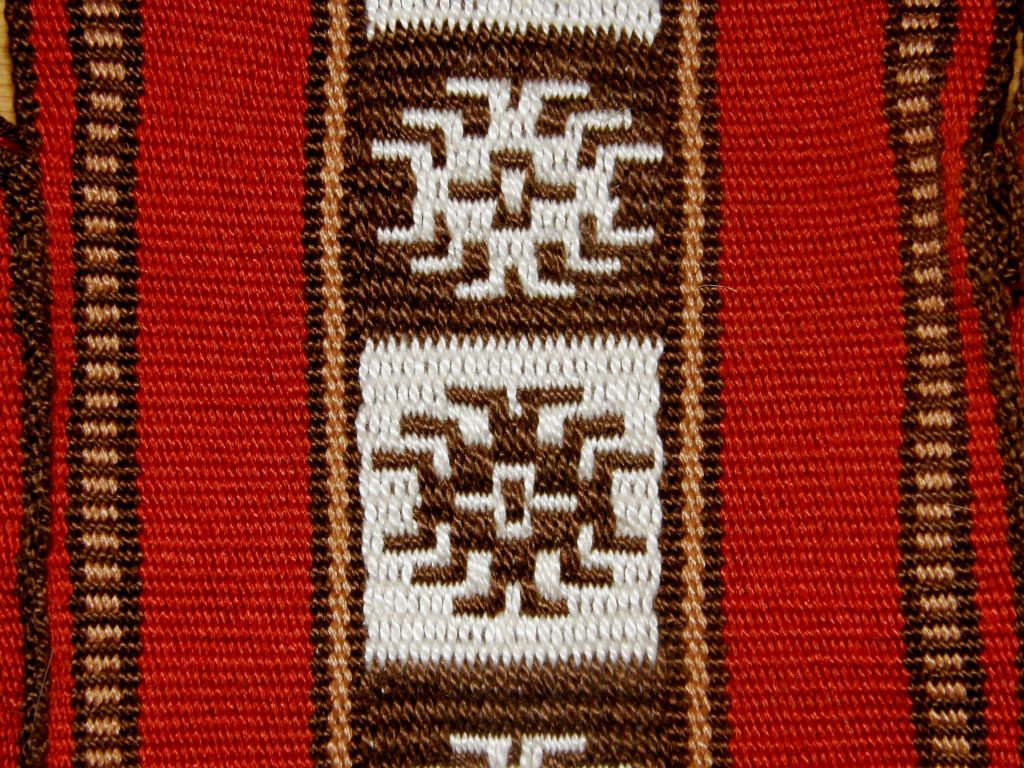
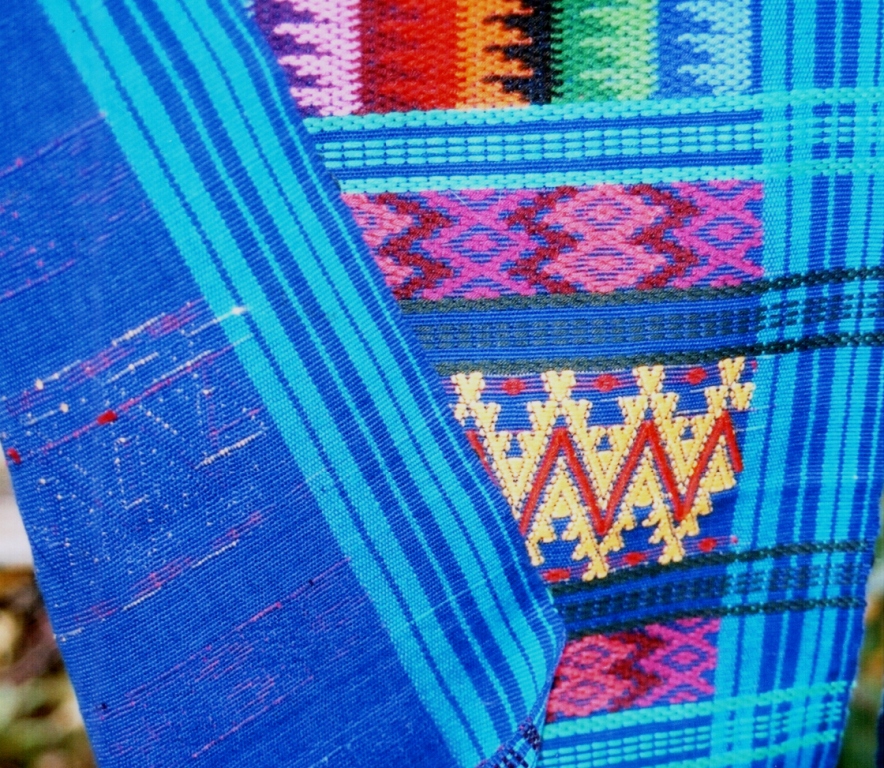
Single faced weft patterning. The patterns can’t be seen on the back of the textile.
This double faced patterning looks very much like embroidery. The national bird, the quetzal, is a very popular motif.
Day 1-Lesson 1. I have chosen my colors for my piece and am winding the thread into balls prior to warping
Making a small warp for my lessons
Once the loom was tensioned, the heddles were made.
Lidia’s sister Carmelita showed me how the warps, under which the patterning wefts would be placed, are picked and stored on two additional sticks. The resulting designs are called ”pepenado”.
The first design lesson-Lidia is weaving the ”tijera” (scissors) pattern. She uses a pointed stick to hook theweft tails and pass them under the raised patterning warps.
The finished tijera pattern
Double faced ”abeja”-bee
Three ”abejas” that I wove when I got home

The ”abeja” was topped off with another section of ”tijera” and that completed my second day of classes. Finally, on day three, I learned the ”arcos” (arches) pattern. This is a combination of weft inlay and warp wrapping.

Weaving the ”arcos” designs
The finished ”arcos” design

It looks like my teachers did all the weaving and I just stood around and snapped pictures! Well, I can tell you  that it wasn’t so. Lidia was a very ”hands-on” teacher and she would take over only when I got up to stretch and take photos.

But it wasn’t all hard work. Other family members and neighbors came to visit, we paused to make and eat tortillas, chatted and played with the nieces and nephews in Lidia’s shady yard and walked to town to go yarn shopping.

Snack time. While making my way around Guatemala I learned to recognize the ”slap slap slapping” sound of tortillas being prepared.
Small rectangular pieces are covered with double faced designs and closed with a drawstrig to make a baby’s hat.
Whne I got back to Bolivia I finished off the piece that I had been making with lidia and then wove another sampler to consolidate the weft patterning techniques I had learned.
And I used my lesson piece in the lid of my weaving toolbox.

I went on from Lidia’s home to study with two other weavers in Guatemala but, more about that in another post!

Lidia’s daugther Sara and her cousins

I will be doing a tutorial on suplementary weft patterning with lots of step-by-step photos here on my blog in the following weeks so that you can add designs like the Central Asian and Huni Kuin ones, that I showed you above, to your projects.

I hope you enjoyed this little trip from Central Asia, to Brazil, to Bolivia and onward to my teacher’s home in Guatemala. If you did, I would love to hear from you 🙂