Backstrap Weaving – Making Way for Things to Come

airport world cup 2014If you read my Boomerang Effect blog post a few weeks ago you will know that my first attempt to get back home to Bolivia after my Sydney visit was not successful. On the second attempt the boomerang sailed over the Pacific Ocean and all the way across the USA, showing no signs of returning to its place of origin, until… it hit a palm tree in Miami and got hung up there swinging around in circles.

I can think of worse place to get stuck for a few days but when you have been away for three months all you want to do is get home! The airport was lively and colorful with large tv screens showing Wimbeldon and the FIFA World Cup. Enthusiastic crowds of all nationalities gathered around. It passed the time. Of course, it would have been a whole lot jollier if the USA hadn’t lost its football match.

I tried to be productive, sat down with my laptop, and poured out the entire Table of Contents for my third book. That felt like an enormous hurdle. Then came a list of all the pictures that need to be taken for each chapter. That done, I was all the more eager to get home and get stuck into it.

???????????????????????????????In the end, I bought a ticket on the Bolivian airline BoA (Boliviana de Aviacion) who had recently added Miami to its system and was offering very good fares, free checked bags, and some of the best Economy Class airplane food I have had in ages.

The coolest thing about BoA was the flight attendant uniform.

They each had a handwoven warp-faced cotton pick-up patterned band made by weavers from the Bolivian lowlands sewn to their pants…very cool!

I had left my brother’s place in Sydney at 9am on Monday and got to my door at 9pm Thursday (Sydney time). It was quite a trip! The jet lag was huge. I have finally reached the point where I can eat lunch without falling asleep in my plate.

The BoA uniforms with their woven bands had stirred me into a longing to be home and back at my loom.

Killing time in the souvenir and Duty Free stores in Sydney airport had already given me guilty reminders of the abandoned project on my backstrap loom at home awaiting my return….here’s one item…

aboriginal art souvenirThis Aboriginal Art souvenir reminded me of the squiggly lines in my Shipibo-inspired project which was the last thing on which I had been working before leaving home in March…
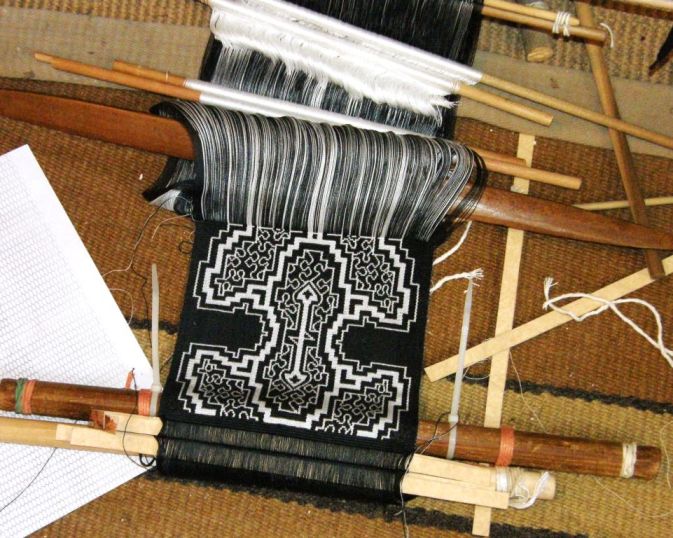
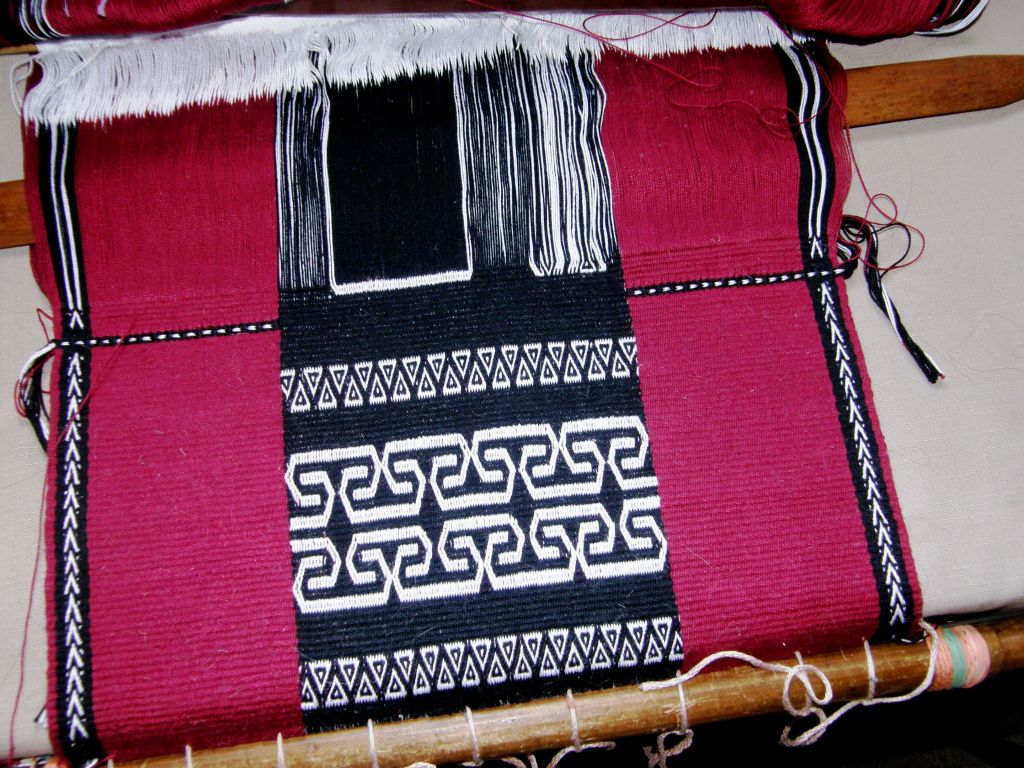
Shipibo inspired wall hanging backstrap weavingI hadn’t packed it away and had simply covered it over wth a sheet. There it lay on the floor with the various shuttles, swords and pick-up sticks that I had been using to weave this double weave with its multiple heddles. It took a me a little while to get back into the rhythm to follow the sequence in which I had been putting all those tools to use…

finishing the shipibo backstrap pieceNow I have finished the main design and am weaving a “‘fringe” of sorts. I divided the fringe into seven sections and am weaving each separately in double weave. I need seven inches of  ”fringe” to complete the panel and have just reached halfway. Each section will be a different length with the center one being the longest and the two outer ones the shortest, creating a stepped effect. Years ago, my brother had sent me a picture of a Native American piece in a London museum that had been finished this way and I have been wanting to do that myself ever since.

twining on backstrap wall hangingThe picture above shows two balls of dark red hemp twine alongside the woven panel.

I hope to create two outer panels with this twine using a structure that includes warp-twining that is used by lowland weavers in Peru to make wristlets. The outer panels will be a quiet solid dark red so as not to clash with the crazy busy-ness of the center panel. The three panels will then be joined together across the top with weft twining. There is a long way to go before I get to that point. Much sampling with the hemp twine needs to be done first.

This will be the second piece of three in the second series of red-black-and-white hangings. That’s the first piece above left.
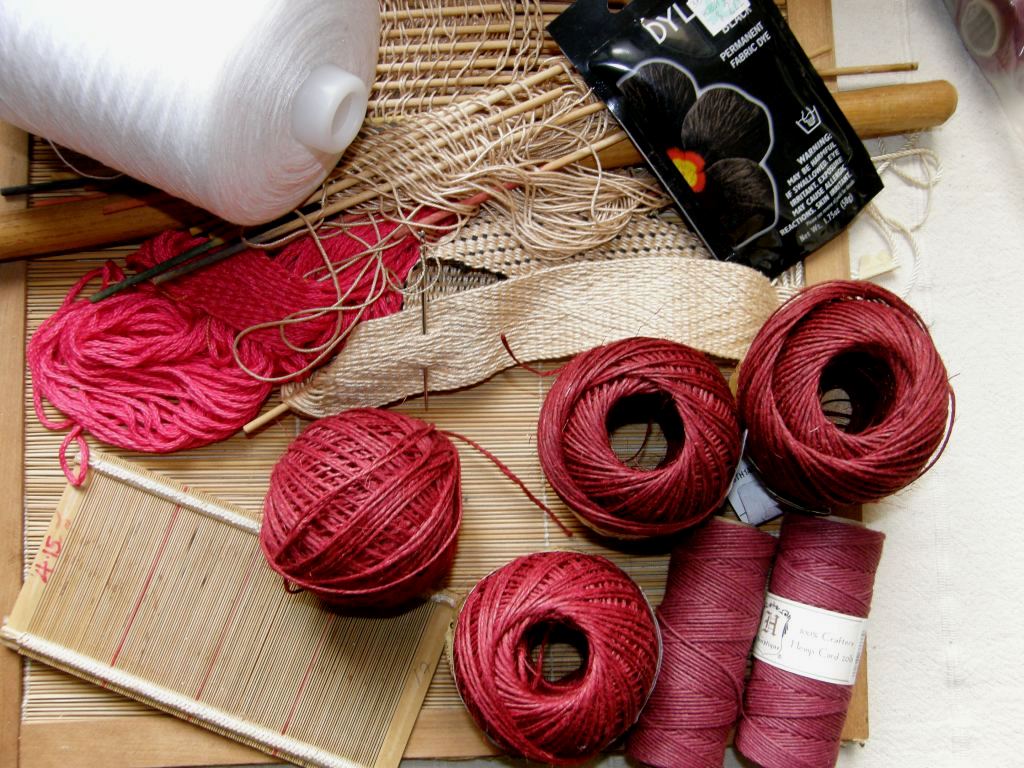
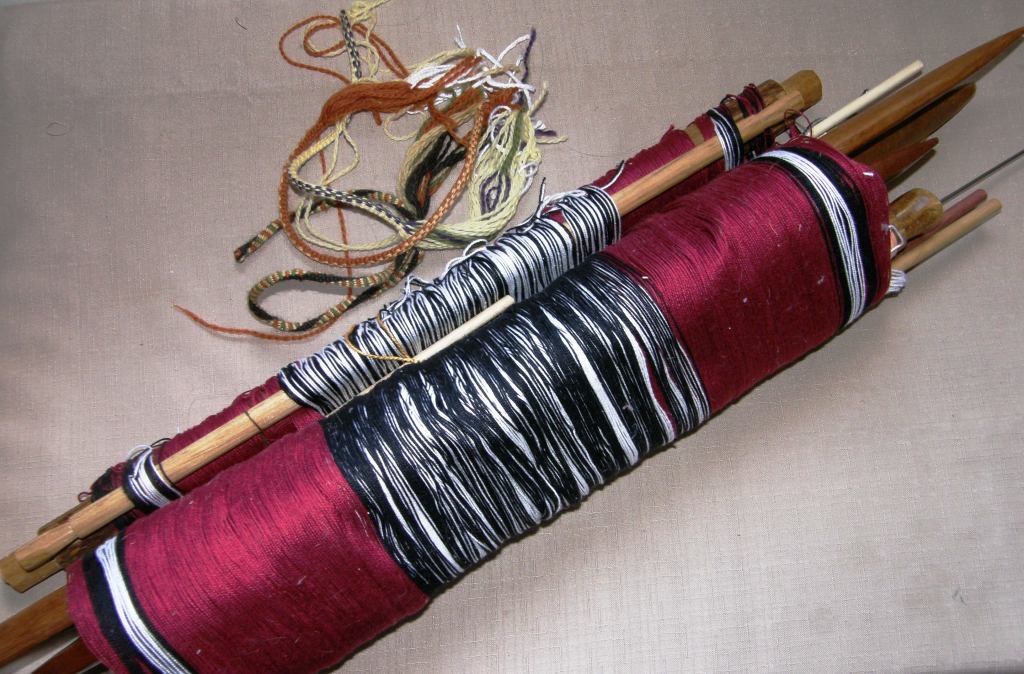
???????????????????????????????Things to come…exciting! There are a couple of varieties of hemp twine in this picture along with an example of the wristlet structure. You can also see the super fine bamboo reed that I bought at CNCH, now removed from its heavy frame and ready to be used on my backstrap loom. I can’t wait to try it out with some silk. The cone of white thread is the 20/2 perle cotton that I want to use for the third wallhanging…an ikat piece…and there’s some of the black dye that I’ll use for that. I am not sure if I will have time to get that started before I have to leave again but I am happy to have more time in which to ponder that one. I seem to get some of my best ideas while sitting on planes!

???????????????????????????????Then there’s the gorgeous 60/2 silk that I got at CNCH waiting to be used as supplementary weft. The large skeins of silk were given to me by my friend Susan in Sydney. It’s a heavier weight silk than the Redfish Dyeworks skeins and I am thinking of using it as the warp for a brocade project.

The project ideas go piling up. You can probably tell that I am pretty excited about being home again.

My weaving friends in Sydney remain in mind. Emerald has been sending me updates on her progress as she weaves off all the projects that we started in our two days together…

emeralds pebble weave collageThat lovely green warp is now a piece of Andean Pebble Weave patterned fabric ready to be made into a cell phone pouch. That’s my second book that she has opened on the floor. I was showing her how to read the spotted charts. That particular motif also appears in the first book.

sewing and weaving tuular band emeraldHere she is weaving and sewing a tubular edging to the pouch.

emeralds cell phone pouch and intermeshThere’s the finished pouch along with her intermesh sample band.

One of the good things about having to stay longer in Sydney than expected was that I got to visit with the Springwood group of weavers again up in the Blue Mountains at Helen Halpin’s place. What a lively and enthusiastic group of weavers! They meet once a month and there is always a lot of show-and-tell.

Yvonne, who had woven with me a couple of weeks earlier, brought in a band that she had since warped and woven. She had played about and created some of her own patterns. I love that! What was also interesting was that she had used bamboo thread. I have never considered using it as I had always thought that it would be too soft. Yvonne’s band felt lovely.

???????????????????????????????In the Ravelry group, Kim has been progressing with the two-color simple warp-float technique while copying as well as adapting motifs from Central Asian textiles. This piece is beautifully woven and I love the combination of colors. I am surprised at how well that green stands out from that background color….inspiration to be more adventurous with color choices.

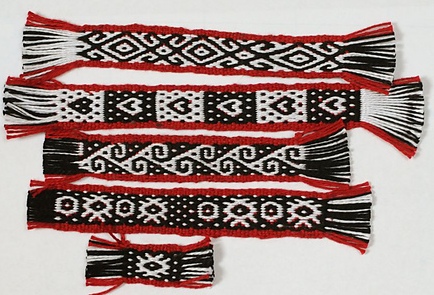
kimberley swfKeith has formed a South American band weaving study group at the Weavers’ Guild of Minnesota. One of the members wove with me on one of my trips and it is nice that they can now study some pick-up weaving techniques together and support each other. Keith posted this picture of some of the first bands with some thoughts of what could be improved. He won me over right from the start with his color choice!
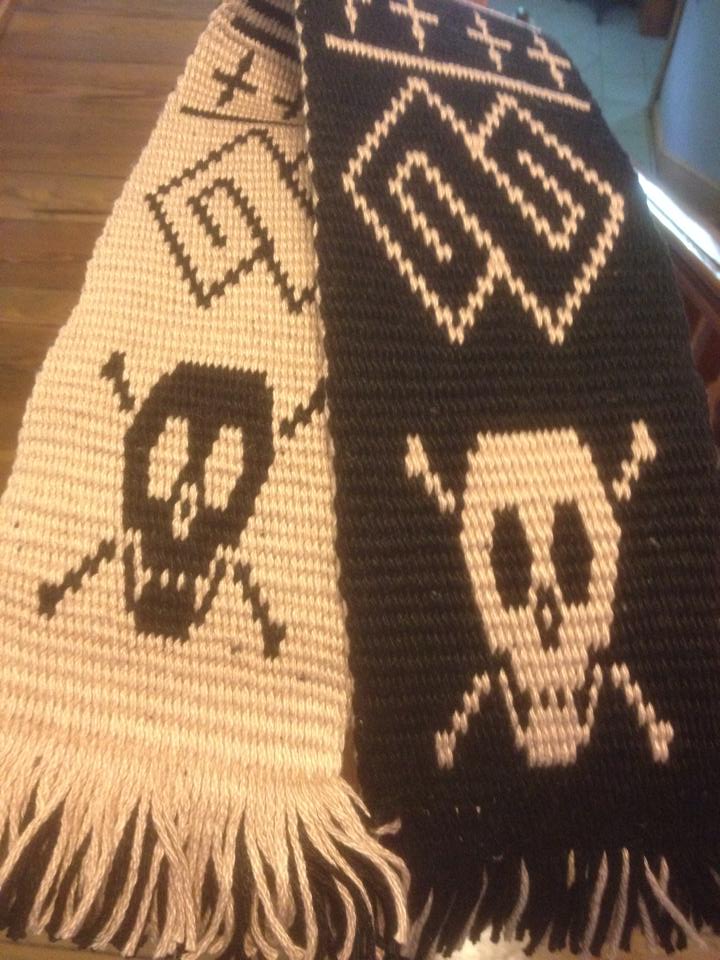
keithScott, a Facebook buddy, posted this striking double weave piece that he started some time ago and just finished…
scottSo, here I am back at home. I unpack and put away the yarn and other goodies that I have brought back on this trip. As is my policy when new things come in, old things have to go out…out went the rocking chair this time which opened up a whole lot of space! Even so, the “stick corner” in my bedroom gets increasingly crowded. I brought back a whole bunch of dowels that were being discarded and a couple of shuttles. I need sticks of all kinds of lengths for all kinds of warp widths…cross sticks, heddle rods and coil rods…shuttles and swords. I don’t weave a limited variety of traditional items as many backstrap weavers do and so, I need sticks that are suitable for a vast range of woven widths.

???????????????????????????????It’s a lot of stuff and I wouldn’t part with any of it!   Would you believe that there are still times when I can’t find just the right length of stick with the right girth?!

But, the equipment you use can be as complex or simple, as rustic or sophisticated as you want it to be. And it’s always nice to know how to improvise a set-up when there simply isn’t any “equipment” to be found..

???????????????????????????????Or when you just couldn’t be bothered fishing all the gear out of a packed bag…

??????????????????????????????? ….in which case a pencil will do for a front beam and a piece of string for a backstrap. The elastic bands will stop the string from sliding off the pencil.

For narrow bands, no equipment is required if you have a good set of “magic fingers and toes”!

??????????????????????Maxima tensions the warp between her index finger and big toe. Her fingers are used as cross sticks to form the picking cross and fast flying fingers and thumbs select the colored threads to form her patterns. Her hand is her sword and beater.

When sticks specifically for backstrap weaving are simply not to be found, as is often the case in the very highest parts of the Bolivian highlands, all kinds of other things can be called into play…like the spindles that Hilda is using in place of cross sticks while setting up a warp for double weave. Hilda’s large sticks and rods are saved for her horizontal ground loom.

hilda preparing backstrap warpIf I am home and have access to my collection of sticks in their handy bins at the end of my bed, I like to use them. I feel more comfortable with a wide breast beam and a backstrap…a nice wide cushy backstrap….no matter how narrow the warp.

This Mexican weaver from Santo Tomas Jalieza, Oaxaca seems to feel the same way!

Picture from Teyacapan's Flickr page
Picture from Teyacapan’s Flickr page.

So, I will never able to resist grabbing a good stick that comes within reach while I am traveling and bringing it home with me. While there are still things that can be removed from my little home to make space, there will always be room for more sticks!

Finally, I would like to thank everyone so very much  who went over to Facebook and ”liked” my nephew Ryan’s triathlete page at my request last week. Someone even posted a “Weavers for Waddington” comment. That was so cool 🙂 Ryan was very pleased to see all the new “likes”.  It really made a difference and he got a new sponsor last week…

1176105_696156010456849_9156188001071593550_nYep, that was THE best thing about being held back in Sydney…I got to hang out with Ryan some more.

If you didn’t get over to Facebook last week to “like’ his page, please help him out by going over now. More “likes” mean more sponsorship appeal, I am sure. I was happy to see so many familiar names there as well as some names I didn’t recognize…people who read my blog but with whom I have not yet connected…many thanks to all of you.


Backstrap Weaving – Sunny Side Up


The only “problem” with double-faced structures, like Andean Pebble Weave, is that you sometimes don’t get to see and enjoy both faces of the fabric. I wove the above piece (using a non-Andean pattern) and then folded and sewed it into a bag. I had to decide which was the “sunny side” or, the side I would have on the outside of the bag while the other side, sadly, would be hidden forever on the inside. Actually, in this case, I guess I ended up choosing what you might call the “shady” side, the one on the right, the darker of the two options. The lighter, or sunny side, went on the inside.

Some of the structures I weave have two acceptable faces but there is one that is obviously the “right” one. What I call the simple warp float structure is one such structure.

central asian backstrap weavingThis is the piece I wove and sewed into a case for my little notebook computer.

central asian simple warp floats both sidesBoth sides are attractive in their own way. The “right” side on the left is patterned with warp floats. The other face shows exposed weft.  So, in the end, I didn’t have to hesitate over which side to use as the outside of the bag.

The same goes for the latest computer bag that I have been weaving.

wool warp backstrap weavingRemember the wool warp that I showed in last week’s post? It really was just supposed to be an experiment in weaving with loosely spun and plied wool. I was nervous about it but, as soon as I started weaving, I could tell that it was going to work out. I could open the sheds carefully and achieve nice clean openings without stressing the wool much at all. I used nylon heddles (yes, shock, horror…you know how much I hate nylon heddles!).

No fluff accumulated on the heddles but it did between the cross sticks and at the point where I pressed down on warps to help raise the heddles. I just gently removed the fluff each time I had to slide the cross sticks up the warp. This didn’t become a problem as I advanced the warp as often as I could so that the points of pressure and friction  and resulting fluffing were never in the same spot for too long.

???????????????????????????????So, I decided that this warp was going to be  a keeper and that I may as well add some patterns with wool supplementary weft. The technique I used is single faced so I won’t have to make a decision about which face is the sunny side.

As you can see below in this cotton example I wove some time ago, the back side of this single-faced technique is plain (which I suppose could be the side you chose to show if you went over the top with your supplementary-weft design and made something that you felt was garish).

???????????????????????????????The only problem with the wool project was that I had used up most of this little wool stash in the warping and only had a bit of terracotta yarn left with which to make patterns.

You can see that I used a coil rod to prevent corrugation. I wouldn’t really expect ridging with wool as it is so springy and forgiving but I wasn’t taking any chances. The wool was behaving nicely and I didn’t want to push it by having to unweave and start over if ridges appeared.

wool warp with pattern color changes backstrap weaving supplementary weftTwo warp ends broke while none of the others looked particularly worn at all.

Eventually I had to change to green supplementary weft. That was okay as I also had a green stripe in the warp into which I could hide the weft turns.This allowed me to save the little remaining terracotta to weave the same design at the other end.

And then just to make things more “interesting” I decided that, since I weave with wool so infrequently, I should use this piece as an opportunity to practice making something with four selvedges.  I turned the whole thing around and started weaving in from the other end.

four selvedge wool warp backstrap weavingBring out the little sticks, the skinny shuttles, the umbrella ribs, the needles and a large serving of patience!

In the above picture there are just under two inches left to weave and I am still, thankfully, able to use both the shed rod and string heddles. I think doing all that twining last week was a good warm-up to this. It was taking me forty minutes to twine a single row. Opening the sheds and weaving in this small space, so far, is a lot faster! I expect that to change pretty soon!

I thnk I might have trouble needle-weaving the last rows as the yarn is plied so loosely. I fear that I will be continually splitting the two strands with the needle.

creating the shed with a needleI suspect that the overspun and tightly plied yarn created by the weavers in Pitumarca, Peru would be easier to work with in this case. I needle wove the two ends of the discontinuous-warp piece shown above (my teacher Yaneth is demonstrating in the picture). Now I will be able to see how it compares with using store-bought yarn.

Will my wool project end up being the computer slip case that I had planned? I am not sure. I definitely want to decorate all four edges with a tubular band and am hoping that I can scrape together enough of this wool to do so. We will see what it wants to be when finished.

As for the twining that was giving me trouble…..

???????????????????????????????….it is done. I have yet to find a spot with good light to stretch this out to full length for photgraphing. Neither of the reds in the above picture are the true color.

After having problems with either the twining buckling or the fabric getting a pleated look, I twined and untwined and finally found the right formula. So, now the three panels are joined across the top and I shall set it all aside while I decide what to do at the bottom. Most likely I will make masses of tiny braids which is how I chose to finish the other three pieces in this series.

hatbands boliviaThis fourth hanging was inspired by hatbands used by the women in the Bolivian highland community of Calcha (the one bottom left in the picture at left).

I visited Calcha in August 1997.  It was a festival weekend and I hadn’t known. Because of the big party in progress, none of the women were weaving. A small boy ran home and brought back a hatband to show and later sell to me when I asked about weaving. I always wonder if he had taken it right off his mother’s hat and if he had gotten in trouble over it later. 

???????????????????????????????Now to dye some cotton red for  number five in the wall hanging series. Thank you, Bobbie, for giving me some of your Guatemalan cotton so that I can over-dye it for my projects.

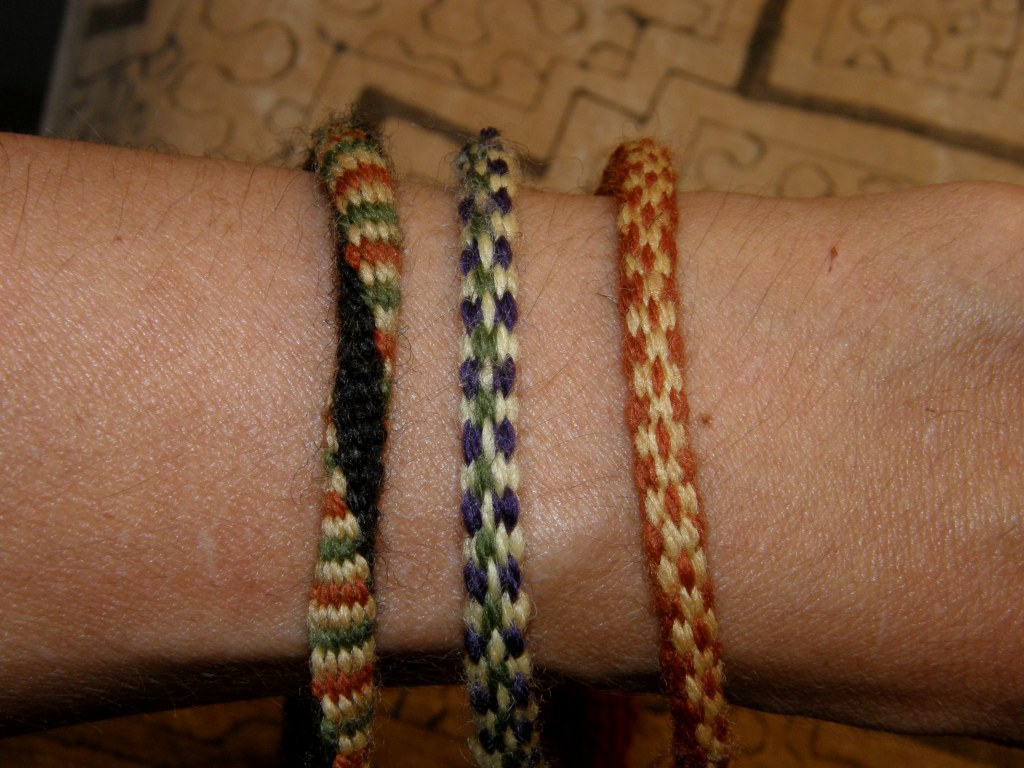
So, we will see the end of the woolly adventure next week. If it gets frustrating, I will get up and do some more keyfob braids. I added one more to the collection this week…the one on the left. It is simply the Palma braid done with only two colors instead of three.

And if the wool project all goes horribly wrong, I shall cut the piece in two and use the two pieces as front and back for a computer slip case anyway.

I think I will be looking more closely at wool when I am visiting the Mannings yarn store. I can usually quite safely breeze through the store without getting too tempted by anything.  I would like to see what other wool I can find that works so nicely on my backstrap loom (the wool for this current project is KnitPicks Palette, by the way. It comes in so many colors! I am almost scared to name it. Every time I fnd a wool designed for knitters that I like to use for weaving, it gets discontinued!).

Last time I was at the Mannings I was checking out the Harrisville Shetland as I had had success using it for warp-faced weaving straight off the cone on a floor loom. I made this band with it on my friend Pam’s floor loom. It felt so good!

warp-faced wool bandI have had success with Navajo warp on my backstrap loom too. I bought a ball in natural white and dyed it and made the bag with Mapuche designs below when I was still living in Chile. It was overtwisted and easy to use and made a good sturdy fabric for a bag but I am looking for fabric with a softer, kinder feel now.

mapuche-bag-front-and-backScreenHunter_003Why am I buying wool and not spinning it myself? One reason is that there simply isn’t any available here to spin in lowland Bolivia where I live.

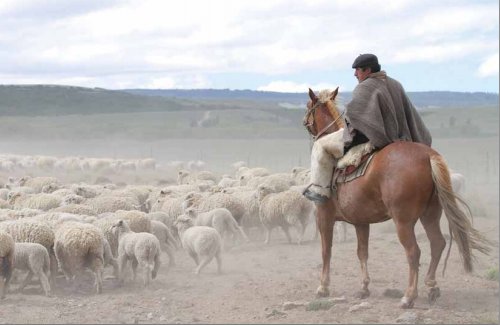
I think of all those years I lived in the Chilean Patagonia and all the sheep! Wool? It was everywhere! My boyfriend down there  worked as a shepherd for many years. I could have all the fleece I wanted. I did spin some of it and wove it as a plain balanced-weave piece that became the back of a vest. I used the rest of the handspun to knit the front. And then…. I moved to the tropics!

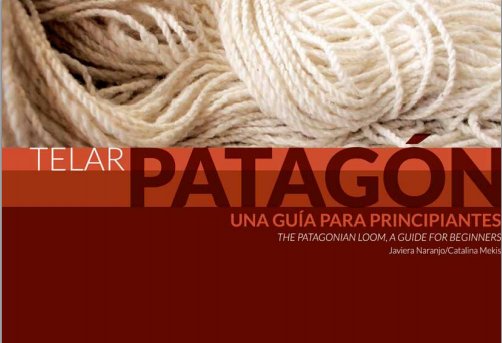
The picture above is from a free e-book entitled The Patagonian Loom, A guide for Beginners the link for which Weaving Southwest shared on Facebook today. It describes the continuing weaving tradition in the southern parts of Chile (not as far down south as where I was living where, unfortunately, I never came across anyone weaving). 

It’s a lovely book crammed with pictures with text in both Spanish and English. It gives a short history of the loom and then describes, the spinning, dyeing and weaving processes. It also provides instructions for warping and setting up the loom for projects that are typical of the region…saddle blankets, saddle bags, sashes, even a poncho. Thank you Weaving Southwest for sharing the link!

ScreenHunter_001Look at that gorgeous chunky handspun on the cover of the book which is used for warp-faced weaving on the vertical Patagonian loom. It reminds me of the fabulous yarn that Ace, one of my US friends, spun to weave into a backstrap. I had a lot of fun weaving with that yarn. It looked hairy and scary but wove up beautifully!

???????????????????????????????Now to get back to the loom and get my hands into that wool warp. Enjoy the e-book with its glimpse of life in the Chilean Patagonia.

Backstrap Weaving – Cutting Corners

CUTTING CORNERS

Guarani weaver, Angela's cell phone pouches.
Guarani weaver Angela’s cell phone pouches.

Amongst other things, I have decided to do a little tutorial this week on cutting backstrap woven fabric and covering the raw cut edge with a protective band.

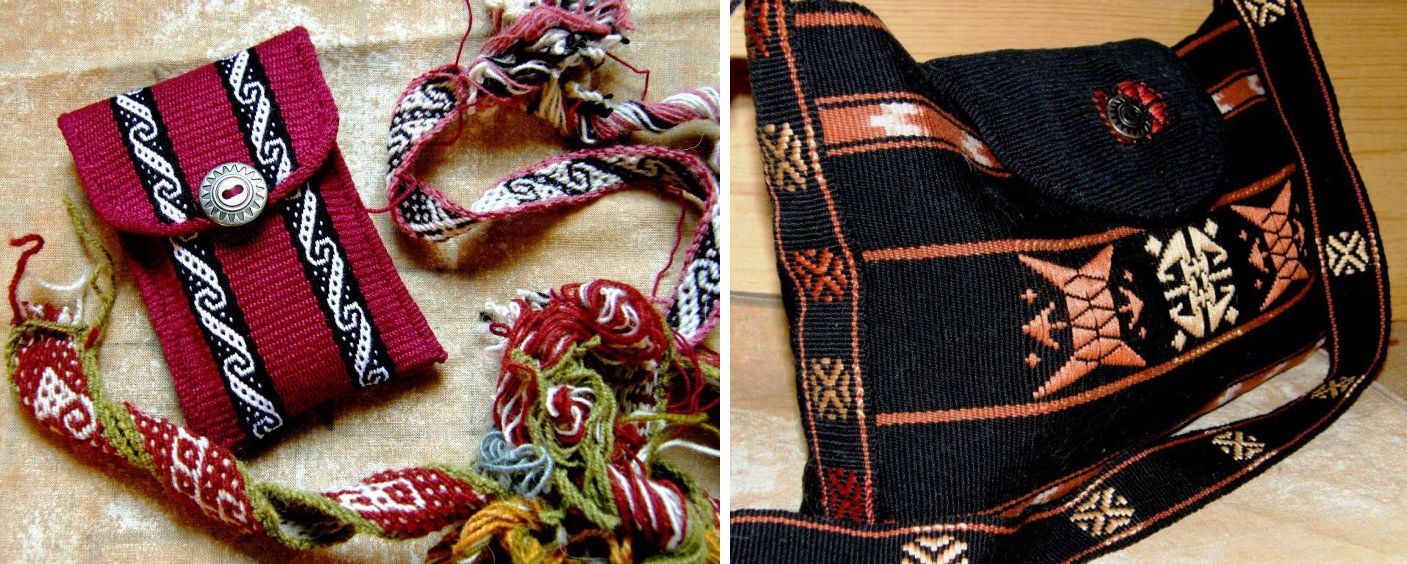
This is my latest favorite way to create the flap on a bag and I was given the courage to try this when I saw some of the work of my GuaranÍ weaving teacher here in Santa Cruz.  She makes cell phone pouches with rounded flaps. I don’t know the steps that Angela takes to create these and so, have come up with my own. Possibly I am a bit over-cautious in my ways, but my system works for me and I am pleased with the results.

cell phone pouchesMaking cell phone pouches is one of my favorite ways to use a piece on which I have been sampling structures or patterns. You can see the different ways in which I have formed the flaps. This often depends on just how much fabric I have to use. The alpaca sample bottom left, for example, is closed with a drawsting as there was not enough cloth to make a flap. The example at top left has a  flap that was cut to shape and then covered with a tubular band.

rounded flapsHere are a couple more examples. The flap on the black bag was woven with quite a lightweight fabric compared to that used for the cell phone pouches. The tubular band, therefore was a bit heavy for it and caused the edges of the black flap to curl inward giving a convex shape. As it turned out that actually had its advantages! When the bag is filled with things and takes on a rounded shape, the flap curves nicely around it.

My latest bag project also has a rounded flap which is edged with a tubular band…

backstrap weaving bhutan bag

ikat robe at folk art marketI had been calling this latest project “Tales from the Subcontinent” as it comprises designs from Bhutan and Afghanistan.

However, now it carries an element which has been influenced by Central Asia. Its closure tab was inspired by tablet- woven trim on Uzbek ikat-patterned robes.

I showed you pictures last week of the Uzbek garments that I saw at the International Folk Art Market in Santa Fe NM with their tablet-woven edging bands.

I give many thanks to Ute for writing to me and sharing what she knows about the Uzbek bands as I was about to launch myself onto the wrong path trying to weave one using threads in 4 holes of the tablets. Ute told me that they are created using only two holes. With my limited tablet-weaving experience, I would have been lost without that valuable tip.

Uzbek two hole tablet band with my experimentsstThe little wristband that I bought at the market is in the center. I changed things a little in my experiments eliminating the dark outer color and altering the way the red stripe was set up. I made a sample in a medium weight cotton to start and then made the final piece for the closure tab on the left. Originally I had wanted to make the entire strap for the bag in this technique but decided that it was a bit too “busy” to play such a major role in this piece which was already highly decorated.

backstrap weaving Bhutan bag???????????????????????????????In this picture I just placed a silver button on the closure tab but I was not all together happy with the way that looked.

And then I remembered that I had coins from my trips to Nepal back in the 80s and 90s.

The smaller one would do perfectly and would be in keeping with the “subcontinent” theme.

I just had to polish it up and then get creative in finding a way to attach it.

You can see the more subdued strap pattern, above, that I used in the end. I used the same pattern as that on the edging band for the flap.

So, “Tales from the Subcontinent” is in search of a new name. I won’t say that it is finished yet as I am now thinking….Wouldn’t it be cool to have some black and white ikat patterned cloth with which to line it?….a sort of “inner bag” with a drawstring top…

bhutan bag front and back

So,  now we get to “cutting corners” and transforming a straight-edged flap into a rounded one…

I am using the lavender Andean Pebble Weave fabric that I was on my demo loom during my last trip. I really don’t like it much and decided that I could at least use it for a tutorial…

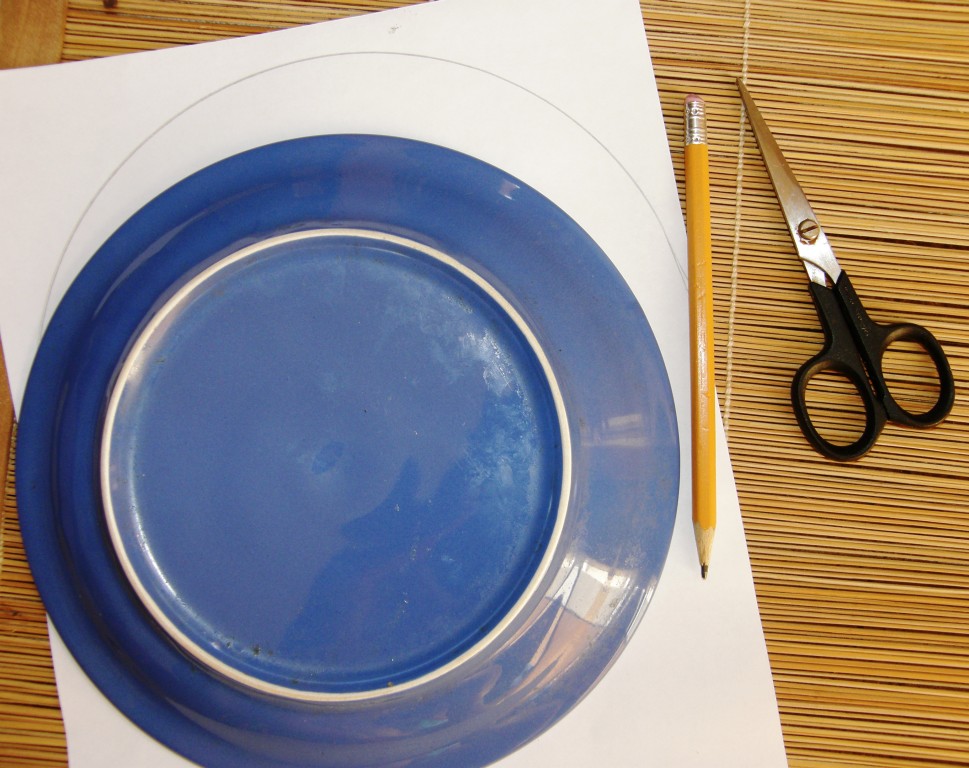
STEP ONE: Choose the curve…

???????????????????????????????I have a small plate that has the right curve for the width of fabric that I am using. I used it for the black bag and saw that it would also work just fine for the lavender piece.

STEP TWO: Make a template.

???????????????????????????????I traced the curve on paper and cut it out.

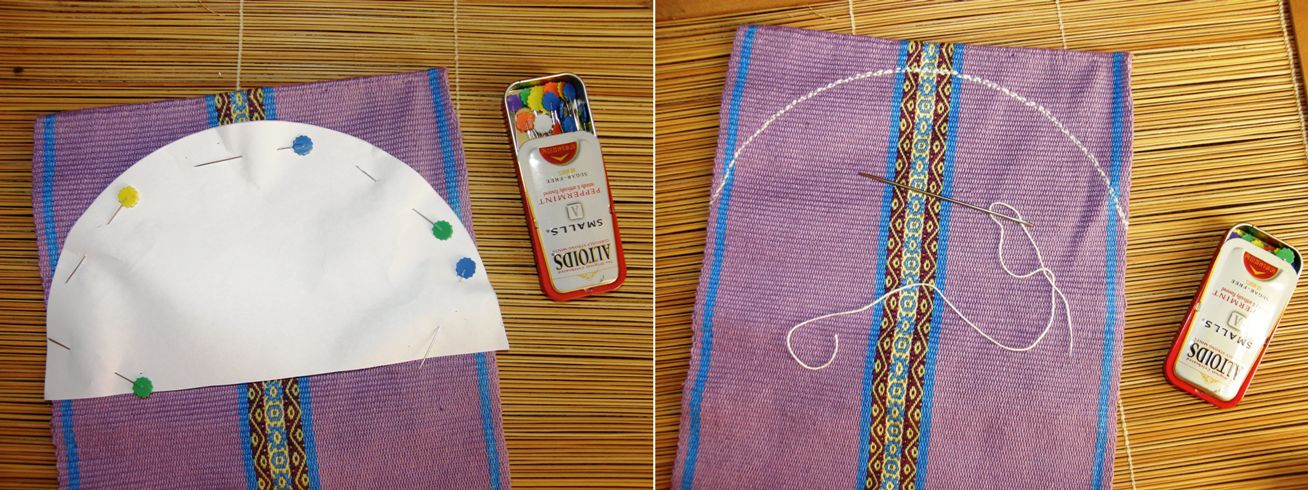
STEP THREE: Pin the template to the fabric and sew along the edge.

sewing around templateI sewed by hand and used crochet cotton for the thread. It’s a good thing that beauty does not count! I backstitched from one end to the other and then returned using a running stitch for extra security.

STEP FOUR: Paint diluted white glue onto the stitches.

???????????????????????????????

I used white glue, or carpenters’ glue, carpi cola , as it is known here. I diluted it with water, painted it onto the stitches on both sides of the cloth and waited until it dried before proceeding.

STEP FIVE: Cut the cloth and glue again.

???????????????????????????????I cut close to the stitches and then applied more diluted glue along the edge of the fabric. The glue goes on white but dries clear. The fabric I am using is dense and I needed to make sure that the glue got right into the weave. As the glue was drying I pinched the threads along the edge together to seal the edge. Once it was almost completely dry, I gave the edge a final trim (this is easier to do when the edge is still damp and supple). You may need to trim some loose weft ends or tidy up the edge a bit. Once it is dry and stiff, it will be harder to make fine cuts.

STEP SIX: Weave and sew your band to the edge.

???????????????????????????????

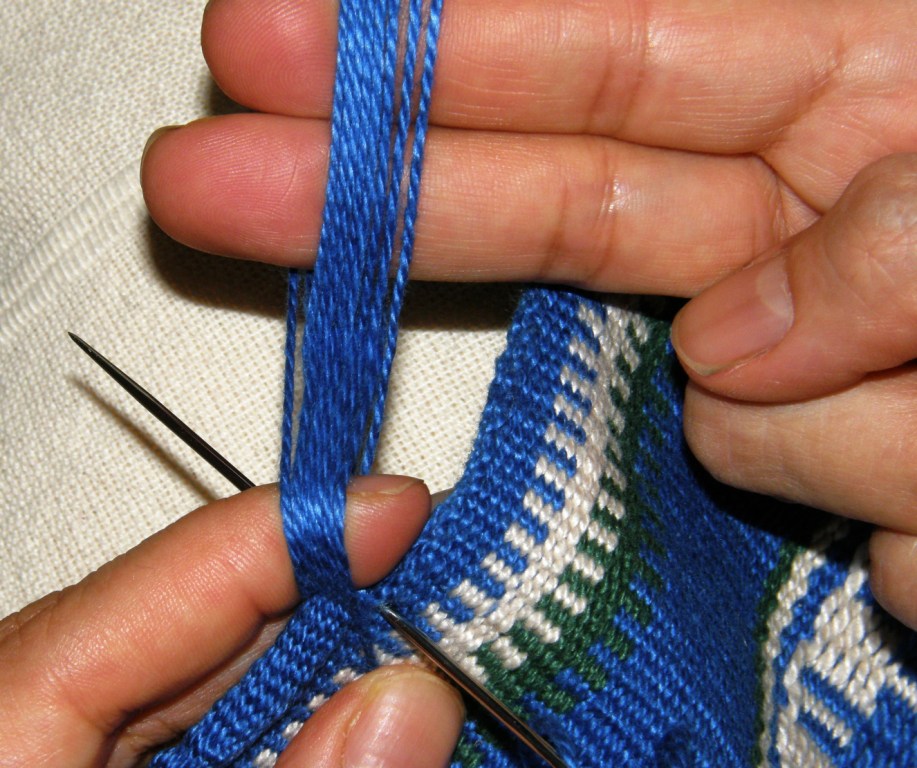
??????????????????????Now you have a nice stiff secure edge to which you can attach a band. See this tutorial for instructions on weaving and attaching tubular bands.

Judge the width of band needed to bend around the edge and cover the stitches and create a warp accordingly. Note that it is easier and often neater to weave these bands using a heavier yarn and few warp ends than fine yarn with many ends. I used a finer yarn here as I did not have a matching color in my heavier yarns. I used a heavier yarn on my recent black bag project and feel that that band is more attractive.

Make sure that your needle clears the glued stitches on both sides when it pierces the cloth. This way, the stitches will be completely covered by the band. Practice weaving and sewing bands many times on scrap fabric. It takes a while to have them turning out neatly and you don’t want to spoil your good fabric until you feel confident with the technique.

As for what to do with the warp ends when the band is done, I have suggestions for that on the tutorial page.

So, with the black bag finished to the point of being able to use it, I am now supposed to be getting on with the next in the wall hanging series. I had gotten as far as winding the yarn off skeins into balls for warping. And then came a distraction.

???????????????????????????????I don’t know what it is about arriving home after a trip. I have this urge to get rid of stuff that goes on for about a week. It’s great! It feels so liberating. So, stuff has been  given away and ejected. The above piece was the cover of a photo album that I was given.

I removed the album to toss and kept the cloth. It reminded me that it has been a long long time since I last played with three colors in complementary-warp pick-up.

I have done three and four-color pieces (see the header of this blog) which are not double faced.

??????????????????????

??????????????????????Here you can see what I mean by “not double faced”. I made this years ago and decided to hang it unfinished on the wall. It also reminds me that I used to get this beautiful fine wool/alpaca yarn when I lived in Chile. I used some leftovers of that yarn when I first came to Bolivia to weave this. How I wish I could get that yarn again.

The piece on the cover of the photo album is double faced. Only two colors show togther on each of the two faces at any one time…color A and B on the upper face and color B and C on the lower one. It is a bright and jolly piece and I love how the weaver flipped colors for just that one small section along the way…you can see how the yellow eyes on the green suddenly change to a red eye in just that one small part. Whether that is the center of the piece, I will never know as it was cut up to make the album cover.

Side A
Side A
Side B
Side B

So, this is what I am playing with and what kept me up past midnight last night. These are the two faces. I wish I could make a smoother transition from the red background to the beige but this defeated me at 12.30am. I suppose it would be easier if my design weren’t continuous. This is a sampler to get my head back around the technique.

#########################################

Some news… Deb McClintock has started setting up her blog again after losing most of her web page content some years ago in some sort of internet glitch…..heartbreaking. It’s all about simple looms in SE Asia and promises to be wonderful. Deb was invited to lecture last month at the Textile Museum in Washington DC about Laos textiles, looms and techniques. Her new blog is entitled Looms of South East Asia.

And, of course, don’t forget my Australian mate Wendy Garrity’s blog about Asian textiles and looms…Textile Trails. Wendy provided a link in last week’s comments to a picture she took of a notched stick on a loom in Nepal that looks very much like the one I was admiring on the backstrap loom from Myanmar at the Santa Fe Folk Art Market. She was also able to extract more information about the tablet woven bands from the Uzbek representatives at the Folk Art Market than I was!

##########################################

???????????????????????????????More news…..AUSTRALIA!

I will most likely be going back to Sydney for a visit in late November and would very much like to meet other weavers!

The decision to make this trip has been a very recent one which makes getting people together for this a little difficult as it is so close to Christmas.

I haven’t been back in 4 years and am very excited. I’m looking forward to hitching my loom to a eucalyptus tree and weaving while listening to the magpies and kookaburras.

The kookaburra picture at left was taken by my brother.

Backstrap Weaving – Hooked!

I was on the lookout for a simple pattern to continue my sampler of supplementary-weft patterns and the positive/negative space studies that I have been writing about these past two weeks.

After weaving some patterns based on Bolivian hatbands where the weft is used to fill the space surrounding the motif rather than the motif itself, as seen below, I wanted to weave a motif where the same shape appeared as both motif and background

supplementary weft in negative space

hook motif of peru and boliviaSeveral of the classic warp-float designs found in the Peruvian and Bolivian highlands have this very characteristic. In the hook motif pictured at left, it makes no sense to talk about “motif” and “background” as the same hook shape flips and turns and dances along the band changing from red to white and back again. Is it a  series of white hooks on a red background or vice versa or none of the aforementioned?

This was the kind of thing that I wanted to weave with supplementary wefts. So, I set about trying to adapt it to the structure with which I have been working.

As it turns out, it wasn’t that straightforward.

So, I spent a lot of time with paper and pencil and eraser (I still like the old fashioned way). The only way I could get the shapes to interlink well was to make several changes to the basic shape and, even then, the black version of the hook is not exactly the same as the gold one. The gold has an extra warp or two in a couple of places. There was a fair bit of weaving and unweaving involved too. But that’s what “sampling” is all about, right? I had to remind myself about that as I was starting to regret having set myself this challenge as I seemed to be spending more time planning out the design than actually sitting at my loom.

supplementary weft study with hook motifsSo, there it is. Two sets of gold hooks surround and expose black hooks in the ground weave. I am pretty happy with the way it turned out and hope to play a lot more with this hooky shape.

red hooks relected anf flipped in supplementary weft Where to go from there and how to best use all the work I put into figuring out those hooks? Chris Buckley writes about pattern building in traditional textiles in his article on warp-ikat weaving of SE Asia:

A further important feature of ikat, and indeed of most traditional textiles, is that weavers tend to use a narrow repertoire of simple shapes such as dashes, hooks and curls, in a ‘building block’ fashion to create their designs. This approach makes understanding and copying complex designs manageable for the weaver, and aids their transmission from generation to generation. Recognition of this repertoire of basic shapes (which I call primitives) is also of considerable help to the researcher with analyzing and comparing motifs between traditions,…..

So, I took one of my many discarded charts of the hook motif and used it as a “building block” for a new design, joining hooks together, reflecting them and flipping them upside down in the same way that many Andean weavers do with their warp-float motifs. The result is the band of red pattern above the gold in which there are four red hooks with just the hint of a black hook outline around them.

What had brought me, yet again, to Chris Buckley’s interesting article was a romp across the internet in search of hook patterns when my initial attempts at charting something suitable for supplementary-weft patterning were not working out. It is so interesting to see how the hooks show up in all sorts of woven structures and cultures. Of course, certain structures only allow a fairly limited repertoire of shapes to be produced and so, regardless of the culture, it is inevitable that a hook motif will appear if those particular structures are in use. Techniques like ikat,  on the other hand, can be used to produce a limitless variety of shapes and patterns.

hook-motifs-in-southeast-asian-textilesThese pictures by Chris Buckley show hook motifs in various SE Asian warp-ikat textiles.

I have woven the hook motifs used in yurt bands of Central Asia…

??????????????????????I wove the  pieces above and below using the same single-faced warp float structure as the yurt bands. You can see how the basic hook motif can be placed in different ways to create patterns and how dark and light hooks interlink so beautifully…

central asian yurtI have also woven patterns in pebble weave that are loosely based on Central Asian hook motifs…

central-asia-all-stitched-wih-borderas well as in supplementary-weft, double weave and supplementary-warp structures…

central asian motifs in various techniquesI enjoy the challenge of adapting a motif woven in one structure to others.

Chris Buckley writes that Indonesian ikat weavers sometimes copy designs, for example, from imported luxury textiles, particularly those from India…

When copying a design from a foreign source, weavers are likely to re-interpret the copied motif in terms of their own vocabulary of basic shapes rather than produce an exact copy. This is analogous to linguistic borrowing, where the pronunciation of a borrowed word may change from one language to another according to the repertoire of sounds available.

My own particular “weaving vocabulary” comprises the various structures that I am able to produce rather than a group of shapes. I have not dedicated myself completely to a study of the patterns of any one weaving region and so have not developed a vocabulary that is limited to certain shapes.

I love it when I see the Bolivian highland design that I call “rolling river” woven by indigenous weavers in both complementary-warp-float and double weave structures. Perhaps a weaver saw and admired this pattern when she traveled to another region and returned home to interpret it in her own weaving vocabulary which, in this case, happened to be a completely different structure. I can only speculate.

I taught Juan to do pebble weave when I was studying in Salasaca, Ecuador. No one in the area was using this structure. It was part of the deal…I teach pebble weave and they teach me to weave their supplementary-warp patterned traditional belts. Eighteen months later when I returned, Juan showed me his finished pebble weave band. Until then, he had not known how to weave at all. His final motif is a rooster which he took from one of the traditional supplementary-warp belts of Salasaca and interpreted in the only weaving “language” he knew…pebble weave. I thought that was brilliant!

juan pebble weave bandBack to the hooks…I like to think of the following  motifs, that I copied from a belt of the Tarahumara people of Mexico, as a “swirling” hooks…

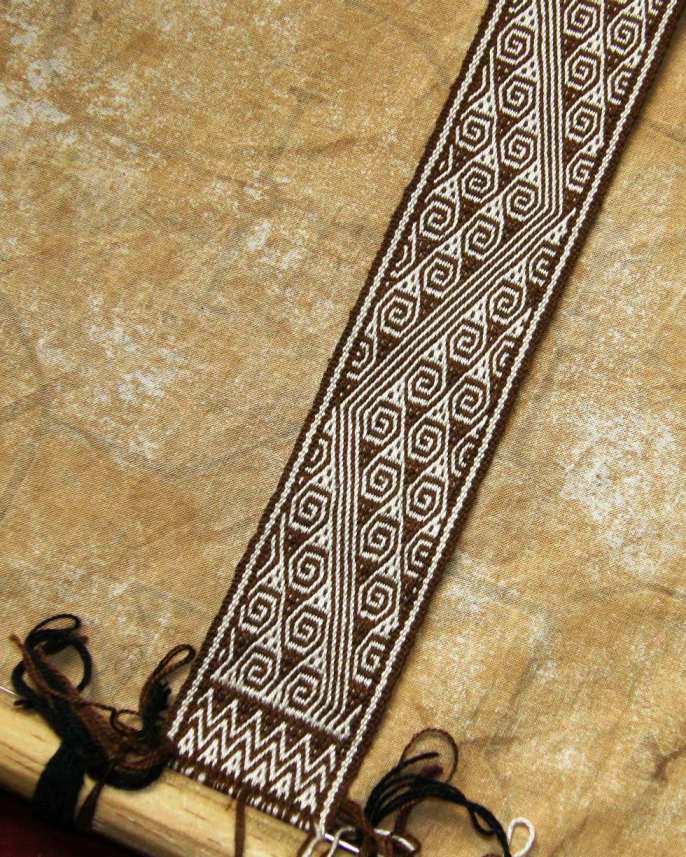
Tarahumara patternI had not become completely familiar with that swirly hook and made it a part of my vocabulary, as skilled Tarahumara weavers surely would have, before attempting this piece and, as a result, it was very tricky to weave! Just as I got a grip on the swirls going in one direction, they changed to the other direction. It was much easier to weave it using another structure in my weaving vocabulary…double weave…in which it is generally much easier to “read” the cloth. However, I don’t think the pattern is as pretty in double weave….maybe slightly more so in my handspun llama fiber on the right (spearmint leaf and cochineal dye).

5892932496_f074da5701_m

handspun llama cochineal dyed

And so I go playing with structures and shapes. Even as I sit and look at the last red supplementary-weft hook pattern that I wove on my most recent sampler, I see the motif on the very right hand edge and think…hmmm….wouldn’t that look good on a narrow double-weave band?

By the way, many of the patterns I have shown in this post are charted in my second book.

Pebble_Leaves_on_a_Band_medium2Here’s one final bit of lovely hookiness before I go. Julia has been using the tutorials in my second book on creating and charting one’s own or adapted patterns in pebble weave.

Here is one of her bands in which she has adapted a tablet weaving pattern to pebble weave and…yes…there are hooks!

Backstrap Weaving – Little Things, Big Smiles

I was going to name this post “Taming the Tube” and that would have possibly been one of the weirdest titles I have come up with for a blog post so far but I decided to go with “Little Things, Big Smiles” as I have had a few things to smile about this week. They reminded me that it is often the little things that bring us most joy. Like the fact that my friends are on a road trip in Colorado and Wyoming and post pictures of every step of the way on Facebook so that I can be with them and share a little of the experience. And it seems that the Santa Cruz winter is over and I am back in shorts and tshirts before I can even run out of clean socks.

As for the tube that needed taming, well, I am talking about tubular bands. I have been following on with the experiments I was doing last week. These little things have brought a smile to my face as I figured out at last how to stop them from spiraling. Yes, it’s just a small thing but it gave me quite a kick!

Of course some bands look great when they spiral and that is precisely the effect that you want.

But that wasn’t what I wanted when I made a pebble weave tubular band. I wanted the woven design to lie straight along the tube so that it could be seen if the band was worn as a wristlet.

I am forcing the design to lie straight in the upper picture. As soon as I let it go, it spirals. I suppose the spiral version has its own charm but that is not what I wanted.

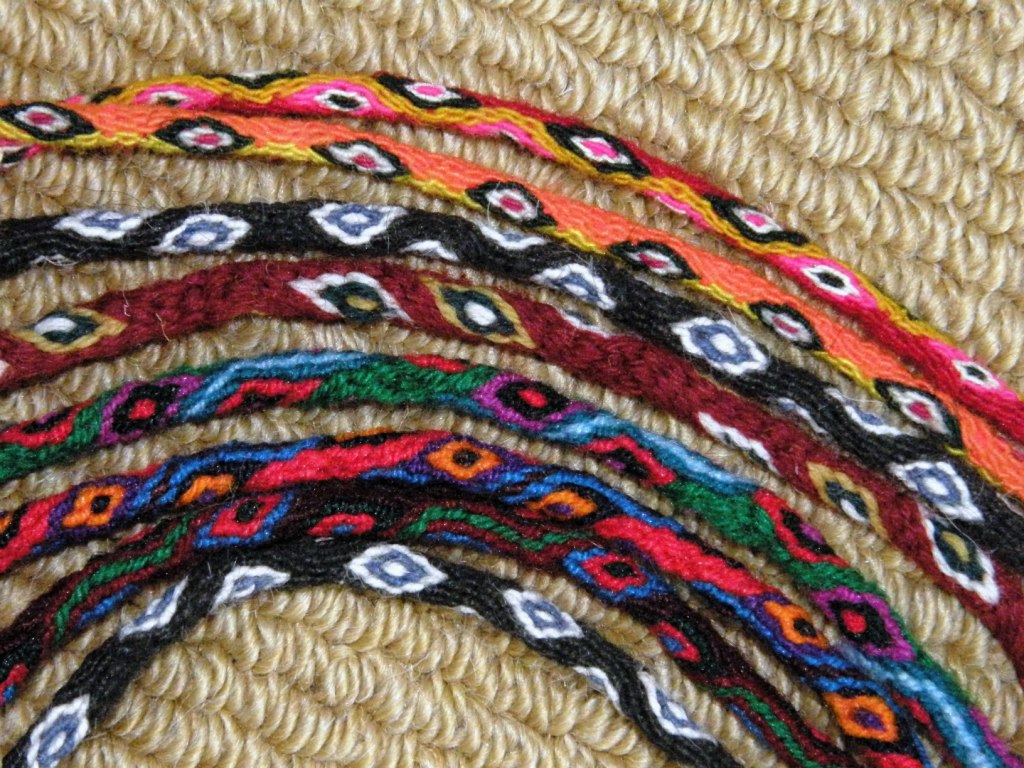
Most ñawi awapa bands that I have seen spiral…some to a lesser degree than others but there are some that pretty much don’t at all as you can see above. The more colorful ones in the center of the group spiral a lot while those above and below them have little or no twist. I LOVE that black one! So, clearly, there is a trick to getting them to lie straight.

I fiddled with this and that. Many warps went into the trash. Luckily I have my mini warping board and so was able to quickly and easily set up tiny two and four-stake warps so not a whole lot of yarn was wasted. And then I got it! He he…big smile.

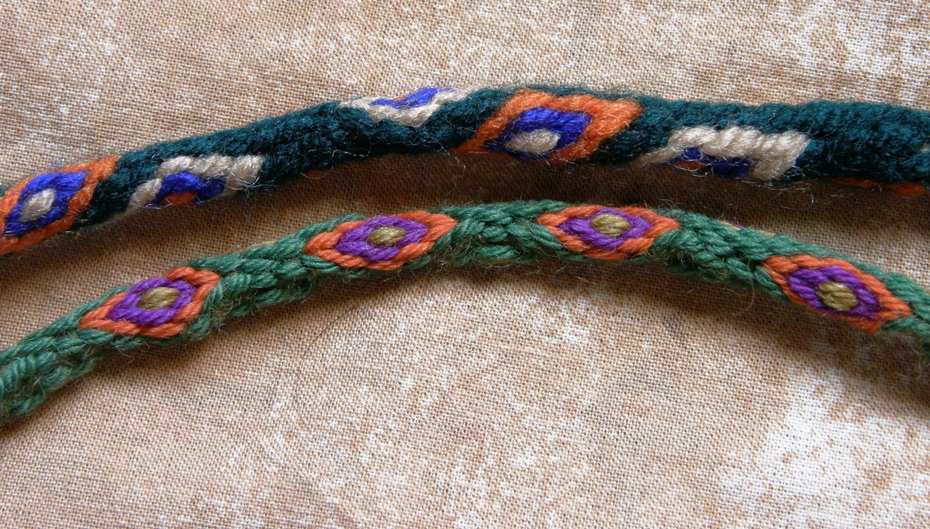
So there’s a spiraling ñawi awapa band that I made ages ago and, below it, one I made this week that behaves nicely and lies straight. Again, I say that both types have their charms…it just depends what you want and now I have options.

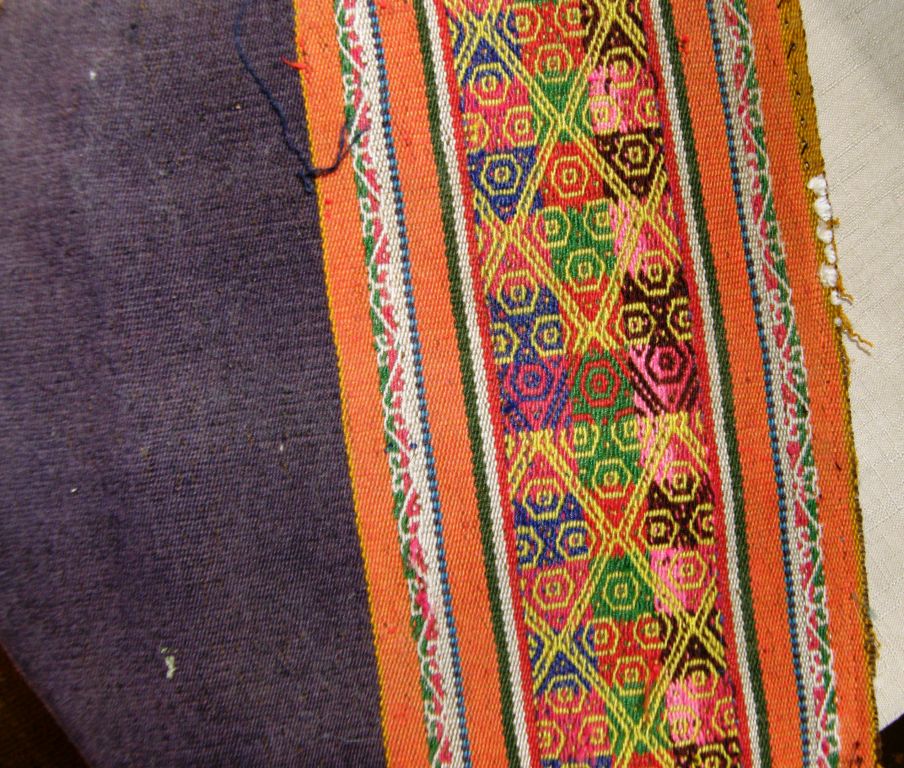
Of course, when tubular bands are sewn to cloth as in this example from Peru, they are forced to lie straight. I was told by Nilda Callañaupa in Peru that tubular bands are sewn to pieces of cloth to help stabilize the edges and corners which tend to curl due to the highly overtwisted wool warp yarn that is used. Now I am wondering if the spiraling in the tube counteracts the curling in the cloth and is what allows the fabric to then lie flat.

I have always sewn my tubular bands to very sturdy material…edges of bags which are doubled pieces of woven cloth so the spiraling nature of the band has not had any effect on the finished piece….no twisting or distortion of the fabric has resulted.

So, after that, I just had to play with my new discovery and make some more tubular bands.

Thick ones, thin ones, in cotton and wool. The wool ones are much smoother and prettier….ñawis with their diverted and twisted warps, plain-weave, pebble weave and warp substitution tubular bands.

Maybe next time I am in the US I will get some caps and clasps and make some wristlets with these although maybe I should just go down to the Buckle Land  store in the street market here and see what I can find.

However, if I am going to wear a wristlet, I think that I would rather make one of these…

These were collected and also reproduced by Anne Blinks and Nora Rogers and now form part of Martha Stanley’s collection. I believe that they were made by the Mayoruna Indians of Peru who live in the same region as the Shipibo in the Upper Amazon Basin. I was given one of Nora Rogers’s pieces in progress on the loom as well as a booklet on the technique from my friend Betty’s vast collection of resources on ethnic weaving techniques.

There it is all ready to be studied!

From tiny to tremendous, I pulled out this monster project this week too….

My tubular bands look quite ridiculous next to it!

That thing is heavy! It is was very weird sitting down to it after not having touched it for so long. It took me a while to get back into the rhythm…which swords do I use when and what sequence of moves had I decided were the most efficient?

Once I was back into it, the first thing I noticed was a mistake in the new pick-up pattern I am weaving which would have had very sad results further down the track. That meant that my first task was to un-weave….sigh! but I am smiling about having caught it in time.

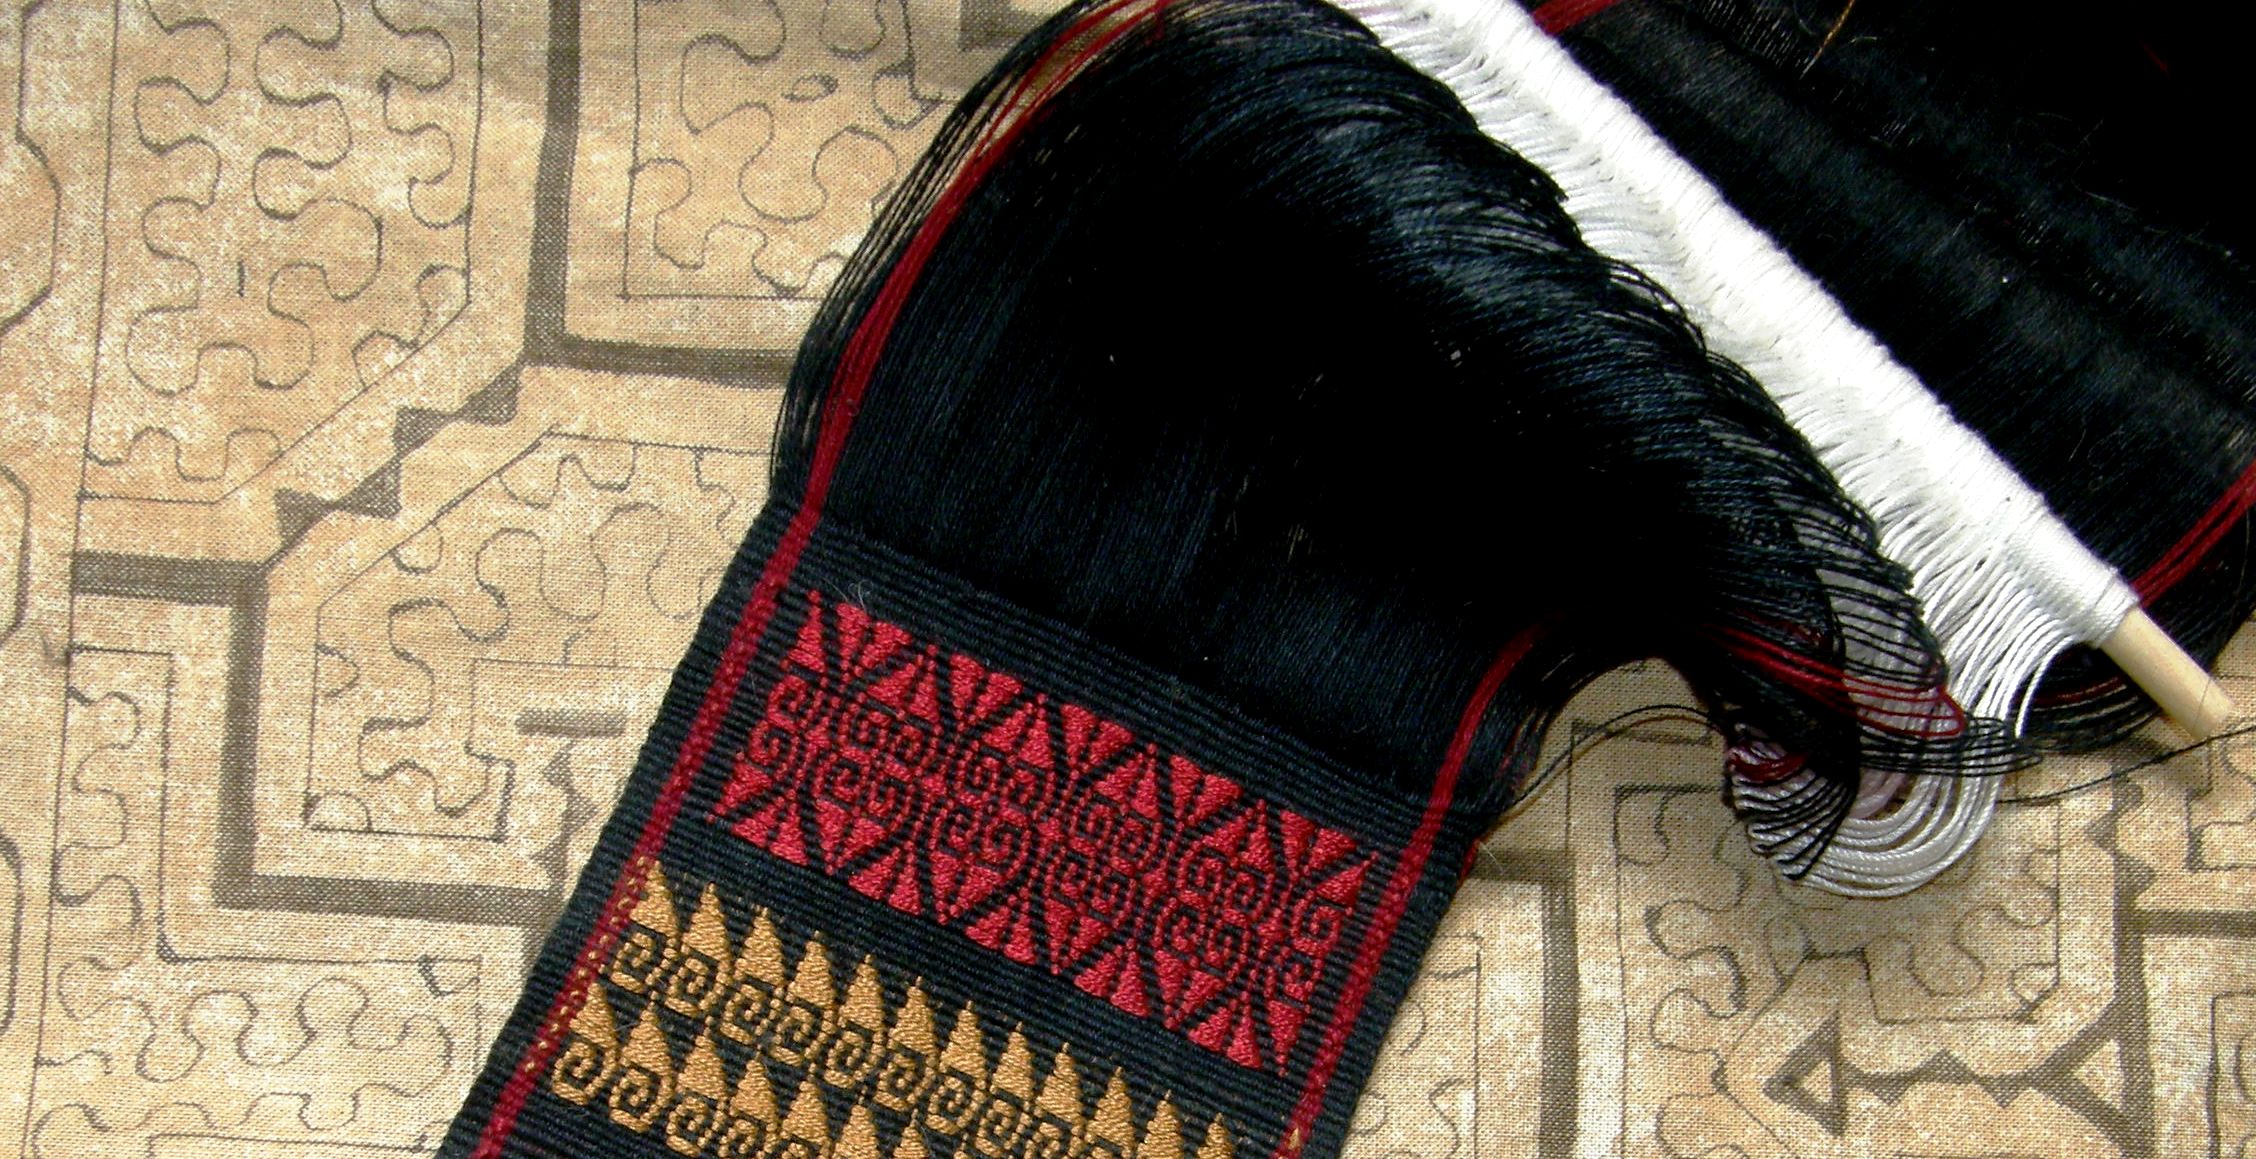
Yes, progress is slow on this piece but if you are thinking that I am getting nowhere, let me show you that I have least gotten the design established. Most of the major scary counting is now over as each row of pick-up is now done based on the last, if  you know what I mean….simply moving a little to the right or the left as the diagonal lines form. It is always exciting to be doing a new design and especially this one as it is my own adaptation of a traditional si’ira pattern of the Wayuu people from Mirja Wark’s book. After all the adjustments I made to have it fit my piece, it now has a lot of my own touches and so I am curious to see just how it will turn out.

So, this week I “tamed the tube” and smiled at many things…like seeing  Jeen zooming on after having woven with her and enjoying herself with my pebble weave book  using her rigid heddle loom. She is now an active member of the Ravelry group.

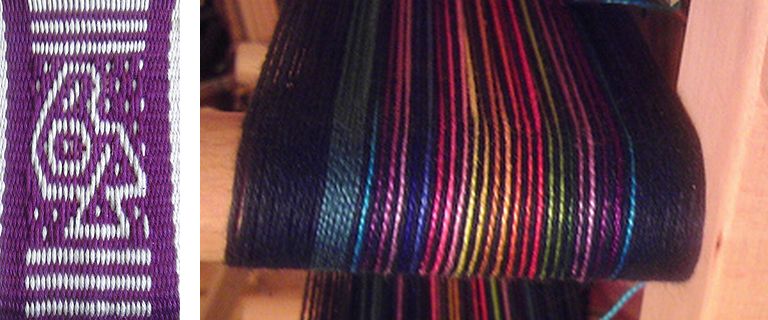
Now that she has woven the bird motif, she plans to try it with that gorgeous multi-color warp.

And Marge, who also wove with me, is trying warp substitution with Bedouin patterns as a warm-up to double weave.

She was a bit dismayed by the long floats on the back until we  assured her that that is what happens with warp substitution.

She will be able to take the skills she learns from this experience a step further when she tries double weave.

Alison wove a backstrap with a striking pattern and beautiful edges…

And then made a pebble weave band on her inkle loom using many of the motifs from my book.

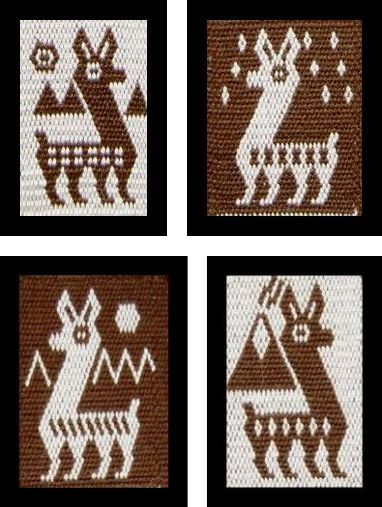
Jenibug blew me away by taking the llama patterns that I have charted here for warp-faced weaving and adapting them to balanced double weave pick-up on her floor loom…

Here they are in warp-faced double weave…the little llama heads come from a Bolivian band. I added the body embellishments and backgrounds.

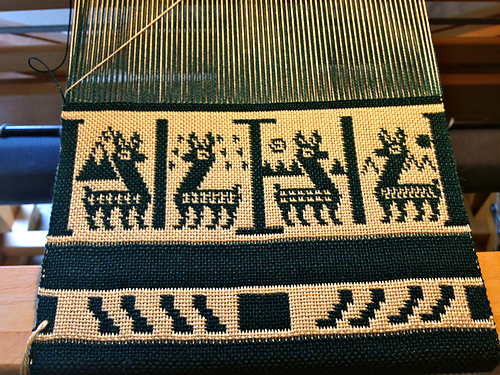
And here is Jenibug’s balanced weave project…How neat is that?!

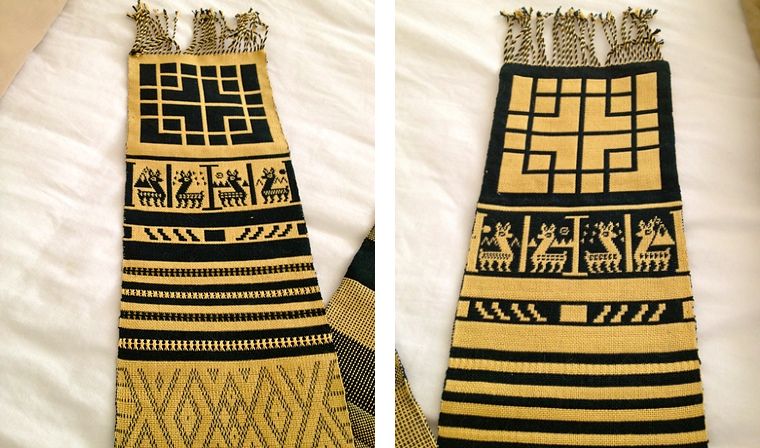
And here it is off the loom and wet finished. Are you sitting down???

Isn’t that spectacular? She took my charts and translated them to balanced weave pick-up…blows me away!

And here are Loli’s pebble weave projects…beautiful bands!

Now can you understand why I am smiling big smiles?!! My experiment with tubular bands brought a smile but seeing cool stuff being made by the Ravelry folks is the best weaving therapy of all.

And just in case your socks are still on after seeing all that, I will leave you with another picture of one of the stunning bands from Ayacucho, Peru that I saw at Maryland Sheep and Wool Festival. I will leave you with bright cheerful colors and these playful figures, one of which is so similar to the ones I was taught when I studied pebble weave in Peru.