Backstrap Weaving – Making Movies

I have been making movies!

Last fall I was in the USA and filmed one with Taproot Video founders Marilyn and Rainer Romatka. We had done some trial filming earlier in July but I won’t let anyone see that! I think that probably everyone’s first time in front of a camera is bound to be awful. Of course, you can’t be sitting there grinning the whole time but you don’t want to look like you are suffering with nerves either! I learned a lot with that trial experience and got back in front of the camera feeling much more comfortable last fall. In fact, it was a whole lot of fun.

Putting the finishing touches on the set and lighting the night before filming.

When I returned to Bolivia, I was feeling so good about filming that I got together and made a short film with a local videographer. I loved being able to use local Guaraní textiles to decorate the room in which we worked. We hung them on the wall and used them on the table. It gives the movie a nice ”lowland Bolivia” flavor. My best friend was there to help out, documenting the takes, handing me props etc. One of his other tasks was being ”chief mosquito-swatter”…yep that’s lowland Bolivia for you. Without professional studio lighting, it wasn’t the slickest set-up, but I feel that natural light has its own beauty. We had a good time and I am really pleased with the result.

Here's a shot captured from the movie to show those lovely Guarani hangings.
Here’s a shot captured from the movie to show those lovely Guarani hangings. They are woven in cotton with the pebble weave structure. The Guarani weavers only weave star and snake patterns when they use this structure as opposed to their weavings in the Moisy, or intermesh, technique in which they depict trees, flowers, birds, insects, people and plants in all shapes and forms.


The title of the movie we made in Bolivia.

I have made lots of little instructional videos and placed them on this blog but they have often been ridiculously short and shot in my bedroom in less than ideal conditions. Back in the days when I was using Flickr to host my videos, they had to be limited to just 90 seconds which meant really having to work fast! or splitting tutorials into several segments. Later, when I started using WordPress as the host, I still couldn’t enjoy making long videos because my internet connection simply couldn’t handle uploading large files. I would often leave them uploading all night only to be disappointed to find in the morning that everything had crashed at some point. Fortunately, Syne Mitchell uploaded the heavy videos that appear in the WeaveZine article.

So, I am pleased that this video I made in Bolivia is a luxurious 30 minutes long and has allowed to me include a lot of detail. I have a friend who has a slower but more stable internet connection than I do which made uploading much easier.

In the movie I show two basic and very useful warping methods, one of which is the one that I use for Andean Pebble Weave and other kinds of complementary-warp pick-up structures. I show this technique in my first book as an optional advanced warping technique in the Appendix because, as you can imagine, it is quite difficult to portray something like this in just images and text.

method 2 warping technique

Here’s the video! I am including it in this blog post but its permanent home on this blog is on a separate page here. May I suggest bookmarking the page so you will always be able to easily find it.:-)

As for the movie we made last fall… it’s is called Operating a Backstrap Loom and is the perfect follow-up to the warping movie. You can stream it or buy the dvd.

operating-a-backstrap-loom-dvd

I made it to address the questions that I am frequently asked online when people are taking their first steps in backstrap weaving…little doubts about uneven heddle length, fluff and fuzz collecting on heddles, sticky sheds, wonky edges, sheds that won’t open, fixing heddle errors, sticks and techniques for wider warps etc…And, I wanted everyone to have one resource that contained all these answers. I show some things that I have never covered on this blog and, best of all, you get to see it all in action. I am so excited to be able to show you all how to use your bodies to operate the loom so you can all be the loom…much more than someone sitting at a piece of equipment.

One of my students told me that when she learned how to use her body to operate the loom she suddenly felt like she had become the ”shed whisperer”. I love that expression! Let’s all be shed whisperers!

Of course, you are all still welcome to write to me any time you like with questions or just to say hi. You know where to find me! In fact, I insist. Show me what you are weaving and tell me how it is going, please! (For all of you who have ever rolled your eyes and sighed when I have told you to ”just keep practicing” when you have written to me about uneven heddle length, I have a great tip for you in this movie!.. something that needs to be seen in action :-)).

movie-collageI had this really great experience last year. Mary posted online about having some problems getting set-up for backstrap weaving. The heddles just weren’t working for her. She posted pictures but it was still really hard to see what exactly was going on. I did my best to help, sending her messages with explanations, links to tutorials and diagrams. I wanted so badly to be able to jump through the computer screen and sit beside her and help. I knew that I could have her up and happily weaving in moments.

I found out that she lived in San Jose and suggested we get together as I was going to be there in my travels. A little voice inside was saying…San Jose is a big city! What are the chances of being able to get this together in the brief time you are there? You don’t drive, maybe she works, she probably lives a long way from your friend, imagine the traffic etc etc.

It turned out that she lived within four blocks of the friend with whom I was staying. It was meant to be! I spent some time with her and we sorted out the heddle problem…..

mary making string heddles on a stick

…and then she wove! I was able to show her how to use her body movements to operate the loom and give her some tips for creating even selvedges. There’s Mary, the shed whisperer.

mary and lola weaving a narrow project on the balconyYou have no idea how much I would love to be able to do that with everyone who writes to me with questions. Making this movie is my attempt to sit right next to all of you who need a little guidance.  Of course, many people take my written answers, solve their problem and move on to happy weaving while many just slip comfortably into it and have no questions at all. I have been lucky to have been able to meet many of you who have supported me and my blog over these years in my travels. It’s always wonderful to see what you have been quietly creating at home on your backstrap looms.

backstrap weaving friends

operating-a-backstrap-loom-dvd-cover

The movie is available for streaming or as a dvd from Taproot Video.

You can watch a short preview here.

As for Taproot Video…working with founders Marilyn and Rainer Romatka was a wonderful experience. Rainer, who was behind the camera, has a keen eye for detail and came up with so many interesting ideas and suggestions.

filming-operating-a-backstrap-loom

15171207_931325007012493_3493847461194729753_nMarilyn is the most resourceful person I have ever met. I started calling her ”MacGyver Marilyn”. She wore many hats… in charge of audio, clap board, continuity, set re-arrangement etc. She and Rainer are an amazing team. She also managed to take these pictures during the filming and her suggestions during editing were invaluable.

Marilyn has her own set of folkart classes on the site including the extremely popular Bow Loom Weaving class that she taught at BRAIDS last year.Marilyn Romatka bow loom weavingtr_logo152Kris Leet has classes on  tablet weaving techniques and Linda Hendrickson teaches ply-split braiding techniques. Joan Ruane has two movies on cotton spinning. She was my roommate at the Mannings a few years ago and it is nice to be sharing space with her in the new Taproot Video  community.

In the meantime, between some fun writing projects, I have been at my loom very slowly moving along with my silk weaving. It is funny how this slower-than-usual pace with the more complicated three-color pick-up can soon start to feel ”normal”.

I might be  1/6 of the way along now.

backstrap weaving silk wrap

I do hope you enjoy my free warping video and hope that you will consider following it up with Operating a Backstrap Loom.

Thank you so much for all your support. I am really excited about and pleased with these movie projects. It’s been a long time since I released my last book and it feels good to have something new out there I am happy to have jumped over the nervous hump of filming! There will surely be more movies to come (and books).

On the set for Basic Warping for Backstrap Looms
On the set of Basic Warping for Backstrap Looms.


Backstrap Weaving – Making Way for Things to Come

airport world cup 2014If you read my Boomerang Effect blog post a few weeks ago you will know that my first attempt to get back home to Bolivia after my Sydney visit was not successful. On the second attempt the boomerang sailed over the Pacific Ocean and all the way across the USA, showing no signs of returning to its place of origin, until… it hit a palm tree in Miami and got hung up there swinging around in circles.

I can think of worse place to get stuck for a few days but when you have been away for three months all you want to do is get home! The airport was lively and colorful with large tv screens showing Wimbeldon and the FIFA World Cup. Enthusiastic crowds of all nationalities gathered around. It passed the time. Of course, it would have been a whole lot jollier if the USA hadn’t lost its football match.

I tried to be productive, sat down with my laptop, and poured out the entire Table of Contents for my third book. That felt like an enormous hurdle. Then came a list of all the pictures that need to be taken for each chapter. That done, I was all the more eager to get home and get stuck into it.

???????????????????????????????In the end, I bought a ticket on the Bolivian airline BoA (Boliviana de Aviacion) who had recently added Miami to its system and was offering very good fares, free checked bags, and some of the best Economy Class airplane food I have had in ages.

The coolest thing about BoA was the flight attendant uniform.

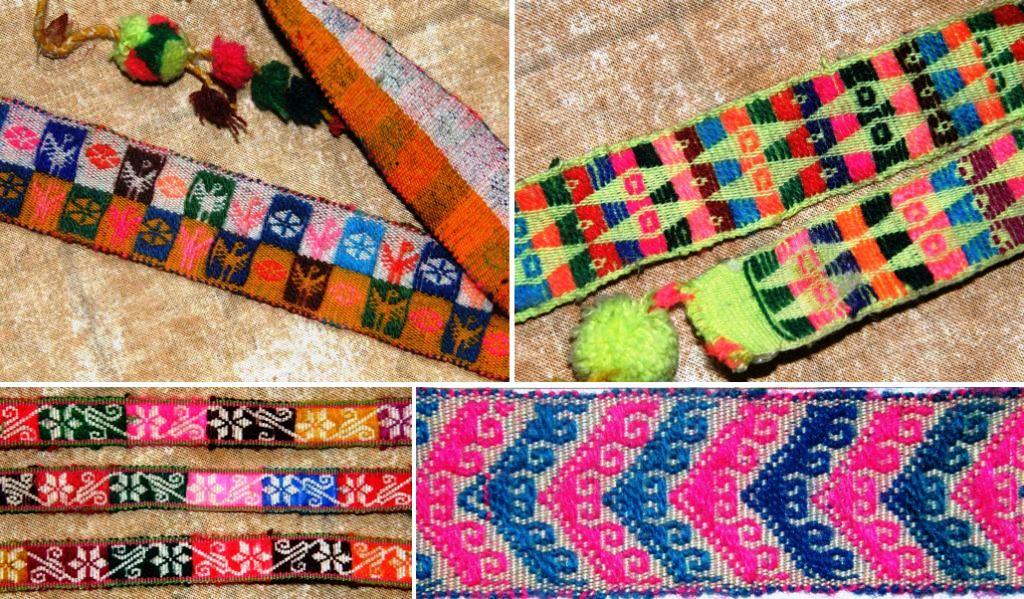
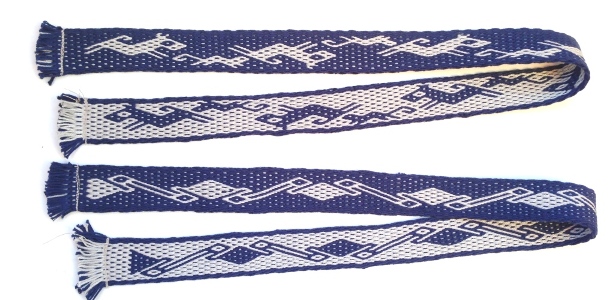
They each had a handwoven warp-faced cotton pick-up patterned band made by weavers from the Bolivian lowlands sewn to their pants…very cool!

I had left my brother’s place in Sydney at 9am on Monday and got to my door at 9pm Thursday (Sydney time). It was quite a trip! The jet lag was huge. I have finally reached the point where I can eat lunch without falling asleep in my plate.

The BoA uniforms with their woven bands had stirred me into a longing to be home and back at my loom.

Killing time in the souvenir and Duty Free stores in Sydney airport had already given me guilty reminders of the abandoned project on my backstrap loom at home awaiting my return….here’s one item…

aboriginal art souvenirThis Aboriginal Art souvenir reminded me of the squiggly lines in my Shipibo-inspired project which was the last thing on which I had been working before leaving home in March…

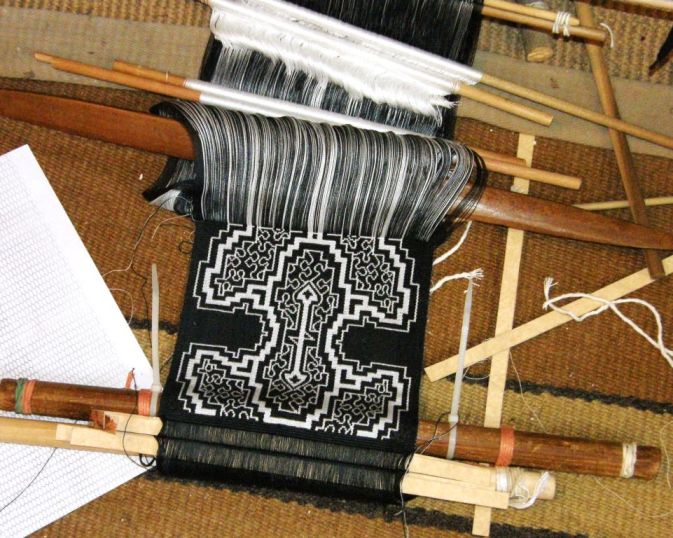
Shipibo inspired wall hanging backstrap weavingI hadn’t packed it away and had simply covered it over wth a sheet. There it lay on the floor with the various shuttles, swords and pick-up sticks that I had been using to weave this double weave with its multiple heddles. It took a me a little while to get back into the rhythm to follow the sequence in which I had been putting all those tools to use…

finishing the shipibo backstrap pieceNow I have finished the main design and am weaving a “‘fringe” of sorts. I divided the fringe into seven sections and am weaving each separately in double weave. I need seven inches of  ”fringe” to complete the panel and have just reached halfway. Each section will be a different length with the center one being the longest and the two outer ones the shortest, creating a stepped effect. Years ago, my brother had sent me a picture of a Native American piece in a London museum that had been finished this way and I have been wanting to do that myself ever since.

twining on backstrap wall hangingThe picture above shows two balls of dark red hemp twine alongside the woven panel.

I hope to create two outer panels with this twine using a structure that includes warp-twining that is used by lowland weavers in Peru to make wristlets. The outer panels will be a quiet solid dark red so as not to clash with the crazy busy-ness of the center panel. The three panels will then be joined together across the top with weft twining. There is a long way to go before I get to that point. Much sampling with the hemp twine needs to be done first.

This will be the second piece of three in the second series of red-black-and-white hangings. That’s the first piece above left.

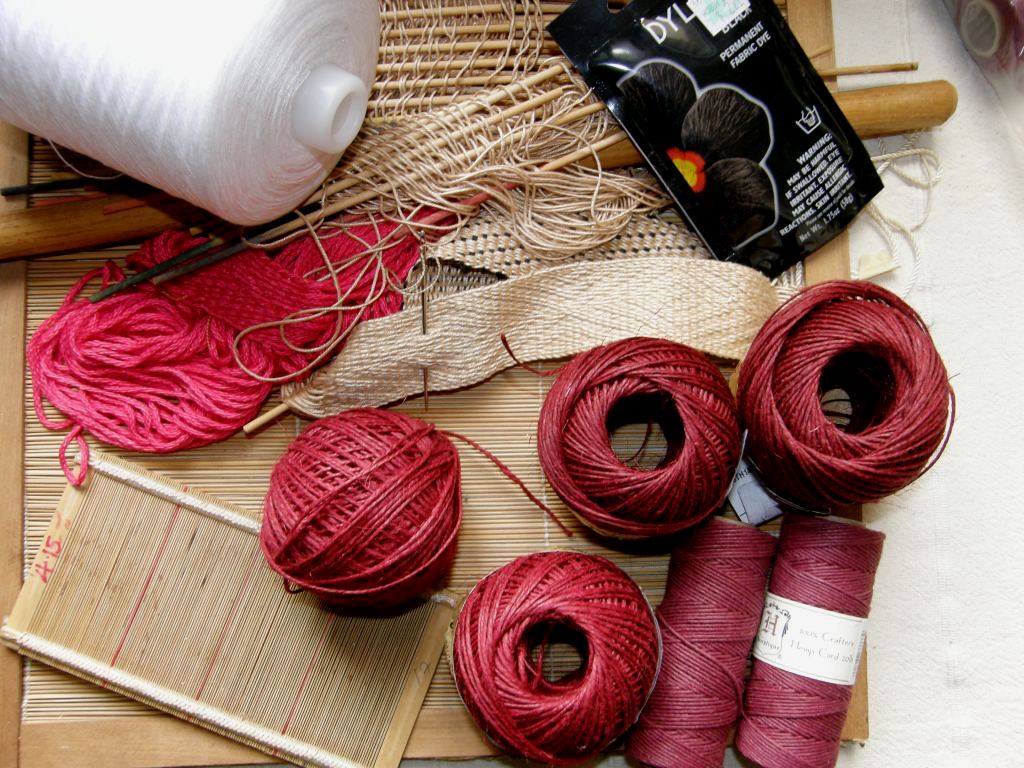
???????????????????????????????Things to come…exciting! There are a couple of varieties of hemp twine in this picture along with an example of the wristlet structure. You can also see the super fine bamboo reed that I bought at CNCH, now removed from its heavy frame and ready to be used on my backstrap loom. I can’t wait to try it out with some silk. The cone of white thread is the 20/2 perle cotton that I want to use for the third wallhanging…an ikat piece…and there’s some of the black dye that I’ll use for that. I am not sure if I will have time to get that started before I have to leave again but I am happy to have more time in which to ponder that one. I seem to get some of my best ideas while sitting on planes!

???????????????????????????????Then there’s the gorgeous 60/2 silk that I got at CNCH waiting to be used as supplementary weft. The large skeins of silk were given to me by my friend Susan in Sydney. It’s a heavier weight silk than the Redfish Dyeworks skeins and I am thinking of using it as the warp for a brocade project.

The project ideas go piling up. You can probably tell that I am pretty excited about being home again.

My weaving friends in Sydney remain in mind. Emerald has been sending me updates on her progress as she weaves off all the projects that we started in our two days together…

emeralds pebble weave collageThat lovely green warp is now a piece of Andean Pebble Weave patterned fabric ready to be made into a cell phone pouch. That’s my second book that she has opened on the floor. I was showing her how to read the spotted charts. That particular motif also appears in the first book.

sewing and weaving tuular band emeraldHere she is weaving and sewing a tubular edging to the pouch.

emeralds cell phone pouch and intermeshThere’s the finished pouch along with her intermesh sample band.

One of the good things about having to stay longer in Sydney than expected was that I got to visit with the Springwood group of weavers again up in the Blue Mountains at Helen Halpin’s place. What a lively and enthusiastic group of weavers! They meet once a month and there is always a lot of show-and-tell.

Yvonne, who had woven with me a couple of weeks earlier, brought in a band that she had since warped and woven. She had played about and created some of her own patterns. I love that! What was also interesting was that she had used bamboo thread. I have never considered using it as I had always thought that it would be too soft. Yvonne’s band felt lovely.

???????????????????????????????In the Ravelry group, Kim has been progressing with the two-color simple warp-float technique while copying as well as adapting motifs from Central Asian textiles. This piece is beautifully woven and I love the combination of colors. I am surprised at how well that green stands out from that background color….inspiration to be more adventurous with color choices.

kimberley swfKeith has formed a South American band weaving study group at the Weavers’ Guild of Minnesota. One of the members wove with me on one of my trips and it is nice that they can now study some pick-up weaving techniques together and support each other. Keith posted this picture of some of the first bands with some thoughts of what could be improved. He won me over right from the start with his color choice!

keithScott, a Facebook buddy, posted this striking double weave piece that he started some time ago and just finished…

scottSo, here I am back at home. I unpack and put away the yarn and other goodies that I have brought back on this trip. As is my policy when new things come in, old things have to go out…out went the rocking chair this time which opened up a whole lot of space! Even so, the “stick corner” in my bedroom gets increasingly crowded. I brought back a whole bunch of dowels that were being discarded and a couple of shuttles. I need sticks of all kinds of lengths for all kinds of warp widths…cross sticks, heddle rods and coil rods…shuttles and swords. I don’t weave a limited variety of traditional items as many backstrap weavers do and so, I need sticks that are suitable for a vast range of woven widths.

???????????????????????????????It’s a lot of stuff and I wouldn’t part with any of it!   Would you believe that there are still times when I can’t find just the right length of stick with the right girth?!

But, the equipment you use can be as complex or simple, as rustic or sophisticated as you want it to be. And it’s always nice to know how to improvise a set-up when there simply isn’t any “equipment” to be found..

???????????????????????????????Or when you just couldn’t be bothered fishing all the gear out of a packed bag…

??????????????????????????????? ….in which case a pencil will do for a front beam and a piece of string for a backstrap. The elastic bands will stop the string from sliding off the pencil.

For narrow bands, no equipment is required if you have a good set of “magic fingers and toes”!

??????????????????????Maxima tensions the warp between her index finger and big toe. Her fingers are used as cross sticks to form the picking cross and fast flying fingers and thumbs select the colored threads to form her patterns. Her hand is her sword and beater.

When sticks specifically for backstrap weaving are simply not to be found, as is often the case in the very highest parts of the Bolivian highlands, all kinds of other things can be called into play…like the spindles that Hilda is using in place of cross sticks while setting up a warp for double weave. Hilda’s large sticks and rods are saved for her horizontal ground loom.

hilda preparing backstrap warpIf I am home and have access to my collection of sticks in their handy bins at the end of my bed, I like to use them. I feel more comfortable with a wide breast beam and a backstrap…a nice wide cushy backstrap….no matter how narrow the warp.

This Mexican weaver from Santo Tomas Jalieza, Oaxaca seems to feel the same way!

Picture from Teyacapan's Flickr page
Picture from Teyacapan’s Flickr page.

So, I will never able to resist grabbing a good stick that comes within reach while I am traveling and bringing it home with me. While there are still things that can be removed from my little home to make space, there will always be room for more sticks!

Finally, I would like to thank everyone so very much  who went over to Facebook and ”liked” my nephew Ryan’s triathlete page at my request last week. Someone even posted a “Weavers for Waddington” comment. That was so cool 🙂 Ryan was very pleased to see all the new “likes”.  It really made a difference and he got a new sponsor last week…

1176105_696156010456849_9156188001071593550_nYep, that was THE best thing about being held back in Sydney…I got to hang out with Ryan some more.

If you didn’t get over to Facebook last week to “like’ his page, please help him out by going over now. More “likes” mean more sponsorship appeal, I am sure. I was happy to see so many familiar names there as well as some names I didn’t recognize…people who read my blog but with whom I have not yet connected…many thanks to all of you.


Backstrap Weaving – Re-defining “fine”

Internet fail yesterday kept me from blogging. All kinds of crazy specials and offers by the phone company here have the whole system on the point of complete saturation. Goodness knows how long it will all keep running before everything comes crashing down. Of course, the phone company tells me that everything is just “fine”.  So, I couldn’t write my blog but, never mind, there is always plenty to do.

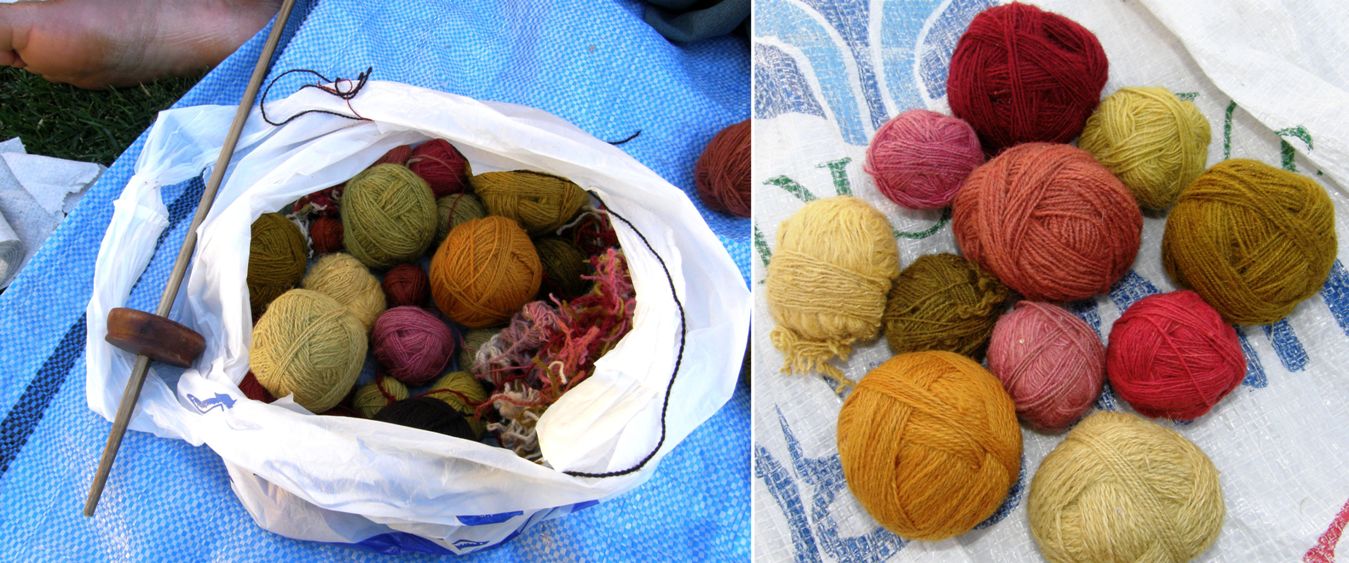
Once again I was immersed in the warm woolly smells and happy colors of the highlands as I took out the beautiful bands made by the weavers in Independencia, Bolivia  from their handspun yarn colored with natural dyes.

yarn

?????????????????????? You know how much I love to dress up little bags and pouches. I am cutting up the bands just as the weavers themselves are doing in Independencia to make cell phone pouches and other such things to sell. So, I have been weaving and sewing tubular bands, braiding and embellishing away and having fun.

embellished wool pouch???????????????????????????????Here is one partly dressed-up pouch with a brown and red tubular band, braids and tassels. These projects give me the perfect opportunity to put into practice the many little finishing techniques that my weaving teachers and sling braiding instructor have shown me over the years.

The two-color edging stitch that my sling teacher in Peru taught me for decorating the cradle section of the sling looks lovely along the edge of fabric. I have used it to edge a table runner.

Now that it is not so hot here, it is really nice to feel the wool in my hands. It is also nice to have something off-loom to play with.

On the loom, I have the black warp that I took on my last spring trip away. I am using the fine Guatemalan cotton which I recently wove into black and purple scarves decorated with supplementary-weft patterns.

As I am still in my supplementary-weft phase, I have been thinking about what to do with this black demo warp. I created it with nothing in particular in mind…just something to show one of the ways in which a warp can be put together for backstrap weaving.

supplementary weft patterned scarf backstrap loom

Now I am thinking that since I used patterns based on Bhutanese motifs on the black scarf and Guatemalan inspired patterns on the purple one, I should base the designs on this new project on supplementary-weft patterns from another weaving culture….either Bolivian hatband motifs or the designs used by the Montagnard weavers with whom I studied in the US.

I have a few hatbands that I have gathered over the years. The problem with studying the motifs on these supplementary-weft patterned bands is that the thread that Bolivian weavers use for these is so incredibly FINE!!

supplementary weft project for on the road

hatbands-aWhat I like about some of the Bolivian hatbands that I have seen is that the supplementary weft is used to fill the negative spaces.

Look at the flower pattern at bottom left on the hatband from Calcha, Bolivia. The ground weave is white and the colored supplementary wefts fill the negative spaces so that the ground weave below is exposed in the shape of a flower. The thread used in that flower band is unbelievably fine….almost like strands of hair! I can’t count the threads and will need to get a magnifying glass to do so. The fineness of the thread means that the weaver has been able to get away with making some very long floats of supplementary weft. As the piece was designed to be worn around a hat, long floats  are not really a problem as it is unlikely that they will catch on things and get pulled.

sample for Bolivian hatband designFor my sample piece I have had to modify the pattern to eliminate some of the long floats as my Guatemalan cotton, as fine as it is, is nowhere near as fine as the Bolivian thread.

You can just see the top half of the flower head in my sample as I weave to check the proportions. Look at the difference in size between my sample with my “fine” cotton and the Bolivian band. I think that I will have to re-define “fine”!

The Bolivian weaver has used a colored stripe to border the pattern so that the colored wefts don’t just end “in space”. Besides looking good, this also saves her the trouble of having to count threads to see where the wefts need to dip back down within the shed. I was trying to just eyeball it when I was doing it and found myself one warp thread off the mark many times. So, to weave this, I really need to make a new warp with stripes included or….maybe I can come up with another plan by doing some more sampling.

Hopefully the  sampling will become something acceptable and I will be able to make this little black piece into a pouch with lots of embellishments.

In the Ravelry group, Cindy has been doing pebble weave on a Gilmore Wave loom making what might become a backstrap. The pattern is one that my teacher Maxima taught me and is charted in my second book.

cindy pebble weaveBetsy is making guitar straps on her backstrap loom with her own handspun. Janet is her spinning teacher and Betsy works hard at her spinning every day, so you can imagine that her handspun is really lovely and works beautifully for backstrap weaving.

betsy guitar strap handspunJennifer demonstrated how using a coil rod eliminated the annoying corrugated look in her cotton warp and gave a new life to this abandoned project. She then used the warp to create a really interesting solid-color warp-float pattern using a pattern stick and heddles to raise the warps for the floats.

jennifer coil rod and warp float patternWell, it’s back to sampling on the cotton warp, embellishing the wool pouches and playing some more on the inklette project for the article. My internet is running again and all is “fine”.

922915_10151577057823866_898758942_nThanks to everyone who wrote with suggestions about the embroidery stitch on the pillow cover from Peru. I think that it would make a nice cover stitch for joins and hope to experiment with it soon.

In the meantime I have also found out that the word used by Spanish speakers for tatting is frivolité….love that word!…and that a few of my online friends do it. I follow the Textile Museum of Oaxaca on Facebook and they are even giving a workshop on it. Let’s see how I can add a bit of frivolité to my weaving!

Backstrap Weaving – Conquering the Corrugation

I am taking a wee break for what will be a short post this week. I have been winding lots of warps this week and don’t want to break the rhythm too much.

OLYMPUS DIGITAL CAMERAAs I settle down to wind warps, opportunities to experiment and learn come my way. This week I learned more about corrugation in plain weave when using cotton.

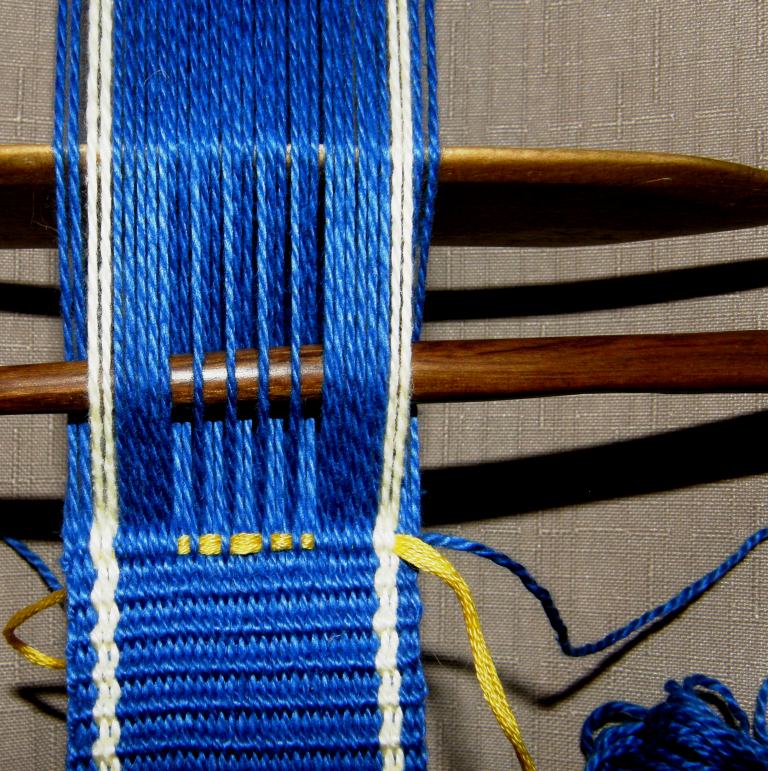
Warping is just one part of the preparation process and I have been warping a lot of narrow bands with cotton. This has given me the opportunity, with the added benefit of repetition on many many examples, to contemplate that pesky ridging problem that we often experience when using cotton and weaving plain weave.

You may have had this happen yourself. Your plain weaving looks like a piece of corrugated board…Above, you can see an extreme example on a warp I was using to show supplementary-weft patterning. See how the woven plain-weave part is ridged? The ridging is all the way across the band. I won’t call it ugly as many people have told me that it happens to them and that they really like the effect. I guess it just bugs me because I can’t control and predict it. Sometimes it happens and other times it doesn’t. But I definitely prefer my weaving without it.

Well, it seems that it is the different movement of the warps around the far loom bar as I open each of the two sheds that is the main culprit for this irregularity in the two sheds causing the warps in one shed to buckle and ridge up while the warps in the other shed don’t.

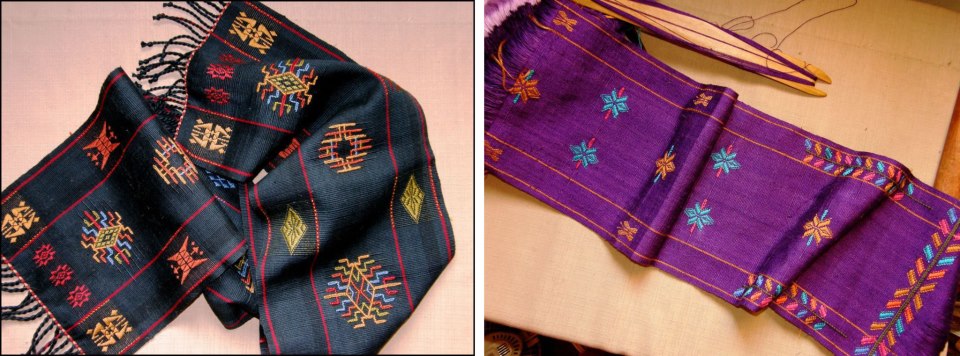
I didn’t get any ridging in my two scarf experiments which were woven in plain weave with supplementary-weft patterns and I know why.

backstrap weaving scarves

The black scarf was woven using a warp in a single plane and the purple one was woven in a circular form and then cut apart.

My design choices for the black one changed so often and I had to unweave so much that the first part of the warp started looking rather sad and worn. So, after the third attempt to get something with which I was happy, I left a couple of inches woven with the abandoned pattern (there was a little bit of ridging) and turned the loom around and started weaving from the other end. The woven part at the far end of the loom secured the warps so that there was no warp slippage or sliding when I opened the sheds. Result: nice smooth flat even cloth…not  a ridge in sight!

I did the same on the practice piece below, that is, I wove from the wrong end first before turning the warp around and weaving from the good end.

Bhutanese supplementary weft pattern sampler

coil rod and other toolsThe coil rod performed the same task on the purple warp. It held all the warps in a tight grip so that they couldn’t slide any signifcant amount when the sheds were opened.

However, I am sure that if I try ikat using the coil rod, I will see that there is, in fact, slight movement. The warps forming the ikat pattern will start to become mis-aligned and the motif will blur.

In the same way, when I wove some ikat experiments last year, there was no ridging because I left the wraps on the warp and they held the warps tight and stopped them from slipping….just enough to prevent ridging but not quite enough to eliminate blurring of the motif. But that’s okay.. blurring is the charm of ikat, right? At the time I was covinced that the fact that I was using a vey fine weft had solved the ridging problem but now I think otherwise.

ikat sample

Why  has it taken me so long to get a grip on this? I think it’s because I very rarely do just plain weave. I spend a lot of time doing pick-up with warp float structures where the ridging problem does not occur. Lately, with my renewed interest in supplementary-weft patterning I find myself doing a lot more plain weave in larger and more ambitious projects. My teachers in Guatemala weave plain weave in cotton and they always weave a little at the far end of the warp before turning the loom around and starting the real weaving. The answer was there in front of my eyes and I didn’t see it!

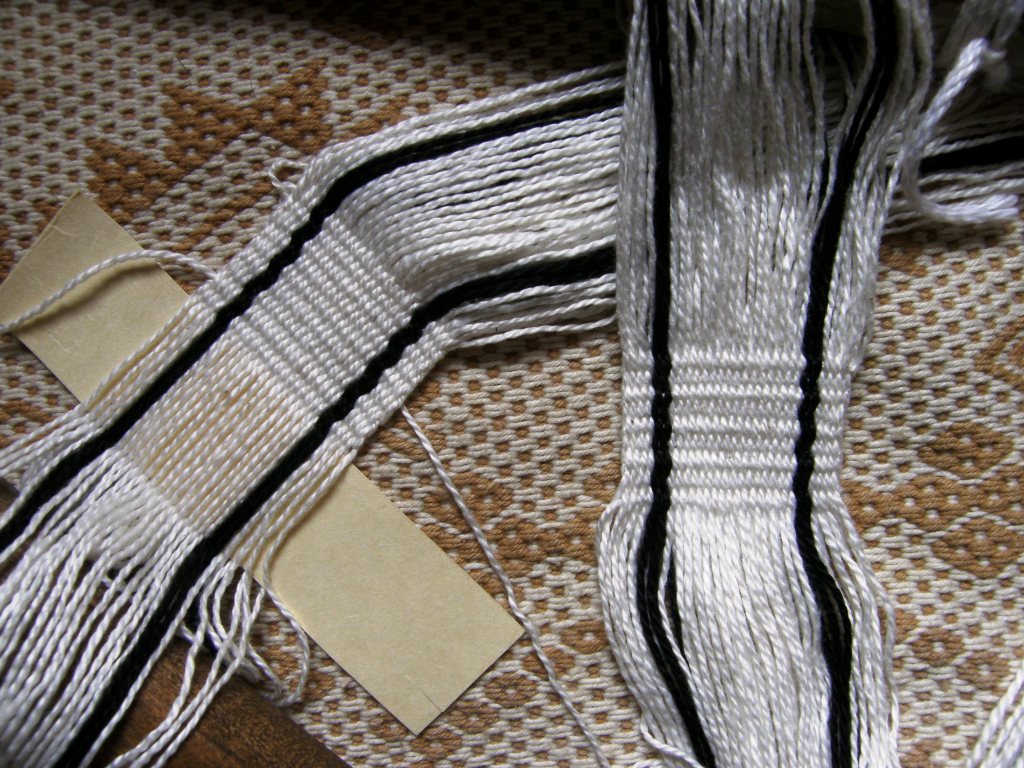
So, below, I can show you one of the warp samples I have been preparing. I first wove from what I call the “wrong” end of the warp….the end with the knots. I did this to lock the warps into place. Then I turned the warp around and started weaving from the “right” end. The weaving from the wrong end is ridged…nothing too extreme, but it is there. The right end is clear. The good thing is that I have woven MANY such samples  to put this to a thorough test….(And, occasionally, I weave at the wrong end and it doesn’t ridge. I have yet to figure out what I am doing differently to cause that to happen).

This was not easy to capture in a picture. This is two ends of the same warp. I hope that you can see the difference…on the right, ridged…on the left, not.

corrugation

So, that’s what I have been up to this week. Like I said, this is just a short post.

To end, I have the most wonderful projects to show you from online weaving friends and from one friend who wove with me last year. Seeing these puts the biggest smile on my face. I am up off the floor now and warping on a table standing up. I can even do a little dance while I am at it.

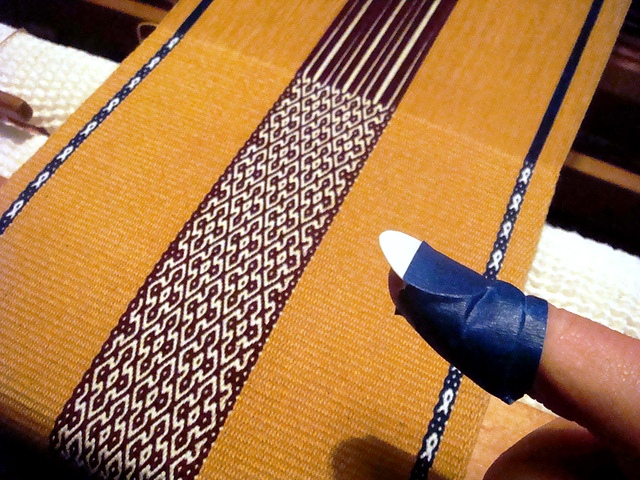
cindyQHere is a sweet pebble weave band from CindyQ . I love the color combination and it is so well woven! She is using the thick border that I describe in my book Andean Pebble Weave and the pattern is my adaptation to pebble weave of a Central Asian motif which appears in the follow-up book More Adventures with Warp-faced Pick-up Patterns. I know CindyQ from Ravelry and we will get to meet at ANWG in June.

lauraThis is from Laura who wove with me last fall. Now she is studying double weave. The “dog chasing squirrel” design is her own. I love it! The birds are from Double Woven Treasures of Old Peru, Cahlander and Baizerman.

???????????????????????????????And, Julia has been doing pebble weave on her floor loom and came up with her own adaptation to pebble weave of traditional Japanese designs. In her own words…

This is my first attempt at a wider pebble weave project in finer yarn. The pattern is taken from a Sashiko (traditional Japanese stitching) pattern and is a variation on several patterns called “Well Curb”.

Early on I was making lots of mistakes. I finally divided the pattern into sections and as I completed the picking of a section I placed a chopstick within. This way I could check my work more easily as I went along. The mistakes gradually decreased.

Isn’t that spectacular? She is also showing her unique pick-up tool. I wish I had taken a picture of the length of my thumbnails when I was making my scarves. They really did help with separating the fine threads (they were horrendous-looking, to tell the truth!, but very nifty). I guess I met Julia here on the blog but we also know each other on Ravelry. I am thrilled that we will get to meet in person in June.

More adventures book cover dszIn my second book I have included tutorials on how to chart pebble weave designs directly from woven examples and then go on to show how to create your own patterns from your head or from other inspiring textiles as Julia has done. It is all about “connecting the dots”. (Please be aware that my second book was written as a follow-up to the first and does not stand alone as a pebble weave how-to).

So, that’s enough break…back to the warping board and loom for me and let’s see what else I can learn while I am at it!

Backstrap Weaving – Braids 2012, Threads that Move

Braids 2012 is all over and all the British attendees must be back home now wondering what hit them. Many of the foreign visitors went off to families or packed their things into rented vans and hit the road leaving  just Elizabeth Kolb of Canada, Ingrid Crickmore of the USA and myself, all of us more or less “homeless”, together here in the MMU dorms.

So, what did we do with our time alone here? Ingrid and I had a fun morning checking out the Costume Museum and the Ede festivities in a nearby park yesterday. Today we all caught up on some much needed sleep and laundry then of course, of course, what else?…we braided.

I spent this afternoon editing my pictures and wondering why I hadn’t taken a whole lot more.

This is the first big conference at which I have registered, signed up for classes and taught which meant that there really wasn’t much free time to just wander about, soak up the atmosphere and take pictures. It was up early every day to participate in a steady stream of activities.  Coffee and meal breaks seemed to be spent waving the food about in the air in our hands while  trying to explain a braiding or weaving move rather than actually consuming the stuff!

That is why I have decided to re-name this conference “Hands that Express”.

I was getting frustrated with my photos which had been taken indoors in low-light conditions with so much movement going on. My pictures always seemed to show two people in deep conversation with a blur of hands in front of their faces…hands that flitted and floated and turned gracefully in the air as they described their craft. Then I understood that my pictures with the blurred hands actually captured better than anything the spirit and essence of this event….expressive hands, conveying passion and ideas even when not putting threads into motion.

Too bad I only realized this after already having deleted many of the pictures!

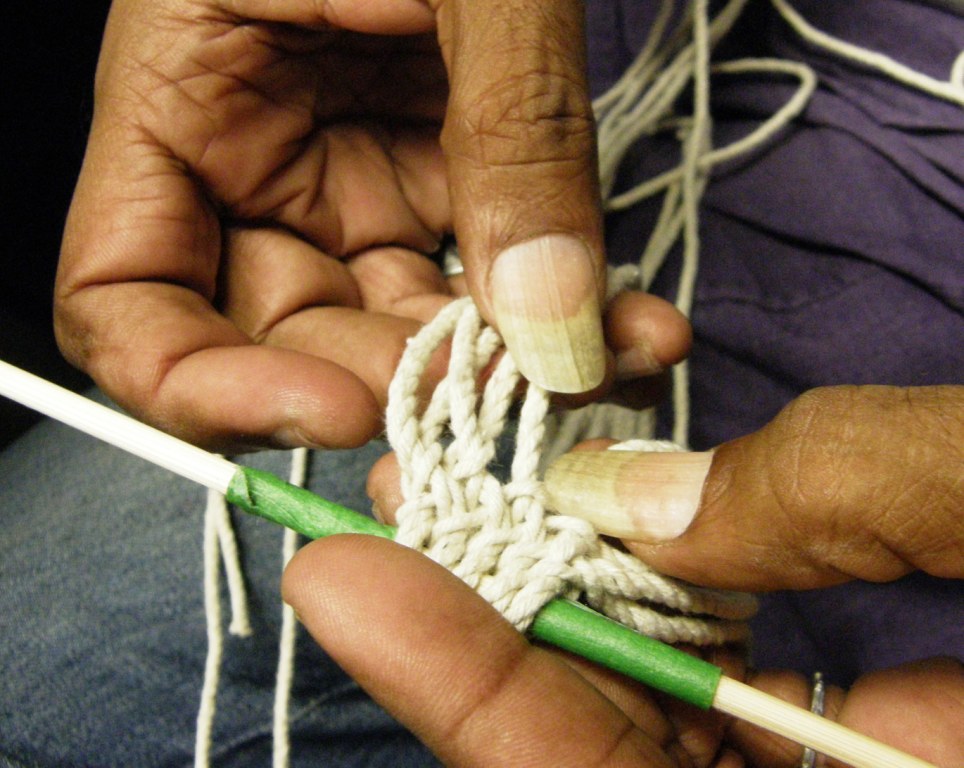
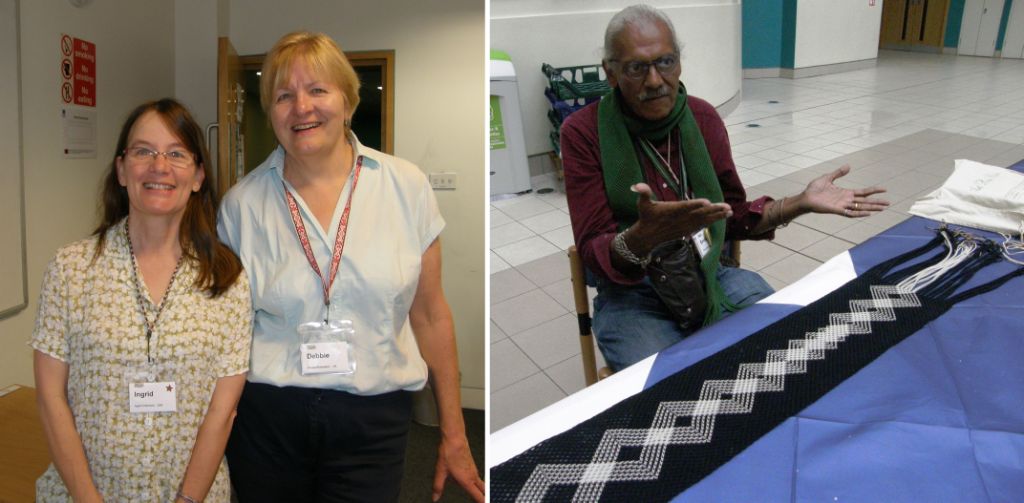
And such interesting hands. Above we see the hands of Errol Pires Nelson of India with their built-in ply-splitting tools. He is starting off a ply-split braid for a new student in one of his many impromptu classes outside his scheduled teaching days. I, too, rely heavily on a long thumbnail as a handy tool for my backstrap weaving, especially for heddle making, but I am a bit shy to leave it long when I am out and about.

The city of Manchester was a wonderful place for this event with its fascinating role in British and world textile industry history. The MMU made a nice home for us all. I have always loved communal living and staying in the dorms took me back to my ski bum days except that we were all tucked up in bed early each night so we would have enough energy to face the full days of lectures, classes, conversation and all that hand-waving!

The little I saw of the city itself was impressive…all that brick and stone…old and new side by side with the gorgeous Palace Hotel, with its landmark clock tower pictured above, built in the late 1800s and early 1900s, standing majestically on the other side of the street from the Holiday Inn Express.

The old and new, the very old British structures and the newer items representing the British melting pot of cultures stand sometimes comfortably, sometimes clumsily and very often very colorfully side by side….the lovely old “Picture House” perched on top of the  MacDonald’s….  But this is just the quick impression I got from the very little time I got to spend out and about before and after the conference.

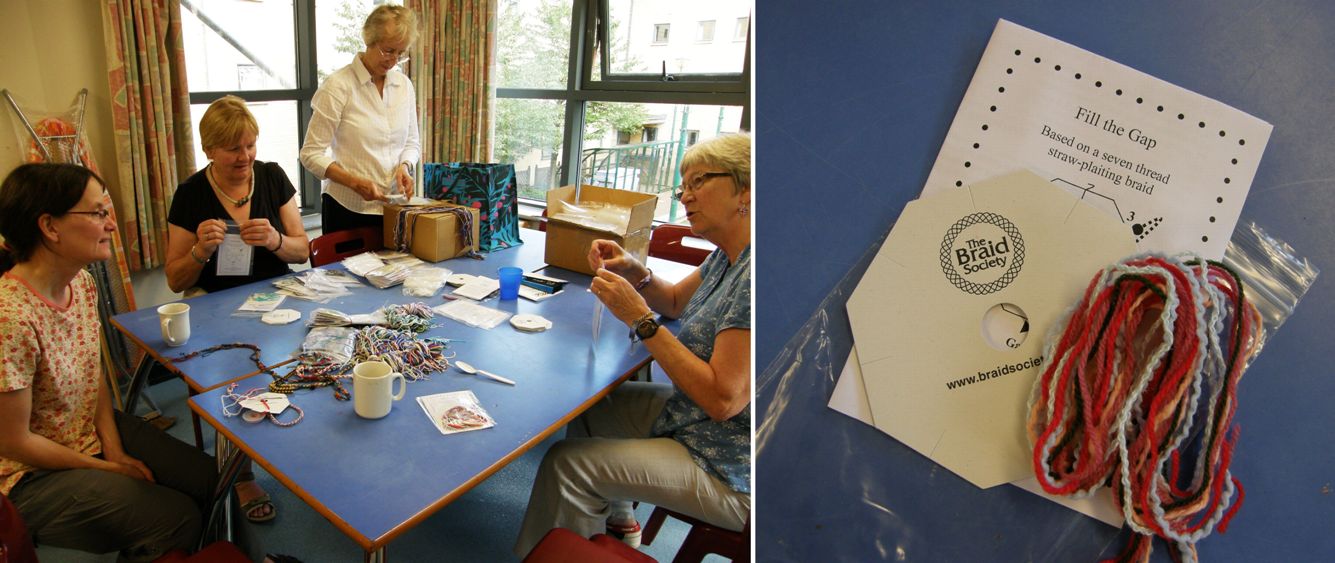
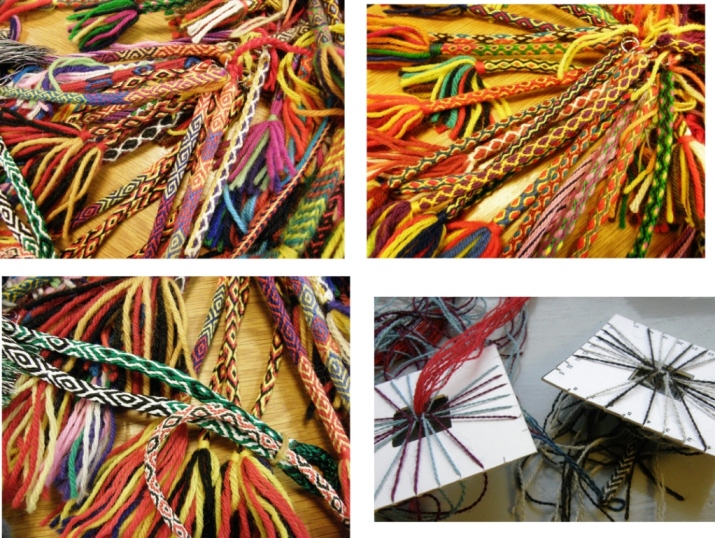
Day one pre conference was spent settling and meeting my dorm-mates…the “naughty old British ladies” as they called themselves. We spent the first evening putting together “fill-the-gap” braiding kits which we were to use to teach braiding to visitors at the Museum of Science and Industry the following day. These humble “fill-the-gap” kits were responsible for providing a considerable part of the funding for the Braids 2012 event. Braid Society volunteers attended fiber events during the many years of planning, taught braiding and sold the little kits. Hundreds of people were introduced to this fun craft for a tiny fee which helped make Braids 2012 possible….impressive!

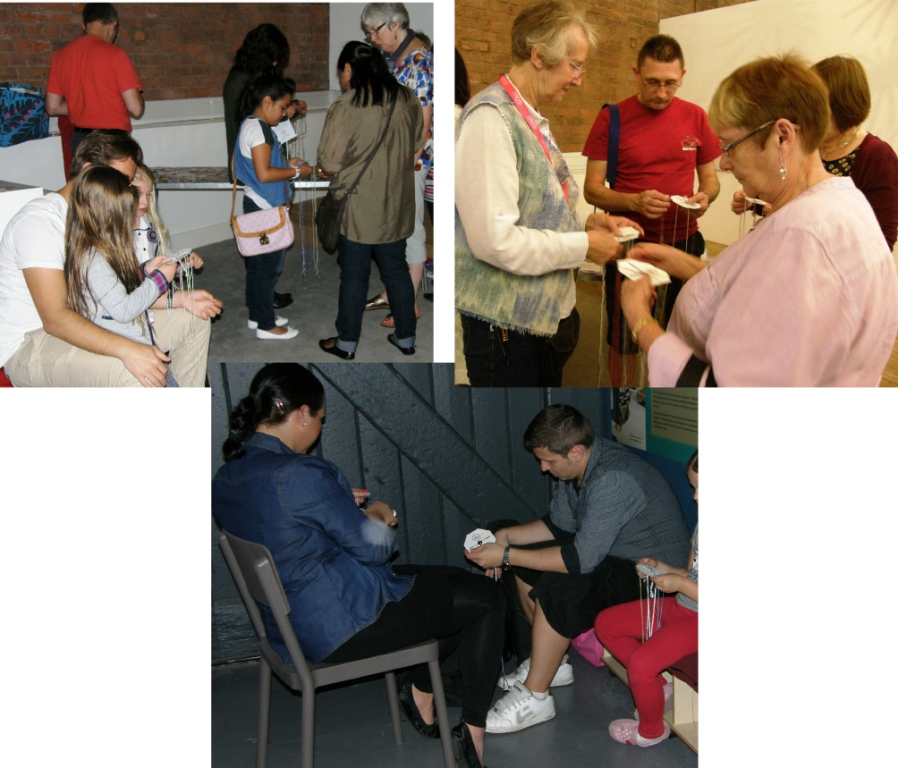
It was a lot of fun seeing Rosie and Sally in action at the museum. Of course they had no problem getting kids to try braiding. It was a little more difficult convincing some of the adults but Sally and Rosie obviously had a lot of experience with this and their cheeky sense of humor soon had entire families of all ages sitting and standing about completely absorbed in braiding. The kits were free at this event.

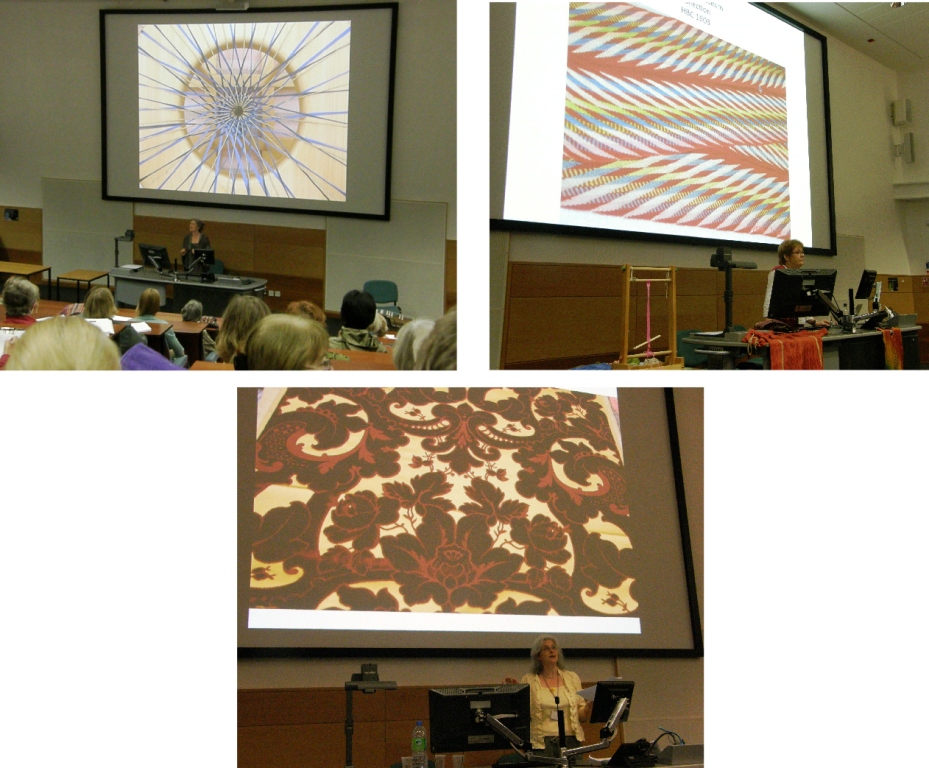
About 100 braiding kits later….we went directly to the conference opening and were welcomed by the Chairman of the Braid Society, Steve Pretty. Society President Jacqui Carey gave the keynote speech. We were then treated to a koto recital by Enokido Fuyuki  who then invited us to come and try our hand at this traditional Japanese instrument. Steve Pretty is being given some playing tips below. It was a lovely way to open the event considering the large number of Japanese attendees and the many traditional Japanese braiding techniques that were being offered in the workshops.

Morning lectures included those offered by Carol James and Stacey Harvey-Brown, pictured above, on North American Braided Sashes and Northwest Archives for Research and Inspiration.

There are those expressive hands at work while Ingrid and Carol discuss techniques besides Carol’s display of beautiful finger-woven pieces.

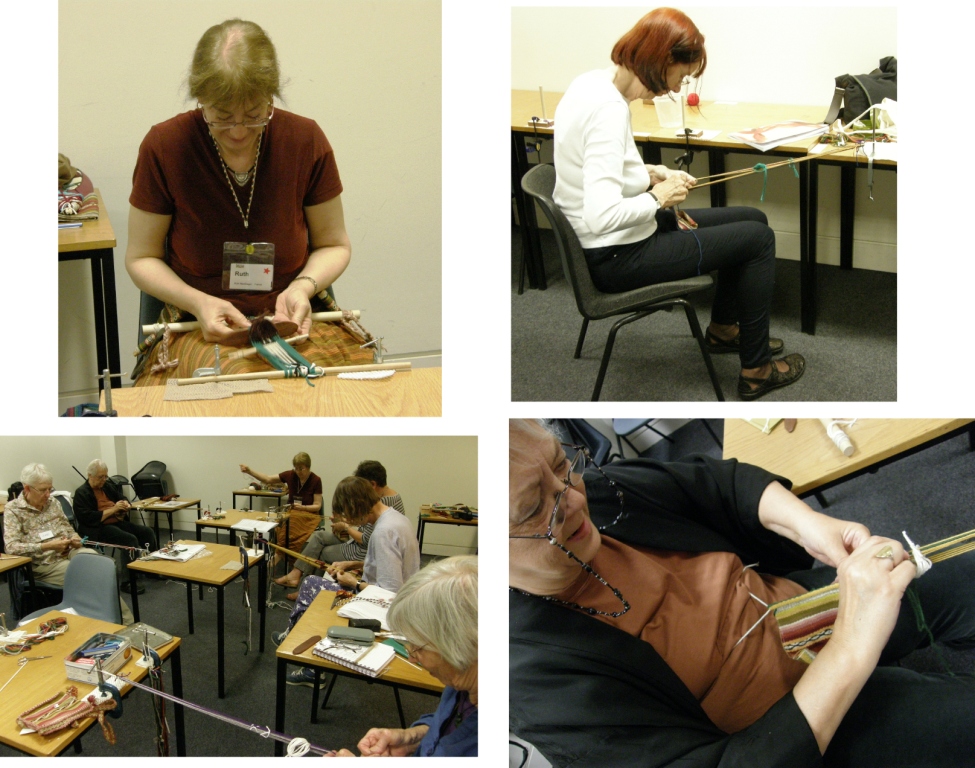
I signed up for Anne Dyer’s class on a technique which she calls “snagging” on tablet-woven bands which has given me some cool ideas for plain-weave tubular bands that I make on my backstrap loom. I also took Robyn Spady’s class on handwoven decorative trim on an inkle loom. I was happy to have Susan Foulkes as my classmate and we were both rebels and wove on backstrap looms rather than on inkle looms. Susan used a rigid heddle and I used my usual string heddles and a shed loop.

Both instructors gave a us a run down of the technique and a multitude of inspiring samples and then let us run with it and create. It was fun to stop every now and then to take a spin about the room to see which direction the other students were taking. This was very interesting for me as the techniques I teach need to be built up in steps throughout the entire duration of the class leaving little class time for any free wheeling and experiments. Things need to be more structured. It is always so wonderful being a student again and especially in the hands of such great teachers. I get to evaluate the way my classmates and I react to the material, the pace of the instruction and the general learning atmosphere. I learn so much that I can then apply to my own teaching.

On Monday night we had the Braiders’ Bazaar. I bought nothing!

Happily, I was too busy demonstrating backstrap weaving and meeting various online weaving friends as well as talking about my first book  Andean Pebble Weave. It was fun to tell an Italian attendant about the translation that has been made of the e-book to her language.

Happily, I was also able to show the front cover and also tell everyone about my follow-up book which had just gone up for sale the night before on Patternfish.com.

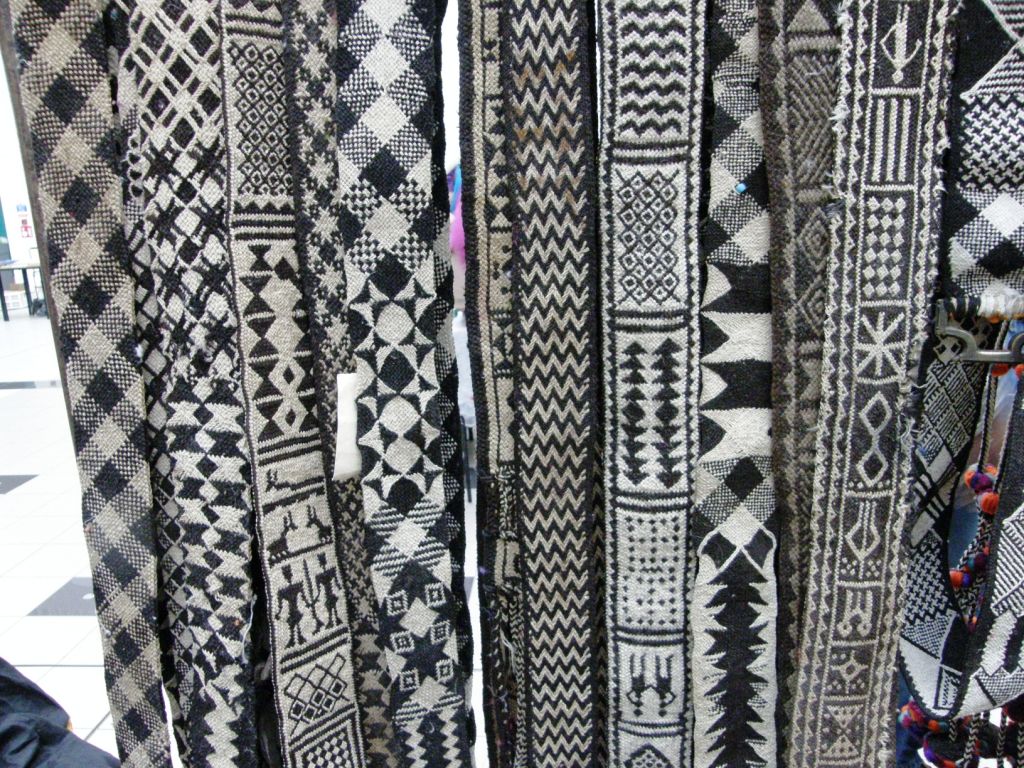
Later I heard about all the wonderful things that had been offered at the bazaar…books, tools, yarn and textiles including some amazing ply-split camel girths, which I did manage to photograph (see above). Ingrid and I were oblivious at our table where I was weaving a pebble weave band on my backstrap loom while she demonstrated how to do what would normally be a two-person/four-handed braid on one pair of hands.

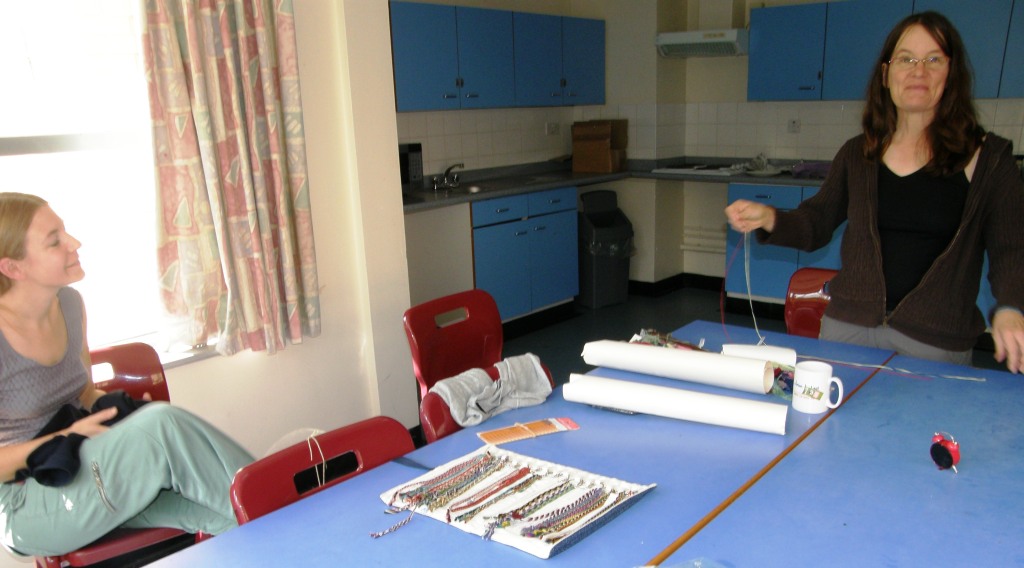
Evenings had us gathered in our communal kitchens, showing what we had learned that day and sharing new techniques with the usual flurry of enthusiastic hand gestures….doing the techniques, talking the techniques, watching (although you weren’t allowed to get away with just watching for too long!), enjoying, discussing…it went on and on.

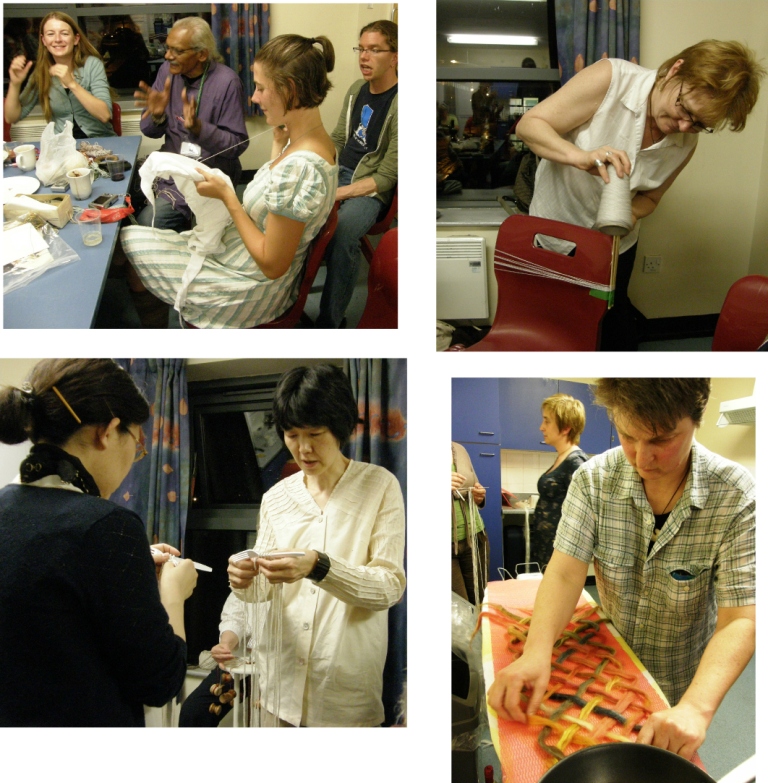
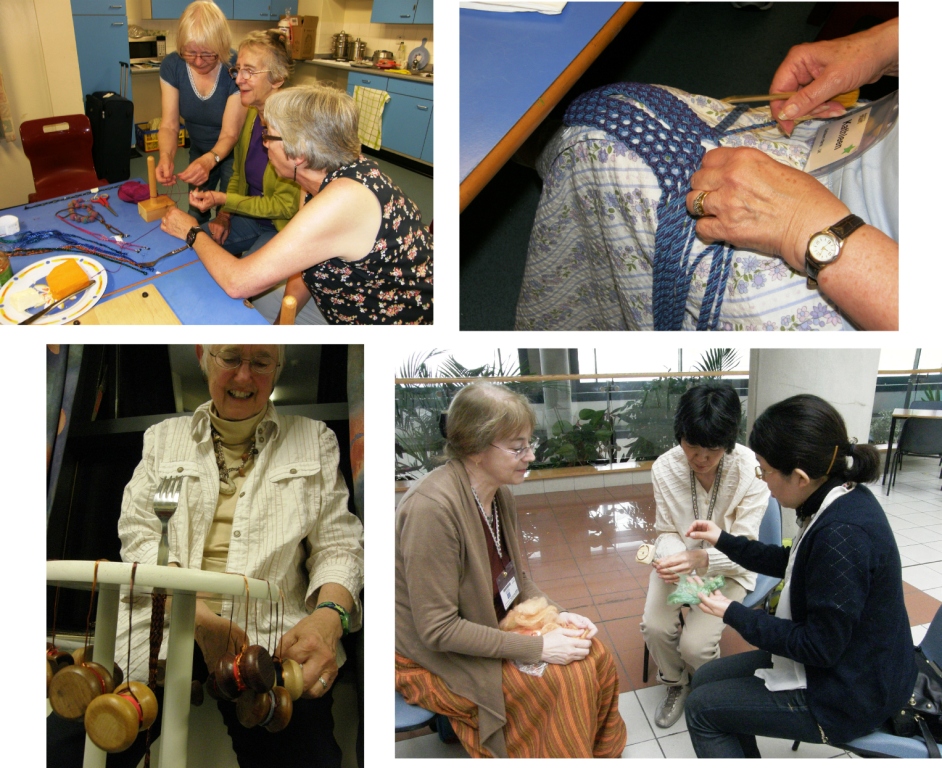
 Many a warp was wound…all Carol needed was a chair and pair of chopsticks. With an ironing board and frying pan Helen sets about making a braided and felted scarf. All hands were occupied and, if you walked in without a craft, you would soon find yourself with strings dangling from your fingers as did the Japanese visitors above.

Kathleen has a ply-split scarf in progress on her knee and Sally, Rosie and Phyllis are knotting bracelets. Ruth found the coffee break a good time to teach silk spinning on one of her home made spindles to Mari Omura who lectured on Chinese and Korean loop braids. And if you run out of chairs, as often happened, just perch yourself on the window sill as Shirley did with her marudai. Carol is finger weaving with her work suspended from the kitchen cupboard while Steve and Elizabeth can do their ply-split braiding anywhere anytime without tools or supports.

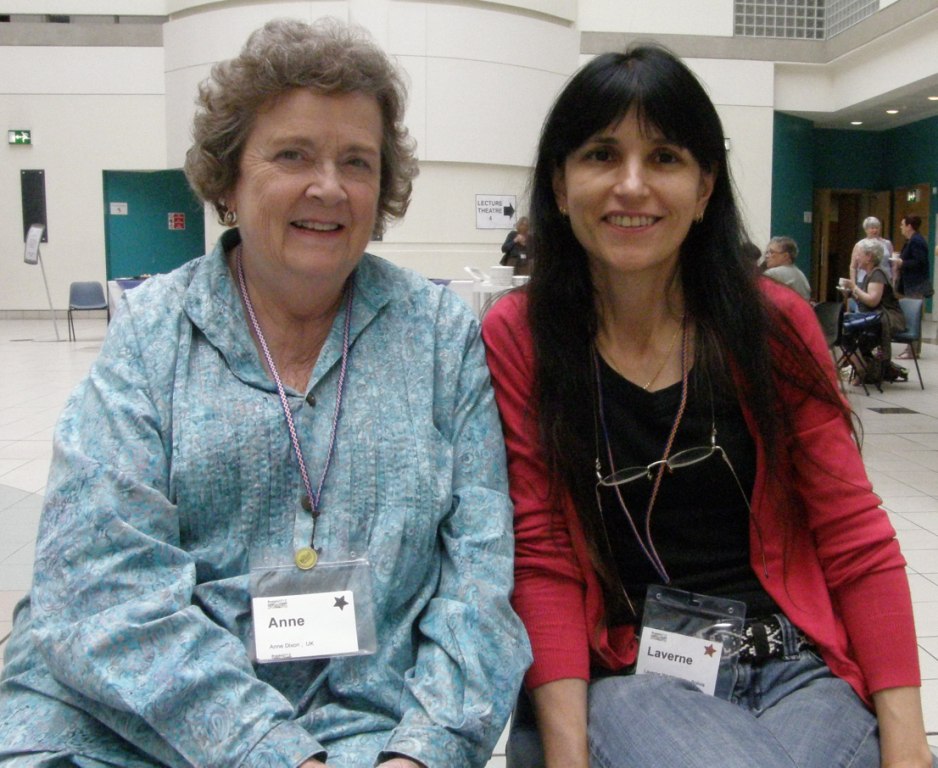
A still moment for a photo op with Anne Dixon…two “warp-faced” ladies, an inkler and a backstrapper who love to weave pick-up patterns.

Every now and then we did manage to sneak out of our classrooms to peek into others and the teachers were all very welcoming. I was lucky to find a moment to pop into Rodrick Owens’s classroom and see his stunning display of Peruvian sling braids which has made us all the more enthusiastic about his up and coming book.

I didn’t get to see Jacqui Carey’s class on Chinese Braid Embroidery in progress but I heard so many wonderful things about it and did manage to see her display of  Chinese braiding bobbins,  a few of which are pictured above. We were also able to see her Chinese braid embroidery work called “Jo’s Jacket” which is breathtaking. I am sorry, but I have nothing to show you about that.  All I can say is “just wait until you see it!”

On Wednesday we had what was called a “rest day” and were taken off to be fully immersed in the history of silk weaving in Maccelsfield with visits to the Heritage Center, Paradise Mill and Silk Industry Museum…a wonderful day out.

This, along with my weekend visit to the Museum of Science and Industry, gave me a glimpse into life at the peak of the cotton and silk weaving industries in Manchester and Maccelsfield….It really is all too much to go into here…life working in a mill, Sunday school and home life for the working children, the hardships of the mill workers, the cloth, the buttons, the costumes, the magnificent looms and machinery….it was a full day which left our heads spinning. I know that I am leaving you hanging here with a bunch of pictures with no description, but maybe I will be able to elaborate in another blog post some time in the future.

Ingrid and I were both slated to weave and braid on Thursday and Friday. Here’s Ingrid with Debbie Richardson, the amazing organizer of this brilliant event, on Thursday morning. I can see Ingrid’s enthusiasm shining in her eyes. I know that all the braiders were thrilled with her.

Errol was also ply-splitting those days and had already made himself a big favorite with his quiet presence and special dry sense of humor. He seemed to be able to just produce out of nowhere at any time one of his fabulous ply-split creations.

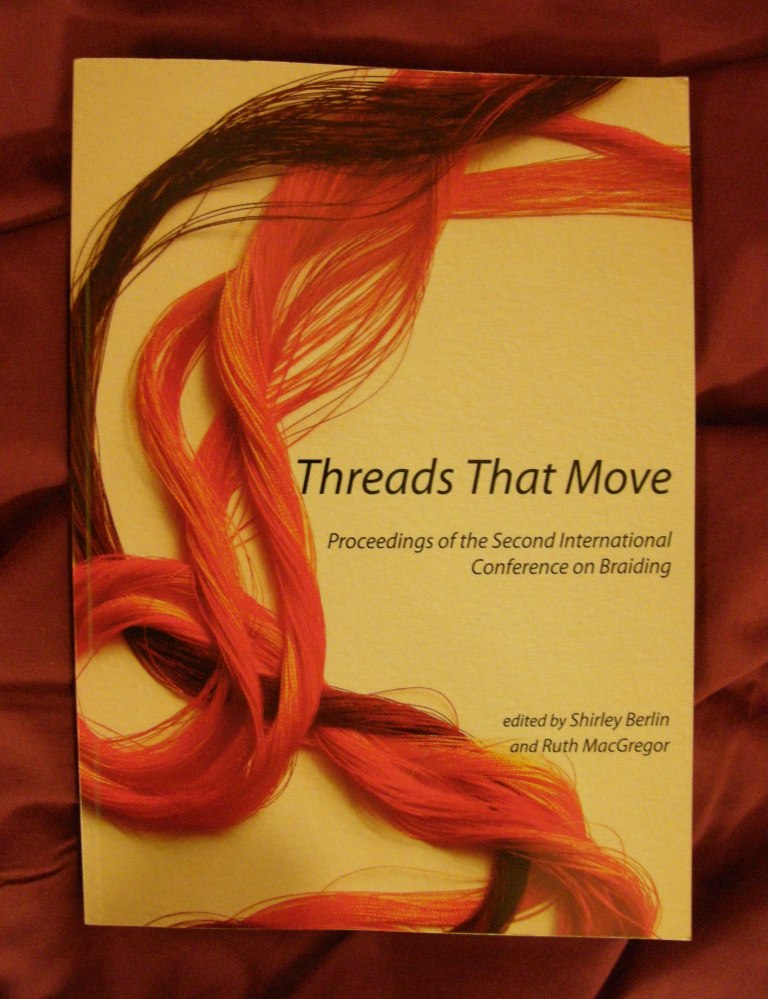
My goodness, I had a fabulous hard-working group! I suggested we not have tea break on day one and everyone was more than happy to stay in and continue working. We also started at 8am on day two rather than at 10am as scheduled. Why not squeeze as much out of this as we can?! It really was a pleasure to have such keen and tenacious weavers. Susan Foulkes joined us on day two for the Andean tubular band segment. Ruth MacGregor, who edited the conference proceedings (along with Shirley Berlin) was also there with Clare, Margot, Marge, Bridget, Janet and Mayako.

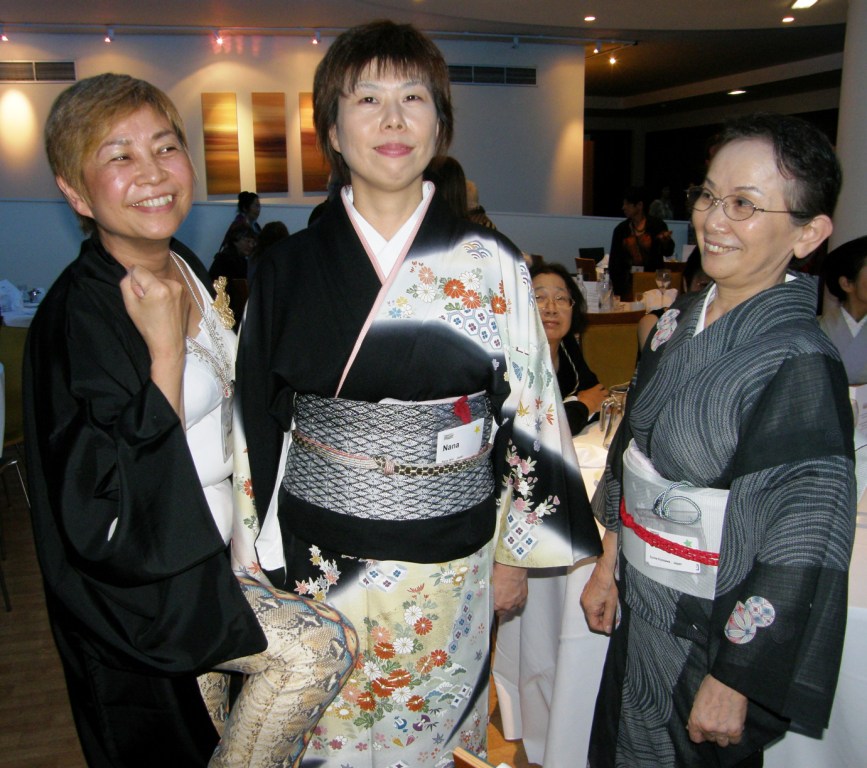
Thursday night was banquet night and a chance to congratulate and thank all involved with the organization of the conference before everyone started disappearing on Friday evening and Saturday. At the banquet it was announced that Braids 2016 will be in the hands of Robyn Spady and will be held in Seattle USA. It was a night for dressing up and our Japanese visitors did not disappoint!

And that brings me to my last night in Manchester. As I said, I am sitting here looking at the pictures and wondering where the week went and why there are so few pictures to tell this story. I hope I have been able to convey just a little of the fun we had and have you all thinking that maybe a trip to Braids 2016 in Seattle is something you should be planning.

Lucky Elizabeth and I got private braiding classes with Ingrid today. I am off to Cambridge tomorrow. I wonder if I will see Elizabeth again somewhere sometime. Ingrid always weaves with me when I am in California so we are bound to meet again soon. That kind of thought always makes the goodbyes easier.