Backstrap Weaving – Rewards

??????????????????????It is a fine comfortable feeling I have when I am  weaving away without challenging myself….I have the warping, set-up, heddle-making and loom operation all under control. I have not had to ditch a warp because of a ”fail”in any of these areas in a long, long time. I guess I am quite at home for the most part with creating motifs and charting patterns too.

But, throw in a little color challenge, I lose control and everything changes!

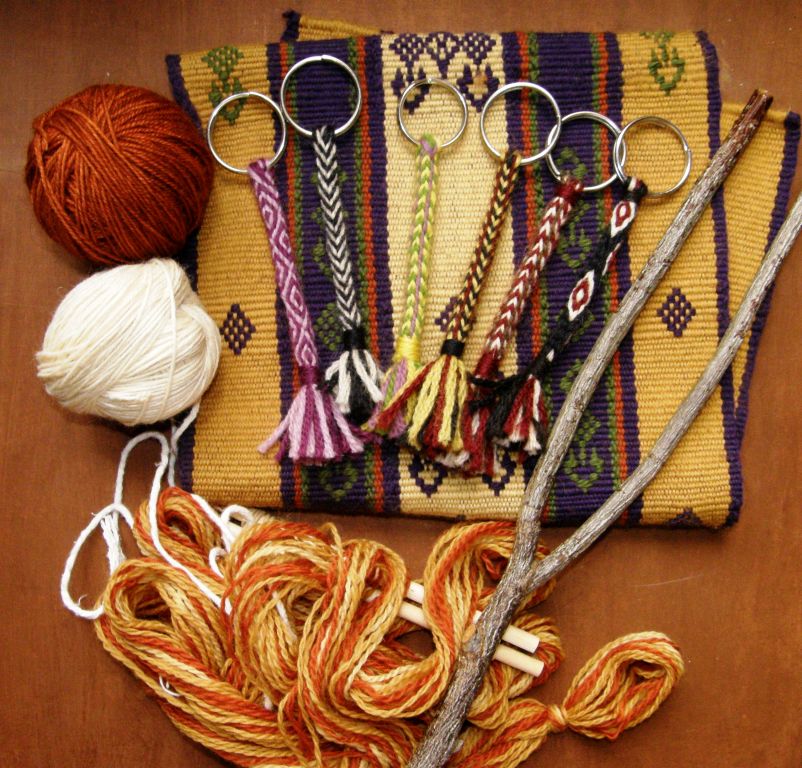
One of my personal challenges during the key fob WAL that we have been running on Ravelry this week was to take a bag of odds and ends of 3/2 perle cotton and put together some color combinations in plain weave…combinations that are not exactly natural for me. Yes, I am color-challenged. I had one result that I would call successful, the one pictured at left, one with which I am ”kind of” pleased and three ”fails”in the trash. It is funny how three colors that looked great together on their balls looked awful when warped up.

Luckily, only tiny amounts of yarn were involved. There was no point in trying to salvage them. I like burying failed projects deep in the trash and then immediately pretending that they never happened….clean slate.

I can understand the way that fellow weavers in the WAL feel when they have had to trash their projects too….things get tangled, sticks fall out, warps slip off bars before they can be lashed, crosses get lost. Throw that teeny tiny warp away, take a deep breath and start afresh.

plain weave backstrap weavingThat’s a five-strand braid at the end of my successful band. One of my students taught it to me and I love it. She had looked at me in horror when I had suggested finishing her band with lots of tiny four-strand round braids, my favorite braid for warp ends. She quickly grabbed all the ends and made this one fat attractive braid and then taught it to me. The looseness of this braid may not make it the best choice for a fob that will spend a lot of its life at the bottom of a handbag as the threads will most likely get snagged on things. This fob will hold one of my spare keys and will hang safely from a hook in my kitchen.There’s a tutorial for this five-strand flat braid here on my blog.

Sometimes it is good to be reminded of the process involved with setting up and weaving a plain-weave band on a simple body-tensioned loom. Here are a few process pictures…

This is the warping board I have been using….

???????????????????????????????It was built for me when I first moved up to Bolivia from Chile in 1998 and this is the first time I am using it. It is really quite awful. Of the ten embedded stakes, only four don’t wobble. Of the four sturdy ones, none stand perfectly straight. The whole thing weighs a ton. I would never consider warping all the way up the stakes as the difference in the length of the warp from start to finish would be noticeable due to the leaning stakes. However, I figured that with these very narrow warps we are creating for keyfobs, I could get away with using it as long as I kept my warp turns low down on the stakes. It has worked well, so I guess it is not so awful after all.

wal 3You can see the warp as it comes off the warping board with cross sticks in place. I attached it to my loom bar, and attached the other end to an S hook lashed to my bed. With the warp under tension, I made continuous string heddles around the ends on the near side of the cross and installed a shed loop around all the ends on the far side of the cross. In the last picture you see the warp all dressed up and ready to go.

Here’s a mini warping board that my friend Ruth made. She can dismantle it, throw it in a bag and to take it to weaving get-togethers in other people’s homes.

ruth's mini warping boardShe gave us some instructions and tips for making and using it….

To make one, get a piece of wood about the size of a furring strip—what I had is about 1/2 inch thick by just under 2″ wide, and a dowel at least 1/4″ in diameter, and make sure you have an Xacto or other carving knife to cut and trim the doweling. a sanding tool and a little bit of glue are all you need besides.

I recommend using the same size drill bit as the diameter of your doweling; you can wiggle the drill around a little bit in the hole to give yourself a little ease, without making it too loose.

ruths warping board 1Eyeballing all measures, I cut the board to the size I wanted (you may vary the length you want by how large is your usual carry-bag) plus two more little pieces to glue onto the ends; drilled holes to seat the pegs in for carrying, and the four holes for the pegs to friction-fit into for use. Here’s where you want to make sure your holes fit Just Right — you don’t want your pegs to lean inward at all when they’re under the tension that simple warping will put them under. If you’re unsure of your ability to drill vertically, use a drill press or a jig that ensures your drill bit is perpendicular to the wood in all ways.

ruths warping board 2You can hold the stick in your hand or set it on a table while winding your warp, which is ideal for travel use: you don’t need clamps for this part. 

Make sure you pick it up by the base when you go to finalize your warp set-up and make your string heddles, or no matter how splendidly wedged a post you pick it up by, it will pop out. If (ha. when) this happens, you can pick up your cross again from the nearest peg, and all is well.

Have fun practicing with many small warps!

Apart from the occasional color failures, I have been finding weaving these fobs lots of fun and really relaxing. I have been using them as little breaks and rewards while I slog away at my large project. My large projects are usually fun and relaxing too and the weaving is all the reward I need, but the current one went wrong and I had to unweave three days of work. I needed some little rewards to get over that!

Guatemalan natural dyed cottonHere is the fine Guatemalan cotton that I have been wanting to sample. This key fob WAL seemed like a fun way to do that. Cindy and I had bought this thread at ANWG in 2013. She bought a bag of the blue and I got the gold and we shared it. The tiny ball is the 60/2 silk that I have been using as supplementary weft.

Here’s the first fob in a set of process pictures…

wal 1

???????????????????????????????– Set up on the loom bar. I am using a fine steel knitting needle lashed to loom bar with cable ties which enables me to create a third selvedge.

– Removed from the loom bar and with the weft tail ready. I will thread that tail on a sewing needle, remove the steel knitting needle and, using the sewing needle, fill the space it occupied with the weft.

– Needle removed and space filled.

– The end of the band is fed through the ring and folded.

– The back of the band with the third selvedge that will be sewn down.

In the meantime, Julia has been using the WAL to try out some Maypole 3-ply worsted wool (before you Google that, let me tell you that, alas, the stuff has been discontinued) and some 5/2 perle cotton. We all think that the chocolate and melon together look fabulous. I like her use of the weft twining at the ends of her bands.

julia collageJanet  has been using her gorgeous handspun. She only uses natural dyes now and but still has some yarn in her stash of handspun that she colored with synthetic dyes.

janet collageThe yarn in the upper bands is Perendale lamb dyed with cochineal and walnut husks. The lower one is natural alpaca and dyed kid mohair.

JoAnne made the wee viscacha motif in Andean Pebble Weave using 5/2 perle cotton…

joanne collageLinda made three bands using stripes and tiny horizontal bars all with nice third selvedges. Joyful had me looking for the the beads I bought while in the US last spring when I saw the way she had used beads in her band. Our other Julia used the more traditional lashing method to attach her warp to her dowel and create the third selvedge. I love this combination of stripes and horizontal bars.

linda joyful juliaHere’s more handspun, this time from from Erin who actually made these fobs with Andean pick-up patterns before the WAL for an exchange amongst her weaving friends. She’ll be joining us to learn and practice some new techniques with cotton before trying them with her lovely wool yarn. She uses natural dyes.

ErinBetsy just started an Andean Pebble Weave fob with her handspun today and I will show you that next week when she has made a bit more progress, Each person’s handspun yarn has quite a different look and Betsy’s looks beautifully soft.

I am back on track with my current large project after all that unweaving. It is the third panel in my ”bird” project. This panel will have bird shapes in ikat filled in with Andean Pebble Weave motifs in three colors. I have decided to make one bird red and black and the other white and black rather than mix all three colors in each bird. I think it would be a bit too busy that way. Besides, it is quite a fiddly technique that I haven’t used all that often and I want to keep things simple while I get back into it.

???????????????????????????????What I am most pleased about so far is the ikat. I did some things differently this time and the ikat came out so very well even on the long sections. And the best part is that I know it wasn’t random and due to luck this time. There was only one tiny leak as wide as a pencil line. It feels like a nice reward for all the time spent experimenting.

And now you are going to want to slap me because I am about to complain….I kind of miss the seepage! My ikat shape is sharp and clean and in-your-face. While I am very pleased with having gained control over the leaks, I think I actually prefer that fade-in-fade-out look when the dye seeps in at the edges of the motif. Anyway, I feel prepared to go on to large circles and other curved shapes now and securely wrap long areas….yay.

Unweaving three days of work might sound like a lot of unweaving, but when you are doing pick-up it sometimes doesn’t represent a lot in terms of inches. I think I have mentioned here before that one of my weaving teachers here told me that weaving the distance of four fingers is what she would consider a good day’s work.

I spent breaks from this larger project working on the key fobs. I have been loving using the fine Guatemalan cotton with the silk supplementary weft and it is always fun to throw in work with 3/2 perle cotton and play with stripes. I have all my fob ”tools” sitting to one side ready to grab when I feel like I want to warp up for a wee fob…

???????????????????????????????…pick-up stick (optional for supplementary-weft inlay), sword/beater, pencils for cross sticks, heddle stick, coil rod (optional…I use it to eliminate ridging in plain weave) far loom bar (optional… string through the warp ends can be looped over an S hook or over a big toe!) near loom bar with cable ties…the steel needle slips under the ties. The steel needle is also optional and my use of one is not traditional. If you would like to see how a weaver from the Bolivian highlands lashes her warp to her loom bar take a look at the video on the right hand side of this webpage.

I have been using motifs that I wove into a ”Four Seasons” wool project some time ago. It’s been interesting seeing how my charted motifs look in this very fine cotton. It seemed fitting to weave that snow flake even in the middle of summer down here. Julia showed us snowy scenes from the window of her Pennsylvania home.

???????????????????????????????Linda gave me a great reminder of how luscious a bold solid color can look in warp-faced plain weave. She has been weaving her fobs using a pillowcase as a backstrap and decided it was about time she had a woven one.linda backstrap

She used a cotton yarn that I had never heard of …Luisa Harding’s Jesse…and it really looks beautiful. I will get to meet Linda this spring and will have a chance to look at this up close. Now I have the urge to make a whole bunch of fobs in bold bright solid colors like this! Maybe some of my wee balls of 3/2 perle cotton will do the trick. Beads, solid colors, handspun..I have been rewarded with lots and ideas and motivation in just one week of WAL.

??????????????????????


Backstrap Weaving- The Flying Kangaroo

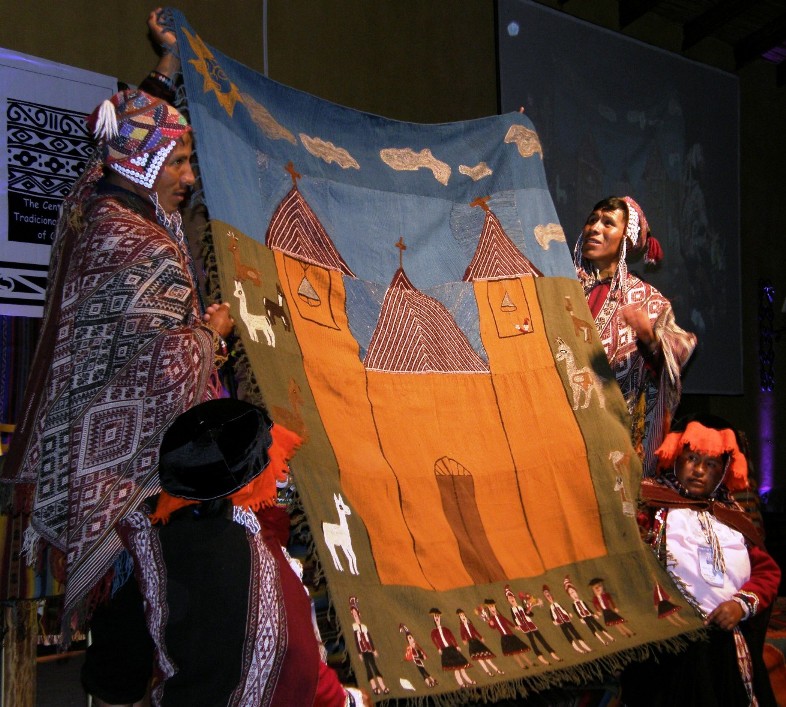
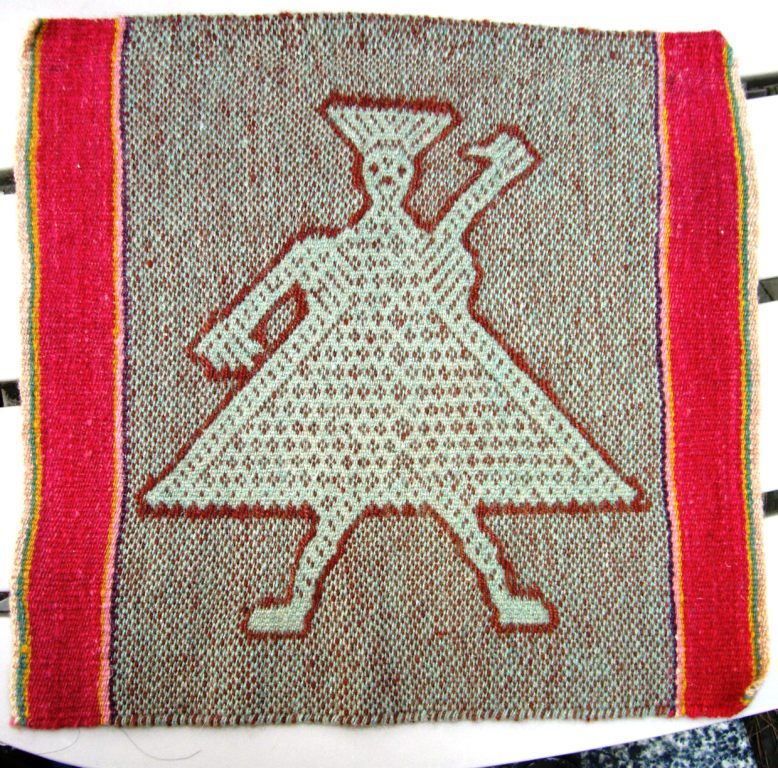
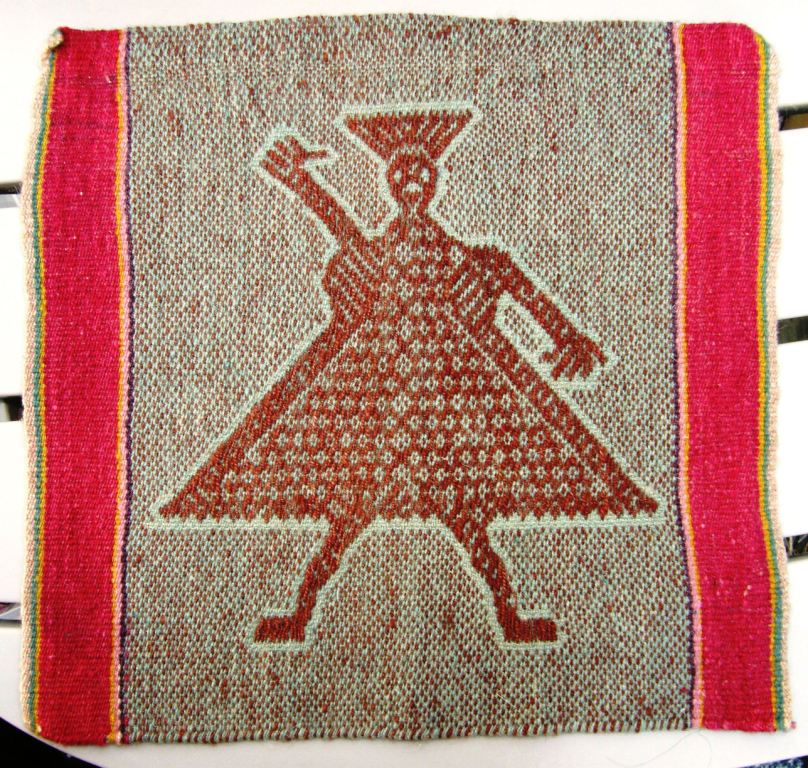
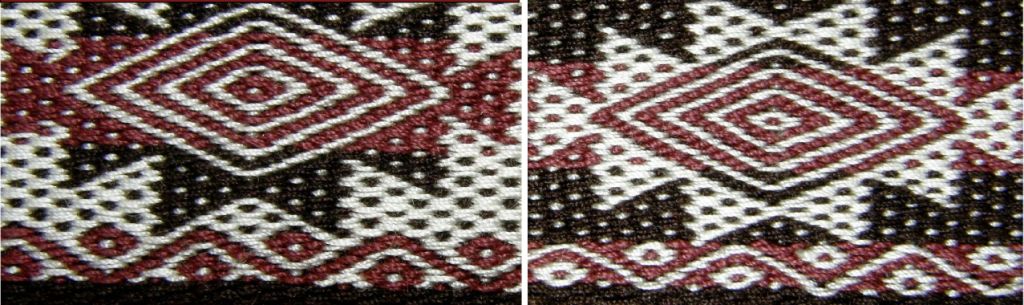
I took pictures of both sides of a lovely little square of weaving that my friend Virginia purchased when she was at Tinkuy 2010 in Cusco, Peru. It was to be part of a piece submitted for the annual weaving competition between teams of weavers from the various communities that form the Centro de Textiles Tradicionales de Cusco.

The competition challenge had been for weavers in each community to weave a series of thirty-six thirty-centimeter squares that would be sewn together to form one large piece. Many squares were woven but only the best selected. Each weaver had to create a perfect four-selvedge square that could be sewn to the others to form a seemingly seamless piece of  fabric. Attempts to include a square that was even ever so slightly off would result in an imperfect overall piece of fabric.

Here are some of the winning pieces from that competitionin 2010….

competition winner bThis entry has squares that were created using the ticlla, or discontinuous warp technique for which the community of Pitumarca has become renowned. Each colored square has a rectangle of pick-up patterning embedded in plain weave, something that only be achieved by using discontinuous warps.

competition winner aThe weavers of Sallac included squares of ikat amongst squares of complex pick-up patterning.

??????????????????????The takers of first place from Chahuaytire presented a deceptively simple piece entitled “matrimonio”. You have to look very closely before you realize that the piece comprises thirty-six masterfully color-matched and pieced-together squares.

Here are some of the pieces from last year’s competition…

cttc competition 2013But, as I mentioned above, not every square submited by the weavers can be accepted for the final piece. I imagine that there is much frustration and disappointment as hard work and dedication is rejected.

The sweet piece that Virginia had bought back in 2010 was actually one such rejected square. At least it managed to find an appreciative owner and a good home and the weaver was compensated for her hard work. I love the figure on this piece. To me, it looks like she is hitch hiking. She looks strong, bold, and independent yet, friendly and good humored.

??????????????????????

??????????????????????It is such clever and creative use of the supplementary-warp technique. I am amazed at how each and very finger on both hands is clearly defined and at how nicely the legs have been shaped.

I am guessing that this figure was supposed to be just one small part of a story told in the finished piece with its thirty-six squares. I am intrigued by this and wonder what role this humorous lady played. What is she doing….what is she saying? What is that “hitchhiker’s” thumb indicating?

Maybe someone who was at Tinkuy 2010 took a picture of the entire piece. I would love to hear from you if you did. These pieces were hung in the co-op store in Chinchero and I somehow missed this one. Quite likely if I had seen the entire piece I would not have even noticed this one female figure and would have been captured by the piece as a whole rather than by its individual parts.

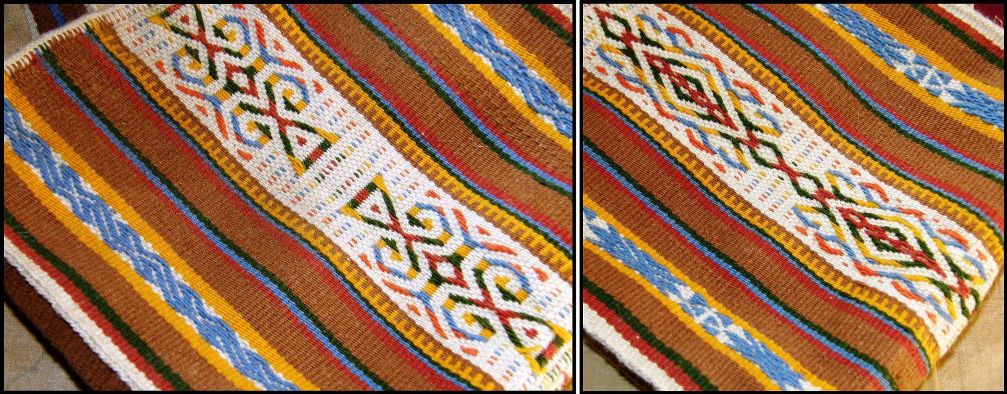
Other pieces that Virginia shared with me during my stay with her at South Lake Tahoe included this very colorful ticlla piece with three-color complementary-warp pick-up patterns. The four selvedges in each half of the cloth were created without having to abruptly interrupt the pick-up pattern.

??????????????????????There were also pretty tubular bands woven independently and as edgings…..

??????????????????????And sprang bags from the tropical lowlands of Peru…

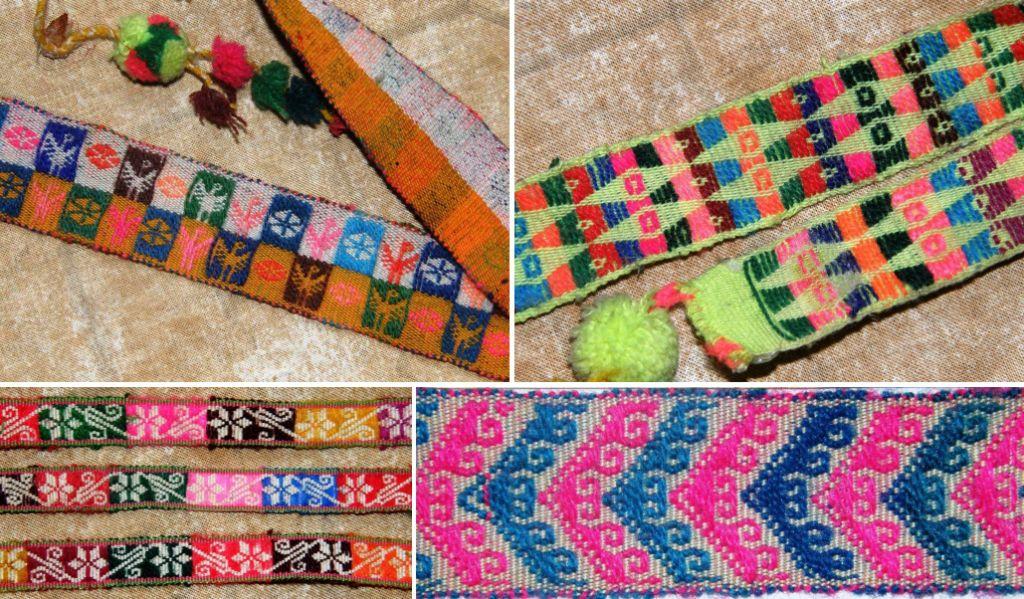
??????????????????????And a reminder that not all highland weaving in Peru has gone the way of the textiles that are being produced by the Centro de Textiles Tradicionales de Cusco with their fine handspun naturally dyed yarn and intricate pick-up patterns. Cheerful pieces with relatively simple patterns made with heavy yarn and bright synthetic colors are still very much in use in many places…..

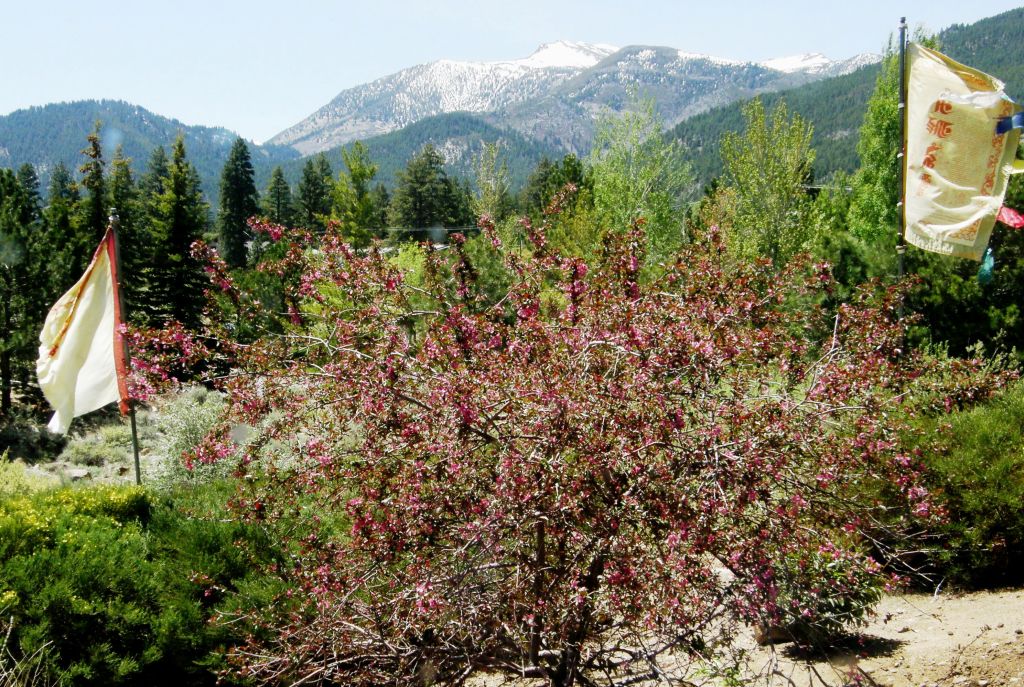
???????????????????????????????Needless to say, I thoroughly enjoyed my stay at Lake Tahoe and the group with whom I wove there. From beautiful mountains…

???????????????????????????????

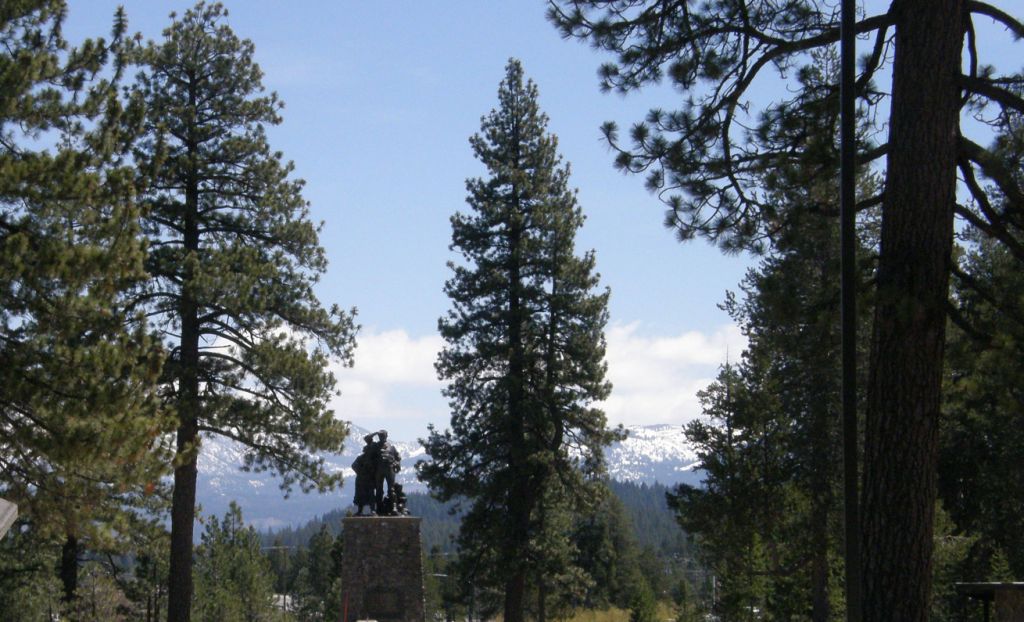
….to  Donner Pass and tales of the ill-fated expedition after which it was named…(Suzanne showed me around the Truckee area)

??????????????????????

….to the glorious lake itself…

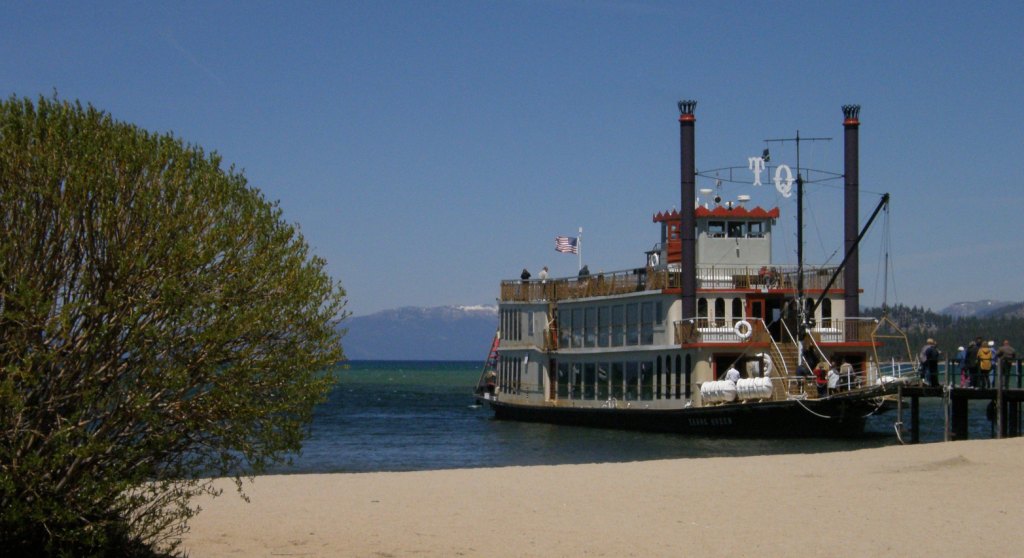
??????????????????????Virginia took me out on a boat crossing and it was spectacular!

??????????????????????And what about the weaving?….three days of Andean Pebble Weave in a resort on the lake shore…what fun!

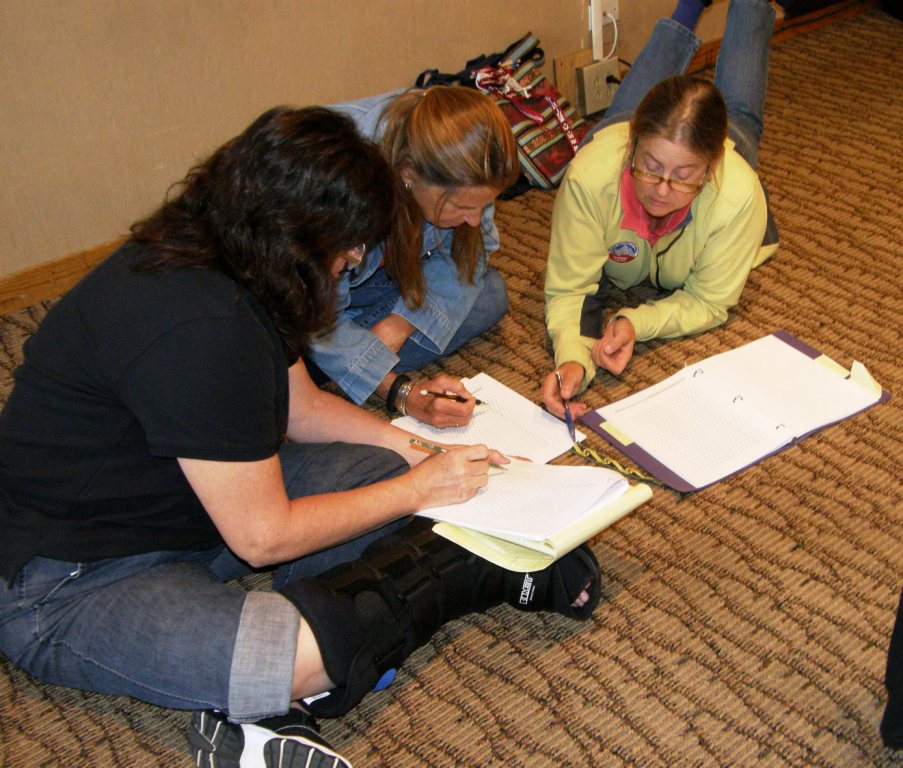
??????????????????????There were ladies who liked to get down on the floor for a session of “team charting’, broken leg and all! Several members of this group had been playing with pebble weave on their four-shaft looms using the instructions in my Andean Pebble Weave book. They were now keen to set it up on a backstrap loom and found that the backstrap loom has a few advantages over the floor loom especially when it comes to saving sheds and creating pick-up shortcuts.

Here is a gorgeous bag that Jen put together from fabric she wove with pebble weave patterns on her floor loom…

jens pebble weave bagAfter the gathering, I stayed with Jen and her sister Elizabeth in Reno with this gorgeously distracting view from the kitchen window…

??????????????????????While all that was happening outside and I tried to stuff all my gear back into the massive bags that I lug about with me on these trips, Jen and Eizabeth calmly wove on their backstrap looms and worked on the Andean Pebble Weave pieces we had started together.

??????????????????????I am thinking that those looms in the background might be left to gather dust for a while!

This is what Jen was weaving…her own adaptation of a Tarahumara pattern…

??????????????????????Elizaebth wove as far as she possibly could so that she could squeeze in the last parts of her design and have a matching start and finish…

??????????????????????I will be seeing these ladies back at the Lake for another gathering in the fall…yay!

From there I headed northwest to stay with my friend Betty. We had two gatherings there…one for beginners and another for learning all kinds of pretty finishing techniques. We used handwoven pieces of fabric which had been made by my Bolivian weaving teacher Maxima and other ladies in her co-op. One piece was used for sampling the new techniques while the other was to become a wee pouch. The pouch could be dressed up with the embellishments that we had practiced together.

linda's nawi awapa bandsLinda really took to the tubular band weaving and came  on the second day with  two finished “eye” bands.

finishing touches class backstrap weavingSharon’s sample cloth has a sewn tubular band and cross knit looped edging. She also applied coil stitches to one end which is the embellishment that Bolivian weavers sometimes use to decorate the bottom edge of their chuspas.

???????????????????????????????Here are some of the ladies weaving and sewing accompanied by snoozing  Trouble, the cat.

Weaving in Betty’s studio is the closest thing you can get to being outdoors with its floor-to-ceiling windows and skylight.

betty's studio for backstrap classDuring my stay a group of us went to the meeting of the Portland Handweavers Guild where Rosalie Nielson presented A Cacophony of Kumihimo….a talk on the history of these braids in Japan and her own personal explorations with the techniques.

???????????????????????????????Dozens of Rosalie’s gorgeous braids were displayed amidst her stunning rep weave work.

Next stop… Seattle…. to re-connect with people I had met at ANWG in 2013 and Braids 2012 as well as to meet new weavers. A talented group of tablet weavers came who slid very easily into the basics of backstrap loom operation and basic patterning techniques. John, a skilled braider and ply-splitter, decided to try his hands at weaving. His wife Stacey quickly settled into it and both she and Lynn found themselves very much at home on the floor while the others were happy to stay in chairs.

Lynn at home on floor backstrap weavingSeattle was glorious in pre-summer warmth…gardens in full bloom and vistas of the Cascades at every bend. It is little wonder that my planned weekend stay in Seattle back in 1992 turned into three weeks!

Annie brought in an old exquisite hair sash from Jaceltenango, Guatemala which had been sold to her by a weaver from Laos many years ago in  midwest USA…how these wonderful weavings get around! John brought some of his ply-split work to show as well. I haven’t been able to find John’s website but he has some Youtube videos on his Takadai work….it’s a lovely process to watch.

I can just imagine Braids 2016 in this corner of the US. It’s going to be HUGE!!

hair sash and ply split braidsHere is the next stop…

??????????????????????Did you guess Austin, Texas? And that was not the only display at the airport. The Weavers and Spinners Society of Austin had an exhibit there too aptly entitled ”Flying Shuttles”. I had met seven of the weavers who had things on display ranging from felted sculptures to basketry to wall hangings to wearable fabrics to ply-split braided jewelry. Three of these talented ladies later wove with me.

I wove Complementary-Warp Pick-Up with some new faces as well as returning weavers. It s my third visit to Austin and third stay with Eileen and Guy. Eight weavers came aged from 18 to 79 producing sweet bands decorated with pick-up patterns. Eileen and Guy’s park-like back yard perched above a pretty creek along with a Saturday evening symphony concert made this a perfect venue in which to wind down at the end of my trip.


And then it was…..Hello Sydney!!

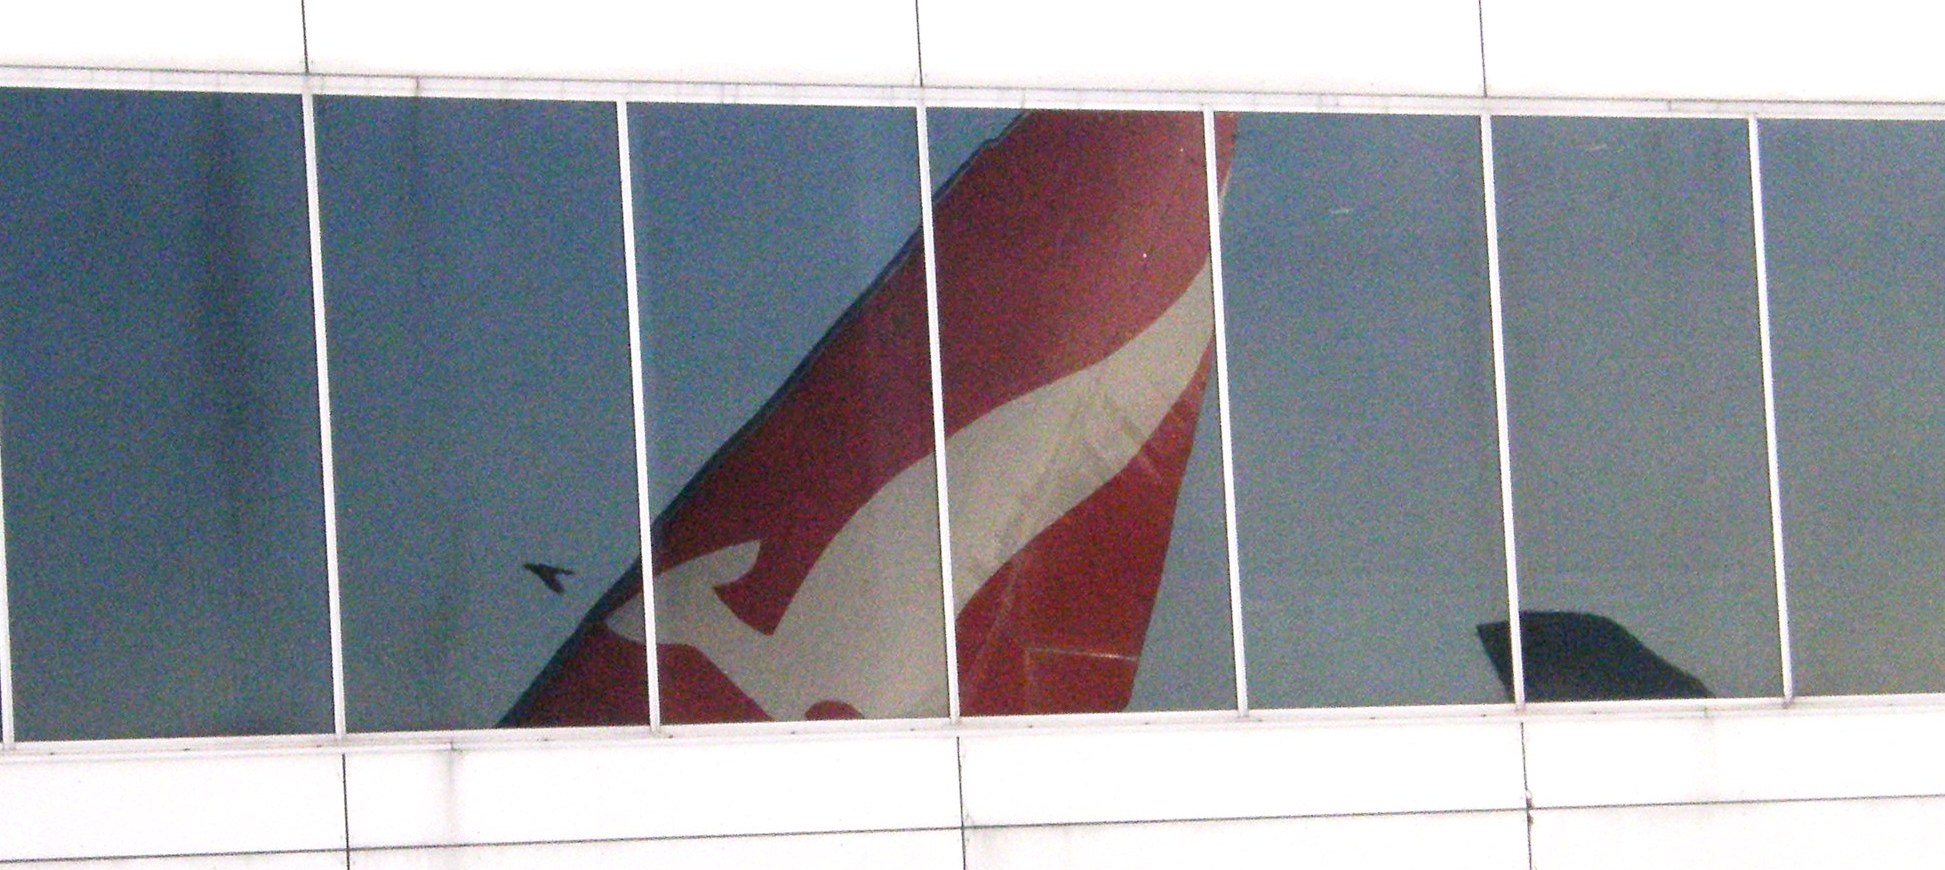
??????????????????????The Flying Kangaroo comes to rest at Sydney airport…

??????????????????????

A couple of weeks to recharge with family and then I shall be doing some weaving here. It is strange to have the days getting shorter, see the fallen leaves and feel the slide into winter after the lengthening days and blooming gardens in the US. Still, the garden is full of color and sound with visits from flocks of raucous lorikeets every evening!

See you next week….

???????????????????????????????


Backstrap Weaving – Two-fers

One of the things I like about the discontinuous-warp technique I have been playing with lately is that it gives me not one, but two opportunities to practice creating four selvedges….a two-fer. So, with the new piece that I warped this week I get two more chances, which makes five in total these last few weeks. I think my skills are improving. At the very least the process is becoming much less intimidating to me. I wonder if one day I will shrug it off and say that it is “normal” as my young teacher  from Pitumarca, Peru did.

Four-selvedge bands woven by Bolivian teenagers-in-training.
Four-selvedge bands woven by relatively new weavers…Bolivian teenagers-in-training.
The first piece on which I learned the four-selvedge technique in Potosi, Bolivia
The first piece on which I learned the four-selvedge technique in Potosi, Bolivia.

discontinuous warp ticlla closing the gapHere’s where I was at last week when I wrote my blog post. I still had the heddles in place and and had just removed the shed rod from the left hand side.

??????????????????????And here is the piece with the gaps closed. There are a few wobbles here and there but I am pretty pleased with it. Next came the tubular edging band and it took me five attempts to settle on the pattern and size. Part of the problem is that I don’t have much of a wool stash and the colors are very limited so, in the end I had to go with a heavier tubular band than I would have liked.

sewing tubular bandLate night weaving and sewing with poor lighting…not a good idea! I had to unpick a fair bit next day. You can just see near the upper left corner the end of the tubular band. I was left with the problem of what to do with all those warps ends. They are easier to deal with when you sew a tubular band to a bag. The band can be continued down into the bag, its end sewn over and hidden away inside. When you look at an Andean textile that has been finished this way, you have to look  hard to find the start and finish of the tubular edging. On all the pieces I have seen, the end has been sewn over and over and the unwoven warps cut. It has been done so neatly that you can barely tell that the resulting blunt end is there. This is something on which I need to work!

So, I wrapped the place where the start and finish of my band collided. It was obvious and ugly and I wanted to hide it. The small bit of  wrapping looked pretty awful. My solution was then to extend the wrapping to about an inch and wrap all four corners  the same way. This would  transform the wrapping into what we weavers like to call, with tongue in cheek, a ”design element”. You can see two of the wrapped parts below.

threaded in tubular band patternI created a threaded-in pattern for the tubular band rather than do something with pick-up. I warped the pattern off center so you can see the whole design sitting next to the upper face of the cloth rather than having to tip the edge to view it. The band on the back side of the cloth is in a solid color. Underneath all  that you can see this week’s new discontinuous-warp project…another two-fer.  It looks like I will be able to use that discarded tubular band warp from last week after all. I think the colors match this new project well.

What am I going to do with these pieces? Nothing! They are samples, practice pieces, notes and lessons in cloth. I would like to have one of the pieces in my wall hanging series represent the ticlla, or discontinuous warp technique, and so, the pieces I am currently weaving are part of my warm-up for that.

???????????????????????????????I so love sitting in front of a fresh warp like this!…terracotta and natural discontinuous warp in the same Navajo wool warp yarn that I used for the Four Seasons piece. This time I warped for a tiny strip of simple pick-up down the center and re-spun some brown wool to match the twist of the Navajo warp to use as the border color. I wanted to use a complementary-warp technique.

I wanted to decorate this one with supplementary-weft patterns again but I chose a “discontinuous” method this time in that the weft does not travel all the way across the warp to turn at the edge. The weft-turns shadow, or outlines, the motif.

discontinuous supplementary weft weft turnsThe terracotta supplementary-weft yarn that I used could have been thicker. I didn’t get as good  coverage with it as I did with the lighter color. The light bumps at the edge of the terracotta half of the cloth are the main weft turns. I had to go back and forth between white and terracotta weft as I didn’t have enough of either alone to complete the project. Those contrast color weft-turns will get covered by the tubular band later. The turns of the supplementary weft lie beside the motifs in a nice outline.

I wove the pick-up pattern wondering if there was a way I could close the gap between the two woven ends without interrupting the pattern. It was a four-shed pattern and I hoped that I would be able to fix things so that I would be in just the right shed for the last weft pass. I think a lot of it came down to luck in the end. The weaving fairies were with me :-).

gap closed on oe side of discontinuous warpIt worked! Now, let’s see if I can manage it on the other side. Hey, weaving fairies, don’t go away yet. I am disappointed with how noticeable the change from white to terracotta weft is in the white section…oh well.

I am very happy with my wee bit of pick-up on this piece but, before I get too carried away, here’s a reminder of what the Pitumarca weavers achieve as far as pick-up is concerned….

Pitumarca ticlla with supplementary warp pick upGranted it is a little easier to weave supplementary-warp pick-up in the small space at the finish of a four-selvedge piece but, oh my gosh, look at that! I would say, and this is just my guess, that the weaver closed the gap at the outer edges where you can see the tiniest fraction of an inch that is without pattern. The natural alpaca colors are so gorgeous. I don’t remember where the start and finish of the tubular band is located on this piece but your eye is certainly not drawn to any obvious spot where the weaver may have finished.

finishing-backstrap-weavingsAbove you can see a weaver from Pitumarca, Peru nearing the end of the warp. You can see how small the space in which she  picks up the patterns and operates the heddles is. One the right you can see how a four-selvedge piece with supplementary- warp patterns (part of a discontinuous-warp piece) has been finished.

While waiting for the brown yarn to dry and have its twist set, I thought about other possible ways to hide the join in tubular bands on these flat woven pieces. Maybe some cross knit looping? I practiced on one of the braided keyfobs that I have been making, the first one which was bit on the loose side. It could be sacrificed for this experiment.

OLYMPUS DIGITAL CAMERAI am not convinced but I will keep it up my sleeve just in case. I think it looks cute, as if I had knitted a wee wool sweater for the braid! I added another Margarita braid to the collection in red and black. 

Jennifer finished her stunning hemp piece with pick-up patterns of Chinchero, Peru. I have charted these in my second book. I like to think of complementary-warp structures as two-fers…one weft shot produces pattern on two beautiful faces.

jennifers chinchero pattern finishedNow she has to choose which face with be the outside of the bag she is planning. I am afraid that none of us in the Ravelry group were helpful when she asked us for opinions. We all liked both sides equally, of course! 

And speaking of bags, Julia once again wowed us with her weaving, piecing together and sewing skills….her creativity!

Julias bag with tubular band strapThe main fabric was woven on her floor loom and is stunning in itself. CindyQ, also in the Ravelry group, wove the blue supplementary-warp pick-up band and had given it to Julia as a gift. Julia’s idea for making a shoulder pad for the slim tubular band strap is so clever. She wove the band for the strap in tubular form and then wove it as a flat band for a while. She braided the flat band  to form the shoulder pad. How cool is that?

Kim varland rabbitbrushstudio dot blogspot dot com(2)Kim Varland, yet another Ravelry weaving buddy, has been playing with the yurt band border pattern that I have charted and explained in one of my tutorials. I love her color combination and she shows more examples on her blog.

Kim has used what I call a simple warp-float technique. While the pattern on the back side of the band is attractive and interesting, it is not truly double-faced. I have shown these patterns to weavers who all love the way it looks on the back.

The other day I was explaining to one of our new Ravelry group members what was meant by a “complementary-warp structure”. I was thinking that surely I had put a description of this somewhere on my blog with lots of pictures. I found it in a post back in 2011 which I had written just before going to Cochabamba to weave with my teacher Maxima. I had promised to start a tutorial page on my return which explained some of these terms which are used for some of the common structures woven by backstrap weavers here in South America.

pebble a and bIt turns out that I never did and so , I will copy that portion of the blog post to a new page and will add some other structures to it this week….only two and a half years overdue! Above you can see the double-faced, or two-fer nature of complementary-warp structures.

Backstrap Weaving – Another Woolly Week

Another woolly week in the middle of summer! What’s going on? I have friends in Pennsylvania and Vermont writing and telling me about the extreme cold they have been suffering, shoveling endless amounts of snow, using crampons to get about in their yards and feeling almost like they can’t breathe. And then there’s all the talk about the Winter Olympics, although I have to admit that I am not feeling too festive about that right now with the way things have been going in the lead up.

Perhaps the chilly scenes in my head have had my hands reaching for wool. I am on a roll and can’t stop! I have to say that I actually felt more uncomfortable handling fine silk in the heat last summer. So far the wool has not been bothering me.

four selvedge wool warp backstrap weavingHere is where I was last week with a couple of inches left to go on this four-selvedge wool fabric. The next step was removing the shed rod. It is a little heart stopping removing that rod. I clung and clung to it. With one swift movement the cross was gone! It felt like the safety net had been pulled out from beneath me and I was left floundering in a mass of threads.

closing the gap discontinuous warpHowever, there are benefits to removing the shed rod. It means that when you raise the heddles to create a shed, you can actually insert two weft shots. One shot, if you look at the picture above, will weave the fabric on the left and the other will weave the fabric on the right….the two sides that I am attempting to join. And then you use a needle to pick up the threads that were formerly held on the shed rod. Again, two weft shots can be placed within that shed. Eventually the heddles are removed and it’s all needle weaving after that.

Finally, I got to the point where I could see that just two more shots would do the trick. The problem is that you can’t finish with two shots in the same shed. You have to squeeze one more between them. So, I could either put in one more shot or three more. One more was not going to be enough and three more would be too many. This happened when I finished the alpaca ticlla piece on which I had studied in Peru (see picture above). I squeezed in too many weft threads and it really looked too tight. I removed one and was left with two in the same shed, removed one more and was left with a noticeable gap and a weak spot in the fabric.

discontinuous warp piece off the loomHere is the finished piece. The gap is most noticeable in the white section (notice how the fabric curls due to the over twisted yarn that was used).

So, I decided to go with one fewer weft shot than I felt was necessary and had a slightly sleazy weak spot in the middle of the piece.

Two things marked the spot where the last weft shots lay…a darkish spot right in the center which was a dimple in the cloth, and  wobbly edges. The edge warps simply ended up being too long once I started closing the gap and there wasn’t a whole lot I could do about it at that stage. Loose edges would not support  the weft turns well.

I didn’t like the dimple. I didn’t like the loose weak feel of the fabric in the middle. What to do?

??????????????????????And then it occurred to me…if I needed to stuff more weft into that space to firm up the fabric, why not make the weft a colored supplemental one? So, that is what I did. I needle-wove in a motif with supplemental weft. It turned out to be surprisingly easy to use the blunt end of a needle to get under the warps and weave in the motif. I can’t see myself ever getting away with that with cotton. But wool is friendly and stretchy!

The dimple disappeared but the wobbly edges didn’t. Everything  is a bit on the wobbly side in that area but at least the fabric is now stable. Believe me, it is really firm now! You can see the purple motif in the center flanked by green ones on the sides.

four selvedge piece second finishAnd I did have problems as anticipated with splitting the ply with the needle when needle-weaving. I thought that I had it under control only to find five skips on the back of the fabric where one of the strands in the 2-ply had not been caught on the needle. Oh well.

Lessons learned….when weaving a four-selvedge piece, keep an eye on the edge warps as you go so that you don’t end up with loose ones as the gap is closed. Avoid loosely plied thread. I split the ply so many times and had to back the needle out for a do-over and then there were several times that I didn’t even notice that it had happened.

This piece will be set aside until I can get more purple KnitPicks Palette for the tubular edging band and the sides. I have not one scrap left! I am still hoping to use this as a sleeve to protect a laptop computer.

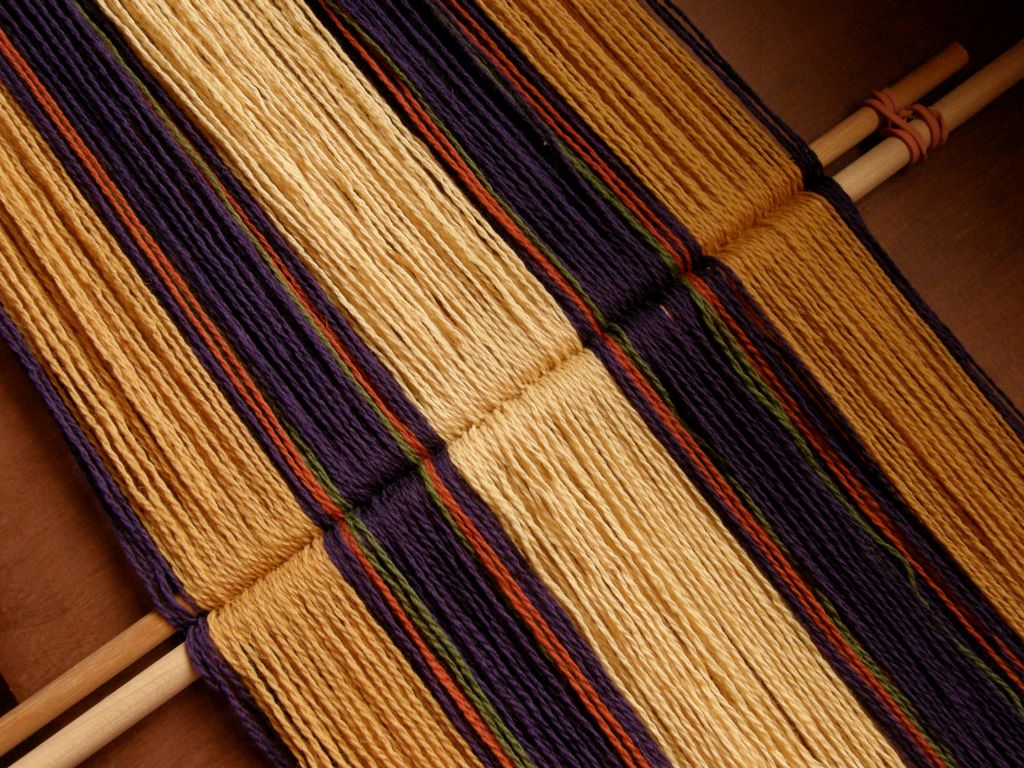
??????????????????????As I said before, I was on a roll…a woolly roll. I found the wool warp yarn for Navajo-style weaving that I had bought at the Mannings last spring. During my stay there, Carol, Tom and Sara had let me dye it using their dye workshop supplies. I found it strangely heavy for Navajo warp but it had a good firm twist..no chance of splitting those strands apart…and any overtwist seemed to have settled.

I had bought it to use for a discontinuous warp project. In order to benefit from the lessons learned in my latest four-selvedge experience, I thought that I may as well  dive into a ticlla project, as the discontinuous warp technique is known in Pitumarca, Peru . The ticlla technique would give me the fun of weaving not one, but two, four-selvedge panels in the one piece.

Of course, my piece would be very, very simple! Nothing like these masterpieces!!…..

weaver from Pitumarca with discontinuous warpThis piece has multiple four-selvedge panels each incorporating complex continuous pick-up patterns.

bhutan-and-discontinuous-warp-from-peruThis ticlla piece, from the collection of my friend Betty, is stunning in the simplicity of its plain weave structure. However, the layout is anything but simple. Betty has adorned its center with a small brooch from Peru which matches so perfectly the colors of the yarn.

So, here is my warp…..

ticlla discontinuous warpI wish I had had a warping buddy to help with this. I finished it late at night and put the two sets of cross sticks, one for each panel, in place. You can see that I had used a metal rod around which to dovetail the threads in the center. I guess I was bleary eyed as, when I got up the next morning I could clearly see that despite my best efforts to keep everything straight and even, the metal rod had become distorted. I unwound the whole thing and started again using a wooden rod in place of the metal one. 

Below, there is a reminder of the warping path for one kind of ticlla warp so you can better understand what is going on above. You can see that the ladies from Pitumarca are  using a wooden rod for their center stick. I have seen pictures of weavers preparing these kinds of warps with metal rods but I think that two pairs of hands might be needed in those cases to help keep the tension on the rod balanced.

ticlla warp pitumarca peruI had four colored panels and, perhaps because I have had my mind on crazy weather patterns lately,…the extreme cold in the north and the extreme heat in Australia… I came up with a Four Seasons theme and designed some very simple motifs. There were relatively few warps to work with so I couldn’t include much detail and the weft floats could not span more than five warps without being awkwardly long.

??????????????????????There are the Spring and Summer motifs  in place…flowers and suns. The bulky turns of the wool supplementary weft on the edges will hopefully be covered later by a tubular edging band. In this picture I have already removed the dovetail stick and woven on both sides of center for stability. 

As for the edge threads, I did not secure them in any permanent way when I finished warping. I have them hitched to the loom bar so that I can easily get at them and pull to take up any slack as I go. Hopefully they will be as taut as all the other threads when it comes time to close the gap in the weaving. I want to avoid having wobbly edges on this piece.

Four seasons discontinuous warpFall and Winter…leaves with breeze lines between them and a snowflake. Now, all that there is left to do is keep an eye on those edge warps and close those gaps.

discontinuous warp ticlla closing the gapWith less than a quarter inch to go, I just removed the shed rod from the left hand side (I was using a fine metal rod as shed rod at this point). I might just be able to get one shed out of the heddles before removing them and needle weaving. Exciting!

More woolly pursuits….

wool work backstrap weavingI made another keyfob braid. The terracotta and white Navajo warp is standing by for another. I also wound a seven-foot warp with the KnitPicks Palette for a tubular edging band. I was impatient to edge that computer case piece. I went as far as weaving and sewing it to the top edge before I decided that the edging band really need to be based on purple. I will just have to be patient and wait until I can get the purple yarn. Maybe I can use this warp to edge something else.

I uncovered the forked stick that Janet found for me in our garden ramblings when I was on her farm last spring. I had tied the prongs to train them to hold the right shape and it looks like it worked. Should I strip its bark or does this more rustic look contrast nicely with the smooth forked stick that fr. Kyriakos made for me?

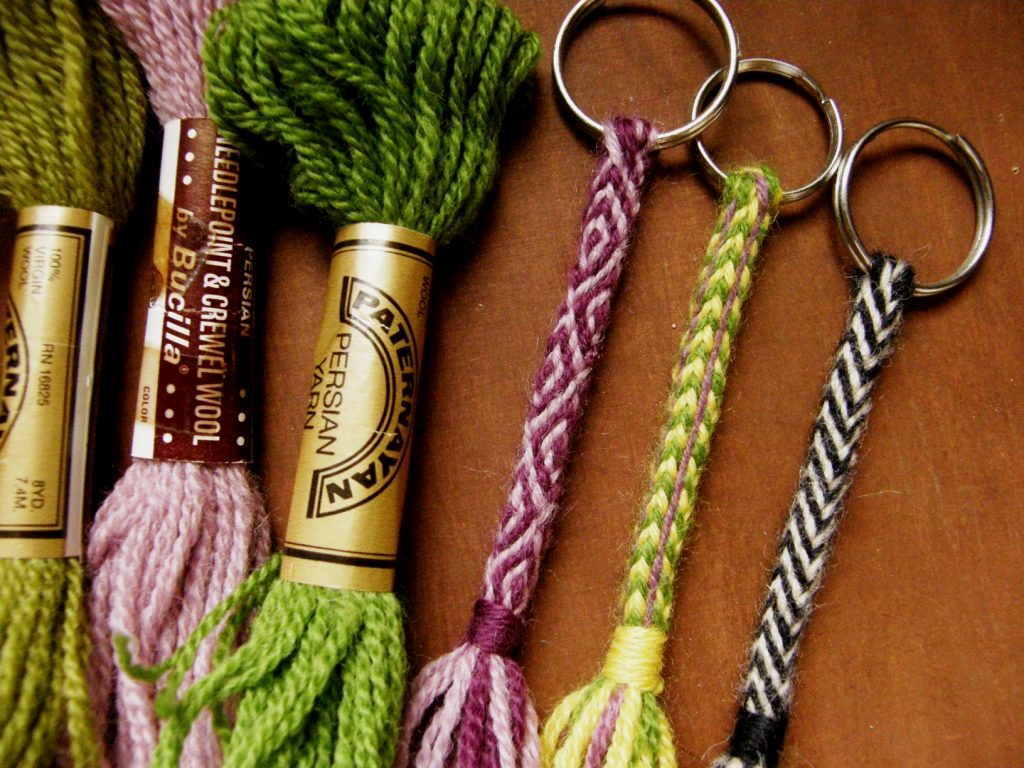
Margarita braid Peruuvian slingsOne of my weaving friends gave me a bag of Paternayan and other wool yarn from her stash and it works beautifully for my keyfob braids. The latest one on the left is the pattern that  my sling braiding teacher in Peru called “Margarita”. There is a tutorial for it here but I recommend starting with the Palma braid first.

I have not 3ven scratched the surface of the world of Peruvian sling braids. In fact, what I learned in Peru is not even a pin prick on the surface! That is why we are all eagerly awaiting the book on Peruvian sling braids on which Rodrick Owen is currently working. In the meantime I will practice the ones that I was taught by Zacarias. Dare I try the Margarita with color changes?  I haven’t tried it since my instruction in Peru in the nineties and am wondering just how good my notes are. We’ll see.

Using that Navajo warp yarn reminded me that when I was in Australia, I got to see a Navajo-style weaving that I had made in 1995 when I lived in Chile. I had given it to my brother when he visited me in Bolivia in 1998 and he has placed under glass on his dining table. How long ago all that seems and there’s my weaving looking like it has just come off the loom!

??????????????????????And there’s more wool in the closet! But, it is time to start planning wall hanging number five.

To finish, I have a rather strange story to tell about peering at my wool warp threads as I wove. As weaving progressed, the wool became hairier. Little fingers of fluff extended and accumulated on the threads creating a sort of shadowy effect. In the shadows I started to see wavy lines…not just random wavy lines, but lines that sort of made sense. They started to remind me of something and suddenly I realised what it was. And there was born the new inspiration for hanging number five! I have abandoned the idea on which I have been pondering all this time and am going with this new one. I’ll let you know more when it is all a bit more concrete.

Now….back to the needle weaving…..

Backstrap Weaving – Sunny Side Up


The only “problem” with double-faced structures, like Andean Pebble Weave, is that you sometimes don’t get to see and enjoy both faces of the fabric. I wove the above piece (using a non-Andean pattern) and then folded and sewed it into a bag. I had to decide which was the “sunny side” or, the side I would have on the outside of the bag while the other side, sadly, would be hidden forever on the inside. Actually, in this case, I guess I ended up choosing what you might call the “shady” side, the one on the right, the darker of the two options. The lighter, or sunny side, went on the inside.

Some of the structures I weave have two acceptable faces but there is one that is obviously the “right” one. What I call the simple warp float structure is one such structure.

central asian backstrap weavingThis is the piece I wove and sewed into a case for my little notebook computer.

central asian simple warp floats both sidesBoth sides are attractive in their own way. The “right” side on the left is patterned with warp floats. The other face shows exposed weft.  So, in the end, I didn’t have to hesitate over which side to use as the outside of the bag.

The same goes for the latest computer bag that I have been weaving.

wool warp backstrap weavingRemember the wool warp that I showed in last week’s post? It really was just supposed to be an experiment in weaving with loosely spun and plied wool. I was nervous about it but, as soon as I started weaving, I could tell that it was going to work out. I could open the sheds carefully and achieve nice clean openings without stressing the wool much at all. I used nylon heddles (yes, shock, horror…you know how much I hate nylon heddles!).

No fluff accumulated on the heddles but it did between the cross sticks and at the point where I pressed down on warps to help raise the heddles. I just gently removed the fluff each time I had to slide the cross sticks up the warp. This didn’t become a problem as I advanced the warp as often as I could so that the points of pressure and friction  and resulting fluffing were never in the same spot for too long.

???????????????????????????????So, I decided that this warp was going to be  a keeper and that I may as well add some patterns with wool supplementary weft. The technique I used is single faced so I won’t have to make a decision about which face is the sunny side.

As you can see below in this cotton example I wove some time ago, the back side of this single-faced technique is plain (which I suppose could be the side you chose to show if you went over the top with your supplementary-weft design and made something that you felt was garish).

???????????????????????????????The only problem with the wool project was that I had used up most of this little wool stash in the warping and only had a bit of terracotta yarn left with which to make patterns.

You can see that I used a coil rod to prevent corrugation. I wouldn’t really expect ridging with wool as it is so springy and forgiving but I wasn’t taking any chances. The wool was behaving nicely and I didn’t want to push it by having to unweave and start over if ridges appeared.

wool warp with pattern color changes backstrap weaving supplementary weftTwo warp ends broke while none of the others looked particularly worn at all.

Eventually I had to change to green supplementary weft. That was okay as I also had a green stripe in the warp into which I could hide the weft turns.This allowed me to save the little remaining terracotta to weave the same design at the other end.

And then just to make things more “interesting” I decided that, since I weave with wool so infrequently, I should use this piece as an opportunity to practice making something with four selvedges.  I turned the whole thing around and started weaving in from the other end.

four selvedge wool warp backstrap weavingBring out the little sticks, the skinny shuttles, the umbrella ribs, the needles and a large serving of patience!

In the above picture there are just under two inches left to weave and I am still, thankfully, able to use both the shed rod and string heddles. I think doing all that twining last week was a good warm-up to this. It was taking me forty minutes to twine a single row. Opening the sheds and weaving in this small space, so far, is a lot faster! I expect that to change pretty soon!

I thnk I might have trouble needle-weaving the last rows as the yarn is plied so loosely. I fear that I will be continually splitting the two strands with the needle.

creating the shed with a needleI suspect that the overspun and tightly plied yarn created by the weavers in Pitumarca, Peru would be easier to work with in this case. I needle wove the two ends of the discontinuous-warp piece shown above (my teacher Yaneth is demonstrating in the picture). Now I will be able to see how it compares with using store-bought yarn.

Will my wool project end up being the computer slip case that I had planned? I am not sure. I definitely want to decorate all four edges with a tubular band and am hoping that I can scrape together enough of this wool to do so. We will see what it wants to be when finished.

As for the twining that was giving me trouble…..

???????????????????????????????….it is done. I have yet to find a spot with good light to stretch this out to full length for photgraphing. Neither of the reds in the above picture are the true color.

After having problems with either the twining buckling or the fabric getting a pleated look, I twined and untwined and finally found the right formula. So, now the three panels are joined across the top and I shall set it all aside while I decide what to do at the bottom. Most likely I will make masses of tiny braids which is how I chose to finish the other three pieces in this series.

hatbands boliviaThis fourth hanging was inspired by hatbands used by the women in the Bolivian highland community of Calcha (the one bottom left in the picture at left).

I visited Calcha in August 1997.  It was a festival weekend and I hadn’t known. Because of the big party in progress, none of the women were weaving. A small boy ran home and brought back a hatband to show and later sell to me when I asked about weaving. I always wonder if he had taken it right off his mother’s hat and if he had gotten in trouble over it later. 

???????????????????????????????Now to dye some cotton red for  number five in the wall hanging series. Thank you, Bobbie, for giving me some of your Guatemalan cotton so that I can over-dye it for my projects.

So, we will see the end of the woolly adventure next week. If it gets frustrating, I will get up and do some more keyfob braids. I added one more to the collection this week…the one on the left. It is simply the Palma braid done with only two colors instead of three.

And if the wool project all goes horribly wrong, I shall cut the piece in two and use the two pieces as front and back for a computer slip case anyway.

I think I will be looking more closely at wool when I am visiting the Mannings yarn store. I can usually quite safely breeze through the store without getting too tempted by anything.  I would like to see what other wool I can find that works so nicely on my backstrap loom (the wool for this current project is KnitPicks Palette, by the way. It comes in so many colors! I am almost scared to name it. Every time I fnd a wool designed for knitters that I like to use for weaving, it gets discontinued!).

Last time I was at the Mannings I was checking out the Harrisville Shetland as I had had success using it for warp-faced weaving straight off the cone on a floor loom. I made this band with it on my friend Pam’s floor loom. It felt so good!

warp-faced wool bandI have had success with Navajo warp on my backstrap loom too. I bought a ball in natural white and dyed it and made the bag with Mapuche designs below when I was still living in Chile. It was overtwisted and easy to use and made a good sturdy fabric for a bag but I am looking for fabric with a softer, kinder feel now.

mapuche-bag-front-and-backScreenHunter_003Why am I buying wool and not spinning it myself? One reason is that there simply isn’t any available here to spin in lowland Bolivia where I live.

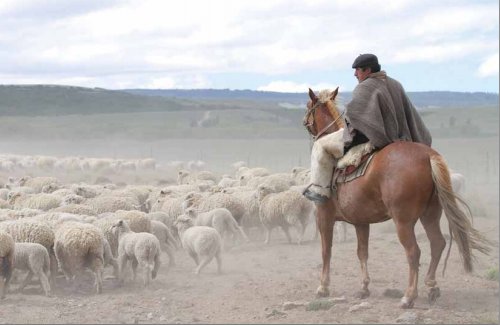
I think of all those years I lived in the Chilean Patagonia and all the sheep! Wool? It was everywhere! My boyfriend down there  worked as a shepherd for many years. I could have all the fleece I wanted. I did spin some of it and wove it as a plain balanced-weave piece that became the back of a vest. I used the rest of the handspun to knit the front. And then…. I moved to the tropics!

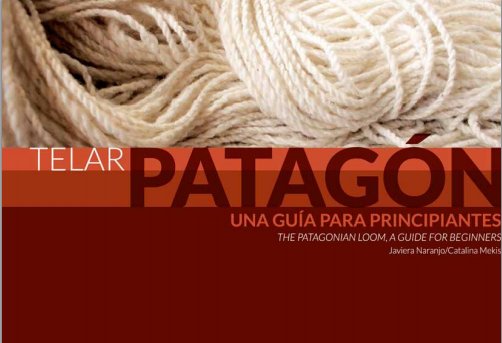
The picture above is from a free e-book entitled The Patagonian Loom, A guide for Beginners the link for which Weaving Southwest shared on Facebook today. It describes the continuing weaving tradition in the southern parts of Chile (not as far down south as where I was living where, unfortunately, I never came across anyone weaving). 

It’s a lovely book crammed with pictures with text in both Spanish and English. It gives a short history of the loom and then describes, the spinning, dyeing and weaving processes. It also provides instructions for warping and setting up the loom for projects that are typical of the region…saddle blankets, saddle bags, sashes, even a poncho. Thank you Weaving Southwest for sharing the link!

ScreenHunter_001Look at that gorgeous chunky handspun on the cover of the book which is used for warp-faced weaving on the vertical Patagonian loom. It reminds me of the fabulous yarn that Ace, one of my US friends, spun to weave into a backstrap. I had a lot of fun weaving with that yarn. It looked hairy and scary but wove up beautifully!

???????????????????????????????Now to get back to the loom and get my hands into that wool warp. Enjoy the e-book with its glimpse of life in the Chilean Patagonia.