Backstrap Weaving – In pursuit of all things pebbly

A wee milestone to mark today: One year since the publication of my very first weaving article – BACKSTRAP BASICS in WeaveZine. I am hoping that this is the kind of article that will never look “dated”! Backstrap weaving is, afterall, an ancient practice and the project I presented in the article, a backstrap, is not exactly a fashion accessory! I hope that people will continue to find it useful for many years to come.

A million thanks to all those who have used the article and shared pictures of their woven backtraps with me. Some have been content with that one backstrap weaving experience while others have gone on to learn more and have created lovely pick up bands. I have made new online friends through that article and even gotten to travel and meet them. It really is a personal milestone worth marking.

This all comes on the very day that Syne Mitchell, editor of WeaveZine, has announced the details of her exciting new steps onward in the world of publishing.

I have had a couple more articles out since then in the WARP newsletter and Shuttle, Spindle and Dyepot and am working on some things at the moment as deadlines approach which means that this week’s post is a bit shorter than usual. My fingers have been a little bit busier at the keyboard than at the loom these last days but, of course, there was time for weaving (I would go mad if there wasn’t!)

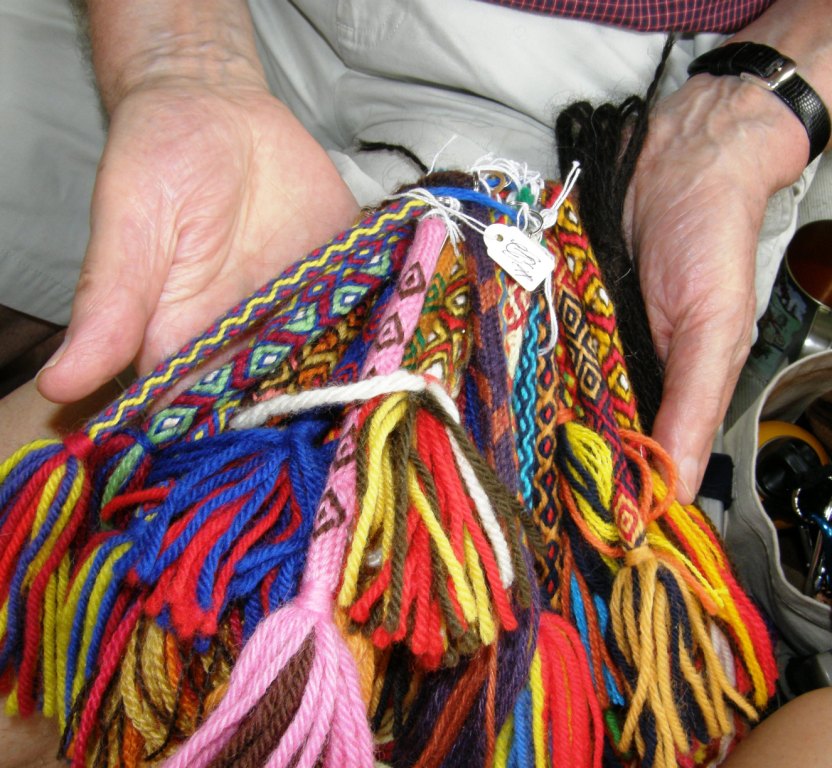
Last weekend I decided to launch into another pebble weave project. You may remember that I showed you some images in a previous post of belts woven by the Tarahumara orRaramuri (he who walks well) people of Mexico…

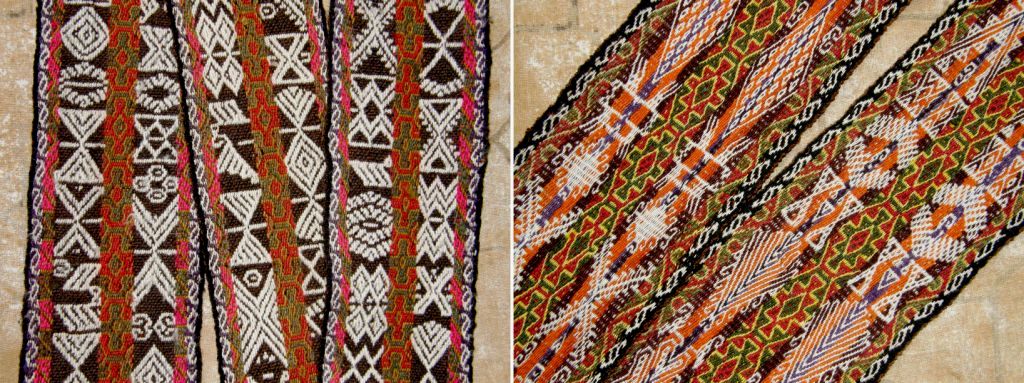
The belt above in the lower right corner belongs to my friend Annie MacHale. She was wearing it one day at Convergence. The others belong to anthropologist Martha Graham. This was another of those chance meetings. She was at Convergence too and stopped by the Weavolution stand where I was displaying my backstrap woven pieces including some of my pebble weave work. She returned the following day with some of her Tarahumara belts to show me and allowed me to photograph them.

The zig zag design with its adjacent triangles reminded me very much of designs in the weavings of the Guarani people here in lowland Bolivia where I live (pictured at left). The Guarani design is said to represent patterns on snake skins. There are motifs on both the Guarani and Tarahumara pieces that resemble stars. According to an article in National Geographic (November 2008 ) “Each star in the night sky is a Tarahumara Indian whose souls – men have three and women have four, as they are the producers of new life – have all, finally, been extinguished.”

I am, of course, only guessing that the motifs on the Tarahumara weavings are, in fact, meant to be stars. I haven’t been able to turn up much information online about the weavings but am in the process of purchasing an article from the Journal of Anthropological Research. The National Geographic article has a picture of men in ritual costume where you can just catch a glimpse of the woven belts under brightly colored cloth that they also wrap about their waists. I also found images of a women weaving on horizontal wooden frames which they hold on their laps while resting the other end on a rock. There does not appear to be any kind of tensioning device on the loom.

I found an image of a woven  belt that I particularly liked which had been collected in the 1890s and set about charting it. When you  see the design you will understand that after about an hour of this I was not only seeing squares when I shut my eyes from the charting paper but also swirling spirals!

These belts, from what I have seen, are generally 2 – 3 1/2 meters in length but I warped up on one of my shorter warping boards to sample.

Normally, I would weave something like this as a sample and, if I liked it, would then plan a project in which I could incorporate it. Not in this case! Weaving this was hard work!! The spirals went this way and that and I found it impossible to leave the chart and just weave. Just as I got accustomed to weaving spirals in one direction, they would change course so it was a very slow process and I decided that this effort must be put to some use. Fortunately I had a piece of black woven fabric that had been left over from another warp and the band looked pretty good on top of that.

And here is the end result…(as if you hadn’t already guessed! just love sewing in those zippers!)
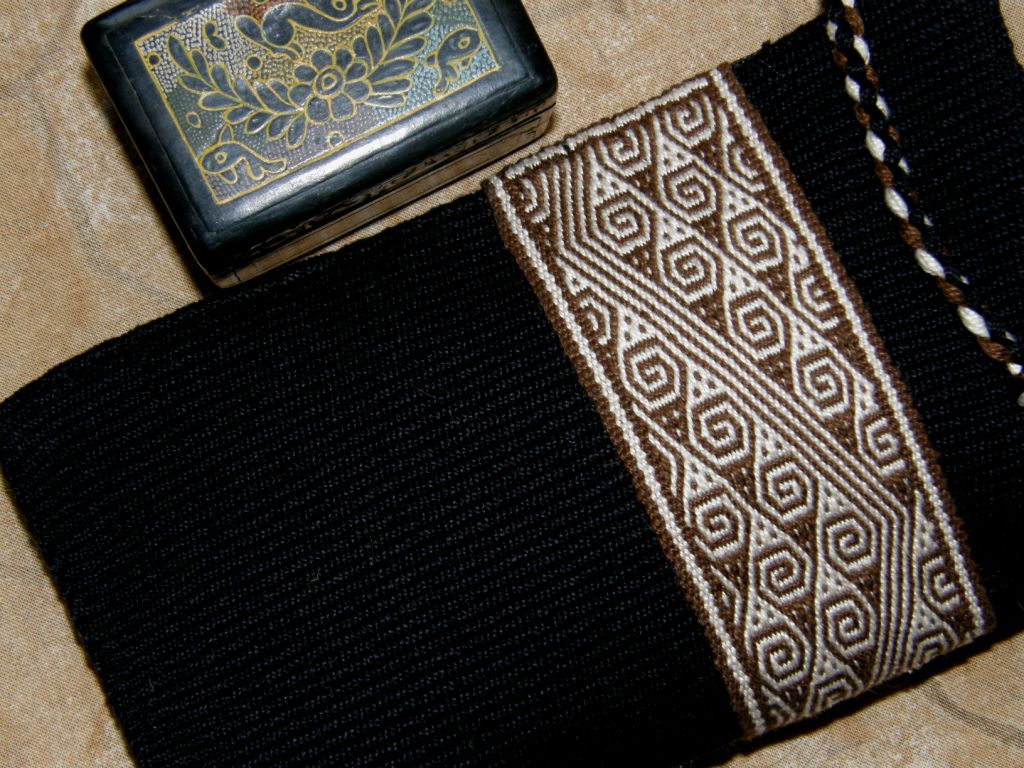
Having the band separate from the body of the bag allowed me to play around a bit with the placement of the pattern and I decided that it looked nicest off to one side.  I have found other Tarahumara bands with unusual designs so I will get down to charting those so that I can incorporate the designs in  larger projects.

Here’s the long band which started out on Lisa’s four-shaft floor loom and then came home with me to go onto the backstrap loom to be finished. I was hoping to make this into a guitar strap for a friend in Utah. However, it seems that  the standard strap hardware does not come any wider than two inches so I have kind of dropped that idea. Roger didn’t know that he was about to get a guitar strap and he doesn’t read my blog so sshhh! we won’t tell him. Now I am thinking “loom bag”.
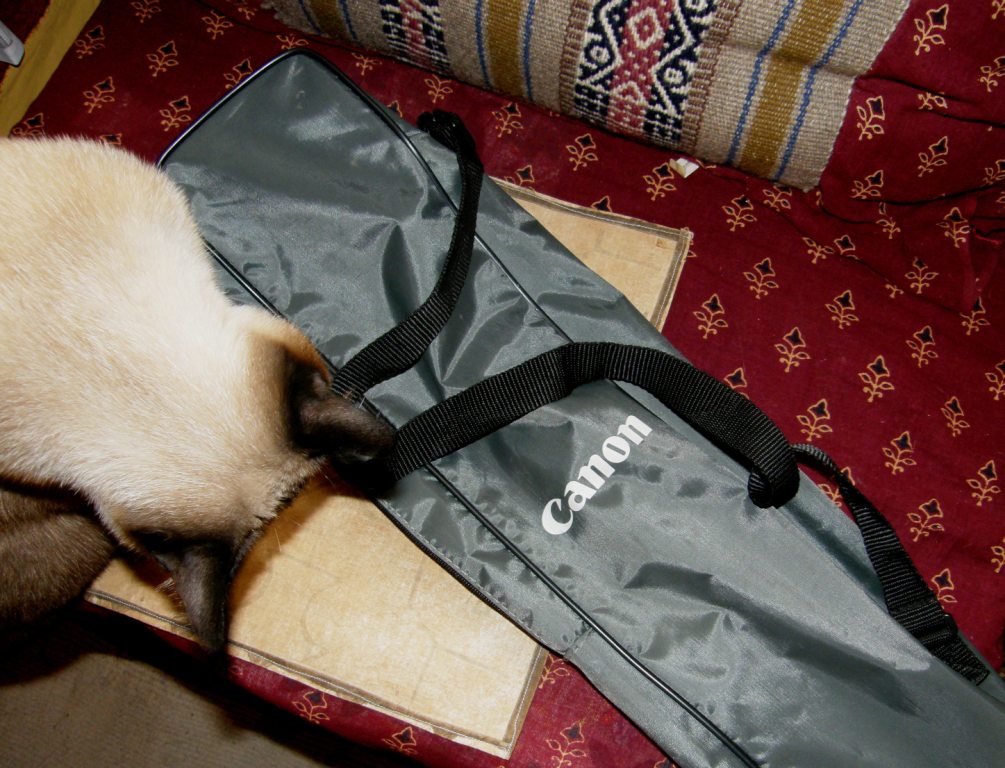
This is my current nifty loom bag, my tripod case. It is perfect with a zippered top and shoulder strap. It is just the right length for a loom and some tool bags and my backstrap. My portable warping board fits in there too but, maybe after all these years, I really need a woven loom bag and I have this one as a model. So I need to weave some plain fabric onto which I will sew my green band or maybe the band could be the sides. I just can’t seem to figure what color fabric would look good with that band.

Ah, so many new projects to get into and I continue to gather up information slowly but surely on past investigations like the woven belts used by the Russian Old Believers. Bits and pieces of information fall into my hands often sparked off by a random comment in a conversation with someone. I love how these things happen!

Here is something  that popped into my inbox the other day…
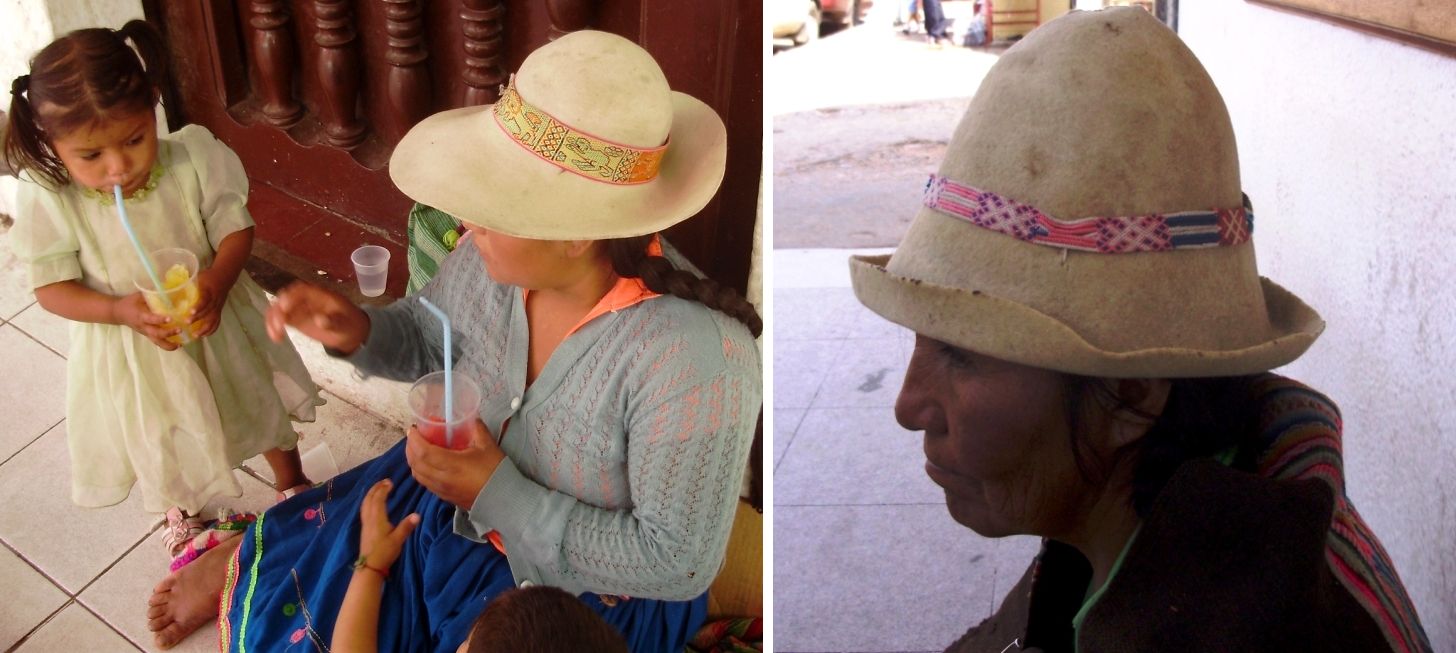
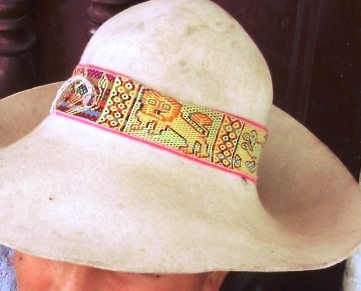
A friend of mine who was out and about snapped a couple of pictures of  ladies in their typical highland felt hats with some interesting hatbands.

You can see that the one at left definitely has a pebbly surface but I strongly suspect that these are factory produced bands. I would so love to talk to this lady and find out more about her hat band. If it is, in fact, factory made I am wondering if there is a growing trend to buying bands now rather than hand weaving them. I had always found the hatbands to be one of the most individual of woven pieces with widths and designs varying greatly.

The other band above has a series of single  woven motifs each separated by braids which is kind of interesting. I can’t get a close enough look to see what kind of weaving it is but it is certainly not the supplementary weft work which is usually used to decorate hat bands here.
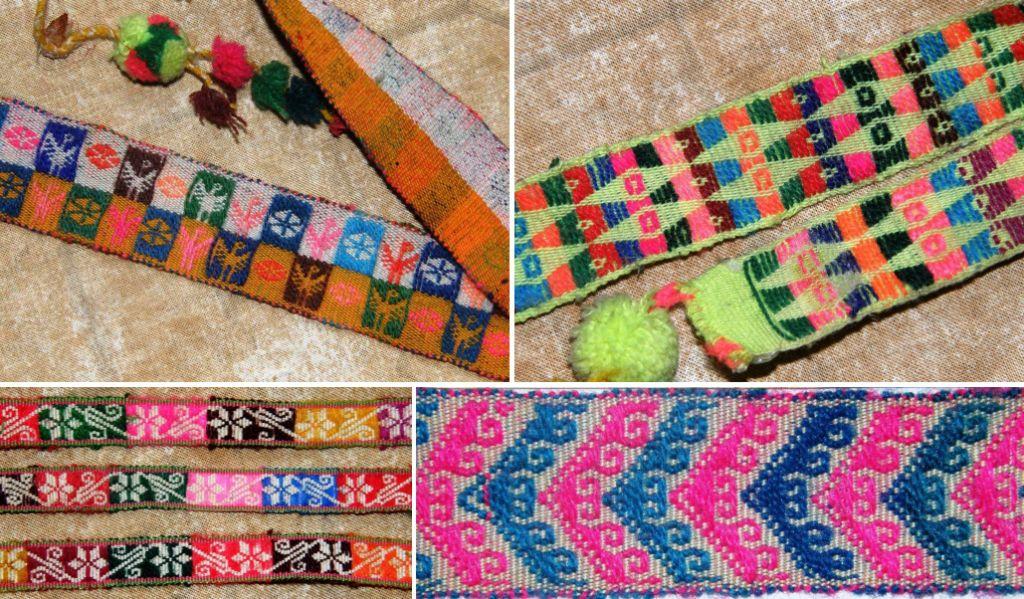
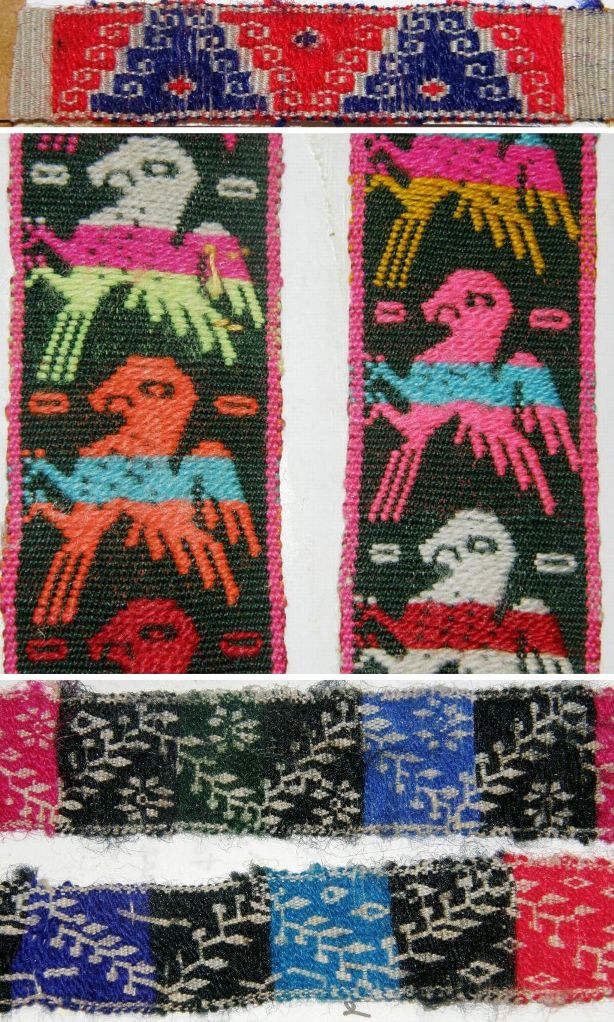
These are the more typical hatbands woven with very fine ground warp thread and decorated with supplementary wefts

More hatbands with their colorful supplementary wefts above. You can see in the top example that the weaver used different weight threads. The red is heavier than the blue and gives better coverage. They key to success in this technique is to find the right weight ratio between your ground warp and main weft and the supplementary weft. Many of these designs are created using very long floats which could be a problem on an item that was destined to be handled a lot. The floats would catch on things. On a hatband this is not such a problem.

You can see that sometimes the supplementary weft creates the motif and other times it is used to fill in the negative space.

A tutorial on this technique (pictured above) can be seen on my blog here.

Here are some pictures from online companions who have been following my tutorials…

Heidai from Norway wove this band in one-weft double weave for the school bell with the school’s name included. She used  four-strand braids to finish it.

Amineko72 in France is  weaving a band from my Andean Pebble Weave book using her inkle loom. If you would like to try this on your inkle loom too, I recommend heading to the Inkle Loom Weavers group on Ravelry where there are a few people working on this together at the moment. Look for the Andean Pebble Weave thread. There is also a larger group working together on another thread called Pick-up using various books to make nice pick-up bands on their inkle looms. They have a very nice helpful community going there.

I just spotted Evelyn Oldroyd’s post on her blog showing one of the large pebble weave designs in my book on her inkle loom. She has made a very interesting warp with a comb design on the edges of the pebble pattern and the colors are gorgeous! I wish I could have posted the picture here but I haven’t gotten her permission yet as I just spied the post. Check it out on her blog.

And now… back to my pebbly pursuits!
Backstrap Weaving – Loops, braids and edgings

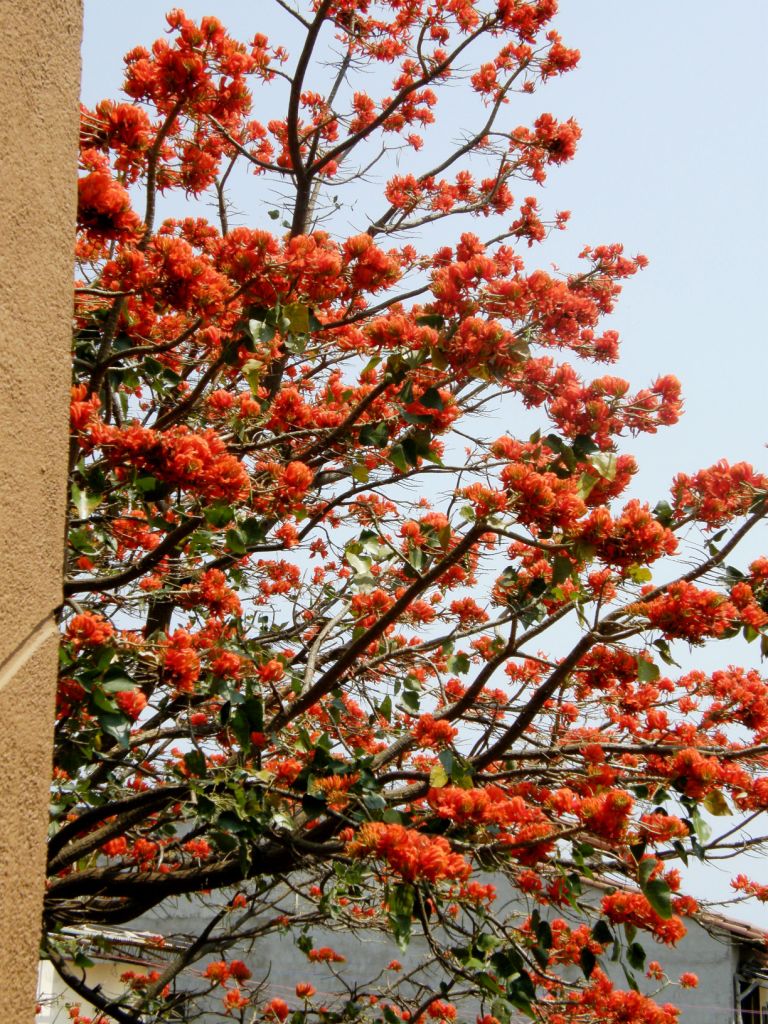
The tajibos have finished blooming and now the city is splashed with the red flowers of the ceibo, the national flower of Argentina, which grows equally well here in Santa Cruz attracting all kinds of small birds to noisily feast on its nectar.

And once again we are experiencing heat, smoke and humidity after a five-day lull where rain preceded low temperatures and provided perfect conditions for Anna from The Netherlands and her boyfriend Alistair to come down from the highlands to visit.

Many backpackers abandon the cold and dry highlands for a few days of sun, swimming pools and lazy afternoons swinging in hammocks in jungly lowland Santa Cruz but Anna and Alistair were quite relieved to find cooler more pleasant conditions. They have been riding their bicycles since May 2008 starting in Alaska and plan to finish their journey in Tierra del Fuego at the very end of the Pan American Highway in February next year.

Occasionally they leave their bikes behind for a side trip here and there and so, after having crossed the Salar de Uyuni by bicycle and taken some spectacular photos including some of their campsite on the salt on the night of a full moon, they took a bus to Potosi and on to Sucre  before flying in to Santa Cruz.

Anna had taken backstrap weaving classes in Huancayo, and after having found my blog, we started corresponding. She proposed getting together to weave. She seemed so unsure of her route and movements…one moment she was coming from La Paz and then the next from Salta, Argentina… that I really didn’t believe she would make it.

But I know how it is. I am guilty of making grand plans to visit many people when I go to the US only to run out of time and money. I also know how difficult it is to keep to a schedule when one is backpacking. So, of course, I was pleased and surprised when I got her mail saying that they were on their way. It was a four-day visit and we crammed as much fiber fun as we could into that time and my small living space while Alistair, who happens to be Australian, went to the stadium to see a football game with my boyfriend and educated him on the finer points of Australian Rules football.

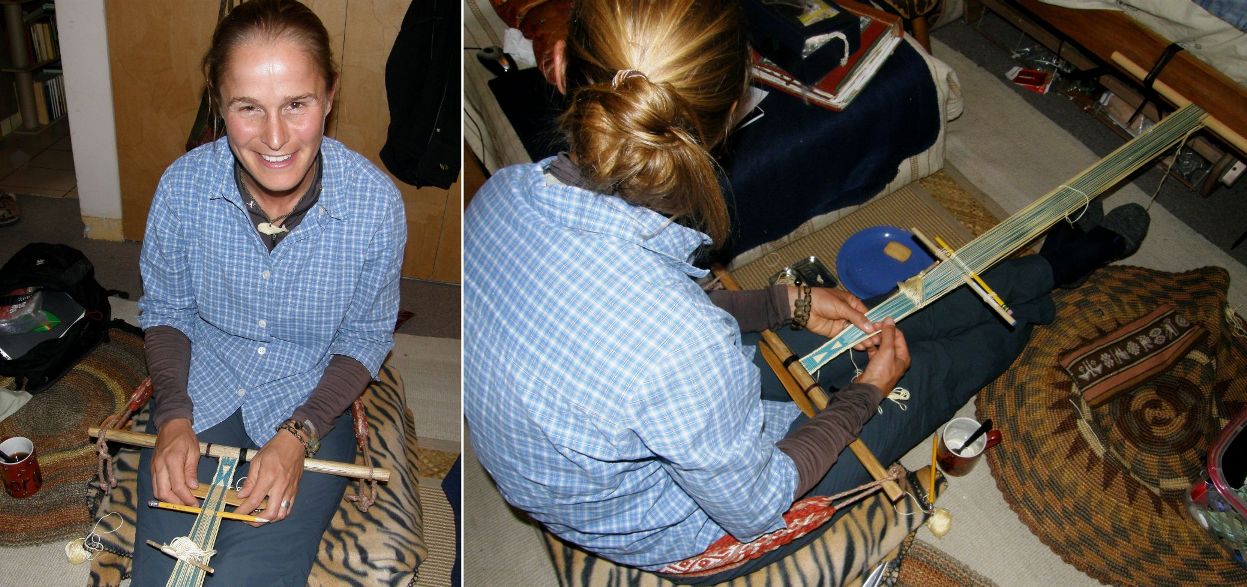
Day one was a chance to brush up on warping and shed making for Andean pebble weave. Anna’s teacher in Huancayo, at her urging, had warped up a long band and so Anna had only had the opportunity to see the warping process once. When I had studied there, I came away with at least four short bands and so had been able to practice warping quite a lot. I was tickled to see that Anna had downloaded my Andean Pebble Weave book and had been carrying its pages in her bicycle panniers.

Anna learns how to pick up the warps to form patterns in pebble weave.

The band on which she learned in Huancayo just happened to have been set up for eight revolution motifs and so she was able to weave many of the patterns from my book while on the road. While with me she practiced making the sheds the “Huancayo” way that I show in the appendix in my book.

Now she has several warps to take along for the rest of her trip and I supplied her with wider patterns to weave. She now has the technique totally under control and I am expecting to see pictures of some beautiful bands and especially of her weaving in some spectacular places between here and Ushuaia.

They are heading to beautiful southern Chile and Argentina and will probably pass through or very near to Punta Arenas on the southern tip of the continent where I spent my first five years in South America.

Anna brought some colorful weavings that she had bought in Sucre and Tarabuco – a tapestry weave bag, another in a complementary warp weave and a striped warp faced plain weave unku, a short poncho-like man’s garment only worn now for festivals.

She also bought a bag with the typical red and black weavings of Potolo as well as a double weave belt which prompted her to want to learn this technique.

Above she is learning the basic steps of double weave while weaving some simple triangles. We made some more warps and copied some more complex charts for her to take away.

At my request, Anna had gone to the campesino market in Sucre and got me some drop spindles and llama bone beaters called wichuñas here in Bolivia and rukis in Peru. In the picture on the right you can see a “new” wichuña after having been boiled and cleaned on the right. The middle one has had some use and is already changing color from having been handled a lot and the one on the left has taken on a nice dark polished sheen from many years of use.

When first bought in the market, the wichuñas are really quite disgusting with scraps of meat and sinew still attached. They are not so bad in the very dry atmosphere of the high plains but once down here in humid Santa Cruz, they are not at all pleasant and need to go into a pot and be boiled before they can be considered tolerable!

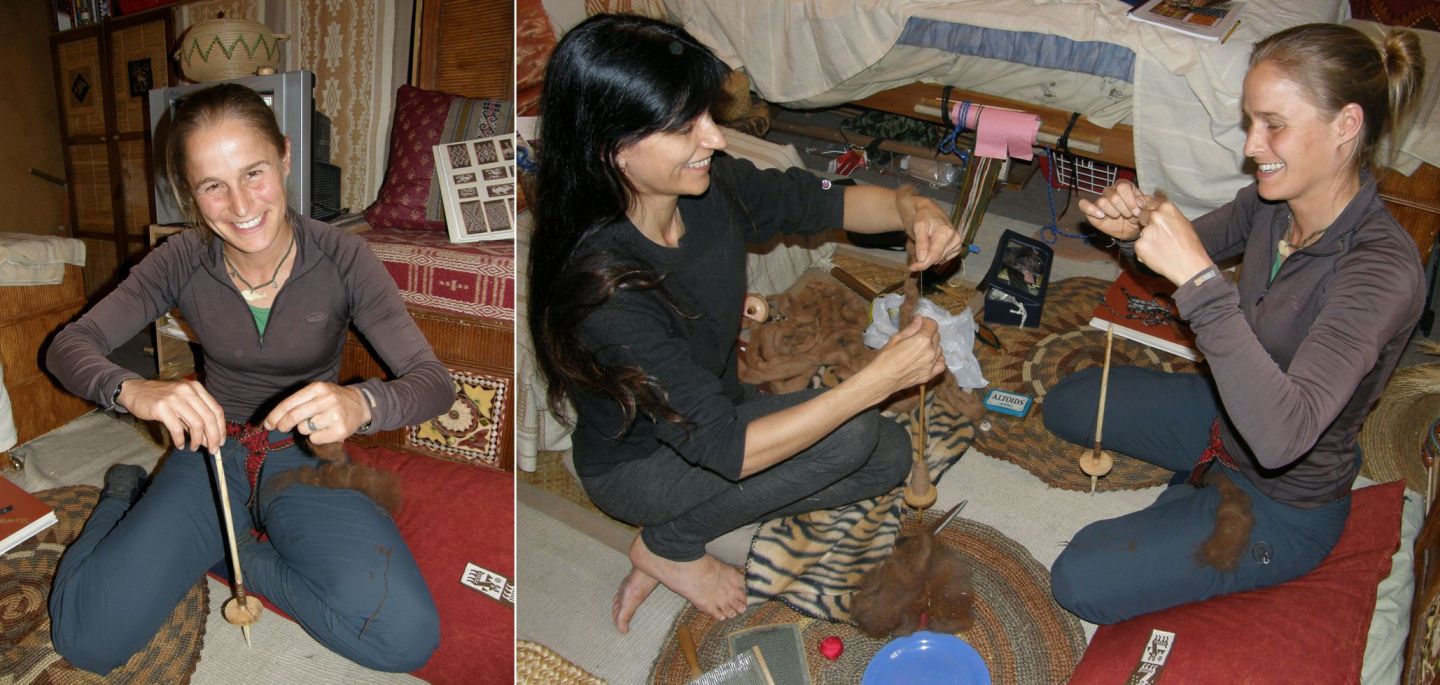
I have a lot of llama fiber here at home and recently got some alpaca from the US so, of course, Anna got a quick lesson in spinning on a drop spindle and took some fiber away for the trip.

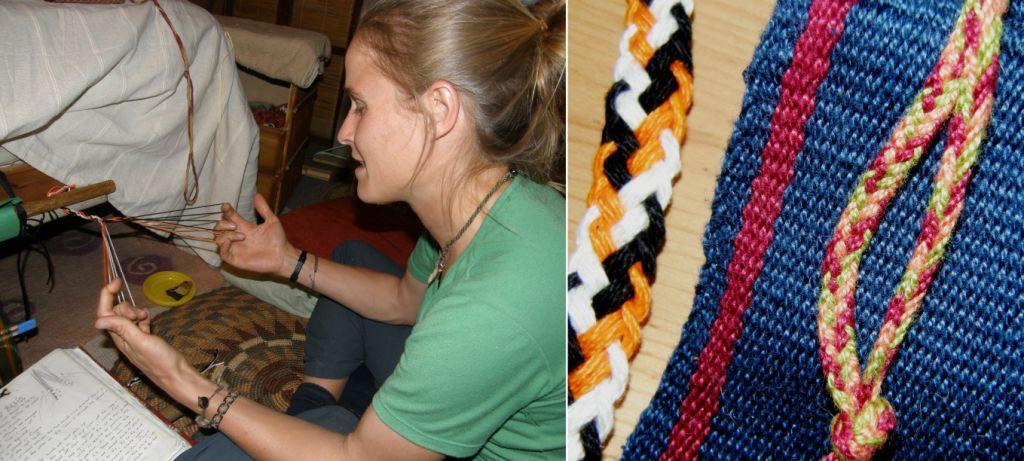
And…to finish it all off we did some braiding so that Anna could put a nice finish on her Huancayo band. I dragged out my journal to teach her a six-strand flat braid that I hadn’t made for a long time. Thank goodness I have recorded everything I have learned with diagrams and directions.

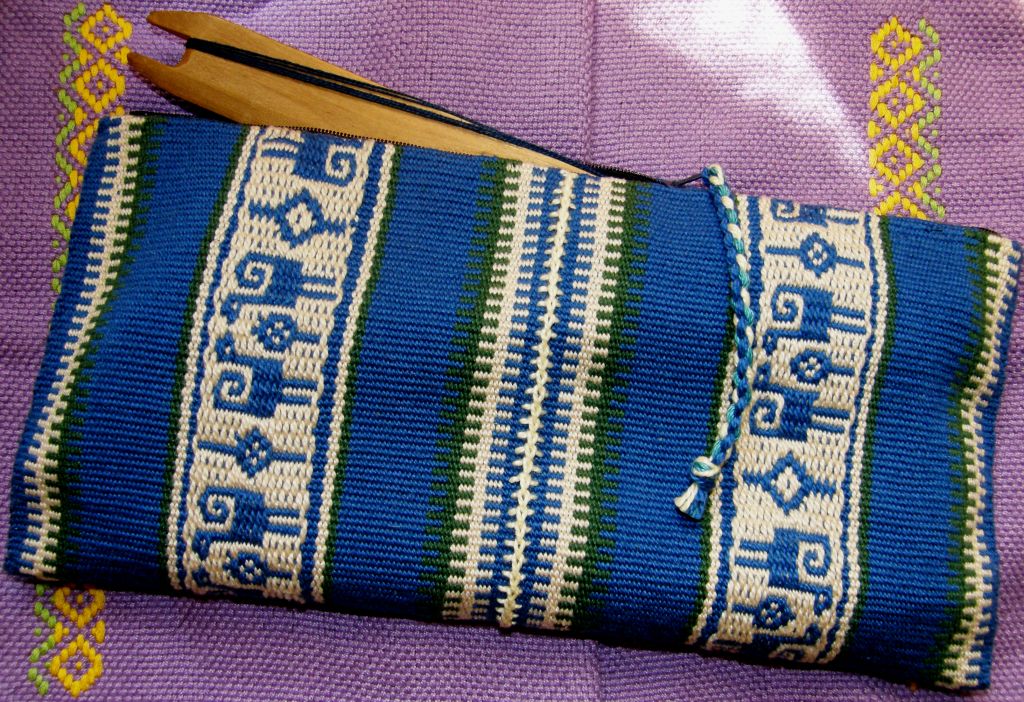
I  had forgotten about this braid and decided to revive it by using it as the zipper pull on my new blue tool bag.

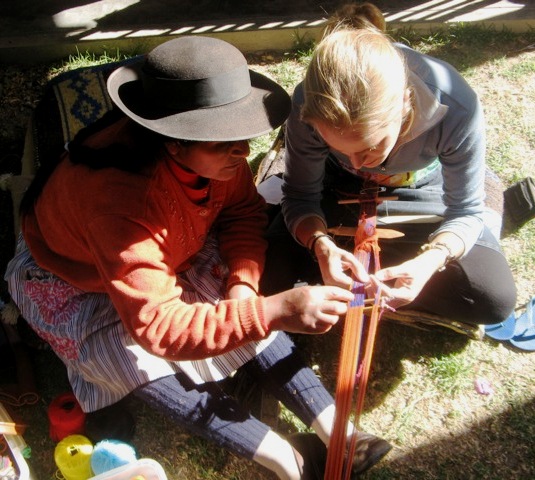
It was a fun few days of weaving, spinning, braiding and chatting. I lived ten months in a backpacker hostel when I first came to live in Santa Cruz and used to teach weaving to many foreigners who were passing through town. It has been many years since I have done that. We learned from each other and this is one of the things that Anna taught me…

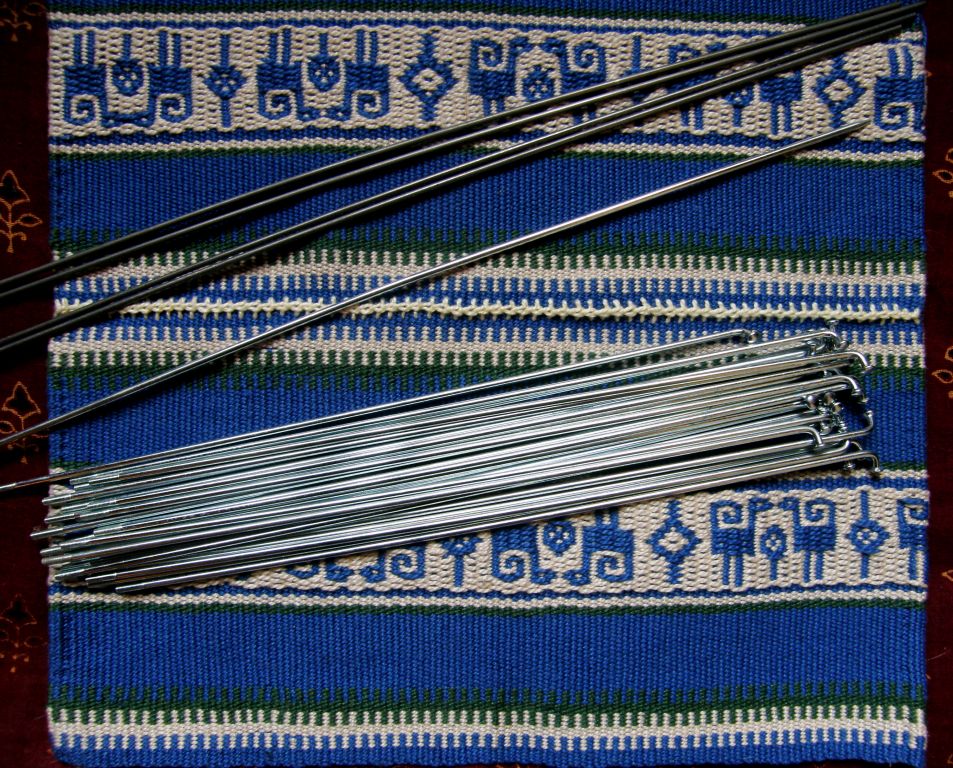
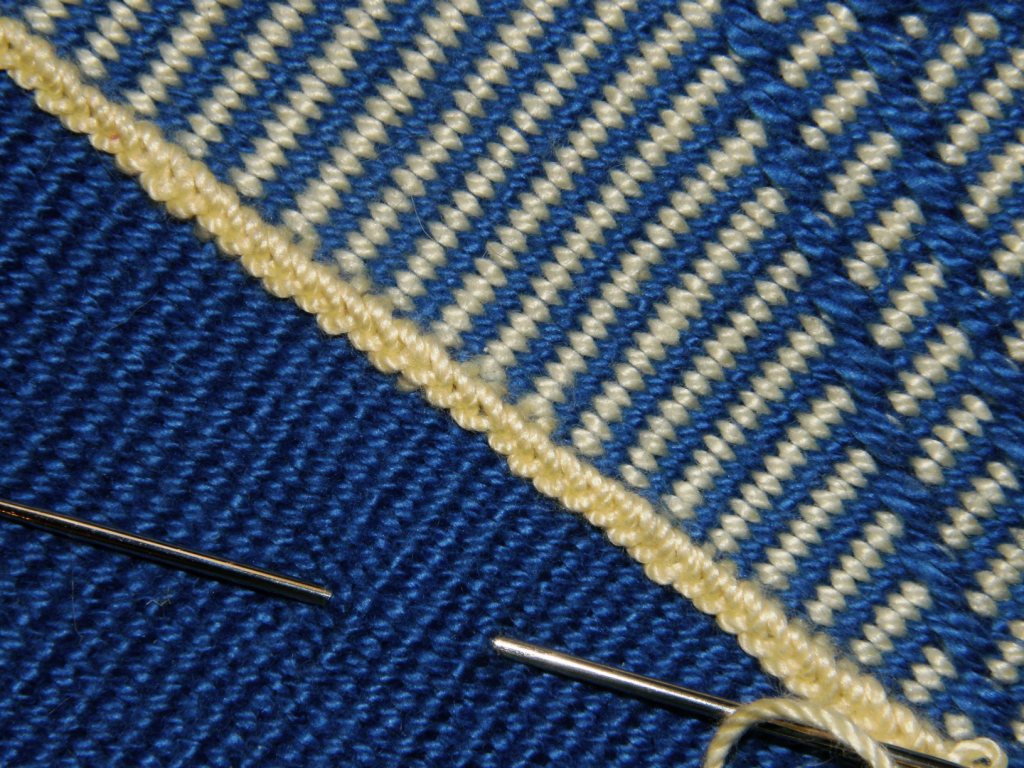
One of Anna’a gifts to me…a bunch of bicycle spokes! I have been using steel knitting needles and piano wire (in the upper part of the photo) to create my third selvedge on my weavings and struggling to find things that weavers can easily get hold of and use. I used to suggest cut down coat hanger wire which is really a bit on the thick side, but bicycle spokes are perfect!! I think that even the smallest town must have a bicycle repair place or somewhere where spokes can be purchased.

Anna and Alistair are back on the road now and riding, if I am not mistaken, by back roads into Argentina. You can start reading about their adventures and enjoying their photos here.

So I had dug the old journal out to brush up on the six-strand finger loop braid and while flicking through stopped on the page with my cross knit looping diagrams and instructions for other edgings and finishes and decided it was  time to brush up on some of these forgotten techniques. So you will be seeing some of those appearing in my projects in the next few weeks.

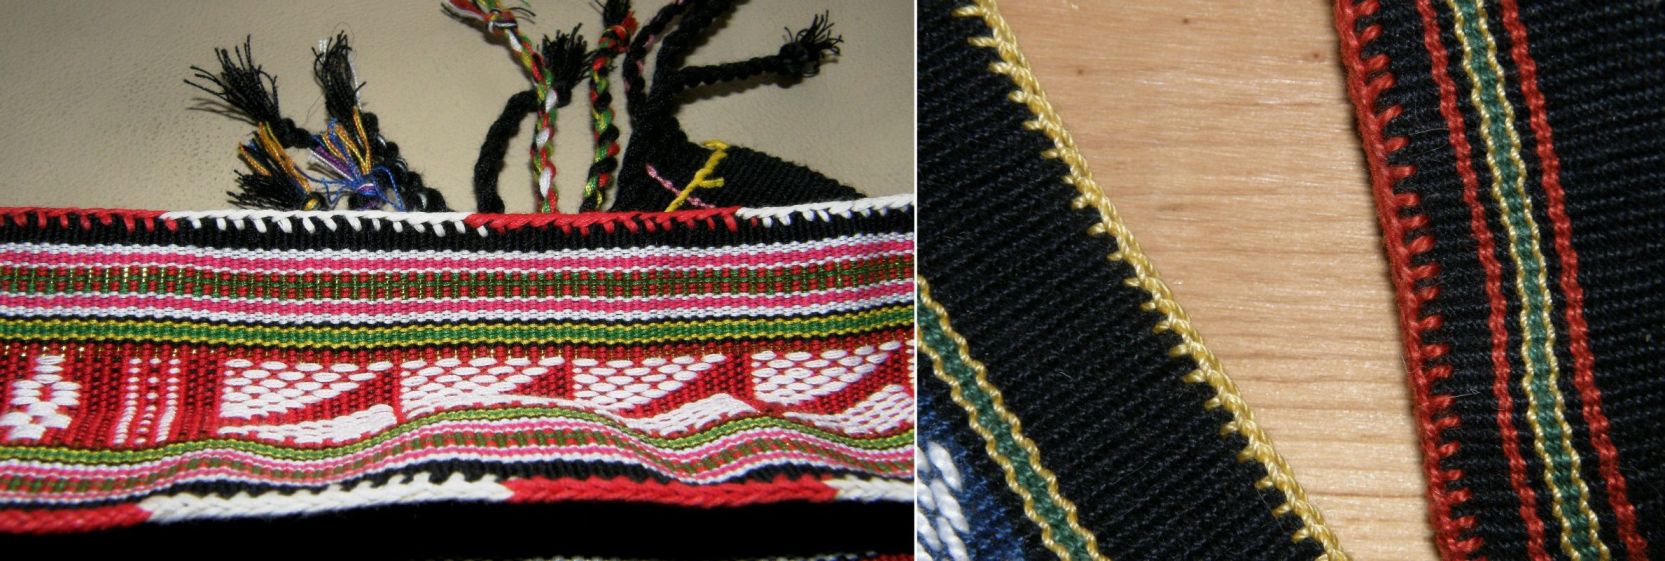
It seems that I had gone a little cross knit looping mad after I first learned the technique in Potosi back in 1997. The woven cover of my journal is edged with it and even some of the pages within. Pretty much anything with an edge got looped!

Triple columns of cross knit looping on the edge of a felt pouch I made many years ago. The button is piece of gourd from Peru. On the right is a page from my journal where I describe different bands, braids and finishes and have worked cross knit looping along the edge.

I always did triple columns as that is what I had been taught in Potosi and never thought to experiment with any other way until recently when I saw that the Montagnard weavers use single columns of this looping to decorate edges as well as to join two pieces of fabric together.

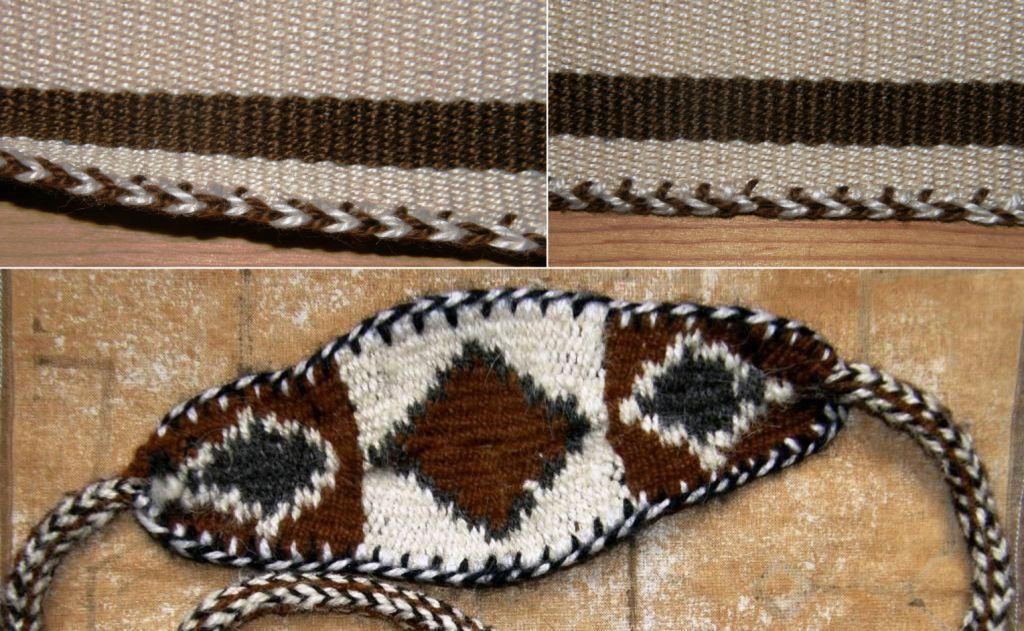
At left, the Montagnard weavers have used this technique to join the side of a bag to the main body. They work it in sections of various colors. I used it in the same way to decorate the edges of some small pouches I recently made.

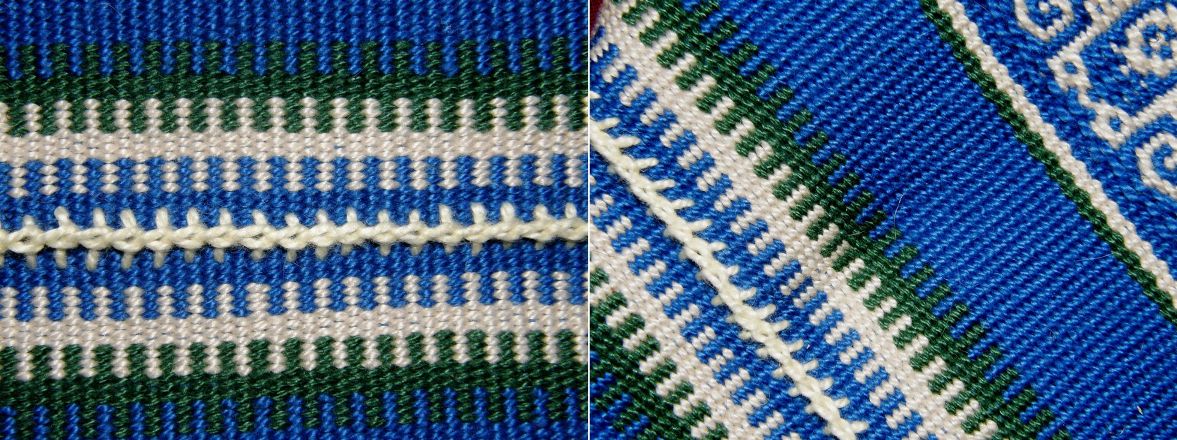
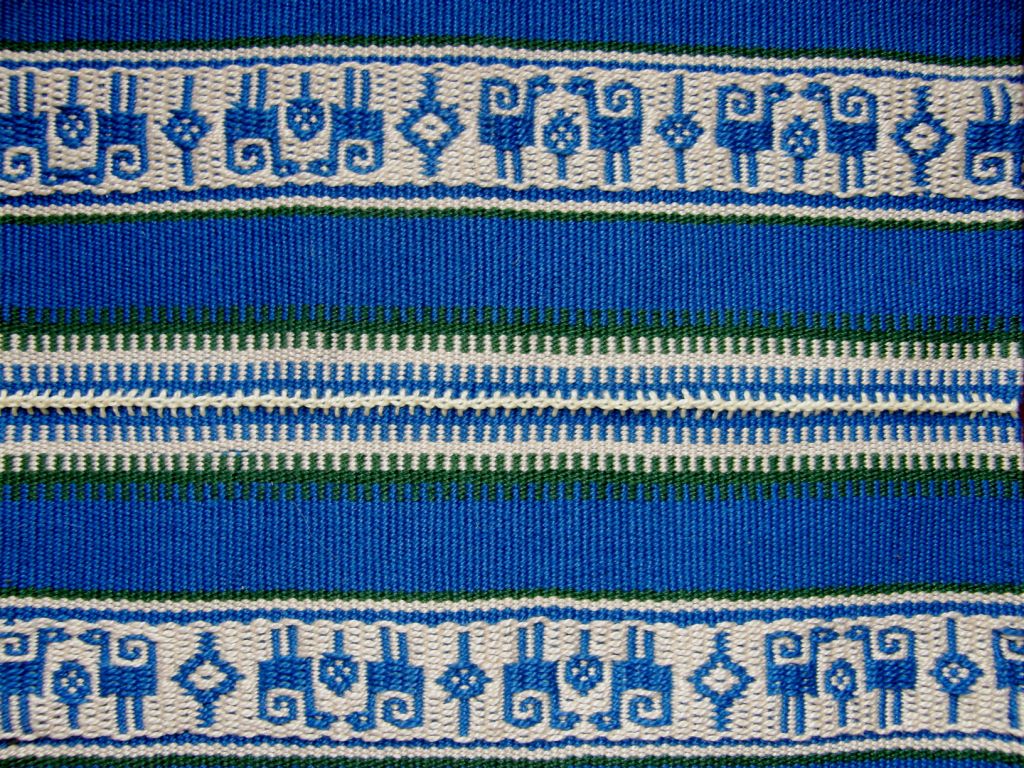
I was keen to try it as a joining stitch to join two pieces of fabric side by side. I had woven a narrow table runner some time ago and, as it wasn’t being used, I decided to cut it in half and use it for my joining stitch experiment.

I think the joining stitch goes well as its form mimics the comb design that I had originally woven into this piece of fabric.

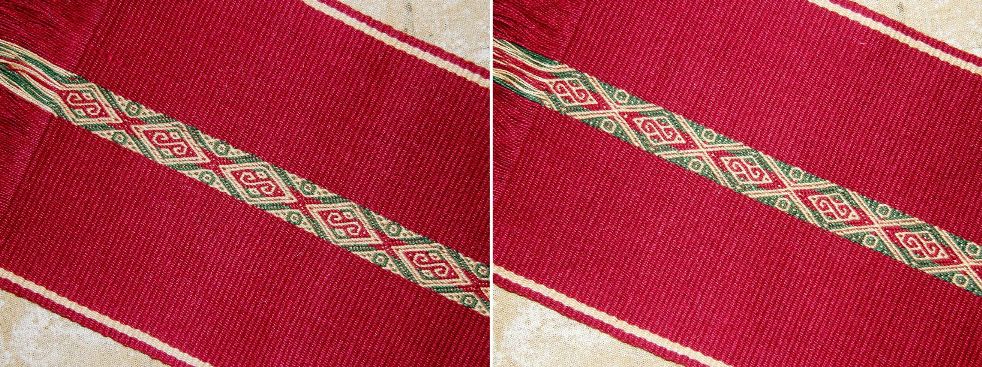
Above left is the front of the fabric. At first, I ended up with a not particularly attractive column of diagonal stitches on the back. Unless the diagonal stitches are exactly the same length and at the same angle they just look untidy and I unhappily pulled out the stitching and redid it several times. I then  looked at an article by Lila O’Neale which contained a diagram showing how the looping can be worked simultaneously on the back of the fabric and so that is what I did. The photo above right shows the back with its row of looped stitches and I am much happier with the way that looks.

And now…finally a tool bag long enough to fit my longest shuttles and a few of my medium sized beaters.

Then I wanted to try it out as a decorative stitch in the middle of a piece of fabric rather than along the edge…

Here it has a different appearance to the work on my tool bag. On the tool bag the looping had to hold two pieces of fabric together and so the “legs” of the stitches had to be spaced widely in order to span the two pieces of cloth. In the example above, they did not.

I have to thank Sue Prior of the Online Guild of Weavers Spinners and Dyers for kindly giving me the link to the Lila M O’Neale article on Peruvian needle knitting which proved to be so very helpful. Sue is part of a Peruvian Textile Study Group in the Cambridgeshire Guild in the UK and a very interesting article about the group’s studies was published in the Journal  for Weavers Spinners and Dyers this summer. In this group Sue has managed, amongst other  things, to needle knit some three-dimensional figures using this looping technique. An article on this technique also appeared in the September/October 1993 issue of Interweave’s Piecework magazine and was more recently re printed in Interweave’s Knitting Traditions magazine.

My aim is to be able to work many columns of stitches flat incorporating color changes and pre Columbian patterns.

While investigating on the net I found this short slide show of the work being done by a Chilean artist to make jewelry with this looping technique – beautiful!

And on re reading the artcile on the Peruvian Textile Study Group I see that Peruvian knitters are also using the versatile bicycle spokes, in this case as knitting needles.

After some more rummaging through my gigantic journal, I found my directions for a nice two-color edging that I was taught by my sling braiding teacher in Peru and so out came another table runner for a refresher on this technique.

The cradle of the sling that I made with my teacher in Peru is edged with a two color looped stitch. Above that you can see the stitch on the edge of my table runner.
I think it makes a really nice finish for this table runner. The central band is a balanced double weave piece.

Some instructions for this two-color edging…

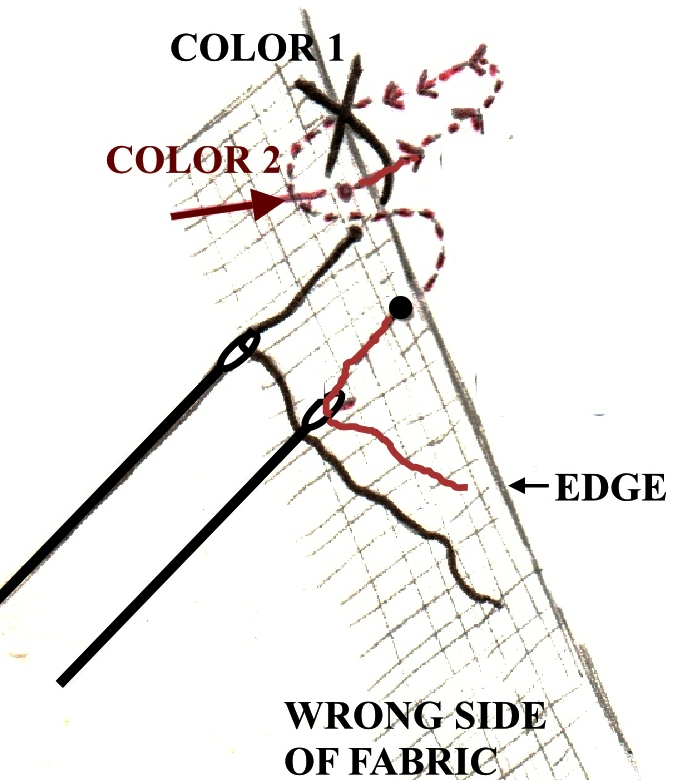
I am right handed and was taught to hold the fabric wrong side up with the edge on the right. The two threads will be on two needles.

  • With color one sew an “X”  which sits along the edge and bring your needle and thread back up to the wrong side of the fabric as shown.
  • Sew a small stitch into the wrong side of the fabric with color two to anchor the thread before passing it under the “X” formed by color one (the needle does not pierce the fabric as it passes under the “X”)  and bring it back out to the wrong side as shown.
  • Color two will have formed an “X” in this path. Color one then passes under the “X” formed by color two and so on.

My mind is swirling with ideas….! Now I am thinking that I might decorate the piece of felt that I made with my friend Lisa on my last visit to North Carolina with this looping technique. I just have to find the right design.

Lisa is a skilled felter and was kind enough to give me a chance to learn a little about the technique when I was visiting her. I had made felt many years ago in Chile, following instructions in the Ashford spinning book, rolling it around on the kitchen floor and taking all the color out of the plastic tile!  I had not felted my piece enough and had no idea about what a physical activity it was!

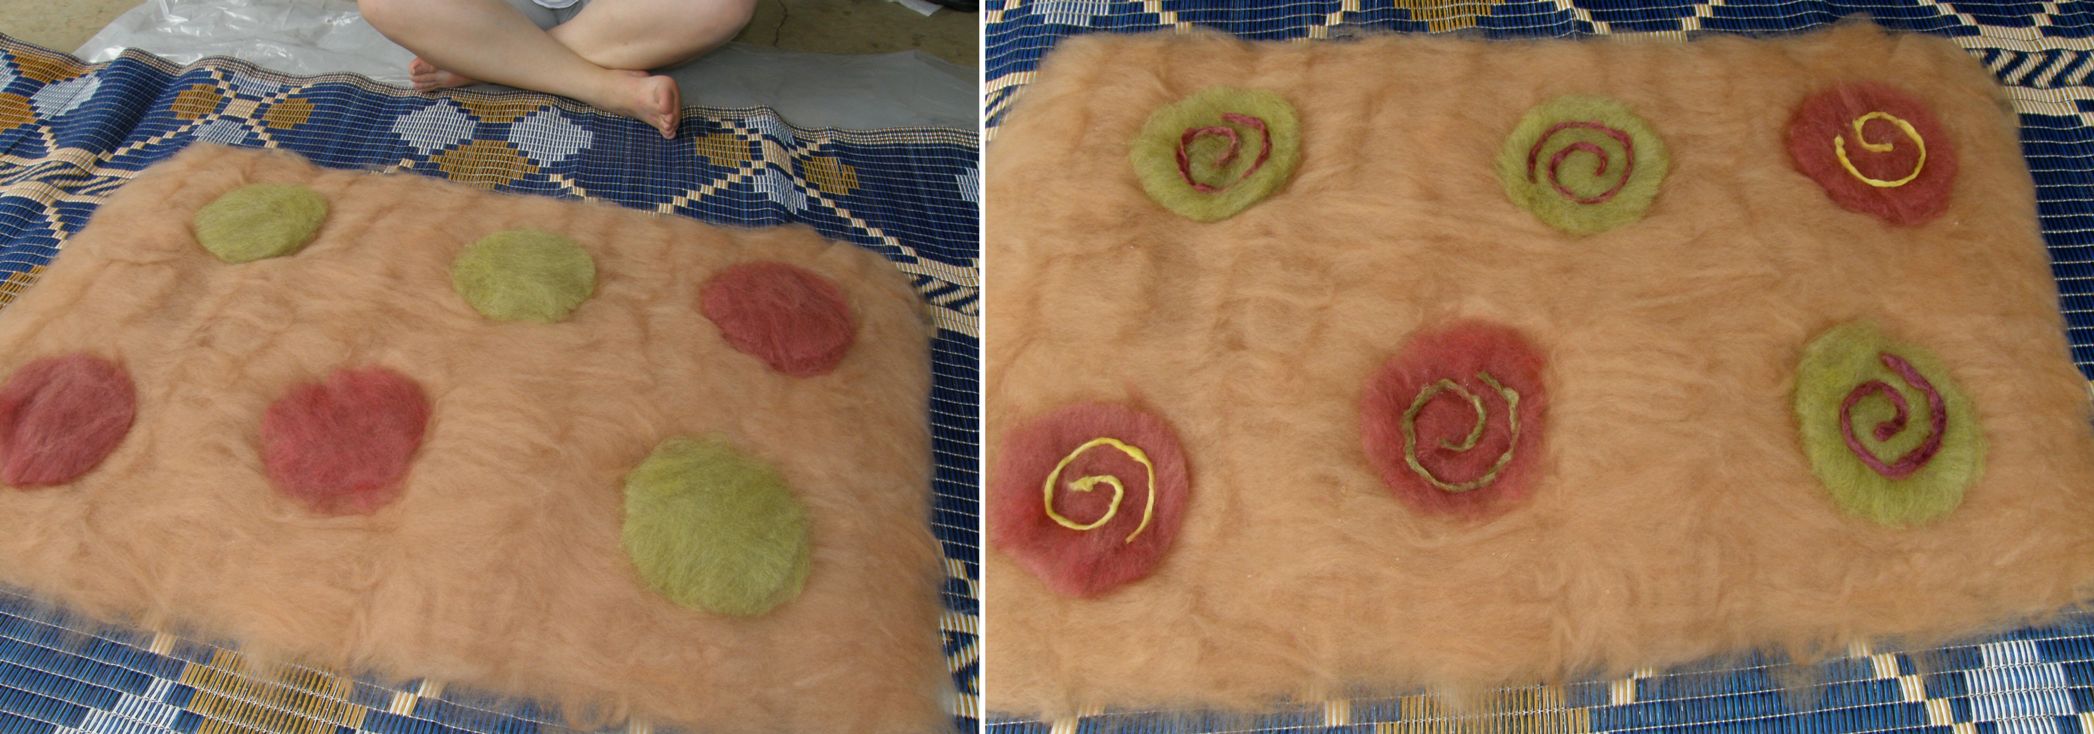
First we chose colors and laid out the wool in five or six thin layers. As there wasn’t enough colored wool we used a white base.
Shapes are cut and placed and then the whole thing gets covered with a piece of tulle and sprayed with hot water and detergent. We then rubbed the surface through the tulle adding more hot soapy water as needed.

When we were satisfied that felting was underway and that the various design elements were clinging sufficiently to each other and the base, the fun began!

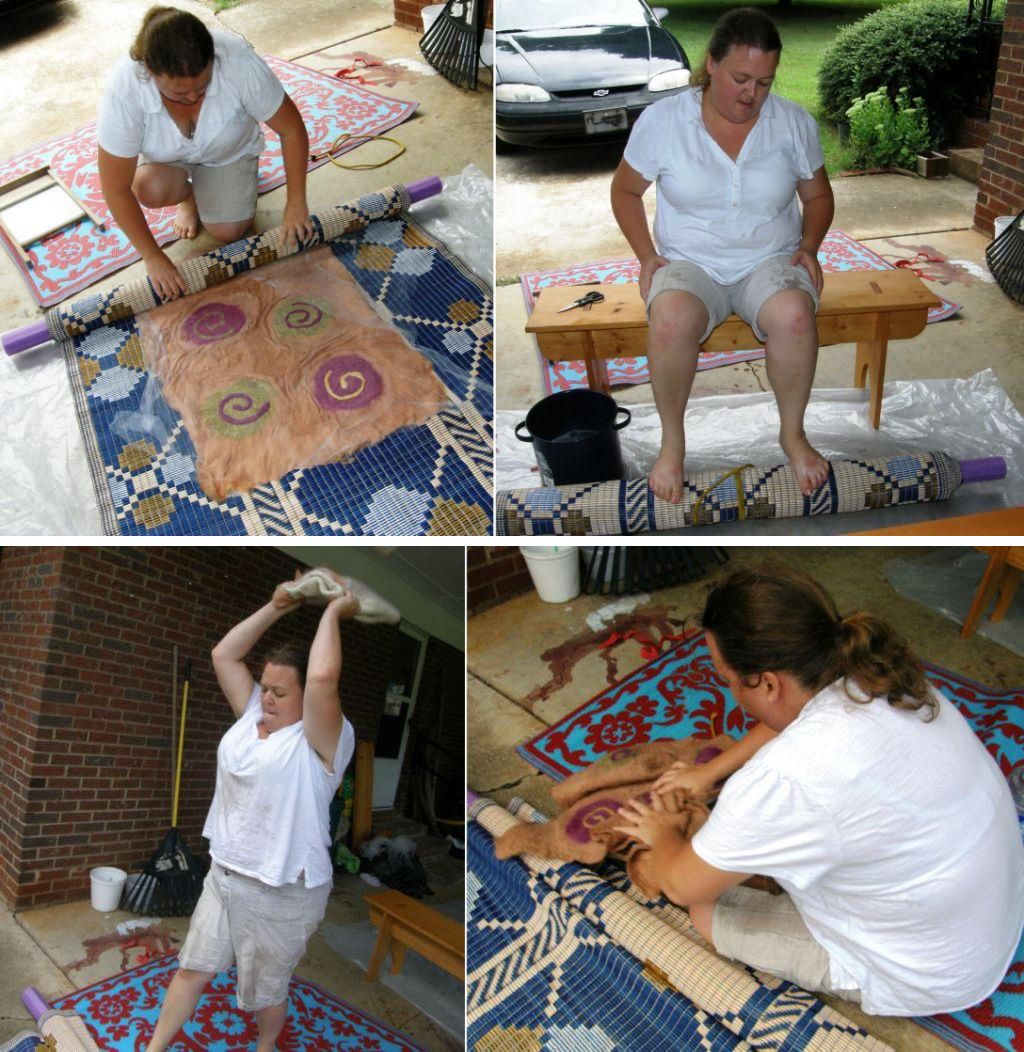
The piece had to be rolled so we both sat on benches facing each other, put on some jolly music by the Carolina Chocolate Drops and rolled away stopping now and then to unroll, turn the piece and re roll. Then came a lot of folding, slamming and pummeling. The piece was rinsed and tossed onto the roof of the shed to dry. 
Back home in Bolivia, my cat has still not decided if she wants to let this luxurious felt piece go. I am not particularly in love with the design I made and so will most likely turn it over and use the white side to create some kind of applique and embroidered design – something inspired by a South American textile no doubt!

I have just about caught up on all pending projects. The guitar strap came off the backstrap loom, all six feet of it and so there will definitely be some left overs to sew up into something.

And here are those blue bags again. I sold the original two and made up two more from the piece I warped up for demonstrations at Convergence. My belt shuttles and sticks once again have a home. You can see the six-strand finger loop braid on the left that I used for the zipper pull. My weaving teacher in Potosi taught me this braid which we used to make a strap for the chuspa I wove with her.

Online weaving friends have been posting pictures in the forums…

Amber has been studying simple warp float techniques weaving both single and two-color motifs and inventing some patterns of her own. I like her two color “S” on the background of horizontal bars.

Amber dove into the deep end earlier this year and wove mug rugs on a backstrap loom following my one-weft double weave tutorial as her first backstrap weaving project and is now weaving simple warp float bands on an inkle loom which allows her to weave in a more confined space.

Marydargie is continuing to follow the lessons in my Andean Pebble Weave book and is also working on an inkle loom producing great-looking bands.

I have a new project in mind for next week which involves charting, which, fortunately, I love so I will be down on the floor once again with paper and colored pencils to see what I can work out. I am very excited about a design I have found and can’t wait to weave it.

Finally, helloooooo out there to Anna and Alistair. I hope you are enjoying smooth riding where ever you are!

Alistair is from Adelaide and Anna now makes her home there too so perhaps we will meet again on my next trip to Australia.

I will leave you all with some gorgeous shots from Anna and Alistair’s time in the hotspring and salt lake region on the Chilean/Bolivian border…The little animal is a viscacha and is one of the motifs in my pebble weave book.

Backstrap Weaving- Convergence, Cusco, Comparisons and Contrasts

I have put the full tutorial for the simple warp float technique shown above on a new tutorial page along with two videos I made that show the process.  In this technique, warps of one color form a design which sits on a background of horizontal stripes. By working slowly through the steps and the two follow up tutorials on warp floats, you will build up the skills necessary to weave the kinds of pieces where floats of two colors are used to completely cover the surface of the weaving. This is the technique used in the yurt band piece below.

My yurt band reproduction moved along this week and, after having done a couple of repeats of the design, I decided that I had had enough practice on this piece and that I would make a new warp adding some plain weave and weave it again to make something useful. So it has finished up like most of my samples with a zip and will be used to store stuff or gifted. Actually, I wouldn’t mind weaving it this size again but on a much longer warp and sewing it onto brown suede for a laptop bag.

Now to chart the designs on these other yurt band pieces. I know I have shown these here before but they are well worth another look…so gorgeous! The designs are very similar and, after having charted the one above, I am sure that it won’t be too hard to do these.

Chris Buckley in Beijing was kind enough to allow me to use these images of yurt bands in his collection. The band immediately above left belongs to Lisa and Ryan Matthews. Remember that there are tutorials on my blog for weaving the red and white border design as well as the yellow and brown one.

I got a little braiding time in this week too but couldn’t find the Margarita braid that I had started for the tutorial I posted here. I suspect my cat made off with it during the night so I made another.

Braiding is fun but I have never really used the braids for anything. One is being used to hang one of my weavings on the wall.

This braid I am working on now in the 12wpi cotton is so thick and sturdy I am sure it will make a brilliant bag handle. So I will make the braid and then think about a bag to match – kind of putting the cart before the horse.

I had started a Palma braid some time ago to use as a handle for an existing bag but the colors were not a good match and that idea was abandoned.

These are the two main braiding styles I learned with a sling braider in Peru many years ago.

Here is a summary of the steps to this braid following on from the original tutorial here:

Part 1,2,3,4,1,2,4,3,2,1,4,3,2,1,3,4,1,2,3,4,1,2,4,3,2,1,4,3,2,1,3,4,1,2, etc……..

This is turning out to be a very red dominated page especially with this, my latest project…

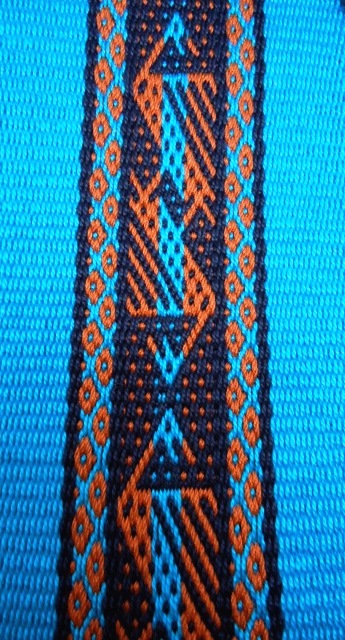
This is both faces of a piece that is destined to be part of the colorful tool bag collection I am making. The design is a classic one from Chinchero, Peru which turns up on so many of the beautiful textiles from there.

Although I have been to Chinchero and bought weavings I only really noticed this particular design for the first time when I was in Sydney of all places at the Saturday Paddington market. An American chap was promoting and selling the knits and weavings of the Cusco and Ausungate areas and amongst his goodies were some beautiful bags with this motif which he allowed me to photograph. I tried to persuade him to sell me a ball or two of the handspun yarn he had there in the basket without success. Since then, I have seen this motif over and over again in various gorgeous pieces of Chinchero and have been waiting for the opportunity to get down and chart and weave it.

It was only when someone participating in the Andean pebble weave weave-along, that I ran recently at Weavolution, asked if this motif could be charted for the pebble weave that I described in my e-monograph, that I took a good hard look at the structure. (This is one of the many things I love about the weave-alongs I run…I get to learn stuff too!)

Certain small elements of the Chinchero motif alone could be woven as a partly loom-controlled piece like the pebble weave I learned in Huancayo. The central “s” and diamond motifs as well as the “eyes” would be easy to chart and weave using pick-up and two sets of string heddles. However, the structure of the other parts of the design make this impossible if one wants to exactly reproduce it. It has to be totally weaver-controlled which means pick-up for every single weft pass.

From what I have seen, the Chinchero weavers use four colors in their design, two for the central motif and another two for the outer ones. I only used three. I confess that I started with four and my color choices were so ugly that I had to unweave a good five inches and take out those warps and replace them!  That’s the price you pay for not doing a sample!

I also noticed that they usually divide the design in three sections of ten warp pairs. I divided mine as nine, twelve, nine so that the diamonds would be split down the center.

In the close-up above you can see the little pebble spots in certain areas which is what had me hoping that this could be woven using the Huancayo technique.

I love looking at these different structures and comparing and contrasting.

Recently on Weavolution a link was posted to a guild gallery of Peruvian weavings purchased in the 1990s that one of the members had brought in and there was a beautiful Chinchero design band in black and white still on the loom. I love this picture as it also shows the overtwist in the handspun wool.

So now I have taken a closer look at the very first weaving I ever bought in Peru (actually the first in South America) on my trip there in 1996. I was in Cusco before I made my way to Huancayo and learned pebble weave and this used belt in one of the market stalls caught my eye.

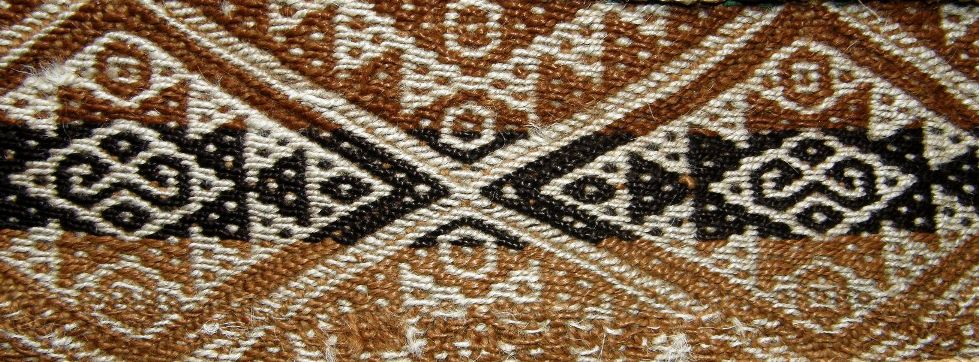
I sewed this belt onto a cushion in my living room and it has been there so long that I just don’t notice it any more. At first glance you see it covered with pebble spots and it looks like the partly loom-controlled pebble weave that I learned in Huancayo. However, those two sets of long diagonals that enclose the main motif do not follow the pebble weave warp float arrangement. I wove a shoulder bag in my handspun llama fiber many years ago with a motif in the Andean pebble weave I learned in Huancayo using a design based on this belt.

You can see that the central motif is the same except that I chose to weave an “S” in the very center but I was not able to exactly duplicate those diagonals as I did in my latest project, the red piece above. Believe me, the Andean pebble weave that I learned in Huancayo is a lot faster for me with the two sets of string heddles. However, I know that the Chinchero weavers are very fast at pick-up and, whatsmore, have this motif well memorized. I haven’t woven this motif enough yet to be able to let go of the pattern chart I made and that slows me down.

Here are a couple of other pieces I bought on this first trip to Cusco…

Although I have been a few times to Peru, I have only been once to Cusco  and am looking forward to seeing it again this November during the tinkuy de tejedores – a gathering of weavers in Urubamba, near Cusco over four days. I finally registered and am so looking forward to going and know quite a few people from the US and a few from Europe from my various online groups who will be there.  I will have the opportunity to meet some of the people that I didn’t manage to see on my US visit in Cusco instead! The tinkuy promises to be a wonderful event with weavers from South America and beyond meeting to share techniques. Experts in the field, including Ann Rowe and Mary Frame will give lectures and presentations on various aspects of indigenous weaving. Workshops are also being offered on Andean knitting, dyeing and weaving techniques. It is not too late to sign up!

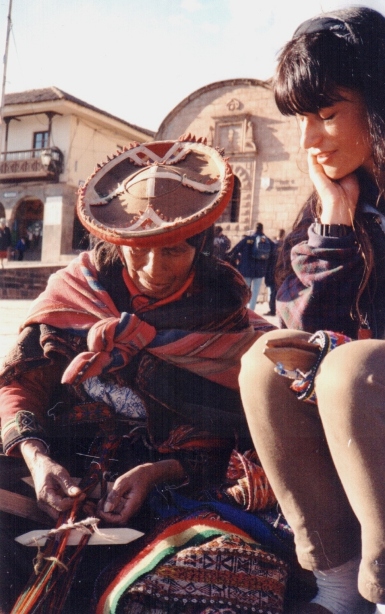
Watching a weaver at work in the main square of Cusco

I thought I would show you a few shots of my visit to Cusco and the Scared Valley in 1996.

I am wondering how much Cusco may have changed.

I have to admit that I was slightly disappointed at first as I was expecting to feel some sort of spiritual vibe from the place similar to what I had felt in Kathmandu when I was there in the mid 80s.

It was soon obvious that I wasn’t going to experience this sitting in the main plaza of downtown Cusco and my special place turned out to be Ollantaytambo.

I felt it as soon as I stepped off the bus at sunset.

My bus had broken down and we had gotten in late after having repaired the mechanical problem with banana skins!

The Sunday market at Chinchero. I bought one of the typical hats and caught the woman at right watching me, probably wondering what in the world I was planning to do with it. I smiled and walked up to her and she took off her old hat, put on the new one and handed the old one to me! I was actually very pleased to have the older one which had some character. A man, who I assumed was her son, came along and they had a good laugh about it.
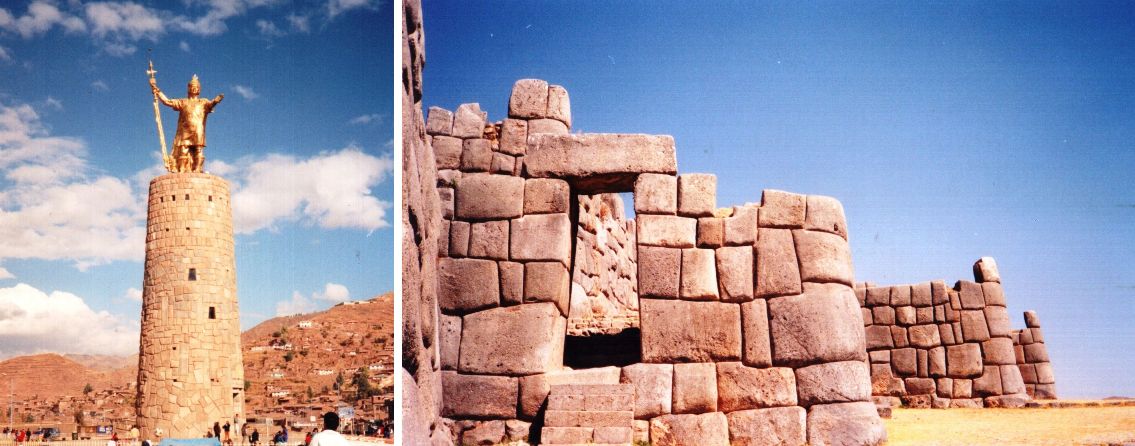
Walking around Cusco itself you can see the statue of the Inca king Pachacutec with whom the history of the Inca empire begins. He is behind one of the great expansions of the empire in the 15th century. The ruins of Sacsayhuaman with its examples of Inca stonework can be reached on foot from the center of Cusco.

A spinner and weavers near Pisac. The weavers are making the band that decorates the edge of their skirts. I have since learned from Nilda Callanaupa’s book that this kind of weaving is called golon. It is a twill tapestry weave.

There are lots of photo ops with the ladies and their lovely llamas. At right is the train station at the bottom of Machhu Pichu. Remember that this is 14 years ago. I had the “Cusco cough” and wasn’t in any shape to hike the Inca Trail and so I did a day trip to Macchu Pichu. Things look completely civilized in this picture but I have to tell you that when the train came in, everything went to hell! People were jumping on and throwing backpacks onto the train before it could even come to a halt. There were no reserved seats and far more passengers than seats and the guys who had spent three days hiking the Inca Trail were determined not to have to stand the 5 hours back to Cusco. I don’t think anyone stood in the end. There were bodies everywhere on the floor on top of backpacks in the aisles, four to a double seat etc….all very cozy, friendly and a wee bit smelly and we had a nice trip back!

Finally, after viewing my pictures from fourteen years ago, let me show you one of Guaman Poma de Ayala’s drawings of Cusco from his chronicle written in the early 17th century:

#############################################################

Finally, a reminder that my e-monograph on Andean Pebble Weave now has an  appendix with instructions for weaving this technique on a four-shaft loom.

I am hoping to warp up for a large pebble weave project on my friend Lisa’s floor loom on my next visit to the US. I leave in a week! Lisa and I wove a narrow band last time I was there.

Here is a new image of the wall hanging that Lydia made on her floor loom using one of the bird motifs that I wove in Huancayo.

Lydia calls this “Fish or Fowl” as she spent some time thinking it was a fish until I told her otherwise! She can see both a fish and a bird. I can’t see the fish at all!

Jennifer’s new backstrap at left and Lisa’s practice band on the right.

The appendix shows how to weave Andean pebble weave motifs using a combination of shafts alternated with pick-up. There are no string heddles involved. Plain pebble weave can be totally loom controlled.

So I am off to the US  next week slowly making my way to Convergence!

I will be hanging out at the Weavolution booth and wandering the vendor hall with my backstrap loom. Please come and visit, bring your loom and weave for a while. I hope to have an Easy Weaver warped up for pebble weave too. Just come along and weave with me!

Backstrap Weaving- Madness at Maryland Sheep and Wool Festival

MARYLAND SHEEP AND WOOL FESTIVAL – MAY 1 AND 2


Backstrap weaving at the Weavolution meetup on Sunday. I got to meet a lot of the people behind those avatars and user names. It turned out that the rabbit building where we all met up was one of the coolest places in the whole festival.

You may remember a few weeks back when I was still in Bolivia and packing all my “on the road” crafting bits and pieces for this trip, I said that if I didn’t get my Friday blog post out, that meant that I was having too good a time. Well it finally got to me. Waaaay too much fun and craziness at the Maryland Festival combined with a stay with my friends Claudia, Janet and David from Weavolution in Montgomery County, a ten-hour train trip back down to North Carolina and now packing for a weekend at the beach means that I can only give you a mini post this week and a hint of the good things to come.

I had fun backstrap weaving on both days and my wallet came out quite unscathed – I only bought a dvd. But I had plenty of time to watch the Sheep to Shawl, wander the vendors halls , pet the animals,  take photos and meet and talk to loads of interesting people.


Meeting Sharon aka Thelmaweaves at Weavolution with Deb McClintock in the background.
I wove some pebble weave at the show on my backstrap loom and also took a sample on an inkle loom that I had woven in the car on the way up to Maryland from North Carolina. I don’t know who took this shot – a lot of people have sent me pictures and I thank you all.
The rabbit building was cool but this was THE COOLEST PLACE at the festival. I tied up my loom and spent the afternoon weaving in a yurt. The felt was great insulation, I had beautiful skins on which to sit and some cool grass for my toes and the opening in the roof aided good air circulation. Here I am shiny faced and slightly bedraggled after a day in the heat but having a ball!

Now I must leave you or this mini post will turn into a small novel. I am about to go out and plant a herb garden with Lisa. Before I do, I would like to leave you with a little story and a teaser until I can write my complete post next week.

While watching the Sheep to Shawl – my first one ever on day two of the show, I climbed up onto the stage to get a better view of the shawl judging. Along came a charming English gent who said that he envied my lofty position from which to take photos. Well, I just told him to come on up where he spotted the inkle loom I had slung over my shoulder with my pebble weave band and we got to chatting. I invited him to come and watch my backstrap demo at noon, he assured me he would and we parted.

I was in full swing at the demo setting up my loom and getting ready to weave when my new British friend sat by my side and then presented me with a beautiful braid that he made from fiber he had picked up at the show…and then he showed me these…

So, have you guessed his identity? I’ll give you another clue…he was recently the subject of one of Syne Mitchell’s Weavecasts….

Speaking of Syne Mitchell and WeaveZine, my e-monograph has been selling well and I have already met a bunch of people here who have bought it and are using it. I will be writing with some yarn recommendations for backstrap weaving in my next post following very useful feedback I have had from some folks..

More about my encounter with my new braiding buddy and a bunch of other MSWF antics as well as some pre-and-post-festival fiber fun soon!

We are off to Oak Island this weekend. I am looking forward to dipping my toes in the Atlantic, eating shrimp, inkling in the car and backstrap weaving on the porch of the beach house. Next week we are going to try out my theory for getting Andean pebble weave onto the four-shaft loom – I have got it down on paper and am dying to try it.

See you then! 🙂

Backstrap Weaving- Crafting “on the road” and a video tutorial

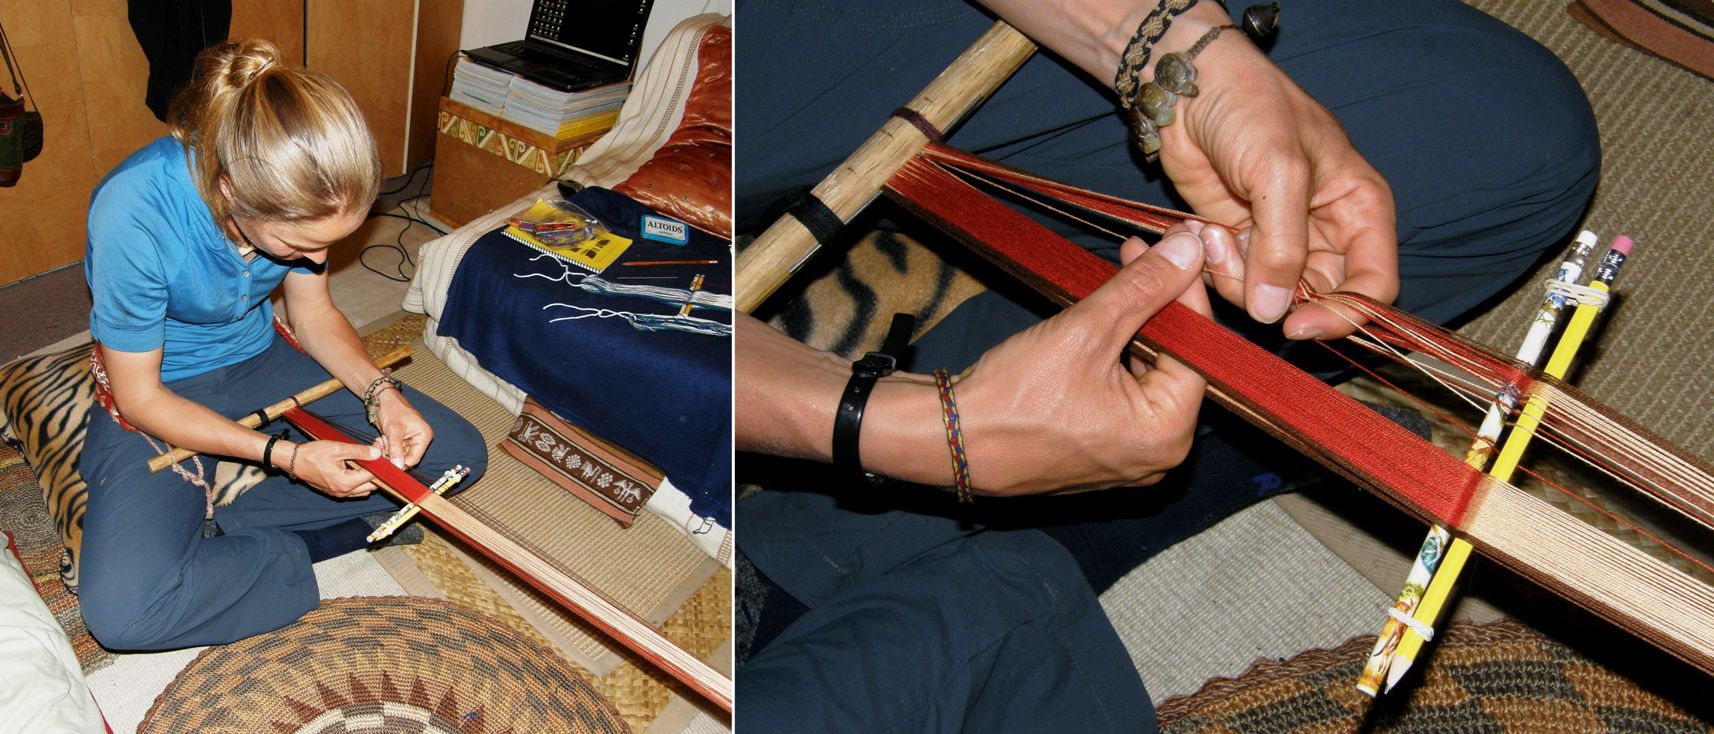
Hopefully, if all my standby flights worked out, at the time this post is published I will be sitting in Robyn Spady’s inkle weaving class at CNCH. (Conference for Northern California Handweavers) My first such event! – very excited. This will be my first experience with an inkle loom and, hopefully, it will be better qualify me to answer those questions I often get about transferring pick-up techniques normally woven on  backstrap looms to inkle looms.

On Saturday, I will be taking Syne Mitchell’s rigid heddle class and the rest of the time I guess I will be looking at all the goodies on display, seeing Weavolution members in the flesh for the first time at the meet-up, perusing the galleries and taking lots of pictures to share with you all here at some stage.

So, as I write this here in Santa Cruz, Bolivia I am thinking it is time for me to get my “on the road” crafting stuff together.

I always take my backstrap gear along with me and, when there really isn’t anywhere I can hitch my loom, I braid or spin.

First the backstrap gear…

Backstrap weaving stuff to take traveling.
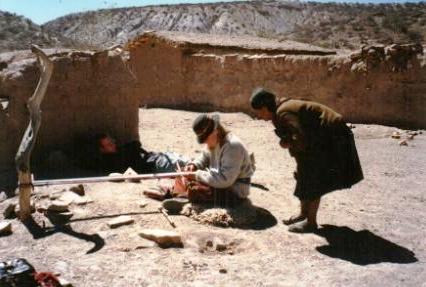
Weaving literally on the road near Potosi, Bolivia. I went with friends to the village of Calcha near Potosi to meet with weavers. On the way back we had to sit for hours on the side of the road waiting for a ride and finally got to travel back to Potosi in the back of a truck. We passed the time by hitching to a convenient dead tree and weaving. We had bought a sheep skin in the market in Calcha so we could pass the night sleeping on the floor in the hospital! This made a nice comfy seat for weaving. One lady who lived right near the main road where we were waiting came along to see and was enchanted!

I see that there is something I forgot to include in the photo – several flat non-stretchy shoelaces to tie the loom bars to a fixed object. I usually take a project already warped up and then my mini warping board goes along for when I get through that and want to start another.

The mini warping board with its removable screw “stakes”  is on the left.  Moving from there to the right, I have several thin dowels for cross sticks and heddle rods, my new shadow weave sewing kit purse, three beaters, a large curved needle, my new belt shuttle (thanks Lydia!), two loom bars and a roll up rod,  metal rods for three-selvedge pieces and my backstrap. I also take a small bottle of white glue so I can finish the braids on keyfobs and bookmarks. I usually pick up yarn on the trip so I can try out new stuff.

As for the braiding…

I was recently sent this image of a Tibetan nomad sling. I am no braiding expert but superficially, at least, the braid on the left looks exactly like the Margarita braid that I learned in Peru.

No, I am not going to pop a marudai, the piece of equipment on the left, into my backpack. Thanks to my teacher, Zacarias in Peru, I can make the nice Palma and Margarita braids used to make slings in Peru (which I first showed you in this post) with those two pieces of equipment on the right.

Of course there are other ways to braid the 24-strand braids without the use of cumbersome equipment. Rodrick Owen shows you in his Braids 250 Patterns from Japan, Peru and Beyond how to make them using notched cardboard squares and circles to keep the strands nicely in order. Perhaps you listened to the recent WeaveZine weavecast with Roderick Owen.

I am going to show you by video today how to work the 24-strand Palma braid as I was taught in Peru by a sling braider. The fiber used in the sling braids is generally llama and the strands are fairly thick and, therefore, easy to manage in the hands. I don’t imagine it would be quite so easy with fine yarns.

The video has been split into two segments. The technique has four parts so you will see parts one and two on the first video and the other two parts on the second one.

The idea of the videos is to show you the movements of the strands. I am not showing you there exactly how my teacher held his hand as he braided as the crossings were not so clear on the video that way so I will show you that in a still shot later.


Two Palma braids made with 12wpi cotton. I am going to use the one on the right as a strap for the bag which you can just see at right.

Getting started on the Palma braid:

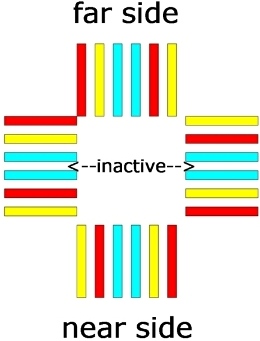
You need eight strands of each of three colors, that is, twenty-four in total. Keep the strands short for your first practice braids – I suggest no longer than 18″. Tie all the ends together in a knot . Hold the knot in your fist having all the strands emerging from the top of your hand and then separate them into four groups. Try to align the strands as closely as possible in the order shown in the following diagram. Organized in this way, you will have red and yellow “Vs” in your braid separated by columns of light blue. It will be impossible to get the strands to stay exactly in this order at first, but don’t worry about that. This is just to get them more or less in place so you can start.


You can also see the strand order in the photo below left. Once you are braiding, only two sets of strands are worked together at any one time. You work with the near and far side sets while the other two sets are hidden in your fist, clasped against the braid itself as you can see in the photo below at right.

LEFT: The four groups of strands. RIGHT: Grasping the strands in the fist.

And now for the videos…They are a bit on the dark side-still haven’t found the perfect spot for movie making…


Well, I hope these video instructions were clear for you. Remember that yellows always pair with reds and vice versa and that you are always working from left to right across the strands. In your very first two moves, you won’t need to think about “uppers” and “lowers” when you work with the blues – just grab any blue and cross it over. Uppers and lowers will become apparent after that. Tug lightly on each strand before you cross it.

Starting is the hardest part as the strands will be loose and wandering about. After the first sequence, however, they will begin to sit naturally in their correct positions.

The picture at left shows how my teacher held the strands while braiding.  All the ends were wound into butterflies and his hand was tilted so the strands all hung down. It looks like a mess and the strands occasionally wrap around each other, but it works! Strands are going this way and that and then you open your fingers to reveal this gorgeous braid. This is the first time I will be using a braid for a bag strap – let’s see how it goes.

I will be braiding on my flight to San Francisco as I am putting some woven pieces in the gallery at the conference and hope to use the braids to hang them. This is one of those things I just didn’t get around to doing so I guess I should stick to four-strand braids for this so I can get them done quickly.

And finally the spinning…

I always take a spindle and a bit of llama fiber along but usually only to show people a

Trini in Ecuador having a go on my drop spindle.

typical Bolivian spindle. The weavers in Guatemala knew nothing about llamas or llama fiber so it was fun to show them pictures of llamas and samples of the fiber as well as some things I had woven with it. Those in coastal Ecuador had never seen drop spinning so it was nice to be able to teach them a little. Spinning, unlike pick-up weaving and braiding, is something I can manage while chatting with people. I do like hunting for typical spindles and unusual whorls on my trips and this usually leads me off the beaten track. Having a spindle on me is always a good ice breaker. Not everyone can weave but in the villages of Bolivia it seems almost everyone can spin a bit or at least use a spindle to respin or ply yarn. They actually think I am a little mad when I say I want to learn – “What is there to learn? Even my four-year old son can do it!” – they tell me.

LEFT: Typical drop spindles sold in the Bolivian markets. RIGHT: A few of the spindles that I have collected in my travels.
LEFT: Spinning in Yanque, Peru RIGHT: Salasaca, Ecuador where the spindle called ‘sigsig’ is made from pampas grass stems. The wool is spun to be woven on floor looms into the cloth from which skirts and shawls are made.
LEFT: Spinning in Otavalo, Ecuador RIGHT: Spinning on the way home from the market, Tarabuco, Bolivia.

And last of all I take my small photo albums with pictures of weavers, looms and textiles from around South America to show weavers and travelers. I also have another album with small samples of various motifs I like to weave. In Salasaca they treated this like some kind of shopping catalog and started  making orders selecting motifs for belts and purses!

Now is there any room left in the backpack for clothes and stuff?

I am going to try my best to continue with my Friday blog posts while on the road. If I don’t don’t get a post out, it will mean I am having too much fun! 🙂

Late addition to this post…here is Stitchwort’s “S” design band from last week’s tutorial on her inkle loom made with her own handspun yarn. So if you have been wanting to try these techniques but have been a bit dubious about getting strapped into a backstrap loom, take a look at the lovely band that she has turned out. By the way, I am in love with her little shuttle and she made that herself – check it out on her blog.

The only drawback with the inkle loom that I can see is width limitations but for a band like this there is no problem. One Weavolution member did mention that these types of weaves put a lot of strain on the inkle loom so that is something to bear in mind – just in case! I am hoping to come back from CNCH a lot wiser about inkle looms!

##################################################

TRAVEL UPDATE…WEDNESDAY: Yay I made it. Both my luggage and I got to San Francisco. I have one day to recover from the trip before the conference. Gorgeous day here today – I even got sunburned.

A little time for some sightseeing…

This is one of the places I wanted to see but, wouldn’t you know it?-it was closed just today to prepare for an exhibition. So I had to satisfy myself with pressing my nose against the window and looking at all the lovely things.
THURSDAY: Dim sum breakfast in lively Chinatown, San Francisco before heading down the coast to Santa Clara. The ocean!-something I miss in Bolivia.
At the Convention Center- meeting other weavers and a lesson on spinning angora rabbit fiber from Janet, a Weavolution friend, using spindles with bead whorls.
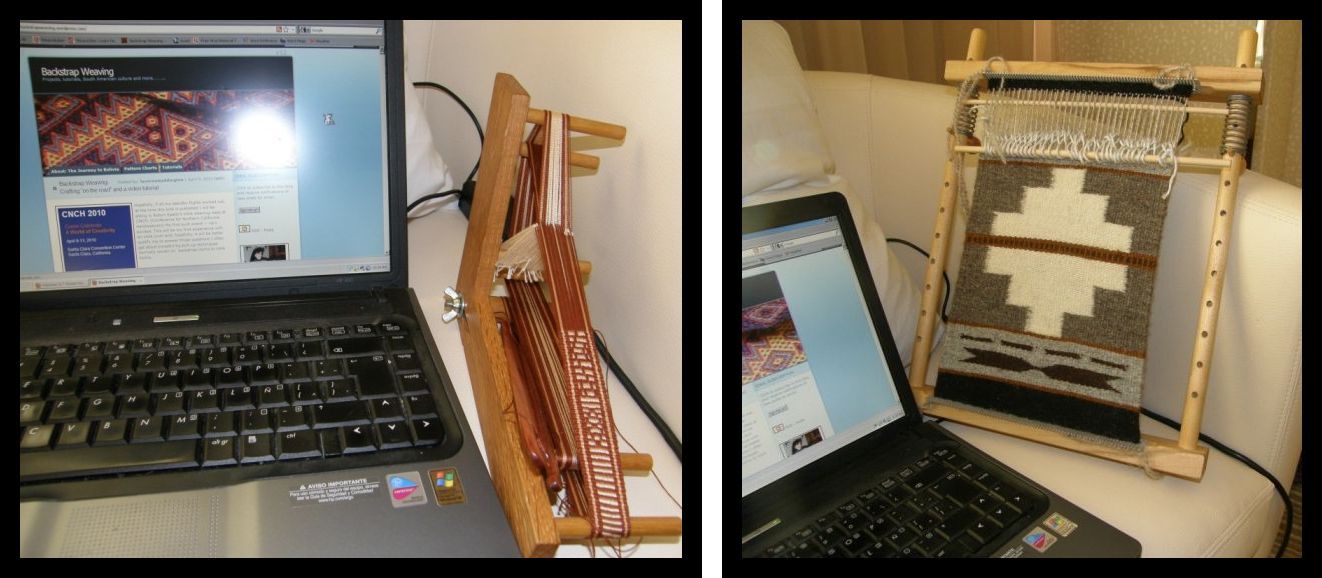
A couple more “on the road” weaving tools belonging to my roomies here at the conference. LEFT: Janet’s mini inkle loom which she let me play on last night. RIGHT: Connie’s cool C Cactus Flower Navajo loom with her cute miniature rug.

It is funny that I have run into this Cactus Flower loom here because I saw one for the very first time last weekend when I was emailing my first weaving teacher – a lady here in the US who taught me Navajo style weaving. This is where I first got my start in weaving back in 1995 and, seeing as I am here once again in the US where it all started, I hope to blog a bit about my first weaving teacher and my adventures in Navajo style weaving next week. I have always lamented having to leave my huge Navajo loom behind in Chile when I moved to Bolivia in 1998. Now you can just pop a Cactus Flower loom in your bag and hit the road!

A buzz of excitement in the air…classes start tomorrow. 🙂