Backstrap Weaving – A Little Armchair Travel (courtesy of Jose Jaime Araujo)

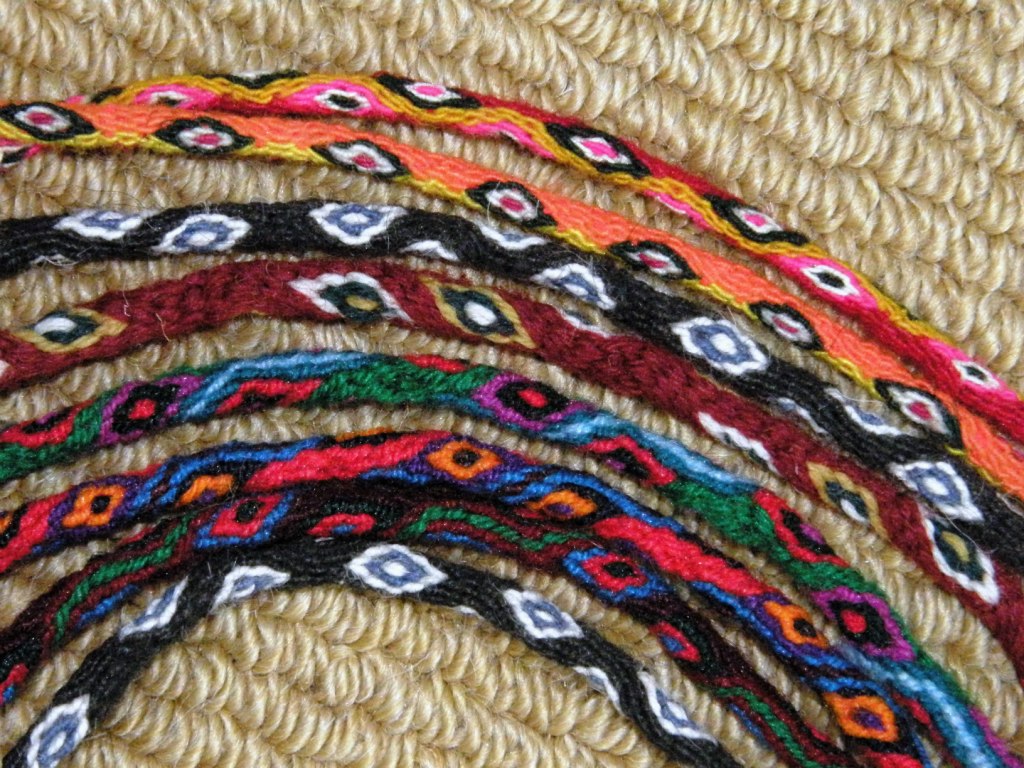
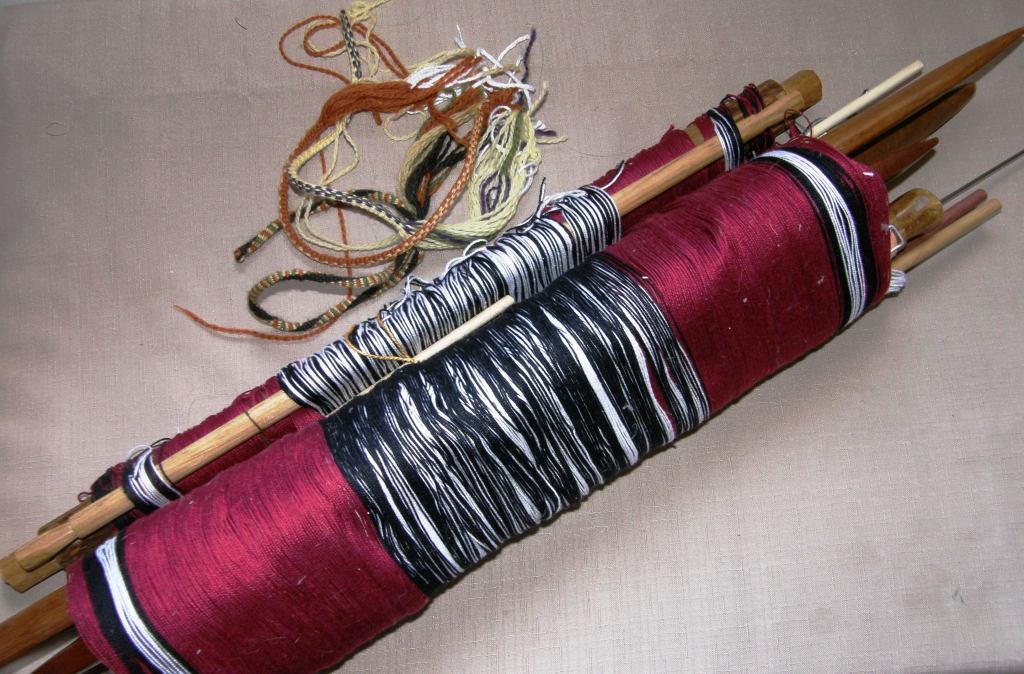
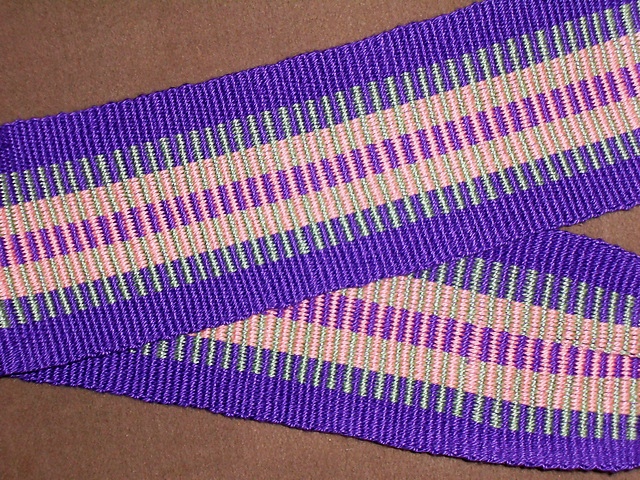
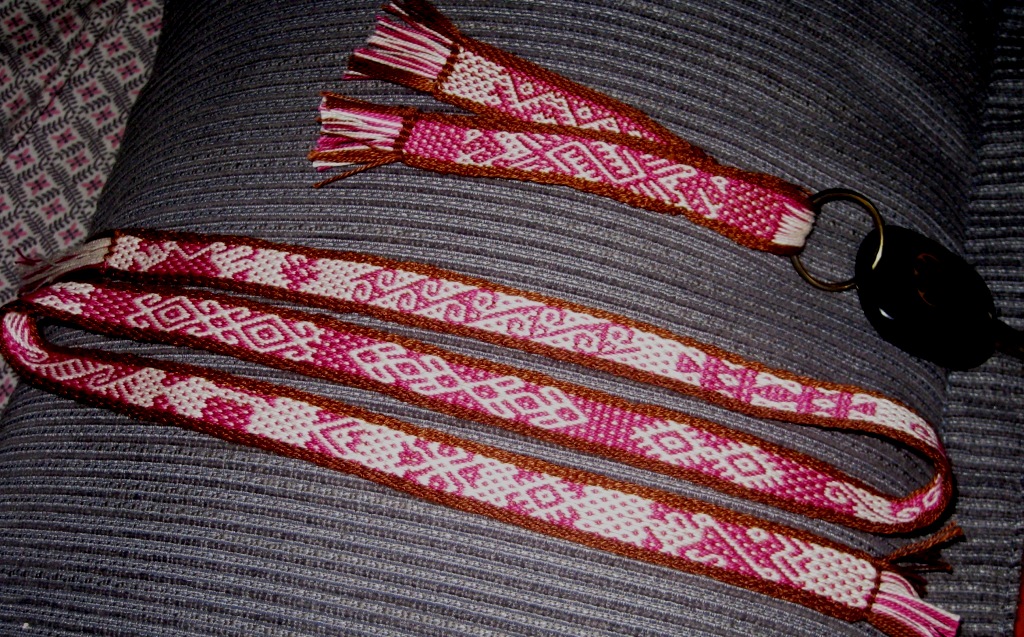
Reproductions of Wayuu si'ira belts woven by Mirja Wark
Reproductions of Wayuu si’ira belts woven by Mirja Wark

I had my heart in my mouth last Sunday night watching the CNN program “Anthony Bourdain’s Parts Unknown”. He was in Colombia! That’s a place where I would dearly like to go although I have to admit it has gotten such bad press that it scares me somewhat. I was hoping to be told what a safe and wonderful place it is and the host did a good job of projecting that. In fact he said that it was the “most welcoming” of all South American countries he had visited.

The part that had me on the edge of my seat was when he went to the Guajira Peninsula, home of the Wayuu people. If you follow my blog you will know that through Mirja Wark’s book, I have been using Wayuu si’ira belt patterns to inspire some of my weaving.

Mr Bourdain wandered through the markets  and I recognized versions of the typical embroidered dress that the Wayuu women wear. Mirja had modeled one for me when I visted her in the Netherlands last year. It was nice to be able to catch these glimpses of life in the market and learn a little about local food.

mirja modeling wayuu dressBut, sadly, he didn’t go looking for weavers or for the craftswomen who make the beautiful crocheted susu, or “mochilas”. He and his guide swung in hammocks after a day of ripping along the coastline on noisy four-wheel bikes. Yes, we got to see all that as well as the host falling off his bike on his head but didn’t get to hear anything about the woven hammocks. Too bad.

Fortunately, I found a gentlemen online, Jose Jaime Araujo, who has visited the Venezuelan side of the Guajira Peninsula and who is willing to allow me to share pictures that he took of the textiles and craftspeople there. He visited a market that looked very similar to the one that Mr Bourdain showed on the CNN program. Here you can see Mr Araujo’s guide using one of the susu, the typical crocheted bag, used by both men and women.

Photo by Jose Jaime Araujo

This could easily be a street market in Bolivia except for the beautiful flowing dresses that the women are wearing . I expect the music they are playing (all markets here  in Bolivia jump to the rhythm of various pieces of music clashing merrily together!) is different and you would be hearing the sounds of the Wayuu language. Mr Araujo’s guide acted as his interpreter.

Photo by Jose Jaime Araujo

Imagine….a stick with a hook on the end and talented hands are the only “tools” needed to create such a beautiful piece! I got to see one of these susu, or “mochilas” when I visited Dorothy on my recent US trip. Mirja, in Holland aslo had a fine collection.

??????????????????????I will leave it up to the crochet experts to look at this and understand how it is done!

close up of Dorothy's Wayuu mochilaAnd below is something for the ply-split braiders…

???????????????????????????????Mirja told me that the art of weaving the si’ira belts is on the verge of dying out and that she found it almost impossible to find someone who could show here how to do it. The belts are woven on simple vertical looms. Mr Araujo was lucky to find this elderly lady working on the ends of a belt after it it had come off the loom. This is eighty-five-year old Maria Úrsula Ipuana and Mr Araujo describes her as a living legend. She is one of the best Wayuu artisans that knows all the techniques of weaving. Right now she is passing her knowledge to other young Wayuu women.

Photo by Jose Jaime Araujo

You can just make out the “like the nose of a cow”  pattern at the end of the belt, a version of which I used in my wall hanging.

Wayuu inspired wall hanging progress

In this next picture Maria Úrsula Ipuana is holding two single loops in her hands and is most likely adding some countered twining to unwoven warp ends.

Photo by Jose Jaime Araujo

You know how I love weft twining! You can see the simple twining in blue and green  at the bottom of Mirja’s belts…

braiding and weft twining at bottom of siira beltsI added a very small and simple version of the twining to the bottom of my Wayuu inspired wall hanging…

wayuu inspired coutered weft twining

You can see how the threads in the first row of white twining are diverted to swap places with the threads in the second row of black twining and then vice versa as the twining proceeds across the warp ends.

Included in Jose Jaime Araujo’s collection of photos are ones of Wayuu women twining across large groups of warp ends which Mr Araujo says will be a hammock.
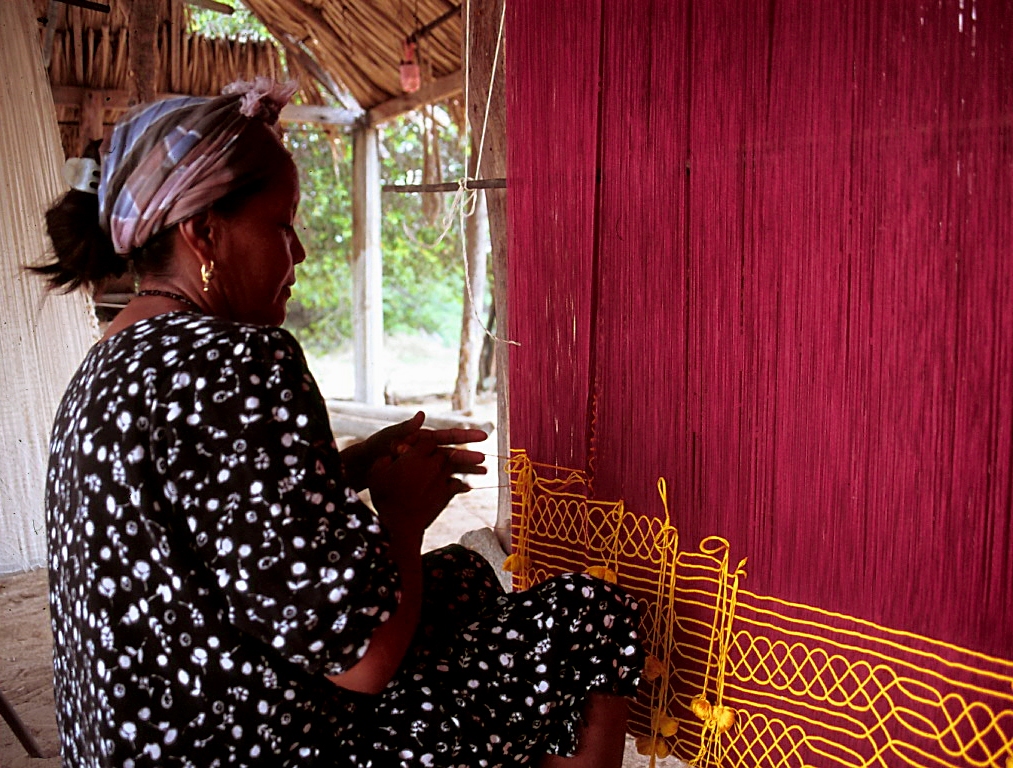
Photo by Jose Jaime Araujo

How spectacular is that?! This is something I wouldn’t mind trying. Here is another one with white on white…gasp!
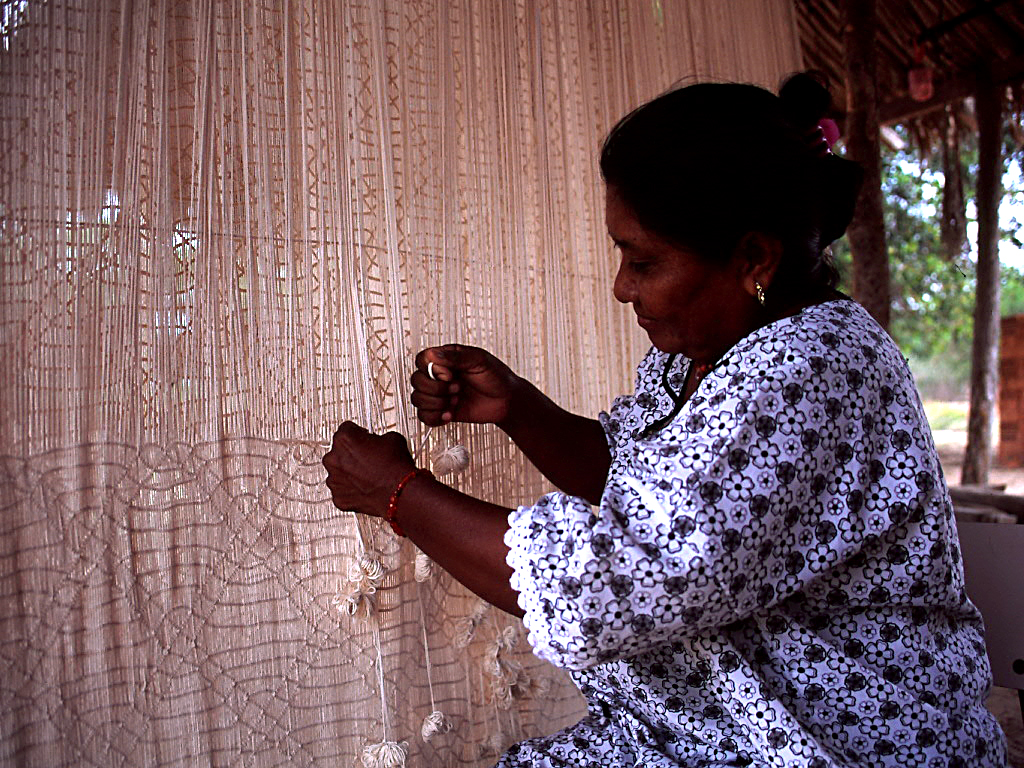
Photo by Jose Jaime Araujo
Picture by Jose Jaime Araujo
Photo by Jose Jaime Araujo
Photo by Jose Jaime Araujo.

Above, Maria Úrsula Ipuana shows a man’s ceremonial belt, a si’ira that she wove. You can see another stunning example at left and get another look at the weft twining at the end of the belt.

Jose Jaime Araujo’s flickr page has more pictures of the Wayuu people, their environment and crafts which include hat-making.

Thanks to Jose Jaime Araujo, we get to see a little of what Mr Bourdain neglected to show us. In the meantime I will look with a little more confidence at Colombia and maybe Venezuela on that long list of places I would like to visit.

Back here in Bolivia, I am still breaking down that seven weeks of accumulated dust and evacuating some unwelcome spiders. Fortunately, I saw this poem on Facebook, by an anonymous poet, only after my work was mostly done. Otherwise, I may never have done anything at all!

dust if you must

bhutan scarf with borderLots of excuses there!

But, I found that dust I must as I had a visitor last weekend from Australia. Wendy Garrity stopped off in Santa Cruz on her way to the highlands. Wendy spent some time in Bhutan teaching music and learned to weave at a weaving center there.

When I was trying to figure out the Bhutanese supplementary-weft chain-stitch technique by studying textiles from Bhutan in friends’ collections and online, I was able to find a piece of missing information about the spacing of the pattern warps from Wendy’s blog. That enabled me to make the scarf, at left, using traditional and adapted Bhutanese patterns
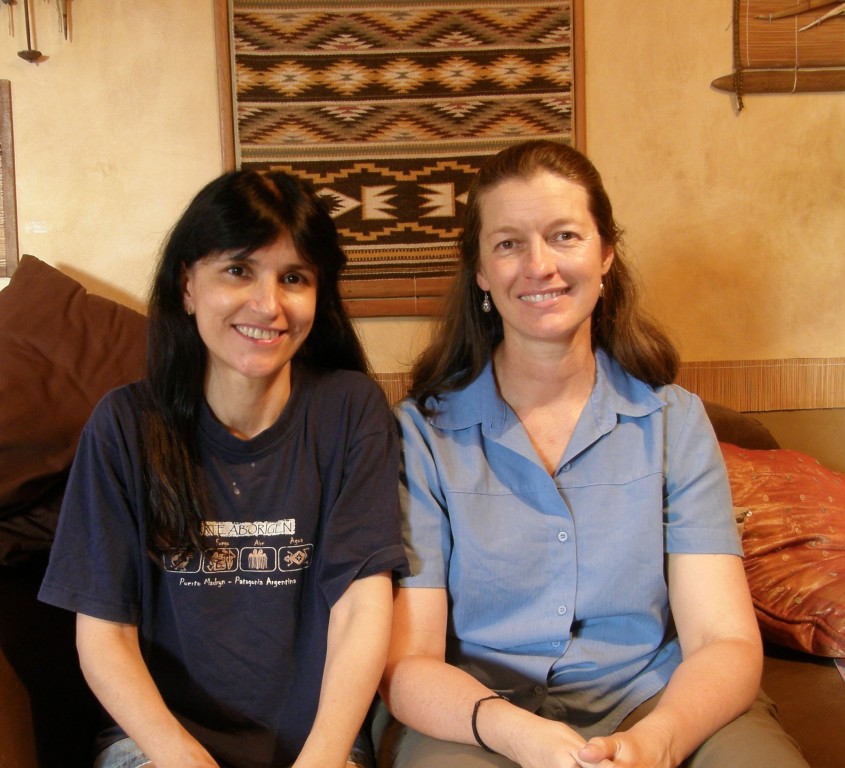
with WendyWhen I found that last piece of crucial information on her blog, I told Wendy that I had wanted to jump through the computer and hug her. That saved me a lot of trial-and-error.

Well, who knew that she would turn up in my home and get that hug for real?!

We spent two days chatting in “Australian”. I always like feeding backpackers who have either been living off cheap greasy cafe and bus terminal food or noodles that they cook up on camping stoves by the side of the road. It makes my simple cooking seem like something wonderful!

We poured over the Bhutanese patterns in David Barker’s books and Wendy told me the names and meanings of many of them. We talked about our travels through Asia…mine having taken place mostly in the mid eighties to early nineties and involved mostly trekking up and down mountains. Wendy’s travels in Asia have been about working and looking at textiles.

We shared what being away from Australia for extended periods of time is like. I have been living outside Australia for 20 years now!

I taught her a simple Andean pattern on a narrow band so that she could take it along with her on her travels. It is a complementary-warp pick-up technique which will give her a little insight into some of the textiles that she will see on her way through  Bolivia and Peru.

Wendy weaving the tanka ch'oro patternWhile Wendy wove her tanka ch’oro pattern, I set up to weave with my friend Janet’s gorgeous handspun wool.
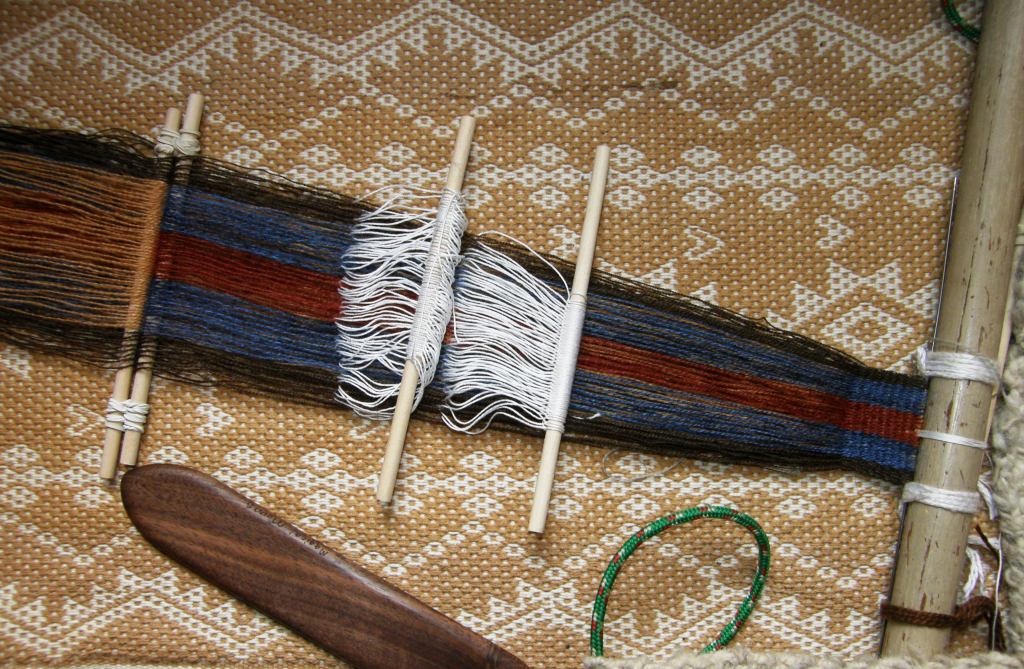
Backstrap weaving with Janet's handspun wool This yarn came from a basketful which Janet invited me to dive into and sample. So, I made up a short warp for the intermesh technique. I weave it as a two-heddle method and teach it in my second book.

???????????????????????????????

I have to tell you that Janet’s yarn is just wonderful to weave with. I have spun llama fiber that I bought here in Bolivia (very dry and coarse stuff it was!) and some beautiful alpaca fiber that Janet gave me. I carded the fiber to prepare it for spinning on my drop spindle. I spun the llama fiber very tightly but tried not to overspin the alpaca. While I was happy with the results, I knew that on a very long warp my handspun would probably start to break quite frequently.
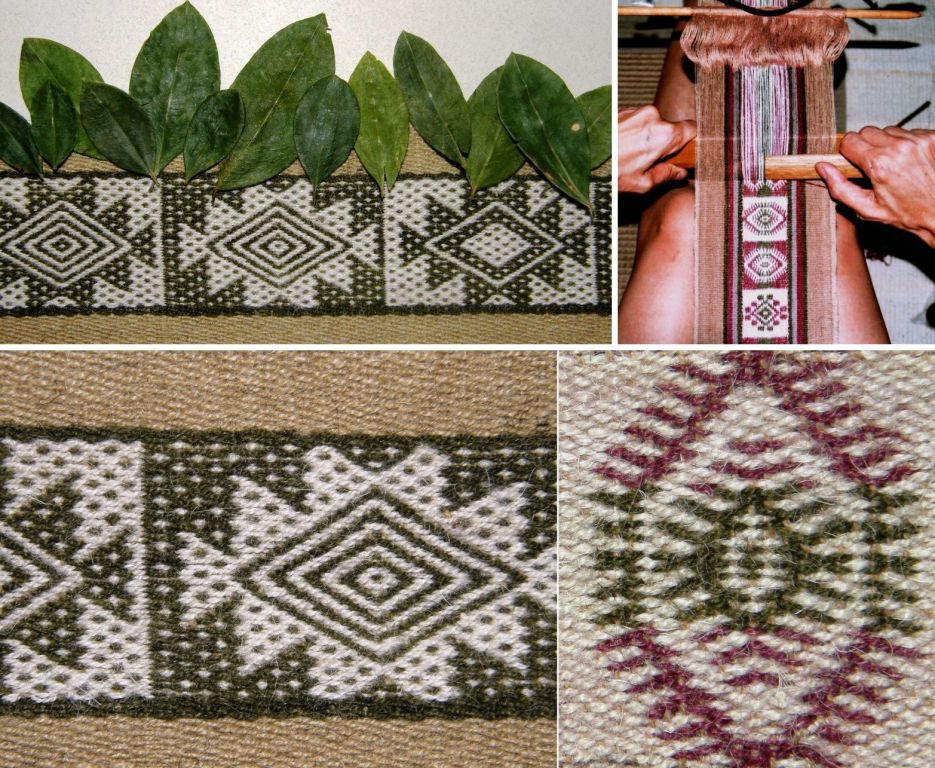
handspun-detailsAbove you can see my handspun llama in pebble weave and double weave projects.

cell_phone_alpaca_warp_on_backstrap_loom

My handspun alpaca lay happily flat when not under tension but this is just a teeny tiny warp…just enough for a cell phone pouch… so, who knows if the yarn would have stood up to a longer project.

Janet combs her wool rather than cards it and the yarn she offered me had been spun on a wheel. I don’t believe that her yarn is anywhere near as prone to breakage as my llama yarn was. Janet’s yarn is wonderfully smooth and resilient without being overtwisted and kinking back on itself. It is perfect for warp-faced weaving and produces fabric that almost lies perfectly flat.

intermesh band with Janet's handspun

It tilts ever so slightly at opposite corners but I have to tell you that sometimes the bands that I weave with Tahki Cotton Classic twist more than this band I made with Janet’s wool! I used a very simple intermesh pattern just to test the wool. The weft is a light gray fine commercial wool. You can see my teacher Maxima’s bands corkscrewing nearby. Those band were woven using Maxima’s handspun as both warp and weft.

You can see a little twist in the unwoven brown warps below but there is certainly none of the furious kinking back that one often sees in yarn spun for warp-faced weaving.

experiment with Janets handspunI love the neat third selvedge that working with wool produces.

And that is all I have done with my backstrap loom since getting home :-(….that darned dusting!)  But, I have been busy with my inkle loom. Why? Because I am writing an article. My wee inklette is one of the dust-covered items that needed taking down from the shelf. Now it is warped up and is being posed all around the place for photographs. I have to admit that sometimes I wish I had a bigger heavier inkle loom. If the article ends up on a printed page, I will tell you all about it!
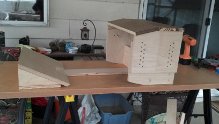
bobbies ergonomic benchThere was sudden flurry of activity in the Ravelry group right at the end of a pretty quiet month and I have a bunch of things to show but will save most of it for next week.

Let me show just a couple of things for now…

Bobbie posted a tiny image of the ergonomic bench for backstrap weaving that she built following the instructions that Synergoarts has put online. It looks like she has done a perfect job and we hope to see a large picture of her using it soon.

Bethan, in Scotland, sent me a pretty spring picture of the warping board she built following pictures of Guatemalan warping boards that I have posted here. The warping boards that I saw in Guatemala all looked like this in various sizes. To keep the set-up compact for long warps, the warp is extended to one end and then turns a corner and comes back to the starting point.

warping board in dandelionsThere I was thinking that this system is  unique to Guatemalan weavers when I remembered that Sasha, who wove with me in Portland last year, learned to weave with cotton in the Piura region of Peru. She shared pictures with me of the warping set-up her teacher used in her home.
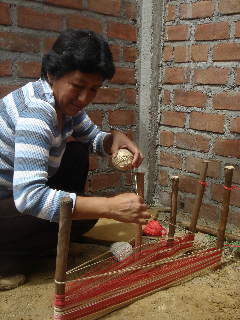
peruweavingI am sure that those stakes are very firmly beaten into the ground so that they won’t lean as warping progresses. They look like they may be permanently positioned there. This weaver  sets up two crosses as she warps as the Guatemalan weavers do.
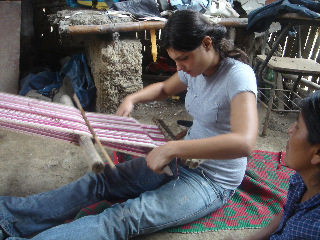
peruweaving-16

Here is Sasha’s friend settling down to work on her cotton warp. Sasha brought her unfinished weaving to show me and get some tips. She had set it aside and had forgotten how to operate it and her string heddles had gotten really messy.

sasha and the piura warp

Amy sent me a picture of her home-made rigid heddle which she is using to weave a band. She wants to teach her children to weave with this as well as give Guatemalan children, who are residents on the US and who participate in a Latin American Cultural group,  a simple hands-on weaving experience.
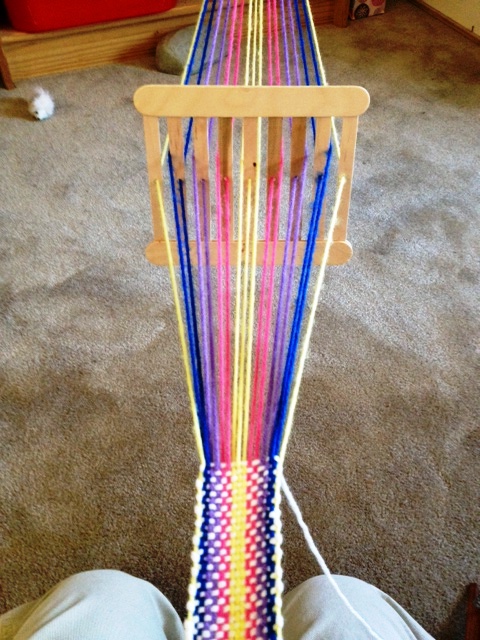
amyAnd adventures with the famous coil rod continue in the Raverly group. Julia is using one on her single plane warp and loving it. (I have only seen it used so far on circular warps). I had been waiting to question Wendy about Bhutanese circular warps and how the coil rod is applied. After having watched a video of Leki Wangmo warping and weaving, I had some questions and now have them answered. Yes, the story of the “curious coil rod” continues to unfold! I will tell you more next time.

I am jumping between winding warps, cutting and hand sewing bands, playing with my inkle loom, photographing the inkle loom and drawing charts, writing an article, braiding , braiding and braiding warp ends and backstrap weaving. Oh, and yes, a little bit of dusting and armchair travel.

Let me leave you with Marge’s beautiful belt…woven on an inkle loom ….but it serves as great inspiration for a backstrap project and the buckle she has used solves all those problems of cutting a slit in the the band and making holes that a regular belt buckle requires.

Marge belt

Backstrap Weaving – New Challenges: Wider, Longer, Finer.

While doing some house keeping in my album of weavings on Facebook, I came across a picture I took of the first red, black and white wall hanging I made entitled “Starry Night”. My caption read that I was weaving this in order to push myself beyond my current width comfort zone. That was a nice reminder as I am now on the third piece of similar width in this series and I have to say that I feel very comfortable with this width now! Seems that I need to go wider.

The first two pieces in the wall hanging series
The first two pieces in the wall hanging series.

Here is where I stand with piece number three. That snake continues to slither its way up the cloth.

O

The pick-up is a piece of cake now…really! There’s nothing like repetition to firmly embed a design in your head and fingers. It began with lots of tedious chart reading which was made a lot easier with the use of removable highlighter tape. Then I played a favorite game…read the cloth and guess what comes next. Then, before passing the weft, sneak a peek at the chart to see if you are correct. Next comes reading the cloth, deciding what comes next and going for it. Beat, pass the weft and then look at the cloth, not at the chart, to see if you were correct. Eventually you reach that chart-free happy place.

But then….you finish the weaving, you start something entirely new with a totally different structure and the fun begins again!

As for going wider….there are still quite a few more pieces I want to make in this current series, but when I do get to the point when I am ready to break out of the old comfort zone, I will need some new equipment…longer loom bars for a start. I already have some pretty long swords.  I would also love to have the kind of backstrap that some of the weavers in Peru use.

Chiclayo and Santiago Atitlan

With its two sets of straps, it was designed to accommodate different widths of weaving.

And, I would like to weave longer pieces. The scarf that I recently made had me extended to the limits of my weaving space. I rolled up part of the warp at the far loom bar but I really prefer to have the warp unrolled at full stretch.

backstrap warp for scarf project

There was just enough space to put my cushion and sit with my back against the closet door. So, if I am to go longer, it is a simple matter of using a circular warp. I have woven on these kinds of warps on a few occasions. Anyone who does inkle weaving certainly knows about circular warps.

circular-and-single-plane-warps

The pictures above show a band on which I was working on my inkle loom. The warp is a complete circle. The black band next to it has been warped in a single plane in the same way as the long black scarf warp. Once weaving is finished, the circular warp is cut apart and the band can be extended to its full length.

The Montagnard weavers with whom I studied use circular warps for their long blanket and skirt panels.

montagnard weaver opening heddle shedYou can see Ju Nie above weaving the top part of her circular warp.

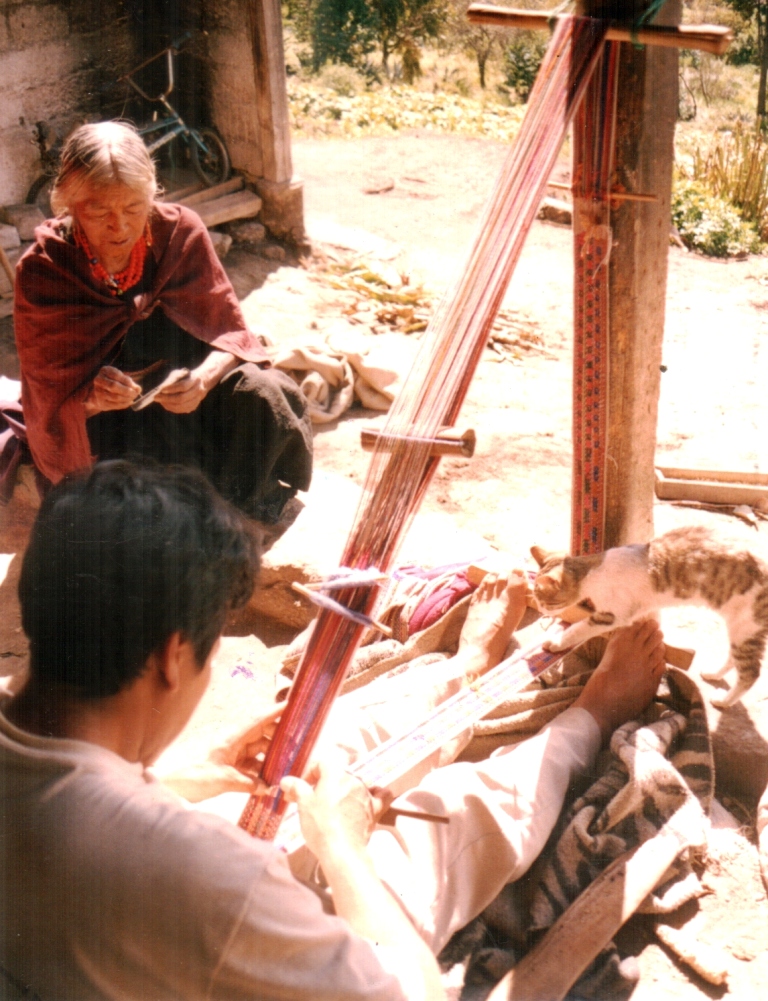
Probably the most time I spent weaving on a circular warp was when I learned to weave the typical belt of Salasaca, Ecuador. My teacher, Felipe, wove on his narrow front porch and his way of setting up a circular warp allowed him to sit and weave the very long belt even in that small space.

dovetail warp Salasaca Ecuador

Felipe’s belt will not have to be cut once the weaving is finished. He has warped in what is known as “dovetail”  fashion.

dovetail warp set-up

The following diagram will show you how he is using five of the six sticks you can see in the above picture to wind the warp for the white ground weave. The stick marked with the red arrow is the one around which the warps “dovetail”. When weaving is finished, the stick will be removed and the belt can be opened out. You can see the dovetail stick in the photo of Felipe weaving. It is in the section of  band that lies along the porch post.

dovetail warping path

And, if you are wondering about the sixth stick…that stick is used to hold the colored supplementary warps. Salasacan belts are woven in a supplementary-warp technique.

my salasaca belt

The diagram above shows the path of the white warps in the ground weave. The following diagram shows the path of the colored supplementary warps. In Salasaca, the supplementary warps all go together in a heddle of their own rather than being split between the two ground weave sheds.

dovetail warp path 2

angela-and-hammock-loomYou can see that when the dovetail stick or cord is removed, the end loops of the warp will stay intact. The loops can be very useful for finishing the woven item.

Guaraní hammock weavers here in Santa Cruz use the dovetail warping method and use the intact end loops for attaching the cords from which the hammock will be suspended.

So, longer warps are on the drawing board for me which will mean building a new warping board or modifying my existing ones.

I would really like to have a set-up like Felipe’s. Too bad I don’t have a porch on which to sit (and, yes, the view was lovely from there). I have seen pictures and videos of many Asian weavers with similar “triangular” set-ups. I will have to see into which wall I can drill holes in a place where I can still get good light! The idea of raising my bed way up high to give myself more space is gaining more and more merit.

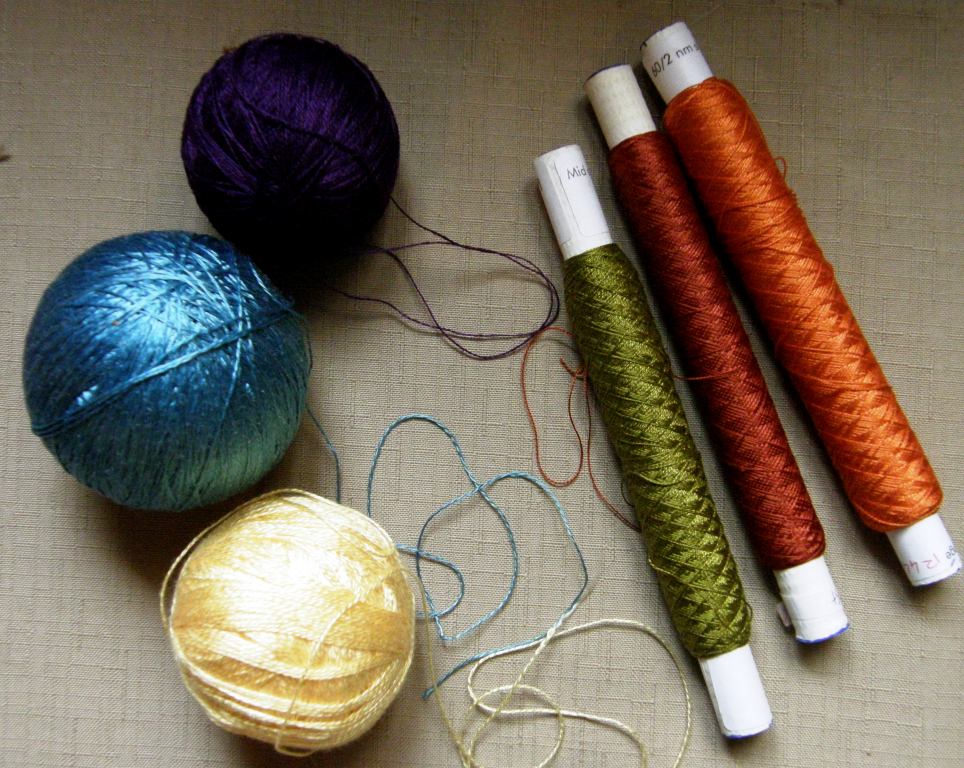
The third challenge is to use finer yarn and I am already in training for that with my scarf projects made from Guatemalan cotton. I have a ball of fabulous indigo-dyed silk that an English teaching colleague brought back for me from Japan years ago. It is heavier than the 60/2 silk that I have been using as supplementary weft and I think that it is a good weight for a first large silk weaving experiment.

Light blue Japanese silk, spools of 60/2 silk, yellow 8/2 tencel and purple Guatemalan cotton.

pebble weave with silkHowever, this doesn’t mean an end to band weaving! I love weaving bands just for the pure fun of it and don’t care if I don’t have a particular use for them.

Narrow bands are a good way to test new yarn or check the proportions of a newly charted motif.

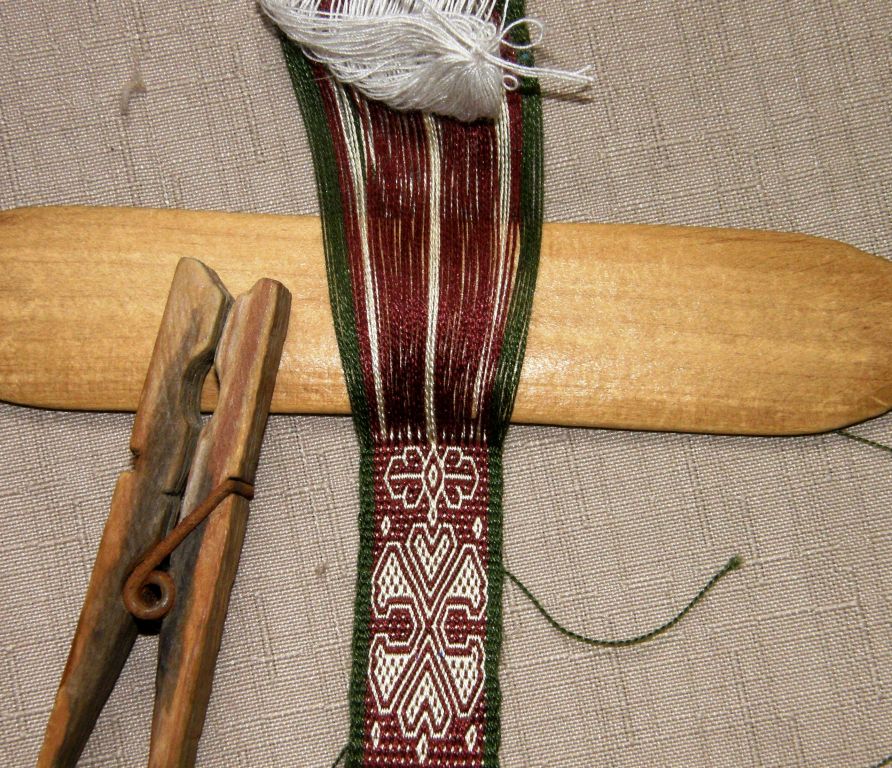
I love weaving miniatures too and have already used the 60/2 silk in a small pebble weave band (at left) to test the yarn, check how difficult it might be to see for doing pick-up as well as to try out a new pebble weave motif.

Band weaving for me is also a nice way to take a break from large pieces on which I might be working…only 16 threads to pick up rather than the 286 in my current project and I can attach to a toe and weave on the sofa.

Much of last year was spent finishing my second book which involved a lot of weaving of samples… mostly bands and a few larger pieces. I have buckets of bands here! They won’t be made into anything. Some of them are very useful in that they travel to my workshops and make good teaching tools.

I took this next idea from my friend Yonat who put together a display of her inkle bands to photograph. I  put together a few of the bands that went into my book last year. They are of different widths and lengths…some barely two inches long… and so, my display is not as pretty and uniform and Yonat’s.

backsrap woven bands for book

The resulting book with yet more bands on the cover…

More adventures book cover dsz

You can download it from Patternfish.com.

ANWG 2013

The North West Weavers Conference, which will be held in Bellingham, Washington this June, recently opened its registrationI am going and hope to see you there!

To finish, here are some great projects from members of the Ravelry group…

carrie

Carrie wove this warp-faced band using the frame of her rigid heddle loom on which to extend her warp. She used string heddles and a shed rod rather than the rigid heddle. The patterns were created with supplementary warps. Gorgeous! We all love the soft colors she chose.

amandaAmanda kindly shared part of her band with her first attempt at creating patterns with supplementary wefts. She shows the difference that applying less tension to her warp made to the amount of coverage she achieved with the supplementary weft. She is using #10 crochet cotton for warp and embroidery floss as her supplementary weft.

janet

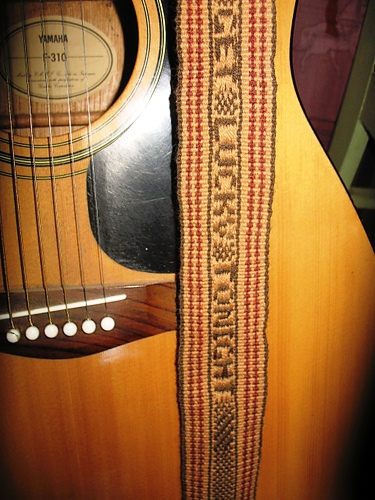
Janet wove this guitar strap for her husband with her own hand-spun and dyed wool. She used instructions for the pick-up patterns from Anne Dixon’s inkle weaving book.  She included words from a song which her husband wrote in the design and used guitar strap hardware made by our friend Annie MacHale to put it all together.

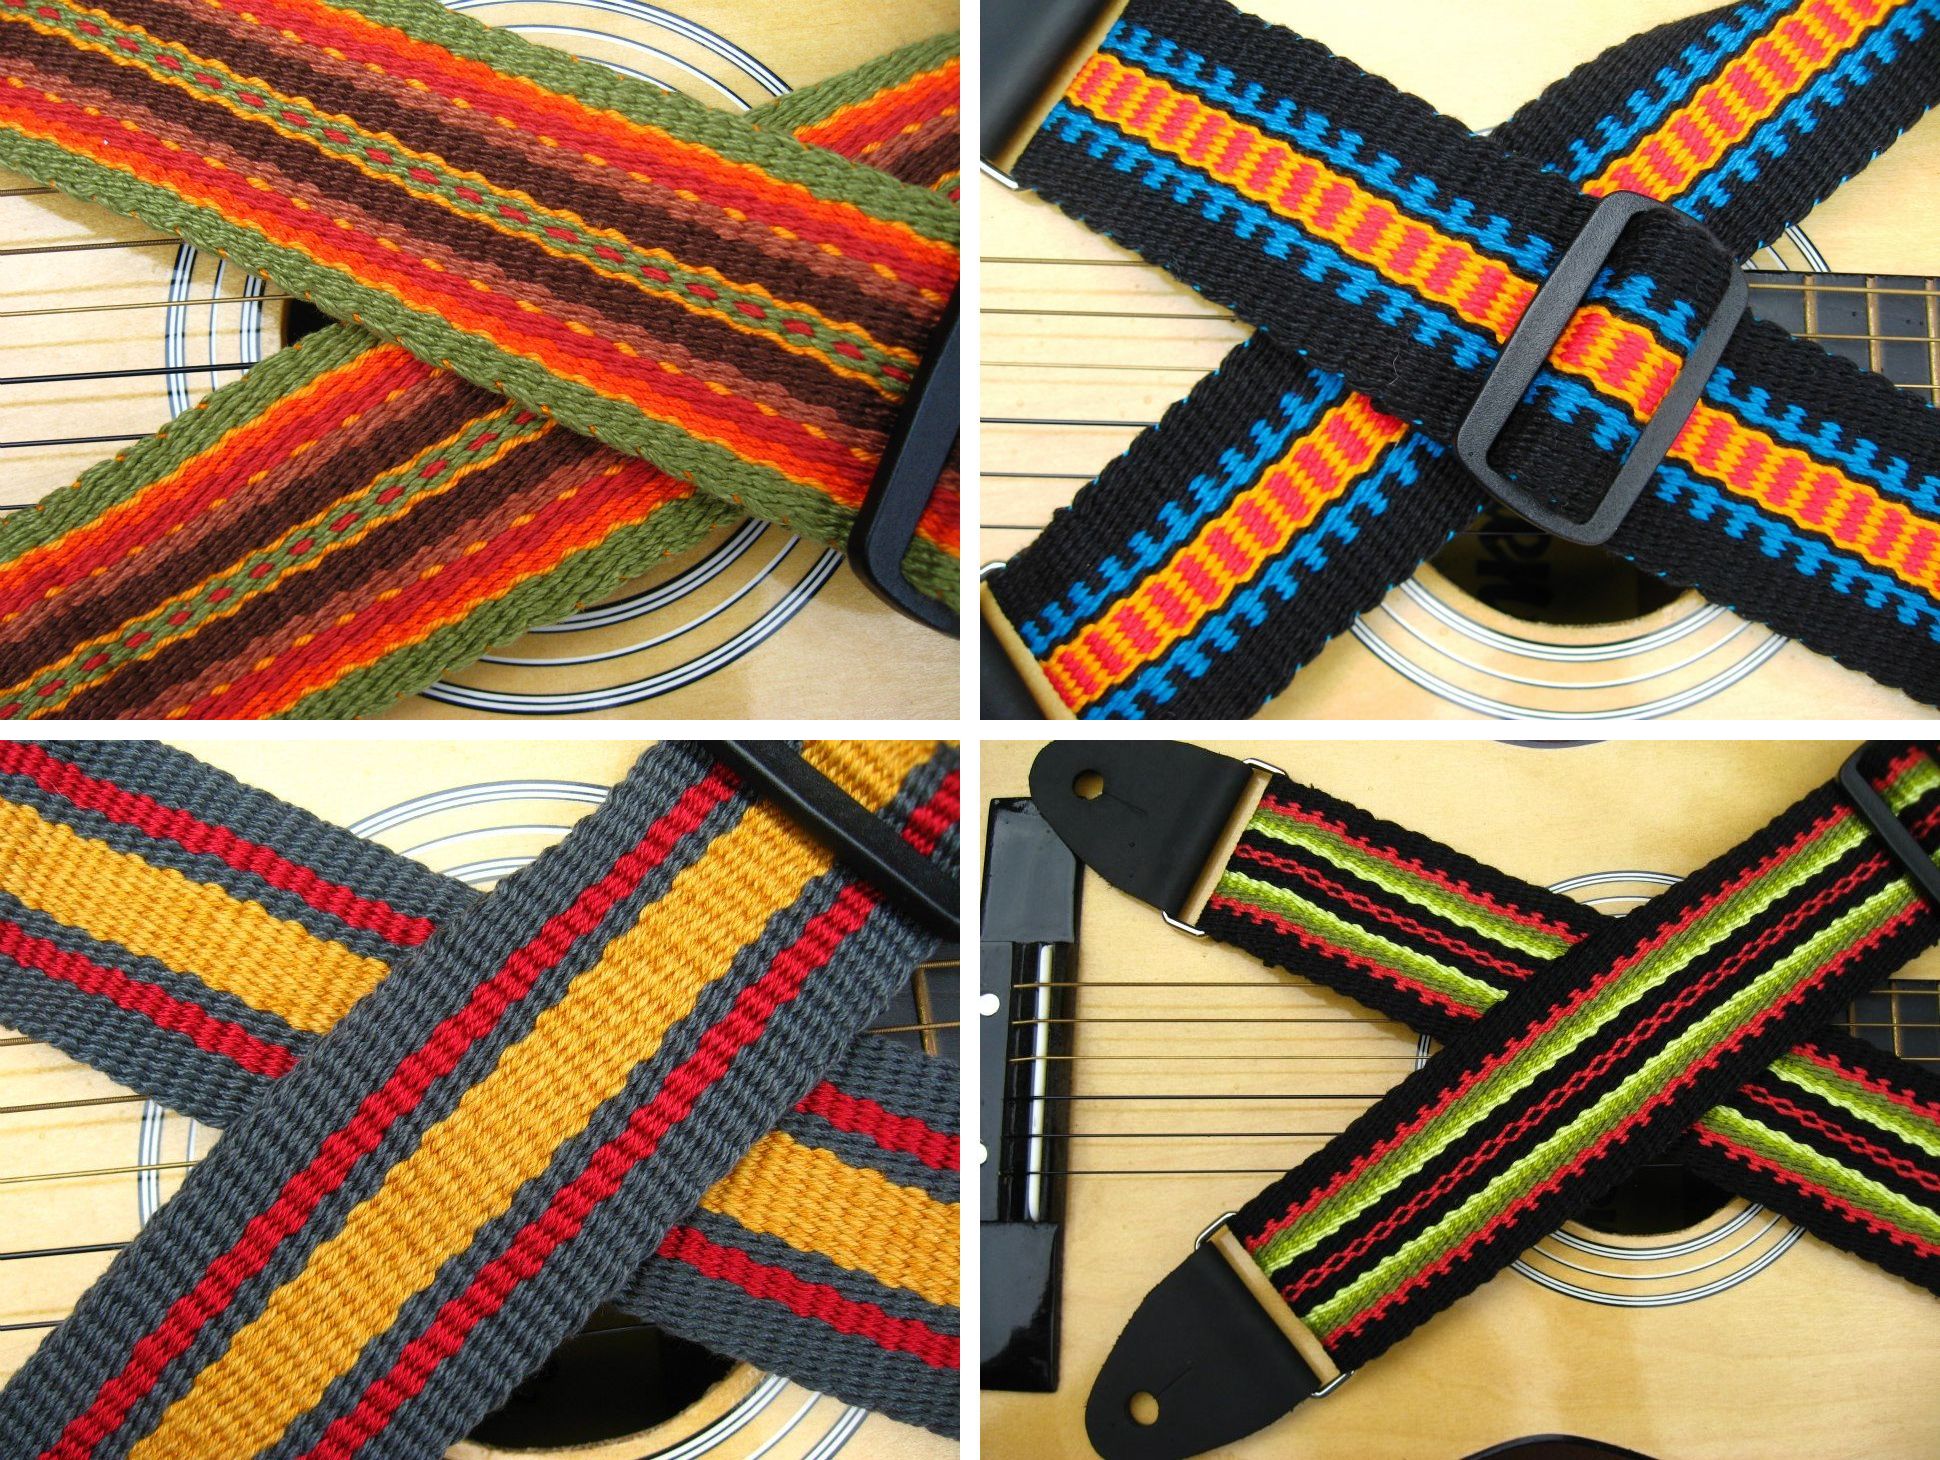
Speaking of Annie, she has been dazzling us on Facebook with the gorgeous straps she has been making on her inkle loom to sell at a big guitar show this weekend in California. Annie is all about color…I will leave you with just four examples of the more than forty guitar straps she will have for sale!

annies straps

So, my challenges are longer, wide, finer. What are yours?

Backstrap Weaving – A Snaky Start to the New Year

A “snaky” start to the new year….”Snaky” isn’t one of those words I find myself writing very often and when I typed it into the title of this post, it was bugging the heck out of me…just didn’t look right. Spell-check wasn’t touching it, yet I wasn’t going to be happy until I had Googled it to make sure. It was then that I read that “snaky” in informal English in Australia and New Zealand  apparently means angry or bad-tempered.

So, I want to make it clear to the Aussies and Kiwis out there that I did not start this year angry or bad-tempered as the title of this post might imply. (This also reminds me that I am in my twentieth year here in South America…that’s a long time to have been away from Australia and any of the new expressions that may have been adopted into the local lingo.)

598638_479457965438891_897317545_n
supplementary weft samplerWhen I say “snaky” here, I am referring to the fact that the Chinese New Year, which will start on February 10, will herald the beginning of the Year of the Snake.

And why do I know this? Well, a Facebook friend shared the above image from a page called “The Journey to the Revelation of my Soul” and I saved it simply because….. I like the COLORS!

I am thinking that I must weave something with this color combination some time. Well, I kind of did in my sampler pictured above… but not quite. I want that rich burnt red background and that special shade of blue. Whoa…is this the structure and process person speaking?… now getting all excited about color?

OAnother reason the snake image appeals to me is that I happen to be starting the new year weaving a snake-like motif into my latest wall hanging project. I like to think of it as a boldly-patterned snake  winding its way back and forth across the cloth.

The pattern is based on one of the designs that Wayuu weavers work into their belts. Imagine my surprise when I got Mirja Wark’s book off the shelf, in which she describes and names the designs, to find that the particular pattern that I have been using as my inspiration is called pasatalo’ ouya which means “like the intestines of a cow”!

Okay…so, I am weaving a wall hanging with representations of cows’ noses and intestines. But, since I adapted the basic motif a lot so that it would be big and bold enough to fit the space in which I am working, I think I could allow myself to call it snaky instead. What do you think?

Sloooow going. I am not achieving the four finger widths which my teachers tell me is a good day’s work. Some days I am lucky if do three. It is, however, very exciting watching the pattern slither its way up the fabric.

It is giving me both a mental and physical workout, I can tell you! It is an extremely dense two-heddle complementary-warp structure and opening the heddles is hard work. While the tiny elements of pattern within the main shape are very repetitive and easy to read, there are just so many warps to handle! I feel that I deserve to get up and go eat mango after every pick!

O

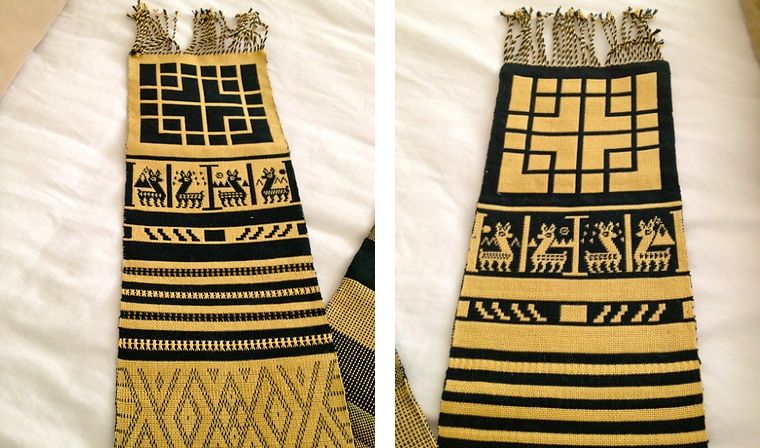
I like to think of the figures on this sash that I wove a long time ago as snakes. I copied the design from a textile from pre- Colombian Peru. Who knows what the weavers of the original fabric were seeing when they created these motifs on their cloth.

books-2

The snake is an important figure in Guaraní weaving legends. My teacher tells me that it was a snake that appeared in the dreams of the first weaver and taught her the weaving designs. When Guaraní weavers of the Izoceña group weave the zig-zagging snake skin patterns in their cloth they are also representing the Isoso river along which they have settled. The snake and the river are one.

I wove Guarani inspired snake skin designs into this guitar strap.

The Mayan Goddess of Weaving, Ixchel, is most often depicted with a snake or snakes on her head or entwined in her hair…

ixchel 3 formsI was told that this is one of the reasons why many Guatemalan women weave richly colored sashes to wrap about their heads and around their hair. The sashes vary enormously, in width, length, color, design and weaving technique  from place to place. It is also interesting to see the different ways they are worn….

santiago atitlan hair sashby a lady from Santiago Atitlan above…

O

weaving a hair sash zunil guatemala…and by this sash weaver in Zunil.

##################################################

Wishing you all the very best for the new year surrounded by completely non-“snaky” (in the Australian sense of the word) folk!

##################################################


Backstrap Weaving – Hands Full of Threads

The black neck wrap is done and I am already thinking about the next one.

I thoroughly enjoyed working with this fine Guatemalan cotton thread (you see how I have forgotten about all the woes in the beginning!). It was fun picking up threads with the delicate Guatemalan pick-up sticks and feeling the silk supplementary wefts slide through my fingers.

This will be the color scheme for the next one…

colors for next backstrap woven scarf

Maybe I will use some Guatemalan-inspired designs this time or perhaps I will invent some of my own.

cotton-spinnersI got the black piece off the loom and then I was faced with fringe twisting. Would you believe I have never done this before? I have left fringes on placemats and braided the ends of other pieces. I had read the grumblings about fringe twisting from those who regularly weave scarves in the weaving forums and seen pictures of the gadgets and gizmos that have been designed to make this task less tedious.

I even watched a video I had taken of my Montagnard weaving and twining teacher, Ju Nie (seen at left spinning cotton), twisting the ends of a piece she had recently taken off her backstrap loom. Ju had come to visit at friend Betsy’s house and, rather than sit idle while chatting in the living room, she pulled out a wad of stuff wrapped in paper and a woven piece of cloth and started working. The “stuff” turned out to be mushy, sticky over-cooked rice through which she drew the warp ends before rolling them on her leg and setting them in the twist.

Here is the video. Ju explains that doing it on her pants is “no good” and that it works much better on her bare leg. I am guessing that her bare shin makes the best rolling surface.


So, I twisted my fringe and it wasn’t as slow as I had thought…much faster than braiding, I can tell you! I added weft twining to the ends of the fabric before taking it off the loom. I think that made a nice finish.  See the countered weft twining tutorial here.

And then I found that scarves are kind of hard to photograph…way too long and flat and lifeless to try and stretch out in one shot so I gathered it up and threw it down many times, fiddled about and I felt that this was the best “pose” in the end.

bhutan scarf with border

And another shot that shows my favorite central motif…

finished bhutan scarf backstrap loom

Although I was mad keen to get into the Guatemalan purple thread and warp up another scarf, (especially since I think that I  already experienced, hopefully, all possible mishaps when weaving the black one), I decided that there was another project sitting in the closet that needed my attention…(plus I really need to ponder and plan the patterns I want to use on the purple scarf before rushing in and weaving it)…

wayuu_motif_with_twining

Remember this guy? I had just started the large main motif when I decided that I would not touch this until I was sure I would have enough time to stick with it and finish it. When doing pick-up, I think it is best to do a pattern all in one go rather than leave it sitting while I travel. If I leave a piece for a long period of time,  I can almost see the place where I left off and picked up again. Perhaps I sit a little differently, apply a little bit more or less tension, beat differently…I don’t know…something changes. So, now is the time to get down and finish this piece.

Usig a forked stick in the warpI welcome the opportunity to have my hands in there and full of threads again. I am not a pick-up stick kind of gal,  unless a particular technique or yarn really demands it. I like to hold and pick and drop threads with my hands. Perhaps it’s because that is the way my first Peruvian teachers showed me. I have been shown and I have willingly tried other ways but I always come back to just using my hands.

Here is a weaver creating a belt patterned with supplementary warps. It is a narrow piece and so it is easy for her to simply insert her hand between the warp layers to do the pick-up.

I was finally successful in uploading the video of this weaver at work. You can see how she does her pick-up as well as see the two-stick method she uses for opening the heddle shed. She has a forked stick in the warp….one prong is her shed rod and the other prong holds a second cross. Grasping and twisting the fork, while leaning forward to relax tension, helps her to smoothly open the heddle shed. 

These are the kinds of textiles she produces…

O

I watched a gentleman from Chahuaytire also weaving supplementary-warp patterns into a much wider piece of cloth. He uses a pick-up stick to hold all the threads in both the pattern and plain-weave sections as he works his way across the cloth…


This is his weaving…

chahuaytire backstrap weaving

Both weavers work equally fast, don’t you think?

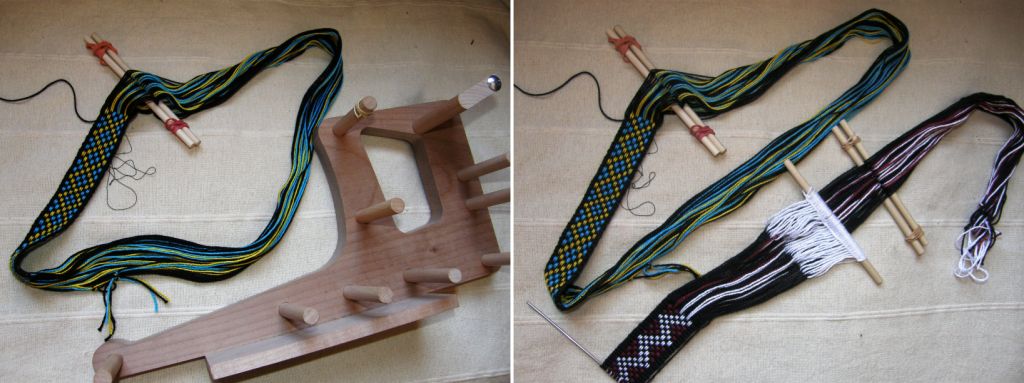
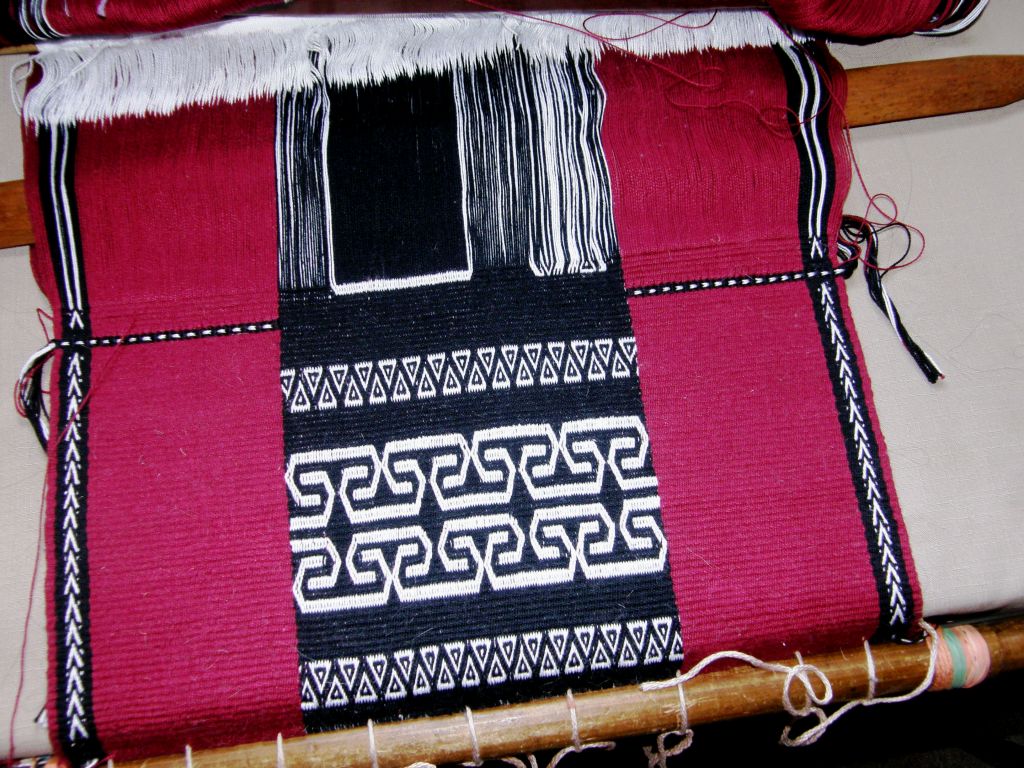
So, on I go with hands full of threads. This is the third piece in my red-white-and-black wall hanging series. This one has patterns which have been inspired by the si’ira belts woven by the Wayuu people of Colombia and Venezuela. Since starting this project, I got to go to Holland and meet Mirja Wark who spent years studying, collecting and cataloging these belts as well as writing a book describing the weaving, braiding and twining techniques used.

si'ira belts wayuu mirja wark

wayuu project in progressThese are belts that Mirja herself wove while studying. You can see the “cow’s nose” pattern at the bottom of the blue, pink and green belt that I used in my wall hanging. The large motif that I will use in the center has been very much adapted to fit my piece and uses just certain elements of the Wayuu patterns as inspiration. There are a lot of threads to pick and, until I things get rolling, I am very much clinging to my pattern chart. Thank you, Terri, for introducing me to removable highlighter tape which works like a dream!

So I will be parked in front of that piece for some time while taking breaks to re-spin the Malabrigo yarn, plan supplementary-weft patterns for the discontinuous-warp piece for which the Malabrigo is destined, ball up that large skein of Guatemalan purple cotton, sketch some patterns for the purple scarf project, plan piece number four in the wall hanging series…maybe ikat??…do I dare?

And I am folding this sampler piece this way and that to see if something useful can be made of it. It’s still on the loom and there is room for more pattern experiments.

O

Let me show you some things that Ravelry members and students and friends have made. It is a strange coincidence that three people decided to edge pieces of clothing with woven bands. Janet decorated a pair of felted slippers that she made, Laura edged gloves (and also made a camera strap and headbands) and Julia edged a couple of tiny shadow-weave kimonos with a pebble weave band. Three gorgeous projects! (I am in love with that shadow-weave cloth, by the way…it takes four shafts…I would like to try it).

christmas_projects__2012_006_medium

laura xmas projects

kimono_baby_black___white2_mediumI will leave you with the happy twin recipients of the wee kimonos…Julia’s grand nieces!

ZellaHattieinKimono_medium2

######################################

Right before I was about to publish this post,  a question was posted in the Ravelry group by a weaver who is trying supplementary-weft patterning for the first time and not getting the rich satin-like finish  that she would like in her patterns. Instead, there are spaces and gaps between the rows of her design. I posted a reply in the group but am copying it here as I think that it may be useful for others who feel like trying this lovely technique…

There is no formula that will suit all weavers…that is, “x” number of strands of such-and-such a supp weft material will give sufficient coverage with such-and-such warp thread. All weavers are different in the way they handle their warps.

For example, some weavers put a lot more tension on their warp than others. This means that they have fewer picks per inch than others because the warps are pulled so tight that they can’t bend over and under the wefts as easily as they do for weavers who use less tension. This means that a certain amount of supplementary weft material won’t give the same amount of coverage for those weavers as it does for others who use less tension.

Another case…some people simply don’t beat hard enough when using supplementary wefts. I beat hard and really mash the weft into place…not “wham wham” beating…more like placing the beater right at the weaving line and pushing against the weft hard with a rocking motion.

Other people pull too tightly on the supplementary weft. It has to be fairly relaxed in the shed to allow it to spread and cover the surface. As an experiment, pull your supplementary weft tight once you have changed sheds and see what happens. It will flatten and narrow and not give good coverage. You have to find the balance between thread that is relaxed enough in the shed and bumps at the sides, where the weft turns, that are not too big and loose.

These are all things that come with trial and error and experience. It might be that you need to use more supp weft material or it could be one of the other factors I have mentioned here.

I often use thread that is similar to #3 and #10 crochet cotton. It is Brazilian cotton that I get here in Bolivia. I have used two strands of embroidery floss with the “#3” and one and a half with the “#10”. This gives people an idea of where to start and what to try but, as I said, every weaver is different.

Hope this helps.

ETA My first Guatemalan teacher combed the strands of her supp wefts with the point of her pick-up stick so that they lay next to rather than on top of each other. They didn’t move with handling…the floats are not long enough to cause that to happen. I did the same with the six strands of 60/2 silk on my current project.

Backstrap Weaving – Little Things, Big Smiles

I was going to name this post “Taming the Tube” and that would have possibly been one of the weirdest titles I have come up with for a blog post so far but I decided to go with “Little Things, Big Smiles” as I have had a few things to smile about this week. They reminded me that it is often the little things that bring us most joy. Like the fact that my friends are on a road trip in Colorado and Wyoming and post pictures of every step of the way on Facebook so that I can be with them and share a little of the experience. And it seems that the Santa Cruz winter is over and I am back in shorts and tshirts before I can even run out of clean socks.

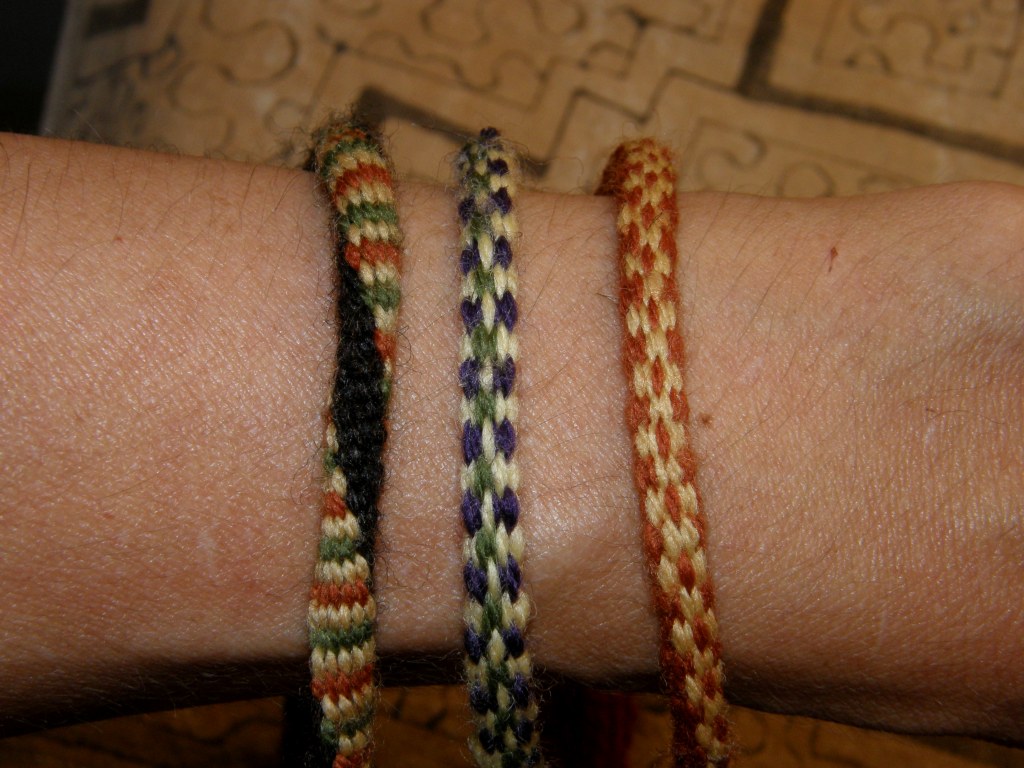
As for the tube that needed taming, well, I am talking about tubular bands. I have been following on with the experiments I was doing last week. These little things have brought a smile to my face as I figured out at last how to stop them from spiraling. Yes, it’s just a small thing but it gave me quite a kick!

Of course some bands look great when they spiral and that is precisely the effect that you want.

But that wasn’t what I wanted when I made a pebble weave tubular band. I wanted the woven design to lie straight along the tube so that it could be seen if the band was worn as a wristlet.

I am forcing the design to lie straight in the upper picture. As soon as I let it go, it spirals. I suppose the spiral version has its own charm but that is not what I wanted.

Most ñawi awapa bands that I have seen spiral…some to a lesser degree than others but there are some that pretty much don’t at all as you can see above. The more colorful ones in the center of the group spiral a lot while those above and below them have little or no twist. I LOVE that black one! So, clearly, there is a trick to getting them to lie straight.

I fiddled with this and that. Many warps went into the trash. Luckily I have my mini warping board and so was able to quickly and easily set up tiny two and four-stake warps so not a whole lot of yarn was wasted. And then I got it! He he…big smile.

So there’s a spiraling ñawi awapa band that I made ages ago and, below it, one I made this week that behaves nicely and lies straight. Again, I say that both types have their charms…it just depends what you want and now I have options.

Of course, when tubular bands are sewn to cloth as in this example from Peru, they are forced to lie straight. I was told by Nilda Callañaupa in Peru that tubular bands are sewn to pieces of cloth to help stabilize the edges and corners which tend to curl due to the highly overtwisted wool warp yarn that is used. Now I am wondering if the spiraling in the tube counteracts the curling in the cloth and is what allows the fabric to then lie flat.

I have always sewn my tubular bands to very sturdy material…edges of bags which are doubled pieces of woven cloth so the spiraling nature of the band has not had any effect on the finished piece….no twisting or distortion of the fabric has resulted.

So, after that, I just had to play with my new discovery and make some more tubular bands.

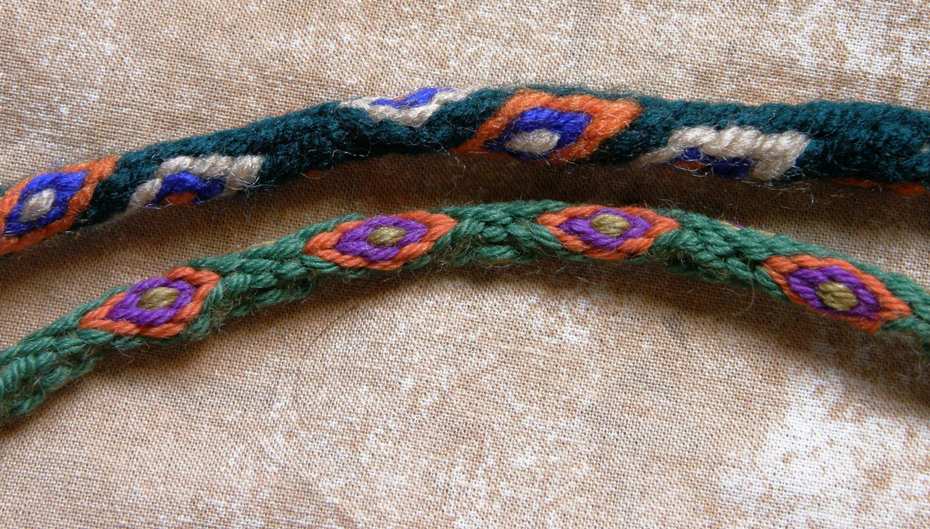
Thick ones, thin ones, in cotton and wool. The wool ones are much smoother and prettier….ñawis with their diverted and twisted warps, plain-weave, pebble weave and warp substitution tubular bands.

Maybe next time I am in the US I will get some caps and clasps and make some wristlets with these although maybe I should just go down to the Buckle Land  store in the street market here and see what I can find.

However, if I am going to wear a wristlet, I think that I would rather make one of these…

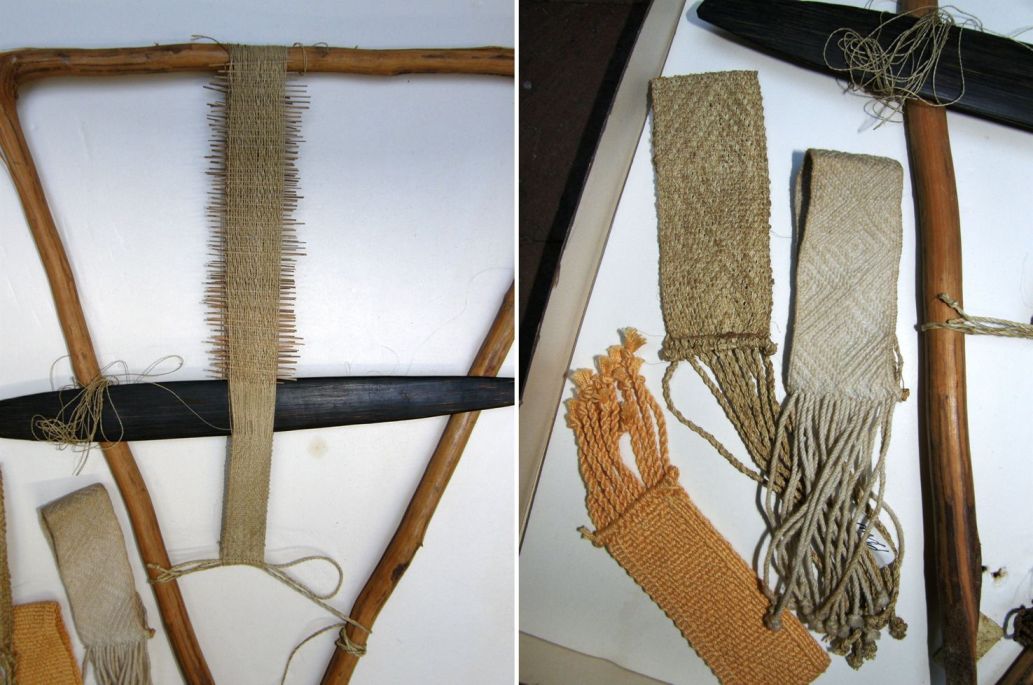
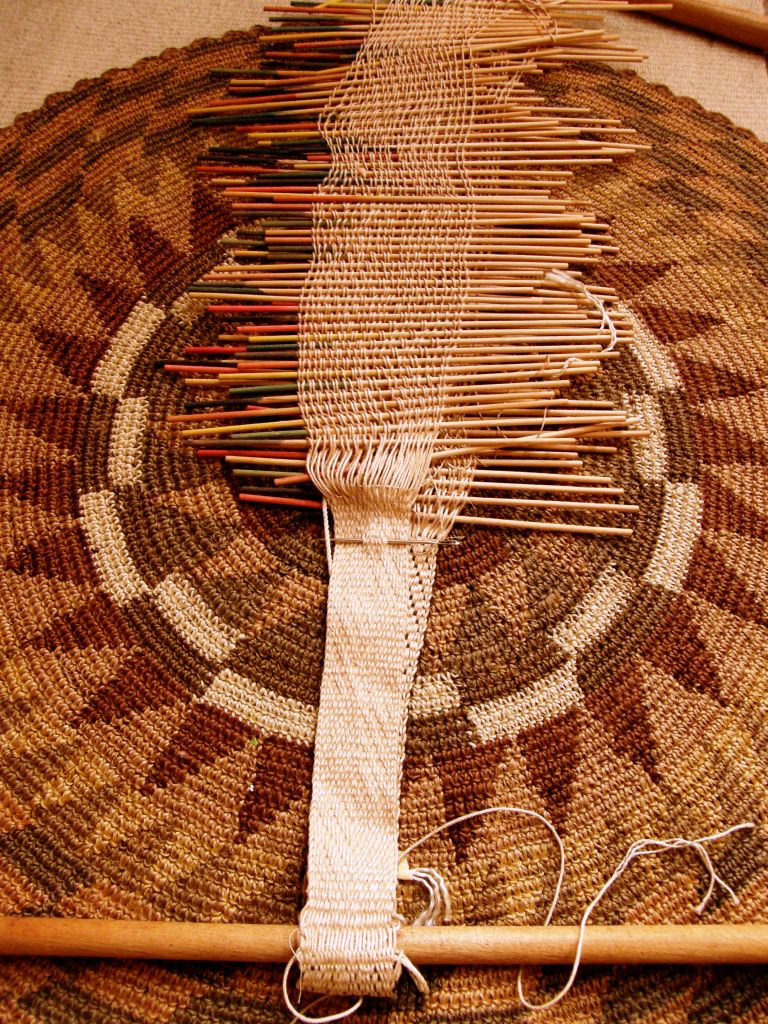
These were collected and also reproduced by Anne Blinks and Nora Rogers and now form part of Martha Stanley’s collection. I believe that they were made by the Mayoruna Indians of Peru who live in the same region as the Shipibo in the Upper Amazon Basin. I was given one of Nora Rogers’s pieces in progress on the loom as well as a booklet on the technique from my friend Betty’s vast collection of resources on ethnic weaving techniques.

There it is all ready to be studied!

From tiny to tremendous, I pulled out this monster project this week too….

My tubular bands look quite ridiculous next to it!

That thing is heavy! It is was very weird sitting down to it after not having touched it for so long. It took me a while to get back into the rhythm…which swords do I use when and what sequence of moves had I decided were the most efficient?

Once I was back into it, the first thing I noticed was a mistake in the new pick-up pattern I am weaving which would have had very sad results further down the track. That meant that my first task was to un-weave….sigh! but I am smiling about having caught it in time.

Yes, progress is slow on this piece but if you are thinking that I am getting nowhere, let me show you that I have least gotten the design established. Most of the major scary counting is now over as each row of pick-up is now done based on the last, if  you know what I mean….simply moving a little to the right or the left as the diagonal lines form. It is always exciting to be doing a new design and especially this one as it is my own adaptation of a traditional si’ira pattern of the Wayuu people from Mirja Wark’s book. After all the adjustments I made to have it fit my piece, it now has a lot of my own touches and so I am curious to see just how it will turn out.

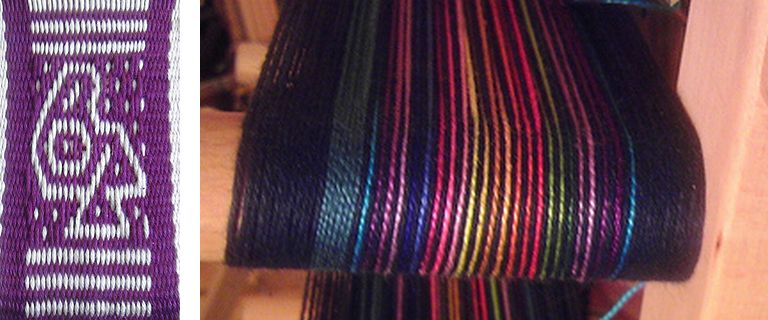
So, this week I “tamed the tube” and smiled at many things…like seeing  Jeen zooming on after having woven with her and enjoying herself with my pebble weave book  using her rigid heddle loom. She is now an active member of the Ravelry group.

Now that she has woven the bird motif, she plans to try it with that gorgeous multi-color warp.

And Marge, who also wove with me, is trying warp substitution with Bedouin patterns as a warm-up to double weave.

She was a bit dismayed by the long floats on the back until we  assured her that that is what happens with warp substitution.

She will be able to take the skills she learns from this experience a step further when she tries double weave.

Alison wove a backstrap with a striking pattern and beautiful edges…

And then made a pebble weave band on her inkle loom using many of the motifs from my book.

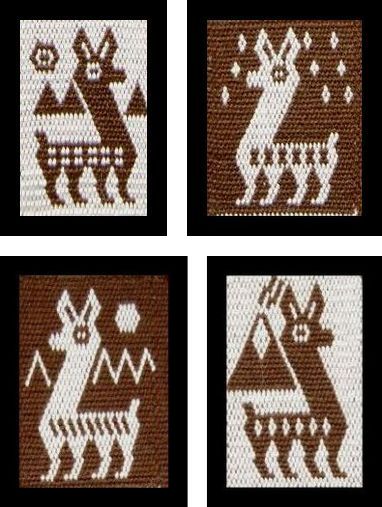
Jenibug blew me away by taking the llama patterns that I have charted here for warp-faced weaving and adapting them to balanced double weave pick-up on her floor loom…

Here they are in warp-faced double weave…the little llama heads come from a Bolivian band. I added the body embellishments and backgrounds.

And here is Jenibug’s balanced weave project…How neat is that?!

And here it is off the loom and wet finished. Are you sitting down???

Isn’t that spectacular? She took my charts and translated them to balanced weave pick-up…blows me away!

And here are Loli’s pebble weave projects…beautiful bands!

Now can you understand why I am smiling big smiles?!! My experiment with tubular bands brought a smile but seeing cool stuff being made by the Ravelry folks is the best weaving therapy of all.

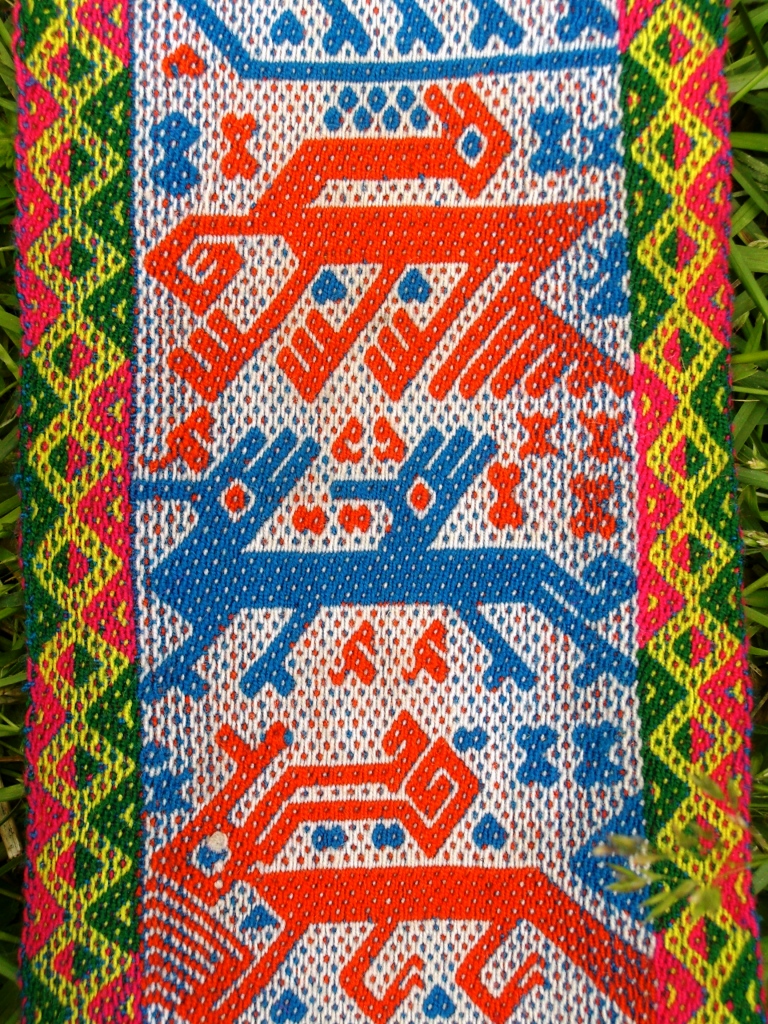
And just in case your socks are still on after seeing all that, I will leave you with another picture of one of the stunning bands from Ayacucho, Peru that I saw at Maryland Sheep and Wool Festival. I will leave you with bright cheerful colors and these playful figures, one of which is so similar to the ones I was taught when I studied pebble weave in Peru.