Backstrap Weaving – There is no one “right” way

THERE’S NO ONE “RIGHT” WAY….and A NEW TUTORIAL

I went to visit Angela again (see last week’s post) one morning this week to see how she has been progressing on her wall hanging and give her copies of some of the photos I had taken during the previous visit.

She had several projects going at once and was very pleased as she had just been given an order for 1500 woven greeting cards from her regular Christmas customer. Now she is planning a trip to her hometown of Isoso to organize the other weavers there to help complete the order. She told me that when she took on this task last year she had been able to weave ten cards a day.  Imagine!

The smaller of her two looms is occupied with this gorgeous wall hanging which I watched her warp on my last visit. As I told you last week, the designs that the Guarani women weave in the Moisy technique are nothing like anything you will see anywhere else in Bolivia.

And here is something else she is working on in the Moisy technique…


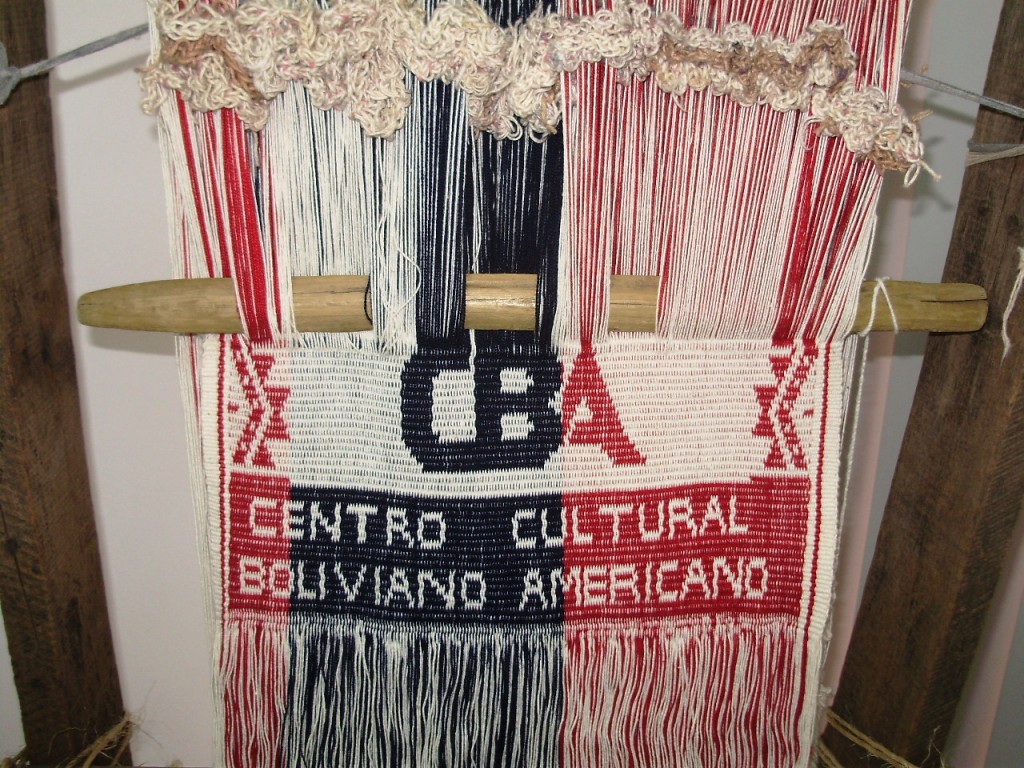
The band says Centro Cultural Boliviano Americano which is the institute where I taught English for eleven years. The teachers are wearing these around their necks to hold their ID cards. Gee, I wish we had had these when I was there! The band includes a small snake skin design. There are over sixty teachers there and so I imagine that this task is keeping her somewhat occupied as well!

Lettering! I was excited to see that but haven’t taken a good enough photo to get a really detailed look.  I think I will ask her to weave me an alphabet band if she ever has the time!

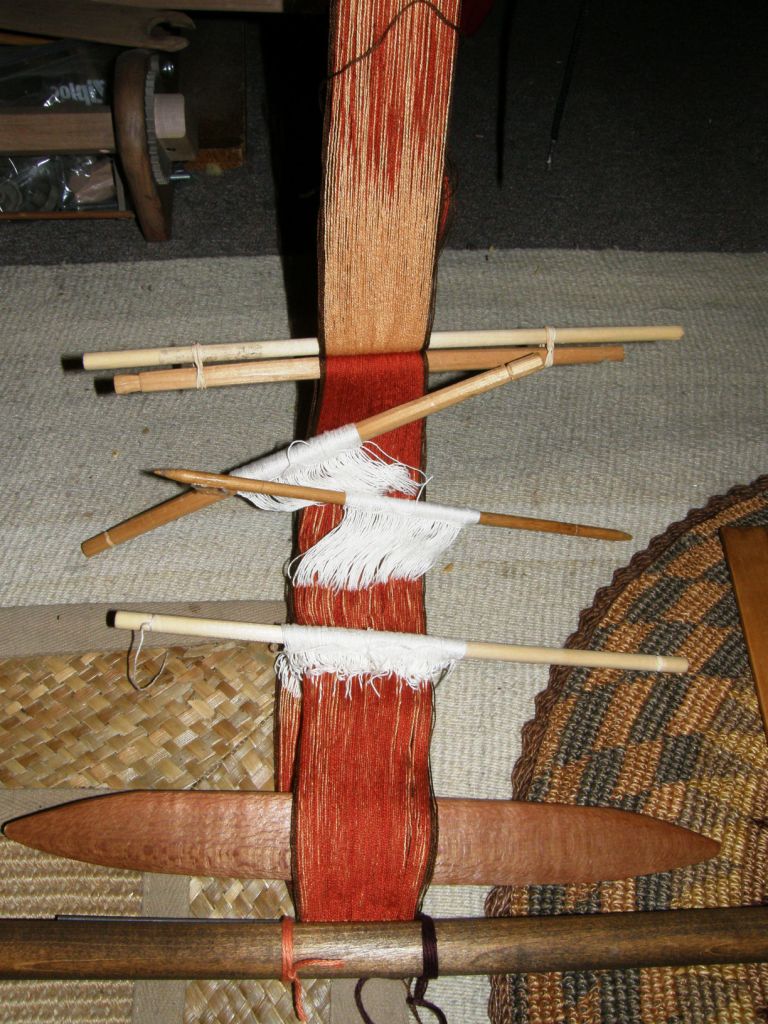
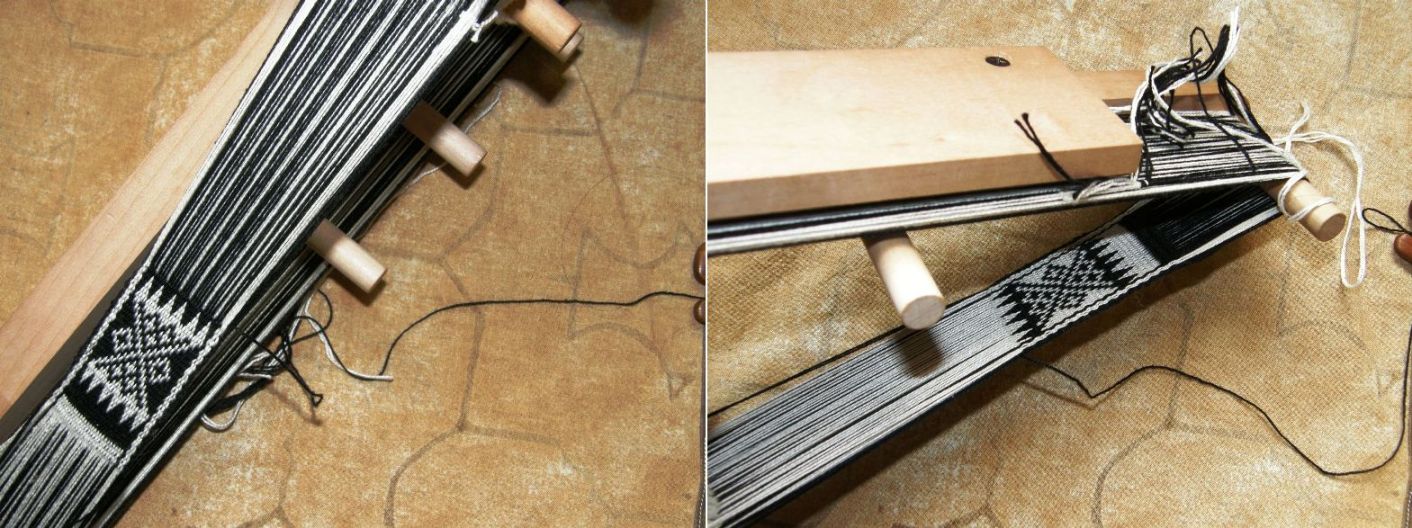
Another thing about which I am very tickled is that she has put one of her sets of heddles on a stick (see photo above). She had asked me to teach her how to do it on my last visit and now here she is using it. If you watched the pick up video in my last blog post you will see that opening the lower of the three sheds is a little tedious with the loose string heddles that she makes. So now she is using the stick on this lower heddle with the extra hitch as I showed her.

The actual stick that she is using as her heddle stick is a large wooden needle which she uses to pass the weft when she is weaving a four-selvedge piece. When she is closing the final piece of weaving and there is very little room in which to manipulate the sheds, she passes the weft under and over each warp with this needle until there is so little room that she has to use a regular steel needle. I loved this needle and, as she has three, she offered to sell me one.

And then I remembered to ask her about spinning. Yes, of course she knows how to spin cotton and she had a tiny bit of cotton to demonstrate. Just a touch of saliva on the spindle tip got her started. Of course, she is usually seated when she spins. This was just a quick demo. She told me that in Isoso both white and brown cotton is still cultivated (there is not a single boll to be found around Santa Cruz although it used to be a very large and important cotton growing area) and that several women still spin and ply their own cotton and carry their spindles about with them when they are plying.

However, she told me that those who grow the cotton are very careful to keep their hold on the small market and won’t sell it with the seeds. Sounds good to me! Deseeding cotton is not a fun task. I did a bit of that in Ecuador although it was fun there as we sat together in a chatty group and worked.

Angela’s whorl is plastic and a spindle that I bought years ago from the store where she used to work has what appears to be a piece of the sole of a shoe as its whorl. However she tells me that in Isoso, clay whorls are used. Guess what I have asked her to bring me from Isoso when she returns next Wednesday.
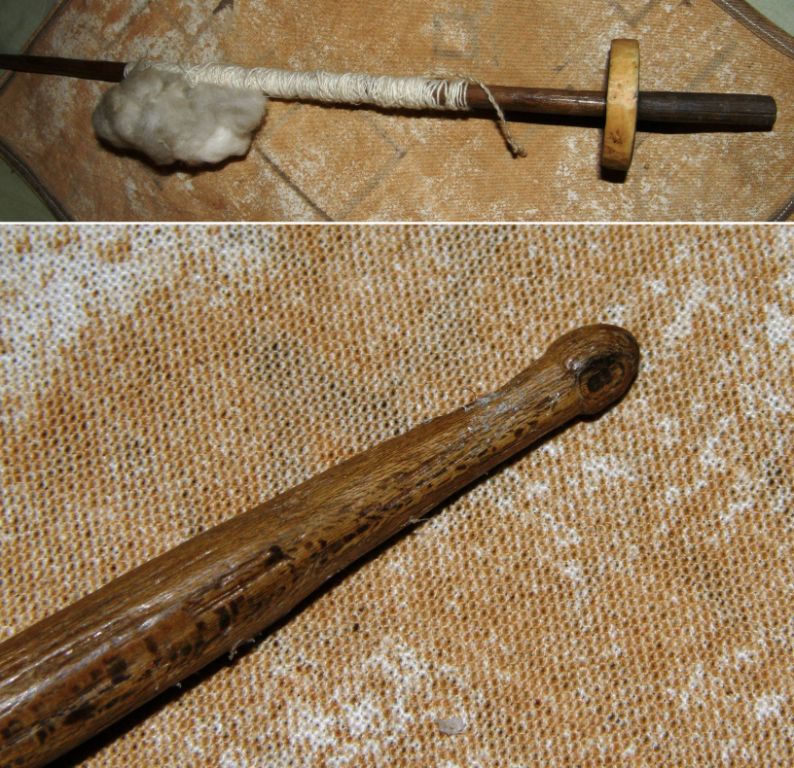
Above you can see the spindle I bought here in the city. The shaft is essentially the same as that on Angela’s spindle. I love the little knob carved into its end.

I also took home the yellow and black sample pebble weave band that Angela was warping up in the video that I put in last week’s post. She has warped this and set up the heddles quite differently to the way I was taught in Peru and so I can take a closer look at it now at home.

And this is kind of what I am alluding to in the title of this post. There is no one “right” way to do these things and I am constantly astounded by the similarities and differences I see in the way people are setting up their looms and weaving as I travel around. I had never seen anyone make string heddles the way Angela does and she was keen to learn the way I had been taught by my Navajo weaving teacher years ago. There is always room to learn something new and adapt your techniques. I am looking forward to a chance to try Angela’s way of doing pick up. It doesn’t work on the backstrap loom, believe me I tried it!

I wish I could do a tutorial on all the ways I have been shown to make string heddles so that you can try them all and see which way you prefer. Making the string heddles takes practice…string and fingers all over the place and then you just get them done and find that there are some that are woefully short…

I ran into Jamie’s blog last weekend where she had been battling to make string heddles following my video. It’s a good thing that resourceful Jamie came up with her own solution to the problem, made some heddles and wove a pebble weave piece.

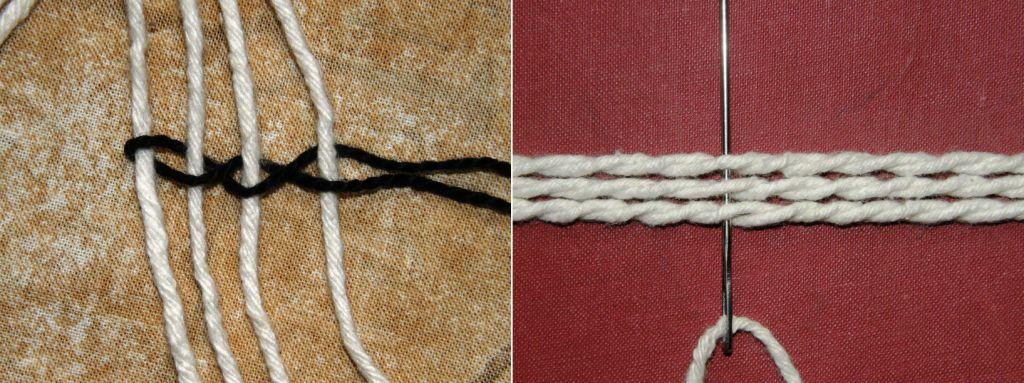
Above right you can see the individual string heddles that she made and successfully used on her warp. She says that this way is much faster. Well, I had to tease her about that because I disagree 🙂 but I can definitely see that these are much easier in that you get guaranteed even length heddles. If you are an inkle weaver you probably already have a bunch of these heddles lying around that you can use. If you don’t, Jamie made a nice tutorial on her blog showing you how to make them.

Above left you can see Helena’s (telarahna on Weavolution) solution with her nifty re-useable heddles. She says she needs to clean them after a project as bits of yarn fluff adheres to them but then they are good to go.

So, if you have been trying to make heddles the way I have shown it here and have been getting frustrated, there you have two nice solutions. Try different ways and see which you prefer and, as Jamie so rightly says in her blog, it’s easy “once you get the hang of it”.

Speaking of “getting the hang of ” something, I spent a great part of last weekend trying to get the hang of tubular woven bands and am pleased to say that I succeeded!…eventually.

This is kind of my warm up for the tinkuy (gathering of weavers) which I will be attending in Cusco next week. I signed up for a class on tubular woven bands but, as it is only a morning session I have doubts about whether we will have time to cover the tubular band that I really want to learn.

I used Adele Cahlander’s booklet pictured above. It is still available out there for under ten dollars. I have had this book for at least thirteen years and have never made the tubular bands. I guess I tried at one point as I have scribblings in the margins and have penciled in the colors that I was using but it seems I gave up as I have nothing to show for it.

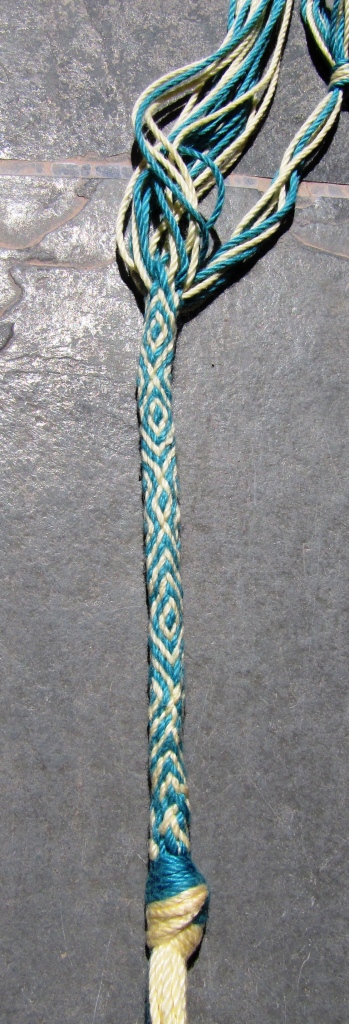
The book has two versions of the band that I wanted to make. One has a sequence of six steps and the other eight. The problem is that there is not a picture of what the six-step version is supposed to look like. It is in fact a slightly imperfect version of the eight-step one and I spent a lot of time trying to figure out why my six-step band did not look like the bands on the cover of the book. I did not feel encouraged to try the eight-step version if I could not even get the simpler version right but in the end I decided I would just go ahead and try it.

In the pictures above you can see the eight-step version on the left. See how it has two neat diamonds enclosing a center spot. In the six-step version the diamonds are not quite so neat and well defined, they overlap and cross and they actually get progressively messier as you proceed. This is just so you know what to expect if you buy the book and have a go yourselves.

Once I had this sorted I had the crazy urge to edge everything I could get my hands on with this tubular braid! I learned a tubular braid here in Bolivia many years ago but it is a very much simplified version of this one and looks nowhere near as nice.

This is one of those bands that are generally simultaneously woven and sewn to the edge of a textile using the weft as the sewing thread. So this is what I did with my Tarahumara bag and I love it!

I was so excited about having learned how to make these bands that I could have quite easily dug out everything I have woven and edged them all with them . But I resisted and decided to weave a miniature piece where I could put several finishing techniques to use. The Cahlander book also has instructions for crossed warp bands which are very interesting. So I decided to make  a small amulet type of bag, edge it with a tubular band and make a crossed warp band as a strap.
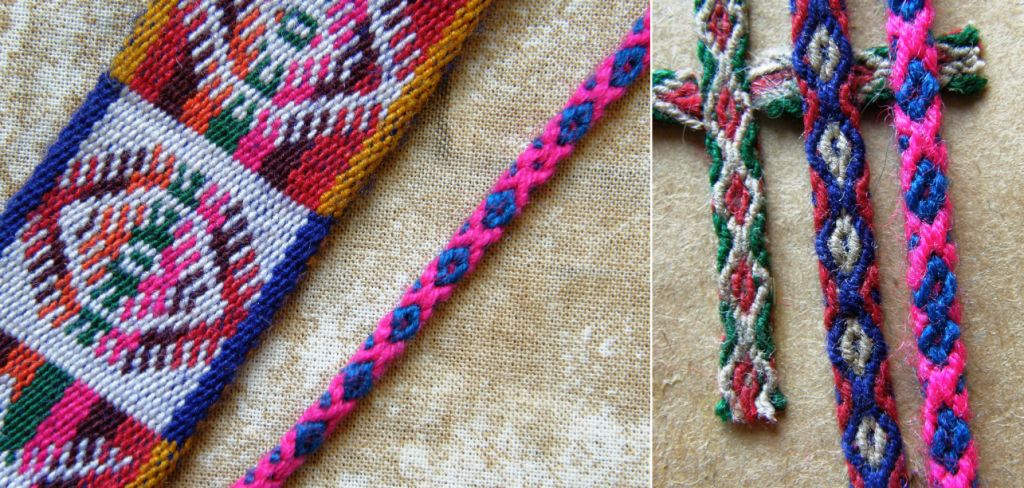
Crossed warp bands are used here in Bolivia as ties on the ends of belts like the one from Potosi seen above left and as chin straps for hats like the two wider bands on the right.
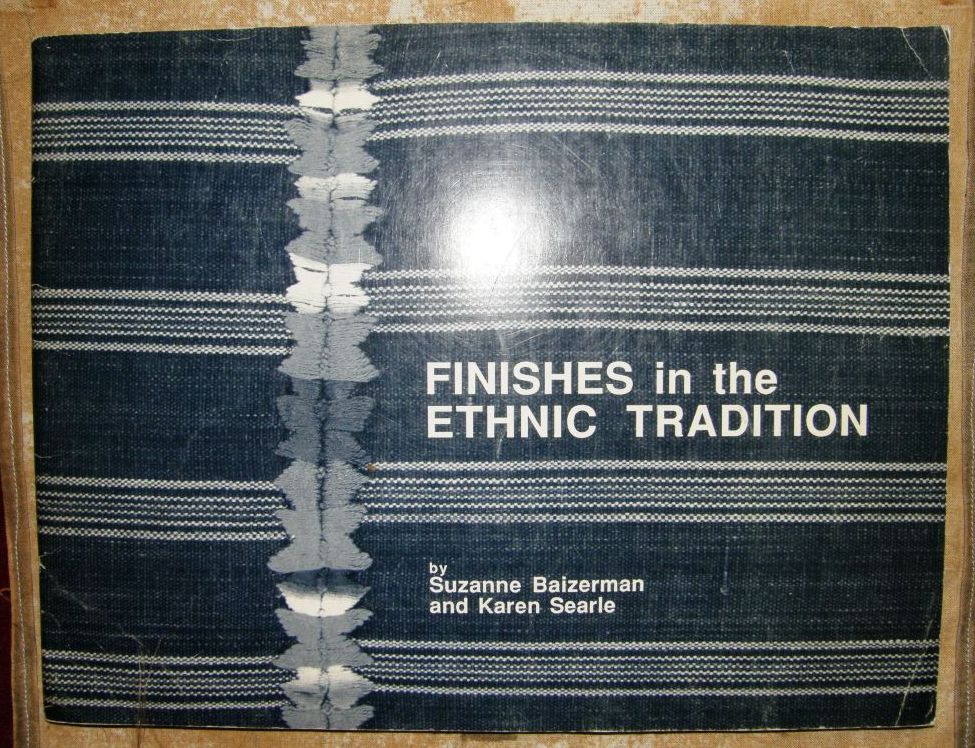
And then I fished out Karen Searle and Suzanne Baizerman’s wonderful work on finishing techniques and found the instructions for Bolivian pompoms I had made years ago to decorate my zampoña.

This book is full of all kinds of useful finishing techniques from around the world

First I had to brush up on the crossed warp techniques.

Then I wove the wee bag. I decided to keep it simple and warped up for plain warp faced weave so I could weave in a small motif with a supplementary weft (see the tutorial here).
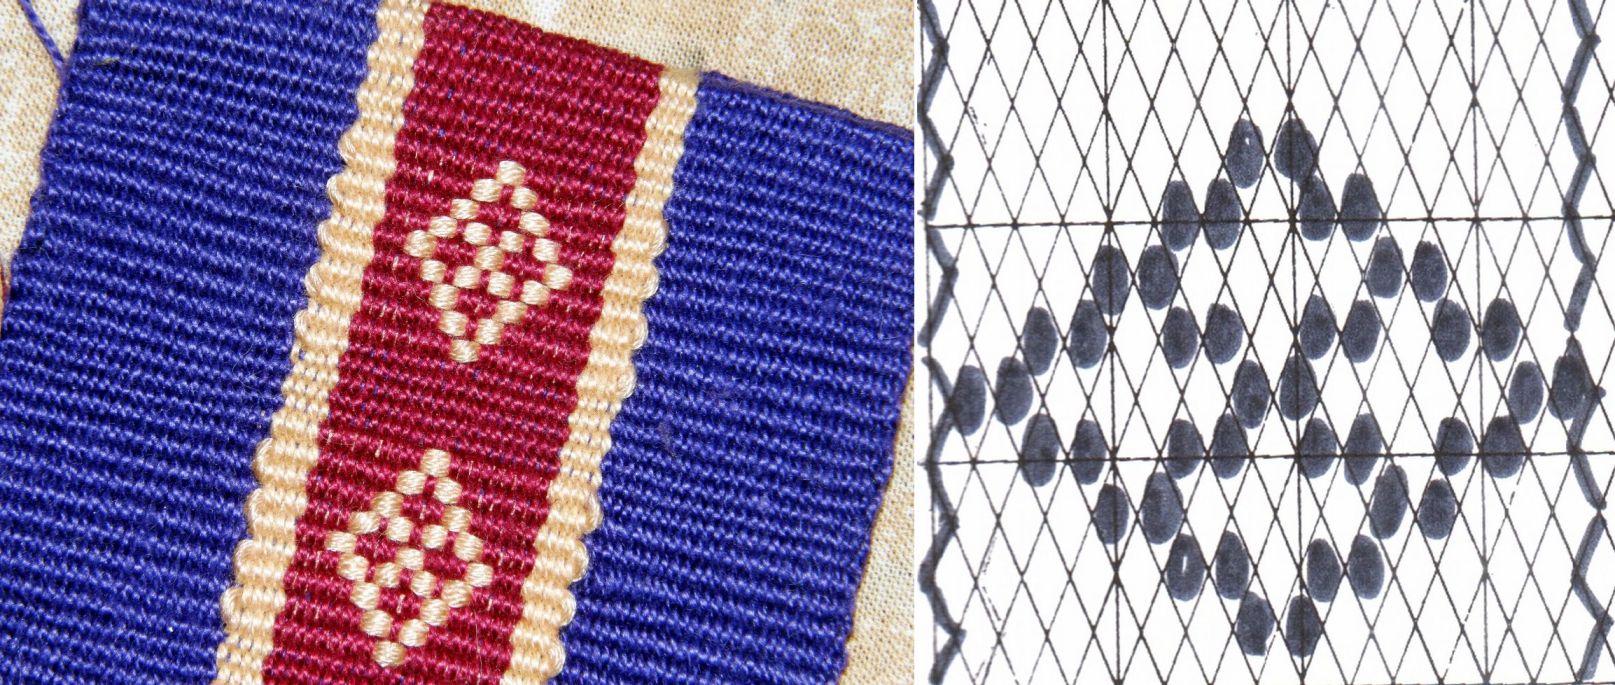
A very simple design and there’s the pattern chart for you if you would like to use it.

Next I wove and sewed on the tubular band.
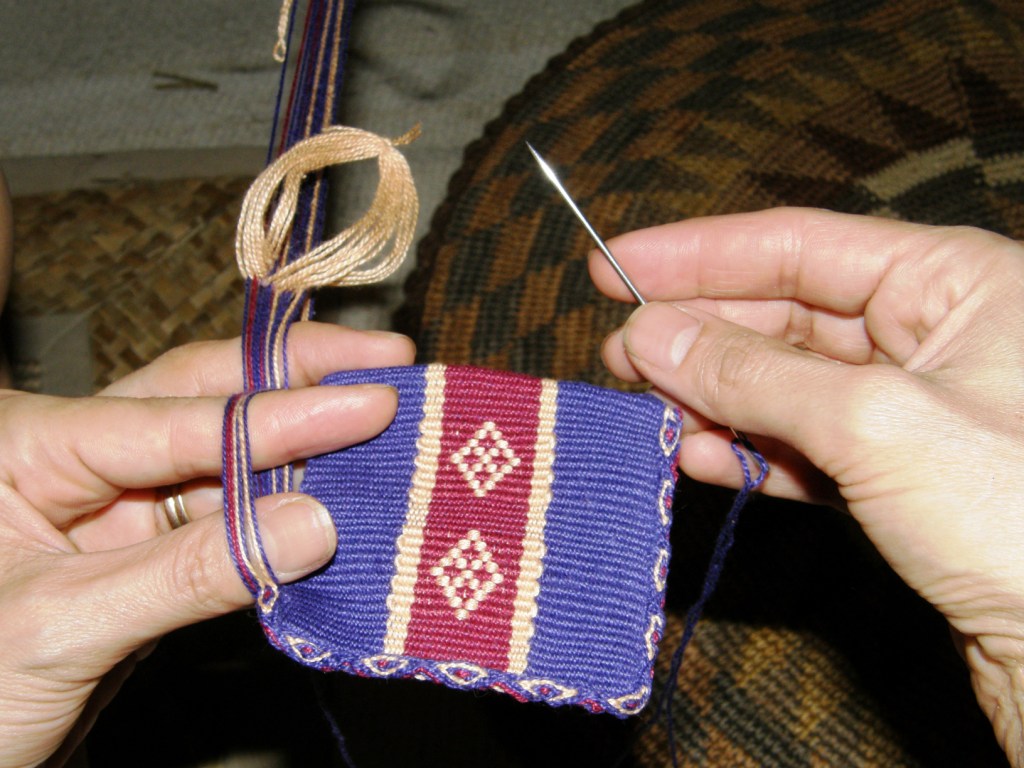
And I had fun making and attaching the tiny Bolivian pompoms.

But darn, I didn’t have time to make the crossed warp band for the strap so I have just placed thread there in the photo so you can get the idea. I am thinking of doing cross knit looping as an edging for the top of the bag too. Now I am mad for not thinking about this earlier. I think that these would have made nice gifts to take to the tinkuy- bags covered with little Bolivian techniques (although the suplementary weft motif is not Bolivian).

However I did find time to put together a NEW TUTORIAL. This one is on warp faced weaving with warp substitution which is the technique I used to weave the band with Bedouin designs that I showed you a couple of weeks ago.

Below is the sample band I wove in order to put together a set of instructions for you.

This is a great stepping stone to one-weft double weave.

You will learn the kind of pick up you need to do for one-weft double weave without having to deal with the extra manipulations and steps involved with weaving the doubled layers.

If you are interested in Bedouin weaving Helena (telarahna on Weavolution) gave me a link to an article by Joy Totah Hilden, author of the book on Bedouin weaving from which I got a lot of these designs.

Alaa (weave2 on weavolution and Ravelry) also gave me two great links to follow on this topic here and here.

And for the Spanish-speaking visitors to my blog, I have put up one tutorial so far in Spanish – the one on simple warp floats (although I haven’t found a way to say “simple warp floats” in Spanish. The literal translation sounds ridiculous!). There is a tab on the header photo and side bar.

Para las personas que hablan español he traducido el primero de los tutoriales que puedan ver aqui. De vez en cuando pueden chequear haciendo “click” en la pestaña “tutoriales en español” en la parte de arriba de la pagina. Alli podran ver si he traducido algun otro tutorial mas.

I may have time to squeeze in one more post before I go to Cusco on November 4th, but if you don’t hear from me you will know where I am 🙂

Backstrap Weaving – In my own backyard.

IN MY OWN BACKYARD

My weaving explorations seem to be taking me further and further afield these days…outside my city, my country (Bolivia) and even outside the continent and I have found myself visiting SE Asian weavers in the USA and learning about weavers in the Middle East from books.

Sometimes I forget about the treasures that are here right in my own backyard.

I wrote about the Ayoreo people who live in this area and their looped bags in a post a couple of weeks ago and the difficulties I have had in winning their trust so that I could learn more about them and their crafts. I have given up on that for now but hope that I can pursue it again some day. In the same way I was reminded of a Guarani weaver with whom I made contact here over six years ago.

I used to visit Angela, a Guarani weaver, every Saturday morning over a period of a couple of months about six years ago. She had her loom set up in a handcraft store and was warping to make a hammock.

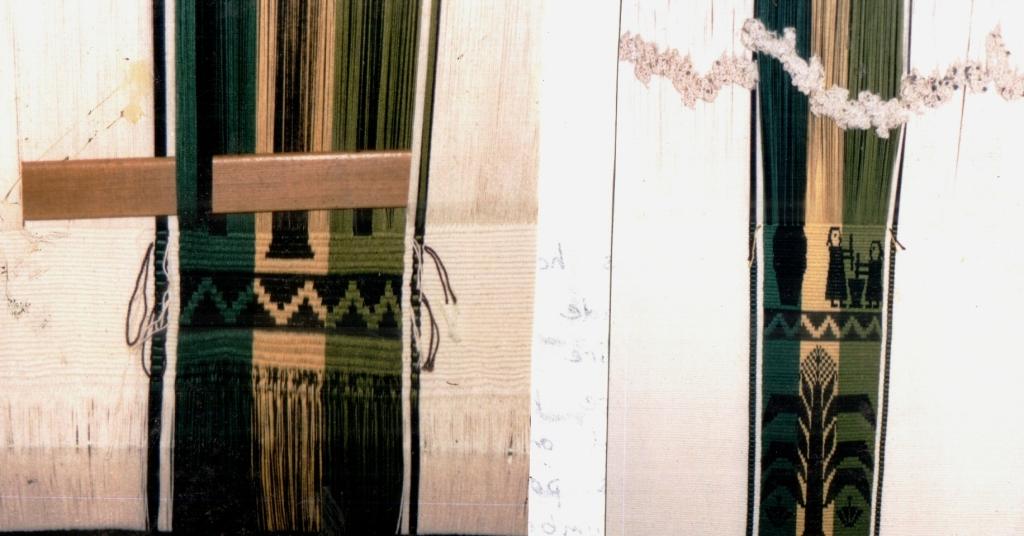
It was such an opportunity to meet up with Angela like this as it is very difficult to find weavers right here in the city let alone a weaver who has a loom and a place in which to use it . Angela’s hometown of Isoso is about twelve hours drive away from here. Angela would weave in the store twice a week. On my Saturday visits I got to see her warp most of the loom, but missed seeing her setting up the heddles. I saw her start the weaving and part of the designs. The white cotton hammock had three bands of green, yellow and black pick up designs. Angela’s motifs included flowers, geometrics, pineapple plants and scenes of people in their typical daily routine.

The motifs are hard to see on my scanned photos. On the right you may be able to make out two ladies “machucando”, that is, pounding plaintains, in order to make “masaco”, a typical Santa Cruz snack.

I would ask Angela where she lived hoping that I could maybe visit her at home and have some lessons. She had told  me that she had a small loom in her house. She would stretch out her arm and say “leeeejos” (“lejos” means far) as if to discourage me from visiting. Unfortunately, her son fell ill before we could really bond and she stopped coming to the store. Eventually the loom disappeared and now even the store is closed. I did manage to give her a copy of the photo of herself and her baby boy before I lost touch with her.

After Angela’s disappearance, I found bits and pieces about Guarani weaving in books and found that the technique she was using to weave her hammock is called Moisy. They also use a pebble weave which in the Guarani language is called Karapepo. I bought a hammock and bag in the Karapepo technique

I was able to copy the deigns from the hammock using Andean pebble weave technique and make this guitar strap.

From books I learned that the earth and the cosmos are represented by the star and snake skin designs. These are pretty much the only designs you will see woven in the pebbled Karapepo technique. In the Moisy technique, however, the weavers have a far greater repertoire and the designs are not like any others that you will see any where else in Bolivia. They speak of the lush tropical fruitiness of Santa Cruz! Leaves, flowers, vines, butterflies, animals and people involved in their daily routines or dancing and celebrating carnival are depicted on the hammocks, wall hangings and bags.

Cell phone pouches made with the Moisy technique with flower and butterfly motifs. A band of horizontal bars serves as the strap and velcro has been sewn on as a closure. A black band was woven and sewn simultaneously to the edges using the weft as the sewing thread to give a very nice neat finish.

And here is the best part of the story…I bought the above cell phone pouches from Angela last weekend at her home. Yes, I found her again, was invited to her home and got to spend the afternoon with her looking at her looms and weaving. The little fellow pictured with her above is now 8 years old and she has since had another son – that makes five sons in all now! Her eldest is married with his own family.

How did I find her? Very much by chance. The English institute where I taught English for eleven years started offering classes in the Guarani language shortly after I left. I recently noticed the loom and weaving pictured at left in the library which had been made and placed there to celebrate the start of the new Guarani program. I asked the receptionists about it they showed me the lovely cell phone pouches that a Guarani weaver had sold them. Fortunately, they had the weaver’s number and it turned out to be none other than Angela.

One of the karapepo cellphone pouches that Angela made for the receptionists – quite a different style to the blue and black ones she made using the Moisy technique.

I was very keen to see how Angela sets up and weaves her pebble weave as well as to learn how to do the Moisy. I was pleased to see that she uses the very same crochet cotton to weave as I do. When I visited her last Saturday, she had just warped up to make a colorful wall hanging on the smaller of her two looms, had just finished a book bag for a university student and was also in the middle of weaving a belt with fighting roosters which had been ordered by a Brazilian business man who mounts the woven pieces on leather and then apparently sells them for a very good price in Brazil. Angela’s enormous hammock loom is there in her patio and she can warp up several small projects on it at a time. She seems to have enough orders to keep her very busy.

She showed us one of her hammocks, the finished book bag, her cell phone pouches, greeting cards depicting carnival celebrations in her hometown of Isoso, pillow covers, belts and purses.

At left, the smaller loom warped for a wall hanging in Moisy technique and at right Angela is warping a narrow band to show me how she sets up for Karapepo technique.

She stretches a cord across the loom around which the start and end loops of the warp dovetail. Except for when she is weaving a hammock, she usually creates a third selvedge by starting her weaving right at the dovetail string.

I filmed her warping, making heddles and weaving the Moisy technique. As usual when I have the camera in front of my face. I find it hard to really absorb what is going on and so I had to come home and watch the movies over and over before I could grasp completely what she had been doing.

I like the way she makes her string heddles chaining them together. You will see her doing this in the video.

Angela’s chained heddles.

She, on the other hand, loved my heddles on their sticks (I had taken my backstrap loom, which she found very amusing, with a double weave piece on it to show her) and so I taught her my way of making heddles.

Here are two short clips of Angela warping using the dovetail string and making heddles. As she makes the heddles she is explaining to me the meaning of the designs on my guitar strap and telling me about the snake skin and how the snake that taught the first Guarani woman to weave in a dream is also embodied in the Parapeti River. Her little boys can be heard chattering in the background in the Guarani language.

In the next video, she is weaving the belt with the fighting roosters in Moisy technique. She has three sets of string heddles and another shed above the cross string. You must see the way she does her pick up. It is quite unique!

The lower of the three string heddles holds a shed through which she simply passes the weft without having to do any pick-up. The two upper heddles hold the separated colors. She pulls on those two heddles working her way from left to right to pick out the colors she needs. Watch her left hand gathering up the selected warps. Her eyes are down at the weaving line watching the design so she knows which colors to pick. Then she opens the shed which the lower string heddle controls. Then she does another row of pick up before opening the shed above the cross string, through which she can pass the weft without having to pick up warps. This shed is a little difficult to open as the warps have become entangled in the string heddles.

So I had to go home and see if I could figure out the Moisy! The best way was to try and reproduce one of her woven motifs. I found that I had to pull the weft really tightly through the shed to have my design look like hers. It makes a very, very sturdy fabric. For those of you who have my Andean Pebble Weave book, I would compare it to the thickness you achieve when you use the three-shed border. In fact, I quickly realized that the three-shed border is the very same structure.

There is my attempt to reproduce the flower on the cell phone pouch. It really helped a lot knowing that we both use the same thread so I knew what width to expect right from the start. I really had to pull the weft tight and force it into that width.

The motif is not exactly the same but I understand the technique.

I tried to chart it and then found my chart was wrong and so ended up just reading it directly off the cell phone pouch which was a really good exercise.

I did notice that Angela is weaving the rooster belt a lot more loosely. .

I confess that, although I started out with my warp set up as Angela showed me with the three string heddles, I found it quite uncomfortable simply because it was so foreign to me…impatient!…  and so I  changed to another set-up after a while with which I felt more at home. I would like to try Angela’s pick-up technique on her vertical loom and hope to visit her again soon. She has invited me to come and see her floral designs on the colorful wall hanging she is making.

In the meantime I will work on my charting as I would like to make a collection of these uniquely Cruceño designs.

###################################

What else have I been up to?

Well I started my double-weave belt using the Bedouin designs that I wove into my wall hanging.


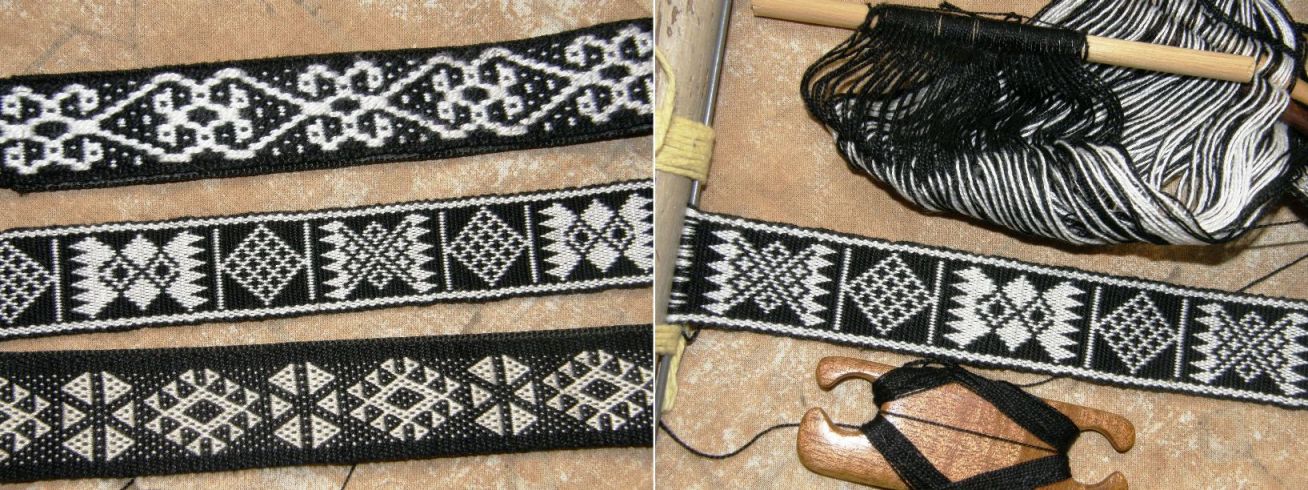
I seem to be gathering a collection of black belts. At least they are all in different techniques with designs from different cultures. The uppermost one is two-color alternating warp floats (my made-up name for it…we could use the Kyrgyz word “terme” for it). The center one is the yet-to-be-finished double woven example with Bedouin designs and the lower one is, as you must all know by now,  Andean pebble weave as taught to me by weavers from Ayacucho, Peru.

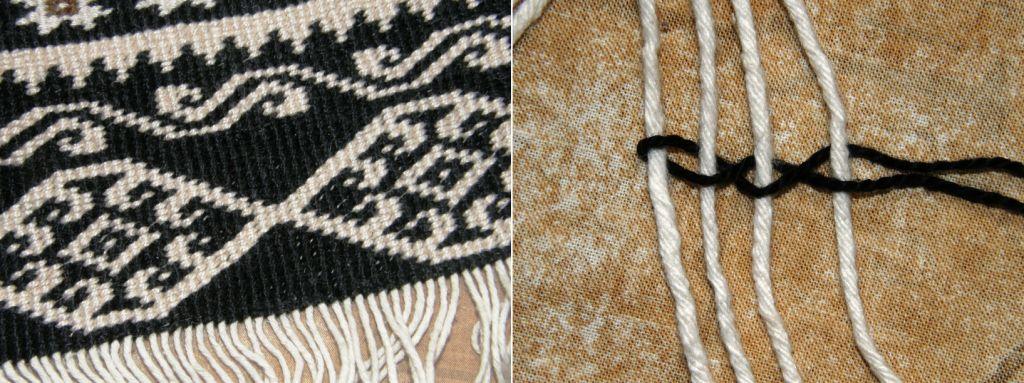
I have also been weft twining but using floats this time to make a textured design in one color which is inspired by the alpargatas worked in ply-split darning that I showed you last week.

I am totally unimpressed with the results so far!

I’ll keep at it. Who knows, it may look better as I progress. Maybe I should overlap the floats by two warps instead of just one. What do you think?

What have my online weaving buddies been up to?

Anna, who is cycling down to Tierra del Fuego has turned up in Salta, Argentina and has added braiding to her skills following my instructions for the Margarita braid.

This is one of the two braids that was taught to me by my sling-making teacher in Peru.

I usually advise people to start with the Palma braid first as a skills builder but she jumped right in and, as you can see, has done really well!

I have gathered up all the information on the Palma and Margarita braids that is embedded in various posts here on my blog and put it all together on one page here.

Zacarias in Yanque Peru taught me these two braids which are used to make the typical slings of the area.

Marsha Knox of Pandula Arts Creations has been playing with simple warp floats in two-color alternating pairs on her Gilmore Wave loom and has created some great designs of her own. More designs like these can be seen on the Guatemalan belt in this post.


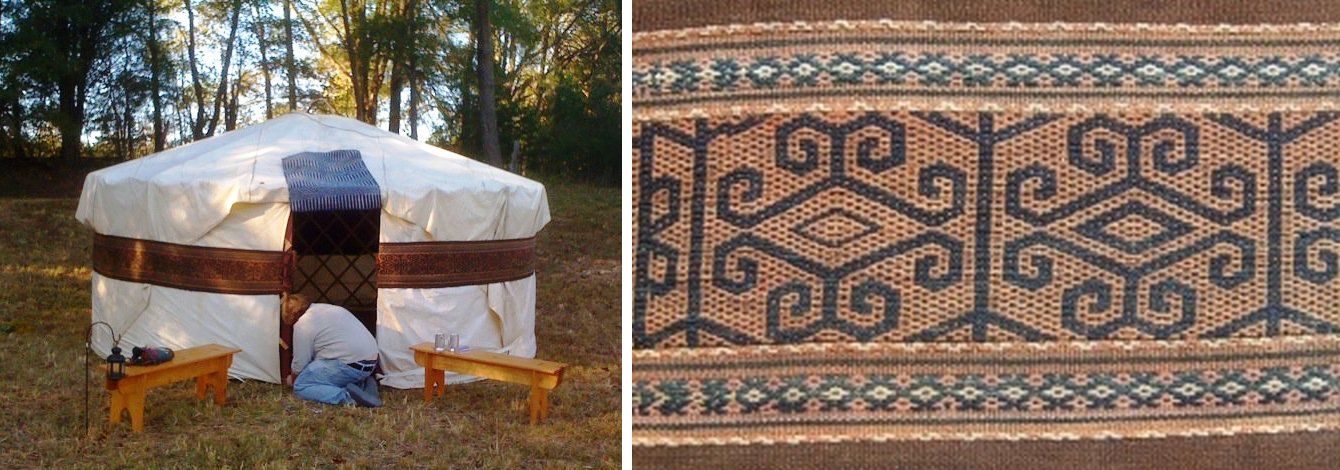
Lisa has been up to her eyeballs in dyeing but took some time out to enjoy a night in her yurt. You will probably recognize the  band encircling the yurt that she was lucky enough to purchase at a reenactment event and which I have shown off many times here on my blog. It is woven in the “terme” technique.

######################################

Finally…you may remember my posting a video some time ago, which had been made in March this year, showing little Melina learning to spin cotton from her aunt in coastal Ecuador. This is the family with whom I stayed in 2007 and learned about the process of weaving cotton saddlebags and the simple warp float technique. I accompanied anthropologist Kathleen Klumpp on this trip and Kathleen has just returned from another trip there with a new video of Melina’s improved skills seven months down the track.

Kathleen tells me that Melina is not yet able to support the weight of the spindle and so rests it on her thigh.

The original video of Melina’s first steps can be seen here. How quickly she has picked up the skills! Aunt Trini and Grandma Luz are master spinners and she is lucky to have such skilled teachers but I think that Melina’s success is largely due to Kathleen’s encouragement. How wonderful too that Kathleen has made and shared these videos so we can all follow this story.

And I have been inspired by a very sweet recent comment from Graciela here on the blog. I don’t know where she is from but she has inspired me to get my act together and put up the tutorials translated into Spanish that I have been promising. Another task for this weekend and I will try try try not to get distracted!

Pssst! There’s a Spotlight article about my backstrap weaving in the latest issue of Handwoven…


Backstrap Weaving – Weft twining with a twist

WEFT TWINING WITH A TWIST? or WHAT?  You tell me.

Weft twining is showing up all over the place. I just discovered what I think might be  classified as “sort of”‘ weft twining in an unexpected place in my journal of notes on my first trip to Ecuador. So I have decided to call it ‘weft twining with a twist” as I don’t know how to define this. Perhaps you can help me. More about that a little later…

I have just about finished the Bedouin piece I was working on last week. I just need to make some tassels from some of the weft ends and figure out what to do with the warp ends and I will be done.

I found two more designs in books and online for the last two panels. The design on the right is from a book that I have had for at least  ten years and I can remember years ago marveling over the pictures of the Bedouin looms with their long long warps stretched out over the stony ground. It is exciting to now be able to weave some of their designs myself even though I used my backstrap loom rather than a staked out one.

I twined a broader band of design at the bottom this time with three colors and “s” wrapped the warp ends. I also wove  two plain narrow black bands which I sewed to the edges to cover the weft ends from the twining.

This one will go on the wall as a long narrow hanging and now I would like to get down to planning a much wider one.

As I told you last week the main designs are done in a technique known as warp substitution which creates long awkward floats on the back. The floats can be eliminated by weaving the designs in double weave but I wanted to stick to the traditional technique. However, I couldn’t resist warping up to try the designs in double weave. I warped up my Ashford inklette as I had showed you last week a little about doing one-weft double weave on this kind of loom.


On the left you can see one of the designs from the large Bedouin style piece woven white on black using 26 doubled warps in the pattern area. On the right, the inklette is tipped upside down so you can see the same design in black on white.


Now I think I want a belt with these black and white designs made on my backstrap loom. The piece on the inklette is a sampler. You can see that I have put a very short warp on it.

I haven’t paid all that much attention to my off loom weft twined piece but I did make a little progress. I am still having a few tensioning issues with this and the piece is getting gradually wider. It’s good practice until I can get to the stage where I can make something useful with this technique.


I am using a swirl border and large motif from Montagnard twined textiles on the left. On the right you can see how the weft twists to encircle each of the hanging warps.


As I was twining away this week my mind was taken back to a trip I did to Ecuador in 2005. There in a small town near Otavalo I met a man who is still making alpargatas, the traditional footwear of Otavaleño men, by hand.

Admittedly most men are choosing sneakers over alpargatas these days but on market day in Otavalo I saw a few older men using them. The very oldest men tend to get about with bare feet.

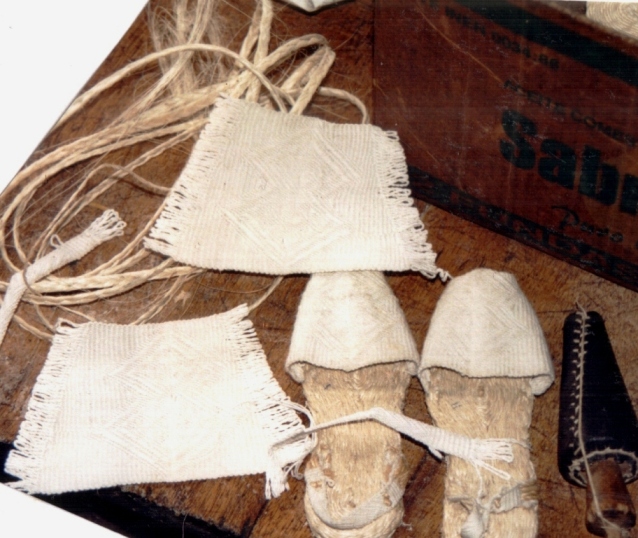
You can see that the foot covering and heel straps are fabric which are worked in a “sort of” twined technique. The sole is braided and coiled “cabuya” fiber (a kind of agave). The cabuya soles on the tiny pair of alpargatas in the above picture have been mounted on rubber.

I asked around as I really wanted to see how these fabric pieces were made and was told to go to a tiny town, a short bus ride out of Otavalo.

I imagined that I could just stroll into town ask around and be pointed in the right direction. Not so! and this day spent touring this town along little lanes between the fields in search of the alpargata maker is one of my favorite memories of that trip to Ecuador. Everyone was very friendly but no one seemed to have the slightest idea about this person I was seeking.

Finally two people pointed in the direction of some hills behind the town and I headed there not really knowing if I could trust this information. People are so eager to please and will often tell you what they think you want to hear.  Of course I should have known that the best place to ask theses things is at the corner store. Corner store owners know everything about everyone and the owner’s daughter was dispatched to take me by the hand right to the door of the alpargata maker.

Aurelio, the alpargata craftsman, can be seen braiding cabuya fiber which will be later coiled to make the soles of the alpargatas. His wife at right asked to have her picture taken with her finest traditional Otavalo clothes.

Unfortunately, Aurelio was not in the process of making alpagartas when I met him. In fact, he had just taken the woven pieces off the mold but he was more than happy to show me his tools and equipment and tell me about the process.  The alpargata fabric is worked around a mold rather than on a loom. I bought the two finished pieces of cloth from him along with the heel straps and a tiny boy’s pair of alpargatas.


The triangular fabric pieces are "woven" around a conical wooden mold which you can see on the right. The foot covering pieces called "mantas" are there with the "taloneras" or heel straps. The braided fiber will form the soles.


The conical mold or ‘horma” is made of wood and covered with  non slip leather. On this the “mantas” and ‘taloneras” will be worked. Aurelio has several molds of different widths and lengths to cover all range of shoe sizes from boys to adults.

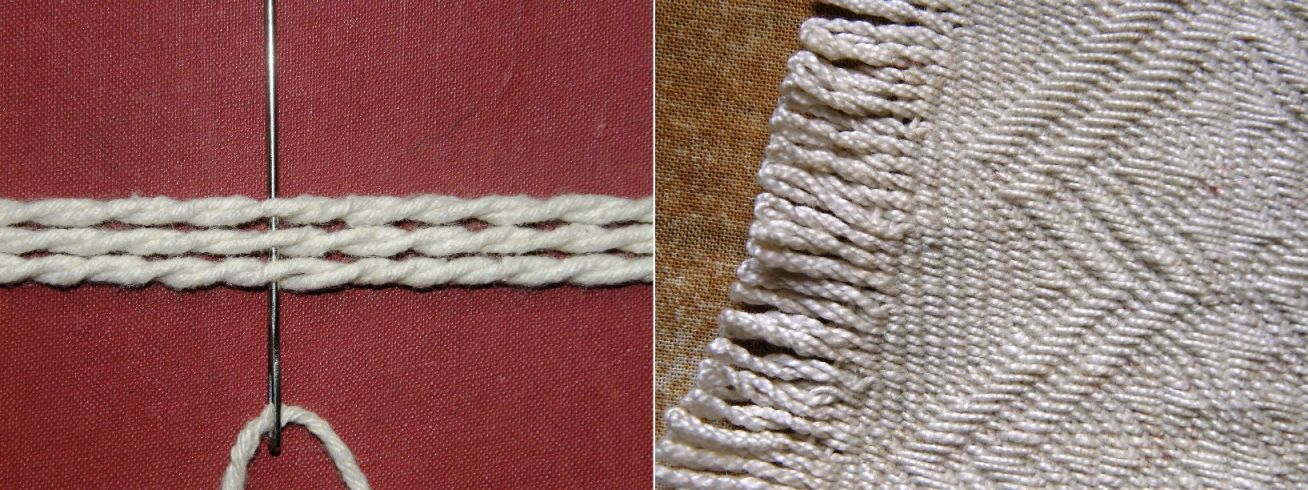
To begin “warping”, a length of cord is tied from the top to the bottom of the mold. Cotton thread is plied and then wound around the mold. Starting from the center cord the plied cotton travels around  the mold and passes around the cord before returning in the opposite direction. And so, back and forth it travels until the required length is reached.


I am using a cardboard mold here for these photos just to demonstrate this along with some very thick cotton string which I have roughly plied just to give you the idea.


Aurelio plies his cotton evenly on a drop spindle unlike my uneven thick cotton string above which I just twisted by hand. You can see the neat twist in the end loops of the piece below.

The “weaving” process then begins…

A single strand of cotton is passed on a needle between the twist in each of the plied cotton  strands from bottom to top, turning at the top and returning through the adjacent twist to the bottom. Designs are formed by passing the needle through the same twist twice, that is, on both the upward and downward journeys, thus creating a float. When the work is finished, the center string is cut and the piece of fabric can be opened out.

So what do we call this? Twining? EDIT: Since posting, there have been a few comments suggesting that this is most likely what is known as ply-split darning (not to be confused with ply-split braiding). Thank you to all who contributed their thoughts and suggestions.

The results look the same. You can see that the “stitches” created have the same slants as those created by weft twining. If you compare the method used by Aurelio to make the mantas with the picture I showed of the weft twining earlier you can see that the same thing is being achieved.


I have been twisting wefts around static warps. For the sake of the comparison we could say that Aurelio draws the “warps” through static twisted “wefts” with the same result. (The moving element on the needle is, however, the weft and the twists the warp).

I have not thought about creating designs with floats this way in my weft twining . I love this textured patterning in one color and can’t wait to try it.

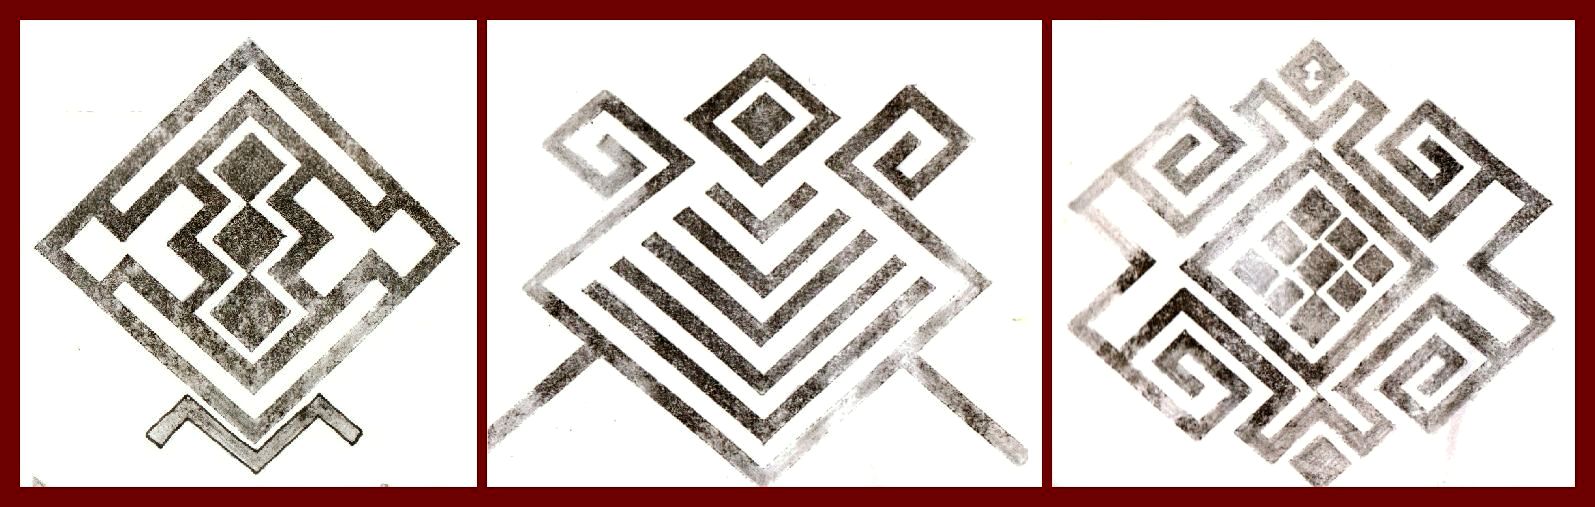
Here are other typical patterns used on the mantas of the alpargatas…


Common designs worked into the alpargata pieces.


The finished mantas….

The finished alpargatas…

These are a small boy’s size and so, eventhough I only saw them being worn by a few older men in the city of Otavalo, they are quite likely being used in towns and villages in the area by males of all ages.

Women also use alpargatas but theirs are now factory made from synthetic materials. The heel straps, however, are still being made by craftsmen like Aurelio. I did not see a synthetic version of the men’s style.


This tiny black pair is a baby's size.


I wish I had better images of the alpargatas in use but here is what I have…


If you look very closely you may be able to make out that one of the men looking at beads at the Otavalo market is wearing the white alpargatas. The weaver at right is wearing the typical women's alpargatas. Cord is tied from loops in the heel straps to hold the shoe onto the foot.


I am happy to see that a couple of Weavolution buddies have been inspired to give weft twining  a try too. Franco has had this on his “to-do” list for some time and has decided to shift it to the top. He has been making a weft twined bag around a cardboard support. You can see it on his blog. Jennifer has been experimenting with it on her cricket loom and I am sure she will have something to show us next week.

I can’t tell you how many things are on my own “to-do” list. Adding to it this week…a belt with black and white double weave Bedouin designs, a larger Bedouin style wall hanging with weft twined bands included and now… float patterns in weft twining inspired by the Otavaleño alpargatas.

I hope that you will be inspired to try some weft twining or perhaps one-weft double weave on your backstrap or inkle loom.

Backstrap Weaving – Spreading the Obsession:warp faced and weft twined


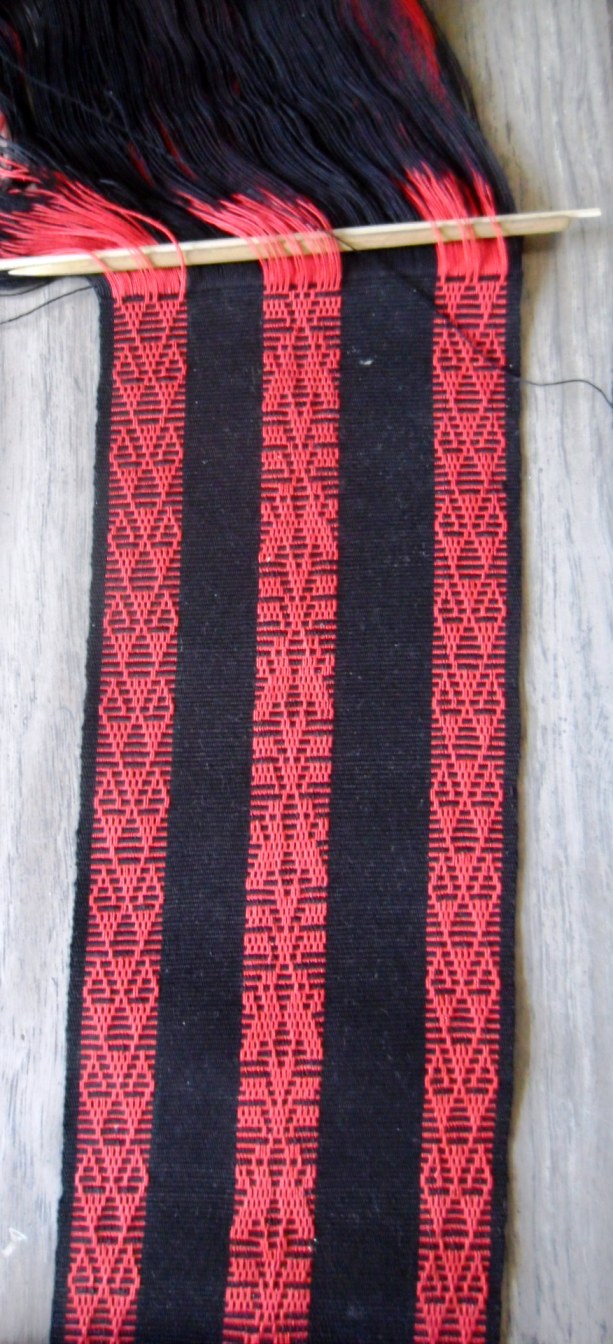
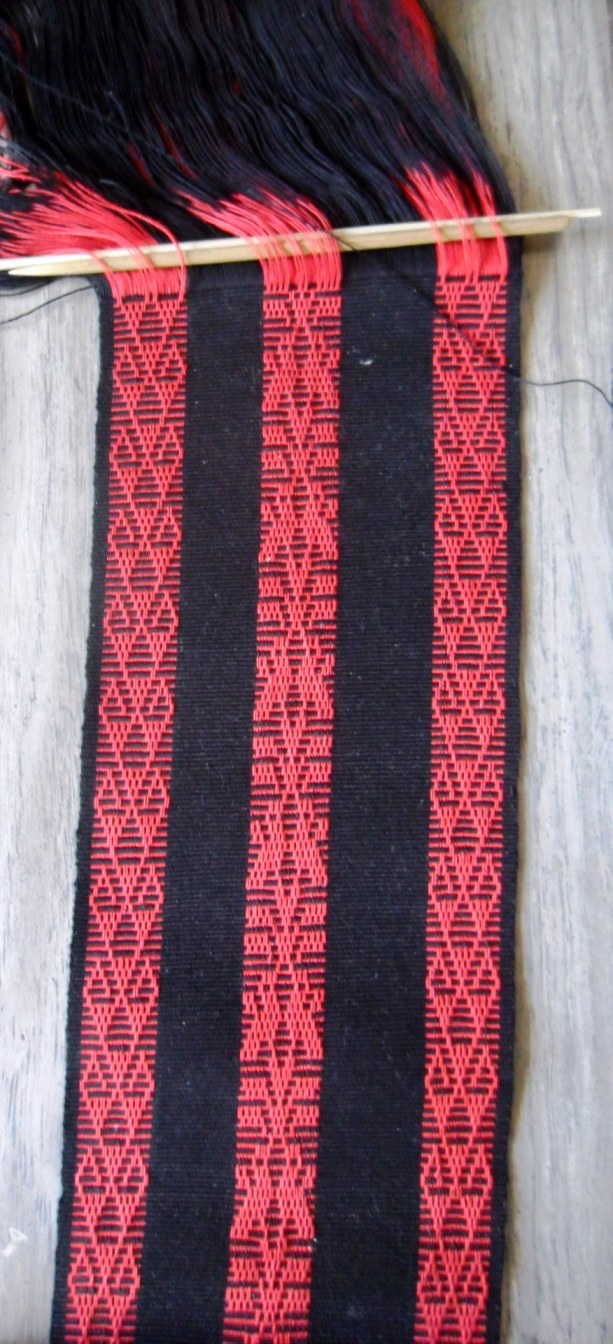
Simple warp floats in red and black by Eladio Salas Torres


WARP FACED AND WEFT TWINED

Three things have influenced the weaving I have been doing this week and they are spread across three very different parts of the world:

– a new book in my collection of weaving books on Bedouin weaving which has taken me on a fascinating trip through Saudi Arabia and other lands inhabited by the Arabian Bedouin with their colorful woven tent dividers, bags and camel adornments;

– the intricate weft twined work that the Montagnard weavers of Vietnam, that I met in the US, incorporate on the edges of their warp faced textiles;

– the beautiful combination of red and black in the backstrap woven piece by Eladio Salas of Mexico that I showed you last week.

First I took a step backwards as I had decided that I didn’t like the weft twined piece that I was practicing on last week. Fortunately I discovered that un-twining is a lot easier and faster than un-weaving. It is just a sample piece for skills-building but I just was not happy with the colors and motifs I had chosen and it had to go! Half of it got pulled apart and I did some searching on the net to figure out how I would like to continue. So now I am continuing with a swirl design from a Jarai tribal textile and will finish it off with other Montagnard motifs.

Meanwhile the Bedouin designs were calling to me…fabulous red, white and black warp faced pieces interspersed with bands of weft twining. I noticed that there was a small three color band of design that was common to many of the pieces which Joy Totah Hilden identifies as al-‘uwairjan pick up patterning and so I decided to sample that before launching into a big project.


The three-color al-'uwairjan pick-up patterning. It is used to create triangles and diamonds and other simple designs and creates long floats on the back of the textile.


I worked, of course, on my backstrap loom.


In Hilden’s book I see that  Bedouin weavers use staked out horizontal ground looms with their heddle bar suspended on forked sticks, rested on top of oil cans, cement blocks or other such objects or tied to sticks driven into the ground.  The weaving is suspended just a few inches above the ground. As the weaving progresses, the work is not rolled up. Instead, the weaver sits on the completed work and inches her way along the warp to stay close to the weaving line. Weaving is even done inside the home with the loom bars and warp held under tension in ingenious ways. One picture shows the loom bar tied to another bar which has been lodged behind a doorway.

Images of Bedouin textiles and looms can be seen here and here.

Here was my chance to put the reds and black together and learn some traditional Bedouin designs. The main panel of my weaving is done in a technique which I believe is called warp substitution. This pick up technique creates long floats on the back of the textile. I have never been a fan of long floats and much prefer double faced weaving but I wanted to use the technique employed by the Bedouin. To eliminate the floats I could have woven the very same designs in double weave.

The center panel of my piece is woven with the warp substitution technique called “shajarah” (tree) pick up patterning.

This weaving also gave me the opportunity to try weft twining on the loom. Many of the pieces shown in Hilden’s book have not only weft twined edges but also several bands of twining at various stages within the weaving. I have been enjoying my off-loom twining experiments and was looking forward to comparing them with twining on warps under tension on a loom.

I have kept these first attempts at on-loom weft twining narrow and simple.

I had to consider how many warps to use in a bundle around which to twine the wefts as well as the right  thickness of weft yarn so that the warps didn’t get spread too much thus widening the piece. Should I twine loosely or tightly? It took a few attempts to get it right. The warps did get spread slightly and so I had to work to get them back into place so I could continue with the warp faced weaving.

I plan to leave the weft ends on as a decorative feature. This piece will be a wall hanging. I was thinking about using it as part of a pillow cover but my cat, no doubt, will chew those weft ends off.

Feeling a bit more confident, I did a slightly wider weft twined band at what will be the center of the piece and added in a little bit of chaining.


A wider band of weft twining.


It is lovely doing the weft twining on the loom and the added control that one has by having the warps under uniform tension allowed me to use a much finer yarn than I have been using on the off-loom pieces. I expect with more practice I will eventually be able to do fine off-loom twining too….some time in the distant future! 

The motifs in the warp substitution band have been copied from images in Hilden’s book and from those I have found online.

You can see the bands of al-‘uwairjan pick up on the sides.

I am now just over half way through this piece and hope to finish it with a wider and more complex piece of weft twining.

I will add to the weft ends that are hanging from the sides to balance both sides and perhaps add some tassels.

Hopefully it will be ready to show next week.

There are many beautiful weft twined camel adornments in gorgeous red, tan and mustard tones that I would like to use as inspiration in other pieces.

While we are in red-and-black mode….

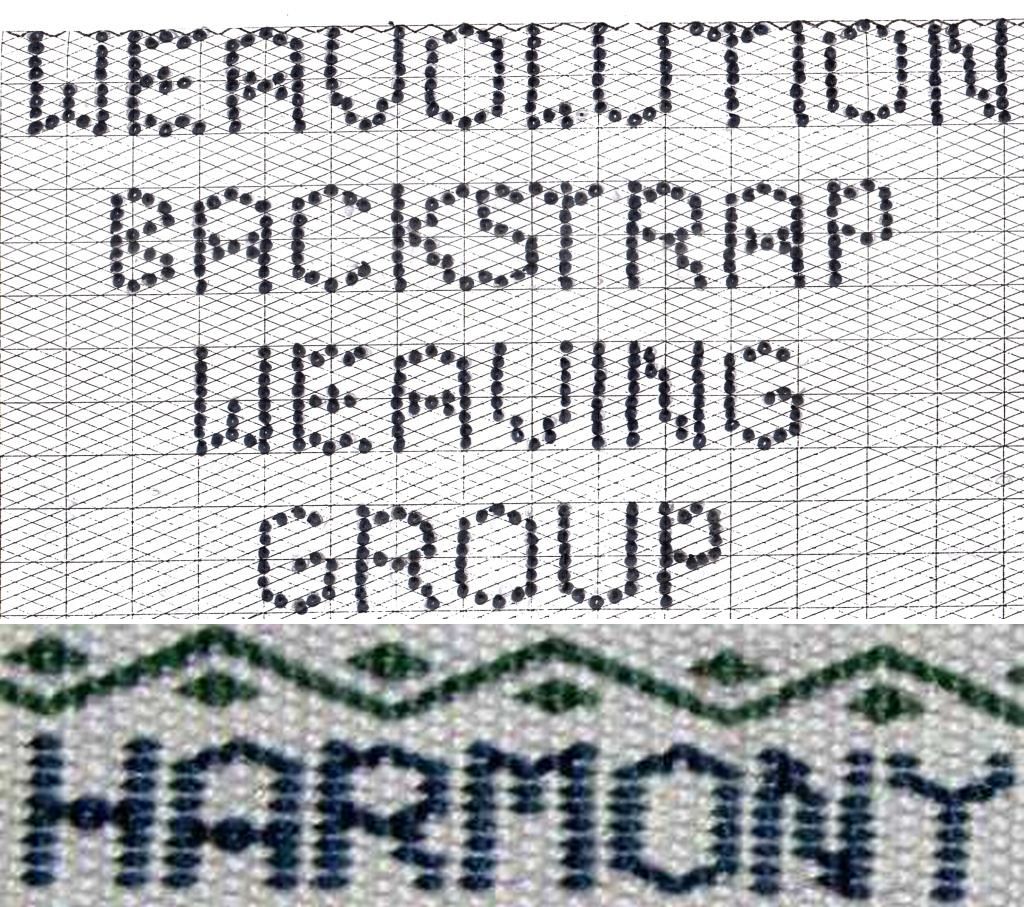
I promised you last week some more information on the lettering used by the Montagnard weavers in their bag straps.

Anyone who knows how to do simple warp floats as detailed in my tutorial here will pick this up in no time. The lettering is done in simple warp float technique with some variation.

In simple warp float technique you are using a shed of each color, for example, all the red warps in one shed and all the whites in the other. You weave alternating red and white horizontal bars and then go floating one of the colors over the other to form your designs.

The difference in the Montagnard method is that they have one shed of red and another shed of alternating red and white which you can see at left (with a two-warp red border).

In the red and white shed, they drop all the whites which exposes their black weft – you can see black dots on the above lettered band. They use twenty-nine warps in each shed to weave their letters, that is, twenty-nine reds in one shed and fifteen whites alternating with fourteen reds in the other.

When they want to weave a letter, they…

-open the shed with the reds and whites and drop all the whites except the ones that they need to form the letter.

-pass the weft.

-save  those whites and add them to the red shed.

-pass the weft.

open the red and white shed again and keep the same whites from the previous weft pass along with the whites  needed to form the next part of the letter.

-drop all the other whites.

-pass the weft.

-save only the whites needed for the next part of the letter and add them to the red shed.

pass the weft.

AND SO ON……

This will be double dutch to those of you who have never done simple warp floats. Well what are you waiting for? Here’s the tutorial! Become familiar with the simple warp float technique first and then try the letters.

NOTE:

  • If you use a red weft instead of black you will create the impression of a smooth solid color background.
  • This is not a double faced technique.
  • This technique does not produce the stiff band typical of true warp faced weaves.

####################################

There was a question in the Inkle Weaving group on Ravelry about doing one-weft double weave on an inkle loom and so I warped up my Ashford inklette and have added some pictures to the one-weft double weave tutorial for this. I only warped up to take the pictures and wove a triangle as a sample. This morning I had some time to play around with the warp…

This is very easy to do on the inkle loom. One-weft double weave produces a thick band with sharp motifs on a solid background. It is double faced.

Flipping the loom upside down, this is what you see…


This is the first time I have tried this on the inkle loom. Weavers in the Backstrap Group at Weavolution have tried it but warned me that it is a bit stressful on the loom. I wasn’t sure if my inklette would be able to take it but I actually don’t find it stresses the loom at all.

You will warp your loom normally except that you will be using doubled threads.


Here are the warps in the heddles. You can see that there are two strands of red border warps and one strand each of blue and yellow together in each heddle.


See the full tutorial with all the details and more pictures here.

######################################

You may remember my blog post about Anna who came to visit and learn backstrap weaving with me here in Bolivia. She and boyfriend Alistair are on their way by bicycle to Ushuaia after having started in Alaska in May 2008.

Well they have just completed the Lagunas trail in the salt lake area of Bolivia and Chile and are currently luxuriating in San Pedro de Atacama, Chile. Anna described that riding section (which turned out to be more of a pushing section for the last five days…deep sand and a strong headwind) as one of the most physically demanding things she has ever undertaken.

Anna and Alistair teamed up with a couple of German cyclists for this part of the trip and Anna has been spreading the obsession by teaching new friend Carolin to backstrap weave. They are carrying printed pages from my Andean Pebble Weave download with them.

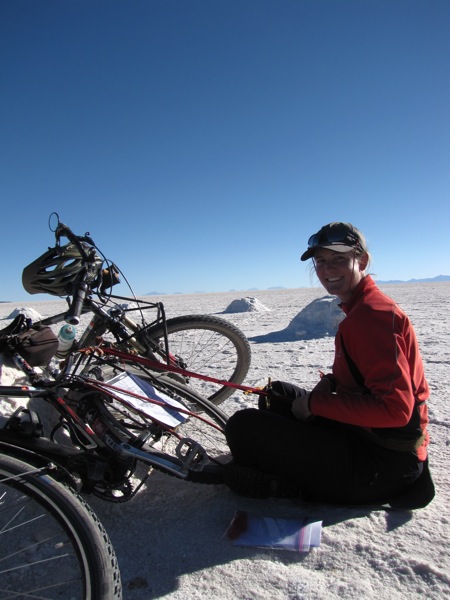
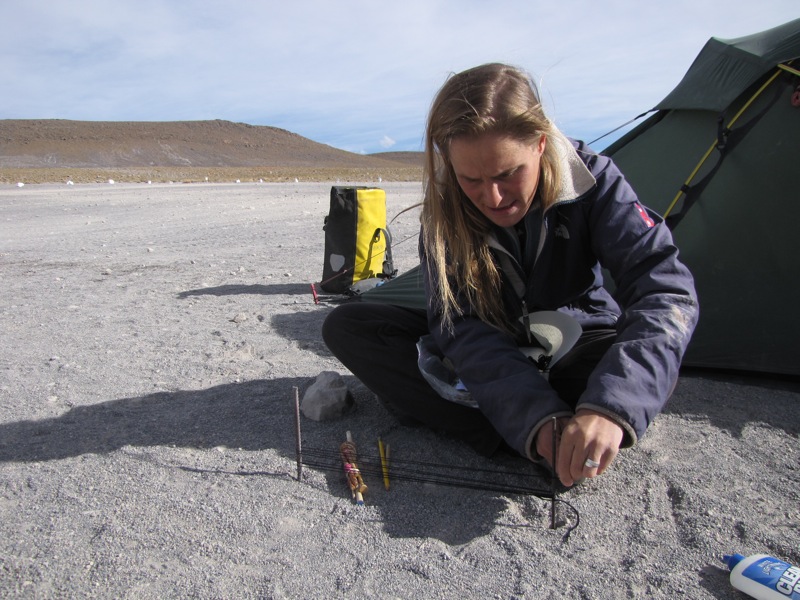
Here are some fun pictures of them weaving on the road…


Anna on the left gave the first weaving class to Carolin in the town of Uyuni in Bolivia before heading off on the lagunas trip. The little table has been fashioned from "madera de cacto" (wood from the dead pillar cactus)


Carolin with her tiny loom tied to her bike and weaving on the salt lake.


Anna designed a fitting motif with which to practice her newly acquired double weave skills.


Anna warping in camp somewhere in the desert. She said her fingers nearly froze off! I recognize those pencils...


So nice to see my apprentice so enjoying her new skills! Apparently Carolin will be doing a long sailing trip after this bike journey so we can expect to see the backstrap loom being used in the middle of the ocean some time in the future!

Anna brought me some spindles and llama bone picks from Sucre.

I gave her very precise directions to the curandera stalls  in the crazy campesino market which sell llama fiber, weaving tools and all kinds of home remedies.

She not only found the curandera area but I believe she bought the things at the very same stall at which I shopped when I was there.

I have sent some of the spindles to the Netherlands and the US and have one left if anyone is interested. I have a few llama bones left too.

Drop me a line if you are interested. 🙂

Backstrap Weaving – Building skills and resources.

BUILDING SKILLS AND RESOURCES

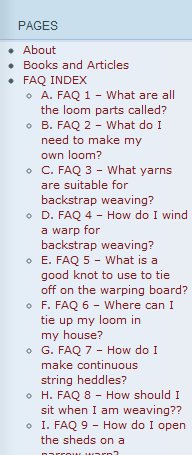
I have been busy behind the scenes building  the resource pages on this blog. I am about three quarters of the way to finishing the “Frequently Asked Questions” pages which will deal with fifteen or so topics related to making your own backstrap loom and weaving on it.

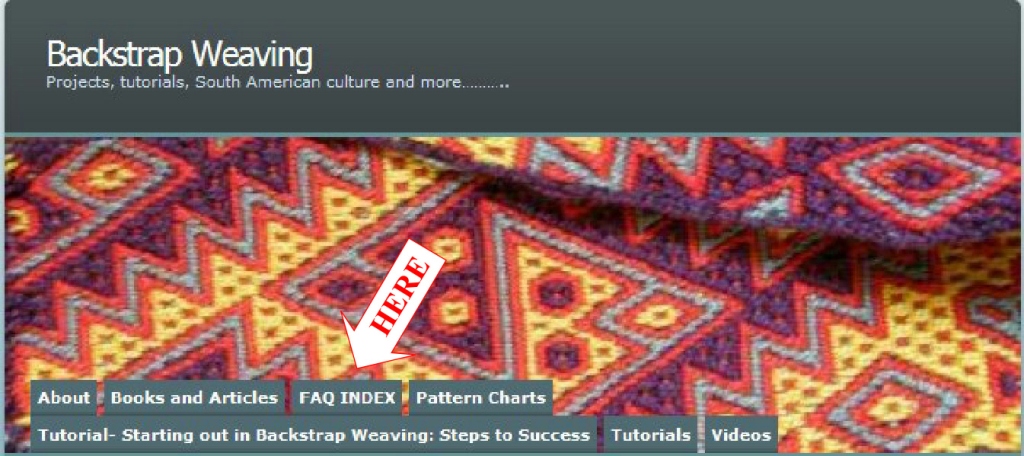
You can access the index by clicking on the FAQ INDEX tab on the header image. There you will find links to the finished pages or you can go directly to each page by clicking on one of the topics on the sidebar.

The pages include explanations with photos, links and images. I hope that you find them useful and please feel free to ask any questions, add information from your own experience or suggest other topics by leaving me a comment here on the blog or the relevant FAQ page.

And….I will be translating all the tutorials to Spanish and putting those on new pages too. (Y….voy a traducir todos los tutoriales a español y los voy a poner en paginas nuevas también).

So, that was my keyboard activity for this week along with writing an article and getting some pages done for my next book!

As for 0n-the-loom activity, I was asked to weave some bookmarks for a friend. I was told what design to use but the colors were left to me. I got to use some more of the Turkish cotton that I bought recently and I can’t say enough about how beautiful it is to weave with. It is only for special projects, though, definitely not for sampling as it is a bit pricey. Details can be found on the FAQ 3 page which answers the question “What yarns are suitable for backstrap weaving?”

These have been woven in double weave. As the borders are plain weave I used two wefts. One weft wove the borders and upper layer of the double weave and the other wove the lower layer. Lettering is really easy to do in double weave and although these letters I invented are very basic, they can be very effective. I have charted them out for you all to use. Most of the letters are in the following two images and I am sure that you can invent the ones that are missing. You can, of course, weave the letters after following my tutorial for one weft double weave.

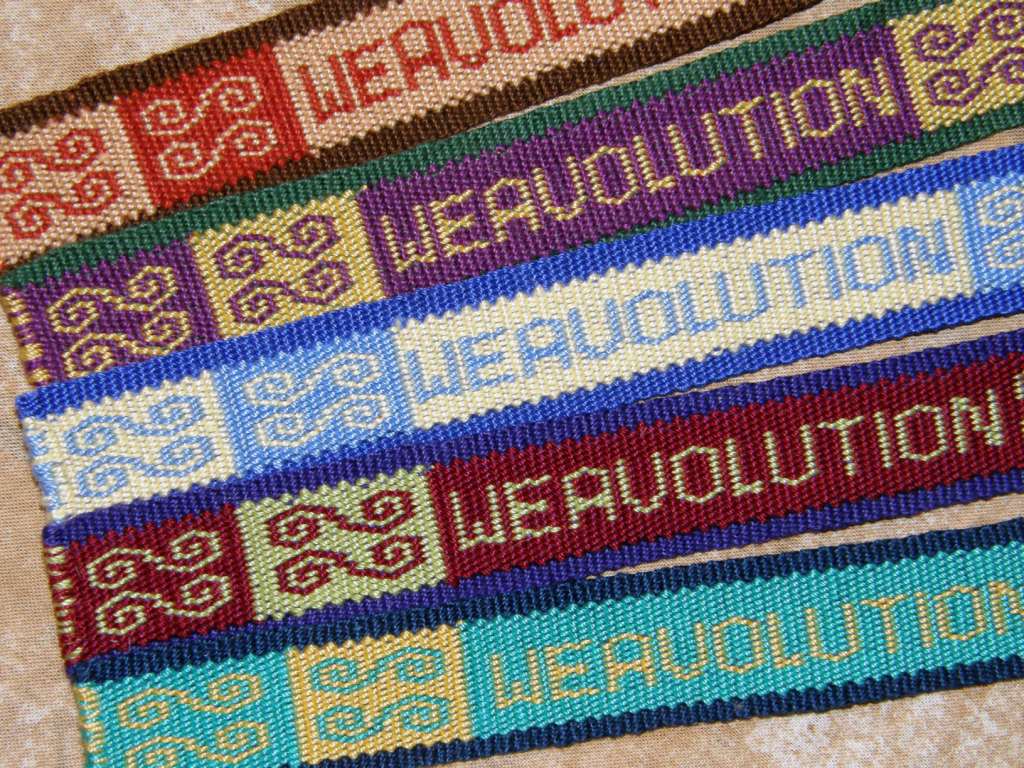
Other woven messages can be done in the Montagnard style lettering. I learned this warp float weave by studying a band I bought from some Montagnard weavers that I met in the US on a recent visit.

This is a “looser” weave and the resulting band is quite flexible unlike the double weave which is very firm.

Next week I will do a tutorial on this warp float lettering.

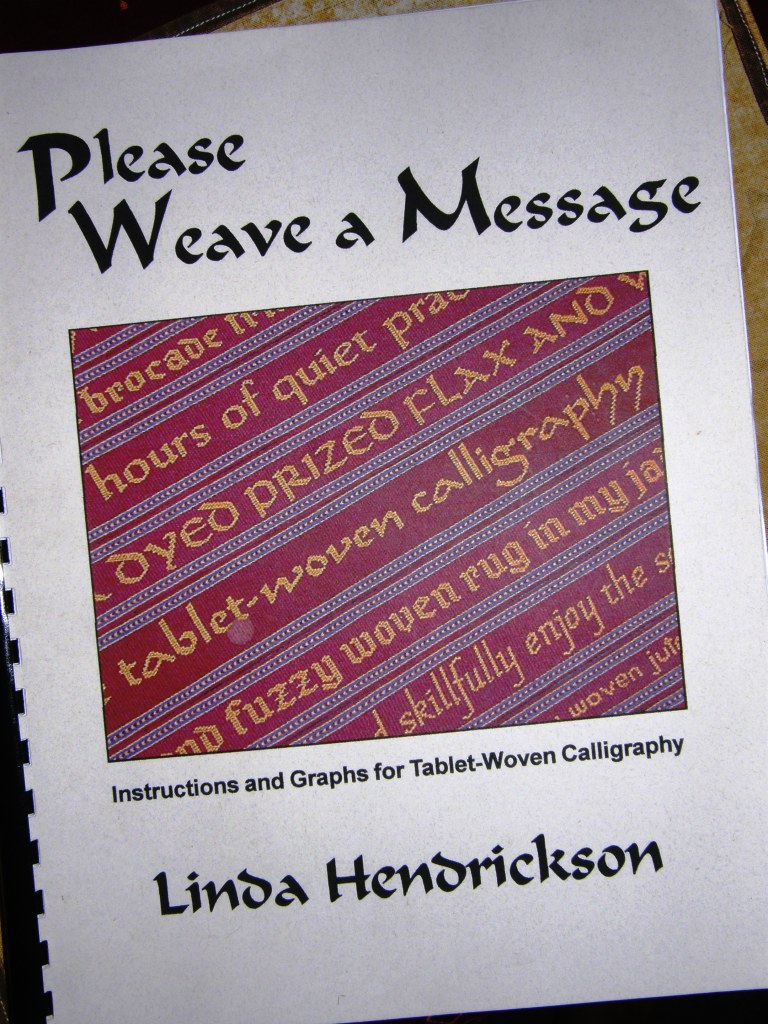
You have probably heard me mention before my love of the letters that Linda Hendrickson has charted in her book Please Weave a Message.

I got this book hoping that I would be able to use the charts for double weave but found that the “stitches” produced in card weaving sit one on top of the other as opposed to those in double weave that are staggered from left to right. This meant that I would have to adapt Linda’s charts for double weave. I did adapt many of the letters but they were seriously altered and just did not look as nice as Linda’s but now I have had an idea!

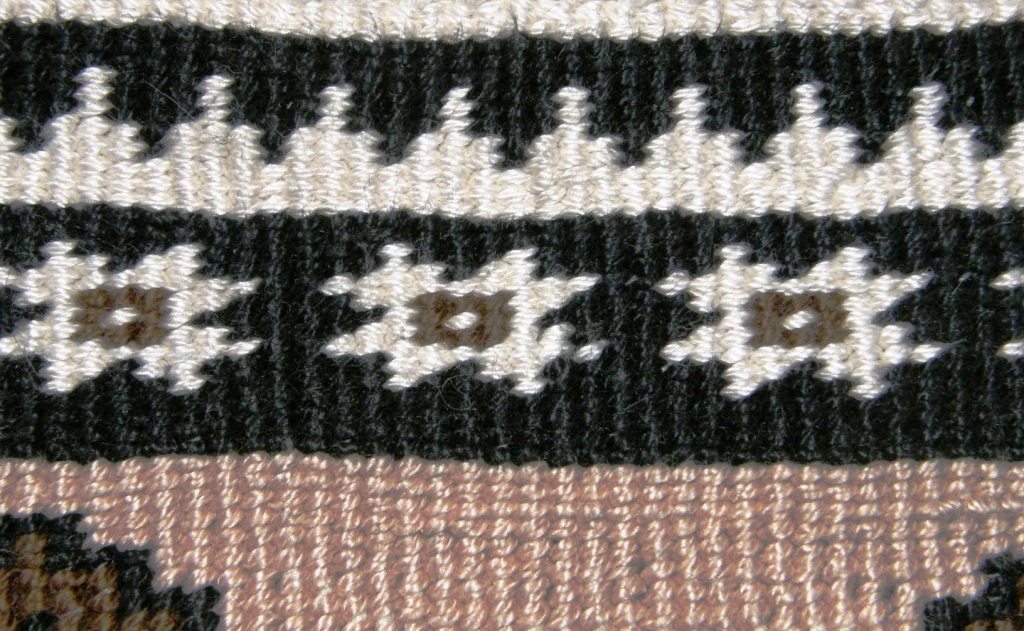
I realize now, after my recent experiments with weft twining, that weft twined “stitches” also sit one on the top of the other and that I should, therefore, be able to use Linda’s charts to twine letters and messages. I am not sure how much the slant on the weft twined stitches will affect the appearance of the letters but I can’t wait to try it out.

I haven’t done so yet as I am still building my weft twining skills while working on another project this week with slightly finer yarn.

This time I am using three and sometimes four colors at a time and it is a little cumbersome but I do like the results. The design has been inspired by pieces in a book on Bedouin weaving. From a distance this looks pretty much like a piece of tapestry. Many things amuse me about this technique….firstly, it is something new, secondly, it helps me to better understand what the Montagnard weavers are doing at the edges of their warp-faced weavings and thirdly, it is an off loom technique that does not require tools apart from one’s own hands.

I am grateful to Bonnie Datta who told me that a chapter of Peter Collingwood’s book The Techniques of Rug Weaving is devoted to twining…both warp and weft. The book can be downloaded for free here. The opening line of the chapter reads….Twining is not weaving,… so that settles that debate!

It shows some ways to turn the wefts at the edges for rug making which I must try as that is something with which I am still battling. The piece that I am working on now is still a “skills builder” but, who knows, I might be able to make something useful out of it.

As far as lettering goes, my boyfriend’s mother asked me a long time ago to make something for her. She is from Cochabamba in the Bolivian highlands and, although she was raised speaking Spanish, both her mother and grandparents were bilingual, speaking both Spanish and Quechua. She told me that there are three lines that comprise the “Law of the Qechua” which go…


which translate to… Don’t steal; Don’t lie; Don’t be lazy. She would like me to weave these words into a wall hanging for her. Well, I might not weave them, I might twine them.

What I am really leading up to with my twining experiments is weaving a double weave piece on my backstrap loom with twined edges where the design on the twined edge matches the double weave motifs. There is much skill-building to be done before that point. Hmm…I am not sure if I am less adventurous now or wiser. I am sure that in years gone by I would have launched myself straight into this and not bothered with the “skill-building”!

In the meantime I have been admiring some ikat pieces from Sumba which I found online which have very broad twined edges. They leave the wefts tails hanging out at the sides as fringe. I am trying to hide the weft ends so I can have smooth neat edges, without much success, I might add!

This has led me to look at other twisty twined off loom techniques and especially one that is practiced right here in Santa Cruz where I live by the Ayoreo people. Actually, I have always wanted to learn about this but gave up some time ago trying to find a willing teacher. Maybe it is time to try again.

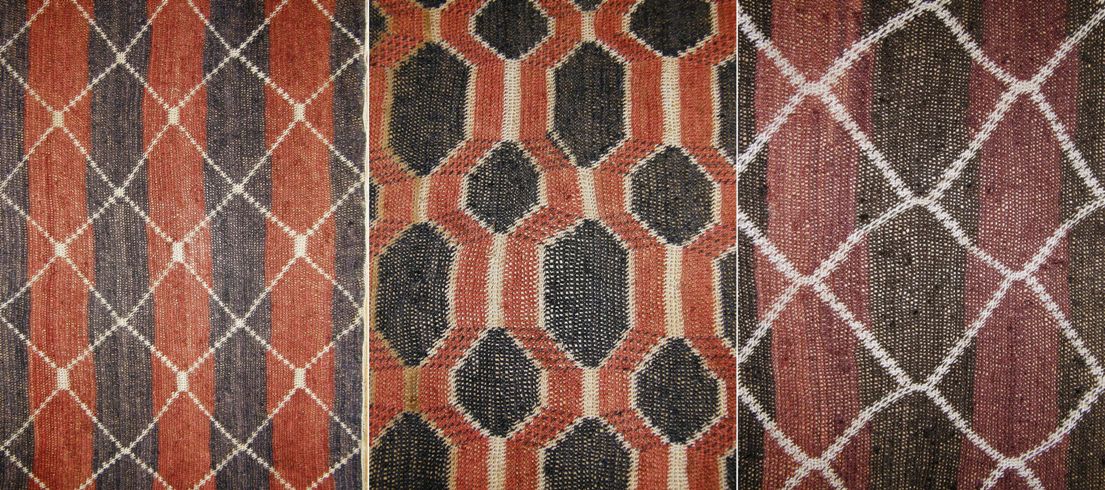
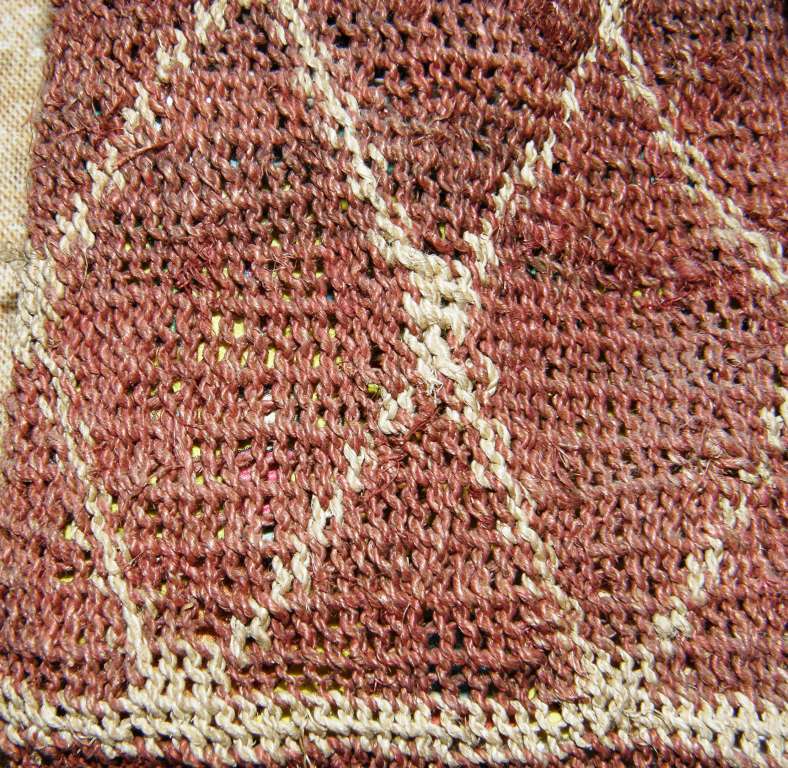
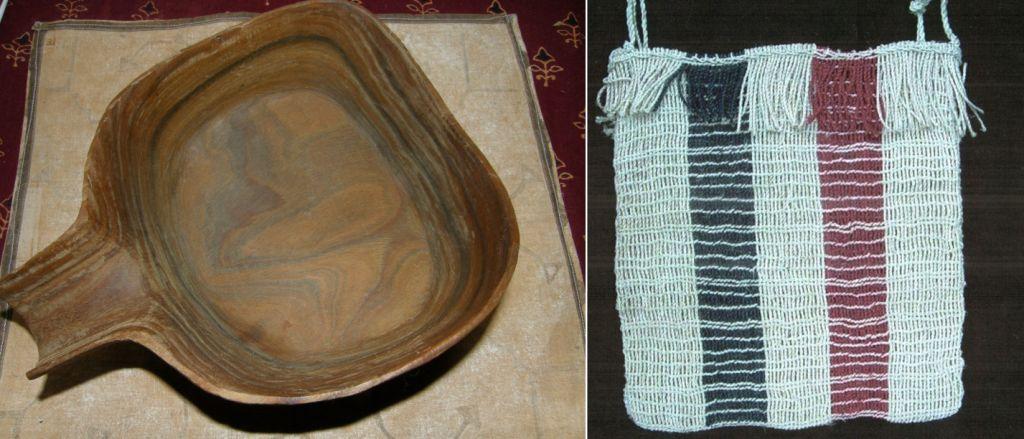
Information about the Ayoreo people is sketchy. Population estimates in different sources range from seventeen hundred to four thousand Ayoreo people, distributed amongst seven to ten clans living in the area known as the Chaco. They use off loom netting, twining and knotting techniques, sometimes with the aid of a needle, to make a type of shoulder bag called utebetai using a fiber called garabatá fino from the Bromelia Hieronymil plant. The fiber is twisted by rolling it on the thigh using ashes to take away some of its stickiness. It is plied and may be also dyed before use.

I have three of these bags but have opened them out to use as wall hangings.

According to a booklet put out by CANOB (Central Ayorea Nativa del Oriente Boliviano), the designs used in the pieces represent seven clans. The motifs include representations of the patterns on armadillo shells, clouds, snake skins and the eyes of a jaguar.

Miniature pieces are also made which are said to be used to carry talismans.

Even if I don’t make something like this myself, I would like to sit down with the ladies and watch the process and document it. Sometimes they are seen working with the fiber in the street but unfortunately I have not found them very open to my questioning or hanging about in the past.

The Ayoreo also use weft twining to make bags and carve beautifully simple bowls.

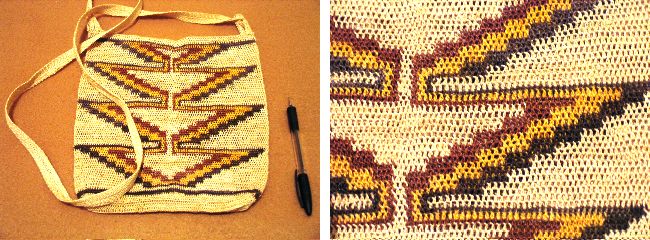
My friend Kathleen sent me pictures some time ago of bags called chácaras, which are said to be of Mayan origin, being made in Panama by the Ngöbe and Buglé people. The fiber is from the Aechmea magdalenae plant and is also twisted by rolling on the leg. The netting method appears to be the same although their color palette is quite different.

To finish this week I have some projects to show you from Marsha Knox who is in the Backstrap Weaving Group at Weavolution and Eladio Salas Torres who lives in Mexico and follows my blog.

Marsha used a tapestry loom to weave a band patterned with simple warp floats. I know that Marsha had a few false starts with this but she persevered and I thank her for showing us how warp faced bands can be woven on a tapestry loom.

Eladio has woven a wide piece incorporating three strips of simple warp floats using patterns from my blog. The red and black together look stunning!

He is using the double bird design from coastal Ecuador and a hook design that I adapted. He also sent me a picture of himself at his loom. I LOVE getting photos like this!

It looks like he is using a cardboard roll for his shed rod and maybe pvc pipe or wood for his loom bar and roll up stick. I wish I could sit cross legged like that! He has just bought my pebble weave book and I am sure we are going to be seeing pebble weave bands from him soon.

NEWS AND STUFF…

Here is the link to the most recent Synergo Arts newsletter about their latest progress with the ergonomic bench in Guatemala.