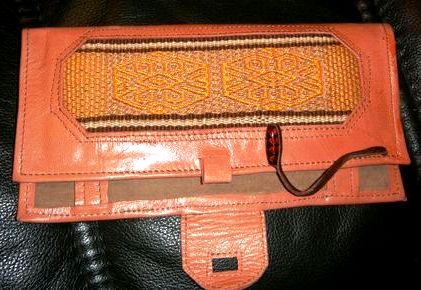
Backstrap Weaving – A Little Armchair Travel (courtesy of Jose Jaime Araujo)

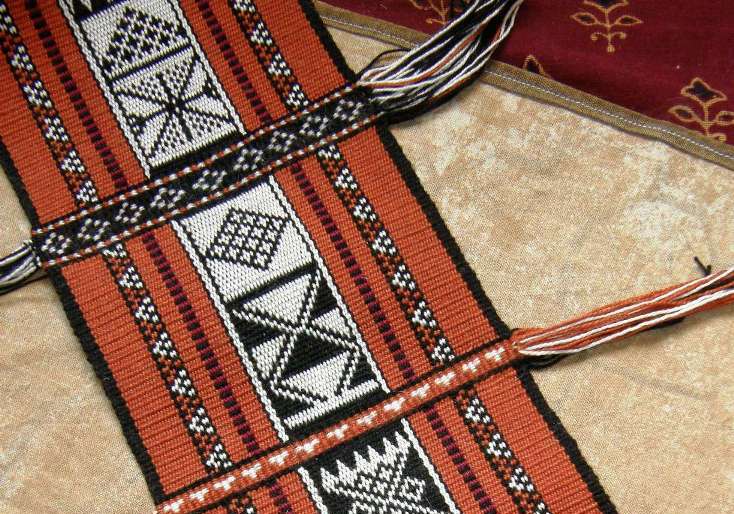
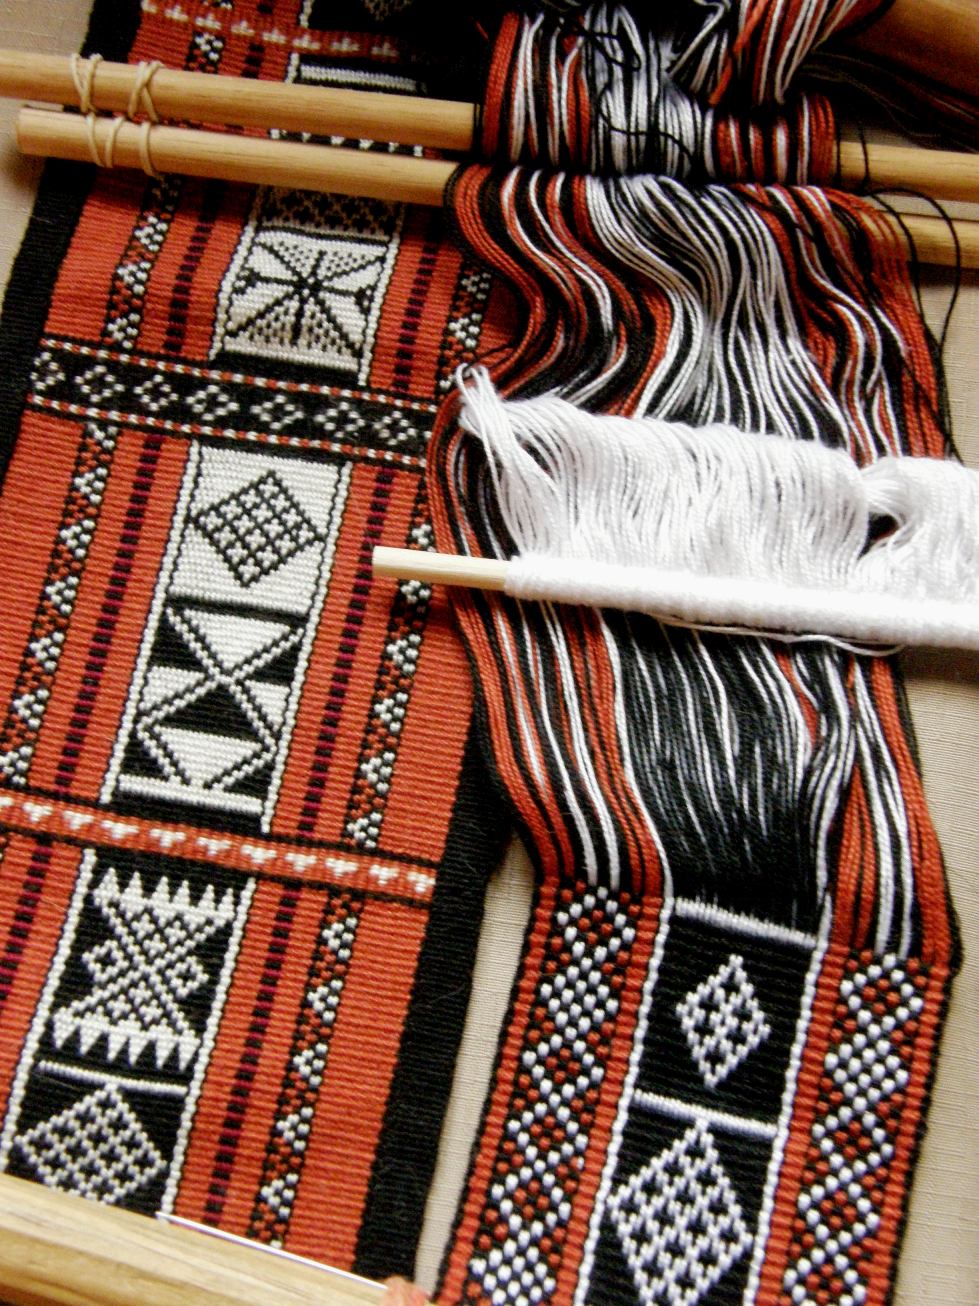
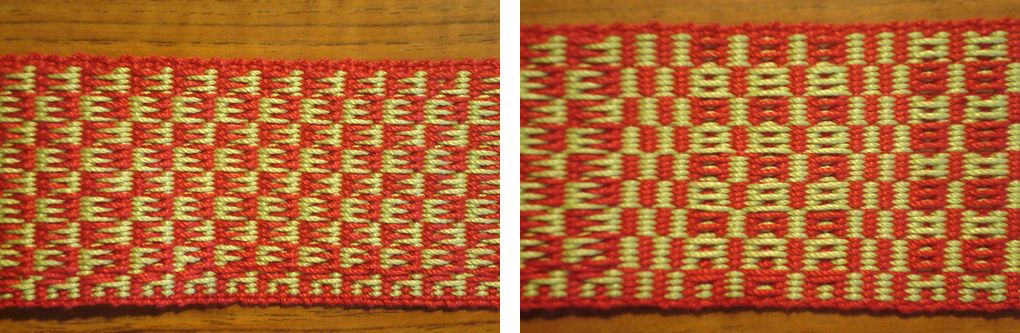
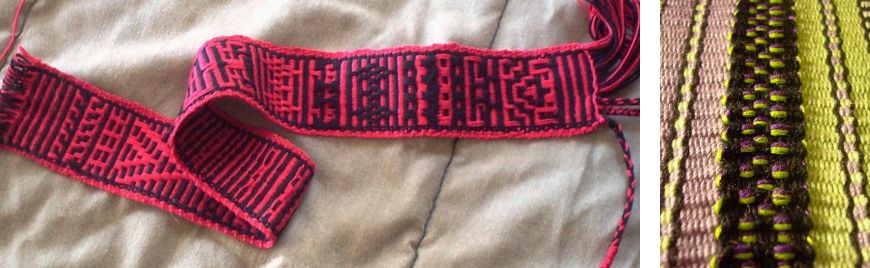
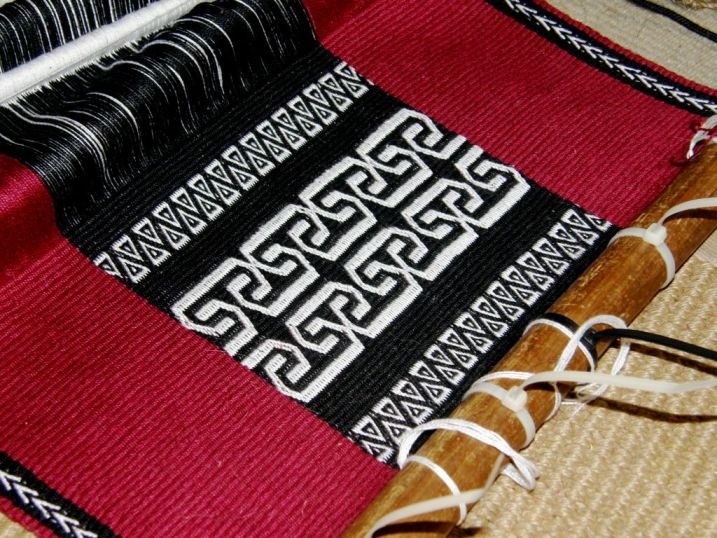
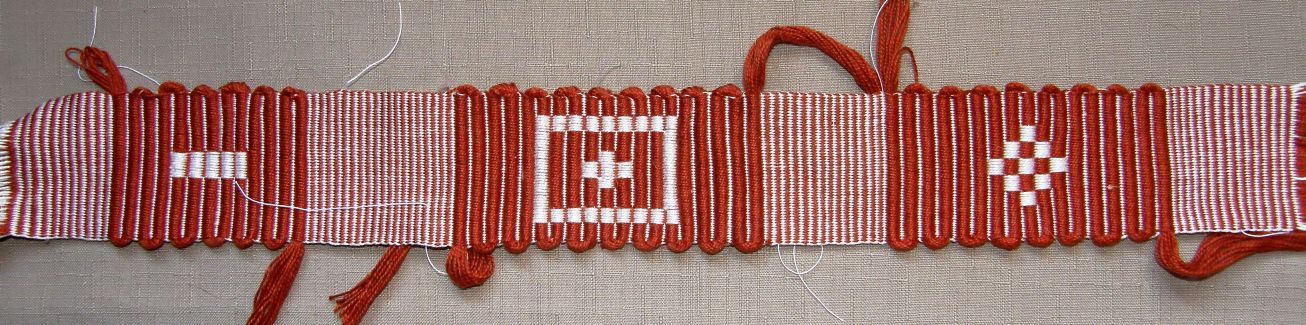
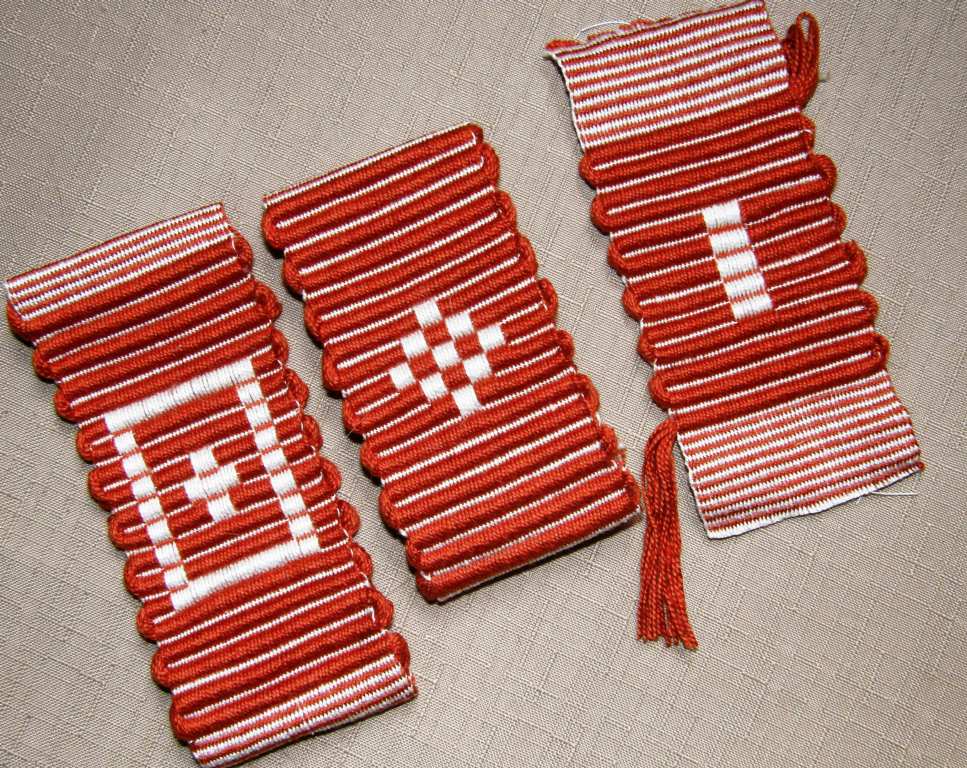
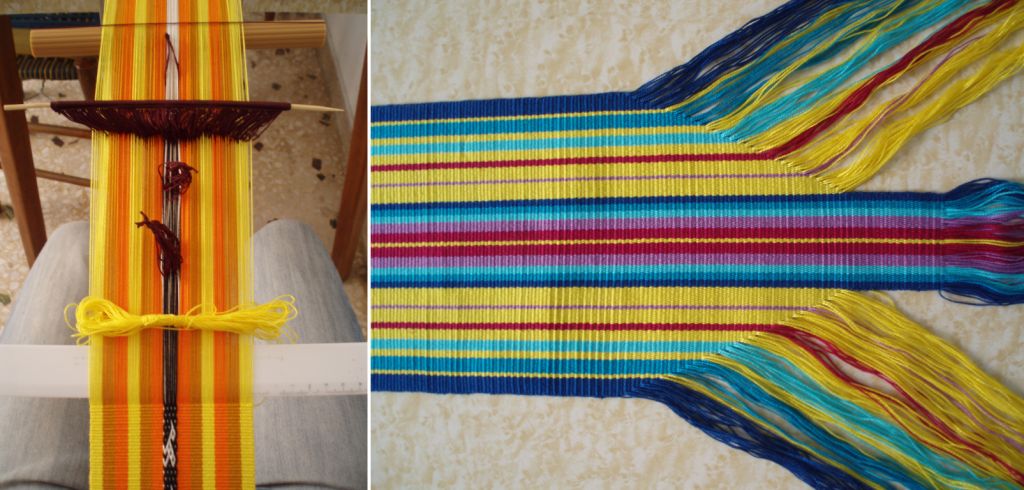
Reproductions of Wayuu si'ira belts woven by Mirja Wark
Reproductions of Wayuu si’ira belts woven by Mirja Wark

I had my heart in my mouth last Sunday night watching the CNN program “Anthony Bourdain’s Parts Unknown”. He was in Colombia! That’s a place where I would dearly like to go although I have to admit it has gotten such bad press that it scares me somewhat. I was hoping to be told what a safe and wonderful place it is and the host did a good job of projecting that. In fact he said that it was the “most welcoming” of all South American countries he had visited.

The part that had me on the edge of my seat was when he went to the Guajira Peninsula, home of the Wayuu people. If you follow my blog you will know that through Mirja Wark’s book, I have been using Wayuu si’ira belt patterns to inspire some of my weaving.

Mr Bourdain wandered through the markets  and I recognized versions of the typical embroidered dress that the Wayuu women wear. Mirja had modeled one for me when I visted her in the Netherlands last year. It was nice to be able to catch these glimpses of life in the market and learn a little about local food.

mirja modeling wayuu dressBut, sadly, he didn’t go looking for weavers or for the craftswomen who make the beautiful crocheted susu, or “mochilas”. He and his guide swung in hammocks after a day of ripping along the coastline on noisy four-wheel bikes. Yes, we got to see all that as well as the host falling off his bike on his head but didn’t get to hear anything about the woven hammocks. Too bad.

Fortunately, I found a gentlemen online, Jose Jaime Araujo, who has visited the Venezuelan side of the Guajira Peninsula and who is willing to allow me to share pictures that he took of the textiles and craftspeople there. He visited a market that looked very similar to the one that Mr Bourdain showed on the CNN program. Here you can see Mr Araujo’s guide using one of the susu, the typical crocheted bag, used by both men and women.

Photo by Jose Jaime Araujo

This could easily be a street market in Bolivia except for the beautiful flowing dresses that the women are wearing . I expect the music they are playing (all markets here  in Bolivia jump to the rhythm of various pieces of music clashing merrily together!) is different and you would be hearing the sounds of the Wayuu language. Mr Araujo’s guide acted as his interpreter.

Photo by Jose Jaime Araujo

Imagine….a stick with a hook on the end and talented hands are the only “tools” needed to create such a beautiful piece! I got to see one of these susu, or “mochilas” when I visited Dorothy on my recent US trip. Mirja, in Holland aslo had a fine collection.

??????????????????????I will leave it up to the crochet experts to look at this and understand how it is done!

close up of Dorothy's Wayuu mochilaAnd below is something for the ply-split braiders…

???????????????????????????????Mirja told me that the art of weaving the si’ira belts is on the verge of dying out and that she found it almost impossible to find someone who could show here how to do it. The belts are woven on simple vertical looms. Mr Araujo was lucky to find this elderly lady working on the ends of a belt after it it had come off the loom. This is eighty-five-year old Maria Úrsula Ipuana and Mr Araujo describes her as a living legend. She is one of the best Wayuu artisans that knows all the techniques of weaving. Right now she is passing her knowledge to other young Wayuu women.

Photo by Jose Jaime Araujo

You can just make out the “like the nose of a cow”  pattern at the end of the belt, a version of which I used in my wall hanging.

Wayuu inspired wall hanging progress

In this next picture Maria Úrsula Ipuana is holding two single loops in her hands and is most likely adding some countered twining to unwoven warp ends.

Photo by Jose Jaime Araujo

You know how I love weft twining! You can see the simple twining in blue and green  at the bottom of Mirja’s belts…

braiding and weft twining at bottom of siira beltsI added a very small and simple version of the twining to the bottom of my Wayuu inspired wall hanging…

wayuu inspired coutered weft twining

You can see how the threads in the first row of white twining are diverted to swap places with the threads in the second row of black twining and then vice versa as the twining proceeds across the warp ends.

Included in Jose Jaime Araujo’s collection of photos are ones of Wayuu women twining across large groups of warp ends which Mr Araujo says will be a hammock.
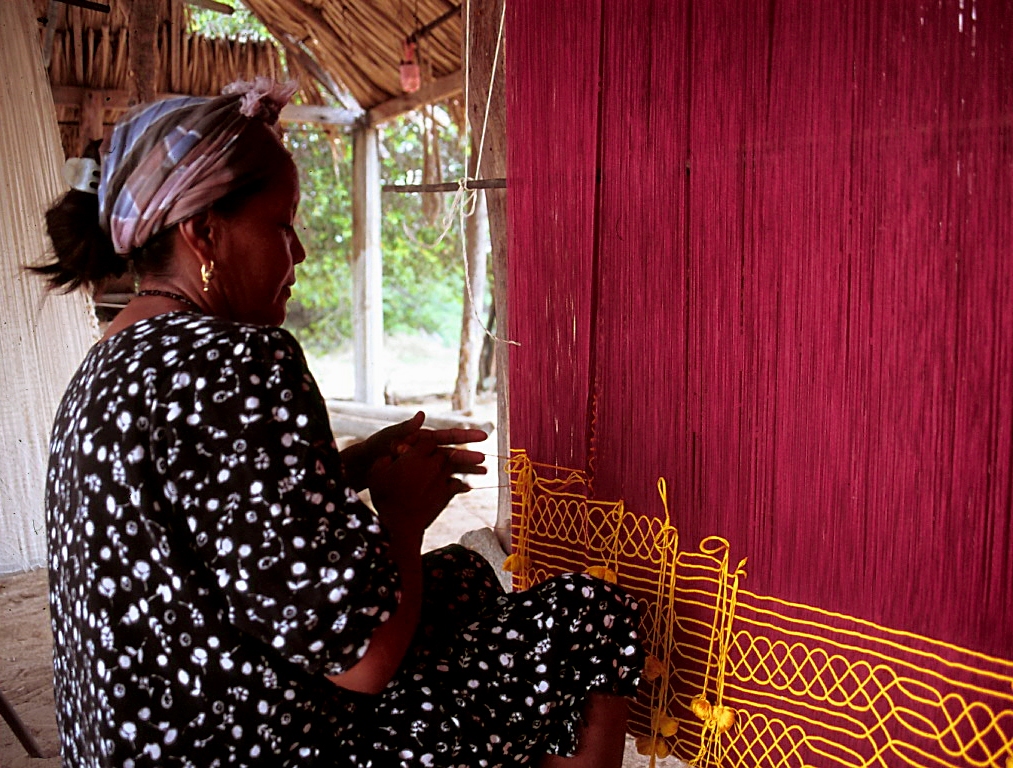
Photo by Jose Jaime Araujo

How spectacular is that?! This is something I wouldn’t mind trying. Here is another one with white on white…gasp!
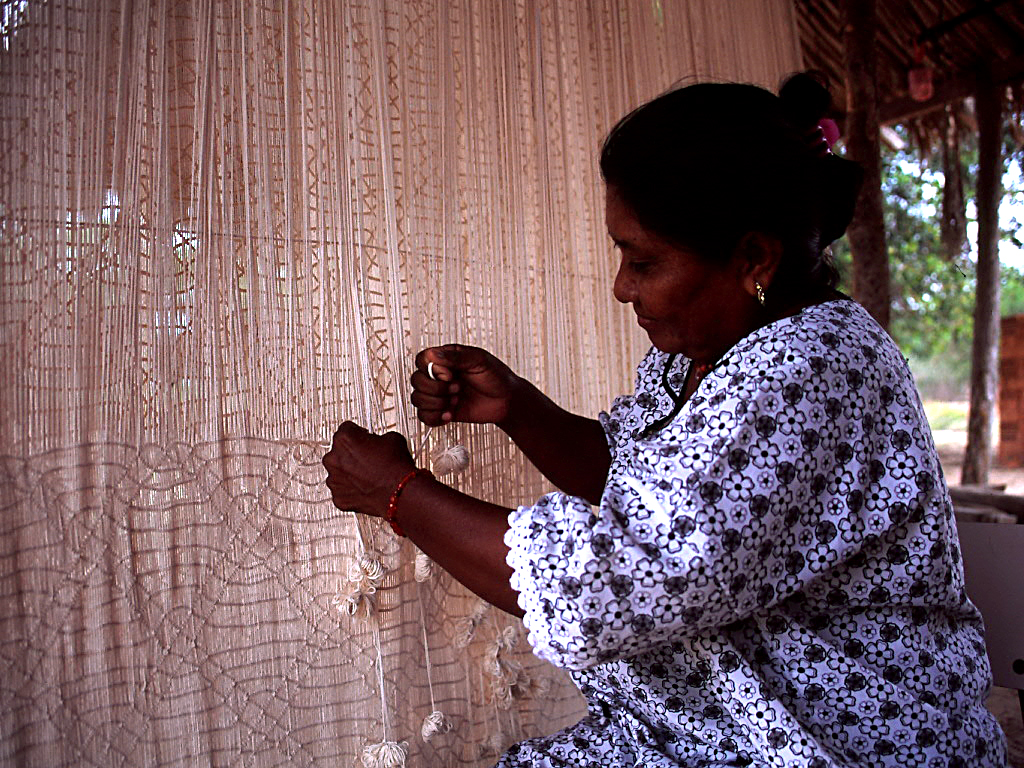
Photo by Jose Jaime Araujo
Picture by Jose Jaime Araujo
Photo by Jose Jaime Araujo
Photo by Jose Jaime Araujo.

Above, Maria Úrsula Ipuana shows a man’s ceremonial belt, a si’ira that she wove. You can see another stunning example at left and get another look at the weft twining at the end of the belt.

Jose Jaime Araujo’s flickr page has more pictures of the Wayuu people, their environment and crafts which include hat-making.

Thanks to Jose Jaime Araujo, we get to see a little of what Mr Bourdain neglected to show us. In the meantime I will look with a little more confidence at Colombia and maybe Venezuela on that long list of places I would like to visit.

Back here in Bolivia, I am still breaking down that seven weeks of accumulated dust and evacuating some unwelcome spiders. Fortunately, I saw this poem on Facebook, by an anonymous poet, only after my work was mostly done. Otherwise, I may never have done anything at all!

dust if you must

bhutan scarf with borderLots of excuses there!

But, I found that dust I must as I had a visitor last weekend from Australia. Wendy Garrity stopped off in Santa Cruz on her way to the highlands. Wendy spent some time in Bhutan teaching music and learned to weave at a weaving center there.

When I was trying to figure out the Bhutanese supplementary-weft chain-stitch technique by studying textiles from Bhutan in friends’ collections and online, I was able to find a piece of missing information about the spacing of the pattern warps from Wendy’s blog. That enabled me to make the scarf, at left, using traditional and adapted Bhutanese patterns
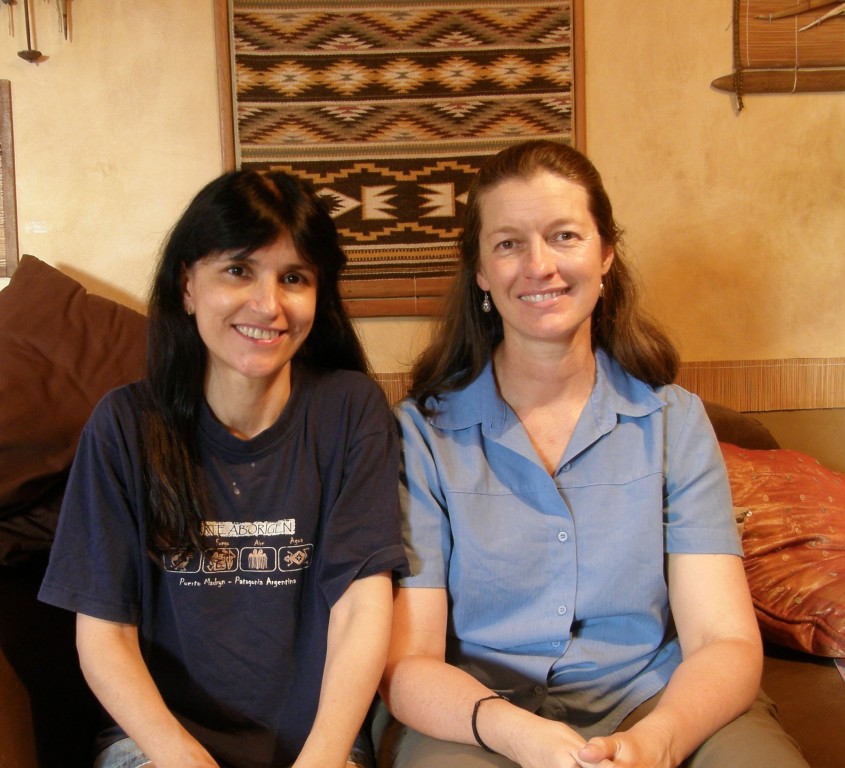
with WendyWhen I found that last piece of crucial information on her blog, I told Wendy that I had wanted to jump through the computer and hug her. That saved me a lot of trial-and-error.

Well, who knew that she would turn up in my home and get that hug for real?!

We spent two days chatting in “Australian”. I always like feeding backpackers who have either been living off cheap greasy cafe and bus terminal food or noodles that they cook up on camping stoves by the side of the road. It makes my simple cooking seem like something wonderful!

We poured over the Bhutanese patterns in David Barker’s books and Wendy told me the names and meanings of many of them. We talked about our travels through Asia…mine having taken place mostly in the mid eighties to early nineties and involved mostly trekking up and down mountains. Wendy’s travels in Asia have been about working and looking at textiles.

We shared what being away from Australia for extended periods of time is like. I have been living outside Australia for 20 years now!

I taught her a simple Andean pattern on a narrow band so that she could take it along with her on her travels. It is a complementary-warp pick-up technique which will give her a little insight into some of the textiles that she will see on her way through  Bolivia and Peru.

Wendy weaving the tanka ch'oro patternWhile Wendy wove her tanka ch’oro pattern, I set up to weave with my friend Janet’s gorgeous handspun wool.
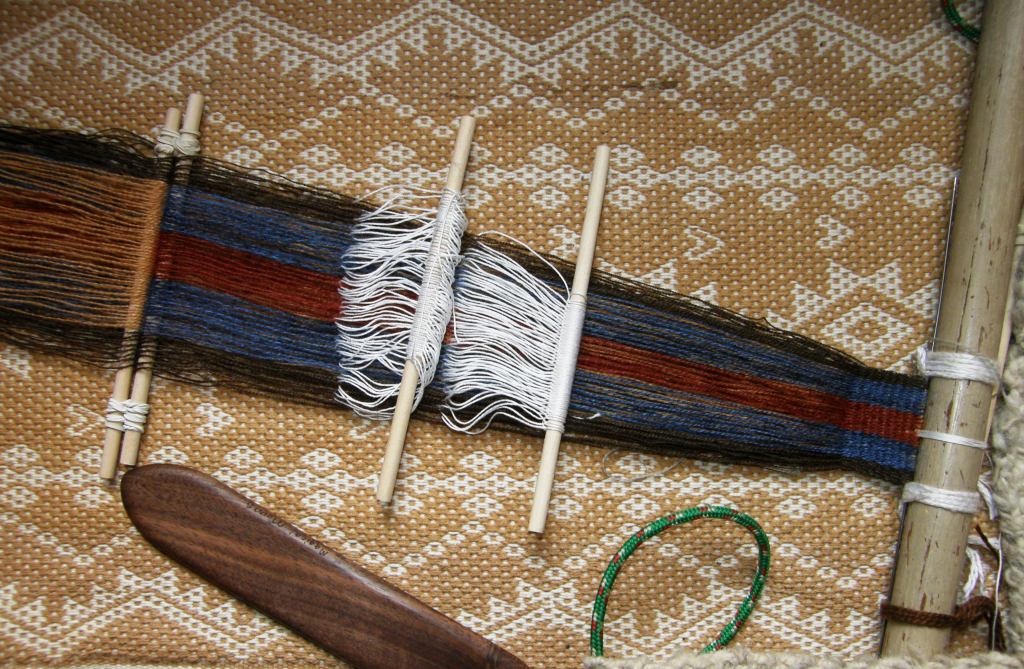
Backstrap weaving with Janet's handspun wool This yarn came from a basketful which Janet invited me to dive into and sample. So, I made up a short warp for the intermesh technique. I weave it as a two-heddle method and teach it in my second book.

???????????????????????????????

I have to tell you that Janet’s yarn is just wonderful to weave with. I have spun llama fiber that I bought here in Bolivia (very dry and coarse stuff it was!) and some beautiful alpaca fiber that Janet gave me. I carded the fiber to prepare it for spinning on my drop spindle. I spun the llama fiber very tightly but tried not to overspin the alpaca. While I was happy with the results, I knew that on a very long warp my handspun would probably start to break quite frequently.
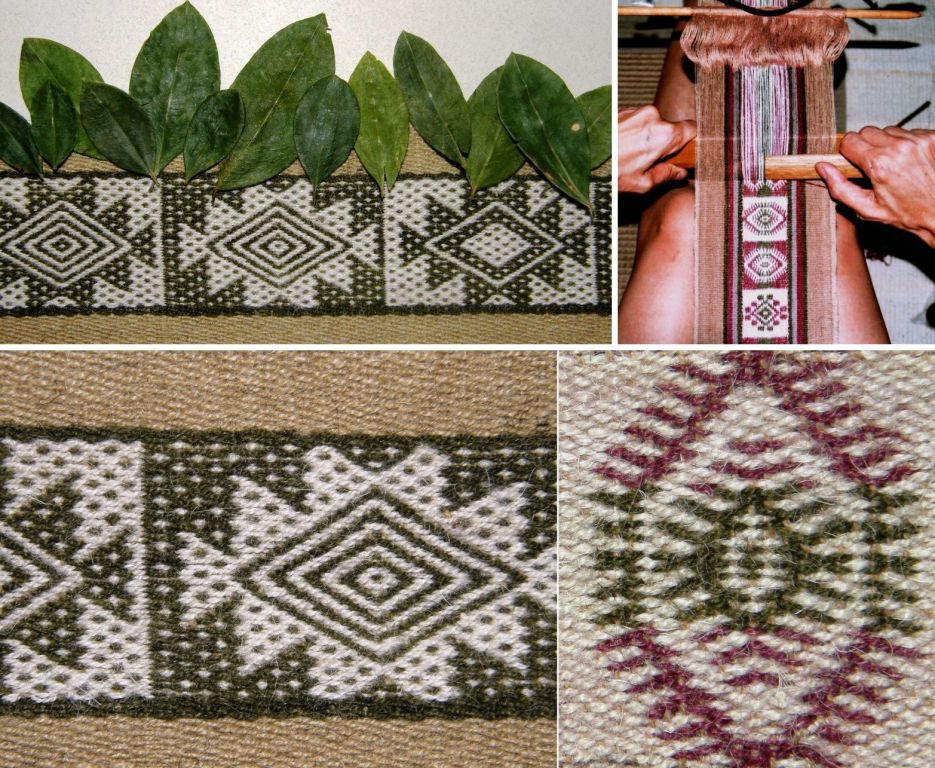
handspun-detailsAbove you can see my handspun llama in pebble weave and double weave projects.

cell_phone_alpaca_warp_on_backstrap_loom

My handspun alpaca lay happily flat when not under tension but this is just a teeny tiny warp…just enough for a cell phone pouch… so, who knows if the yarn would have stood up to a longer project.

Janet combs her wool rather than cards it and the yarn she offered me had been spun on a wheel. I don’t believe that her yarn is anywhere near as prone to breakage as my llama yarn was. Janet’s yarn is wonderfully smooth and resilient without being overtwisted and kinking back on itself. It is perfect for warp-faced weaving and produces fabric that almost lies perfectly flat.

intermesh band with Janet's handspun

It tilts ever so slightly at opposite corners but I have to tell you that sometimes the bands that I weave with Tahki Cotton Classic twist more than this band I made with Janet’s wool! I used a very simple intermesh pattern just to test the wool. The weft is a light gray fine commercial wool. You can see my teacher Maxima’s bands corkscrewing nearby. Those band were woven using Maxima’s handspun as both warp and weft.

You can see a little twist in the unwoven brown warps below but there is certainly none of the furious kinking back that one often sees in yarn spun for warp-faced weaving.

experiment with Janets handspunI love the neat third selvedge that working with wool produces.

And that is all I have done with my backstrap loom since getting home :-(….that darned dusting!)  But, I have been busy with my inkle loom. Why? Because I am writing an article. My wee inklette is one of the dust-covered items that needed taking down from the shelf. Now it is warped up and is being posed all around the place for photographs. I have to admit that sometimes I wish I had a bigger heavier inkle loom. If the article ends up on a printed page, I will tell you all about it!
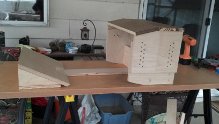
bobbies ergonomic benchThere was sudden flurry of activity in the Ravelry group right at the end of a pretty quiet month and I have a bunch of things to show but will save most of it for next week.

Let me show just a couple of things for now…

Bobbie posted a tiny image of the ergonomic bench for backstrap weaving that she built following the instructions that Synergoarts has put online. It looks like she has done a perfect job and we hope to see a large picture of her using it soon.

Bethan, in Scotland, sent me a pretty spring picture of the warping board she built following pictures of Guatemalan warping boards that I have posted here. The warping boards that I saw in Guatemala all looked like this in various sizes. To keep the set-up compact for long warps, the warp is extended to one end and then turns a corner and comes back to the starting point.

warping board in dandelionsThere I was thinking that this system is  unique to Guatemalan weavers when I remembered that Sasha, who wove with me in Portland last year, learned to weave with cotton in the Piura region of Peru. She shared pictures with me of the warping set-up her teacher used in her home.
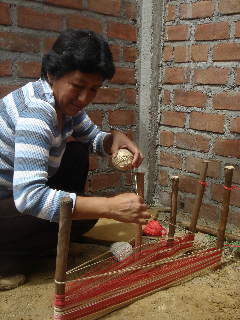
peruweavingI am sure that those stakes are very firmly beaten into the ground so that they won’t lean as warping progresses. They look like they may be permanently positioned there. This weaver  sets up two crosses as she warps as the Guatemalan weavers do.
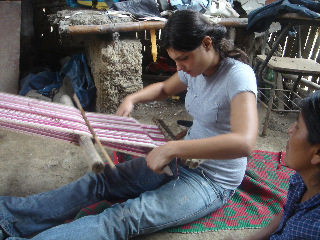
peruweaving-16

Here is Sasha’s friend settling down to work on her cotton warp. Sasha brought her unfinished weaving to show me and get some tips. She had set it aside and had forgotten how to operate it and her string heddles had gotten really messy.

sasha and the piura warp

Amy sent me a picture of her home-made rigid heddle which she is using to weave a band. She wants to teach her children to weave with this as well as give Guatemalan children, who are residents on the US and who participate in a Latin American Cultural group,  a simple hands-on weaving experience.
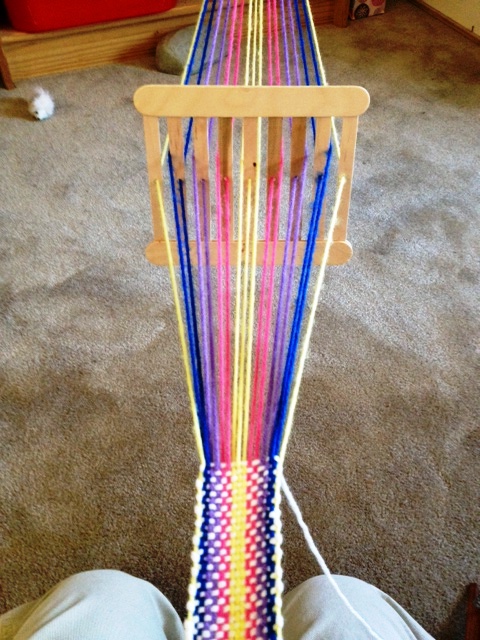
amyAnd adventures with the famous coil rod continue in the Raverly group. Julia is using one on her single plane warp and loving it. (I have only seen it used so far on circular warps). I had been waiting to question Wendy about Bhutanese circular warps and how the coil rod is applied. After having watched a video of Leki Wangmo warping and weaving, I had some questions and now have them answered. Yes, the story of the “curious coil rod” continues to unfold! I will tell you more next time.

I am jumping between winding warps, cutting and hand sewing bands, playing with my inkle loom, photographing the inkle loom and drawing charts, writing an article, braiding , braiding and braiding warp ends and backstrap weaving. Oh, and yes, a little bit of dusting and armchair travel.

Let me leave you with Marge’s beautiful belt…woven on an inkle loom ….but it serves as great inspiration for a backstrap project and the buckle she has used solves all those problems of cutting a slit in the the band and making holes that a regular belt buckle requires.

Marge belt

Backstrap Weaving – Hands Full of Threads

The black neck wrap is done and I am already thinking about the next one.

I thoroughly enjoyed working with this fine Guatemalan cotton thread (you see how I have forgotten about all the woes in the beginning!). It was fun picking up threads with the delicate Guatemalan pick-up sticks and feeling the silk supplementary wefts slide through my fingers.

This will be the color scheme for the next one…

colors for next backstrap woven scarf

Maybe I will use some Guatemalan-inspired designs this time or perhaps I will invent some of my own.

cotton-spinnersI got the black piece off the loom and then I was faced with fringe twisting. Would you believe I have never done this before? I have left fringes on placemats and braided the ends of other pieces. I had read the grumblings about fringe twisting from those who regularly weave scarves in the weaving forums and seen pictures of the gadgets and gizmos that have been designed to make this task less tedious.
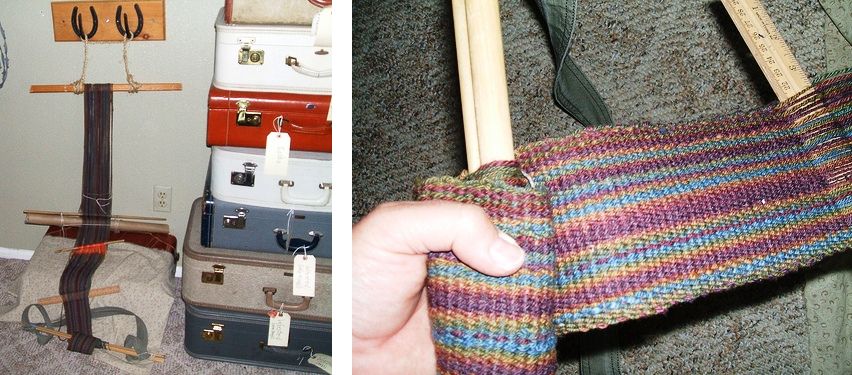
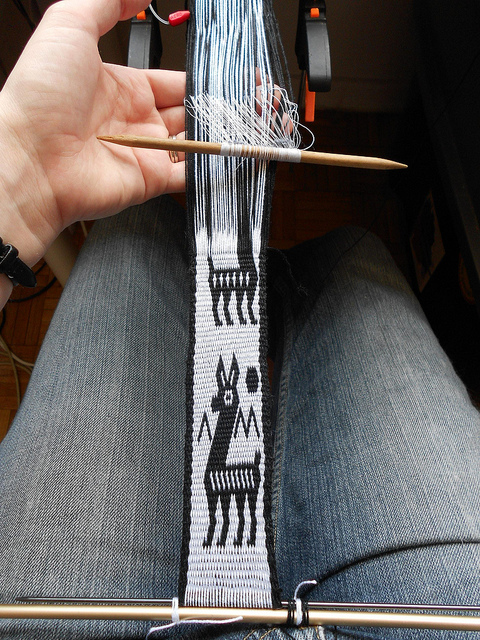
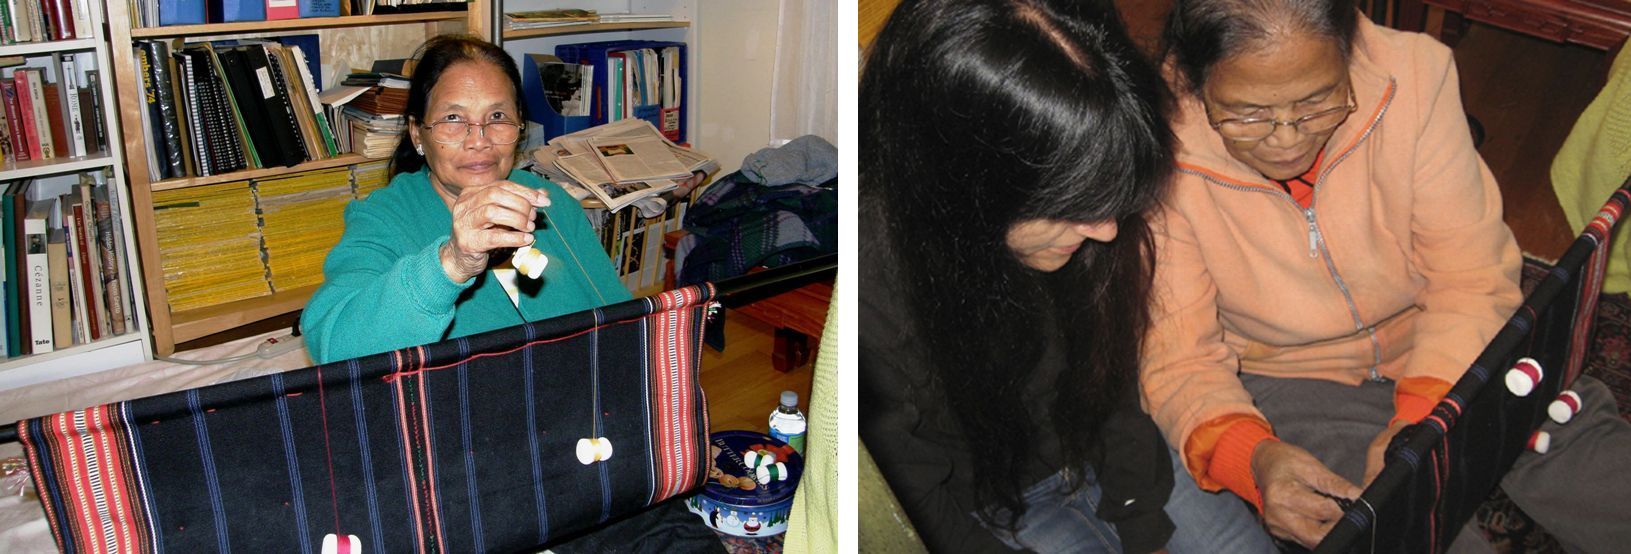
I even watched a video I had taken of my Montagnard weaving and twining teacher, Ju Nie (seen at left spinning cotton), twisting the ends of a piece she had recently taken off her backstrap loom. Ju had come to visit at friend Betsy’s house and, rather than sit idle while chatting in the living room, she pulled out a wad of stuff wrapped in paper and a woven piece of cloth and started working. The “stuff” turned out to be mushy, sticky over-cooked rice through which she drew the warp ends before rolling them on her leg and setting them in the twist.

Here is the video. Ju explains that doing it on her pants is “no good” and that it works much better on her bare leg. I am guessing that her bare shin makes the best rolling surface.


So, I twisted my fringe and it wasn’t as slow as I had thought…much faster than braiding, I can tell you! I added weft twining to the ends of the fabric before taking it off the loom. I think that made a nice finish.  See the countered weft twining tutorial here.

And then I found that scarves are kind of hard to photograph…way too long and flat and lifeless to try and stretch out in one shot so I gathered it up and threw it down many times, fiddled about and I felt that this was the best “pose” in the end.

bhutan scarf with border

And another shot that shows my favorite central motif…

finished bhutan scarf backstrap loom

Although I was mad keen to get into the Guatemalan purple thread and warp up another scarf, (especially since I think that I  already experienced, hopefully, all possible mishaps when weaving the black one), I decided that there was another project sitting in the closet that needed my attention…(plus I really need to ponder and plan the patterns I want to use on the purple scarf before rushing in and weaving it)…

wayuu_motif_with_twining

Remember this guy? I had just started the large main motif when I decided that I would not touch this until I was sure I would have enough time to stick with it and finish it. When doing pick-up, I think it is best to do a pattern all in one go rather than leave it sitting while I travel. If I leave a piece for a long period of time,  I can almost see the place where I left off and picked up again. Perhaps I sit a little differently, apply a little bit more or less tension, beat differently…I don’t know…something changes. So, now is the time to get down and finish this piece.

Usig a forked stick in the warpI welcome the opportunity to have my hands in there and full of threads again. I am not a pick-up stick kind of gal,  unless a particular technique or yarn really demands it. I like to hold and pick and drop threads with my hands. Perhaps it’s because that is the way my first Peruvian teachers showed me. I have been shown and I have willingly tried other ways but I always come back to just using my hands.

Here is a weaver creating a belt patterned with supplementary warps. It is a narrow piece and so it is easy for her to simply insert her hand between the warp layers to do the pick-up.

I was finally successful in uploading the video of this weaver at work. You can see how she does her pick-up as well as see the two-stick method she uses for opening the heddle shed. She has a forked stick in the warp….one prong is her shed rod and the other prong holds a second cross. Grasping and twisting the fork, while leaning forward to relax tension, helps her to smoothly open the heddle shed. 

These are the kinds of textiles she produces…

O

I watched a gentleman from Chahuaytire also weaving supplementary-warp patterns into a much wider piece of cloth. He uses a pick-up stick to hold all the threads in both the pattern and plain-weave sections as he works his way across the cloth…


This is his weaving…

chahuaytire backstrap weaving

Both weavers work equally fast, don’t you think?

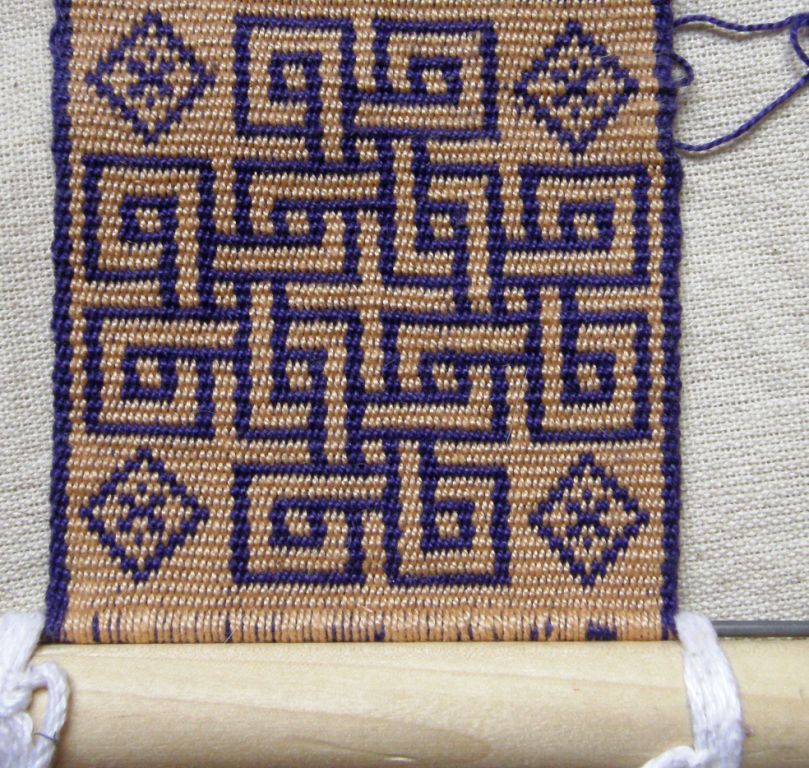
So, on I go with hands full of threads. This is the third piece in my red-white-and-black wall hanging series. This one has patterns which have been inspired by the si’ira belts woven by the Wayuu people of Colombia and Venezuela. Since starting this project, I got to go to Holland and meet Mirja Wark who spent years studying, collecting and cataloging these belts as well as writing a book describing the weaving, braiding and twining techniques used.

si'ira belts wayuu mirja wark

wayuu project in progressThese are belts that Mirja herself wove while studying. You can see the “cow’s nose” pattern at the bottom of the blue, pink and green belt that I used in my wall hanging. The large motif that I will use in the center has been very much adapted to fit my piece and uses just certain elements of the Wayuu patterns as inspiration. There are a lot of threads to pick and, until I things get rolling, I am very much clinging to my pattern chart. Thank you, Terri, for introducing me to removable highlighter tape which works like a dream!

So I will be parked in front of that piece for some time while taking breaks to re-spin the Malabrigo yarn, plan supplementary-weft patterns for the discontinuous-warp piece for which the Malabrigo is destined, ball up that large skein of Guatemalan purple cotton, sketch some patterns for the purple scarf project, plan piece number four in the wall hanging series…maybe ikat??…do I dare?

And I am folding this sampler piece this way and that to see if something useful can be made of it. It’s still on the loom and there is room for more pattern experiments.

O

Let me show you some things that Ravelry members and students and friends have made. It is a strange coincidence that three people decided to edge pieces of clothing with woven bands. Janet decorated a pair of felted slippers that she made, Laura edged gloves (and also made a camera strap and headbands) and Julia edged a couple of tiny shadow-weave kimonos with a pebble weave band. Three gorgeous projects! (I am in love with that shadow-weave cloth, by the way…it takes four shafts…I would like to try it).

christmas_projects__2012_006_medium

laura xmas projects

kimono_baby_black___white2_mediumI will leave you with the happy twin recipients of the wee kimonos…Julia’s grand nieces!

ZellaHattieinKimono_medium2

######################################

Right before I was about to publish this post,  a question was posted in the Ravelry group by a weaver who is trying supplementary-weft patterning for the first time and not getting the rich satin-like finish  that she would like in her patterns. Instead, there are spaces and gaps between the rows of her design. I posted a reply in the group but am copying it here as I think that it may be useful for others who feel like trying this lovely technique…

There is no formula that will suit all weavers…that is, “x” number of strands of such-and-such a supp weft material will give sufficient coverage with such-and-such warp thread. All weavers are different in the way they handle their warps.

For example, some weavers put a lot more tension on their warp than others. This means that they have fewer picks per inch than others because the warps are pulled so tight that they can’t bend over and under the wefts as easily as they do for weavers who use less tension. This means that a certain amount of supplementary weft material won’t give the same amount of coverage for those weavers as it does for others who use less tension.

Another case…some people simply don’t beat hard enough when using supplementary wefts. I beat hard and really mash the weft into place…not “wham wham” beating…more like placing the beater right at the weaving line and pushing against the weft hard with a rocking motion.

Other people pull too tightly on the supplementary weft. It has to be fairly relaxed in the shed to allow it to spread and cover the surface. As an experiment, pull your supplementary weft tight once you have changed sheds and see what happens. It will flatten and narrow and not give good coverage. You have to find the balance between thread that is relaxed enough in the shed and bumps at the sides, where the weft turns, that are not too big and loose.

These are all things that come with trial and error and experience. It might be that you need to use more supp weft material or it could be one of the other factors I have mentioned here.

I often use thread that is similar to #3 and #10 crochet cotton. It is Brazilian cotton that I get here in Bolivia. I have used two strands of embroidery floss with the “#3” and one and a half with the “#10”. This gives people an idea of where to start and what to try but, as I said, every weaver is different.

Hope this helps.

ETA My first Guatemalan teacher combed the strands of her supp wefts with the point of her pick-up stick so that they lay next to rather than on top of each other. They didn’t move with handling…the floats are not long enough to cause that to happen. I did the same with the six strands of 60/2 silk on my current project.

Backstrap Weaving – The Weaving Melting Pot

The Weaving Melting Pot….that is what I have bubbling away here. Every time I start a new piece on my backstrap loom I am so aware of the vast array of sources from which I have drawn technique and inspiration. I have studied weaving on a variety of simple looms here in  South America, in Central America and even in North America  and bring a little of everything to my work when I set up to weave on my loom of choice…the backstrap loom.

I even draw inspiration from the online weavers who work on floor looms…a handy tip about how to handle the two wefts in rep weave from Tom Knisely, ideas about finishing pieces from shadow weave weave-alongs, lessons in handling floating selvedges from discussions on twill, or from card-woven and inkle loom-woven warp patterned bands…all far removed from the Bolivian weaving environment in which I live.

They all go into the pot….stir, stir, stir….add a dash of ideas I have developed from my own experiments and onto the loom it goes. Some of my ideas having nothing to do with the traditional way of doing things……..

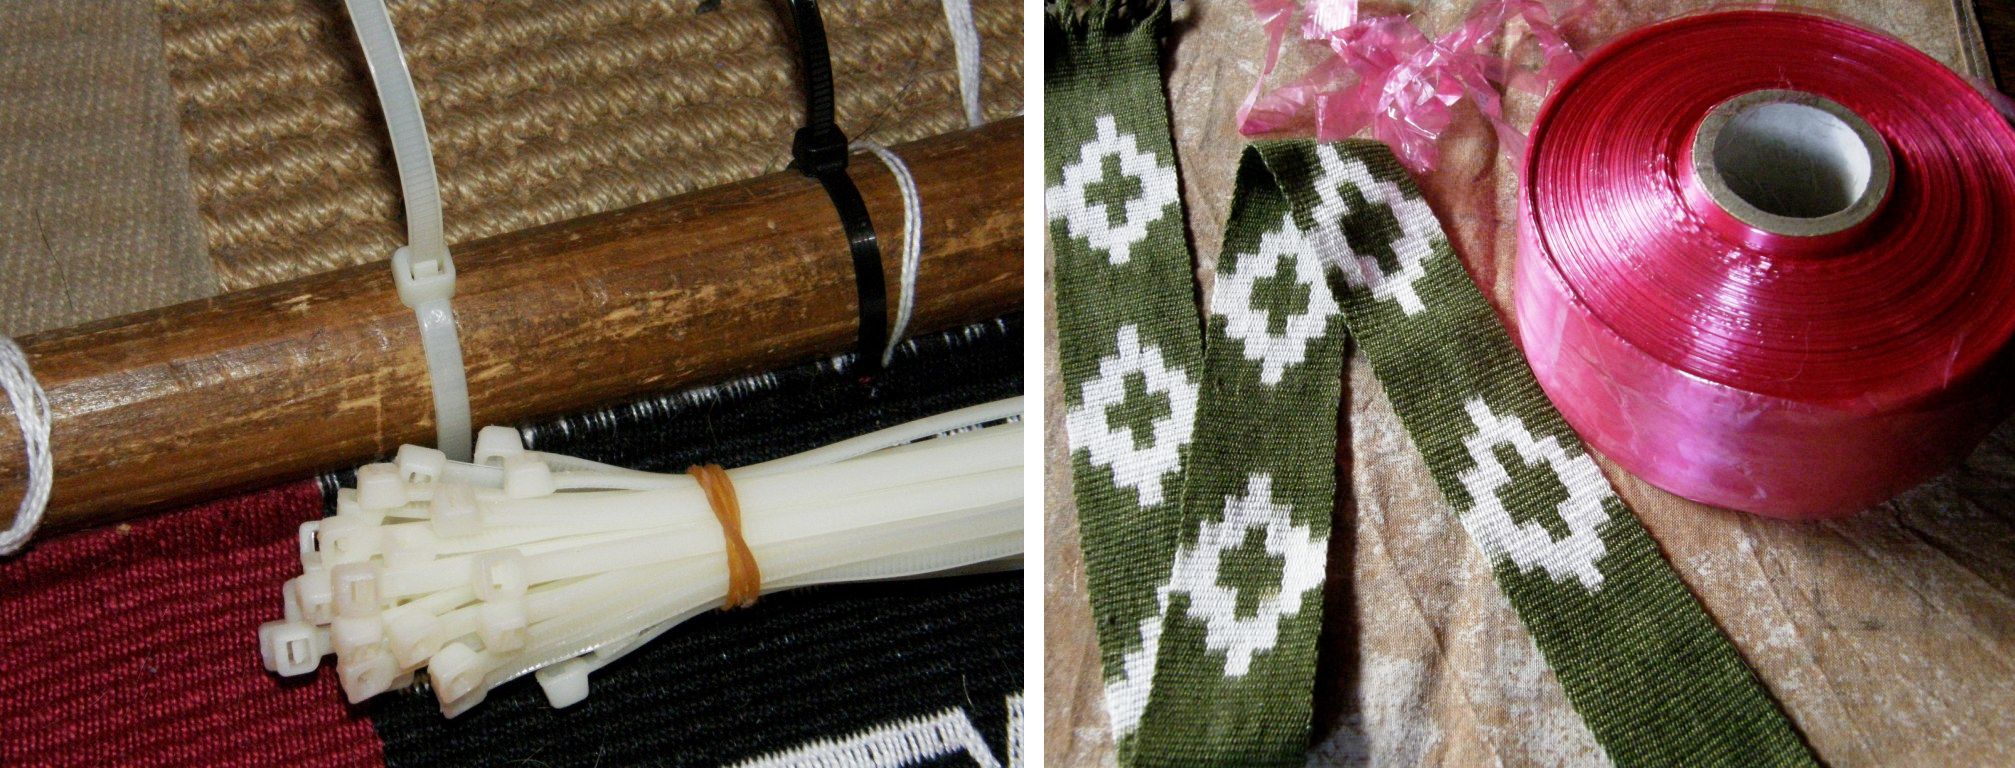
like using cable ties to lash my warp to the loom bar and a bicycle spoke instead of a yarn header cord. I was using cassette tape to wrap my warps for ikat until I was given “proper” ikat tape which seems acceptable in place of cabuya fiber and other natural materials in many “traditional” settings these days.

Plastic and metal??? One of the weavers I met in Candelaria found using what looked like a steel railway spike far more efficient than the traditional llama bone tool for beating in her weft. PVC pipe often replaces wooden shed rods.  It’s like the time I had a lovely wooden Navajo weaving loom made for me when I lived in southern Chile and used rope to tension the warp only to find that a lot of the Navajo weavers are using metal looms and turnbuckles for tensioning. After weaving for some time on that Navajo loom I found that copper pipe for the loom bars worked much better than wood anyway.

I travel from place to place and see things and bring back ideas to add to the ingredients that go into my weaving melting pot.

And now I am about to apply some Bolivian highland weaving technology to a weaving tradition on the other side of the world.

I am jumping the gun this week by sampling for the next piece in my red, black and white wall hanging series and I am concocting quiet a brew in the old melting pot.. I say jumping the gun as I am nowhere near finished the third piece which is coming along veeeeery slowly! The other two pieces while off the loom are not yet completely finished. But the temptation to  put an idea into action once it develops and starts churning in my head is irresistible!

You can see the melting pot at work in the above pieces…I took a motif designed by a German weaver for tablet weaving and wove it in an Andean technique, Chilean ponchos called chamantos influenced the leaf design hanging to which I added weft twining which has nothing to do with Chilean ponchos and the piece inspired by si’ira  weavings of northern Columbia and Venezuela has more than a few of my own added touches.

Some of the traditional colors of Bedouin weaving make that the perfect influence for what will be in the fourth piece in the wall hanging series… in red, black and white, of course.

It was a weird and wonderful path that led me to Bedouin weavings way back in October 2010. I was Googling weft twining techniques after having seen the twined work of Montagnard (Vietnamese hilltribe) backstrap weavers in North Carolina in August 2010.

A book on the Taaniko twining practiced by the Maoris of New Zealand helped me to get started on my own off-loom experiments…. a Maori technique for Vietnamese patterns…straight out of the melting pot!

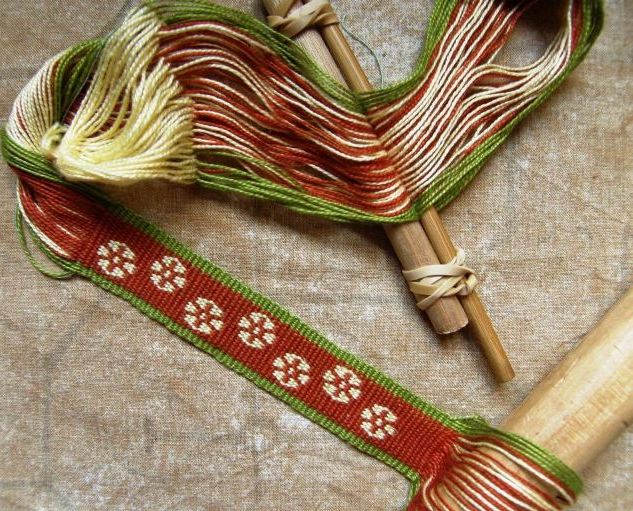
This piece has Montagnard designs as well as motifs found in both Bedouin weaving and twining. My Google searches led me to sites with Bedouin weaving and I was in love! I bought Joy Totah Hilden’s book on Bedouin weaving after finding her website and was pleased to be able to see images of the back of the woven pieces making the technique easy to identify as warp substitution which I already knew how to do. There is a link to a pdf  on Bedouin weaving by Hilden on my RESOURCES page.

It was clear from the book that the Bedouin do their twining  both on and off the loom and so I was interested in trying it on the loom…it’s so much easier when the warp is under tension, as far as I am concerned, and that enabled me to use much finer yarn than I had used for the off-loom piece.

Here is the first piece with its al’ouerjan (in which I had made a warping mistake) and shajarah patterns. The al’ouerjan pattern is the checkerboard type design on the sides.

The twined sections are sometimes worked in the middle of the woven piece as well as at both ends.

I then dove into the melting pot and added a finish of wrapped warp ends…

I enjoyed the process and I wanted to know more…both about weft twining in general and about Bedouin weaving.

I was especially curious as I found out from Betsy, who works with the Montagnard weavers in North Carolina, that their weft twining technique is done off-loom and this astonished me as the yarn they use for their designs is so very fine (Cebelia #20 or finer). I had to see and learn this! Betsy was happy to have me visit and I was able to learn from Jarai weaver, Ngach.

And in the meantime, Tracy, a member of the Backstrap Weaving Group on Ravelry, started showing us gorgeous pictures of Bedouin textiles from the souk in Doha Qatar where she currently lives and telling us about her experiences watching a Bedouin weaver at work.

From books and images on the internet to suddenly finding myself seated next to Ngach, watching her bobbins twirl as she gracefully applied weft twined patterns to her large blanket piece off the loom, listening to her stories about her desire and determination as a young girl to learn to make the traditional kteh patterns. It was a dream come true.

Once back home, I stirred the tricks and tips I had witnessed with Ngach about color changes, hiding the ”bump” and other details into the pot and made my own kteh designs on my backstrap woven piece which you can see above.

I did it on the loom as my off-loom techniques still really needed some work! The advantage with off-loom twining is that several backstrap woven pieces once off the loom can be joined together and then the weft twining can be added along the edge of the entire piece. I have yet to do that and will definitely do so one of these days. I have my bobbins and thread ready!

Much later, the following year, came a golden gift in the form of  bag made from pieces of Bedouin weaving that Tracy sent to me through a friend who was visiting Bolivia.

Once again, imagine the thrill of getting to feel and smell the real thing…forgive me but that coarse handspun wool is just begging to be smelled! The bag is pictured above on the right next to the cotton piece that I made.

As you can see below, the floats that form in in the shajarah pattern area (the black and white design strip) are really very long! Some of them are even broken from possibly having gotten caught on things.

Now back to the sample I am weaving for the fourth wall hanging. I want to do a Bedouin-style piece but I do not want the long floats on the back. Tracy showed us images of pieces from a co-operative in Oman in which the weavers had found a way to tie down the floats  in the al’ouerjan parts (the checkerboard patterns) of their weaving possibly to make the pieces more attractive to foreign customers. It didn’t take long for me to see that they were using a  second fine weft to do so. This makes the woven cloth more practical too.

You can see the long floats that you typically get on the back of the fabric in the lower right hand corner of the image on the right and see how the appearance improves when the second fine weft is used. Unfortunately the second fine weft does not do much for improving the appearance of the shajarah patterns (the larger back and white patterns).
The solution to that is to go once more to the ingredients on the shelf and add some of the Bolivian highland weaving technology that I mentioned earlier to the mix. So I added embedded double weave to my sample, a technique I learned while studying with weavers in Potosi, Bolivia.

This technique allows you to weave sections of double weave alongside plain weave in the one piece. It is essentially the same warp substitution technique but with an extra step or two which basically insures, with the use of a second weft, that all the warps are interlaced with none left to float on either face.

The two-color center section of the band at left is double weave alongside a plain-weave single-color border.

What I sometimes don’t like about the embedded double weave technique is the obvious transition in the fabric from plain weave to double…the climb from single layer to double layer and back again which naturally has to occur….it is sometimes more obvious than at other times depending quite often on the kind of yarn used, and I have been experimenting with various things to help soften that. I don’t want to make the entire piece double weave either.(The three-color double weave that would be required to weave the al’ouerjan pattern is bulky and unattractive).  And that is where I throw my very own bit of spice into the melting pot!

It is still in the experimental stage but what I am trying to do is combine double weave with plain weave, add the thin weft for tying down the al’ouerjan warp floats and make the transition from plain to  double weave section as subtle as possible with a trick I am trying out.

There is my first Bedouin piece on the left and the new sample on the right. The upper surfaces of both look the same and I don’t think you can tell that the center of the new sample is double weave.

The big difference is the back side of the fabric. My embedded double weave sample is on the left and my first sample with its long floats on the right. If this goes along well, I shall use this technique for my fourth wall hanging using the deeper shade of red that I have used for the other piece and incorporating more traditional Bedouin patterns.

So, enough red, black and white for goodness sake! Bring on some other colors. Here are projects from Ravelry group members and other online friends to save the day…

Oops! My bicycling friend Anna in Australia just happens to be using the same colors in a double weave piece. This is a Mapuche design from the book in Spanish by Enrique Taranto.

A new member to the Raverly group, Rob, showed us what he has been doing with simple warp floats inspired by a Guatemalan piece that Jennifer found on the Education and More website. You may remember that Bobbie wove a very large version of this in naturally dyed Guatemalan cotton thread that she bought from Education and More. Rob has added his own twist to the pattern at left.

Here are some of his other bands with simple warp floats and supplementary wefts. He used two supplementary wefts in different colors at the same time and says that one color stands out more than the other depending on the angle at which you view the piece….

Another new member, Tracy, blew us away with her first ever piece made from her own handspun wool…we love her loom set-up!

And Xav dove straight into double weave and the llama figures that I have charted here on the blog…her first ever backstrap woven band!

Jeen used her pebble weave experiments as embellishments on a couple of bags she completed. I love what she calls her “ball bag” and I think her use of variegated yarn for the border of her plain pebble weave band is so cool.

From Sweden Camila sent me pictures of her bands….

Some fun and clever designs with simple warp floats….she wove a pattern which is traditionally woven in a complementary- warp technique in the two-color simple warp float technique instead and it looks great!! On the right she has a pebble weave design from my book on her backstrap loom.

Well, I am off to continue my small sample as I think I can make something with it, weave a few rows on the third big wall hanging piece and see what unusual combination of ingredients might inspire the next piece on the loom…..

Backstrap Weaving – Roaming and Repping

There I sat with a mass of tiny blank squares in front of me. I was supposed to chart the next motif on my Si’ira inspired wall hanging.

I want to use one of the motifs already charted in Mirja Wark’s book but make some adjustments and basically double its size so it will be bigger and bolder on my wall hanging.

I don’t know why, I just couldn’t get motivated to start it.

I knew very well that once the first few squares were filled I would be off and running and having fun but I put down the pencil and decided to roam a little online instead.

And there it was…one of those delightful distractions. Someone revived an old thread in the Warped Weavers Group on Ravelry – the rep weave weave-along thread – and it reminded me that I had returned from my fall trip to the US with ideas about trying this on my backstrap loom. After all, it’s warp-faced and seemed like quite a natural thing for me to do. All that is required is the use of alternating thick and thin wefts. There is a very nice article here about the basics of rep weave.

Some time ago, before I had ever heard of rep weave, I had played a little with this basic idea when doing simple warp floats.

In an attempt to make the horizontal stripes less distracting on the band on the right I had used a #10 size weft under the white warps and a #3 under the colored ones. Obviously the difference in thickness wasn’t enough to be noticeable and I suppose if I had gone thicker, this piece would not have been practical for its intended use as a bookmark. And that is as far as I got with that.

And then rep weave came very much to life for me when I was staying at The Mannings last October during that big wet early season snow fall. Through the wintry wet, whiteness and darkness (we had three-day power outage) came this…

Color!! This was woven by The Mannings’ instructor Tom Knisely and made the front cover of Handwoven’s Jan /Feb 2011 issue, an issue that was near and dear to me because I had a little article in there myself. Little did I know that I would run into both the cover piece and its weaver in person.

So what are you to do when there is no power and you are the guest of owners of a weaving store?….sit down with piles of back issues of Handwoven and enjoy! It seemed that almost every issue I picked up had rep weave in it or maybe it was just that my mind was now tuned into it. There was this gorgeous rep weave rug in one issue….

And it turns out that it was hanging right there in one of the rooms in The Mannings store. I had been far too occupied weaving to notice. So, I got to take a look at this one as well. It was also woven by Tom. I learned that the warps don’t always have to be sett to completely cover the weft as they are in the first cover piece I showed above. In this piece the weft can be seen a little between the warps. Of course you can’t even notice that from a distance.

Perhaps this little bit of space helps you to achieve a clean shed more easily. Personally I like the more solid look.

So, between Tom’s pieces and the articles I read in the magazines I came home with ideas which went onto the “to-do” list. I decided that now was a good time to try something in rep weave. I wasn’t in the mood for charting and just wanted to weave! I already knew the design I wanted to try and hooray, it didn’t need charting.

First to sample…just how thick should that thick weft be? And what about the thin one?

This is what worked with my Clea cotton (Clea is close to a #10 crochet cotton): I used sixteen strands of Clea for the thick and some tatting thread for the thin. The plain weave sections between the rep samples came up beautifully using the tatting thread as weft….no ridging and such pretty selvedges! A tip from one of the members in the Ravelry weave-along about finishing made me weave those plain weave sections. They can be folded under and hemmed and end up being pretty much the same thickness as the rep weave sections.

And that takes care of those thick weft tails too. They can be concealed within the folds. The hemmed plain weave pieces can be folded partly or all the way under. In the picture above I have just folded them but haven’t yet sewn them into place.

There were lots of nice tips on the weave-along thread. Some people finished their rep weave mug rugs with fringes. In that case I guess that the thick weft tails are somehow added to the fringe. Some people hem- stitched the ends.

Here are a couple of the results of the weave-along. A lot of the participants were using a four-harness mug rug kit from Yarn Barn and this four-shaft one for placemats.

Dawn MacFall hemmed her set of mug rugs while Donna finished hers with fringe.

Geri made this beautiful set of placemats…

And it doesn’t have to always be about two alternating colors in the warp. This rug made by Ellen Turner uses the same colors in both sheds….clean and simple!

There were tips about handling the two shuttles of weft in the weave-along thread as well but, to be honest, the tip I liked the most was one by Tom Knisely in his Handwoven article (darn I didn’t write down the issue date). The article is called Getting Started with Warp Rep.

If you want to see some amazing bags made from rep weave fabric take a look here. I love these!! Lynnette, who created these gorgeous bags, has allowed me to post a picture here but please do go to her blog to see all the bags.

Eva Stossel has some terrific designs for four and sixteen shafts on her blog here.

Well you know me…clean and simple is elegant and beautiful but I have a thing for motifs and I wanted to adapt this design to rep weave…

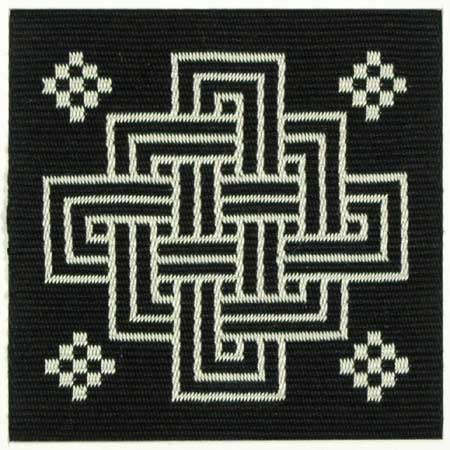
This image is from the web site of Dutch tablet weaver Marijke Van Epen and I have been admiring the knotwork designs she has there for a long long time. She has a page of all these beautiful black and white squares with knot designs and when I saw them for the first time, the idea of mug rugs immediately popped into my head. I wrote to Marijke and asked her permission to use her patterns which she kindly gave. But once I got into planning my mug rug project, I thought that I should come up with some patterns of my own…

So here I am once again admiring Marijke’s designs and wanting very much to do something with them. I could weave them in double weave like I did with the Abba Yohanni motif I wove below (which also happens to be on Marijke’s page) but I thought it might be fun and challenging to try one of them in rep.

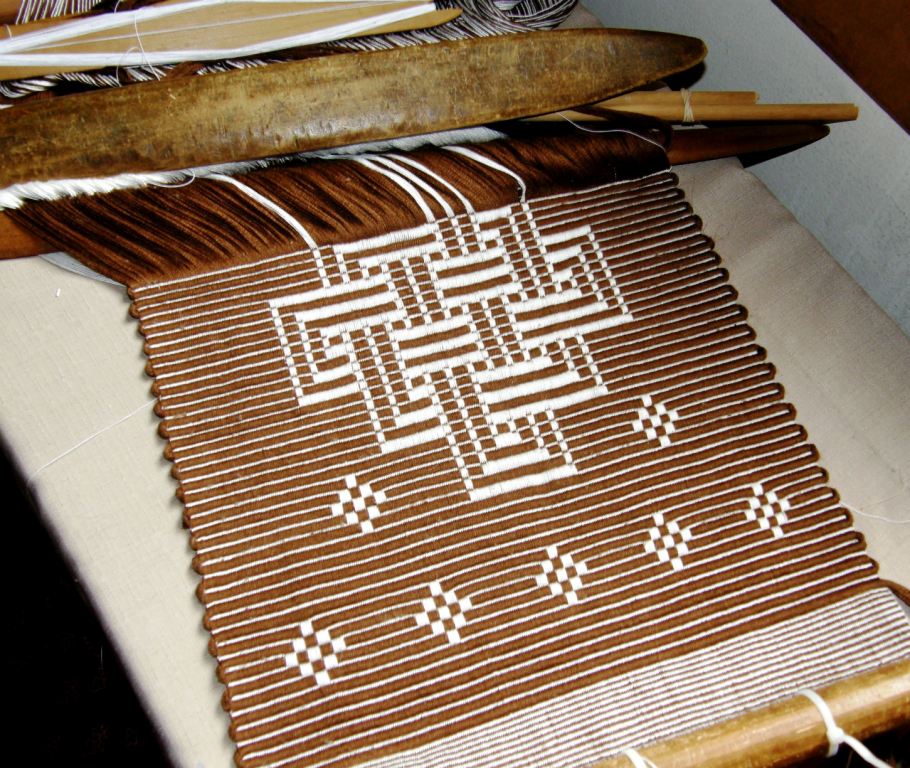
What I have on the loom now I am calling a sample for a table runner. The brown yarn was the only color of which I had enough to make both warp and weft. The sixteen strands required for the thick weft chews up a lot of yarn. I used two sheds…the usual shed rod and string heddles and hand manipulated the warps to create the pattern.

So, this is the sample. For the real piece I have an idea for a much more interesting border design and I will make those diamonds beside the main motif larger. I lost a tiny bit of width so I will make adjustments for that next time too.

Once the first row of the main motif has been placed, there really isn’t any major counting to do and that is nice for a change. Also, can you imagine how fast this weaves up with that chunky weft?!

My calculations of width to height worked out pretty well. If I had made the verticals in the motif wider to match the thickness of the horizontals the motif as a whole would not have turned out square.

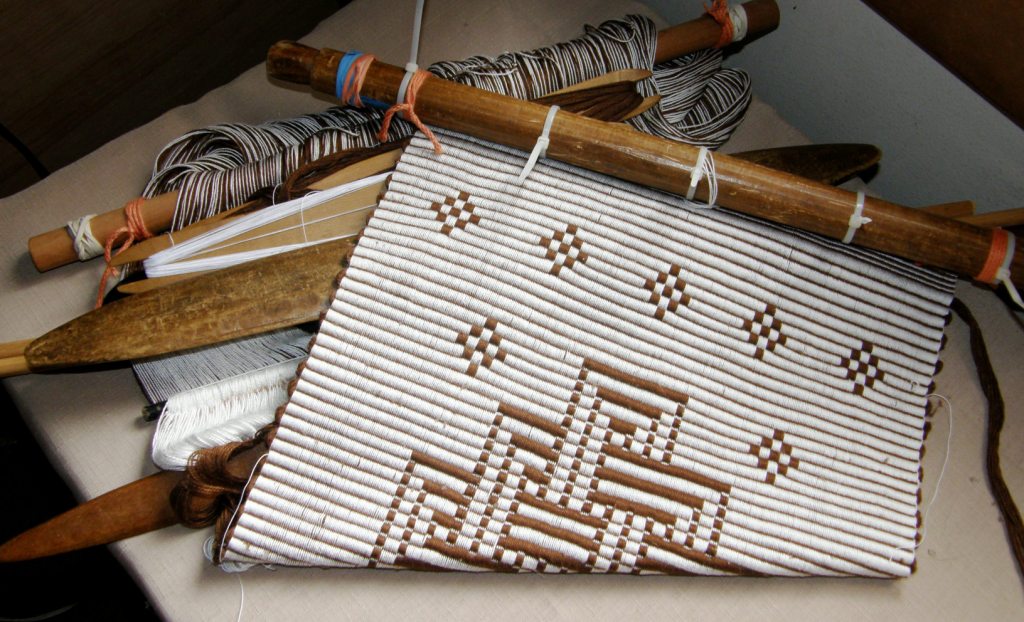
Here’s a peek at the back…

It was nice to return to Marijke’s site as she and I have been corresponding lately about a possible visit in September. I will be in the UK for the Braids 2012 conference in August and then plan to go over to The Netherlands. And I am secretly hoping to meet Mirja Wark somehow!

So, this has been fun! Normally when I weave I can’t listen to music that has lyrics as I automatically want to sing along and all my pick-up counting goes out the window. So, I have enjoyed being able to weave and sing at the same time with this project. The B52’s Cosmic Thing album was my choice…no love songs, no broken hearts, nothing deep or analytical…just pure fun. One of my favorites is “Roam”. We used to sing that back in my ski bumming days in the 80’s when we literally would “roam around the world” following the snow.

Now I roam around the world via the internet and the world comes to me too. This week Greece paid a visit when Andreas sent me pictures of his latest backstrap weaving. My oh my, he has been getting on with it and brought me a cheerful splash of color.

Color and all plain weave except for the one little pebble weave motif. I like the nice large shed rod he is using and the knitting needle heddle rod.

There he is teasing me with the special shaped finish that he does so well. I must try that again some time. Sweden also dropped by in the shape of two beautiful books on Leksandsband that were sent as a gift.

But it will be back to Colombia and Venezuela for me this coming week so I can get my design for the wall hanging ready. I will buy some yarn for the rep table runner and continue roaming the web for rep weave pattern ideas.

Check out my RESOURCES page…I added a couple of new goodies.

Backstrap Weaving – Juggling!

Juggling! Yes, here I am juggling…weaving my wall hanging project, warping, writing and taking pictures for my new book, putting together the translated versions of my first book, planning articles, answering online questions from new backstrap weavers. I have had to come up with some new routines to fit all this in.

Most people roll their eyes and sigh in dismay at the word “routine”…dull, boring repetitive. I, on the other hand, am all for it, that is, if it is a routine of my own making and not one that is imposed. Having a fixed routine is the most efficient way in which I can operate.

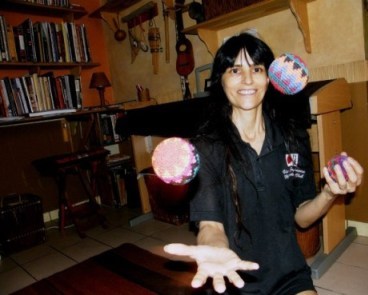
And I do take time out for a little mindless fun!

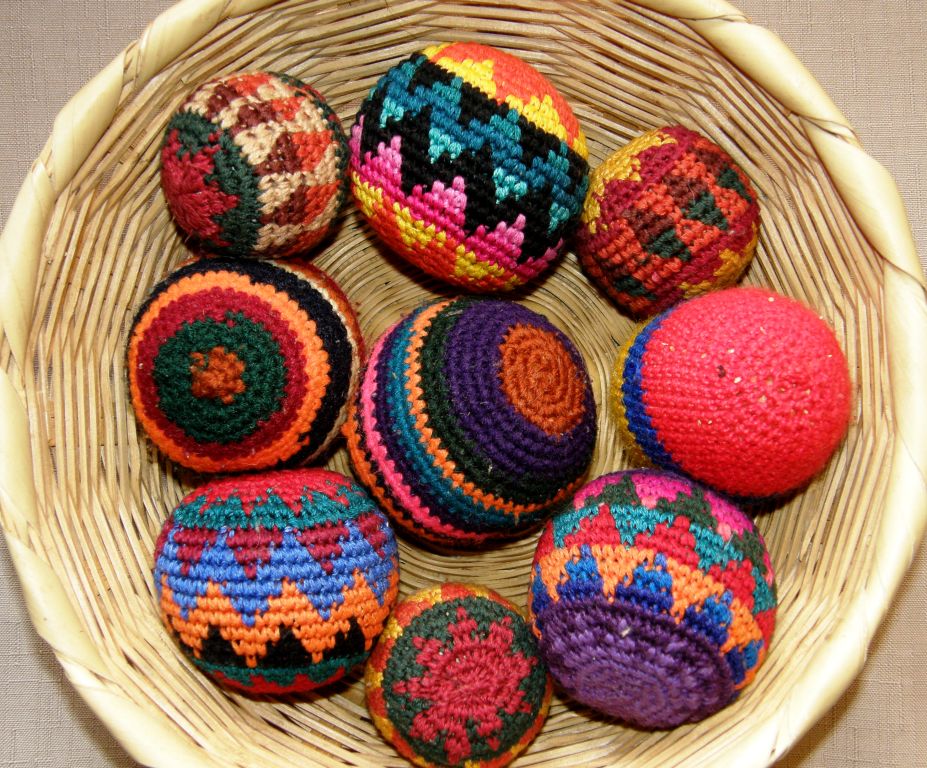
Juggling is both relaxing for the mind and a darn good work-out for the body…at least for an inexpert juggler as indeed I am….with lots of crawling around on the floor picking up dropped balls.

What prompted me to drag out the Guatemalan juggling balls from the depths of one of my woven storage bags?….They are crocheted and I wanted to take a look at how they had been made.

We talk about the simplicity of the backstrap loom and what can be achieved with a loom comprising just a few sticks, or sometimes no sticks at all.

What about the wonders that can be created with one small stick with a hook on the end?

And what led me to all this?… pictures in Mirja Wark’s book on the woven belts of the Wayuu people of northern Colombia and Venezuela. The designs on these belts are the inspiration for my latest wall hanging project. One picture shows a man wearing a belt with a small patterned bag at his side which Wark says is crocheted. She describes crocheted cotton bags that are used by both men and women. The women carry a medium-size bag called susu. Men have smaller crocheted money pouches called susuchon and other pouches which can hold tobacco, keys and amulets.

So it was off to Google and Youtube Land to learn more. I have decided to do without air conditioning and pay for a faster internet service instead so Youtube viewing does not make me want to tear out all my hair anymore! But, finding time to watch all those videos is yet another ball that must be added to the juggling mix.

These images of Wayuu susu, which are also sometimes referred to on these sites as mochilas, are from the online store of the Wayuu Taya Foundation.

I found that these traditional crocheted bags became very popular outside Colombia a couple of years ago and even prompted an article in the NY Times.

On many sites the bags are described as having been “woven”, “knitted” or “woven in crochet” but we have Mirja Wark who tells us that they are, in fact, crocheted. One article describes the straps as having been created on looms.

I love the big bold designs! The bag at left is from CordoBags.

The following is probably the nicest video I found in my alotted Youtube time showing the Wayuu people and their terribly harsh environment. A woman can be seen carrying her susu, there’s a little weaving showing those loose joined heddles that I talked about last week, some fast and efficient twining in progress (love that part!) and there are two brief segments showing the women crocheting bags.

So, here is my latest project which has been inspired by the work of the Wayuu people and the beautiful designs on their woven si’ira which I have been able to see in Mirja Wark’s book.

I have made a few adaptations of my own. The triangular “border” design is my own pattern as I wanted something bolder than those shown in the book. The larger design is one of many “block patterns” as Wark calls them and, as I charted this one myself, I cannot be absolutely sure that it is faithful to the traditional design. It falls into a group of patterns called schichirujuna paa which means “like the nose of a cow” in which there are eleven variations.

I like how the herringbone design on the edges is similar to the weft-twined design I plan to do along the bottom edge.

This is slow work, I can tell you….lots of threads to count and pick up!! I was very unsure about this piece last week and was on the point of putting it aside for a while and working on something else to clear my head. But, I persevered and am now happy with the result.

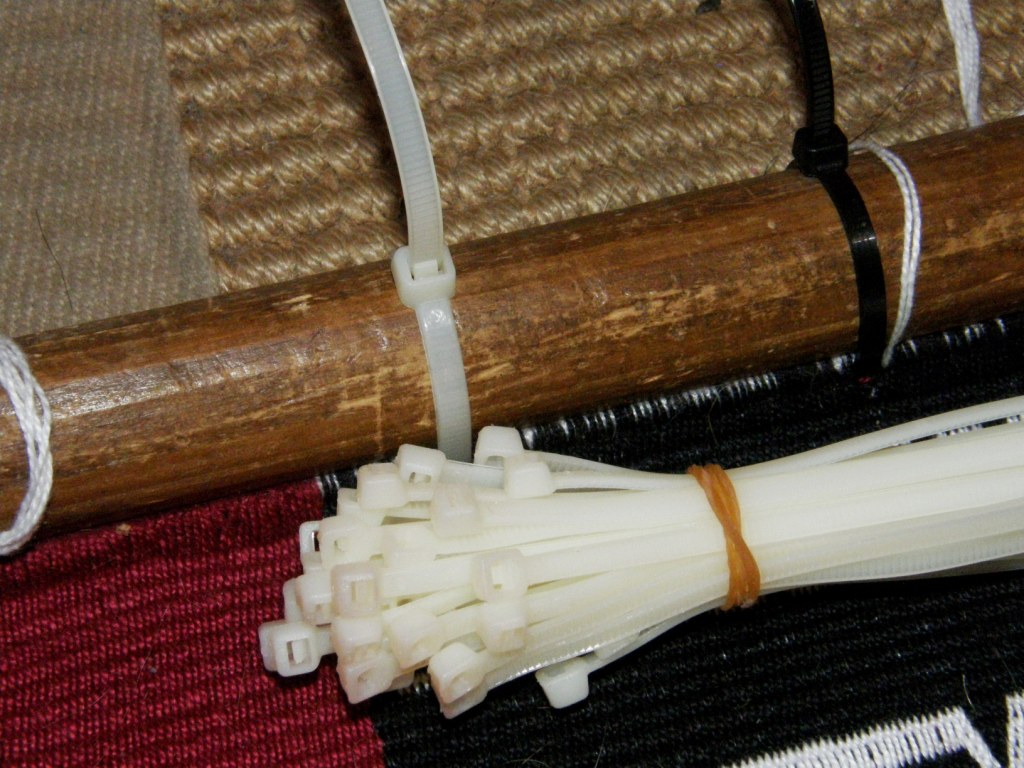
And you may have noticed my new favorite addition to the toolbox at left…cable ties.

These are absolutely brilliant for lashing the warp on its piano wire to the loom bar and creating a third selvedge. I was getting really fed up with my lashing cords on this project working their way loose.

They always do and I usually just wedge thin dowels between then and the loom bar to tighten them up. This time for some reason, nothing I did was solving the problem.

In my recent home de-clutter mission I found a bag full of these cable ties in the junk drawer in the kitchen. They are perfect for lashing but, unfortunately, can only be used for one project as they will have to be cut in order to remove the finished weaving. I wouldn’t use them to lash right from the start as they are wide and space the warps. I would only use them once the weaving has progressed an inch or so to replace the lashing string, which has probably already started to work its way loose.

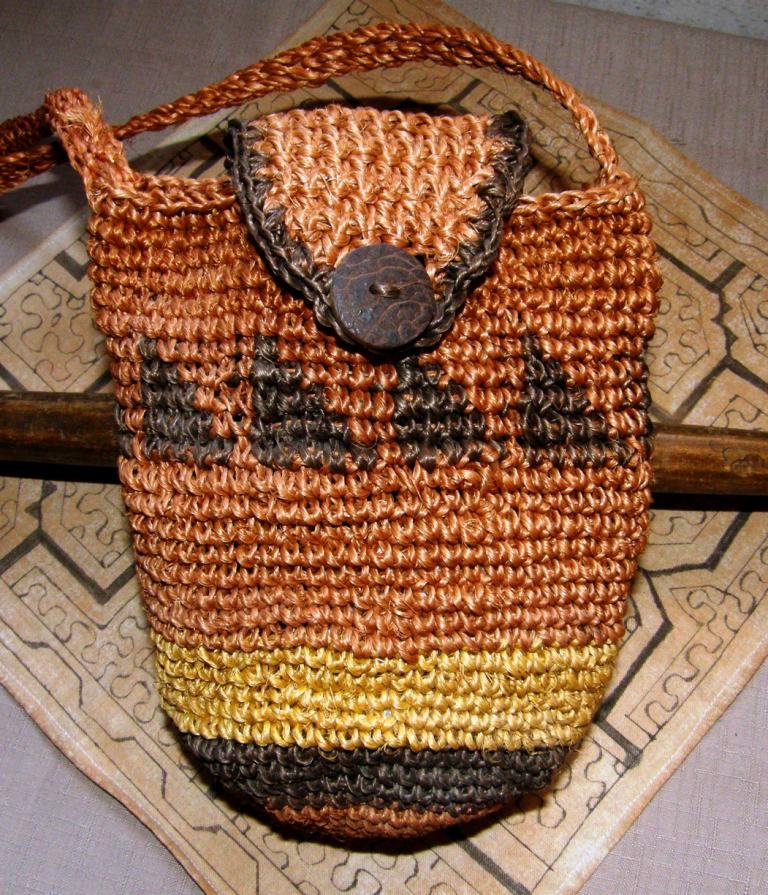
Now back to the crochet. No, I am not about to add this to the juggling act! But, who knows, the next time I am thinking about some on-the-road projects, maybe I will toss a hook in my bag. I know the very basics of crochet. When I went to Ecuador and visited the artisans who work with cabuya fiber, I stayed with a lady who taught me how to crochet this little pouch.

She was kind enough to say that it wasn’t too bad for a first attempt. The button is made from the tagua nut and the dye for the cabuya fiber comes from natural sources.

I was happy to learn how to do color changes and carry the thread. Whether this color change technique is what is known as tapestry crochet, I do not know. I noticed that there is a group for tapestry crochet on Ravelry and another for fair-isle crochet. I am guessing that indicates that there are differences in techniques.

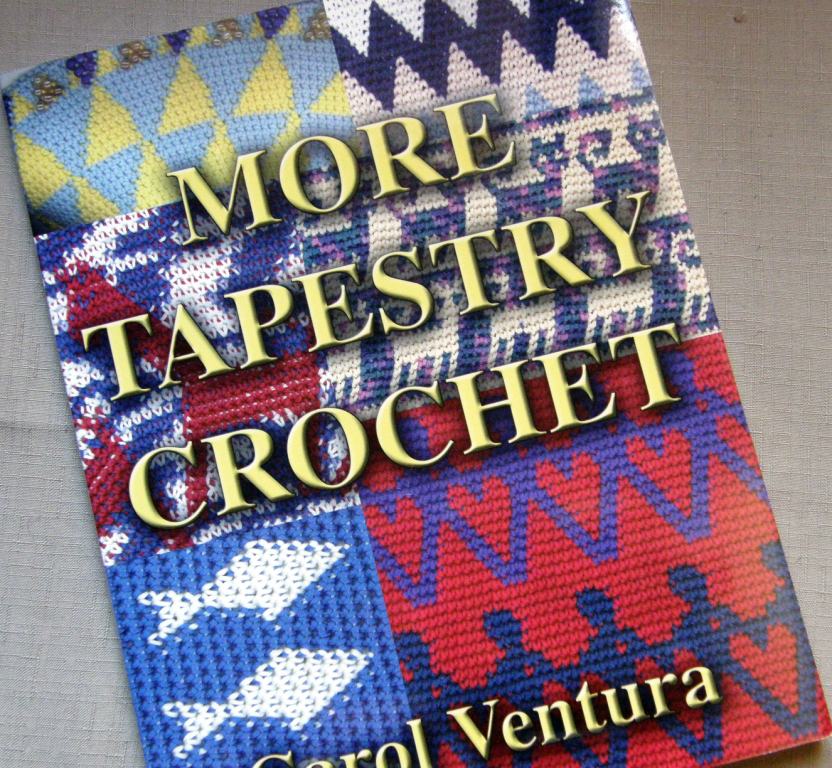
I was given Carol Ventura’s second book on the tapestry crochet technique many years ago and, although I have enjoyed looking through it, I haven’t used it yet. There are some beautiful projects in there for those of us who like imagery and bold geometrics in our handwork.

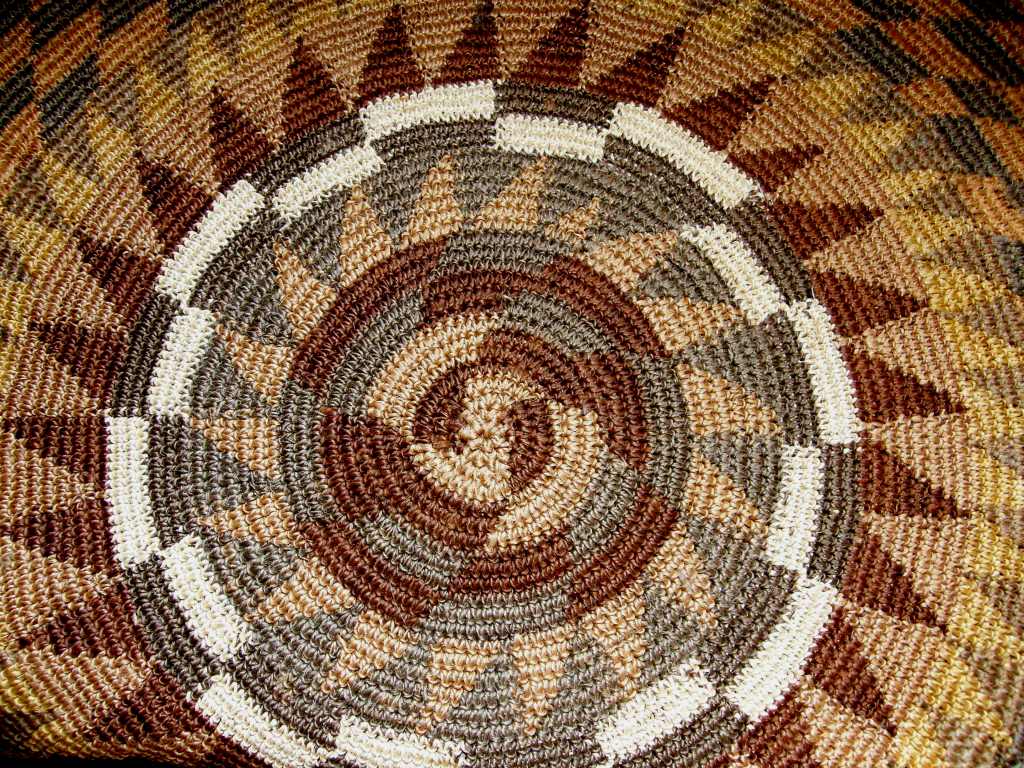
Here is some of the beautiful crochet work that the cabuya fiber artisans from the Intag valley of Ecuador do…a round mat on my bedroom floor…

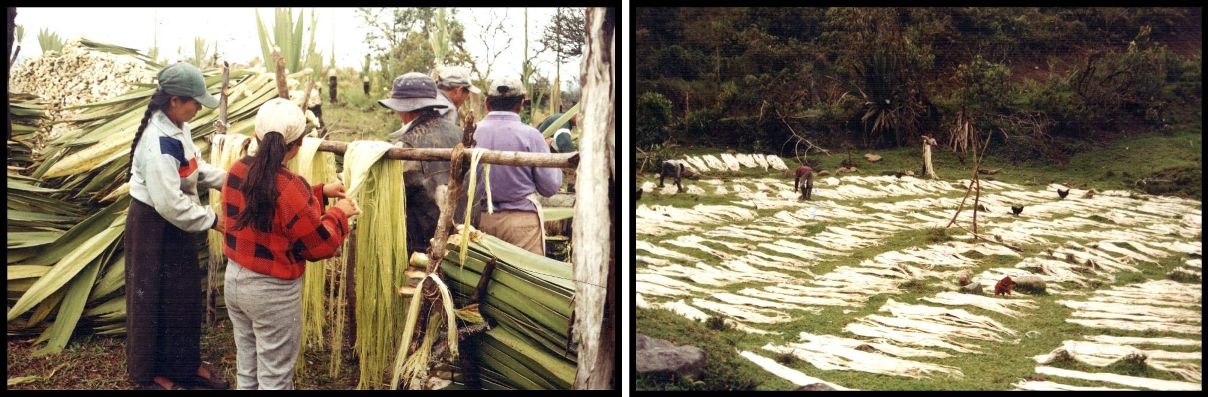
I wrote a post some time ago about the cabuya fiber and how it is processed if you would like to know more.

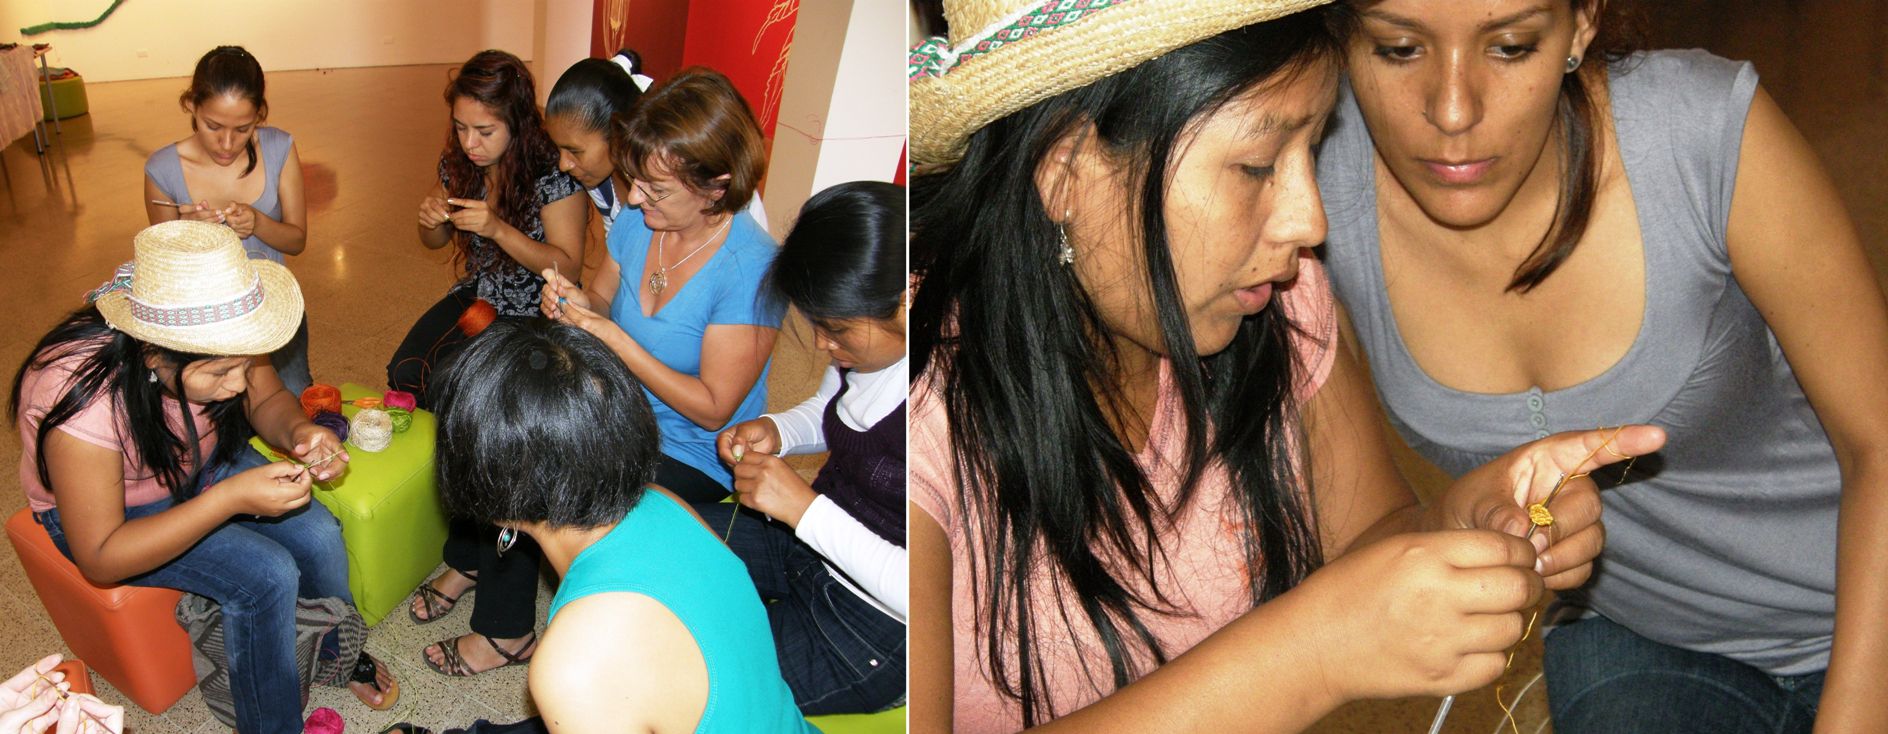
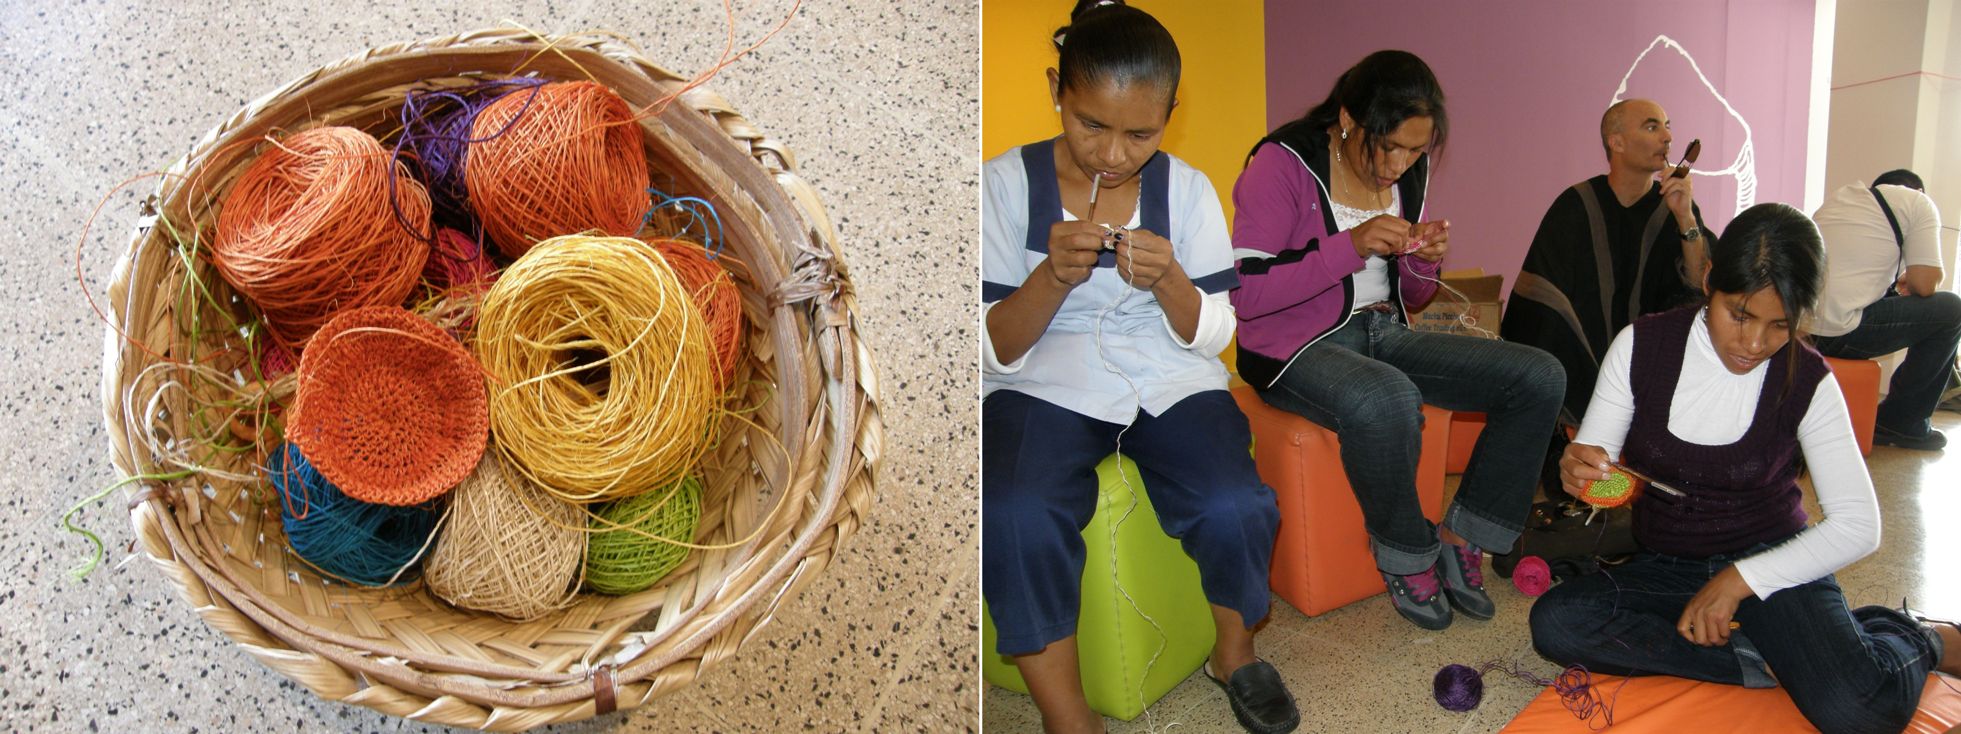
Last year we had a gathering of artisans here in Santa Cruz and Maritza came from Colombia to show us how to crochet with cabuya fiber. Weavers and craftspeople from Chinchero in the Peruvian highlands, coastal Ecuador, the highlands of northern Chile and lowland Bolivia as well as Santa Cruz locals joined in to learn.

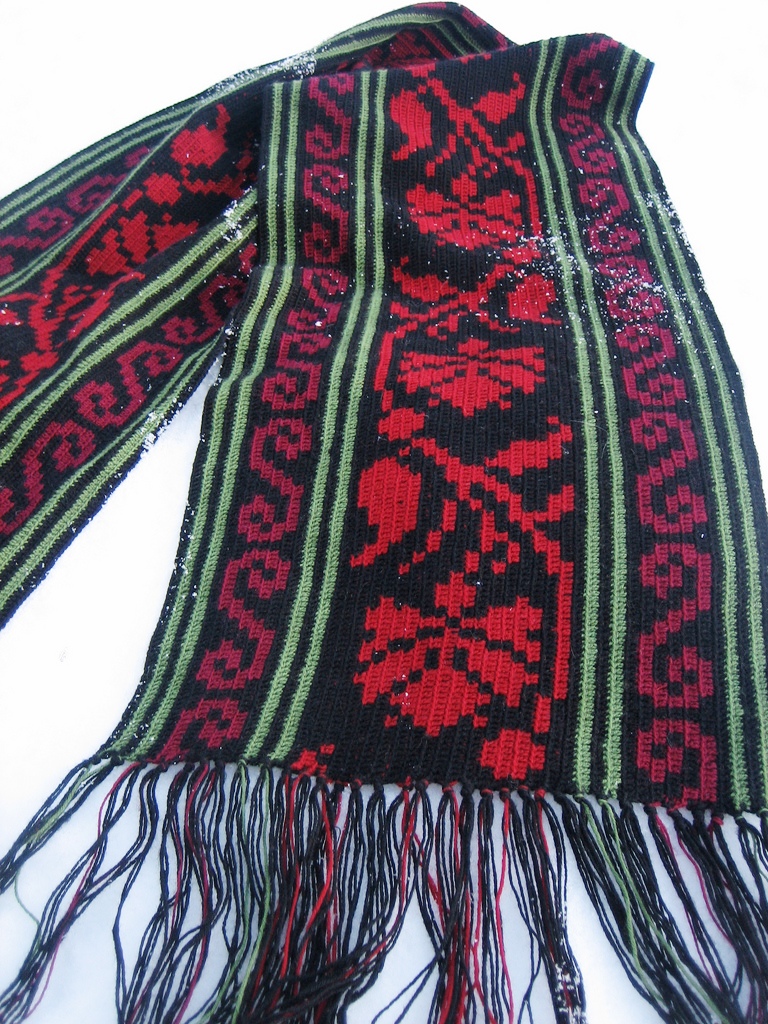
I think the thing that has most gotten me all charged up about crochet this week is the beautiful crocheted scarf that Marit from Norway, aka yarnjungle on Ravelry, recently finished and posted.

There’s that black and red again! Doesn’t this make you want to grab your hook?

In Marits’s own words…I saw a picture of a crocheted men’s scarf from Sweden in a magazine about nordic folk costumes. It had a flower pattern in tapestry crochet technique, worked lengthwise, but with double crochet stitches instead of single. Made my own version by throwing together some antique cross stitch patterns.

I have come across images online of belts in Mexico woven with flower designs that are quite similar to this. I notice them as, to my eye, they look “un Mexican”, if you know what I mean (funny how we form this idea of what “Mexican” should look like). Again, I wonder, as I was wondering last week, about how patterns may travel and turn up in unexpected places or how they may just develop independently on opposite sides of the globe. Some of the motifs in Huichol weavings are so similar to traditional Scandinavian finnweave ones.

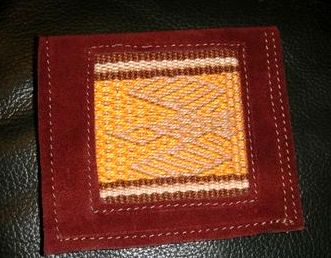
Well, I shall finish this week with some pictures of beautiful work that Sylvie in France has been doing combining her woven bands with leather to make a wallet and purse.

This bird motif in pebble weave is in  my book and comes from the island of Taquile on the Peruvian side of Lake Titicaca. What a lovely job Sylvie has done.

This motif is also in the book and is one that I invented for a wall hanging. These are great projects and Sylvie definitely has the hang of pebble weave! As this motif is one of the last ones in my book, I expect that Sylvie may be wanting more….hold on, a second book is coming!

It seems that this is a shorter post than usual as I have finished early and so have a gap in my schedule…what shall I do? I think I’ll go and look for my crochet hooks and sit down and have a good read of Carol Ventura’s book. 🙂